
House Magnet Fundraiser - The Art of Ed€¦ · Inspire your students to make a difference in the...
12
House Magnet Fundraiser for grades K and up! © Cheryl Trowbridge / www.TeachKidsArt.net 2013 “Houses of Hope”
Transcript of House Magnet Fundraiser - The Art of Ed€¦ · Inspire your students to make a difference in the...

House MagnetFundraiser
forgrades
K and up!
© Cheryl Trowbridge / www.TeachKidsArt.net 2013
“Houses of Hope”

Inspire your students to make a difference in the world with their creativity and artistic skills!
Students from Kindergarten (with a little help) through middle school and beyond will all love making these magnets! Even the adults will want to join in the fun!
By using simple, inexpensive materials, most of your proceeds can go directly to the cause of your choice. Students will learn how a little creativity can go a long way when it comes to helping others!
Not planning a fundraiser?? These house magnets also make great gifts for Christmas, Valentine’s Day, and Mother’s Day. You can add the option of attaching a pin back for even more versatility!
House Magnet Fundraiser
© TeachKidsArt / Cheryl Trowbridge 2013 www.TeachKidsArt.net
Create these charming magnets for your next fundraiser and watch your sales soar! My
students raised over $2,000 in one weekend selling these to benefit our local food bank. They were so popular, everyone wanted to
know how we made them!
2

House Magnet Fundraiser
© TeachKidsArt / Cheryl Trowbridge 2013 www.TeachKidsArt.net
Step TWO Make backing cards with
information about your fundraiser!Create your own custom backing card, including:
• the name of your fundraiser• price per magnet (or pin)• who/what will benefit• any other compelling information• a website, if possible• blank line for artist to sign name
....or simply fill in and copy my card on the next page...
Step ONE
Determine the cause you are raising funds for! Whether it’s local (a child in your town battling cancer) or international (clean water for families in India), pick a cause your students can relate to! Usually anything involving children and their families will strike a chord. Relate it to an area of your curriculum if
possible, study the issue, and give your students a couple of possible options to vote on. Inspire them, talk it up, and get them excited about making a difference!
3

Houses of Hope“Magnets with a Mission”
$5Each house magnet sold benefits
Houses of Hope“Magnets with a Mission”
$5Each house magnet sold benefits
Houses of Hope“Magnets with a Mission”
$5Each house magnet sold benefits
Houses of Hope“Magnets with a Mission”
$5Each house magnet sold benefits
Created by
Created by Created by
Created by

House Magnet Fundraiser
© TeachKidsArt / Cheryl Trowbridge 2013 www.TeachKidsArt.net
You will need:strips of thin cardboard about 1″ wide(the length doesn’t really matter) assorted scrapbooking papers or catalog pages (I cut ours to 3“x3” and gave each student a few pieces… variety is more important than the size. Catalogs from Pottery Barn, Crate & Barrel, Pier One, etc. are full of texture, pattern, and color... and they’re FREE!) glue stick (I think the Avery Permanent Glue Stic sticks the best!)scissorsmagnetic tape (1/2“ wide x 3/4″ long, per house)masking tape (about 2” per house… I tear a piece off and hang it from the side of each student’s desk)“Triple Thick” Gloss Glaze (for adult use)flat paint brush or popsicle stick for spreading glaze (for adult use)pin backs and glue gun (optional)
Gather your supplies!
Time Saving Tip: Sort items into individual ziplock bags
(or baskets for table groups) to keep things organized and to simplify the passing out and
picking up of supplies!
5

House Magnet Fundraiser
© TeachKidsArt / Cheryl Trowbridge 2013 www.TeachKidsArt.net
Home design catalogs from stores like Pottery Barn, Crate & Barrel, and Pier One are a great
source for paper printed with bright, colorful patterns… and
best of all, they’re free! You can tear out whole pages or cut them up to give everyone lots of
variety to work with.
Using a variety of bright colors, patterns, and visual textures is a BIG part of what gives these little houses so much charm! You can achieve this at little or no cost by using free catalogs
and donations of no longer needed scrapbooking paper.
Parents who like todo scrapbooking (or did in the past)
often have sheets of paper in colors or patterns they no longer want. You might be
surprised by the donations you will get if you just ask! The papers we were given were 12” x
12”, so I cut them into 3” x 3” squares before passing them out to students. The size you cut them into isn’t as important as having
lots of variety for your students to choose from!
6

House Magnet Fundraiser
© TeachKidsArt / Cheryl Trowbridge 2013 www.TeachKidsArt.net
Directions:For each house….
1. Cut a square (or rectangle) from your cardboard strip.
2. Next cut a triangle from the end of your cardboard strip.
3. Put LOTS of glue on both pieces. Be sure your glue goes all the way to the edges!
4. Glue each piece to the back of the paper you want to use. (Note: We’re using double-sided paper in these pictures, so the design that will be on the front is on the other side.)
7
© TeachKidsArt / Cheryl Trowbridge 2013 www.TeachKidsArt.net
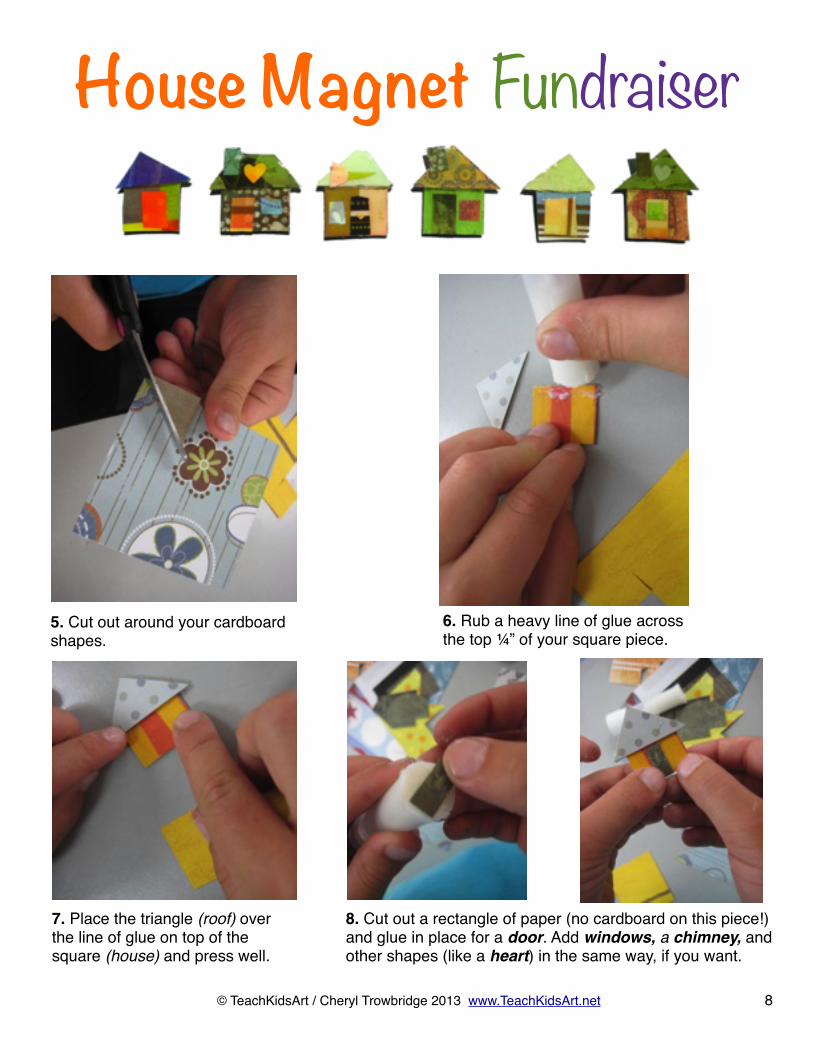
5. Cut out around your cardboard shapes.
6. Rub a heavy line of glue across the top ¼” of your square piece.
7. Place the triangle (roof) over the line of glue on top of the square (house) and press well.
8. Cut out a rectangle of paper (no cardboard on this piece!) and glue in place for a door. Add windows, a chimney, and other shapes (like a heart) in the same way, if you want.
House Magnet Fundraiser
8

© TeachKidsArt / Cheryl Trowbridge 2013 www.TeachKidsArt.net
9. Cut a piece of magnetic tape to about ¾” and peel off the paper backing.
10. Stick the magnetic tape to the back of your house and press well.
11. Make a tape roll with masking tape. Press it onto your magnet, and stick your house onto the card you prepared with information about your fundraiser. Be sure to sign your name! (Note: If you’re making these house magnets for gifts and not for a fundraiser, you’ll still need to set your houses on something so they’ll be movable while the top coat is drying. Paper plates work great for this!
House Magnet Fundraiser
9

© TeachKidsArt / Cheryl Trowbridge 2013 www.TeachKidsArt.net
Encourage students to make as many magnets as they can. The more magnets they make, the
more money they can raise for their cause!
Now for the “secret ingredient”….
Triple Thick Gloss Glaze! This product is amazing... if you use it correctly! It’s definitely worth ordering if you can’t find it locally. Triple Thick gives your magnets a thick, almost glass-like finish…. and it’s even non-toxic! Everyone will be asking you how you did it! Here’s a very important tip, though…. how you apply it makes all the difference!
This part of the project should be done by adults or older students. They call this a “brush-on” glaze, but do not brush it on! If you do, you won’t get it thick enough in one coat, and you may see brushstrokes. Instead, hold the bottle directly over each house and squeeze it out so the glaze just pools on top of the house. You can use a flat paint brush to “coax” the glaze to the edges, but avoid “brushing” over it. Get as much of the glaze on each house as you can without it spilling over the edges…. it may take a bit of practice to get the feel for what is exactly the right amount, but once you get it, this process goes quickly!
See my how-to photos on the next page…..
House Magnet Fundraiser
10

© TeachKidsArt / Cheryl Trowbridge 2013 www.TeachKidsArt.net
12. Squeeze Triple Thick onto the center of your house, allowing it to pool and spread until it comes close to each edge.
13. Use a flat brush or a popsicle stick to gently “coax” the Triple Thick right up to each edge. If it starts to run over, you’ve applied too much. You’ll quickly learn how much is the right amount!
House Magnet Fundraiser
14. Set your houses aside to dry.... overnight is best, especially you’re going to be stacking them. (Note: fingerprints will show if you touch them too soon!)
11
Applying the “Triple Thick”....
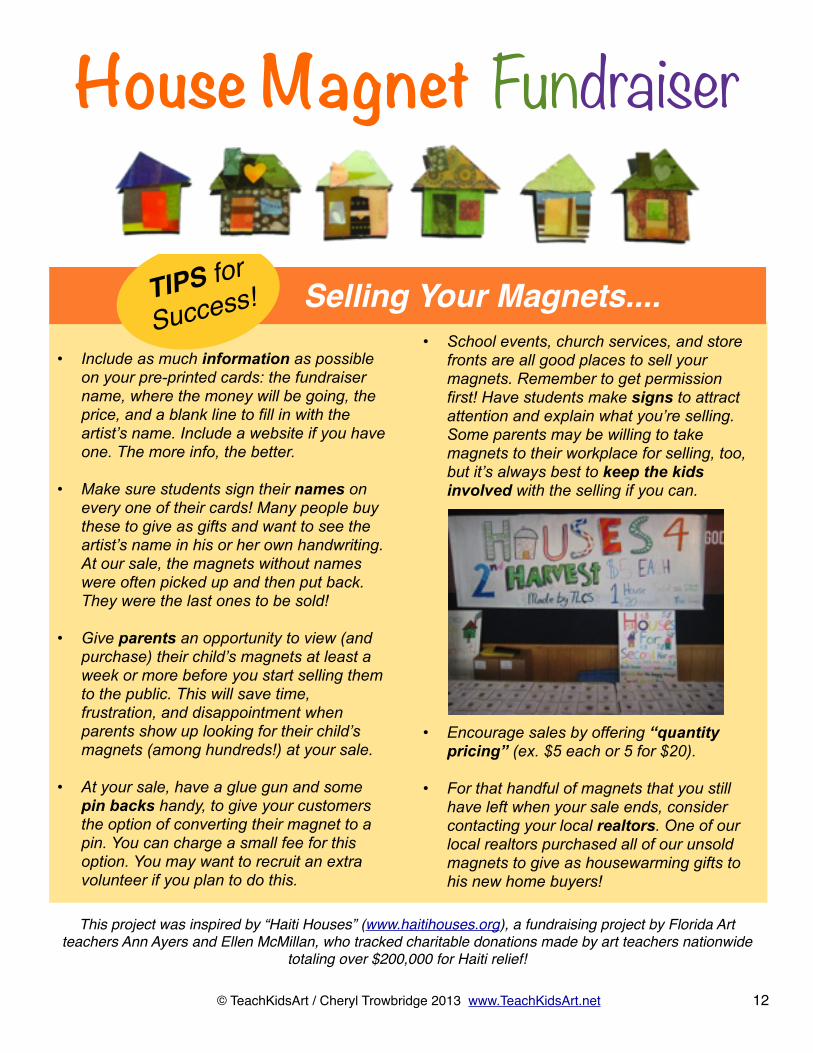
• School events, church services, and store fronts are all good places to sell your magnets. Remember to get permission first! Have students make signs to attract attention and explain what you’re selling. Some parents may be willing to take magnets to their workplace for selling, too, but it’s always best to keep the kids involved with the selling if you can.
• Encourage sales by offering “quantity pricing” (ex. $5 each or 5 for $20).
• For that handful of magnets that you still have left when your sale ends, consider contacting your local realtors. One of our local realtors purchased all of our unsold magnets to give as housewarming gifts to his new home buyers!
House Magnet Fundraiser
© TeachKidsArt / Cheryl Trowbridge 2013 www.TeachKidsArt.net
This project was inspired by “Haiti Houses” (www.haitihouses.org), a fundraising project by Florida Art teachers Ann Ayers and Ellen McMillan, who tracked charitable donations made by art teachers nationwide
totaling over $200,000 for Haiti relief!
Selling Your Magnets....TIPS for
Success!
• Include as much information as possible on your pre-printed cards: the fundraiser name, where the money will be going, the price, and a blank line to fill in with the artist’s name. Include a website if you have one. The more info, the better.
• Make sure students sign their names on every one of their cards! Many people buy these to give as gifts and want to see the artist’s name in his or her own handwriting. At our sale, the magnets without names were often picked up and then put back. They were the last ones to be sold!
• Give parents an opportunity to view (and purchase) their child’s magnets at least a week or more before you start selling them to the public. This will save time, frustration, and disappointment when parents show up looking for their child’s magnets (among hundreds!) at your sale.
• At your sale, have a glue gun and some pin backs handy, to give your customers the option of converting their magnet to a pin. You can charge a small fee for this option. You may want to recruit an extra volunteer if you plan to do this.
12


