
HeliaLux SmartControl INSTRUCTION MANUAL · Manufacturer: JUWEL Aquarium AG & CO. KG Address:...
27
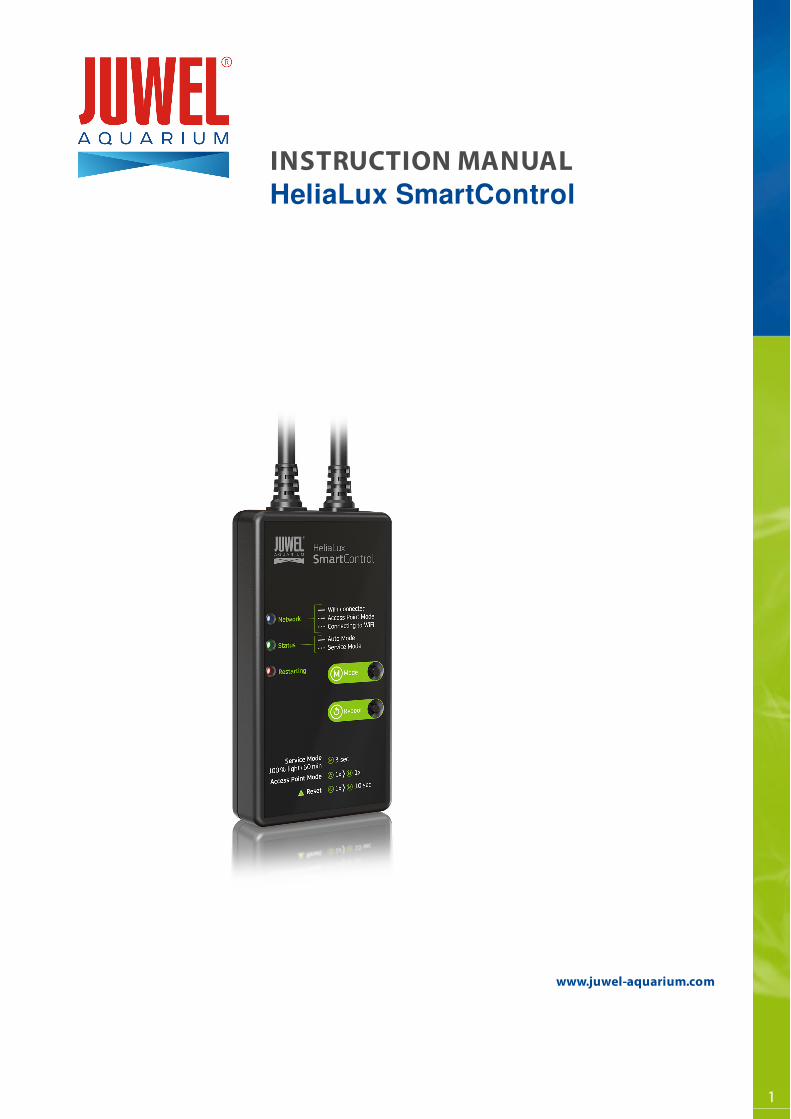
INSTRUCTION MANUAL HeliaLux SmartControl www.juwel-aquarium.com 1
Transcript of HeliaLux SmartControl INSTRUCTION MANUAL · Manufacturer: JUWEL Aquarium AG & CO. KG Address:...
IntroductionWe are pleased that you have decided to purchase a JUWEL Aquarium product and thank you for the trust that you have placed in us.
First of all, please read through all chapters of these operating instructions carefully and check that your JUWEL product is complete.Please observe the safety notices, as well as the maintenance and care recommendations.
We have taken the utmost care in the development of these operating instructions, in order to provide correct and accurateinformation.
However, we cannot assume any liability for possibly existing misprints and errors. Technical specifications are to be understood asapproximations. We reserve the right to make technical changes.
SAFETY NOTICES
Manufacturer: JUWEL Aquarium AG & CO. KG Address: Karl-Göx-Str. 1, 27356 Rotenburg Wümme, Germany
Model List
Model name Art. No. Input voltage TA (°C)Output rated load
wattageOutput voltage frequency
HeliaLuxSmartControl
48996 24V DC 40 ° C 1 W 24 V DC
2,4 GHz, ISM Band2,4GHhz, WiFi
Protocols 802.11b/g/n, +20dBm
output power in802.11b mode
The electrical devices may only be operated indoors.•
In case of damage or malfunction, never open the HeliaLux SmartControl or repair the power cable. Always replace the entiredevice in case of damage.
•
For safety reasons, it is only permitted to operate the HeliaLux SmartControl with an original JUWEL HeliaLux light unit and aJUWEL power supply unit.
•
Only operate with a ground fault circuit interrupter, max. 30 mA.•
This appliance can be used by children aged from 8 years and above and persons with reduced physical, sensory or mentalcapabilities or lack of experience and knowledge, if they have been given supervision or instruction concerning use of theappliance in a safe way and understand the hazards involved. Children may not play with the appliance. Cleaning and usermaintenance may not be performed by children without supervision.
•
The device may contain small parts. Keep these out of reach of small children.•
Never throw the device or batteries into fire.•
Protect the HeliaLux SmartControl from moisture, dust, liquids and vapours.•
Do not disconnect the HeliaLux SmartControl from the power during a firmware update. The resulting loss of data could causeyour device to stop working.
•
2
Scope of deliveryThe scope of delivery includes:1 x HeliaLux Smart Control
1x QuickStart
1 x Operating manual on DVD
Optional accessoriesA. HeliaLux Spectrum Splitter – for operating two HeliaLux Spectrum units – article number: 48998
B. HeliaLux LED Splitter – for operating one or two HeliaLux LEDs – article number: 48997
Connecting the HeliaLux SmartControlThe HeliaLux SmartControl can be used to control the HeliaLux Spectrum light unit. It is also possible to control the HeliaLux LED lightunit with the optionally available splitter. The optionally available splitter allows up to two HeliaLux lamps to be used with oneSmartControl.
The HeliaLux SmartControl has four operating modes:
Version A: HeliaLux Control + 1x HeliaLux Spectrum (4 colours)
Version B: HeliaLux SmartControl + HeliaLux Spectrum Splitter + 2x HeliaLux Spectrum (4 colours)
Version C: HeliaLux SmartControl + HeliaLux LED Splitter + 1x HeliaLux LED (2 colours)
Version D: HeliaLux SmartControl + HeliaLux LED Splitter + 2x HeliaLux LED (2 colours)
Notice
Please select your version from the user interface. Please refer to ‘Selecting the lamp type’ to this end.
3

Version A
HeliaLux Control + 1x HeliaLux Spectrum (4 colours)1. Connect both plugs on the HeliaLux SmartControl to those on the HeliaLux LED Spectrum and the power supply unit in accordancewith the illustration and screw the locking rings completely on to the screw connectors.
2. Connect the plug of the power supply unit to the mains and switch the power supply unit on.
Version B
HeliaLux SmartControl + HeliaLux Spectrum Splitter + 2x HeliaLuxSpectrum (4 colours)
You will need the HeliaLux Spectrum Splitter part number to use two HeliaLux Spectrum with the HeliaLuxSmartControl: 48998
The splitter allows you to operate one or two lamps with the HeliaLux SmartControl.
1. Connect the plugs on the HeliaLux SmartControl, the splitter and the power supply units and lamps in accordance with the illustrationand screw the locking rings completely on to the screw connectors.
2. Connect the plugs of the power supply units to the mains and switch the power supply units on.
4

Version C
HeliaLux SmartControl + HeliaLux LED Splitter + 1x HeliaLux LED (2colours)You will need the HeliaLux LED Splitter to use the HeliaLux LED Daylight (2 colours) with the HeliaLux SmartControl,article number: 48997
The splitter allows you to operate one or two lamps with the HeliaLux SmartControl.1. Connect the plugs on the HeliaLux SmartControl, the splitter and the power supply unit as well as the lamp in accordance with theillustration and screw the locking rings completely on to the screw connectors.
2. Connect the plug of the power supply unit to the mains and switch the power supply unit on.
Version D:
HeliaLux SmartControl + HeliaLux LED Splitter + 2x HeliaLux LED (2colours)
You will need the HeliaLux LED Splitter to use two HeliaLux LEDs (2 colours) with the HeliaLux LED SmartControl,article number: 48997
The splitter allows you to operate one or two lamps from the HeliaLux SmartControl.
1. Connect the plugs on the HeliaLux SmartControl, the splitter and the power supply units and lamps in accordance with the illustrationand screw the locking rings completely on to the screw connectors.
2. Connect the plug to the mains and switch on the power supply units.
5

Establishing a connection to the user interface using Access PointMode
InfoYour device has been configured as follows at delivery:
Network name (SSID): HLSmartControl
Wi-Fi password: password
IP for the user interface: 192.168.4.1
Alternatively "http://local.HLSmartControl" (only in AP mode)
1. In the delivered state, the HeliaLux SmartControl will start inAccess Point Mode (AP Mode) when it is switched on. AccessPoint Mode creates its own wireless network to which Wi-Ficapable devices are able to connect (smartphone, tablet andcomputer).
2. Connect to the available Wi-Fi network of your HeliaLuxSmartControl. The factory default setting for the Wi-Fi network'sname is “HLSmartControl”.3. Enter the Wi-Fi password. At delivery, the password is:‘password’
4. Once the connection has been established successfully, theHeliaLux SmartControl user interface may be accessed byentering the IP address (192.168.4.1) in your Internet browser'saddress line. The user interface may alternatively be accessed byentering "http://local.HLSmartControl" in your Internet browser'saddress bar.
Notice: We recommend the use of up-to-date / commonbrowsers.
If you do not operate your SmartControl in Access PointMode but have connected it to your home network, pleaseread the section 'HeliaLux SmartControl in home networks'.
•
You can alternatively return your SmartControl to AccessPoint Mode. Please refer to 'Switching from home networkto Access Point Mode' to this end.
•
6

Basic settings
Selecting the language
Selecting the lamp type
1. Connect to the HeliaLux SmartControl's user interface.
2. Select the main 'Settings' menu item.
3. Navigate to 'General Settings' and select your preferred language from the 'Language'selection list.
4. Click the 'Save' button to confirm your choice.
Via AP mode, please refer to 'Establishing a connection to the user interface viaAccess Point Mode'.
•
Via the home network, please refer to 'HeliaLux SmartControl in home networks'.•
1. Connect to the HeliaLux SmartControl's user interface.
2. Select the main 'Settings' menu item.
3. Navigate to the 'General settings' item and select your configuration from the 'Lamptype' selection list.
The following configurations are available to choose from:
4. Click the 'Save' button to confirm your choice.
Notice: All configured profiles are reset to the factory settings when the lamp type ischanged.
Via AP mode, please refer to 'Establishing a connection to the user interface viaAccess Point Mode'.
•
Via the home network, please refer to 'HeliaLux SmartControl in home networks'. •
HeliaLux Spectrum (1x HeliaLux Spectrum or 2x HeliaLux Spectrum synchronouslycontrolled)
•
HeliaLux LED 2Ch (1x HeliaLux LED or 2x HeliaLux LED synchronously controlled) •
HeliaLux LED 2x 2Ch (2x HeliaLux LED individually controlled) •
7

Setting the date and time
1. Connect to the HeliaLux SmartControl's user interface.
2. Select the main 'Settings' menu item.
3. Navigate to the 'Date and time' item and set the date, time andyour time zone.
Info: The time zone guarantees a correct change betweensummer and winter time.
4. Confirm your input by clicking the 'Save' button.
InfoThe time and date can be obtained automatically over theInternet. The HeliaLux SmartControl must be connected to thehome network and have access to the Internet to this end (pleaserefer to ‘HeliaLux SmartControl in home networks’).
The correct time zone must be selected for retrieving the time. Itcan take up to 30 seconds to retrieve the date and time over theInternet.
Via AP mode, please refer to 'Establishing a connection to theuser interface via Access Point Mode'.
•
Via the home network, please refer to 'HeliaLuxSmartControl in home networks'.
•
8

Lighting profilesUp to 8 different light profiles can be created with the HeliaLuxSmartControl. You can assign an individual lighting profile to eachday of the week. One light profile can contain up to 16 individuallighting phases that may be used to adjust all your HeliaLux lamp'scolours throughout the day.
NoticeOne light profile (Profile 1) is already preconfigured and assignedto all 7 days in the HeliaLux SmartControl's factory settings. Thisprofile may be changed at any time. Please refer to ‘Configurationof the Light Profiles’ to this end.
An individual target time along with the light intensity to beachieved with the individual colours must be set for each lightingphase.
The start time for one lighting phase is automatically thedefined end time of the previous lighting phase.
Recommendation:If the adjusted light intensity is identical for two successivelighting phases, the light intensity between these phases willremain constant.
9

Configuring light profilesIt is possible to individually adjust target times and the light intensities to be achieved during individual light phases and to add orremove further phases. It is possible to define up to 16 lighting phases per light profile.
Editing light profiles
InfoThe selected light intensity is always reached at the end of a phase (target time).
1. Connect to the HeliaLux SmartControl's user interface.
2. Select the main 'Profiles' menu item.
3. Select one of the 8 profiles by pressing the 'Edit' button.
4. Give your profile a name if necessary (e.g. 'working day').
5. In Phase 1, first define the light intensity with which the selected profile should start at00:00 hours.
6. Then select the desired target times for the other lighting phases.
InfoA lighting phase's start time is set automatically and corresponds to the previous lightingphase's defined end time.
Example of the automatic start time of a lighting phaseThe first phase of a profile always starts at 00:00 hours.
You have configured 2 phases. Phase 1 is predefined by the system and cannot beremoved. The specified target time is 00:00 hours. Phase 2 begins with 00:00 hours andends at 08:45 hours. Phase 3 is added with the target time of 12:00 hours by clicking the'+' button. The system sets the start time for the newly added phase to 08:45 hours.
7. The 'Edit' button is used to set the desired target intensity of the respective lightcolours for each lighting phase using the sliding colour controllers.
8. Confirm your setting by clicking the 'Save' button.
Via AP mode, please refer to 'Establishing a connection to the user interface viaAccess Point Mode'.
•
Via the home network, please refer to 'HeliaLux SmartControl in home networks'.•
10

Lighting phase with constant light intensityPlease ensure that the target intensity values are the same as those used for the previous phase if you do not want the light output tochange within a phase.
Example: Phase 2 ends at 8.45 a.m. with a target intensity of: white: 50%, red: 80%, green: 75%, blue: 50%. Copy these values into thetarget intensity for Phase 3 to keep the light intensity constant within Phase 3.
Adding a lighting phase
Removing a lighting phase
Assigning light profiles to weekdays
1. Set the desired target time under 'Add another phase' andconfirm your entry by clicking the '+' button.
Info: The newly added lighting phase is automatically sorted inchronological order into the list of existing phases.
2. Then select the desired target intensity for the added phase asdescribed in Point 7 (Editing light profiles).
Click the 'x' button to remove an existing lighting phase.
1. Connect to the HeliaLux SmartControl's user interface.
2. Configure your light profile as described in the 'Configuringlight profiles' section.
NoticeOne light profile (Profile 1) is already preconfigured and assignedto all 7 days in the HeliaLux SmartControl's factory settings. Thisprofile may be changed at any time. Please refer to ‘Configurationof the Light Profiles’ to this end.
3. Select the main 'Weekdays' menu item.
4. Click the selection list next to the day of the week and selectthe desired profile for the respective day of the week.
5. Click the 'Save' button to confirm your choice.
Via AP mode, please refer to 'Establishing a connection to theuser interface via Access Point Mode'.
•
Via the home network, please refer to 'HeliaLuxSmartControl in home networks'.
•
11

'Status' page in the user interface
Lighting graph for the selected profileThe lighting graph displays the light profile for the current day of the week in a graph.
Manual simulation of the time of day
InfoManual simulation will by default remain active for 60 minutes and can be extended up to 24 hours when necessary if it is notdeactivated. The SmartControl will then switch back to automatic mode.
The manual simulation of the time of day allows you to simulate the light profile for thecurrent day of the week in fast motion by moving the sliding controller.
Activating manual simulation of the time of day:
1. Connect to the HeliaLux SmartControl's user interface.
2. Select the main 'Status' menu item.
3. Enable the sliding controller for the manual simulation of the time of day.
4. Move the sliding controller to simulate the course of the day in fast motion.
Via AP mode, please refer to 'Establishing a connection to the user interface viaAccess Point Mode'.
•
Via the home network, please refer to 'HeliaLux SmartControl in home networks'. •
12

Manual control of light coloursActivating manual control:
1. Connect to the HeliaLux SmartControl's user interface.
2. Select the main 'Status' menu item.
3. Activate the sliding controller for manually controlling the light colours.
InfoManual control will by default remain active for 60 minutes and can be extended up to 24hours when necessary if it is not deactivated. The SmartControl will then switch back toautomatic mode.
4. Make the desired colour and intensity settings using the sliding colour controllers.
Via AP mode, please refer to 'Establishing a connection to the user interface viaAccess Point Mode'.
•
Via the home network, please refer to 'HeliaLux SmartControl in home networks'.•
13

HeliaLux SmartControl in home networksIt is possible to connect the device to the home network for easy access to the HeliaLux SmartControl. Manually connecting to theHeliaLux SmartControl via Access Point Mode is no longer necessary with this type of connection.
The following additional options are available when your home network is connected to the Internet:
Establishing a connection to the home network
Automatically retrieving the date and time•
Installing firmware updates•
1. Connect to the HeliaLux SmartControl's user interface (see 'Establishing a connectionto the user interface using Access Point Mode').
2. Select the main 'Settings' menu item.
3. Navigate to the 'Home network' item.
4. Activate the 'Connect to home network' sliding controller. The search for available WiFinetworks will start.
5. Select the WiFi network to which you want to connect the HeliaLux SmartControl.
6. Enter the password for the selected WiFi network.
7. Confirm your setting by clicking the 'Save' button.
8. Confirm the system message for checking the WiFi connection by clicking the 'OK'button. The HeliaLux SmartControl will now check the connection to your home network.
9. Once the connection has been checked, reconnect to your HeliaLux SmartControl'sWiFi network and then enter 192.168.4.1 as the IP address in your Internet browser'saddress line to launch the user interface. You will then see the result of the connectioncheck.
10. The IP address at which you can access your SmartControl in your home network willbe displayed on successful conclusion of the connection check. Make a note of thisaddress. Confirm that you have made a note of the IP address and then click the ‘Connect’button to connect to your home network.
11. Please ensure that your device is connected to your home network when theconnection has been established. You can then access your HeliaLux SmartControl's userinterface by entering the IP address that you noted in Step 10 in your Internet browser'saddress line.
InfoThe blue network LED on your device will flash while the connection to your homenetwork is being established. The blue network LED will light up continuously once theconnection has been successfully established.
14

If it is no longer possible to connect to the user interface in the home network (the blue network LED does not light up permanentlyeven after 30 seconds), you can return your HeliaLux SmartControl to Access Point Mode using the following key combination andthen repeating Steps 1 to 11.
Press the 'Reboot' button once, then press the 'Mode' button once to do so.
Please refer to the 'Troubleshooting problems' for further assistance in the event of faulty connections.
15
Launching the user interface when a connection to the homenetwork has been established1. Please ensure that your HeliaLux SmartControl has successfully connected to the home network (please refer to chapter 'HeliaLuxSmartControl in home networks').
2. Please ensure that your end device (e.g. smartphone or computer) with which you intend to operate your SmartControl is connectedto the same home network.
3. Launch your HeliaLux SmartControl's user interface by entering the IP address you noted in your Internet browser's address bar:
NoticeIn the event that you have misplaced it, you will find the IP address assigned during the connection check in your router'sadministration interface. It is possible for the router to have been assigned a new IP address following a power failure or otherconnection problems.
Solution 1: Return your HeliaLux SmartControl to AP mode (see 'Switching from home network to Access Point Mode') and establisha new connection to your home network (see 'Connecting to the home network').
Solution 2: Alternatively, it is also possible to assign a fixed IP address to your SmartControl through which it is possible topermanently access the HeliaLux SmartControl. Please refer to 'Assigning a static IP address in home networks' to this end. Please alsomake sure in this event that the selected IP address is supported by your network.
Many common routers support the technology of name resolution. It allows you to access the user interface by entering the followingaddress in your Internet browser: 'http://HLSmartControl'.
If you have changed the HeliaLux SmartControl's network name (SSID), you can access the user interface using the following address:http:// 'Your network name' without quotation marks. Provided your router supports name resolution.
Switching from home network to Access Point Mode
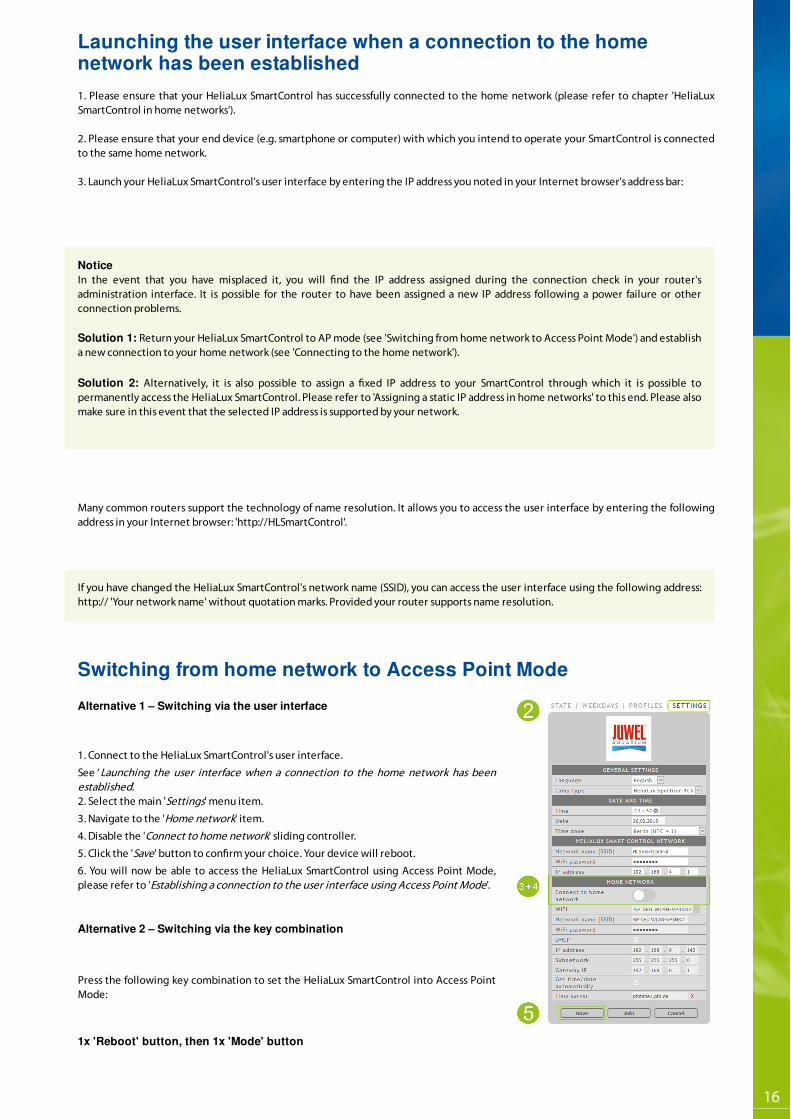
Alternative 1 – Switching via the user interface
1. Connect to the HeliaLux SmartControl's user interface.
See ‘Launching the user interface when a connection to the home network has beenestablished’.2. Select the main 'Settings' menu item.
3. Navigate to the 'Home network' item.
4. Disable the 'Connect to home network' sliding controller.
5. Click the 'Save' button to confirm your choice. Your device will reboot.
6. You will now be able to access the HeliaLux SmartControl using Access Point Mode,please refer to 'Establishing a connection to the user interface using Access Point Mode'.
Alternative 2 – Switching via the key combination
Press the following key combination to set the HeliaLux SmartControl into Access PointMode:
1x 'Reboot' button, then 1x 'Mode' button
16

Other settings
Changing the network name (SSID) and passwordPlease proceed as follows to configure the network name and password:
1. Connect to the HeliaLux SmartControl's user interface.
2. Select the main 'Settings' menu item.
3. Navigate to the 'HeliaLux SmartControl network' item.
ImportantPlease ensure that the 'Connect to home network' sliding controller has been disabled.
4. Assign a new unique network name to your HeliaLux SmartControl in the 'Networkname (SSID)' input field.
Notice
Network names (SSID) may not contain any spaces, special characters orumlauts.
5. Create a new secure Wi-Fi password for your HeliaLux SmartControl in the 'Wi-Fipassword' input field.
InfoSecure passwords contain at least 8 characters and use uppercase and lowercase letters,digits and special characters.
6. Click the 'Save' button to confirm your choice. Your device will reboot.
7. Establish the connection to your SmartControl's newly created Wi-Fi network (pleaserefer to 'Establishing a connection to the user interface using Access Point Mode').
Via AP mode, please refer to 'Establishing a connection to the user interface viaAccess Point Mode'.
•
Via the home network, please refer to 'HeliaLux SmartControl in home networks'.•
17

Assigning a static IP address in your home network
Using several HeliaLux SmartControls in a single householdWe recommend that you change your device's SSID (network name) / the IP address when several HeliaLux SmartControls are used in asingle household, This will ensure that each device is assigned a unique name / a unique IP address in the network and that it isindividually accessible.
InfoConfigure your individual HeliaLux SmartControls in sequence. Please ensure that only one device is in operation during configuration.
Using several HeliaLux SmartControls in Access Point ModeAn individual network name (SSID) must be assigned to each individual device if you want to use several HeliaLux SmartControls inAccess Point Mode.
Please refer to 'Changing the network name (SSID) and password' to this end.
Please proceed as follows if you want to be able to launch the HeliaLuxSmartControl using a static IP address that you have assigned:
AttentionOnly for experienced users. We recommend that only experienced users make changesto the IP settings. We otherwise recommend use in DHCP mode.
1. Establish the connection to the HeliaLux SmartControl's user interface (please refer to'Connecting the HeliaLux SmartControl to home networks').
2. Select the main 'Settings' menu item.
3. Navigate to the 'Home network' item.
4. Disable the checkbox for DHCP mode.
InfoDisable DHCP mode to assign your own IP address to the HeliaLux SmartControl by whichit can be accessed. Your router must support the manual assignment of a separate IPaddress. Please refer to your router's user manual for more information in this regard.
5. Assign the desired IP address.
6. Confirm your choice and input by clicking the 'Save' button. Your device will reboot andwill then be accessible via the new IP address.
18

Using several HeliaLux SmartControls in a home networkPlease ensure that you are connected to the home network. Please refer to 'HeliaLux SmartControl in home networks' to this end.
Alternative 1: Accessing the individual SmartControls throughindividual IP addresses
Each HeliaLux SmartControl can be manually assigned an individual IP address. Please refer to 'Assigning static IP addresses in homenetworks' to this end.
You will be able to access the individual SmartControls once you've configured your home network to support manually assigned IPaddresses by entering the assigned IP addresses into your Internet browser's address bar.
Example:You have changed the HeliaLux SmartControl's IP address from 192.168.4.1 to your desired IP address, e.g.: 192.168.1.35.
You can then access your device by entering the newly assigned IP address in your Internet browser's address bar.
Save the IP addresses for the respective HeliaLux SmartControl as favourites in your end device. This will help you access the userinterface more quickly and more comfortably.
Alternative 2: Your home network supports name resolution
Assign a unique network name (SSID) to each device if you intend to use several HeliaLux SmartControls in a single home network.
Please refer to 'Changing the network name (SSID) and password' if you want to change the network name (SSID). Do not disable the'Connect to home network' sliding controller in this case!
You will be able to access the individual SmartControls by entering the assigned SSID in your Internet browser's address bar if your homenetwork supports name resolution.
Example:You have changed the network name (SSID) from 'HLSmartControl' to 'Controller1' for example. You will then be able to access yourcontroller by entering the newly assigned SSID: "http://Controller1" in your Internet browser's address bar.
NoticeNetwork names (SSID) may not contain spaces or umlauts.
19

Firmware update
Care and maintenanceDuring care and maintenance activities, always disconnect the HeliaLux SmartControl from the power supply.
If necessary, we recommend cleaning with a soft cloth and mild detergent.
We recommend that you regularly check for firmware updates to ensure optimumcontrol of your HeliaLux SmartControl. Firmware updates improve performance and mayprovide additional features.
1. Establish a connection through your home network to the HeliaLux SmartControl's userinterface. Please refer to 'Connecting the HeliaLux SmartControl to home networks'.
NoticePlease ensure that your home network has access to the Internet.
2. Select the main 'Settings' menu item.
3. Navigate to the 'Info' button and press it.
4. Press the 'Firmware' button on the page that is now being displayed. The system willcheck for new firmware.
5. Press the 'Update' button if new firmware is available.
6. The system will automatically install the new firmware and will reboot onceinstallation has been concluded.
NoticeDo not disconnect the HeliaLux SmartControl from the power during afirmware update. The resulting loss of data could cause your device to stopworking.
20

Status lights and function keys on the HeliaLux SmartControl
Status lights on the HeliaLux SmartControl
LED blue: Network
LED green: Status
LED red: Restarting
Green and red - Demo-Mode
Lights up continuously after successfully connecting to a Wi-Fi home network.•
Briefly lights up twice and once long in Access Point Mode•
Flashes when establishing a connection to a Wi-Fi home network.•
Lights up continuously in Auto Mode (operation mode)•
Flashes in Service Mode or manual control of the lamp via the user interface•
Lights up during system restart•
flash in demo mode in parallel.•
21

Functions using the buttons on the device
Service ModeIdeal for aquarium maintenance work
All the colours of your HeliaLux lamps will light up with 100% luminosity for 60 minutesin Service Mode:
Activation: Press and hold the 'Mode' button for 3 seconds.
InfoThe luminosity can be successively reduced by briefly pressing the 'Mode'key in Service Mode.
Deactivation: Press and hold the 'Mode' button again for three seconds. The HeliaLuxSmartControl will then switch back to Auto Mode (operating mode). The HeliaLuxSmartControl will automatically switch back to Auto Mode (operating mode) if it is notswitched off manually within 60 minutes.
Access Point Mode (AP Mode)
InfoIf you are not operating the SmartControl in Access Point Mode, but theconnection to a Wi-Fi home network fails, you can still access the userinterface by pressing the key combination to return the SmartControl toAccess Point Mode.
Activation: Press the 'Reboot' button once, then press the 'Mode' button once to do so.
Reboot
Press the 'Reboot' button once
Demo-Mode
Activation: Press and hold the 'Mode' button for 20 seconds.
Deactivation: Press and hold the 'Mode' button for 3 seconds to exit Demo Mode. TheHeliaLux SmartControl will then switch back to Auto Mode (operating mode).
InfoThe SmartControl will also start in Demo Mode after a restart when DemoMode has been activated.
Reset
Press the 'Reboot' button once and then press and hold the 'Mode' buttonfor 10 seconds.
NoticeAll settings will be lost when you do so.
Access Point Mode creates its own wireless network to which Wi-Fi capable devicesare able to connect.
•
Executes a system restart of the HeliaLux SmartControl.•
The HeliaLux lamp dims up and down in various light configurations in Demo Mode.•
Resets the HeliaLux SmartControl to the factory settings.•
22

23

Troubleshooting in the event of problems
Problem
Possible cause
Remedy
No status lamps have litup on the controller.
The power supply has beeninterrupted.
Check whether the switch on the cable to thepower supply unit is switched on.
Check the plug socket used. Use a device thatyou know works to this end.
No connection can beestablished to thewireless home network(Wi-Fi).
The Wi-Fi function on yourrouter has been disabled.
Enable Wi-Fi on your router. A connection to theInternet should ideally have been established.
The following will bedisplayed in yourInternet browser afterentering the HeliaLuxSmartControl's IPaddress: The pagecould not be loaded.
You have entered the wrongIP or the wrong name.
Check the IP address. The default is:192.168.4.1 alternatively:
“http://local.HLSmartControl“
(assuming your router supports nameresolution).
It is not possible tolaunch the HeliaLuxSmartControl's userinterface in your homenetwork
and
the blue status lamp onthe SmartControlflashes continuously.
Possible cause:
- The selected Wi-Fi networkis not available or is out ofrange.
- You have entered anincorrect password for yourWi-Fi network.
- You have changed your Wi-Fi network's name (SSID) orhave entered it incorrectly.
- Your DHCP / IP settings areincompatible with your Wi-Finetwork.
Start the HeliaLux SmartControl on the device inAccess Point Mode. To do so, press
the 'Reboot' button once and the 'Mode' buttononce.
Now connect with your controller in Access PointMode. Please refer to ‘Establishing a connectionto the user interface using Access Point Mode’ tothis end.
Check your network settings as described in the'Establishing a connection to home networks'menu item.
It is not possible tolaunch the HeliaLuxSmartControl's userinterface in your homenetwork
and
the blue status light onthe SmartControl lightsup continuously withoutinterruption.
The IP address you noted isno longer valid or your routerhas assigned a new address.
Solution 1: Return your HeliaLux SmartControlto AP mode (see 'Switching from home networkto Access Point Mode') and establish a newconnection to your home network (see'Connecting to the home network').
24

___________________________
The end device that you are using tocontrol your HeliaLux SmartControl isnot connected to the same Wi-Finetwork as your SmartControl.___________________________
You are not entering yourSmartControl's name into yourI n t e r n e t browser's address barcorrectly__________________________
You have entered your HeliaLuxSmartControl's network name (SSID)in to your Internet browser's addressbar correctly.
(Default: “"http://HLSmartControl), theuser interface cannot be accessed,however, because your routerpossibly does not support nameresolution.
Solution 2: Alternatively, it is also possible toassign a fixed IP address to your SmartControlthrough which it is possible to permanentlyaccess the HeliaLux SmartControl. Pleaserefer to 'Assigning a static IP address in homenetworks' to this end. Please also make sure inthis event that the selected IP address issupported by your network.
Solution 3: Check your router's administrationinterface to see whether a new IP address hasbeen assigned to your HeliaLux SmartControl.
____________________________
Please ensure that your end device isconnected to the same Wi-Fi network as yourHeliaLux SmartControl.
___________________________
Please enter your HeliaLux SmartControl'snetwork name (SSID) in your Internet browser'saddress bar.
The default name if you have not changed thenetwork name (SSID) is:
“http://HLSmartControl”
You can alternatively access the HeliaLuxSmartControl by entering the IP address thathas been assigned by your home network.Please refer to your router's operating manualto this end.____________________________
Please enter the IP address assigned to yourSmartControl by your home network into yourInternet browser's address bar.
Please refer to your router's operatinginstructions to this end.
You can alternatively reach your HeliaLuxSmartControl in Access Point Mode. To do this,please refer to: 'Switching from home networkto Access Point Mode'
Your HeliaLuxSmartControl isno longer workingfollowing afirmware update.
The connections to your controllerwere interrupted during the firmwareupdate.
Reset the HeliaLux SmartControl to factorysettings. Please contact the JUWEL customerservice if this is not successful.
25

Proper disposalProper disposal
When your light fitting comes to the end of it’s life or you choose to update or upgrade it by replacing it. Please do not dispose of itwith your normal household waste. Please recycle where facilities exist. When you need to dispose of this fitting, check with yourretailer or local authority for suitable options. New regulations will encourage the recycling of Waste from Electrical and ElectronicEquipment (European “WEEE Directive” effective 2012/19/EC).
•
The connection of wires must be followed according to the illustration.•
26

GuaranteeWe guarantee the performance of the JUWEL-Aquarium product or its accessories to the purchaser for a period of 24 months from thedate of purchase according to the following conditions:
§ 1 Extent of the guarantee
(1) This guarantee extends to the JUWEL-Aquarium product and its components excluding items subject to wear and tear such as T5 andT8 light tubes and filter media. It is limited to the product as such and does not cover damage to other property and/or individuals. Inaddition, the provisions of the product liability law apply. These provisions are not limited by the aforementioned arrangement.
(2) It is the prerogative of JUWEL-Aquarium to decide whether the guarantee is performed by means of repair or replacement. If neitherrepair nor replacement can ensure the performance of the JUWEL-Aquarium product the purchaser is entitled to demand a reduction inprice or to return the product against repayment of the purchase price.
§ 2 Guarantee period and settlement procedure
(1) The guarantee period begins on the day of the purchase of the JUWEL Aquarium product from the retailer. Claims under thisguarantee will not be honoured, if
(a) the damage is caused as a result of improper use or maintenance or nonobservance of the instructions given in this manual
(b) the product or its components have been maintained by persons or companies not authorised by the manufacturer to do so
(c) the product or its components have been damaged by mechanical means of whatsoever kind, in particular broken glass
(2) All claims under this guarantee have to be notified to the retailer, from whom the aquarium has been purchased without delay,however, not longer than 2 weeks from the day of first occurrence of defects. Rights under the consumer protection laws will remainunaffected.
(3) Guarantee claims will only be accepted if the validity of the claim is supported by evidence of purchase of the JUWEL-Aquariumproduct. This declaration of guarantee is a translation only. In case of doubts the original
German language version prevails.
We reserve the right to make technical alterations.
© JUWEL AQUARIUM
® JUWEL, Trigon, Vision, Rekord, Rio, Lido, Vio, Primo, Korall,
MonoLux, DuoLux, MultiLux, KoralLux, Violux, NovoLux, PrimoLux,
SeaSkim, EccoSkim AquaHeat, EasyFeed, SmartFeed, High-Lite,
Warm-Lite, Colour-Lite, Day-Lite, Juwel Twin-Lite, HiFlex,
SmartControl, Juwel Eccoflow, Bioflow, Cirax, Nitrax, Phorax, Carbax,
BioPad, BioCarb, BioPlus, bioBoost, OxyPlus, Silexo,Conexo.
JUWEL AQUARIUM AG & CO. KG
Karl-Göx-Straße 1 27356 Rotenburg/Wümme . GERMANY
Telefon +49(0)42 61/93 79-32
Telefax +49(0)42 61/93 79-856
Service-Mail [email protected]
JUWEL AQUARIUM UK Branch
Gateway 11 Business Park
Penfold Drive, Wymondham Norfolk NR18 0WZ
Tel.: 01953 606 363 Fax: 01953 603 839
E-Mail: [email protected]
Service-Mail: [email protected]
27