Heavy Equipment - CareerTech (CT) - okcareertech.org · Each of the four sections in this guide...
28
Heavy Equipment Study Guide Assessment: 2155 Heavy Equipment Mechanic
Transcript of Heavy Equipment - CareerTech (CT) - okcareertech.org · Each of the four sections in this guide...

Heavy Equipment
Study Guide
Assessment:2155 Heavy Equipment Mechanic

Overview
This study guide is designed to help students prepare for the Heavy Equipment Mechanic assessment. It not only includes information about the assessments, but also the skills standards upon which the assessment is based and test taking strategies.
Each of the four sections in this guide provides useful information for students preparing for the Heavy Equipment Mechanic assessment.
■ CareerTech and Competency-Based Education: A Winning Combination
■ Heavy Equipment Mechanic assessment
▶ Assessment Information
▶ Standards and Test Content
▶ Sample Questions
▶ Abbreviations, Symbols, and Acronyms
■ Strategies for Test Taking Success
■ Notes
These assessments were developed by the CareerTech Testing Center and measure a student’s ability to apply knowledge of the skills necessary for success in the Heavy Equipment Mechanic sector.
DisclaimerThe Oklahoma Department of Career and Technology Education cannot vouch for the accuracy of the information contained in any linked site. Our intent is to simply provide a list of sites that we feel may be useful to you. Some of the links presented here are commercial sites. We do not endorse these sites or their products, and we do not request or accept any fee for inclusion on this list. The Department makes no representations or warranties, express or implied, with respect to the document, or any part thereof, including any warrantees of title, noninfringement of copyright or patent rights of others, merchantability, or fitness or suitability for any purpose.
Equal Opportunity/Non Discrimination StatementThe Oklahoma Department of Career and Technology Education does not discriminate on the basis of race, color, national origin, sex/gender, age, disability, or veteran status. Inquiries concerning application of this policy may be referred to the ODCTE Compliance Coordinator, 1500 W. 7th Ave. Stillwater, OK 74074-4364, or call 1-800 522-5810 or (405) 377-2000.
2

CareerTech and Competency-Based Education:A Winning Combination
Competency-based education uses learning outcomes that emphasize both the application and creation of knowledge and the mastery of skills critical for success. In a competency-based education system, students advance upon mastery of competencies, which are measurable, transferable outcomes that empower students.
Career and technology education uses industry professionals and certification standards to identify the knowledge and skills needed to master an occupation. This input provides the foundation for development of curriculum, assessments and other instructional materials needed to prepare students for wealth-generating occupations and produce comprehensively trained, highly skilled employees demanded by the work force.
Tools for Success
CareerTech education relies on three basic instructional components to deliver competency-based instruction: skills standards, curriculum materials, and competency assessments.
Skills standards provide the foundation for competency-based instruction and outline the knowledge and skills that must be mastered in order to perform related jobs within an industry. Skills standards are aligned with national skills standards and/or industry certification requirements; therefore, a student trained to the skills standards is equally employable in local, state and national job markets.
Curriculum materials and textbooks contain information and activities that teach students the knowledge and skills outlined in the skills standards. In addition to complementing classroom instruction, curriculum resources include supplemental activities that enhance learning by providing opportunities to apply knowledge and demonstrate skills.
Competency Assessments test the student over material outlined in the skills standards and taught using the curriculum materials and textbooks. When used with classroom performance evaluations, written competency assessments provide a means of measuring occupational readiness.
Each of these components satisfies a unique purpose in competency-based education and reinforces the knowledge and skills students need to gain employment and succeed on the job.
Measuring Success
Evaluation is an important component of competency-based education. Pre-training assessments measure the student's existing knowledge prior to receiving instruction and ensure the student's training builds upon this knowledge base. Formative assessments administered throughout the training process provide a means of continuously monitoring the student's progress towards mastery.
Written competency assessments provide a means of evaluating the student's mastery of knowledge and skills. Coaching reports communicate competency assessment scores to students and provide a breakdown of assessment results by standard area. The coaching report also shows how well the student has mastered skills needed to perform major job functions and identifies areas of job responsibility that may require additional instruction and/or training.
3

Heavy Equipment Mechanic Assessment Information
What is the Heavy Equipment Mechanic assessment?
The Heavy Equipment Mechanic assessment is an end-of-program assessment for students in Heavy Equipment Mechanic programs. The assessments provide an indication of student mastery of knowledge and concepts necessary for success in careers in this area.
How was the assessment developed?
The assessment was developed by the CareerTech Testing Center. Items were developed and reviewed by a committee of subject matter experts.
What does the assessment cover?
Specifically, the test includes multiple-choice test items over the following areas:
Heavy Equipment Mechanic (55 questions)General Engine Diagnosis 5%Cylinder Head and Valve Train Diagnosis and Repair 2%Engine Block Diagnosis and Repair 2%Lubrication and Cooling Systems Diagnosis and Repair 4%Fuel, Induction, and Exhaust Systems Diagnosis and Repair 11%Drive Training Diagnosis and Repair 11%Steering System and Tires Diagnosis and Repair 4%Hydraulic Brakes Diagnosis and Repair 7%Electrical/Electronic Systems Diagnosis and Repair 16%Heating and Air Conditioning Diagnosis and Repair 20%Preventive Maintenance Inspections 13%Maintain Hydraulics Systems 5%
What are the benefits of using these assessments?
Students receive a competency certificate for each assessment that he/she passes. This certificate may be included in his/her portfolio and used to communicate the student’s mastery of the subject matter to potential employers.
When should the assessment be taken?
The CareerTech Testing Center recommends that students take this assessment as soon as possible after receiving all standards-related instruction, rather than waiting until the end of the school year.
Is the assessment timed?
No. However, most students finish the assessment within one hour.
4
5
What resources can students use on these assessments?
Students are allowed to use calculators and scratch paper on CTTC competency assessments; however, these items must be provided by the testing proctor and returned to the proctor before the student’s exam is submitted for scoring. Calculator apps on cell phones and other devices may not be used on these assessments.
What accommodations can be made for students with Individualized Education Plans (IEPs)?
Accommodations are allowed for students with an Individualized Education Plan. Examples of allowable accommodations include:
■ Extended time — This assessment is not timed; therefore, students may take as much time as needed to finish. The assessment must be completed in one testing session.
■ Readers — A reader may be used to read the assessment to a student who has been identified as needing this accommodation.
■ Enlarged text — Students needing this accommodation can activate this feature by clicking the icon in the upper right corner of the screen.
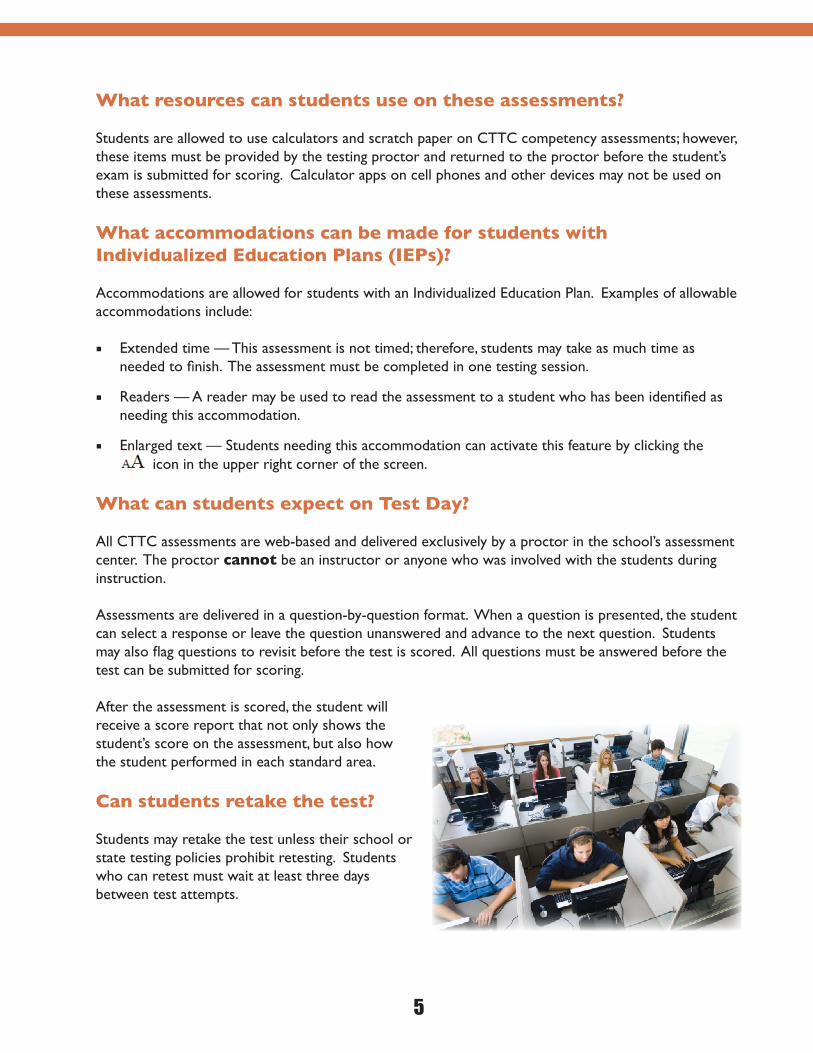
What can students expect on Test Day?
All CTTC assessments are web-based and delivered exclusively by a proctor in the school’s assessment center. The proctor cannot be an instructor or anyone who was involved with the students during instruction. Assessments are delivered in a question-by-question format. When a question is presented, the student can select a response or leave the question unanswered and advance to the next question. Students may also flag questions to revisit before the test is scored. All questions must be answered before the test can be submitted for scoring. After the assessment is scored, the student will receive a score report that not only shows the student’s score on the assessment, but also how the student performed in each standard area.
Can students retake the test?
Students may retake the test unless their school or state testing policies prohibit retesting. Students who can retest must wait at least three days between test attempts.

6
Standards and Test Content
General Engine Diagnosis (3 questions) General Engine Diagnosis; Removal and Reinstallation
1. Listen to and verify operator’s complaint; review past maintenance documents; determine needed repairs
2. Create detailed work orders
3. Inspect fuel, oil, and coolant level and condition; determine needed repairs
4. Inspect engine assembly and compartment for fuel, oil, coolant, air, and other leaks; determine needed repairs
5. Diagnose the cause of excessive oil consumption, unusual engine exhaust color, odor, and sound; determine needed repairs
6. Interpret engine noises; determine needed repairs
7. Remove engine; prepare for tear down
8. Reinstall engine
Diesel Engine Diagnosis and Repair
1. Perform diagnostic procedures on equipment with on-board or self-diagnostic type computer systems; determine needed repair
2. Perform cylinder compression tests; determine needed repairs
3. Perform cylinder leakage tests; determine needed repairs
4. Perform diagnostic procedures on equipment computer system using scan tools; determine needed repairs
5. Inspect a test sensor, actuator components, and circuits of electronic engine management systems; adjust or replace as needed
6. Perform air intake system restriction and/or pressure tests; determine needed repairs
7. Perform manifold pressure and/or air box pressure tests; determine needed repairs
8. Perform exhaust back pressure tests; determine needed repairs
9. Perform crankcase pressure test; determine needed repairs
10. Diagnose no cranking, cranks but fails to start, hard starting, and starts but does not continue to run problems; determine needed repairs
11. Diagnose surging, rough operation, misfiring, low power, slow deceleration, slow acceleration, and shutdown problems; determine needed repairs
12. Diagnose engine vibration problems; determine needed repairs
13. Locate a misfiring cylinder; determine needed repairs

7
Cylinder Head and Valve Train Diagnosis and Repair (1 question)
1. Remove and clean cylinder head(s); visually inspect cylinder heads for cracks; check gasket surface areas for warpage and leakage; check passage condition
2. Clean and inspect threaded holes, studs, and bolts for serviceability; service or replace as needed
3. Inspect pushrods, rocker arms, rocker arm pivots, and shafts for wear, bending, cracks, looseness, blocked oil passages, and wiring harnesses; repair or replace as needed
4. Inspect and repair camshaft(s) drives; check gear wear, end play and backlash; time camshaft
5. Inspect camshaft journals, lobes, and followers
6. Install cylinder heads and gaskets
7. Adjust valve clearance
8. Inspect injector sleeves, tips, and seals; replace as needed
9. Clean and inspect pre-combustion chambers, replace as needed
10. Inspect valve bridges (crossheads) and guides; replace and adjust bridges as needed
11. Boroscope internal inspection
Engine Block Diagnosis and Repair (1 question)
1. Inspect, service, and install oil pan(s), covers, vents, gaskets, and seals
2. Clean engine block; inspect for cracks; measure mating surfaces for warpage; check condition of passage, core, and gallery plugs; inspect threaded holes, studs, dowel pins, and bolts for serviceability; service and replace as needed
3. Demonstrate the proper use of precision measurement instruments
4. Inspect and measure camshaft bearing bores for wear, damage, out-of-round, and alignment; determine needed repairs
5. Inspect, measure, and replace/reinstall in-block camshaft; measure/adjust end play
6. Clean and inspect crankshaft for surface cracks and journal damage; check condition of oil passage(s); check passage plugs; measure journal diameter and seal wear; determine needed service
7. Inspect and measure main and connecting rod bearings for damage, wear patterns, clearance, and crankshaft end play; determine needed repairs
8. Clean, inspect (wear patterns), and measure pistons, pins, bushings, retainers, and connecting rods; replace as needed
9. Measure piston-to-cylinder wall clearance
10. Check ring-to-groove clearance and end gap; install rings on pistons
11. Assemble pistons and connecting rods; install in block; replace rod bearings and check clearances
12. Inspect crankshaft vibration damper (harmonic balancer); replace as needed
13. Inspect, install, and align flywheel housing
14. Inspect crankshaft flange and flywheel/flexplate mating surfaces for burrs; measure runout; repair as necessary

8
15. Inspect flywheel/flexplate for cracks, wear (includes ring gear), and measure runout; determine needed repair
16. Reassemble engine using correct gaskets, sealants, and fasteners
17. Pre-lube engine lubrication system
18. Hone and clean cylinder liners
19. Inspect cylinder sleeve counterbore and lower bore; check bore distortion; determine needed service
20. Clean, inspect, and measure cylinder walls or liners for wear and damage; determine needed service
Lubrication and Cooling Systems Diagnosis and Repair (2 questions)
1. Check engine oil level and condition; determine needed repairs
2. Check engine oil pressure, gauge, and sending unit; determine needed repairs
3. Perform oil pressure tests; determine needed repairs
4. Inspect and measure oil pumps (includes gears, rotors, and housing), filters, pressure relief devices, inlet pipes, screens, and pump drives; replace as needed
5. Perform cooling system tests (pressure, combustion leakage, and temperature); determine needed repairs
6. Inspect drive belts and pulleys; replace and adjust as needed
7. Inspect engine cooling and heater system hoses; replace as needed
8. Inspect and test thermostat, by-pass, and housing; replace as needed
9. Recover, flush, and refill with recommended coolant and/or additive package; bleed cooling system
10. Inspect water pump; repair/replace as needed
11. Inspect and test radiator, pressure cap, and coolant recovery system; replace as needed
12. Clean, inspect, and test fan(s), (electrical and mechanical), fan clutch, fan shroud, and cooling system related temperature sensors/switches; replace as needed
13. Inspect and test oil coolers; replace as needed
14. Inspect and test oil temperature/pressure switches and sensors; replace as needed
15. Determine proper lubricant and perform oil and filter change
16. Inspect, clean, and test oil cooler and components; determine needed action
17. Inspect turbocharger lubrication system; determine needed repairs

9
Fuel, Induction, and Exhaust Systems Diagnosis and Repair (6 questions) General Diagnosis and Repair
1. Identify the components of a common rail fuel system and the safety precautions related to each component
2. Inspect and test exhaust manifold, exhaust pipes, mufflers, resonators, tail pipes, heat shields, and mounting hardware; replace as necessary
3. Check fuel level, quality, and consumption; determine needed repairs
4. Inspect fuel tank, fuel gauge sending unit, fuel tank filter (sock), fuel cap, fuel lines, fuel filters, hoses, supply, crossover, and return lines and fittings; determine needed repairs
5. Inspect air cleaner assembly and filter elements; replace as needed
6. Inspect and test (pressure, vacuum, and volume) fuel pumps and pump controls (electrical/electronic); replace as needed
7. Inspect, test, and clean screens, water separators, filters, and heaters, replace as necessary
Diesel Fuel System General Diagnosis and Repair
1. Locate and use relevant diagnostic service information to include diagnostic procedures. Flow-charts, technical service bulletins (information) and schematics
2. Check fuel system for air; determine needed repairs
3. Prime and bleed fuel system; check primer pump; determine needed repairs
4. Perform on-engine inspections. Remove, test, adjust injectors (and nozzles); determine needed repairs
5. Inspect high pressure injection lines, fittings, and seals; replace as needed
6. Inspect low pressure fuel lines, fittings, and seals; repair as needed
Diesel Mechanical Fuel Injection Diagnosis and Repair
1. Perform on-engine inspections, test, adjustments; check timing or replace and time a distributor (rotary) type injection pump; determine needed repairs
2. Inspect, test, and adjust safety shut-down devices, circuits, and sensors; determine needed repairs
3. Perform on-engine inspections, tests, adjustments; check timing or replace and time an in-line type injection pump; determine needed repairs
4. Perform on-engine inspections, tests, and adjustments; replace a PT-type injection pump and injectors as needed
5. Inspect and adjust throttle control linkage; determine needed repairs
6. Inspect smoke limiters (air/fuel ratio controls); determine needed repairs
7. Inspect, test, and adjust engine governors; determine needed repairs
8. Inspect, test, and adjust engine fuel shut-down devices and controls; determine needed repairs

10
Diesel Electronic Fuel Injection System Diagnosis and Repair
1. Inspect and test power and ground circuits and connections; determine needed repairs
2. Check DTC (Diagnostic Trouble Codes) from on-board computer system utilizing scan tool and technical information; determine needed repairs
3. Inspect and replace electrical connector terminal, seals, and locks
4. Inspect and test sensors, controls, and actuator components and circuits; adjust or replace as needed
Air Induction and Exhaust Systems Diagnosis and Repair
1. Inspect air induction piping, air cleaning, and element; service or replace as needed
2. Inspect turbocharger and waste gate, piping systems, and Exhaust Gas Recirculation (EGR) systems; determine needed repairs
3. Remove and reinstall turbocharger and waste gate
4. Inspect intake manifold, gaskets, and connections; repair or replace as needed
5. Inspect, clean, and test after cooler (intercooler) and charge air cooler assemblies; repair or replace as needed
6. Inspect pre-heater (glow plug) system and controls; repair or replace as needed
7. Inspect starting fluid systems and controls; repair or replace as necessary
8. Using recommended electronic diagnostic tools (to include PC-based software and/or data scan tools) access customer parameters; determine needed repairs
9. Remove, inspect, test, reinstall, and adjust electronic injectors; determine needed repairs
10. Perform cylinder power balance/cylinder cut-out test utilizing electronic scan tool
11. Perform engine timing sensor adjustment
12. Utilizing a scan tool, extract engine monitoring information
13. Download and program an Electrical Control Unit utilizing a PC and/or a scan tool
Perform Drive Train Diagnosis and Repair (6 questions)
Clutch
1. Inspect flywheel mounting area on crankshaft; check crankshaft end play; determine needed repairs
2. Inspect flywheel and starter ring gear; determine needed repairs
3. Measure flywheel face runout and pilot bore runout; determine needed repairs
4. Inspect engine block, flywheel housing, and transmission housing mating surfaces; determine needed repairs

11
5. Measure flywheel housing bore runout and face runout; determine needed repairs
6. Locate hydraulic components used to operate a wet clutch
7. Inspect an electric clutch and perform electrical tests on the clutch coil
Transmission
1. Diagnose transmission noise, shifting; lockup, jump-out-of-gear, overheating, and vibration problems; determine needed repairs
2. Diagnose transmission component failure cause, both before and during disassembly procedures; determine needed repairs
3. Inspect, adjust, service, repair, or replace transmission remote shift linkages, brackets, bushings, pivots, and levers
4. Inspect and replace transmission mounts; insulators, and mounting bolts; determine needed repairs
5. Inspect for leakage and replace transmission cover plates, gaskets, seals, and top bolts; inspect seal surfaces and vents; determine needed repairs
6. Check transmission fluid level, proper type, and condition; determine needed service
7. Inspect, adjust, and replace transmission shift lever, cover, rails, forks, levers, bushings, sleeves, detents, interlocks, springs, and lock bolts
8. Remove and reinstall component transmission
9. Remove a transmission from a tractor-type chassis
10. Inspect and replace input shaft, gear, spacers, bearings, retainers, and slingers
11. Inspect and adjust main shaft, gears, sliding clutches, washers, spacers, bushings, bearings, auxiliary drive assemblies, retainers, and keys; replace as needed
12. Inspect countershafts, gears, bearings, retainers, and keys; adjust bearing pre-load and time multiple countershaft gears; replace as necessary
13. Inspect output shafts, gears, washers, spacers, bearings, retainers, and keys; replace as needed
14. Inspect and replace reverse idler shafts, gears, bushings, bearings, thrust washers, and retainers; check reverse idler gear end play (where applicable)
15. Inspect and replace synchronizer hub, sleeve, keys (inserts), springs, blocking rings, synchronizer plates, blocker pins, and sliding clutches
16. Inspect or replace transmission cases including surfaces, bores, bushings, pins, studs, and magnets; determine needed repairs
17. Inspect and replace transmission oil filters; inspect coolers
18. Inspect speedometer components; determine needed repairs
19. Inspect and adjust power take-off (P.T.O.) assemblies, controls, and power take-off (P.T.O.) shafts; service, repair, or replace as needed
20. Inspect and test function of backup light, neutral start, and warning device circuit switches; determine needed repairs
21. Inspect and test transmission temperature gauge; determine needed repairs
22. Inspect and adjust transfer case assemblies; remove and/or replace as needed
23. Disassemble, inspect, repair, assemble, and make all adjustments for a mechanical transmission

12
Drive Shaft and Universal Joint
1. Diagnose drive shaft and universal joint noise and vibration problems; determine needed repairs
2. Inspect, service, or replace driveshaft, slip joints, yokes, drive flanges, universal joints; check phasing of all yokes
3. Inspect, service, repair, and replace driveshaft center support bearings, and mounts
4. Measure and adjust drive line angles
Drive Axle
1. Diagnose axle(s) drive unit noise and over-heating problems; determine needed repairs
2. Check for and repair fluid leaks; inspect and replace axle(s) drive unit cover plates, gaskets, vents, magnetic plugs, and seals
3. Check axle(s) drive unit fluid level and condition; determine needed service and add proper type of lubricant
4. Remove and replace differential carrier assembly
5. Inspect and replace differential case assembly including spider gears, cross shaft, side gears, thrust washers, case halves, and bearings
6. Inspect and replace components of traction control (limited slip) differential case assembly
7. Inspect differential carrier case and caps, side bearing bores, and pilot bearing bore; determine needed service
8. Measure ring gear runout; determine needed repairs
9. Inspect and replace ring and drive pinion gears, spacers, sleeves, bearing cage, and bearings
10. Measure and adjust drive pinion bearing pre-load
11. Adjust drive pinion depth
12. Measure and adjust side bearing pre-load and ring pinion backlash
13. Inspect, adjust, or repair ring gear thrust block/screw
14. Inspect, adjust, repair, or replace planetary gear-type 2-speed axle assembly including: case idler pinion, pins, thrust washers, sliding clutch gear, shift fork, pivot, seals cover, and springs
15. Inspect, repair, or replace 2-speed axle shift control system speedometer adapters, motors, axle shift units, wires, air lines, and connectors
16. Inspect, repair, or replace axle lubrication system pump, troughs, collectors, slingers, tubes, and filters
17. Inspect and replace axle shafts
18. Remove and replace wheel assembly; check wheel seal and axle flange gaskets for leaks; determine needed repairs
19. Diagnose wheel bearing noises and damage; determine needed repairs
20. Inspect and test axle temperature gauge sensor; determine needed repairs
13
Power Shift Transmissions
1. Use test gauges to diagnose problems before disassembly
2. Test, diagnose, and repair a “Quad Range” two speed transmission
3. Disassemble a power shift transmission and make necessary adjustments and repairs
4. Reassemble a power shift transmission and make necessary adjustments and repair
Hydrostatic Drives
1. Use pressure gauges to diagnose a hydrostatic transmission problem
2. Disassemble, inspect, repair, and reassemble a hydrostatic transmission
Torque Converters
1. Diagnose a torque converter problem
2. Remove and repair a torque converter
Final Drives
1. Replace axle and make axle bearing adjustments
2. Remove and inspect a final drive from equipment
3. Disassemble a final drive, inspect for wear and damage, repair, reassemble, and make all adjustments
4. Install a final drive on equipment
5. Disassemble a MFWD axle, inspect for wear, and reassemble making all necessary adjustments
6. Replace duo-cone seals
Steering Systems and Tires Diagnosis and Repair (2 questions)
Steering Column and Manual Steering Gear
1. Diagnose steering system problems, column, shaft noise, looseness, and binding problems; determine needed repairs
2. Inspect steering shaft U-joint(s), slip joints, bearings, bushings, and seals; phase shaft U-joints; replace as needed
3. Diagnose steering noise, binding, uneven turning effort, looseness, hard steering, and lubricant leakage problems; determine needed repairs
4. Inspect lubricant for proper type, level, and condition; determine needed service
Steering Linkage
1. Inspect and adjust tie rod; replace as needed
2. Inspect and repair steering linkage and components
Wheels and Tires
1. Inspect wheels, rims, spacers, clamps, studs, and nuts; replace as needed
2. Measure wheel and tire radial and lateral runout; adjust or repair as necessary
3. Inspect tires, check air pressure, measure tire diameter, match tires
4. Clean, inspect, lubricate, and adjust wheel bearings; replace seals and wear rings; replace as needed

14
Related Components
1. Inspect frame and frame members for cracks, breaks, distortion (alignment), elongated holes, looseness, and damage; determine needed repairs
2. Inspect, install, or repair frame, hangers, brackets, and cross-members
3. Inspect, test, and adjust cab suspension components: lines, hoses, fittings, springs, bushings, shocks, valves, and linkage; determine needed repairs
4. Inspect, test, and adjust drivers’ suspension seat components; determine needed repairs
Hydraulic Brakes Diagnosis and Repair (4 questions) Hydraulic System
1. Diagnose poor stopping, pulling, or dragging problems caused by the hydraulic system; determine needed repairs
2. Test hydraulic system; inspect for leaks
3. Check and adjust brake pedal pushrod length
4. Inspect and test master cylinder; determine needed repairs
5. Inspect, test, or replace brake lines, flexible hoses, and fittings
6. Inspect disc brake caliper assemblies; determine needed repairs
7. Bleed and/or flush hydraulic system
8. Inspect and test hydraulic parking brake systems; repair or replace as needed
Mechanical System
1. Diagnose poor stopping, noise, pulling, grabbing, or pedal pulsation problems caused by drum to disc brake mechanical assembly; determine needed repairs
2. Inspect and measure brake drums or rotors; determine needed repairs
3. Inspect drum brake shoes, mounting hardware, adjuster mechanisms, and backing plates; replace as needed
4. Inspect disc brake pads and mounting hardware; replace as needed
Power Assist Units and Related Components
1. Test and adjust brake stop light switch, bulbs, wiring, and connectors; repair or replace as needed
2. Check emergency brake system
Electrical/Electronic Diagnosis and Repair (9 questions)
General
1. Check continuity in electrical/electronic circuits using appropriate test equipment and wiring diagrams
2. Check applied voltages, circuit voltages, and voltage drops in electrical/electronic circuits using a digital multimeter (DMM)

15
3. Check current flow in electrical/electronic circuits and components using an ammeter
4. Check resistance in electrical/electronic circuits and components using an ohmmeter
5. Find shorts, grounds, and opens in electrical/electronic circuits
6. Diagnose key-off battery drain problems
7. Inspect and test fusible links, circuit breakers, relays, solenoids, and fuses; replace as needed
8. Inspect and test spike suppression diodes/resistors; replace as needed
Battery
1. Perform battery hydrometer test; determine specific gravity of each cell
2. Perform battery capacity (load, high rate discharge) test; determine needed service
3. Determine battery state of charge by measuring terminal post voltage using a DMM
4. Inspect, clean, and service battery; replace as needed
5. Inspect and clean battery boxes, mounts, and hold downs; repair or replace as needed
6. Charge battery using slow or fast charge method as appropriate
7. Inspect and clean battery cables and connectors; repair or replace as needed
8. Jump start a vehicle using jumper cables and a booster battery or auxiliary power supply using proper safety procedures
Starting System
1. Perform starter current draw test; determine needed repairs
2. Perform starter circuit voltage drop tests; determine needed repairs
3. Inspect, test, and replace components and wires in the starter control circuit
4. Remove and replace starter
5. Inspect, test, and replace starter relays and solenoids/switches
Charging System
1. Diagnose dash mounted charge meters and/or indicator lights that show a no charge, low charge, or overcharge condition; determine needed repairs
2. Diagnose the cause of a no charge, low charge, or overcharge conditions; determine needed repairs
3. Inspect, adjust, and replace alternator drive belts, pulleys, fans, and mounting brackets
4. Perform charging system output test; determine needed repairs
5. Perform charging circuit voltage drop tests; determine needed repairs

16
6. Remove and replace alternator
7. Inspect, repair, or replace connectors and wires in the charging circuit
8. Diagnosis 12/24 volt alternator charging system problems; determine needed repairs
Headlights, Parking, Clearance, Tail, Cab, and Dash Lights
1. Diagnose the cause of brighter than normal, intermittent, dim, or no headlight operation
2. Test, aim, and replace headlights
3. Test headlight and dimmer switches and relays, wires, terminal, connectors, and sockets; repair or replace as needed
4. Inspect and test switches, bulbs, sockets, connectors, terminal, and wires of parking, clearance, and taillight circuits; repair or replace as needed
5. Inspect and test interior cab light circuit switches, bulbs, sockets, connectors, terminals, and wires; repair or replace as needed
6. Inspect and test tractor to implement multi-wire connector; repair or replace as needed
Stoplights, Turn Signals, Hazard Lights, and Back-up Lights
1. Inspect, test, and adjust stoplight circuit switches, bulbs, sockets, connectors, terminals, and wires; repair or replace as needed
2. Diagnose the cause of turn signal and hazard flasher light problems
3. Inspect and test turn signal and hazard circuit flasher switches, relays, bulbs, sockets, connectors, terminals, and wires; repair or replace as needed
4. Inspect, test, and adjust back-up light and warning device circuit switches, bulbs, sockets, horns, buzzers, connectors, terminals, and wires; repair or replace as needed
Gauges and Warning Devices
1. Diagnose the cause of intermittent, high, low, or no gauge readings; determine needed repairs
2. Test and replace gauge-circuit voltage regulators (limiters)
3. Inspect, test, and adjust gauge circuit sending units, gauges, connectors, terminals, and wires; repair or replace as needed
4. Inspect and test warning light circuit sending units, bulbs, sockets, and connectors, wires, and printed circuits/control modules; repair or replace as needed
5. Inspect and test warning buzzer circuit sending units, buzzers, switches, relays, connectors, terminal, wires, and printed circuits/control modules; repair or replace as needed
6. Inspect, test, replace, and calibrate electronic speedometer, odometer, and tachometer systems
Related Electrical Components
1. Diagnose the cause of constant, intermittent, or no horn operation
2. Inspect and test horn circuit relays, horns, switches, connectors, and wires; repair or replace as needed
3. Diagnose the cause of constant, intermittent, or no wiper operation; diagnose the cause of wiper speed control and/or park problems
4. Inspect and test wiper motor, resistors, park switch, relays, switches, connectors, and wires; repair or replace as needed

17
5. Inspect and replace wiper motor transmission linkage, arms, and blades
6. Inspect and test windshield washer motor or pump/relay assembly, switches, connectors, terminals, and wires; repair or replace as needed
7. Inspect and test mirror; heater circuit grids, motors, relays, switches
8. Inspect and test heater and A/C electrical components including: A/C clutch motors, resistors, relay switches, connectors, terminals, and wires; repair or replace as needed
9. Inspect and test auxiliary power port, integral fuse, connectors, terminals, and wires; repair or replace as needed
10. Inspect block heaters; determine needed repairs
Heating and Air Conditioning Diagnosis and Repair (11 questions) System Diagnosis and Repair
1. Diagnose the cause of unusual operating noises of the A/C system; determine needed repairs
2. Identify system type and conduct performance test of the A/C system; determine needed repairs
3. Diagnose A/C system problems indicated by refrigerant flow past the sight glass (for systems using a sight glass); determine needed repairs
4. Diagnose A/C system problems indicated by pressure gauge readings; determine needed repairs
5. Diagnose A/C system problems indicated by visual and touch procedures; determine needed repairs
6. Leak test A/C system; determine needed repairs
7. Evacuate A/C system
8. Clean A/C system components and hoses in accordance with required procedures
9. Charge A/C system with required refrigerant (liquid or vapor)
Compressor and Clutch
1. Diagnose A/C system problems that cause the pressure protection devices to interrupt system operation; determine needed repairs
2. Inspect A/C system pressure protection devices (including engine fan controls); determine needed repairs
3. Inspect and adjust A/C compressor drive belts and pulleys; determine needed repairs
4. Inspect and test A/C compressor clutch components or assembly; replace as needed
5. Inspect and adjust oil level in A/C compressor
6. Inspect and test A/C compressor; replace as needed
7. Inspect A/C compressor mountings; repair or replace as needed

18
Evaporator, Condenser, and Related Components
1. Inspect A/C system mufflers, hoses, lines, filters, fittings, and seals; repair or replace as needed
2. Inspect A/C condenser for air flow restriction; clean and straighten fins
3. Inspect, test, and replace A/C system condenser and mountings
4. Inspect receiver/drier; replace as needed
5. Inspect accumulator/drier in orifice tube A/C systems; replace as needed
6. Inspect and test expansion valve; replace as needed
7. Inspect and test orifice tube (including filter); replace as needed
8. Inspect, test, and clean evaporator; replace as needed
9. Inspect and clean evaporator housing and water drain; repair as needed
10. Identify and inspect A/C system service valves (gauge connections); replace as needed
11. Inspect A/C system high pressure relief device; replace as needed
Heating System
1. Diagnose the cause of temperature control problems in the heater/ventilation/air conditioning system; determine needed repairs
2. Diagnose window fogging problems; determine needed repairs
3. Perform cooling system tests; determine needed repairs
4. Inspect and replace heater system hoses; assure correct routing
5. Inspect, test, and replace thermostat, by-pass, and housing
6. Inspect and test heater coolant valve (manual or electrical types); replace as needed
7. Inspect and flush heater core; replace as needed
Electrical Systems
1. Diagnose the electrical and electronic control system or heating, ventilation and A/C systems; determine needed repairs
2. Inspect, test, repair, and replace A/C heater blower motors, resistors, switches, relay/modules, wiring, and protection devices
3. Inspect, test, repair, and replace A/C compressor clutch control devices (relay/modules, wiring, sensors, switches, diodes, and protection devices)
Vacuum/Mechanical/Air Controls
1. Inspect, test, and service heating, ventilating, and A/C control panel assemblies; replace as needed
2. Inspect, test, and adjust heating, ventilating, and A/C control cables and linkages; replace as needed
3. Inspect, test, and adjust heating, ventilating, and A/C ducts, doors, hoses, and outlets; repair or replace as needed
4. Diagnose temperature control system problems; determine needed repairs
5. Diagnose blower system problems; determine needed repairs
6. Diagnose air distribution system problems; determine needed repairs
7. Inspect and test heater valve and controls; replace as needed
8. Inspect and test electric motors, solenoids, and switches; replace as needed

19
Refrigerant Recovery, Recycling, and Handling
1. Verify correct operation of refrigerant handling equipment
2. Identify and recover A/C system refrigerant
3. Label and store refrigerant
4. Test refrigerant for non-condensable gases
Preventative Maintenance Inspections (7 questions) Cab and Body
1. Inspect gauges and indicators for proper operation
2. Check accessories for proper operation
3. Check condition of interior components including seats and upholstery. Check operation
4. Make visual inspection of cab exterior and body for damage or missing components
5. Check air pressure drop
6. Compare air pressure build-up time with original equipment specifications
7. Check steering wheel free-play
8. Check pedal and accelerator operation
Tires and Wheels
1. Inspect tires for wear patterns, condition, and air pressure; record tread depth
2. Check rim/wheel condition (bends, cracks)
3. Check spacers, clamps, rings, studs, and nuts for cracks, damage, and indications of looseness
4. Inspect wheel lug nuts for rust, elongation, or wear indicators that would indicate improper torque
5. Inspect outer hubs for oil leaks
6. Check wheel bearing pre-load
Engine Compartment
1. Inspect fluid reservoirs for correct levels and condition
2. Check compartment for leaks (fuel, air, coolant, exhaust)
3. Check alternator, air-conditioning compressor, starter, engine, and air compressor mounts for tightness and wear
4. Check hoses and lines (air, water, fuel, power steering, air conditioning) for wear and tightness
5. Check belt tension and wear
6. Check electrical wiring, routing, and hold down clamps
7. Inspect air intake system (mounts, hoses, clamps, restriction indicators, turbo) for leaks, damage, and restrictions

20
8. Listen and note unusual noises
9. Check optional equipment for proper operation
10. Check air-conditioning condenser, radiator, and after-coolers for air flow restriction
Electrical/Electronic Components
1. Inspect condition of batteries, battery boxes, looms, relays, solenoids, starter wiring, and ground conditions
2. Inspect condition of battery cables, ends, looms, relays, solenoids, starter wiring, and ground connections
3. Check starter and solenoid for proper operation and mounting
4. Check condition and operation of charging system including: alternator, mounting brackets, wiring, belt condition, tension, and alignment
5. Check tractor and implement lighting systems for operation, mounting, and condition
6. Check operation of dash gauges, dash lights, cab interior lights, wipers, blower fans, turn signals, flashers, air-conditioning, horn, radio, and optional equipment
7. Check diagnostic displays for proper operation
Chassis/Undercarriage
1. Check manual/power steering system and linkage for noises, looseness, binding, hard steering, and fluid leakage
2. Check transmission mounts
3. Check transmission for leaks and correct fluid levels
4. Inspect transmission shift components for leaks and damage
5. Inspect driveshaft and yokes for alignment (phasing), wear, and damage
6. Check brake adjustment
7. Check brake lining condition, wheel seals, drums, and rotors for wear and damage
8. Identify track-type undercarriage components
9. Inspect track-type undercarriage components for wear and determine needed repairs
10. Remove, disassemble, and install track groups, idlers, and rollers
Maintain Hydraulics Systems (3 questions) General 1. Purge and/or bleed system in accordance to manufacturer’s recommended procedures
2. Trace path of flow and locate the components in a hydraulics system by using a schematic diagram
3. Remove and replace filters
4. Identify, drain and replace hydraulic fluid
5. Cleanse a contaminated hydraulic system
6. Remove and replace crimp and mechanical hose ends

21
7. Locate and repair leaks
8. Use a diagnosis flow chart in a technical manual to isolate a malfunction
9. Use a hydraulic flowmeter and pressure gauge to test a hydraulic pump
Valves
1. Remove, disassemble, inspect, reassemble, install, and test a selective control valve
2. Remove and install a quick drop valve
3. Remove and replace a check valve
4. Remove and replace a main relief valve
5. Remove and install an overload relief valve assembly
6. Remove and replace a metering-pump style steering valve
7. Remove and replace a poppet style steering valve
Actuators 1. Disassemble and repair a hydraulic cylinder
2. Replace hydraulic seals
3. Disassemble, inspect, and reassemble a hydraulic motor
4. Remove and replace an accumulator
5. Test the charge of an accumulator

22
Sample Questions
������� 1. Exhaust back pressure is caused by a:
a. bad exhaust valve. b. clogged air cleaner. c. clogged fuel filter. d. constriction in the exhaust pipe. ������� 2. What causes hydraulic oil to appear milky in color?
a. aeration b. overheating c. oil contamination d. water contamination ������� 3. Before checking for disc rotor run-out, a mechanic should check and adjust the:
a. caliper condition. b. camber. c. toe-in. d. wheel bearings. ������� 4. The most probable cause of “cupped” or “scalloped” tire tread is:
a. an inadequate suspension system. b. improper camber. c. improper caster. d. too much toe-in or toe-out. ������� 5. A pyrometer is used to measure:
a. high pressures. b. high temperatures. c. low pressures. d. low temperatures. ������� 6. Overfilling a power shift transmission results in:
a. low shift points at full throttle. b. low stall speed. c. overheating. d. unforced downshift.

23
������� 7. Coolant in the engine oil results from a defective:
a. head gasket. b. transmission cooler. c. water pump. d. thermostat. ������� 8. Loss of power in the engine is caused by:
a. a restricted induction system. b. coolant in the oil. c. excessive fan belt tension. d. excessive fuel pressure.
������� 9. A current output test is used to evaluate the:
a. alternator. b. battery. c. voltage regulator. d. wiring harness.
������� 10. What is used to troubleshoot an electrical problem using a fault code?
a. flow chart diagram b. harness diagram c. ladder diagram d. routing diagram

24
Sample Questions — Key
1. Exhaust back pressure is caused by a:
a. bad exhaust valve. Wrong, but plausible b. clogged air cleaner. Wrong, but plausible c. clogged fuel filter. Wrong, but plausible d. constriction in the exhaust pipe. Correct 2. What causes hydraulic oil to appear milky in color?
a. aeration Wrong, but plausible b. overheating Wrong, but plausible c. oil contamination Wrong, but plausible d. water contamination Correct 3. Before checking for disc rotor run-out, a mechanic should check and adjust the:
a. caliper condition. Wrong, but plausible b. camber. Wrong, but plausible c. toe-in. Wrong, but plausible d. wheel bearings. Correct 4. The most probable cause of “cupped” or “scalloped” tire tread is:
a. an inadequate suspension system. Correct b. improper camber. Wrong, but plausible c. improper caster. Wrong, but plausible d. too much toe-in or toe-out. Wrong, but plausible 5. A pyrometer is used to measure:
a. high pressures. Wrong, but plausible b. high temperatures. Correct c. low pressures. Wrong, but plausible d. low temperatures. Wrong, but plausible 6. Overfilling a power shift transmission results in:
a. low shift points at full throttle. Wrong, but plausible b. low stall speed. Wrong, but plausible c. overheating. Correct d. unforced downshift. Wrong, but plausible
25
7. Coolant in the engine oil results from a defective:
a. head gasket. Correct b. transmission cooler. Wrong, but plausible c. water pump. Wrong, but plausible d. thermostat. Wrong, but plausible 8. Loss of power in the engine is caused by:
a. a restricted induction system. Correct b. coolant in the oil. Wrong, but plausible c. excessive fan belt tension. Wrong, but plausible d. excessive fuel pressure. Wrong, but plausible
9. A current output test is used to evaluate the:
a. alternator. Correct b. battery. Wrong, but plausible c. voltage regulator. Wrong, but plausible d. wiring harness. Wrong, but plausible
10. What is used to troubleshoot an electrical problem using a fault code?
a. flow chart diagram Correct b. harness diagram Wrong, but plausible c. ladder diagram Wrong, but plausible d. routing diagram Wrong, but plausible

26
Abbreviations, Symbols and Acronyms
When abbreviations, symbols or acronyms are more commonly used in written and verbal communications within the heavy equipment industry than the words they represent, they will also be used on the written examination required for competency. The following is a list of abbreviations, symbols and acronyms used on the heavy equipment mechanic examination.
° Degrees% PercentA/C Air conditioningDMM Digital multimeterEGR Exhaust Gas RecirculationMFWD Mechanical front wheel drivePC Personal computerPsi Pounds per square inchPT Pressure timeP.T.O Power take-offR-12 Dichlorodifluoromethane
27
Test Taking Strategies
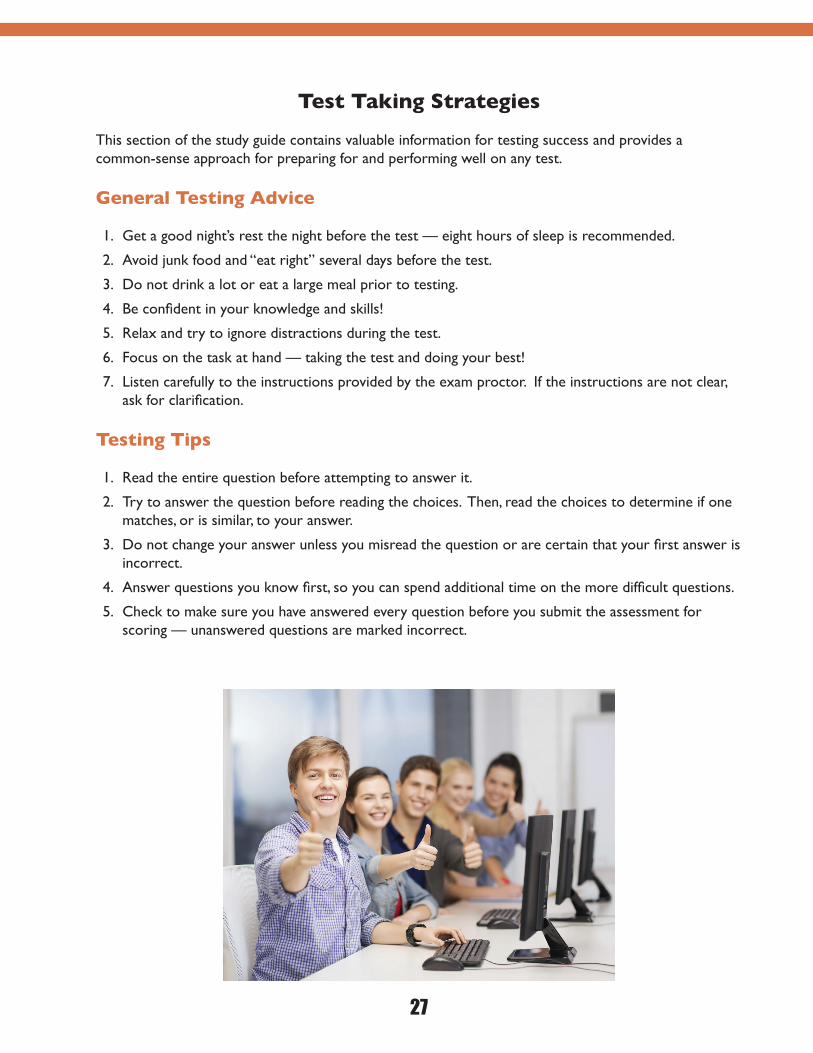
This section of the study guide contains valuable information for testing success and provides a common-sense approach for preparing for and performing well on any test.
General Testing Advice
1. Get a good night’s rest the night before the test — eight hours of sleep is recommended.
2. Avoid junk food and “eat right” several days before the test.
3. Do not drink a lot or eat a large meal prior to testing.
4. Be confident in your knowledge and skills!
5. Relax and try to ignore distractions during the test.
6. Focus on the task at hand — taking the test and doing your best!
7. Listen carefully to the instructions provided by the exam proctor. If the instructions are not clear, ask for clarification.
Testing Tips
1. Read the entire question before attempting to answer it.
2. Try to answer the question before reading the choices. Then, read the choices to determine if one matches, or is similar, to your answer.
3. Do not change your answer unless you misread the question or are certain that your first answer is incorrect.
4. Answer questions you know first, so you can spend additional time on the more difficult questions.
5. Check to make sure you have answered every question before you submit the assessment for scoring — unanswered questions are marked incorrect.

28
NOTES
�����������������������������������������������������������������������������
�����������������������������������������������������������������������������
�����������������������������������������������������������������������������
�����������������������������������������������������������������������������
�����������������������������������������������������������������������������
�����������������������������������������������������������������������������
�����������������������������������������������������������������������������
�����������������������������������������������������������������������������
�����������������������������������������������������������������������������
�����������������������������������������������������������������������������
�����������������������������������������������������������������������������
�����������������������������������������������������������������������������
�����������������������������������������������������������������������������
�����������������������������������������������������������������������������
�����������������������������������������������������������������������������
�����������������������������������������������������������������������������
�����������������������������������������������������������������������������
�����������������������������������������������������������������������������
�����������������������������������������������������������������������������
�����������������������������������������������������������������������������
�����������������������������������������������������������������������������
�����������������������������������������������������������������������������
�����������������������������������������������������������������������������