Heart Rate Monitor
9
MD 7455 BDA_UK 26.09.2003 8:28 Uhr Seite 1 OPERATING INSTRUCTIONS SAFETY NOTES ! The heart rate monitor is not medical device. It is a training instrument designed for measuring and indicating your heart rate, your calorie consumption and fat catabolism. Before starting your training programme, please consult your doctor or trainer to determine your individual upper and lower heart rate limit (training zone), training frequency and length of training. With the parameters of your current fitness level, you will then achieve the best possible results. Do not use your heart rate monitor when practising any injury-prone sports. For changing batteries or with regard to the legally prescribed removal of the batteries prior to the disposal of your heart rate monitor, please contact the service hotline or an authorised service shop. Please read the operating instructions carefully and keep the instructions as long as you possess your heart rate monitor. Individuals with cardiovascular disease or cardiac pacemaker bearers should use this heart rate monitor only after consultation with their doctor. CARE Wipe off your heart rate monitor and the transmitter with a damp cloth after your training. Please take care that the transmitter unit is kept in a dry place in order to avoid any premature discharge of the batteries. Please unfold! • • • • • • 01/04 Heart Rate Monitor MD 7455 MEDION Electronics Ltd. 130 Faraday Park Faraday Road Dorcan Swindon SN3 5JF GB-Wiltshire Phone: 0870 7270370 • +44 (0) 1793 715699 (EIRE) Fax: 01793 715716 or e-mail: [email protected]
Transcript of Heart Rate Monitor

MD
7455 BD
A_U
K 26.09.2003 8:28 U
hr Seite 1
OPER
ATIN
G IN
STR
UCTIO
NS
SA
FE
TY
NO
TE
S!
The heart rate m
onitor is not medical device. It is a training
instrument designed for m
easuring and indicating your heartrate, your calorie consum
ption and fat catabolism.
Before starting your training program
me, please consult your
doctor or trainer to determine your individual upper and low
erheart rate lim
it (training zone), training frequency and lengthof training.W
ith the parameters of your current fitness level, you w
illthen achieve the best possible results.D
o not use your heart rate monitor w
hen practising anyinjury-prone sports.F
or changing batteries or with regard to the legally prescribed
removal of the batteries prior to the disposal of your heart
rate monitor, please contact the service hotline or an
authorised service shop.P
lease read the operating instructions carefully and keepthe instructions as long as you possess your heart ratem
onitor.In
divid
uals w
ith card
iovascu
lar disease o
r cardiac
pacem
aker bearers sh
ou
ld u
se this h
eart rate mo
nito
ro
nly after co
nsu
ltation
with
their d
octo
r.
CA
RE
Wipe off your heart rate m
onitor and the transmitter w
ith a damp
cloth after your training.P
lease take care that the transmitter unit is kept in a dry place
in order to avoid any premature discharge of the batteries.
Please unfold!
••••••
01/04
Heart Rate Monitor
MD
74
55
ME
DIO
N E
lectronics Ltd.130 F
araday Park
Faraday R
oadD
orcanS
windon S
N3 5JF
GB
-Wiltshire
Phone: 0870 7270370 • +
44 (0) 1793 715699 (EIR
E)
Fax: 01793 715716
or e-mail: hotline@
medion.co.uk

MD
7455 BD
A_U
K 26.09.2003 8:28 U
hr Seite 2
A M
ode buttonT
he A m
ode button is used for changing the different operating modes.
Press the m
ode button briefly to switch from
the clock mode to the
training zone mode, to the heart rate m
ode, to the kilogram calorie
mode, to the training stopw
atch mode and to return again to the clock
mode.
B S
et buttonT
he B set button is used for setting the upper and low
er heart rate,norm
al time, date, alarm
time, countdow
n timer and the calorie
consumption param
eters.F
urthermore, the set button is used for starting the countdow
n, trainingstopw
atch and lap stopwatch functions.
C O
ption buttonT
he C option button is used for sw
itching between the individual options
to the respective operating mode as follow
s:F
rom the norm
al time m
ode, you will get to the alarm
mode, to the
date mode and back again to the norm
al time m
ode.F
rom the heart rate m
ode, you will get from
the average heart rate tothe m
aximum
heart rate and back again to the average heart rate.F
rom the training stopw
atch mode, you w
ill get to the countdown m
ode,to the lap stopw
atch mode and back again to the training stopw
atchm
ode.
D A
larm/ light button
The D
alarm/ light button is used for sw
itching on the back light or asignal tone. P
ress the alarm button to activate the signal tone. A
soundsym
bol appears on the display, and when pressing the button or w
henleaving the training zone, a signal tone w
ill be heard, provided thisfunction has been activated.P
ress the alarm button for 2 seconds for activate the back light for 5
seconds.
Nam
e:
Norm
al pulse rate:
Lower pulse rate lim
it:
Upper pulse rate lim
it:
- 1 -
FL
OW
CH
AR
T
LAP
ST
OP
WA
TC
H M
OD
E
CO
UN
TD
OW
N M
OD
E
TR
AIN
ING
ST
OP
WA
TC
H M
OD
E
KILO
GR
AM
CA
LOR
IE M
ET
ER
FAT
CA
TAB
OLIS
M M
ET
ER C
LOC
K M
OD
ET
RA
ININ
G Z
ON
E M
OD
E
AV
ER
AG
E H
EA
RT
RA
TE
MA
XIM
UM
HE
AR
T R
AT
E
A CC
DA
TE
MO
DE
ALA
RM
MO
DE C
CC C
AA
A
CC
CC
A AC
=M
ode button
=O
ption button
BU
TTO
N F
UN
CT
ION
S
Your heart rate monitor has four buttons.
The function B
uttons must never be pressed or activated under
water, since m
oisture could penetrate into the housing.
BU
TTO
N F
UN
CT
ION
S
A B
C
D
Mode
Alarm
/ light
Set
Option

The bell sym
bol will rem
ain visible in every operating mode, if any alarm
s are switched on.
- 2 -
To set the time, the m
onitor must be in
the clock mode, i.e. the tim
e will be
indicated on the display on the upperright, and the current heart rate on thelow
er right. If this is not so, press theoption button until you get to the operatingm
ode. There, you press the m
ode buttonto get to the clock m
ode.
You confirm your choice w
ith the mode
button, and the clock with a flashing
display of the hours will appear. S
et thecurrent hour w
ith the set button.
Or in case of a 12 hour setting:
Press the m
ode button. The display of
minutes w
ill start flashing. Set the
minutes w
ith the set button.
Press the m
ode button. The display of the
time zone w
ill start flashing. Set the desired
time shift w
ith the set button.B
y pressing the mode button, you w
ill returnagain to the clock m
ode.B
y pressing the option button for 2 seconds,you w
ill change to the second time zone.
When choosing the 12 hour display, the A
merican calendar form
at of month/day w
ill automatically
be shown; w
hen choosing the 24 hour display, the European form
at of day/month.
In the case of the 12 hour setting, please note that AM
will be displayed for the m
orning andP
M for the afternoon.
- 3-
For setting the alarm
time, the m
onitorm
ust be in the alarm clock m
ode, i.e.the alarm
time, current heart rate and
the letters “AL“ w
ill be indicated on thedisplay.If this is not so, sw
itch to the clock mode
and press the option button to get to thealarm
time m
ode.
You confirm your choice w
ith the mode
button, and the alarm clock w
ill appearw
ith a flashing display of the hours. Set
the desired hour by pressing the setbutton.
Press the m
ode button. The display of
minutes w
ill start flashing. Now
, set them
inutes with the set button.
By pressing the m
ode button, you will
return to the alarm tim
e mode.
By pressing the option button for tw
oseconds, you can set the second up tothe eighth alarm
now (as described
above).
In the clock mode, keep the set button
pressed for about 2 seconds until thedisplay “H
old“ disappear. Press the set
button now to choose betw
een a12 hour and 24 hour display of the tim
eof day.
In the alarm tim
e mode, keep the set
button pressed for about 2 seconds untilthe display “H
old“ will disappear. P
ressthe set button now
for switching the
alarm on (“on“ and a bell sym
bol will
appear on the display) or off (“off“ will
appear on the display).
SE
TT
ING
TH
E T
IME
SE
TT
ING
TH
E A
LA
RM
TIM
E
With pressing the option button for about
2 seconds you can set up to eightpersonal alarm
s:B
oth individually on a daily basis as well
as on a weekly basis.

- 4 -
Your pulse rate monitor is equipped w
ith a 50 year calendar which w
ill compute for
you the day of the week of the respective date up to the year 2050.
If you have chosen the 12 hour display for your time setting, please note that the A
merican
calendar format of m
onth/date will autom
atically be displayed; if you have chosen the24 hour display, the E
uropean format of date/m
onth will be show
n.
By pressing the m
ode button, you will
return to the date mode. T
he day of thew
eek will autom
atically be displayed asan E
nglish abbreviation in front of thedate.
PU
TT
ING
ON
TH
E T
RA
NS
MIT
TE
R A
ND
TH
E H
EA
RT
RA
TE
MO
NITO
R
To achieve a better contact with the skin, the transm
itter cushion should be slightly moistened,
e.g. with an E
CG
gel (available from your local chem
ist). Put on the strap a few
minutes
before you are going to start so it can heat to body temperature. F
ind the best possible strapposition for you. T
he contact between the skin and the transm
itter must not be interrupted
at any time, even in the event of deep breathing.
- 5 -
The transm
itter has to be worn on naked skin. A
djust the elastic strap so that thetransm
itter sits tightly your chest.
Attach the heart rate m
onitor to your wrist.
Press w
hatever button you choose for activating the monitor. If there is a problem
-free reception, the heart sym
bol will start flashing w
ith the incoming transm
ittedsignals.
It can take a few seconds until a heart rate display can be seen.
If necessary, try varying positions of the transmitter to achieve an optim
um contact.
Wireless heart rate m
onitors can be influenced by interferences of external radiofrequencies. E
lectronic training devices at fitness clubs, mobile phones, w
irelessbicycle com
puters, high voltage transmission lines or the like can cause irregular
transmitter pulses and be the reason w
hy “0“ is indicated on the display during thetraining. W
hen training in groups, other heart rate transmitters can interfere w
ith yoursignal w
hich will lead to a false heart rate display. To get correct signals, keep a
distance of approx. 2 metres to other users of heart rate m
onitors.
To set the date, the monitor m
ust be indate m
ode, i.e. the date and the currentheart rate are show
n on the display.If this is not so, sw
itch to the clock mode
and press the option button to get to thedate m
ode.
In the date mode, keep the set button
pressed for about 2 seconds until thedisplay “H
old“ disappears. Now
, pressthe set button for setting the year betw
eenthe year 2000 and the year 2050.
You confirm your choice w
ith the mode
button, and the date will appear w
ith aflashing display of the m
onth. Set the
desired month by pressing the set button.
Press the m
ode button. The display of
the day will start flashing. S
et the dayw
ith the set button.
The heart sym
bol on the displayw
ill start flashing as soon as yourheart rate m
onitor receivessignals from
the transmitter.
Explanation of the abbreviations of the days of the w
eek:
Monday =
MO
Tuesday = T
U W
ednesday = W
ET
hursday =T
H F
riday = F
R S
aturday = S
AS
unday = S
U
SE
TT
ING
TH
E D
AT
E D
ISP
LA
Y
®
:
RA
DIO
FR
EQ
UE
NC
Y IN
TE
RF
ER
EN
CE
S
HE
AR
T R
AT
E D
ISP
LA
Y
The types of training w
ith the different heart rate zones are just examples.
Please ensure you discuss your choice of training w
ith your doctor or qualified trainer.
- 7 -
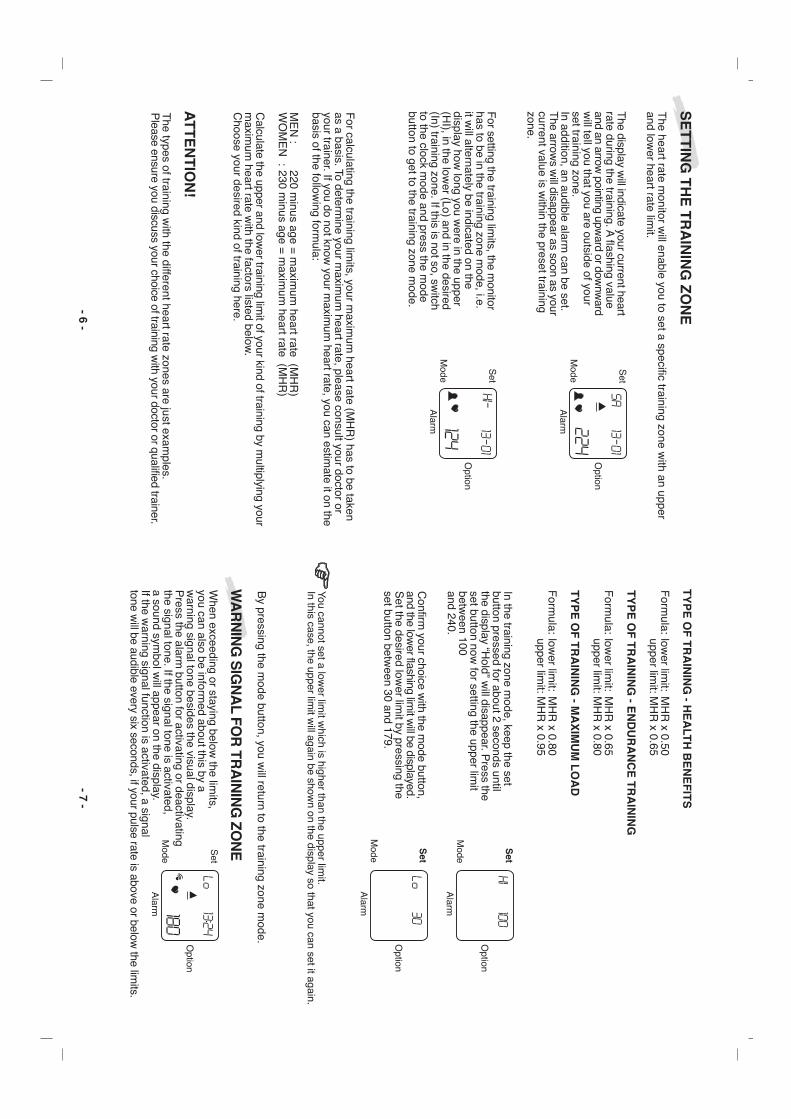
You cannot set a lower lim
it which is higher than the upper lim
it.In this case, the upper lim
it will again be show
n on the display so that you can set it again.
By pressing the m
ode button, you will return to the training zone m
ode.
When exceeding or staying below
the limits,
you can also be informed about this by a
warning signal tone besides the visual display.
Press the alarm
button for activating or deactivatingthe signal tone. If the signal tone is activated,a sound sym
bol will appear on the display.
If the warning signal function is activated, a signal
tone will be audible every six seconds, if your pulse rate is above or below
the limits.
- 6 -
The heart rate m
onitor will enable you to set a specific training zone w
ith an upperand low
er heart rate limit.
The display w
ill indicate your current heartrate during the training. A
flashing valueand an arrow
pointing upward or dow
nward
will tell you that you are outside of your
set training zone.In addition, an audible alarm
can be set.T
he arrows w
ill disappear as soon as yourcurrent value is w
ithin the preset trainingzone.
For setting the training lim
its, the monitor
has to be in the training zone mode, i.e.
it will alternately be indicated on the
display how long you w
ere in the upper(H
I), in the lower (Lo) and in the desired
(In) training zone. If this is not so, switch
to the clock mode and press the m
odebutton to get to the training zone m
ode.
For calculating the training lim
its, your maxim
um heart rate (M
HR
) has to be takenas a basis. To determ
ine your maxim
um heart rate, please consult your doctor or
your trainer. If you do not know your m
aximum
heart rate, you can estimate it on the
basis of the following form
ula:
ME
N :
220 minus age =
maxim
um heart rate (M
HR
)W
OM
EN
: 230 minus age =
maxim
um heart rate (M
HR
)
Calculate the upper and low
er training limit of your kind of training by m
ultiplying yourm
aximum
heart rate with the factors listed below
.C
hoose your desired kind of training here.
AT
TE
NT
ION
!
In the training zone mode, keep the set
button pressed for about 2 seconds untilthe display “H
old” will disappear. P
ress theset button now
for setting the upper limit
between 100
and 240.
Confirm
your choice with the m
ode button,and the low
er flashing limit w
ill be displayed.S
et the desired lower lim
it by pressing theset button betw
een 30 and 179.
Form
ula:low
er limit:
MH
R x 0.50
upper limit:M
HR
x 0.65
TY
PE
OF
TR
AIN
ING
- EN
DU
RA
NC
E T
RA
ININ
G
Form
ula:low
er limit:
MH
R x 0.65
upper limit:M
HR
x 0.80
TY
PE
OF
TR
AIN
ING
- MA
XIM
UM
LO
AD
Form
ula:low
er limit: M
HR
x 0.80upper lim
it:MH
R x 0.95
SE
TT
ING
TH
E T
RA
ININ
G Z
ON
E
WA
RN
ING
SIG
NA
L FOR
TRA
ININ
G ZO
NE
TY
PE
OF
TR
AIN
ING
- HE
ALT
H B
EN
EF
ITS

- 8 -
To be able to see the average or them
aximum
heart rate, your monitor m
ust bein the heart rate display m
ode, i.e. theaverage heart rate w
ill be indicated on theupper right on the display and the currentheart rate value as w
ell as the letters “AV
G“
on the lower right.
If this is not so, switch to the clock m
odeand press the m
ode button to get to theheart rate display m
ode.
In the heart rate display mode, press the
option button, then the maxim
um heart rate
value and the letters “MA
X“ w
ill appear onthe upper right on the display.
Your heart rate monitor provides the possibility of reading your average and m
aximum
heart rate so that you will be able to adjust your training the best possible w
ay andto avoid any overloading.
By pressing the option button again, you w
ill return to the heart rate display mode.
While the training stopw
atch is switched on, the achieved calorie consum
ption andfat catabolism
will be calculated on the basis of the m
easured heart rate. You must
enter your sex, weight and current activity so that these values can be determ
inedprecisely. P
roceed as follows:
For setting the data, the m
onitor must
be in the kilogram calorie m
ode, i.e. theconsum
ed kilogram calories w
ill beindicated on the upper right on thedisplay, and below
the current heart rateas w
ell as the letters “KC
AL“. If this is
not so, switch to the clock m
ode andpress the m
ode button to get to thekilogram
calorie mode.
In the kilogram calorie m
ode, keep theset button pressed for about 2 secondsuntil the display “H
old” will disappear.
Press the set button now
to choose yoursex betw
een “M” for m
en and “F” for
wom
en.
If you have entered your weight in lb (B
ritish pound), the fat catabolism w
ill bedisplayed in pounds.
- 9 -
Press the m
ode button. The calorie
parameter w
ill start flashing. Set the calorie
parameter w
ith the set button between the
value of 00010 and the value of 00131.
Som
e examples of different calorie param
eters are as follows:
Aerobic
0.00047 – 0.00061C
limbing
0.00055B
adminton
0.00044R
unning 0.00074 – 0.00131B
asketball0.00063
Bicycle riding 0.00029 – 0.00079
Soccer
0.00060S
wim
ming
0.00028 – 0.00078G
ardening0.00025 – 0.00057
Skiing
0.00052 – 0.00074H
andball0.00063
Squash
0.00096Jogging
0.00036 – 0.00069Tennis
0.00050C
anoeing0.00020 – 0.00047
Circuit training
0.00039 – 0.00060
These calorie param
eters are approximate values w
hich are to serve as a rough guideline.You should decide individually, since each of these types of sport can be practised w
ithdifferent intensiveness.T
he calorie consumption w
ill only be measured from
a heart rate of more than 100 beats/m
inuteonw
ards and only after the training stopwatch has been started.
Press the option button in order to read the
exact fat catabolism achieved during your
training sequence with a precision of
10 gramm
es. The m
aximum
displayam
ounts to 1.30 kg.
By pressing the m
ode button, you will get
again to the kilogram calorie m
ode. Here,
you can read the consumed kilogram
calories while the training stopw
atch is onin the training stopw
atch mode.
Confirm
your choice with the m
ode button,and the flashing w
eight display will appear.
Set your actual w
eight between 20kg
(British pounds) and 225kg by pressing the
set button.B
y pressing the option button, you canchoose betw
een kilogram and the B
ritishpound (454g).
HE
AR
T R
AT
E D
ISP
LA
Y M
OD
E
CA
LO
RIE
CO
NS
UM
PT
ION
MO
DE

- 10 -- 11 -
By resetting the training stopw
atch to 0:00:00, the mem
ory for the heart rate will be deleted,
and your heart rate monitor w
ill be ready for the next training session.
At the end of the countdow
n time, the display w
ill stop when 0:00:00 is reached, and an
alarm signal w
ill be audible. By keeping the set button pressed for a longer tim
e, thecountdow
n timer w
ill be reset to the originally set value.
Confirm
your choice with the m
ode button,and the m
inute display will start flashing.
Press the set button now
for setting them
inutes.
In the countdown m
ode, keep the set buttonpressed for about 2 seconds until the display“H
old“ disappears. Press the set button now
for setting the number of hours betw
een 0and 9 hours.
By pressing the m
ode button, you will return
to the countdown m
ode.
By pressing the set button, you w
ill start orstop the countdow
n timer. B
y keeping theset button pressed for a longer tim
e, thecountdow
n timer w
ill be reset to the originallyset value.
To start the training stopwatch, the m
onitorm
ust be in the training stopwatch m
ode, i.e.the training tim
e will be indicated on the
upper right on the display, and below the
current heart rate as well as the letters “S
TP
”.If this is not so, sw
itch to the clock mode
and press the mode button to get to the
training stopwatch m
ode.
In the training stopwatch m
ode, press theset button in order to start the training tim
eand thereby your training sequence.
After pressing the set button again, a beep
will be audible, a break of 3 m
inutes will
begin. The training tim
e stopped by you will
remain visible for another 5 seconds.
Thereafter, the break countdow
n will appear,
which w
ill automatically be effected dow
nto 0 seconds.
At the end of the break, four beeps w
ill beaudible. T
he stored heart rate will be
indicated in the upper line for comparison
with the current heart rate in the low
er line.
For setting the countdow
n timer, the m
onitorm
ust be in the countdown m
ode, i.e. thecountdow
n timer w
ill be indicated on the upperright on the display, and below
this the currentheart rate as w
ell as the letters “CD
T”. If this
is not so, change to the clock mode and press
the mode button to get to the training stopw
atchm
ode, then press the option button to get tothe countdow
n mode.
TR
AIN
ING
STO
PW
AT
CH
MO
DE
Your heart rate monitor is equipped w
ith a training stopwatch w
ith which you can read
times up to 9 hours, 59 m
inutes and 59 seconds.
By pressing the set button (m
ore than for 2 seconds), the training stopwatch w
ill bereset to 0:00:00.
CO
UN
TD
OW
N T
IME
R M
OD
E
Your heart rate monitor provides the possibility of program
ming a countdow
n timer
from 1 m
inute up to 9 hours and 59 minutes.
STP
STP
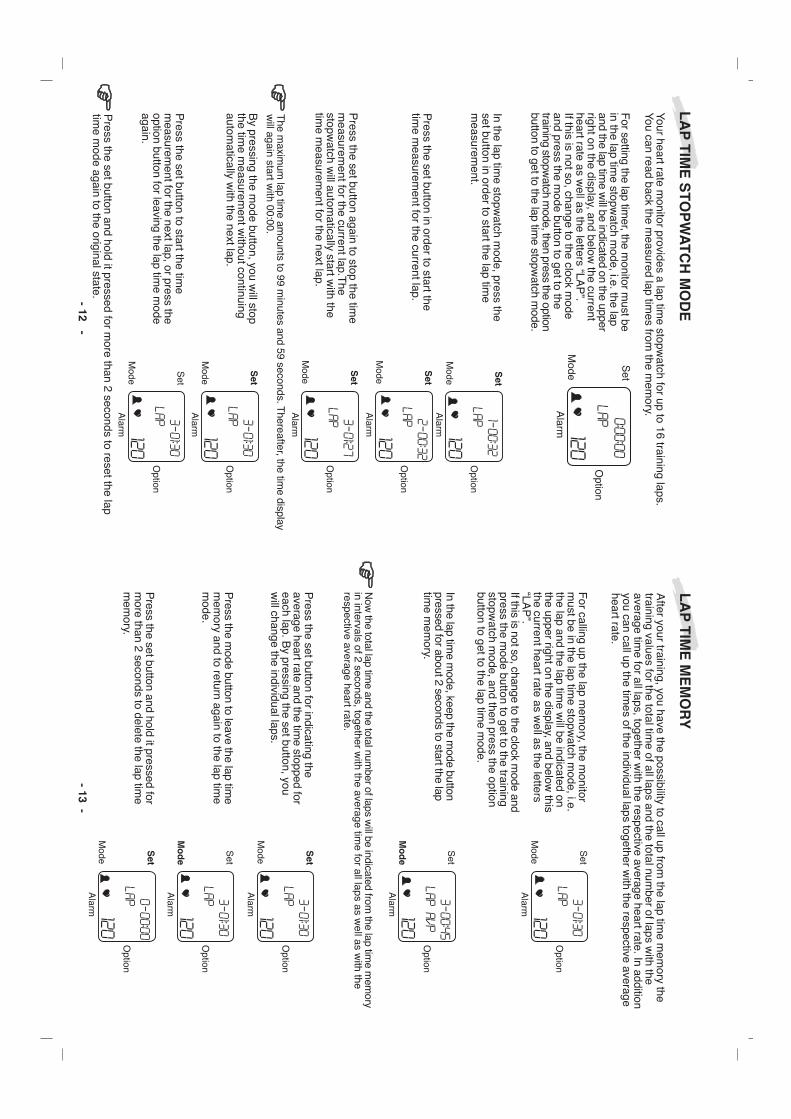
In the lap time stopw
atch mode, press the
set button in order to start the lap time
measurem
ent.
The m
aximum
lap time am
ounts to 99 minutes and 59 seconds. T
hereafter, the time display
will again start w
ith 00:00.
Press the set button and hold it pressed for
more than 2 seconds to delete the lap tim
em
emory.
- 12 -
Now
the total lap time and the total num
ber of laps will be indicated from
the lap time m
emory
in intervals of 2 seconds, together with the average tim
e for all laps as well as w
ith therespective average heart rate.
For calling up the lap m
emory, the m
onitorm
ust be in the lap time stopw
atch mode, i.e.
the lap and the lap time w
ill be indicated onthe upper right on the display, and below
thisthe current heart rate as w
ell as the letters“LA
P”.
If this is not so, change to the clock mode and
press the mode button to get to the training
stopwatch m
ode, and then press the optionbutton to get to the lap tim
e mode.
By pressing the m
ode button, you will stop
the time m
easurement w
ithout continuingautom
atically with the next lap.
Press the set button again to stop the tim
em
easurement for the current lap.T
hestopw
atch will autom
atically start with the
time m
easurement for the next lap.
Press the set button in order to start the
time m
easurement for the current lap.
Press the set button to start the tim
em
easurement for the next lap, or press the
option button for leaving the lap time m
odeagain.
For setting the lap tim
er, the monitor m
ust bein the lap tim
e stopwatch m
ode, i.e. the lapand the lap tim
e will be indicated on the upper
right on the display, and below the current
heart rate as well as the letters “LA
P”.
If this is not so, change to the clock mode
and press the mode button to get to the
training stopwatch m
ode, then press the optionbutton to get to the lap tim
e stopwatch m
ode.
In the lap time m
ode, keep the mode button
pressed for about 2 seconds to start the laptim
e mem
ory.
Press the set button for indicating the
average heart rate and the time stopped for
each lap. By pressing the set button, you
will change the individual laps.
Press the m
ode button to leave the lap time
mem
ory and to return again to the lap time
mode.
LA
P T
IME
STO
PW
AT
CH
MO
DE
Your heart rate monitor provides a lap tim
e stopwatch for up to 16 training laps.
You can read back the measured lap tim
es from the m
emory.
Press the set button and hold it pressed for m
ore than 2 seconds to reset the laptim
e mode again to the original state.
LA
P T
IME
ME
MO
RY
After your training, you have the possibility to call up from
the lap time m
emory the
training values for the total time of all laps and the total num
ber of laps with the
average time for all laps, together w
ith the respective average heart rate. In additionyou can call up the tim
es of the individual laps together with the respective average
heart rate.
- 13 -
- 14 -
Batteries:
Receiver
1 x CR
2025 3VS
tation 1 x C
R 2032 3V
Transmitter frequency: 5.3 K
Hz
Subject to technical m
odifications!
PO
WE
R S
AV
ING
MO
DE
If no signal is received for approx.5 m
inutes, your heart rate monitor w
illautom
atically switch to the pow
er savingm
ode, and the current time w
ill beindicated. P
ress any button to “wake up“
your heart rate monitor. T
hereafter, youw
ill again be back in the training stopwatch
mode.
AT
TAC
HIN
G T
HE
HE
AR
T R
AT
E M
ON
ITOR
TO T
HE
HA
ND
LE
BA
RS
OF
A B
ICY
CL
EA
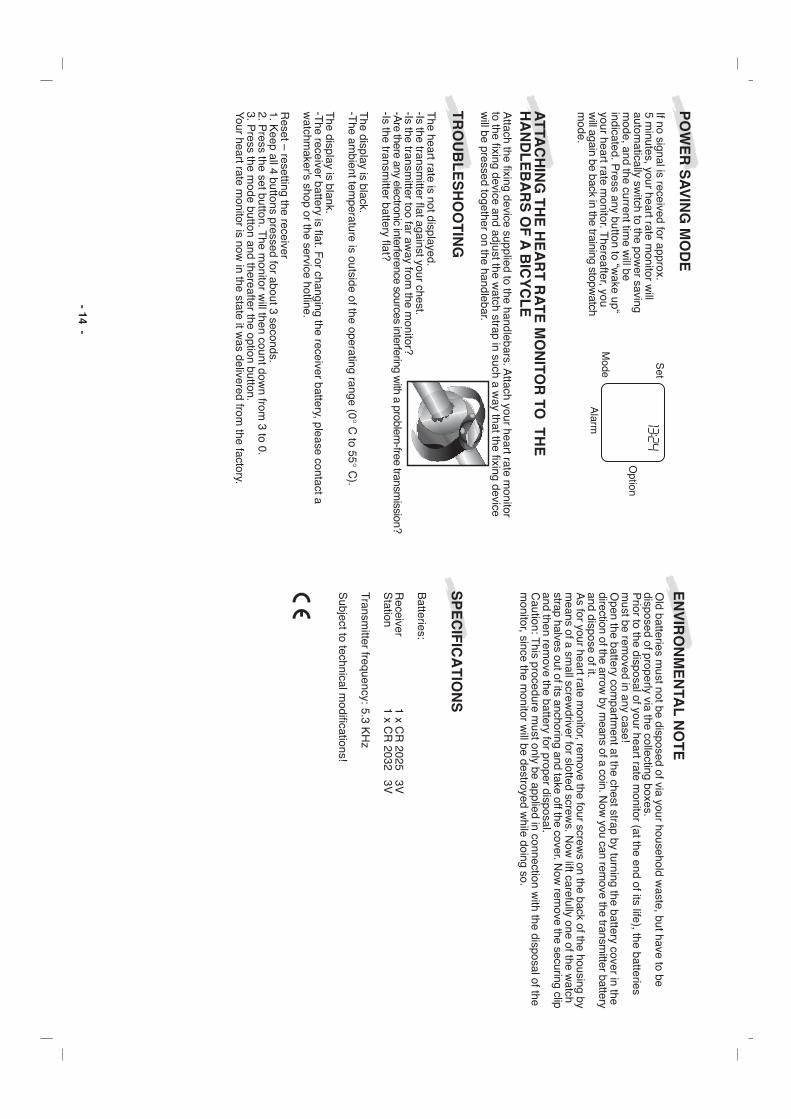
ttach the fixing device supplied to the handlebars. Attach your heart rate m
onitorto the fixing device and adjust the w
atch strap in such a way that the fixing device
will be pressed together on the handlebar.
TR
OU
BL
ES
HO
OT
ING
The heart rate is not displayed.
-Is the transmitter flat against your chest.
-Is the transmitter too far aw
ay from the m
onitor?-A
re there any electronic interference sources interfering with a problem
-free transmission?
-Is the transmitter battery flat?
The display is black.
-The am
bient temperature is outside of the operating range (0° C
to 55° C).
The display is blank.
-The receiver battery is flat. F
or changing the receiver battery, please contact aw
atchmaker's shop or the service hotline.
Reset – resetting the receiver
1. Keep all 4 buttons pressed for about 3 seconds.
2. Press the set button. T
he monitor w
ill then count down from
3 to 0.3. P
ress the mode button and thereafter the option button.
Your heart rate monitor is now
in the state it was delivered from
the factory.
SP
EC
IFIC
AT
ION
S
Set
Mode
13:2
4
EN
VIR
ON
ME
NTA
L NO
TE
Old batteries m
ust not be disposed of via your household waste, but have to be
disposed of properly via the collecting boxes.P
rior to the disposal of your heart rate monitor (at the end of its life), the batteries
must be rem
oved in any case!O
pen the battery compartm
ent at the chest strap by turning the battery cover in thedirection of the arrow
by means of a coin. N
ow you can rem
ove the transmitter battery
and dispose of it.A
s for your heart rate monitor, rem
ove the four screws on the back of the housing by
means of a sm
all screwdriver for slotted screw
s. Now
lift carefully one of the watch
strap halves out of its anchoring and take off the cover. Now
remove the securing clip
and then remove the battery for proper disposal.
Caution: T
his procedure must only be applied in connection w
ith the disposal of them
onitor, since the monitor w
ill be destroyed while doing so.