
Learn Along Bingo - Healthy Me Activity Book - Grade 1 And ...
LESSON PLANS FOR 2011-12 SCHOOL YEAR Grade 2
Harvesting Healthy Garden Produce
Lesson eleven: When and how do we harvest our salad garden? How do we clean and prepare salads? How do we plan and have a Salad Party?
“Harvesting” and “Salad Party” from SEED TO SALAD, Cornell University Garden-Based Learning and Ithaca Children’s Garden
How do you create a perfect tossed salad from the garden to your tummy? Students learn how to harvest cool-season crops, wash them and toss them into a huge tossed salad for themselves and their families for the Salad Party that they plan. _____________________________________________________________________________
Content objectives: Apply harvesting, cleaning, and salad mixing strategies for salad crops; Plan and implement a Salad Party Life skill objectives: Critical thinking, Decision making, Communication, Citizenship, Leadership, Healthy living Core and STEM concepts and skills: Science Earth and space, Life science Math Operations and algebraic thinking, Measurement and data Language Arts Viewing, Speaking, Listening, (depends on what you do for the Salad Party) Social Studies: Behavioral, Economic Healthy snack: Tossed salads Additional and supporting resources: Present plays, projects, songs, and a tour of the garden during the Salad Party. Plant seeds or transplants for late-summer, early-fall harvest. Depending on climate and who is taking care of the garden over the summer, salad crops can be planted 30 to 60 days before school starts again so that students can harvest them along with the late-summer or fall harvest crops. Extension Master Gardeners are great resources.

LESSON PLANS FOR 2011-12 SCHOOL YEAR Grade 2
BEFORE THE LESSON 1. Grade 2, Lesson 11: This document contains all the curriculum items and resources you need for this lesson. All lesson downloads are located on the www.peoplesgarden.wsu.edu Educational Toolkit. Please read through everything well in advance of delivering this lesson. 2. School Garden Harvesting Guide, Cornell Garden-based Learning Food Safety Tips for School Gardens, excerpted from United States Department of Agriculture Harvesting and Storing Vegetables, Iowa State University Extension and Outreach Please read and use these resources as guides to tell you when and how to harvest the crops from your school garden. If the students and their families have a garden or would like to start a garden, you may copy these resources to send home with the students. Please continue with your gardening through the end of the school year. THE LESSON 1. Seed to Salad: Salad Party It’s time to celebrate! Planning the party,
harvesting salad greens, and hosting the harvest party can be carried out over several days.
2. Garden Journal - have students complete any items for their garden journal. RECIPE Harvest greens and other vegetables from the garden to include in the tossed salad. Select dressings or have the students make one that you select.
8/6/2012 1
SCHOOL GARDEN HARVESTING GUIDE Prepared by Liz Falk, Cornell Garden‐based Learning
Harvesting is one of the nicest chores of the season. If you follow a few important, but easy tips, you will get the most of your crops. Some crops (e.g. carrots) only provide one harvest, while other crops (e.g. lettuce) can provide multiple harvests. If possible, harvest early in the morning, after the dew dries, but before the heat of the day.
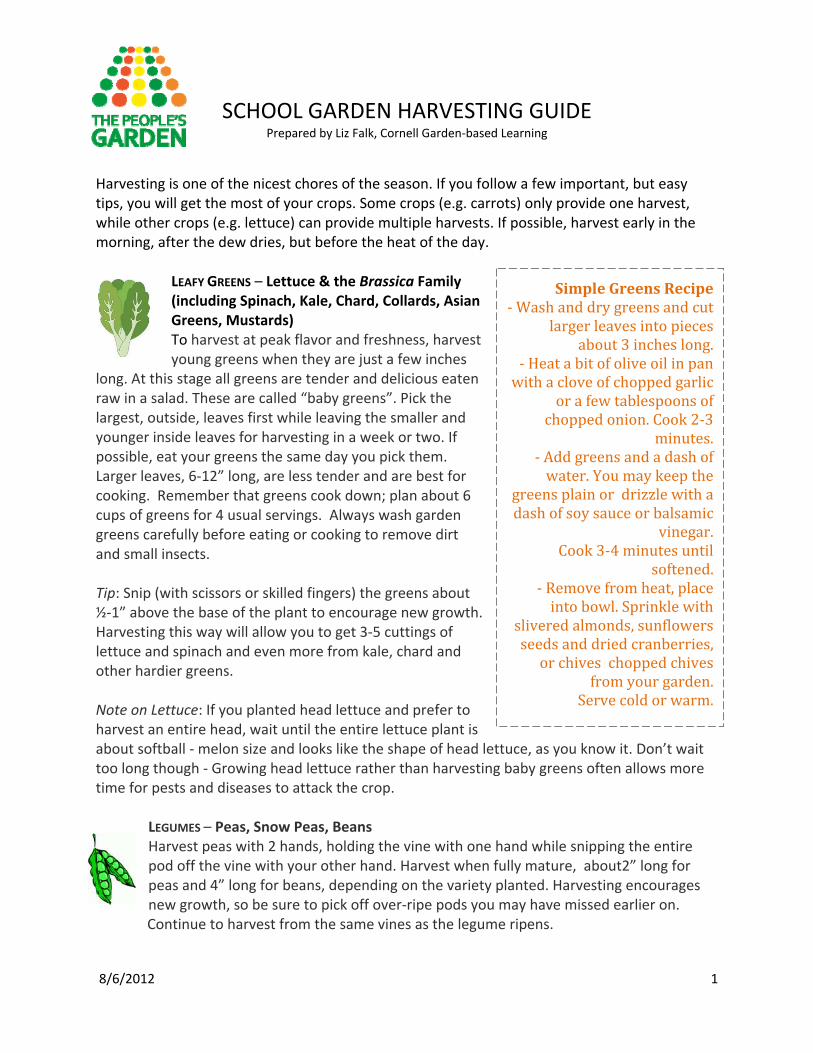
LEAFY GREENS – Lettuce & the Brassica Family (including Spinach, Kale, Chard, Collards, Asian Greens, Mustards) To harvest at peak flavor and freshness, harvest young greens when they are just a few inches
long. At this stage all greens are tender and delicious eaten raw in a salad. These are called “baby greens”. Pick the largest, outside, leaves first while leaving the smaller and younger inside leaves for harvesting in a week or two. If possible, eat your greens the same day you pick them. Larger leaves, 6‐12” long, are less tender and are best for cooking. Remember that greens cook down; plan about 6 cups of greens for 4 usual servings. Always wash garden greens carefully before eating or cooking to remove dirt and small insects.
Tip: Snip (with scissors or skilled fingers) the greens about ½‐1” above the base of the plant to encourage new growth. Harvesting this way will allow you to get 3‐5 cuttings of lettuce and spinach and even more from kale, chard and other hardier greens. Note on Lettuce: If you planted head lettuce and prefer to harvest an entire head, wait until the entire lettuce plant is about softball ‐ melon size and looks like the shape of head lettuce, as you know it. Don’t wait too long though ‐ Growing head lettuce rather than harvesting baby greens often allows more time for pests and diseases to attack the crop.
LEGUMES – Peas, Snow Peas, Beans Harvest peas with 2 hands, holding the vine with one hand while snipping the entire pod off the vine with your other hand. Harvest when fully mature, about2” long for peas and 4” long for beans, depending on the variety planted. Harvesting encourages new growth, so be sure to pick off over‐ripe pods you may have missed earlier on.
Continue to harvest from the same vines as the legume ripens.
Simple Greens Recipe ‐ Wash and dry greens and cut
larger leaves into pieces about 3 inches long.
‐ Heat a bit of olive oil in pan with a clove of chopped garlic
or a few tablespoons of chopped onion. Cook 2‐3
minutes. ‐ Add greens and a dash of water. You may keep the
greens plain or drizzle with a dash of soy sauce or balsamic
vinegar. Cook 3‐4 minutes until
softened. ‐ Remove from heat, place into bowl. Sprinkle with
slivered almonds, sunflowers seeds and dried cranberries, or chives chopped chives
from your garden. Serve cold or warm.
8/6/2012 2
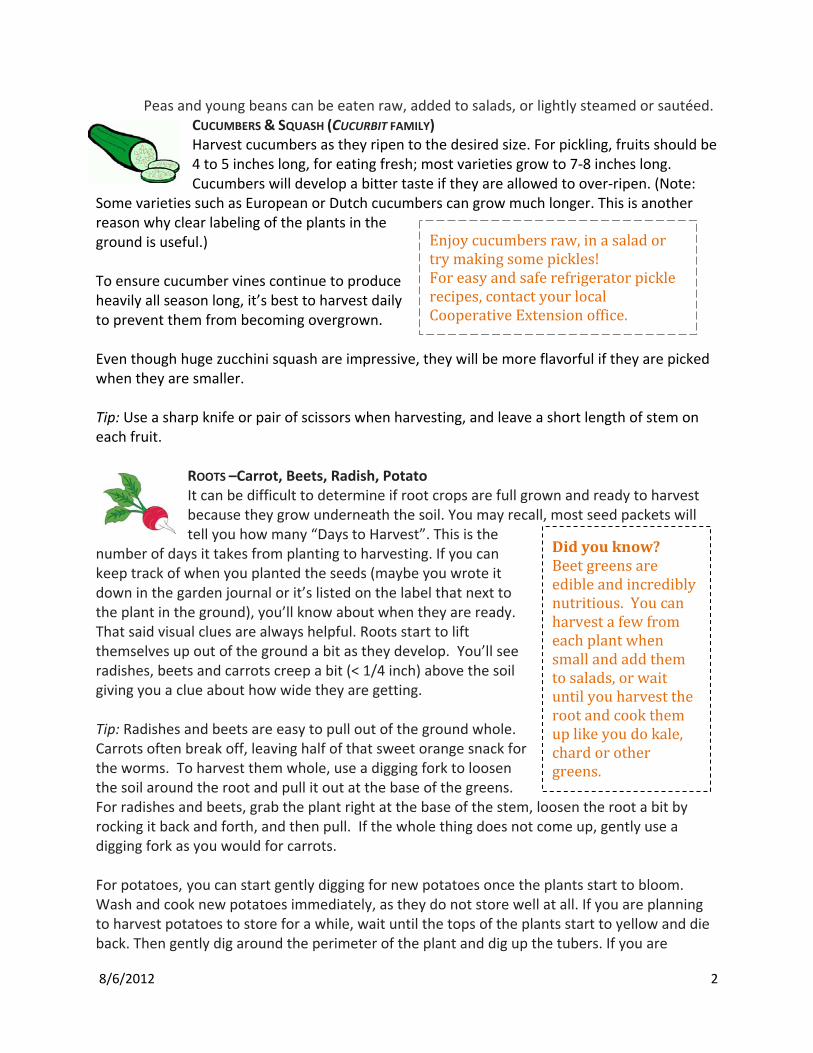
Peas and young beans can be eaten raw, added to salads, or lightly steamed or sautéed. CUCUMBERS & SQUASH (CUCURBIT FAMILY) Harvest cucumbers as they ripen to the desired size. For pickling, fruits should be 4 to 5 inches long, for eating fresh; most varieties grow to 7‐8 inches long. Cucumbers will develop a bitter taste if they are allowed to over‐ripen. (Note:
Some varieties such as European or Dutch cucumbers can grow much longer. This is another reason why clear labeling of the plants in the ground is useful.) To ensure cucumber vines continue to produce heavily all season long, it’s best to harvest daily to prevent them from becoming overgrown. Even though huge zucchini squash are impressive, they will be more flavorful if they are picked when they are smaller. Tip: Use a sharp knife or pair of scissors when harvesting, and leave a short length of stem on each fruit.
ROOTS –Carrot, Beets, Radish, Potato It can be difficult to determine if root crops are full grown and ready to harvest because they grow underneath the soil. You may recall, most seed packets will tell you how many “Days to Harvest”. This is the
number of days it takes from planting to harvesting. If you can keep track of when you planted the seeds (maybe you wrote it down in the garden journal or it’s listed on the label that next to the plant in the ground), you’ll know about when they are ready. That said visual clues are always helpful. Roots start to lift themselves up out of the ground a bit as they develop. You’ll see radishes, beets and carrots creep a bit (< 1/4 inch) above the soil giving you a clue about how wide they are getting. Tip: Radishes and beets are easy to pull out of the ground whole. Carrots often break off, leaving half of that sweet orange snack for the worms. To harvest them whole, use a digging fork to loosen the soil around the root and pull it out at the base of the greens. For radishes and beets, grab the plant right at the base of the stem, loosen the root a bit by rocking it back and forth, and then pull. If the whole thing does not come up, gently use a digging fork as you would for carrots. For potatoes, you can start gently digging for new potatoes once the plants start to bloom. Wash and cook new potatoes immediately, as they do not store well at all. If you are planning to harvest potatoes to store for a while, wait until the tops of the plants start to yellow and die back. Then gently dig around the perimeter of the plant and dig up the tubers. If you are
Enjoy cucumbers raw, in a salad or try making some pickles! For easy and safe refrigerator pickle recipes, contact your local Cooperative Extension office.
Did you know? Beet greens are edible and incredibly nutritious. You can harvest a few from each plant when small and add them to salads, or wait until you harvest the root and cook them up like you do kale, chard or other greens.

8/6/2012 3
planning on storing them, don't wash them! Let them sit out in a cool place for a few days to cure, then gently rub off any dirt, and store in a cool, dark place.
FRUITS – Strawberries, Tomatoes, Peppers, Eggplant Similar to cucurbits, fruits like to be harvested when ripe and harvesting regularly encourages new production. Use a scissors or be very careful to snip eggplant and peppers from the stem without damaging the fruit. Leaving a small stem on the
harvested fruit will help keep it ripe and ensure you don’t bruise it when harvested. Carefully pick tomatoes from the plant. For strawberries, grasp the stem just above the berry between the forefinger and the thumbnail and pull with a slight twisting motion. Carefully place the fruit into your containers.
HERBS – Basil, parsley, mint, cilantro, oregano, rosemary, tarragon, sage, chives, lavender, thyme & more. Herbs are grown for their leaves, flower, roots or seed. Most commonly, culinary herbs are grown for their leaves and should be harvested before they flower.
Flowering can cause the foliage to develop a bitter flavor. For example, while chives are quite attractive in bloom – and their flowers are edible and delicious – the stems tend to become tough and woody after bloom. Some general guidelines for harvesting herbs:
• Begin harvesting the herb when the plant has steadily been producing new growth. Harvesting generates the plant to continue to produce. Just be sure to leave enough leaves so the plant can continue to photosynthesize. Don’t be afraid to harvest. Up to 75% of the current season's growth can be harvested at one time!
• Harvest herbs before flowering, otherwise, leaf production declines because the plant will put its energy towards flowering and producing seed to reproduce. Tip: Pick off flowers buds as you notice them develop.
• ‘Annual’ herbs (basil, cilantro, chives) will have to be planted each year. They have soft stems and can be harvested until frost. Perennial herbs (rosemary, lavender) have somewhat woody stems and can be clipped until about one month before the frost date.
8/6/2012 4
“Healthy Gardens, Healthy Youth” People’s Garden School Pilot Project
The Extension Partnership including: Washington State University Extension Cornell University Cooperative Extension
Iowa State University Extension and Outreach University of Arkansas Extension
This project has been funded at least in part with Federal funds from the U.S. Department of Agriculture. The contents of this publication do not necessarily reflect the view or policies of the U.S. Department of Agriculture, nor does mention of trade names, commercial products, or organizations imply endorsement by the U.S. Government

National Food Service Management InstituteThe University of Mississippi
Growing and Harvesting ProduceA school garden provides an opportunity for children and volunteers to learn about how to handle food safely. The following are some food safety tips to follow when growing and harvesting produce.
• Ensure that all persons, including staff, students, and volunteers receive basic food and gardening safety training instructions according to local health regulations. The following topics are recommended:
u Handwashing and personal hygiene u Cleaning and sanitizing garden equipment and containers used to hold produce u Handling produce during harvest, washing, and transportation u Glove use• Ensure that volunteers are covered by the school district insurance policy in the event of accident or injury.• Require signed permission slips for all student gardeners. Permission slips should list potential hazards of
working in a school garden and identify any allergies the child may have.• Do not allow anyone to work in the garden while sick, or until 24 hours after symptoms, such as vomiting or
diarrhea, have subsided.• Ensure that all harvesters wash hands thoroughly in warm, soapy water for at least 10 to 15 seconds, and
then rinse with potable water. Ensure that all open cuts or wounds on hands, arms, or legs are properly covered prior to participating in the harvest.
• Require harvesters to wear closed-toed shoes to prevent cuts, stings, or other injuries. • Consider using single-use disposable gloves when harvesting, or handling, fresh produce as an extra
precaution.• Harvest the garden regularly and remove any rotten produce.
Food Safety Tips for School Gardens
National Food Service Management InstituteThe University of Mississippi
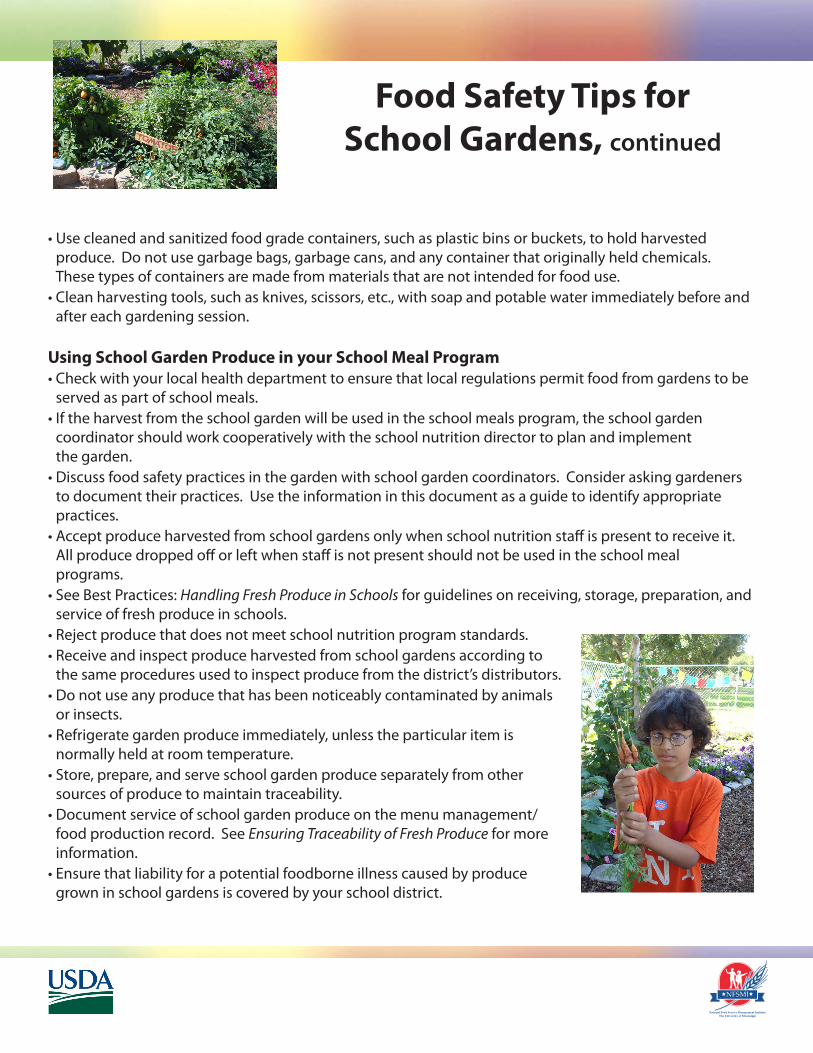
• Use cleaned and sanitized food grade containers, such as plastic bins or buckets, to hold harvested produce. Do not use garbage bags, garbage cans, and any container that originally held chemicals. These types of containers are made from materials that are not intended for food use.
• Clean harvesting tools, such as knives, scissors, etc., with soap and potable water immediately before and after each gardening session.
Using School Garden Produce in your School Meal Program• Check with your local health department to ensure that local regulations permit food from gardens to be
served as part of school meals.• If the harvest from the school garden will be used in the school meals program, the school garden
coordinator should work cooperatively with the school nutrition director to plan and implement the garden.
• Discuss food safety practices in the garden with school garden coordinators. Consider asking gardeners to document their practices. Use the information in this document as a guide to identify appropriate practices.
• Accept produce harvested from school gardens only when school nutrition staff is present to receive it. All produce dropped off or left when staff is not present should not be used in the school meal programs.
• See Best Practices: Handling Fresh Produce in Schools for guidelines on receiving, storage, preparation, and service of fresh produce in schools.
• Reject produce that does not meet school nutrition program standards.• Receive and inspect produce harvested from school gardens according to
the same procedures used to inspect produce from the district’s distributors.• Do not use any produce that has been noticeably contaminated by animals
or insects.• Refrigerate garden produce immediately, unless the particular item is
normally held at room temperature. • Store, prepare, and serve school garden produce separately from other
sources of produce to maintain traceability. • Document service of school garden produce on the menu management/
food production record. See Ensuring Traceability of Fresh Produce for more information.
• Ensure that liability for a potential foodborne illness caused by produce grown in school gardens is covered by your school district.
Food Safety Tips for School Gardens, continued

Lesson contents
GeneraL InformatIon
Lesson 7ALesson 7B
You may want to use the Harvesting and Storing Vegetables chart found at the end of this introduction as a quick guide for harvesting, cleaning and storing vegetables.
How do you know when a crop is ready to harvest? What are the consequences of harvesting too early or too late? Where should picked vegetables be stored to retain their freshness? These questions and others will be answered in the lessons in this unit. Here are some guiding tips.
When and hoW to harvestThere is a difference between “mature” and “ripe” garden produce that determines when to har-vest them. A mature fruit or vegetable is one that has reached a sufficient stage of development that, after harvesting, is or will be at the best stage to eat. A vegetable or fruit is ripe when it is at its prime edible state. For example, pears, bananas, and sometimes tomatoes are harvested when they are mature, yet they may still be green in color. A few days after harvest, they “ripen” to the stage at which we like to eat them.
Beginning gardeners and children often pick vegetables, such as peppers, eggplant, carrots, cucumbers and potatoes, before they have reached the best stage for harvest. At a small stage,
these crops are technically mature, but harvesting them too early results in low yields and less to eat. There are some exceptions and it depends on how you are going to use them.
Early harvested, small potatoes – called “new potatoes” – are a tasty treat in early sum-mer. Cucumbers are sometimes harvested early at a small size and used for pickles.
If you want a bell pepper for slicing or stuffing, it is best to wait to harvest it when it has reached its full size. A full-sized green tomato will ripen to red, orange, or
yellow; and, if left on the plant, a full-sized green bell pepper will ripen into red, yellow, or even purple, depending on the variety.
Crops that are harvested and eaten at their peak ripeness are typi-cally tastier and have a better texture than those eaten before they are ripe or when they are over ripe. As much as you don’t want
to harvest crops too early, you don’t want to let them become over ripe in the garden. Crops that are left in the garden too long may be-come soft or even begin to rot. They are wasted and no longer edible.
?
How do you harvest garden produce?
Unit 7introdUction
GrowinG in the Garden: LocaL Foods and heaLthy LivinG
General Information continued on the next page.
4-H Youth Development4H-905LFHL | August 2011

GrowinG in the Garden: LocaL Foods and heaLthy LivinG
GeneraL InformatIonConTInuEd
?
Crops that continue to produce for several weeks in the summer, such as green beans, zucchini, cucumbers, peppers, and tomatoes, need to be harvested regularly to keep them producing and setting on more fruits. The plant will set fewer fruit if they are left on the plant too long and become large and over ripe.
Some leafy crops, such as spinach, leaf lettuce, and chard can be cut about an inch and a half to two inches above the ground and they will grow back. This can be done two or three times in the spring. These plants cannot withstand the heat and long days of the summer. At that time remove the plants entirely from the garden and plant another crop, such as green beans, for a fall harvest. Make sure there are enough days remaining in the growing season (before the first average fall frost in your area) for that crop to mature.
Seed packages, plant labels, and garden catalogs often give the “approximate” number of days for a crop to mature. Growing conditions, such as weather, moisture, and weed competition affect this number. So it should only be used as a guide. Work with the youth to figure this out together.
To help you to be watchful of the best stage for harvest, you may want to use the Approximate Harvest Dates chart found towards the end of this lesson.
harvest tooLs • Scissorsarebestforthestudentstocutleaflettuceandspinach • Pruningshearsmayworkbetterforharvestingzucchini,squash,pumpkins,peppersand
eggplant • Bucketsand/orbagsforharvest • Gardenforkforcarrots,potatoesandsweetpotatoes • Trowelforlooseningsoilaroundrootcropsandonions
food safety and cLeanInGAt harvest time, make sure everyone practices good food safety. Wash hands thoroughly before and after picking vegetables. The harvest containers should be clean and free from soil and old plant residue. Gallon-sized bucket can be lined with plastic grocery bags which will make hauling and clean up easier and insure clean harvest containers.
Clean your vegetables before you put them in the refrigerator. Rinse leafy vegetables (lettuce, spinach, chard, cabbage and kale) in clean cold water, preferably in a strainer to drain the ex-cess moisture. Then store in airtight bags. Tomatoes, peppers, melons, squash, and cucum-bers, can be rinsed off and air dried. Rinse and rub (not scrub) the soil from root crops such as carrots and beets. Soil residue on onions, garlic, potatoes and sweet potatoes should be rubbed off after they are cured (see Storing Vegetables). never wash or soak them in water.
storInG veGetabLesdifferent crops have different storage needs. Some, such as potatoes and onions, need to be “cured” before they are stored. Curing is a treatment that increases their storage life. once crops are harvested their quality starts to deteriorate. To slow that process, most vegetables need to be refrigerated almost immediately. If that is not possible, put them in a cool, shady location. do not leave them sitting in bags in the hot sun.

?
GrowinG in the Garden: LocaL Foods and heaLthy LivinG
approxImate harvest datesPleaserecordtheharvestinformationaboutthecropsyouareplantinginyourgarden.Youmay find this information on the seed packet, the tag for the transplant, in garden catalogues, on the Internet, or at your local extension office. Besides using visual clues, this will help you to determine when the crops may be at the best stage to harvest.
Crop Days to maturity planting Date estimateD first harvest Date
Example: radishes 28 April 20 May 18
Example: zucchini 48 June 15 August 3
GrowinG in the Garden: LocaL Foods and heaLthy LivinG
GeneraL InformatIonConTInuEd
?
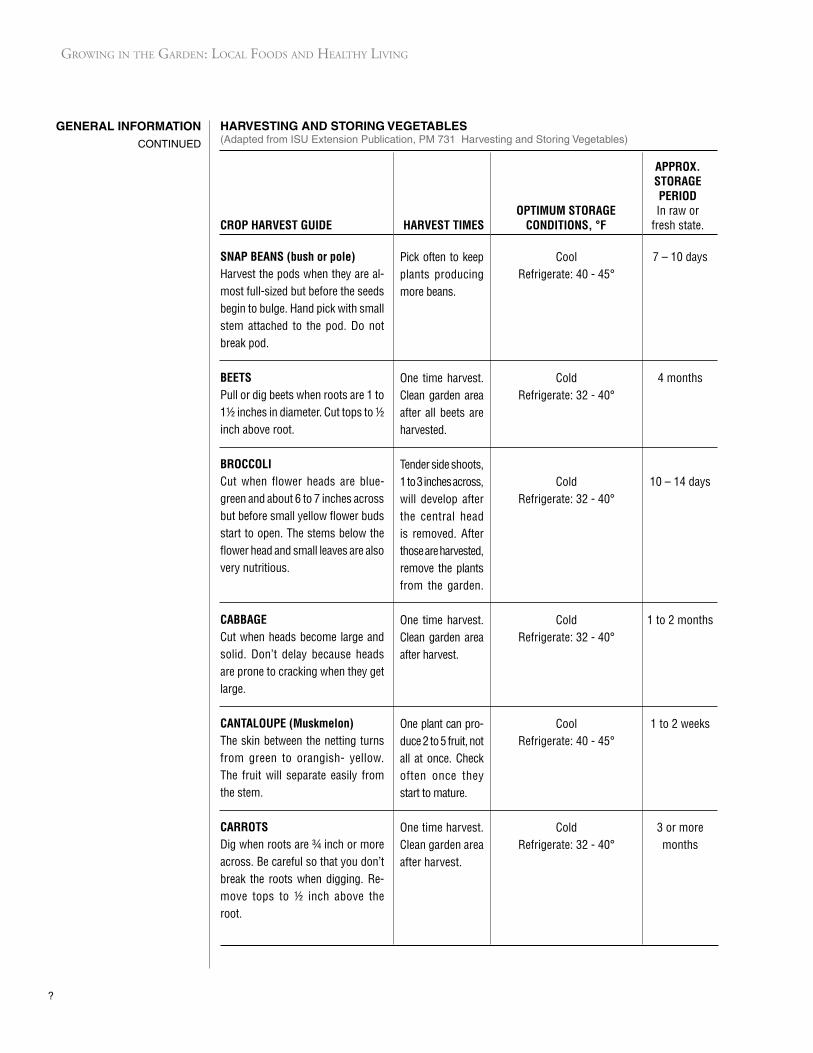
harvestInG and storInG veGetabLes(AdaptedfromISUExtensionPublication,PM731HarvestingandStoringVegetables)
approx.storage perioD
optimum storage In raw orCrop harvest guiDe harvest times ConDitions, °f fresh state.
snap Beans (bush or pole)Harvest the pods when they are al-most full-sized but before the seeds begin to bulge. Hand pick with small stem attached to the pod. Do not break pod.
Beets Pull or dig beets when roots are 1 to 1½ inches in diameter. Cut tops to ½ inch above root.
BroCColiCut when flower heads are blue-green and about 6 to 7 inches across but before small yellow flower buds start to open. The stems below the flower head and small leaves are also very nutritious.
CaBBageCut when heads become large and solid. Don’t delay because heads are prone to cracking when they get large.
Cantaloupe (muskmelon)The skin between the netting turns from green to orangish- yellow. The fruit will separate easily from the stem.
CarrotsDig when roots are ¾ inch or more across. Be careful so that you don’t break the roots when digging. Re-move tops to ½ inch above the root.
Pick often to keep plants producing more beans.
One time harvest. Clean garden area after all beets are harvested.
Tender side shoots, 1 to 3 inches across, will develop after the central head is removed. After those are harvested, remove the plants from the garden.
One time harvest. Clean garden area after harvest.
One plant can pro-duce 2 to 5 fruit, not all at once. Check often once they start to mature.
One time harvest. Clean garden area after harvest.
CoolRefrigerate: 40 - 45°
ColdRefrigerate: 32 - 40°
ColdRefrigerate: 32 - 40°
ColdRefrigerate: 32 - 40°
CoolRefrigerate: 40 - 45°
ColdRefrigerate: 32 - 40°
7 – 10 days
4 months
10 – 14 days
1 to 2 months
1 to 2 weeks
3 or more months
GeneraL InformatIonConTInuEd
?
GrowinG in the Garden: LocaL Foods and heaLthy LivinG
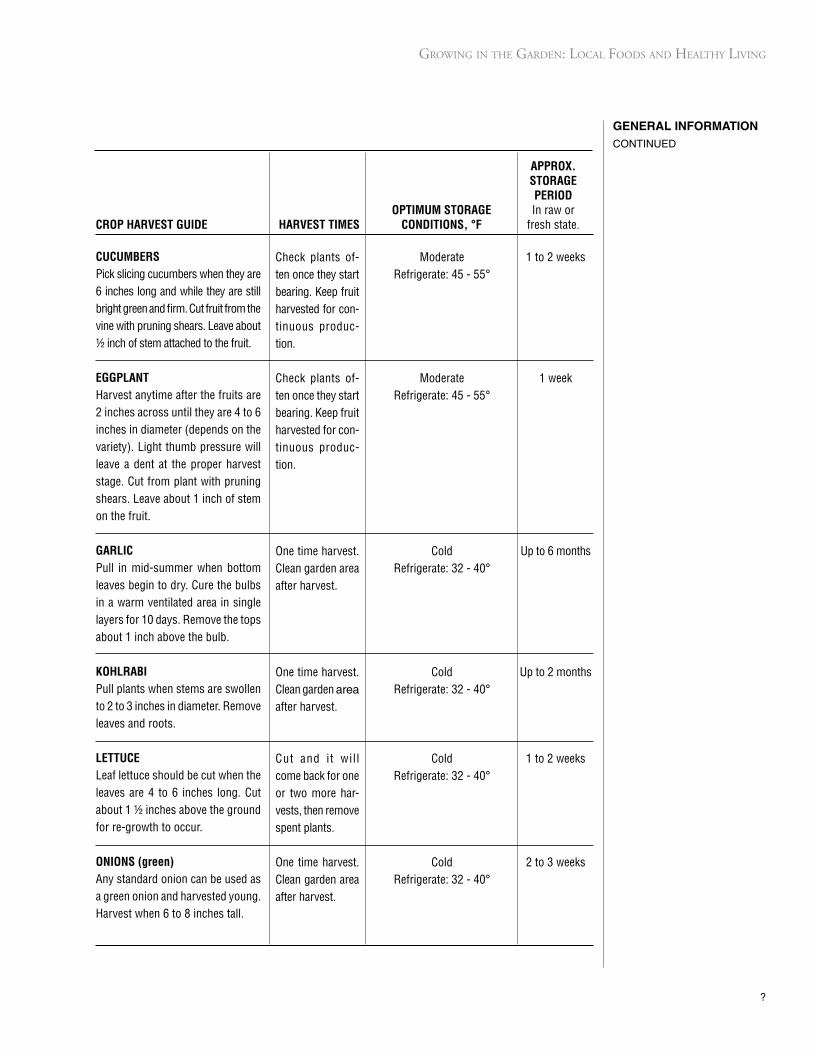
CuCumBersPick slicing cucumbers when they are 6 inches long and while they are still bright green and firm. Cut fruit from the vine with pruning shears. Leave about ½ inch of stem attached to the fruit.
eggplantHarvest anytime after the fruits are 2 inches across until they are 4 to 6 inches in diameter (depends on the variety). Light thumb pressure will leave a dent at the proper harvest stage. Cut from plant with pruning shears. Leave about 1 inch of stem on the fruit. garliCPull in mid-summer when bottom leaves begin to dry. Cure the bulbs in a warm ventilated area in single layers for 10 days. Remove the tops about 1 inch above the bulb.
KohlraBiPull plants when stems are swollen to 2 to 3 inches in diameter. Remove leaves and roots. lettuCeLeaf lettuce should be cut when the leaves are 4 to 6 inches long. Cut about 1 ½ inches above the ground for re-growth to occur.
onions (green)Any standard onion can be used as a green onion and harvested young. Harvest when 6 to 8 inches tall.
approx. storage perioD optimum storage In raw orCrop harvest guiDe harvest times ConDitions, °f fresh state.
Check plants of-ten once they start bearing. Keep fruit harvested for con-tinuous produc-tion.
Check plants of-ten once they start bearing. Keep fruit harvested for con-tinuous produc-tion.
One time harvest. Clean garden area after harvest.
One time harvest. Clean garden area after harvest.
Cut and it wil l come back for one or two more har-vests, then remove spent plants.
One time harvest. Clean garden area after harvest.
ModerateRefrigerate: 45 - 55°
ModerateRefrigerate: 45 - 55°
ColdRefrigerate: 32 - 40°
ColdRefrigerate: 32 - 40°
ColdRefrigerate: 32 - 40°
ColdRefrigerate: 32 - 40°
1 to 2 weeks
1 week
Up to 6 months
Up to 2 months
1 to 2 weeks
2 to 3 weeks
GrowinG in the Garden: LocaL Foods and heaLthy LivinG
?
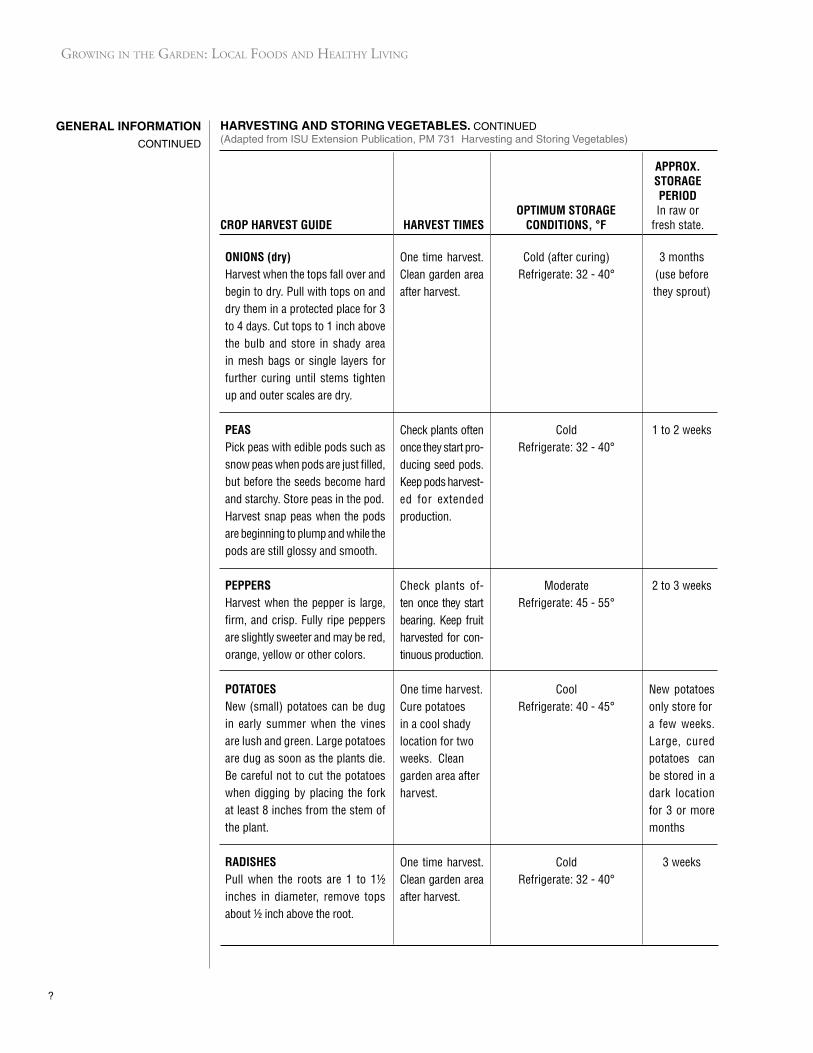
One time harvest. Clean garden area after harvest.
Check plants often once they start pro-ducing seed pods. Keep pods harvest-ed for extended production.
Check plants of-ten once they start bearing. Keep fruit harvested for con-tinuous production.
One time harvest. Cure potatoes in a cool shady location for two weeks. Clean garden area after harvest.
One time harvest. Clean garden area after harvest.
Cold (after curing)Refrigerate: 32 - 40°
ColdRefrigerate: 32 - 40°
ModerateRefrigerate: 45 - 55°
CoolRefrigerate: 40 - 45°
ColdRefrigerate: 32 - 40°
3 months(use before they sprout)
1 to 2 weeks
2 to 3 weeks
New potatoes only store fora few weeks.Large, cured potatoes can be stored in a dark location for 3 or more months
3 weeks
GeneraL InformatIonConTInuEd
onions (dry)Harvest when the tops fall over and begin to dry. Pull with tops on and dry them in a protected place for 3 to 4 days. Cut tops to 1 inch above the bulb and store in shady area in mesh bags or single layers for further curing until stems tighten up and outer scales are dry. peasPick peas with edible pods such as snow peas when pods are just filled, but before the seeds become hard and starchy. Store peas in the pod.Harvest snap peas when the pods are beginning to plump and while the pods are still glossy and smooth.
peppers Harvest when the pepper is large, firm, and crisp. Fully ripe peppers are slightly sweeter and may be red, orange, yellow or other colors.
potatoesNew (small) potatoes can be dug in early summer when the vines are lush and green. Large potatoes are dug as soon as the plants die. Be careful not to cut the potatoes when digging by placing the fork at least 8 inches from the stem of the plant. raDishesPull when the roots are 1 to 1½ inches in diameter, remove tops about ½ inch above the root.
harvestInG and storInG veGetabLes. ConTInuEd(AdaptedfromISUExtensionPublication,PM731HarvestingandStoringVegetables)
approx. storage perioD optimum storage In raw orCrop harvest guiDe harvest times ConDitions, °f fresh state.

GeneraL InformatIonConTInuEd
?
GrowinG in the Garden: LocaL Foods and heaLthy LivinG
approx. storage perioD optimum storage In raw orCrop harvest guiDe harvest times ConDitions, °f fresh state.
Cut and it will come back for one or two more harvests, then remove spent plants
Check plants often once they start bearing. Keep fruit harvested for con-tinuous produc-tion.
Check frequently when they reach maturity. Harvest all at once or within a few days.
Harvest all at once. Cure for 1 week in a warm, shady location.
Check plants of-ten once they start bearing.
Check plants often once they start bearing.
ColdRefrigerate: 32 - 40°
CoolRefrigerate: 40 - 45°
ColdRefrigerate: 32 - 40°
ModerateRefrigerate: 45 - 55°
Cool room55 - 65°
Moderate to cool room45 - 65°
1 to 2 weeks
1 to 2 weeks
1 week
3 or more months
4 to 7 days
2 to 3 weeks
spinaChHarvest when leaves are 2 to 6 inches long. Cut about 1½ inches above the ground for re-growth to occur.
summer squash (Zucchini)Cut squash from plant when they are 6 to 12 inches long. The rind is very tender and scrapes easily. Scallop type (‘Patty Pan’) are harvested when 3 to 5 inches in diameter. Leave ½ inch stem on the fruit.
sweet CornHarvest by grasping the ear at its base and then twisting downward. It is ready as soon as the silks are brown and dry at the ear tip. sweet potatoesHarvest in late fall, just before frost, by digging with a garden fork. Be careful not to stab a tuberous root.
tomatoesPick any time from pink to fully red stage. Pick and remove stem from the fruit.
watermelonHarvest when fruits are full sized, rind is dull in appearance, and the bottom part touching the ground turns from greenish white to creamy yellow. Leave 2-inch long stem at-tached to fruit.
Seed to Salad: Salad Party
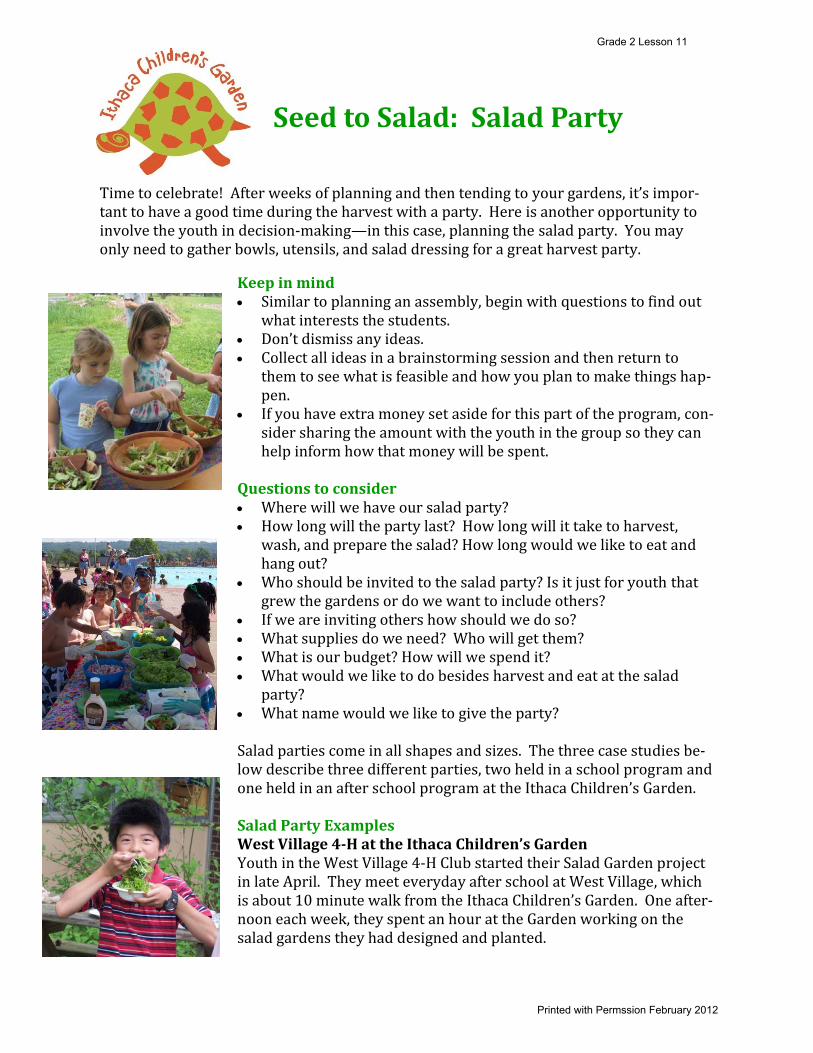
Keep in mind • Similar to planning an assembly, begin with questions to find out
what interests the students.• Don’t dismiss any ideas.• Collect all ideas in a brainstorming session and then return to
them to see what is feasible and how you plan to make things hap‐pen.
• If you have extra money set aside for this part of the program, con‐sider sharing the amount with the youth in the group so they canhelp inform how that money will be spent.
Questions to consider • Where will we have our salad party?• How long will the party last? How long will it take to harvest,
wash, and prepare the salad? How long would we like to eat andhang out?
• Who should be invited to the salad party? Is it just for youth thatgrew the gardens or do we want to include others?
• If we are inviting others how should we do so?• What supplies do we need? Who will get them?• What is our budget? How will we spend it?• What would we like to do besides harvest and eat at the salad
party?• What name would we like to give the party?
Salad parties come in all shapes and sizes. The three case studies be‐low describe three different parties, two held in a school program and one held in an after school program at the Ithaca Children’s Garden.
Salad Party Examples West Village 4H at the Ithaca Children’s Garden Youth in the West Village 4‐H Club started their Salad Garden project in late April. They meet everyday after school at West Village, which is about 10 minute walk from the Ithaca Children’s Garden. One after‐noon each week, they spent an hour at the Garden working on the salad gardens they had designed and planted.
Time to celebrate! After weeks of planning and then tending to your gardens, it’s impor‐tant to have a good time during the harvest with a party. Here is another opportunity to involve the youth in decision‐making—in this case, planning the salad party. You may only need to gather bowls, utensils, and salad dressing for a great harvest party.
Grade 2 Lesson 11
Printed with Permssion February 2012
West Village 4H at the Ithaca Children’s Garden (continued) Their program was designed to finish the second week in June. The first week in June, af‐ter watering and weeding tasks were complete, the group planned a salad party for the following week. The youth invited their families and made invitations to take home. A vote decided what two types of salad dressings would be available. Although most of the vegetables were growing well, the carrots were still too small to eat. The group asked if they could have extra carrots from the grocery store to supplement. A vote was also taken to decide what beverages would be available. The following week, youth arrived, some with parents and siblings joining them. Each youth harvested about half of their salad garden, washed and dried the greens and vegeta‐bles and helped prepare a communal salad. While everyone ate salad we shared our fa‐vorite part of the salad garden project. Once finished, youth were supplied with bags to harvest the remainder of their plots to take home and share with their families. Northeast Elementary AllSchool Salad Party Although only twenty students were active in the “garden club” that met several times each week for the Seed to Salad program, the whole school was aware of the project. The garden plots were located along the path from the school to the playground and students had a chance to observe the gardens changing over the course of the spring. Both the school and the students were interested in a Salad Party that would involve the entire school. We realized that what was growing in the small plots would not feed over 400 people. With the help of a teacher, donation requests were sent to a local hydroponic lettuce producer and two local grocery stores. The response was tremendous: 10 cases of lettuce and enough gift certificates to provide the entire school with salad. Youth active in the garden club brainstormed a list of supplies and teachers purchased them. Since it was difficult to find a time when all grade levels would be at school at the same time, the principal suggested we take the Salad Party on the road and stage the party at the all‐school field trip to a local pool. Set up under a series of awnings from 11am‐1pm, students active in the garden club took shifts serving salad to nearly every student, parent, and teacher at the pool. Several stu‐dents came back for second and third helpings. Northeast Elementary Garden Club Fueled from the success of the all‐school salad party, youth active in the garden club were eager to celebrate the harvest as a group. The day after the all‐school party, the garden club met during an extended lunch and recess period to harvest, wash, and prepare salad from their plots at the school. Then, they celebrated!
http://blogs.cornell.edu/garden
Grade 2 Unit 5 Lesson 11
Printed with Permssion February 2012
Seed to Salad: Harvesting Tips
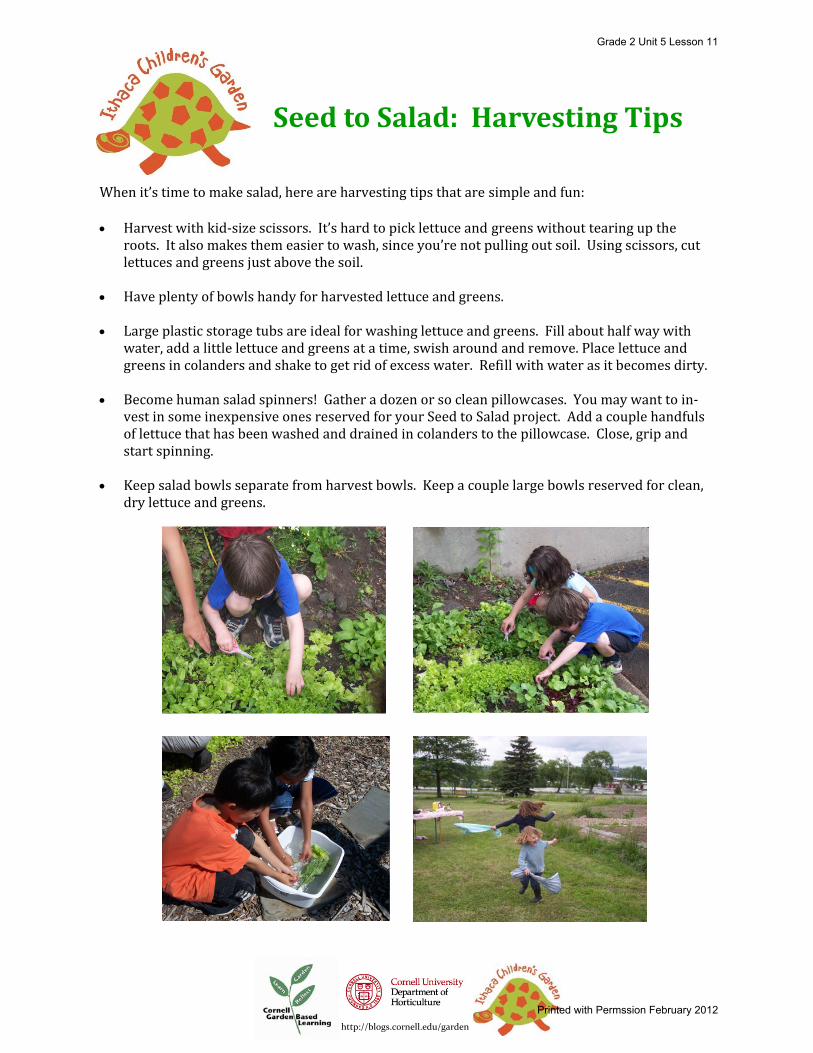
When it’s time to make salad, here are harvesting tips that are simple and fun:
• Harvest with kid‐size scissors. It’s hard to pick lettuce and greens without tearing up the roots. It also makes them easier to wash, since you’re not pulling out soil. Using scissors, cut lettuces and greens just above the soil.
• Have plenty of bowls handy for harvested lettuce and greens. • Large plastic storage tubs are ideal for washing lettuce and greens. Fill about half way with
water, add a little lettuce and greens at a time, swish around and remove. Place lettuce and greens in colanders and shake to get rid of excess water. Refill with water as it becomes dirty.
• Become human salad spinners! Gather a dozen or so clean pillowcases. You may want to in‐
vest in some inexpensive ones reserved for your Seed to Salad project. Add a couple handfuls of lettuce that has been washed and drained in colanders to the pillowcase. Close, grip and start spinning.
• Keep salad bowls separate from harvest bowls. Keep a couple large bowls reserved for clean,
dry lettuce and greens.
http://blogs.cornell.edu/garden
Grade 2 Unit 5 Lesson 11
Printed with Permssion February 2012


