H80 HEAT User Guide - Dallas County Community …netsupport.dcccd.edu/Documents/Heat/HEAT 8.0 User...
228
User Guide VERSION 8.0 10/03
-
Upload
nguyenminh -
Category
Documents
-
view
220 -
download
0
Transcript of H80 HEAT User Guide - Dallas County Community …netsupport.dcccd.edu/Documents/Heat/HEAT 8.0 User...

User Guide
VERSION 8.0
10/03
ii Copyright
Copyright 2003 FrontRange Solutions Inc. All Rights Reserved.
The Sentry Spelling-Checker Engine Copyright © 1999 Wintertree Software Inc.
USE OF THIS SOFTWARE AND ITS RELATED USER DOCUMENTATION IS SUBJECT TO THE TERMS AND CONDITIONS OF THE APPLICABLE END-USER LICENSE AGREEMENT (EULA), A COPY OF WHICH IS FOUND IN THE USER DOCUMENTA-TION. YOU MUST AGREE TO THE TERMS AND CONDITIONS OF THE EULA IN ORDER TO USE THIS SOFTWARE. IF YOU DO NOT AGREE TO THE TERMS AND CONDITIONS OF THE EULA, PROMPTLY RETURN THE UNUSED SOFTWARE IN ITS UNOPENED CD PACKAGE TO THE PLACE FROM WHICH YOU OBTAINED IT FOR A REFUND.
WARNING: The software described in this manual and its related user documentation are protected by copyright law. In no event, shall any part of the related user documentation be copied, reproduced, distributed, transmitted, stored in a retrieval system, or translated into any language, without the express written permission of FrontRange Solutions Inc.
Contact FrontRange Solutions Inc. at our Web site: www.frontrange.com(Jan. 2003)/HEAT801003
HEAT User Guide
Copyright iii
Trademark NoticesFrontRange Trademark Information
The following are trademarks or registered trademarks of FrontRange Solutions Inc. and/or its subsidiaries in the United States and/or other countries:
FrontRange Solutions™, GoldMine®, GoldSync®, GoldMine® Answer Wizard™, GoldMine® Sales & Marketing™, GoldMine® Management Intelligence™, GoldMine® Manager’s Console™, iGoldMine™, HEAT®, HEAT® Service & Support™, HEAT® PowerDesk™, iHEAT™, HEAT® Self Service™, HEAT® Manager’s Console™, HEAT® Answer Wizard™, HEAT® Quick Start Wizard™, InfoCenter®, Automated Processes™, First Level Support®, GoldMine® CustomerIQ™, HEAT® CustomerIQ™, CustomerIQ™ and other FrontRange products and brands.
Other Trademark Information
The following are trademarks or registered trademarks of their respective owners/companies:
TRADEMARK OR REGISTERED TRADEMARK COMPANY
ACT!® CRM Division of Best Software Inc.Adobe® and Acrobat® Adobe Systems Inc.Apple®, Mac® OS, and Macintosh® Apple Computer, Inc.
Beyond Gold™ ComputereseBorland® Interbase® Borland International Inc.Calyx® Calyx SoftwareCitrix® Citrix Systems, Inc.Corel® Corel CorporationCrystal Reports® Crystal DecisionsdBASE® dBASE Inc.dbCAMS+™ Financial Computer Support, Inc.Genesis 2000® Genesis 2000, Inc.GoldBox© copyright of Redstone Softbase CompanyGraphOn® and GO-Global® GraphOn CorporationGreat Plains® Great Plains Software Inc.Hewlett Packard® Hewlett Packard CompanyIBM®, Lotus®, Lotus Notes®, and Lotus Organizer® IBM CorporationInaPlex™ and Inaport™ Inaplex LimitedIntel® and Pentium® Intel CorporationIntuit®, QuickBooks®, and QuickBooks Pro® Intuit Inc.KNOWLIX™ Peregrine Systems Inc.LANDesk® LanDESK Group Ltd. Linux® Linus TorvaldsMaximizer Enterprise™ Multiactive Software

iv Copyright
Other products and brands are registered trademarks or trademarks of their respective owners/companies.
Microsoft®, Active Directory®, Microsoft® SQL Server™, Internet Explorer®, ActiveX®, Visual FoxPro®, Outlook®, Windows®, Windows NT®, and Microsoft®.Net™
Microsoft Corporation
Netcensus® Tally Systems CorporationNetilla® Netilla Networks, Inc.Netscape® and Netscape Navigator® Netscape Communications Corp.NextPage®, Folio®, Folio Views®, Folio Publisher®, Folio Builder®, Folio Integrator®, NXT™, NextPage Triad™, Nex-tPage Contenta™, NextPage Solo, Rapidapps™, Matrix™, and LivePublish™
NextPage, Inc.
Novell® and Netware® Novell, Inc.
OmniRush™ (formerly FaxRush®) Z-Firm LLCOracle® Oracle CorporationPalm™, MyPalm™, Palm Powered™, Palm.Net®, PalmOS®, and PalmPak® Palm, Inc.
QuickBooks® and Intuit® Intuit Corp.Red Hat® Red Hat, Inc.RightFax® Captaris, Inc.Rolodex® Rolodex Corp.Sage Line™ The Sage Group plcSaleMaker® SaleMaker Corp.SPARC® SPARC International Inc.Sun®, Java, and Solaris® Sun Microsystems, Inc.Sybase® Sybase, Inc.Symantec™, PCAnywhere™, and WinFax® Symantec CorporationUNIX® UNIX System Laboratories, Inc.VNC™ AT&T Laboratories CambridgeVisor® Handspring, Inc.Zetafax® PRO Equisys PLC Company
TRADEMARK OR REGISTERED TRADEMARK COMPANY
End-User License Agreement (EULA) v
FrontRange Solutions Software Product: HEAT
(Rev. Nov. 2002)
END-USER LICENSE AGREEMENT (“EULA”)IMPORTANT – READ CAREFULLY
THIS EULA IS A LEGAL AGREEMENT BETWEEN YOU (“YOU” OR “LICENSEE”) AND FRONTRANGE SOLUTIONS INC. (A DELAWARE CORPORATION WITH ITS PRINCIPAL PLACE OF BUSINESS IN COLORADO), ON ITS OWN BEHALF AND ON BEHALF OF ITS SUBSIDIARIES, DIVISIONS AND AFFILIATES (COLLECTIVELY REFERRED TO AS “FRONTRANGE SOLUTIONS”), FOR THE SOFTWARE PRODUCT IDENTIFIED ABOVE WHICH INCLUDES COMPUTER SOFTWARE AND ASSOCIATED MEDIA AND DOCUMENTATION (COLLECTIVELY “LICENSED SOFTWARE”). BY OPENING THE SOFTWARE PACKAGING, COMPLETING THE SERIALIZATION PROCESS, OR DOWNLOADING, INSTALLING, ACCESSING OR UTILIZING THE LICENSED SOFTWARE OR CLICKING THE “I ACCEPT” BUTTON, YOU AGREE TO BE BOUND BY THE TERMS OF THIS EULA. IF YOU DO NOT AGREE WITH THE TERMS OF THIS EULA, PROMPTLY RETURN THE UNUSED LICENSED SOFTWARE TO THE PLACE FROM WHICH YOU OBTAINED IT FOR A REFUND.
1. Protection/Ownership. The Licensed Software may include software owned by third-parties (collectively "Third-Party Owners"). The Third-Party Owners are third-party beneficiaries of this EULA and You agree to be bound to them under all the terms and conditions of this EULA, unless and to the extent that a separate license agreement for such software governs. The Licensed Software is protected by copyright and other intellectual property laws. FrontRange Solutions or a Third Party Owner retain ownership of the Licensed Software and the copies of the Licensed Software provided herewith. The Licensed Software is licensed to Licensee for use subject to the terms set forth in this EULA.
2. Grant of License. FrontRange Solutions hereby grants to Licensee and Licensee fully accepts, upon delivery, a nonexclusive, nontransferable and perpetual (unless earlier terminated as provided below) right to use only the executable version (no source code) of the Licensed Software for its own internal business purposes. You may use only one copy of the Licensed Software installed on one server accessing one database. Installation of the Licensed Software entails completion of a serialization procedure in which You will be required to enter a serialization code(s) provided to You as a part of the Licensed Software. You agree not to disclose the serialization code(s) provided to You to any third party other than an authorized FrontRange Solutions reseller (“Reseller”). The serialization code indicates to the loaded Licensed Software the number of authorized concurrent users covered by the license.
3. Scope of License. You are allowed only the number of concurrent users of the Licensed Software as shown in the corresponding purchase order or other order confirmation form. The number of authorized concurrent users covered by the license will be visually displayed to You during the serialization procedure. A remote user accessing the Licensed Software (via a web-enabled HEAT product) is considered to be utilizing one concurrent user license. Nothing in this paragraph shall limit Licensee from allowing its employees, agents or representatives or the employees, agents or representatives of Licensee’s parent, subsidiaries or affiliates, if any, from accessing or using the Licensed Software for Licensee’s own internal business purposes; provided, however that (i) the total number of concurrent users does not exceed the number of authorized concurrent users covered by the license; and (ii) use or access is restricted to no more than one copy of the Licensed Software installed on one server accessing one database.
vi End-User License Agreement (EULA)
4. Additional users. If You wish to expand the number of authorized concurrent users covered by the license You may be able to purchase the additional licenses from FrontRange Solutions or a Reseller. Such added licenses will be affected by the provision of additional serialization code(s) by FrontRange Solutions.
5. Transfer. To the maximum extent permitted by applicable law, Licensee may not resell or otherwise transfer for value the Licensed Software. Notwithstanding the foregoing, Licensee may assign all of its licensed rights and duties under this EULA to a third-party that: (a) directly or indirectly controls Licensee; (b) is controlled by or under common control with Licensee; or (c) purchases all or substantially all of Licensee’s assets; provided, however, that (i) Licensee gives written notice to FrontRange Solutions of the transfer or assignment; (ii) the permitted third-party assignee agrees to be bound by all the terms herein and completes and returns a registration card or other requested transfer documentation to FrontRange Solutions; and (iii) in no circumstance shall any transfer or assignment, unless specifically agreed upon in writing, (y) release Licensee from any prior outstanding obligation under this EULA, or (z) allow Licensee or Licensee’s transferee or assignee, collectively, to utilize more licenses than the number of licenses authorized under this EULA. If You transfer the Licensed Software, You must simultaneously transfer possession of all associated media and documentation, and remove all Licensed Software from Your computers.
6. Restrictions. You agree not to copy the Licensed Software except for backup and disaster recovery purposes, or as described in the documentation comprising the Licensed Software. If You make backup copies of the Licensed Software, the original copy of the Licensed Software and all backup copies that You make may not leave your control and are owned by FrontRange Solutions or a Third Party Owner. You agree that this is a license only and that no title passes to You. You agree not to challenge FrontRange Solutions’ rights in or otherwise attempt to assert any rights in the Licensed Software, except those provided under this EULA. You agree not to disclose, modify, decompile, translate, disassemble or reverse engineer the Licensed Software. You agree not to distribute, rent or lease the Licensed Software. You agree not to use the Licensed Software as a commercial hoster or application service provider. You agree not to use the Licensed Software except as expressly permitted under this EULA. You acknowledge that the Licensed Software contains information deemed confidential or otherwise proprietary to FrontRange Solutions or a Third Party Owner, and You agree to handle the Licensed Software with at least the same degree of care employed with respect to Your own confidential or proprietary information.
7. Warranty/Remedy/Limitation of Liability. TO THE MAXIMUM EXTENT PERMITTED BY APPLICABLE LAW, THE WARRANTY AND REMEDY SET FORTH BELOW ARE EXCLUSIVE AND IN LIEU OF ALL OTHER WARRANTIES AND REMEDIES, ORAL OR WRITTEN, EXPRESSED OR IMPLIED. Except as provided for in this EULA, no FrontRange Solutions reseller, dealer, agent or employee is authorized to modify or add to the following warranties and remedies.
FrontRange Solutions warrants that for a period of ninety (90) days following delivery of the Licensed Software (i) the media on which the Licensed Software is furnished shall be free from defects in materials and workmanship under normal use; and (ii) the Licensed Software will perform substantially in accordance with FrontRange Solutions’ user documentation accompanying the Licensed Software. FrontRange Solutions does not warrant that the Licensed Software will meet Your requirements or that the operation of the Licensed Software will be uninterrupted or error free or that all defects will be corrected. This Limited Warranty is void if failure of the Licensed Software has resulted from accident, abuse, modification, or misapplication of the Licensed Software.
If You believe there is a defect in the Licensed Software such that it does not meet the Limited Warranty provided above, You must notify FrontRange Solutions in writing within the 90-day warranty period. FrontRange Solutions’ entire liability and Your exclusive remedy with regard to the Limited Warranty, shall be, at FrontRange Solutions’ sole discretion, either repair or replacement of the Licensed Software or a refund of the amount paid by You for the Licensed Software (provided in that case that You also return the Licensed Software). Any repaired or replacement Licensed Software shall be warranted for the remainder of the original warranty period.
End-User License Agreement (EULA) vii
To the maximum extent permitted by applicable law, except as provided above, FRONTRANGE SOLUTIONS MAKES NO WARRANTY OR REPRESENTATION, EITHER EXPRESSED OR IMPLIED WITH RESPECT TO THE LICENSED SOFTWARE, ITS QUALITY, PERFORMANCE, MERCHANTABILITY, OR FITNESS FOR A PARTICULAR PURPOSE.
UNLESS BOTH EXPRESSLY REPRESENTED AND AGREED IN WRITING, THE LICENSED SOFTWARE IS NOT DESIGNED, OR INTENDED FOR USE IN ANY MEDICAL, LIFE SAVING OR LIFE SUSTAINING SYSTEMS, TRANSPORTATION SYSTEMS, NUCLEAR SYSTEMS, OR FOR ANY OTHER MISSION CRITICAL APPLICATION IN WHICH THE FAILURE OF THE LICENSED SOFTWARE COULD CREATE A SITUATION WHERE SUBSTANTIAL PROPERTY DAMAGE OR PERSONAL INJURY OR DEATH MAY OCCUR. FRONTRANGE SOLUTIONS AND ANY THIRD-PARTY OWNERS RECOMMEND AGAINST, AND DISCLAIM ANY LIABILITY FOR, USE OF THE LICENSED SOFTWARE IN ANY SUCH APPLICATION.
You understand and acknowledge that FrontRange Solutions will not be liable for network-related problems attributable to the operation of the Licensed Software and that network configuration changes may affect the system's performance.
To the maximum extent permitted by applicable law, and except for liability arising under paragraph 8 below, FrontRange Solutions’ entire liability under this EULA shall be limited to the amount paid by You for the Licensed Software.
IN NO EVENT WILL FRONTRANGE SOLUTIONS BE LIABLE FOR INDIRECT, SPECIAL, INCIDENTAL OR CONSEQUENTIAL DAMAGES ARISING OUT OF THE USE OR INABILITY TO USE THE LICENSED SOFTWARE, even if advised of the possibility of such damages. In particular, and without limitation, FrontRange Solutions shall have no liability for any data stored or processed with the Licensed Software, including the costs of recovering such data.
8. Indemnification. FrontRange Solutions represents that it has the right to grant to Licensee the license to use the Licensed Software as set forth in this EULA without violating any rights of any third party and that there is no actual or threatened suit by any third party based on an alleged violation of such right by FrontRange Solutions. FrontRange Solutions will defend, indemnify and hold Licensee harmless from any third party claim that the Licensed Software infringes any copyright, trademark or trade secret owned or controlled by the third party; provided, however, that (i) FrontRange Solutions shall be notified promptly in writing by Licensee of any such claim; (ii) FrontRange Solutions shall have sole control of the defense of any action on such claim and all negotiations for its settlement or compromise; (iii) Licensee shall cooperate with FrontRange Solutions, at FrontRange Solutions’ expense, in a reasonable way to facilitate the settlement or defense of such claim; (iv) such claim does not arise from Licensee’s modifications not authorized by FrontRange Solutions; and (v) should the Licensed Software become, or in FrontRange Solutions’ opinion likely to become, subject to such claim of infringement, then Licensee shall permit FrontRange Solutions, at FrontRange Solutions’ option and expense, either (a) to procure for Licensee the right to continue using the Licensed Software, or (b) to replace or modify the Licensed Software so that it becomes noninfringing and performs in a substantially similar manner to the original product, or (c) upon failure of (a) or (b), despite the reasonable efforts of FrontRange Solutions, to terminate this EULA and return the license fee paid by Licensee for the Licensed Software.
9. Maintenance and Support. FrontRange Solutions provides maintenance and/or technical support (including upgrades and enhancements) for the Licensed Software only through separate Agreements. Please contact FrontRange Solutions or the place from which You obtained the Licensed Software if You wish to obtain maintenance and/or technical support through the execution of such an agreement.
10. Export Control. You may not export, ship, transmit, or re-export the Licensed Software in violation of any applicable law or regulation, including, without limitation, the Export Administration Regulations issued by the United States Department of Commerce, or any such similar law or regulation issued by such other governmental entity which may have jurisdiction over such export.
viii End-User License Agreement (EULA)
11. United States Government Restricted Rights. THIS SECTION APPLIES ONLY TO LICENSING OR USE BY THE FEDERAL GOVERNMENT OF THE UNITED STATES. The Licensed Software is provided with RESTRICTED RIGHTS. Use, duplication, or disclosure by the federal government is subject to restricted rights as set forth in subparagraph (c)(1)(ii) of The Rights in Technical Data and Computer Software clause at 252.227-7014 for DOD contracts and at FAR (48 CFR 52.227-19) for civilian agency contracts or other comparable agency clauses.
12. Termination. Your right to use the Licensed Software continues until this EULA is terminated. You may terminate this EULA at any time by destroying all of Your copies of the Licensed Software. This EULA will automatically terminate if You fail to comply with the material terms of this EULA. Upon any termination, You agree to remove all Licensed Software from Your computers, destroy all copies of the Licensed Software, and, upon request from FrontRange Solutions, certify in writing Your compliance herewith.
13. Severability. If any of the terms, or portions thereof, of this EULA are invalid or unenforceable under any applicable statute or rule of law, the court shall reform the contract to include an enforceable term as close to the intent of the original term as possible; all other terms shall remain unchanged.
14. Whole Agreement. This EULA and any applicable FrontRange Solutions order form or maintenance and support agreement or like document constitutes the entire agreement between You and FrontRange Solutions relating to the subject matter hereof, and any additions to, or modifications of, this EULA shall be binding upon the parties only if the same shall be in writing and duly executed by You and by a duly authorized representative of FrontRange Solutions. THE TERMS AND CONDITIONS OF ANY CORRESPONDING PURCHASE ORDER OR OTHER ORDER CONFIRMATION FORM RELATING TO THE LICENSED SOFTWARE ARE ONLY BINDING ON FRONTRANGE SOLUTIONS IF SUCH TERMS AND CONDITIONS ARE AGREED TO IN WRITING IN ACCORDANCE WITH THE PRIOR SENTENCE AND IN A DOCUMENT OTHER THAN THE PURCHASE ORDER OR OTHER ORDER CONFIRMATION FORM.
15. Waiver. The waiver or failure of either party to exercise in any respect any right provided for in this EULA shall not be deemed a waiver of any further or future right under this EULA.
16. Assignability. This EULA shall inure to the benefit of, and is freely assignable to, FrontRange Solutions’ successors and assignees of rights in the Licensed Software.
17. Resellers. If Licensee acquired the Licensed Software through a Reseller, Licensee acknowledges that (i) payment and delivery terms for the Licensed Software must be established separately and independently between the Licensee and the Reseller; (ii) this EULA constitutes the entire agreement between the Licensee and FrontRange Solutions regarding the license rights for the Licensed Software as described above and is controlling; (iii) the terms and conditions of any purchase order or any other agreement between the Licensee and the Reseller are not binding on FrontRange Solutions; (iv) the Reseller is not FrontRange Solutions’ agent and is not authorized to alter, amend or modify the terms of this EULA or to otherwise grant any license or other rights relating in any way to the Licensed Software; and (v) Licensee’s nonpayment of any amount due to a Reseller or any other relevant third party relating to its licensed rights under this EULA shall constitute a basis for FrontRange Solutions’ termination of this EULA. Licensee further acknowledges that FrontRange Solutions makes no representation or warranty with regard to any services provided by any Reseller, or any actions or failures to act by any Reseller.
T A B L E O F C O N T E N T S
Contents
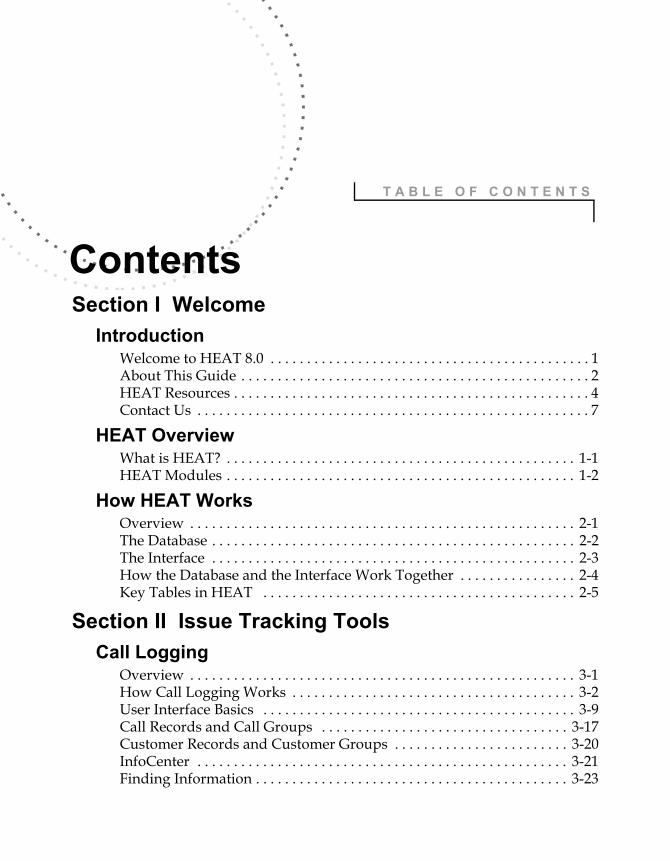
Section I WelcomeIntroductionWelcome to HEAT 8.0 . . . . . . . . . . . . . . . . . . . . . . . . . . . . . . . . . . . . . . . . . . . . 1About This Guide . . . . . . . . . . . . . . . . . . . . . . . . . . . . . . . . . . . . . . . . . . . . . . . . 2HEAT Resources . . . . . . . . . . . . . . . . . . . . . . . . . . . . . . . . . . . . . . . . . . . . . . . . . 4Contact Us . . . . . . . . . . . . . . . . . . . . . . . . . . . . . . . . . . . . . . . . . . . . . . . . . . . . . . 7
HEAT OverviewWhat is HEAT? . . . . . . . . . . . . . . . . . . . . . . . . . . . . . . . . . . . . . . . . . . . . . . . . 1-1HEAT Modules . . . . . . . . . . . . . . . . . . . . . . . . . . . . . . . . . . . . . . . . . . . . . . . . 1-2
How HEAT WorksOverview . . . . . . . . . . . . . . . . . . . . . . . . . . . . . . . . . . . . . . . . . . . . . . . . . . . . . 2-1The Database . . . . . . . . . . . . . . . . . . . . . . . . . . . . . . . . . . . . . . . . . . . . . . . . . . 2-2The Interface . . . . . . . . . . . . . . . . . . . . . . . . . . . . . . . . . . . . . . . . . . . . . . . . . . 2-3How the Database and the Interface Work Together . . . . . . . . . . . . . . . . 2-4Key Tables in HEAT . . . . . . . . . . . . . . . . . . . . . . . . . . . . . . . . . . . . . . . . . . . 2-5
Section II Issue Tracking ToolsCall Logging
Overview . . . . . . . . . . . . . . . . . . . . . . . . . . . . . . . . . . . . . . . . . . . . . . . . . . . . . 3-1How Call Logging Works . . . . . . . . . . . . . . . . . . . . . . . . . . . . . . . . . . . . . . . 3-2User Interface Basics . . . . . . . . . . . . . . . . . . . . . . . . . . . . . . . . . . . . . . . . . . . 3-9Call Records and Call Groups . . . . . . . . . . . . . . . . . . . . . . . . . . . . . . . . . . 3-17Customer Records and Customer Groups . . . . . . . . . . . . . . . . . . . . . . . . 3-20InfoCenter . . . . . . . . . . . . . . . . . . . . . . . . . . . . . . . . . . . . . . . . . . . . . . . . . . . 3-21Finding Information . . . . . . . . . . . . . . . . . . . . . . . . . . . . . . . . . . . . . . . . . . . 3-23

x
AutoTasks . . . . . . . . . . . . . . . . . . . . . . . . . . . . . . . . . . . . . . . . . . . . . . . . . . . 3-25SupportMail . . . . . . . . . . . . . . . . . . . . . . . . . . . . . . . . . . . . . . . . . . . . . . . . . 3-27Reporting . . . . . . . . . . . . . . . . . . . . . . . . . . . . . . . . . . . . . . . . . . . . . . . . . . . . 3-29Table Maintenance . . . . . . . . . . . . . . . . . . . . . . . . . . . . . . . . . . . . . . . . . . . . 3-30User Preferences . . . . . . . . . . . . . . . . . . . . . . . . . . . . . . . . . . . . . . . . . . . . . . 3-31Call Logging Wrap-up . . . . . . . . . . . . . . . . . . . . . . . . . . . . . . . . . . . . . . . . . 3-32
Alert MonitorOverview . . . . . . . . . . . . . . . . . . . . . . . . . . . . . . . . . . . . . . . . . . . . . . . . . . . . . 4-1How Alert Monitor Works . . . . . . . . . . . . . . . . . . . . . . . . . . . . . . . . . . . . . . 4-2User Interface Basics . . . . . . . . . . . . . . . . . . . . . . . . . . . . . . . . . . . . . . . . . . . 4-4Call Group Alerts . . . . . . . . . . . . . . . . . . . . . . . . . . . . . . . . . . . . . . . . . . . . . . 4-7System Message Alerts . . . . . . . . . . . . . . . . . . . . . . . . . . . . . . . . . . . . . . . . . 4-9Working with Alert Monitor . . . . . . . . . . . . . . . . . . . . . . . . . . . . . . . . . . . 4-10Alert Monitor Wrap-up . . . . . . . . . . . . . . . . . . . . . . . . . . . . . . . . . . . . . . . . 4-13
First Level SupportOverview . . . . . . . . . . . . . . . . . . . . . . . . . . . . . . . . . . . . . . . . . . . . . . . . . . . . . 5-1How First Level Support Works . . . . . . . . . . . . . . . . . . . . . . . . . . . . . . . . . 5-2User Interface Basics . . . . . . . . . . . . . . . . . . . . . . . . . . . . . . . . . . . . . . . . . . . 5-4Configuring First Level Support . . . . . . . . . . . . . . . . . . . . . . . . . . . . . . . . . 5-8Using First Level Support . . . . . . . . . . . . . . . . . . . . . . . . . . . . . . . . . . . . . . . 5-9Working With Knowledge Trees . . . . . . . . . . . . . . . . . . . . . . . . . . . . . . . . 5-10Working with Nodes and Branches . . . . . . . . . . . . . . . . . . . . . . . . . . . . . 5-13Searching . . . . . . . . . . . . . . . . . . . . . . . . . . . . . . . . . . . . . . . . . . . . . . . . . . . . 5-16Posting an FLS Solution to a Call Record . . . . . . . . . . . . . . . . . . . . . . . . . 5-19Customizing First Level Support . . . . . . . . . . . . . . . . . . . . . . . . . . . . . . . . 5-20For the HEAT System Administrator . . . . . . . . . . . . . . . . . . . . . . . . . . . . 5-21For the FLS Administrator . . . . . . . . . . . . . . . . . . . . . . . . . . . . . . . . . . . . . 5-22First Level Support Wrap-up . . . . . . . . . . . . . . . . . . . . . . . . . . . . . . . . . . . 5-23
Section III Automation ToolsAuto Ticket Generator
Overview . . . . . . . . . . . . . . . . . . . . . . . . . . . . . . . . . . . . . . . . . . . . . . . . . . . . . 6-1How Auto Ticket Generator Works . . . . . . . . . . . . . . . . . . . . . . . . . . . . . . 6-2User Interface Basics . . . . . . . . . . . . . . . . . . . . . . . . . . . . . . . . . . . . . . . . . . . 6-4Auto Ticket Generator Definitions . . . . . . . . . . . . . . . . . . . . . . . . . . . . . . . 6-6Auto Ticket Generator Actions . . . . . . . . . . . . . . . . . . . . . . . . . . . . . . . . . . 6-7Auto Ticket Generator Wrap-up . . . . . . . . . . . . . . . . . . . . . . . . . . . . . . . . 6-13
HEAT
xi
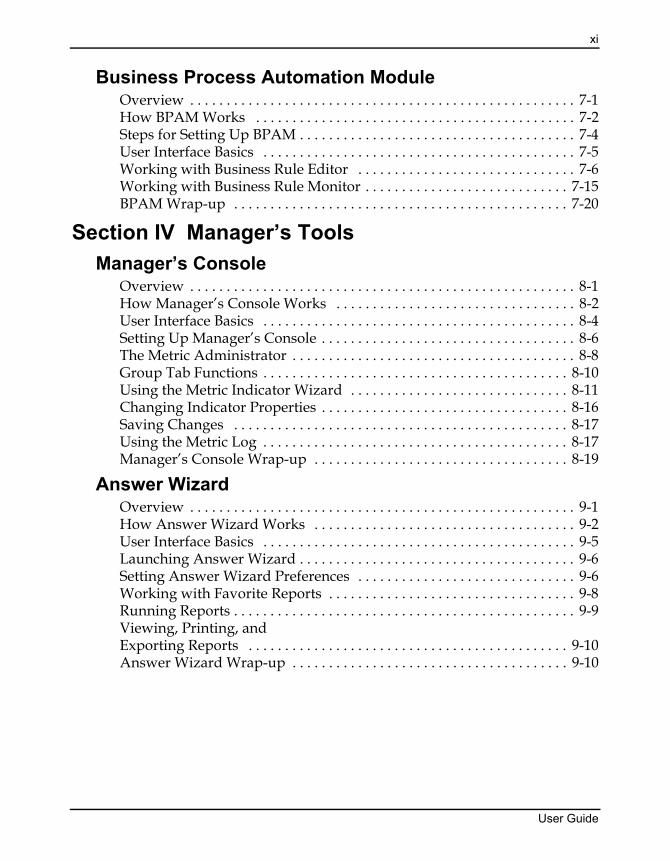
Business Process Automation ModuleOverview . . . . . . . . . . . . . . . . . . . . . . . . . . . . . . . . . . . . . . . . . . . . . . . . . . . . . 7-1How BPAM Works . . . . . . . . . . . . . . . . . . . . . . . . . . . . . . . . . . . . . . . . . . . . 7-2Steps for Setting Up BPAM . . . . . . . . . . . . . . . . . . . . . . . . . . . . . . . . . . . . . . 7-4User Interface Basics . . . . . . . . . . . . . . . . . . . . . . . . . . . . . . . . . . . . . . . . . . . 7-5Working with Business Rule Editor . . . . . . . . . . . . . . . . . . . . . . . . . . . . . . 7-6Working with Business Rule Monitor . . . . . . . . . . . . . . . . . . . . . . . . . . . . 7-15BPAM Wrap-up . . . . . . . . . . . . . . . . . . . . . . . . . . . . . . . . . . . . . . . . . . . . . . 7-20
Section IV Manager’s ToolsManager’s Console
Overview . . . . . . . . . . . . . . . . . . . . . . . . . . . . . . . . . . . . . . . . . . . . . . . . . . . . . 8-1How Manager’s Console Works . . . . . . . . . . . . . . . . . . . . . . . . . . . . . . . . . 8-2User Interface Basics . . . . . . . . . . . . . . . . . . . . . . . . . . . . . . . . . . . . . . . . . . . 8-4Setting Up Manager’s Console . . . . . . . . . . . . . . . . . . . . . . . . . . . . . . . . . . . 8-6The Metric Administrator . . . . . . . . . . . . . . . . . . . . . . . . . . . . . . . . . . . . . . . 8-8Group Tab Functions . . . . . . . . . . . . . . . . . . . . . . . . . . . . . . . . . . . . . . . . . . 8-10Using the Metric Indicator Wizard . . . . . . . . . . . . . . . . . . . . . . . . . . . . . . 8-11Changing Indicator Properties . . . . . . . . . . . . . . . . . . . . . . . . . . . . . . . . . . 8-16Saving Changes . . . . . . . . . . . . . . . . . . . . . . . . . . . . . . . . . . . . . . . . . . . . . . 8-17Using the Metric Log . . . . . . . . . . . . . . . . . . . . . . . . . . . . . . . . . . . . . . . . . . 8-17Manager’s Console Wrap-up . . . . . . . . . . . . . . . . . . . . . . . . . . . . . . . . . . . 8-19
Answer WizardOverview . . . . . . . . . . . . . . . . . . . . . . . . . . . . . . . . . . . . . . . . . . . . . . . . . . . . . 9-1How Answer Wizard Works . . . . . . . . . . . . . . . . . . . . . . . . . . . . . . . . . . . . 9-2User Interface Basics . . . . . . . . . . . . . . . . . . . . . . . . . . . . . . . . . . . . . . . . . . . 9-5Launching Answer Wizard . . . . . . . . . . . . . . . . . . . . . . . . . . . . . . . . . . . . . . 9-6Setting Answer Wizard Preferences . . . . . . . . . . . . . . . . . . . . . . . . . . . . . . 9-6Working with Favorite Reports . . . . . . . . . . . . . . . . . . . . . . . . . . . . . . . . . . 9-8Running Reports . . . . . . . . . . . . . . . . . . . . . . . . . . . . . . . . . . . . . . . . . . . . . . . 9-9Viewing, Printing, and Exporting Reports . . . . . . . . . . . . . . . . . . . . . . . . . . . . . . . . . . . . . . . . . . . . 9-10Answer Wizard Wrap-up . . . . . . . . . . . . . . . . . . . . . . . . . . . . . . . . . . . . . . 9-10
User Guide
xii
Section V Administrator’s ToolsHEAT Administrator
Overview . . . . . . . . . . . . . . . . . . . . . . . . . . . . . . . . . . . . . . . . . . . . . . . . . . . . 10-1How Administrator Works . . . . . . . . . . . . . . . . . . . . . . . . . . . . . . . . . . . . . 10-2User Interface Basics . . . . . . . . . . . . . . . . . . . . . . . . . . . . . . . . . . . . . . . . . . 10-3Customizing HEAT . . . . . . . . . . . . . . . . . . . . . . . . . . . . . . . . . . . . . . . . . . . 10-6Setting Security . . . . . . . . . . . . . . . . . . . . . . . . . . . . . . . . . . . . . . . . . . . . . . . 10-7Setting Defaults . . . . . . . . . . . . . . . . . . . . . . . . . . . . . . . . . . . . . . . . . . . . . . 10-8Integrating HEAT with Other Products . . . . . . . . . . . . . . . . . . . . . . . . . 10-10Maintaining Your Database . . . . . . . . . . . . . . . . . . . . . . . . . . . . . . . . . . . 10-11Administrator Wrap-up . . . . . . . . . . . . . . . . . . . . . . . . . . . . . . . . . . . . . . 10-12
Other Administrator ToolsOverview . . . . . . . . . . . . . . . . . . . . . . . . . . . . . . . . . . . . . . . . . . . . . . . . . . . . 11-1How LoadDB Utility Works . . . . . . . . . . . . . . . . . . . . . . . . . . . . . . . . . . . . 11-2How Quick Start Wizard Works . . . . . . . . . . . . . . . . . . . . . . . . . . . . . . . . 11-3The Other Administrator Tools Wrap-up . . . . . . . . . . . . . . . . . . . . . . . . . 11-6
Section VI Add-on ToolsOther Add-on Tools
Overview . . . . . . . . . . . . . . . . . . . . . . . . . . . . . . . . . . . . . . . . . . . . . . . . . . . . 12-1GoldMine . . . . . . . . . . . . . . . . . . . . . . . . . . . . . . . . . . . . . . . . . . . . . . . . . . . . 12-2HEAT Asset Tracker . . . . . . . . . . . . . . . . . . . . . . . . . . . . . . . . . . . . . . . . . . 12-2HEAT Plus Call Center . . . . . . . . . . . . . . . . . . . . . . . . . . . . . . . . . . . . . . . . 12-3HEAT Plus Knowledge . . . . . . . . . . . . . . . . . . . . . . . . . . . . . . . . . . . . . . . . 12-3HEAT Plus Remote Support Suite . . . . . . . . . . . . . . . . . . . . . . . . . . . . . . . 12-4HEAT Self Service . . . . . . . . . . . . . . . . . . . . . . . . . . . . . . . . . . . . . . . . . . . . 12-4HEAT WebCenter . . . . . . . . . . . . . . . . . . . . . . . . . . . . . . . . . . . . . . . . . . . . 12-4iHEAT . . . . . . . . . . . . . . . . . . . . . . . . . . . . . . . . . . . . . . . . . . . . . . . . . . . . . . 12-5
GlossaryIndex
HEAT

S E C T I O N I
Welcome

in this chapter...WelcomeAbout This GuideHEAT ResourcesContact Information
I N T R O D U C T I O N
Introduction
Welcome to HEAT 8.0Welcome to HEAT 8.0. HEAT is a fully customizable suite of modules that work together to provide a complete service and support solution for your Help Desk or Support Center. It provides all the tools you need to log and resolve calls, store information about your customers, track information on your organization’s performance, and generate detailed reports.
HEAT contains the following core tools to help you work more productively.
• Call Logging: Call Logging provides all the tools you need to log, track, and resolve calls quickly and efficiently.
• Alert Monitor: Alert Monitor is a notification tool that alerts you when you receive new HEAT messages, Assignments, or other conditions. You can even set up Alert Monitor to notify you while you are away from your desk.
• First Level Support (FLS): FLS is a simple but powerful tool used to build and maintain knowledge bases. Whether purchased or custom built, FLS knowledge trees can provide answers to questions, solve problems, share knowledge, and document work flow.
2 Introduction
• Manager’s Console: Manager’s Console is a management tool that monitors the status of vital organizational processes.
• Answer Wizard: Answer Wizard is a management reporting tool providing the ability to generate detailed reports about the status and trends of your company’s issues.
• Business Process Automation Module (BPAM): BPAM is an automation tool that uses a service to monitor common problems or events based on the Business Rules you establish. BPAM then executes actions you define in order to resolve or escalate issues.
• Auto Ticket Generator (ATG): ATG is an automation tool that automatically creates or updates Call Records from e-mail messages or text files. The ATG module also allows customers to perform information queries regarding their existing Call Records, and it allows users to transfer Call Records from one HEAT system to another.
• Administrator: Administrator is the pivotal tool for controlling your HEAT system. Designed for a system administrator, this module controls all aspects of security, defaults, database maintenance, customization, integrations, and so on.
About This GuideThis guide is designed to introduce you to the main modules and features of the entire HEAT suite of products. Use this guide as a reference for any basic questions you have about HEAT.
For more in-depth information or how-to steps, refer to the online Help by clicking the Help command in any module’s menu bar. Many dialog boxes also contain a Help button; click it to access context-sensitive Help, that is, Help pertaining to the specific dialog box in which you find yourself operating.
HEAT
Introduction 3
Audience and ExpertiseThe information in this guide is written for call center and internal support professionals.
The material assumes the user has already installed and set up HEAT. It also assumes the user has a basic understanding of databases and the Microsoft Windows operating system.
Document ConventionsThis document uses the following terms and syntax when explaining steps and procedures:
• Menu bar commands and the corresponding menu item are presented as File>>Print. This means you should select the word File on the menu bar, and then click Print in the drop-down menu.
• Dialog box, window, menu, and menu bar names begin with uppercase letters and are referenced in bold text when they are the result of an action. For example: “Click OK. The Select a Data Source dialog box appears.” Bold text may also be used if needed for emphasis on the first mention of that item.
• Command buttons you click on-screen are referenced in bold text or pictured as they actually appear.
Example: OK or
• Tips are presented in the margins to provide users with alternative procedures or with suggestions for using the feature.
• Notes are presented with a line above and below the paragraph; the word Note always appears in bold text. Notes provide information to supplement or emphasize information in the text.
• Important Notes are presented with a line above and below the paragraph; the word IMPORTANT is always capitalized and appears in bold text. Important notes provide information essential to the text.
User Guide
4 Introduction
• Cautions are presented with the word CAUTION in all capital letters and bold text. Cautions alert users that failure to read and use information provided may result in data loss.
• Warnings are presented with the word WARNING in all capital letters and bold text. Warnings alert users that failure to read and use information provided may result in functionality and/or data loss.
• Cross-references are presented with a book icon . Cross-references inform users that related or
additional information is available in another topic or manual.
HEAT ResourcesManuals
HEAT offers the following manuals to help you get the information you need:
• HEAT User Guide: This guide provides an introduction to the main modules and features of the entire HEAT suite of products.
• HEAT Administrator Guide: This guide provides an introduction to the main concepts and features of HEAT administration.
• HEAT Installation Guide: This guide provides installation and setup instructions for core HEAT modules. Core HEAT modules include Call Logging, First Level Support, Alert Monitor, BPAM, Auto Ticket Generator, Manager’s Tools, Answer Wizard, and Administrator.
• iHEAT Getting Started Guide: This guide provides installation, setup, and integration instructions for iHEAT.
• HEAT Self Service Getting Started Guide: This guide provides installation, setup, and integration instructions for HEAT Self Service.
• HEAT Asset Tracker Getting Started Guide: This guide provides installation, setup, and integration instructions for HEAT Asset Tracker.
HEAT
Introduction 5
• HEAT Plus Knowledge Getting Started Guide: This guide provides installation, setup, and integration instructions for HEAT Plus Knowledge.
• HEAT Plus Call Center Installation Guide: This guide provides installation and configuration instructions for HEAT Plus Call Center.
• HEAT Plus Remote Support Suite Getting Started Guide: This guide provides installation, setup, and integration instructions for HEAT Plus Remote Support Suite.
• HEAT WebCenter Getting Started Guide: This guide provides installation and configuration instructions for HEAT WebCenter.
IMPORTANT: Manuals applicable to the subject application are available in PDF format on the installation CD-ROM or NetUpdate download, or to maintenance customers on our support Web site at support.frontrange.com.
User Guide

6 Introduction
Online HelpFrontRange Solutions provides an extensive online Help system for most modules. This convenient feature allows you to access step-by-step instructions, overviews, checklists, tips, notes, definitions, dialog box descriptions, and reference information without having to look past your computer screen.
Two types of online Help are generally available. They are:
• Module Help: This Help describes how to use each module. Step-by-step instructions walk you through basic tasks while overviews, checklists, tutorials, and definitions explain general concepts and ideas.
• Dialog Box Help: This Help is context-sensitive and describes the purpose of a dialog box as well as the controls (text box, drop-down list, check box, and so on) found on the dialog box.
To Access Module HelpChoose commands from the Help menu located in the module’s main menu bar.
To Access Dialog Box HelpClick the Help button located in the active dialog box or press F1.
HEAT
Introduction 7
Contact UsOur Support Site
Do you have a technical question about HEAT or GoldMine products?
FrontRange Solutions Support is there to answer your questions and make sure you get the help you need. Visit:
support.frontrange.comSelect the appropriate section on the navigation bar for quick solutions to technical issues.
FrontRange Solutions Inc.U.S. Contact Information
Corporate Headquarters:FrontRange Solutions Inc.(a Delaware corporation)1150 Kelly Johnson Blvd.Colorado Springs, CO 80920TEL: 800.776.7889 and +1 719.531.5007
Worldwide Contact InformationVisit our Web site at www.frontrange.com to find contact information for FrontRange around the world:
• United States
• Asia Pacific
• Europe
• South Africa
User Guide

8 Introduction
HEAT
in this chapter...What is HEAT?HEAT Modules
C H A P T E R O N E
1HEAT Overview
What is HEAT?HEAT is a fully customizable suite of modules that work together to provide a complete service and support solution for your Support Center or internal support team. In all, HEAT comprises eleven modules ranging in functionality from issue tracking tools, to automation tools, to Web tools. HEAT provides solutions for call trackers, managers, and system administrators.
1-2 HEAT Overview
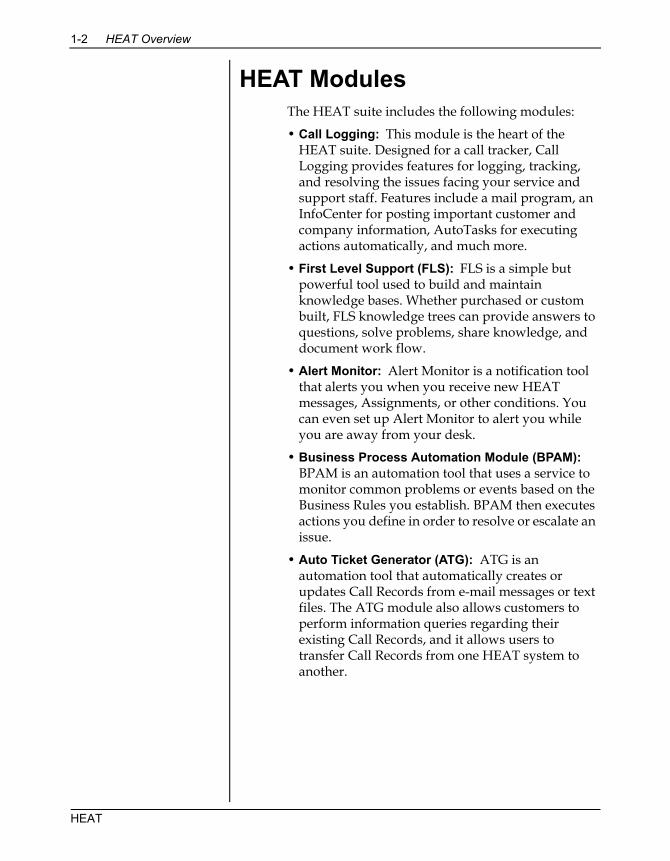
HEAT ModulesThe HEAT suite includes the following modules:
• Call Logging: This module is the heart of the HEAT suite. Designed for a call tracker, Call Logging provides features for logging, tracking, and resolving the issues facing your service and support staff. Features include a mail program, an InfoCenter for posting important customer and company information, AutoTasks for executing actions automatically, and much more.
• First Level Support (FLS): FLS is a simple but powerful tool used to build and maintain knowledge bases. Whether purchased or custom built, FLS knowledge trees can provide answers to questions, solve problems, share knowledge, and document work flow.
• Alert Monitor: Alert Monitor is a notification tool that alerts you when you receive new HEAT messages, Assignments, or other conditions. You can even set up Alert Monitor to alert you while you are away from your desk.
• Business Process Automation Module (BPAM): BPAM is an automation tool that uses a service to monitor common problems or events based on the Business Rules you establish. BPAM then executes actions you define in order to resolve or escalate an issue.
• Auto Ticket Generator (ATG): ATG is an automation tool that automatically creates or updates Call Records from e-mail messages or text files. The ATG module also allows customers to perform information queries regarding their existing Call Records, and it allows users to transfer Call Records from one HEAT system to another.
HEAT

HEAT Modules 1-3
• Answer Wizard: Answer Wizard is a management reporting tool providing the ability to generate detailed reports about the status and trends of industry issues. Answer Wizard is shipped with numerous predefined reports—each designed to monitor specific areas of your company. You can view, export, print, or save each report. For even greater flexibility, Answer Wizard provides the Favorite Reports folder which allows you to organize and run customized reports created outside Answer Wizard. All reports are organized in an intuitive tree structure so they are easy to locate and run.
• Manager’s Console: Manager’s Console is a management tool that monitors key information regarding the overall status of your Service and Support Center. In addition, you can use this information to implement proactive problem management, automate the delegation of problem resolution, and act on the solutions of problems previously encountered and resolved.
• Administrator: Administrator is the pivotal tool for controlling your HEAT system. Designed for a system administrator, this module controls all aspects of security, defaults, database maintenance, customization, integrations, and so on for the entire HEAT suite.
The HEAT suite also includes the following add-on modules:
• GoldMine: GoldMine can be integrated with HEAT so that you can view your GoldMine data through Call Logging.
• HEAT Asset Tracker: HEAT Asset Tracker can help reduce your IT budget through real-time asset inventory.
• HEAT Plus Call Center: HEAT Plus Call Center integrates HEAT with a powerful telephony application giving you a resource for even greater business efficiency.
User Guide
1-4 HEAT Overview
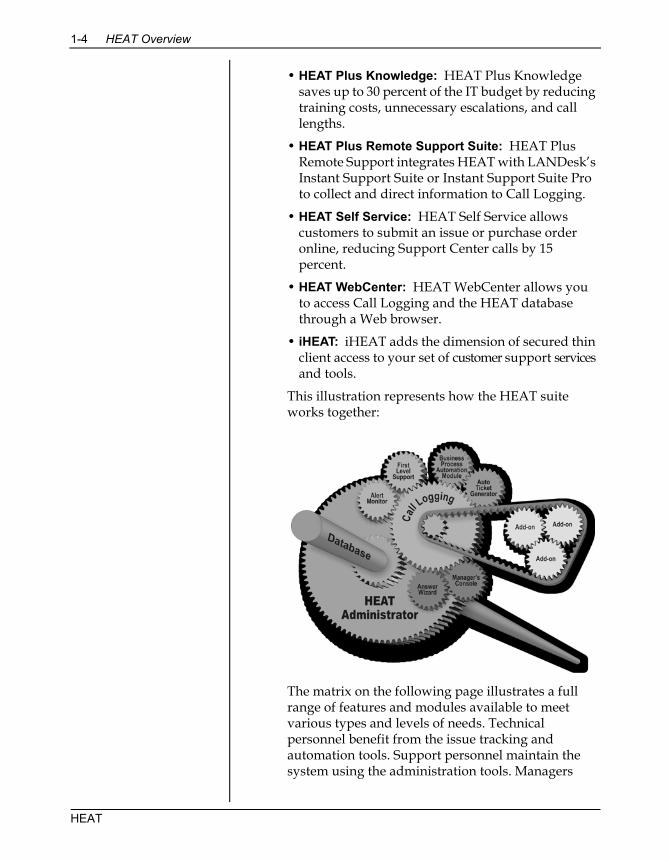
• HEAT Plus Knowledge: HEAT Plus Knowledge saves up to 30 percent of the IT budget by reducing training costs, unnecessary escalations, and call lengths.
• HEAT Plus Remote Support Suite: HEAT Plus Remote Support integrates HEAT with LANDesk’s Instant Support Suite or Instant Support Suite Pro to collect and direct information to Call Logging.
• HEAT Self Service: HEAT Self Service allows customers to submit an issue or purchase order online, reducing Support Center calls by 15 percent.
• HEAT WebCenter: HEAT WebCenter allows you to access Call Logging and the HEAT database through a Web browser.
• iHEAT: iHEAT adds the dimension of secured thin client access to your set of customer support services and tools.
This illustration represents how the HEAT suite works together:
The matrix on the following page illustrates a full range of features and modules available to meet various types and levels of needs. Technical personnel benefit from the issue tracking and automation tools. Support personnel maintain the system using the administration tools. Managers
HEAT
HEAT Modules 1-5
make use of the reports and monitoring modules available as manager’s tools. End users—either internal or external—can submit tickets or remotely administrate HEAT.
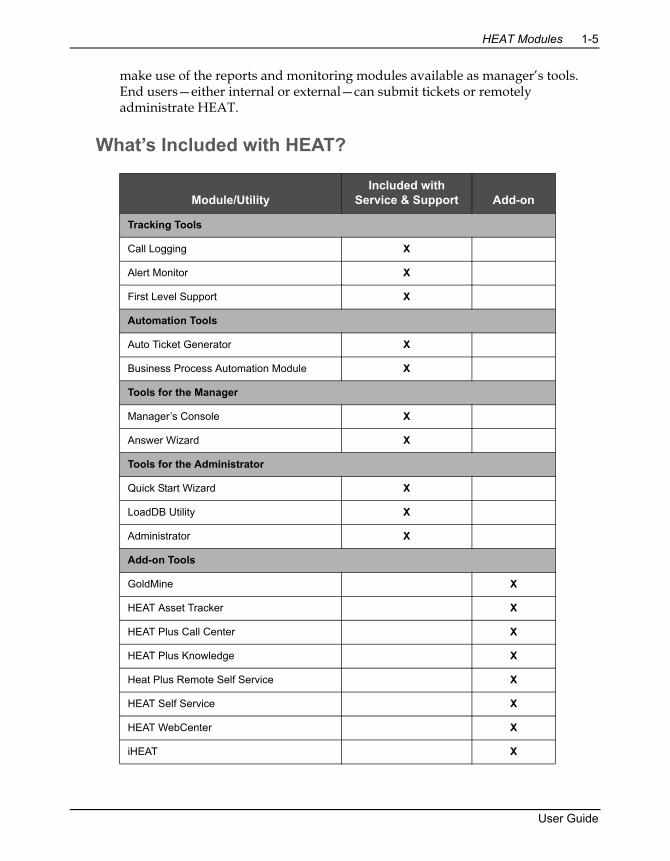
What’s Included with HEAT?
Module/UtilityIncluded with
Service & Support Add-on
Tracking Tools
Call Logging X
Alert Monitor X
First Level Support X
Automation Tools
Auto Ticket Generator X
Business Process Automation Module X
Tools for the Manager
Manager’s Console X
Answer Wizard X
Tools for the Administrator
Quick Start Wizard X
LoadDB Utility X
Administrator X
Add-on Tools
GoldMine X
HEAT Asset Tracker X
HEAT Plus Call Center X
HEAT Plus Knowledge X
Heat Plus Remote Self Service X
HEAT Self Service X
HEAT WebCenter X
iHEAT X
User Guide

1-6 HEAT Overview
HEAT
in this chapter...The DatabaseThe InterfaceHow the Database and the
Interface Work TogetherKey Tables in HEAT
C H A P T E R T W O
2How HEAT Works
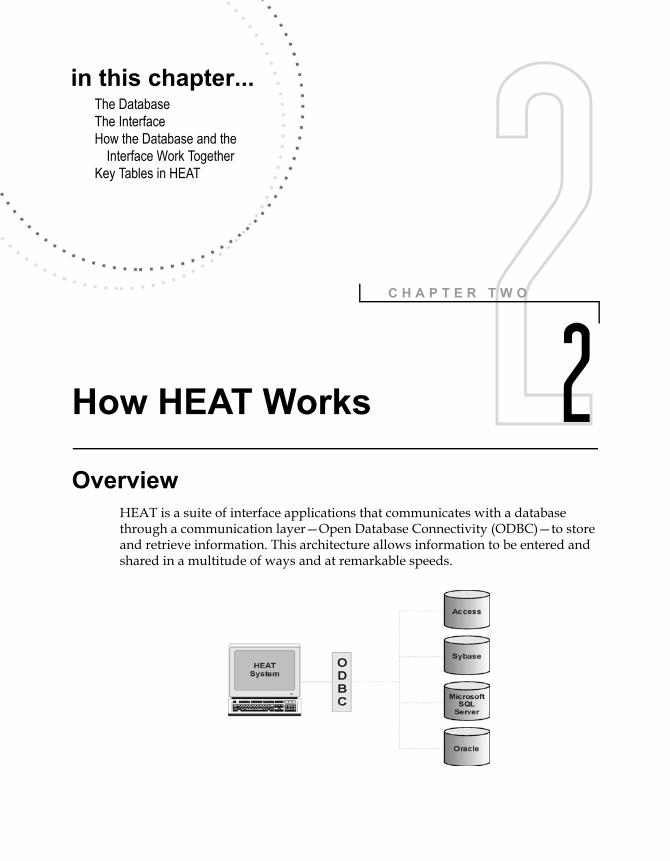
OverviewHEAT is a suite of interface applications that communicates with a database through a communication layer—Open Database Connectivity (ODBC)—to store and retrieve information. This architecture allows information to be entered and shared in a multitude of ways and at remarkable speeds.

2-2 How HEAT Works
ODBC is a common communication platform that functions with many database types. HEAT is certified to connect to many database formats.
The DatabaseThe HEAT database is the storage facility. It stores information specially organized for fast and efficient manipulation and retrieval. Your system stores this information in the form of tables and fields:
• Tables: A table is where records are stored within a database. Tables are made up of fields.
• Fields: Fields are specific parcels of information within tables.
Example: HEAT contains a table named CallLog. Fields within the table include CallID, CustID, CallType, Cause, Priority, CallStatus, and so on.
HEAT is shipped with several predefined tables and fields. Your system administrator can also create tables and fields meeting your specific needs.
HEAT
The Interface 2-3
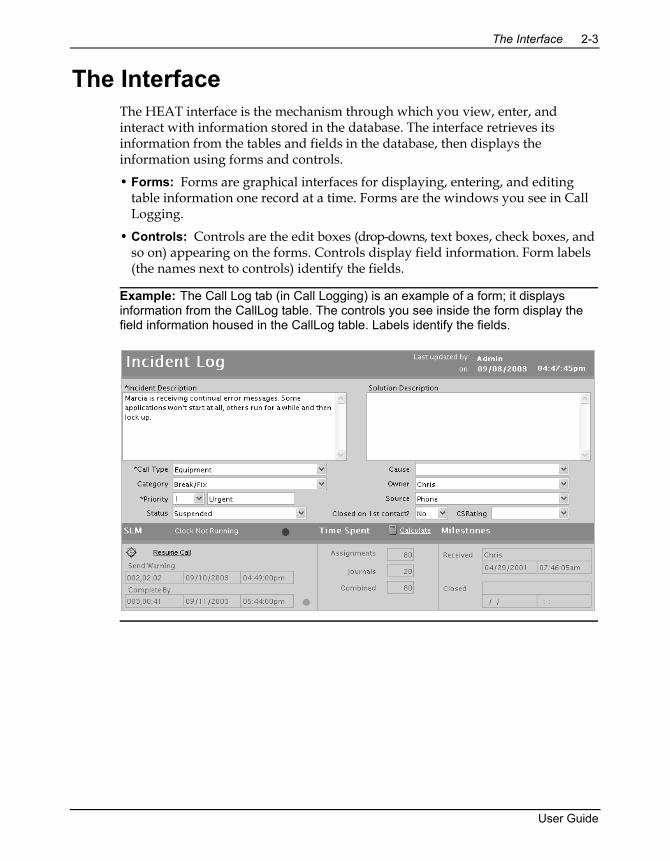
The InterfaceThe HEAT interface is the mechanism through which you view, enter, and interact with information stored in the database. The interface retrieves its information from the tables and fields in the database, then displays the information using forms and controls.
• Forms: Forms are graphical interfaces for displaying, entering, and editing table information one record at a time. Forms are the windows you see in Call Logging.
• Controls: Controls are the edit boxes (drop-downs, text boxes, check boxes, and so on) appearing on the forms. Controls display field information. Form labels (the names next to controls) identify the fields.
Example: The Call Log tab (in Call Logging) is an example of a form; it displays information from the CallLog table. The controls you see inside the form display the field information housed in the CallLog table. Labels identify the fields.
User Guide
2-4 How HEAT Works
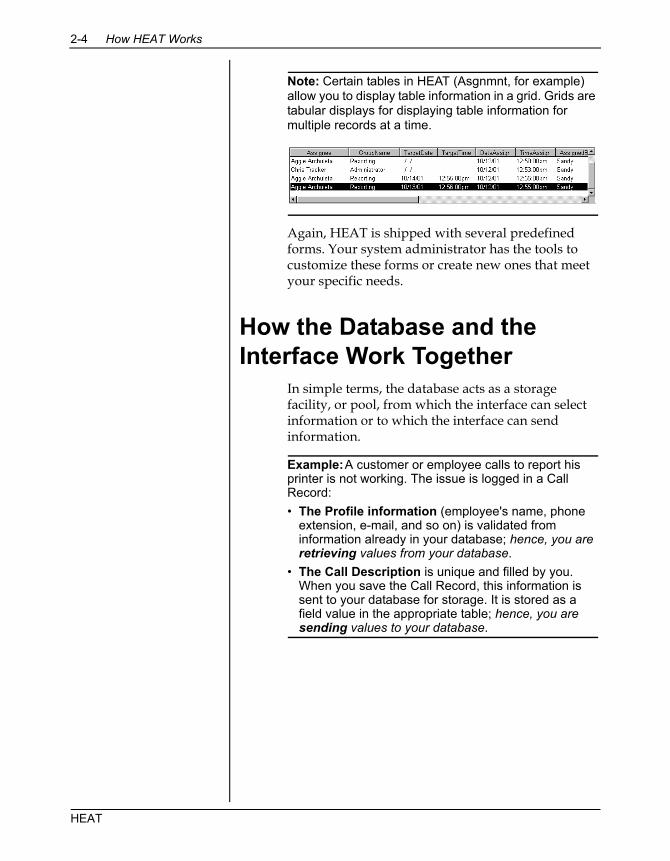
Note: Certain tables in HEAT (Asgnmnt, for example) allow you to display table information in a grid. Grids are tabular displays for displaying table information for multiple records at a time.
Again, HEAT is shipped with several predefined forms. Your system administrator has the tools to customize these forms or create new ones that meet your specific needs.
How the Database and the Interface Work Together
In simple terms, the database acts as a storage facility, or pool, from which the interface can select information or to which the interface can send information.
Example:A customer or employee calls to report his printer is not working. The issue is logged in a Call Record:• The Profile information (employee's name, phone
extension, e-mail, and so on) is validated from information already in your database; hence, you are retrieving values from your database.
• The Call Description is unique and filled by you. When you save the Call Record, this information is sent to your database for storage. It is stored as a field value in the appropriate table; hence, you are sending values to your database.
HEAT
Key Tables in HEAT 2-5
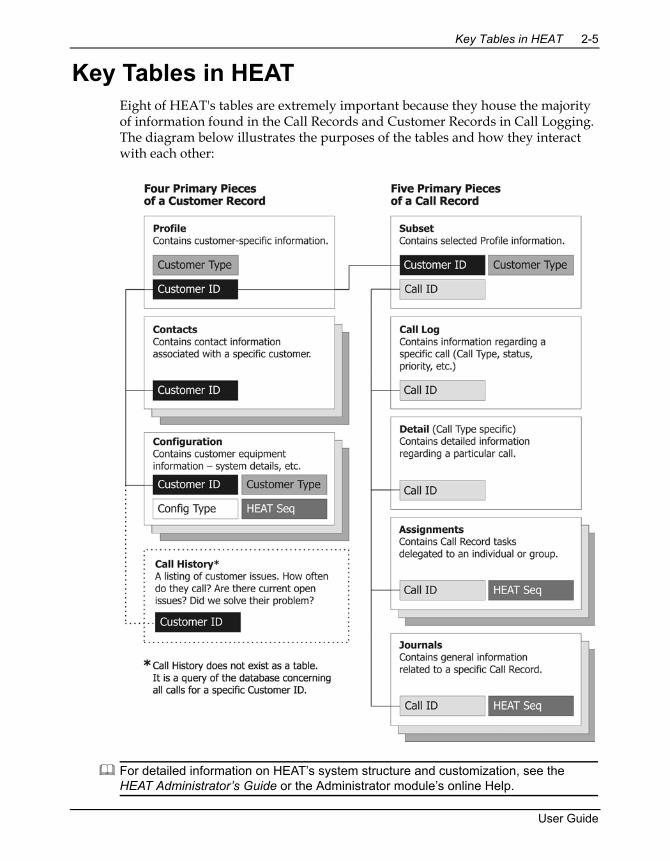
Key Tables in HEATEight of HEAT's tables are extremely important because they house the majority of information found in the Call Records and Customer Records in Call Logging. The diagram below illustrates the purposes of the tables and how they interact with each other:
For detailed information on HEAT’s system structure and customization, see the HEAT Administrator’s Guide or the Administrator module’s online Help.
User Guide

2-6 How HEAT Works
HEAT

S E C T I O N I I
Issue Tracking Tools


in this chapter...How Call Logging WorksUser Interface BasicsCall Records and Call GroupsCustomer Records and
Customer GroupsInfoCenterFinding InformationAutoTasks, SupportMail, and
ReportingTable MaintenanceUser Preferences
C H A P T E R T H R E E
3Call Logging
OverviewCall Logging is HEAT’s foundational module. It provides all the tools you need to effectively track and resolve your organization’s important issues. Features include an internal mail program, an InfoCenter for posting important customer and company information, AutoTasks for executing actions automatically, Call Groups and Customer Groups for managing your issues, extensive reporting features to help you keep abreast of your organization’s performance, and much more.
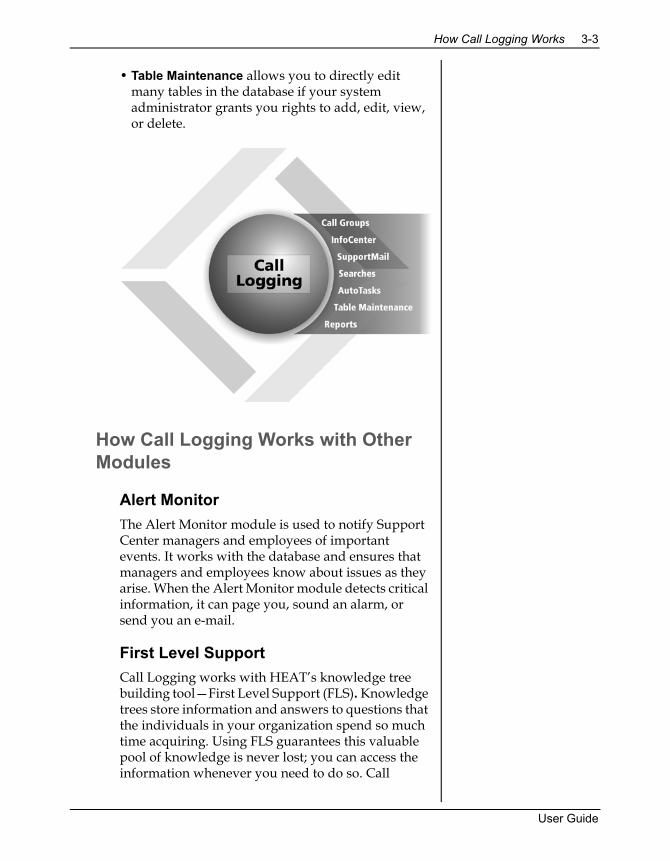
Call Logging is considered a HEAT Issue Tracking tool, but it is truly the centerpiece of HEAT. Think of Call Logging as the hub of a wheel with the other HEAT modules interacting from the spokes. These other modules increase the overall functionality of HEAT by providing a range of tools to assist you in running your organization.
3-2 Call Logging
How Call Logging WorksCall Logging tracks all of your organization’s calls and customers. By completing each field in a Call Record or Customer Record, you create a thorough account of every issue your organization receives. Using Call Logging’s tools helps you gather information and keep accurate records of your customers’ histories and service.
Call Logging comprises powerful functionality designed to streamline every aspect of your call- taking operation. Some of the most important features of Call Logging are featured below:
• Call Records and Customer Records track pertinent call and customer information. Call Groups and Customer Groups organize various types of calls and/or issues into orderly categories.
• The InfoCenter houses the Call Map, a repository for detailed information pertaining to the current call. By clicking the tab at the bottom of the InfoCenter, you can switch over to the HEATBoard where issues affecting the organization as a whole can be posted.
• Call Logging allows multiple ways of searching for data: Go to Call ID, the Find command, the profile search, Simple Searching, Quick Searching, and Boolean searches all help you quickly find the specific information for which you are looking.
• SupportMail is an electronic mail system unique to Call Logging. You can use it to send messages to anyone using the Call Logging module. External e-mail packages can also be accessed by SupportMail if they are VIM, MAPI, or POP/SMTP compliant.
• AutoTasks are a terrific way to automate routine Call Logging activities and combine several operations within one task. Several operations can be defined to sequentially create a record, modify a record, send an e-mail, activate an alarm, or so on.
• Call Logging makes reporting as efficient as possible. You can access the Answer Wizard module’s many reports or create your own. Use Manager’s Console to review your organization’s metrics.
HEAT
How Call Logging Works 3-3
• Table Maintenance allows you to directly edit many tables in the database if your system administrator grants you rights to add, edit, view, or delete.
How Call Logging Works with Other Modules
Alert MonitorThe Alert Monitor module is used to notify Support Center managers and employees of important events. It works with the database and ensures that managers and employees know about issues as they arise. When the Alert Monitor module detects critical information, it can page you, sound an alarm, or send you an e-mail.
First Level Support Call Logging works with HEAT’s knowledge tree building tool—First Level Support (FLS). Knowledge trees store information and answers to questions that the individuals in your organization spend so much time acquiring. Using FLS guarantees this valuable pool of knowledge is never lost; you can access the information whenever you need to do so. Call
User Guide
3-4 Call Logging
Logging also integrates with other third-party knowledge base software products.
Business Process Automation ModuleCall Logging integrates with the Business Process Automation Module (BPAM). Through this module you can define your own Business Rules or use the ones provided. For instance, you can set up a Business Rule to monitor your HEAT database for calls left unresolved after two hours and then have BPAM e-mail you the results.
Auto Ticket GeneratorWith Auto Ticket Generator (ATG), your customers can send e-mails or text files that automatically create or update Call Records. Providing this ability to customers means they don’t have to call with issues—they can simply e-mail their questions or updates.
Answer Wizard and Manager’s ConsoleAs we touched upon previously, you also have the powerful Answer Wizard reporting feature at your fingertips. Answer Wizard comes with many ready-to-run reports, and Managers Console provides a means for generating graphical representations of various Help Desk statistics. These two management tools help keep you fully aware of the many details involved in running your organization.
HEAT
How Call Logging Works 3-5
Key Terms and ConceptsYou should be familiar with the following key terms and concepts found in Call Logging:
• Call Record: A Call Record is the collective information about a specific call, such as caller, status, priority, and so on. A Call ID identifies the call and ties together all the components of a Call Record (details, assignments, journals, and so on). A Customer ID links the Call Record to a Customer Record. A Call Record comprises all the information displayed in the Profile Subset, CallLog, Detail, Assignment, and Journal forms.
• Customer Record: A Customer Record is the collective information about a specific customer, such as name, address, phone number, call history, and so on. A Customer ID identifies the customer, ties together all components of the Customer Record (profile information, call history, configuration data, and contact details), and links the Call Record to the associated Call Records. A Customer Record comprises all the information displayed in the Profile, Config, and Contacts forms.
• Call ID Number: The Call ID number is a unique system-generated sequential number that identifies each Call Record and ties together all components of the Call Record. Call ID numbers are never reissued, even if a call is deleted or abandoned. The Call ID number appears in the Call Status banner.
• Customer ID: A Customer ID (often called Cust ID) is a number or alphanumeric combination assigned by the system administrator or department manager to uniquely identify a customer. The Customer ID is unique for a particular Customer Type and is used to tie together all components of the Customer Record. The Customer ID also links the Customer Record to the associated Call Records.
User Guide
3-6 Call Logging
• Call Type: A Call Type helps classify various customer issues. For example, a customer may call with a billing issue, manual request, or sales inquiry.
• Customer Type: A Customer Type allows you to categorize the various kinds of customers that are supported by an organization. For example, a customer may be a person or an organization.
• Configuration Type: A Configuration Type allows you to categorize various types of equipment—or tasks related to equipment—specific to a customer. For example, a Configuration Type could register a product, handle contract information, or track training information.
• Assignment: In Call Logging you can create an Assignment to appoint responsibility for a task to another person in your organization. Assignments allow you to send an issue on to another employee who can acknowledge, resolve, or reassign the issue.
• Journal: Journals are intended to record notes about the Call Record. When a new Journal entry is created, the User ID, Date, and Time values are automatically posted. Displaying the Journal entries in chronological order gives you the complete picture of the sequence of work that occurred on the call.
• Profile: A customer profile displays information specific to the customer such as name, address, phone number, and so on.
• Profile Subset: The Profile Subset appears in the top pane of the Call Logging window. It displays selected information from the Profile table—for example, the customer name, address, phone number, and Customer ID. This information remains visible regardless of which tab you click in the main Call Logging window. The Profile Subset information is saved with the Call Record and does not reflect changes made after the Call Record is created.
HEAT
How Call Logging Works 3-7
• InfoCenter: The InfoCenter is located in Call Logging’s main window. The two features of the InfoCenter are the Call Map and the HEATBoard. The Call Map is an expandable and collapsible summary view of the current Call Record. The system administrator determines which fields appear in the Call Map. With the HEATBoard, users can post and read issues for other support desk personnel and receive system-wide information.
• Call Group: A Call Group is used to organize Call Records according to similarities or some other desirable criteria. For example, you can create a Call Group to open all Call Records created yesterday. Creating a group allows you to search for records very quickly. You can also run AutoTasks and reports against groups. The Work Group is a special Call Group containing all of the calls you have created or modified in the current HEAT session.
• Customer Group: A Customer Group allows you to “group” Customer Records according to similarities or some other desirable criteria. For example, you can create a Customer Group to open all Customer Records for those living in Colorado Springs. Creating a group allows you to search for records very quickly. You can also run AutoTasks and reports against groups.
• Hot Lists: A Hot List is a special type of Call Group. While typical Call Groups have similarities such as Call Type or Call Status, a Hot List is a collection of unrelated calls that you manually add. You can include any Call Type or number of calls you wish.
A personal Hot List called “My Hot List” is already set up on your system. All you need to do is add calls to it. You can also create new Hot Lists for personal use or for viewing by specific teams or the global audience.
User Guide
3-8 Call Logging
• AutoTasks: AutoTasks are a repeatable series of tasks. You may often send e-mail, page, and run reports. With AutoTasks, you can define the actions you need to take, combine them in a Task, and run the Task from a button on the toolbar. AutoTasks follow any set of logical Call Logging instructions.
• Validated Fields: When a field is validated, you can select information from a dialog box containing a list of values. This enables you to access information directly from the database tables and helps you avoid inaccurate or misspelled information. If the information you want is not displayed, in some cases you can type the appropriate information into the field.
Note: These concepts are discussed in detail later in this chapter.
HEAT
User Interface Basics 3-9
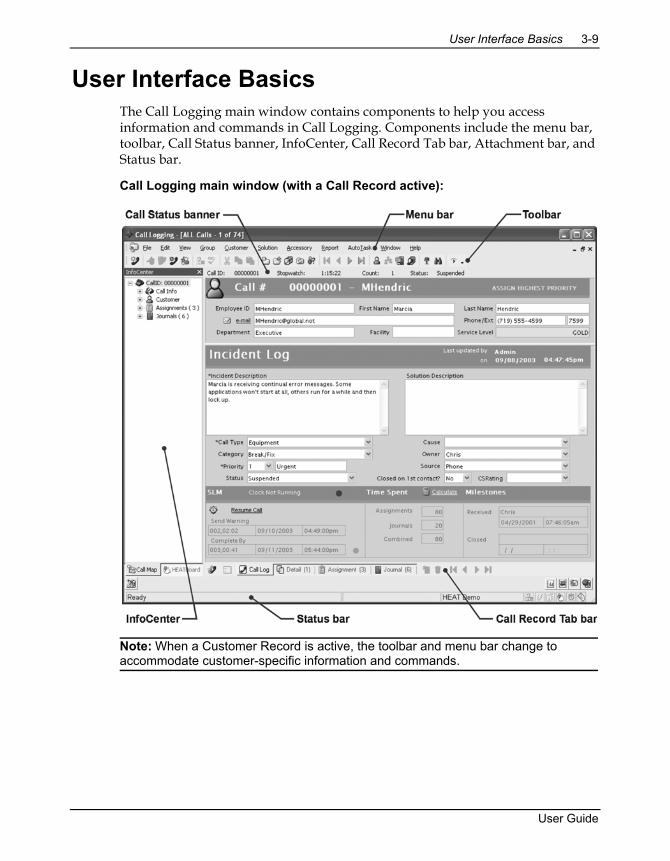
User Interface BasicsThe Call Logging main window contains components to help you access information and commands in Call Logging. Components include the menu bar, toolbar, Call Status banner, InfoCenter, Call Record Tab bar, Attachment bar, and Status bar.
Call Logging main window (with a Call Record active):
Note: When a Customer Record is active, the toolbar and menu bar change to accommodate customer-specific information and commands.
User Guide
3-10 Call Logging
Menu BarThe dockable menu bar provides access to Call Logging functions. Menus include:
• File: Accesses commands for manipulating Call Records such as saving, locking, printing, viewing attachments, and so on.
• Edit: Accesses commands for manipulating record data as well as commands for customizing your user preferences, toolbars, field validations, and so on.
• View: Accesses commands for displaying the different Call Record forms, components of the Call Logging window, SupportMail, alarms, and Activity Logs.
• Group: Accesses commands for finding Call Records and managing Call Groups.
• Customer: Accesses the four Customer Record forms for the selected customer as well as Profile attachments and Simple Search options.
• Solution: Provides additional search methods and launches the loaded knowledge base.
• Accessory: Accesses commands for table maintenance, the HEATBoard, asset configuration, e-mail functions, and so on.
• Report: Accesses commands for managing reports.
• AutoTask: Accesses commands for managing AutoTasks.
• Window: Accesses display options for information in the Call Logging window.
• Help: Accesses online Help, a link to the FrontRange Solutions Home Page, and information about the application.
Note: When a Customer Record is active in the Call Logging main window, the toolbar and menu bar change to accommodate customer-specific commands (for example, the Group menu accommodates Customer Groups, and the AutoTask menu accommodates customer AutoTasks).
HEAT
User Interface Basics 3-11
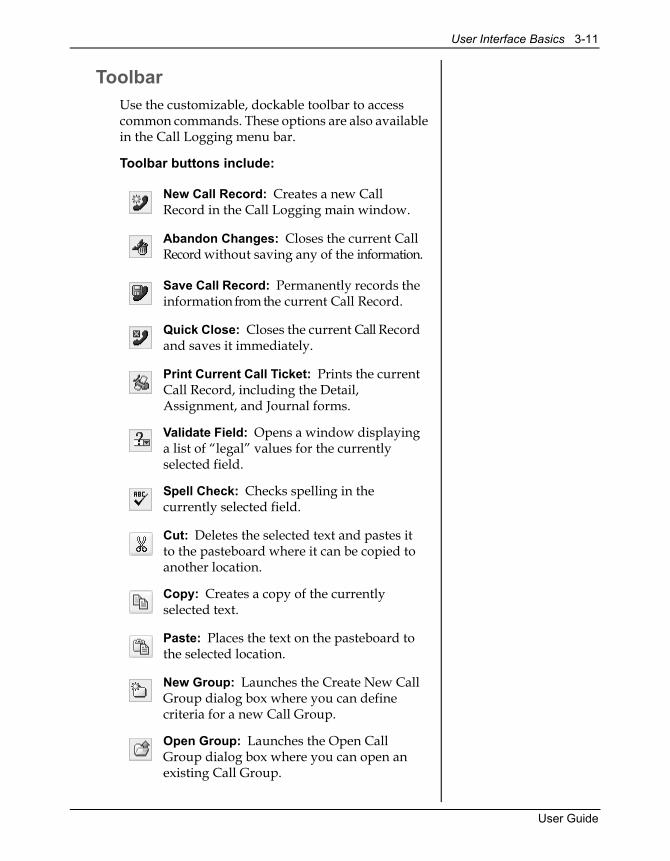
ToolbarUse the customizable, dockable toolbar to access common commands. These options are also available in the Call Logging menu bar.
Toolbar buttons include:
New Call Record: Creates a new Call Record in the Call Logging main window.
Abandon Changes: Closes the current Call Record without saving any of the information.
Save Call Record: Permanently records the information from the current Call Record.
Quick Close: Closes the current Call Record and saves it immediately.
Print Current Call Ticket: Prints the current Call Record, including the Detail, Assignment, and Journal forms.
Validate Field: Opens a window displaying a list of “legal” values for the currently selected field.
Spell Check: Checks spelling in the currently selected field.
Cut: Deletes the selected text and pastes it to the pasteboard where it can be copied to another location.
Copy: Creates a copy of the currently selected text.
Paste: Places the text on the pasteboard to the selected location.
New Group: Launches the Create New Call Group dialog box where you can define criteria for a new Call Group.
Open Group: Launches the Open Call Group dialog box where you can open an existing Call Group.
User Guide
3-12 Call Logging
Note: Because your toolbar is customizable, you may have different buttons.
Call Status BannerThe banner area of the main window displays important information about the Call Record currently open in Call Logging, including:
• Call ID: A unique reference number for the current Call Record. It is automatically generated by HEAT and displayed on the left end of the banner area.
• Stopwatch: A tool designed to track the time that elapses from opening to closing a Call Record.
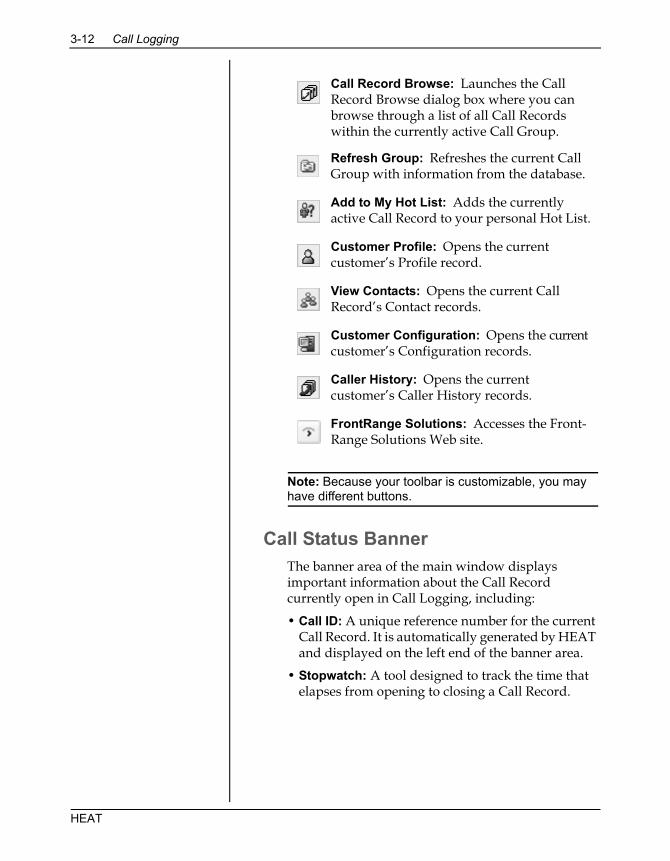
Call Record Browse: Launches the Call Record Browse dialog box where you can browse through a list of all Call Records within the currently active Call Group.
Refresh Group: Refreshes the current Call Group with information from the database.
Add to My Hot List: Adds the currently active Call Record to your personal Hot List.
Customer Profile: Opens the currentcustomer’s Profile record.
View Contacts: Opens the current Call Record’s Contact records.
Customer Configuration: Opens the current customer’s Configuration records.
Caller History: Opens the current customer’s Caller History records.
FrontRange Solutions: Accesses the Front-Range Solutions Web site.
HEAT
User Interface Basics 3-13
• Call Counter: Keeps track of events associated with the active Call Record. For example, using the Call Counter, you can follow how many incoming calls relate to the issue documented in the Call Record. To change the Call Counter, use the plus (+) and minus (-) keyboard keys.
• Status: Displays whether the call is open, closed, reopened, pending, and so on.
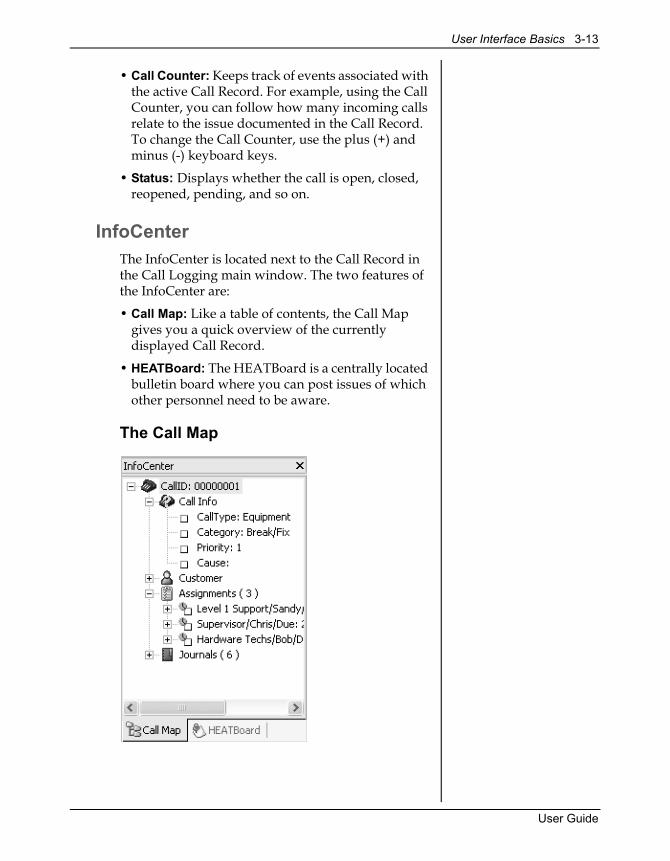
InfoCenterThe InfoCenter is located next to the Call Record in the Call Logging main window. The two features of the InfoCenter are:
• Call Map: Like a table of contents, the Call Map gives you a quick overview of the currently displayed Call Record.
• HEATBoard: The HEATBoard is a centrally located bulletin board where you can post issues of which other personnel need to be aware.
The Call Map
User Guide
3-14 Call Logging
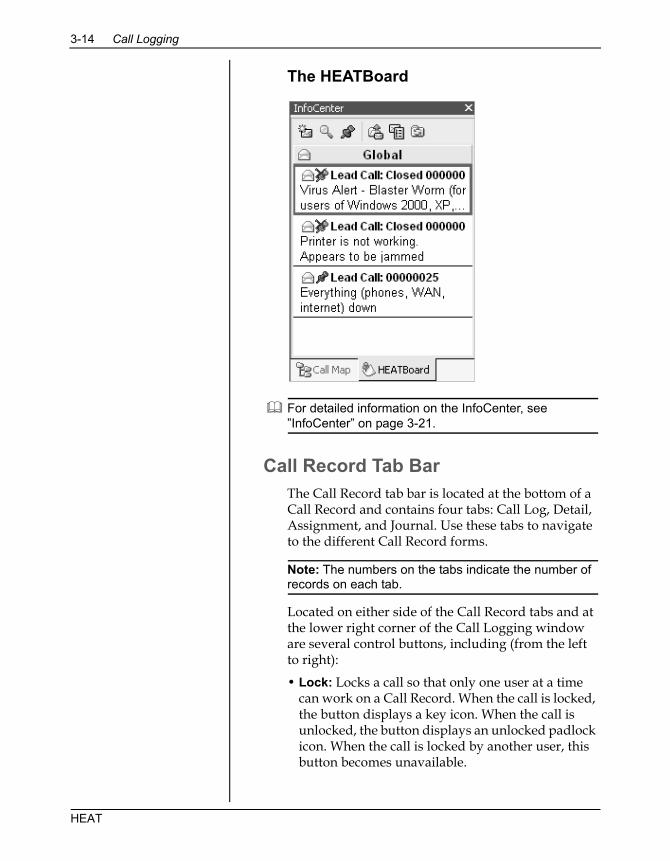
The HEATBoard
For detailed information on the InfoCenter, see ”InfoCenter” on page 3-21.
Call Record Tab BarThe Call Record tab bar is located at the bottom of a Call Record and contains four tabs: Call Log, Detail, Assignment, and Journal. Use these tabs to navigate to the different Call Record forms.
Note: The numbers on the tabs indicate the number of records on each tab.
Located on either side of the Call Record tabs and at the lower right corner of the Call Logging window are several control buttons, including (from the left to right):
• Lock: Locks a call so that only one user at a time can work on a Call Record. When the call is locked, the button displays a key icon. When the call is unlocked, the button displays an unlocked padlock icon. When the call is locked by another user, this button becomes unavailable.
HEAT
User Interface Basics 3-15
• Grid/Form View: Lets you switch from an Assignment or Journal form view to a grid view of all Assignments or Journal entries.
• New Entry: Opens a new Assignment or Journal form when you are on the Assignment or Journal form.
• Abandon Record: Becomes available when you click the New Entry button. You may abandon your new entry, and the Assignment or Journal entry defaults to the last Assignment or Journal entry.
• Arrow keys: Let you scroll through sequential Assignments and Journal records.
Attachment BarThe Attachment Bar is located at the bottom of the Call Logging window and displays attachments as well as the following buttons (from left to right):
• Display Attachment Bar Menu: Click this button to add, edit, or remove an attachment.
• Display Activity Log: Click this button to display the activity log for the current Call Record.
• Display Call Transfer Log: Click this button to display the transfer log for the current Call Record.
• Display Mail Attachments: Click this button to receive the Mail Attachments dialog box where you can view details of the mail attachments associated with the current Call Record.
• Display Global Attachments: Click this button to receive the Global Attachments dialog box where you can view, add, edit, or remove global attachments.
User Guide
3-16 Call Logging
Status BarThe status bar is located at the bottom of the Call Logging window and displays system prompt messages associated with the selected data field, the current data source, and the following buttons (from left to right):
• Validate Field: This button is available if your cursor is in a validated field. Double-click it to access a list of values.
• Required Field: When this button is available it indicates that your cursor is in a required field.
• HEAT Board: This button becomes available when a new HEATBoard Issue is posted. Double-click it to access the HEATBoard in the InfoCenter.
• Alarms: Double-click this button to access the Alarms dialog box where you can set up alarm parameters for any event of which you might need reminding. To remind you of an event, the alarm button turns bright yellow if you set it up to do so by selecting Edit>>User Preferences>> SupportMail.
• SupportMail: This button becomes available if you have SupportMail waiting. Double-click it to access the SupportMail window.
HEAT
Call Records and Call Groups 3-17
Call Records and Call GroupsA Call Record holds all of the information pertaining to any one call and features discrete areas for typing in specific kinds of information. Effective organization of information within the Call Record guarantees fast assimilation of that information at a later time.
A Call Record is made up of five records (displayed as forms or tabs):
• Subset: The Profile Subset form appears at the top of each Call Record and displays basic information about each customer.
• Call Log: The Call Log tab displays basic facts about the call including Call Type, status, owner, description, solution information, and so on.
• Detail: The Detail tab displays additional information about the call, pertinent to the selected Call Type. For example, if you select Software as the Call Type, a Detail form containing fields specific to the Software Call Type is available.
Note: Call Logging comes pre-loaded with a variety of Call Types and their associated Detail forms. Alternately, the HEAT administrator can create Detail forms for Call Types not already linked to a Detail form. If the administrator wanted to suppress a predefined Detail form, s/he would have to disable it. Because it is customizable, the Detail forms you can access in your system may look different than the example provided.
• Assignment: The Assignment tab displays information about the call’s work. The assignment status updates as assignments are acknowledged and then resolved. You can create multiple assignments for each Call Record.
• Journal: The Journal tab displays notes and correspondence about the call. You can have multiple journal entries for each Call Record.
User Guide
3-18 Call Logging
Call GroupsCall Groups allow you to “group” or organize Call Records according to similarities or some other desirable criteria. For example, you can create a Call Group to cluster all open Call Records.
Creating a group allows you to search for records very quickly. You can also run AutoTasks and reports against groups. Using them this way provides you with the opportunity to:
• Schedule your work to make sure it gets completed on time.
• Organize your work by priority to make sure the most important tasks get done first.
• Track your work according to various criteria.
• Alert you to new calls, calls from important customers, or return calls.
Note: The Demo database contains several predefined Call Groups (for example, “All Calls” contains all of the open calls in the database). You can use these Call Groups, modify them, or create your own.
Creating Call GroupsTo define the criteria for a Call Group, use one of the following:
• Simple Search: One expression (for example, all customers living in Colorado Springs; expression is City = Colorado Springs).
• Boolean Search: Multiple expressions (for example, all “Gold” customers living in Colorado Springs; expressions are City = Colorado Springs AND SLA = Gold)
Note: The Group Menu is the tool you use to manage your Call Groups. Using the Group menu, you can open, create, edit, refresh, and save Boolean Call Groups and run Simple Searches.
HEAT
Call Records and Call Groups 3-19
Work GroupsThe Work Group is a special group that contains all Call Records you created, modified, or opened during your current working session. Use the Work Group for quick access to your current work session’s Call Records.
Hot ListsThe Hot List is a special group that contains calls manually grouped together that may not have any similarities. You can add any number or type of calls you wish. Hot Lists can be created for personal or global viewing.
Selecting an AudienceGroups are saved to a particular audience of users. These audiences are also used in conjunction with AutoTasks and Reports in Call Logging.
When you select an audience, the window displays all of the Call Groups and Hot Lists available to that audience. The symbol next to the group name indicates the view defined for the group:
Personal View: Available only to you.
Team View: Available to a specific team.
Global View: Available for global viewing.
User Guide
3-20 Call Logging
Customer Records and Customer Groups
A Customer Record is a complete record of the customer information you have on file.
A Customer Record is made up of four records:
• Profile: Profile Records contain background information about your customers, including the company name, contact name, phone number, and address.
• Contacts: Contact Records contain a list of contacts (because several people from any one company can call in) associated with your customer.
• Configuration: Configuration Records contain information about the equipment and software each customer uses.
• Call History: Call History displays a list of the Help Desk calls your customer has made.
You can display the Customer Record in the Call Logging main window by selecting Customer>> Profile from the menu bar. Access the forms for Configuration, Call History, and Contacts by selecting the appropriate tab just below the Customer Record. Call Logging can display them in form view or in grid view.
Customer GroupsCustomer Groups allow you to “group” Customer Records according to similarities or some other desirable criteria. For example, you can create a Customer Group to cluster all Customer Records for those living in Colorado Springs.
Creating a group allows you to search for records very quickly. You can also run AutoTasks against groups.
Note: The Demo database contains several predefined Customer Groups. You can use these Customer Groups, modify them, or create your own.
HEAT
InfoCenter 3-21
Creating Customer GroupsYou define the criteria for a Customer Group using one of the following:
• Simple Search: One expression (for example, all customers living in Colorado Springs; expression is City = Colorado Springs).
• Boolean Search: Multiple expressions (for example, all “Gold” customers living in Colorado Springs; expressions are City = Colorado Springs AND SLA = Gold).
Note: The Group Menu is the tool you use to manage your Customer Groups. Using the Group menu, you can open, create, edit, refresh, and save Boolean Customer Groups and run Simple Searches.
InfoCenterThe InfoCenter holds the HEATBoard and the Call Map. The InfoCenter is located in the main Call Logging window and can be displayed or hidden.
HEATBoardThe HEATBoard is a centrally located bulletin board where you can post issues of which other personnel need to be aware. This could include one issue affecting many customers (such as a printer malfunction or power failure) or an important issue to which all members of a team need to be alerted (such as a new application patch release).
With HEATBoard, you can link Call Records pertaining to an issue so all those calls are managed as a group with one call designated as the Lead Call. All new information, new actions, or final resolutions for the issue are input to the Lead Call. After an issue is resolved, you can close all the Call Records linked to the issue automatically in one step with the AutoClose feature. When the issue is closed, the resolution of the HEATBoard issue is automatically posted to all of the other Call Records linked to the issue.
User Guide
3-22 Call Logging
Note: When you automatically close HEATBoard issues, only the solution information is included in the linked calls.
Access HEATBoard features using the toolbar along the top of the board, or select Accessory>> HEATBoard to access features through the Call Logging menu bar.
Call MapLike a table of contents, the Call Map gives you a quick overview of the currently displayed Call Record. As you expand and collapse the tree in the Call Map, the branches of the map display icons for each component. You can click on these icons to directly link to the related components of the call.
You can set up the Call Map to display key information or situations requiring attention such as past due dates. In addition, the number of Journal entries, Assignments connected to this Call Record, and attachments can be set up to display beside the appropriate node. These settings are activated by the HEAT administrator.
Access the Call Map by clicking the Call Map tab in the InfoCenter.
Note: The information displayed on the Call Map is governed by the security rights set by the HEAT administrator for each individual.
HEAT

Finding Information 3-23
Finding InformationYou can perform several types of searches to access information from the HEAT database. Searches are used to create Call Groups and Customer Groups (these are temporary groups based upon the selected criteria), locate specific customer information, and search the knowledge base.
Several other features are included with HEAT to help you locate the information you need. You may perform a search in the following ways:
• Browse through a list of Call Records.
• Retrieve a Call Record by its Call ID number.
• Use a Quick Search.
• Search for records with a Simple Search (creates a temporary group).
• Search for records with a Boolean search (creates a saved group).
BrowsingYou can browse through a list of Call Records to locate a specific Call Record in a Call Group. To browse through the group, go to the Group menu and select Call Record Browse.
Call IDYou can retrieve any Call Record by its Call ID number. Go to the File menu and select Go to Call ID.
User Guide
3-24 Call Logging
Simple SearchesSimple Searches search based on the information in one field and include only one expression. For example, you can run a Simple Search to search for all Open Call Records. Select Group>>Simple Search and choose from the list of values in the shortcut menu. Should you want to narrow your search further, you can Quick Search by making your selection and clicking the Browse button. In the Quick Search area, type a letter or number, and the search retrieves all of the values beginning with your selection.
Note: A Simple Search actually creates a temporary Group (Call Group or Customer Group).
Boolean SearchesBoolean searching is a method developed primarily for a computer-generated search of a database. This type of search also locates information based on specific criteria. The criteria is defined in terms of an expression—a statement used in programming logic. An expression employs values and/or symbols to find the data meeting the conditions you set up in the expression. In a Boolean search, these expressions can compare, filter, or define relationships using the logical operators AND, OR, NOR, NOT, and more.
Note: When you are creating a Boolean expression, you may need to use @Functions to capture constantly changing variables. Doing so greatly simplifies Group creation by eliminating the need to constantly redefine new Groups.
HEAT
AutoTasks 3-25
AutoTasksAutoTasks are another HEAT feature that expedite your work flow. An AutoTask is a macro program in HEAT that lets you link a series of actions to create one task you can execute automatically. Use AutoTasks to complete a series of repetitive tasks such as logging a request for setting up a new employee’s workstation, or for shorter tasks such as posting noting a wrong number.
AutoTask MenuThe AutoTask menu is the tool you use to manage your AutoTasks. Using the AutoTask menu, you can:
• Create, edit, copy, delete, and run AutoTasks
• Organize AutoTasks into folders and Views
• Add, edit, and delete actions
• Import and export AutoTasks
AutoTask ActionsWhen you create the AutoTask, you define the actions you need to accomplish. HEAT supplies numerous actions, including:
• Send a Message: Send a message to SupportMail or any VIM- or MAPI-compliant mail system.
• Run a Program: Launch a program automatically.
• Print Call Ticket Information: Print selected fields of the current Call Record instead of the entire Call Record.
• Create a Call Record: Set up a Call Record so that it fills in fields automatically. This is a quick way to handle repetitive, simple calls.
• Create an Assignment: Automatically create Assignments within Call Records.
User Guide
3-26 Call Logging
• Create a Journal Entry: Automatically create Journal entries within Call Records.
• Update a Call Record: Automatically update your Call Records.
HEAT provides several other actions. For a complete list of AutoTask actions, see Call Logging online Help.
Inserting Variables into AutoTask Actions
Several AutoTask dialog boxes contain an Insert button accessing an Insert shortcut menu. From this menu you can add variables and additional information into an AutoTask. The Insert options are:
• Insert Field: Adds fields with variable information.
• Insert Function: Inserts an @Function into the AutoTask.
• Insert File Name: Inserts a file name variable which is replaced with an actual file name when the AutoTask executes.
• Insert Temporary File Name: Inserts a temporary file name which is replaced with a permanent file name when the AutoTask executes.
• Insert All Assignments: Inserts all Assignments from the Call Record.
• Insert All Journals: Inserts all Journal entries from the Call Record.
• Insert Counter: Inserts a Counter into the AutoTask.
HEAT

SupportMail 3-27
SupportMailSupportMail is HEAT’s unique e-mail system. It can be used to send messages to anyone using the Call Logging module. SupportMail can also access external e-mail packages if they are VIM, MAPI, or POP/SMTP compliant. This makes sending messages to outside addresses efficient.
You can set up Alert Monitor to notify you each time you get a call. You can also share information with other Help Desk workers, using paging and SupportMail.
• Alert Monitor: You can tell HEAT when, where, and how to alert you and others to new calls or Assignments.
• Paging: You can page assignees who are not in-house to notify them of calls or Assignments.
• SupportMail: Exchange e-mail with others on internal or external mail systems. You can also send broadcast messages to everyone on your mail system.
SupportMail FeaturesSupportMail offers numerous electronic messaging features. With SupportMail you can:
• Receive e-mail messages (from other SupportMail users)
• Reply to e-mail messages
• Forward e-mail messages
• Compose and send e-mail messages
• Attach files to e-mail messages
• Attach Call Records to e-mail messages
• Forward unread e-mail messages
• Create Mail Groups
• Create Mail Folders
• Save e-mail messages
• Delete e-mail messages
User Guide
3-28 Call Logging
SupportMail InterfaceWhen you launch SupportMail, the SupportMail interface displays in the main Call Logging window.
AreasInformation is organized into a Folders area and a Contents area:
• Folders Area: This area displays your mail folders such as your Inbox, Outbox, and Drafts folders. You can also create your own mail folders to hold incoming mail by sender or by subject.
Note: If a MAPI-compliant e-mail package is installed on the system and the user has enabled it in User Preferences, an extra mail folder appears with the system’s name. For example, “Outlook.”
• Contents Area: This area displays a list of e-mail messages contained within the selected folder. E-mail messages can be viewed by double-clicking them in the list.
IconsIcons identify the e-mail messages:
• A closed envelope icon identifies an unopened message.
• An open envelope icon identifies an opened message.
• A telephone icon identifies a message with a Call Record attached.
Menu Bars and Toolbars• When SupportMail is launched, the Call Logging
menu bar changes to incorporate SupportMail commands. To launch SupportMail, select View>> SupportMail from Call Logging.
• The SupportMail toolbar also appears, providing shortcuts to commonly used SupportMail commands.
HEAT
Reporting 3-29
ReportingCrystal Reports and other report writing programs can produce reports about your organization and its customers. You can view a report on your desktop or print it. HEAT gives you two ways to produce reports:
• HEAT Answer Wizard: You can run Answer Wizard’s predefined reports.
• Crystal Reports: You can create your own reports using Crystal Reports and save them as Favorite reports.
Creating Report ShortcutsReport shortcuts allow you to predefine and reuse your reports. Defining a shortcut for a report makes it easier to run frequently used reports because you can reuse settings to access information from the database. You can list the reports that you create on the Call Logging Report menu.
You can also designate a default report to run on all Call Records or by Call Type.
To add, edit, delete, or copy a shortcut, from the Report menu select Run/Edit Report Shortcuts.
Running Call Ticket ReportsYou can create and format a report to automatically use information from the active Call Record. You can also customize the report so the default shortcut creates the same report for different Call Records or Call Types.
To set a default shortcut, from the Report>>Run/Edit Report Shortcuts menu select Defaults>>Set a Default Shortcut.
User Guide

3-30 Call Logging
Table MaintenanceThe database is at the core of HEAT. It comprises multiple relational tables. Use the Table Maintenance feature to add values to existing database tables either through planned Table Maintenance or “on the fly” while you are working within the Call Logging module.
All of the tables listed under Table Maintenance are Validation tables. These tables provide the values that populate the drop-down lists provided throughout Call Logging. By adding values through Table Maintenance, the user is provided with a longer list of possible choices.
Note: You cannot maintain all tables through Table Maintenance. The tables maintained this way are predominantly Validation tables.
Planned Table MaintenanceYou can perform table maintenance in two ways: planned changes to tables that build new values in the order of table relationships, or “on the fly” changes made from within a Call Record or another table when a desired value does not exist (for example, when you find that a validation value is not available while you are logging a call).
“On the Fly” Table MaintenanceAlthough planned table maintenance is recommended, you may also add values while logging a call.
Notes:• New tables are created in the Administrator module.
Only your system administrator can create a table.• As a quality control, it is often best that a system
administrator maintain the tables. However, with HEAT, the system administrator can grant rights and access to other users who may need to assist in the maintenance of tables.
• The user cannot edit any HEAT internal system tables for system integrity and security reasons.
HEAT

User Preferences 3-31
User PreferencesHEAT incorporates user preferences (that is, various settings controlling how the application looks and acts for each individual) so that users can customize settings only affecting themselves. User preferences are organized according to tabs.
User Preferences Tabs• Display Tab: Controls how users see certain
features in Call Logging. For example, check marks on active tabs, window size, form auto-sizing, and so on.
• Grid Settings Tab: Controls how Call History, Assignment, Journal, and configuration information is presented within grids.
• SupportMail Tab: Controls polling intervals and labels for SupportMail.
• MAPI/VIM Tab: Enables and controls HEAT’s interface with MAPI-compliant e-mail systems.
• POP/SMTP Tab: Enables and controls HEAT’s interface with POP/SMTP-compliant e-mail systems.
• Paths Tab: Defines paths to files or executables that interface with HEAT.
• Sounds Tab: Controls sounds for associated Call Logging features/functions.
• Prompts Tab: Controls auto-saving prompts for calls, Journals and Assignments, and the restore prompt for Call Groups.
• HEATBoard Tab: Controls the display for the HEATBoard.
• Call Map Tab: Controls the display for the Call Map.
• Location Tab: Provides an area where you can set time zone offset and default data source information.
Access User Preferences in Call Logging by selecting Edit>>User Preferences.
User Guide
3-32 Call Logging
Call Logging Wrap-upHaving read this chapter, you acquainted yourself with the core concepts needed to successfully use Call Logging. Those main points include:
• The basic concepts of how Call Logging works, its functionality with other HEAT modules, and key terminology
• Call Logging user interface basics—the main window, menu bar, toolbar and so on
• Call Records and Call Groups
• Customer Records and Customer Groups
• The InfoCenter, including HEATBoard and CallMap
• Finding information through Quick Search, Simple Search, Boolean Search, and so on
• Using AutoTasks
• Using SupportMail
• Reporting
• Performing Table Maintenance
• Establishing User Preferences
For more step-by-step instructions for implementing any of Call Logging’s features, please see Call Logging online Help.
HEAT
in this chapter...How Alert Monitor WorksUser Interface BasicsCall Group AlertsSystem Message AlertsWorking with Alert Monitor
C H A P T E R F O U R
4Alert Monitor
OverviewAs mentioned in the Call Logging chapter, Call Logging stores and retrieves information from the HEAT database. As one of the modules in the HEAT suite of products, Alert Monitor is used to notify Help Desk managers and employees of important events. It works with the database and with Call Logging to make sure managers and employees know about issues as they arise.
For example, sometimes calls need to be assigned to someone with expertise in a different area. Once the call is assigned to a technician through the Call Logging module, Alert Monitor can notify that person of the new Assignment by page, system alarm, or e-mail.
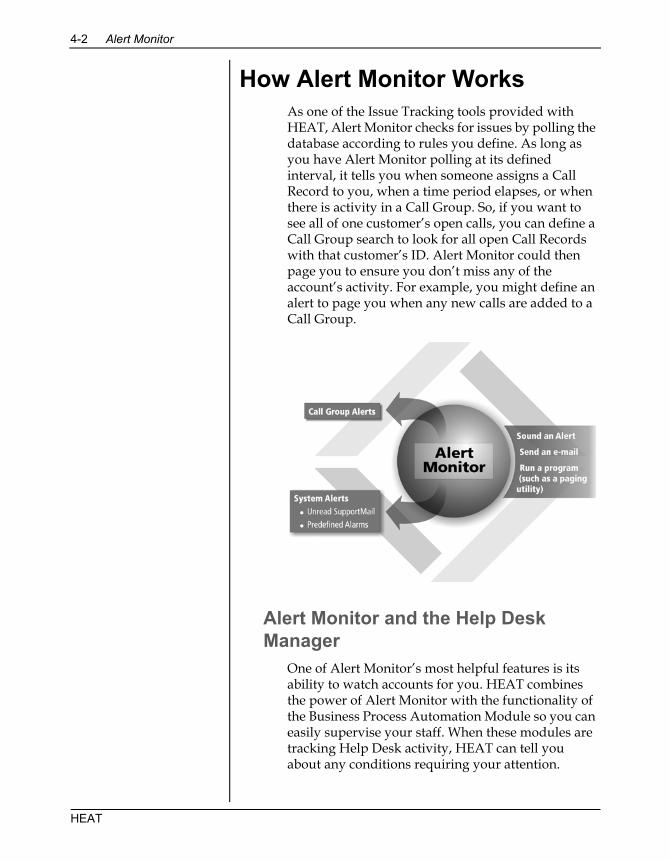
4-2 Alert Monitor
How Alert Monitor WorksAs one of the Issue Tracking tools provided with HEAT, Alert Monitor checks for issues by polling the database according to rules you define. As long as you have Alert Monitor polling at its defined interval, it tells you when someone assigns a Call Record to you, when a time period elapses, or when there is activity in a Call Group. So, if you want to see all of one customer’s open calls, you can define a Call Group search to look for all open Call Records with that customer’s ID. Alert Monitor could then page you to ensure you don’t miss any of the account’s activity. For example, you might define an alert to page you when any new calls are added to a Call Group.
Alert Monitor and the Help Desk Manager
One of Alert Monitor’s most helpful features is its ability to watch accounts for you. HEAT combines the power of Alert Monitor with the functionality of the Business Process Automation Module so you can easily supervise your staff. When these modules are tracking Help Desk activity, HEAT can tell you about any conditions requiring your attention.
HEAT
How Alert Monitor Works 4-3
For example:
• Are your customers getting the customer service they deserve? Do you have any customers who shouldn’t be satisfied with the level of customer service they received? Is it because outstanding Help Desk issues exist that you don’t know about?
• Are your employees meeting the expectations you have set for them? Are they making sure issues are resolved quickly and professionally?
Note: To check on the status of outstanding issues, you can also run Answer Wizard reports against the HEAT database.
Using the Alert Monitor ModuleTo use Alert Monitor to its fullest potential, you must think about how its abilities apply to your particular organization. Here are some decisions you must make before getting started:
• For which information do you want Alert Monitor to watch? Do you want to monitor by Call Groups to check on important customers? Are the correct Call Groups set up within the Call Logging module?
• Do you want Alert Monitor to monitor your new Assignments?
• What do you want Alert Monitor to do when it detects new information?
• How often do you want it to check for new information?
• How do you want it to notify you? Do you want it to page you if you are not at your desk, or do you want it to send you an e-mail?
After you understand how you want to use the module, you can set up individual Alert Definitions and Actions for each condition you want to monitor.
User Guide
4-4 Alert Monitor
This chapter covers some of Alert Monitor’s basic functionality. We’ll help you understand how often to poll the database, how to set up the actions to notify you of important events, and how to tell the module when you are away from your desk.
For detailed instructions on using this module, please refer to the HEAT online Help provided with your software.
User Interface BasicsThe Alert Monitor main window contains menus and commands for accessing Alert Monitor’s main functions.
You can access the following Alert Monitor menu items:
• File: Accesses commands for creating new Alert Monitor definitions. You can also modify existing Alert Monitor definitions from the File menu.
• Options: Accesses commands for launching Call Logging and setting User Preferences.
• Define: Accesses commands for defining Call Group Alerts, System Message Alerts, Call Group Alert Actions, and polling intervals.
• View: Accesses commands for viewing the toolbar, status bar, and Startup menu.
• Window: Accesses commands for arranging items in the Alert Monitor main window.
• Help: Accesses online Help.
HEAT
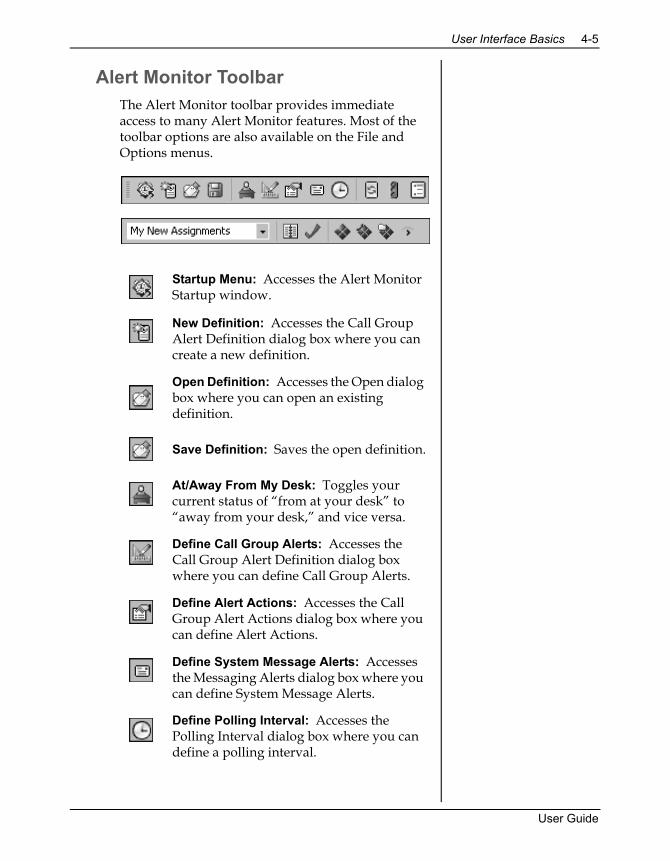
User Interface Basics 4-5
Alert Monitor ToolbarThe Alert Monitor toolbar provides immediate access to many Alert Monitor features. Most of the toolbar options are also available on the File and Options menus.
Startup Menu: Accesses the Alert Monitor Startup window.
New Definition: Accesses the Call Group Alert Definition dialog box where you can create a new definition.
Open Definition: Accesses the Open dialog box where you can open an existing definition.
Save Definition: Saves the open definition.
At/Away From My Desk: Toggles your current status of “from at your desk” to “away from your desk,” and vice versa.
Define Call Group Alerts: Accesses the Call Group Alert Definition dialog box where you can define Call Group Alerts.
Define Alert Actions: Accesses the Call Group Alert Actions dialog box where you can define Alert Actions.
Define System Message Alerts: Accesses the Messaging Alerts dialog box where you can define System Message Alerts.
Define Polling Interval: Accesses the Polling Interval dialog box where you can define a polling interval.
User Guide
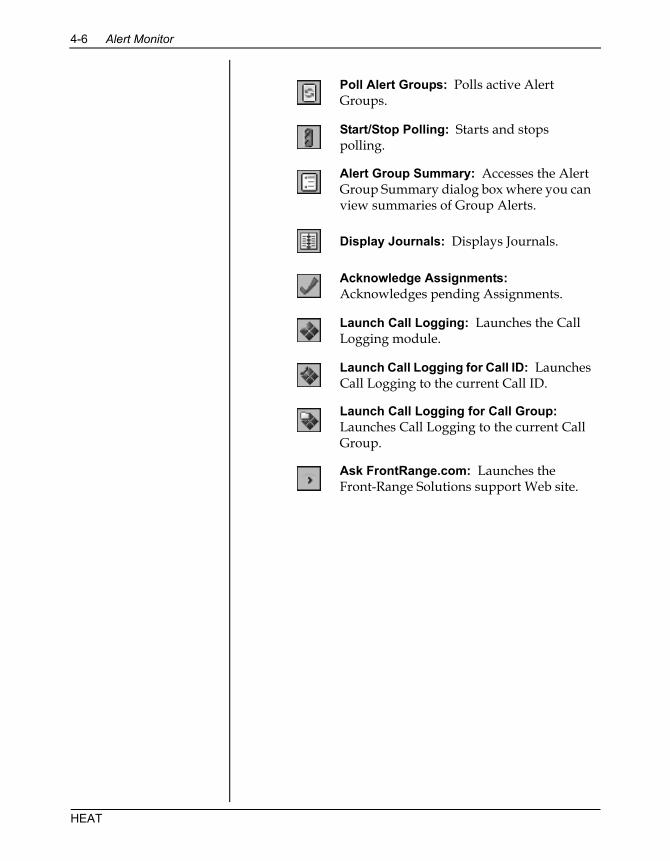
4-6 Alert Monitor
Poll Alert Groups: Polls active Alert Groups.
Start/Stop Polling: Starts and stops polling.
Alert Group Summary: Accesses the Alert Group Summary dialog box where you can view summaries of Group Alerts.
Display Journals: Displays Journals.
Acknowledge Assignments: Acknowledges pending Assignments.
Launch Call Logging: Launches the Call Logging module.
Launch Call Logging for Call ID: Launches Call Logging to the current Call ID.
Launch Call Logging for Call Group: Launches Call Logging to the current Call Group.
Ask FrontRange.com: Launches the Front-Range Solutions support Web site.
HEAT
Call Group Alerts 4-7
Call Group AlertsCall Group Alerts notify Help Desk employees when a selected event occurs within a particular Call Group. Call Group Alert Definitions allow you to control when you are alerted, where you are alerted, and how you are alerted.
For more information on Call Groups, see Chapter 3, "Call Logging."
There are two steps involved in creating a Call Group Alert Definition:
1. Create a Call Group Alert Definition to notify you when a defined event occurs in a selected Call Group.
2. Add a Call Group Alert Action to define what Alert Monitor does when it detects the selected event occurring in the Call Group.
To define a Call Group Alert, from the Alert Monitor menu bar select Define>>Call Group Alerts.
You can set the following conditions for generating an Alert:
• Any Calls are Found: Notifies you any time calls are found in the selected Call Groups.
• Any Calls are Added: Notifies you any time calls are added to the selected Call Groups.
• Any Calls are Removed: Notifies you any time calls are removed from the selected Call Groups.
User Guide
4-8 Alert Monitor
Adding Actions to Call Group Alert Definitions
Once you create a Call Group Alert Definition, the second step is to define what Alert Monitor does when it detects an event in the Call Group. You can set up Alert Monitor to perform the following actions:
• Sound an alert on a computer running Alert Monitor: You can set Alert Monitor to produce a system beep. You can also designate a .wav file to play when an Alert Monitor detects an event.
• Send an e-mail message: You can add an action to send an e-mail whether you are at or away from your desk.
• Run a program (such as a paging utility): You can navigate to an executable file to have Alert Monitor notify you by page.
Note: To have Alert Monitor page you, first you must define the paging command line in the User Preferences dialog box.
Editing Call Group Alert DefinitionsIf conditions change, you can edit the attributes of a definition. From the Call Group Alert Definition dialog box, select the Alert Monitor Definition you want to change and click Edit.
Deleting Alert Monitor Definitions from the List
You can also delete definitions. From the Call Group Alert Definition dialog box select the Alert Monitor Definition you want to delete and click Delete.
HEAT
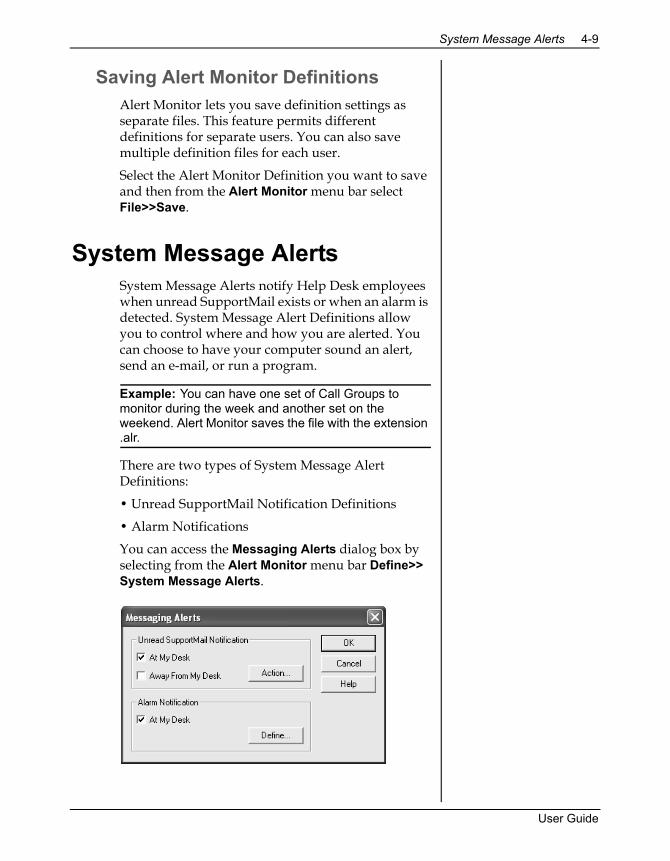
System Message Alerts 4-9
Saving Alert Monitor DefinitionsAlert Monitor lets you save definition settings as separate files. This feature permits different definitions for separate users. You can also save multiple definition files for each user.
Select the Alert Monitor Definition you want to save and then from the Alert Monitor menu bar select File>>Save.
System Message AlertsSystem Message Alerts notify Help Desk employees when unread SupportMail exists or when an alarm is detected. System Message Alert Definitions allow you to control where and how you are alerted. You can choose to have your computer sound an alert, send an e-mail, or run a program.
Example: You can have one set of Call Groups to monitor during the week and another set on the weekend. Alert Monitor saves the file with the extension .alr.
There are two types of System Message Alert Definitions:
• Unread SupportMail Notification Definitions
• Alarm Notifications
You can access the Messaging Alerts dialog box by selecting from the Alert Monitor menu bar Define>> System Message Alerts.
User Guide
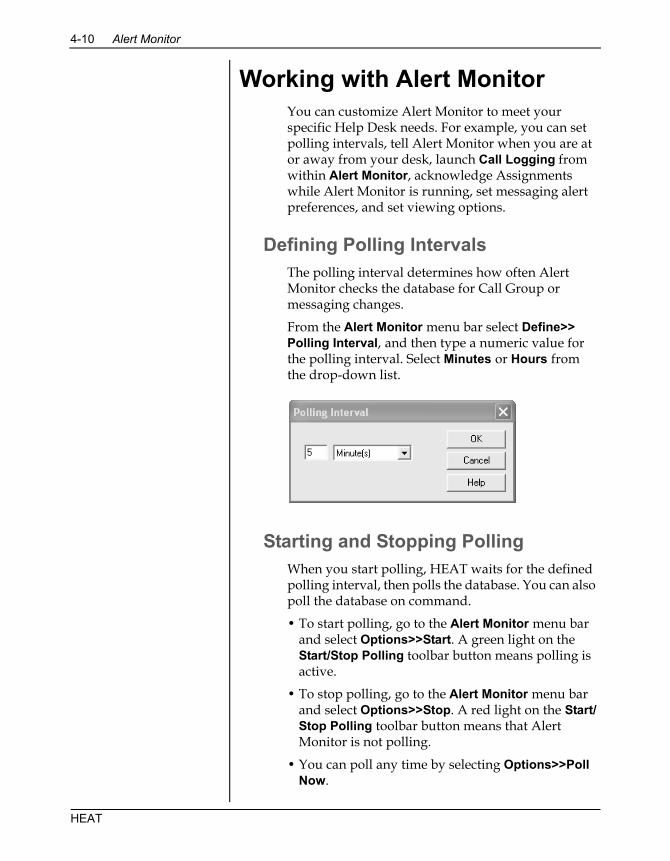
4-10 Alert Monitor
Working with Alert MonitorYou can customize Alert Monitor to meet your specific Help Desk needs. For example, you can set polling intervals, tell Alert Monitor when you are at or away from your desk, launch Call Logging from within Alert Monitor, acknowledge Assignments while Alert Monitor is running, set messaging alert preferences, and set viewing options.
Defining Polling IntervalsThe polling interval determines how often Alert Monitor checks the database for Call Group or messaging changes.
From the Alert Monitor menu bar select Define>> Polling Interval, and then type a numeric value for the polling interval. Select Minutes or Hours from the drop-down list.
Starting and Stopping PollingWhen you start polling, HEAT waits for the defined polling interval, then polls the database. You can also poll the database on command.
• To start polling, go to the Alert Monitor menu bar and select Options>>Start. A green light on the Start/Stop Polling toolbar button means polling is active.
• To stop polling, go to the Alert Monitor menu bar and select Options>>Stop. A red light on the Start/Stop Polling toolbar button means that Alert Monitor is not polling.
• You can poll any time by selecting Options>>Poll Now.
HEAT
Working with Alert Monitor 4-11
Acknowledging Alert Monitor Assignments
You can acknowledge an Assignment while running Alert Monitor, but the control is activated only if an Assignment exists.
When Alert Monitor announces a new Assignment, from the Alert Monitor menu bar select Options>> Acknowledge Assignment.
Telling Alert Monitor Where You AreTo apprise Alert Monitor of your whereabouts:
• From the Alert Monitor menu bar, select Options>> Away from my desk to tell the Alert Monitor module you stepped away. Alert Monitor places a check mark beside the menu item.
• Clear the Options>>Away from my desk check box to tell the Alert Monitor when you return to your work area.
Note: The At/Away from my desk button changes to reflect the current status of the module. When you are at your desk, the person on the button is bright and not transparent. When you set the module to “Away from my desk,” the person on the button is transparent
.
Launching Call Logging from Alert Monitor
You can launch Call Logging in one of three ways from the Alert Monitor module:
• Launch Call Logging: Launches the Call Logging module.
• Launch Call Logging for Call ID: Launches Call Logging to open the Call Record currently selected in the Alert Monitor window.
• Launch Call Logging for Call Group: Launches Call Logging open to the Call Group of the Call Record currently selected in the Alert Monitor window.
User Guide
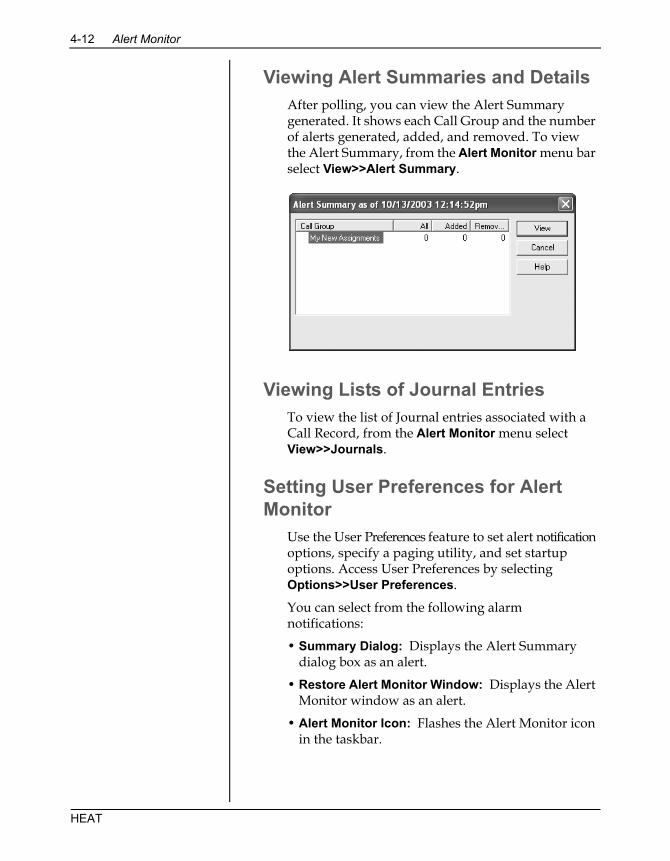
4-12 Alert Monitor
Viewing Alert Summaries and DetailsAfter polling, you can view the Alert Summary generated. It shows each Call Group and the number of alerts generated, added, and removed. To view the Alert Summary, from the Alert Monitor menu bar select View>>Alert Summary.
Viewing Lists of Journal EntriesTo view the list of Journal entries associated with a Call Record, from the Alert Monitor menu select View>>Journals.
Setting User Preferences for Alert Monitor
Use the User Preferences feature to set alert notification options, specify a paging utility, and set startup options. Access User Preferences by selecting Options>>User Preferences.
You can select from the following alarm notifications:
• Summary Dialog: Displays the Alert Summary dialog box as an alert.
• Restore Alert Monitor Window: Displays the Alert Monitor window as an alert.
• Alert Monitor Icon: Flashes the Alert Monitor icon in the taskbar.
HEAT
Alert Monitor Wrap-up 4-13
You can also specify a paging utility in User Preferences. When you specify a paging utility here, Alert Monitor enables the Send Page check box in the Call Group Alert Action dialog box.
You can also select from the following startup options for Alert Monitor:
• Minimize the main window on startup.
• Set the module to automatically start polling.
• Set Alert Monitor so it automatically selects Away from My Desk when you start the module.
• Open a default Alert Monitor Definition (.alr file) on startup so that this definition is automatically opened each time you start the module.
Alert Monitor Wrap-upAlert Monitor helps you keep track of important events affecting your organization. Because you can design it to do some of your work for you, it can help the Help Desk staff maintain the workflow.
Remember that you only need to set up the module to watch for the conditions you want it to monitor. After you set it up, you can depend on it to notify you when those conditions are met.
For more step-by-step instructions for implementing any of Call Logging’s features, please see Call Logging online Help.
User Guide

4-14 Alert Monitor
HEAT
in this chapter...How First Level Support WorksUser Interface BasicsConfiguring First Level SupportUsing First Level SupportWorking with Knowledge TreesWorking with Nodes and BranchesSearching, Posting an FLS Solution to a Call
Record, and Customizing FLSFor the HEAT System AdministratorFor the FLS Administrator
C H A P T E R F I V E
5First Level Support
OverviewFirst Level Support (FLS) is a simple yet powerful tool used for building knowledge bases. These knowledge bases, called knowledge trees, can be purchased or custom-built to provide answers to questions, solve problems, and share information. FLS integrates with Call Logging, allowing technicians to look up an answer or a resolution and automatically transfer that answer or resolution text to a Call Record. You can attach external files such as word processing documents, spreadsheets, or even video clips to provide knowledge trees that are rich with information.
First Level Support allows you to create, install, customize, and use as many knowledge trees as your system resources allow.
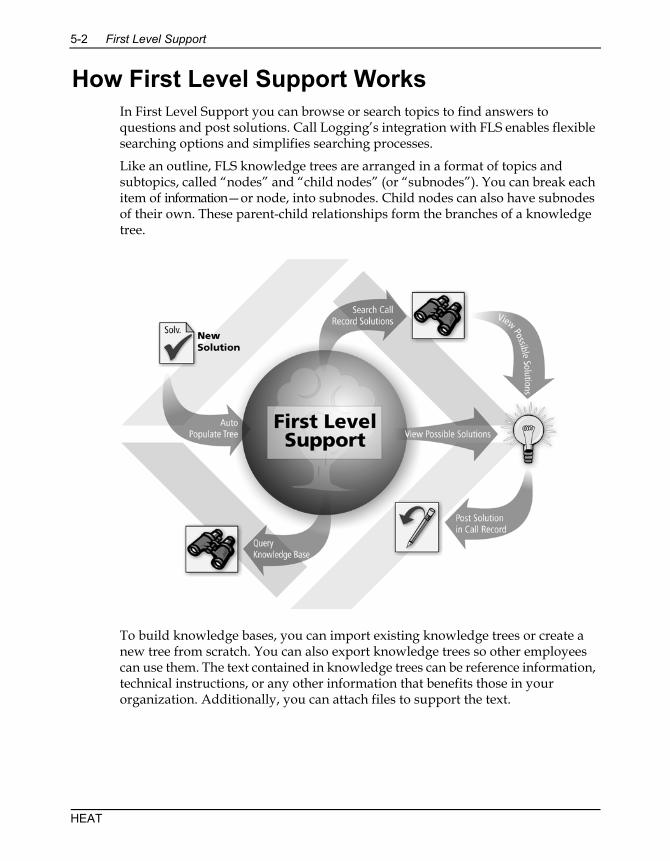
5-2 First Level Support
How First Level Support WorksIn First Level Support you can browse or search topics to find answers to questions and post solutions. Call Logging’s integration with FLS enables flexible searching options and simplifies searching processes.
Like an outline, FLS knowledge trees are arranged in a format of topics and subtopics, called “nodes” and “child nodes” (or “subnodes”). You can break each item of information—or node, into subnodes. Child nodes can also have subnodes of their own. These parent-child relationships form the branches of a knowledge tree.
To build knowledge bases, you can import existing knowledge trees or create a new tree from scratch. You can also export knowledge trees so other employees can use them. The text contained in knowledge trees can be reference information, technical instructions, or any other information that benefits those in your organization. Additionally, you can attach files to support the text.
HEAT
How First Level Support Works 5-3
Find answers in First Level Support by browsing through the knowledge tree’s nodes or by searching for keywords or phrases. When you use FLS to find an answer, you can post the solution back to a Call Record in the Call Logging module. This automates the process of moving information from the knowledge tree to the Call Record and helps save time.
Key Terms and ConceptsFirst Level Support uses the following key terms andconcepts:• Branch: A smaller subset of information focused
on a particular subject. Branches have child nodes.
• Child Node or Subnode: The nodes beneath other nodes. Node children can also have their own node children. Child nodes should expand upon the information stored in the parent node.
• Confidence Value: A percentage used to calculate the accuracy of the information returned in the search.
• Knowledge Tree or Tree: The structure of a knowledge base made up of branches and nodes. It is the most general topic of the nodes and branches it contains.
• Node: A small collection of information in a knowledge base organized for retrieval. Unlike a branch, a node has no child nodes.
• Noise Words: Words that FLS ignores in a search.
• Parent Node: A node that has subnodes beneath it.
• Root Node/Branch: The very first node in the data tree.
User Guide
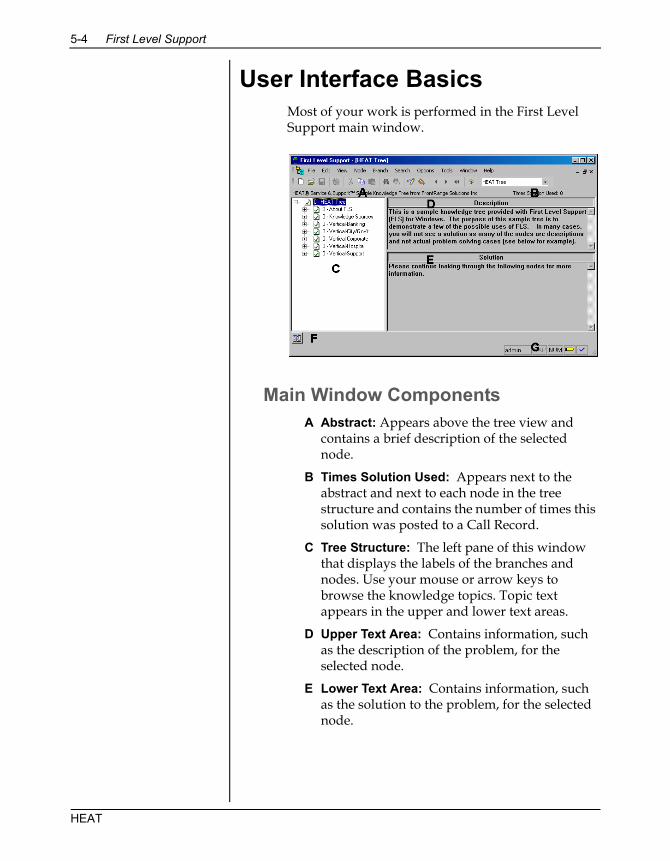
5-4 First Level Support
User Interface BasicsMost of your work is performed in the First Level Support main window.
Main Window ComponentsA Abstract: Appears above the tree view and
contains a brief description of the selected node.
B Times Solution Used: Appears next to the abstract and next to each node in the tree structure and contains the number of times this solution was posted to a Call Record.
C Tree Structure: The left pane of this window that displays the labels of the branches and nodes. Use your mouse or arrow keys to browse the knowledge topics. Topic text appears in the upper and lower text areas.
D Upper Text Area: Contains information, such as the description of the problem, for the selected node.
E Lower Text Area: Contains information, such as the solution to the problem, for the selected node.
HEAT
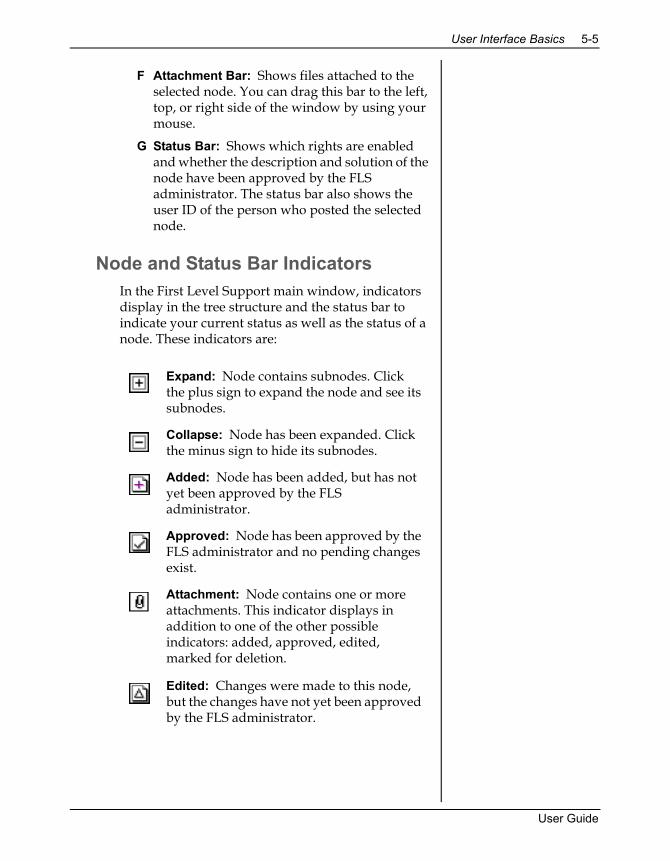
User Interface Basics 5-5
F Attachment Bar: Shows files attached to the selected node. You can drag this bar to the left, top, or right side of the window by using your mouse.
G Status Bar: Shows which rights are enabled and whether the description and solution of the node have been approved by the FLS administrator. The status bar also shows the user ID of the person who posted the selected node.
Node and Status Bar IndicatorsIn the First Level Support main window, indicators display in the tree structure and the status bar to indicate your current status as well as the status of a node. These indicators are:
Expand: Node contains subnodes. Click the plus sign to expand the node and see its subnodes.
Collapse: Node has been expanded. Click the minus sign to hide its subnodes.
Added: Node has been added, but has not yet been approved by the FLS administrator.
Approved: Node has been approved by the FLS administrator and no pending changes exist.
Attachment: Node contains one or more attachments. This indicator displays in addition to one of the other possible indicators: added, approved, edited, marked for deletion.
Edited: Changes were made to this node, but the changes have not yet been approved by the FLS administrator.
User Guide
5-6 First Level Support
The Approval, Marked for Deletion, and Editing concepts are described later in "Security and Rights" on page 5-9.
First Level Support Menu BarThe First Level Support menu bar is located at the top of the First Level Support main window. It contains the following commands:
• File: Accesses commands for creating, deleting, opening, closing, importing, exporting, and printing knowledge trees.
• Edit: Accesses commands for copying, cutting, pasting, and searching words or phrases.
• View: Accesses commands for displaying the attachment bar, captions, status bar, and toolbar.
• Node: Accesses commands for working with nodes.
• Branch: Accesses commands for working with branches.
• Search: Accesses simple and advanced searching commands.
• Options: Accesses commands for obtaining rights, sorting, and defining system settings.
• Tools: Accesses the FLS configuration tool.
• Window: Accesses commands for arranging windows and icons in the First Level Support main window.
• Help: Accesses FLS online Help.
Marked for Deletion: This node was marked for deletion, but the deletion has not yet been approved by the FLS administrator.
View Only: You currently have viewing rights only.
Editing Allowed: You currently have editing rights.
Administrator Options: You currently have FLS administrator rights.
HEAT
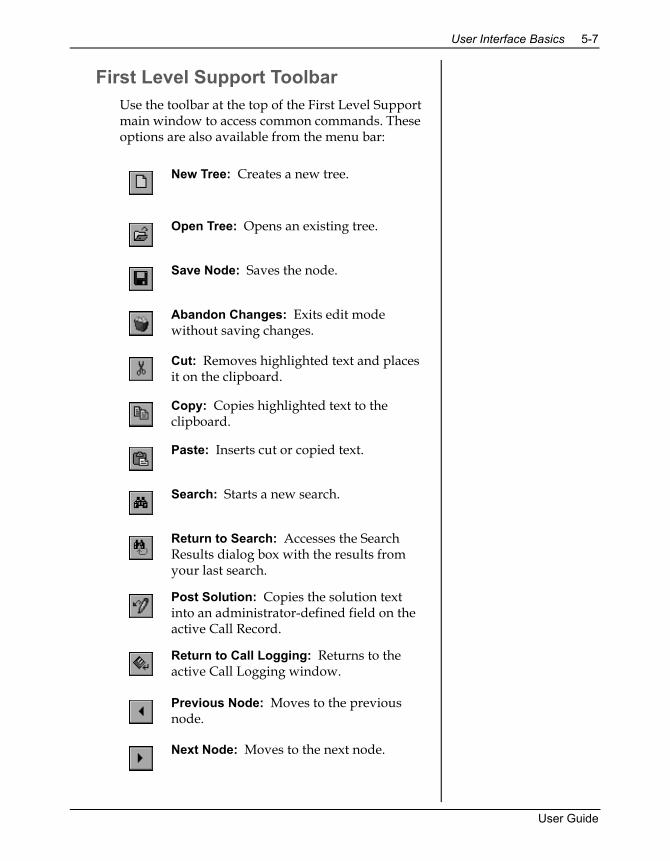
User Interface Basics 5-7
First Level Support Toolbar Use the toolbar at the top of the First Level Support main window to access common commands. These options are also available from the menu bar:
New Tree: Creates a new tree.
Open Tree: Opens an existing tree.
Save Node: Saves the node.
Abandon Changes: Exits edit mode without saving changes.
Cut: Removes highlighted text and places it on the clipboard.
Copy: Copies highlighted text to the clipboard.
Paste: Inserts cut or copied text.
Search: Starts a new search.
Return to Search: Accesses the Search Results dialog box with the results from your last search.
Post Solution: Copies the solution text into an administrator-defined field on the active Call Record.
Return to Call Logging: Returns to the active Call Logging window.
Previous Node: Moves to the previous node.
Next Node: Moves to the next node.
User Guide
5-8 First Level Support
Configuring First Level SupportTwo steps are involved in configuring FLS. These steps must be performed before you can launch FLS:
• Establish the path to FLS
• Add the tables to the data source
Establishing the Path to FLSBefore FLS can be launched from Call Logging, you must direct Call Logging to the location of the FLS.exe file. Do this by selecting Edit>>User Preferences in Call Logging and then clicking on the Paths tab. In the Knowledge Base Executable box, browse to the location of the FLS32.exe and click OK.
Note: All users need to path out to FLS on their local computer.
Adding the Tables to the Data SourceThe first time you access FLS by clicking the First Level Support button on the Call Logging toolbar, you’ll receive a message telling you that the data source does not contain the required tables. Select Yes to generate the tables automatically. This creates several new tables within the main database which will hold FLS information. The tables only need to be generated once and do not need to be generated on each computer.
Parent Node: Moves to the parent node.
FrontRange Solutions: Accesses the FrontRange Solutions support Web site.
HEAT

Using First Level Support 5-9
Using First Level SupportLaunching First Level Support
Launch the First Level Support module from Call Logging by clicking the First Level Support button on the Call Logging toolbar or by selecting Solution>> First Level Support. The First Level Support main window appears.
Security and RightsFLS is equipped with a hierarchical security structure that controls who can make changes to a knowledge tree. At the top of the hierarchy is the FLS administrator who acts as the “keeper” of the tree; all changes are routed through the administrator for final approval. Including the FLS administrator, three security levels exist:
• View Only: Able to browse nodes, see node text, and post node solutions.
• Editing: Able to add, edit, and mark nodes for deletion and export the tree.
• Administrator: Able to approve node edits and additions as well as permanently delete nodes and branches. It is recommended to set this password so that not all users have full control over the tree.
Everyone has View Only rights. Passwords for Editing and Administrator rights are set for each tree in the Tree Properties dialog box. Additionally, you can set a Tree Deletion password to prevent a user who has Editing rights from marking a node or branch for deletion.
The Administrator password must be set before the Tree Deletion and Editor passwords can be set. Setting these passwords, however, is not required. When a password is not set, all users gain those rights. For example, if an Editor password is not set, all users are able to add, edit, and mark nodes for deletion and export the tree without entering a password. If the Administrator password is not set, all users have Administrator rights.
User Guide
5-10 First Level Support
Obtaining RightsEach time you launch FLS, you have View Only rights. To gain Editing rights, select Options>> Editing Allowed and enter your User ID and the Editing password. To gain Administrator rights, select Options>>Administrator Options and enter your User ID and the Administrator password.
Working With Knowledge TreesFLS is built around knowledge trees. A knowledge tree is the main topic of all branches and nodes it encompasses. Trees are organized in a format similar to an outline. You can browse the tree or search for a particular word or phrase. You can have as many knowledge trees as your system resources allow and can even import them from third-party vendors.
Acquiring a Knowledge TreeYou can acquire a knowledge tree by creating one in FLS or by importing an existing tree or formatted data.
Creating a Knowledge TreeWhen you want to preserve important knowledge, you can build your own knowledge tree. Any user can create a knowledge tree, regardless of his or her rights.
To create a knowledge tree, select File>>New or click the New Tree button. The Tree Properties dialog box appears. Work through this dialog box to create the tree and then begin adding nodes and branches to the tree structure.
HEAT
Working With Knowledge Trees 5-11
Importing a Knowledge Tree
To gain instant access to knowledge, you can import trees from colleagues in your organization. You can also purchase trees from FrontRange Solutions Inc. or from other third-party vendors.
You must save a file to be imported in one of the following formats:
• Distribution File (*.dst): Distribution files contain a copy of the knowledge tree, plus all attached files (if you choose) in a compressed format. Distribution files are used to recreate a complete knowledge tree at a different location.
• Data File (*.dat): Data files are specially formatted ASCII text files that contain all of the tree’s information plus instructions for recreating its structure. Control codes must be used in a data file for FLS to properly import it.
Refer to FLS online Help for information about control codes.
To import a knowledge tree, select File>>Import. The Import Tree dialog box appears. Click each button on this dialog box to select importing parameters.
Exporting Knowledge TreesIf you have Editing rights, you can quickly export an existing FLS tree or branch for backup purposes, for manipulation in another application, or to share with coworkers who can then import it. The export command can export an entire tree or any part of the tree; this means that no matter how large or small, any branch can become a new knowledge tree.
You can choose from two export file formats: Distribution files (.dst) or data files (.dat). You can also export a knowledge tree to the Microsoft Index Server to create .htm files from nodes that can be used for Web searches and distribution.
To export a tree or branch as a .dst or a .dat file, select File>>Export. To export to Microsoft Index Server, select File>>Export to Index Server.
User Guide
5-12 First Level Support
Opening a Knowledge TreeFLS lets you simultaneously open and work with several different knowledge trees.
To open a knowledge tree, select File>>Open. Choose the knowledge tree you want to open and click Select. The knowledge tree appears in the First Level Support main window.
Note: When you open a tree, the file name is added to the File menu for easy retrieval. The File menu saves the last four trees that were opened.
Closing a Knowledge TreeBecause you can have several trees open at one time, FLS allows you to close only the active tree or close all open trees at once.
To close the active tree, select File>>Close. To close all open trees, select Window>>Close All.
Tip:If the new node is similar toan existing node, then copy
the existing node, paste itinto the new location, and
edit the copy.
HEAT
Working with Nodes and Branches 5-13
Working with Nodes and Branches
Branches and nodes are the components of knowledge trees that contain information. When you are working in FLS, you can add nodes, edit nodes, delete nodes and branches, and attach files to nodes.
Creating, Editing, Deleting, and Attaching Files to Nodes and Branches
IMPORTANT: Editing rights must be enabled to create or edit a node or branch. Administrator rights must be enabled to permanently delete a node or branch and to approve node additions and edits.
For more information on rights, see "Security and Rights" on page 5-9.
Creating NodesWhen you want to add a new topic to the FLS knowledge tree, you can create a new node by selecting the parent node (that is, the node under which the new node should fall) and selecting Node>>Add Child. A blank node template appears. Replace the “unlabeled” text with a title for the node, then tab to and fill out the abstract, and upper and lower text areas. Save the node by clicking the Save Node toolbar button.
Note: Before you save a new node, you can always back out of the addition by selecting Node>>Abandon Changes.
User Guide
5-14 First Level Support
Editing NodesIf you need to change a node’s text or add text to an existing node, you can choose to edit the node. To edit a node, select the node you want to edit and then select Node>>Edit. The node’s label, abstract, and upper and lower text areas become available. Make your changes and save the node. To undo your edits, select Node>>Abandon Changes.
Deleting Nodes and BranchesUnless you have Administrator rights, you cannot permanently delete a node or branch. However, as long as you have Editing rights, you can mark a node or branch for deletion. The Administrator sees any nodes or branches that were marked for deletion and can then select to permanently delete the node or branch.
Marking a Node or Branch for DeletionTo mark a node for deletion, select the node and then select Node>>Mark Node for Deletion. Answer Yes to the confirmation message. A red x appears next to the node. Upon the next login, the administrator will see that x indicator and can approve and perform the actual deletion by selecting Node>>Delete.
Similarly, to mark a branch for deletion, select Branch>>Mark Branch for Deletion and answer Yes to the confirmation message.
Note: Only approved nodes and branches may be marked for deletion. Root branches cannot be marked for deletion.
Attaching Files to NodesFLS provides significant flexibility in how you document problem resolutions. In addition to using the text areas of the node itself, you can attach files to further describe or illustrate the node.
A paperclip icon displays next to each node in an FLS tree that contains an attachment. The Attachment bar displays files and applications attached to the current node. Attachments can be word processing
HEAT
Working with Nodes and Branches 5-15
documents, spreadsheets, graphics, videos, and so on. Any user can open attachments. FLS allows up to 20 attachments to a single node.
As long as you have Editing rights, you can attach files by selecting File>>Attachments>>Add. The Enter New Attachment Information dialog box appears where you can type a description of the attachment (the name that displays in the Attachment bar) and then browse to the file to attach.
Copying NodesTwo FLS copy commands are available from the Edit menu:
• Copy: Copies a node’s highlighted upper or lower text to paste into other Windows applications or areas of FLS.
• Copy Special: Copies selected parts of the node in addition to or aside from the upper and lower text areas.
Pasting Text into FLSBy using the Copy and Paste commands, you can copy plain text (ASCII format) from another application and paste it into an FLS node.
Note: Before you can paste text, you must have Editing rights.
User Guide
5-16 First Level Support
SearchingUse FLS searches to find information in a knowledge tree. In addition to looking for information by expanding and collapsing the nodes and branches, you have two more advanced search options available:
• Traditional Search: Performs searches using specific search criteria. You can perform a simple search or build complex queries.
• Search Using the Microsoft Index Server: Performs searches using Microsoft Index Server.
How the search is conducted and the results the search produces is dependent upon search defaults that are set up by your HEAT system administrator in the Administrator module. These defaults should be set before anyone starts working in FLS.
For instructions on how to set FLS search defaults, refer to the Administrator module online Help.
Traditional SearchA traditional search looks through nodes for specific words or phrases. You can choose to search within the current knowledge tree by selecting Search>> Search Tree or you can search several trees at once by selecting Search>>Search Multiple Trees. The Logical Operators “and” and “or” can be used to build flexible queries.
And ConnectorsUse “and” to find nodes or paths that contain all words in the query. For example, to search for toner and cartridge (that is, both words must appear in the same node or path) type toner and cartridge.
Note: To use “and,” you must type it in. FLS assumes words are connected with “or” unless you specifically use “and.”
Or ConnectorsUse “or” to find nodes or paths that contain any of the words in the query.
HEAT
Searching 5-17
Microsoft Index Server SearchIf you have a large knowledge tree, using Microsoft Index Server to search can greatly improve search engine retrieval time. You can use this searching tool on trees exported to Index Server. Index Server provides the following options that traditional FLS searching does not:
• Word Stemming: Placing two asterisks (**) at the end of the word causes index server to look for different forms of the same word. For example, “sink**” will find “sinking,” “sank,” and “sunk.”
• Double Quotes Search: Searching for phrases by placing words in double quotes (“ ”).
• NEAR Search: Using NEAR( ) to find words that are within 50 words of each other. For example, Microsoft NEAR( ) Excel finds all nodes where Microsoft and Excel are within 50 words of each other. The closer the words, the higher the confidence value returned by Index Server.
Microsoft Index Server cannot:
• Perform case-sensitive searches.
• Search within particular areas of the window (label, abstract, upper, lower, and so on).
• Perform searches on attachments.
Note: Before you can use FLS with Microsoft Index Server, requirements must be met and the Index Server must be set up by your HEAT system administrator.
For more information, refer to "For the HEAT System Administrator" on page 5-21.
Noise WordsExtraneous words called “noise words” are ignored by search functions unless they are placed in quotation marks. Noise words include a, of, to, as, is, and so on.
For a complete list of noise words, refer to FLS online Help.
User Guide
5-18 First Level Support
Using Search ResultsAfter conducting a search in FLS, matches to your search criteria display in the Search Results dialog box. This dialog box lists the knowledge tree and specific node that contains text meeting your search criteria. It also displays the Confidence Value and the number of times the solution in the node has been used to populate a Call Record field. Results are sorted by descending confidence value. Confidence Values are described in the next subsection.
To open one of the nodes that contains your search criteria, select the node, then click Select.
Additionally, if you have Editing or Administrator rights and want to create a new node using your search criteria as the upper text of that node, use the Auto Populate command.
Note: If you’ve closed the Search Results dialog box, you can still view your last query by selecting Search>> View Search Results.
Confidence ValuesSearch results are sorted based on the percentage of search words found in each node. This percentage is called the confidence value. For example, if your search is Lotus AND files, all nodes containing both words Lotus and files receive a confidence value of 100 percent. All nodes containing the word Lotus or the word files receive a Confidence Value of 50 percent.
To use confidence values in your searches, ensure that the Search>>Calculate Confidence Values command is checked.
Tip:Select the first occurrence
of the word or phrase beforeyou select Find. When the
Find dialog box appears, theselected text is already inthe Find What dialog box.
When you know you wantto replace all occurrences
of the Find What text, clickReplace All. Otherwise,
click the Replace button toevaluate each replacement
individually.
HEAT
Posting an FLS Solution to a Call Record 5-19
Finding and Replacing Text in NodesYou can use the Edit>>Find command to search for a specific word or phrase in a node’s upper text or lower text area.
If you have Editing rights, you can use Replace to find a word or phrase within one text area of the current node and replace it with a different word or phrase. To do this, select Node>>Edit and then select Edit>>Replace. The Replace dialog box appears allowing you to type the text you want to find and the text with which you want to replace it.
When using the Find command, the first occurrence is highlighted. Continue clicking Find Next to locate subsequent occurrences. If the text is not found or if all occurrences have been exhausted, you receive the message, “FLS has finished searching the text area. The search item was not found.”
Posting an FLS Solution to a Call Record
After you find the information you were looking for, you can use it to expedite the closing of Call Records. Simply copy the FLS solution text (in the lower text area) directly to a designated field on the Call Record.
Note: You can also use a solution from the Call Record to create a new FLS node.
Refer to the Call Logging online Help for instructions on how to post a solution from Call Logging into FLS.
To post an FLS solution to the current Call Record, first ensure that your HEAT system administrator has enabled this feature from the Administrator module. Secondly, ensure you have selected a Call Type in Call Logging and that the Call Record can be edited. Then, select the node that contains the solution and select Search>>Post Search Solution, or click the Post Solution toolbar button. The solution text will be copied directly into the Call
User Guide
5-20 First Level Support
Record. The node's number of Times Solution Used is incremented by one (this displays in the upper right-hand corner of the window as well as next to each node in the tree structure).
Note: The Times Solution Used is incremented by one even if you overwrite or delete a posted solution. You can, however, manually change this number.
Customizing First Level Support
Arranging the Tree WindowYou can adjust the sizes of the tree display, the upper text area, and the lower text area by dragging the borders. You can also choose to hide or display the Attachment bar, toolbar, Status bar, text area captions, and Times Solution Used by selecting the corresponding option from the View or Node menu.
Changing the Sort Order of a TreeYou can sort a tree's nodes alphabetically or by the number of times a solution is used, either in ascending or descending order. Select Options>>Sort By to view and change your sorting options.
Adding Links to Other ProgramsIf you frequently launch other applications or program information files while in FLS, you can build a list of shortcuts to your favorite programs and tools. Add any application file (.exe or .com) or program information file (.pif) to the FLS Tools menu for quick launch directly from FLS. To do this, select Tools>>Configure and then click Add to access the Open dialog box where you can locate the application or program information file you want to link to from the Tools menu.
HEAT
For the HEAT System Administrator 5-21
For the HEAT System Administrator
Your HEAT system administrator is responsible for setting up several aspects of FLS:
• Setting FLS search defaults from the Administrator module.
• Setting Auto Populate defaults from the Administrator module.
• Setting up Microsoft Index Server if your organization uses Index Server.
Steps for Setting Up Microsoft Index Server
Follow these steps to set up the Index Server for searching from FLS:
1. Export the FLS tree to Microsoft Index Server.
2. Set up the Microsoft Index Server Catalog on your Web server.
3. Modify the MSDFMAP.ini file on your Web server.
4. Run the Text Search Setup Wizard to set up the FLS text search service on the Web machine or a separate machine to off-load processing on your Web server.
5. Set up Administrator search defaults in order to search FLS from within Call Logging.
6. Select a Search Engine in order to search multiple FLS knowledge trees using Microsoft Index Server.
For details on performing these steps, refer to the FLS online Help.
User Guide
5-22 First Level Support
For the FLS AdministratorThe FLS administrator is responsible for maintaining knowledge trees, managing passwords, defining tree properties, and changing captions. The FLS administrator does not have to be the HEAT system administrator; your organization may have a knowledge administrator or another employee who may want to take ownership of the knowledge base.
Following is a complete list of the FLS administrator’s roles and responsibilities:
• Approve or reject node additions, edits, and deletions.
• Change knowledge tree properties.
• Remove passwords.
• Set passwords, including the Administrator password that grants you these rights.
• Change the system settings if needed. If you have multiple installations of FLS, you can use the System Settings dialog box (to access, select Options>>System Settings) to uniquely identify the database you are using.
HEAT
First Level Support Wrap-up 5-23
First Level Support Wrap-upHaving read this chapter, you have acquainted yourself with FLS’s core concepts:
• Knowledge tree concept and structure.
• FLS security and rights hierarchy.
• The user interface basics, including the main FLS window, menu bar, and toolbar.
• How to launch FLS and acquire knowledge trees by creating or importing them.
• How to work with trees, including adding and editing them as well as working with individual nodes.
• Methods for finding information in trees.
• How to post solutions to Call Records.
• Differences and roles of the HEAT system administrator and the FLS administrator.
For step-by-step instructions for implementing any of the FLS features, please refer to the FLS online Help.
User Guide

5-24 First Level Support
HEAT
S E C T I O N I I I
Automation Tools

in this chapter...How Auto Ticket Generator WorksUser Interface BasicsAuto Ticket Generator DefinitionsAuto Ticket Generator Actions
C H A P T E R S I X
6Auto Ticket Generator
OverviewHEAT’s Auto Ticket Generator (ATG) module offers a convenient method for problem solving. External customers as well as internal users can submit Call Tickets. While they wait for resolution, they can continue other work knowing a technician is addressing their issue. Call Tickets can be submitted at any time; thus, technicians can address issues logged during nonstandard hours as soon as they return to work—no one is inconvenienced waiting for a phone call or for business hours to begin.
ATG performs several functions that facilitate a customer or user’s work process. ATG creates or updates Call Records from e-mail or text files. The ATG module also allows customers to perform information queries regarding their existing Call Ticket(s), and it allows users to transfer Call Tickets from one HEAT system to another. If ATG fails to automatically create or update a Call Ticket, the Error Handler Action creates an “incident” Call Record containing the information from the incoming e-mail and routes it to the correct person.
6-2 Auto Ticket Generator
How Auto Ticket Generator Works
ATG engages the HEAT database and automatically creates Call Records in the Call Logging module. ATG harvests information from specific fields in the incoming e-mail and populates the Subset of a new Call Record. When you set up ATG, you establish a polling interval; thus, when you start the module, it checks its own inbox at the interval you set.
ATG performs the following five Actions:
• Creates a Call Record: To create a Call Record, ATG takes an incoming e-mail or text file and searches its fields for a data value matching a value in a field of HEAT’s Profile table. When it finds a matching value, it then fills in the Subset information for the Call Ticket it creates.
• Updates a Call Record: To update a Call Record, ATG looks for a value and a Call Record ID in the e-mail or text file indicating an update is requested, and then it modifies or replaces information in that Call Record.
• Performs an Information Query: To perform an information query, ATG retrieves specific information from the HEAT database on behalf of the customer. Customers can request data contained in specific fields from all their Call Records (based on their Customer ID), or data from just one (based on a Call ID) Call Record.
• Transfers a Call Record(s): ATG can transfer a Call Ticket(s) from one HEAT system to another. A comparison (.cmp) file is created which exactly mirrors the field structure and validation values of the sending system so the receiving system can correctly translate the data and recreate the Call Ticket(s).
• Handles an Error: If an incoming e-mail fails to create or update a Call Record, ATG’s Error Handler Action captures the information from the e-mail and creates a Call Record notifying someone of the error.
HEAT

How Auto Ticket Generator Works 6-3
Note: HEAT PowerDesk does not support the Ticket Transfer Action.
The following illustration represents the basic flow between ATG, incoming e-mail, and the HEAT database.
User Guide
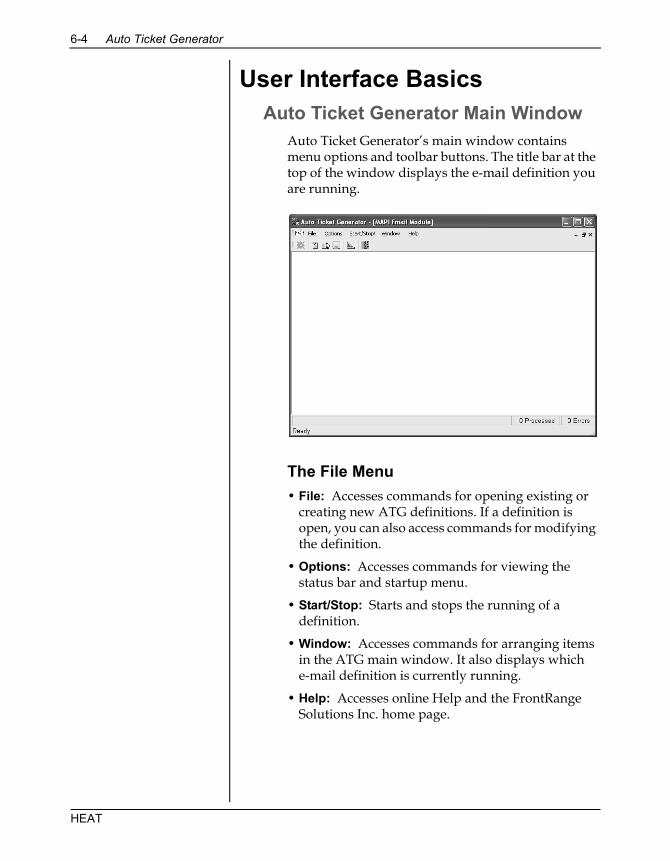
6-4 Auto Ticket Generator
User Interface BasicsAuto Ticket Generator Main Window
Auto Ticket Generator’s main window contains menu options and toolbar buttons. The title bar at the top of the window displays the e-mail definition you are running.
The File Menu• File: Accesses commands for opening existing or
creating new ATG definitions. If a definition is open, you can also access commands for modifying the definition.
• Options: Accesses commands for viewing the status bar and startup menu.
• Start/Stop: Starts and stops the running of a definition.
• Window: Accesses commands for arranging items in the ATG main window. It also displays which e-mail definition is currently running.
• Help: Accesses online Help and the FrontRange Solutions Inc. home page.
HEAT
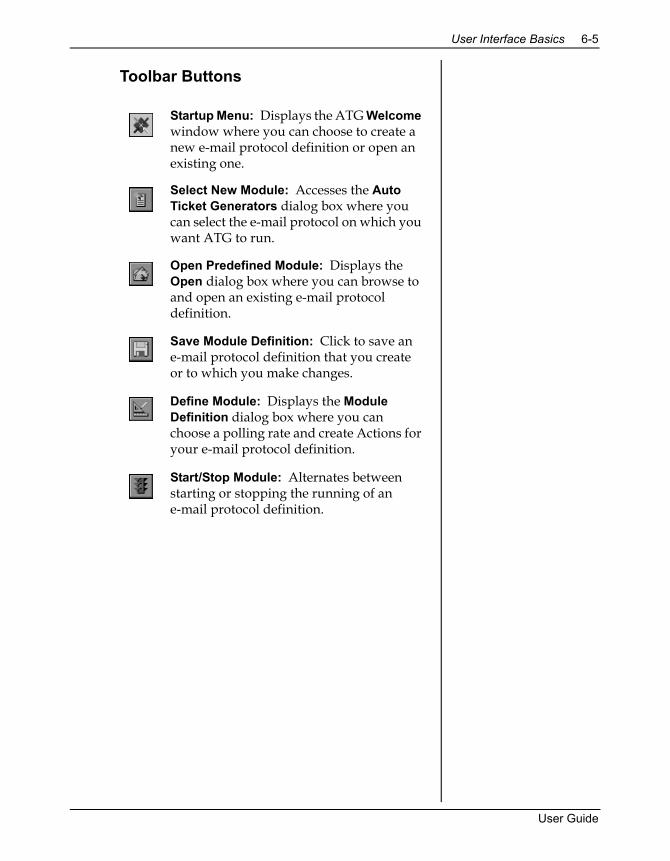
User Interface Basics 6-5
Toolbar Buttons
Startup Menu: Displays the ATG Welcome window where you can choose to create a new e-mail protocol definition or open an existing one.
Select New Module: Accesses the Auto Ticket Generators dialog box where you can select the e-mail protocol on which you want ATG to run.
Open Predefined Module: Displays the Open dialog box where you can browse to and open an existing e-mail protocol definition.
Save Module Definition: Click to save an e-mail protocol definition that you create or to which you make changes.
Define Module: Displays the Module Definition dialog box where you can choose a polling rate and create Actions for your e-mail protocol definition.
Start/Stop Module: Alternates between starting or stopping the running of an e-mail protocol definition.
User Guide
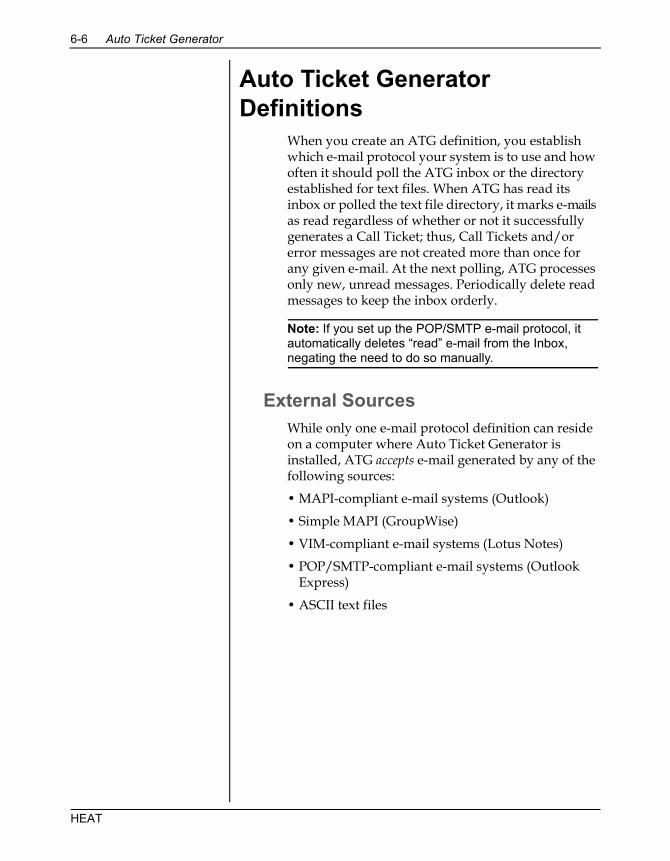
6-6 Auto Ticket Generator
Auto Ticket Generator Definitions
When you create an ATG definition, you establish which e-mail protocol your system is to use and how often it should poll the ATG inbox or the directory established for text files. When ATG has read its inbox or polled the text file directory, it marks e-mails as read regardless of whether or not it successfully generates a Call Ticket; thus, Call Tickets and/or error messages are not created more than once for any given e-mail. At the next polling, ATG processes only new, unread messages. Periodically delete read messages to keep the inbox orderly.
Note: If you set up the POP/SMTP e-mail protocol, it automatically deletes “read” e-mail from the Inbox, negating the need to do so manually.
External SourcesWhile only one e-mail protocol definition can reside on a computer where Auto Ticket Generator is installed, ATG accepts e-mail generated by any of the following sources:
• MAPI-compliant e-mail systems (Outlook)
• Simple MAPI (GroupWise)
• VIM-compliant e-mail systems (Lotus Notes)
• POP/SMTP-compliant e-mail systems (Outlook Express)
• ASCII text files
HEAT
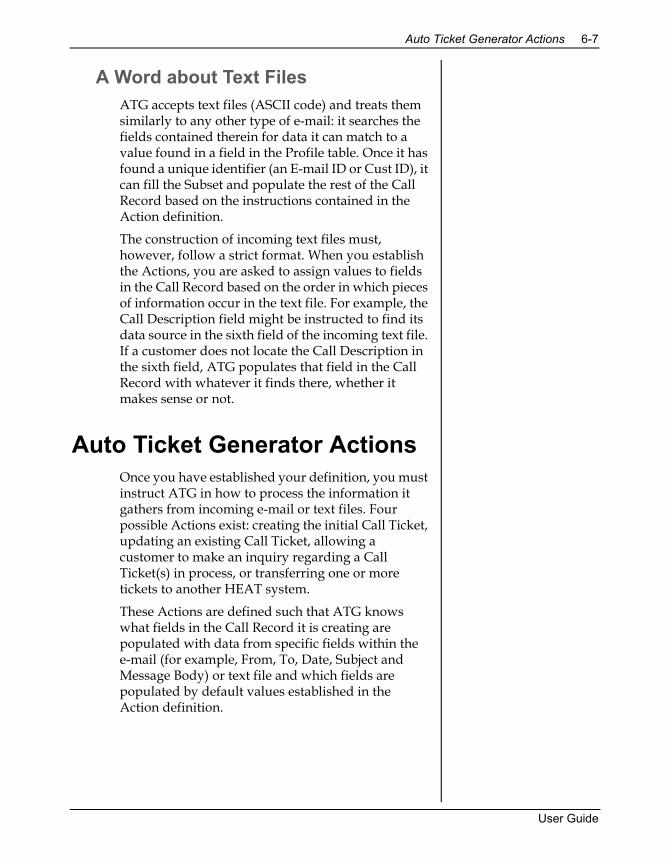
Auto Ticket Generator Actions 6-7
A Word about Text FilesATG accepts text files (ASCII code) and treats them similarly to any other type of e-mail: it searches the fields contained therein for data it can match to a value found in a field in the Profile table. Once it has found a unique identifier (an E-mail ID or Cust ID), it can fill the Subset and populate the rest of the Call Record based on the instructions contained in the Action definition.
The construction of incoming text files must, however, follow a strict format. When you establish the Actions, you are asked to assign values to fields in the Call Record based on the order in which pieces of information occur in the text file. For example, the Call Description field might be instructed to find its data source in the sixth field of the incoming text file. If a customer does not locate the Call Description in the sixth field, ATG populates that field in the Call Record with whatever it finds there, whether it makes sense or not.
Auto Ticket Generator ActionsOnce you have established your definition, you must instruct ATG in how to process the information it gathers from incoming e-mail or text files. Four possible Actions exist: creating the initial Call Ticket, updating an existing Call Ticket, allowing a customer to make an inquiry regarding a Call Ticket(s) in process, or transferring one or more tickets to another HEAT system.
These Actions are defined such that ATG knows what fields in the Call Record it is creating are populated with data from specific fields within the e-mail (for example, From, To, Date, Subject and Message Body) or text file and which fields are populated by default values established in the Action definition.
User Guide
6-8 Auto Ticket Generator
The Create Ticket ActionIn order for ATG to instantly create a Call Record from an incoming e-mail, you must associate fields in the source e-mail with fields in the Call Record and establish default values for Call Record fields that do not autofill from data contained in the source e-mail.
The Auto Ticket Generator Module Creation Definition dialog box is where you make all of the necessary associations for ATG to build the Call Record from the e-mail it receives and information already residing in the database. As you choose Call Record fields for association, you may select the data to appear in those fields in the Edit Data Source dialog box. You are given four options:
• Select a source item from the incoming e-mail to fill a destination field.
• Fill a destination field with an @Function.
• Fill a destination field with a default value from the database.
• Indicate that data found in a specific place in the body of the incoming e-mail should fill a destination field.
Once you have successfully filled all of the required fields, ATG begins creating Call Records from incoming e-mail when you initiate polling.
HEAT
Auto Ticket Generator Actions 6-9
The Update Tickets ActionATG can update data in an existing Call Record by completely replacing old information with new or by modifying the information it finds there. Each new e-mail or text file can modify one Call Record. ATG uses both conditional and unconditional updates to modify Call Records. In the ATG Module Ticket Update Definition dialog box, you have the opportunity to ensure a Call Record is created regardless of whether or not the record indicated is found. This helps guarantee no information is lost in the event a CallID number is typed incorrectly. The actions involved in creating a Ticket Update are virtually identical to those performed in the Create Tickets Action.
The Conditional UpdateThe conditional Update Action requires the presence of an indicator value (essentially a code word) in an assigned field to update a Call Record. The indicator value you choose is not case sensitive. ATG must also find the Call ID number in the Update Action so it knows what Call Record to revise. The indicator value and the Call ID number can appear in the same field, but the indicator value must come first in the sequence.
The Unconditional UpdateAn unconditional update does not require an indicator value in order to update a Call Record. If the incoming e-mail references a CallID that already exists in the system, ATG updates whatever fields contain altered information. An unconditional update also checks the Assignment and Journal fields of the existing Call Record against those of the incoming e-mail. If it finds new information, it executes the changes.
User Guide

6-10 Auto Ticket Generator
The Information Query ActionDefining the Information Query Action allows customers to use ATG to query the HEAT database for information. The results of the query are returned by e-mail. The following two categories of information are available, and you can allow a customer to select one or both depending upon how you define the Action:
• Allow CustID Requests: The customer can request information about all of the Call Records associated with their Customer ID. You can determine whether ATG sends only Call Records with an open status, or if it sends all Call Records regardless of the status value.
• Allow CallID Requests: This option allows the customer to request information specific to a particular Call Record.
The Transfer Tickets ActionCertain working conditions mandate transferring Call Tickets from one HEAT system to another. For example, if your company has offices on both the east and west coasts, when the east coast branch closes for business at 5:00 P.M., the west coast branch is still open for another three hours. Technicians at the west coast office can use those three hours to resolve critical issues left open by colleagues in the eastern time zone.
Transferring tickets from one HEAT system to another requires the two systems to have identical CallLog table structures. The reality of identical structures existing on two different systems, however, is unlikely. ATG must be able to account for the inevitable differences between HEAT systems, and it does so by using comparison files.
A comparison file is an exact copy of the sending system’s CallLog table. It mirrors the field order as well as the validation values available for each field.
HEAT
Auto Ticket Generator Actions 6-11
Saving an ATG Action Definition1. When you have finished defining the first Action,
the Module Definition dialog box appears. Click Close.
2. Select File>>Save As. Navigate to the directory where you want to save the e-mail definition and its Actions. Type a name for the definition in the File Name text box and click Save.
3. As you create other Actions for the e-mail definition, click Close when the Module Definition dialog box appears with the new Action displayed in the list.
4. Select File>>Save or click the Save Module Definition toolbar button that is now available. New Actions are saved to the file you designated earlier.
PollingPolling is the action ATG undertakes to read its Inbox. As it encounters e-mails, it performs whatever action it is instructed to take.
To start or stop polling, click Start/Stop on the menu bar or the Start/Stop Module button on the toolbar to start ATG’s polling. A window appears displaying when ATG was started and what Actions were committed.
The Enable Auto Attachment FeatureATG allows you to accept attachments that are appended to incoming e-mails. Text files, however, do not support auto attachments. You can use the Enable Auto Attachment feature from the Create, Update, Information Query or Transfer Tickets Actions.
User Guide
6-12 Auto Ticket Generator
The Send Confirmation via E-Mail Feature
ATG allows you to automatically respond to incoming e-mails with responses tailored to inform the customer of the success or failure of their request. You can use the Send Confirmation via E-Mail feature from the Create, Update, Information Query, or Transfer Tickets Actions.
The Error Handler ActionConfiguring ATG’s Error Handler Action ensures that in addition to creating an error in the TktError.log, an “incident” Call Ticket is created when an incoming e-mail fails to correctly generate the specified Action. The TktError.log not only reflects the error, but also the newly created Call Ticket’s ID.
The following are included in the Call Description field of the Call Ticket generated by the Error Handler:
• the reason for the failure
• the information logged in the TktError.log
• the entire text of the incoming e-mail
The Call Ticket can also contain (in any field of either the Assignment or Journal form) the text of the Failure Notification sent to the customer or user. Simply specify in what field you want this notification information housed, and it appears in that location.
If the failed e-mail contains attachments, those are appended to the newly created Call Ticket and saved to the user-defined attachment directory.
HEAT
Auto Ticket Generator Wrap-up 6-13
Auto Ticket Generator Wrap-upHaving read this chapter, you acquainted yourself with the core concepts needed to successfully configure and use ATG. Those main points include:
• ATG’s four Actions
• User interface basics
• Establishing e-mail protocols
• Text file fundamentals
• Polling
For step-by-step instructions for implementing any of ATG’s Actions or features, please refer to the online Help.
User Guide

6-14 Auto Ticket Generator
HEAT
in this chapter...How BPAM WorksSteps for Setting up BPAMUser Interface BasicsWorking with Business Rule EditorWorking with Business Rule Monitor
C H A P T E R S E V E N
7Business ProcessAutomation Module
OverviewHEAT’s Business Process Automation Module (BPAM) allows you to precisely tailor Business Rules to fit your unique business needs. Business Rules are those policies that management determines need monitoring to ensure consistency of application.
The condition of a Call Record either falls inside or outside of the established Business Rules. When a Call Record broaches the parameters of an existing rule, certain actions or escalations defined in BPAM automatically occur; thus, management and technicians are quickly notified of issues requiring immediate attention.
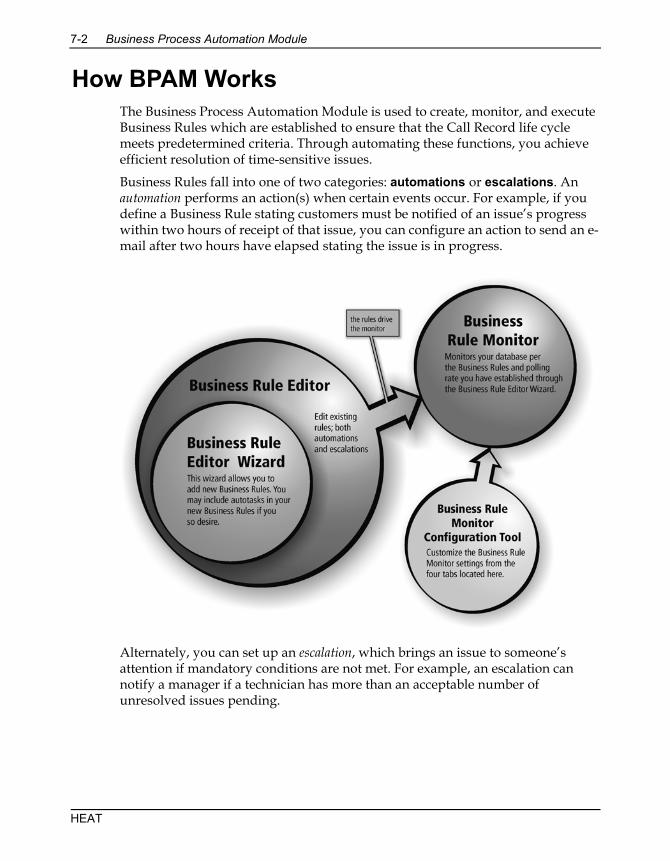
7-2 Business Process Automation Module
How BPAM WorksThe Business Process Automation Module is used to create, monitor, and execute Business Rules which are established to ensure that the Call Record life cycle meets predetermined criteria. Through automating these functions, you achieve efficient resolution of time-sensitive issues.
Business Rules fall into one of two categories: automations or escalations. An automation performs an action(s) when certain events occur. For example, if you define a Business Rule stating customers must be notified of an issue’s progress within two hours of receipt of that issue, you can configure an action to send an e-mail after two hours have elapsed stating the issue is in progress.
Alternately, you can set up an escalation, which brings an issue to someone’s attention if mandatory conditions are not met. For example, an escalation can notify a manager if a technician has more than an acceptable number of unresolved issues pending.
HEAT
How BPAM Works 7-3
BPAM comprises three components:
• The Business Rule Editor (BRE): This component allows you to add and edit Business Rules and establish AutoTasks.
When you add a new rule, the Business Rule Editor Wizard walks you through a series of dialog boxes designed to answer specific questions about how you want your Business Rules to function.
When you edit an existing rule, one of two sets of tabs specific to automation or escalation appears depending upon which type of rule you are editing.
BRE allows you to add actions—both AutoTasks and e-mail—to any business rule. Depending upon the option you choose, the AutoTask Send Mail Action or the Select a Task dialog box appears to assist you in completing your selection.
• The Business Rule Monitor (BRM): The BRM is a service that monitors your database predicated on the Business Rules you define. The BRM service runs automatically upon installation.
• The Business Rule Monitor Configuration Tool: The BRM Configuration Tool allows you to customize the Business Rule Monitor to suit your needs. Do so by completing information in the Configuration Tool’s Database Selection, Mail Login, Log Files, and Advanced tabs.
User Guide
7-4 Business Process Automation Module
Steps for Setting Up BPAMFor most efficient structure and execution of BPAM, we recommend following the steps below when configuring BPAM for your system.
• Define Business Rules Using Business Rule Editor: Define the Business Rules you want to run on your system. You can define automations, escalations, and AutoTasks to monitor the status of Call Records in your Support Center.
• Enable Business Rules in the Administrator module: To execute Business Rules that run based on information found in the various parts of a Call Record, you must first enable those Business Rules for each of the associated tables through the Administrator module. The associated tables are CallLog, Detail, Subset, Journal, Profile, Config, and Asgnmnt.
• Configure Business Rule Monitor Using the Business Rule Monitor Configuration Tool: The Business Rule Monitor Configuration Tool contains tabs where you select your data source, type e-mail login information, define how to log files, and set up the database polling frequency of scheduling and rule confirmation queries as well as the rules for follow-up actions.
• Monitor Business Rules Using the Business Rule Monitor: Launch the service from the Start button on the Windows taskbar. Select Settings>>Control Panel and click the Services icon. Business Rule Monitor (BRM) begins polling for Call Records that meet the criteria defined in your Business Rules.
HEAT
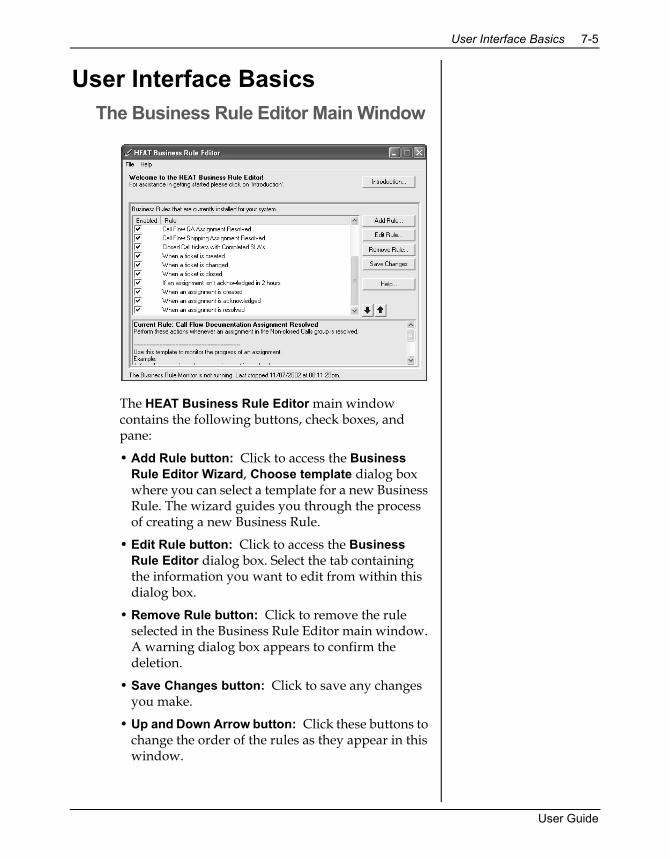
User Interface Basics 7-5
User Interface BasicsThe Business Rule Editor Main Window
The HEAT Business Rule Editor main window contains the following buttons, check boxes, and pane:
• Add Rule button: Click to access the Business Rule Editor Wizard, Choose template dialog box where you can select a template for a new Business Rule. The wizard guides you through the process of creating a new Business Rule.
• Edit Rule button: Click to access the Business Rule Editor dialog box. Select the tab containing the information you want to edit from within this dialog box.
• Remove Rule button: Click to remove the rule selected in the Business Rule Editor main window. A warning dialog box appears to confirm the deletion.
• Save Changes button: Click to save any changes you make.
• Up and Down Arrow button: Click these buttons to change the order of the rules as they appear in this window.
User Guide
7-6 Business Process Automation Module
• Enabled check box: Select this check box to enable Business Rules; clear the check box to disable Business Rules.
Note: Enabling/disabling here is not the same as enabling Business Rules for the tables in the HEAT Administrator module, which is a required step in setting up BPAM.
• Current Rule description pane: This area of the window defines the rule selected in the list above and gives examples for how to use it.
Working with BusinessRule Editor
Business Rule Editor is the BPAM component allowing you to tailor Business Rules to suit the needs of your Support Center. Business Rules monitor the status of Call Records and perform either automations or escalations. Simply put, Business Rules tell the Business Rule Monitor service what to look for, where to look for it, and which action to execute when a defined event is detected. You define these functions in the Business Rule Editor.
Launching Business Rule EditorLaunch Business Rule Editor from the Start button on the Windows taskbar.
To Launch Business Rule Editor
1. From the Start button on the Windows taskbar, select Programs>>HEAT>>Business Rule Editor. The Select a Data Source dialog box appears.
2. Choose a HEAT data source and click OK.
3. Type your user ID and password and click OK. The HEAT Business Rule Editor main window appears.
Note: Your user ID and password are set by your system administrator in the Administrator module.
HEAT
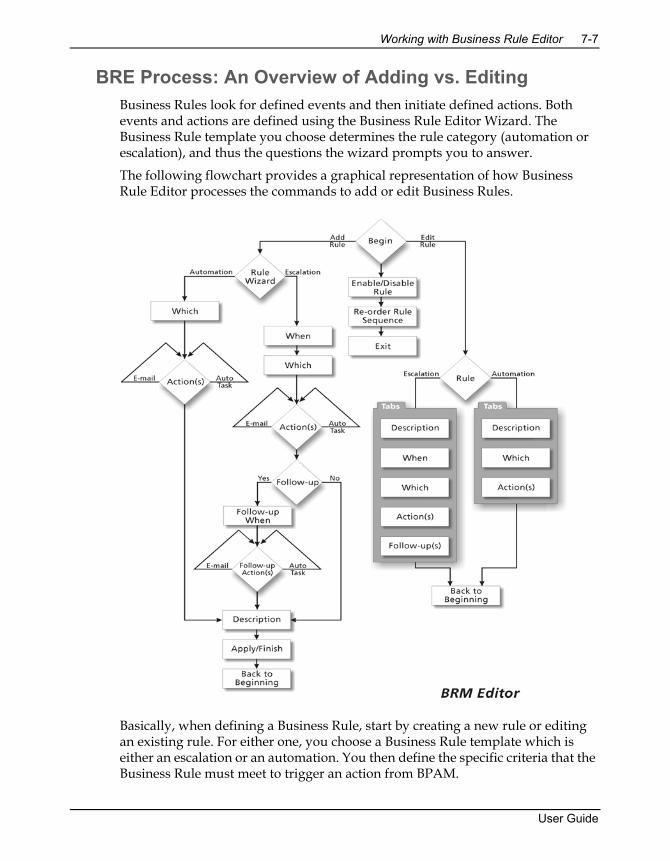
Working with Business Rule Editor 7-7
BRE Process: An Overview of Adding vs. EditingBusiness Rules look for defined events and then initiate defined actions. Both events and actions are defined using the Business Rule Editor Wizard. The Business Rule template you choose determines the rule category (automation or escalation), and thus the questions the wizard prompts you to answer.
The following flowchart provides a graphical representation of how Business Rule Editor processes the commands to add or edit Business Rules.
Basically, when defining a Business Rule, start by creating a new rule or editing an existing rule. For either one, you choose a Business Rule template which is either an escalation or an automation. You then define the specific criteria that the Business Rule must meet to trigger an action from BPAM.
User Guide
7-8 Business Process Automation Module
Adding a New Business RuleThe flow chart illustrates that your first choice is between adding a new rule or editing an existing one. If you follow the route for adding a rule (down the left side of the chart), the first stop is at the Rule Wizard (the Business Rule Editor Wizard, Choose template dialog box) where you select a template for the rule you want to design. Remember, rules fall into two categories: automations or escalations, and the template you choose determines which category of rule you are modifying. Numerous templates are available. They cover everything from customizing rules for how to proceed when a ticket is first created to what to do when the ticket’s issue is resolved.
Please see the BPAM online Help for a complete listing of the available templates.
The five main categories of templates are:
• Templates for Call Ticket Rules: Provide lead-in arguments for building Business Rules to track Call Records.
• Rules for Assignments: Provide lead-in arguments for building Business Rules to track Assignments.
• Rules for Journals: Provide lead-in arguments for building Business Rules to track Journal entries.
• Templates for Customer Profile Rules: Provide lead-in arguments for building Business Rules to track Customer Profiles.
• Templates for Customer Configuration Rules: Provide lead-in arguments for building Business Rules to track Configuration Records.
HEAT
Working with Business Rule Editor 7-9
Navigating the Wizard’s Dialog Boxes – an OverviewThe wizard is meant to guide you through creating a Business Rule. It asks questions and flows logically from one step to the next. Refer again to the flow chart. Although the sequence of dialog boxes you encounter using the wizard depend upon the Business Rule template you choose, the following bullets outline the dialog boxes you may encounter.
• The BRE Wizard, Choose template dialog box asks what you would like to do. When you choose a template here, you tell the Business Rule Monitor (BRM) for what condition or event it is searching.
• The When and Date Passed dialog boxes require you to tell Business Rule Monitor when it should look for events and conditions to transpire. You are given options to choose how much time should elapse, what calendar should be used, or if BRM should look for a date and time to pass or only a date to pass before initiating an action. Depending upon the template you choose, the wizard first presents you with one of three dialog boxes. The When and Date Passed dialog boxes represent two of those first three possibilities.
• The Which Customers dialog box tells BRM which customers to monitor. You can select a particular Call Group to apply the rule to only certain types of calls rather than all calls in your system.
• The Which Calls dialog box tells BRM which calls it is to monitor. Two options are given: All non-closed calls and All records in a Call Group. If you choose a Call Group, you may navigate to an existing group or create a new one. The Which Calls dialog box is the third of the three possible initial dialog boxes you see after choosing a template.
User Guide
7-10 Business Process Automation Module
• The Actions dialog box tells BRM how to proceed when it detects a Business Rule condition or event. If an action already exists, it displays. If no action is yet created, a note appears stating, “No actions currently defined.” Two action possibilities are presented. You may either add an AutoTask action or you can send an e-mail action.
IMPORTANT: Any program that can run silently—that is, run without any kind of user interface or user intervention—can be run through BPAM. For example, several paging programs are suitable for launching through an AutoTask. Alternately, an AutoTask that launches Microsoft Word cannot be run through BPAM.
• The Follow-up Question dialog box is the first in a loop of dialog boxes designed to trigger subsequent actions in BRM if the first action did not solve the issue.
This dialog box asks you if you want to execute a follow-up action and enter the loop, or if you want to tell BRE that no follow-up is required. If you enter the loop, the following dialog boxes appear in sequence:
– The Follow-up dialog box allows you to add subsequent actions should an event or condition occur and not be resolved. When you have completed adding a follow-up action(s), the Repeat last action(s) every X amount of time until the condition is no longer true check box becomes available. Selection indicates this follow-up action will be repeated as defined in the Follow-up When dialog box.
IMPORTANT: If you are in the first stage of the Follow-up loop, you have not yet defined any follow-up actions; therefore, no actions are listed. In addition, the Edit and Remove buttons and the Repeat check box are unavailable.
Note: The wizard runs the loop allowing you to build a series of follow-up actions, if needed, by repeatedly clicking the Add button in the Follow-up dialog box. Exit the loop by clicking Next in the Follow-up dialog box.
HEAT
Working with Business Rule Editor 7-11
– The Follow-up When dialog box allows you to specify a time duration for the follow-up action. Determine how much additional time you should allow before BRM initiates the follow-up action, and then select a calendar. Remember that this unit of time is how long BRM waits to execute the follow-up action after the initial action takes place.
– The Follow-up Actions dialog box allows you to define BRM’s subsequent actions when the first action does not solve the issue. You may click Add E-Mail, which accesses the AutoTask Send Mail Action dialog box, or Add AutoTask, which accesses the Select A Task dialog box.
Note: The wizard progresses through this sequence of dialog boxes in a loop: Follow-up, Follow-up When, Follow-up Actions, then returns to Follow-up. This loop allows you to build a series of follow-up actions, if needed, by repeatedly clicking Add in the Follow-up dialog box. Exit the loop by clicking Next in the Follow-up dialog box.
• The Business Rule Editor Wizard, Description dialog box appears when you click Next in the Follow-up dialog box and exit the follow-up loop, if applicable.
Type a descriptive title in the Name for this Business Rule text box. The name should be unique to avoid confusion. Click Finish and the New Rule Processing dialog box appears.
In this dialog box you are asked to determine to what records your new rule applies. Select from All existing records or New or Changed Records. Click OK. The HEAT Business Rule Editor main window reappears and your new rule displays in the menu.
User Guide
7-12 Business Process Automation Module
AutoTask ActionsWhen you create an AutoTask for the BRM to carry out, you are given the opportunity to customize the AutoTask by selecting an action. For example, you can choose to automatically send an e-mail, update a record, and so on.
Please refer to Chapter 3, "Call Logging" for more information on AutoTasks and AutoTask actions.
Editing Existing Business RulesTo edit existing Business Rules, access the HEAT Business Rule Editor main window. Double-click on any rule, and the Business Rule Editor dialog box appears. Depending upon what type of rule you are editing—an automation or an escalation—a specific set of tabs applicable to that action appears. These tabs may include:• Description• When• Which Calls• Which CustomersFor escalations, the following two tabs are available in addition to the three listed above:• Action(s)• Follow-up(s)
Note: The tabs appearing in the Business Rule Editor dialog box are identical to the Business Rule Editor Wizard—Description, When, Which Calls, Which Customers, Action(s), and Follow-up(s) dialog boxes.
HEAT
Working with Business Rule Editor 7-13
Removing Business RulesWhen a Business Rule is no longer needed, you can remove it from your system. Removing a Business Rule does not remove the template from which it was created, but the rule itself is permanently deleted.
Remove a rule by selecting the rule in the Business Rule Editor main window and then clicking Remove Rule.
Saving Your ChangesAny time a change is made to a Business Rule, you must save it. The new changes take effect the next time Business Rule Monitor runs a query.
For more information on Queries, see the section titled "Advanced” on page 7-17.
Save a rule by selecting the rule in the Business Rule Editor main window, then clicking Save Changes. A confirmation dialog box appears confirming your changes were saved.
Note: The Business Rule Monitor incorporates your changes during its next Rule Confirmation Query. If you want immediate incorporation, you must stop and restart the Business Rule Monitor service.
Importing and Exporting Business Rules
Business Rules can be shared between systems. Before you can share a rule, you must export it using the File>>Export function in Business Rule Editor. Exported Business Rules are saved with a .hef (HEAT Export File) extension. Once exported, these .hef files can be imported into another BPAM system using the File>>Import function in Business Rule Editor. Additionally, these files can be opened in a text editor application allowing you to see and/or print out the Business Rule format, if desired.
User Guide
7-14 Business Process Automation Module
Enabling Business RulesBusiness Rules run by using your system’s database tables. To enable Business Rules, you must log on to the Administrator module and enable the Business Rules in the data tables. This process adds a date-time field to each table that the Business Process Automation module uses to track changes.
IMPORTANT: You must complete this process for every data table you plan to use for the Business Process Automation Module. For example, if you want to execute a Business Rule based on the duration of a Call Record, you must enable Business Rules for the CallLog table. Similarly, if you want to execute a Business Rule based on any kind of Assignment information, you must enable Business Rules for the Asgnmnt table.
Business Rules can be enabled for the CallLog, Detail, Subset, Journal, Profile, Config, and Asgnmnt tables.
For more information on data tables, refer to the HEAT Administrator online Help.
Enable a Business Rule by selecting the Enable Business Rule check box in the Administrator module’s Table Editor.
Note: For more information on Edit Sets, refer to the HEAT Administrator online Help.
HEAT
Working with Business Rule Monitor 7-15
Working with Business Rule Monitor
Business Rule Monitor runs as a Windows NT/2000/XP service. Business Rule Monitor must be set up on a computer running NT/2000/XP to work properly; the Business Process Automation installation program typically handles installation of the Business Rule Monitor.
Note: Before you can run Business Rule Monitor, you must configure it using the Business Rule Monitor Configuration Tool.
Business Rule Monitor Configuration Tool
Because the Business Rule Monitor is a service and therefore has no direct interface, use the Business Rule Monitor Configuration Tool to set up controls or preferences for Business Rule Monitor.
The BRM Configuration Tool uses a single window containing tabs that enable you to define your database selection, mail login, log file information, and so on. Typically, settings in the Configuration Tool are configured upon installation. If you must make modifications, it is recommended that the system administrator handle these. With the exception of the Log File tab, any changes you make do not take effect until the service is stopped and restarted. Changes to the Log File tab are reflected after the next Rule Confirmation Query.
User Guide
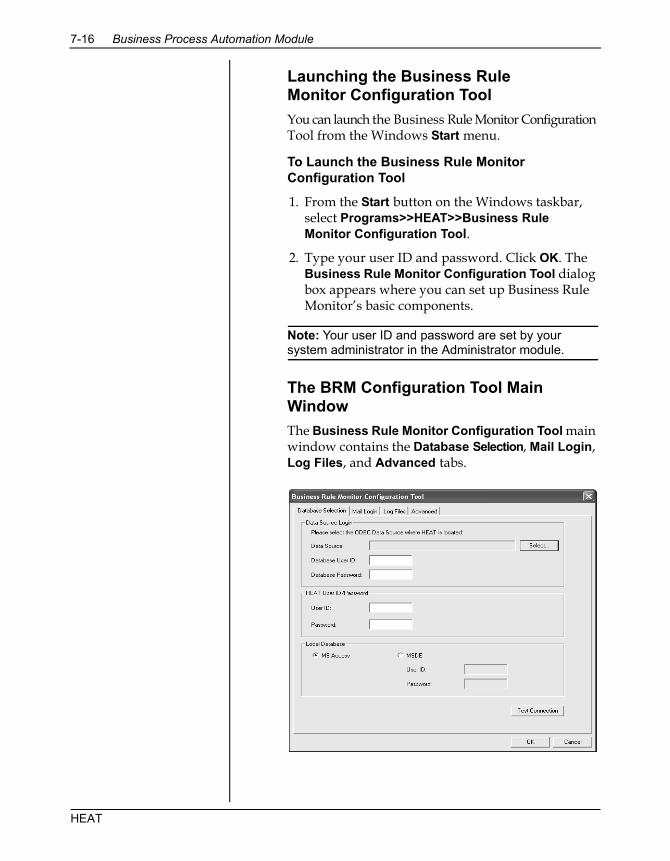
7-16 Business Process Automation Module
Launching the Business Rule Monitor Configuration ToolYou can launch the Business Rule Monitor Configuration Tool from the Windows Start menu.
To Launch the Business Rule Monitor Configuration Tool
1. From the Start button on the Windows taskbar, select Programs>>HEAT>>Business Rule Monitor Configuration Tool.
2. Type your user ID and password. Click OK. The Business Rule Monitor Configuration Tool dialog box appears where you can set up Business Rule Monitor’s basic components.
Note: Your user ID and password are set by your system administrator in the Administrator module.
The BRM Configuration Tool Main WindowThe Business Rule Monitor Configuration Tool main window contains the Database Selection, Mail Login, Log Files, and Advanced tabs.
HEAT
Working with Business Rule Monitor 7-17
Setting Up the Database SelectionBusiness Rule Monitor works with a specified data source (database). The data source must be set up before Business Rule Monitor can use it.
Setting Up the Mail LoginThe Mail Login tab is used to set up MAPI, VIM, or POP/SMTP information for the mail account sending Business Rule notifications. You can use a specific individual’s mail account information or set up a special mail account from which messages are sent (the account is actually set up through your VIM, MAPI, or POP/SMTP software; Business Rule Monitor needs the account information only).
Setting Up Log FilesLog files store a variety of information about Business Rules. Business Process Automation lets you select the information you want to include in the log file. Each Business Rule has a log file that can be reset at a time you specify. If you accidentally delete a log file, it is recreated when you restart the service.
Note: We recommend you reset the log files periodically because they can become very large.
Advanced Several advanced settings are available in Business Rule Monitor. You can specify a database polling frequency, Rule Confirmation Query, or action failure contingency.
User Guide
7-18 Business Process Automation Module
The Scheduling Query setting indicates how often you want the service to query the database for changes in Call Record information.
Note: The Scheduling Query uses the Date Last Modified (DTLastMod) field in the applicable table (for example, Call Log or Assignment) to determine which Call Records were added or changed since the last query. Although the Time Zone Offset from the Main Database (in Call Logging) setting is designed to compensate for time zone (EST, CST, MST, PST, and so on) differences between Call Logging instances and the HEAT database, it is also important to allow for differences in local clocks.
For an example of this function, refer to the BPAM online Help.
The Rule Confirmation Query determines how frequently the Business Rules are polled for modifications. During this query the program looks for Business Rules that were modified and reloads them. It is designed to run less frequently than the scheduling query and can be used to handle greater variations in local clocks without slowing down the system during each query.
Note: The time you type should be in large increments so that your system performance is not compromised. We suggest 90 minutes or more.
An Action contingency is an event that occurs if an action does not execute properly. You can choose to move on to the next action or stop the action process completely.
Note: Any changes you make to any of these tabs take effect after the service is stopped and restarted.
HEAT
Working with Business Rule Monitor 7-19
Running Business Rule MonitorThe Business Process Automation Setup installer configures Business Rule Monitor as an NT/2000/XP service that runs automatically on your system. From your control panel or from Administrative Tools (for XP and 2000), you can view Business Rule Monitor’s service settings, start/stop the service, configure startup options, and view Application Event logs. The service that BPAM uses is named HEAT Business Rule Monitor.
For details on configuring startup options and running Business Rule Monitor, refer to the BPAM online Help.
If the Business Rule Monitor service does not run or you get an error message, check the Application Event Logs for errors. Errors appear in the BRMError.log or NT Event Log files. To view Application Event Logs, select Administrative Tools from your Windows Control Panel and select Event Viewer.
User Guide
7-20 Business Process Automation Module
BPAM Wrap-upHaving read this chapter, you acquainted yourself with BPAM’s core concepts:
• Adding and Editing Business Rules
• Creating AutoTasks (both automations and escalations)
• Using the Business Rule Monitor Configuration Tool
• Launching the Business Rule Monitor
For in-depth information or step-by-step instructions for implementing any of BPAM’s features, please refer to the BPAM online Help.
HEAT
S E C T I O N I V
Manager’s Tools

in this chapter...How Manager’s Console WorksUser Interface BasicsSetting Up Manager’s ConsoleThe Metric AdministratorGroup Tab FunctionsUsing the Metric Indicator WizardChanging Indicator PropertiesSaving ChangesUsing the Metric Log
C H A P T E R E I G H T
8Manager’s Console
OverviewManager’s Console is a wizard-driven tool for defining Metrics, which are the parameters within which you want your business processes to function. The wizard also helps you create Metric Indicators which provide visual confirmation of Metric status.
With Metrics and Metric Indicators in place, managers and analysts have a reliable means of tracking critical, time-sensitive issues. In addition, Manager’s Console provides a step-by-step procedure for creating Actions to manage those issues if they cross established limits. The information gathered from this regular monitoring can provide statistical justification for resource, technology, or process changes.
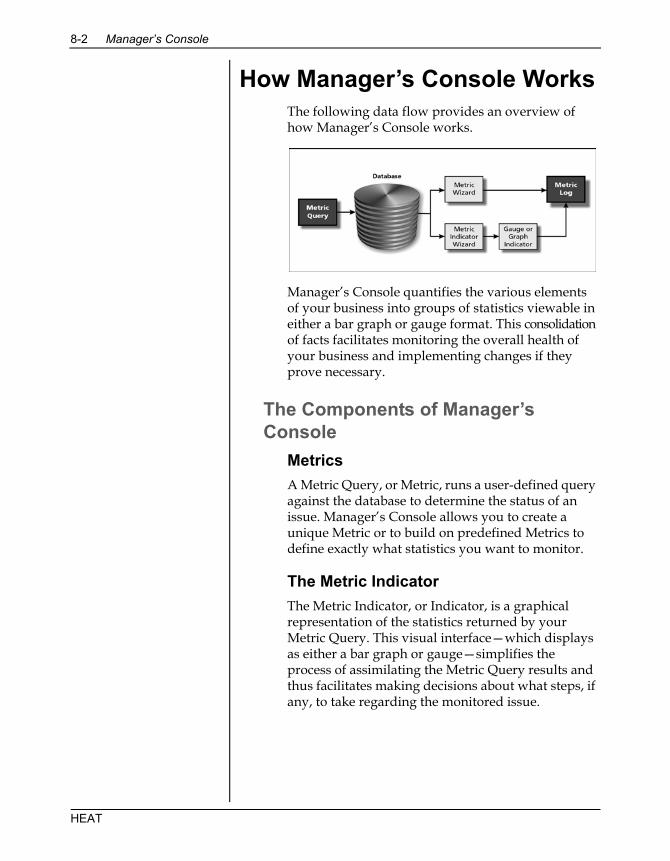
8-2 Manager’s Console
How Manager’s Console WorksThe following data flow provides an overview of how Manager’s Console works.
Manager’s Console quantifies the various elements of your business into groups of statistics viewable in either a bar graph or gauge format. This consolidation of facts facilitates monitoring the overall health of your business and implementing changes if they prove necessary.
The Components of Manager’s Console
MetricsA Metric Query, or Metric, runs a user-defined query against the database to determine the status of an issue. Manager’s Console allows you to create a unique Metric or to build on predefined Metrics to define exactly what statistics you want to monitor.
The Metric Indicator The Metric Indicator, or Indicator, is a graphical representation of the statistics returned by your Metric Query. This visual interface—which displays as either a bar graph or gauge—simplifies the process of assimilating the Metric Query results and thus facilitates making decisions about what steps, if any, to take regarding the monitored issue.
HEAT
How Manager’s Console Works 8-3
Indicators are divided into user-defined zones that use color to reflect the status of the Metric. Red indicates the Metric is in an unacceptable zone, yellow indicates it is approaching an unacceptable zone, and green indicates the Metric is within acceptable parameters.
If you wish, you can place several Indicators together under one group tab in the Manager’s Console Main Group window.
The Metric Wizard The Metric Wizard allows you to create a Metric without having it appear as an Indicator. To access the Metric Wizard through the Main Group – Manager’s Console window, select Console>> Metric Administration. Creating the Metric without an Indicator means the statistics it provides are available for review or reporting purposes but do not appear as a visual interface.
The Metric Indicator Wizard The Metric Indicator Wizard takes you step-by-step through a series of dialog boxes that first create the Metric and then create the Indicator to display the status of that Metric. You may then create an Action to send an e-mail based on events that occur. To access the Metric Indicator Wizard through the Main Group – Manager’s Console window, select Indicator> New.
The Metric Indicator Log The Metric Log is a record of all the thresholds a specific Metric crosses. To access a Metric Log, click the Metric Indicator to select it, then right-click and select View Log from the shortcut menu. In the Metric Log dialog box, you have the opportunity to record the cause of the parameter breach and the plan to correct it.
User Guide
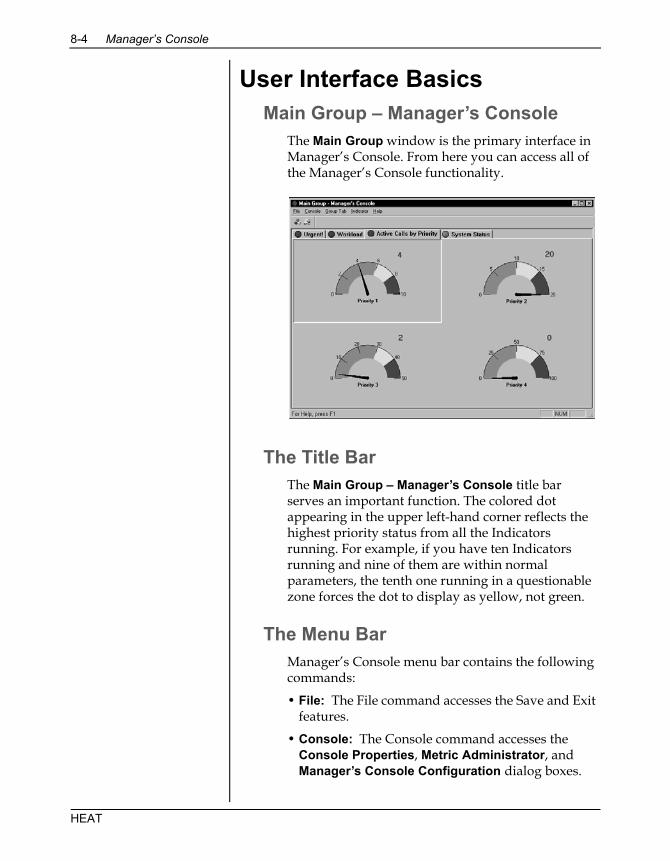
8-4 Manager’s Console
User Interface BasicsMain Group – Manager’s Console
The Main Group window is the primary interface in Manager’s Console. From here you can access all of the Manager’s Console functionality.
The Title BarThe Main Group – Manager’s Console title bar serves an important function. The colored dot appearing in the upper left-hand corner reflects the highest priority status from all the Indicators running. For example, if you have ten Indicators running and nine of them are within normal parameters, the tenth one running in a questionable zone forces the dot to display as yellow, not green.
The Menu BarManager’s Console menu bar contains the following commands:
• File: The File command accesses the Save and Exit features.
• Console: The Console command accesses the Console Properties, Metric Administrator, and Manager’s Console Configuration dialog boxes.
HEAT
User Interface Basics 8-5
• Group Tab: The group tab command accesses the Group Metric Properties dialog box for both creating a new and modifying an existing group tab. Here you can also click Delete here and delete the currently active group tab.
• Indicator: The Indicator command accesses the Metric Indicator Wizard, the Indicator Properties dialog box, the Manager’s Console Metric Log dialog box, and the Zoom feature. You can also click Delete and remove the currently active Indicator.
• Help: The Help command accesses Manager’s Console online Help, copyright information about Manager’s Console, and the FrontRange Solutions Web site.
The ToolbarTwo icons appear on the Manager’s Console toolbar:
• The New Tab icon opens the Group Metric Properties dialog box where you can create a new Group Tab.
• The New Indicator icon opens the Metric Indicator Wizard.
The Group TabsThe Group Tabs run below the toolbar and reflect user-defined groups of indicators. Click a tab to activate it, then right-click to see the shortcut menu.
The Indicator PanesThe panes below the group tabs reflect the Indicators that are running in the currently active tab. Click any Indicator and a shortcut menu appears. This menu is identical to the menu that appears if you click the Indicator command on the menu bar.
User Guide
8-6 Manager’s Console
Setting Up Manager’s ConsoleThere are several components to setting up and launching Manager’s Console. You must install, choose what product’s Metric Groups appear in the Metric Administrator tree (HEAT, GoldMine, or both), set up mail service, and then install Manager’s Console on the client machines.
IMPORTANT: FrontRange Solutions highly recommends that users on the client computer installations of Manager’s Console NOT create any new Metrics or Metric Indicators on their client stations. If client changes are saved, the next time the master installation is started the changes from the client computers appear there. We recommend the administrator create all required Metrics and Metric Indicators on the master at the time of setup. If additions or changes prove necessary at a later time, they should be made to the master installation.
Launching Manager’s ConsoleYou should install Manager’s Console on its own computer. This installation acts as the Manager’s Console administrative image; however, the user interface refers to this as the server.
In reality, this installation is acting as the master—not as a true server. After you install Manager’s Console on the client computers, the client users log on in the Start Mode dialog box by selecting Connect to Server (that is, connect to the master). Doing so links them to the master installation and all of the Metrics and Indicators defined by the Administrator.
The master performs the polling, and thus only one computer is querying the database—not all of the clients running Manager’s Console. This configuration conserves valuable resources.
HEAT
Setting Up Manager’s Console 8-7
Once you have logged on and selected a data source, you must:
• Define and create your Metrics and Indicators.
• Set up your mail service and configure the Metric Administrator tree.
• Install Manager’s Console on all of the client computers.
Configuring Manager’s ConsoleManager’s Console allows you to determine which Metric Groups appear in the Metric Administrator tree. You can run Metrics against HEAT, GoldMine, or a combination of both products.
Note: System Metrics cannot be changed or deleted.
Setting Up Mail ServicesFor Manager’s Console to send and receive e-mail, you must tell it which e-mail protocol your system uses. You do not, however, have the ability to alter any of the e-mail protocol settings. These are set up through SupportMail in Call Logging, and Manager’s Console reads its information directly from SupportMail.
User Guide
8-8 Manager’s Console
The Metric AdministratorFrom the Metric Administrator, you can access the Metric Wizard—a tool that walks you through the creation of a Metric. You can also delete or change a Metric’s properties from this area.
Note: The Metric Wizard is not the Metric Indicator Wizard. The initial steps in the Metric Indicator Wizard also create a Metric Query, but you continue on to build an Indicator. Creating a Metric in the Metric Wizard adds it to the Metric Administrator tree, but no Indicator is created for it. The statistics gathered by your Metric are available for review and reporting purposes, but no graphical interface exists for them.
Using the Metric WizardAccess the Metric Wizard from the Main Group window by selecting Console>>Metric Administration.
Through the Metric Wizard you can:
• Add a Call Group to the HEAT Call Group Metrics.
• Refine Call Groups to query by specific fields using SQL Where Clauses (doing so precisely reflects what you need to know about your organization because you are not limited by existing Call Groups).
• Add a user-defined Metric.
• Add a new Sales and Marketing Metric.
HEAT
The Metric Administrator 8-9
Changing a Metric’s PropertiesOnce you have written your Metrics, you can access their properties through the Metric Administrator.
1. In the Metric Administrator dialog box select any Metric.
2. Click Properties. The Metric Properties dialog box appears. Three tabs are available:
• The Call Group tab: This is a read-only tab that displays which Call Group is selected.
• The Table and Where Clause tab: This is a read-only tab that displays your query’s table name and SQL Where Clause.
• The Query Frequency tab: This tab displays the currently selected polling frequency. You may change the frequency by typing a new numeric interval.
Deleting a MetricAt any time you may delete obsolete Metrics.
To Delete a Metric
1. In the Metric Administrator dialog box, choose the Metric you wish to delete.
2. Click Delete. A dialog box appears asking if you want to delete. Click Yes.
User Guide
8-10 Manager’s Console
Group Tab FunctionsTo access Group Tab functions, click Group Tab on the menu bar, or click a group tab to select it and then right-click. Three possibilities display:
• New: Displays the Group Metric Properties dialog box where you can type the title of the new group tab as well as in how many rows you would like the Indicators to display.
• Delete: Deletes the selected group tab and all of the Indicators in it.
Note: When you click Delete, no warning message appears to ask if you really intend to delete. If you unintentionally delete a Group Tab, simply close down Manager’s Console without saving changes; the Group Tab reappears when you restart the program.
• Properties: Displays the Group Metric Properties dialog box where you can change the title of a group tab or change the number of rows in which it displays.
HEAT
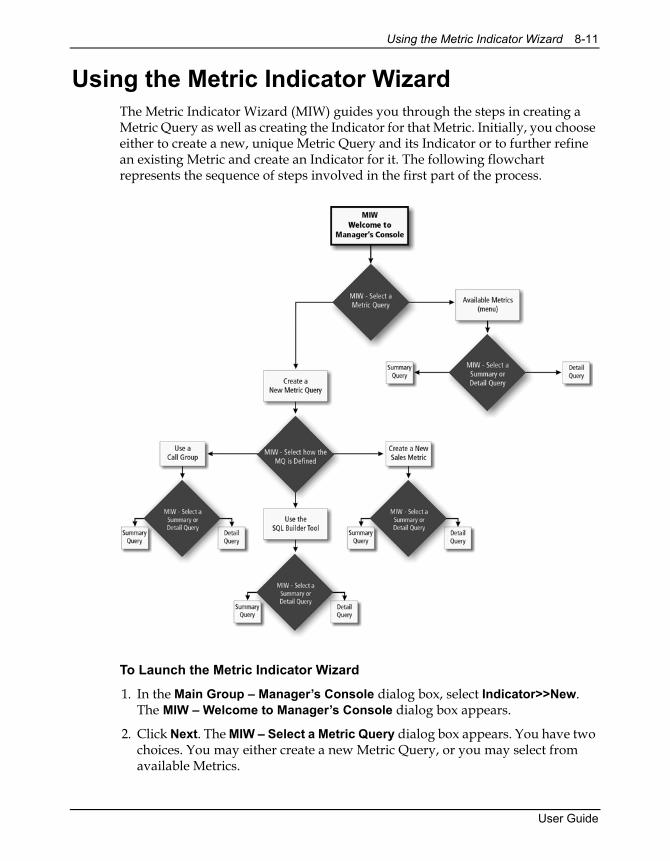
Using the Metric Indicator Wizard 8-11
Using the Metric Indicator WizardThe Metric Indicator Wizard (MIW) guides you through the steps in creating a Metric Query as well as creating the Indicator for that Metric. Initially, you choose either to create a new, unique Metric Query and its Indicator or to further refine an existing Metric and create an Indicator for it. The following flowchart represents the sequence of steps involved in the first part of the process.
To Launch the Metric Indicator Wizard
1. In the Main Group – Manager’s Console dialog box, select Indicator>>New. The MIW – Welcome to Manager’s Console dialog box appears.
2. Click Next. The MIW – Select a Metric Query dialog box appears. You have two choices. You may either create a new Metric Query, or you may select from available Metrics.
User Guide
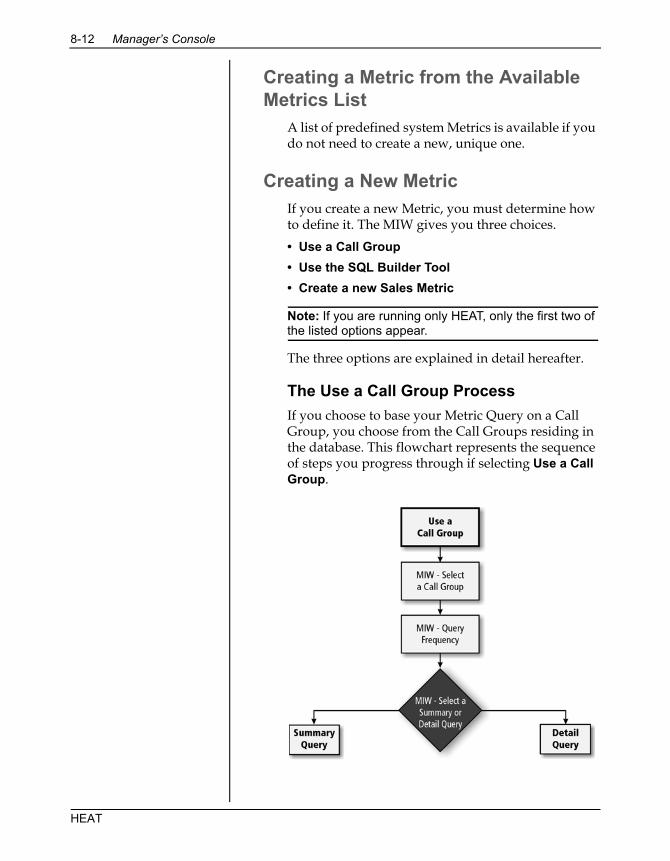
8-12 Manager’s Console
Creating a Metric from the Available Metrics List
A list of predefined system Metrics is available if you do not need to create a new, unique one.
Creating a New MetricIf you create a new Metric, you must determine how to define it. The MIW gives you three choices. • Use a Call Group• Use the SQL Builder Tool• Create a new Sales Metric
Note: If you are running only HEAT, only the first two of the listed options appear.
The three options are explained in detail hereafter.
The Use a Call Group ProcessIf you choose to base your Metric Query on a Call Group, you choose from the Call Groups residing in the database. This flowchart represents the sequence of steps you progress through if selecting Use a Call Group.
HEAT
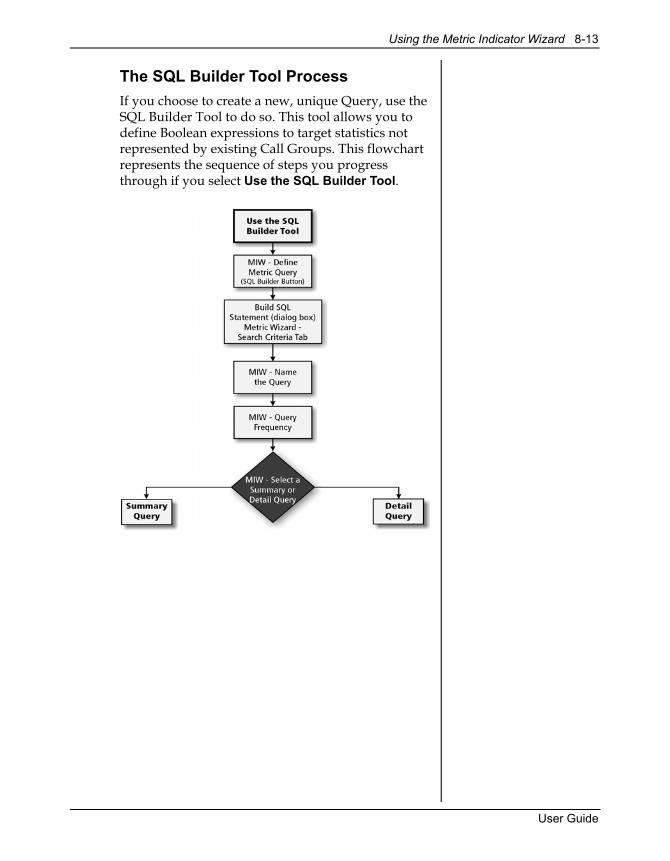
Using the Metric Indicator Wizard 8-13
The SQL Builder Tool ProcessIf you choose to create a new, unique Query, use the SQL Builder Tool to do so. This tool allows you to define Boolean expressions to target statistics not represented by existing Call Groups. This flowchart represents the sequence of steps you progress through if you select Use the SQL Builder Tool.
User Guide
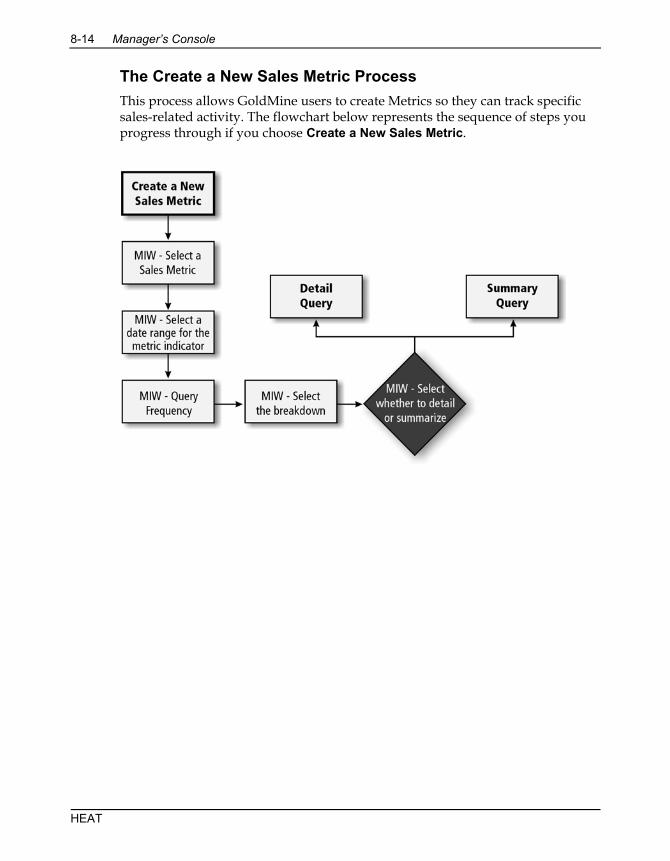
8-14 Manager’s Console
The Create a New Sales Metric ProcessThis process allows GoldMine users to create Metrics so they can track specific sales-related activity. The flowchart below represents the sequence of steps you progress through if you choose Create a New Sales Metric.
HEAT
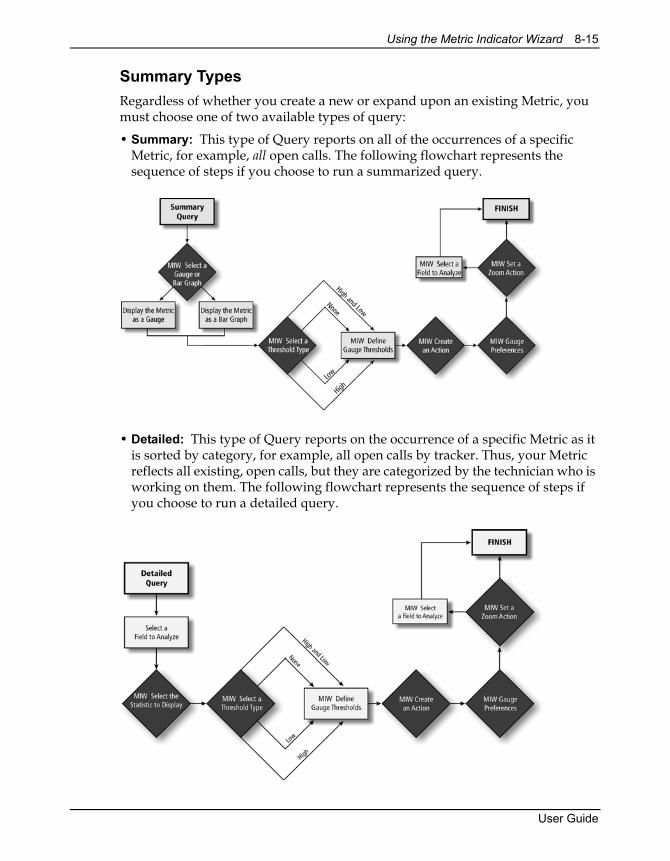
Using the Metric Indicator Wizard 8-15
Summary TypesRegardless of whether you create a new or expand upon an existing Metric, you must choose one of two available types of query:
• Summary: This type of Query reports on all of the occurrences of a specific Metric, for example, all open calls. The following flowchart represents the sequence of steps if you choose to run a summarized query.
• Detailed: This type of Query reports on the occurrence of a specific Metric as it is sorted by category, for example, all open calls by tracker. Thus, your Metric reflects all existing, open calls, but they are categorized by the technician who is working on them. The following flowchart represents the sequence of steps if you choose to run a detailed query.
User Guide
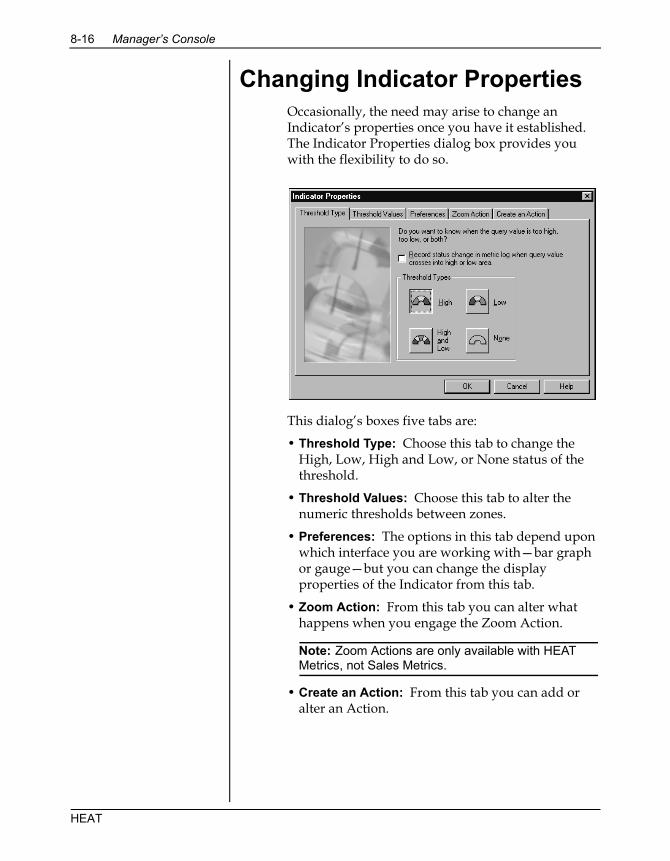
8-16 Manager’s Console
Changing Indicator PropertiesOccasionally, the need may arise to change an Indicator’s properties once you have it established. The Indicator Properties dialog box provides you with the flexibility to do so.
This dialog’s boxes five tabs are:
• Threshold Type: Choose this tab to change the High, Low, High and Low, or None status of the threshold.
• Threshold Values: Choose this tab to alter the numeric thresholds between zones.
• Preferences: The options in this tab depend upon which interface you are working with—bar graph or gauge—but you can change the display properties of the Indicator from this tab.
• Zoom Action: From this tab you can alter what happens when you engage the Zoom Action.
Note: Zoom Actions are only available with HEAT Metrics, not Sales Metrics.
• Create an Action: From this tab you can add or alter an Action.
HEAT
Saving Changes 8-17
Saving ChangesChanges are not permanent until they are saved.
To Save ChangesFrom the Main Group window, select File>>Save. The changes you made are saved.
When a user saves changes from the File>>Save menu, the server stores the changes to the Main Group file. All users can see these changes, regardless of whether the file was saved from a client PC or the server.
Note: When using Manager’s Console in a multi-user environment, it’s important to realize any user can make changes to the Manager’s Console Main Group. Because Manager’s Console resides on the server, the Save option saves the most recent changes and overwrites any other previously saved information.
Using the Metric LogThe Metric Log maintains a record of when Metric Indicators cross from one zone into another. You can also record information about why Metrics crossed thresholds and the corrective action taken. This chronicle is an important source of statistical information with which you can justify changes in your business.
Note: HEAT Answer Wizard contains a folder of predefined reports that draw their information from the Metric Log.
To have Indicator activity register in the Metric Log, you must ensure that the Indicator is set up to have its activity captured by tying it to the Metric Log.
User Guide
8-18 Manager’s Console
To View or Use the Metric Log
1. From the Manager’s Console menu bar, select Indicator>>View Log.
2. From the Indicator drop-down list, select the Indicator to display.
Note: All the transitions that have occurred appear in the Manager’s Console Log Entries drop-down list.
3. In the Log Entry list, select the log entry you want to analyze.
Note: The Log Entry drop-down list contains a log of all transitions (for example, every time the selected Metric Indicator crosses a set threshold) for the selected Metric. The date the Indicator crossed a threshold and the day it crossed the opposite threshold are also logged. Entries are made in this log by Manager’s Console only if you enable logging.
4. In the Cause text box, type information explaining the threshold crossing’s cause.
Note: You can also update the Cause automatically by e-mail every time that log entry is selected in the future.
5. In the Corrective Action/Plan text box, type information detailing the corrective action taken or a plan to prevent the problem in the future.
6. Click Close.
HEAT
Manager’s Console Wrap-up 8-19
Manager’s Console Wrap-upHaving read this chapter, you acquainted yourself with Manager’s Console core concepts:
• The Manager’s Console components—Metrics, Metric Indicators, the Metric Wizard, the Metric Indicator Wizard, and the Metric Log.
• User interface basics.
• Setting up Manager’s Console including launching, configuring, and setting up mail services.
• Using the Metric Administrator and the Metric Indicator Wizard.
• Using the Call Group, SQL Builder Tool and Sales Metric Processes and creating Indicators and Activities for them.
• Using the Metric Log.
For step-by-step instructions for implementing any of Manager’s Console features, please refer to the online Help.
User Guide

8-20 Manager’s Console
HEAT
in this chapter...How Answer Wizard WorksUser Interface BasicsLaunching Answer WizardSetting Answer Wizard PreferencesWorking with Favorite ReportsRunning ReportsViewing, Printing, and Exporting Reports
C H A P T E R N I N E
9Answer Wizard
OverviewHEAT’s Answer Wizard is a reporting tool that provides both managers and technicians with the ability to generate detailed reports about the status of various business elements. Answer Wizard is shipped with numerous predefined reports, each designed to monitor specific issues. These predefined reports get you up and running in no time. You can view, export, print, or save each report.
For added flexibility, Answer Wizard provides a Favorite Reports folder which allows users to organize and run customized reports created outside Answer Wizard. All reports are organized in an intuitive tree structure so they are easy to locate and run.
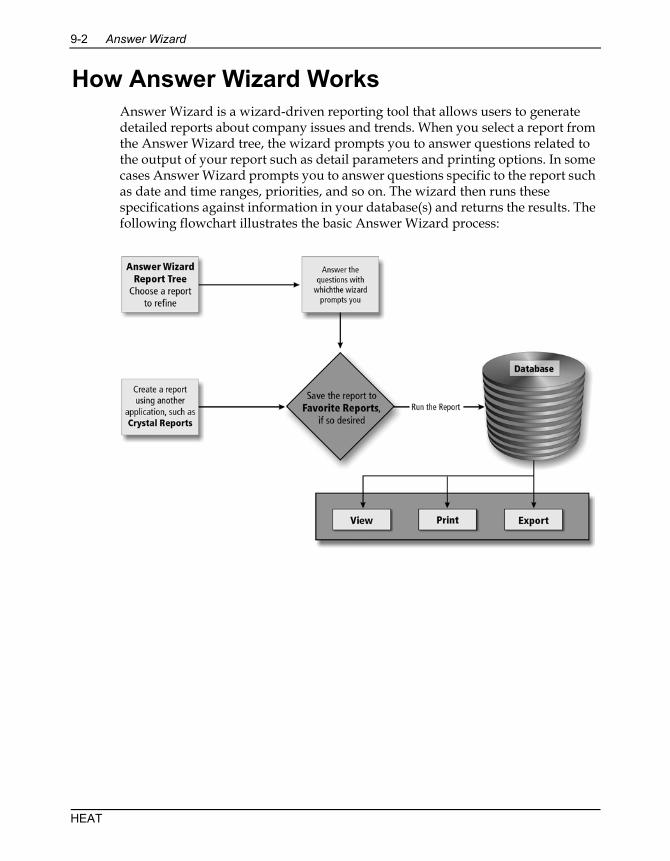
9-2 Answer Wizard
How Answer Wizard WorksAnswer Wizard is a wizard-driven reporting tool that allows users to generate detailed reports about company issues and trends. When you select a report from the Answer Wizard tree, the wizard prompts you to answer questions related to the output of your report such as detail parameters and printing options. In some cases Answer Wizard prompts you to answer questions specific to the report such as date and time ranges, priorities, and so on. The wizard then runs these specifications against information in your database(s) and returns the results. The following flowchart illustrates the basic Answer Wizard process:
HEAT
How Answer Wizard Works 9-3
ReportsAnswer Wizard works with two kinds of reports:
• Answer Wizard Reports: Answer Wizard reports are predefined reports that are shipped with Answer Wizard. Answer Wizard reports are specially designed for sales and marketing and Support Center activities. Answer Wizard reports are read-only and should not be directly modified; however, you can add or save Answer Wizard reports to your Favorite Reports folder where you can edit them.
• Custom Reports: Custom reports are created outside Answer Wizard with an application such as Crystal Reports. Once created, you can add them to the Favorite Reports folder so that you can run them directly from Answer Wizard.
IMPORTANT: If you add a Custom report created using fields from a password-protected database, you may be prompted for the User ID and password for that database before the report can be output.
Note: All reports are organized and displayed in the Answer Wizard Report tree.
The Answer Wizard Report TreeThe Answer Wizard Report tree is located in the Answer Wizard main window and houses the reports available in Answer Wizard. Categories compose the branches of the tree and help organize the Answer Wizard reports. The Favorite Reports folder appears at the top of the tree and helps organize your custom reports.
User Guide
9-4 Answer Wizard
Categories are represented by the icon. Reports are identified by the icon. To view reports contained in the Report tree, simply click the plus sign (+) located next to the folder name to expand the tree. A brief description of the report displays at the bottom of the window.
Note: Answer Wizard reports and tree structures vary depending on the product/version installed, the data source(s) configured, and the data files (.dat files) you choose to add.
Navigating Through the WizardAnswer Wizard is an intuitive, step-by-step guide that walks you through the process of generating reports. To navigate through the wizard, simply select a report in the Answer Wizard Report tree, answer the questions when prompted, then click Next to continue. To return to the previous dialog box, click Back. To return to the Answer Wizard main window, click Start Over. To cancel the process, click Cancel.
Answer Wizard QuestionsAnswer Wizard questions vary according to the report selected to run. Typically, all reports prompt you to choose detail parameters and printing options. Some Answer Wizard reports, however, prompt you to answer questions specific to the report. For example, some reports ask that you type the number of minimum hours or days to specify a time frame for your report; other reports request a customer identification number. These specifications help refine the data returned in the report.
HEAT
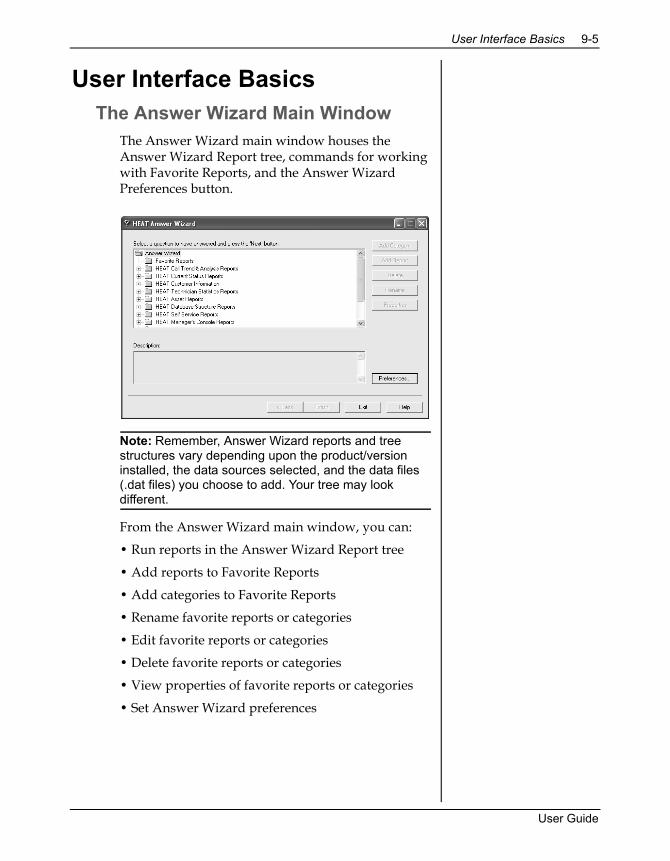
User Interface Basics 9-5
User Interface BasicsThe Answer Wizard Main Window
The Answer Wizard main window houses the Answer Wizard Report tree, commands for working with Favorite Reports, and the Answer Wizard Preferences button.
Note: Remember, Answer Wizard reports and tree structures vary depending upon the product/version installed, the data sources selected, and the data files (.dat files) you choose to add. Your tree may look different.
From the Answer Wizard main window, you can:
• Run reports in the Answer Wizard Report tree
• Add reports to Favorite Reports
• Add categories to Favorite Reports
• Rename favorite reports or categories
• Edit favorite reports or categories
• Delete favorite reports or categories
• View properties of favorite reports or categories
• Set Answer Wizard preferences
User Guide
9-6 Answer Wizard
Launching Answer WizardLaunch Answer Wizard from the Start button on the Windows taskbar.
To Launch Answer Wizard• From the Start button on the Windows task bar,
select Programs>>HEAT/GoldMine>>Answer Wizard.
• Type your User ID and password and then click OK. The Answer Wizard main window appears.
Note: When you log on to Answer Wizard for the first time, the User Preferences dialog box appears prompting you to set your report path, data file location, and data source(s).
For more information, see ”Setting Answer Wizard Preferences” on page 9-6.
Setting Answer Wizard Preferences
User Preferences tell Answer Wizard where to find the information it needs to function properly. For example, User Preferences specify:
• Where to find the Answer Wizard reports and data fields (.dat files): These are the predefined reports shipped with Answer Wizard.
• Where to find the Answer Wizard reports and data files (.dats): The Answer Wizard data files store the Answer Wizard tree structure and questions needed to refine the report parameters.
• Which data source(s) to use: The data source specifies the database used to run reports.
• Where to find the GoldMine program (GoldMine users only): In order for Answer Wizard to communicate with GoldMine, you must specify the User ID and password required to access GoldMine.
HEAT
Setting Answer Wizard Preferences 9-7
Note: You are prompted to set User Preferences the first time you log on to Answer Wizard. After that, access them by clicking the Preferences button in the Answer Wizard main window.
Configuring the Report Path and Data File Location
Answer Wizard is shipped with predefined reports (organized into categories) and questions that help you refine your reporting parameters; this information is stored in data files (.dats). Together these make up your Report Tree.
To add a category of reports to your Report Tree, you must configure the paths to these reports and data files.
Note: In most cases the paths are configured by default during installation; if not, you must set up the paths manually.
Configuring the Data SourcesAnswer Wizard runs its reports using information in a database. The data source you select tells Answer Wizard which database(s) to use.
Note: If you have both HEAT and GoldMine installed, you must configure data sources for both programs.
Configuring the User ID and Password for GoldMine (GoldMine Users only)
In order for Answer Wizard to connect to GoldMine, you must specify the User ID and password required to access GoldMine.
User Guide
9-8 Answer Wizard
Working with Favorite ReportsThe Favorite Reports folder is located at the top of the Answer Wizard Report tree and is used to store commonly used reports. Storing the reports in a central location allows you to find them quickly and easily. Storing reports in the Favorite Reports folder also allows you to modify the reports (that is, you can edit names, descriptions, and report parameters). The Favorite Reports folder may consist of the following:
• Answer Wizard reports you use regularly: You can add or save Answer Wizard reports to the Favorite Reports folder. Once they are stored in the Favorite Reports folder, you can modify their names, descriptions, and parameters without affecting the original report.
• Custom reports: Custom reports are created outside Answer Wizard with an application such as Crystal Reports. Once created, you can add them to Favorite Reports so you can run the reports directly from Answer Wizard.
Adding Categories to Favorite Reports
You can add categories to the Favorites Reports folder to further organize information within the folder. Added categories can contain additional categories and reports.
Note: The Add Category button is available only when the Favorite Reports category (or category within the Favorite Reports category) is selected.
HEAT
Running Reports 9-9
Adding Reports to Favorite ReportsYou can add custom reports and Answer Wizard reports to the Favorite Reports folder so you can access them quickly and easily. You can also modify reports included in Favorite Reports (that is, you can edit names, descriptions, and parameters).
Note: The Add Report button is available only when the Favorite Reports category (or category within the Favorite Reports category) is selected.
Saving Reports to Favorite ReportsOnce you run an Answer Wizard report and select a print option, you can choose to save the report to the Favorite Reports folder. Saving an Answer Wizard report to Favorite Reports allows you to access it quickly as well as modify its name, description, and parameters.
Note: Answer Wizard reports are added to the Favorite Reports category from the Save as Favorite Reports dialog box. This dialog box appears automatically after you have run a report and completed one of the print options.
Editing Favorite ReportsYou can modify the properties of any report or category stored within the Favorite Reports folder. Properties include report name, description, and report parameters.
Running ReportsAnswer Wizard walks you through the process of running a report by prompting you to select report specifications such as date ranges, detail parameters, and so on. The wizard then runs these specifications against information in your database(s) and displays the results on your monitor.
User Guide
9-10 Answer Wizard
Viewing, Printing, and Exporting Reports
After reporting specifications are set, you can set output options for the report. You can view, print, or export reports on your monitor.
IMPORTANT: If you run a Custom report that was created using fields from a password-protected database, you may be prompted for the User ID and password for that database before the report can be output.
Answer Wizard Wrap-upHaving read this chapter, you acquainted yourself with Answer Wizard’s core concepts:
• Reports and Report trees and navigating through them.
• User interface basics.
• Launching Answer Wizard.
• Setting Answer Wizard Preferences including configuring the report path, the data file location and data source.
• Working with favorite reports including adding categories and adding, editing, and saving favorite reports.
• Running reports, viewing, printing, and exporting reports.
• Understanding the basic report categories.
For more in-depth information or step-by-step instructions for implementing any of Answer Wizard’s features, please refer to the online Help.
HEAT
S E C T I O N V
Administrator’s Tools

in this chapter...How Administrator WorksUser Interface BasicsCustomizing HEATSetting SecuritySetting DefaultsIntegrating HEAT with Other ProductsMaintaining Your Database
C H A P T E R T E N
10HEAT Administrator
OverviewThe Administrator module is the pivotal tool for managing your HEAT system. Designed for a system administrator, this module controls all aspects of customization, security, defaults, database maintenance, and integrations for the entire HEAT suite.
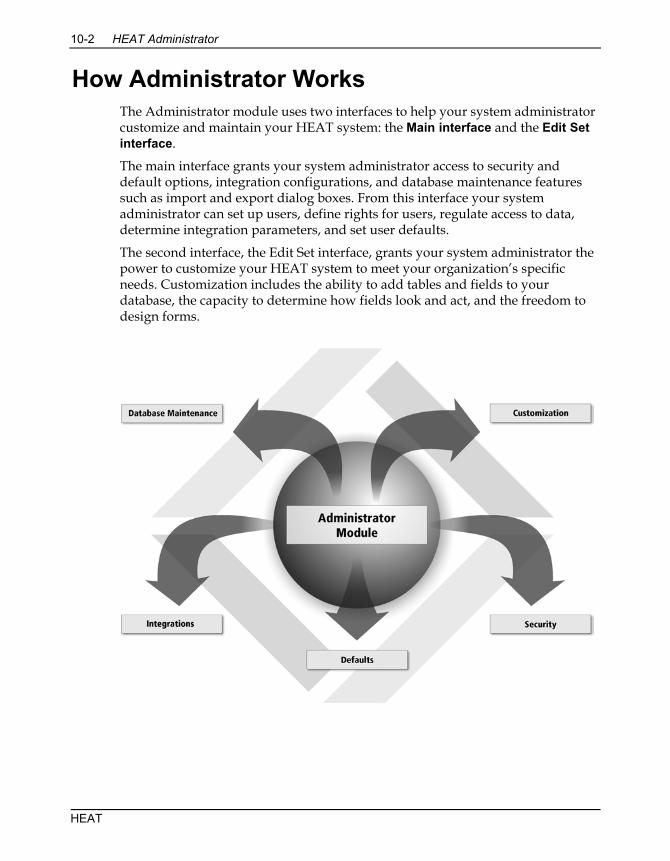
10-2 HEAT Administrator
How Administrator WorksThe Administrator module uses two interfaces to help your system administrator customize and maintain your HEAT system: the Main interface and the Edit Set interface.
The main interface grants your system administrator access to security and default options, integration configurations, and database maintenance features such as import and export dialog boxes. From this interface your system administrator can set up users, define rights for users, regulate access to data, determine integration parameters, and set user defaults.
The second interface, the Edit Set interface, grants your system administrator the power to customize your HEAT system to meet your organization’s specific needs. Customization includes the ability to add tables and fields to your database, the capacity to determine how fields look and act, and the freedom to design forms.
HEAT
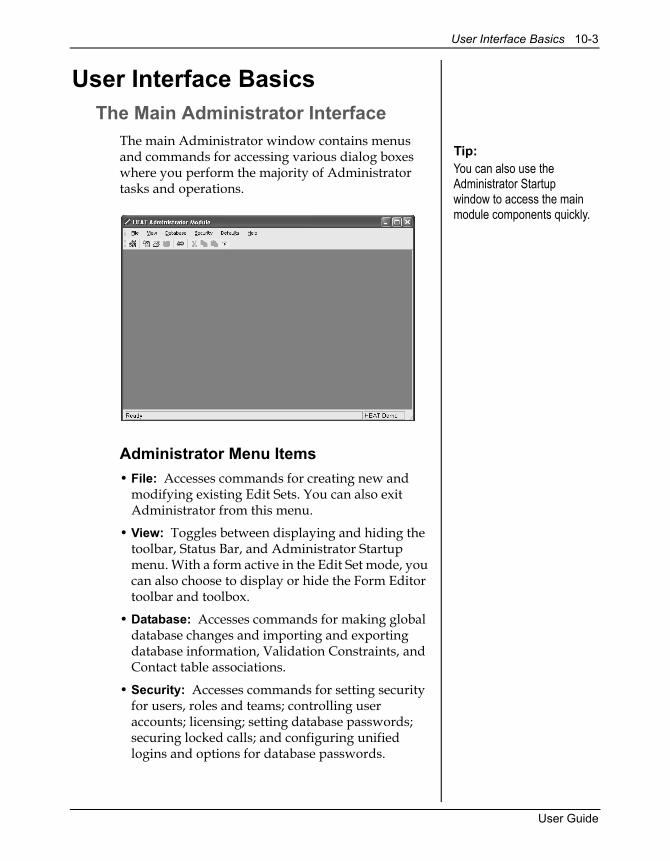
User Interface Basics 10-3
User Interface BasicsThe Main Administrator Interface
The main Administrator window contains menus and commands for accessing various dialog boxes where you perform the majority of Administrator tasks and operations.
Administrator Menu Items• File: Accesses commands for creating new and
modifying existing Edit Sets. You can also exit Administrator from this menu.
• View: Toggles between displaying and hiding the toolbar, Status Bar, and Administrator Startup menu. With a form active in the Edit Set mode, you can also choose to display or hide the Form Editor toolbar and toolbox.
• Database: Accesses commands for making global database changes and importing and exporting database information, Validation Constraints, and Contact table associations.
• Security: Accesses commands for setting security for users, roles and teams; controlling user accounts; licensing; setting database passwords; securing locked calls; and configuring unified logins and options for database passwords.
Tip:You can also use the Administrator Startup window to access the main module components quickly.
User Guide
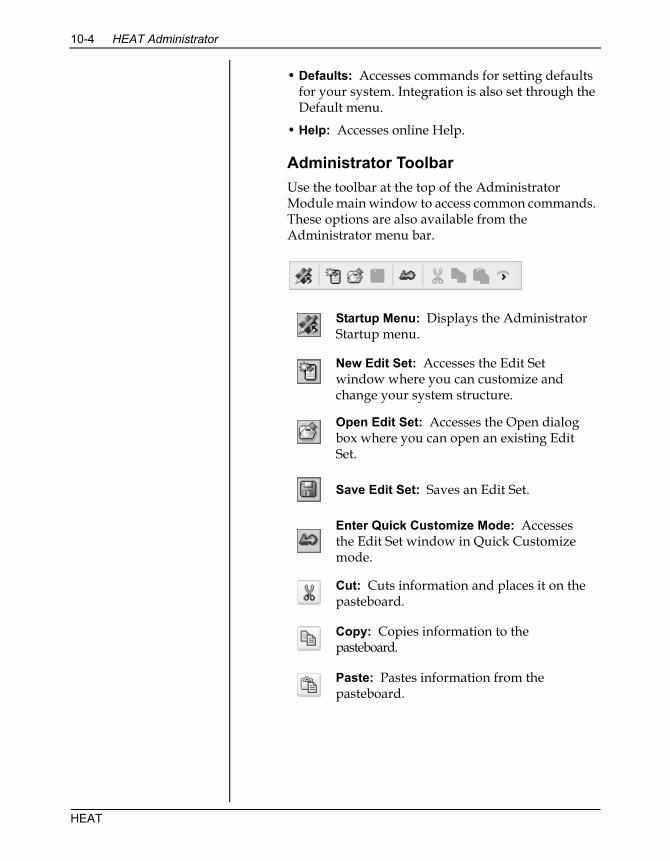
10-4 HEAT Administrator
• Defaults: Accesses commands for setting defaults for your system. Integration is also set through the Default menu.
• Help: Accesses online Help.
Administrator Toolbar Use the toolbar at the top of the Administrator Module main window to access common commands. These options are also available from the Administrator menu bar.
Startup Menu: Displays the Administrator Startup menu.
New Edit Set: Accesses the Edit Set window where you can customize and change your system structure.
Open Edit Set: Accesses the Open dialog box where you can open an existing Edit Set.
Save Edit Set: Saves an Edit Set.
Enter Quick Customize Mode: Accesses the Edit Set window in Quick Customize mode.
Cut: Cuts information and places it on the pasteboard.
Copy: Copies information to the pasteboard.
Paste: Pastes information from the pasteboard.
HEAT
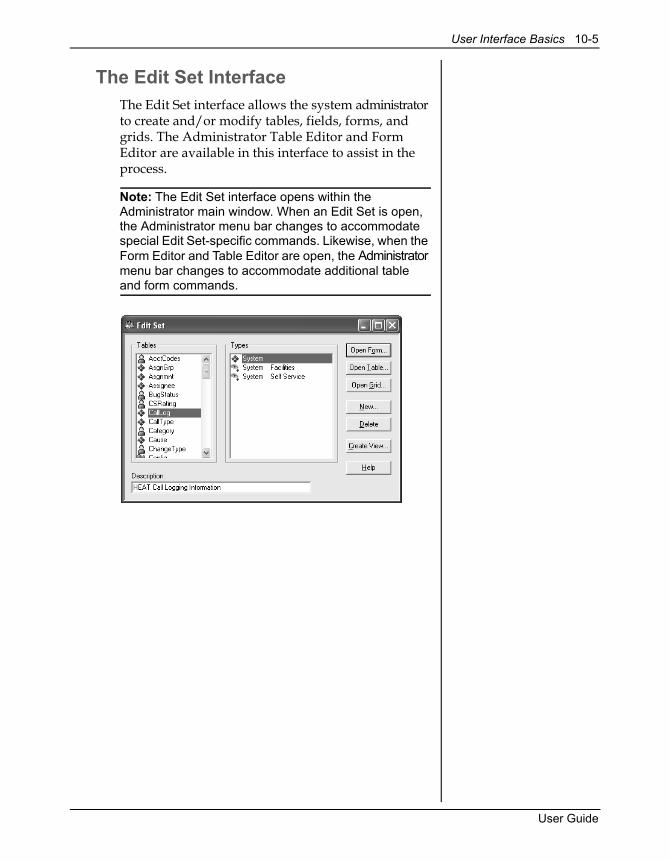
User Interface Basics 10-5
The Edit Set Interface The Edit Set interface allows the system administrator to create and/or modify tables, fields, forms, and grids. The Administrator Table Editor and Form Editor are available in this interface to assist in the process.
Note: The Edit Set interface opens within the Administrator main window. When an Edit Set is open, the Administrator menu bar changes to accommodate special Edit Set-specific commands. Likewise, when the Form Editor and Table Editor are open, the Administrator menu bar changes to accommodate additional table and form commands.
User Guide
10-6 HEAT Administrator
Customizing HEATAs mentioned, your system administrator uses the Edit Set interface to customize tables, fields, forms, and grids. Using the features of the Administrator module, your system administrator can control almost every aspect of these database components.
Adding Tables to Your DatabaseHEAT is shipped with numerous tables intended to help your organization log and track issues efficiently. Once you assess your organization’s needs, however, you may find that you want to create your own tables to help store and relay important information. Administrator gives your system administrator the flexibility to add tables directly to your working database. Your system administrator can also modify existing tables in your database, precluding System tables which cannot be modified.
Adding Fields to Tables and GridsWhen a new field is needed to store data, your system administrator can add it to a table in your database. Your system administrator can also modify existing fields shipped with HEAT (precluding System fields that cannot be changed). The Table Editor and New Field Wizard make it easy for your team to customize the attributes of your fields. Some of the attributes you can customize include the field’s name, size of the field, type of field (for example, memo or number), the field format (for example, drop-down or check box), and field Flags (such as “required to close” or “required to save”).
Note: These are just some of the attributes your system administrator controls; many more are customizable.
IMPORTANT: Fields can also be added to the grid view for the selected table. A grid displays multiple fields at a time.
HEAT
Setting Security 10-7
Designing FormsAfter fields are added to your database tables, your system administrator can design forms to display the field data. As always, several predefined forms are shipped with HEAT; your system administrator can use these templates or modify them to meet your company’s individual needs. Using the Form Editor in the Edit Set interface, your system administrator can customize field labels, alignment, text fonts, color, and much, more.
Setting SecurityUsing the Administrator module, your system administrator can assign very detailed access to every area of your HEAT system. This means your system administrator can control which modules and features you can access, which tables you can interact with, and which fields you can view. Your system administrator can even control how you log on to HEAT and how you access your database. In general, your “rights” are based on your role and team. Roles and teams are determined for each person, or user, working in the HEAT system.
UsersA user is a person who works in the HEAT system. In some cases users are services and other HEAT modules. Auto Ticket Generator, for example, is often set up as a user so it can maintain its own e-mail address and security. In order to access and use HEAT, your system administrator must set you up as a user by creating a user profile for you. This profile contains information such as your name, e-mail address, user ID, and password. Once your user profile is set up, your system administrator can monitor your user ID and control your access to the HEAT system.
User Guide
10-8 HEAT Administrator
RolesA role is a user’s unique function in the HEAT system. For example, if you work on the Help Desk, your role might be “support staff.” If you work in the Accounting department, your role may be “Accounting.” Each user has one—and only one—role, but several users can have the same role. Your role determines your “rights” for each area of the HEAT system. In other words, access to the database tables and rights to HEAT features are determined based on your role.
TeamsA team is a collection of one or more users who work on a common project, or toward a common goal. For example, if you are a technician, you may belong to the Network Support team. If you are a Product Manager, you may belong to the Management team. Teams are used to organize and secure access to information in Call Groups, SupportMail, AutoTasks, and the HEATBoard. A user may be on one or more teams, or no team.
Setting DefaultsUsing the Administrator module, your system administrator can also define defaults for the HEAT system. Defaults are preset specifications controlling the appearance and operation of HEAT for all users working in the HEAT system. Defaults can be as simple as setting default searching parameters or as complex as defining knowledge base search criteria. In general, defaults can be overwritten by users by setting individual User Preferences.
HEAT
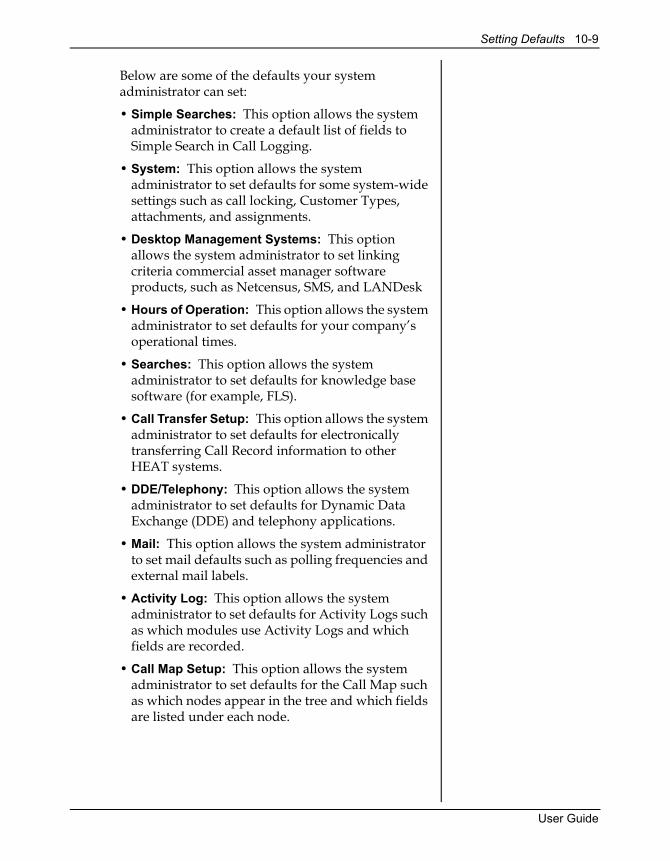
Setting Defaults 10-9
Below are some of the defaults your system administrator can set:
• Simple Searches: This option allows the system administrator to create a default list of fields to Simple Search in Call Logging.
• System: This option allows the system administrator to set defaults for some system-wide settings such as call locking, Customer Types, attachments, and assignments.
• Desktop Management Systems: This option allows the system administrator to set linking criteria commercial asset manager software products, such as Netcensus, SMS, and LANDesk
• Hours of Operation: This option allows the system administrator to set defaults for your company’s operational times.
• Searches: This option allows the system administrator to set defaults for knowledge base software (for example, FLS).
• Call Transfer Setup: This option allows the system administrator to set defaults for electronically transferring Call Record information to other HEAT systems.
• DDE/Telephony: This option allows the system administrator to set defaults for Dynamic Data Exchange (DDE) and telephony applications.
• Mail: This option allows the system administrator to set mail defaults such as polling frequencies and external mail labels.
• Activity Log: This option allows the system administrator to set defaults for Activity Logs such as which modules use Activity Logs and which fields are recorded.
• Call Map Setup: This option allows the system administrator to set defaults for the Call Map such as which nodes appear in the tree and which fields are listed under each node.
User Guide
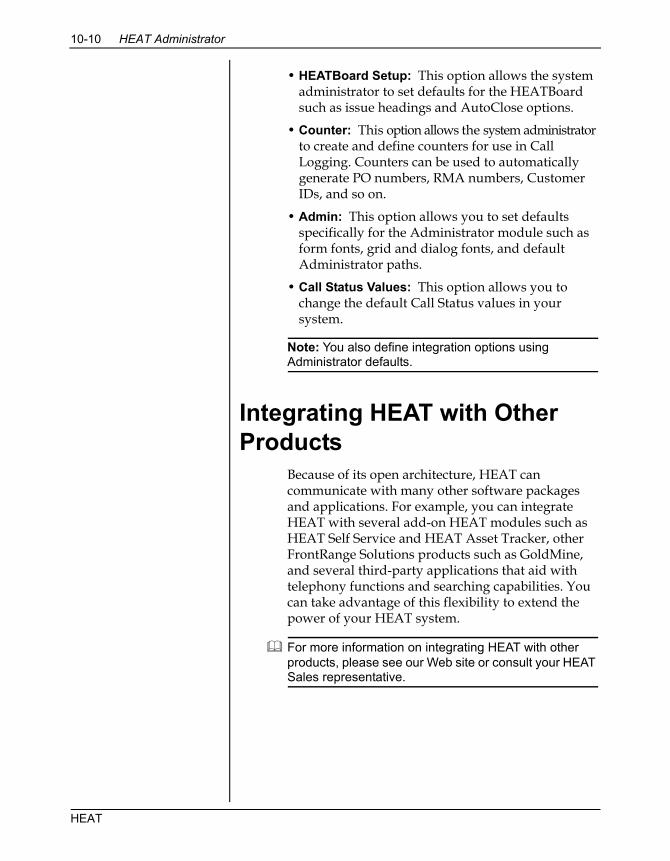
10-10 HEAT Administrator
• HEATBoard Setup: This option allows the system administrator to set defaults for the HEATBoard such as issue headings and AutoClose options.
• Counter: This option allows the system administrator to create and define counters for use in Call Logging. Counters can be used to automatically generate PO numbers, RMA numbers, Customer IDs, and so on.
• Admin: This option allows you to set defaults specifically for the Administrator module such as form fonts, grid and dialog fonts, and default Administrator paths.
• Call Status Values: This option allows you to change the default Call Status values in your system.
Note: You also define integration options using Administrator defaults.
Integrating HEAT with Other Products
Because of its open architecture, HEAT can communicate with many other software packages and applications. For example, you can integrate HEAT with several add-on HEAT modules such as HEAT Self Service and HEAT Asset Tracker, other FrontRange Solutions products such as GoldMine, and several third-party applications that aid with telephony functions and searching capabilities. You can take advantage of this flexibility to extend the power of your HEAT system.
For more information on integrating HEAT with other products, please see our Web site or consult your HEAT Sales representative.
HEAT
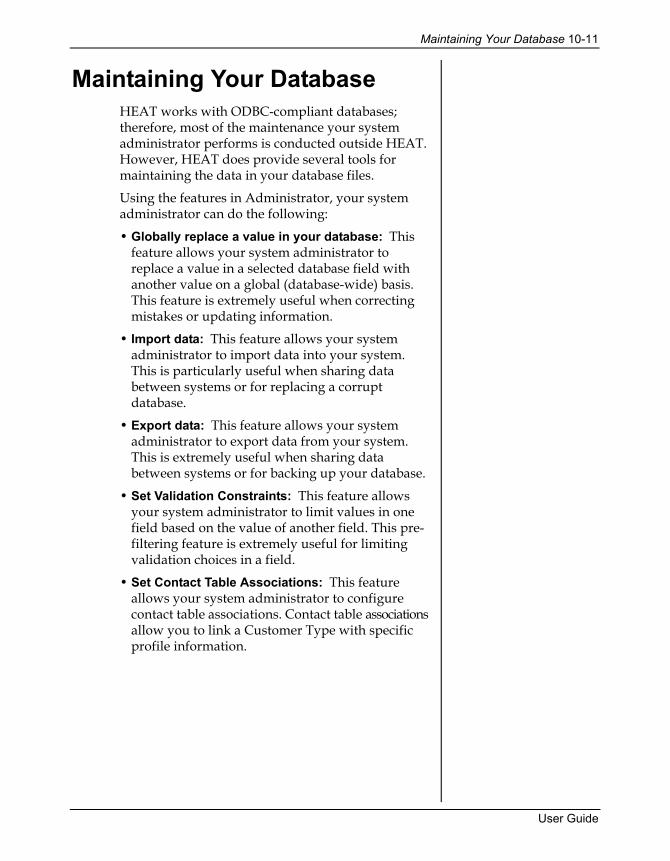
Maintaining Your Database 10-11
Maintaining Your DatabaseHEAT works with ODBC-compliant databases; therefore, most of the maintenance your system administrator performs is conducted outside HEAT. However, HEAT does provide several tools for maintaining the data in your database files.
Using the features in Administrator, your system administrator can do the following:
• Globally replace a value in your database: This feature allows your system administrator to replace a value in a selected database field with another value on a global (database-wide) basis. This feature is extremely useful when correcting mistakes or updating information.
• Import data: This feature allows your system administrator to import data into your system. This is particularly useful when sharing data between systems or for replacing a corrupt database.
• Export data: This feature allows your system administrator to export data from your system. This is extremely useful when sharing data between systems or for backing up your database.
• Set Validation Constraints: This feature allows your system administrator to limit values in one field based on the value of another field. This pre-filtering feature is extremely useful for limiting validation choices in a field.
• Set Contact Table Associations: This feature allows your system administrator to configure contact table associations. Contact table associations allow you to link a Customer Type with specific profile information.
User Guide
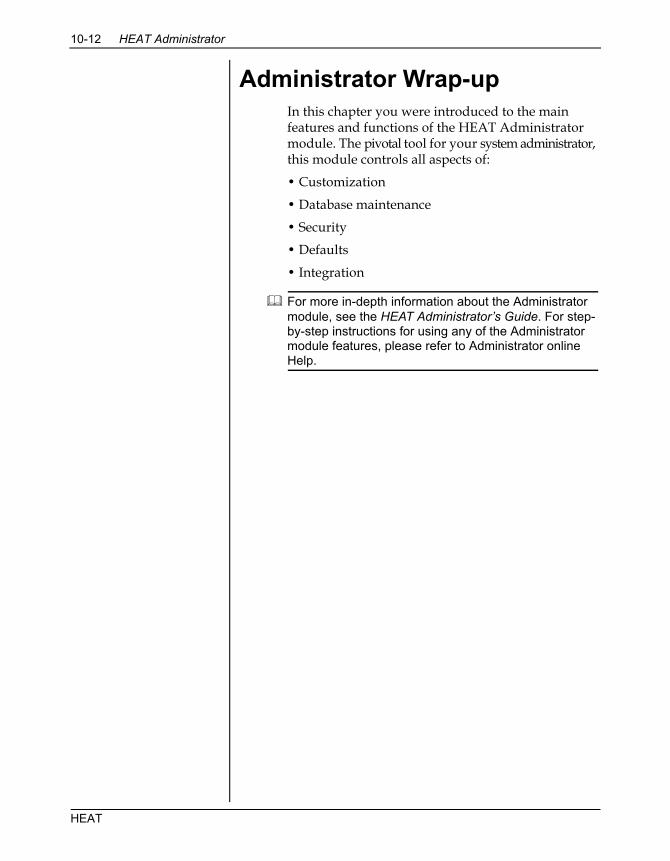
10-12 HEAT Administrator
Administrator Wrap-upIn this chapter you were introduced to the main features and functions of the HEAT Administrator module. The pivotal tool for your system administrator, this module controls all aspects of:
• Customization
• Database maintenance
• Security
• Defaults
• Integration
For more in-depth information about the Administrator module, see the HEAT Administrator’s Guide. For step-by-step instructions for using any of the Administrator module features, please refer to Administrator online Help.
HEAT
in this chapter...How LoadDB Utility WorksHow Quick Start Wizard Works
C H A P T E R E L E V E N
11Other Administrator Tools
OverviewHEAT provides Load DB Utility and Quick Start Wizard, which are additional tools to help you set up your system.
After you finish installing the software, you can run the LoadDB Utility to load the HEAT database into an existing ODBC data source.
Quick Start Wizard is designed to help you configure your system. It allows you to custom design many aspects of your HEAT system including forms, fields, Customer Types, and user setup.
11-2 Other Administrator Tools
How LoadDB Utility WorksThe LoadDB Utility program lets you load the HEAT database into an existing Open Database Connectivity (ODBC) data source. You can load data from any archive file created by the database export in the Administrator module.
ODBC is a standard that facilitates connections between different types of databases from applications such as HEAT. The application can then communicate using one standard communication format.
Launch the LoadDB Utility from the Start button on the Windows taskbar and click the Select button in the Selected ODBC Data Source area.
Note: If the selected data source already contains a HEAT database, you are prompted to overwrite the existing table.
IMPORTANT: After you select a data source, the default data types for your engine fill automatically in the Data source specific data types section of the LoadDB window. We recommend that you do not change these defaults. These are special options for very specific issues.
Loading an Archive FileAn archive file contains a .haf extension. You can load an archive file by clicking the Browse button next to the Archive File field. Select the Log data error to file (no prompt) check box to hide any error messages and click Load.
HEAT
How Quick Start Wizard Works 11-3
How Quick Start Wizard WorksAfter you install HEAT, you must complete several steps to finish the setup. First, you need to run the Quick Start Wizard (QSW). HEAT provides the QSW to help you customize your forms. Virtually all of the forms in HEAT can be customized to meet the needs of your organization. Customizing your system is accomplished in two phases: initial setup with the Quick Start Wizard, and ongoing changes that are made from within the Administrator module.
The Quick Start Wizard helps you:
• Set up your customer information
• Set up your HEAT users
• Choose your screen color themes
• Choose what types of calls you handle
• Make educated choices on which industry best practices to include in your system
Note: After you’ve started logging calls, you may need to fine tune your system by adding or changing fields. To make ongoing changes, use the Administrator module, which gives you complete control over the design and function of every form and window in HEAT.
Please refer to the HEAT Administrator Guide for more information.
Tip:After you’ve started logging calls, you may need to fine-tune your system by adding or changing fields. To make ongoing changes use the Administrator module which gives you complete control over the design and function of every form and window in HEAT. Please refer to the HEAT Administrator Guide for more information.
User Guide
11-4 Other Administrator Tools
Running the Quick Start WizardWith the Quick Start Wizard, you can easily get started with your initial customization to make HEAT work for you and your organization. The Quick Start Wizard asks a series of questions you need to answer when first setting up the HEAT database. When you’ve finished answering the questions in each dialog box, click the Next button to move forward.
• The Welcome section provides basic instructions for using the Wizard. We recommend you read the entire Welcome section.
• The Begin section asks some general questions about your HEAT system—questions about your company name and adding users to your system.
• The Customer section helps you set up your HEAT Customer Types. Once you select your basic model, the wizard assists you with further customization. After you finish defining a Customer Type, you can repeat the process to create additional Customer Types.
• The Call Type section lets you choose Call Types and Detail forms for your system.
Note: You can use the Administrator module to further customize the basic forms or to create new forms of your own at a later time.
• The Fields dialog box guides you through the how’s and why’s of some common fields and functionality for you to consider for your system.
• The Themes section lets you choose color themes to apply to the main types of HEAT forms: Call Forms, Customer Information, and Validation Forms.
HEAT
How Quick Start Wizard Works 11-5
Moving Through the Quick Start Wizard
You can save your work at any time by selecting File>>Save. Then you can pick up where you left off at a later time.
You don’t have to finish the entire wizard before applying your changes. You can keep sections, answer just a few questions in each section, or even jump straight to the Apply button.
After you’ve applied your answers you can still rerun the wizard—either starting with a fresh questionnaire or opening your saved answers from a previous session. You can change some or all of your answers, apply again, test your answers, and change them again to get exactly the system you want.
IMPORTANT: Each time you rerun the Wizard, your database is restored to its original condition. Any data you entered or any customization you’ve made outside of the wizard is lost. The wizard is a startup tool; once you’ve started logging calls into your HEAT system, you won’t be able to rerun the Quick Start Wizard without losing those records. Making changes to a live HEAT system is done through the Administrator module.
Applying and Using Your ChangesWhen you’re ready, test your Quick Start Wizard answers in an actual HEAT database by clicking the Apply button.
1. Click the Apply button.
2. Click Apply Changes. Select the data source to which you want to apply the changes. Login under your user name and select Yes to continue.
3. Create an archive before you commit your changes to the database. Click OK. The wizard applies your changes to the Quick Start Wizard database.
4. Exit the Quick Start Wizard when the Apply process is complete.
User Guide

11-6 Other Administrator Tools
5. Select Programs>>HEAT>>Call Logging to see your system changes.
6. Select the data source to which you made the changes and test your changes.
Note: When you see the login window, you may need to type a User ID and password. A User ID of Chris works without a password. If you chose to enter your users as part of your Quick Start Wizard answers, you can use one of those User IDs with a password of password.
The Other Administrator Tools Wrap-up
Having read this chapter, you acquainted yourself with the core concepts needed to successfully use Load DB Utility and Quick Start Wizard.
For step-by-step instructions for implementing any of the Load DB Utility or Quick Start Wizard features, please refer to the online Help.
HEAT
S E C T I O N V I
Add-on Tools

in this chapter...GoldMineHEAT Asset TrackerHEAT Plus Call CenterHEAT Plus KnowledgeHEAT Plus Remote
Support SuiteHEAT Self ServiceHEAT WebCenteriHEAT
C H A P T E R T W E L V E
12Other Add-on Tools
OverviewHEAT add-on modules help the product deliver even greater value.
• GoldMine: GoldMine can be integrated with HEAT so that you can view your GoldMine data through Call Logging.
• HEAT Asset Tracker: HEAT Asset Tracker can help reduce your IT budget through real-time asset inventory.
• HEAT Plus Call Center: HEAT Plus Call Center integrates HEAT with a powerful telephony application giving you a resource for even greater business efficiency.
• HEAT Plus Knowledge: HEAT Plus Knowledge saves up to 30 percent of the IT budget by reducing training costs, unnecessary escalations, and call lengths.
• HEAT Plus Remote Support Suite: HEAT Plus Remote Support integrates HEAT with LANDesk’s Instant Support Suite or Instant Support Suite Pro to collect and direct information to Call Logging.
• HEAT Self Service: HEAT Self Service allows customers to submit an issue or purchase order online, reducing Support Center calls by 15 percent.
12-2 Other Add-on Tools
• HEAT WebCenter: HEAT WebCenter allows you to access Call Logging and the HEAT database through a Web browser.
• iHEAT: iHEAT adds the dimension of secured thin client access to your set of customer support services and tools.
GoldMineYou can integrate HEAT with GoldMine so that the two applications can share information. The integration allows HEAT users read and write access to GoldMine customer information from within the Call Logging module. Likewise, GoldMine users can view Call Logging information from within the Tickets tab and Details tab in the GoldMine application. Answer Wizard and Manager’s Console can be used to monitor and report on information from both systems.
Complete integration instructions are available in the Administrator Module online Help and at http://support.frontrange.com (maintenance customers only).
HEAT Asset TrackerHEAT Asset Tracker (HAT) is fully integrated with HEAT and can optimize service and support operations by tracking every phase of your asset-infrastructure life cycle. Asset Tracker’s scanner module performs a desktop scan, and then the Asset Tracker Service directly populates HEAT tables with this inventory data—data that is systematically gathered, comprehensive, and up to date.
Asset Tracker’s other two modules—Tracking Manager and Asset Details—make data quickly available to managers and Support Center personnel. Because Asset Tracker places the right information in the right hands at the right time, it can quickly become a cornerstone in your company’s asset management program.
HEAT
HEAT Plus Call Center 12-3
HEAT Plus Call CenterHEAT Plus Call Center (HPCC) brings together two powerful applications: HEAT Service & Support from FrontRange Solutions and Interaction Center—the computer telephony solution from Interactive Intelligence.
HPCC significantly enhances the effectiveness and efficiency of HEAT Call Logging by automating distribution of both voice- and text-based communications. Whether a phone call, voice mail, e-mail, chat mail, or fax, HPCC evaluates, prioritizes, and distributes each customer’s incoming request quickly and appropriately.
HPCC uses first-level interaction management, centralized ticket queuing, and availability-based or skill-based routing to ensure customers get the requisite attention from the proper Call Logging technician.
HEAT Plus KnowledgeUse HEAT Plus Knowledge to build a library of your organization’s knowledge and expedite the closing of Call Records. HEAT Plus Knowledge’s close integration with Call Logging allows you to perform cross-program tasks including:
• Searching: You can execute knowledge entry searches directly from Call Logging or from HEAT Plus Knowledge. Advanced searching options allow you to search external search engines.
• Post Solution: When you find a solution to the issue on the current Call Record, you can automatically copy the text from the knowledge entry to an administrator-defined Call Record field.
• Auto Populating: You can quickly pass new solutions on the Call Record to HEAT Plus Knowledge to create a new knowledge entry.
User Guide
12-4 Other Add-on Tools
HEAT Plus Remote Support Suite
HEAT Plus Remote Support Suite integrates HEAT Call Logging with the powerful functionality of LANDesk’s Instant Support Suite or Instant Support Suite Pro. This means you can gather system information about a user’s computer, remotely control that computer, and have the collected information routed directly into the appropriate fields in your Call Record.
HEAT Self ServiceHEAT Self Service (HSS) is a fully customizable addition to Support Center and Help Desk management; it provides the Internet interface that introduces self service to your set of customer support services and tools. Fully integrated with HEAT, it manages data between the Web interface and your HEAT database.
HSS provides your Support Center customers with a 24-hour self-service option for researching issues and submitting Issue tickets. HSS is available to your customers using a standard Web browser.
HEAT WebCenterHEAT WebCenter expands the scope of HEAT, making it easy for your users to access Call Logging and the HEAT database through their Web browser. Use this Web-based application to create, edit, and view Call Records, assignments, and journals. Use the reports and charts features to quickly review the status of calls on hold, tech workloads, or HEATBoard Issues.
HEAT
iHEAT 12-5
HEAT WebCenter also features access from both Macintosh and Microsoft systems. And, using the WebCenter Administrator tool, HEAT administrators can quickly customize the WebCenter Host page to display the Call Logging data important to their users.
iHEATiHEAT adds the dimension of secured thin client access to your set of customer support services and tools. It provides a solution for harmonizing data transactions across platforms, and as a thin client, requires no costly desktop installations.
The iHEAT application uses any network connection (including the Internet) to deliver the core functionality of the HEAT applications to virtually any computer in your network. Your analysts can log on to HEAT and work remotely, viewing and updating records as if they were working locally.
iHEAT offers cross-platform compatibility allowing analysts to run HEAT applications from computers operating Macintosh, Linux, Windows, or any Java-enabled device or browser systems.
User Guide

12-6 Other Add-on Tools
HEAT
G L O S S A R Y
gGlossary
.haf FileA HEAT archive file that contains data from HEAT tables that provides a structure and backup file for the entire database.
.hcf FileA HEAT Control file that contains both data and structural information about one selected table.
@functionVariables that can be used in Call Groups and AutoTasks. For example, @current date.
G-2 Glossary
AAbandonA command button that allows users to terminate work on a current record.
AbstractText in FLS that appears above the tree window and describes the currently selected node.
Acknowledge AssignmentsThe process of affirming that an assignment in Call Logging was received and accepted.
Acknowledge RequiredA flag on the Assignment Table field designating that an entry in that field must be present for the Assignment to be considered “Acknowledged.”
ActionOne individual activity within an overall automated process. An AutoTask created to update a call and send an e-mail message to the customer would have two actions.
Activity LogA HEAT system database record that chronicles the history of an individual Call Record.
Administrator ModuleThe support module in HEAT used to create, customize, maintain, and secure your system.
AlarmUser-defined prompts that remind users to perform a task or mark a time interval.
AlertA notification that a call was added or restored to an Alert Monitor Call Group.
HEAT
G-3
Alert DetailsSpecific information pertaining to an Alert Monitor Call Group.
Alert MonitorA support module that allows HEAT users to notify themselves of important events.
Alert SummaryA synopsis delineating Call Groups and the number of Alerts generated, added, and removed from each.
Archive FileA file that contains a text-based representation of all data and structure from all database tables in your HEAT system. Archive files carry a .haf extension.
Asgnmnt TableA System table containing information about assignments.
ASPMicrosoft’s “Active Server Pages” provide server-side scripting to facilitate building a dynamic Web page—primarily small embedded programs within the HTML code.
Asset ManagementSoftware that tracks technology equipment and products that the company uses.
AssignmentA Call Record task delegated to an individual or group.
AttachmentA file or Web URL reference linked to a Call Record or FLS node.
User Guide
G-4 Glossary
Auto PopulateThe process of saving Call Logging information, descriptions, and solutions to a knowledge base for future reference.
Auto SearchA knowledge solution search in Call Logging defined to take place automatically at established intervals.
Auto Search IntervalA user-defined period of time (in seconds) between auto searches.
Auto Ticket GeneratorATG is a HEAT module that creates and modifies Call Records directly from MAPI- or VIM-compliant e-mail systems and ASCII text files.
AutoCloseA command that closes all calls linked to a specific HEATBoard Issue when that issue has been resolved.
AutofillA feature of the system design, customized using an Edit Set, that by choosing a value for one field automatically places data into another field.
AutoTaskA user-defined function that allows you to group multiple actions together as a single command to accomplish the actions sequentially and automatically.
BBoolean ExpressionSearch criteria that use Boolean logic to define database query, typically employing the operators AND and OR.
HEAT
G-5
Boolean SearchA text-syntax search method that lets you query a database for multiple conditions set forth in Boolean expressions.
BranchA specific path of information in an FLS knowledge tree which includes the node and all child nodes.
Broadcast MessageA message that can be sent to every user on the HEAT system.
Business Process Automation Module“BPAM” is a HEAT module created to monitor Call Record business rules and perform related actions.
CCall CounterA feature that incrementally tracks multiple incoming references to the same Call Record.
Call GroupA specific collection of Call Records, normally generated as a result of a query to the HEAT database; various automated processes can be applied to a Call Group.
Call Group AlertA predefined notification from Alert Monitor that prompts you when a call has been added or restored to an Alert Monitor Call Group.
Call ID NumberA HEAT-generated number that uniquely identifies each Call Record.
User Guide
G-6 Glossary
Call LoggingThe main module in HEAT providing call and customer information management—log, track, resolve—to Support Desk personnel.
Call MapAn expandable and collapsible summary view of the current Call Record displayed in the InfoCenter window of Call Logging.
Call RecordThe collective information about a specific call inclusive of caller data, detail, assignments, and journals. Also referred to as a Call Ticket.
Call Status BannerAn area of the Call Log form that displays information about the current call—Call ID, Call Status, Call Count, and Stopwatch.
Call TemplatesUser-defined AutoTasks that automate Call Record creation for commonly reported calls.
Call TicketThe collective information about a specific call that includes caller data, details, assignments, and Journals. Also referred to as a Call Record.
Call TransferA process that sends a Call Record to another HEAT system or another application via e-mail.
Call TypeA user-defined classification that categorizes an issue a customer is experiencing such as software or equipment. A type must be associated to track a call.
CallLog TableA System table containing the primary information about a specific Call Record.
HEAT
G-7
Catalog FileA system-created file (.hfw) containing user interface screen definitions and other HEAT system settings; speeds workstation/system performance with HEAT.
Closed RequiredA flag on CallLog, Detail, and Subset table fields designating that an entry in that field must be present in order to change the status of a Call Record to “Closed.”
CommitThe process used by the system administrator to apply Edit Set design changes permanently in the HEAT system.
Compound TableA special “System” table that exists as one table in the database but can function as multiple table types through the interface application such as Profile, Subset.
Confidence ValueA percentage value that represents the relevance of results found during an FLS search against the query words.
Config RecordA system record contained in the Configuration Table that contains information relevant to the customer such as their hardware or software.
Configuration TableThe table that contains configuration records within Call Logging that describes, for example, customer equipment and training information.
Configuration TypeA subtable in the Configuration Table that captures specific information about a category of equipment or other customer attributes such as CPU, modem.
User Guide
G-8 Glossary
Contacts TableA System table containing all contacts associated with a customer.
ControlAn object for displaying information in a form.
CounterAn automatic number generator used to streamline numerical processes. For example, counters can be defined to generate an RMA number.
Customer IDThe unique value assigned to each customer; used to tie all the elements of a customer’s record together.
Customer RecordA collection of information about a specific customer made up of the customer’s profile, contact, and configuration information.
Customer TypeA user-defined classification that helps categorize the kinds of customers served by a support desk. For example, internal or external.
Customer WindowThe window in Call Logging in which the Profile, Config or Call History displays.
DData SourceA symbolic name representing a connection setup to an ODBC-compliant database.
DatabaseA collection of data arranged for ease and speed of search and retrieval; an electronic filing system organized so that a computer program can quickly select desired data.
HEAT
G-9
DDEMicrosoft’s “Dynamic Data Exchange” process allows data to pass between Windows-based applications.
Demo DatabaseA database containing sample data that demonstrates the various features of HEAT and some of its ancillary products.
Detail TableA System table containing additional information about a specific Call Record.
Distribution FilesA compressed file (*.DST) containing a copy of the knowledge tree and all attachments that is used to transfer First Level Support trees.
DLL (Dynamic-Link Library) Contains executable programming code which can be run by an application.
EEdit BlocksAn AutoTask feature that allows you to specify the text and formatting when Assignments or Journals are inserted into an AutoTask.
Edit SetA “snapshot” of the database structure and screen design; used to modify HEAT form definitions, table/field attributes, and data entry rules.
External TableA database table that exists outside of the HEAT system, but whose data is tapped for use in HEAT tables. A connection is made through ODBC.
User Guide

G-10 Glossary
FFieldAn element of a database record in which one piece of information is stored. In database systems, fields are the smallest units of information you can access.
First Level Support (FLS)A HEAT module that allows HEAT users to create and maintain knowledge bases.
FlagA tag that denotes the properties of a field.
FormA graphical interface used to display, enter, and edit table information one record at a time.
Form ViewIn Edit Set design, the screen display aspect for the user interface. It contains custom labels and layout as well as edit boxes for fields from the associated database table.
GGlobalA Call Group that includes all users with viewing access in the system.
GridA tabular display for viewing multiple records.
Grid ViewThe third element in Edit Set design. It allows the administrator to select fields from a database table to determine grid displays in Call Logging.
HEAT
G-11
HHEATBoardA display within the Call Logging InfoCenter where important issues are posted.
HEAT Self ServiceOptional module allowing customers a self-service window on HEAT where the Administrator decides the view and interface capabilities.
HEAT TablesTables used solely by the system itself to control operation of the program and maintain user information.
Helpful ValidationA more flexible form of validation that allows users to either select an entry from a list or type an entry if one is not available from the “legal” values.
Hot ListA collection of Call Records that the user manually assembles to set as a Call Group.
IiHEATOptional HEAT module allowing technicians to access HEAT database via a Web browser.
IIS (Microsoft NT Server’s Internet Information Server)IIS provides a high-speed secure platform for publishing information on internal networks or on the Internet. It is a prerequisite for HEAT Self Service, iHEAT, HEAT Plus Knowledge, and HEAT WebCenter.
Index FileA component of Microsoft Index Server that speeds up searches.
User Guide
G-12 Glossary
Index Server CatalogA directory generated and used by the Microsoft Index Server to store indexing information about the Web site on the computer designated to hold the Web page files.
InfoCenterThe dockable display area in Call Logging that contains the HEATBoard and the Call Map.
JJournal TableA System table containing notes or comments—referred to as Journal entries—pertaining to a specific Call Record.
KKnowledge TreePart of an FLS knowledge base. The “tree” structure represents contents organized as an expandable system of branches and nodes.
LLead CallThe primary call of a HEATBoard Issue; it contains the most relevant information and directs follow-up actions.
Linked CallsCalls that are attached to a particular HEATBoard Issue.
LoadDB UtilityA utility that allows you to load your HEAT database onto an existing ODBC data source.
HEAT
G-13
Locked CallA Call Record that has been temporarily secured so that it cannot be modified by other users.
MMemo FieldA text field that accommodates a large amount of text—up to 10K.
NNodeAn element in a knowledge base that may contain other nodes.
OODBC“Open Database Connectivity” is a standard that facilitates connections between different types of databases.
ODBC AdministratorA utility that allows you to open and query a database through the use of an ODBC interface.
PPersonalA view access available only to a specific user; defined mainly for Call Groups and AutoTasks.
Polling IntervalThe period of time that elapses before the system checks for information such as retrieving e-mail.
User Guide
G-14 Glossary
Post SolutionA feature that automatically copies solution text directly from a knowledge base application into a HEAT Call Record.
Pre-Commit Edit Set VerifyFunction allowing the administrator to test the integrity of the Edit Set prior to actually committing it to the database.
PriorityAn assigned rating that helps determine Call Record importance.
Profile RecordUniquely defined by a combination of a Customer ID value and Customer Type value.
Profile TableA System table containing information about a specific customer such as their name and address.
Proxy AnalystA value used in HEAT Self Service tables to populate the Tracker fields.
QQuick CustomizeSimilar to New Edit Set Option, this option of the HEAT Administrator module limits modifications to those that do not change the database table or field structure.
Quick Start WizardConvenient way to customize the database. Intuitive interface that allows the administrator to select key features when initially implementing HEAT.
HEAT
G-15
RRecordAs used in database management systems, a complete set of information. Composed of fields—each of which contains one item of data—a set of records constitutes a file.
Reference IDA term used by HEAT Self Service as the unique identifier.
Remote ControlSoftware that can be launched to take control of a customer’s system for troubleshooting purposes.
Required FieldA field that must be filled in before the record can be saved.
Resolved RequiredA flag on the Assignment Table field designating that an entry in that field must be present for the Assignment to be considered “Resolved.”
RoleA role determines a user’s security rights for each area of the HEAT system. Each user can only be assigned one role.
Root NodeThe very first node in a knowledge tree.
SService Level Agreement (SLA) An agreement between a Service Desk and its customers defining what types of issues will be resolved in what time frame.
User Guide
G-16 Glossary
Simple SearchUsed to search a single field for a condition within the Call Records; for example, search for all “Open” Call Records.
Smart PromptsIn some Detail forms, user-defined questions designed to prompt the user in obtaining specific information from the caller.
SMSMicrosoft Systems Management Server—a desktop management system that can be integrated with HEAT.
StopwatchA HEAT tool designed to track the elapsed time spent on a Call Record.
Subset TableThe table containing select data from a customer Profile. The Subset presents this data about a customer who initiates an issue in the Call Log window.
SupportMailHEAT’s internal messaging system. It also allows access to external e-mail systems.
System AdministratorThe individual responsible for designing and maintaining the HEAT system; tasks include designing screens and forms, setting defaults, and controlling security.
System TableA table required to run HEAT. You cannot remove System tables, but you can modify them by adding, editing, and removing fields.
HEAT
G-17
TTableAn orderly arrangement of data set up in columns and rows such as a spreadsheet; relational database management systems all store data in the form of tables.
Table TypeEssentially a “subtable” of a selected Compound table. For example, a Detail Table might have a hardware type and a software type.
Table ViewIn Edit Set design, the table view contains the actual structure of the database table and lists all fields in that table along with their size, format, attributes, and validation information.
TeamAn administrator-determined collection of HEAT users that defines their access to system components such as Call Groups, HEATBoard Issues, and AutoTasks.
Temporary File NamesAn AutoTask feature that provides a way to temporarily write information to a file to be used by another program.
ThemeA coordinated set of design elements used to establish a standard look to Quick Start Wizard or the Web pages in HEAT Self Service.
Thin ClientIn client/server paradigm, a client that occupies relatively little memory or storage space and leaves most processing to the server.
User Guide
G-18 Glossary
Time Zone OffsetA feature designed to facilitate the sharing of the same HEAT database between locations in more than one time zone.
Times Solutions UsedA numerical indication in FLS of how many times a particular node solution was posted back to a Call Record. Used to track node relevancy.
TrackerThe HEAT user primarily responsible for a Call Record. HEAT defaults to the person logging the call as the Tracker.
UUser PreferencesVarious settings that control how the application looks and acts for each individual.
VValidated FieldA field whose value is checked against a list of legal values from another table.
Validation ConstraintA method used to limit the choices available to a field based on the value of another field.
Validation TableA reference table used to verify values that are entered into other tables.
ViewAn alternate form design of a HEAT table. It may incorporate different field attributes such as autofill and read-only.
HEAT

G-19
View SetA collection of designed “Views” that control the forms available to users within a given security role.
Virtual DirectoryA directory alias that browsers access instead of your actual home directory. It is more secure because it cloaks where the file directory is physically located.
WWeb ApplicationA program designed to be accessed through the World Wide Web.
Web Page Browser ViewA viewing area in the HEAT Self Service Configuration Tool main window where you can preview the corresponding Web page.
Web Page Tree ViewA viewing area in the HEAT Self Service Configuration Tool main window that displays the component files of each Web page.
Work GroupA system-created Call Group that contains calls worked on during a current Call Logging session.
User Guide

G-20 Glossary
HEAT
iIndex
I N D E X
AActions
creating tickets, 6-8e-mail confirmation, 6-12enabling auto attachments, 6-11error handler, 6-12informational queries, 6-10polling, 6-11saving definitions, 6-11transferring tickets, 6-10updating tickets, 6-9
Add-on ModulesGoldMine, 12-2HEAT Asset Tracker, 12-2HEAT Plus Call Center, 12-3HEAT Plus Knowledge, 12-3HEAT Self Service, 12-4
Administrator, 2recommendations, 2
Alert Definitionsadding actions, 4-8deleting, 4-8editing, 4-8saving, 4-9
Alert Monitor, 1acknowledging assignments, 4-11adding actions to Call Group Alert
Definitions, 4-8Call Group Alerts, 4-7defining polling intervals, 4-10how it works, 4-2launching Call Logging, 4-11overview, 4-1recommendations, 1setting user preferences, 4-12starting and stopping polling, 4-10System Message Alerts, 4-9toolbar, 4-5user interface basics, 4-4viewing alert summaries and
details, 4-12
I-2
Alert Monitor (continued)viewing journal entry lists, 4-12with Call Logging, 3-3working with, 4-10wrap-up, 4-13
Answer Wizard, 2configuring the report path, 9-7configuring user ID and password for
GoldMine, 9-7data source configuration, 9-7exporting reports, 9-10how it works, 9-2launching, 9-6
first time, 9-6main window, 9-5navigating the wizard, 9-4printing reports, 9-10question prompts, 9-4recommendations, 2report tree, 9-3reports, 9-3running reports, 9-9setting preferences, 9-6user interface basics, 9-5user preferences, 9-6viewing reports, 9-10with Call Logging, 3-4working with Favorite Reports, 9-8wrap-up, 9-10
Assignment form/tab, 3-17Assignments
overview, 3-6Audience, 3-19Auto Ticket Generator, 2
recommendations, 2Auto Ticket Generator (ATG)
actions, 6-7definitions, 6-6external sources, 6-6how it works, 6-2main window, 6-4overview, 6-1polling, 6-11saving action definitions, 6-11text files, 6-7
user interface basics, 6-4with Call Logging, 3-4wrap-up, 6-13
AutoTasksActions, 3-25AutoTask Menu, 3-25Inserting Variables, 3-26overview, 3-8, 7-12
BBoolean Searches, 3-18
About, 3-24Browsing, 3-23Business Process Automation Module
(BPAM), 2AutoTasks, 7-12Business Rule Editor (BRE), 7-3components, 7-3how it works, 7-2overview, 7-1recommendations, 2user interface basics, 7-5with Call Logging, 3-4wrap-up, 7-20
Business Rule Editor (BRE)adding a new Business Rule, 7-8editing existing rules, 7-12enabling rules, 7-14launching, 7-6main window, 7-5navigating the wizard, 7-9overview, 7-6processes, 7-7removing rules, 7-13saving changes, 7-13working with, 7-6
Business Rule Monitor (BRM), 7-3running, 7-19viewing application logs, 7-19
Business Rule Monitor Configuration Tool, 7-3
advanced settings, 7-17launching, 7-16log files, 7-17
I-3
Business Rule Monitor Configuration (continued)
mail login, 7-17main window, 7-16setting up database selections, 7-17working with, 7-15
Business Rulesexporting, 7-13importing, 7-13
CCall Groups
About, 3-18alerts, 4-7Creating, 3-18Hot Lists, 3-19overview, 3-7Work Groups, 3-19
Call History form/tab, 3-20Call Log form/tab, 3-17Call Logging, 1
About, 3-2and other modules, 3-3Assignments, 3-6Attachment Bar, 3-15Call Groups, 3-7Call Record Tab Bar, 3-14Call Status Banner, 3-12finding information, 3-23Hot Lists, 3-7InfoCenter, 3-7key terms and concepts, 3-5Menu Bar, 3-10overview, 3-1Profile Subset, 3-6recommendations, 1Tool Bar, 3-11user interface basics, 3-9using the Call Map, 3-22using the HEATBoard, 3-21Validated Fields, 3-8wrap-up, 3-32
Call Map, 3-13overview, 3-22
Call Records, 3-17Configuration form/tab, 3-20Contacts form/tab, 3-20Customer Groups
About, 3-20Creating, 3-21
Customer RecordsAbout, 3-20
Customizing HEAT, 10-6adding fields to Tables and Grids, 10-6adding tables to your database, 10-6designing forms, 10-7
DData Sources
configuration, 9-7Database
working with interface, 2-4Detail form/tab, 3-17Document Conventions, 3
EExpertise, 3Exporting
Business Rules, 7-13
FFavorite Reports
adding categories, 9-8adding reports, 9-9editing, 9-9saving to, 9-9working with, 9-8
First Level Support (FLS), 1adding links to other programs, 5-20arranging the tree window, 5-20changing the sort order, 5-20customizing, 5-20finding and replacing text in
nodes, 5-19how it works, 5-2Information Branch, 5-3
I-4
First Level Support (continued)Knowledge Trees, 5-9
finding information, 5-16user status, 5-9, 5-10
launching, 5-11, 5-12main window components, 5-4, 5-5menu bar, 5-6Node Children, 5-3overview, 5-1Parent Node, 5-3recommendations, 1Root Node, 5-3system administrator
options, 5-21, 5-22toolbar, 5-7user interface basics, 5-4using, 5-9viewing attached files and
applications, 5-17with Call Logging, 3-3wrap-up, 5-23
GGoldMine
overview, 12-2GoldMine Resources, 6
HHEAT
key tables, 2-5module overviews, 1-2overview, 1-1
HEAT Administratoradding fields to Tables and Grids, 10-6adding tables to your database, 10-6customizing HEAT, 10-6designing forms, 10-7Edit Set interface, 10-5how it works, 10-2integrating HEAT with other products,
10-10main interface, 10-3
maintaining your database, 10-11menu items, 10-3roles, 10-8setting defaults, 10-8setting security, 10-7toolbar, 10-4user interface basics, 10-3users, 10-7wrap-up, 10-12
HEAT Plus Call Centeroverview, 12-3
HEAT Plus Knowledgeoverview, 12-3
HEAT Plus Remote Support Suite (HPRSS)overview, 12-4
HEAT Resources, 4HEAT Self Service (HSS)
overview, 12-4HEAT WebCenter
overview, 12-4HEATBoard, 3-14
overview, 3-21Hot Lists, 3-19
overview, 3-7
IiHEAT
overview, 12-5Importing
Business Rules, 7-13InfoCenter, 3-13
About, 3-21overview, 3-7
Interfaceworking with database, 2-4
JJournal form
overview, 3-6Journal form/tab, 3-17
I-5
KKey Tables, 2-5Knowledge Trees
acquiring, 5-11adding nodes, 5-13copying text from nodes, 5-15editing nodes, 5-14, 5-19finding information, 5-16using search results, 5-18
LLoadDB Utility
loading an archive file, 11-2
MManager’s Console, 2
changing metric properties, 8-9components, 8-2configuring, 8-7deleting a metric, 8-9group tab functions, 8-10group tabs, 8-5how it works, 8-2indicator panes, 8-5launching, 8-6main group window, 8-4menu bar, 8-4metric administrator, 8-8metric indicator log, 8-3metric indicator wizard, 8-3metric indicators, 8-2metric queries, 8-2metric wizard, 8-3recommendations, 2saving, 8-17setting up, 8-6setting up mail services, 8-7title bar, 8-4toolbar, 8-5user interface basics, 8-4using the Metric Indicator Wizard, 8-11
using the Metric Log, 8-17using the Metric Wizard, 8-8with Call Logging, 3-4wrap-up, 8-19
Metric Indicator Wizardchanging indicator properties, 8-16creating a metric, 8-12creating a new Sales Metric
Process, 8-14SQL Builder Tool process, 8-13summary types, 8-15using a Call Group process, 8-12
Metric Indicatorslog, 8-3overview, 8-2wizard, 8-3
Metric Queriesoverview, 8-2wizard, 8-3
Module Overview, 1-2
OOnline Help, 6Other Add-on Tools
overview, 12-1Other Tools
overview, 11-1Quick Start Wizard, 11-3wrap-up, 11-6
OverviewCall Logging, 3-1
PPolling
starting and stopping, 4-10Polling Intervals
defining, 4-10Profile form/tab, 3-20Profile Subset
overview, 3-6
I-6
QQuick Start Wizard
applying and using changes, 11-5navigating, 11-5running, 11-4
RReporting
About, 3-29creating shortcuts, 3-29running Call Ticket reports, 3-29
ReportsAnswer Wizard, 9-3configuring the report path, 9-7custom, 9-3exporting, 9-10Favorite
working with, 9-8printing, 9-10report tree, 9-3running, 9-9viewing, 9-10
SSearches, 3-23
Boolean Searches, 3-24Browsing, 3-23Simple Searches, 3-24
Securityroles, 10-8setting, 10-7users, 10-7
Simple Searches, 3-18About, 3-24
Subset, 3-17SupportMail
About, 3-27Features, 3-27Interface, 3-28
System Message Alerts, 4-9System Structure
database, 2-2interface, 2-3
TTable Maintenance
About, 3-30On the Fly, 3-30Planned, 3-30
ToolbarsAlert Monitor, 4-5Call Logging, 3-11First Level Support (FLS), 5-7
UUser Interface
Alert Monitor, 4-4Call Logging, 3-9
User PreferencesAbout, 3-31Alert Monitor, 4-12Tabs, 3-31
VValidated Fields
overview, 3-8Variables
Inserting into AutoTask Actions, 3-26
WWork Groups, 3-19


![Sybase® Mobile Workflow for SAP® Business Suite 1.2 [2012]](https://static.fdocuments.net/doc/165x107/58a156f41a28abbe3c8b6241/sybase-mobile-workflow-for-sap-business-suite-12-2012.jpg)