Guidelines for Culverts - SeamlessCMS · Fig. 1 Siting of a culvert Culvert pipe sizing The culvert...
4
Guidelines for the Assessment of Water Affecting Activities - Culvert Construction Criteria for the assessment of culverts Landholders have a right to access property and the construction of culverts should be allowed provided the proposal satisfies the following criteria: 1. Small (<1m height) dry weather access culverts a. Should meet standard design/specification supplied by Department (see following section) 2. Larger all weather culverts a. Should be designed by an engineer and design plans forwarded to the Department for approval. In addition to the above the construction of any culvert should not: 1. Increase erosion up or downstream 2. Increase flooding downstream or upstream 3. Cause alteration to natural flow regimes 4. Cause change to the natural timing or duration of ponding upstream 5. Cause loss of upstream/downstream connectivity of ecosystems 6. Cause detrimental impacts on water dependant ecosystems, for example (but not limited to) habitat destruction, alteration of flows or structures affecting fauna migration. Guidelines for the construction of low environmental impact culverts Siting Culverts Aim to site a culvert across a straight section of the watercourse where the flow line and stream power is concentrated in the center of the watercourse (Fig.1). Avoid locating culverts: • At sharp angles to the stream • Near sharp bends • Near sections of unstable bank • Across sinuous meandering waterways (as their migration rates may be increased due to changes in flow dynamics) • At sites that will require the removal of vegetation (important for bank stabilisation)
-
Upload
truongxuyen -
Category
Documents
-
view
255 -
download
0
Transcript of Guidelines for Culverts - SeamlessCMS · Fig. 1 Siting of a culvert Culvert pipe sizing The culvert...

Guidelines for the Assessment of Water Affecting Activities - Culvert Construction
Criteria for the assessment of culverts Landholders have a right to access property and the construction of culverts should be allowed provided the proposal satisfies the following criteria:
1. Small (<1m height) dry weather access culverts a. Should meet standard design/specification supplied by Department (see following
section)
2. Larger all weather culverts a. Should be designed by an engineer and design plans forwarded to the Department for
approval. In addition to the above the construction of any culvert should not:
1. Increase erosion up or downstream 2. Increase flooding downstream or upstream 3. Cause alteration to natural flow regimes 4. Cause change to the natural timing or duration of ponding upstream 5. Cause loss of upstream/downstream connectivity of ecosystems 6. Cause detrimental impacts on water dependant ecosystems, for example (but not
limited to) habitat destruction, alteration of flows or structures affecting fauna migration.
Guidelines for the construction of low environmental impact culverts
Siting Culverts Aim to site a culvert across a straight section of the watercourse where the flow line and stream power is concentrated in the center of the watercourse (Fig.1). Avoid locating culverts:
• At sharp angles to the stream • Near sharp bends • Near sections of unstable bank • Across sinuous meandering waterways (as their migration rates may be increased due
to changes in flow dynamics) • At sites that will require the removal of vegetation (important for bank stabilisation)
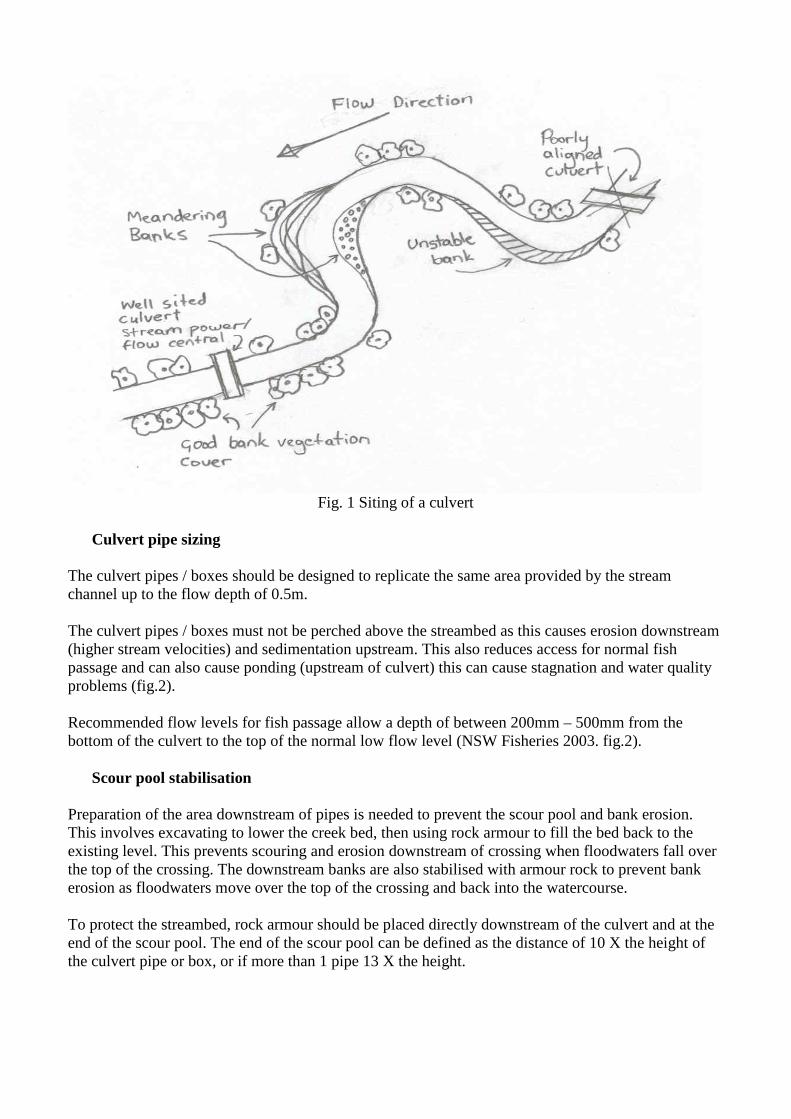
Fig. 1 Siting of a culvert
Culvert pipe sizing
The culvert pipes / boxes should be designed to replicate the same area provided by the stream channel up to the flow depth of 0.5m. The culvert pipes / boxes must not be perched above the streambed as this causes erosion downstream (higher stream velocities) and sedimentation upstream. This also reduces access for normal fish passage and can also cause ponding (upstream of culvert) this can cause stagnation and water quality problems (fig.2). Recommended flow levels for fish passage allow a depth of between 200mm – 500mm from the bottom of the culvert to the top of the normal low flow level (NSW Fisheries 2003. fig.2).
Scour pool stabilisation Preparation of the area downstream of pipes is needed to prevent the scour pool and bank erosion. This involves excavating to lower the creek bed, then using rock armour to fill the bed back to the existing level. This prevents scouring and erosion downstream of crossing when floodwaters fall over the top of the crossing. The downstream banks are also stabilised with armour rock to prevent bank erosion as floodwaters move over the top of the crossing and back into the watercourse. To protect the streambed, rock armour should be placed directly downstream of the culvert and at the end of the scour pool. The end of the scour pool can be defined as the distance of 10 X the height of the culvert pipe or box, or if more than 1 pipe 13 X the height.
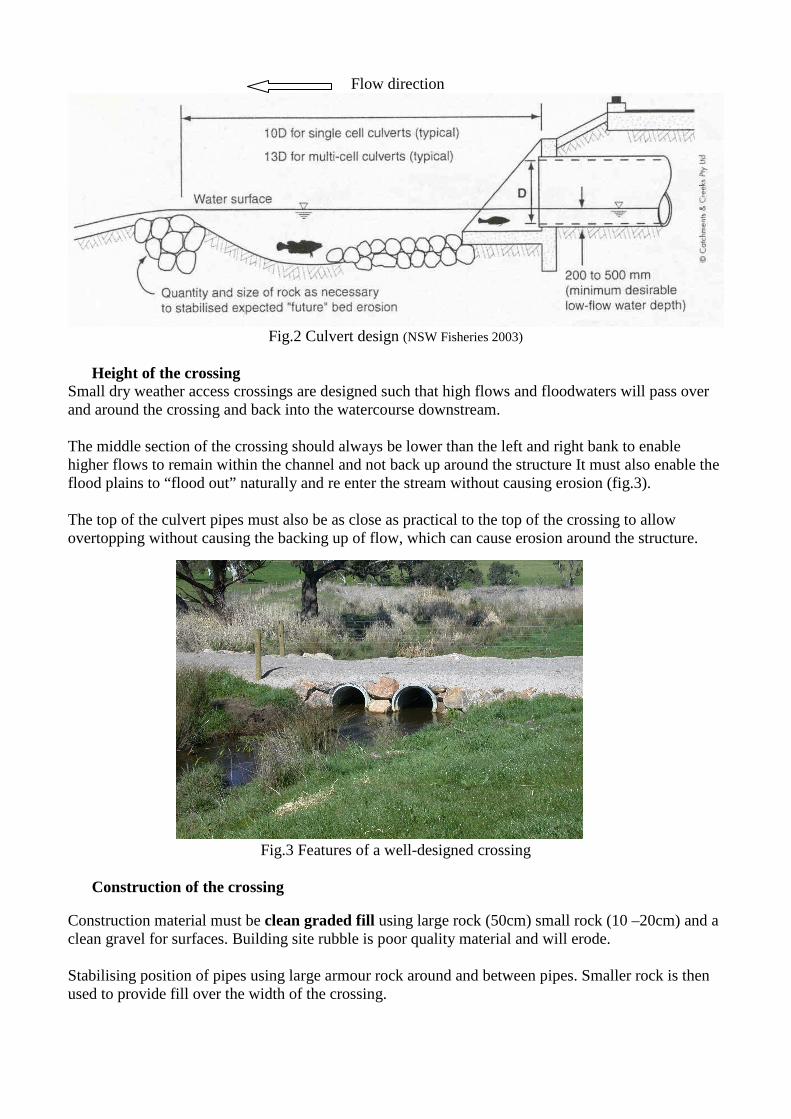
Flow direction
Fig.2 Culvert design (NSW Fisheries 2003)
Height of the crossing
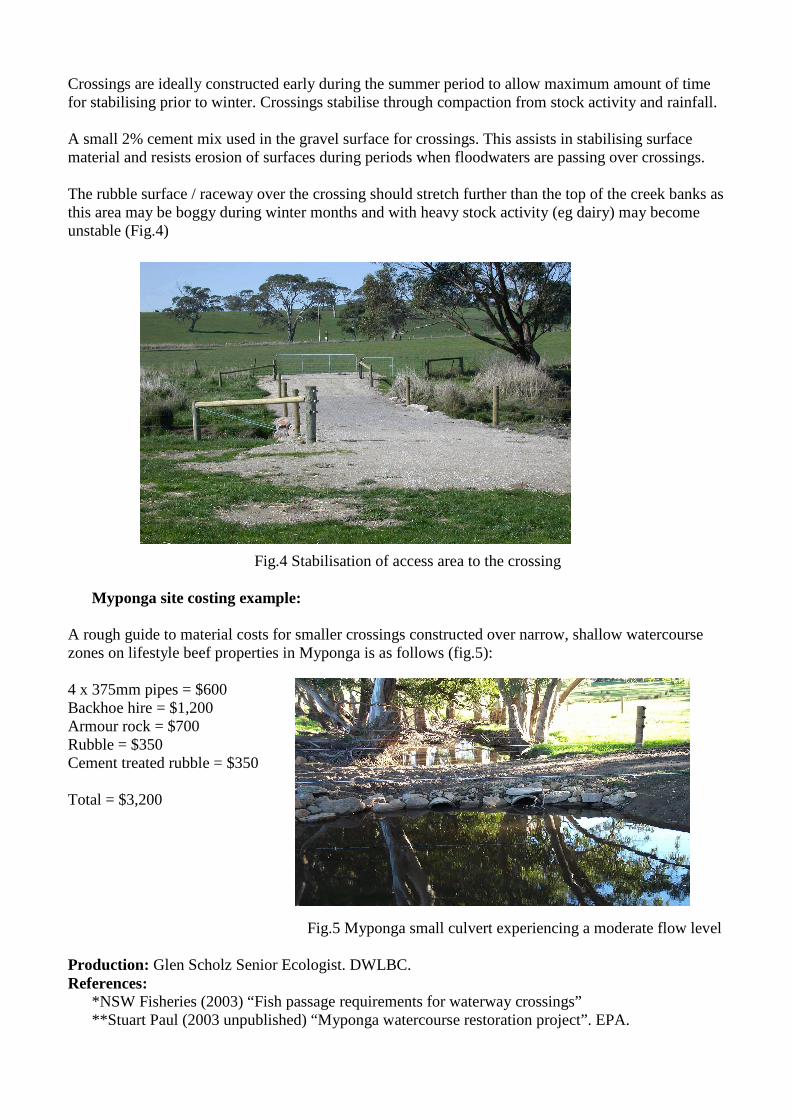
Small dry weather access crossings are designed such that high flows and floodwaters will pass over and around the crossing and back into the watercourse downstream. The middle section of the crossing should always be lower than the left and right bank to enable higher flows to remain within the channel and not back up around the structure It must also enable the flood plains to “flood out” naturally and re enter the stream without causing erosion (fig.3). The top of the culvert pipes must also be as close as practical to the top of the crossing to allow overtopping without causing the backing up of flow, which can cause erosion around the structure.
Fig.3 Features of a well-designed crossing
Construction of the crossing
Construction material must be clean graded fill using large rock (50cm) small rock (10 –20cm) and a clean gravel for surfaces. Building site rubble is poor quality material and will erode. Stabilising position of pipes using large armour rock around and between pipes. Smaller rock is then used to provide fill over the width of the crossing.
Crossings are ideally constructed early during the summer period to allow maximum amount of time for stabilising prior to winter. Crossings stabilise through compaction from stock activity and rainfall. A small 2% cement mix used in the gravel surface for crossings. This assists in stabilising surface material and resists erosion of surfaces during periods when floodwaters are passing over crossings. The rubble surface / raceway over the crossing should stretch further than the top of the creek banks as this area may be boggy during winter months and with heavy stock activity (eg dairy) may become unstable (Fig.4)
Fig.4 Stabilisation of access area to the crossing Myponga site costing example:
A rough guide to material costs for smaller crossings constructed over narrow, shallow watercourse zones on lifestyle beef properties in Myponga is as follows (fig.5): 4 x 375mm pipes = $600 Backhoe hire = $1,200 Armour rock = $700 Rubble = $350 Cement treated rubble = $350 Total = $3,200 Fig.5 Myponga small culvert experiencing a moderate flow level Production: Glen Scholz Senior Ecologist. DWLBC. References:
*NSW Fisheries (2003) “Fish passage requirements for waterway crossings” **Stuart Paul (2003 unpublished) “Myponga watercourse restoration project”. EPA.