Grafting 101 - · PDF fileGrafting 101 How to duplicate your favorite plants Presentation on...
29
Grafting 101 How to duplicate your favorite plants Presentation on 2017.10.19 by Larry Zimmerman, President of the Treasure Coast Rare Fruit Club Port St. Lucie Botanical Garden www.TreasureCoastRareFruitClub.com Wednesday, October 25, 17
Transcript of Grafting 101 - · PDF fileGrafting 101 How to duplicate your favorite plants Presentation on...
Grafting 101How to duplicate your favorite plants
Presentation on 2017.10.19 byLarry Zimmerman, President of the
Treasure Coast Rare Fruit ClubPort St. Lucie Botanical Garden
www.TreasureCoastRareFruitClub.com
Wednesday, October 25, 17
What is grafting?
• Grafting is splicing a branch of a desired plant onto the base of another plant, of the same species. The new plant is a clone: it is essentially the same plant with new roots.
• You can create many new trees without depleting the original tree.
• When you graft a tree you are NOT creating a hybrid.
Wednesday, October 25, 17
Why graft?• Maintain the identity of the plant.
• Seeds introduce genetic diversity; they will not have identical characteristics such as growth habit, fruit size and shape, flavor, texture, productivity, bearing season, etc.
• A graft is identical to the mother plant. The only differences will be due to location, the soil and the care it is given.
• Horticultural advantages
• A seed-grown tree must go through stages–seedling, juvenile, mature, bearing. This might take 8-10 years or more.
• When the graft joins a mature tree part with a seedling, the juvenile stage is by-passed. The only limit is for the root system to develop enough to support the tree structurally and to provide enough energy for the tree to fruit. Typically that takes 2-3 years.
• A grafted tree is already mature; it will grow differently, i.e it may not have thorns (which protect some juvenile tree species)
• The rootstock can impart different characteristics such as disease tolerance. It can make the tree dwarf, more productive, or flood tolerant, etc.
Wednesday, October 25, 17
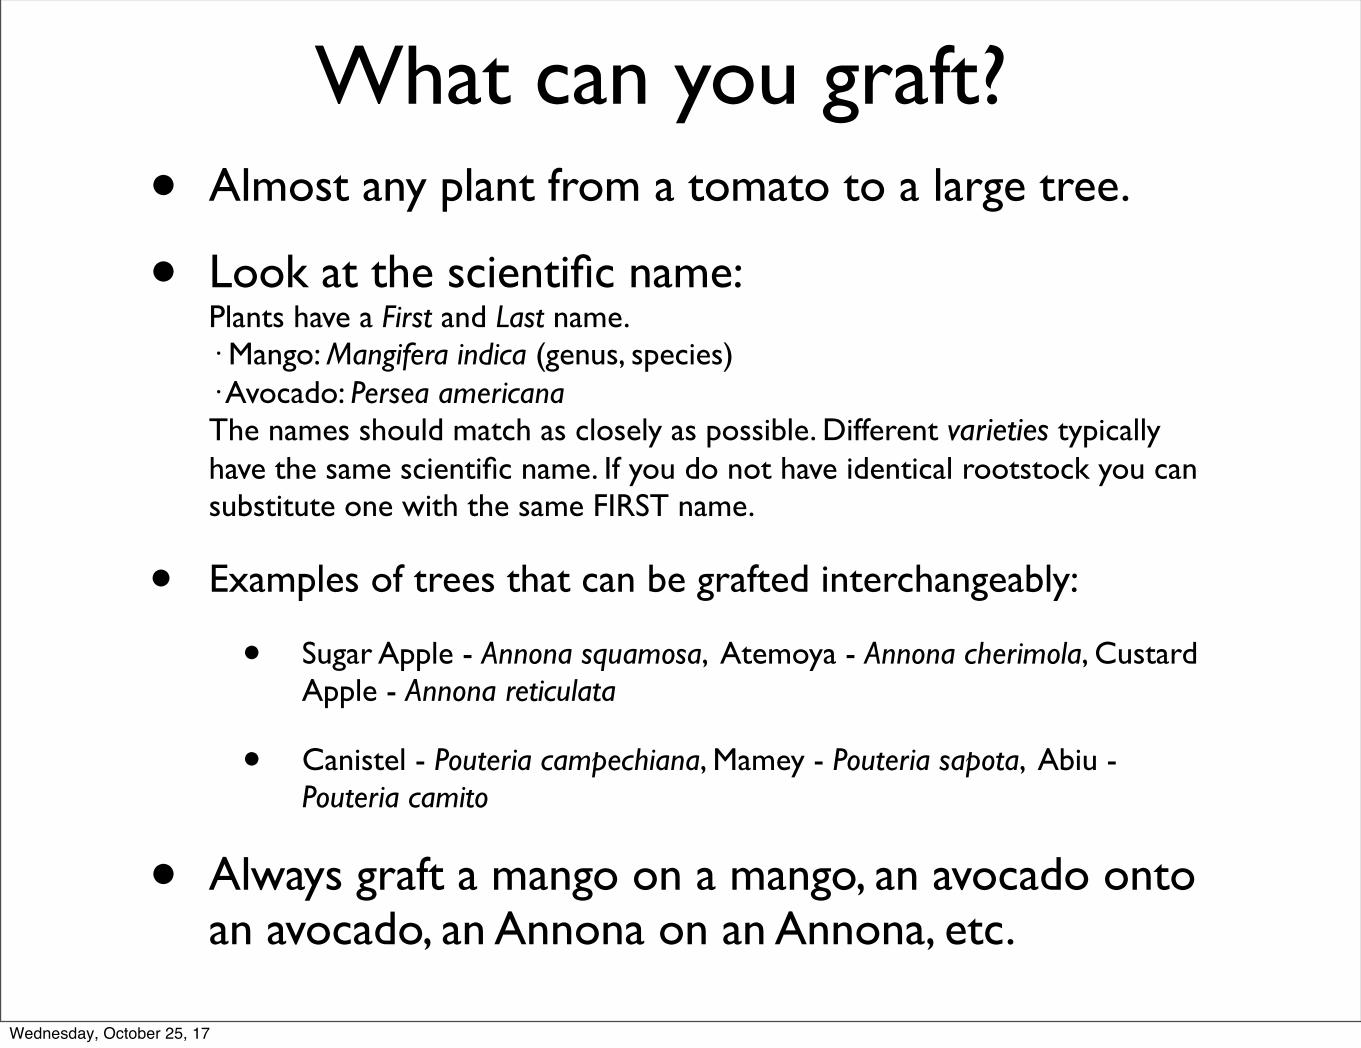
• Almost any plant from a tomato to a large tree.
• Look at the scientific name: Plants have a First and Last name. · Mango: Mangifera indica (genus, species)· Avocado: Persea americanaThe names should match as closely as possible. Different varieties typically have the same scientific name. If you do not have identical rootstock you can substitute one with the same FIRST name.
• Examples of trees that can be grafted interchangeably:
• Sugar Apple - Annona squamosa, Atemoya - Annona cherimola, Custard Apple - Annona reticulata
• Canistel - Pouteria campechiana, Mamey - Pouteria sapota, Abiu - Pouteria camito
• Always graft a mango on a mango, an avocado onto an avocado, an Annona on an Annona, etc.
What can you graft?
Wednesday, October 25, 17
•Winter
• During dormancy, after the fruit is gone: Avocado
• After the leaves fall: (temperate fruit)Stone fruit (peach, plum), apple, mulberry, persimmon.
When do you graft?a function of night time temperature
Wednesday, October 25, 17
• Summer–night temperatures > 70°
• Mango–July through August, right after harvesting. Earlier in the year, they are focused on producing flowers.
• Citrus
When do you graft?a function of night time temperature
Wednesday, October 25, 17

• Jackfruit, Guava, Sapodilla, Canistel, Mamey
• Spring and fallnight temperatures upper 50s to upper 60s
When do you graft?a function of night time temperature
Wednesday, October 25, 17
Difficult to graft
• Longan, Lychee, Spanish lime are very difficult to graft, so generally they are air layered.
• Miracle Fruit does not graft, and are typically seed grown or air layered.
Wednesday, October 25, 17
Definitions
• Rootstock–usually a young seedling. Could also be a mature tree.
• Scion or budwood–the mature branch you want to clone.
• Cambium–located between the bark and the wood in the stem, the cambium is part of the circulatory system that connects the roots to the rest of the tree, carrying water and soluble nutrients.
Wednesday, October 25, 17
Tools• Clippers: used to cut stems or leaves as necessary.
• Grafting knife
• Any very sharp blade is ok. Xacto knife, single-edge razor blade, pocket knife, paring knife.
• If you will be grafting a lot, a grafting knife is useful. It is beveled on one side and flat on the other, which makes it easier to get a flat cut.
• Alcohol, paper towels: Keep it clean: use alcohol to sterilize the knife, clippers, your hands, anything else that will touch the graft. Alcohol will damage plant tissue, so be sure everything is dry before beginning.
• Parafilm: made to seal test tubes, it is wax tape, and seals the stem so it does not dry out. It stretches quite a lot and sticks to itself.
• Grafting tape: a strong stretchy tape used to hold the graft union tight until it heals. With small grafts, parafilm may be enough. It is not the same as nursery tape which does not stretch. An alternative is grafting rubber bands.
• Labels: if you forget to label you WILL forget what you grafted. Write the name, the variety, the date, maybe the source of the budwood.
Wednesday, October 25, 17

Step 1–Scion• Start by collecting the scion, then graft ASAP.
• A scion is cut from a tree, so it has a limited lifespan. It must be connected and healed before it dies.
• A scion can dry out within 15 minutes. Do not leave in a hot car more than 5 minutes. Store in a refrigerator or at least a cooler and they can be saved for a day or two. If there is any delay, wrap with parafilm or at least keep it in a plastic bag preferably with a moist paper towel.
• Covering the scion with parafilm wrap seals it so it doesn’t dry out and doesn’t need as much water or moist napkins / newspaper, which could cause mold or rot.
• There should be a leaf bud forming, but just before the bud pushes out. Once the leaf begins to push (leaves emerge) it is too late for that branch.
Wednesday, October 25, 17
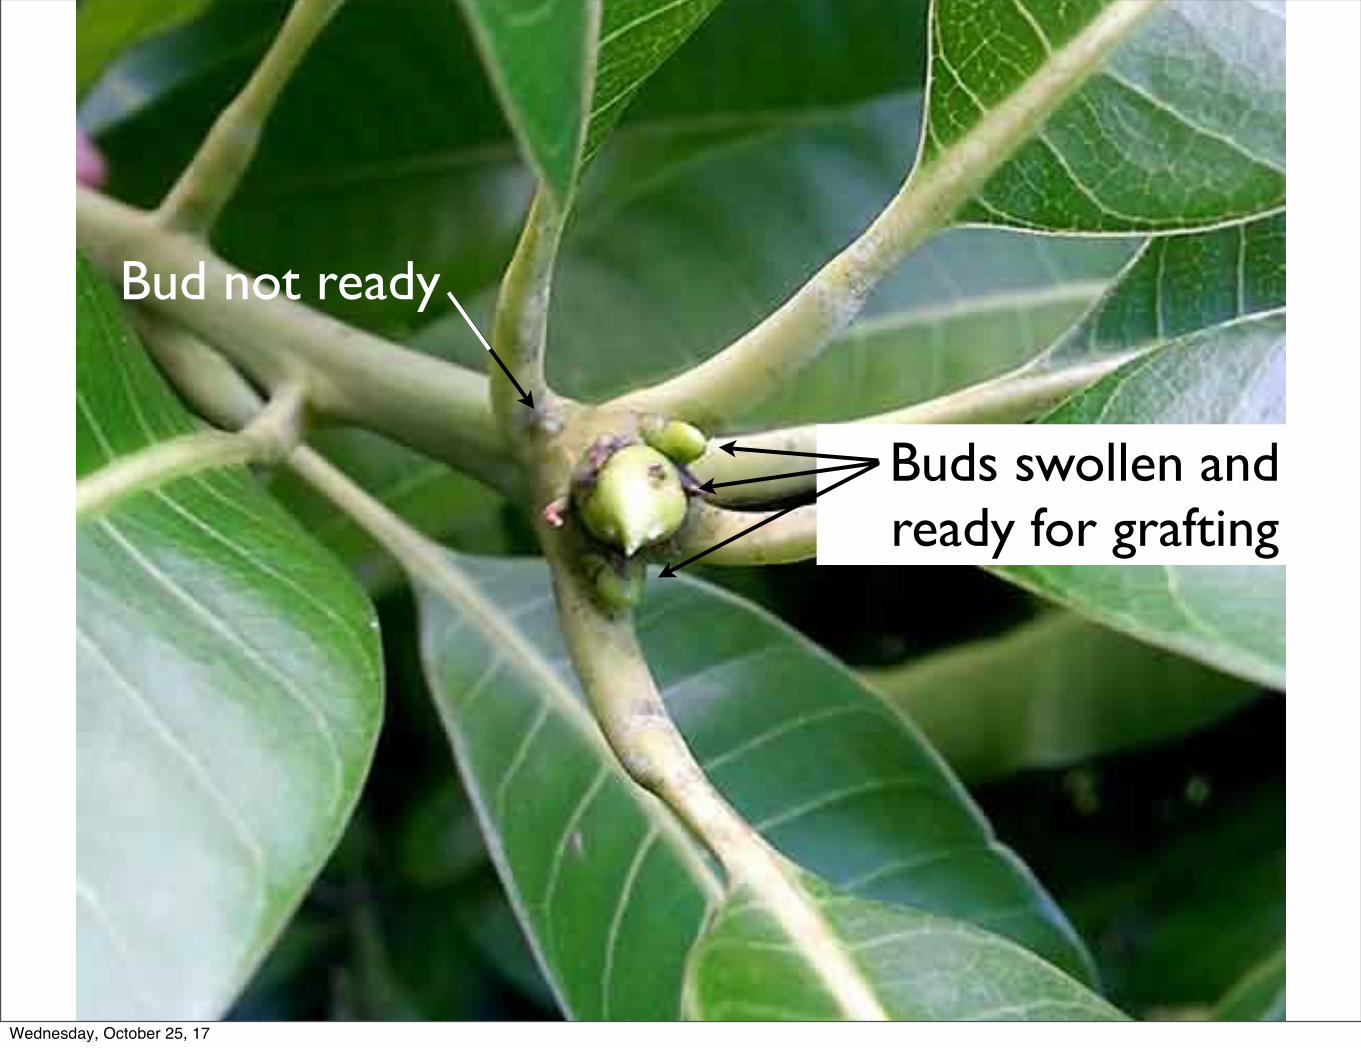
Bud not ready
Buds swollen and ready for grafting
Wednesday, October 25, 17
• For most grafts, remove all the leaves.
• A few plants do better if there are some leaves left on the scion. For the Sapotaceae family (Sapodilla, Abiu, Mamey, Canistel) remove all but the terminal half dozen leaves, and cut those in half.
• Protect the graft from water loss: parafilm covering the stem, or a plastic bag over the pot if there are leaves on the scion.
Leaves on the stems
Wednesday, October 25, 17

Step 2–Cambium• Cambium–the parts that are joined in a graft.
• Cambium is located inside the stem between the bark and the wood running from the roots up the trunk and branches to the stems and leaves. This is where the connection is made between the rootstock and the scion. Like our bones knit together when broken, the cambium will heal together.
Wednesday, October 25, 17

• A perfect match is necessary.
• The surfaces of the cut in the rootstock and scion must be flat so there is good contact.
• The size of both stems should be the same so the cambium matches on both sides.
• Use a sharp knife; cut it fast, join the two pieces and wrap them so they heal together and form a solid connection. At first you will wish you had an extra hand. It takes a practice to do it perfectly.
• It is best to graft in the morning when you are fresh and temperatures are cooler. Have a cup of tea or coffee: sit down and be comfortable so the plant is comfortable.
Step 2–the connectionCleft graft before wrapping
Wednesday, October 25, 17

• Once the graft is put together, it is wrapped.
• Often parafilm is used as waterproofing, then grafting tape or rubber bands hold it tight. On very small grafts, parafilm alone may be sufficient if the plant is not bumped.
• Holds it steady until the wound heals, like a cast.
• Protects the graft from dirt, rain, contamination
• Keeps the graft from drying out.
• Start at the bottom and wrap in a spiral up so water will run off (like shingles on a roof).
• Wrap over any branch intersections to protect them from water.
• Not too tight (cuts off circulation), not too loose (cambium can slip apart.)
• At the top hold open a loop at the last wrap, tuck the end through the loop and pull tight.
Step 3–wrapping
Wednesday, October 25, 17
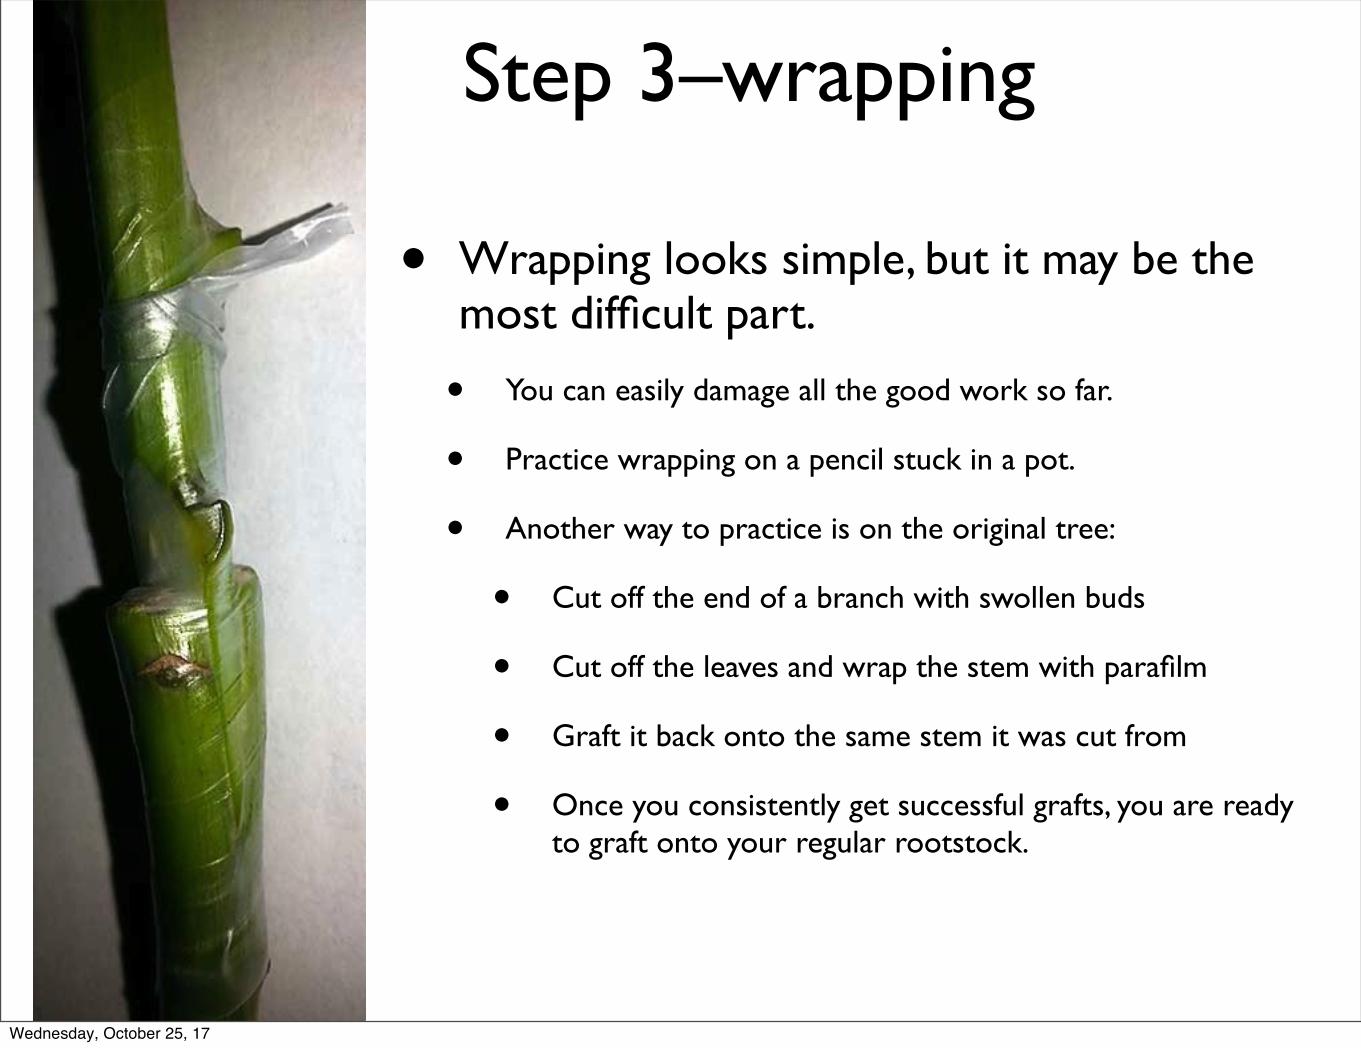
• Wrapping looks simple, but it may be the most difficult part.
• You can easily damage all the good work so far.
• Practice wrapping on a pencil stuck in a pot.
• Another way to practice is on the original tree:
• Cut off the end of a branch with swollen buds
• Cut off the leaves and wrap the stem with parafilm
• Graft it back onto the same stem it was cut from
• Once you consistently get successful grafts, you are ready to graft onto your regular rootstock.
Step 3–wrapping
Wednesday, October 25, 17
• LABEL: This is a critical step. Don’t think you will come back later and label it. Label immediately or you will forget.
Step 4–Label !!
• Name of plant (Mango / Avocado / Starfruit)
• Variety (Hayden / Glenn)
• Date
• Optional: Source of the budwood.
• Also optional: also keep a journal, or mark on a calendar you save.
• Use blank wrap-tags like you see in nurseries, or get plastic plant labels that stick in the soil.Cut up old mini-blinds and stick it in the soil or use a hole punch then hang it from the plant with string.
Wednesday, October 25, 17
Step 5–After care
• If there are leaves remaining on the budwood, the plant must be covered in a plastic bag tied to the pot to keep it humid. Keep in complete shade or the plastic will cook the plant.
• Can use a grocery bag on small plants or a garbage bag. Clear plastic is best, but white bags are ok. Use 3 sticks stuck in the dirt to keep the plastic from touching the plant. Tie the bag to the pot.
• If the budwood is covered in parafilm, no need to cover the plant further. Start it out in 70% shade.
• The tree has just had major surgery. Not too much water, do NOT use fertilizer until new growth stabilizes.
Wednesday, October 25, 17
• Once new leaves push out, you know the graft was successful. Let it go through two growth flushes before planting out. Allow the plant to slowly adjust to more sun and wind.
• How long? Depending on the species and time of year it can be 10 days to 2 weeks, up to 3 months or more.
• As long as the budwood is green and flexible, there is still hope. If it turns black, try again.
• If the plant is in a plastic bag, open the bag a little at a time, not all at once.
• Remove grafting tape, along with any parafilm that has not deteriorated.
• Re pot in a larger container if not planting out.
• Watch for and remove suckers sprouting below the graft. They tend to be more vigorous, so they grow
Step 6–After new growth
Wednesday, October 25, 17
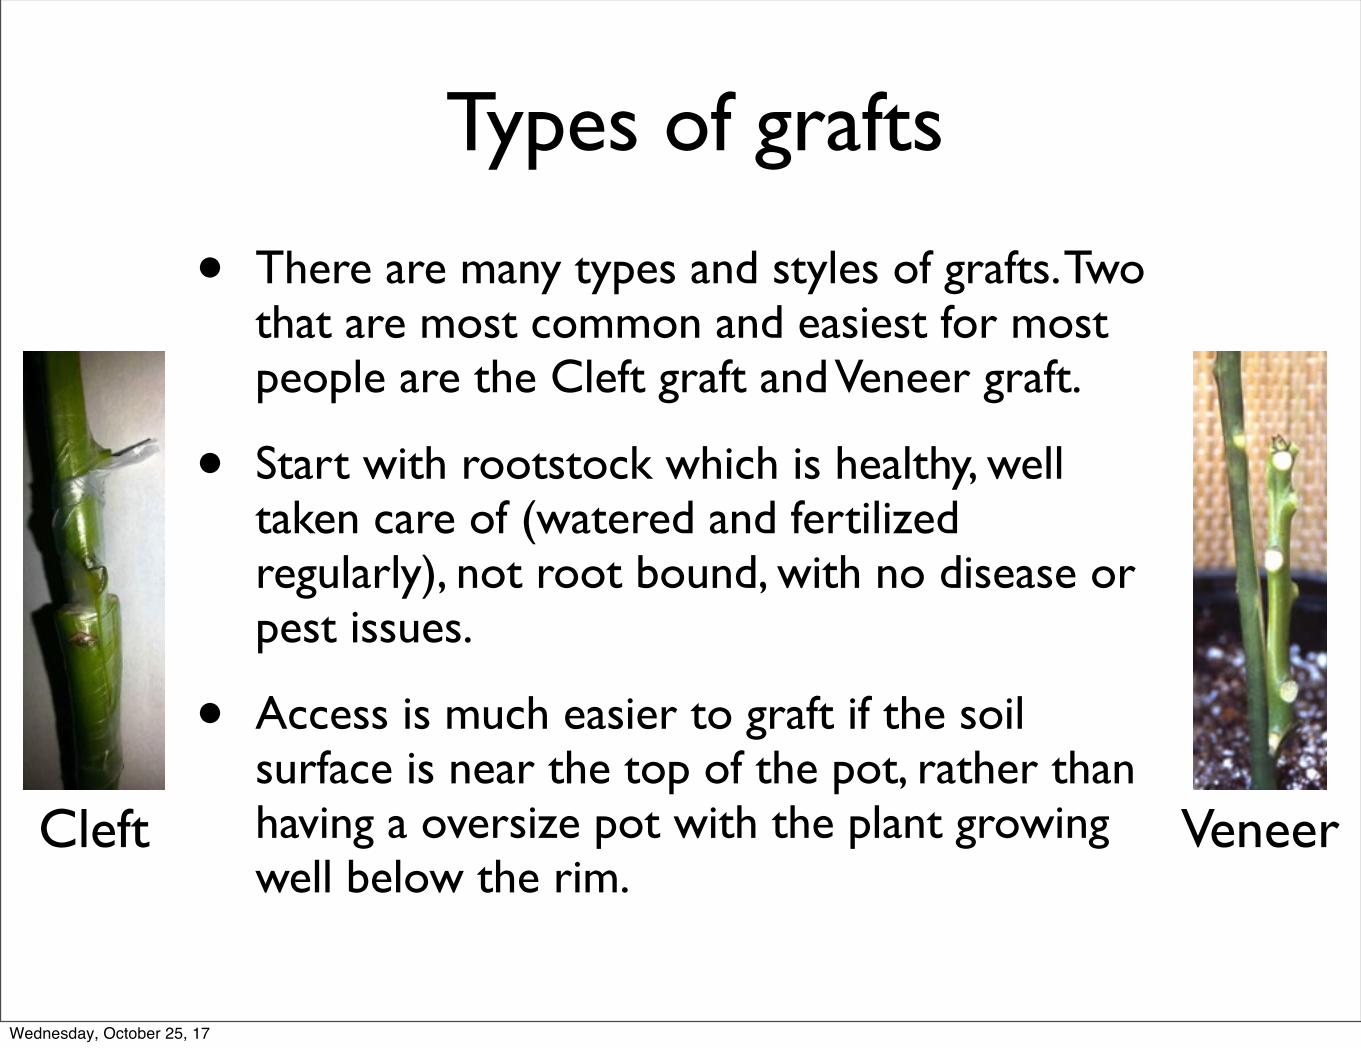
• There are many types and styles of grafts. Two that are most common and easiest for most people are the Cleft graft and Veneer graft.
• Start with rootstock which is healthy, well taken care of (watered and fertilized regularly), not root bound, with no disease or pest issues.
• Access is much easier to graft if the soil surface is near the top of the pot, rather than having a oversize pot with the plant growing well below the rim.
Types of grafts
Cleft Veneer
Wednesday, October 25, 17
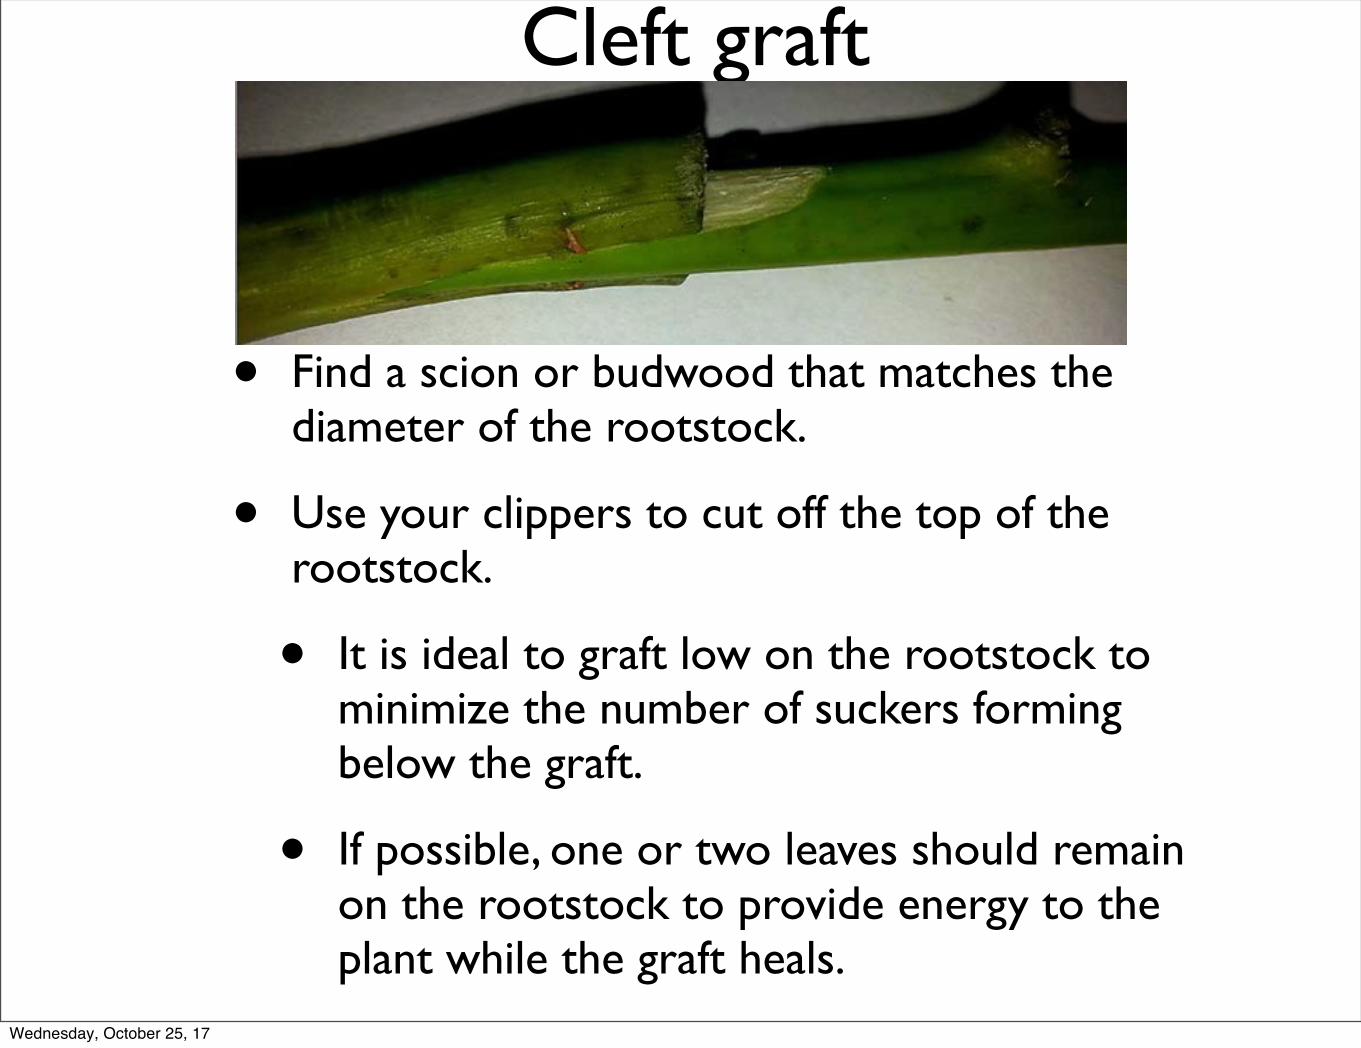
• Find a scion or budwood that matches the diameter of the rootstock.
• Use your clippers to cut off the top of the rootstock.
• It is ideal to graft low on the rootstock to minimize the number of suckers forming below the graft.
• If possible, one or two leaves should remain on the rootstock to provide energy to the plant while the graft heals.
Cleft graft
Wednesday, October 25, 17
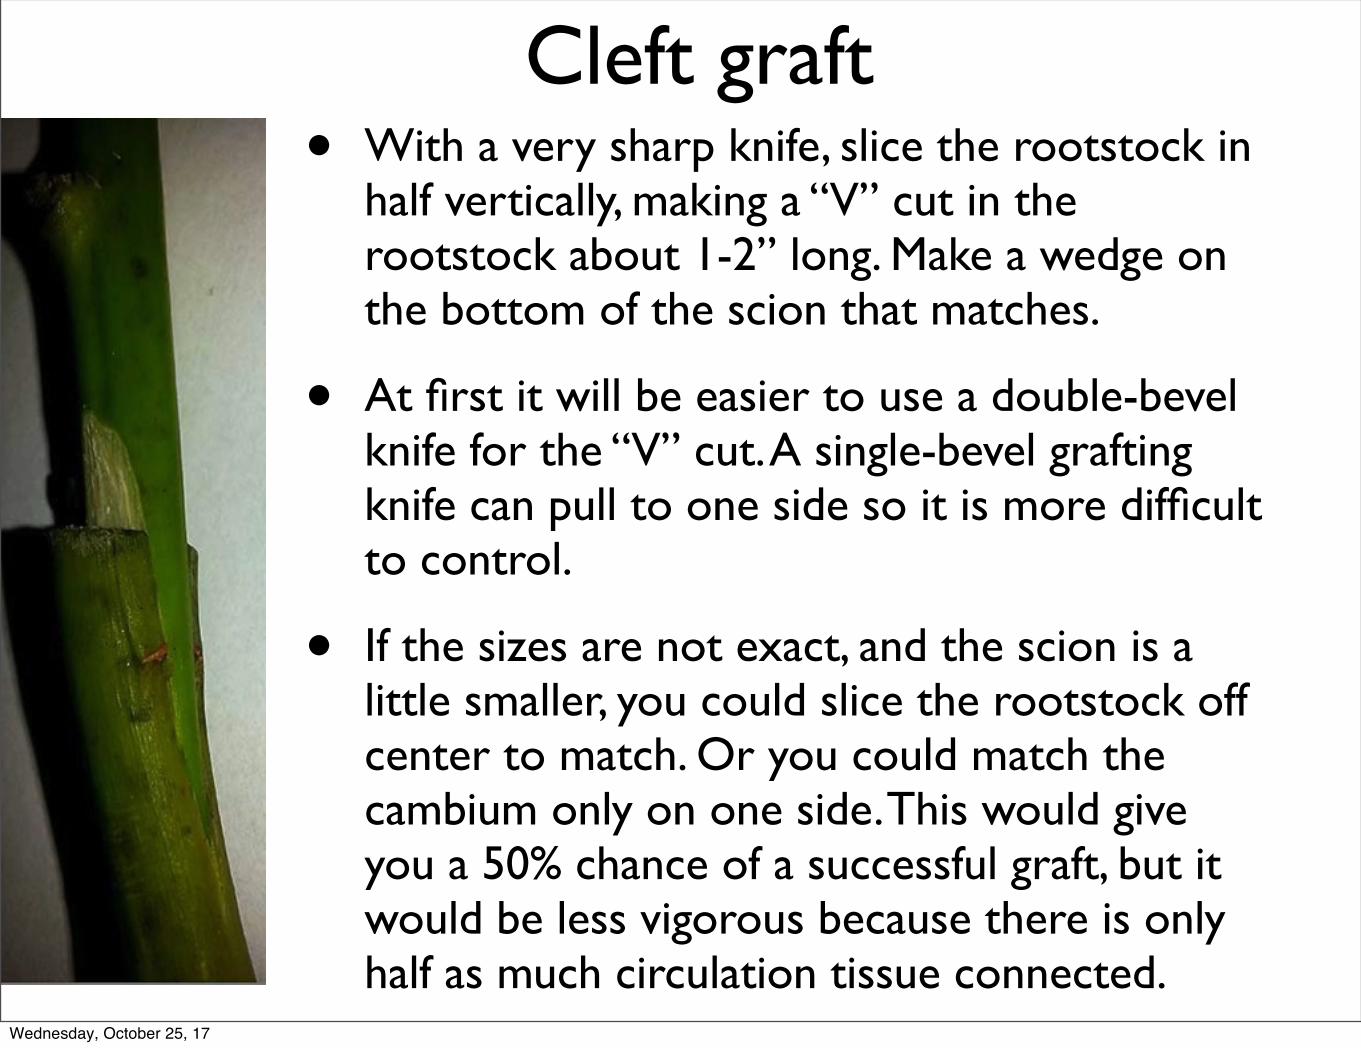
• With a very sharp knife, slice the rootstock in half vertically, making a “V” cut in the rootstock about 1-2” long. Make a wedge on the bottom of the scion that matches.
• At first it will be easier to use a double-bevel knife for the “V” cut. A single-bevel grafting knife can pull to one side so it is more difficult to control.
• If the sizes are not exact, and the scion is a little smaller, you could slice the rootstock off center to match. Or you could match the cambium only on one side. This would give you a 50% chance of a successful graft, but it would be less vigorous because there is only half as much circulation tissue connected.
Cleft graft
Wednesday, October 25, 17
• Join the two pieces–wedge into the “V”. Be sure the scion is right side up. If you aren’t sure, check the location of the buds at the base of leaf nodes. They are always above the leaf stem.
• Now wrap the connection with parafilm and grafting tape or a grafting rubber band.
• Once you get new growth, over a few days open the plastic bag a little at a time (if used). Once the bag is removed, gradually move the plant into more sun.
Cleft graft, continued
Wednesday, October 25, 17
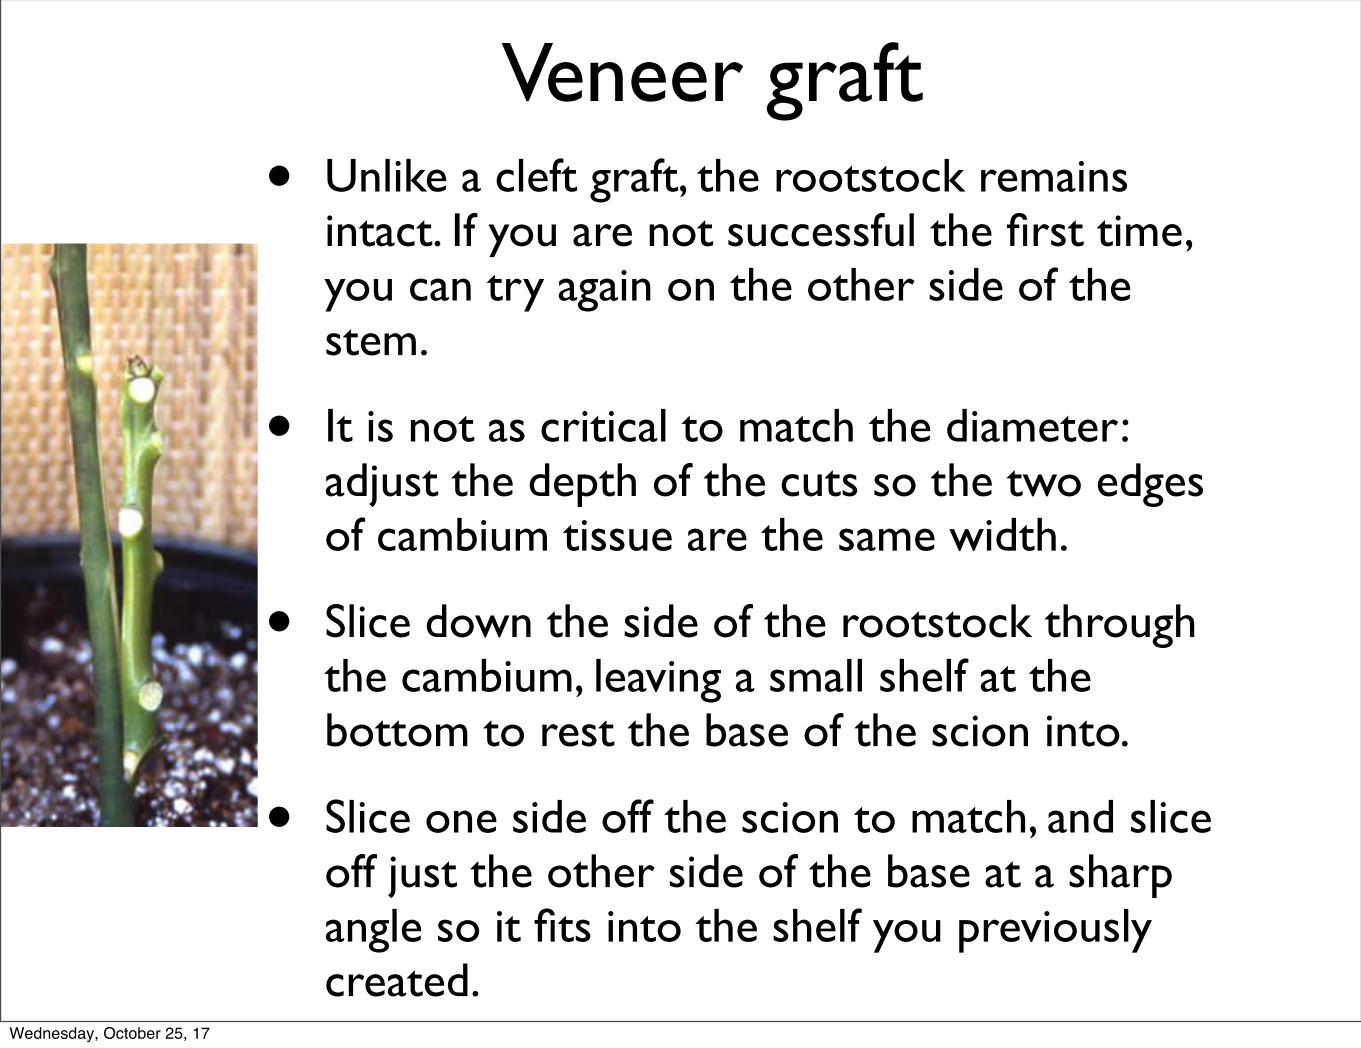
• Unlike a cleft graft, the rootstock remains intact. If you are not successful the first time, you can try again on the other side of the stem.
• It is not as critical to match the diameter: adjust the depth of the cuts so the two edges of cambium tissue are the same width.
• Slice down the side of the rootstock through the cambium, leaving a small shelf at the bottom to rest the base of the scion into.
• Slice one side off the scion to match, and slice off just the other side of the base at a sharp angle so it fits into the shelf you previously created.
Veneer graft
Wednesday, October 25, 17

• Slide the angle of the base of the scion into the shelf at the bottom of the rootstock cut.
• Align the rest of the half-wedge of the scion to the flat cut surface of the rootstock.
• Now wrap the connection with parafilm or grafting tape.
• Cut off just the top few leaves of the rootstock to encourage growth mode.
• Once you get two flushes of new growth, cut halfway through the rootstock above the graft, wait a week or two then remove the top entirely. Now you can move the plant into more sun.
Veneer graft continued
Wednesday, October 25, 17
• Approach graft. Instead of cutting off the scion, the potted rootstock is moved to the tree and grafted directly onto a still-connected branch. Once new growth forms you can cut the original tree below the graft and the rootstock above the graft.
• Bud graft. If you have very little budwood, you can usually cut off each bud separately and graft them into the bark of the rootstock.
• Top work. If you want to change the variety of an existing mature tree, you can graft onto the branches and remove the original tree above the graft.
Other less common grafts
Wednesday, October 25, 17

• You know the qualities of the new tree because it is a clone of the mother plant.
• You don’t have to wait years to find out if a seedling has the taste, texture, size, productivity, disease resistance and other characteristics you like.
• You skip the juvenile stage of growth, resulting in faster fruiting.
Review grafting advantages
Wednesday, October 25, 17

• If the plant is a named variety, it is probably grafted.
• Apple, Avocado, Guava, Jackfruit, Jujube, Macadamia, Mango, Peach, Persimmon, Sugar Apple, White Sapote,
• Some trees are easier to air layer.
• Longan, Lychee, Miracle Fruit, Spanish Lime
• Some are typically grown from cuttings:
• Barbados cherry, Fig, Miracle Fruit, Monstera, Mulberry, Natal Plum, Passion Fruit, Pomegranate, Prickley Pear, Sugar Cane, Wampee
• Some are commonly grown from seed, or come nearly true to seed, or creating better varieties have not attracted commercial interest:
• Cherry of the Rio Grande, Grumichama, Jackfruit, Jaboticaba, Monstera, Papaya, Pitomba, Sugar Apple, Surinam Cherry, Tamarind
Common propagation methods
Wednesday, October 25, 17