
Grade 10 - Discovery
19
High school Grade 10
Transcript of Grade 10 - Discovery
1Discovery Vitality |
Highschool
Grade 10
3Discovery Vitality | 2| Discovery Vitality
3Warm-up and cool-down exercises
The warm-up 3
Dynamic stretches 4
The cool-down 8
Static stretches 8
9Grade 10 lesson plans
Lesson 1: Fitness 9
Lesson 2: Introduction to 5km running/walking6-week programme 13
Lesson 3: Practise basic volleyball skills 18
Lesson 4: Introduction to orienteering – theory 23
Lesson 5: Introduction to orienteering – practical 28
A CATHSSETA-accredited training provider. 613/P/000126/2008
Grade 10 Warm-up and cool-down exercises
The warm-up Warm-up exercise 1: Light jogSend the class on a light jog around the learning area.
Warm-upexercise2:AlternatingpaceSend the class on a light jog around the perimeter of the playing area. Whenever you blow your whistle, learners must change how fast they are running. To keep it simple, there should only be 2 levels of speed and you should make it clear which of the 2 speed levels the learners should use. Depending on the fitness of the class, the 2 speed levels could alternate between a brisk walk and a light jog, a light jog and a slightly faster run (three-quarter sprint), or a three-quarter sprint and a fast sprint.
Warm-up exercise 3: Play tag• Divide the class into groups of approximately 10 learners• Assign each group to half a playing area• Select 1 learner to be the ‘catcher or tagger’• This learner must attempt to tag another learner by touching them and yelling ‘tag’• The learner that has just been tagged becomes the new ‘catcher or tagger’
and the process repeats itself• Continue the game for approximately 5 minutes so that all the learners are
active and thoroughly warmed up.
Warm-upexercise4:JoggingwithdirectionchangeSend the class on a light jog, but emphasise that when they hear the whistle, they need to change direction. You will indicate which direction they must go in using hand signals. They will jog either left, right, forwards or backwards, depending on the signal you give them. Make sure to vary these directions throughout the activity.
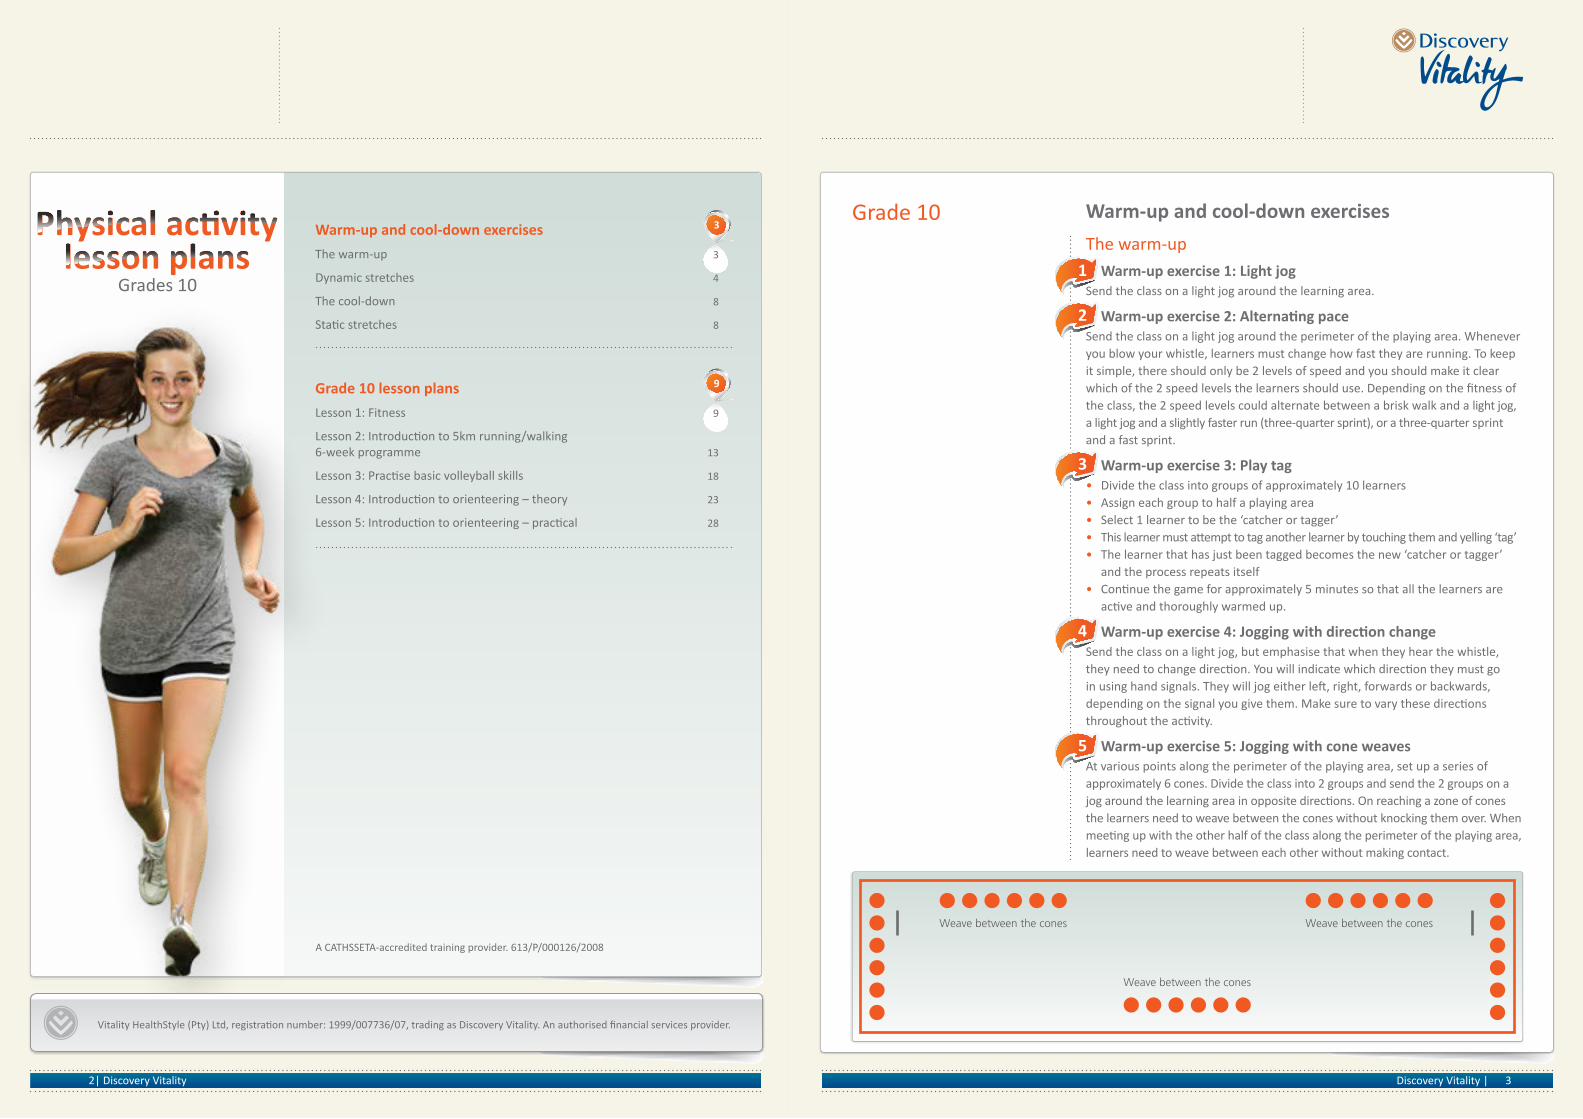
Warm-up exercise 5: Jogging with cone weaves At various points along the perimeter of the playing area, set up a series of approximately 6 cones. Divide the class into 2 groups and send the 2 groups on a jog around the learning area in opposite directions. On reaching a zone of cones the learners need to weave between the cones without knocking them over. When meeting up with the other half of the class along the perimeter of the playing area, learners need to weave between each other without making contact.
1
5
4
3
2
Weave between the cones
Weave between the cones Weave between the cones
Grades 10
Vitality HealthStyle (Pty) Ltd, registration number: 1999/007736/07, trading as Discovery Vitality. An authorised financial services provider.
5Discovery Vitality | 4| Discovery Vitality
Warm-up exercise 6: SkippingGive each learner a skipping rope and send the class skipping around the learning area. If there are only enough skipping ropes for 1 rope between 2 learners, divide the class into pairs. Half of the class skip to the other end of the playing area and back and then hand the skipping rope to their partners who complete the activity in the same manner.
Warm-up exercise 7: Team warm-upDivide the class into groups of 6 learners and send the groups on a jog around the playing area. When you blow your whistle, the learner at the back of each group must sprint to the front of the group and then resume a jogging pace at the front. This process repeats itself until all the learners have had a chance to sprint to the front of their groups.
Stretching A note on stretchingThere are 2 types of stretching. One is staticstretching, where the person tries to stretch as far as possible and then hold the position for a particular time period, and the other is dynamic stretching, which involves movement.There is some doubt whether static stretching is important during the warm up. Most sport scientists are now of the opinion that it can be damaging and increase the risk of injury if not done properly, and it probably won’t be of any benefit to young children. So we suggest you don’t plan a structured static stretching session in the warm-up. Dynamic stretching, however, is considered to be a very important part of the warm-up, so we have included this form of stretching in this section. Please take note that learners should not go straight from rest into full-out sprinting and changing direction. It is best to control their energy levels so that, regardless of which activity you choose (or make up if you are being creative), you ease learners into training.One of the benefits of warm-ups that end in stretching is that all the players are together, which gives you time to discuss the activities that will follow in the lesson.
Dynamic stretchesYou can use any of the dynamic stretches below in your warm-up and cool-down sessions.
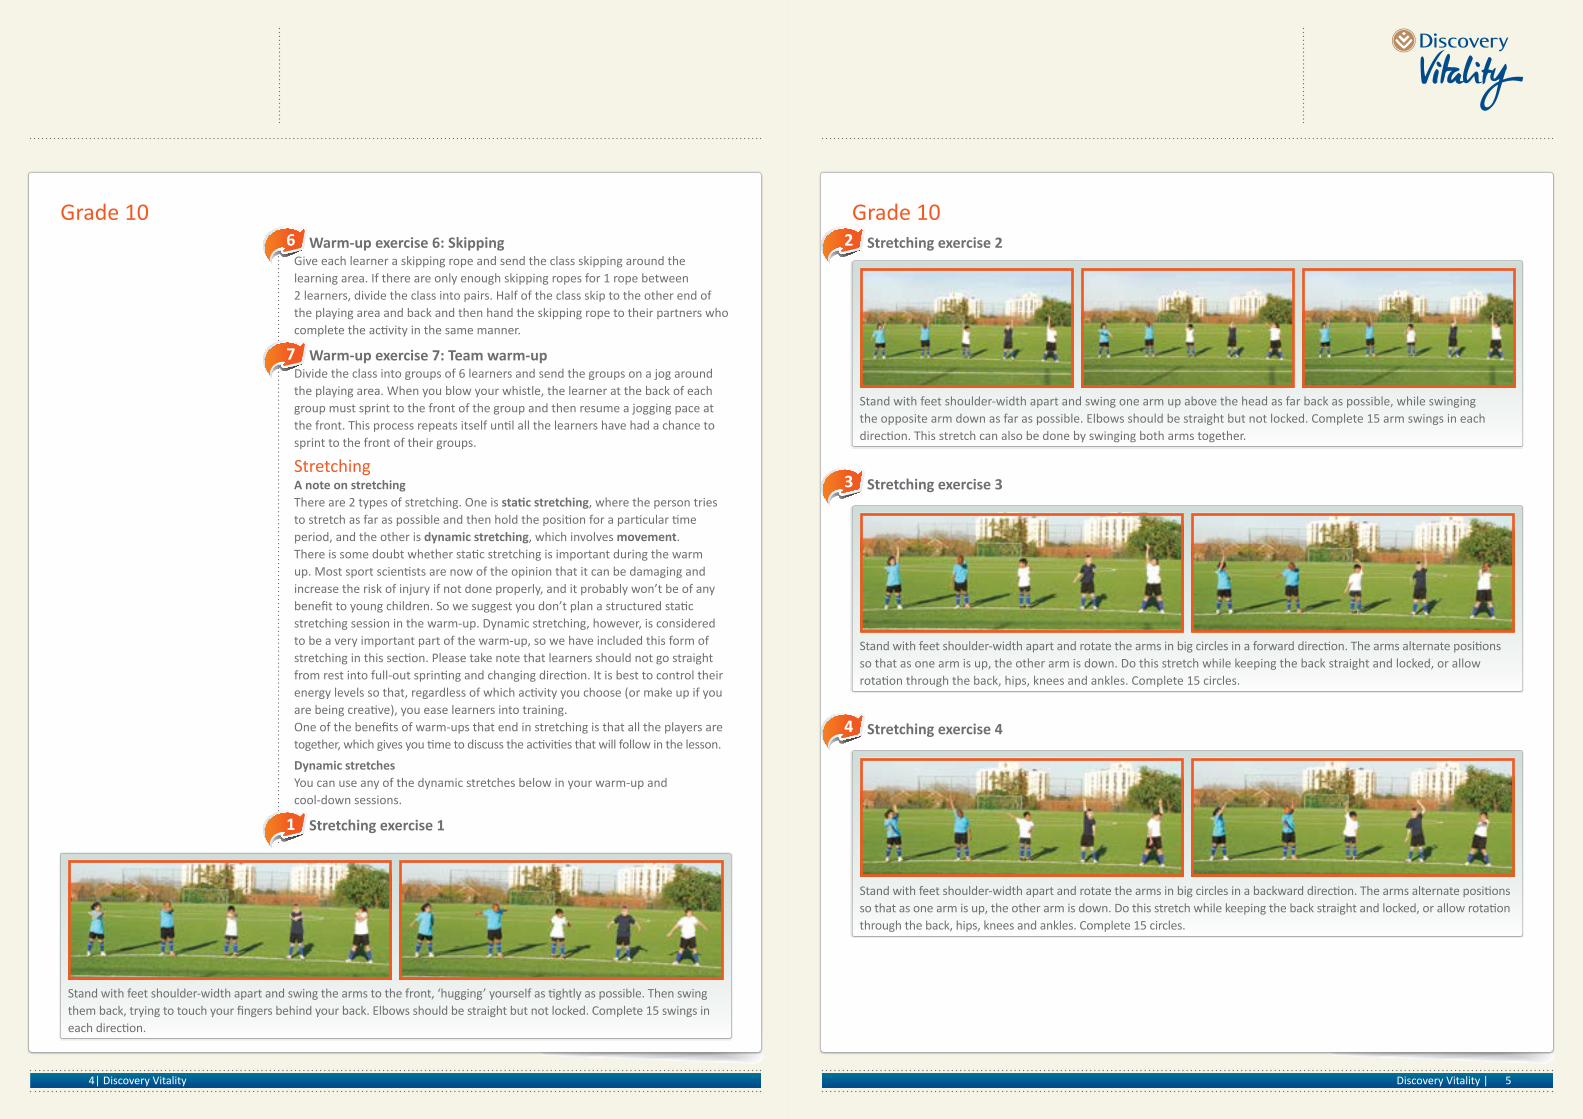
Stretching exercise 1
Grade 10Grade 106
7
1
Stand with feet shoulder-width apart and swing the arms to the front, ‘hugging’ yourself as tightly as possible. Then swing them back, trying to touch your fingers behind your back. Elbows should be straight but not locked. Complete 15 swings in each direction.
Stretching exercise 33
Stand with feet shoulder-width apart and rotate the arms in big circles in a forward direction. The arms alternate positions so that as one arm is up, the other arm is down. Do this stretch while keeping the back straight and locked, or allow rotation through the back, hips, knees and ankles. Complete 15 circles.
Stretching exercise 44
Stand with feet shoulder-width apart and rotate the arms in big circles in a backward direction. The arms alternate positions so that as one arm is up, the other arm is down. Do this stretch while keeping the back straight and locked, or allow rotation through the back, hips, knees and ankles. Complete 15 circles.
Stretching exercise 22
Stand with feet shoulder-width apart and swing one arm up above the head as far back as possible, while swinging the opposite arm down as far as possible. Elbows should be straight but not locked. Complete 15 arm swings in each direction. This stretch can also be done by swinging both arms together.
7Discovery Vitality | 6| Discovery Vitality
Grade 10Grade 10
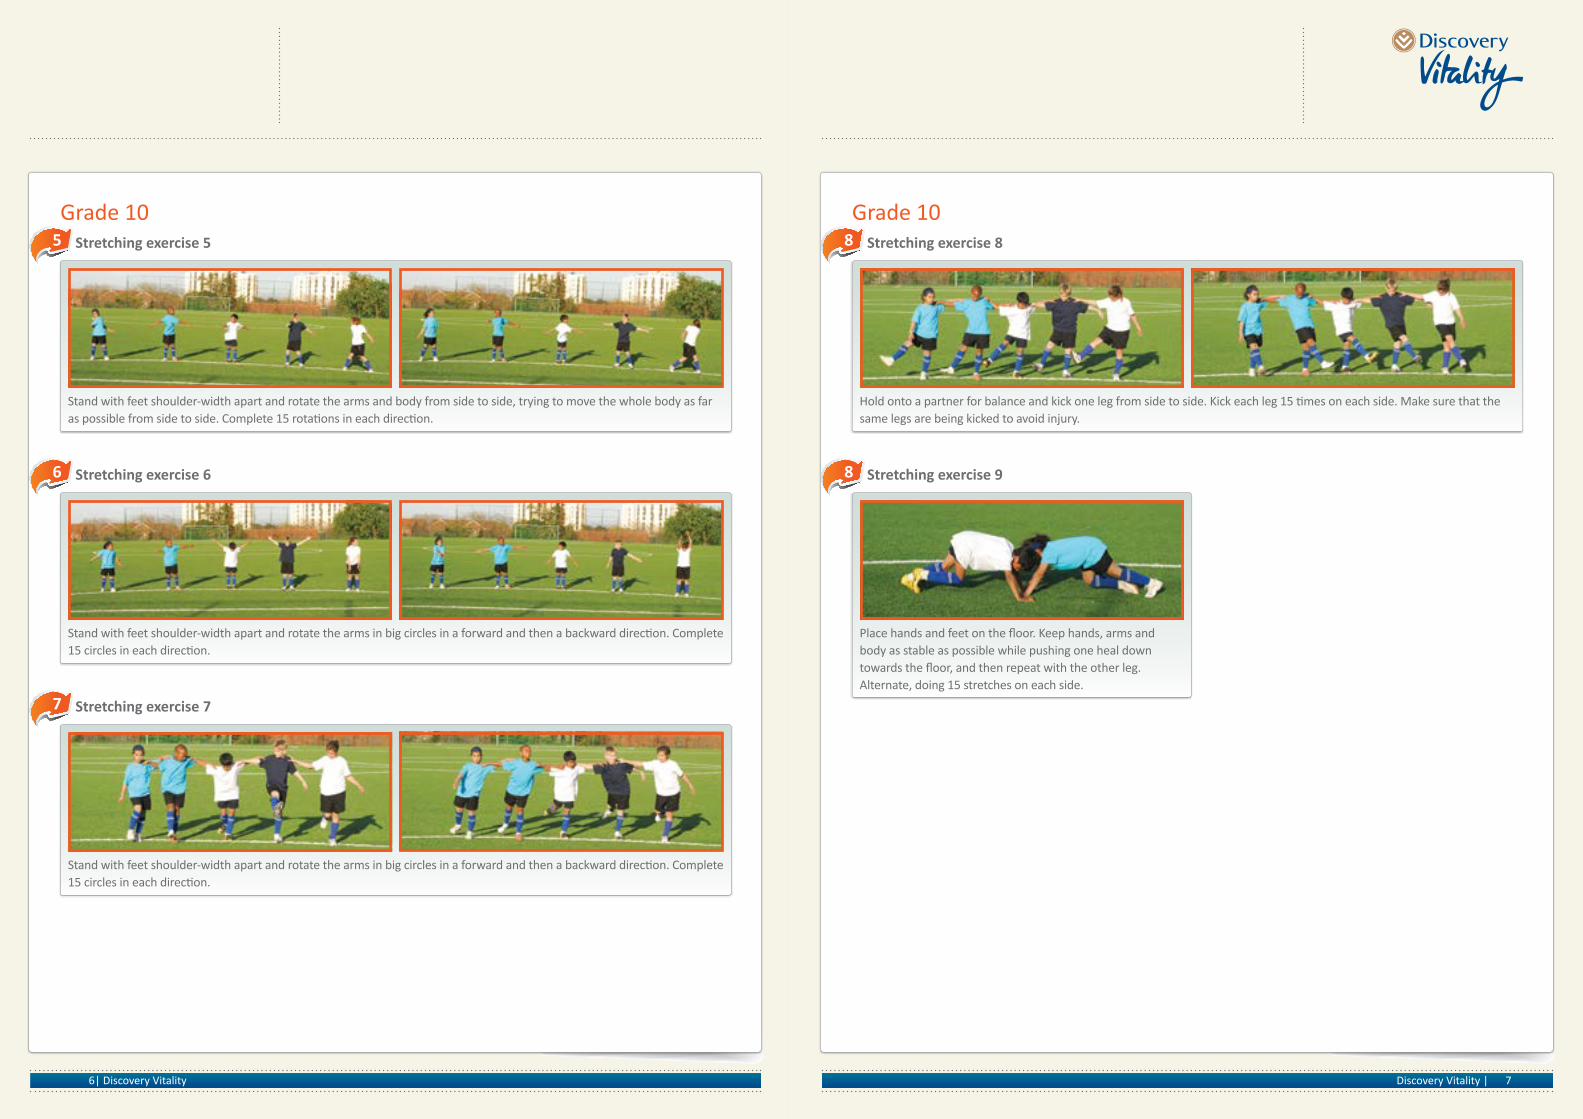
Stand with feet shoulder-width apart and rotate the arms and body from side to side, trying to move the whole body as far as possible from side to side. Complete 15 rotations in each direction.
Stretching exercise 55
Hold onto a partner for balance and kick one leg from side to side. Kick each leg 15 times on each side. Make sure that the same legs are being kicked to avoid injury.
Stretching exercise 88
Stand with feet shoulder-width apart and rotate the arms in big circles in a forward and then a backward direction. Complete 15 circles in each direction.
Stretching exercise 66
Place hands and feet on the floor. Keep hands, arms and body as stable as possible while pushing one heal down towards the floor, and then repeat with the other leg. Alternate, doing 15 stretches on each side.
Stretching exercise 98
Stand with feet shoulder-width apart and rotate the arms in big circles in a forward and then a backward direction. Complete 15 circles in each direction.
Stretching exercise 77
9Discovery Vitality | 8| Discovery Vitality
Grade 10Grade 10 Warm-up and cool-down exercises Lesson 1
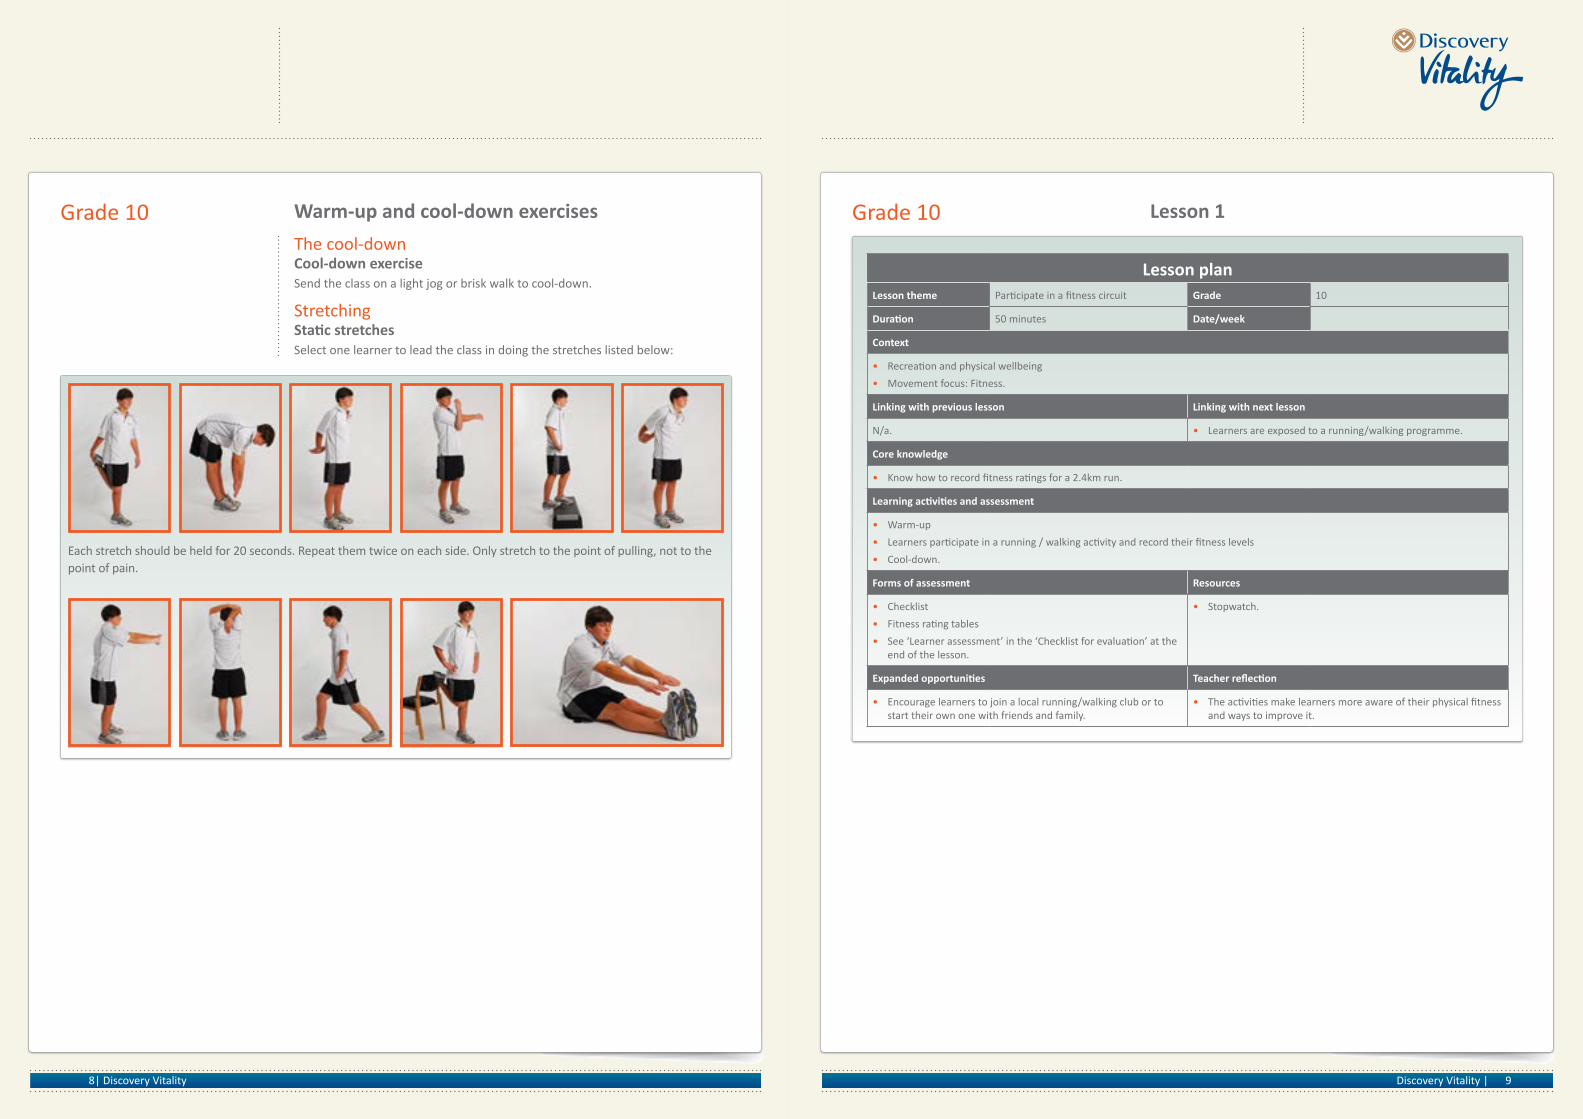
Each stretch should be held for 20 seconds. Repeat them twice on each side. Only stretch to the point of pulling, not to the point of pain.
The cool-downCool-down exerciseSend the class on a light jog or brisk walk to cool-down.
Stretching StaticstretchesSelect one learner to lead the class in doing the stretches listed below:
Lesson planLesson theme Participate in a fitness circuit Grade 10
Duration 50 minutes Date/week
Context
• Recreation and physical wellbeing
• Movement focus: Fitness.
Linking with previous lesson Linking with next lesson
N/a. • Learners are exposed to a running/walking programme.
Core knowledge
• Know how to record fitness ratings for a 2.4km run.
Learningactivitiesandassessment
• Warm-up
• Learners participate in a running / walking activity and record their fitness levels
• Cool-down.
Forms of assessment Resources
• Checklist
• Fitness rating tables
• See ‘Learner assessment’ in the ‘Checklist for evaluation’ at the end of the lesson.
• Stopwatch.
Expandedopportunities Teacherreflection
• Encourage learners to join a local running/walking club or to start their own one with friends and family.
• The activities make learners more aware of their physical fitness and ways to improve it.

11Discovery Vitality | 10| Discovery Vitality
3
4
Grade 10 Grade 10 OutcomesBy the end of the lesson learners should be able to:
• Work at improving fitness by being introduced to a 6-week running/walking programme
• Work at improving their fitness to a level that will allow them to complete a 5km run at the end of a 6-week period.
Teacher’s cornerThe aim of this lesson is to assess learners’ levels of fitness to determine their starting level in the 6-week fitness programme, which they will be introduced to in the next lesson.
It is recommended that you repeat this lesson in 7 weeks’ time to assess whether learners’ fitness levels have improved. Learners can then be awarded a mark for Life Orientation based on the improvement in their fitness levels after following the 6-week training programme. Learners who have maintained a high level of fitness should be awarded maximum marks.
Settingup
• This lesson is ideally carried out on a field marked for rugby, hockey or football so that learners have lines to guide them along a route
• Taping off the running area boundary will ensure that learners do not ‘cut corners’ and run a shorter distance than is required
• Ensure that you demarcate a start and end point clearly so that learners can see the 2.4km distance (or the extent of a lap)
• If a number of laps are required to complete the 2.4km distance, explain clearly to learners just how many laps they will need to do.
For lesson 1 you’ll need the following equipment
• Stopwatches to time learners’ completion of the 2.4km distance. If these are not available, learners can time a partner using a stopwatch on a cellphone.
ActivitiesActivity1:Instruction(5minutes)• Explain to learners that they will be required to run a 2.4km distance in the
lesson and that the time taken for them to complete the distance will be recorded. It is all right for them to walk sections if they feel they need to
• Learners will be exposed to a running / walking programme in the next Physical education lesson, which they can follow to improve their fitness over a six-week period
• At the end of the 6-week period, it is recommended that learners be re-evaluated on the 2.4km run and their progress be used to inform assessment
• Divide the class into 2 groups so that each learner has a partner who will record their time.
Activity2:Warm-up(5minutes)Plan a warm-up exercise based on the warm-up and dynamic stretching exercises found on pages 3 to 7.
Activity3:Running/walking(32minutes,includingchangeover)1. Group 1 starts the 2.4km run on the blow of the teacher’s whistle and
partners start keeping time on their stopwatches
2. On Group 1’s completion of the 2.4km run, learners record the time it took them to complete the distance on their score card
3. Group 2 then completes the 2.4km run and these learners also record their times on their score cards.
Activity4:Cool-down(8minutes)Plan a cool-down exercise based on the cool-down and stretching exercises found on page 8.
Assessment• Use the Fitness rating tables (on page 12) to assess learners’ fitness levels
according to statistics gained from www.exrx.net (recommended by sport scientist K. Mc Quaide-Little of the Sports Science Institute of South Africa)
• Mark off participation in lesson on the class list and use the “Checklist for evaluation” below.
1
2
Lesson1:Run2.4km–fitnesstest(50minutes)
Lesson1:ChecklistforevaluationActivity Question Yes No
Completing the 2.4km run • Did learners manage to complete the 2.4km distance and record their times on their score cards?
Teacher reflection • Do you think that this activity has made learners more aware of their physical fitness and ways to improve it?
• If you had to repeat the lesson, what improvements would you make to it?
Learner assessment • Look at the table on page 10 and assign the relevant marks to the learners depending on the time it took them to cover the 2.4km run. Example: if a 16-year-old male learner ran the 2.4 km race in 10’30”, assign a mark of 5-6.
13Discovery Vitality | 12| Discovery Vitality
Grade 10 Grade 10 Fitness rating tables 5
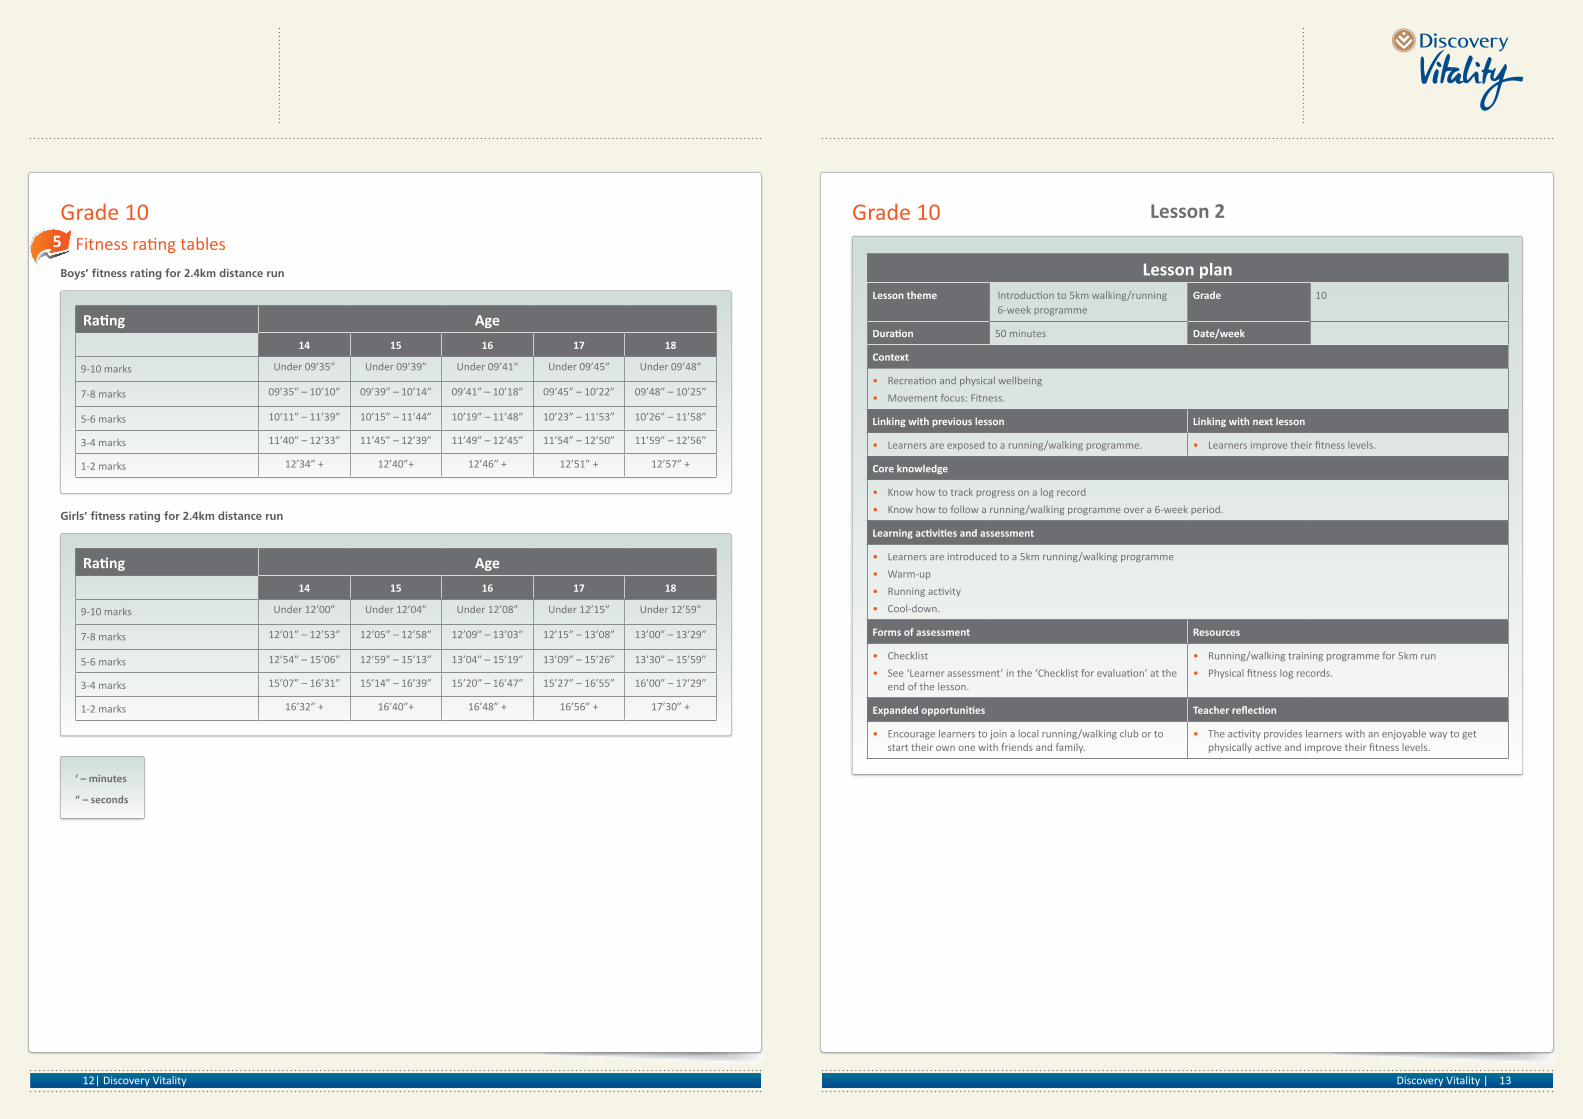
Boys’ fitness rating for 2.4km distance run
Girls’ fitness rating for 2.4km distance run
Rating Age
14 15 16 17 18
9-10 marks Under 09’35” Under 09’39” Under 09’41” Under 09’45” Under 09’48”
7-8 marks 09’35” – 10’10” 09’39” – 10’14” 09’41” – 10’18” 09’45” – 10’22” 09’48” – 10’25”
5-6 marks 10’11” – 11’39” 10’15” – 11’44” 10’19” – 11’48” 10’23” – 11’53” 10’26” – 11’58”
3-4 marks 11’40” – 12’33” 11’45” – 12’39” 11’49” – 12’45” 11’54” – 12’50” 11’59” – 12’56”
1-2 marks 12’34” + 12’40”+ 12’46” + 12’51” + 12’57” +
Rating Age
14 15 16 17 18
9-10 marks Under 12’00” Under 12’04” Under 12’08” Under 12’15” Under 12’59”
7-8 marks 12’01” – 12’53” 12’05” – 12’58” 12’09” – 13’03” 12’15” – 13’08” 13’00” – 13’29”
5-6 marks 12’54” – 15’06” 12’59” – 15’13” 13’04” – 15’19” 13’09” – 15’26” 13’30” – 15’59”
3-4 marks 15’07” – 16’31” 15’14” – 16’39” 15’20” – 16’47” 15’27” – 16’55” 16’00” – 17’29”
1-2 marks 16’32” + 16’40”+ 16’48” + 16’56” + 17’30” +
‘ – minutes
“ – seconds
Lesson 2
Lesson planLesson theme Introduction to 5km walking/running
6-week programmeGrade 10
Duration 50 minutes Date/week
Context
• Recreation and physical wellbeing
• Movement focus: Fitness.
Linking with previous lesson Linking with next lesson
• Learners are exposed to a running/walking programme. • Learners improve their fitness levels.
Core knowledge
• Know how to track progress on a log record
• Know how to follow a running/walking programme over a 6-week period.
Learningactivitiesandassessment
• Learners are introduced to a 5km running/walking programme
• Warm-up
• Running activity
• Cool-down.
Forms of assessment Resources
• Checklist
• See ‘Learner assessment’ in the ‘Checklist for evaluation’ at the end of the lesson.
• Running/walking training programme for 5km run
• Physical fitness log records.
Expandedopportunities Teacherreflection
• Encourage learners to join a local running/walking club or to start their own one with friends and family.
• The activity provides learners with an enjoyable way to get physically active and improve their fitness levels.

15Discovery Vitality | 14| Discovery Vitality
3
4
5
Grade 10 Grade 10
OutcomesBy the end of the lesson learners should be able to:
• Implement a programme they can follow to improve their fitness through running and walking
• Work at improving their fitness to a level that will allow them to complete a 5km run at the end of a 6-week period.
Teacher’s cornerSettingup
• This lesson is ideally carried out on a field marked for rugby, hockey or football so that learners have lines to guide them along a route.
For lesson 2 you’ll need the following equipment:
• Running/walking training programme for 5km run (1 for each learner), see ‘Your training programme’ on page 16
• Physical fitness log records (1 for each learner), see page 17.
ActivitiesActivity1:Feedback(5minutes)1. Give learners their fitness level ratings based on the 2.4km test completed in
the previous lesson
2. Divide the class into 5 groups according to their fitness level (use the fitness level rating categories referenced in the previous lesson as a guide).
Activity2:Introductionto5kmrunning/walkingprogramme (5minutes)1. Provide each learner with a copy of the 5km running/walking programme (see
‘Your training programme’)
2. Provide learners with log records so they can track their progress. They must hand these in at the end of the 6-week period (see ‘Your physical fitness log record’)
3. Inform learners that they will be required to complete a running/walking programme over a 6-week period in order to improve their fitness levels
4. Assign each group a starting level in this programme and then inform the class that they are required to follow this programme for a period of 6 weeks, after which time they will have their fitness reassessed.
Activity3:Warmup(5minutes)Plan a warm-up exercise based on the warm up and dynamic stretching exercises found on pages 3 to 7.
Activity4:Running/walking(20minutes)Each group in the class completes the activity session according to their starting level in the 5km running/walking programme.
Activity5:Cool-down(10minutes)Plan a cool-down exercise based on the cool-down and stretching exercises found on page 8.
Wrap-up (5 minutes)• Encourage learners to continue with the programme by following the
guidelines on the sheet provided for them
• If learners would like to complete a similar programme outside of school, advise them how to get into contact with the organisation Run/Walk For Life (visit www.run/walkforlife.co.za)
• Alternatively, learners could set up their own running or walking group with friends or family by simply following the 5km programme guidelines.
Assessment • Complete the ‘Learner assessment’ according to the mark allocation in the
table below (‘Checklist for evaluation’)
• Mark off participation in lesson on the class list and complete the ‘Checklist for evaluation’.
1
2
Lesson2:Introductionto5kmwalking/running6-week programme
Lesson2:ChecklistforevaluationActivity Question Yes No
Completing the activity for the 5km programme
• Do learners understand how to follow a fitness programme?• Did they manage to complete the activity for their starting level in
the 5km running/walking programme?
Teacher reflection • Do you think the learners understand the benefits of following a fitness programme?
• Do you think that this activity has made them more aware of their physical fitness and ways to improve it?
• If you had to repeat the lesson, what improvements would you make to it?
Learner assessment Assess whether learners hand in a physical fitness log record:• Learners handed in a complete 6-week training programme (9 to 10 marks)• Learners handed in a complete 3 to 4-week training programme (7 to 8 marks)• Learners handed in a complete 3 to 4-week training programme (5 to 6 marks)• Learners handed in a complete 1 to 2-week training programme (3 to 4 marks)• Learners did not hand in any programme at all (0 marks).
17Discovery Vitality | 16| Discovery Vitality
Grade 10 Grade 10 Your training programme 5
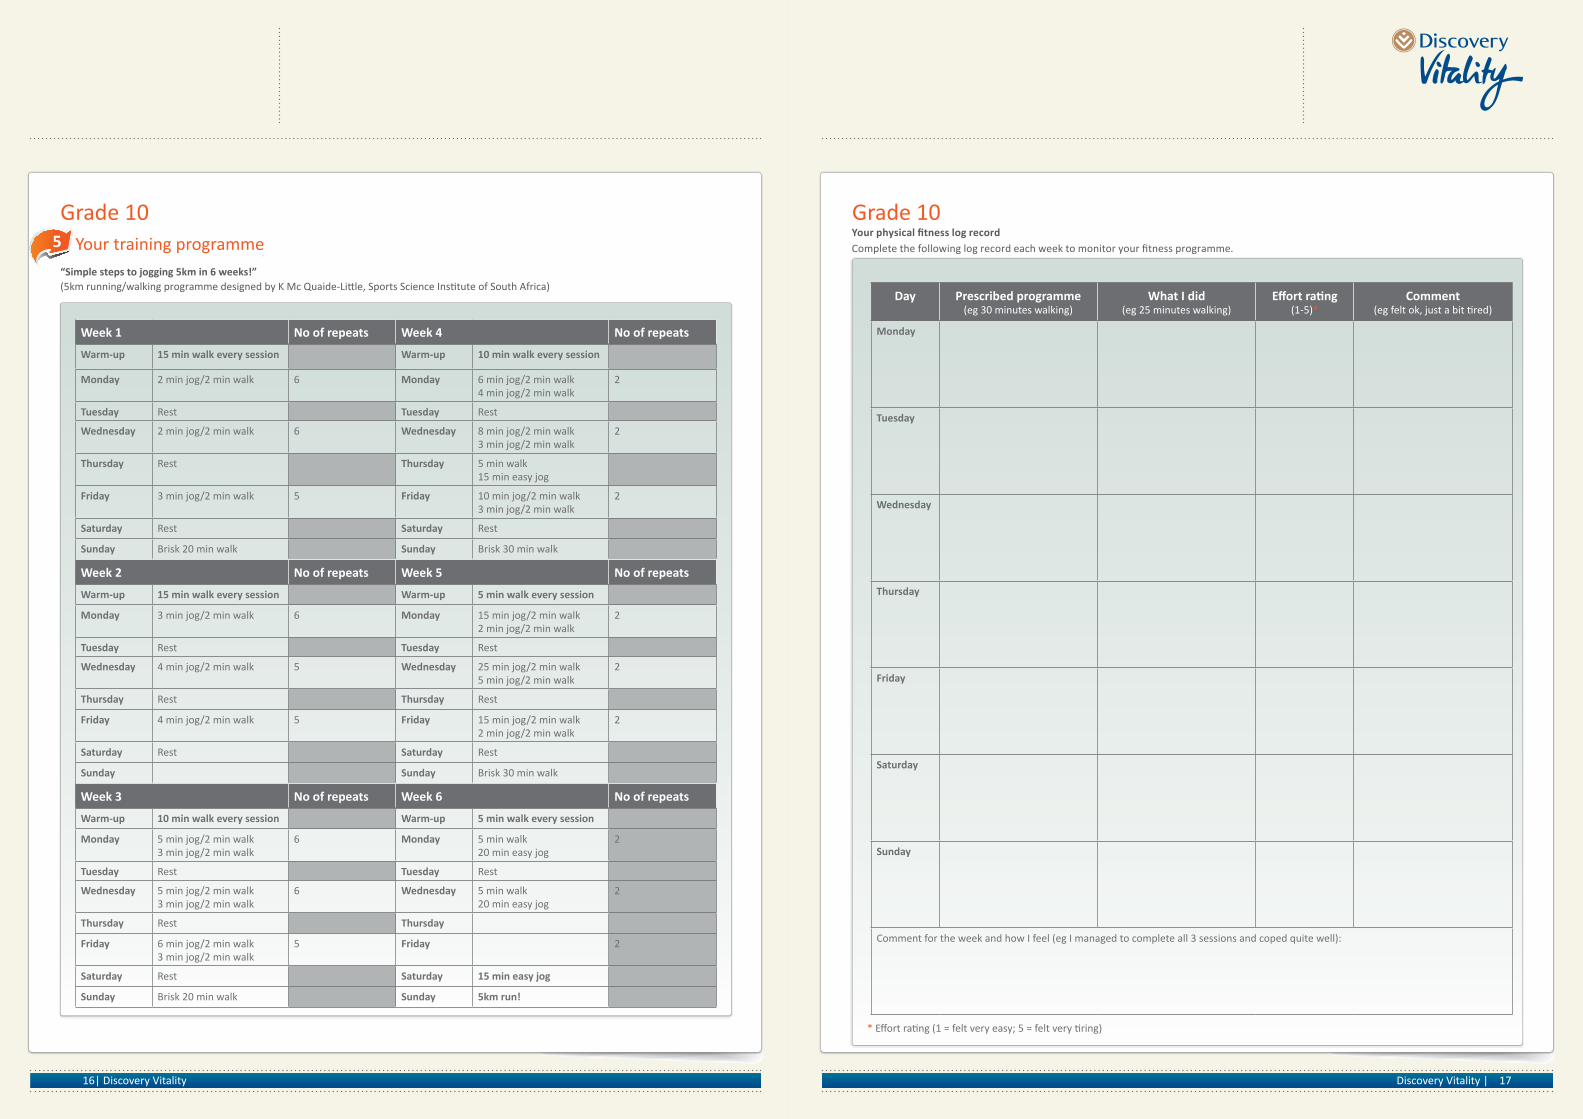
Week 1 No of repeats Week 4 No of repeats
Warm-up 15 min walk every session Warm-up 10 min walk every session
Monday 2 min jog/2 min walk 6 Monday 6 min jog/2 min walk 4 min jog/2 min walk
2
Tuesday Rest Tuesday Rest
Wednesday 2 min jog/2 min walk 6 Wednesday 8 min jog/2 min walk 3 min jog/2 min walk
2
Thursday Rest Thursday 5 min walk 15 min easy jog
Friday 3 min jog/2 min walk 5 Friday 10 min jog/2 min walk 3 min jog/2 min walk
2
Saturday Rest Saturday Rest
Sunday Brisk 20 min walk Sunday Brisk 30 min walk
Week 2 No of repeats Week 5 No of repeats
Warm-up 15 min walk every session Warm-up 5 min walk every session
Monday 3 min jog/2 min walk 6 Monday 15 min jog/2 min walk 2 min jog/2 min walk
2
Tuesday Rest Tuesday Rest
Wednesday 4 min jog/2 min walk 5 Wednesday 25 min jog/2 min walk 5 min jog/2 min walk
2
Thursday Rest Thursday Rest
Friday 4 min jog/2 min walk 5 Friday 15 min jog/2 min walk 2 min jog/2 min walk
2
Saturday Rest Saturday Rest
Sunday Sunday Brisk 30 min walk
Week 3 No of repeats Week 6 No of repeats
Warm-up 10 min walk every session Warm-up 5 min walk every session
Monday 5 min jog/2 min walk 3 min jog/2 min walk
6 Monday 5 min walk 20 min easy jog
2
Tuesday Rest Tuesday Rest
Wednesday 5 min jog/2 min walk 3 min jog/2 min walk
6 Wednesday 5 min walk 20 min easy jog
2
Thursday Rest Thursday
Friday 6 min jog/2 min walk 3 min jog/2 min walk
5 Friday 2
Saturday Rest Saturday 15 min easy jog
Sunday Brisk 20 min walk Sunday 5km run!
Day Prescribed programme (eg 30 minutes walking)
WhatIdid (eg 25 minutes walking)
Effortrating (1-5)*
Comment (eg felt ok, just a bit tired)
Monday
Tuesday
Wednesday
Thursday
Friday
Saturday
Sunday
Comment for the week and how I feel (eg I managed to complete all 3 sessions and coped quite well):
* Effort rating (1 = felt very easy; 5 = felt very tiring)
“Simple steps to jogging 5km in 6 weeks!”(5km running/walking programme designed by K Mc Quaide-Little, Sports Science Institute of South Africa)
YourphysicalfitnesslogrecordComplete the following log record each week to monitor your fitness programme.

19Discovery Vitality | 18| Discovery Vitality
OutcomesBy the end of the lesson learners should be able to:
• Serve (either underarm or overarm)
• Perform a dig shot confidently
• Perform a set shot confidently
• Take an active part in a volleyball rally.
Teacher’s cornerSettingup
• Familiarise yourself with the drills outlined in the ‘Activities’ section below
• Get a learner to demonstrate the techniques used for the different shots while you provide the ‘voice-over’.
For lesson 3 you’ll need the following equipment:
• Volleyball net (or rope fashioned into a net)
• As many volleyballs as possible for the performing of drills.
ActivitiesActivity1:Warm-up(5minutes)Plan a warm-up exercise based on the warm-up and dynamic stretching exercises found on pages 3 to 7.
Activity2:Theunderarmserve(5minutes)1. Demonstrate the underarm serve drill to the learners, explaining the various
body movements associated with this shot as described below.
1. Stand side-on to the net with your feet approximately shoulder-width apart.
2. Make your hitting hand into a flat surface by forming a fist.
3. Hold the ball in front of your body with your non-hitting hand.
4. Take your hitting hand back so that it is coming from behind your body.
5. Move your body weight from your back foot to your front foot as your hand swings through.
6. As your hand swings through, release the ball from your non-hitting hand, connecting underneath it with your hitting hand.
7. Follow through with your arm in the direction of your target as your hitting hand connects with the ball.
2. Pair learners up and ask them to hit the ball to each other following the example provided in the demonstration.
Grade 10 Grade 10Lesson 3
Lesson planLesson theme Practise basic volleyball skills Grade 10
Duration 50 minutes Date/week
Context
• Recreation and physical wellbeing
• Movement focus: Sports and games.
Linking with previous lesson Linking with next lesson
• Learners improve their fitness levels. • Learners develop sports skills.
Core knowledge
• Know how to serve underarm and overarm in volleyball
• Know how to perform a dig and set shot.
Learningactivitiesandassessment
• Warm-up
• Learners perform drills that develop volleyball skills. They then try to maintain a rally using these skills
• Cool-down.
Forms of assessment Resources
• Checklist
• See ‘Learner assessment’ in the ‘Checklist for evaluation’ at the end of the lesson.
• Volleyball net/rope
• Volleyballs.
Expandedopportunities Teacherreflection
• Encourage learners that are interested in volleyball to join a local club.
• The activities teach learners important skills and help them improve their co-ordination and fitness levels.
3
1
2
Lesson3:Practisebasicvolleyballskills (50minutes)
21Discovery Vitality | 20| Discovery Vitality
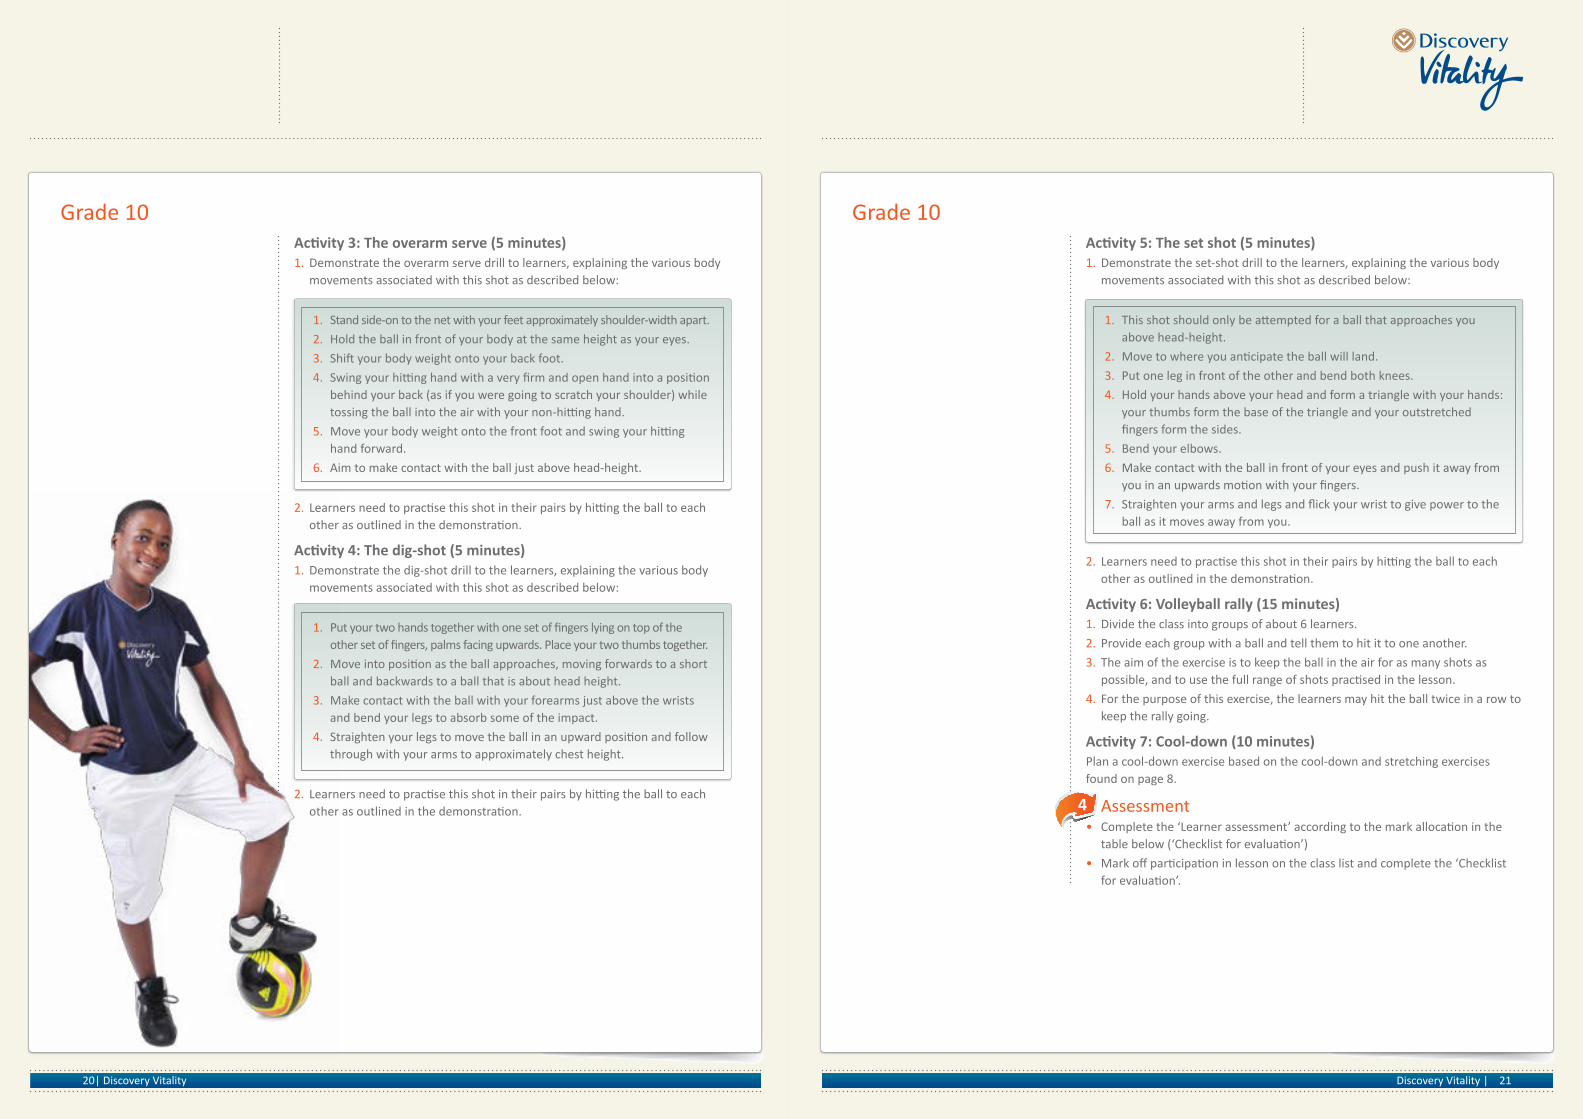
Activity5:Thesetshot(5minutes)1. Demonstrate the set-shot drill to the learners, explaining the various body
movements associated with this shot as described below:
1. This shot should only be attempted for a ball that approaches you above head-height.
2. Move to where you anticipate the ball will land.
3. Put one leg in front of the other and bend both knees.
4. Hold your hands above your head and form a triangle with your hands: your thumbs form the base of the triangle and your outstretched fingers form the sides.
5. Bend your elbows.
6. Make contact with the ball in front of your eyes and push it away from you in an upwards motion with your fingers.
7. Straighten your arms and legs and flick your wrist to give power to the ball as it moves away from you.
2. Learners need to practise this shot in their pairs by hitting the ball to each other as outlined in the demonstration.
Activity6:Volleyballrally(15minutes)1. Divide the class into groups of about 6 learners.
2. Provide each group with a ball and tell them to hit it to one another.
3. The aim of the exercise is to keep the ball in the air for as many shots as possible, and to use the full range of shots practised in the lesson.
4. For the purpose of this exercise, the learners may hit the ball twice in a row to keep the rally going.
Activity7:Cool-down(10minutes)Plan a cool-down exercise based on the cool-down and stretching exercises found on page 8.
Assessment • Complete the ‘Learner assessment’ according to the mark allocation in the
table below (‘Checklist for evaluation’)
• Mark off participation in lesson on the class list and complete the ‘Checklist for evaluation’.
Activity3:Theoverarmserve(5minutes)1. Demonstrate the overarm serve drill to learners, explaining the various body
movements associated with this shot as described below:
1. Stand side-on to the net with your feet approximately shoulder-width apart.
2. Hold the ball in front of your body at the same height as your eyes.
3. Shift your body weight onto your back foot.
4. Swing your hitting hand with a very firm and open hand into a position behind your back (as if you were going to scratch your shoulder) while tossing the ball into the air with your non-hitting hand.
5. Move your body weight onto the front foot and swing your hitting hand forward.
6. Aim to make contact with the ball just above head-height.
2. Learners need to practise this shot in their pairs by hitting the ball to each other as outlined in the demonstration.
Activity4:Thedig-shot(5minutes)1. Demonstrate the dig-shot drill to the learners, explaining the various body
movements associated with this shot as described below:
1. Put your two hands together with one set of fingers lying on top of the other set of fingers, palms facing upwards. Place your two thumbs together.
2. Move into position as the ball approaches, moving forwards to a short ball and backwards to a ball that is about head height.
3. Make contact with the ball with your forearms just above the wrists and bend your legs to absorb some of the impact.
4. Straighten your legs to move the ball in an upward position and follow through with your arms to approximately chest height.
2. Learners need to practise this shot in their pairs by hitting the ball to each other as outlined in the demonstration.
Grade 10 Grade 10
4
23Discovery Vitality | 22| Discovery Vitality
Grade 10 Grade 10
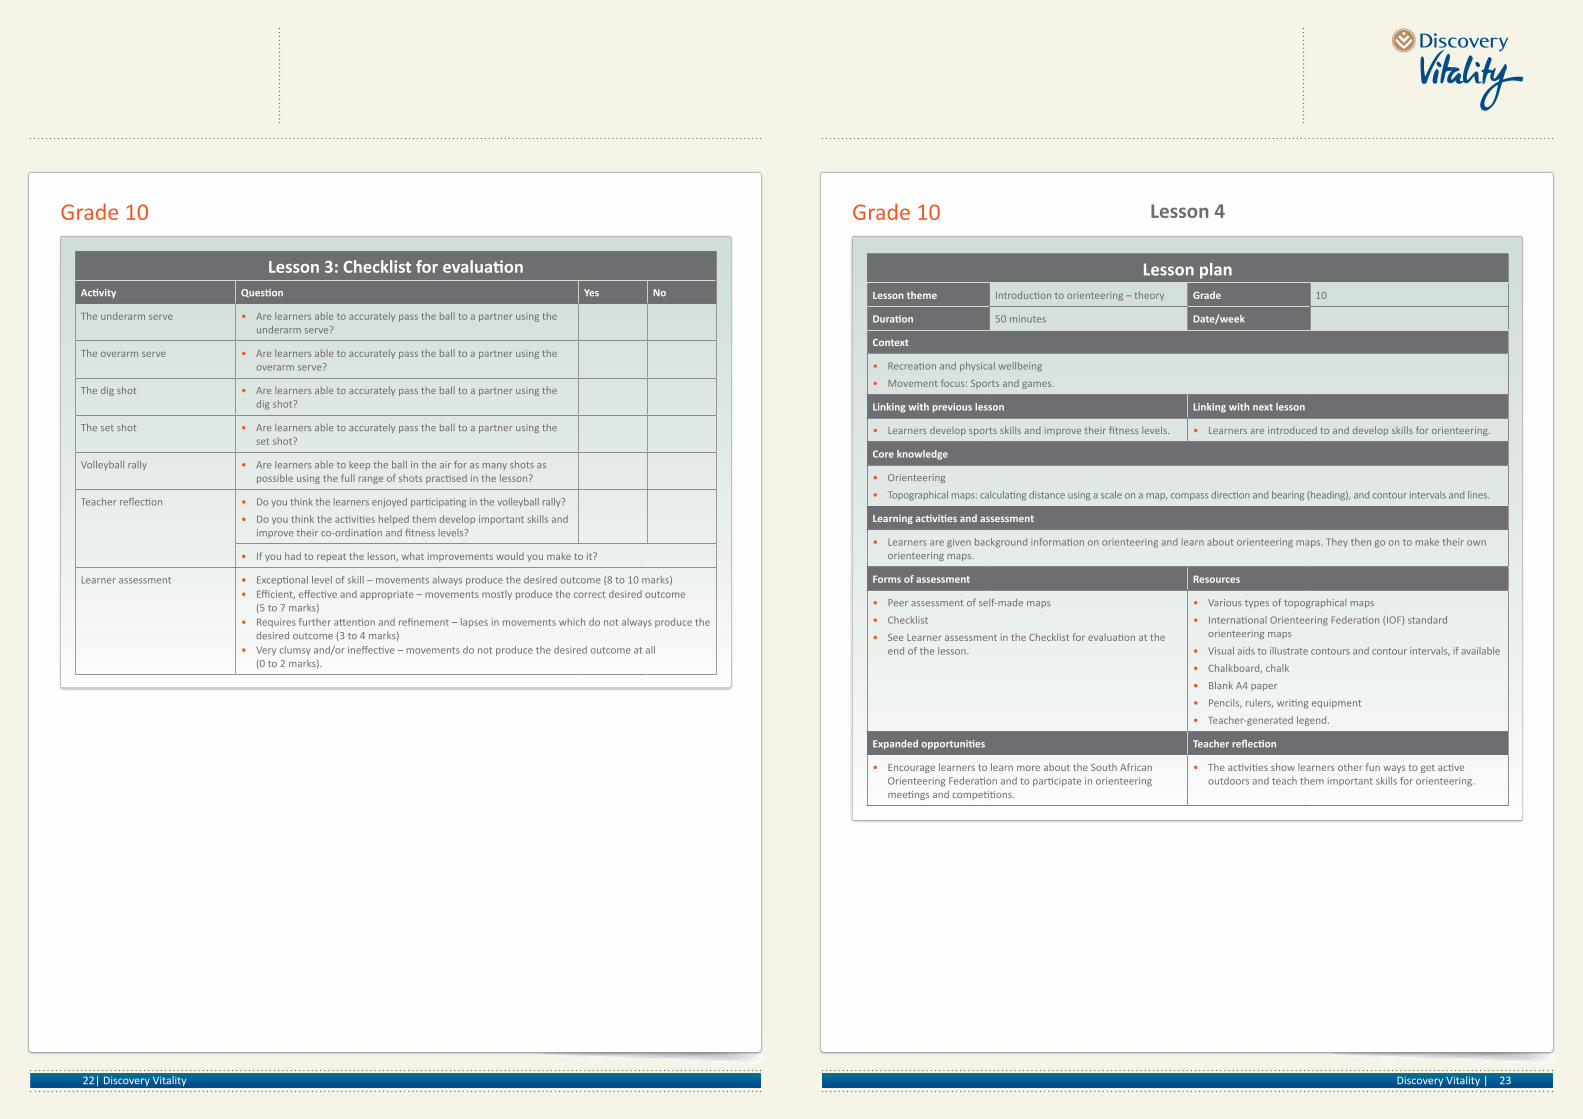
Lesson3:ChecklistforevaluationActivity Question Yes No
The underarm serve • Are learners able to accurately pass the ball to a partner using the underarm serve?
The overarm serve • Are learners able to accurately pass the ball to a partner using the overarm serve?
The dig shot • Are learners able to accurately pass the ball to a partner using the dig shot?
The set shot • Are learners able to accurately pass the ball to a partner using the set shot?
Volleyball rally • Are learners able to keep the ball in the air for as many shots as possible using the full range of shots practised in the lesson?
Teacher reflection • Do you think the learners enjoyed participating in the volleyball rally?
• Do you think the activities helped them develop important skills and improve their co-ordination and fitness levels?
• If you had to repeat the lesson, what improvements would you make to it?
Learner assessment • Exceptional level of skill – movements always produce the desired outcome (8 to 10 marks)• Efficient, effective and appropriate – movements mostly produce the correct desired outcome
(5 to 7 marks)• Requires further attention and refinement – lapses in movements which do not always produce the
desired outcome (3 to 4 marks)• Very clumsy and/or ineffective – movements do not produce the desired outcome at all
(0 to 2 marks).
Lesson 4
Lesson planLesson theme Introduction to orienteering – theory Grade 10
Duration 50 minutes Date/week
Context
• Recreation and physical wellbeing
• Movement focus: Sports and games.
Linking with previous lesson Linking with next lesson
• Learners develop sports skills and improve their fitness levels. • Learners are introduced to and develop skills for orienteering.
Core knowledge
• Orienteering
• Topographical maps: calculating distance using a scale on a map, compass direction and bearing (heading), and contour intervals and lines.
Learningactivitiesandassessment
• Learners are given background information on orienteering and learn about orienteering maps. They then go on to make their own orienteering maps.
Forms of assessment Resources
• Peer assessment of self-made maps
• Checklist
• See Learner assessment in the Checklist for evaluation at the end of the lesson.
• Various types of topographical maps
• International Orienteering Federation (IOF) standard orienteering maps
• Visual aids to illustrate contours and contour intervals, if available
• Chalkboard, chalk
• Blank A4 paper
• Pencils, rulers, writing equipment
• Teacher-generated legend.
Expandedopportunities Teacherreflection
• Encourage learners to learn more about the South African Orienteering Federation and to participate in orienteering meetings and competitions.
• The activities show learners other fun ways to get active outdoors and teach them important skills for orienteering.
25Discovery Vitality | 24| Discovery Vitality
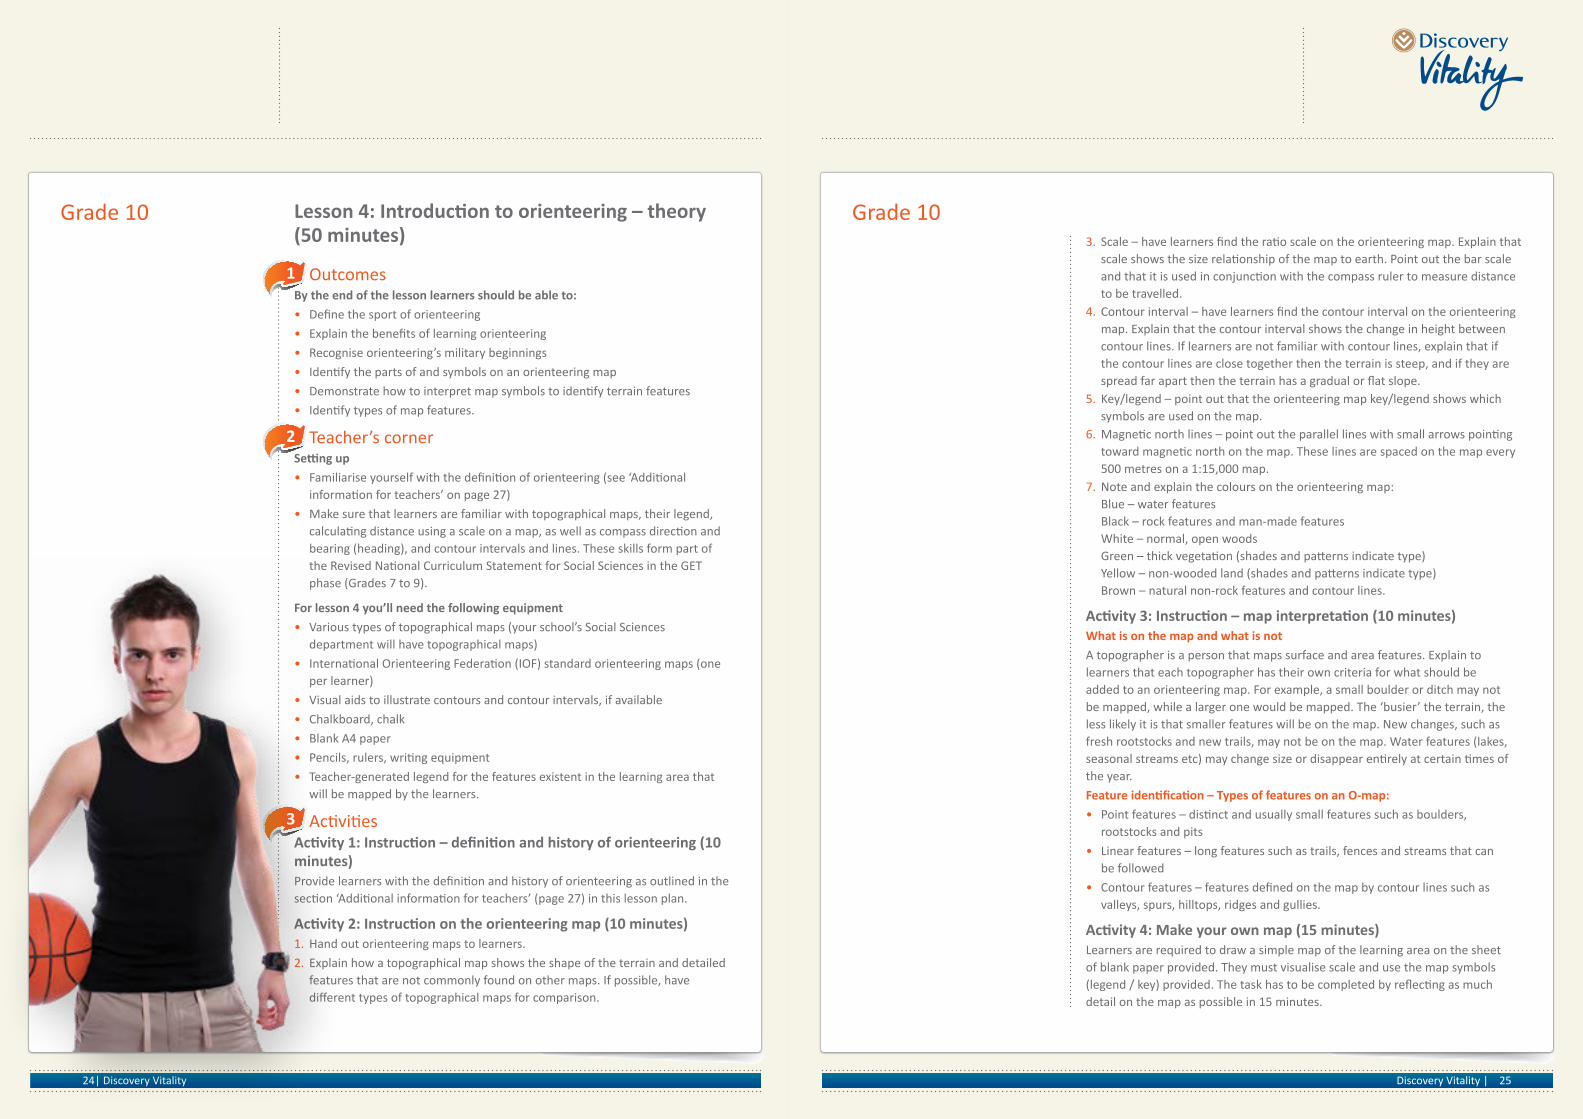
Grade 10 Grade 103. Scale – have learners find the ratio scale on the orienteering map. Explain that
scale shows the size relationship of the map to earth. Point out the bar scale and that it is used in conjunction with the compass ruler to measure distance to be travelled.
4. Contour interval – have learners find the contour interval on the orienteering map. Explain that the contour interval shows the change in height between contour lines. If learners are not familiar with contour lines, explain that if the contour lines are close together then the terrain is steep, and if they are spread far apart then the terrain has a gradual or flat slope.
5. Key/legend – point out that the orienteering map key/legend shows which symbols are used on the map.
6. Magnetic north lines – point out the parallel lines with small arrows pointing toward magnetic north on the map. These lines are spaced on the map every 500 metres on a 1:15,000 map.
7. Note and explain the colours on the orienteering map: Blue – water features Black – rock features and man-made features White – normal, open woods Green – thick vegetation (shades and patterns indicate type) Yellow – non-wooded land (shades and patterns indicate type) Brown – natural non-rock features and contour lines.
Activity3:Instruction–mapinterpretation(10minutes)What is on the map and what is not
A topographer is a person that maps surface and area features. Explain to learners that each topographer has their own criteria for what should be added to an orienteering map. For example, a small boulder or ditch may not be mapped, while a larger one would be mapped. The ‘busier’ the terrain, the less likely it is that smaller features will be on the map. New changes, such as fresh rootstocks and new trails, may not be on the map. Water features (lakes, seasonal streams etc) may change size or disappear entirely at certain times of the year.
Featureidentification–TypesoffeaturesonanO-map:
• Point features – distinct and usually small features such as boulders, rootstocks and pits
• Linear features – long features such as trails, fences and streams that can be followed
• Contour features – features defined on the map by contour lines such as valleys, spurs, hilltops, ridges and gullies.
Activity4:Makeyourownmap(15minutes)Learners are required to draw a simple map of the learning area on the sheet of blank paper provided. They must visualise scale and use the map symbols (legend / key) provided. The task has to be completed by reflecting as much detail on the map as possible in 15 minutes.
3
OutcomesBy the end of the lesson learners should be able to:
• Define the sport of orienteering
• Explain the benefits of learning orienteering
• Recognise orienteering’s military beginnings
• Identify the parts of and symbols on an orienteering map
• Demonstrate how to interpret map symbols to identify terrain features
• Identify types of map features.
Teacher’s cornerSettingup
• Familiarise yourself with the definition of orienteering (see ‘Additional information for teachers’ on page 27)
• Make sure that learners are familiar with topographical maps, their legend, calculating distance using a scale on a map, as well as compass direction and bearing (heading), and contour intervals and lines. These skills form part of the Revised National Curriculum Statement for Social Sciences in the GET phase (Grades 7 to 9).
For lesson 4 you’ll need the following equipment
• Various types of topographical maps (your school’s Social Sciences department will have topographical maps)
• International Orienteering Federation (IOF) standard orienteering maps (one per learner)
• Visual aids to illustrate contours and contour intervals, if available
• Chalkboard, chalk
• Blank A4 paper
• Pencils, rulers, writing equipment
• Teacher-generated legend for the features existent in the learning area that will be mapped by the learners.
ActivitiesActivity1:Instruction–definitionandhistoryoforienteering(10minutes)Provide learners with the definition and history of orienteering as outlined in the section ‘Additional information for teachers’ (page 27) in this lesson plan.
Activity2:Instructionontheorienteeringmap(10minutes)1. Hand out orienteering maps to learners.
2. Explain how a topographical map shows the shape of the terrain and detailed features that are not commonly found on other maps. If possible, have different types of topographical maps for comparison.
1
2
Lesson4:Introductiontoorienteering–theory(50minutes)
27Discovery Vitality | 26| Discovery Vitality
Grade 10 Grade 10
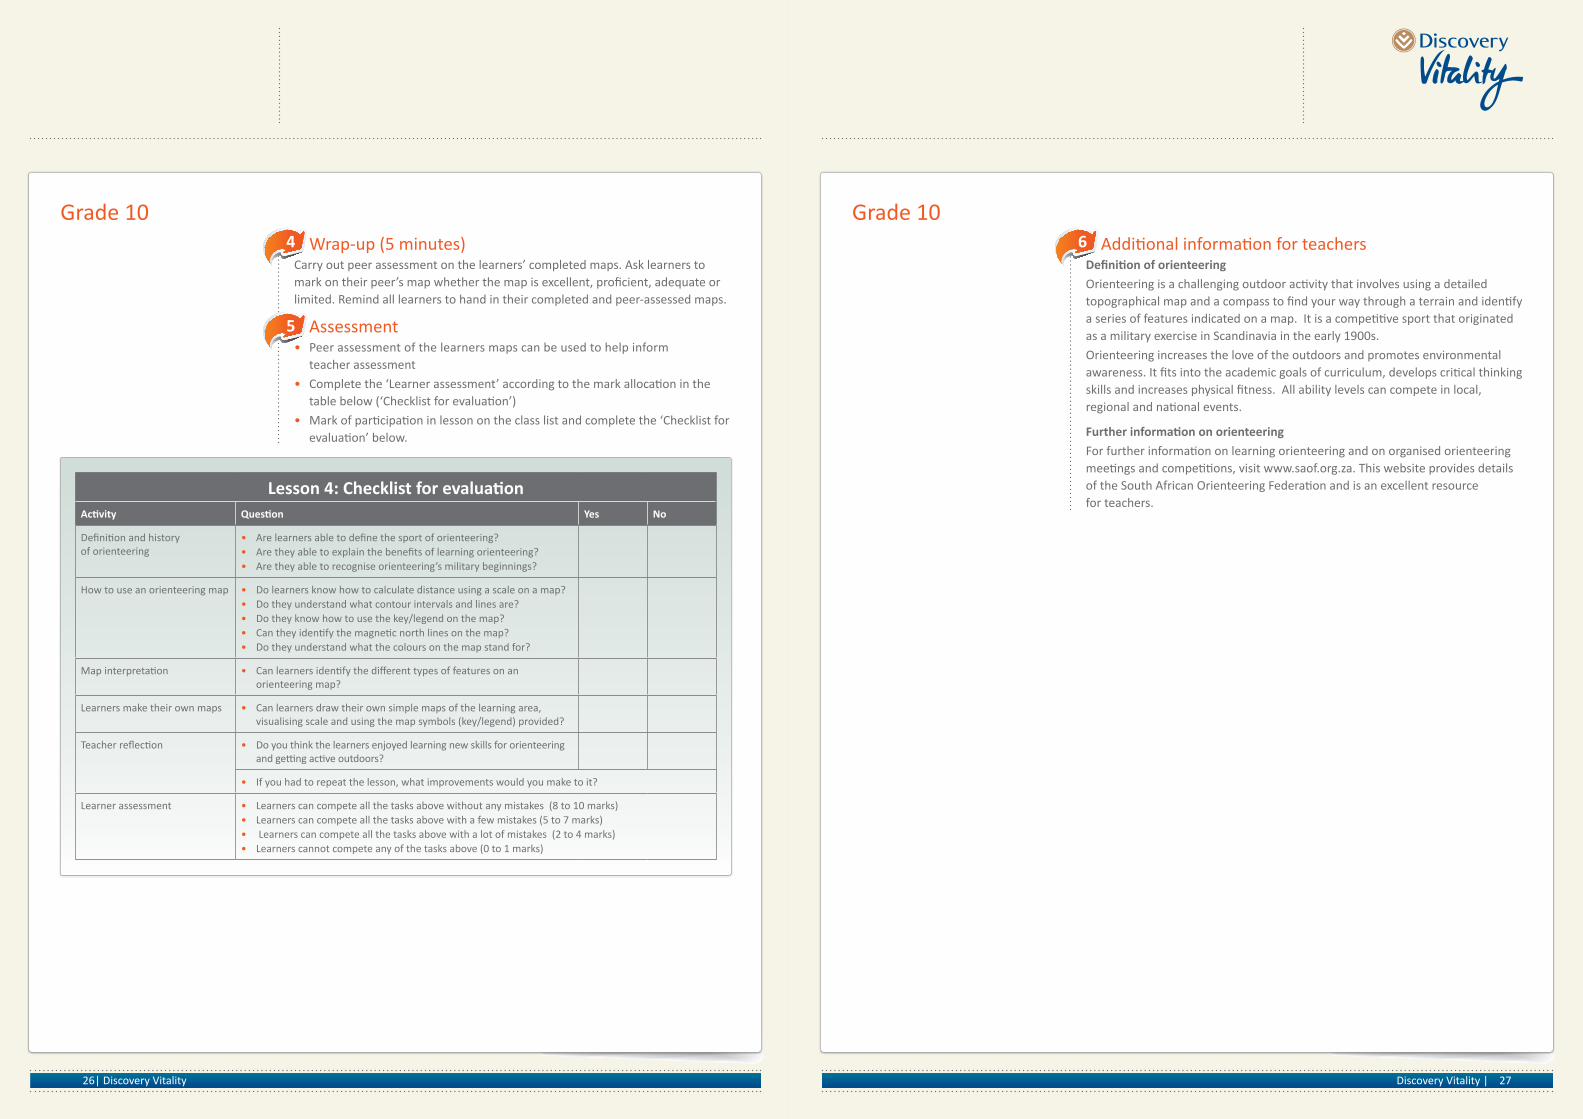
Lesson4:ChecklistforevaluationActivity Question Yes No
Definition and history of orienteering
• Are learners able to define the sport of orienteering?• Are they able to explain the benefits of learning orienteering?• Are they able to recognise orienteering’s military beginnings?
How to use an orienteering map • Do learners know how to calculate distance using a scale on a map?• Do they understand what contour intervals and lines are?• Do they know how to use the key/legend on the map? • Can they identify the magnetic north lines on the map? • Do they understand what the colours on the map stand for?
Map interpretation • Can learners identify the different types of features on an orienteering map?
Learners make their own maps • Can learners draw their own simple maps of the learning area, visualising scale and using the map symbols (key/legend) provided?
Teacher reflection • Do you think the learners enjoyed learning new skills for orienteering and getting active outdoors?
• If you had to repeat the lesson, what improvements would you make to it?
Learner assessment • Learners can compete all the tasks above without any mistakes (8 to 10 marks)• Learners can compete all the tasks above with a few mistakes (5 to 7 marks)• Learners can compete all the tasks above with a lot of mistakes (2 to 4 marks)• Learners cannot compete any of the tasks above (0 to 1 marks)
Wrap-up (5 minutes)Carry out peer assessment on the learners’ completed maps. Ask learners to mark on their peer’s map whether the map is excellent, proficient, adequate or limited. Remind all learners to hand in their completed and peer-assessed maps.
Assessment• Peer assessment of the learners maps can be used to help inform
teacher assessment
• Complete the ‘Learner assessment’ according to the mark allocation in the table below (‘Checklist for evaluation’)
• Mark of participation in lesson on the class list and complete the ‘Checklist for evaluation’ below.
Additional information for teachersDefinitionoforienteering
Orienteering is a challenging outdoor activity that involves using a detailed topographical map and a compass to find your way through a terrain and identify a series of features indicated on a map. It is a competitive sport that originated as a military exercise in Scandinavia in the early 1900s.
Orienteering increases the love of the outdoors and promotes environmental awareness. It fits into the academic goals of curriculum, develops critical thinking skills and increases physical fitness. All ability levels can compete in local, regional and national events.
Furtherinformationonorienteering
For further information on learning orienteering and on organised orienteering meetings and competitions, visit www.saof.org.za. This website provides details of the South African Orienteering Federation and is an excellent resource for teachers.
4 6
5
29Discovery Vitality | 28| Discovery Vitality
Grade 10Grade 10 Lesson 5
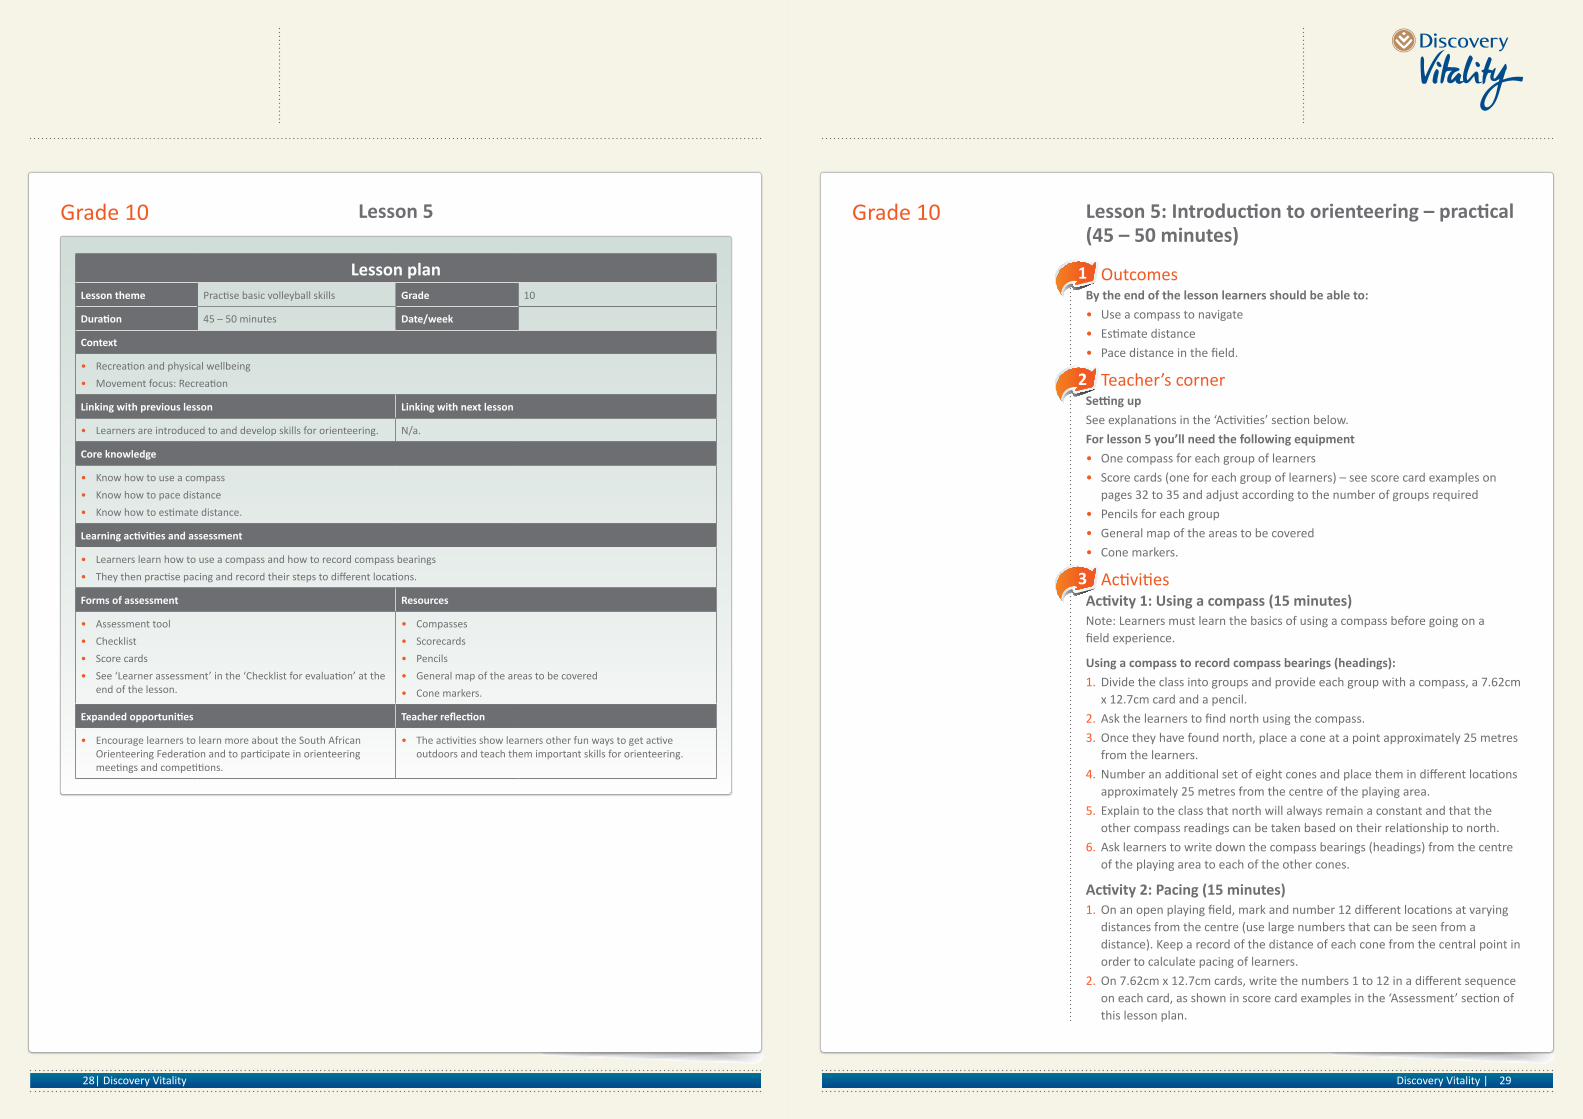
Lesson planLesson theme Practise basic volleyball skills Grade 10
Duration 45 – 50 minutes Date/week
Context
• Recreation and physical wellbeing
• Movement focus: Recreation
Linking with previous lesson Linking with next lesson
• Learners are introduced to and develop skills for orienteering. N/a.
Core knowledge
• Know how to use a compass
• Know how to pace distance
• Know how to estimate distance.
Learningactivitiesandassessment
• Learners learn how to use a compass and how to record compass bearings
• They then practise pacing and record their steps to different locations.
Forms of assessment Resources
• Assessment tool
• Checklist
• Score cards
• See ‘Learner assessment’ in the ‘Checklist for evaluation’ at the end of the lesson.
• Compasses
• Scorecards
• Pencils
• General map of the areas to be covered
• Cone markers.
Expandedopportunities Teacherreflection
• Encourage learners to learn more about the South African Orienteering Federation and to participate in orienteering meetings and competitions.
• The activities show learners other fun ways to get active outdoors and teach them important skills for orienteering.
3
OutcomesBy the end of the lesson learners should be able to:
• Use a compass to navigate
• Estimate distance
• Pace distance in the field.
Teacher’s cornerSettingup
See explanations in the ‘Activities’ section below.
For lesson 5 you’ll need the following equipment
• One compass for each group of learners
• Score cards (one for each group of learners) – see score card examples on pages 32 to 35 and adjust according to the number of groups required
• Pencils for each group
• General map of the areas to be covered
• Cone markers.
ActivitiesActivity1:Usingacompass(15minutes)Note: Learners must learn the basics of using a compass before going on a field experience.
Usingacompasstorecordcompassbearings(headings):
1. Divide the class into groups and provide each group with a compass, a 7.62cm x 12.7cm card and a pencil.
2. Ask the learners to find north using the compass.
3. Once they have found north, place a cone at a point approximately 25 metres from the learners.
4. Number an additional set of eight cones and place them in different locations approximately 25 metres from the centre of the playing area.
5. Explain to the class that north will always remain a constant and that the other compass readings can be taken based on their relationship to north.
6. Ask learners to write down the compass bearings (headings) from the centre of the playing area to each of the other cones.
Activity2:Pacing(15minutes)1. On an open playing field, mark and number 12 different locations at varying
distances from the centre (use large numbers that can be seen from a distance). Keep a record of the distance of each cone from the central point in order to calculate pacing of learners.
2. On 7.62cm x 12.7cm cards, write the numbers 1 to 12 in a different sequence on each card, as shown in score card examples in the ‘Assessment’ section of this lesson plan.
1
2
Lesson5:Introductiontoorienteering–practical(45–50minutes)
31Discovery Vitality | 30| Discovery Vitality
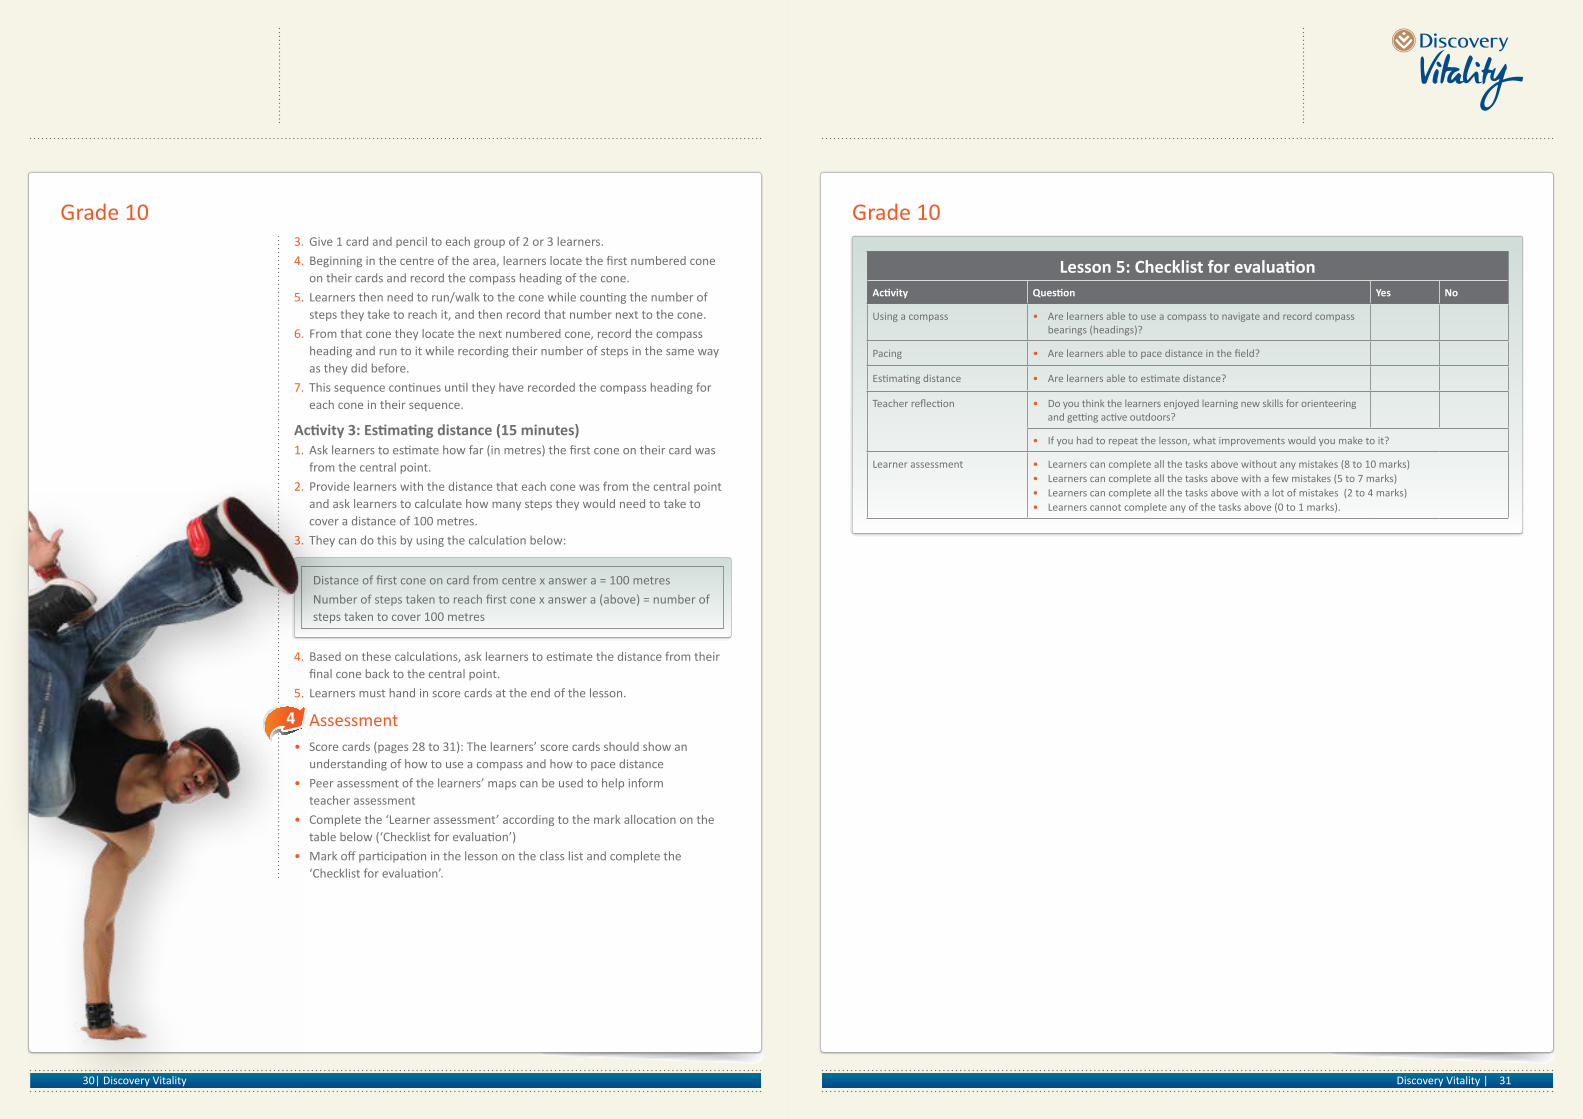
3. Give 1 card and pencil to each group of 2 or 3 learners.
4. Beginning in the centre of the area, learners locate the first numbered cone on their cards and record the compass heading of the cone.
5. Learners then need to run/walk to the cone while counting the number of steps they take to reach it, and then record that number next to the cone.
6. From that cone they locate the next numbered cone, record the compass heading and run to it while recording their number of steps in the same way as they did before.
7. This sequence continues until they have recorded the compass heading for each cone in their sequence.
Activity3:Estimatingdistance(15minutes)1. Ask learners to estimate how far (in metres) the first cone on their card was
from the central point.
2. Provide learners with the distance that each cone was from the central point and ask learners to calculate how many steps they would need to take to cover a distance of 100 metres.
3. They can do this by using the calculation below:
Distance of first cone on card from centre x answer a = 100 metres
Number of steps taken to reach first cone x answer a (above) = number of steps taken to cover 100 metres
4. Based on these calculations, ask learners to estimate the distance from their final cone back to the central point.
5. Learners must hand in score cards at the end of the lesson.
Assessment• Score cards (pages 28 to 31): The learners’ score cards should show an
understanding of how to use a compass and how to pace distance
• Peer assessment of the learners’ maps can be used to help inform teacher assessment
• Complete the ‘Learner assessment’ according to the mark allocation on the table below (‘Checklist for evaluation’)
• Mark off participation in the lesson on the class list and complete the ‘Checklist for evaluation’.
Grade 10 Grade 10
Lesson5:ChecklistforevaluationActivity Question Yes No
Using a compass • Are learners able to use a compass to navigate and record compass bearings (headings)?
Pacing • Are learners able to pace distance in the field?
Estimating distance • Are learners able to estimate distance?
Teacher reflection • Do you think the learners enjoyed learning new skills for orienteering and getting active outdoors?
• If you had to repeat the lesson, what improvements would you make to it?
Learner assessment • Learners can complete all the tasks above without any mistakes (8 to 10 marks)• Learners can complete all the tasks above with a few mistakes (5 to 7 marks)• Learners can complete all the tasks above with a lot of mistakes (2 to 4 marks)• Learners cannot complete any of the tasks above (0 to 1 marks).
4
33Discovery Vitality | 32| Discovery Vitality
Grade 10 Grade 10
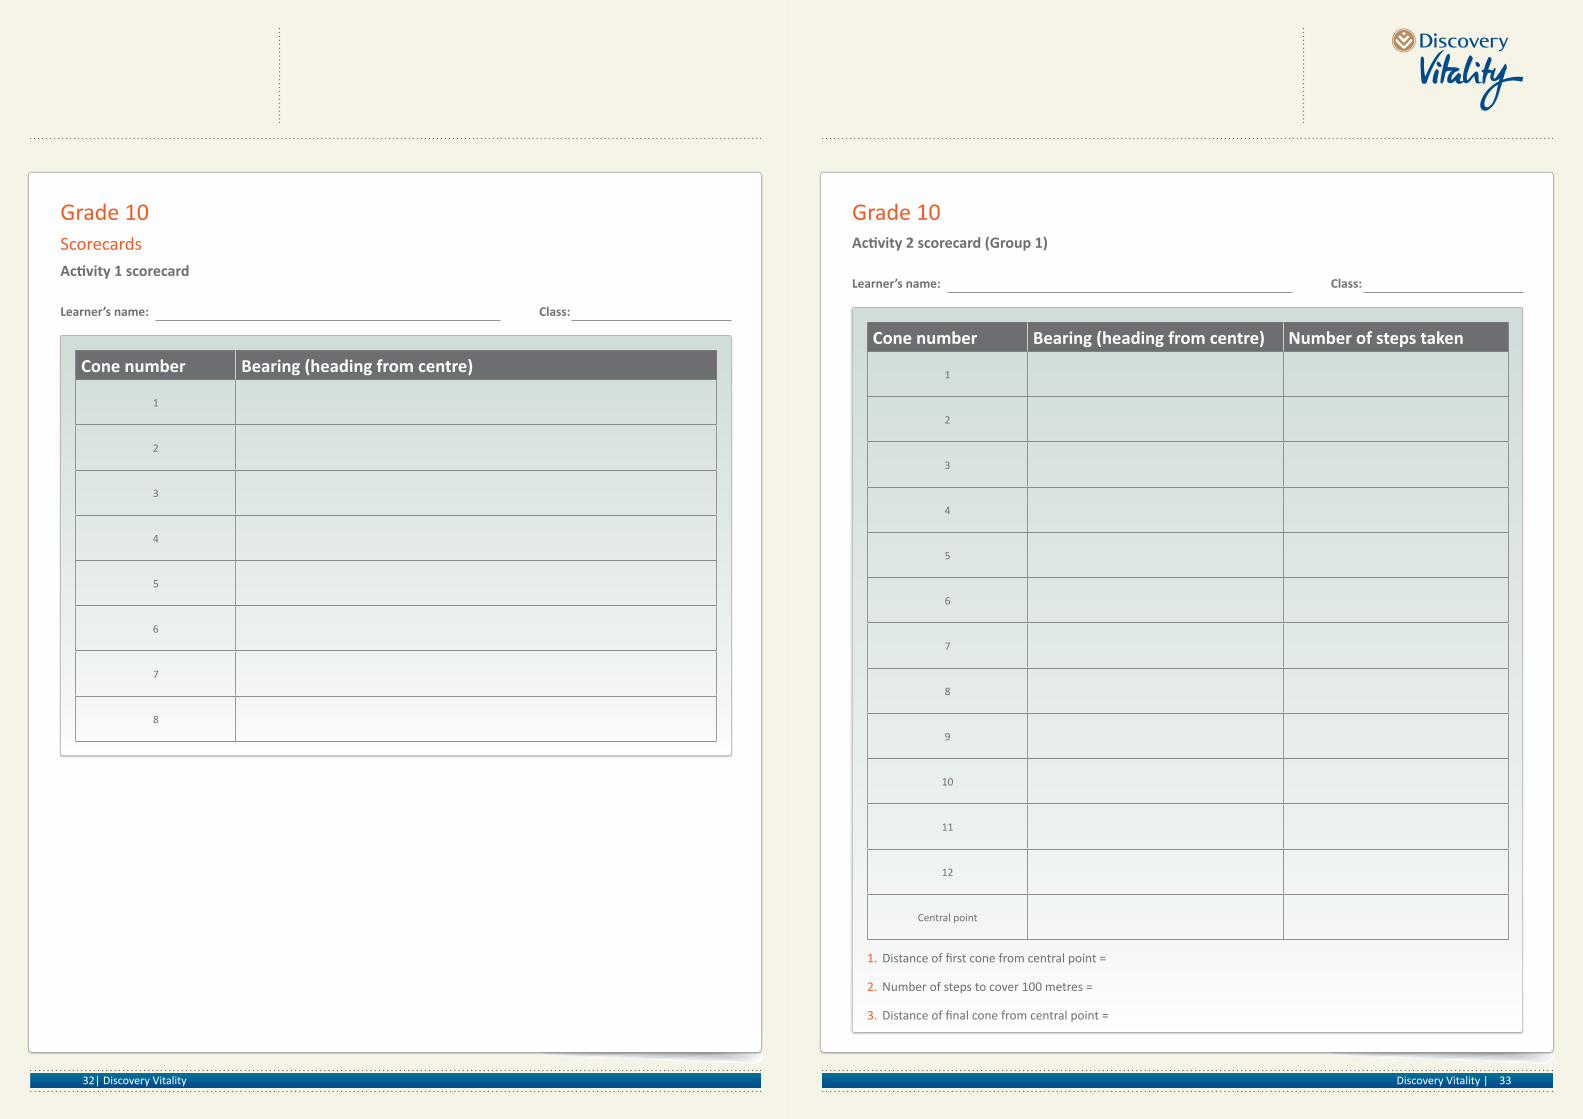
Cone number Bearing(headingfromcentre) Number of steps taken
1
2
3
4
5
6
7
8
9
10
11
12
Central point
Cone number Bearing(headingfromcentre)
1
2
3
4
5
6
7
8
ScorecardsActivity1scorecard
Learner’s name: Class:
Activity2scorecard(Group1)
Learner’s name: Class:
1. Distance of first cone from central point =
2. Number of steps to cover 100 metres =
3. Distance of final cone from central point =

35Discovery Vitality | 34| Discovery Vitality
Grade 10Grade 10Activity2scorecard(Group3)
Learner’s names: Class:
Activity2scorecard(Group2)
Learner’s name: Class:
Cone number Bearing(headingfromcentre) Number of steps taken
9
10
7
4
6
1
3
11
12
2
8
5
Central point
Cone number Bearing(headingfromcentre) Number of steps taken
5
2
7
4
1
6
3
8
12
10
11
9
Central point
1. Distance of first cone from central point =
2. Number of steps to cover 100 metres =
3. Distance of final cone from central point =
1. Distance of first cone from central point =
2. Number of steps to cover 100 metres =
3. Distance of final cone from central point =

Discovery Vitality | 155 West Street | Sandton | 0860 109 939 l www.vitalityschools.co.za l [email protected]
GM_14666DHV_07/06/12


