Google Earth Files - Aquaveosmstutorials-11.0.aquaveo.com/SMS_Googleearth.pdf · Google Earth Files...
7
Last Edited August 24, 2011 Page 1 of 7 © Aquaveo SURFACE WATER MODELING SYSTEM Google Earth Files This lesson is designed to help you understand how to save SMS data to a *.kmz file format. Files of this type are Google Earth files and will allow you to view your SMS data in Google Earth. You can save any geo-referenced data from SMS into a .kmz format. This tutorial will take you through the steps necessary to do this. This tutorial requires that you have Google Earth installed on your computer. 1 Open an Existing Geo-referenced File Any type of SMS data can be saved as a *.kmz file if the data has been geo-referenced and has a specific coordinate system. To make this tutorial easier, you will be working with previously geo-referenced data. If you would like to know more about geo-referencing, complete the Overview tutorial. 1. Open a new project in SMS. Select File | Delete All to make sure all other data has been erased. 2. Select File | Open and find the shinfinal.2dm file in the Data Files Folder for this tutorial. Click Open to read the file into SMS. 3. Repeat step 2 for the dataset.h5 file in the same folder. 2 Editing Display Options The first *.kmz file you will make will be of the mesh of Shinnecock Bay. Whatever options you have turned on in SMS will be shown in Google Earth when you load in the *,kmz file to it. 1. Select Display | Display Options... to open the Display Options dialog.
Transcript of Google Earth Files - Aquaveosmstutorials-11.0.aquaveo.com/SMS_Googleearth.pdf · Google Earth Files...
Last Edited August 24, 2011 Page 1 of 7 © Aquaveo
SURFACE WATER MODELING SYSTEM
Google Earth Files
This lesson is designed to help you understand how to save SMS data to a *.kmz file format.
Files of this type are Google Earth files and will allow you to view your SMS data in Google
Earth. You can save any geo-referenced data from SMS into a .kmz format. This tutorial will
take you through the steps necessary to do this.
This tutorial requires that you have Google Earth installed on your computer.
1 Open an Existing Geo-referenced File
Any type of SMS data can be saved as a *.kmz file if the data has been geo-referenced and has a
specific coordinate system. To make this tutorial easier, you will be working with previously
geo-referenced data. If you would like to know more about geo-referencing, complete the
Overview tutorial.
1. Open a new project in SMS. Select File | Delete All to make sure all other data has been
erased.
2. Select File | Open and find the shinfinal.2dm file in the Data Files Folder for this
tutorial. Click Open to read the file into SMS.
3. Repeat step 2 for the dataset.h5 file in the same folder.
2 Editing Display Options
The first *.kmz file you will make will be of the mesh of Shinnecock Bay. Whatever options
you have turned on in SMS will be shown in Google Earth when you load in the *,kmz file to it.
1. Select Display | Display Options... to open the Display Options dialog.
Page 2 of 7 © Aquaveo
2. Select 2D Mesh, if not already selected, from the list of available display types in the
list box on the left side of the dialog.
3. Click off the Nodestrings option to turn off the blue ocean nodestring and the brown
land boundary specified on the mesh.
4. Also, turn off the Mesh Boundary option in the dialog. Click OK to close the Display
Options dialog.
5. The display should be showing a plain mesh once all of the options above have been
turned off. Click the Frame button from the Display Toolbar near the top of SMS to
center the mesh on the screen. Also toggle off the Map Data items in the project
explorer on the left side of the screen.
3 Editing Projection
In order to save data as a Google earth KMZ file, the file has to be in global projection or the
file will not be saved.
1. Select Edit | Projection in order to change the projection of the mesh.
2. Change the Horizontal coordinates to Global projection. Click on the Set Projection
button and change the Projection to Geographic NAD27 in ARC DEGREES (Planar
units).
3. Change the vertical units to meters as well. Click OK to make the conversion.
4 Saving a KMZ file
There are two different ways to save a Google Earth kmz file. Files can be saved as Raster files
or Vector files. The following section will show and outline the differences between the two
methods. Make sure that the dataset you want to save out to a KMZ file is selected before
saving.
4.1 Raster KMZ file
1. In order to save a Raster KMZ file, select File | Save As...
2. Near the bottom of the Save As... dialog, change the file type to read Google Earth
Raster KMZ File (*.KMZ).
3. Enter “Raster” as the file name and then click the Save button. In this case the file
should be saved fairly quickly. However if you are working with another file that is
extensively larger than the file provided for this tutorial, this step might take a little
while.
Page 3 of 7 © Aquaveo
4. To open the Raster.KMZ file into Google Earth just double click on it. Remember you
must first download and install Google Earth to your computer prior to opening the
*.KMZ file.
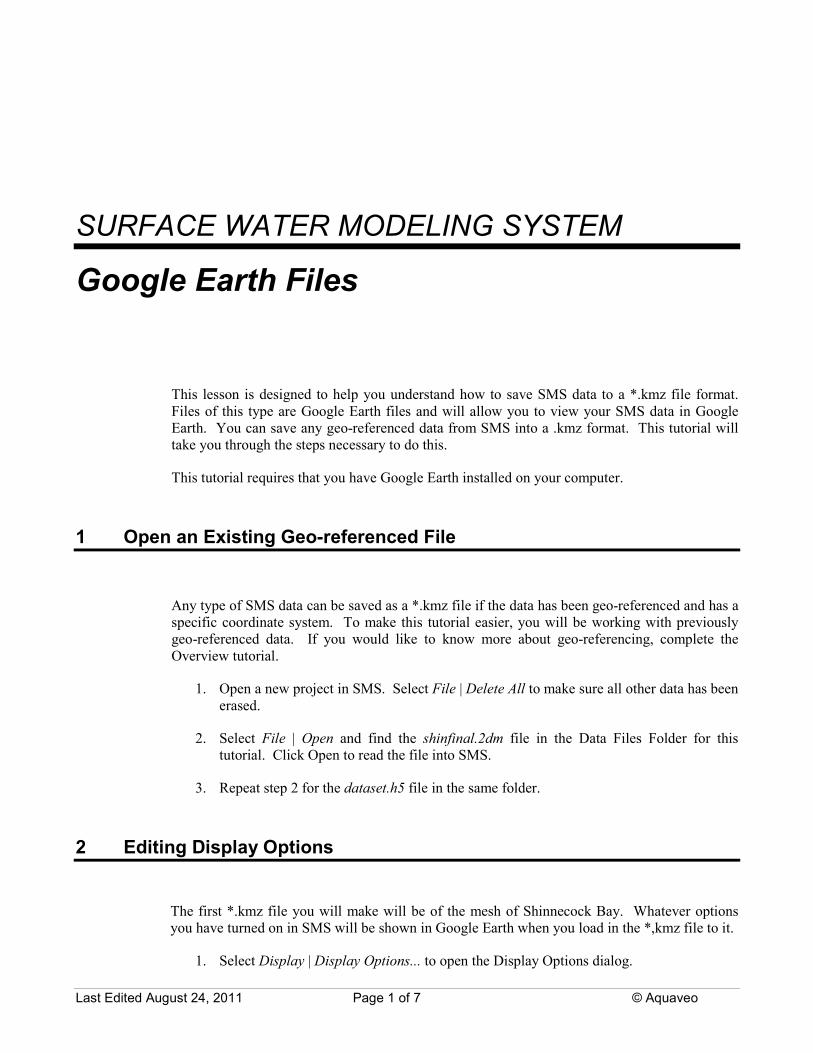
5. When Google Earth opens it should automatically zoom in to the desired location. If
this does not happen, zoom in to the location and the result should look something like
what you see in Figure 1.
Figure 1 Raster file shown in Google Earth.
4.2 Vector KMZ file
1. Now you are ready to save out a Vector KMZ file. To do this select File | Save As...
2. Near the bottom of the Save As... dialog, change the file type to read Google Earth
Vector KMZ File (*.KMZ).
3. Enter “Vector” as the file name and then click the Save button. It may take a little time
to save, so wait for SMS to completely finish saving.
4. To open the Vector.KMZ file into Google Earth just double click on it. Remember you
must first download and install Google Earth to your computer prior to opening the
KMZ file.
Page 4 of 7 © Aquaveo
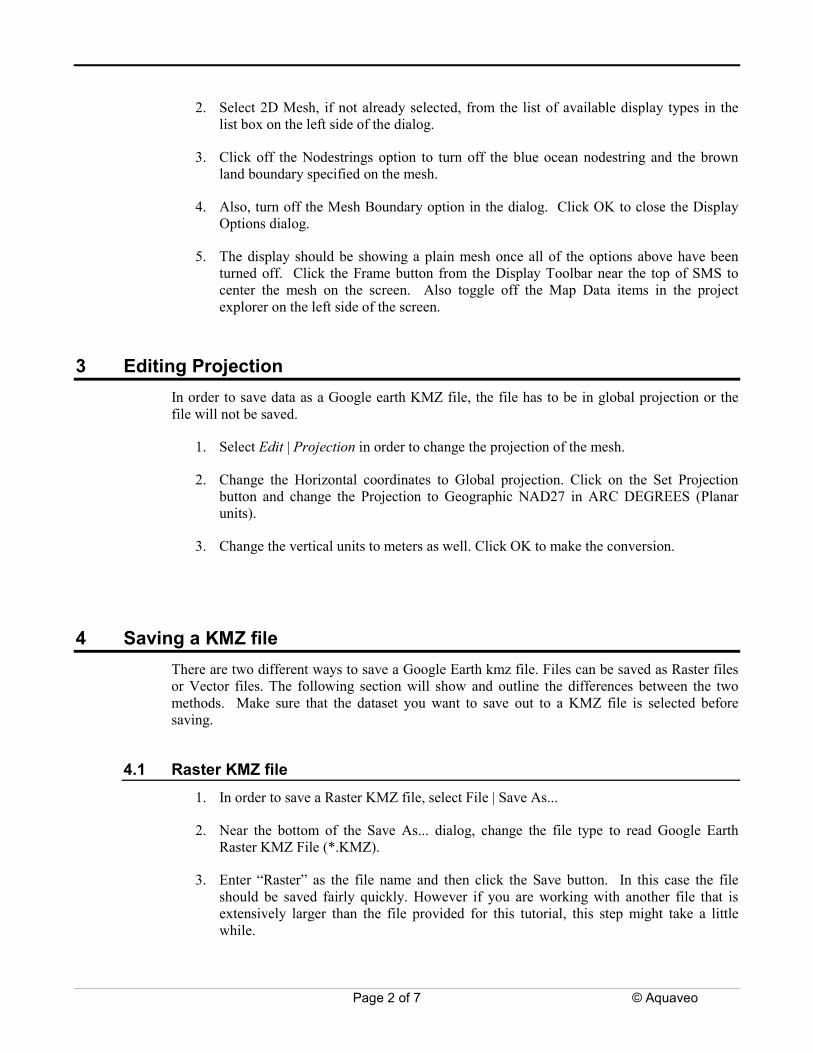
5. When Google Earth opens it should automatically zoom in to the desired location. If
this does not happen, zoom in to the location and the result should look something like
what you see in Figure 2.
Figure 2 Vector kmz file shown in Google Earth.
5 Differences between Raster and Vector KMZ files
In order to better show the differences between the Raster files and the Vector files, it is
important to zoom in to a closer section of the mesh in Google Earth.
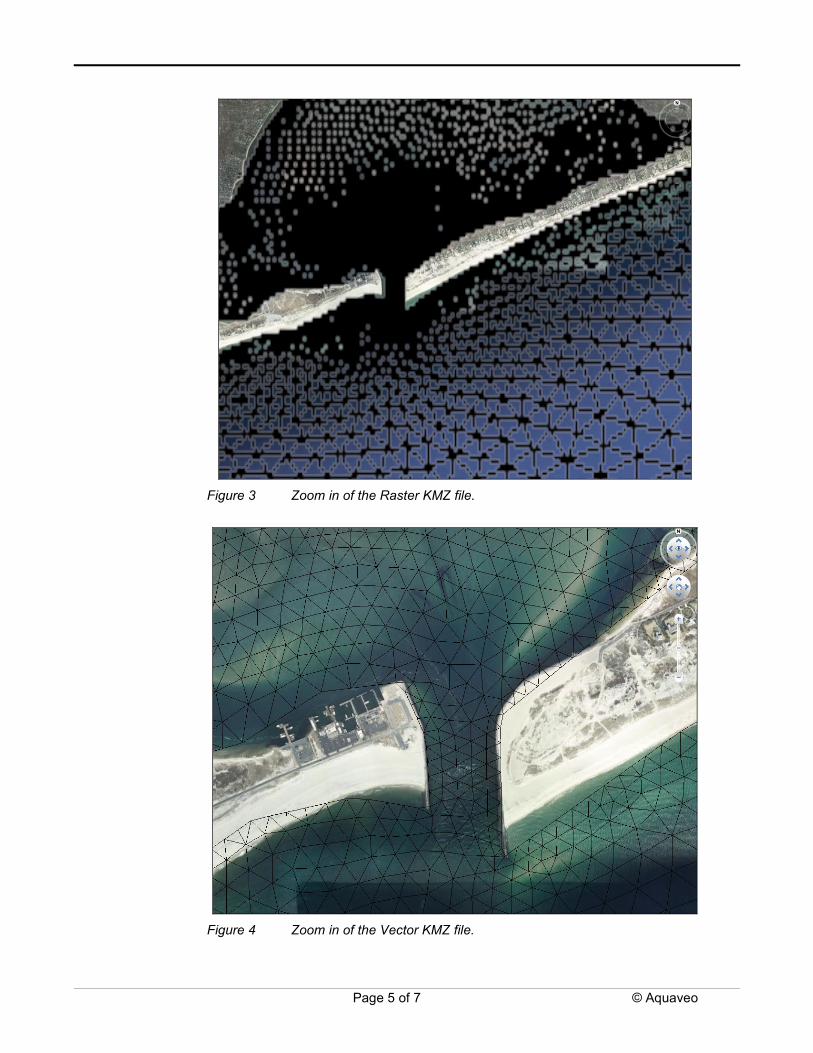
Figure 3 shows the Raster KMZ file as seen in Google Earth when zoomed in near the inlet.
Notice how the mesh in very pixilated and the image is not very clear. Figure 4 shows the
Vector KMZ file as seen in Google Earth when zoomed in. Notice how the image is clear and
the mesh can clearly be seen.
The Vector KMZ file is of course better in terms of pixilation and if you want to view the mesh
on small areas. However the Raster file does not take as much time to save as the Vector file.
Page 5 of 7 © Aquaveo
Figure 3 Zoom in of the Raster KMZ file.
Figure 4 Zoom in of the Vector KMZ file.
Page 6 of 7 © Aquaveo
6 Saving the File with Contours Enabled
To show you that other views of data is available, you will be shown how to save the file with
contours enabled. However it is important to know that Contour with the Color Fill method
cannot be used to save a Vector KMZ file.
1. Return to SMS, and select Display | Display Options... to reopen the Display Options
dialog.
2. Select 2D Mesh from the list box on the left side of the dialog. Toggle all options off,
except the Contours option.
3. Click on Contour tab at the top of the dialog. Change the Contour Method to Linear.
4. Change the Number of Contours to 40.
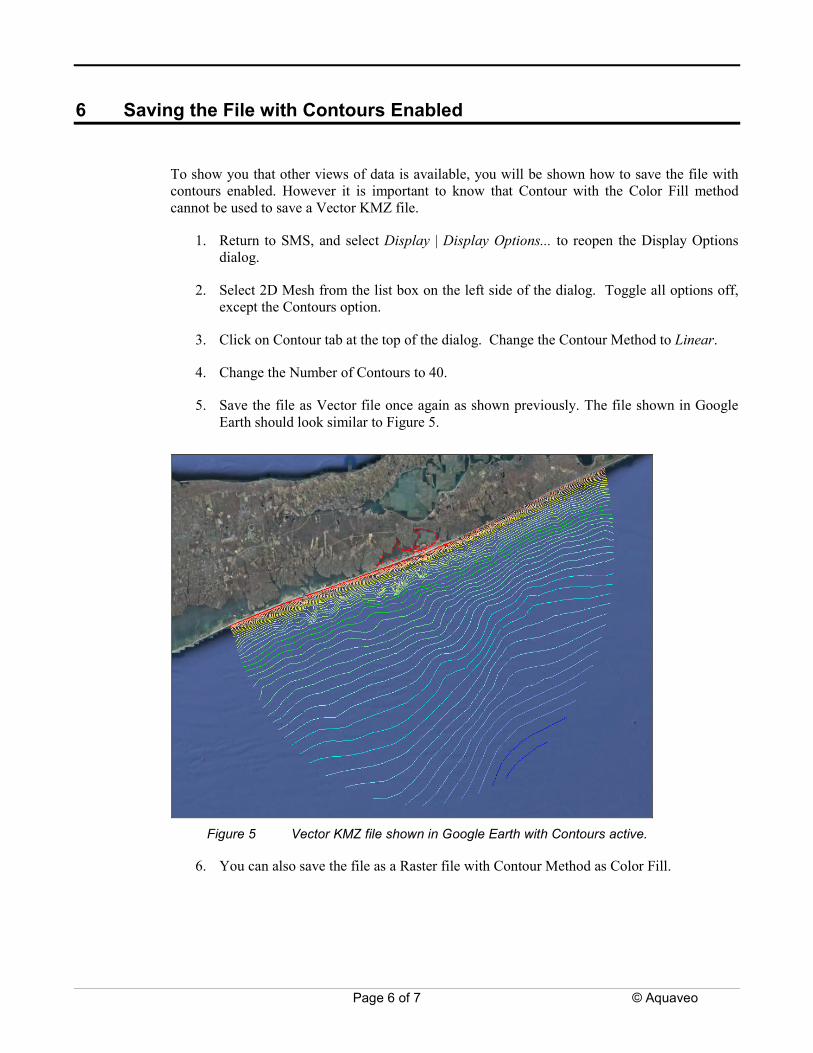
5. Save the file as Vector file once again as shown previously. The file shown in Google
Earth should look similar to Figure 5.
Figure 5 Vector KMZ file shown in Google Earth with Contours active.
6. You can also save the file as a Raster file with Contour Method as Color Fill.

Page 7 of 7 © Aquaveo
7 Exporting KMZ Transient Data Animation
It is also possible to export a KMZ transient data animation using the Film Loop Wizard. This
will export a series of raster images which can be animated in Google Earth ©. The background
color can be specified in the Film Loop Wizard. It is recommended that the option for no
background be used so the Earth can be seen through the overlaid image in Google Earth ©.
You must be in plan view to export a KMZ transient data animation.
First we need to change the Display Options of the data set in order to better view animation in
Google Earth ©. To do so,
1. Select Display | Display Options.
2. Toggle on Contours and Vectors only and make sure that all other options are off.
3. Select Contours tab and change Contour Method to Color Fill and Transparency to 80%.
4. Select Vectors tab and change the Maximum shaft length of Arrow options to 60.
5. Select OK to close Display Options dialog.
To export a KMZ animation,
1. Select Data | Film Loop.
2. Under Film Loop Files, select Create Google Earth © KMZ File and make sure that the
file will be saved in the appropriate folder.
3. Make sure that Transient Data Animation is selected under Film Loop type and then
click Next.
4. Change the Time Zone to GMT America / New York (EST).
5. Change the Zero time to August 1st of 2000 (8/1/2000) at 8 AM. Click Next.
6. Click Finish to start Animation. Once completed, the Animation file will open
automatically in Google earth ©.
8 Conclusion
This concludes the Google Earth Files tutorial. You may continue to experiment creating KMZ
files in SMS or move on to the next tutorial.