Gloucester county Library System - GCLS Access Toolbar The Quick Access Toolbar is just to the right...
58
Gloucester County Library System POWERPOINT BASICS
Transcript of Gloucester county Library System - GCLS Access Toolbar The Quick Access Toolbar is just to the right...

Gloucester County Library System
POWERPOINT
BASICS

Computer Classes
Check the GCLS online calendar
for the schedule of
Computer Classes
www.gcls.org
Basic Computer Skills:
Required for all other computer classes. Learn how to use the mouse, open and close
programs, select items and text.
Internet Basics:
Learn how to use the Internet, click links, navigate sites and print useful information.
Email Basics:
Learn about email, create your own email address and get some valuable practice.
Software Basics:
Overview of common office software such as Microsoft Word, Excel and PowerPoint.
Quick Reference Guides:
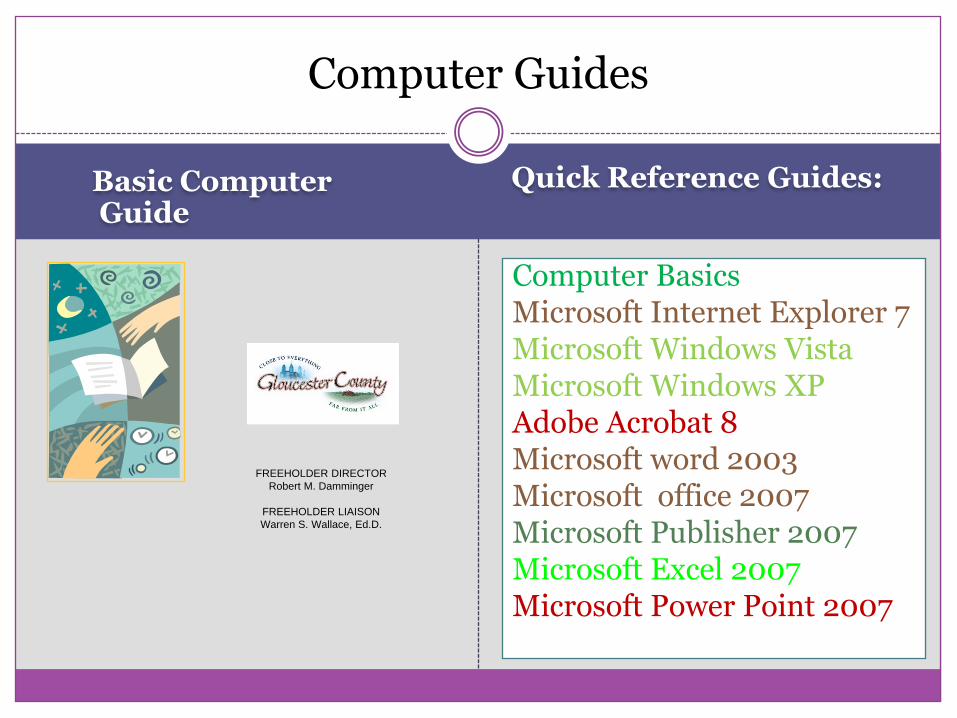
Computer Guides
Basic Computer Guide
Computer BasicsMicrosoft Internet Explorer 7Microsoft Windows VistaMicrosoft Windows XPAdobe Acrobat 8Microsoft word 2003Microsoft office 2007Microsoft Publisher 2007Microsoft Excel 2007Microsoft Power Point 2007
FREEHOLDER DIRECTOR
Robert M. Damminger
FREEHOLDER LIAISON
Warren S. Wallace, Ed.D.

Quick Access Toolbar
The Quick Access Toolbar is just to the right of the Microsoft Office Button.
When the cursor is over a button, the name of the button is displayed.
The options available when Microsoft Office 2007 is first installed include Save, Undo, and Redo.
Customizing the Quick Access Toolbar
To add an item, click on the Customize Quick Access Toolbar drop down arrow at the end of the
Quick Access Toolbar and click on the desired item.
Options with a check mark in front of them are displayed on the Quick Access Toolbar.
To remove a button, click on the Customize Quick Access Toolbar drop down arrow at the end of
the Quick Access Toolbar and click on the desired item. (This removes the checkmark from in front
of the item.)
To add a command button from the Ribbon, right click on the desired command button and choose
Add to Quick Access Toolbar.
To remove a command button that has been added to the Quick Access Toolbar, right click on the
button on the Quick Access Toolbar and choose Remove from Quick Access Toolbar.
Changing the order of the Buttons on the Quick Access Toolbar
Power Point Beginning

Microsoft
Office Button
The Microsoft Office Button is in the top left
corner of the window and provides access to
open, save, and print documents.
Click on the Microsoft Office Button and then
click on the desired option.
Menu options with an arrow have additional
choices available in the area to the right.
The Word Options button at the bottom of the window allows the user to make
adjustments to Word such as color scheme, page display options, AutoCorrect options,
spelling, and grammar.

Customize Quick Access Toolbar Click on the Customize Quick Access Toolbar drop down arrow at the end of the
Quick Access Toolbar
and choose More Commands…
In the column on the right below Customize Quick Access Toolbar,
click on the item to be moved.
To move the item up, click on the up arrow at the right.
To move the item down, click on the down arrow at the right.
Click on OK.
Position of the Quick Access Toolbar
The Quick Access Toolbar is usually located to the right of the
Microsoft Office Button.
To place the Quick Access Toolbar below the Ribbon, click on the Customize Quick
Access Toolbar drop down arrow and choose Show Below the Ribbon.
To place the Quick Access Toolbar back next to the Microsoft Office Button, click on
the Customize Quick Access Toolbar drop down arrow and choose Show Above the
Ribbon.
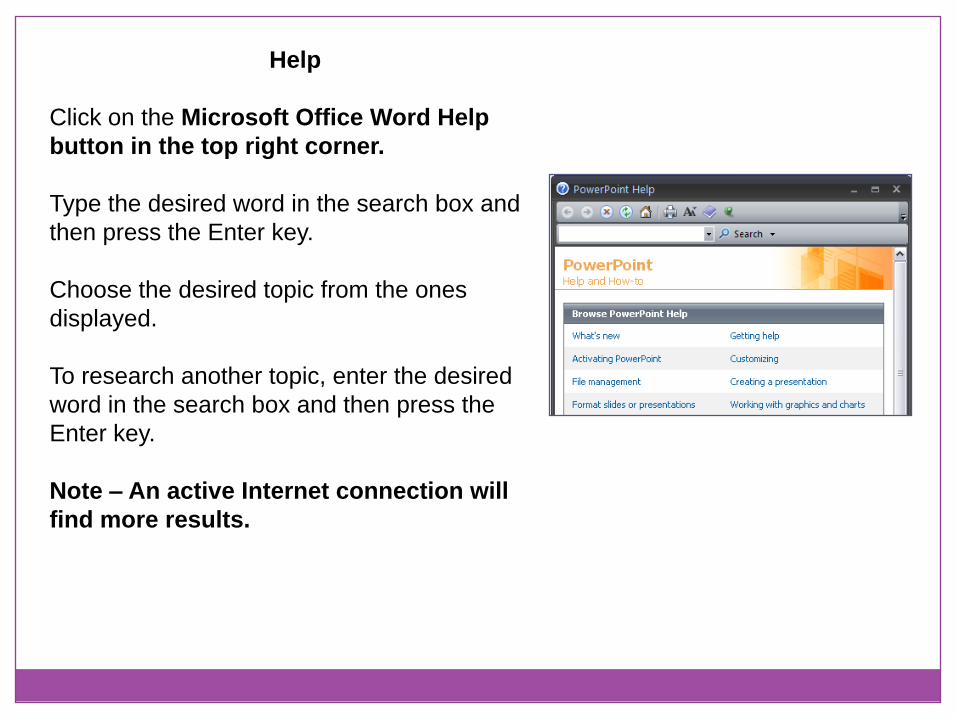
Help
Click on the Microsoft Office Word Help
button in the top right corner.
Type the desired word in the search box and
then press the Enter key.
Choose the desired topic from the ones
displayed.
To research another topic, enter the desired
word in the search box and then press the
Enter key.
Note – An active Internet connection will
find more results.

The Ribbon
The Ribbon runs across the top of the window.
The Ribbon consists of 3 types of items.
• Tabs – This is the main level and includes Home, Insert, Page Layout, etc.
• Groups – Each tab has several groups that show related items together.
• Commands – A command is a button in a group or an item in a list.
Some tabs are only available when a particular item is selected. For example, the
Picture Tools tab is only shown when a picture is clicked on.

• Using the Ribbon
Click on the desired tab.
The commands under each tab are grouped. The name of the group is at
the bottom.
Some groups have a Dialog Box Launcher button which opens the dialog
box with more commands.
• Minimizing/Restoring the Ribbon
To minimize the Ribbon, click on the Customize Quick Access Toolbar drop down
arrow and choose Minimize the Ribbon (a checkmark is now displayed in front of
Minimize the Ribbon)
OR double click on the currently selected tab on the Ribbon.
To display the Ribbon, click on the Customize Quick Access Toolbar drop down
arrow and choose Minimize the Ribbon (the checkmark in front of Minimize the
Ribbon is removed.)
OR double click on the currently selected tab on the Ribbon.

Opening a Document
Click on the Microsoft Office Button and then click on Open.
Navigate to the location of the desired file.
(Optional) Click on the Views button and choose
Choose the name of the file to work with and click on the Open button.
View Option’s

Challenge!
Open
Power
Point

Starting a Blank Presentation
Click on the Microsoft Office
Button and then click on New.
In the Templates pane, click on
Blank and Recent.
In the Blank and Recent pane,
click on Blank Presentation.
Click on the Create button.

Templates
Templates provide the basic format of a document.
Click on the Microsoft Office Button and then click on New.
The Templates section displays templates available on the computer.
Choose the category of template desired.
Click on the desired template.
Click on the Create button.
The Microsoft Office Online section connects to templates
available online from Microsoft.
Choose a category and click on the desired template.
Click on the Download button.
The template opens in Word.
Note – The document should be saved to the computer.
Applying and Customizing a Theme
On the Ribbon, click on the Design tab.
In the Themes group, click on the More button located to the far right of the thumbnails.
Click on the desired theme.
Note – Holding the cursor over a theme without clicking displays the slide with the theme.
This also applies to each of the choices mentioned below.
In the Background group, click on the Background Styles button and choose the desired
background.
In the Themes group, click on the Colors button and choose the desired color scheme.
In the Themes group, click on the Fonts button and choose the desired font theme.
In the Themes group, click on the Effects button and choose the desired effect.

Zooming in on the Slide in Normal View
The Zoom bar is in the bottom right corner of the window.
Click on the Zoom slider and drag it until the slide is the desired size. To make full use of the size of the Slide Pane, click on the Fit slide to current window
button to the right of the Zoom slider.
Changing the Size of the Panes
Place the cursor over the line that divides the panes. (The cursor changes to a two-headed arrow.)
Click and drag to the desired size.

Layouts
PowerPoint 2007
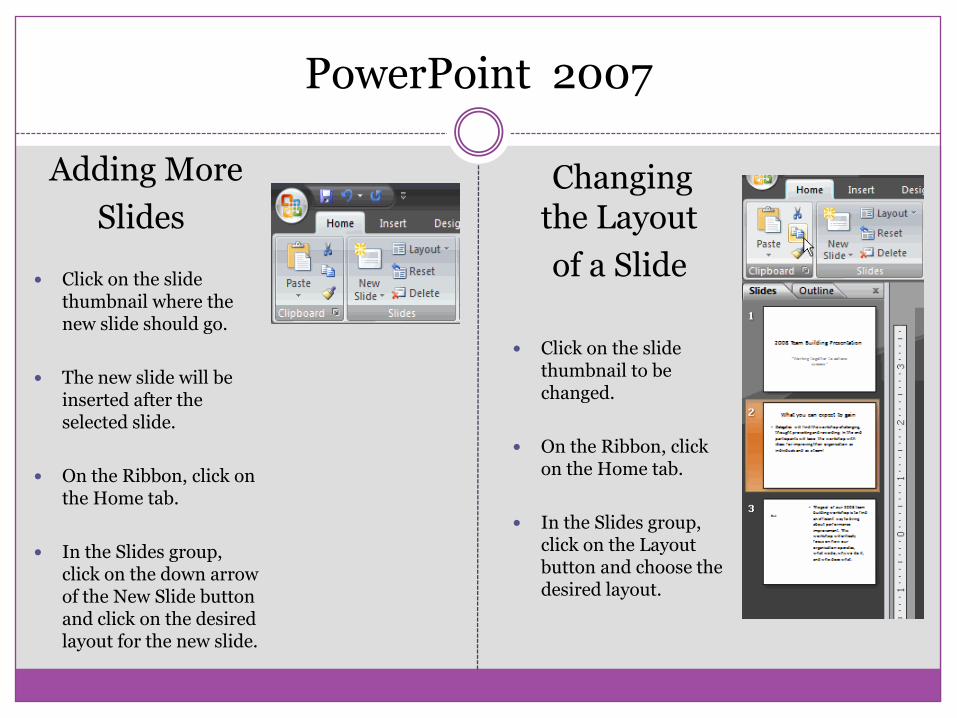
Adding More
Slides
Click on the slide thumbnail where the new slide should go.
The new slide will be inserted after the selected slide.
On the Ribbon, click on the Home tab.
In the Slides group, click on the down arrow of the New Slide button and click on the desired layout for the new slide.
Changing the Layout
of a Slide
Click on the slide thumbnail to be changed.
On the Ribbon, click on the Home tab.
In the Slides group, click on the Layout button and choose the desired layout.

Slide Sorter View
To change the order of the slides, click and
drag a slide to the new location
OR Cut and Paste:
Right click on the slide to be moved and choose Cut.
Right click on the slide at the desired location and
choose Paste.
The new slide will be pasted after the selected slide.
To change the size of the thumbnails, click on the slider
of the Zoom bar and drag it to adjust the thumbnails to
the desired size.
Power Point 2007
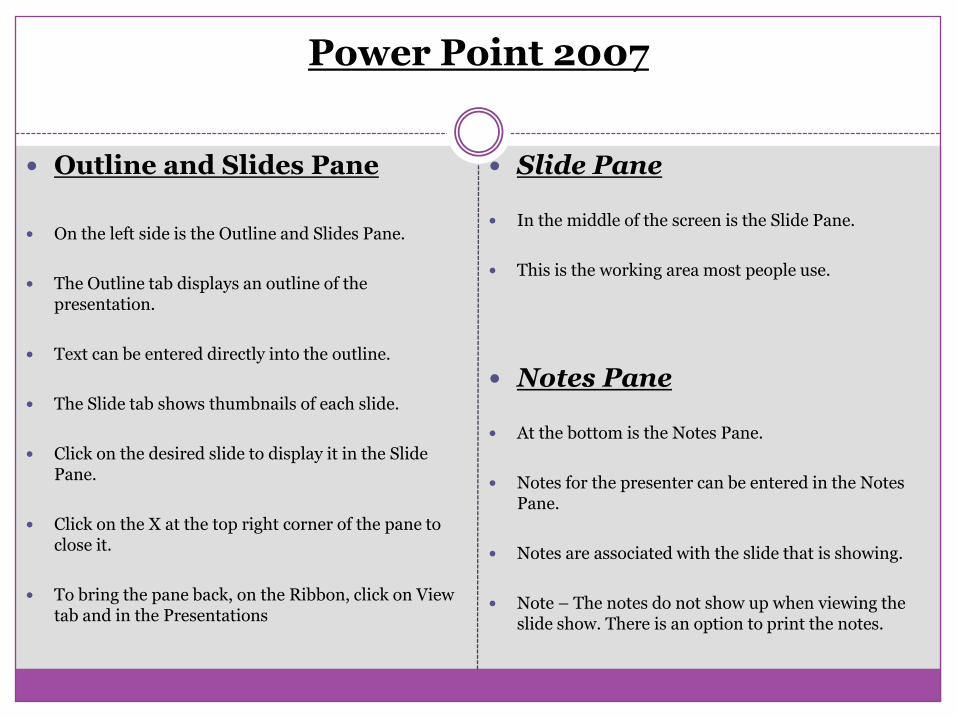
Outline and Slides Pane
On the left side is the Outline and Slides Pane.
The Outline tab displays an outline of the presentation.
Text can be entered directly into the outline.
The Slide tab shows thumbnails of each slide.
Click on the desired slide to display it in the Slide Pane.
Click on the X at the top right corner of the pane to close it.
To bring the pane back, on the Ribbon, click on View tab and in the Presentations
Slide Pane
In the middle of the screen is the Slide Pane.
This is the working area most people use.
Notes Pane
At the bottom is the Notes Pane.
Notes for the presenter can be entered in the Notes Pane.
Notes are associated with the slide that is showing.
Note – The notes do not show up when viewing the slide show. There is an option to print the notes.

Changing the View
Normal View
Slide Sorter View Click on this button to see thumbnails of the slides
Double click on a slide to open it in the Slide Pane.
Notes Page Click on this button to see the presentation
with notes for each slide.
Slide Show View Click on this button to play the show starting with the
slide that is currently selected.
Click on this button to see the three panes.

Viewing the Slide Show in Play Mode
On the Ribbon, click on the Slide
Show tab and in the Start Slide
Show group click on the From
Beginning button or the From
Current Slide button.
(Press F5 to play the slide show
from the beginning.)
OR to play the slide show from the
current slide, click on the Slide
Show button located at the bottom
right of the window.

Challenge!
Use the Workshop presentation or any
other PowerPoint presentation you
choose to complete this challenge.
Open a presentation.
View it in Normal view.
View it in Slide Sorter view.
View it in Slide Show view.
View it in Notes Page view.

Undo and Redo Landscape or Portrait Orientation
To reverse the last change made, click on the Undo button on the Quick Access Toolbar.
To change things back, click on the Redo button on the Quick Access Toolbar.
To see the undo history, click on the down arrow next to the button.
To perform multiple undo’s, click on the Undo down arrow and click on the desired item in the list. The
action clicked on and all others above it in the list will be undone.`
On the Ribbon, click on the Page Layout tab.
In the Page Setup group, click on the Orientation button and choose Portrait or Landscape.
Power Point 2007

Mini toolbar Format Painter
The Mini toolbar is a semi-transparent toolbar which appears when text is selected.
Highlight text to be formatted.
Use the buttons on the Mini toolbar to make the desired changes to the text.
If the Mini toolbar has disappeared, right click on the highlighted text to
bring up the Mini toolbar.
Select the text that has the desired formatting.
On the Ribbon click on the Home tab.
In the Clipboard group, click on Format Painter.
Notice - The cursor changes to a paintbrush.
Click and drag over the text to be formatted.
Note - The Format Painter then turns itself off.
Power Point 2007

Formatting Text
Highlight the text to be changed.
On the Ribbon, click on the Home tab.
In the Font group, change the font and font size as desired.
Click on the Grow Font or Shrink Font buttons to quickly adjust the font size.
Note - By clicking on the Font down arrow or the Font Size down arrow and resting the cursor over the desired choice, the highlighted text changes to preview the effect of the choice.
Exact Font Size
The exact font size desired can be typed in the Font Size box.
Click in the Font Size box.
Type in the desired size (i.e. 11.5), and press the Enter key.
Power Point 2007

Alignment
Highlight the text to be formatted.
On the Ribbon, click on the Home tab.
In the Paragraph group, click on the appropriate alignment button on the toolbar.
Left – Text aligns to the left with an uneven edge on the right.
Center – Text aligns to the center.
Right – Text aligns to the right with an uneven edge on the left.
Justify – Text aligns with even edges on left and right by spacing words across the page.
Power Point 2007
Changing the Default Font
On the Ribbon, click on the Home tab.
In the Font group, click on the Dialog Box Launcher button
at the bottom right corner.
Choose the desired font and font size.
Click on the Default button at the bottom left.
Click yes
Changing Case
Highlight the text to be formatted.
On the Ribbon, click on the Home tab.
In the Font group, click on the Change Case button.
Choose the case. (Sentence case, lowercase,
UPPERCASE, Capitalize Each Word, tOGGLE cASE)

Adjusting Line Spacing Bullets
Click in the paragraph to be formatted or highlight the paragraphs if formatting more than one.
On the Ribbon,
click on the Home tab.
In the Paragraph group, click on the Line Spacing button and choose the desired spacing.
Creating a Bulleted List
Click in the line of text to be bulleted.
On the Ribbon, click on the Home tab.
In the Paragraph group, click on the Bullets button.
Turning Off Bullets
Click in the line of text that is bulleted.
On the Ribbon, click on the Home tab.
In the Paragraph group, click on the Bullets button
Power point 2007

Challenge!
Use any slide you choose to
complete this challenge.
Change the line spacing of a list.
Change the line spacing of a
paragraph of text.
Change the paragraph spacing
between body text and a heading

Right Click Correct
Right click on the word in question. (The word is marked with red underscore.)
Select from the words at the top of the box OR
Click on Spelling and use the Spell Checker as noted below
Spelling & Grammar Check
Spelling Check
On the Ribbon, click on the Review tab.
In the Proofing group, click on Spelling & Grammar.
The word in question will be shown in red in the context of the sentence.
Choose one of the following:
Ignore Once - Don’t replaced the word.
Ignore All - Don’t replace the word and don’t stop if the same problem is
encountered again.
Add to Dictionary- Add the word to the dictionary. This is dangerous because it changes
the Spelling Dictionary.
Change - Change the word in red to the selected word in the Suggestions box.
Change All - Change all occurrences of the word in the document to the selected word in
the Suggestions box.
AutoCorrect - Sets the computer to automatically help with spelling. Note- automatic
spelling must be turned on in Options.
Click on the Close button.
Note – If no words are recognized as being misspelled and no grammar errors are
encountered, the window does not open.

Grammar Check
When the computer encounters a grammar question, the word(s) in question are shown in green.
Choose one of the following:
Ignore Once - Don’t replaced it.
Ignore Rule - Don’t replace it and don’t stop if encountered again.
Next Sentence - Used to move to the next problem after making corrections to the sentence in the window.
Change - Change the word in red to the selected word in the Suggestions box.
Explain - Offers an explanation of the grammar in question.
Click on the Close button.
Spelling and Grammar Options
Start a spelling and grammar check.
Note – If no errors are misspell a word so the Spelling window comes up.
Click on the Options button at the bottom.
In the When correcting spelling and grammar in Word section, make the desired choices.
Click on OK.
Power Point 2007

Challenge!
Type the following sentences in the slide:
I really enjoy learning an computers and about
new skillz.
This is the first classs I have takenn.
Correct the spelling errors in the sentences.
Correct the grammar mistake that appears in one of
the sentences.
Use the Spelling and Grammar command to check
the remainder of the document.

Readability Statistics Seeing the Statistics
Displaying Readability Statistics
Start a spelling and grammar check.
Click on the Options button at the bottom.
In the When correcting spelling and grammar in Word section, click in front of Show readability statistics.
Click on OK.
The Readability Statistics will be displayed when the spelling and grammar checking have finished.
Counts - the number of words, characters, paragraphs, and sentences in the document.
Averages - the average number of Sentences per Paragraph, Words per Sentence, and Characters per Word.
Readability - the percentage of Passive Sentences, the Flesch Reading Ease score, and the Flesch-Kincaid Grade Level of the document.
Click on OK.
Power Point 2007

Word Count
The number of words in a document is displayed on the Status Bar at the bottom of the screen.
To count the number of words in a selection, highlight the selection and the first number is the count. (i.e. 250/3500 indicates the section has 250 words out of a total of 3500 words in the document.)
If the Word Count is not displayed, right click on the Status Bar and select Word Count.
AutoCorrect
Click on the Microsoft Office Button.
Click on the Word Options button at the bottom.
Click on Proofing.
Click on the AutoCorrect Option button.
Choose from the checkboxes:
Correct TWo INitial CApitals
Capitalize first letter of sentences
Capitalize names of days
Correct accidental usage of cAPS lOCK key
Power Point 2007

Thesaurus
Right Click Thesaurus
Right click on the desired word.
Place the cursor over Synonyms and then click on the desired word.
Thesaurus
Right click in the word to look up.
Place the cursor over Synonyms and then click on Thesaurus at the
bottom of the list.
Click on the desired meaning if the list of words is not showing.
Right click on the desired word and choose Insert.
Looking Up a Different Word
Click on a word showing in the window of the Search for box.
Type in the desired word and click on the green arrow

Find Find and Replace
On the Ribbon, click on the Home tab.
In the Editing group, click on Find.
In the Find what box, enter the word or phrase to be found.
Click on the Find Next button.
On the Ribbon, click on the Home tab.
In the Editing group, click on Replace.
In the Find what box, enter the word or phrase to be found.
In the Replace with box, enter the word or phrase to replace it with.
Click on the Find Next button to find the word(s) in the text.
Click on the Replace button to replace the word in the text.
Power Point 2007

Pictures
• Inserting a Picture from Clip Art
Click in the document where the picture should
be placed.
On the Ribbon, click on the Insert tab.
In the Illustrations group, click on Clip Art.
In the Clip Art pane, type a word in the Search
text: box and click on the Go button.
If a message appears asking if pictures should
be included from the Microsoft site, click on the
Yes button.
Note – An active Internet connection is
required to see clipart from the Microsoft site.
Scroll through the collection and find the
desired picture.
Click on the desired picture.

Positioning Pictures
in Power Point
Double click on the picture.
The Format tab of Picture Tools comes up on the Ribbon.
In the Arrange group, click on the Text Wrapping button and choose Square or Tight.
Square causes the text to line up on a straight edge on the side of the picture.
Tight causes the text to wrap closely to the picture, following the shape for the picture.
Click on the picture and drag it to the desired position.
Rotating the Picture
Double click on the picture.
The Format tab of Picture Tools comes up on the Ribbon..
In the Arrange group, click on the Rotate button and choose the desired rotation.
OR click on the green dot above the picture and drag the picture to the desired angle.
Power Point 2007
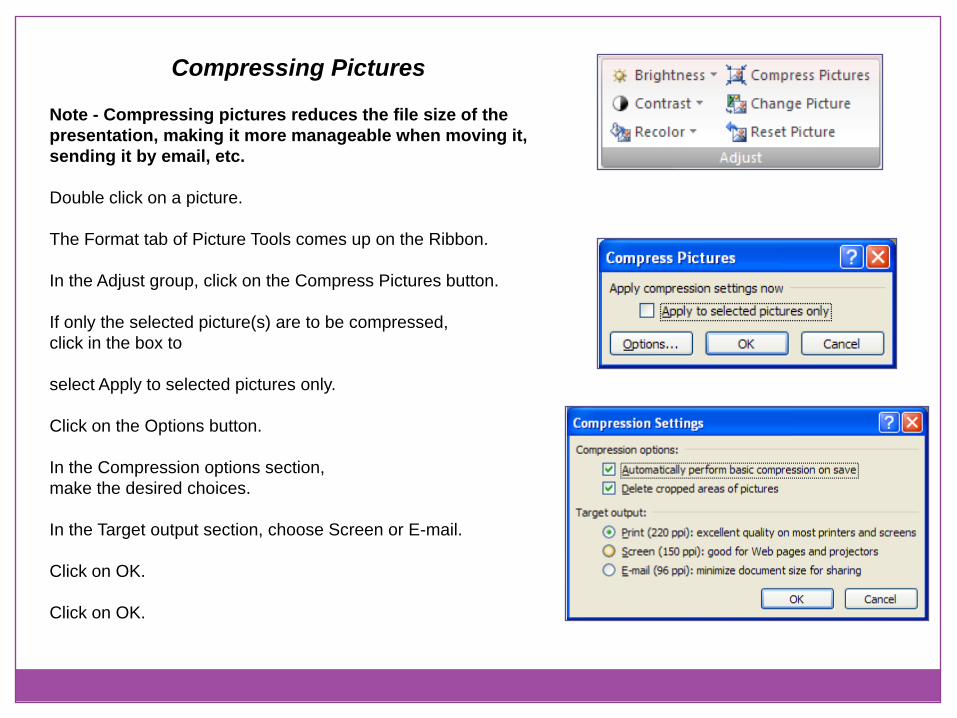
Compressing Pictures
Note - Compressing pictures reduces the file size of the
presentation, making it more manageable when moving it,
sending it by email, etc.
Double click on a picture.
The Format tab of Picture Tools comes up on the Ribbon.
In the Adjust group, click on the Compress Pictures button.
If only the selected picture(s) are to be compressed,
click in the box to
select Apply to selected pictures only.
Click on the Options button.
In the Compression options section,
make the desired choices.
In the Target output section, choose Screen or E-mail.
Click on OK.
Click on OK.

Text Boxes
Creating a Text Box
On the Ribbon, click on the Insert tab.
In the Text group, click on the Text Box button.
Click and drag on the slide to create the text box.
Moving a Text Box
Click in the text box.
Move the cursor to the edge of the box.
Note - The cursor changes to a four-headed arrow.
Click and drag the box to the desired location.

Resizing a Text Box
Click in the text box.
Move the cursor to a corner of the box. (The box at the corner is called a handle.)
Note - The cursor changes to a two-headed arrow.
Click and drag to change the size of the box.
Deleting a Text Box
Click in the text box.
Click on the border of the text box.
Press the Delete key on the keyboard.
Text Boxes
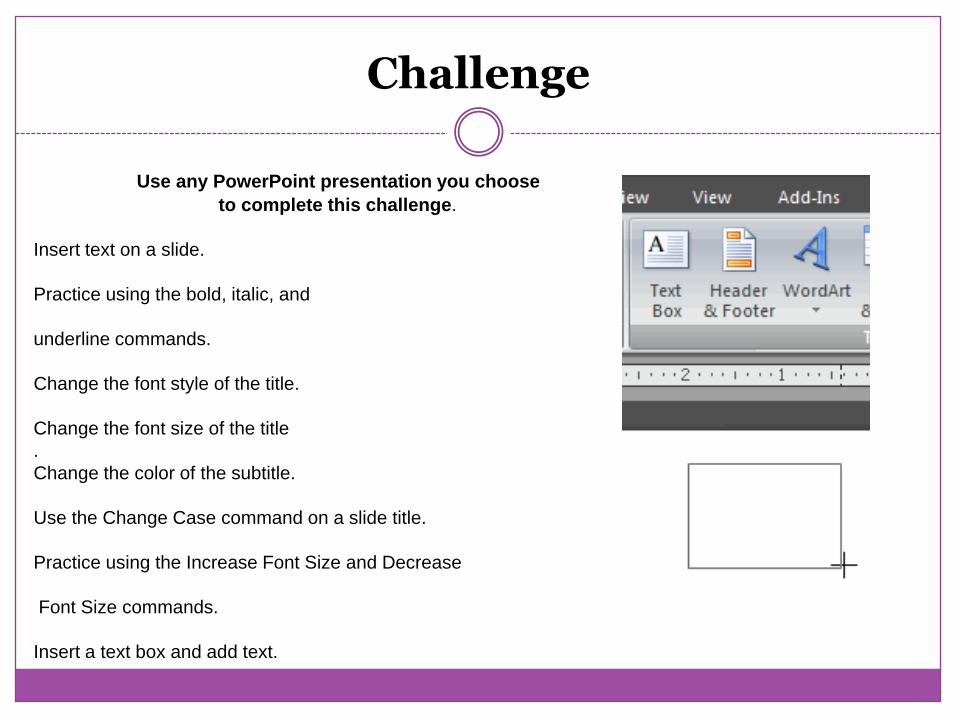
Challenge
Use any PowerPoint presentation you choose
to complete this challenge.
Insert text on a slide.
Practice using the bold, italic, and
underline commands.
Change the font style of the title.
Change the font size of the title
.
Change the color of the subtitle.
Use the Change Case command on a slide title.
Practice using the Increase Font Size and Decrease
Font Size commands.
Insert a text box and add text.
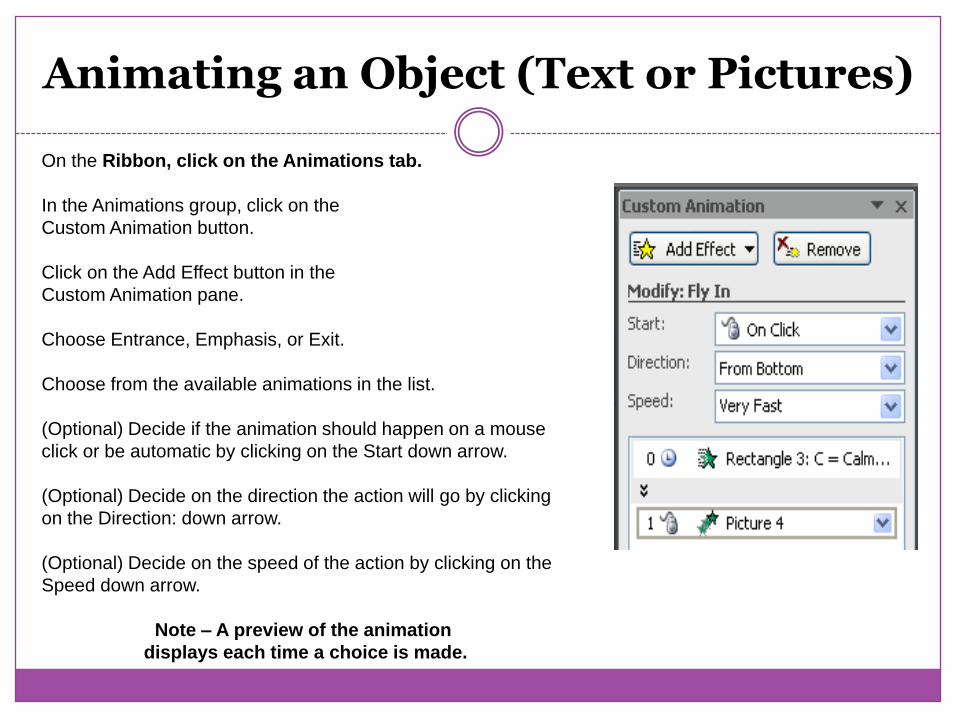
Animating an Object (Text or Pictures)
On the Ribbon, click on the Animations tab.
In the Animations group, click on the
Custom Animation button.
Click on the Add Effect button in the
Custom Animation pane.
Choose Entrance, Emphasis, or Exit.
Choose from the available animations in the list.
(Optional) Decide if the animation should happen on a mouse
click or be automatic by clicking on the Start down arrow.
(Optional) Decide on the direction the action will go by clicking
on the Direction: down arrow.
(Optional) Decide on the speed of the action by clicking on the
Speed down arrow.
Note – A preview of the animation
displays each time a choice is made.

Removing/Changing the Animation
Click on the object.
Click on the corresponding number of the object in the animation list.
Click on the Remove button in the Custom Animation pane to remove the previous choice
OR click on the Change button to choose a different animation.
Power Point 2007

Adding a Delay to an Automatic Animation
Click on the object.
Click on the down arrow next to the corresponding number of the object in the animation list.
Click on Timing.
Change the Delay to the desired number of seconds.
Click OK.

Power Point 2007
Adding Multiple
Animations to
the Same Object
Click on the object.
Click on the Add Effect button in the Custom Animation pane.
Choose Entrance, Emphasis, or Exit.
Choose from the available animations in the list.
Changing the Order
Objects Play
If the Custom Animations screen is not showing:
On the Ribbon, click on the Animations tab.
In the Animations group, click on the Custom Animation button.
Look at the list in the Custom Animations pane showing the order in which objects play.
Click on the object on the slide to be changed. (The animation in the list is highlighted.)
Click and drag the animation in the list to the desired playing position.

Slide Transitions
.
On the Ribbon, click on the Animations tab.
In the Transition to This Slide group,
hold the cursor over a transition without clicking to display the slide with that transition.
Use the up and down arrows on the right side of the Slide Transitions window to scroll through the choices.
Click on the desired transition.
Note – The question mark at the bottom of the list is for random transitions.
Adjust the speed of the transition by clicking on the Transition Speed down arrow and making the desired choice.
Add a sound by clicking on the Transition Sound
down arrow and making the desired choice.
In the Advance slide section, choose either On Mouse Click, or set a time for the automatic advance of the slide.
To apply this transition to all of the slides in the presentation, click on the Apply to All button.
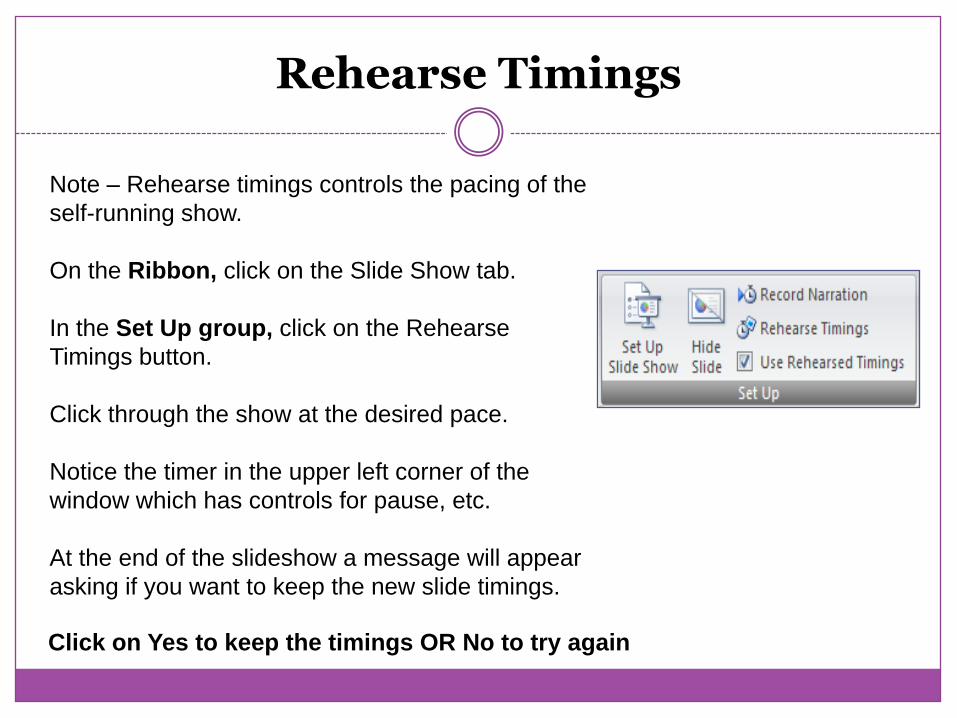
Rehearse Timings
Note – Rehearse timings controls the pacing of the
self-running show.
On the Ribbon, click on the Slide Show tab.
In the Set Up group, click on the Rehearse
Timings button.
Click through the show at the desired pace.
Notice the timer in the upper left corner of the
window which has controls for pause, etc.
At the end of the slideshow a message will appear
asking if you want to keep the new slide timings.
Click on Yes to keep the timings OR No to try again

Self-Running Show
Note – To have a self-running slide show, the
slide transitions must be set to Automatically
after with a
desired length of time.
On the Ribbon, click on the Slide Show button.
In the Set Up group,
click on the Set Up Slide Show button.
In the Show Options section, check the box to
Loop continuously until “Esc”.
In the Advance slides section, choose Using
timings, if present.
Click on OK.

Sounds
Adding an Automatic Sound to an Animated Object
If the Custom Animations screen is not showing:
On the Ribbon, click on the Animations tab.
In the Animations group, click on the Custom Animation
button.
Click on the animated object to which the sound is to be
attached.
In the Custom Animation pane, click on the down arrow next
to the animated object and choose Effect Options.
Click on the Effect tab.
In the Enhancements section, next to Sound, click on the
down arrow and choose the desired sound.
Click OK.

Adding a Sound to a Slide Transition
Go to the slide that is to have the sound.
On the Ribbon, click on the Animations tab.
In the Transition to This Slide group, click on the Transition Sound down arrow and make the desired choice.
Note – To hear the sound, hold the mouse over the
sound in the list.
Adding a Clickable
Sound to an Object
Click on the animated object to which the
sound is to be attached.
On the Ribbon, click on the Insert tab.
In the Links group, click on the Action
button.
Click on the Mouse Click tab.
Check the box in front of Play sound.
Click on the down arrow in the box and
choose the desired sound.
OR choose Other Sound… at the bottom of
the list and navigate to the location of the
sound.
Click OK.
Note – To hear the sound when playing
the slide show, click on the object with
the sound attached.

Saving a slide show
Click on the Microsoft Office Button and then click on Save As.
By default, Word saves documents to the My Documents folder as a .docx file.
In the schools, the default location may have been changed to the H: drive.
If it is not saving it in My Documents, click on the My Documents button (left side of the Save window) or navigate to the desired location.
Note – To create a new folder to place the document in, click on the Create new folder button and type in
a name for the folder.
Check the name of the document and make
changes as needed.
Click on the Save button.

Saving the Slide Show
Saving to a Previous Version
Files created with PowerPoint 2007 can be opened and worked on in
the older versions, but a plugin is required.
Click on the Microsoft Office Button and then click on Save As.
Check the name of the slide show and make changes as needed.
In the Save as type box, click on the down arrow and choose:
PowerPoint 97-2003 Presentation.
Click on the Save button.
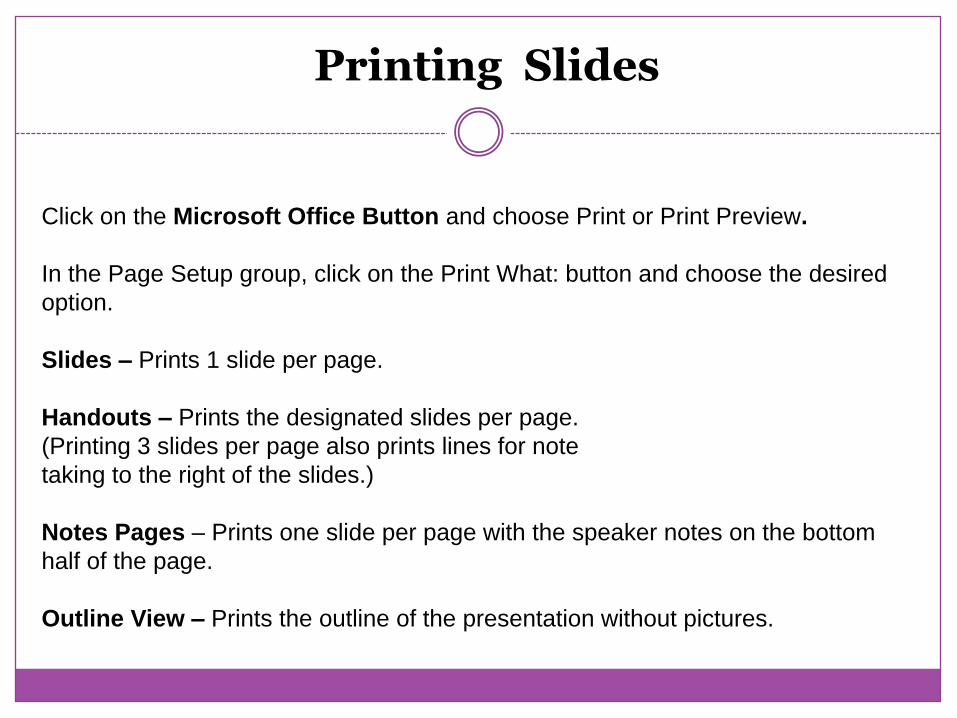
Printing Slides
Click on the Microsoft Office Button and choose Print or Print Preview.
In the Page Setup group, click on the Print What: button and choose the desired
option.
Slides – Prints 1 slide per page.
Handouts – Prints the designated slides per page.
(Printing 3 slides per page also prints lines for note
taking to the right of the slides.)
Notes Pages – Prints one slide per page with the speaker notes on the bottom
half of the page.
Outline View – Prints the outline of the presentation without pictures.

In the Page Setup group, click on the Orientation
button and choose Portrait or Landscape.
In the Preview group, click on the Next Page button or
the Previous Page button to view each of the pages to
be printed.
In the Print group, click on the Options button and
choose Scale to Fit Paper to fit the largest possible
image of the slide on the paper.
In the Print group, click on the Options button and
choose Frame Slides to place a wire frame around
each slide as a border.
In the Print group, click on the Print button.
Check the settings in the window and change them if
desired.
Click on OK.


Printing Options
Other options are available for printing by clicking on the Microsoft Office Button, choosing Print and then clicking on one of the available options.
Print – Click in the Print button to open the Print dialog box as noted above.
Quick Print – Sends the document directly to the printer last used.
Print Preview – Displays how the document will appear before printing it.
Click on the Microsoft Office Button and then choose Print.
Check to make sure the correct printer is chosen (Click on the down arrow in the Printer section and choose a printer).
In the Page range section, decide which pages to print. (All, the current page, or a range of pages.)
In the Copies section, indicate how many copies.
Click on the OK button.
Printing the Document

Converting from Older Versions
• Microsoft Office 2007 can open documents created in all previous versions of
Word. Previous versions will be opened in compatibility mode. (The name of the
document in the title bar is followed by [Compatibility Mode] to indicate is an older
document.)
• Converting Older Word Documents
Click on the Microsoft Office Button and then
click on Convert.
Click on OK.

Thank You!
We hope this Class was helpful
If you still need help Please set up an appointment with a
computer instructor.
Please fill out a survey to help us improve our
computer classes
FREEHOLDER DIRECTOR
Robert M. Damminger
FREEHOLDER LIAISON
Warren S. Wallace, Ed.D.