Git Training - homes.jamk.fihomes.jamk.fi/~huojo/opetus/IIZP2010/Git_training_JAMK.pdf · Git...
132
Git Training Ilkka Turunen Niko Korhonen Marko Silokunnas
Transcript of Git Training - homes.jamk.fihomes.jamk.fi/~huojo/opetus/IIZP2010/Git_training_JAMK.pdf · Git...

Git Training
Ilkka TurunenNiko KorhonenMarko Silokunnas

Why use version control?
• To distribute your code to your co-workers• To backup your code• To keep track of what's happening • Automation

The history of GIT• Or how Linus made some magic• Background of Git

Linux kernel
• Linux kernel was developed using BitKeeper• 2005 marked a change, BitKeeper revoked their free-usage
license.• Linus Torvalds started developing a viable alternative

• Design principlesSpeedSimple designStrong support for non-linear development (thousands of parallel branches) (= Good support for branching and merging)Fully distributed (Committing code does not require access to a central server)Able to handle large projects like the Linux kernel efficiently (speed and data size) (13,5 million lines of code)• Distributed version control system (DVCS) • Nowadays maintained by Junio Hamano
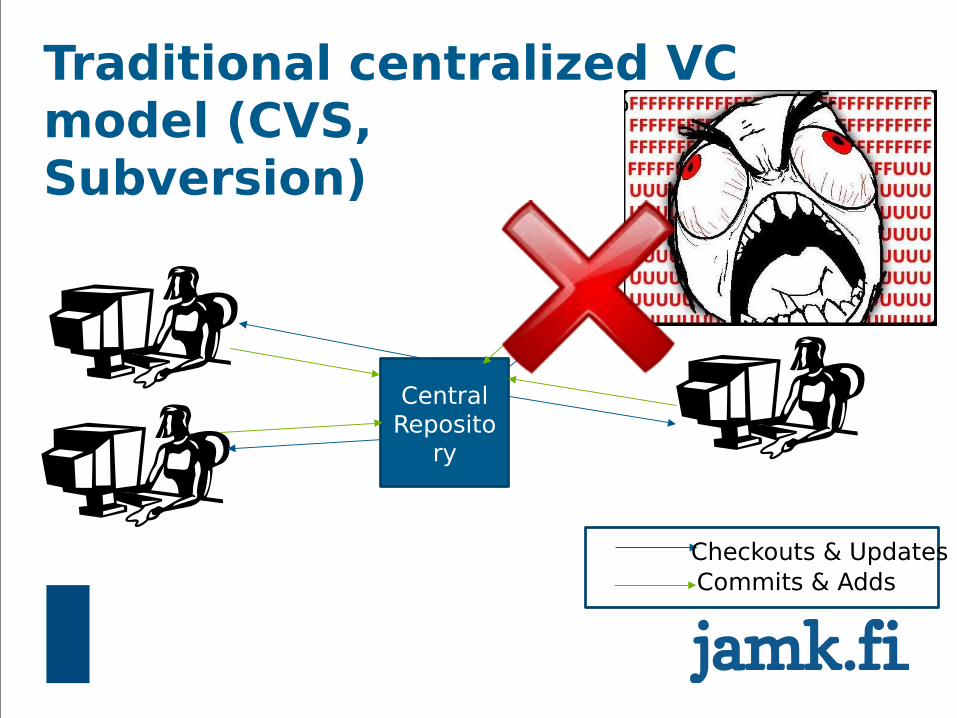
Traditional centralized VC model (CVS, Subversion)
Central Reposito
ry
Checkouts & UpdatesCommits & Adds

Distributed version control system (git, hg)
Remote reposito
ry
Local
Local
Local
Local
Pulls & ClonesPushes
Commits & Adds

Advantages
• Git saves commits as snapshots, not as deltas=> FAST reverts=> History is always stored with local repository=> diff can be performed locally

Advantages continued
• Changing branches can be done offline• Other revisions of a file can be obtained• Changes can be commited offline• Merging and Diff can be done offline

Git trainingBasic terminology and concepts

Git terminology ( 1/5 )• Git DirectoryThe .git directory that holds all information in the repositoryHidden from view• Working directoryThe directory in which .git residesContains a "snapshot" of the repositoryWill be changed constantly eg. when reverting or branchingYour changes will be made to this directory• IndexChanges have to be added to the index from the working directory in order to be saved into a commitCould be thought of as a “loading bay” for commits

Git terminology ( 2/5 )
• BranchAn alternate line of development• Working copyThe branch you are in now that you make your changes in• MasterThe default branch of the repository

Git terminology ( 3/5 )
• BranchAn alternate line of development• Working copyThe branch you are in now that you make your changes in• MasterThe default branch of the repository

Git terminology ( 4/5 )
• CommitA set of changes that have been saved to the repositoryCan be reverted and even modified to some extentIdentified by a hash of the changes it contains• TagA certain commit that has been marked as special for some reasonFor example used to mark release-ready versions

Git terminology ( 5/5 )
• HEADThe latest revision of the current branchCan be used to reference older revisions with operants
– HEAD^^2 == 2 revisions before latest– HEAD^ == 1 revision before latest– HEAD~3 == 3 latest revisions– HEAD^^2..HEAD == 2 revisions before the latest to the
latest• OriginDefault name for a remote repository when cloning an existing repository

Git object model – The SHA hash
• All git objects are represented in the history of a project with a 40 character hash
Example: 678ce96d260a869eb54aef96c482958257e7d17d
• The hash is a SHA1 hash of the contents of the object=> All hashes are unique=> Identify commits=> Are used to check if the files are valid=> Identical objects can be identified because they will have identical hashes

Git TrainingBasic operations
Basic operations
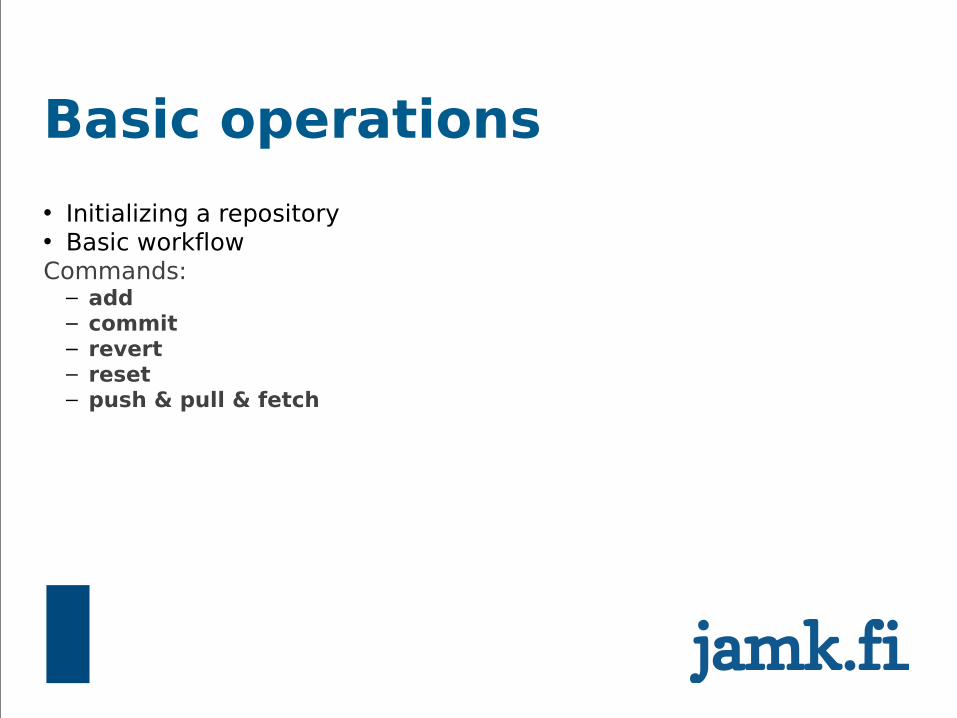
• Initializing a repository• Basic workflowCommands:
– add– commit– revert– reset– push & pull & fetch

Initializing a repository
• Initializing an empty repositoryGo to wanted directoryWrite $ git init• Cloning from existing repositoryGo to wanted directory$ git clone URL
• Remember to set your user name and optionsgit config ––global user.name ”my name” git config ––global user.email [email protected]

Visualization of basic workflow

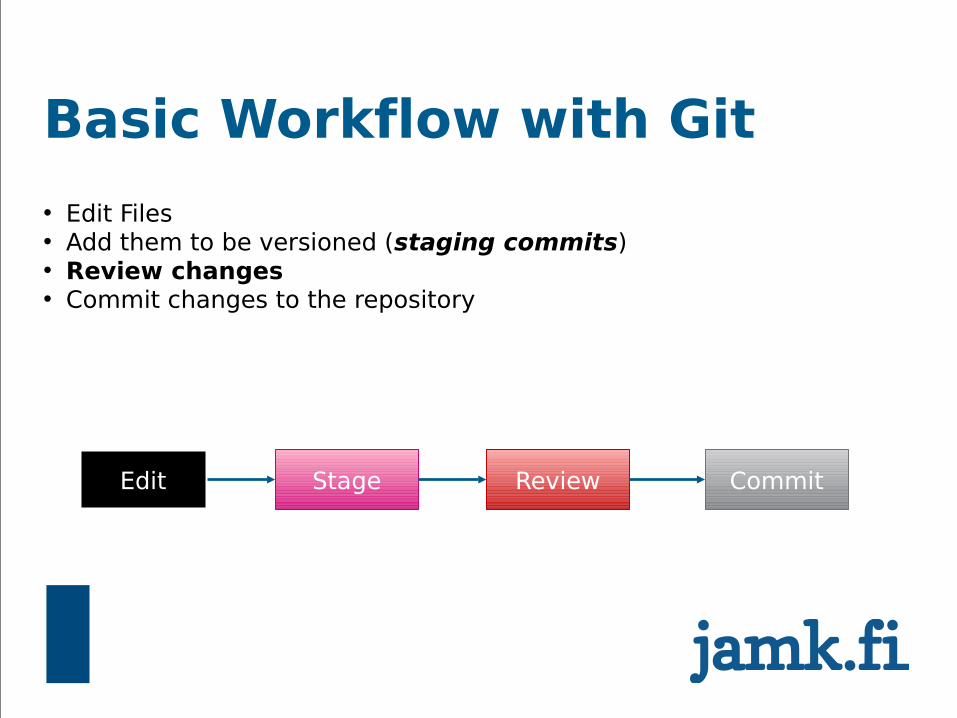
Basic Workflow with Git
• Edit Files• Add them to be versioned (staging commits)• Review changes• Commit changes to the repository
Edit Stage Review Commit

Basic Workflow with Git
• Edit Files• Add them to be versioned (staging commits)• Review changes• Commit changes to the repository
Edit Stage Review Commit

Staging commits (git add)
• Adds your files to the index so that they are ready to be committed
• Only added files can be committed• You can add individual files or all$ git add .$ git add filename$ git add part/filename

Assigment 1: Let’s create a file
• Initialize a new Git repository
• Create a file that has your first name in it. Call it 'name' or whatever you want
• Make Git track your file (stage the change)
Basic Workflow with Git
• Edit Files• Add them to be versioned (staging commits)• Review changes• Commit changes to the repository
Edit Stage Review Commit

Git status
• Shows the branch you are on• Shows staged commits (files added to the index)• Files can still be removed from the index• Usage:$ git status• If there are any files that need removing from the index$ git reset HEAD <filename>
– Unstages file from current HEAD

Basic Workflow with Git
• Edit Files• Add them to be versioned (staging commits)• Review changes• Commit changes to the repository
Edit Stage Review Commit

Commit• Adds your changes to your local repositoryOnly changes added to the index will be notified=> Only added files will be versioned• Opens a dialog where you can insert a commit message• Commit messages consists of two parts:One short line describing the commit in generalLonger more detailed description about the commit• Short and long description are separated by a newline• Only the short description is required• Empty commit message will cancel the commit• Lines beginning with # are regarded as commits• You can view the commits in a repository by using:• $ git log

Usage
• $ git commitOpens up a text editor for you to change the commit messageGood to review all changes in this stage tooWhen you have added all the files you want, you can commit them to the repository using$ git commit -m "commit message“• Inserts a commit message straight away, does not open an
editor

Example of a commit message
short description on first line
more detailed description of your patch, which is likely to take up multiple lines.
Separated by a \n

Git rm• Removes files from Git and disk• Only committed files can be removed• Usage$ git rm filename

A1: Committing more changes
• Commit your previously staged changes• Add your last name to the file. Add it to a new lineMake Git store the updated file• Add your middle name to the file. Add it to a new lineMake Git store the updated file
• Verify that your commits have been stored

Assignment 1: answer
$ git init• <add your first name to the file>• $ git add name• $ git commit -m "Added first name"• <add your last name to the file>• $ git add name• $ git commit -m "Added last name"• <add your middle name to the file>• $ git add name• $ git commit -m "Added middle name“• $ git log
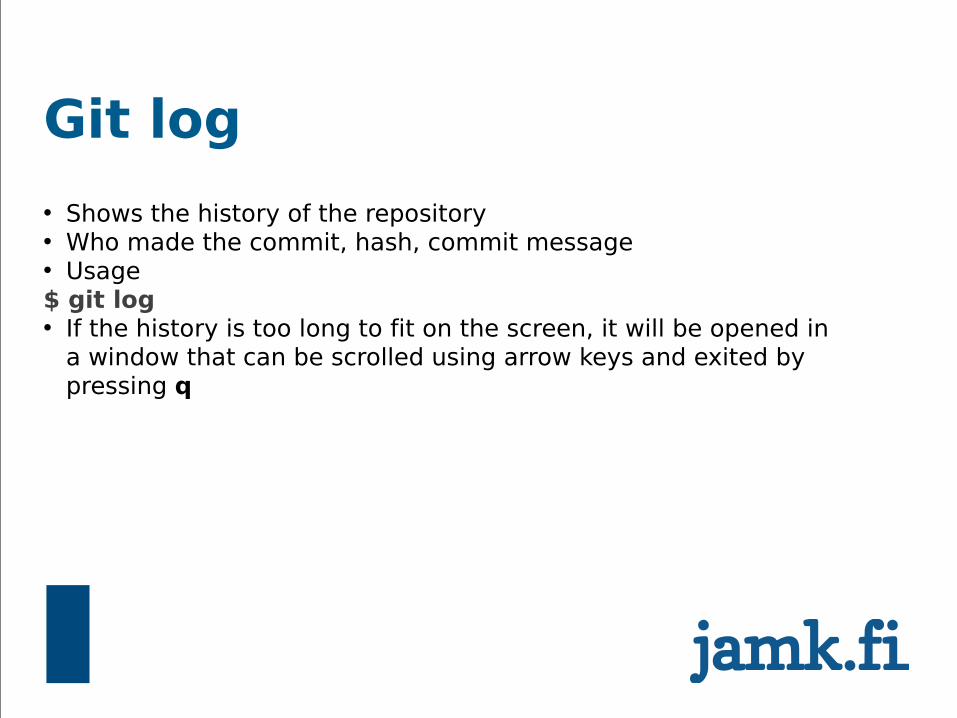
Git log
• Shows the history of the repository• Who made the commit, hash, commit message• Usage$ git log• If the history is too long to fit on the screen, it will be opened in
a window that can be scrolled using arrow keys and exited by pressing q

Comparing differences between files• Git makes heavy use of *NIX software called diff• Usage $ diff <file1> <file2>
• Sometimes you need to know about what changes have occured in a file between two revisions
$ git diff <start commit>..<end commit> -- fileE.g. $ git diff HEAD^^..HEAD^ -- index.php


Revert
• You can undo commits by using revert• Revert undoes a single commit and leaves other commits
intact• This means that you can revert a change that broke
something, but reverting it doesn't affect commits made after the "faulty commit"
• Adds a commit that undoes the given commit• usage example:• $ git revert <commit-id>

Revert

Assigment 2: Differences
• View the difference between your second and third commit in the last assignment.
• Revert the second commit in your repository, so that you end up with a file that contains only your first and middle name.
• Add your mother's maiden name to the file. DO NOT COMMIT. Realize that this is a mistake and restore the state of the file the last commit

Assigment 2: Answers
• $ git diff <id of the second commit> <id of the third commit>
• $ git revert <id of the second commit>• $ git add name• $ git reset HEAD name

Git trainingWorking with remotes

Before we start• Generate an SSH-key$ ssh-keygen -t rsa
● Name it as your own name and hit Enter when it asks for a passphrase
• Go to your ~/.ssh -folder and create a file called “config” with following contents:
host git fn1 Hostname fn1.vm User git IdentityFile ~/.ssh/<name of your ssh key>
• Copy the contents of <name of your ssh key>.pub and paste them into your user details in your FreeNest

Remote
• Remotes are remote git repositories• You can pull and push changes to remote repositories• You can also fetch branches from the remote repository
• Remotes have to be added by using:$ git remote add <name> <url>
• You can list all remotes with$ git remote• You can list details about a specific remote with$ git remote show <name>

Creating a central repository• While technically any repository can be used as a central
repository, it is sometimes better to create a ”bare” repo to act as a central unit
If you use a full git repository as a central repo, you will get errors• Bare repositories contain just the contents of the .git folder, and
no working directory• They cannot be locally modifiedInstead all changes must be pushed to them• Creation of a bare repo:$ git init --bare

Cloning remote repositories• You can easily clone remote repositories with git• Every clone is always a full copy of the remote repository=> Full backup too if push comes to shove
• Usage:$ git clone <url>- Example: $ git clone https://github.com/jnode/jnode.git- Example when using config: $ git clone fn1:testing
The remote repository is automatically called origin– To use something else as a name for the origin, use – $ git clone –o <name> <url>

Pushing changes
Sends your changes from your current branch to a remote repositoryIf the repository has changed since you last pulled from it you will be shown an error and you have to pull and merge the changes before you can push
– There might be conflicts! – The error message usually is something like “no fast-forward
commits”The changes will be taken from your current branch by defaultUsage:
– $ git push <remote name> <branch on remote>– If you are in a cloned repo you need not specify remote names or
branches unless encountered with an error– If you are on a repo with an added remote you need to specify

Pulling changes from remoteSimilar to push, but the other way aroundPulls changes from the remote to the current branchIf any changes have been made locally to a file that has changed at the remote end, this causes a conflict
– Conflicts need to be resolved by editing the conflicted files– After the conflicted file has been fixed, commit your changes and then
push to the remote– Git pull tries to merge conflicts automatically
Usage– $ git pull <remote-name> <remote-branch>– If you are using a cloned repo, you don’t need to specify a remote
name or branch– If you use an added remote you need to remember to specify both

Fetching changes
Similiar to pull, but doesn't try to merge the changes instantlyUsage
– $ git fetch <remote-name> <remote-branch>When using fetch, you have to merge the changes manually in any conflicted filesYou merge the changes by using git merge
– $ git merge <filename>– Or if automatic merge fails, use the default mergetool of your system– $ git mergetool <filename>

Assignment 3: Cloning, Pushing, Pulling & Conflict
• Clone the “testing” -repo from your FreeNest• Add some changes to the repository
● Create a new file with your name as the file name ● Commit your changes● Push to the remote repository
• If you can't push, pull the changes from the repository • Change a mutual file
● Create a file called “names” and add your name in it● Commit your changes● Push to the remote repository
• Solve the conflicts, commit and push again

Assignment 3: Answers$ git clone fn1:testing$ cd testing$ vim YourName$ git add YourName$ git commit –m ”Added my name file”$ git push origin master$ git pull
$ vim names$ git add names$ git commit –m ”added a names -file”$ git push
$ git pull$ git mergetool names$ git commit -a$ git push

Git TrainingAdvanced operations - Working with branches

Branches
Branches are one of Git’s killer featuresBranches always have a starting point in a commit in another branchBranches are "parallel lines of development"
– You can commit, revert (etc.) in a branch without having to worry about it affecting other branches
– Until you merge of course.You can move changes between branches by using git mergeBranches are extremely flexible!

Branches: SVN vs. Git
• Branches are fundamentally different in git and SVNSVN Branches are, essentially, just folders, that increase the global revision numberGit branches are fully parallel lines of development that are completely autonomous
– => Makes switching between branches really fast– => Makes it easier to manage branches
In git there’s no predefined trunk or branches– Instead, the trunk is more or less just some branch that has been
designated as such– Allows for flexible strategies

Feature branches
• "Feature branches" are commonly used:Branches that are specific to one featureWhen development of that feature is done, the branch is cleaned and merged to a "development branch"

Creating branches
$ git branch <name>creates a new branch called <name>
$ git branch• shows a list of branches

Switching between branches• Switching is done with a checkoutCheckout == Change Branch• NOT to be confused with SVN’s checkoutSNV’s Checkout == Git Clone
• You can always see the branch you are in by typing$ git branch

Checking out
$ git checkout <name>changes in to a branch called <name>•• $ git checkout -b <name>• creates and checkouts to a branch called <name>

Merging branches
Adds changes to the current branch (by default)The changes are usually taken from other branchesMerges changes that have been committed after the two branches diverged
Two kinds of merges– Fast Forward merge– Non-Fast Forward

Merging branches: Usage
$ git merge <branch>• merges changes from <branch> to the current branch• $ git merge --no-ff <branch>• merges changes from <branch> to the current branch and
always creates an extra commit about the mergeThis makes it easier to undo merges


Rebase• Changes the "starting point" of a branch• Can be used in feature branches when the "development
branch" changes drastically and it affects the feature branches• Usage:• $ git rebase <branch>• sets the starting point of the current branch to <branch>


Tags
There are 2 kinds of tags "lightweight tags" and "tag objects"Lightweight tags
– Simple aliases for tags– "branch that never moves"
Tag objects– Added as objects to the git database– Can be signed using gpg– Require tag messages
Tags create a sort of a frozen branch, which to which you can perform a checkout

Tag visualization

Usage
• Lightweight tags• $ git tag <tagname> <commit>creates a tag called <tagname> that points to <commit>• Tag objects• $ git tag -a <tagname> <commit>creates a tag object and opens a text editor where you can type a tag message tag objects can be signed• List all tags$ git tag

Assignment 6: Merging
• Merge your ‘family’ branch to ‘master’.Verify that the master branch contains the contents of the family branch• Create a new lightweight tag to master called release-
1.0Verify that the tag exists

Assignment: conflict
• Create new branch ’test’Create file called fatha.txt and add your fathers second name on the first line. Commit changes.• Checkout to master branchCreate file called fatha.txt and add your fathers first and last name on the first line. Commit changes• Merge the branch test to masterResolve conflict using git mergetoolRetry merge
Assignment 6: Answers
• $ git checkout master• $ git merge family
• $ git tag version-1.0• $ git tag

Squashing commits (rebase –i)• A subcommand of rebase• Combines several commits into a single commit• Do not use this on commits that have been pushed a
remote!=> That results in a huge mess• Cannot be reverted• Useful when tidying up feature branches


Squash usage
Usage:$ git rebase -i HEAD~4•• Takes 4 last commits and opens a text editor to determine what
to do with each (pick, squash or edit)If a line representing a commit in the editor is removed, that commit will be lost! You must pick the commit to be savedYou can then squash the others listed to that commit by replacing the text pick with squash

Assignment 7: Squashing
• Checkout to branch ‘family’
• Create a file called ‘mother’Insert your mother’s first name in to the file and commit.Add your mother’s last name to the file and commit. • Now squash those two commits together and merge to
master
• Verify that master’s history contains the squashed commit.

Assignment 7: Answers• $ git checkout family• $ touch mother• <Add mothers name>• <Commit>• <Add mothers last name>• <commit>
• $ git rebase -i HEAD~2• <change second line that starts with ‘pick’ to ‘squash’,
save&quit, write a commit msg>• $ git checkout master• $ git merge family

Common branch types• master branchEvery commit is a release• Release branchUse tags to mark releasesUsed for release specific changes before merging to master• Feature branchesWork is done in feature branches• Development branchFeatures branches are merged here before going to release• Testing branchesOptional, you can also use tags instead in the release branch• Hotfix branchesBranched from release branchMerged into development before going to release

Branching example• 2 "main" branches: master and developmaster
– Production ready state– 1 commit = 1 release
develop – approved changes– nightly builds– "integration branch"
• Feature branchesBranches where work is being doneSpecific to one feature! (Bug #1234 for example)Unit tested and reviewed before merged into developmentRemoved after merge to developmentuse --no-ff when merging to development!

Branching continued• Hotfix branchesCritical bugs in productionBranched from releaseMerged to development and master• Release branchesRelease specific changesSmall bug fixesUsed so that development can be used for new featuresWhen the release is done, merge to master

Visualization

Git TrainingSession 2 – Handy advanced featuresReset, Blame, Ignore, Patching, Hooks, Stashing commits

Git reset- Advanced stuff• Specifically, git reset is a tool for resetting HEAD to a
desired stage• Most commonly it is used to unstage commits
• Reset general usage $ git reset --<mode> [<commit>]
Most common modes:– soft: Resets repository HEAD position to <commit>, leaving your
changed files marked as ”Changes to be committed”– hard: Resets the index and working tree. Any changes to tracked files
in the working tree since <commit> are discarded.– mixed: default action without the <mode> identifier. Resets the
index but not the working tree (i.e., the changed files are preserved but not marked for commit) and reports what has not been updated.

Git reset – Advanced stuff• Permanently removing commits=> Primarily should not be used, instead use revert=> If you are absolutely sure,
– $ git reset --hard HEAD~3– Removes last 3 commits
• Undo merge or pull$ git reset --hard ORIG_HEAD Git stores the local head in ORIG_HEAD-file after merges or pullsRestore status to Original HEAD
– => undoes whatever happened

Blame it on others• blame allows you to see who has modified a file on a line by
line basis• blame prints out the entire file accompanied by the name of the
user who made changes to that specific file• usage example:• $ git blame <filename>

Git Blame

.gitignore• You can make sure that no unnecessary files can be added to
your repository by using a .gitignore file• it contains filenames and paths that cannot be added to the
repository and will not be shown in git status when they change• it should be placed in your projects root directory• it can be be tracked by git just like any other file

Example .gitignore file#ignore all .serializedconf files*.serializedconf
#ignore all .pyc files*.pyc
#ignore all files in build dirBuild/*

Git hooksHooks allow you to attach scripts to trigger before or after certain commandsExample hooks might include:
– Running unit tests after push before merging to the branch. If the tests fail don't merge
– Running code diagnostics tool to make sure that the code follows coding standards set for the project
– Compiling the code before commit to make sure that it compilesHooks are placed into .git/hooks folder and thus are not tracked by the repository by default.
– This can circumvented using symlinks– ...but symlinks might turn troublesome on different platforms
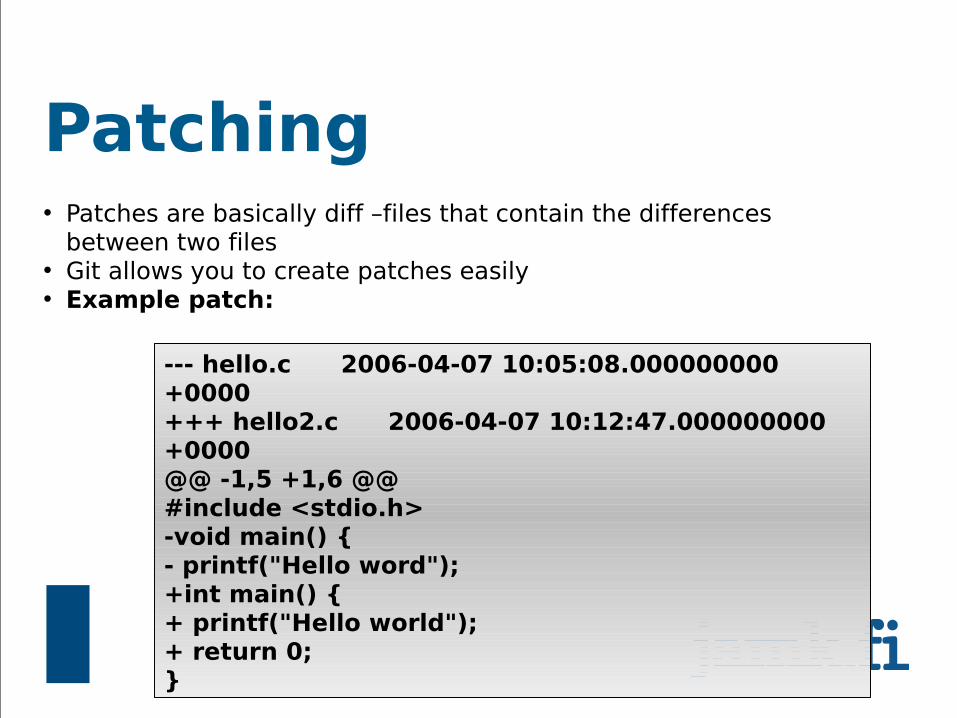
Patching• Patches are basically diff –files that contain the differences
between two files• Git allows you to create patches easily• Example patch:
--- hello.c 2006-04-07 10:05:08.000000000 +0000+++ hello2.c 2006-04-07 10:12:47.000000000 +0000@@ -1,5 +1,6 @@#include <stdio.h>-void main() {- printf("Hello word");+int main() {+ printf("Hello world");+ return 0;}

Create a patch• Usage$ git format-patch master --stdout > name.patch
Or alternatively you can just use git diff to generate a patch for single files between two revisions:
$git diff –p <STARTING REVISION>..<END REVISION> <file> > name.patch

Apply a patch• 1: Test its contents$ git apply --check fix_empty_poster.patchIf there are no errors, you can apply it with
• 2: Apply$ git am --signoff < fix_empty_poster.patch

Stashing commits• Stashing commits can be useful when you have made some
changes in your working directory, but want to return to a ”clean working directory”
Like when you need to do a quick fix on something entirely else, but your hacking is not complete• UsageStashing your commits since last pull
– $ git stashListing all stashed changes
– $ git stash listRecovering changes from stash
– $ git stash pop

Git trainingExample workflows of distributed projects

Case: The FreeNest Project• Development happens with feature branchesProject is split under multiple featuresEach feature has their own git repository4 main branches
– Feature branch on developer’s local mahcine– Dev branch on central repo– Test-branch on the same– Automated and non-automated testing takes place there– Passed commits are passed on to the stable -repository


Case: Google Android

http://source.android.com/source/life-of-a-patch.html

Workflow visualization: Developer view

Git trainingSubmodules

Git submodules• Git submodules allow you to include external Git repositories in
your Git repository• Submodules are always a reference to a single commit in the
external repository• Git submodules have few quirks which should be taken into
account when using them

Adding a submodule• You can add a subdmodule to a repository using$ git submodule add http://URL-TO-A-REPO/ SUBMODULENAME• Example:$ git submodule add URL jquery• After the submodule has been added, you have a new file in
your repository: .gitmodules• [submodule "jquery"] path = jquery url = https://github.com/jquery/jquery• All submodules have similar entries in the .gitmodules file• You can check what commit your submodule points to by using$ git submodule status

Cloning a repository with submodules• When you clone a repository with submodules in it, you get
empty directories for the submodules• In order to "fill" the submodules you have to use$ git submodule init
– Which will initialize the submodules• After initialization you have to use$ git submodule update
– to update the reference to the submodule to match the parent repo• $ git submodule update has to be called whenever a submodule reference changes in the parent repo

Dos and Don'ts with submodulesSuper = project containing the submodule(s)ALWAYS commit changes to the submodules before committing changes to the super.ALWAYS commit changes in the submodules to a public repositoryDO NOT add the submodule directory to tracked files using $ git add submoduledir/ALWAYS add the submodule without the trailing slash eg.$ git add submoduledir• Otherwise Git thinks that you want to remove the submodule
and add the contents of the submodule to super

Git trainingSubtree mergeArchiving repository

Subtree merge• Is a technique to be used when merging code between two
repositories1st: add remote repository B
– $ git remote add -f Bproject /path/to/B2nd: force merge without commit to ours from project
– $ git merge -s ours --no-commit Bproject/master3rd: Read repository b’s tree structure as subdirectory in our directory
– $ git read-tree --prefix=dir-B/ -u Bproject/master4th: Commit this change
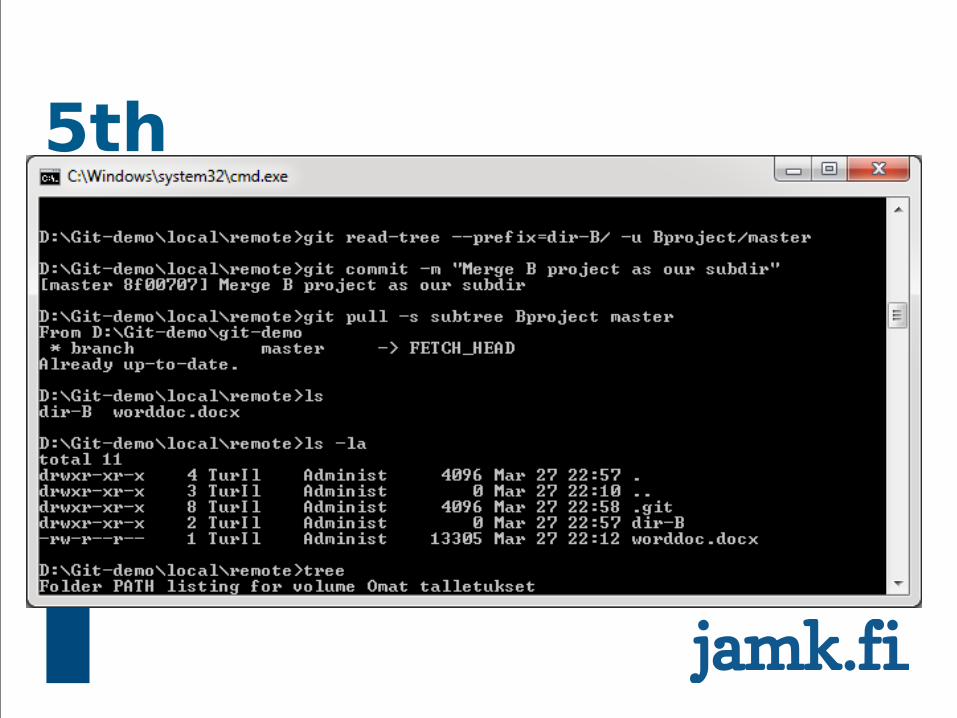
– $ git commit -m "Merge B project as our subdirectory“5th: pull the subtree from repo B to the subdir
– $ git pull -s subtree Bproject master• There’s also a tool called subtree merger for linuxhttps://github.com/apenwarr/git-subtree

1st

2nd

3rd

4th
5th

Git archive• A handy command to export current branch to a zip fileUsage: $ git archive --format zip --output /full/path/to/zipfile.zip master
– Exports master branch to a zipfile– More options: $ git help archive
Will not contain .git folder, but will contain other git specific files like .gitattributes and .gitignore

Git trainingRepository authentication
Repository authentication• Git itself does not contain a method of creating private
repositories• Instead, 3rd party software is needed to manage the repository
access rightsGitoliteGitoriousGerrit (auditing, already explained)
• Usually done through ssh• 90% authentication is handled with SSH KeysBUT normal ssh keys DO NOT work with TortoiseGITTortoiseGIT can use Putty keysPuttyGen is installed with TortoiseGit

Gitolite• Gitolite is a piece of software installed on the server where your
central git repository lives• It automates setting up remotes and helps administer user
rightsUser groupsVisibility of repositories of user groupsUser keys• Gitolite is administered by a default repo called gitolite-admin2 Directories:
– Conf : Configuration file– Keydir: user’s ssh keys

Gitolite• Example conf:
@admin = adminuser ile-w ile2@regular_group = ile-windows2repo gitolite-admin RW+ = @admin
repo testing_repo RW+ = @admin @regular_group R = gitweb
repo hidden_repo RW+ = @admin
Names of public key files
Single users (gitweb is a web application
layer)

Gitolite• Also allows for system wide hooksBUT occupies some hook spots like update which should not be overwritten• Other featuresMirroring
– Users push to one single server, it automatically mirrors contents to slaves which act as backups. Slaves should only be updated by the master machine
• Lightweight• https://github.com/sitaramc/gitolite

Gitolite demo with FreeNEST• Creating new remote repositoryAdded new adminuser• Creating new user• Creating new keypair with PuttyGen• Pulling the empty repository• Adding README• F5 at GitwebPRESTO!

Gitorious• Developed originally by Nokia for QT• Offers authentication, repository management, timelining• 2nd most popular web interface for git after github• Open sourceBut has professional support and services• Can be installed locally• Administration of git repos from web browser• Administration of users from web interface• Allows for public / private repos

Git trainingBinaries

Binaries and git• Git stores copy of every file=> Large binaries bloat repositories=> But fast reverts are in order• Merging binaries can be troublesome=> But some user interfaces offer custom merging tools=> TortoiseGit offers TortoiseMergeGit has heuristics to determine binary files and prevents normal merge tools from being usedConflicts must be resolved by copying the correct version by hand • Managing binaries is a case-by-case-affairSubmodules can be handy with thisSome extra tools also exist
– Git-annex

Forcing a file extension to be recognized as a binary• Add a file called .gitattributes to the repo• Add this line:*.foo -crlf -diff –mergeWill prevent diffing and merges will result in conflicts that leave the original file untouched.
http://progit.org/book/ch7-2.html

.gitattributes• You can use this file to create custom diffing solutionsIf you don’t add anything, trying to diff binary files will result in a message saying that binary file a and b differ• Some binaries can be diffed, by creating custom diff filters• They can be defined in the .gitattributes-fileFor example ”*.doc diff=word”Now the word filter must be defined in .git/config file
– Command line: – $ git config diff.word.textconv strings– Otherwise just add line to config file under repositorys .git– [diff "word"] textconv = strings– => Will now use the strings linux app to convert word files into
diffable plaintext files

.gitattributes• Can also be used to create merge strategiesExample: you have database.xml file
– You want it to remain the same when merging to branches togetherAdding line database.xml merge=ours to .gitattributes forces git to use te database.xml in the current branch where the file is saved.When merging, instead of merge conflict git will output
– $ git merge topic – Auto-merging database.xml – Merge made by recursive.
This means git used the current version of the database.xml

Git-annex• Extra tool that does not push large binaries to git repo but
instead pushes directory structureA second step after a pull is necessary to get the contents of said fileCan be very complicated to manage with larger projects

Git trainingProblems & solutions

Error: Untracked working tree file XYZ would be overwritten by merge
• Caused by a safety feature that causes git to not write over untracked files on the local repository
• The merged branch / changeset has a file with the same name that is being tracked
• Solutions$ git merge –f
– Git will not stop on such errorsOR$ git add XYZ $ git commit –m ”added XYZ to be versioned”Pull/merge and resolve any conflicts

Error: Asked me to pull without telling me which branch to merge with• Check that you are not in HEADLESS mode• Check the remote branch is trackedIf not, add it with $ git add remote <name> <branch>• This might also be because the branch on your local machine is
not configured to be tracked with the remoteDue to the branch being created on the local machneTo fix, during next push, write$ git push –u <name> <branch>
– This adds a line to the config file in the .git folder and should succesfully also

Fatal: No destination configured to push to• This is caused by trying to push to a remote repository without
specifying to which branch to push toUse $ git push <name> <branch>

Failed to push some refs• This is a very common error that is caused by the remote
repository having new changes that your local repository does not
• Simple to fix:Pull from remoteResolve conflictsPush again

Git trainingReview and Further reading

Basic Workflow1.Edit Files2.Add them to be versioned (staging commits)3.Review changes4.Commit changes to the repository5.Rinse and repeat
Edit Stage Review Commit

Distributed workflow

Git summary• Branches are the most powerful feature of gitMerging between branches is easyBranches are fastBranches are to be used• Distributed version control system => Every repository is a
backup• Submodules enable including other repositoriesBut be careful when using them

Further Reading• Pragmatic Version Control Using Git (Pragmatic Starter Kit)Travis Swicegood• The Git Community bookhttp://book.git-scm.com/• Git contribution guide for TortoiseGIT Typo3 CMShttp://wiki.typo3.org/Contribution_Walkthrough_with_TortoiseGit• Git 101 Scott Chacon, Githubhttp://www.slideshare.net/chacon/git-101-presentation• Smacking Git around (Advanced Git)Scott Chaconhttp://www.slideshare.net/railsconf/smacking-git-around-advanced-git-tricks• Progithttp://progit.org• Subtree Merging and youMarkus Prinzhttp://nuclearsquid.com/writings/subtree-merging-and-you/


![Verlässliche Echtzeitsysteme - Übungen zur Vorlesung [1em]Git file2005 von Linus Torvalds für den Linux-Kernel geschrieben Konsequenz der Erfahrungen mit bitkeeper Eigenschaften:](https://static.fdocuments.net/doc/165x107/5e1b43e2f1253e2d3b2d9c41/verlssliche-echtzeitsysteme-oebungen-zur-vorlesung-1emgit-von-linus-torvalds.jpg)