
Git In Practice - Mirantis · 53 Filesystem interactions When working with a project in Git,...
50
Mike McQuaid Foreword by Scott Chacon MANNING I NCLUDES 66 TECHNIQUES
Transcript of Git In Practice - Mirantis · 53 Filesystem interactions When working with a project in Git,...

Mike McQuaidForeword by Scott Chacon
M A N N I N G
INCLUDES 66 TECHNIQUES

Git in Practiceby Mike McQuaid
Chapters 3, 5, and 13ISBN 9781617291975
Copyright 2015 Manning PublicationsTo pre-order or learn more about this book go to www.manning.com/mcquaid/

v
brief contents
PART 1 INTRODUCTION TO GIT.....................................................1
1 ■ Local Git 3
2 ■ Remote Git 24
PART 2 GIT ESSENTIALS..............................................................51
3 ■ Filesystem interactions 53
4 ■ History visualization 68
5 ■ Advanced branching 84
6 ■ Rewriting history and disaster recovery 104
PART 3 ADVANCED GIT ............................................................127
7 ■ Personalizing Git 129
8 ■ Vendoring dependencies as submodules 141
9 ■ Working with Subversion 151
10 ■ GitHub pull requests 163
11 ■ Hosting a repository 174

BRIEF CONTENTSvi
PART 4 GIT BEST PRACTICES......................................................185
12 ■ Creating a clean history 187
13 ■ Merging vs. rebasing 196
14 ■ Recommended team workflows 206

53
Filesystem interactions
When working with a project in Git, you’ll sometimes want to move, delete, change,and/or ignore certain files in your working directory. You could mentally keeptrack of the state of important files and changes, but this isn’t a sustainableapproach. Instead, Git provides commands for performing filesystem operationsfor you.
Understanding the Git filesystem commands will allow you to quickly performthese operations rather than being slowed down by Git’s interactions. Let’s startwith the most basic file operations: renaming or moving a file.
This chapter covers Renaming, moving, and removing versioned
files or directories
Telling Git to ignore certain files or changes
Deleting all untracked or ignored files or directories
Resetting all files to their previously committed state
Temporarily stashing and reapplying changes to files

54 CHAPTER 3 Filesystem interactions
Technique 17 Renaming or moving a file: git mvGit keeps track of changes to files in the working directory of a repository by theirname. When you move or rename a file, Git doesn’t see that a file was moved; it seesthat there’s a file with a new filename, and the file with the old filename was deleted(even if the contents remain the same). As a result, renaming or moving a file in Git isessentially the same operation; both tell Git to look for an existing file in a new loca-tion. This may happen if you’re working with tools (such as IDEs) that move files foryou and aren’t aware of Git (and so don’t give Git the correct move instruction).
Sometimes you’ll still need to manually rename or move files in your Git reposi-tory, and want to preserve the history of the files after the rename or move operation.As you learned in technique 4, readable history is one of the key benefits of a versioncontrol system, so it’s important to avoid losing it whenever possible. If a file has had100 small changes made to it with good commit messages, it would be a shame toundo all that work just by renaming or moving a file.
Problem
In your Git working directory, you wish to rename a previously committed file namedGitInPractice.asciidoc to 01-IntroducingGitInPractice.asciidoc and commit the newlyrenamed file.
Solution
1 Change to the directory containing your repository: for example, cd /Users/mike/GitInPracticeRedux/.
2 Run git mv GitInPractice.asciidoc 01-IntroducingGitInPractice.asciidoc. There will be no output.
3 Run git commit --message 'Rename book file to first part file.'. The out-put should resemble the following.
# git commit --message 'Rename book file to first part file.'
[master c6eed66] Rename book file to first part file.1 file changed, 0 insertions(+), 0 deletions(-)rename GitInPractice.asciidoc =>
01-IntroducingGitInPractice.asciidoc (100%)
You’ve renamed GitInPractice.asciidoc to 01-IntroducingGitInPractice.asciidoc andcommitted it.
Discussion
Moving and renaming files in version control systems rather than deleting andre-creating them is done to preserve their history. For example, when a file has beenmoved into a new directory, you’ll still be interested in the previous versions of the filebefore it was moved. In Git’s case, it will try to auto-detect renames or moves on git
Listing 3.1 Output: renamed commit
Commitmessage
No insertions/deletions
Old filename changed to new filename

55TECHNIQUE 18 Removing a file: git rm
add or git commit; if a file is deleted and a new file is created, and those files have amajority of lines in common, Git will automatically detect that the file was moved andgit mv isn’t necessary. Despite this handy feature, it’s good practice to use git mv soyou don’t need to wait for a git add or git commit for Git to be aware of the moveand so you have consistent behavior across different versions of Git (which may havediffering move auto-detection behavior).
After running git mv, the move or rename will be added to Git’s index stagingarea, which, if you remember from technique 2, means the change has been stagedfor inclusion in the next commit.
It’s also possible to rename files or directories and move files or directories intoother directories in the same Git repository using the git mv command and the samesyntax as earlier. If you want to move files into or out of a repository, you must use adifferent, non-Git command (such as a Unix mv command), because Git doesn’t han-dle moving files between different repositories with git mv.
WHAT IF THE NEW FILENAME ALREADY EXISTS? If the filename you move toalready exists, you’ll need to use the git mv -f (or --force) option to requestthat Git overwrite whatever file is at the destination. If the destination filehasn’t already been added or committed to Git, then it won’t be possible toretrieve the contents if you erroneously asked Git to overwrite it.
Technique 18 Removing a file: git rmLike moving and renaming files, removing files from version control systems requiresnot just performing the filesystem operation as usual, but also notifying Git and com-mitting the file. In almost any version-controlled project, you’ll at some point want toremove some files, so it’s essential to know how to do so. Removing version-controlledfiles is also safer than removing non-version-controlled files because even afterremoval, the files still exist in the history.
Sometimes tools that don’t interact with Git may remove files for you and requireyou to manually indicate to Git that you wish these files to be removed. For testingpurposes, let’s create and commit a temporary file to be removed:
1 Change to the directory containing your repository; for example, cd /Users/mike/GitInPracticeRedux/.
2 Run echo Git Sandwich > GitInPracticeReviews.tmp. This creates a new filenamed GitInPracticeReviews.tmp with the contents “Git Sandwich”.
3 Run git add GitInPracticeReviews.tmp.4 Run git commit --message 'Add review temporary file.'.
Note that if git add fails, you may have *.tmp in a .gitignore file somewhere (intro-duced in technique 21). In this case, add it using git add --force GitInPractice-Reviews.tmp.
56 CHAPTER 3 Filesystem interactions
Problem
You wish to remove a previously committed file named GitInPracticeReviews.tmp inyour Git working directory and commit the removed file.
Solution
1 Change to the directory containing your repository; for example, cd /Users/mike/GitInPracticeRedux/.
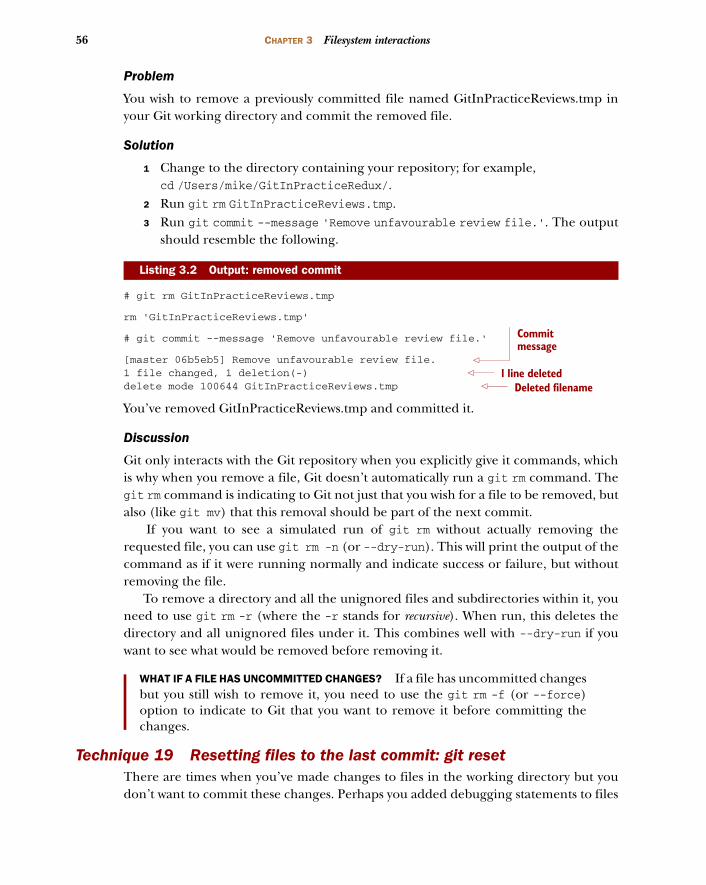
2 Run git rm GitInPracticeReviews.tmp.3 Run git commit --message 'Remove unfavourable review file.'. The output
should resemble the following.
# git rm GitInPracticeReviews.tmp
rm 'GitInPracticeReviews.tmp'
# git commit --message 'Remove unfavourable review file.'
[master 06b5eb5] Remove unfavourable review file.1 file changed, 1 deletion(-)delete mode 100644 GitInPracticeReviews.tmp
You’ve removed GitInPracticeReviews.tmp and committed it.
Discussion
Git only interacts with the Git repository when you explicitly give it commands, whichis why when you remove a file, Git doesn’t automatically run a git rm command. Thegit rm command is indicating to Git not just that you wish for a file to be removed, butalso (like git mv) that this removal should be part of the next commit.
If you want to see a simulated run of git rm without actually removing therequested file, you can use git rm -n (or --dry-run). This will print the output of thecommand as if it were running normally and indicate success or failure, but withoutremoving the file.
To remove a directory and all the unignored files and subdirectories within it, youneed to use git rm -r (where the -r stands for recursive). When run, this deletes thedirectory and all unignored files under it. This combines well with --dry-run if youwant to see what would be removed before removing it.
WHAT IF A FILE HAS UNCOMMITTED CHANGES? If a file has uncommitted changesbut you still wish to remove it, you need to use the git rm -f (or --force)option to indicate to Git that you want to remove it before committing thechanges.
Technique 19 Resetting files to the last commit: git resetThere are times when you’ve made changes to files in the working directory but youdon’t want to commit these changes. Perhaps you added debugging statements to files
Listing 3.2 Output: removed commit
Commit message
1 line deletedDeleted filename

57TECHNIQUE 20 Deleting untracked files: git clean
and have now committed a fix, so you want to reset all the files that haven’t been com-mitted to their last committed state (on the current branch).
Problem
You wish to reset the state of all the files in your working directory to their last commit-ted state.
Solution
1 Change to the directory containing your repository: for example, cd /Users/mike/GitInPracticeRedux/.
2 Run echo EXTRA >> 01-IntroducingGitInPractice.asciidoc to append“EXTRA” to the end of 01-IntroducingGitInPractice.asciidoc.
3 Run git reset --hard. The output should resemble the following.
# git reset --hard
HEAD is now at 06b5eb5 Remove unfavourable review file.
You’ve reset the Git working directory to the last committed state.
Discussion
The --hard argument signals to git reset that you want it to reset both the index stag-ing area and the working directory to the state of the previous commit on this branch.If run without an argument, it defaults to git reset --mixed, which resets the indexstaging area but not the contents of the working directory. In short, git reset --mixedonly undoes git add, but git reset --hard undoes git add and all file modifications.
git reset will be used to perform more operations (including those that alter his-tory) later, in technique 42.
DANGERS OF USING GIT RESET - -HARD Take care when you use git reset--hard; it will immediately and without prompting remove all uncommittedchanges to any file in your working directory. This is probably the commandthat has caused me more regret than any other; I’ve typed it accidentally andremoved work I hadn’t intended to. Remember that in section 1.1 youlearned that it’s very hard to lose work with Git? If you have uncommittedwork, this is one of the easiest ways to lose it! A safer option may be to useGit’s stash functionality instead.
Technique 20 Deleting untracked files: git cleanWhen working in a Git repository, some tools may output undesirable files into yourworking directory. Some text editors may use temporary files, operating systemsmay write thumbnail cache files, or programs may write crash dumps. Alternatively,sometimes there may be files that are desirable, but you don’t wish to commit them
Listing 3.3 Output: hard reset
Reset commit
58 CHAPTER 3 Filesystem interactions
to your version control system; instead you want to remove them to build clean ver-sions (although this is generally better handled by ignoring these files, as shown intechnique 21).
When you wish to remove these files, you could remove them manually. But it’s eas-ier to ask Git to do so, because it already knows which files in the working directoryare versioned and which are untracked.
You can view the files that are currently tracked by running git ls-files. This cur-rently only shows 01-IntroducingGitInPractice.asciidoc, because that is the only filethat has been added to the Git repository. You can run git ls-files --others (or -o)to show the currently untracked files (there should be none).
For testing purposes, let’s create a temporary file to be removed:
1 Change to the directory containing your repository; for example, cd /Users/mike/GitInPracticeRedux/.
2 Run echo Needs more cowbell > GitInPracticeIdeas.tmp. This creates a newfile named GitInPracticeIdeas.tmp with the contents “Needs more cowbell”.
Problem
You wish to remove an untracked file named GitInPracticeIdeas.tmp from a Git work-ing directory.
Solution
1 Change to the directory containing your repository; for example, cd /Users/mike/GitInPracticeRedux/.
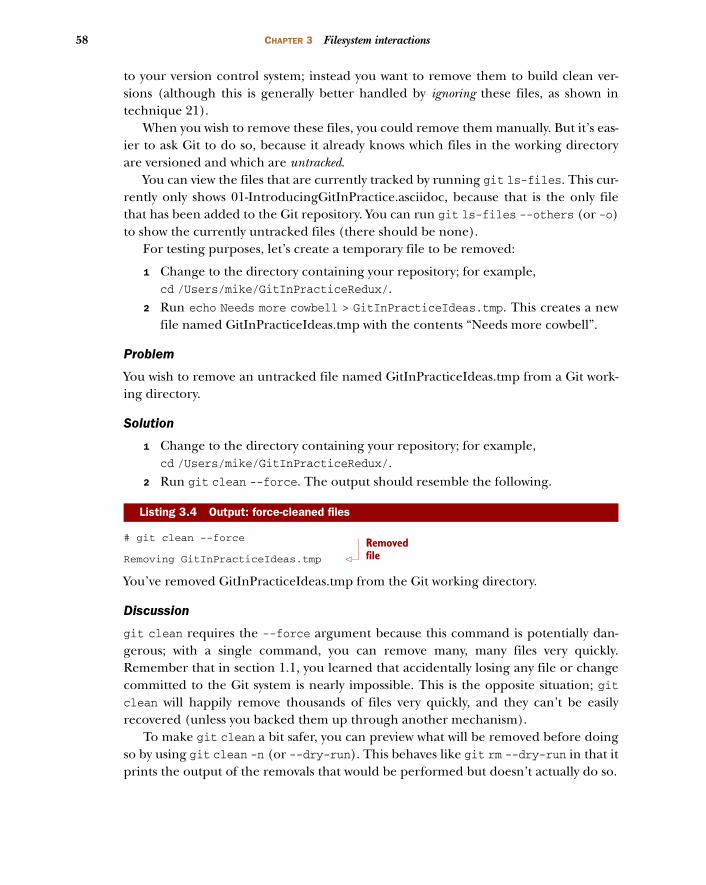
2 Run git clean --force. The output should resemble the following.
# git clean --force
Removing GitInPracticeIdeas.tmp
You’ve removed GitInPracticeIdeas.tmp from the Git working directory.
Discussion
git clean requires the --force argument because this command is potentially dan-gerous; with a single command, you can remove many, many files very quickly.Remember that in section 1.1, you learned that accidentally losing any file or changecommitted to the Git system is nearly impossible. This is the opposite situation; gitclean will happily remove thousands of files very quickly, and they can’t be easilyrecovered (unless you backed them up through another mechanism).
To make git clean a bit safer, you can preview what will be removed before doingso by using git clean -n (or --dry-run). This behaves like git rm --dry-run in that itprints the output of the removals that would be performed but doesn’t actually do so.
Listing 3.4 Output: force-cleaned files
Removed file

59TECHNIQUE 21 Ignoring files: .gitignore
To remove untracked directories as well as untracked files, you can use the -d(“directory”) parameter.
Technique 21 Ignoring files: .gitignoreAs discussed in technique 20, sometimes working directories contain files that areuntracked by Git, and you don’t want to add them to the repository. Sometimes thesefiles are one-off occurrences; you accidentally copy a file to the wrong directory andwant to delete it. More often, they’re the product of software (such as the softwarestored in the version control system or some part of your operating system) puttingfiles into the working directory of your version control system.
You could git clean these files each time, but that would rapidly become tedious.Instead, you can tell Git to ignore them so it never complains about these files beinguntracked and you don’t accidentally add them to commits.
Problem
You wish to ignore all files with the extension .tmp in a Git repository.
Solution
1 Change to the directory containing your repository: for example,cd /Users/mike/GitInPracticeRedux/.
2 Run echo \*.tmp > .gitignore. This creates a new file named .gitignore withthe contents “*.tmp”.
3 Run git add .gitignore to add .gitignore to the index staging area for the nextcommit. There will be no output.
4 Run git commit --message='Ignore .tmp files.'. The output should resem-ble the following.
# git commit --message='Ignore .tmp files.'
[master 0b4087c] Ignore .tmp files.1 file changed, 1 insertion(+)create mode 100644 .gitignore
You’ve added a .gitignore file with instructions to ignore all .tmp files in the Git work-ing directory.
Discussion
Each line of a .gitignore file matches files with a pattern. For example, you can addcomments by starting a line with a # character or negate patterns by starting a linewith a ! character. Read more about the pattern syntax in git help gitignore.
Listing 3.5 Output: ignore file commit
Commit message
1 line deletedCreated filename
60 CHAPTER 3 Filesystem interactions
A good and widely held principle for version control systems is to avoid commit-ting output files to a version control repository. Output files are those that are createdfrom input files that are stored in the version control repository.
For example, you may have a hello.c file that is compiled into a hello.o object file.The hello.c input file should be committed to the version control system, but thehello.o output file should not.
Committing .gitignore to the Git repository makes it easy to build up lists ofexpected output files so they can be shared between all the users of a repository andnot accidentally committed. GitHub also provides a useful collection of gitignore filesat https://github.com/github/gitignore.
Let’s try to add an ignored file:
1 Change to the directory containing your repository; for example, cd /Users/mike/GitInPracticeRedux/.
2 Run touch GitInPracticeGoodIdeas.tmp. This creates a new, empty filenamed GitInPracticeGoodIdeas.tmp.
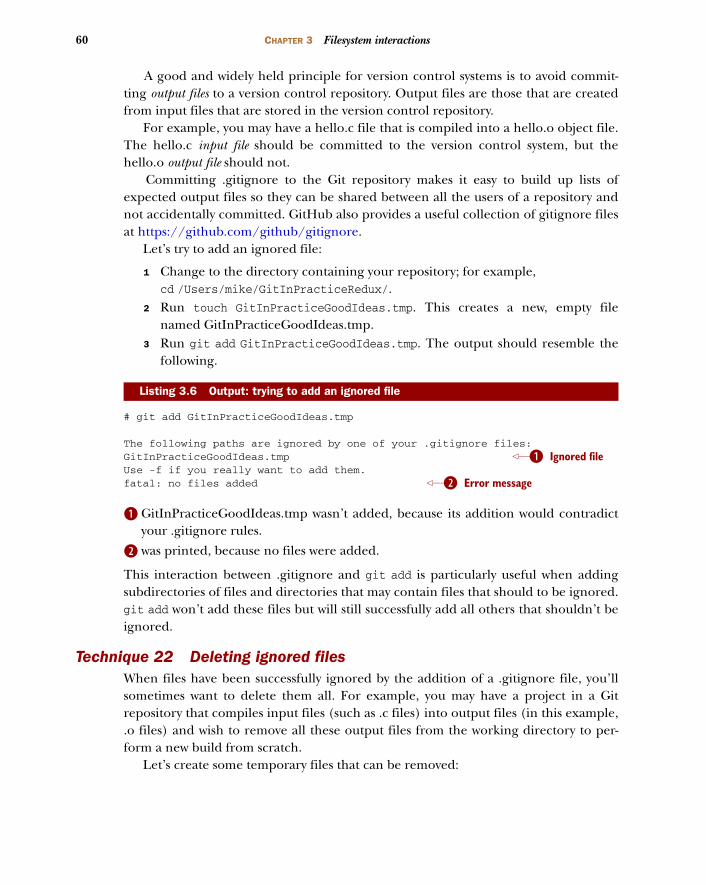
3 Run git add GitInPracticeGoodIdeas.tmp. The output should resemble thefollowing.
# git add GitInPracticeGoodIdeas.tmp
The following paths are ignored by one of your .gitignore files:GitInPracticeGoodIdeas.tmpUse -f if you really want to add them.fatal: no files added
B GitInPracticeGoodIdeas.tmp wasn’t added, because its addition would contradictyour .gitignore rules.
C was printed, because no files were added.
This interaction between .gitignore and git add is particularly useful when addingsubdirectories of files and directories that may contain files that should to be ignored.git add won’t add these files but will still successfully add all others that shouldn’t beignored.
Technique 22 Deleting ignored filesWhen files have been successfully ignored by the addition of a .gitignore file, you’llsometimes want to delete them all. For example, you may have a project in a Gitrepository that compiles input files (such as .c files) into output files (in this example,.o files) and wish to remove all these output files from the working directory to per-form a new build from scratch.
Let’s create some temporary files that can be removed:
Listing 3.6 Output: trying to add an ignored file
Ignored fileB
Error messageC

61TECHNIQUE 23 Temporarily stashing some changes: git stash
1 Change to the directory containing your repository: for example, cd /Users/mike/GitInPracticeRedux/.
2 Run touch GitInPracticeFunnyJokes.tmp GitInPracticeWittyBanter.tmp.
Problem
You wish to delete all ignored files from a Git working directory.
Solution
1 Change to the directory containing your repository: for example, cd /Users/mike/GitInPracticeRedux/.
2 Run git clean --force -X. The output should resemble the following.
# git clean --force -X
Removing GitInPracticeFunnyJokes.tmpRemoving GitInPracticeWittyBanter.tmp
You’ve removed all ignored files from the Git working directory.
Discussion
The -X argument specifies that git clean should remove only ignored files from theworking directory. If you wish to remove ignored files and all the untracked files (asgit clean --force would do), you can instead use git clean -x (note that the -x islowercase rather than uppercase).
The specified arguments can be combined with the others discussed intechnique 20. For example, git clean -xdf removes all untracked or ignored files(-x) and directories (-d) from a working directory. This removes all files and directo-ries for a Git repository that weren’t previously committed. Take care when runningthis; there will be no prompt, and all the files will be quickly deleted.
Often git clean -xdf is run after git reset --hard; this means you’ll have to resetall files to their last-committed state and remove all uncommitted files. This gets you aclean working directory: no added files or changes to any of those files.
Technique 23 Temporarily stashing some changes: git stashThere are times when you may find yourself working on a new commit and want totemporarily undo your current changes but redo them at a later point. Perhaps therewas an urgent issue that means you need to quickly write some code and commit a fix.In this case, you could make a temporary branch and merge it in later, but this wouldadd a commit to the history that may not be necessary. Instead you can stash youruncommitted changes to store them temporarily and then be able to changebranches, pull changes, and so on without needing to worry about these changes get-ting in the way.
Listing 3.7 Output: force-cleaning ignored files
Removed file

62 CHAPTER 3 Filesystem interactions
Problem
You wish to stash all your uncommitted changes for later retrieval.
Solution
1 Change to the directory containing your repository; for example, cd /Users/mike/GitInPracticeRedux/.
2 Run echo EXTRA >> 01-IntroducingGitInPractice.asciidoc.3 Run git stash save. The output should resemble the following.
# git stash save
Saved working directory and index state WIP on master:36640a5 Ignore .tmp files.HEAD is now at 36640a5 Ignore .tmp files.
You’ve stashed your uncommitted changes.
Discussion
git stash save creates a temporary commit with a prepopulated commit message andthen returns your current branch to the state before the temporary commit was made.It’s possible to access this commit directly, but you should only do so through gitstash to avoid confusion.
You can see all the stashes that have been made by running git stash list. Theoutput will resemble the following.
stash@{0}: WIP on master: 36640a5 Ignore .tmp files.
This shows the single stash that you made. You can access it using ref stash@{0}; forexample, git diff stash@{0} will show you the difference between the working direc-tory and the contents of that stash.
If you save another stash, it will become stash@{0} and the previous stash willbecome stash@{1}. This is because the stashes are stored on a stack structure. A stackstructure is best thought of as being like a stack of plates. You add new plates on thetop of the existing plates; and if you remove a single plate, you take it from the top.Similarly, when you run git stash, the new stash is added to the top (it becomesstash@{0}) and the previous stash is no longer at the top (it becomes stash@{1}).
DO YOU NEED TO USE GIT ADD BEFORE GIT STASH? No, git add is not needed.git stash stashes your changes regardless of whether they’ve been added tothe index staging area by git add.
DOES GIT STASH WORK WITHOUT THE SAVE ARGUMENT? If git stash is run withno save argument, it performs the same operation; the save argument isn’t
Listing 3.8 Output: stashing uncommitted changes
Listing 3.9 List of stashes
Current commit
Stashed commit

63TECHNIQUE 24 Reapplying stashed changes: git stash pop
needed. I’ve used it in the examples because it’s more explicit and easier toremember.
Technique 24 Reapplying stashed changes: git stash popWhen you’ve stashed your temporary changes and performed whatever operationsrequired a clean working directory (perhaps you fixed and committed the urgentissue), you’ll want to reapply the changes (because otherwise you could’ve just rungit reset --hard). When you’ve checked out the correct branch again (which maydiffer from the original branch), you can request that the changes be taken from thestash and applied onto the working directory.
Problem
You wish to pop the changes from the last git stash save into the current workingdirectory.
Solution
1 Change to the directory containing your repository; for example, cd /Users/mike/GitInPracticeRedux/.
2 Run git stash pop. The output should resemble the following.
# git stash pop
# On branch master# Changes not staged for commit:# (use "git add <file>..." to update what will be committed)# (use "git checkout -- <file>..." to discard changes in working# directory)## modified: 01-IntroducingGitInPractice.asciidoc#no changes added to commit (use "git add" and/or "git commit -a")Dropped refs/stash@{0} (f7e39e2590067510be1a540b073e74704395e881)
You’ve reapplied the changes from the last git stash save.
Discussion
When running git stash pop, the top stash on the stack (stash@{0}) is applied to theworking directory and removed from the stack. If there’s a second stash in the stack(stash@{1}), it’s now at the top (it becomes stash@{0}). This means if you run gitstash pop multiple times, it will keep working down the stack until no more stashesare found, at which point it will output No stash found.
If you wish to apply an item from the stack multiple times (perhaps on multiplebranches), you can instead use git stash apply. This applies the stash to the workingtree as git stash pop does but keeps the top stack stash on the stack so it can be runagain to reapply.
Listing 3.10 Output: reapplying stashed changes
Current branch output
Begin status output
End status outputStashed
commit
64 CHAPTER 3 Filesystem interactions
Technique 25 Clearing stashed changes: git stash clearYou may have stashed changes with the intent of popping them later, but then realizethat you no longer wish to do so—the changes in the stack are now unnecessary, soyou want to get rid of them all. You could do this by popping each change off the stackand then deleting it, but it would be handy to have a command that allows you to dothis in a single step. Thankfully, git stash clear does just this.
Problem
You wish to clear all previously stashed changes.
Solution
1 Change to the directory containing your repository; for example, cd /Users/mike/GitInPracticeRedux/.
2 Run git stash clear. There will be no output.
You’ve cleared all the previously stashed changes.
Discussion
Clearing the stash is done without a prompt and removes every previous item fromthe stash, so be careful when doing so. Cleared stashes can’t be easily recovered. Forthis reason, once you learn about history rewriting in technique 42, I’d recommendmaking commits and rewriting them later rather than relying too much on git stash.
Technique 26 Assuming files are unchangedSometimes you may wish to make changes to files but have Git ignore the specificchanges you’ve made so that operations such as git stash and git diff ignore thesechanges. In these cases, you could ignore them yourself or stash them elsewhere, butit would be ideal to be able to tell Git to ignore these particular changes.
I’ve found myself in a situation in the past where I wanted to test a Rails configura-tion file change for a week or two while continuing to do my normal work. I didn’twant to commit it because I didn’t want it to apply to servers or my coworkers, but Idid want to continue testing it while I made other commits rather than change to aparticular branch each time.
Problem
You wish for Git to assume there have been no changes made to 01-IntroducingGitIn-Practice.asciidoc.
Solution
1 Change to the directory containing your repository; for example, cd /Users/mike/GitInPracticeRedux/.
65TECHNIQUE 27 Listing assumed-unchanged files
2 Run git update-index --assume-unchanged 01-IntroducingGitInPractice.asciidoc. There will be no output.
Git will ignore any changes made to 01-IntroducingGitInPractice.asciidoc.
Discussion
When you run git update-index --assume-unchanged, Git sets a special flag on thefile to indicate that it shouldn’t be checked for any changes. This can be useful to tem-porarily ignore changes made to a particular file when looking at git status or gitdiff, but also to tell Git to avoid checking a file that is particularly huge and/or slowto read. This isn’t generally a problem on normal filesystems on which Git can quicklyquery whether a file has been modified by checking the File Modified timestamp(rather than having to read the entire file and compare it).
git update-index --assume-unchanged takes only files as arguments, rather thandirectories. If you assume multiple files are unchanged, you need to specify them asmultiple arguments; for example, git update-index --assume-unchanged 00-Preface.asciidoc 01-IntroducingGitInPractice.asciidoc.
The git update-index command has other complex options, but we’ll only coverthose around the “assume” logic. The rest of the behavior is better accessed throughthe git add command; it’s a higher-level and more user-friendly way of modifying thestate of the index.
Technique 27 Listing assumed-unchanged filesWhen you’ve told Git to assume no changes were made to particular files, it can behard to remember which files were updated. In this case, you may end up modifying afile and wondering why Git doesn’t seem to want to show you the changes. Addition-ally, you could forget that you made the changes and be confused as to why the statein your text editor doesn’t seem to match the state that Git is seeing.
Problem
You wish for Git to list all the files that it has been told to assume haven’t changed.
Solution
1 Change to the directory containing your repository; for example, cd /Users/mike/GitInPracticeRedux/.
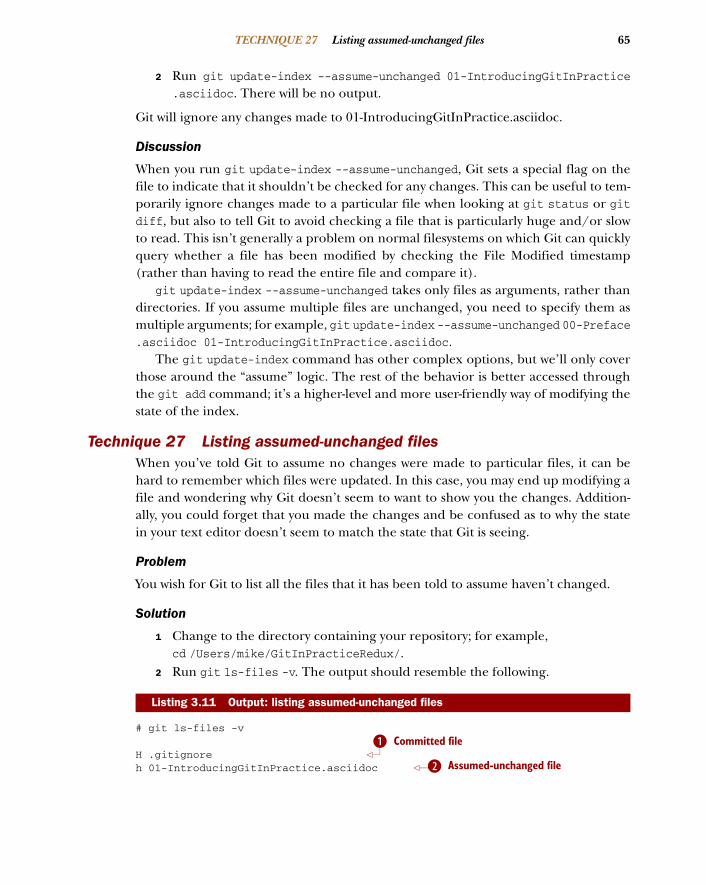
2 Run git ls-files -v. The output should resemble the following.
# git ls-files -v
H .gitignoreh 01-IntroducingGitInPractice.asciidoc
Listing 3.11 Output: listing assumed-unchanged files
Committed fileB
Assumed-unchanged fileC

66 CHAPTER 3 Filesystem interactions
B shows that committed files are indicated by an uppercase H at the beginning of theline.
C shows that an assumed-unchanged file is indicated by a lowercase h tag.
Discussion
Like git update-index, git ls-files -v is a low-level command that you’ll typicallynot run often. git ls-files without any arguments lists the files in the current direc-tory that Git knows about, but the -v argument means it’s followed by tags that indi-cate file state.
Rather than reading through the output for this command, you can instead rungit ls-files -v | grep '^[hsmrck?]' | cut -c 3-. This uses Unix pipes, where theoutput of each command is passed into the next and modified.
grep '^[hsmrck?]' filters the output filenames to show only those that begin withany of the lowercase hsmrck? characters (the valid prefixes output by git ls-files).It’s not important to understand the meanings of any prefixes other than H and h, butyou can read more about them by running git ls-files --help.
cut -c 3- filters the first two characters of each of the output lines: h followed by aspace, in the example.
With these combined, the output should resemble the following.
# git ls-files -v | grep '^[hsmrck?]' | cut -c 3-
01-IntroducingGitInPractice.asciidoc
HOW DO PIPES, GREP, AND CUT WORK? Don’t worry if you don’t understandquite how Unix pipes, grep, and cut work; this book is about Git rather thanshell scripting, after all! Feel free to use the command as is, as a quick way oflisting files that are assumed to be unchanged. To learn more about these, Irecommend the Wikipedia page on Unix filters: http://en.wikipedia.org/wiki/Filter_(Unix).
Technique 28 Stopping assuming files are unchangedUsually, telling Git to assume there have been no changes made to a particular file is atemporary option; if you have to keep files changed in the long term, they shouldprobably be committed. At some point, you’ll want to tell Git to once again monitorany changes made to these files.
With the example I gave previously in technique 26, eventually the Rails configura-tion file change I had been testing was deemed to be successful enough that I wantedto commit it so my coworkers and the servers could use it. If I merely used git add tomake a new commit, then the change wouldn’t show up, so I had to make Git stopignoring this particular change before I could make a new commit.
Listing 3.12 Output: assumed-unchanged files
Assumed-unchanged file
67 Summary
Problem
You wish for Git to stop assuming there have been no changes made to 01-Introducing-GitInPractice.asciidoc.
Solution
1 Change to the directory containing your repository; for example, cd /Users/mike/GitInPracticeRedux/.
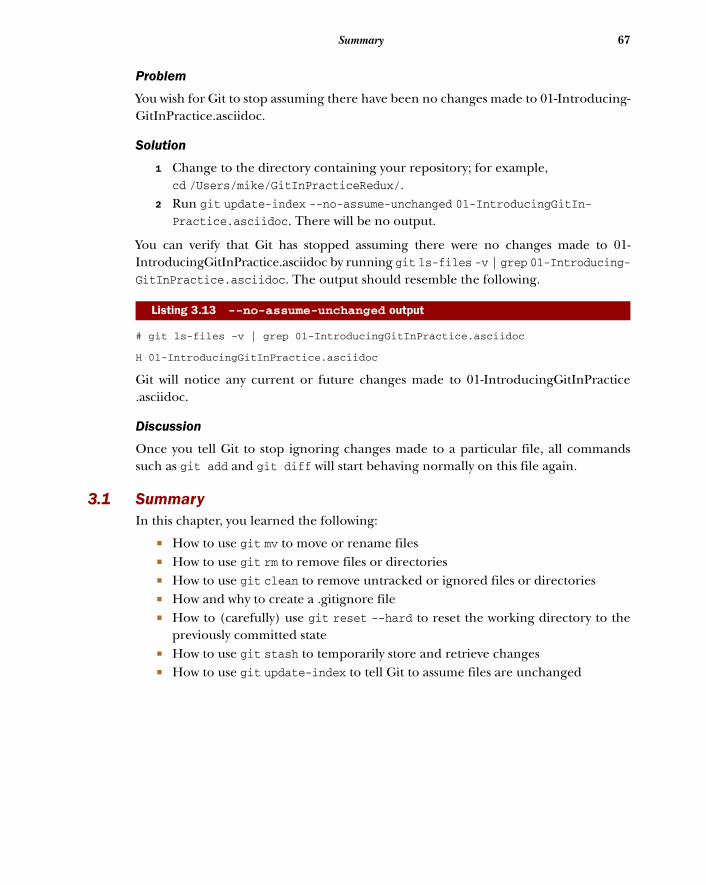
2 Run git update-index --no-assume-unchanged 01-IntroducingGitIn-Practice.asciidoc. There will be no output.
You can verify that Git has stopped assuming there were no changes made to 01-IntroducingGitInPractice.asciidoc by running git ls-files -v | grep 01-Introducing-GitInPractice.asciidoc. The output should resemble the following.
# git ls-files -v | grep 01-IntroducingGitInPractice.asciidoc
H 01-IntroducingGitInPractice.asciidoc
Git will notice any current or future changes made to 01-IntroducingGitInPractice.asciidoc.
Discussion
Once you tell Git to stop ignoring changes made to a particular file, all commandssuch as git add and git diff will start behaving normally on this file again.
3.1 SummaryIn this chapter, you learned the following:
How to use git mv to move or rename files How to use git rm to remove files or directories How to use git clean to remove untracked or ignored files or directories How and why to create a .gitignore file How to (carefully) use git reset --hard to reset the working directory to the
previously committed state How to use git stash to temporarily store and retrieve changes How to use git update-index to tell Git to assume files are unchanged
Listing 3.13 --no-assume-unchanged output

84
Advanced branching
When working as part of a team on a software project, you’ll typically use branchesto separate work between individuals, features, bug fixes, and software releases. Youshould already be able to perform some basic branching actions, such as creating,deleting, and merging a branch. This chapter will expand on those so you canimprove your branching workflow to be more effective. Let’s start by learning howto use some of the parameters provided by git merge.
This chapter covers Configuring git merge’s behavior
Resolving merge conflicts
Avoiding having to solve the same merge conflicts multiple times
Creating a tag
Generating a version number from previous tags
Bringing individual commits from one branch to another
Reverting a previous commit
Listing what branches contain a given commit

85TECHNIQUE 33 Merging branches and always creating a merge commit
Technique 33 Merging branches and always creating a merge commit
You learned in technique 14 how to perform a basic merge of two branches by usinggit merge branchname, where branchname is the name of the branch you wish tomerge into the current branch.
Recall that a merge commit is one that has multiple parents and is displayed in GitXby the convergence of two or more branch tracks. git merge provides various optionsfor merging branches without creating merge commits, using various strategies orresolving conflicts with a graphical merge tool.
WHY WOULD YOU WANT TO FORCE THE CREATION OF A MERGE COMMIT? Althoughfast-forward merges can sometimes be useful in some Git workflows, youshould explicitly signify the merging of a branch even if it isn’t necessary todo so. This explicit indication of a merge through the creation of a mergecommit can show all the metadata present in any other commit, such as whoperformed the merge, when, and why. In software projects, merging a newfeature is usually done by merging a branch, and it’s useful for regression test-ing and history visualization for this feature merge to be more explicit.
Let’s start by setting up how to perform a merge that could be made without creatinga merge commit: a fast-forward merge. Recall that a fast-forward merge means theincoming branch has the current branch as an ancestor. This means commits havebeen made on the incoming branch, but none have been made on the current branchsince the incoming branch was branched from it.
You’re creating a branch that can have a fast-forward merge. This is so when youcreate a merge commit, you know it was because it was specifically requested, notbecause it was required.
Let’s create a branch that can be merged without a merge commit:
1 Change to the directory containing your repository: for example, cd /Users/mike/GitInPracticeRedux/.
2 Run git checkout -b chapter-spacing.3 Edit 01-IntroducingGitInPractice.asciidoc to add a line break between chapters.4 Run git commit --message 'Add spacing between chapters' 01-Introducing-
GitInPractice.asciidoc. The output should resemble the following.
# git commit --message 'Add spacing between chapters'01-IntroducingGitInPractice.asciidoc
[chapter-spacing 4426877] Add spacing between chapters1 file changed, 1 insertion(+)
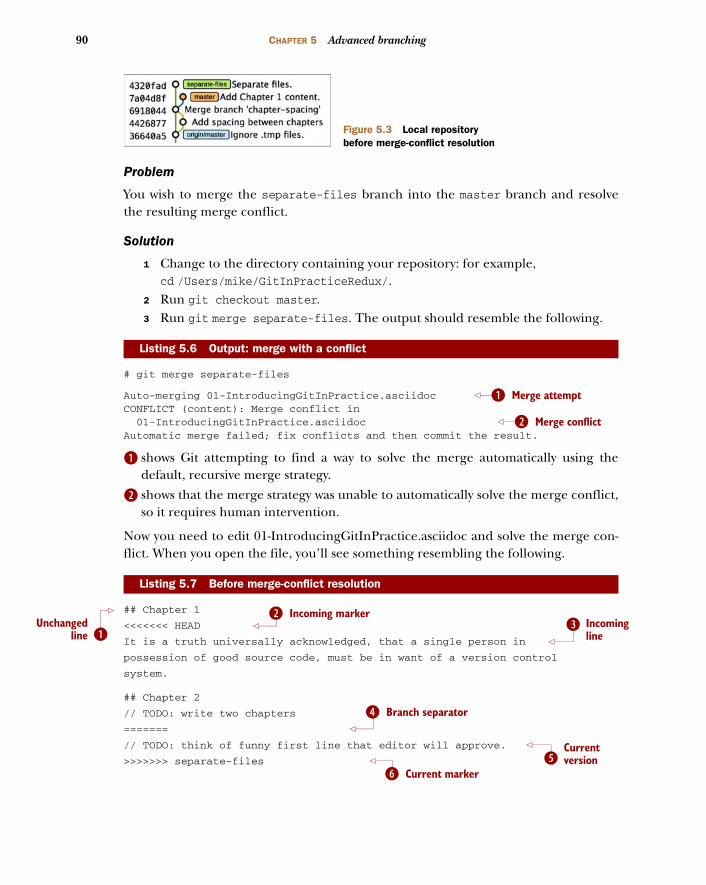
You can see from figure 5.1 that you’ve created a new branch named chapter-spacingthat can be merged without a merge commit into the master branch.
Listing 5.1 Output: fast-forward branch commit

86 CHAPTER 5 Advanced branching
Problem
You wish to merge the chapter-spacing branch into the master branch and create amerge commit—not perform a fast-forward merge.
Solution
1 Change to the directory containing your repository: for example, cd /Users/mike/GitInPracticeRedux/.
2 Run git checkout master.3 Run git merge --no-ff chapter-spacing. You’ll be prompted for a commit mes-
sage, but you can accept the default. The output should resemble the following.
# git merge --no-ff chapter-spacing
Merge made by the 'recursive' strategy.01-IntroducingGitInPractice.asciidoc | 1 +1 file changed, 1 insertion(+)
B shows that this was a merge (rather than a fast-forward) and therefore produced amerge commit. It used the recursive Git merge strategy (we’ll discuss strategies morein the discussion section).
C shows a short summary of the changes made in this merge commit—all the differ-ences between the master branch and the chapter-spacing branch.
You can now delete the merged chapter-spacing branch by running git branch--delete chapter-spacing from the master branch.
You’ve now merged the chapter-spacing branch into the master branch andforced a merge commit to be created.
Discussion
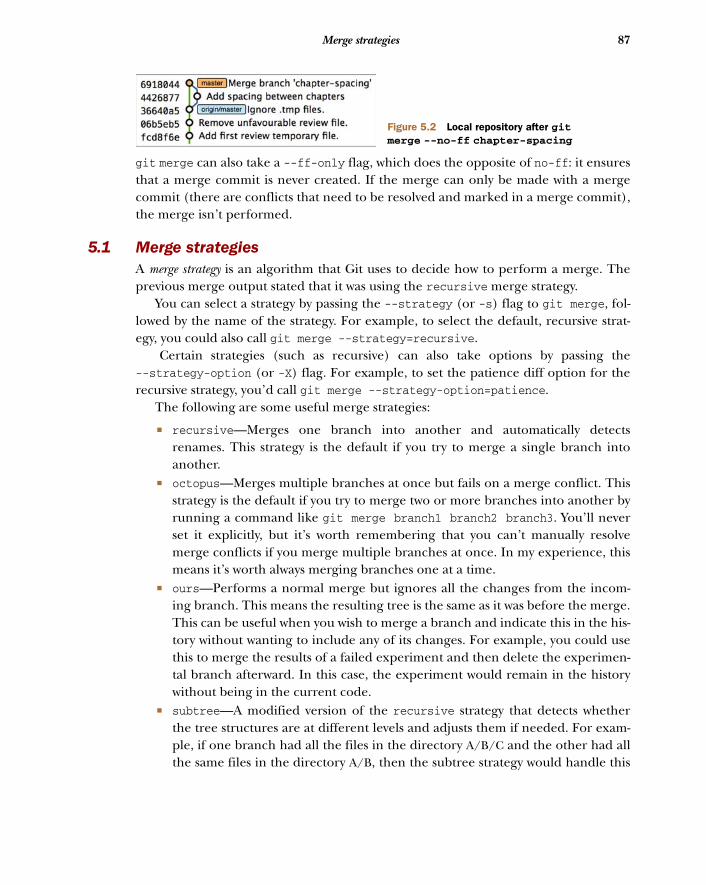
A merge commit has two parents: the previous commit on the current branch (masterin this case) and the previous commit on the incoming branch (chapter-spacing inthis case). You can see from figure 5.2 that GitX shows a merge commit differentlyfrom a fast-forward. Even when the chapter-spacing branch is deleted, the existenceof a branch remains implied by the visual branching and merging in GitX.
In this case, where the branch contained a single commit, this may not be terriblyuseful. But on larger features, this explicit indication of branches can aid historyvisualization.
Listing 5.2 Output: forced merge commit
Figure 5.1 Local repository before merge without a merge commit
Merge typeB
Diff summaryC
87 Merge strategies
git merge can also take a --ff-only flag, which does the opposite of no-ff: it ensuresthat a merge commit is never created. If the merge can only be made with a mergecommit (there are conflicts that need to be resolved and marked in a merge commit),the merge isn’t performed.
5.1 Merge strategiesA merge strategy is an algorithm that Git uses to decide how to perform a merge. Theprevious merge output stated that it was using the recursive merge strategy.
You can select a strategy by passing the --strategy (or -s) flag to git merge, fol-lowed by the name of the strategy. For example, to select the default, recursive strat-egy, you could also call git merge --strategy=recursive.
Certain strategies (such as recursive) can also take options by passing the--strategy-option (or -X) flag. For example, to set the patience diff option for therecursive strategy, you’d call git merge --strategy-option=patience.
The following are some useful merge strategies:
recursive—Merges one branch into another and automatically detectsrenames. This strategy is the default if you try to merge a single branch intoanother.
octopus—Merges multiple branches at once but fails on a merge conflict. Thisstrategy is the default if you try to merge two or more branches into another byrunning a command like git merge branch1 branch2 branch3. You’ll neverset it explicitly, but it’s worth remembering that you can’t manually resolvemerge conflicts if you merge multiple branches at once. In my experience, thismeans it’s worth always merging branches one at a time.
ours—Performs a normal merge but ignores all the changes from the incom-ing branch. This means the resulting tree is the same as it was before the merge.This can be useful when you wish to merge a branch and indicate this in the his-tory without wanting to include any of its changes. For example, you could usethis to merge the results of a failed experiment and then delete the experimen-tal branch afterward. In this case, the experiment would remain in the historywithout being in the current code.
subtree—A modified version of the recursive strategy that detects whetherthe tree structures are at different levels and adjusts them if needed. For exam-ple, if one branch had all the files in the directory A/B/C and the other had allthe same files in the directory A/B, then the subtree strategy would handle this
Figure 5.2 Local repository after git merge --no-ff chapter-spacing

88 CHAPTER 5 Advanced branching
case; A/B/C/README.md and A/B/README.md could be merged despite theirdifferent tree locations.
Some useful merge strategy options for a recursive merge (currently the only strategywith options) are as follows:
ours—Automatically solves any merge conflicts by always selecting the previousversion from the current branch (instead of the version from the incomingbranch).
theirs—The reverse of ours. This option automatically solves any merge con-flicts by always selecting the version from the incoming branch (instead of theprevious version from the current branch).
patience—Uses a slightly more expensive git diff algorithm to try to decreasethe chance of a merge conflict.
ignore-all-space—Ignores whitespace when selecting which version shouldbe chosen in case of a merge conflict. If the incoming branch has made onlywhitespace changes to a line, the change is ignored. If the current branch hasintroduced whitespace changes but the incoming branch has made non-whitespace changes, then that version is used.
Neither of these lists is exhaustive, but these are the strategies and options I’ve foundare most commonly used. You can examine all the merge strategies and options byrunning git help merge.
Technique 34 Resolving a merge conflictAs mentioned previously, sometimes when you merge one branch into another, therewill have been changes to the same part of the same file in both branches, and Git can’tdetect automatically which of these changes is the desired one to include. In this situ-ation you have what’s known as a merge conflict, which you’ll need to resolve manually.
These situations tend to occur more often in software projects where multipleusers are working on the same project at the same time. One user might make a bugfix to a file while another refactors it, and when the branches are merged, a mergeconflict results.
Let’s create a new branch and change the same files in both branches to produce amerge conflict:
1 Change to the directory containing your repository: for example, cd /Users/mike/GitInPracticeRedux/.
2 Run git checkout -b separate-files.3 Run git mv 01-IntroducingGitInPractice.asciidoc 00-Preface.asciidoc.4 Cut the “Chapter 2” section from 00-Preface.asciidoc, and paste it into a new
file named 02-AdvancedGitInPractice.asciidoc.5 Cut the “Chapter 1” section from 00-Preface.asciidoc, and paste it into a new
file named 01-IntroducingGitInPractice.asciidoc.
89TECHNIQUE 34 Resolving a merge conflict
6 Run git add.7 Run git commit --message 'Separate files.'. The output should resemble
the following.
# git commit --message 'Separate files.'
[separate-files 4320fad] Separate files.3 files changed, 3 insertions(+), 4 deletions(-)create mode 100644 00-Preface.asciidoccreate mode 100644 02-AdvancedGitInPractice.asciido
Now let’s change the same file in the master branch:
1 Change to the directory containing your repository: for example, cd /Users/mike/GitInPracticeRedux/.
2 Run git checkout master.3 Edit 01-IntroducingGitInPractice.asciidoc to add content for chapter 1.4 Run git commit --message 'Add Chapter 1 content.' 01-IntroducingGit-
InPractice.asciidoc. The output should resemble the following.
# git commit --message 'Add Chapter 1 content.'01-IntroducingGitInPractice.asciidoc
[master 7a04d8f] Add Chapter 1 content.1 file changed, 3 insertions(+), 1 deletion(-)
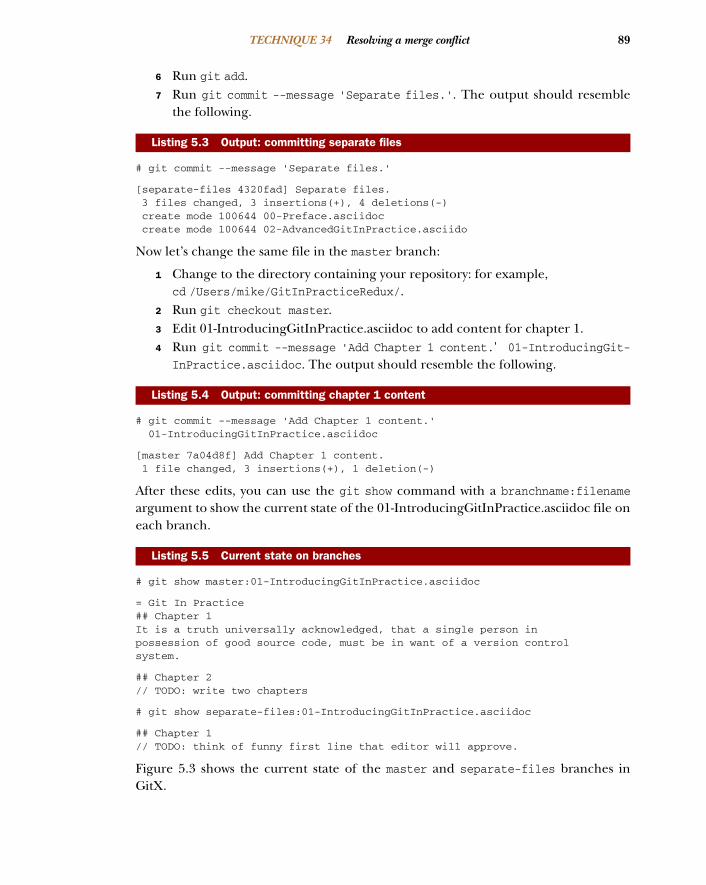
After these edits, you can use the git show command with a branchname:filenameargument to show the current state of the 01-IntroducingGitInPractice.asciidoc file oneach branch.
# git show master:01-IntroducingGitInPractice.asciidoc
= Git In Practice## Chapter 1It is a truth universally acknowledged, that a single person inpossession of good source code, must be in want of a version controlsystem.
## Chapter 2// TODO: write two chapters
# git show separate-files:01-IntroducingGitInPractice.asciidoc
## Chapter 1// TODO: think of funny first line that editor will approve.
Figure 5.3 shows the current state of the master and separate-files branches inGitX.
Listing 5.3 Output: committing separate files
Listing 5.4 Output: committing chapter 1 content
Listing 5.5 Current state on branches
90 CHAPTER 5 Advanced branching
Problem
You wish to merge the separate-files branch into the master branch and resolvethe resulting merge conflict.
Solution
1 Change to the directory containing your repository: for example, cd /Users/mike/GitInPracticeRedux/.
2 Run git checkout master.3 Run git merge separate-files. The output should resemble the following.
# git merge separate-files
Auto-merging 01-IntroducingGitInPractice.asciidocCONFLICT (content): Merge conflict in
01-IntroducingGitInPractice.asciidocAutomatic merge failed; fix conflicts and then commit the result.
B shows Git attempting to find a way to solve the merge automatically using thedefault, recursive merge strategy.
C shows that the merge strategy was unable to automatically solve the merge conflict,so it requires human intervention.
Now you need to edit 01-IntroducingGitInPractice.asciidoc and solve the merge con-flict. When you open the file, you’ll see something resembling the following.
## Chapter 1
<<<<<<< HEAD
It is a truth universally acknowledged, that a single person in
possession of good source code, must be in want of a version control
system.
## Chapter 2
// TODO: write two chapters
=======
// TODO: think of funny first line that editor will approve.
>>>>>>> separate-files
Listing 5.6 Output: merge with a conflict
Listing 5.7 Before merge-conflict resolution
Figure 5.3 Local repository before merge-conflict resolution
Merge attemptB
Merge conflictC
Unchangedline B
Incoming markerCIncoming line
D
Branch separatorE
Current versionF
Current markerG

91TECHNIQUE 34 Resolving a merge conflict
Recall this output and annotations from section 2.2:
B is provided for context.
C starts the current branch section containing the lines from the current branch (ref-erenced by HEAD here).
D shows a line from the incoming branch.
E starts the section containing the lines from the incoming branch.
F shows a line from the current branch.
g ends the section containing the lines from the incoming branch (referenced byseparate-files, the name of the branch being merged in).
You now need to edit the file so it has the correct version. In this case, this involvesremoving the chapter 2 section, because it was moved to another file in the separate-files branch, and using the new chapter 1 content that was entered in the masterbranch (here indicated by the HEAD section).
After editing, the file should resemble the following.
## Chapter 1It is a truth universally acknowledged, that a single person inpossession of good source code, must be in want of a version controlsystem.
Now that the merge conflict has been resolved, it can be marked as resolved with gitadd and then the merge commit committed. You don’t need to run git merge again;you’re still in the middle of a merge operation, which concludes when you git commit:
1 Change to the directory containing your repository: for example, cd /Users/mike/GitInPracticeRedux/.
2 Run git add 01-IntroducingGitInPractice.asciidoc.3 Run git commit. Accept the default commit message. The output should resem-
ble the following.
[master 725c33a] Merge branch 'separate-files'
You can run git branch --delete separate-files to delete the branch now that it’smerged.
You’ve merged two branches and resolved a merge conflict.
Discussion
Merge commits have default commit message formats and slightly different diff out-put. Let’s take a look at the merge commit by running git show master.
Listing 5.8 After merge-conflict resolution
Listing 5.9 Output: committing the merge conflict

92 CHAPTER 5 Advanced branching
# git show master
commit 725c33ace6cd7b281c2d3b342ca05562d3dc7335Merge: 7a04d8f 4320fadAuthor: Mike McQuaid <[email protected]>Date: Sat Feb 1 14:55:38 2014 +0100
Merge branch 'separate-files'
Conflicts:01-IntroducingGitInPractice.asciidoc
diff --cc 01-IntroducingGitInPractice.asciidocindex 6a10e85,848ed39..c9cda9c--- a/01-IntroducingGitInPractice.asciidoc+++ b/01-IntroducingGitInPractice.asciidoc@@@ -1,8 -1,2 +1,4 @@@- = Git In Practice 1
== Chapter 1-// TODO: think of funny first line that editor will approve.+It is a truth universally acknowledged, that a single person in+possession of good source code, must be in want of a version control+system.
-- == Chapter 2- // TODO: write two chapters
B shows the default commit message subject for merge commits. It specifies theincoming branch name. It can be changed; but I prefer to leave it as is and add anyadditional information in the commit message body instead, so it’s easily recogniz-able from the subject alone as a merge commit.
C shows a file that had conflicts to be resolved manually. Sometimes these conflictsmay be resolved incorrectly, so this list is useful in spotting which files required res-olution so they can be reviewed by other people later.
D shows a line that was deleted in the incoming (separate-files) branch’s com-mit(s). The - is in the first column as a result.
E shows a line that was deleted in the current (master) branch’s commit(s). The - isin the second column as a result.
F shows a line that was inserted in the current (master) branch’s commit(s). The + isin the second column as a result.
In this diff there are two columns (rather than the usual one) allocated for - and +markers. This is because whereas a normal diff indicates insertions into and deletionsfrom a file, this merge diff shows file insertions and deletions and the branch in whichthey were inserted or removed. For example, in the preceding listing, the first columnindicates a line inserted into or deleted from the incoming branch (separate-files), and the second column indicates a line inserted into or deleted from thecurrent branch (master). Don’t worry about identifying which column is which; it’snot very important but provides more context for changes.
Listing 5.10 Output: merge commit
Merge subjectB
Conflicted fileC
Incoming deleteD Current delete
E
Current insert F

93 Using a graphical merge tool
You can see from figure 5.4 that thechanges from both branches are visible inthe GitX output and that they’re not alwaysshown in chronological order. The AddChapter 1 content commit occurs before theSeparate files. commit even although itwas made 3 minutes later.
5.2 Using a graphical merge toolInstead of manually editing the contents of a file, you can instead run git mergetool,which runs a graphical merge tool such as emerge, gvimdiff, kdiff3, meld, vimdiff,opendiff, or tortoisemerge. Details of how to configure git mergetool to use yourtool of choice are available by running git help mergetool.
Sometimes it can be helpful to use a graphical merge tool to be able to visualizeconflicts graphically and understand how they relate to the changes that have beenmade by viewing them, say, side by side. Although I personally tend not to use thesetools anymore, I found them useful when learning how to use version control.
You can also customize the tool that is used to specify your own merge tools.Figure 5.5 shows the opendiff tool provided with OS X being used to resolve the pre-vious merge conflict.
WHO SHOULD RESOLVE MERGE CONFLICTS? In Git, the person who makes amerge (runs the git merge command) should always be the person whoresolves a merge conflict. This may differ from other version control systems.Additionally, this may sometimes mean that if a conflict resolution requires aparticular member of a team to be able to pick the correct resolution, the gitmerge should be done by this person.
Figure 5.5 opendiff merge-conflict resolution
Figure 5.4 Local repository after merge-conflict resolution
94 CHAPTER 5 Advanced branching
Technique 35 Resolving each merge conflict only once: git rerereYou may find yourself in a situation where you have a long-running branch that youhave to keep merging in another branch, and you get the same merge conflicts everytime. It can be frustrating to have to manually resolve the same merge conflict multipletimes; after all, isn’t repeatedly performing boring tasks what computers are good for?
Git has a command named git rerere (which stands for “Reuse Recorded Resolu-tion”) that integrates with the normal git merge workflow to record the resolution ofmerge conflicts for later replay. In short, you only need to solve a particular merge con-flict once. I always tend to enable this when I use Git, because it runs automatically toensure that I don’t need to solve the same merge conflicts multiple times if I’m doingsomething like repeatedly merging the same branch, which produces the same conflict.
When git rerere is enabled, it stores the changes before a merge conflict andcompares them to after the merge conflict was resolved. This is used to fingerprint aparticular merge conflict based on the entire contents of the conflict (the changesfrom both branches). This fingerprint is then used whenever there’s another mergeconflict, to compare against all the previously resolved merge conflicts. If a mergeconflict is detected to be the same, then git rerere reuses the previously recordedmerge-conflict resolution and edits the files as if you had resolved it manually. You stillneed to use git add to mark the merge conflict as resolved, however; this is in caseyou’ve decided to resolve this merge conflict in a slightly different way, so Git gives youa chance to edit it.
Let’s learn how to set up git rerere.
Problem
You want to set up git rerere to integrate with the merge workflow so you don’t needto repeatedly resolve the same merges.
Solution
Run git config --global --add rerere.enabled 1. There will be no output. You’ve enabled git rerere to automatically save and retrieve merge-conflict reso-
lutions in all repositories.
Discussion
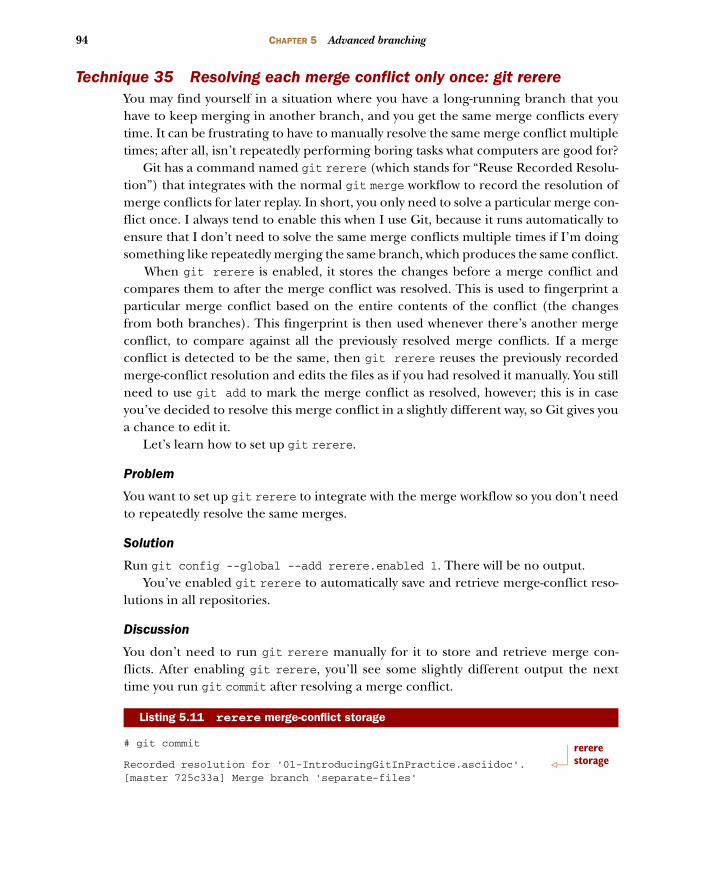
You don’t need to run git rerere manually for it to store and retrieve merge con-flicts. After enabling git rerere, you’ll see some slightly different output the nexttime you run git commit after resolving a merge conflict.
# git commit
Recorded resolution for '01-IntroducingGitInPractice.asciidoc'.[master 725c33a] Merge branch 'separate-files'
Listing 5.11 rerere merge-conflict storage
rerere storage

95TECHNIQUE 36 Creating a tag: git tag
git rerere has been run by git commit to store the conflict and resolution so it canrecall the same resolution when it sees the same conflict.
The output is as follows if the same conflict is seen again.
# git merge separate-files
Auto-merging 01-IntroducingGitInPractice.asciidocCONFLICT (content): Merge conflict in
01-IntroducingGitInPractice.asciidocResolved '01-IntroducingGitInPractice.asciidoc' using
previous resolution.Automatic merge failed; fix conflicts and then commit the result.
git rerere has again been run by git merge to retrieve the resolution for the identi-cal conflict. You still need to run git add to accept the conflict, and you can use gitdiff or edit the file to ensure that the resolution was as expected and desired.
HOW CAN YOU MAKE GIT RERERE FORGET AN INCORRECT RESOLUTION? Some-times you may want to make git rerere forget a resolution for a particularfile because you resolved it incorrectly. In this case, you can use git rererewith a path to forget any resolutions for that file or directory. For example, toforget the resolution on 01-IntroducingGitInPractice.asciidoc, you’d run gitrerere forget 01-IntroducingGitInPractice.asciidoc. There will be nooutput.
Technique 36 Creating a tag: git tagRemember refs from section 1.7? A tag is another ref (or pointer) for a single commit.Tags differ from branches in that they’re (usually) permanent. Rather than pointingto the work in progress on a feature, they’re generally used to describe a version of asoftware project.
For example, if you were releasing version 1.3 of your software project, you’d tagthe commit that you release to customers as v1.3 to store that version for later use.Then if a customer later complained about something being broken in v1.3, youcould check out that tagged commit and test against it, confident that you were usingthe same version of the software that the customer was. This is one of the reasons youshouldn’t modify tags; once you’ve released a version to customers, if you want toupdate it, you’ll likely release a new version such as 1.4 rather than changing the defi-nition of 1.3.
Figure 5.6 shows the current state of the master branch in GitX before the tag hasbeen created.
Listing 5.12 rerere merge-conflict retrieval
rerere retrieval
Figure 5.6 Local repository before git tag

96 CHAPTER 5 Advanced branching
Problem
You wish to tag the current state of the GitInPracticeReduxmaster branch as versionv0.1.
Solution
1 Change to the directory containing your repository: for example, cd /Users/mike/GitInPracticeRedux/.
2 Run git checkout master.3 Run git tag v0.1. There will be no output.4 Run git tag. The output should resemble the following.
# git tag
v0.1
B shows that there is a tag named v0.1 in the local repository. All tags in the currentrepository (not just the current branch) are listed by git tag.
You’ve created a v0.1 tag in the GitInPracticeRedux repository.
Discussion
You can see from figure 5.7 that after git tag, there’s a new v0.1 ref on the latestcommit on the master branch (in the GitX interface, this is yellow). This indicatesthat this commit has been tagged v0.1.
Note that, unlike branches, when new commits are made on the master branch thev0.1 tag won’t change. This is why tags are useful for versioning; they can record thesignificance of a particular commit without changing it.
git tag can take various flags:
The --list (or -l) flag lists all the tags that match a given pattern. For exam-ple, the tag v0.1 will be matched and listed by git tag list --v0.*.
The --force (or -f) flag updates a tag to point to the new commit. This is use-ful for occasions when you realize you’ve tagged the wrong commit.
The --delete (or -d) flag deletes a tag. This is useful if you’ve created a tagwith the wrong name rather than just pointing to the wrong commit.
Run git push to push the master branch to origin/master. You may notice that itdoesn’t push any of the tags. After you’ve tagged a version and verified that it’s point-ing to the correct commit and has the correct name, you can push it using git push
Listing 5.13 Output: tag listing
Version tagB
Figure 5.7 Local repository after git tag
97TECHNIQUE 37 Generating a version number based on previous tags: git describe
-tags. This pushes all the tags you’ve created in the local repository to the remoterepository. These tags will then be fetched by anyone using git fetch on the samerepository in future.
HOW CAN YOU UPDATE REMOTE TAGS? You’ve seen that by using git tag--delete or git tag --force, it’s possible to delete or modify tags locally. It’salso possible to push these changes to the remote repository with git push--tags --force, but doing so is not advised. If other users of the repositorywant to have their tags updated, they will need to delete them locally andrefetch. This is intentionally cumbersome, because Git intends tags to bestatic and so doesn’t change them locally without users’ explicit intervention.
If you realize you’ve tagged the wrong commit and wish to update it after pushing, it’sgenerally a better idea to tag a new version and push that instead. This complexity iswhy git push requires the --tags argument to push tags.
Technique 37 Generating a version number based on previous tags: git describe
You’ve seen that git tag can be used to identify certain commits as released versionsof a project. I’m a passionate advocate of continuous integration systems, and I’veworked on desktop software projects with semantic versioning (such as 1.0.0). Onthese projects, I’ve set up continuous integration systems to create installers of thesoftware on every commit to the master branch.
But some software has an About screen that displays the software’s version. In thiscase, I’d like to have a version number generated that makes sense but doesn’t rely onauto-generating a tag for each version of the software and is sortable with some infor-mation about the current version of the software. Something like v0.1-1-g0a5e328would be preferential to a short revision like g0a5e328.
The expected version number would be v0.1, given that has just been tagged, solet’s make another modification to the GitInPracticeRedux repository and generatea version number for the new, untagged commit:
1 Change to the directory containing your repository: for example cd /Users/mike/GitInPracticeRedux/.
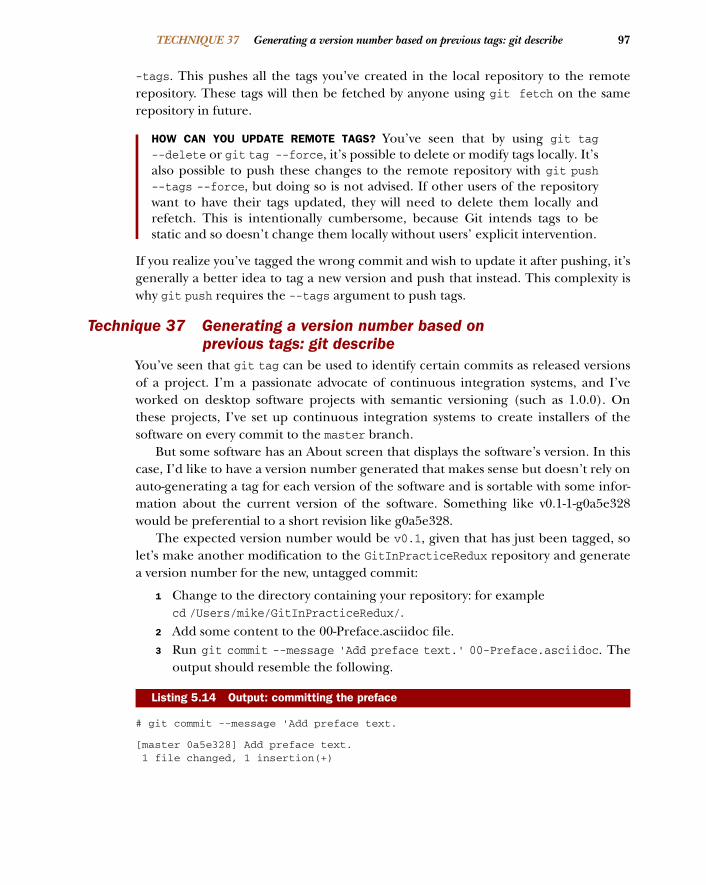
2 Add some content to the 00-Preface.asciidoc file.3 Run git commit --message 'Add preface text.' 00-Preface.asciidoc. The
output should resemble the following.
# git commit --message 'Add preface text.
[master 0a5e328] Add preface text.1 file changed, 1 insertion(+)
Listing 5.14 Output: committing the preface

98 CHAPTER 5 Advanced branching
Problem
You want to generate a version number for a software project based on existing tags inthe repository.
Solution
1 Change to the directory containing your repository: for example, cd /Users/mike/GitInPracticeRedux/.
2 Run git describe --tags. The output should resemble the following.
# git describe --tags
v0.1-1-g0a5e328
B shows the version generated from the state based on existing tags. It’s hyphenatedinto three parts:
v0.1 is the most recent tag on the current branch. 1 indicates that one commit has been made since the most recent tag (v0.1) on
the current branch. g0a5e328 is the current commit SHA-1 prepended with a g (which stands for
git).
If you’d run git describe --tags when on the previous commit (the v0.1 tag), itwould’ve output v0.1.
You’ve generated a version number based on the existing tags in the repository.
Discussion
If git describe is passed a ref, it generates the version number for that particularcommit. For example, git describe --tags v0.1 outputs v0.1, and git describe--tags 0a5e328 outputs v0.1-1-g0a5e328.
If you wish to generate the long-form versions for tagged commits, you can passthe --long flag. For example, git describe --tags --long v0.1 outputs v0.1-0-g725c33a.
If you wish to use a longer or shorter SHA-1 ref, you can configure this using the--abbrev flag. For example, git describe --tags --abbrev=5 outputs v0.1-1-g0a5e3. Note that if you use very low values (such as --abbrev=1), git describe mayuse more than you’ve requested if it requires more to uniquely identify a commit.
Technique 38 Adding a single commit to the current branch: git cherry-pick
Sometimes you may wish to include only a single commit from a branch onto the cur-rent branch rather than merging the entire branch. For example, you may want toback-port a single bug-fix commit from a development branch into a stable release
Listing 5.15 Output: tag describe
Generated versionB

99TECHNIQUE 38 Adding a single commit to the current branch: git cherry-pick
branch. You could do this by manually creating the same change on that branch, but abetter way is to use the tool that Git provides: git cherry-pick.
Let’s create a new branch based off the v0.1 tag called v0.1-release so you havesomething to cherry-pick:
1 Change to the directory containing your repository: for example, cd /Users/mike/GitInPracticeRedux/.
2 Run git checkout -b v0.1-release v0.1.3 Add some content to the 02-AdvancedGitInPractice.asciidoc file.4 Run git commit --message 'Advanced practice technique.' 02-Advanced-
GitInPractice.asciidoc. The output should resemble the following.
# git commit --message 'Advanced practice technique.'02-AdvancedGitInPractice.asciidoc
[v0.1-release dfe2377] Advanced practice technique.1 file changed, 1 insertion(+), 1 deletion(-)
Problem
You wish to cherry-pick a commit from the v0.1-release branch to the masterbranch.
Solution
1 Change to the directory containing your repository: for example, cd /Users/mike/GitInPracticeRedux/.
2 Run git checkout master.3 Run git cherry-pick v0.1-release. The output should resemble the
following.
# git cherry-pick v0.1-release
[master c18c9ef] Advanced practice technique.1 file changed, 1 insertion(+), 1 deletion(-)
B shows the result of the cherry-pick operation. Note that this is the same as the out-put for the previous git commit command, with one difference: the SHA-1 haschanged.
WHY DOES THE SHA-1 CHANGE ON A CHERRY-PICK? Recall that the SHA-1 of acommit is based on its tree and metadata (which includes the parent commitSHA-1). Because the resulting master branch cherry-picked commit has a dif-ferent parent than the commit that was cherry-picked from the v0.1-releasebranch, the commit SHA-1 differs also.
Listing 5.16 Output: committing the release branch
Listing 5.17 Output: commit cherry-pick
Commit summaryB

100 CHAPTER 5 Advanced branching
You’ve cherry-picked a commit from the v0.1-release branch to the master branch.
Discussion
git cherry-pick (like many other Git commands) can take a ref as the parameterrather than only a specific commit. As a result, you could have interchangeably usedgit cherry-pick dfe2377 (where dfe2377 is the most recent commit on thev0.1-release branch) in the previous example with the same result. You can passmultiple refs to cherry-pick, and they will be cherry-picked onto the current branchin the order requested.
HOW MANY COMMITS SHOULD YOU CHERRY PICK? Cherry-picking is best usedfor individual commits that may be out of sequence. The classic use case high-lighted earlier is back-porting bug fixes from a development branch to a sta-ble branch. When this is done, it’s effectively duplicating the commits (ratherthan sharing them as with a merge). If you find yourself wanting to cherry-pick the entire contents of a branch, you’d be better off merging it instead.
git cherry-pick can take various flags:
If the --edit flag is passed to git cherry-pick, it prompts you for a commitmessage before committing.
If you’re cherry-picking from a public branch (one you’ll push remotely) toanother public branch, you can use the -x flag to append a line to the cherry-picked commit’s message saying which commit this change was picked from.For example, if this flag had been used in the last example, the commit messagewould have had (cherry picked from commit dfe2377f00bb58b0f4ba5200b8f4299d0bfeeb5d)appended to it.
When you want to indicate in the commit message which person cherry-pickeda particular change more explicitly than the Committer metadata set by default,you can use the --signoff (or -s) flag. This appends a Signed-off-by line tothe end of the commit message. For example, if this flag had been used in thelast example, the commit message would have had Signed-off-by: MikeMcQuaid <[email protected]> appended to it.
If there’s a merge conflict on a cherry-pick, you need to resolve it in a fashionsimilar to a git merge (or in the same fashion as git rebase, which you’ll seelater in technique 43). This involves resolving the conflict and running git add,but then using git cherry-pick --continue instead of git commit to committhe changes. If you want to abort the current cherry-pick, perhaps becauseyou’ve realized the merge conflict is too complex, you can do this using gitcherry-pick --abort.

101TECHNIQUE 39 Reverting a previous commit: git revert
WHEN WOULD YOU SIGN OFF A COMMIT? Signing off a commit is generally usedin projects to indicate that a commit was checked by someone else beforebeing included. I’m a maintainer of the Homebrew open source project anduse signing off to indicate to other maintainers that I was the one whomerged this commit. This information is also included as the Author meta-data in the commit, but the sign-off makes it more readily accessible. Thesame process could be used in companies when a developer reviews the workof another and wants to signify this in a commit message.
Technique 39 Reverting a previous commit: git revertYou may occasionally make a commit that you regret. You’ll then want to undo thecommit until you can fix it so it works as intended.
In Git you can rewrite history to hide such mistakes (as you’ll learn later in tech-nique 42), but this is generally considered bad practice if you’ve already pushed acommit publicly. In these cases, you’re better off instead using git revert.
Problem
You wish to revert a commit to reverse its changes.
Solution
1 Change to the directory containing your repository: for example, cd /Users/mike/GitInPracticeRedux/.
2 Run git checkout master.3 Run git revert c18c9ef. You’re prompted for a message. Accept the default.
The output should resemble the following.
# git revert c18c9ef
[master 3e3c417] Revert "Advanced practice technique."1 file changed, 1 insertion(+), 1 deletion(-)
To view the revert in more depth, run git show 3e3c417.
# git show 3e3c417
commit 3e3c417e90b5eb3c04962618b238668d1a5dc5abAuthor: Mike McQuaid <[email protected]>Date: Sat Feb 1 20:26:06 2014 +0000
Revert "Advanced practice technique."
This reverts commit c18c9ef9adc73cc1da7238ad97ffb50758482e91.
diff --git a/02-AdvancedGitInPractice.asciidocb/02-AdvancedGitInPractice.asciidoc
index 0e0765f..7eb5017 100644
Listing 5.18 Output: revert
Listing 5.19 Output: revert show
Revert subject
Revert subjectB
Reversed diffC
102 CHAPTER 5 Advanced branching
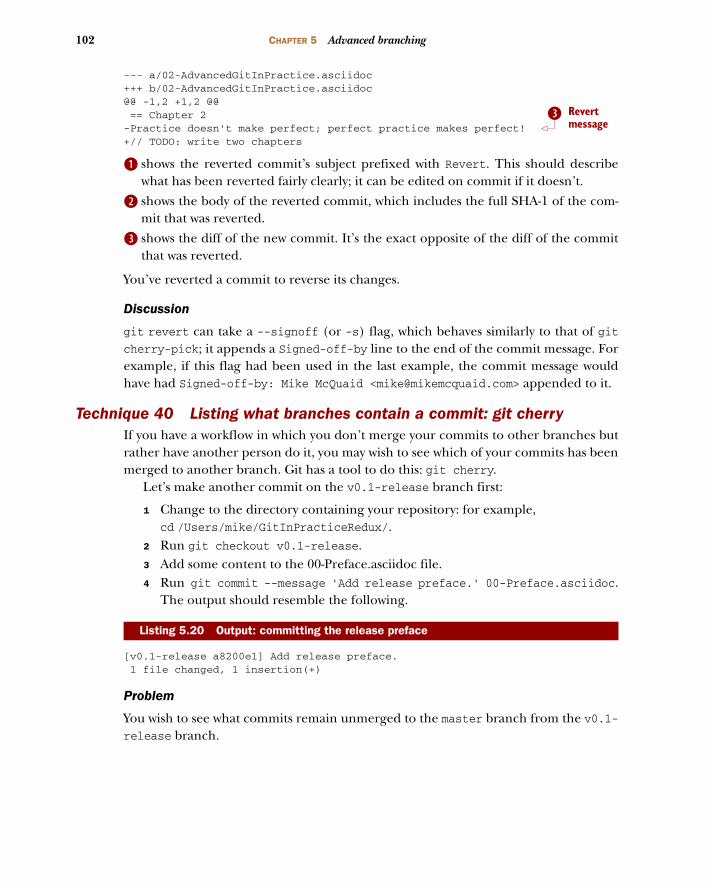
--- a/02-AdvancedGitInPractice.asciidoc+++ b/02-AdvancedGitInPractice.asciidoc@@ -1,2 +1,2 @@== Chapter 2
-Practice doesn't make perfect; perfect practice makes perfect!+// TODO: write two chapters
B shows the reverted commit’s subject prefixed with Revert. This should describewhat has been reverted fairly clearly; it can be edited on commit if it doesn’t.
C shows the body of the reverted commit, which includes the full SHA-1 of the com-mit that was reverted.
D shows the diff of the new commit. It’s the exact opposite of the diff of the committhat was reverted.
You’ve reverted a commit to reverse its changes.
Discussion
git revert can take a --signoff (or -s) flag, which behaves similarly to that of gitcherry-pick; it appends a Signed-off-by line to the end of the commit message. Forexample, if this flag had been used in the last example, the commit message wouldhave had Signed-off-by: Mike McQuaid <[email protected]> appended to it.
Technique 40 Listing what branches contain a commit: git cherryIf you have a workflow in which you don’t merge your commits to other branches butrather have another person do it, you may wish to see which of your commits has beenmerged to another branch. Git has a tool to do this: git cherry.
Let’s make another commit on the v0.1-release branch first:
1 Change to the directory containing your repository: for example, cd /Users/mike/GitInPracticeRedux/.
2 Run git checkout v0.1-release.3 Add some content to the 00-Preface.asciidoc file.4 Run git commit --message 'Add release preface.' 00-Preface.asciidoc.
The output should resemble the following.
[v0.1-release a8200e1] Add release preface.1 file changed, 1 insertion(+)
Problem
You wish to see what commits remain unmerged to the master branch from the v0.1-release branch.
Listing 5.20 Output: committing the release preface
Revert message
D

103 Summary
Solution
1 Change to the directory containing your repository: for example, cd /Users/mike/GitInPracticeRedux/.
2 Run git checkout v0.1-release.3 Run git cherry --verbose master. The output should resemble the following.
# git cherry --verbose master
- dfe2377f00bb58b0f4ba5200b8f4299d0bfeeb5d Advanced practice technique.+ a8200e1407d49e37baad47da04c0981f43d7c7ff Add release preface.
B is prefixed with - and shows a commit that has been already included into the master branch.
C is prefixed with + and shows a commit that hasn’t yet been included into the master branch.
You’ve seen which commits remain unmerged from the master branch.
Discussion
If you omit the --verbose (or -v) flag from git cherry, it shows just the -/+ and thefull SHA-1 but not the commit subject: for example, - dfe2377f00bb58b0f4ba5200b8f4299d0bfeeb5d.
When you learn about rebasing later in technique 43, you’ll see how git cherry canbe useful for showing what commits will be kept or dropped after a rebase operation.
5.3 SummaryIn this chapter you learned the following:
How to use git merge’s options to perform different types of merges How to resolve merge conflicts How to use git rerere to repeatedly replay merge-conflict resolutions How to use git tag to tag commits How to use git describe to generate version numbers for commits How to use git cherry-pick to bring individual commits from one branch to
another How to use git revert to reverse individual commits How to use git cherry to list what commits remain unmerged on a branch
Listing 5.21 Output: cherry
Droppable commit
B
Kept commitC

196
Merging vs. rebasing
As discussed in technique 14 and technique 43, merging and rebasing are two strat-egies for updating the contents of one branch based on the contents of another.Merging joins the history of two branches together with a merge commit (a commitwith two parent commits); and rebasing creates new, reparented commits on top ofthe existing commits.
Why are there two strategies for accomplishing essentially the same task? Let’sfind out by comparing the Git history of two popular open source projects andtheir different branching strategies.
13.1 CMake’s workflowCMake is a cross-platform build-system created by Kitware. It has many contributorsboth inside and outside Kitware; most contributions are among those with directpush access to the Kitware Git repository.
This chapter covers Using CMake’s branching and merging strategy to
manage contributions
Using Homebrew’s rebasing and squashing strategy to manage contributions
Deciding what strategy to use for your project
197CMake’s workflow
CMake’s Git repository is available to access at http://cmake.org/cmake.git. It’s alsomirrored on GitHub at https://github.com/Kitware/CMake if you’d rather browse orclone it from there. Please clone it and examine it while reading this chapter.
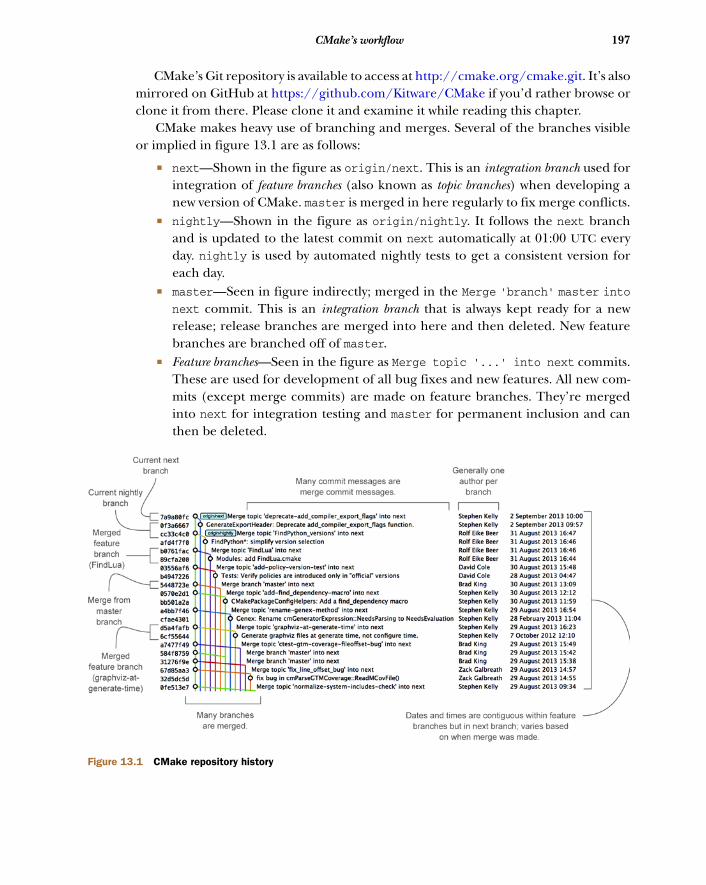
CMake makes heavy use of branching and merges. Several of the branches visibleor implied in figure 13.1 are as follows:
next—Shown in the figure as origin/next. This is an integration branch used forintegration of feature branches (also known as topic branches) when developing anew version of CMake. master is merged in here regularly to fix merge conflicts.
nightly—Shown in the figure as origin/nightly. It follows the next branchand is updated to the latest commit on next automatically at 01:00 UTC everyday. nightly is used by automated nightly tests to get a consistent version foreach day.
master—Seen in figure indirectly; merged in the Merge 'branch' master intonext commit. This is an integration branch that is always kept ready for a newrelease; release branches are merged into here and then deleted. New featurebranches are branched off of master.
Feature branches—Seen in the figure as Merge topic '...' into next commits.These are used for development of all bug fixes and new features. All new com-mits (except merge commits) are made on feature branches. They’re mergedinto next for integration testing and master for permanent inclusion and canthen be deleted.
Figure 13.1 CMake repository history

198 CHAPTER 13 Merging vs. rebasing
The merging of master into next is done immediately after merging any featurebranch to master. This ensures that any merge conflicts between master and next areresolved quickly in the next branch. The regular merging of feature branches intonext allows integration testing before a new release is prepared and provides contextfor individual commits; the branch name used in the merge commit helps indicatewhat feature or bug the commit was in relation to.
Figure 13.2 focuses on the interactions between branches in the CMake workflow(rather than the interactions between commits and branches in figure 13.1). For anew commit to end up in master, a new feature branch needs to be created, commitsmust be made on it, the feature branch must be merged to the next branch for inte-gration testing, and finally the feature branch must be merged to master and deleted.
13.1.1 Workflow commands
The following commands are used by CMake developers to clone the repository, cre-ate new branches for review, and merge them to next to be tested, and by CMake coremaintainers to finally merge them into master.
nightly branch next branch master branch
feature branche.g., graphviz-at-
generate-time
feature branche.g., FindLua
Updated every night to point to the latest
commit on nextNext is infrequently
re-created from master.
New feature branchesare created frequently foreach new fix/feature andbranched from master.
Feature branches canbe shared between
multiple committers (butusually are not).
Master is merged into nextfrequently to resolve conflicts.
All commits and branching occur within the CMake repository.Many regular committers with commit access.
Feature branches arefrequently merged
into next and masterfor a new release.
Figure 13.2 CMake branch/merge workflow

199CMake’s workflow
These steps set up the CMake repository on a local machine:
1 Clone the fetch-only CMake Git repository with git clone http://cmake.org/cmake.git.
2 Add the pushable staging repository with git remote add stage [email protected]:stage/cmake.git. The staging repository is used for testing and review-ing branches before they’re ready to be merged. CMake developers are givenpush access to it, but only CMake core maintainers have push access to themain repository.
These commands make a new branch and submit it for review:
1 Fetch the remote branches with git fetch origin.2 Branch from origin/master with git checkout -b branchname origin/master.3 Make changes and commit them with git add and git commit.4 Push the branch to the staging repository with git push --set-upstream stage
branchname.5 Post an email to the CMake mailing list (www.cmake.org/mailman/listinfo/
cmake-developers) to ask other CMake developers for review and feedback ofthe changes.
These steps merge a branch for nightly testing:
1 Fetch the remote branches with git fetch stage.2 Check out the next branch with git checkout next.3 Merge the remote branch with git merge stage/branchname.4 Push the next branch with git push.
CMake developers perform these steps with the stage command over SSH by runningssh [email protected] stage cmake merge -b next branchname.
These steps make changes based on feedback from other CMake developers:
1 Check out the branch with git checkout branchname.2 Make changes and commit them with git add and git commit.3 Push the new commits to the staging repository with git push.4 Post another email to the CMake mailing list (www.cmake.org/mailman/
listinfo/cmake-developers).
These steps allow a CMake core maintainer to merge a branch into master after suc-cessful review:
1 Fetch the remote branches with git fetch stage.2 Check out the master branch with git checkout master.3 Merge the remote branch with git merge stage/branchname.4 Push the master branch with git push.
CMake core maintainers perform these steps with the stage command over SSH byrunning ssh [email protected] stage cmake merge -b master branchname.
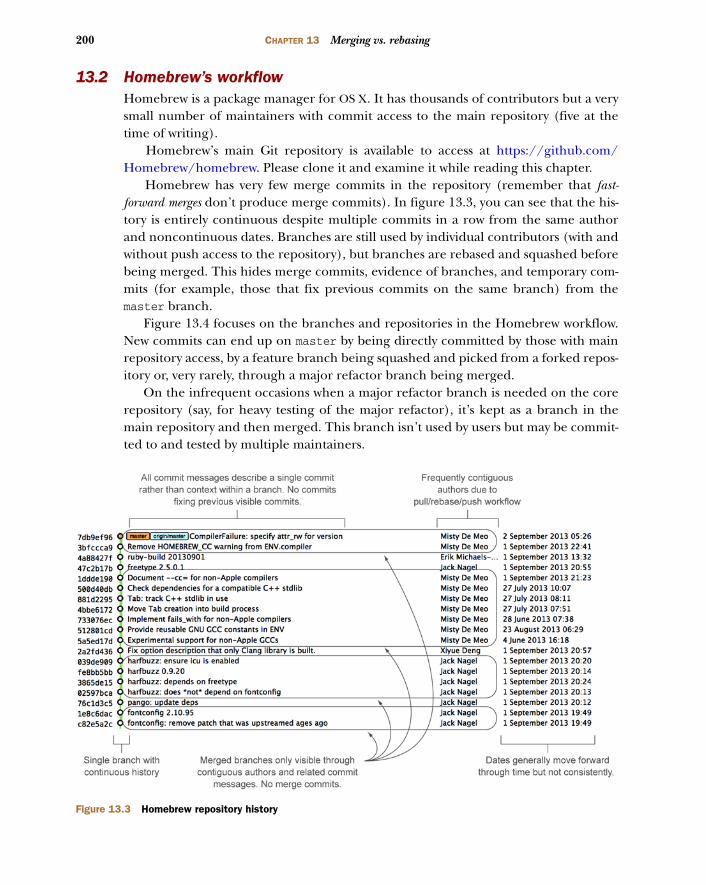
200 CHAPTER 13 Merging vs. rebasing
13.2 Homebrew’s workflowHomebrew is a package manager for OS X. It has thousands of contributors but a verysmall number of maintainers with commit access to the main repository (five at thetime of writing).
Homebrew’s main Git repository is available to access at https://github.com/Homebrew/homebrew. Please clone it and examine it while reading this chapter.
Homebrew has very few merge commits in the repository (remember that fast-forward merges don’t produce merge commits). In figure 13.3, you can see that the his-tory is entirely continuous despite multiple commits in a row from the same authorand noncontinuous dates. Branches are still used by individual contributors (with andwithout push access to the repository), but branches are rebased and squashed beforebeing merged. This hides merge commits, evidence of branches, and temporary com-mits (for example, those that fix previous commits on the same branch) from themaster branch.
Figure 13.4 focuses on the branches and repositories in the Homebrew workflow.New commits can end up on master by being directly committed by those with mainrepository access, by a feature branch being squashed and picked from a forked repos-itory or, very rarely, through a major refactor branch being merged.
On the infrequent occasions when a major refactor branch is needed on the corerepository (say, for heavy testing of the major refactor), it’s kept as a branch in themain repository and then merged. This branch isn’t used by users but may be commit-ted to and tested by multiple maintainers.
Figure 13.3 Homebrew repository history

201Homebrew’s workflow
13.2.1 Workflow commands
The following commands are used by Homebrew contributors to clone the repository,create new branches, and issue pull requests, and by Homebrew maintainers to finallymerge them into master.
These commands set up the Homebrew repository on the local machine:
1 Clone the fetch-only Homebrew Git repository with git clone https://github.com/Homebrew/homebrew.git.
2 Fork the Homebrew repository on GitHub. This creates a pushable, personalremote repository. This is needed because only Homebrew maintainers havepush access to the main repository.
3 Add the pushable forked repository with git remote add username https://github.com/username/homebrew.git.
These commands make a new branch and submit it for review:
1 Check out the master branch with git checkout master.2 Retrieve new changes to the master branch with git pull --rebase (or Home-
brew’s brew update command, which calls git pull).3 Branch from master with git checkout -b branchname origin/master.4 Make changes and commit them with git add and git commit.5 Push the branch to the fork with git push --set-upstream username
branchname.6 Create a pull request on GitHub, requesting review and merge of the branch.
master branch
major refactorbranch
Major refactorbranches are infrequently
merged into masterand then deleted.
Refactor branchesare created very
infrequently(maybe once a year).
Feature branchesare created very
frequently in forksof the mainrepository.
Committers withmain repository commit
access frequently commitdirectly to the master
branch.
Many commits and few branches occur within themain Homebrew repository. Many committers,
few with commit access.Fork of the main
Homebrew repository with a single committer
feature/fixbranch
Feature branchesare very frequentlyrebased, squashed,
and picked bycommitters withmain repositorycommit access.
Another fork of the mainHomebrew repository.
feature/fixbranch
Figure 13.4 Homebrew’s branch/rebase/squash workflow

202 CHAPTER 13 Merging vs. rebasing
These commands make changes based on feedback:
1 Check out the branch with git checkout branchname.2 Make changes and commit them with git add and git commit.3 Squash the new commits with git rebase --interactive origin/master.4 Update the remote branch and the pull request with git push --force.
These commands allow a Homebrew maintainer to merge a branch into master:
1 Check out the master branch with git checkout master.2 Add the forked repository and cherry-pick the commit with git add remote
username https://github.com/username/homebrew.git, git fetch username,and git merge username/branchname. Alternatively, some maintainers (includ-ing me) use Homebrew’s brew pull command, which pulls the contents of apull request onto a local branch by using patch files rather than fetching fromthe forked repository.
3 Rebase, reword, and clean up the commits on master with git rebase--interactive origin/master. It’s common for Homebrew maintainers toedit or squash commits and rewrite commit messages but preserve the authormetadata so the author retains credit. Often a commit will be edited to containa string like “Closes #123”, which automatically closes the pull request num-bered 123 when the commit is merged to master. This was covered in greaterdetail in chapter 10.
4 Push the master branch with git push.
13.3 CMake workflow pros and consCMake’s approach makes it easy to keep track of what feature branches have beenmerged, when they were merged, and by whom. Individual features and bug fixes livein separate branches and are integrated only when and where it makes sense to do so.Individual commits and evidence of branches (but not the branches themselves) arealways kept in history for future viewing. Feature branches are tested individually, andthen integration testing is done in the next branch. When a feature branch is deemedto be in a sufficiently stable state, it’s merged into the master branch and deleted.This ensures that the master branch is always stable and kept ready for a release.
When developing desktop software like CMake that ships binary releases, having avery stable branch is important; releases are a formal, time-consuming process, andupdates can’t be trivially pushed after release. Thus it’s important to ensure that test-ing is done frequently and sufficiently before releasing.
CMake’s approach produces a history that contains a lot of information but, asseen from the plethora of lines in figure 13.1, can be hard to follow. Merge commitsare frequent, and commits with actual changes are harder to find as a result. This canmake reverting individual commits tricky; using git revert on a merge commit ishard because Git doesn’t know which side of the merge it should revert to. In addi-tion, if you revert a merge commit, you can’t easily re-merge it.

203Homebrew workflow pros and cons
There are also potential trust issues with CMake’s approach. Everyone who wantsto create a feature branch needs commit access to the CMake repository. Because Gitand Git-hosting services don’t provide fine-grained access control (such as restrictingaccess to particular branches), and because CMake’s Git workflow doesn’t rewrite his-tory, anyone with commit access could, for example, make commits directly to themaster branch and circumvent the process. Everyone who commits to CMake needsto be made aware of the process and trusted not to break or circumvent it. Kitwareprotects against process violations with rewriting and server-side checks. But thisrequires complex setup and server configuration and a willingness to rewrite pushedbranches to fix mistakes.
13.4 Homebrew workflow pros and consA major benefit of Homebrew’s approach should be evident from figure 13.3: the his-tory is simple. The master branch contains no direct merges, so ordering is easy tofollow. Commits contain concise descriptions of exactly what they do, and there areno commits that are fixing previous ones. Every commit communicates importantinformation.
As a result of commits being squashed, it’s also easy to revert individual commitsand, if necessary, reapply them at a later point. Homebrew doesn’t have a release pro-cess (the top of the master branch is always assumed to be stable and delivered tousers), so it’s important that changes and fixes can be pushed quickly rather than hav-ing a stabilization or testing process.
WHY IS A READABLE HISTORY IMPORTANT FOR HOMEBREW? Readable history isan important feature of Homebrew’s workflow. Homebrew uses Git not just asa version control system for developers, but also as an update delivery mecha-nism for users. Presenting users with a more readable history allows them tobetter grasp updates to Homebrew with basic Git commands and withoutunderstanding merges.
Homebrew’s workflow uses multiple remote repositories. Because only a few peoplehave commit access to the core repository, their approach is more like that of Linuson the Git project (as discussed in section 1.1), often managing and including com-mits from others more than making their own commits. Many commits made to therepository are made by squashing and merging commits from forks into the masterbranch of the main repository. The squashing means any fixes that needed to be madeto the commit during the pull request process won’t be seen in the master branchand each commit message can be tailored by the core team to communicate informa-tion in the best possible way.
This workflow means only those on the core team can do anything dangerous tothe main repository. Anyone else’s commits must be reviewed before they’re applied.This puts more responsibility on the shoulders of the core team, but other contribu-tors to Homebrew only need to know how to create a pull request and not how to dostuff like squash or merge commits.

204 CHAPTER 13 Merging vs. rebasing
Unfortunately, Homebrew’s approach means most branch information is (inten-tionally) lost. It’s possible to guess at branches from multiple commits with relatedtitles and/or the same author for multiple commits in a row, but nothing explicit inthe history indicates that a merge has occurred. Instead, metadata is inserted intocommit messages stating that a commit was signed-off by a particular core contributorand which pull request (or issue) this commit related to.
13.5 Picking your strategyOrganizations and open source projects vary widely in their branching approaches.When picking between a branch-and-merge or a branch-rebase-and-squash strategy,it’s worth considering the following:
If all the committers to a project are trusted sufficiently and can be educated onthe workflow, then giving everyone access to work on a single main repositorymay be more effective. If committers’ Git abilities vary dramatically and someare untrusted, then using multiple Git repositories and having a review processfor merges between them may be more appropriate.
If your software can release continuous, quick updates (like a web application)or has a built-in updater (like Homebrew), then focusing development on a sin-gle (master) branch is sensible. If your software has a more time-consumingrelease process (such as desktop or mobile software that needs to be compiledand perhaps even submitted to an app store for review), then working acrossmany branches may be more suitable. This applies even more if you have toactively support many released versions of the software simultaneously.
If it’s important to be able to trivially revert merged changes on a branch (andperhaps re-merge them later), then a squashing process may be more effectivethan a merging process.
If it’s important for the history to be easily readable in tools such as GitX andgitk, then a squashing process may be more effective. Alternatively, a mergingprocess can still be done, but with less frequent merges so each merge containsat least two or more commits. This ensures that the history isn’t overwhelmedwith merge commits.
There are various other considerations you could take into account, but these are agood starting point. You may also consider creating your own blended approach thatuses merging and squashing in different situations.
Regardless of which workflow you decide is best for your project, it’s important totry to remain consistent: not necessarily across every branch (for example, it might bereasonable to always make merge commits in master but always rebase branches ontop of other branches), but across the repository. This should ensure that, whateverstrategy is adopted, the history will communicate something about the project’s devel-opment process and new committers can look at the history for an example of whattheir workflow should be like.

205Summary
WHAT IS THE AUTHOR’S PREFERRED APPROACH? Although I’ve committed toboth projects, most of my open source time is spent working on Homebrew. Itwill therefore probably come as no surprise to hear that I prefer Homebrew’sapproach. Maintaining a simple and readable history has frequently paid offin terms of quickly being able to git bisect or git revert problematic com-mits. Also, I prefer software-release processes that favor lots of small updatesrather than fewer, large updates. I think these processes are easier to test,because they encourage incremental improvements rather than huge, sweep-ing changes.
13.6 SummaryIn this chapter you learned the following:
How CMake uses multiple branches to keep features developed in separation How Homebrew uses a single branch to release continuous updates to users How merging allows you to keep track of who added commits, when, and why How rebasing and squashing allow you to maintain a cleaner history and elimi-
nate commits that may be irrelevant

For ordering information go to www.manning.com
Learn Git in a Month of Lunches by Rick Umali
ISBN: 9781617292415 375 pages, $39.99August 2015
Docker in Actionby Jeff Nickoloff
ISBN: 9781633430235300 pages, $49.99December 2015
Docker in Practiceby Ian Miell and Aidan Hobson Sayers
ISBN: 9781617292729275 pages, $44.99November 2015
OpenStack in Actionby V. K. Cody Bumgardner
ISBN: 9781617292163 375 pages, $54.99October 2015
RELATED MANNING TITLES


![Lab 1: Git - Hanyang · 2020. 3. 26. · 1. git init 2. git remote add [repoName] [url] 3. git pull [repoName] [branch(e.g. master)] 4. Working… 5. git add * 6. git commit –m](https://static.fdocuments.net/doc/165x107/5ff18f05f6668f333e2be74f/lab-1-git-hanyang-2020-3-26-1-git-init-2-git-remote-add-reponame-url.jpg)


