Getting to Know Your JNX DM3 Supergun - Jamma Nation X · Getting to Know Your JNX DM3 Supergun...
6
Getting to Know Your JNX DM3 Supergun 1. Volt Meter – Shows what the +5v line is currently putting out. 2. +5v line adjustment knob. Default is in the 9 o'clock position. Turn the knob clock-wise very slowly if you need to adjust the +5v level. Recommended levels are between 5.00v and 5.10v. DO NOT EXCEED 5.20v as it may cause damage to the chips on the arcade board. 3. JAMMA Connector w/JAMMA Key – This is where you plug in the supplied JAMMA harness. You will notice on the board side of the JAMMA harness that there is a notch cut out. This notch aligns with the white key inside the blue JAMMA connector. This is to prevent owners from putting in the harness upside down. The connector side of the harness also has a key in it as well. 4. RGB Adjustment Knobs – Turn these knobs clock-wise to increase the color brightness levels. Some boards may have different color levels than others which is why these are important to have. 5. Controller ports – These are DB15 controller ports using the Neo Geo pinout. You can plug in any Neo Geo controller to these ports. The ports for player 1 and player 2 (Top Left and Right) are also wired for use with the kick harness for games like Street Fighter which utilize a kick harness. Depending on the request of the customer, the coin buttons are either on the supergun or on the select button on the controller.
Transcript of Getting to Know Your JNX DM3 Supergun - Jamma Nation X · Getting to Know Your JNX DM3 Supergun...

Getting to Know Your JNX DM3 Supergun
1. Volt Meter – Shows what the +5v line is currently putting out.2. +5v line adjustment knob. Default is in the 9 o'clock position. Turn the
knob clock-wise very slowly if you need to adjust the +5v level. Recommended levels are between 5.00v and 5.10v. DO NOT EXCEED 5.20v as it may cause damage to the chips on the arcade board.
3. JAMMA Connector w/JAMMA Key – This is where you plug in the supplied JAMMA harness. You will notice on the board side of the JAMMA harness that there is a notch cut out. This notch aligns with the white key inside the blue JAMMA connector. This is to prevent owners from putting in the harness upside down. The connector side of the harness also has a key in it as well.
4. RGB Adjustment Knobs – Turn these knobs clock-wise to increase the color brightness levels. Some boards may have different color levels than others which is why these are important to have.
5. Controller ports – These are DB15 controller ports using the Neo Geo pinout. You can plug in any Neo Geo controller to these ports. The ports for player 1 and player 2 (Top Left and Right) are also wired for use with the kick harness for games like Street Fighter which utilize a kick harness. Depending on the request of the customer, the coin buttons are either on the supergun or on the select button on the controller.
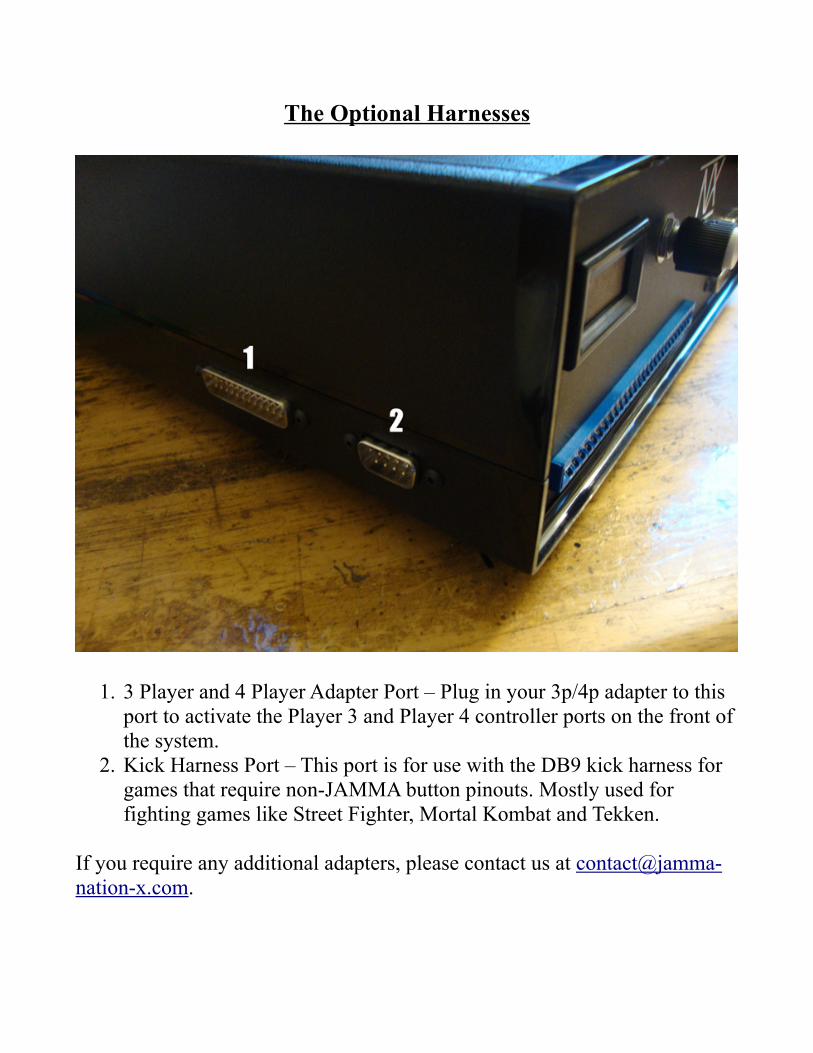
The Optional Harnesses
1. 3 Player and 4 Player Adapter Port – Plug in your 3p/4p adapter to this port to activate the Player 3 and Player 4 controller ports on the front of the system.
2. Kick Harness Port – This port is for use with the DB9 kick harness for games that require non-JAMMA button pinouts. Mostly used for fighting games like Street Fighter, Mortal Kombat and Tekken.
If you require any additional adapters, please contact us at [email protected].
The Voltage Switch
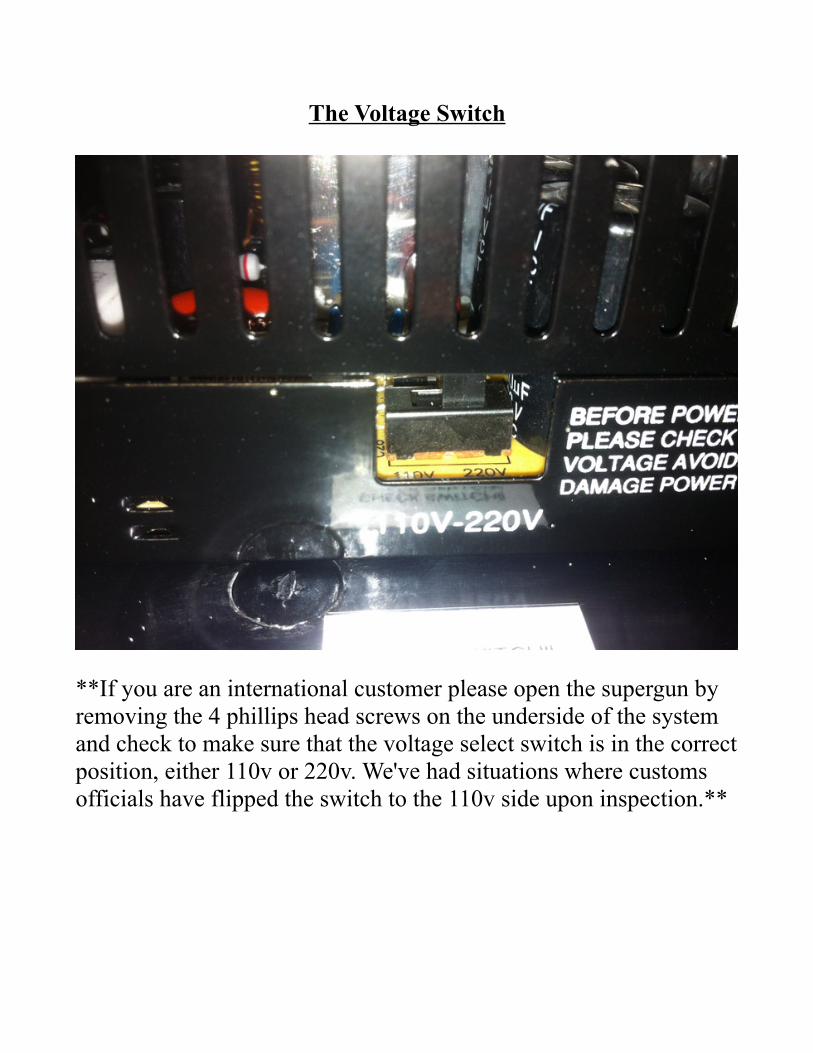
**If you are an international customer please open the supergun by removing the 4 phillips head screws on the underside of the system and check to make sure that the voltage select switch is in the correct position, either 110v or 220v. We've had situations where customs officials have flipped the switch to the 110v side upon inspection.**

The Rear Panel
1. Power Switch – Flip to power on the system.2. Power Socket – Plug in your 3 prong power cable here.3. Sync Cleaner – This switch activates the sync cleaner circuit. Some
boards may display weird artifacts or a scrambled screen. Sometimes this is due to a noisy sync signal. Turning the circuit on remedies most of these problems.
4. Attenuated Stereo/Dual Mono Switch – Supports both JAMMA and MVS audio pinouts. Audio is attenuated for use on TVs and home stereos.
5. Test Switch – This switch pulls up the test menu of the game board(if applicable) works for both JAMMA and MVS pinout.
6. Service Switch – In the arcades this was mainly used to add a credit that didn't count towards revenue to test certain things of the game. This is needed on a supergun as some arcade boards require it to navigate the test menus in test mode.
7. Stereo Output Jacks – This is where the audio is output on the system, for use with the Attenuated Stereo/Dual Mono Switch.
8. 8 Pin DIN socket – Mainly used for RGB output. Plug in the supplied RGB SCART cable.
Using the JAMMA Harness
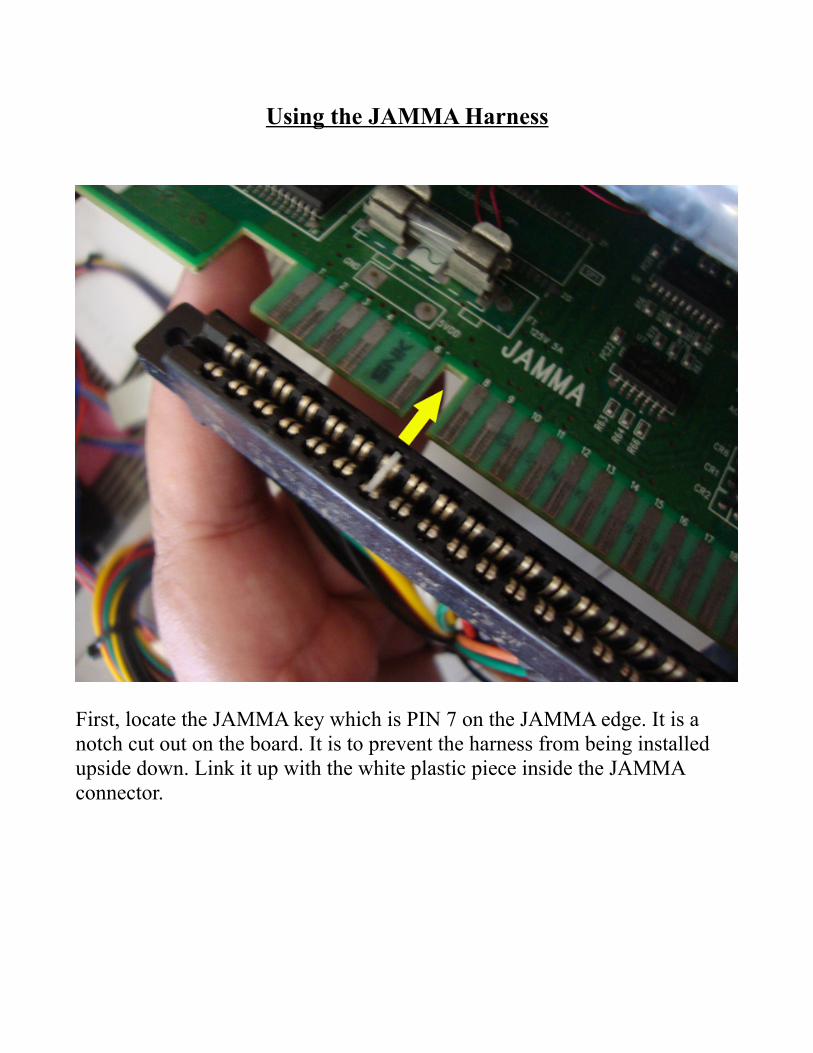
First, locate the JAMMA key which is PIN 7 on the JAMMA edge. It is a notch cut out on the board. It is to prevent the harness from being installed upside down. Link it up with the white plastic piece inside the JAMMA connector.
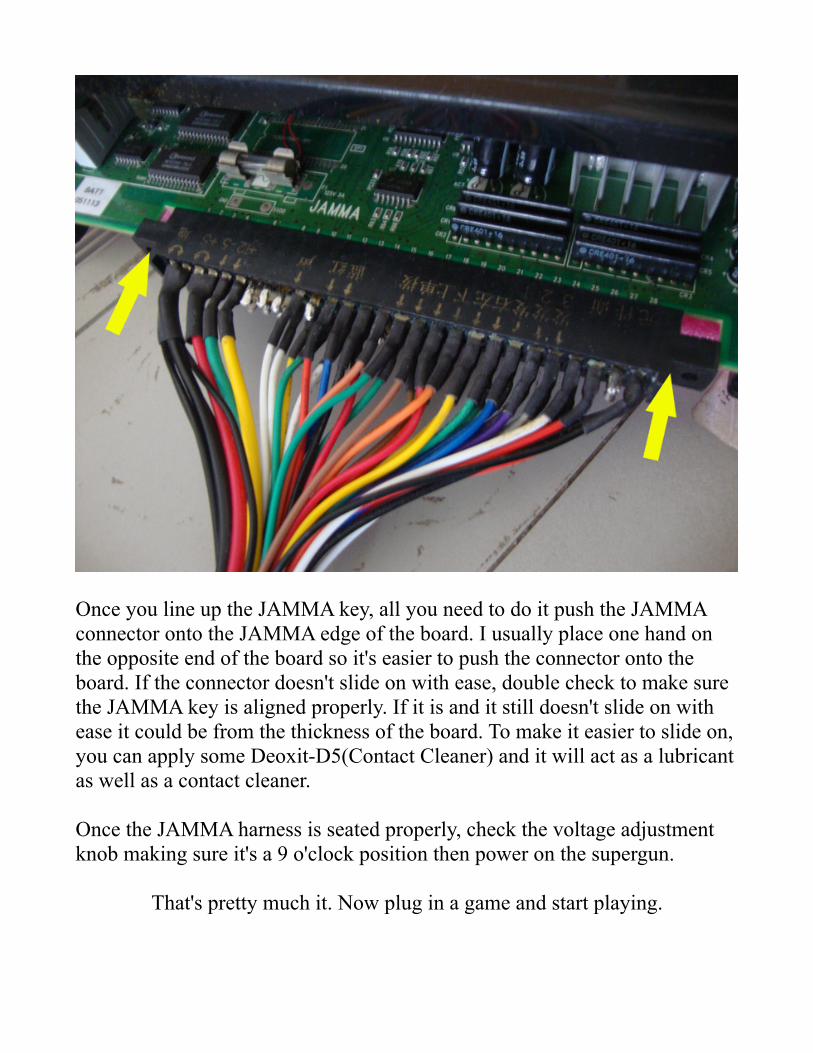
Once you line up the JAMMA key, all you need to do it push the JAMMA connector onto the JAMMA edge of the board. I usually place one hand on the opposite end of the board so it's easier to push the connector onto the board. If the connector doesn't slide on with ease, double check to make sure the JAMMA key is aligned properly. If it is and it still doesn't slide on with ease it could be from the thickness of the board. To make it easier to slide on, you can apply some Deoxit-D5(Contact Cleaner) and it will act as a lubricant as well as a contact cleaner.
Once the JAMMA harness is seated properly, check the voltage adjustment knob making sure it's a 9 o'clock position then power on the supergun.
That's pretty much it. Now plug in a game and start playing.


![[II]-Garmin y los mapas ráster BirdsEye (JNX)](https://static.fdocuments.net/doc/165x107/557201ac4979599169a213a5/ii-garmin-y-los-mapas-raster-birdseye-jnx.jpg)