Get Started with Q-interactive · SECTION 1: Download the App. The Q-interactive Assess app must be...
4
Get Started with Q-interactive ® qiactive.com Q-interactive Start-Up Guide Here are instructions for installing the Q-interactive Assess app, establishing the proper settings on both iPad ® s, finalizing your login credentials, and creating a practice assessment session. We recommend practicing the tests a few times before assessing real clients. SECTION 1: Download the App The Q-interactive Assess app must be downloaded onto both iPad ® s in order to use the system. Step 1 Open the App Store, found on the home screen of the iPad. Assess ® Step 2 Search for Q-interactive and tap on “GET.”
Transcript of Get Started with Q-interactive · SECTION 1: Download the App. The Q-interactive Assess app must be...
Get Started with Q-interactive®
qiactive.com
Q-interactive Start-Up GuideHere are instructions for installing the Q-interactive Assess app, establishing the proper settings on both iPad®s, finalizing your login credentials, and creating a practice assessment session. We recommend practicing the tests a few times before assessing real clients.
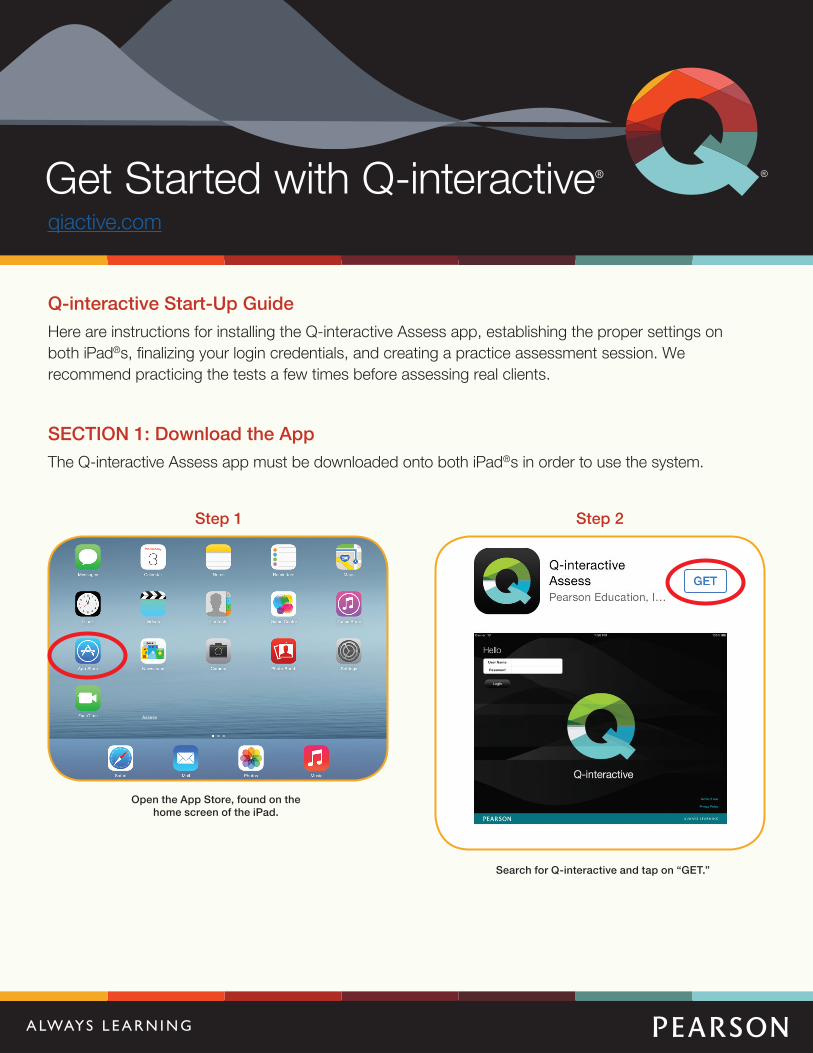
SECTION 1: Download the AppThe Q-interactive Assess app must be downloaded onto both iPad®s in order to use the system.
Step 1
Open the App Store, found on the home screen of the iPad.
Assess
®
Step 2
Search for Q-interactive and tap on “GET.”
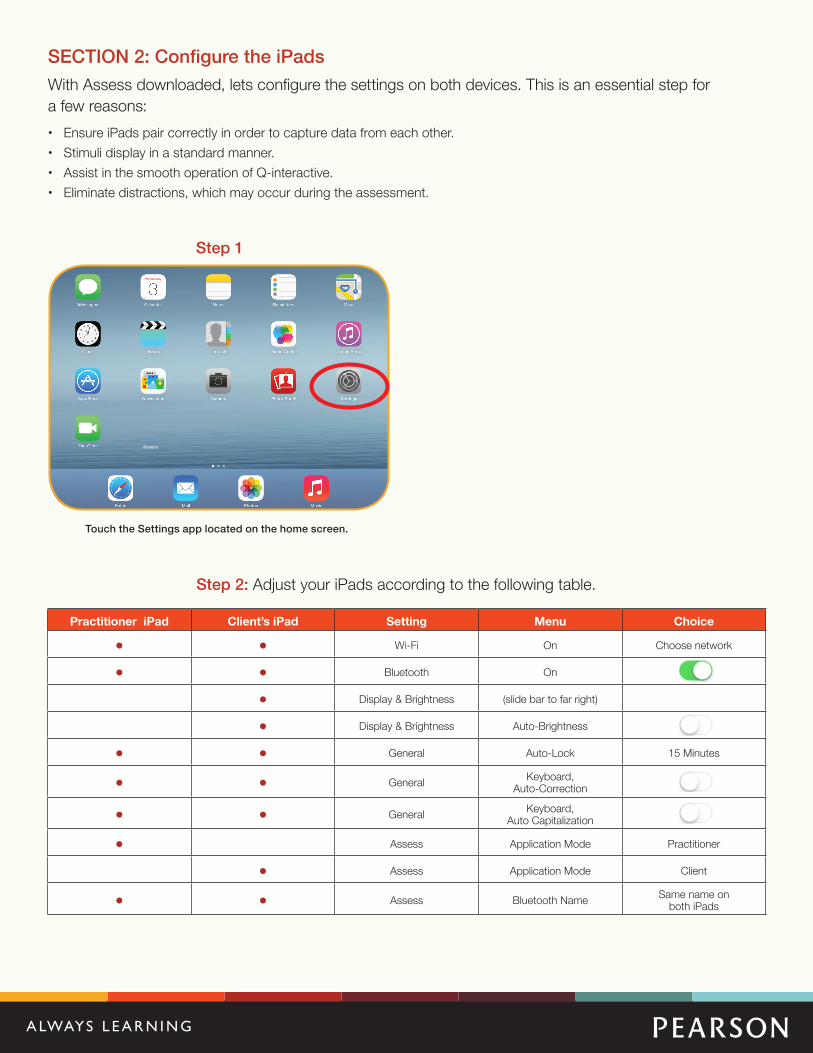
Practitioner iPad Client’s iPad Setting Menu Choice
• • Wi-Fi On Choose network
• • Bluetooth On
• Display & Brightness (slide bar to far right)
• Display & Brightness Auto-Brightness
• • General Auto-Lock 15 Minutes
• • General Keyboard, Auto-Correction
• • General Keyboard, Auto Capitalization
• Assess Application Mode Practitioner
• Assess Application Mode Client
• • Assess Bluetooth Name Same name on both iPads
SECTION 2: Configure the iPads With Assess downloaded, lets configure the settings on both devices. This is an essential step for a few reasons:
• Ensure iPads pair correctly in order to capture data from each other.
• Stimuli display in a standard manner.
• Assist in the smooth operation of Q-interactive.
• Eliminate distractions, which may occur during the assessment.
Step 2: Adjust your iPads according to the following table.
Step 1
Touch the Settings app located on the home screen.
Assess
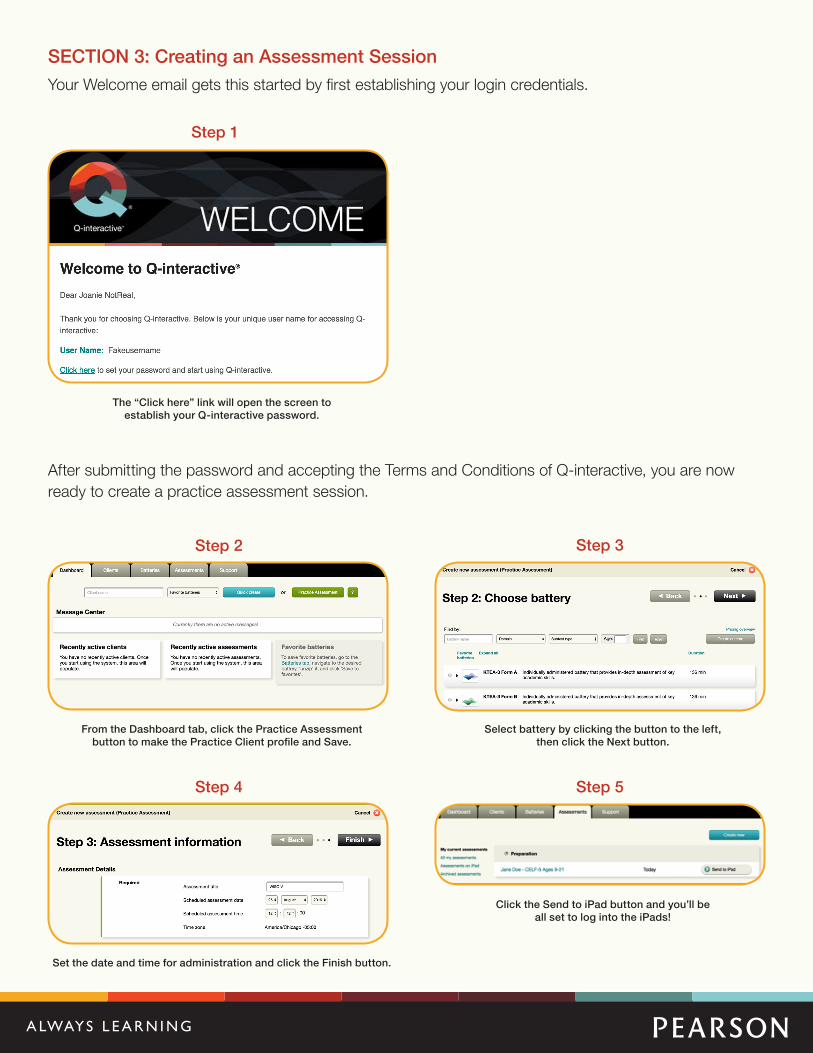
Step 3
Step 5
Select battery by clicking the button to the left, then click the Next button.
Click the Send to iPad button and you’ll be all set to log into the iPads!
Step 4
Step 2
From the Dashboard tab, click the Practice Assessment button to make the Practice Client profile and Save.
Set the date and time for administration and click the Finish button.
Step 1
The “Click here” link will open the screen to establish your Q-interactive password.
SECTION 3: Creating an Assessment Session Your Welcome email gets this started by first establishing your login credentials.
After submitting the password and accepting the Terms and Conditions of Q-interactive, you are now ready to create a practice assessment session.
1800 882 385 (AUS) 0800 942 722 (NZ) | | HelloQ.com.auCopyright © 2016 Pearson Education, Inc. or its affiliate(s). All rights reserved. Q-interactive, Always Learning, Pearson, PSI design, and PsychCorp, are trademarks in the U.S. and/or other countries, of Pearson Education, Inc. or its affiliate(s). IPad is a registered trademark of Apple Inc. CLINA15779-15753 09/16
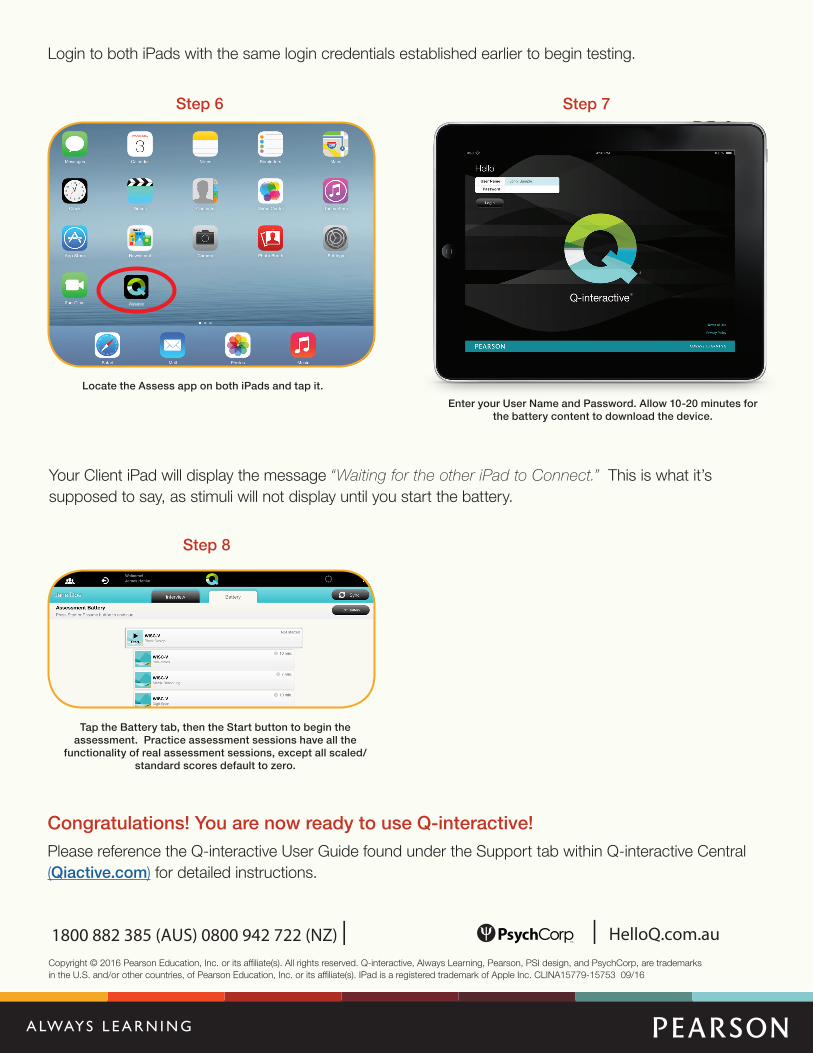
Step 8
Your Client iPad will display the message “Waiting for the other iPad to Connect.” This is what it’s supposed to say, as stimuli will not display until you start the battery.
Tap the Battery tab, then the Start button to begin the assessment. Practice assessment sessions have all the
functionality of real assessment sessions, except all scaled/standard scores default to zero.
Congratulations! You are now ready to use Q-interactive! Please reference the Q-interactive User Guide found under the Support tab within Q-interactive Central (Qiactive.com) for detailed instructions.
Step 7Step 6
Locate the Assess app on both iPads and tap it.
Login to both iPads with the same login credentials established earlier to begin testing.
Assess
Enter your User Name and Password. Allow 10-20 minutes for the battery content to download the device.