General Laboratory Procedures - Nyaya Health
140
General Laboratory Procedures Sanfe Bagar Medical Clinic, Achham, Nepal This is the manual that Nyaya Health uses at our rural primary care clinic in Nepal. Please adapt any content as you feel fit to your unique setting. Please also let us know if you have any suggestions. This is a work-in-progress last updated: March 9, 2008. Compiled by Ana Serralheiro, MSc: ana(AT)nyayahealth(DOT)org.
Transcript of General Laboratory Procedures - Nyaya Health
General Laboratory Procedures Sanfe Bagar Medical Clinic, Achham, Nepal
This is the manual that Nyaya Health uses at our rural primary care clinic in Nepal. Please adapt any content as you feel fit to your unique setting. Please also let us know if you have any suggestions. This is a work-in-progress last updated: March 9, 2008. Compiled by Ana Serralheiro, MSc: ana(AT)nyayahealth(DOT)org.
I. THE USE OF MICROSCOPE
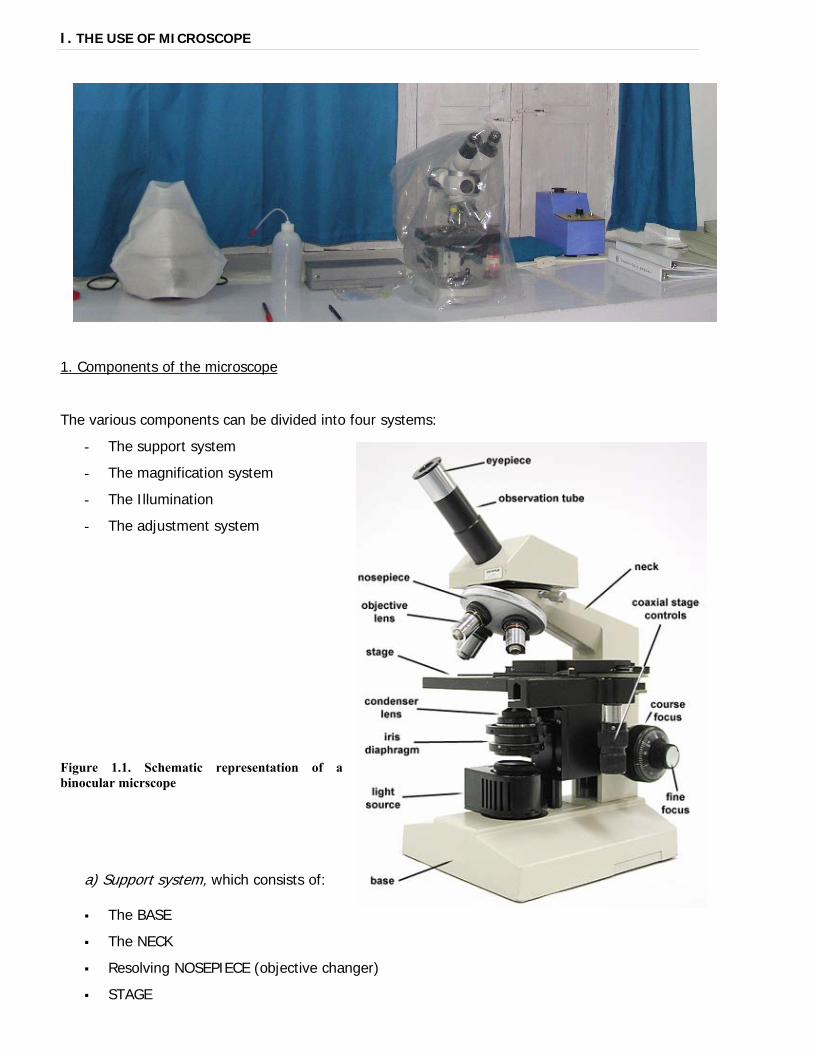
1. Components of the microscope
The various components can be divided into four systems:
- The support system
- The magnification system
- The Illumination
- The adjustment system
Figure 1.1. Schematic representation of a binocular micrscope
a) Support system, which consists of:
The BASE
The NECK
Resolving NOSEPIECE (objective changer)
STAGE

MECHANICAL STAGE, which gives a slow controlled movement to the object slide.
b) Magnification system or system of lenses mounted in two different groups:
The OBJECTIVES, positioned at the bottom of the tube, just above the preparation under examination.
The magnifying power of each objective is:
- 10x that magnifies 10 times.
- 40x that magnifies 40 times
- 100x that magnifies 100 times.
NOTE: The 100x objective is marked with a red ring which means that it should be used with immersion oil. Immersion oil also increases the resolving power (ability to reveal closely adjacent details as separate and distinct).
The EYEPIECE is located at the top of the tube. The eyepiece magnification power is marked on it (e.g.
5X).
Note: When a objective is analyzed with a 40X objective and a 5x eyepiece, it means that the object is magnified 40 times by the objective and then 5 times by the eyepiece (total magnification = 5x40 = 200).
c) Illumination components:
LIGHT SOURCE
MIRROR: The mirror reflects rays from the light source onto the object.
CONDENSER: It brings the rays of light to a focus on the object to be examined.
The condenser can be raised to maximum illumination and lowered to minimum illumination,
and it must be centered and adjusted correctly.
Figure 1.2 – Representation of some of the illumination components of a microscope: Condenser (A) and Diaphragm (B).[Adapted from WHO]
A) B)
DIAFHRAGM: It is located inside the condenser and it’s is used to reduce or increase the angle
and therefore the amount of light that passes into the condenser.
Note: The wider the diaphragm the greater the numerical aperture and the smaller the detailed
seen. But the contrast is correspondingly diminished.
FILTERS: Colored filters are present in some microscopes and can be removed or placed
according to the type of preparation being examined.
d) Adjustment system, which consists of:
COARSE ADJUSTEMENT SCREW: first used to achieve an approximate focus. This screw should
not be used when the 100 X objective is in use.
FINE ADJUSTEMENT SCREW: moves the objective more slowly and is used to bring the object
into the perfect focus.
COINDENSER ADJUSTEMENT SCREW: raise the condenser for greater illumination or lower the
condenser to reduce the illumination.
CONDENSER CENTRING SCREWS: Usually three screws are placed around the condenser and
are used to centre the condenser exactly in relation to the objective.
IRIS DIAPHRAGM LEVER fixed to the condenser. It can be moved to close or open the
diaphragm, thus reducing or increasing both the angle and the intensity of the light.
MECHANICAL STAGE CONTROLS used to move the object slide on the stage.
2. Setting up the microscope
A microscope must be installed in a clean and well ventilated environment, away from chemicals.
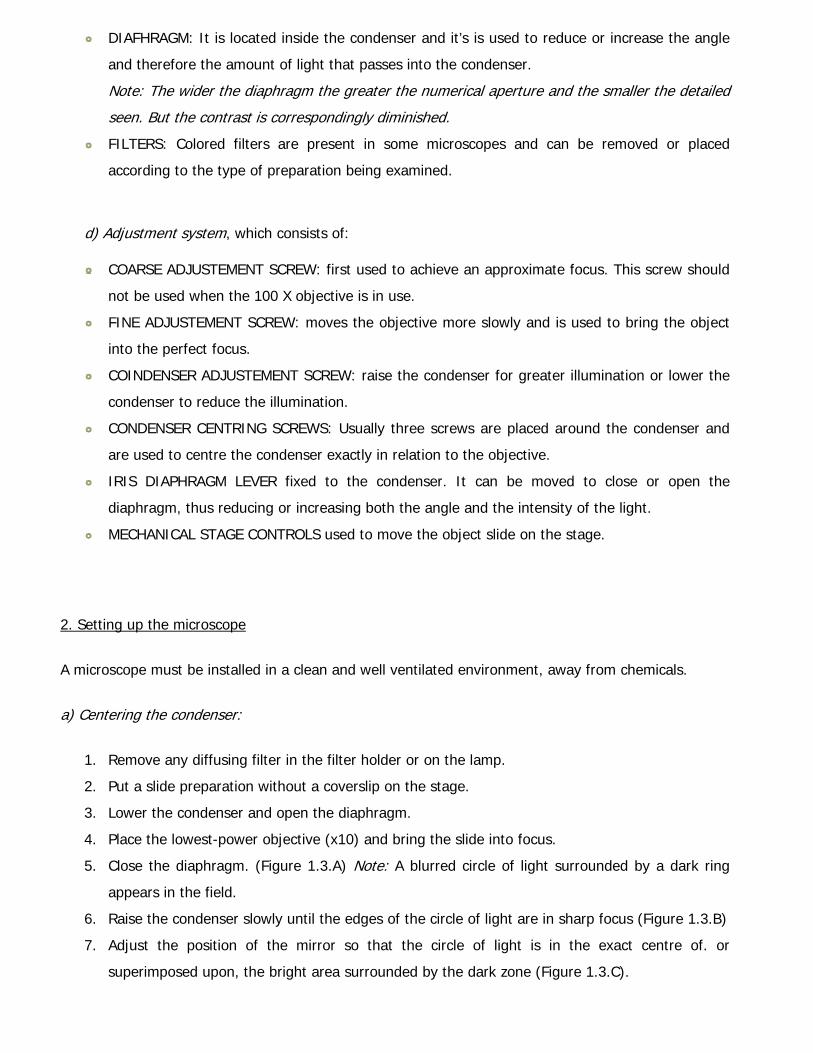
a) Centering the condenser:
1. Remove any diffusing filter in the filter holder or on the lamp.
2. Put a slide preparation without a coverslip on the stage.
3. Lower the condenser and open the diaphragm.
4. Place the lowest-power objective (x10) and bring the slide into focus.
5. Close the diaphragm. (Figure 1.3.A) Note: A blurred circle of light surrounded by a dark ring
appears in the field.
6. Raise the condenser slowly until the edges of the circle of light are in sharp focus (Figure 1.3.B)
7. Adjust the position of the mirror so that the circle of light is in the exact centre of. or
superimposed upon, the bright area surrounded by the dark zone (Figure 1.3.C).

8. Adjust the centering screws of the condenser so that the circle of light is in the exact centre of
the field (Figure 1.3.D).
9. Check with the other objectives.
b) Adjusting the diaphragm:
1. Open the diaphragm completely.
2. Remove the eyepiece and look down the tube: the upper lens of the objective will be seen to
be filled with a circle of light.
3. Close the diaphragm slowly until the circle of light takes up only two-thirds of the surface. Do
this for each objective as it is used.
c) Focusing the eyepieces:
Focus first the eyepiece that has a focusing collar. If the collar is on the left eyepiece holder, close your
left eye and using the 40x objective, bring the image into focus for your right eyepiece.
Then close your right eye and look through the left eyepiece holder. If the image is not clear turn the
focusing collar until it is focus. The microscope is now adjusted to suit your own binocular vision.
2. Routine Maintenance of microscope:
Decontaminate regularly due to the permanent contact of the surfaces with biological tissues and
fluids.
Heavy contaminated can be removed with mild soapy solutions.
The instrument should then be cleaned with a 50:50 mixture of distilled water and 95%ethanol
(not suitable for optical surfaces).
The mechanical parts should be periodically cleaned and lubricated with machine oil to make
them run freely.
Figure 1.3. – Images observed at the microscope during the centralization of the condenser. A) diaphragm closed; B) Edges of the circle of light focus after raise the condenser; C) Light source centered by adjusting the position of the mirror; D) Light source centered after centering with the condenser centering screws.
A) B) C) D)
Optical surfaces (condenser, objectives, and eyepieces):
- Kept free from dust with a fine paintbrush.
- If dust is found inside the eyepiece, unscrew the upper lens and clean the inside.
- Clean with 80% petroleum ether (boiling point 60-80 C) and 20% 2-propanol.
Note: Do not use 95% ethanol, xylene or toluene to clean optical surfaces.
- Oil residues on the lenses should be removed with special lens paper, adsorbent paper or
medical-grade cotton wool.
3. Maintenance:
In order to maintain the microscope appropriately: check:
Check the mechanical stage; focusing mechanism; diaphragm; mechanical parts; spring load on
the specimen clamp (too high tension may result in breakage of slides and damage of the clamp);
optical alignment (a dim appearance of the specimen is often due to misalignment of the optical
parts rather than to insufficient light).
Remove any fungal growth
Clean all mechanical parts
4. Precautions:
Never dip the objectives in xylene or ethanol.
Never use ordinary paper to clean the lenses.
Never touch the lenses with the fingers.
Never clean the support or the stage with xylene or acetone.
Always use a air brush, a fine paintbrush or a blower to clean the inside lenses of the eyepieces
and objectives.
Never leave the microscope without the eyepieces unless the openings are plugged.
Never keep the microscope in a closed wooden box in hot humid countries.
Never press the objective on to the slide because both may break (care must be taken when
focusing the microscope).
Do not remove slides with the high power objective placed.
Keep the mechanical stage clean
Do not dismantle the optical components, as this may cause misalignment.
Never put the microscope away with immersion oil on the objectives. Remove any oil daily. Mild
soap solution is suitable for most cleaning.
Use organic solvents only in accordance with the manufacturer’s recommendations.
Always carry microscope with both hands: one under the foot and other holding the neck.
When changing a bulb, avoid touching the glass with your fingers (finger-prints reduce the
intensity of illumination).
To maximize the lifespan of bulbs, adjust the voltage with a dimmer switch to give the lowest
required light intensity.
Use a voltage stabilizer to prevent from voltage fluctuates.
Also, in humid climates:
Avoid fungal growth by always keeping the microscope under a air tight plastic cover when not in
use, Also keep a dish filled with blue silica to dry the air under the cover.
Note: Blue silica turns red when saturated and can be regenerated by heating over a fire)
The microscope must be cleaned daily to get rid of dust.
Do not keep optical instruments for long periods in close compartments in order to avoid fungal
growth that can corrode optical surfaces.

II.THE USE OF COLORIMETER
General rules for the use of a colorimeter: - Read the colorimeter user manual before use the equipment.
- Make sure the cuvettes are optically matched, the optical surfaces are dry, clean and free from
finger marks and scratches.
- For clinical chemistry tests, 10 mm (light path) cuvettes are recommended.
- Before reading the Abs check if the solution is clear, if there are no bubbles and if it’s at RT.
- Calibrate the colorimeter for each test method and every time new reagents are used.
- Clean the colorimeter immediately after a spillage.
- Switch off the colorimeter after use. At the end of the day disconnect from the battery and cover.
- Get lamps’ stocks.
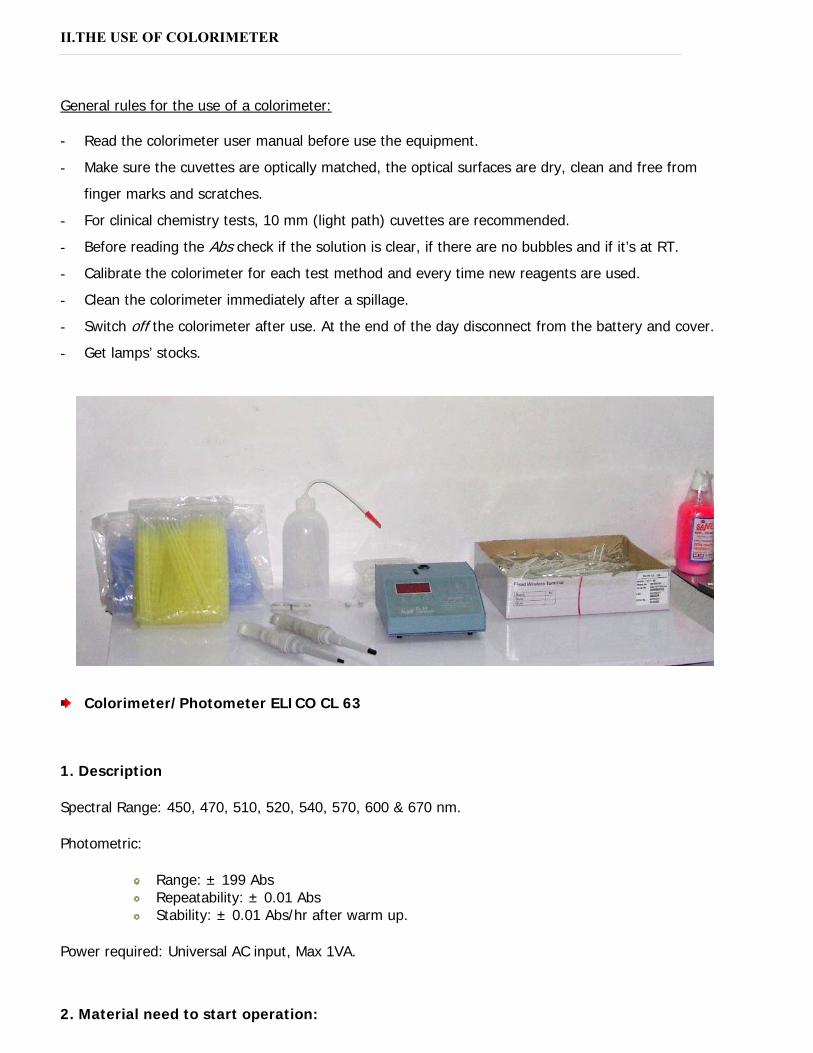
Colorimeter/Photometer ELICO CL 63
1. Description
Spectral Range: 450, 470, 510, 520, 540, 570, 600 & 670 nm.
Photometric:
Range: ± 199 Abs Repeatability: ± 0.01 Abs Stability: ± 0.01 Abs/hr after warm up.
Power required: Universal AC input, Max 1VA.
2. Material need to start operation:
- Colorimeter
- Cuvettes (10 mm) (glass or plastic)
- Paper
- Distilled water
- Blank/standard/control/sample solution.
3. USING THE COLORIMETER…
Pre-operating instructions:
• Keep blank and sample ready to be tested.
• Keep always the same container for the blank (B) and also for the sample to be tested (T)
• Ensure:
- Availability of universal input 90 to 270 V single phase power supply at the power socket
- Cartridge fuse of F3A, 250 V is inserted in its place in the instrument
- The 3 contact moulded plug is inserted into the power outlet.
- Power outlet is in ON position
Operating instructions:
• Place/make sure the colorimeter is on a solid surface free from mechanical vibration (no
centrifuge) and away from sunlight.
• Switch the instrument ON and allow sufficient time for colorimeter stabilization (10 min).
• Select the appropriate filter disc. For details on further applications check the manual.
• Transfer the correct amount of blank solution or distilled water (1 ml) to the cuvette B and
place it in the colorimeter Test Tube Holder (make sure that the tube is in the correct position
and that the optical sides are dry.
• Read and register the value or press zero.
• Transfer the correct amount of the sample solution (standard, control, or patient’s) to the clean
and dry T cuvette.
• Replace the B cuvette by the T cuvette that contain the sample solution to be analyzed.
• Read and record the Abs reading shown on the Panel Meter.
• Return the blank solution to the colorimeter and check if it continues to read the expected
Abs/zero.
• Switch OF the colorimeter.
• Subtract the Blank Abs to the Sample Abs (if zero was not previously performed).
• Calculate the concentration of the control and test samples.
NOTE: Use at least 1 ml of solution. Do not overfill the test tube

4. Check the performance of the colorimeter: Measure the Abs of a sample solution of known Abs value.
→ If the Abs displayed on the readout match the expected value the instrument is considered to be
working properly.
→ If the Abs does not matched the expected value, further test should be performed in order to
confirm the source of the error.
NOTE: Make sure that the correct filter was selected and that the tube in the correct position and that
the optical sides are dry.
5. Maintenance
The colorimeter requires little or no maintenance:
a) Keep away from vibration and sunlight exposition.
b) Clean the colorimeter immediately after a spillage.
c) Replace fuse or lamp according to the following trouble shooting:
d)
Abnormality Possible fault Remedy
a) No display on Readout
b) Display glowing but %T and Abs getting
Fuse blew off
Lamp blew off
Replace fuse
Replace lamp
For any other fault consult the supplier or return the instrument to the nearest ELICO supplier
(Label correctly the equipment with the serial number and fault description and pack it correctly)
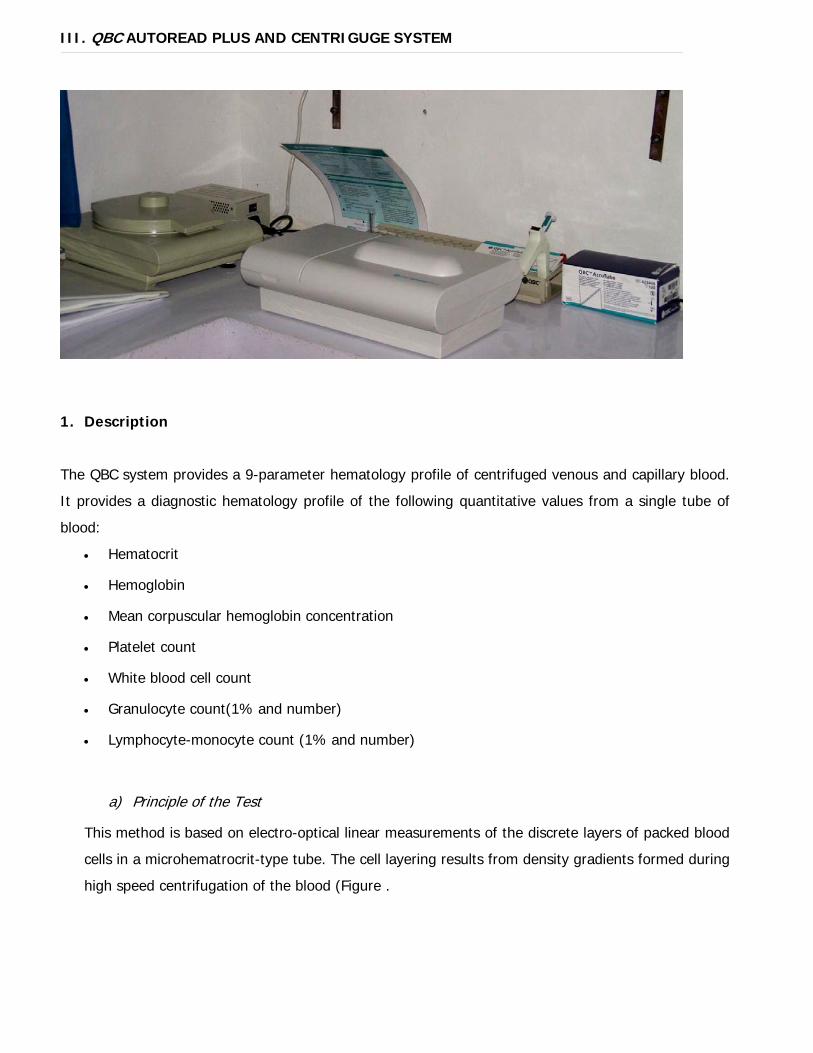
III. QBC AUTOREAD PLUS AND CENTRIGUGE SYSTEM
1. Description
The QBC system provides a 9-parameter hematology profile of centrifuged venous and capillary blood.
It provides a diagnostic hematology profile of the following quantitative values from a single tube of
blood:
• Hematocrit
• Hemoglobin
• Mean corpuscular hemoglobin concentration
• Platelet count
• White blood cell count
• Granulocyte count(1% and number)
• Lymphocyte-monocyte count (1% and number)
a) Principle of the Test
This method is based on electro-optical linear measurements of the discrete layers of packed blood
cells in a microhematrocrit-type tube. The cell layering results from density gradients formed during
high speed centrifugation of the blood (Figure .
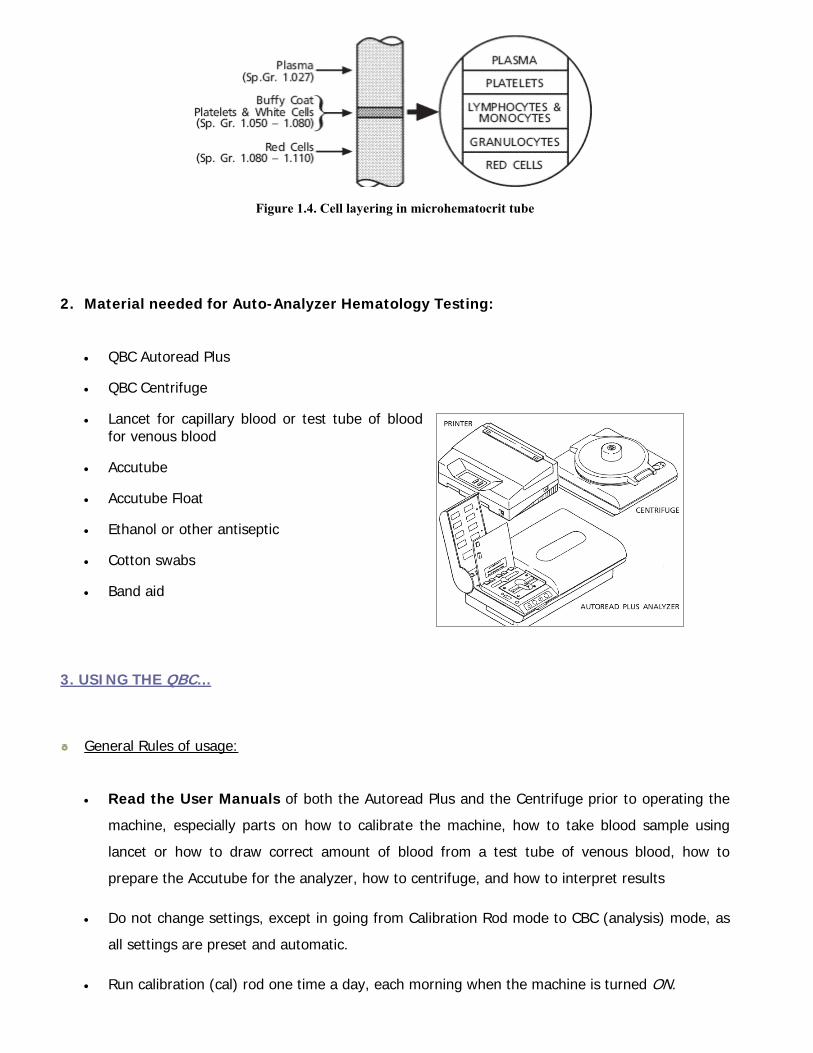
Figure 1.4. Cell layering in microhematocrit tube
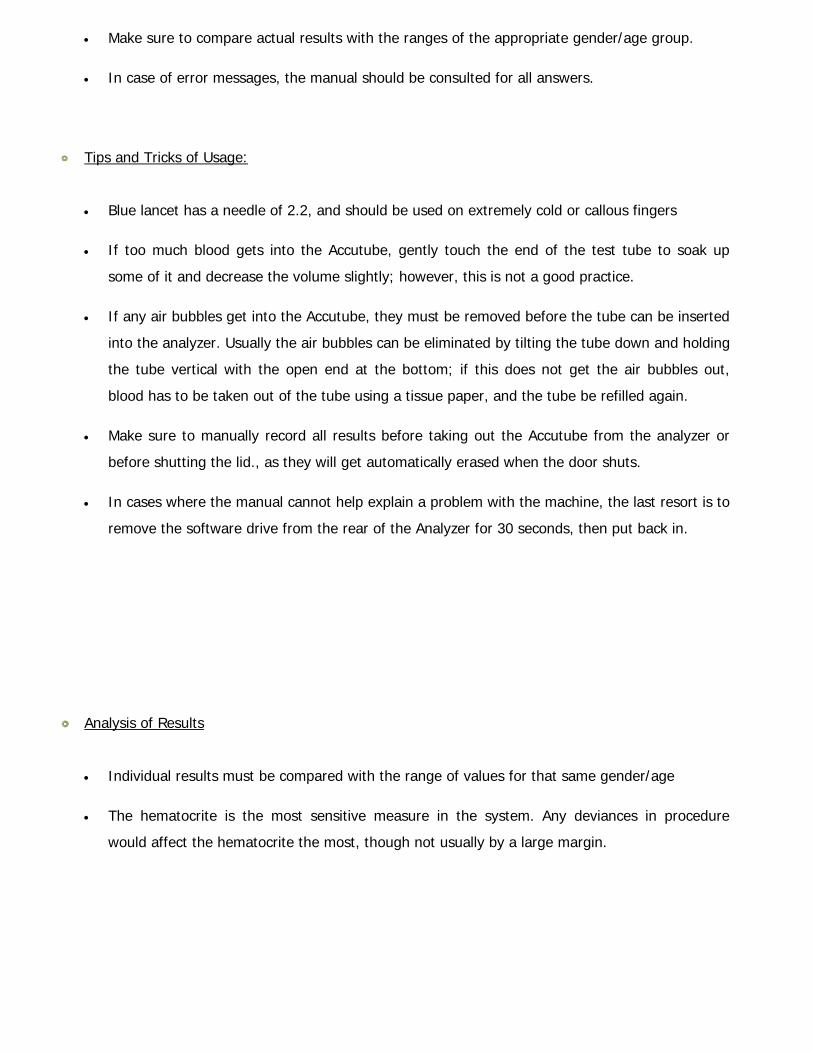
2. Material needed for Auto-Analyzer Hematology Testing:
• QBC Autoread Plus
• QBC Centrifuge
• Lancet for capillary blood or test tube of blood for venous blood
• Accutube
• Accutube Float
• Ethanol or other antiseptic
• Cotton swabs
• Band aid
3. USING THE QBC…
General Rules of usage:
• Read the User Manuals of both the Autoread Plus and the Centrifuge prior to operating the
machine, especially parts on how to calibrate the machine, how to take blood sample using
lancet or how to draw correct amount of blood from a test tube of venous blood, how to
prepare the Accutube for the analyzer, how to centrifuge, and how to interpret results
• Do not change settings, except in going from Calibration Rod mode to CBC (analysis) mode, as
all settings are preset and automatic.
• Run calibration (cal) rod one time a day, each morning when the machine is turned ON.
• Make sure to compare actual results with the ranges of the appropriate gender/age group.
• In case of error messages, the manual should be consulted for all answers.
Tips and Tricks of Usage:
• Blue lancet has a needle of 2.2, and should be used on extremely cold or callous fingers
• If too much blood gets into the Accutube, gently touch the end of the test tube to soak up
some of it and decrease the volume slightly; however, this is not a good practice.
• If any air bubbles get into the Accutube, they must be removed before the tube can be inserted
into the analyzer. Usually the air bubbles can be eliminated by tilting the tube down and holding
the tube vertical with the open end at the bottom; if this does not get the air bubbles out,
blood has to be taken out of the tube using a tissue paper, and the tube be refilled again.
• Make sure to manually record all results before taking out the Accutube from the analyzer or
before shutting the lid., as they will get automatically erased when the door shuts.
• In cases where the manual cannot help explain a problem with the machine, the last resort is to
remove the software drive from the rear of the Analyzer for 30 seconds, then put back in.
Analysis of Results
• Individual results must be compared with the range of values for that same gender/age
• The hematocrite is the most sensitive measure in the system. Any deviances in procedure
would affect the hematocrite the most, though not usually by a large margin.
Quality Control
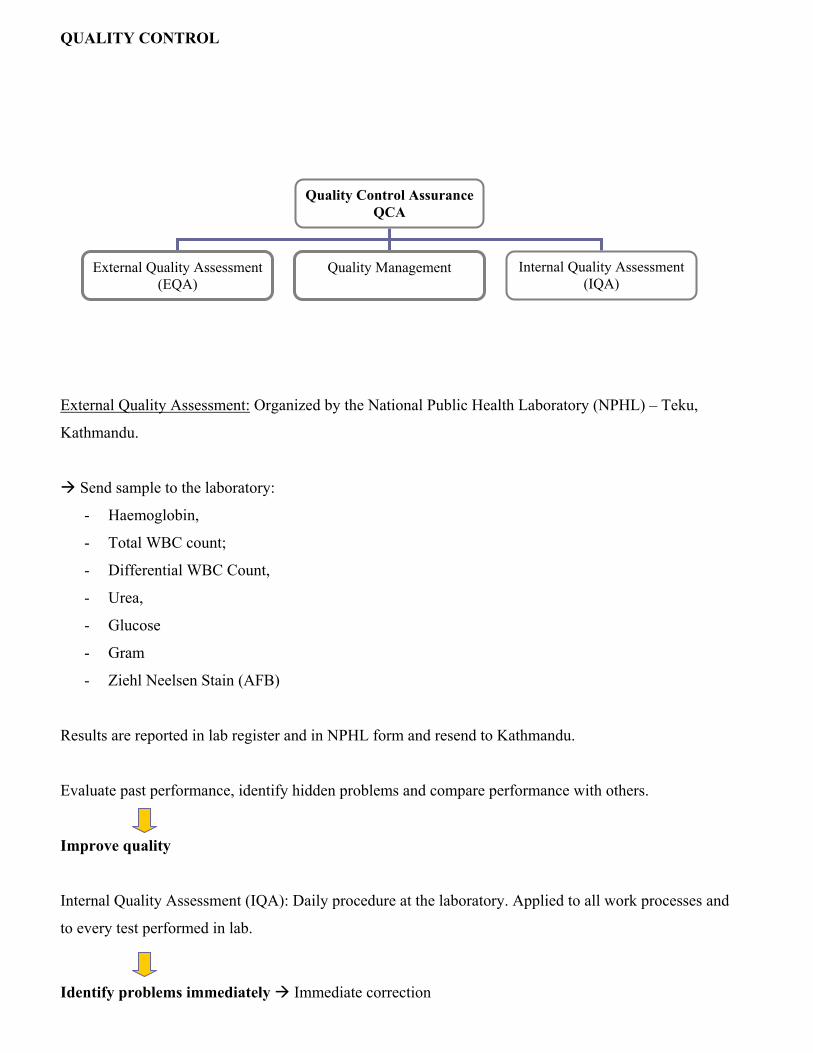
QUALITY CONTROL
External Quality Assessment: Organized by the National Public Health Laboratory (NPHL) – Teku,
Kathmandu.
Send sample to the laboratory:
- Haemoglobin,
- Total WBC count;
- Differential WBC Count,
- Urea,
- Glucose
- Gram
- Ziehl Neelsen Stain (AFB)
Results are reported in lab register and in NPHL form and resend to Kathmandu.
Evaluate past performance, identify hidden problems and compare performance with others.
Improve quality
Internal Quality Assessment (IQA): Daily procedure at the laboratory. Applied to all work processes and
to every test performed in lab.
Identify problems immediately Immediate correction
Quality Control AssuranceQCA
External Quality Assessment (EQA)
Internal Quality Assessment(IQA)
Quality Management

Quality Management:
- Training of laboratory staff
- Use of SOPs
- Standard supply management
- Standard equipment management
- Supervision and Organization
Quality control: Before implement the test in the laboratory: Calculate the Standard deviation (SD) and the coefficient of variation (CV) for the 0.5 mg/dl standard
by measuring 15 samples. By plotting these values as previously described, the Optimal Conditions
Variance (OCV) can be obtained.
In the beginning of each day, with the first test.
Measure the Abs of a standard and see if it matches the calibration curve. If the standard matches the
calibration curve the sample can be read from the graph.
If it doesn’t match the calibration curve, check how the result is distributed around the mean (if it’s
within the standard deviation (2SD)).
If the value is outside the limits, further measurements should not be performed till confirm the source
of the error (operator, colorimeter performance, reagent…). A new standard or a control should be tested
to see if the expected value of concentration is obtained.
Setting up a new test:
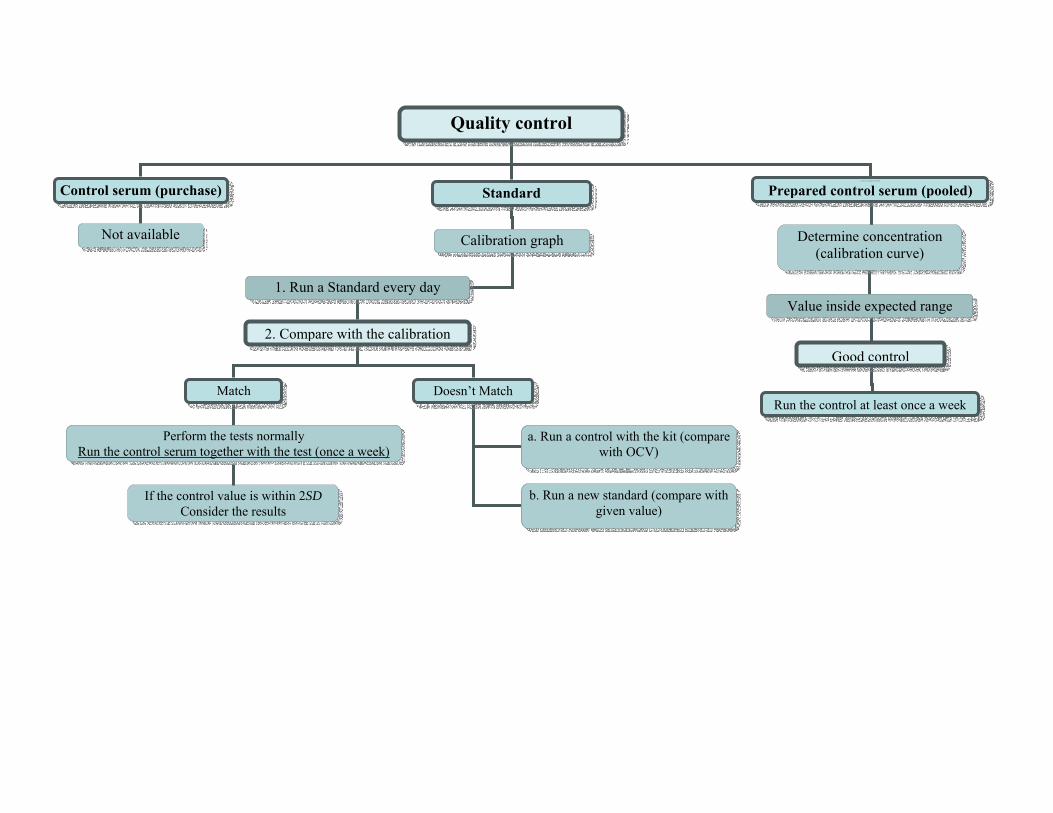
Quality control
Control serum (purchase) Standard Control serum (produced in the lab)
Prepared control serum (pooled)
Determine concentration (calibration curve)
Not available Calibration graph
1. Run a Standard every day
2. Compare with the calibration
Match Doesn’t Match
Perform the tests normally Run the control serum together with the test (once a week)
a. Run a control with the kit (compare with OCV)
b. Run a new standard (compare with given value)
Value inside expected range
Good control
Run the control at least once a week
If the control value is within 2SD Consider the results
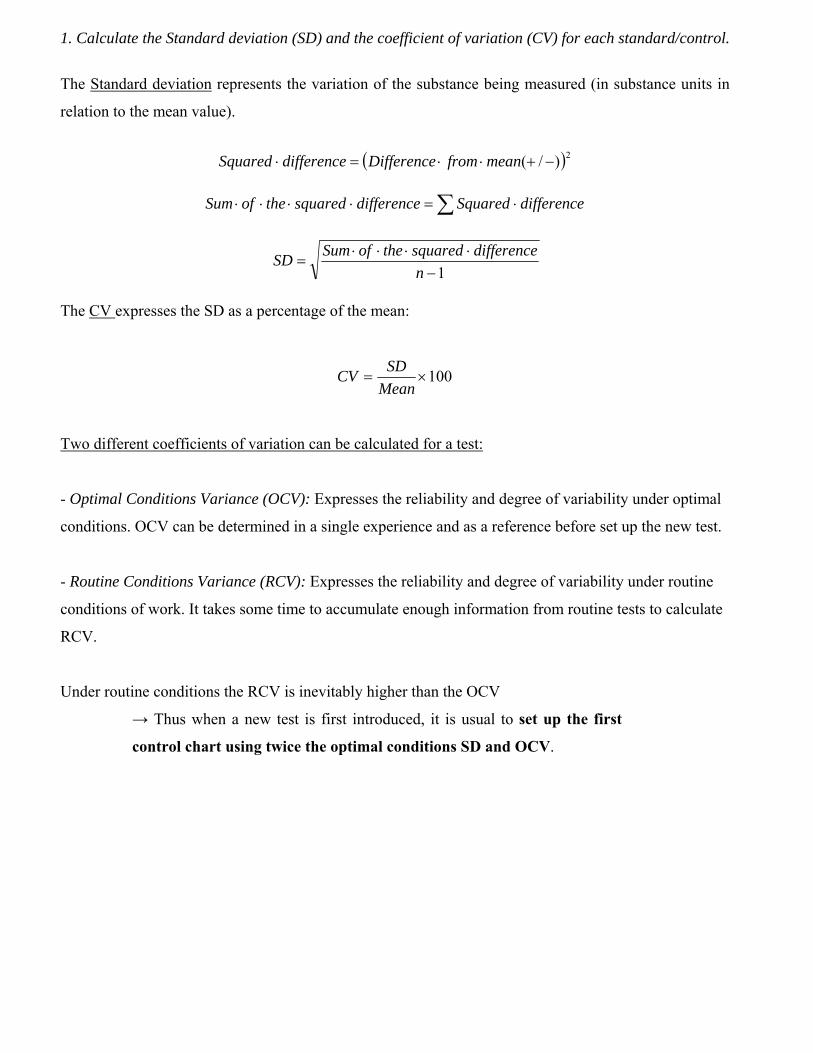
1. Calculate the Standard deviation (SD) and the coefficient of variation (CV) for each standard/control.
The Standard deviation represents the variation of the substance being measured (in substance units in
relation to the mean value).
( )2)/( −+⋅⋅=⋅ meanfromDifferencedifferenceSquared
∑ ⋅=⋅⋅⋅⋅ differenceSquareddifferencesquaredtheofSum
1−⋅⋅⋅⋅
=n
differencesquaredtheofSumSD
The CV expresses the SD as a percentage of the mean:
100×=Mean
SDCV
Two different coefficients of variation can be calculated for a test:
- Optimal Conditions Variance (OCV): Expresses the reliability and degree of variability under optimal
conditions. OCV can be determined in a single experience and as a reference before set up the new test.
- Routine Conditions Variance (RCV): Expresses the reliability and degree of variability under routine
conditions of work. It takes some time to accumulate enough information from routine tests to calculate
RCV.
Under routine conditions the RCV is inevitably higher than the OCV
→ Thus when a new test is first introduced, it is usual to set up the first
control chart using twice the optimal conditions SD and OCV.
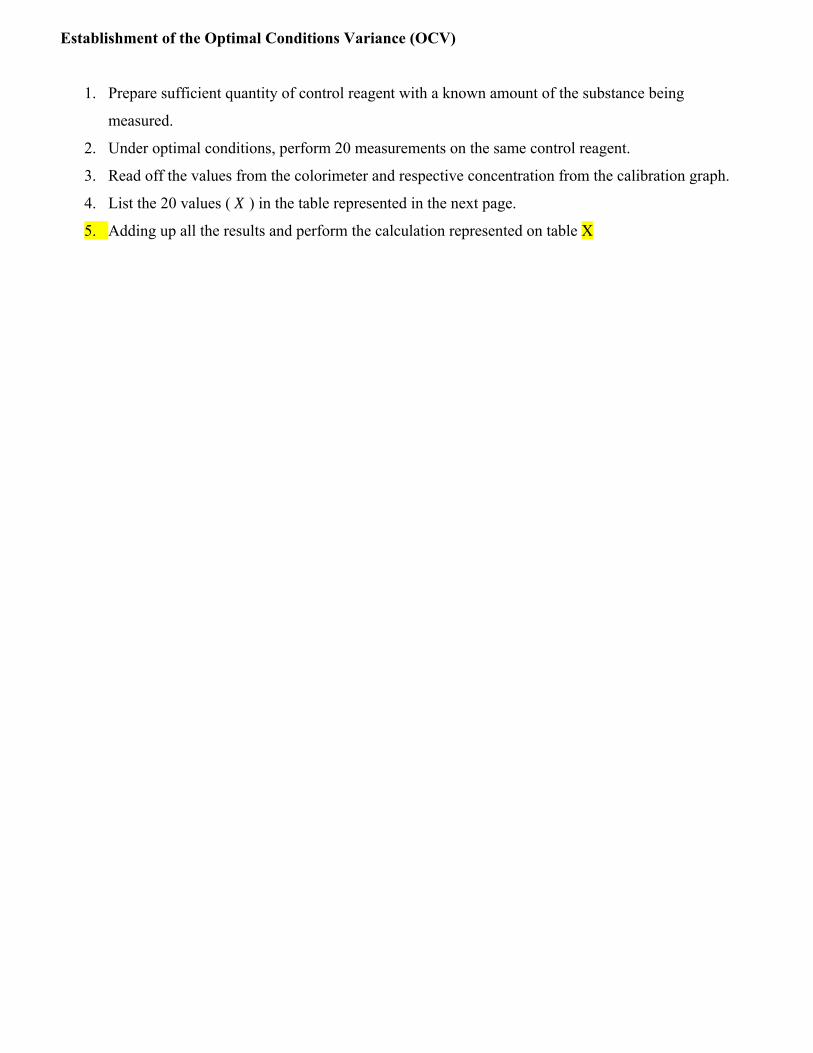
Establishment of the Optimal Conditions Variance (OCV)
1. Prepare sufficient quantity of control reagent with a known amount of the substance being
measured.
2. Under optimal conditions, perform 20 measurements on the same control reagent.
3. Read off the values from the colorimeter and respective concentration from the calibration graph.
4. List the 20 values ( X ) in the table represented in the next page.
5. Adding up all the results and perform the calculation represented on table X
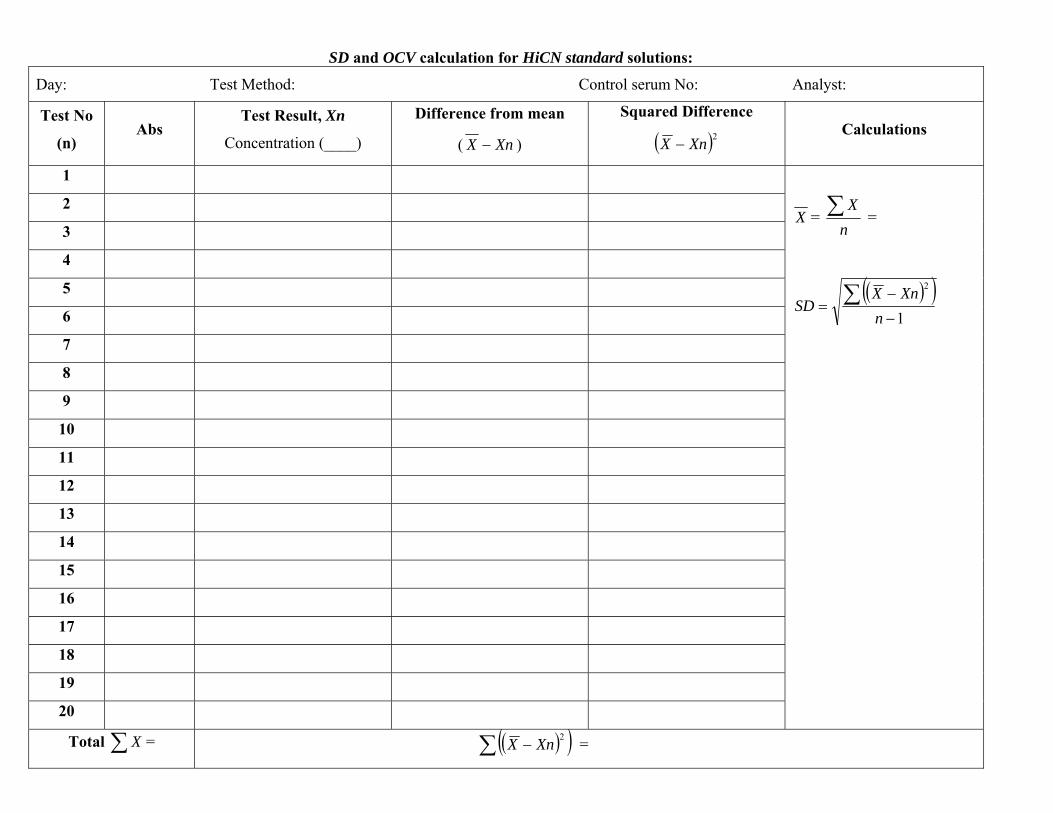
SD and OCV calculation for HiCN standard solutions:
Day: Test Method: Control serum No: Analyst:
Test No
(n) Abs
Test Result, Xn
Concentration (____)
Difference from mean
( XnX − )
Squared Difference
( )2XnX − Calculations
1
2
3
4
5
6
7
8
9
10
11
12
13
14
15
16
17
18
19
20
X = n
X∑ =
( )( )1
2
−
−= ∑
nXnX
SD
Total ∑ X = ( )( )∑ −2XnX =

Checking the test method and colorimeter: Calibration graphs Calibration curves are used to check if the Abs of the measured substance increases in a linear way with its
concentration.
How to prepare a calibration curve?
1. Allow the standard solutions to warm to room temperature.
2. Place the correct filter in the colorimeter or set the right wavelength.
3. Turn the colorimeter on.
4. Zero the colorimeter with diluting/blank fluid.
5. Read the Abs of each standard, beginning with lowest.
6. Plot the Abs (y) of each standard against its concentration (g/L) (x) in a graph paper and draw a
straight line from the zero through the points plotted (extended the line till 200 g/L)..
7. Make a table for intended substance values from 20-200 g/L.
Notes:
1. Use 5 standards: Series of dilutions of the substance being assayed.
Graph interpretation and further application:
1. Check if a straight line is drawn through the points plotted:
a) If yes the Beer-Lambert formula can be applied to estimate the concentration and the value can
be read from a table covering the appropriate range of values (prepared from the graph).
Concentration of test = Abs of test x Concentration of standard
Abs of standard
b) If a non-linear graph is produced the Beer-Lambert formula cannot be used and the values must
be read from the calibration graph.
Notes:
1. If one or two points are slightly off the linear line, it usually means inaccurate pipetting. Repeat the
calibration if a line of “best fit” cannot be drawn.
2. Ideally the line should pass through zero at an 45o angle. If the angle is too steep or to flat, repeat the
readings. Using the filter or wavelength near the maximum absorption.

During calibration always record: Date, instrument used, filter used, blank solution, used to zero, name of
the analyst.
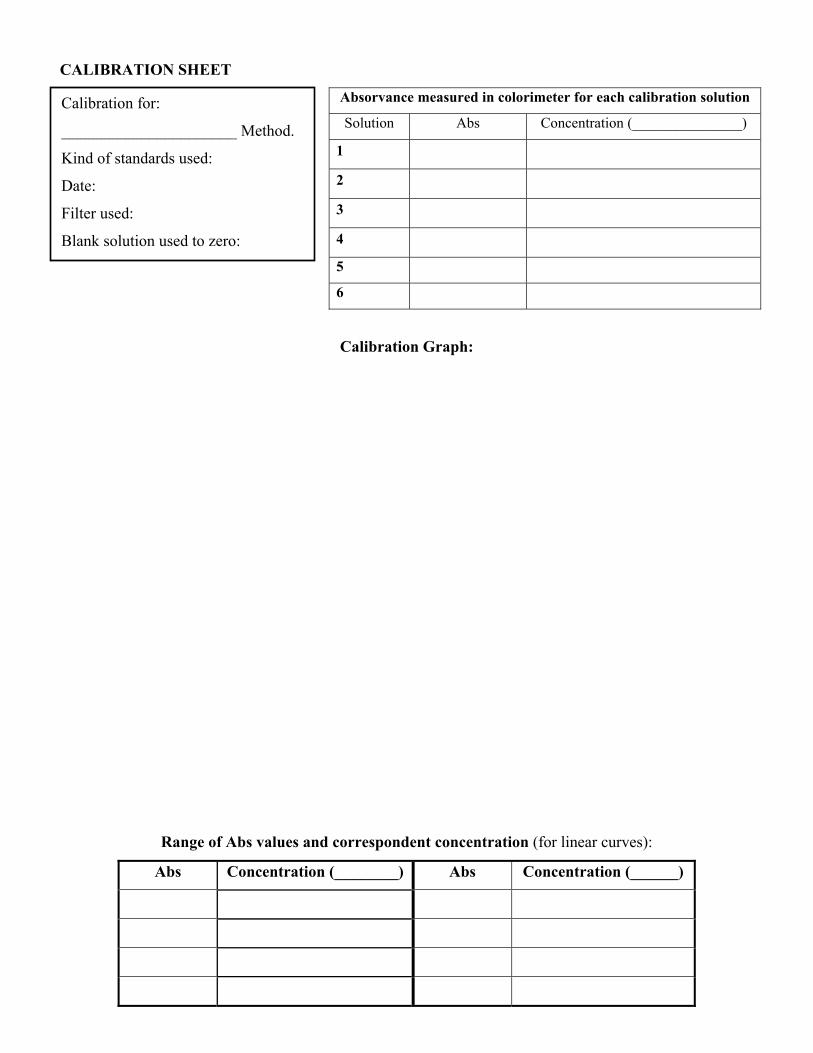
CALIBRATION SHEET
Absorvance measured in colorimeter for each calibration solution
Solution Abs Concentration (_______________)
1
2
3
4
5
6
Calibration Graph:
Range of Abs values and correspondent concentration (for linear curves):
Abs Concentration (________) Abs Concentration (______)
Calibration for:
______________________ Method.
Kind of standards used:
Date:
Filter used:
Blank solution used to zero:
Daily control:
In the beginning of the day, at least the reading of 2 standards must be checked to see if it matches with the
calibration graph. The correspondent values should be also registered and marked every day in the monthly
graph in order to see if its within the acceptable limits (SD). This record helps to predict upward or
downward drifts in relation to mean (Interpretation of results in next page).
Check turbidity and presence of floccules in the solutions which might indicate deterioration or
contamination by fungi. Suspicious fluids should be discarded and not used.
For Drabkin’s Reagent:
Also visible (turbidity) and photometric check of the diluting fluid must be performed to look for signs of
deterioration:
1. Measure against a water blank with a yellow-green filter in the colorimeter (wavelength 540 nm)
Note: A zero reading should be obtained for the diluting fluid (with correct pH 7.0-7.4).
A different result may indicate deterioration and thus the fluid should not be used. When this happens,
check the absorbance of a new equal fluid to check if the problem is the reagent or the equipment.
If a control serum is available, run the control together with each test once a week, and plot it in the quality
control graph.
Furthermore, a control serum will be sent from TEKU (Kathmandu) in order to check the performance of
our equipment, technician and methodology. The results obtained in Sanfe Bagar laboratory will be resend
to Kathmandu in order to compare it with TEKU results.
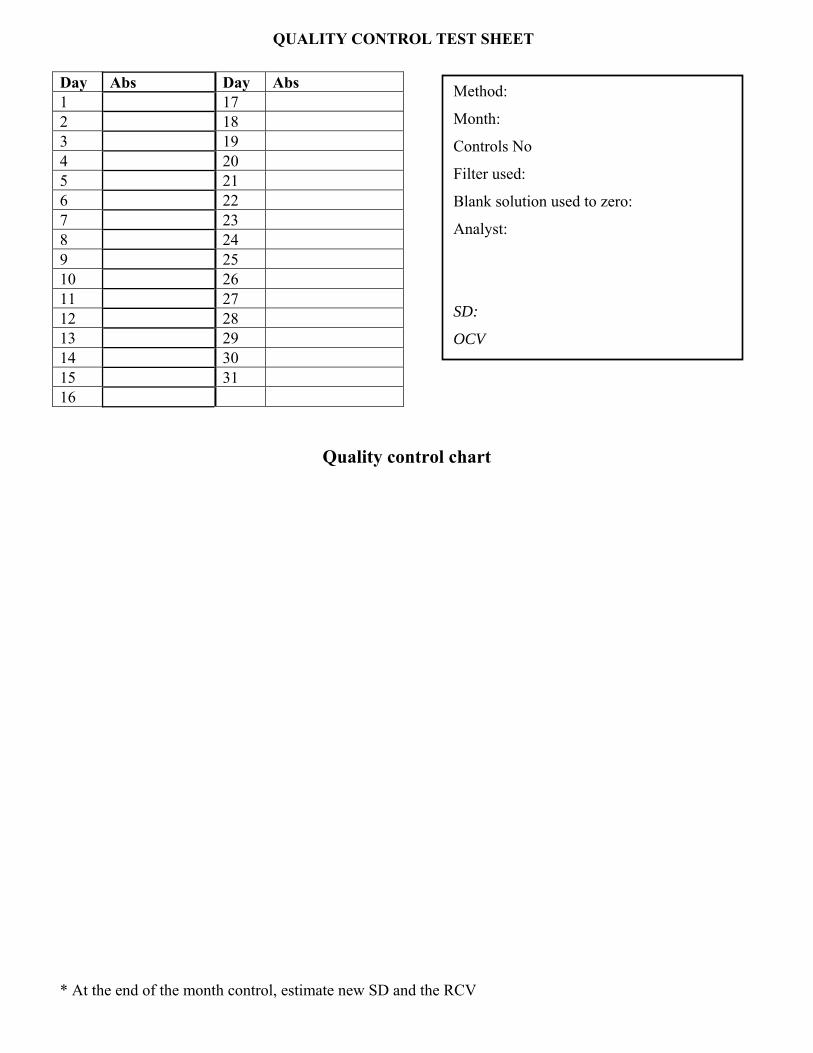
Quality control chart
* At the end of the month control, estimate new SD and the RCV
Day Abs Day Abs 1 17 2 18 3 19 4 20 5 21 6 22 7 23 8 24 9 25 10 26 11 27 12 28 13 29 14 30 15 31 16
QUALITY CONTROL TEST SHEET
Method:
Month:
Controls No
Filter used:
Blank solution used to zero:
Analyst:
SD:
OCV

Daily interpretation from Quality control tests (Check where the control sample Abs is positioned in the graph)
Results Interpretation What to do? Result Interpretation What to do? Value within +/- 2 SD limits
Reliable result and equipment
Further patient’s results can be considered
Value outside +/- 2SD limits:
The result is not reliable because: 1. Wrong filter being used 2. Reagent deterioration/wrong working reagent. 3. Unacceptable performance of the equipment.
a) Check the filter in
use b) Check the reagent in
use c) If both are OK: Measure a fresh control and pre-analyzed/characterized samples
i) The fresh standard’ Abs is within +/- 2 SD limits and the samples present the same Abs values. ii) The Abs of the new standard continues not acceptable and the samples values do not match the previous results. iii) The Abs of the new standard continues not acceptable and the samples values match the previous results.
The equipment is reliable. The result is not reliable probably because: - Faulty equipment. The result is not reliable probably because: - Deterioration of the standard reagents
→ The old standard must be discarded. - Further patient’s results can be reported. → Further results should not be recorded. Check and Fix equipment → Further results should not be recorded till confirm that the standard solution is the source of the problem. Analyze another standards/characterized solutions.
Detecting errors that can lead to incorrect test results:
Incorrect or uncommon test results can be generated from errors produced during:
1. Pre-analytical stage
2. Analytical stage
3. Post-analytical stage
In order to anticipate and avoid errors and incorrect test results, the following precautions should
be considered and followed:
1. Pre-analytical stage:
• DO NOT collect blood from the wrong patient. The Laboratory staff MUST check the
patient’s identification/number and take special ATTENTION when there are language
difficulties.
• DO NOT use a wet syringe and needle when collecting venous blood. DO NOT remove
the needle from the syringe before dispensing the blood.
• DO NOT collect blood from an arm into which an intravenous infusion has been given.
• DO NOT apply a tourniquet too tightly or for too long because it can lead to venous
stasis and false increase of the Hemoglobin or other detected substances.
• DISPENSE blood into a container with sufficient anticoagulant (EDTA) and MIX
appropriately to avoid formation of clots in the sample.
• ADD sufficient blood to anticoagulant in a container.
• DO NOT leave blood samples at high temperatures and exposed to sunlight and TEST it
as soon as possible.
• APPLY correct techniques for the collection of capillary blood (from a qualified person).
E.g. (Excessive squeezing of tissues can lead to sample dilution with tissues juice).
• DO NOT use a wet and damaged/fragmented pipette to collect capillary blood
• When a specimen reaches the laboratory it should be accompanied by a request form
which provides the following patient details:
- Name

- Age
- Gender
- Inpatient
- Outpatient number
- Ward when an impatient
- Home area or village
- Patient Illness
- Date and time of specimen collection
• Check if the identity on the specimen container matches the one from the request form.
2. Analytical stage:
• Mix the samples appropriately. (E.g. Before testing anticoagulant venous blood it must be
mixed for 2-5 minutes (manually or preferably on a mixer)
• Avoid pipetting errors: wipe the blood from the outside surface of a pipette tip and check
if the blood is on the graduation line before dispensing it. Do not used wet or chip pipette
tips.
• Prepare and stain sample films correctly:
- Use a clean grease-free slide and smooth edged spreader.
- The spreading of a sample film must be done by an experienced technician.
- Avoid humidity (causes lyses of red cells) prior to fixation (a hair dryer can help
to dry films rapidly).
- Avoid the presence of water in the methanol used to fix the film.
- Prepare the stock stain correctly and without water.
- Use suitable water to prepare the buffered water and check the appropriate pH (if
not correct smears appear to red or blue.
- Respect the staining time.
- Apply the staining technique in a correct way to avoid stain deposit.
- Prepare blood films that will be only used as a control and a reference of well
prepared staining.
3. Post-analytical stage:
• Report and verify test results.
• Take appropriate actions when a result has serious clinical implications.
• Ensure that the results are interpreted correctly and that adequate records are kept.


Standard Operation Process (SOPs)
MICROSCOPY
Gram Stain protocol
Gram staining of corneal material enables visualization of bacteria and fungi within the tissue,
thus providing a simple and effective means of differentiating between the two commonest types
of causative organism, enabling appropriate treatment to be initiated.
Materials
• Microscope slides (76.2 mm x 25.4 mm x 1.2 mm)
• Disposable micropipettes
• Light microscope
• Paper towel
• Immersion oil
• Timer
• Washed bottles (with filtered water)
• Droppers or suitable stain dispensing container
• Reagent containers (clear and amber)
Reagents
• Distilled water
• Filtered water
Solutions:
• Crystal violet
• Gram’ s iodine
• Acetone-ethanol decolorizer

• Safranin or Carbol fuchsin
• Distilled water
Procedures
Fixation:
3. Make a smear of the tissue or body fluid that is to be stained, by spread it on a slide till
covering an area of about 15-20 mm.
4. Allow the smear to air dry completely
5. Depending on the type of smear, alcohol-fix as follows:
- For Gram negative diplococci (N.gonorrhoeae or N.menigitidis) fix with 1 or 2 drops of absolute ethanol.
- For gonococci or meningococci use methanol for 2 minutes.
6. Leave the alcohol on the smear for a minimum of 2 minutes or until the alcohol
evaporates.
Staining:
1. Cover the fixed smear with crystal violet stain for 30-60 minutes. This step colors all
cells violet.
2. Rapid wash off the stain with clean water (filtered water)
3. Tip off all the water by tapping gently on paper towels and cover the smear with Gram's
iodine for 30-60 seconds. (All cells remain violet).
4. Wash off the iodine with filtered water.
5. Decolorize rapidly (few seconds) with ethanol-acetone (1:1, v/v). Wash immediately with
filtered water.
6. Cover the smear with safranin or Carbol fuchsin and incubate for 30 seconds-1 minute.
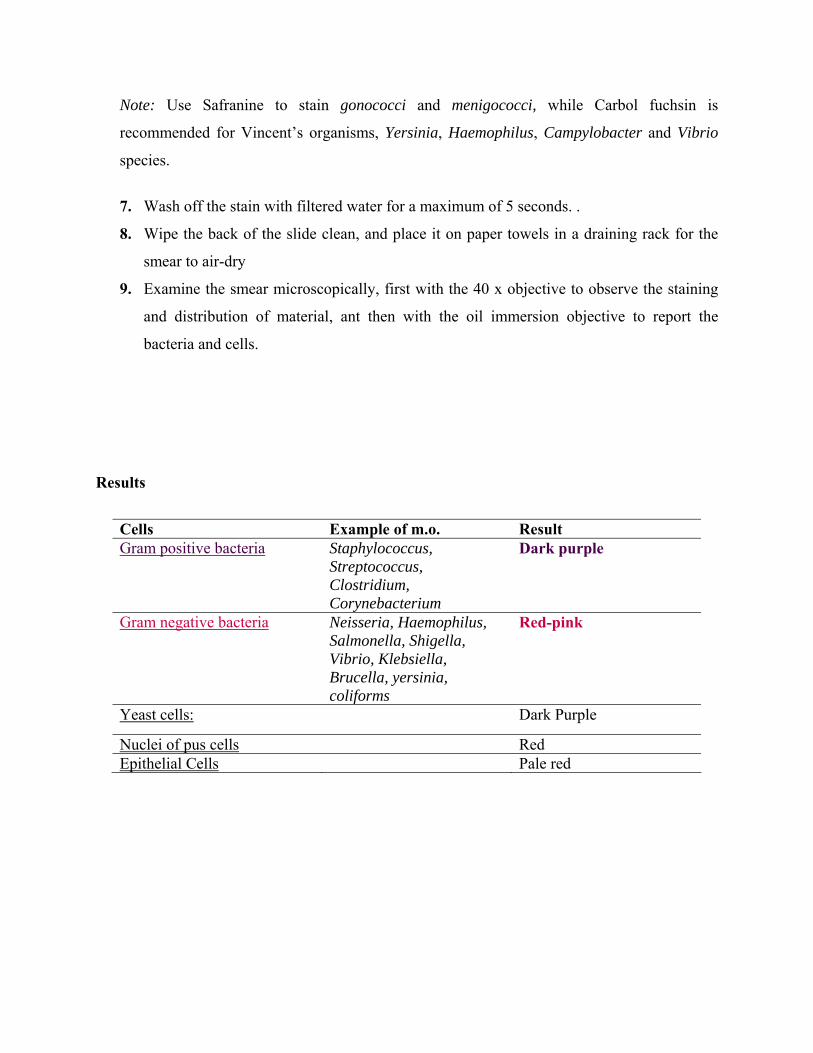
Note: Use Safranine to stain gonococci and menigococci, while Carbol fuchsin is
recommended for Vincent’s organisms, Yersinia, Haemophilus, Campylobacter and Vibrio
species.
7. Wash off the stain with filtered water for a maximum of 5 seconds. .
8. Wipe the back of the slide clean, and place it on paper towels in a draining rack for the
smear to air-dry
9. Examine the smear microscopically, first with the 40 x objective to observe the staining
and distribution of material, ant then with the oil immersion objective to report the
bacteria and cells.
Results
Cells Example of m.o. Result Gram positive bacteria
Staphylococcus, Streptococcus, Clostridium, Corynebacterium
Dark purple
Gram negative bacteria Neisseria, Haemophilus, Salmonella, Shigella, Vibrio, Klebsiella, Brucella, yersinia, coliforms
Red-pink
Yeast cells: Dark Purple
Nuclei of pus cells Red Epithelial Cells Pale red
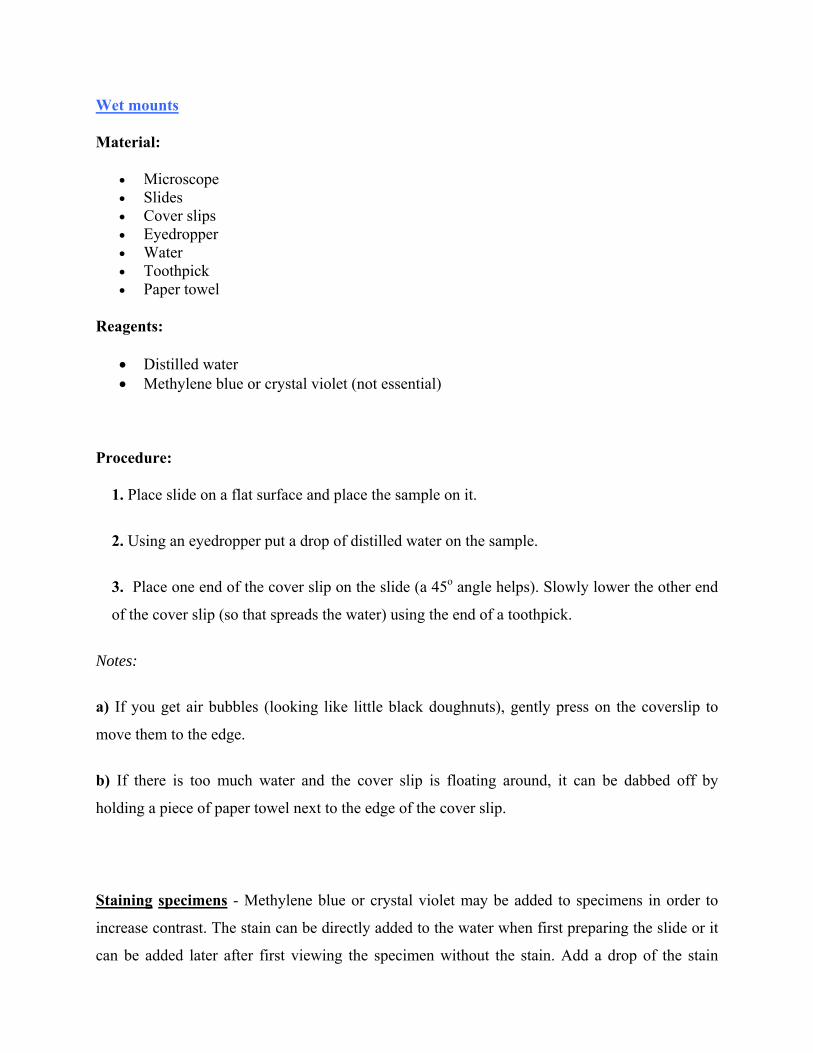
Wet mounts
Material:
• Microscope • Slides • Cover slips • Eyedropper • Water • Toothpick • Paper towel
Reagents:
• Distilled water • Methylene blue or crystal violet (not essential)
Procedure:
1. Place slide on a flat surface and place the sample on it.
2. Using an eyedropper put a drop of distilled water on the sample.
3. Place one end of the cover slip on the slide (a 45o angle helps). Slowly lower the other end
of the cover slip (so that spreads the water) using the end of a toothpick.
Notes:
a) If you get air bubbles (looking like little black doughnuts), gently press on the coverslip to
move them to the edge.
b) If there is too much water and the cover slip is floating around, it can be dabbed off by
holding a piece of paper towel next to the edge of the cover slip.
Staining specimens - Methylene blue or crystal violet may be added to specimens in order to
increase contrast. The stain can be directly added to the water when first preparing the slide or it
can be added later after first viewing the specimen without the stain. Add a drop of the stain

along one edge of the coverslip. Placing a piece of paper towel along the opposite edge of the
coverslip will help draw the stain under the coverslip.

KOH prep
Clinical indication: Identification of fungal elements in clinic specimens (e.g. vaginal
secretions).
Material:
• Scraping implement:
- Sterile blade for skin and nail;
- Forceps for hair;
- Sterile swab for vaginal secretions.
• Vials for vaginal samples
• Microscope slides
• Cover slips
• Disposable pipettes
• Microscope with a 20 watt halogen lamp and a blue daylight filter
• Scalpel
• Sterile swabs
• Vials
• Gloves
Reagents:
• 20% Potassium Hydroxide (KOH) with DMSO
• 0.9% Sterile sodium chloride
• Physiological saline
• 70 % alcohol
Vaginal sample:
Sample collection
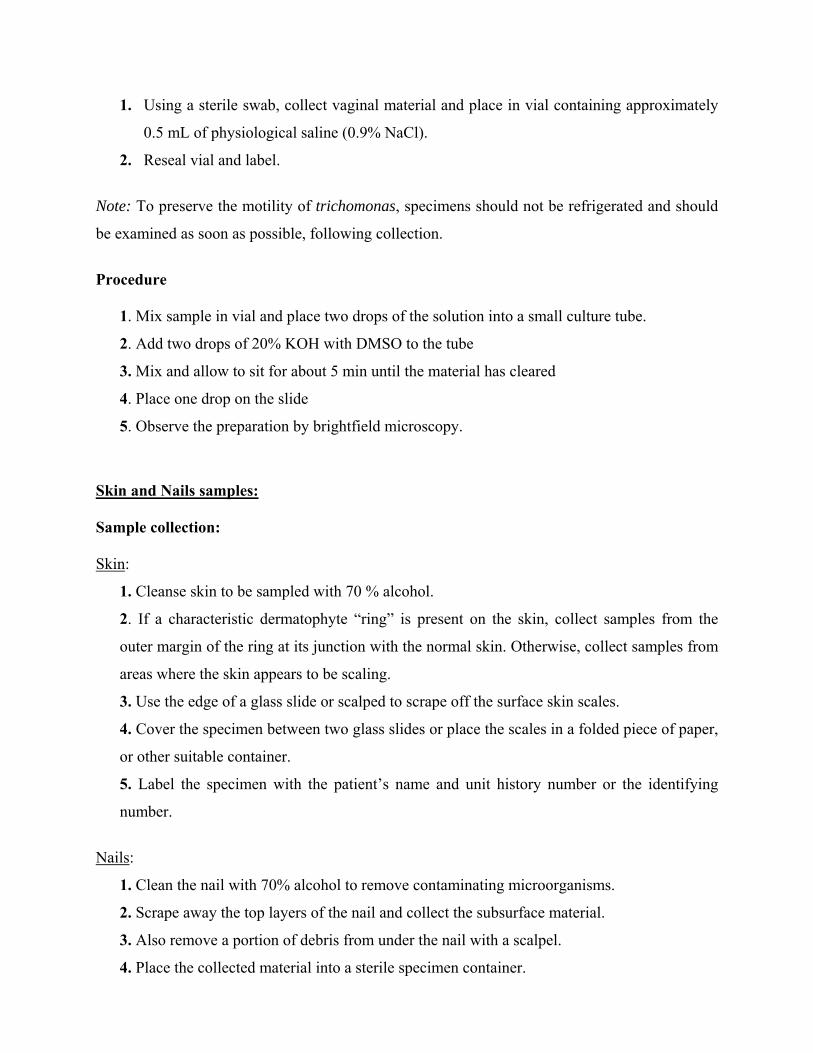
1. Using a sterile swab, collect vaginal material and place in vial containing approximately
0.5 mL of physiological saline (0.9% NaCl).
2. Reseal vial and label.
Note: To preserve the motility of trichomonas, specimens should not be refrigerated and should
be examined as soon as possible, following collection.
Procedure
1. Mix sample in vial and place two drops of the solution into a small culture tube.
2. Add two drops of 20% KOH with DMSO to the tube
3. Mix and allow to sit for about 5 min until the material has cleared
4. Place one drop on the slide
5. Observe the preparation by brightfield microscopy.
Skin and Nails samples: Sample collection: Skin:
1. Cleanse skin to be sampled with 70 % alcohol.
2. If a characteristic dermatophyte “ring” is present on the skin, collect samples from the
outer margin of the ring at its junction with the normal skin. Otherwise, collect samples from
areas where the skin appears to be scaling.
3. Use the edge of a glass slide or scalped to scrape off the surface skin scales.
4. Cover the specimen between two glass slides or place the scales in a folded piece of paper,
or other suitable container.
5. Label the specimen with the patient’s name and unit history number or the identifying
number.
Nails:
1. Clean the nail with 70% alcohol to remove contaminating microorganisms.
2. Scrape away the top layers of the nail and collect the subsurface material.
3. Also remove a portion of debris from under the nail with a scalpel.
4. Place the collected material into a sterile specimen container.
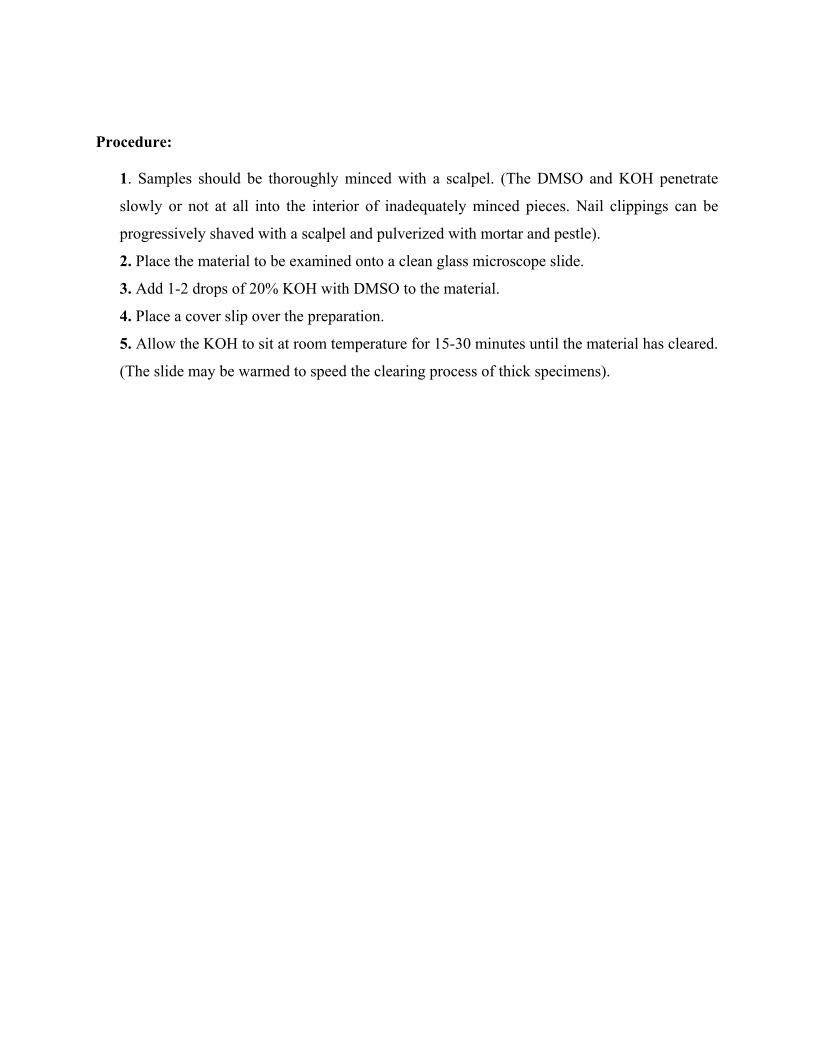
Procedure:
1. Samples should be thoroughly minced with a scalpel. (The DMSO and KOH penetrate
slowly or not at all into the interior of inadequately minced pieces. Nail clippings can be
progressively shaved with a scalpel and pulverized with mortar and pestle).
2. Place the material to be examined onto a clean glass microscope slide.
3. Add 1-2 drops of 20% KOH with DMSO to the material.
4. Place a cover slip over the preparation.
5. Allow the KOH to sit at room temperature for 15-30 minutes until the material has cleared.
(The slide may be warmed to speed the clearing process of thick specimens).
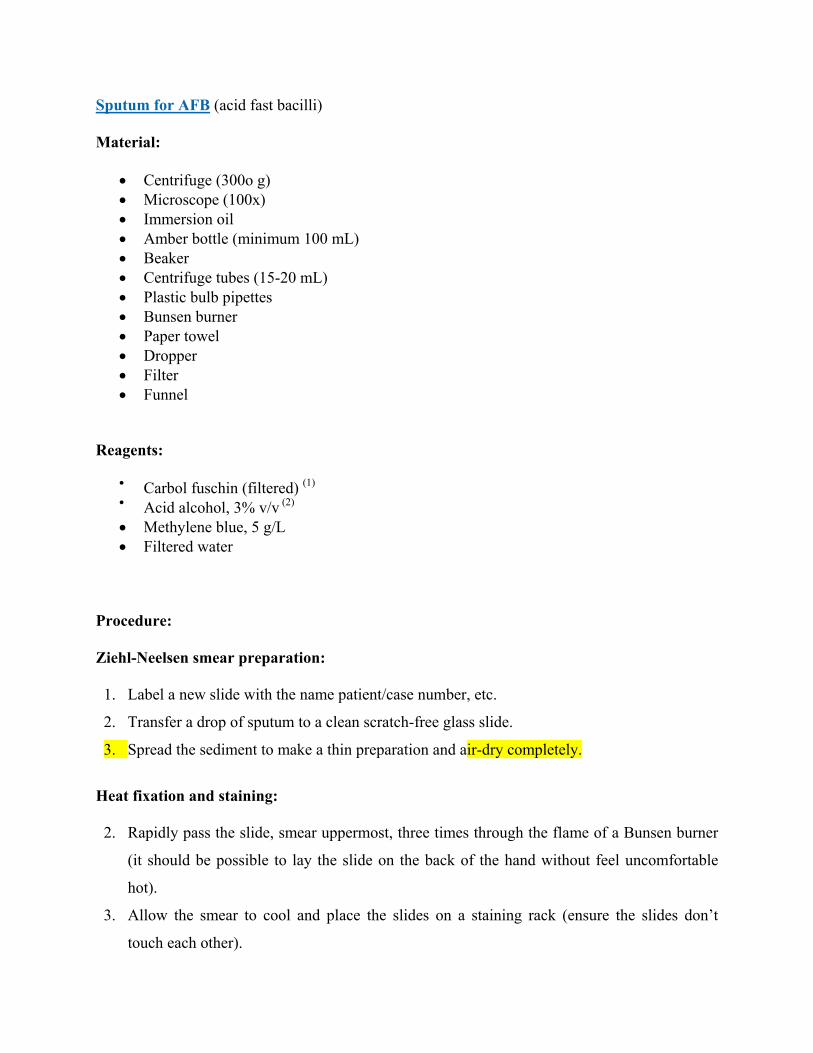
Sputum for AFB (acid fast bacilli)
Material:
• Centrifuge (300o g) • Microscope (100x) • Immersion oil • Amber bottle (minimum 100 mL) • Beaker • Centrifuge tubes (15-20 mL) • Plastic bulb pipettes • Bunsen burner • Paper towel • Dropper • Filter • Funnel
Reagents:
• Carbol fuschin (filtered) (1)
• Acid alcohol, 3% v/v (2)
• Methylene blue, 5 g/L • Filtered water
Procedure:
Ziehl-Neelsen smear preparation:
1. Label a new slide with the name patient/case number, etc.
2. Transfer a drop of sputum to a clean scratch-free glass slide.
3. Spread the sediment to make a thin preparation and air-dry completely.
Heat fixation and staining:
2. Rapidly pass the slide, smear uppermost, three times through the flame of a Bunsen burner
(it should be possible to lay the slide on the back of the hand without feel uncomfortable
hot).
3. Allow the smear to cool and place the slides on a staining rack (ensure the slides don’t
touch each other).
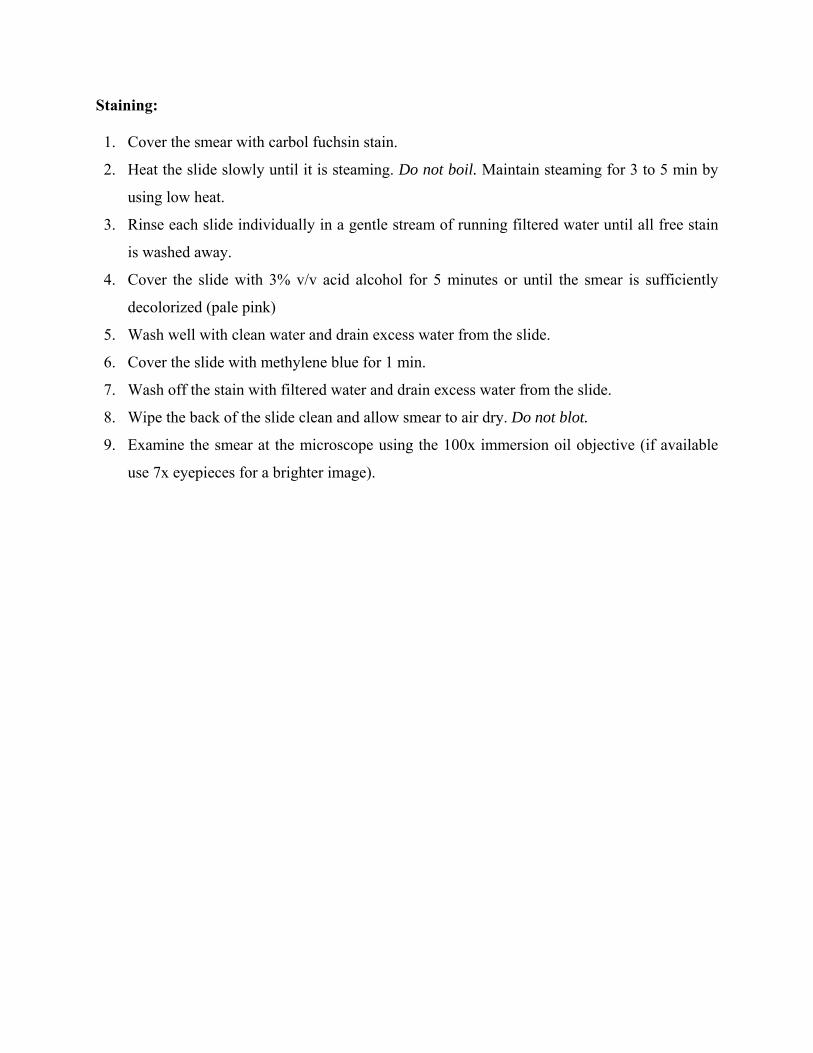
Staining:
1. Cover the smear with carbol fuchsin stain.
2. Heat the slide slowly until it is steaming. Do not boil. Maintain steaming for 3 to 5 min by
using low heat.
3. Rinse each slide individually in a gentle stream of running filtered water until all free stain
is washed away.
4. Cover the slide with 3% v/v acid alcohol for 5 minutes or until the smear is sufficiently
decolorized (pale pink)
5. Wash well with clean water and drain excess water from the slide.
6. Cover the slide with methylene blue for 1 min.
7. Wash off the stain with filtered water and drain excess water from the slide.
8. Wipe the back of the slide clean and allow smear to air dry. Do not blot.
9. Examine the smear at the microscope using the 100x immersion oil objective (if available
use 7x eyepieces for a brighter image).


Haematology (colorimeter)
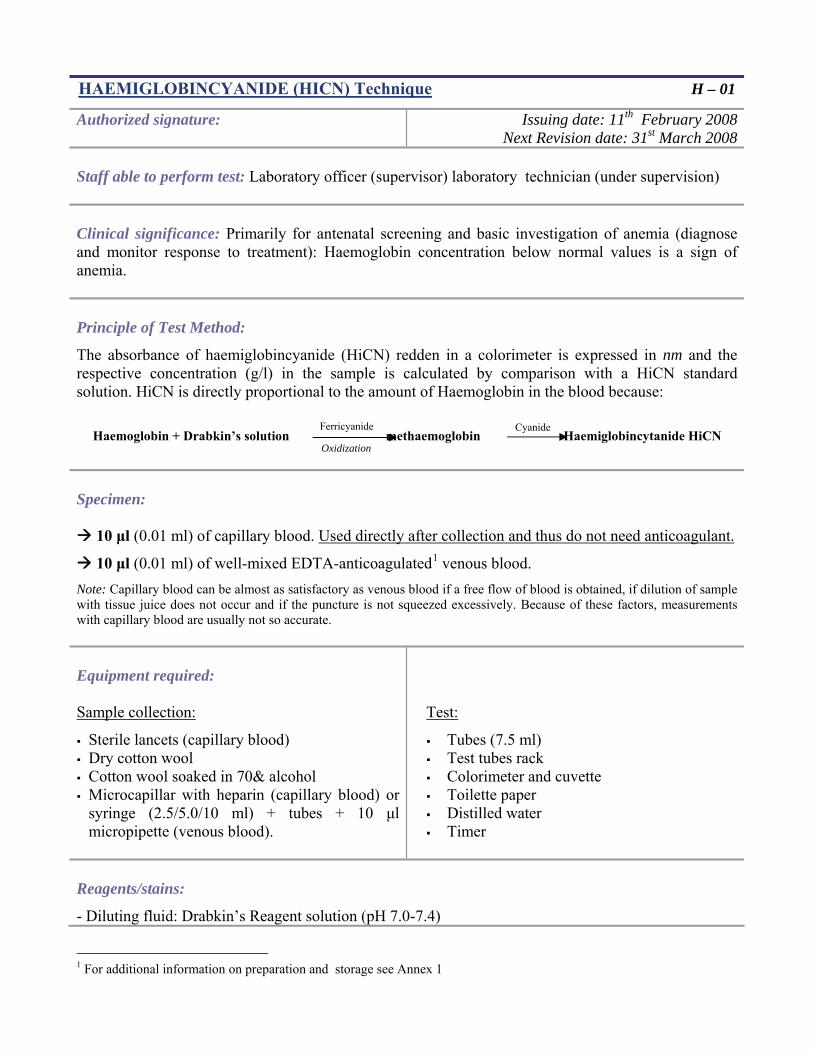
HAEMIGLOBINCYANIDE (HICN) Technique H – 01
Authorized signature: Issuing date: 11th February 2008Next Revision date: 31st March 2008
Staff able to perform test: Laboratory officer (supervisor) laboratory technician (under supervision) Clinical significance: Primarily for antenatal screening and basic investigation of anemia (diagnose and monitor response to treatment): Haemoglobin concentration below normal values is a sign of anemia. Principle of Test Method:
The absorbance of haemiglobincyanide (HiCN) redden in a colorimeter is expressed in nm and the respective concentration (g/l) in the sample is calculated by comparison with a HiCN standard solution. HiCN is directly proportional to the amount of Haemoglobin in the blood because:
Haemoglobin + Drabkin’s solution methaemoglobin Haemiglobincytanide HiCN
Specimen:
10 μl (0.01 ml) of capillary blood. Used directly after collection and thus do not need anticoagulant.
10 μl (0.01 ml) of well-mixed EDTA-anticoagulated1 venous blood. Note: Capillary blood can be almost as satisfactory as venous blood if a free flow of blood is obtained, if dilution of sample with tissue juice does not occur and if the puncture is not squeezed excessively. Because of these factors, measurements with capillary blood are usually not so accurate. Equipment required: Sample collection:
Sterile lancets (capillary blood) Dry cotton wool Cotton wool soaked in 70& alcohol Microcapillar with heparin (capillary blood) or syringe (2.5/5.0/10 ml) + tubes + 10 μl micropipette (venous blood).
Test:
Tubes (7.5 ml) Test tubes rack Colorimeter and cuvette Toilette paper Distilled water Timer
Reagents/stains:
- Diluting fluid: Drabkin’s Reagent solution (pH 7.0-7.4)
1 For additional information on preparation and storage see Annex 1
Oxidization
Ferricyanide Cyanide

- Haemiglobincyanide (HiCN) standard solution. NOTE: During hot season store Drabkin’s reagent in the refrigerator. Before use it, allow warming to RT. Drabkin’s solution is very poisonous.
Procedure:
1. Label test-tubes (7.5 ml) as T1, T2 (Test 1, Test 2) according to the number of samples to be tested.
2. Pipette 1 ml of Drabkin’s solution into the marked test-tubes.
3. With a pipette, measure exactly 10 µL (0.01 mL) of capillary blood or well-mixed (gentle inversion or swirling) venous EDTA-anticoagulant blood.
4. Wipe the outside of the pipette with a piece of cotton/toilet paper/gauze while holding the pipette in the horizontal.
5. Before dispense the blood, check if there are no air bubbles in the pipette.
6. Dispense the blood into the test tubes (T1, T2…) and rinse the tip by washing 3 to 5 times out the inside of the pipette tip repeatedly.
7. Stopper the tube, mix in vortex, and leave the sample at RT and protected from sunlight, for 10 minutes*
* When a neutral (pH 7.0-7.4) Drabkin’s reagent is not available, at least 20 min is required for an alkaline Drabkin’s reagent.
8. Set the wavelength of the colorimeter at 540 nm and zero the colorimeter without cuvette (if not
ON, turn it ON and allow to worm up for 10 min).
9. Place 1 ml of Drabkin’s solution into a match cuvette (blank cuvette) and place in the colorimeter.
10. Zero the colorimeter and then remove the blank cuvette.
11. Place the patient’s sample into the test-cuvette and place it in the colorimeter. Note: If the diluted blood is cloudy, which can be related to the presence of abnormal plasma proteins or to high concentration of white cells), centrifuge the diluted blood at 2000 g for 5 min before read the Abs.
12. Read the Abs of the patient’s sample, and by using the graph or the table prepared from the calibration curve, read the patient’s haemoglobin value (g/l). Note: Replaced the test samples back into the original test-tube so that, if necessary they are available for re-check.
NOTE: Always check if the cuvette is clear on the side that will face the light path, and ensure that there are no air bubbles.
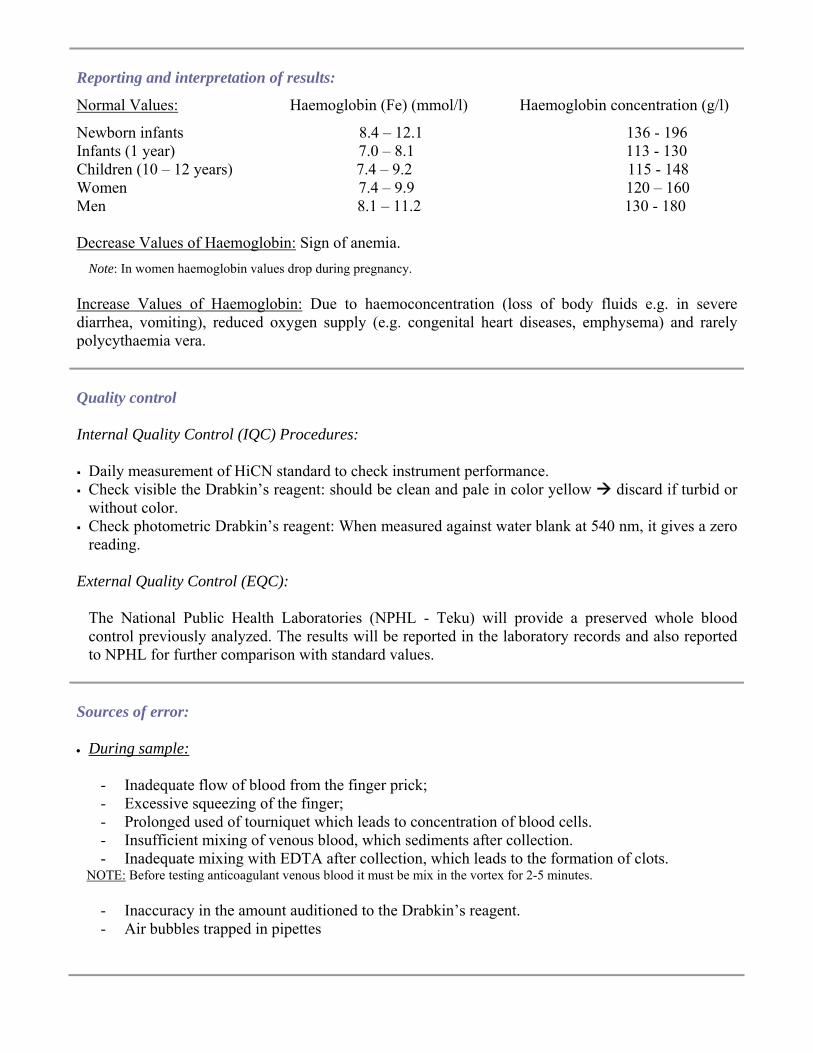
Reporting and interpretation of results:
Normal Values: Haemoglobin (Fe) (mmol/l) Haemoglobin concentration (g/l)
Newborn infants 8.4 – 12.1 136 - 196 Infants (1 year) 7.0 – 8.1 113 - 130 Children (10 – 12 years) 7.4 – 9.2 115 - 148 Women 7.4 – 9.9 120 – 160 Men 8.1 – 11.2 130 - 180 Decrease Values of Haemoglobin: Sign of anemia.
Note: In women haemoglobin values drop during pregnancy. Increase Values of Haemoglobin: Due to haemoconcentration (loss of body fluids e.g. in severe diarrhea, vomiting), reduced oxygen supply (e.g. congenital heart diseases, emphysema) and rarely polycythaemia vera. Quality control Internal Quality Control (IQC) Procedures: Daily measurement of HiCN standard to check instrument performance. Check visible the Drabkin’s reagent: should be clean and pale in color yellow discard if turbid or without color.
Check photometric Drabkin’s reagent: When measured against water blank at 540 nm, it gives a zero reading.
External Quality Control (EQC):
The National Public Health Laboratories (NPHL - Teku) will provide a preserved whole blood control previously analyzed. The results will be reported in the laboratory records and also reported to NPHL for further comparison with standard values.
Sources of error: • During sample:
- Inadequate flow of blood from the finger prick; - Excessive squeezing of the finger; - Prolonged used of tourniquet which leads to concentration of blood cells. - Insufficient mixing of venous blood, which sediments after collection. - Inadequate mixing with EDTA after collection, which leads to the formation of clots.
NOTE: Before testing anticoagulant venous blood it must be mix in the vortex for 2-5 minutes.
- Inaccuracy in the amount auditioned to the Drabkin’s reagent. - Air bubbles trapped in pipettes
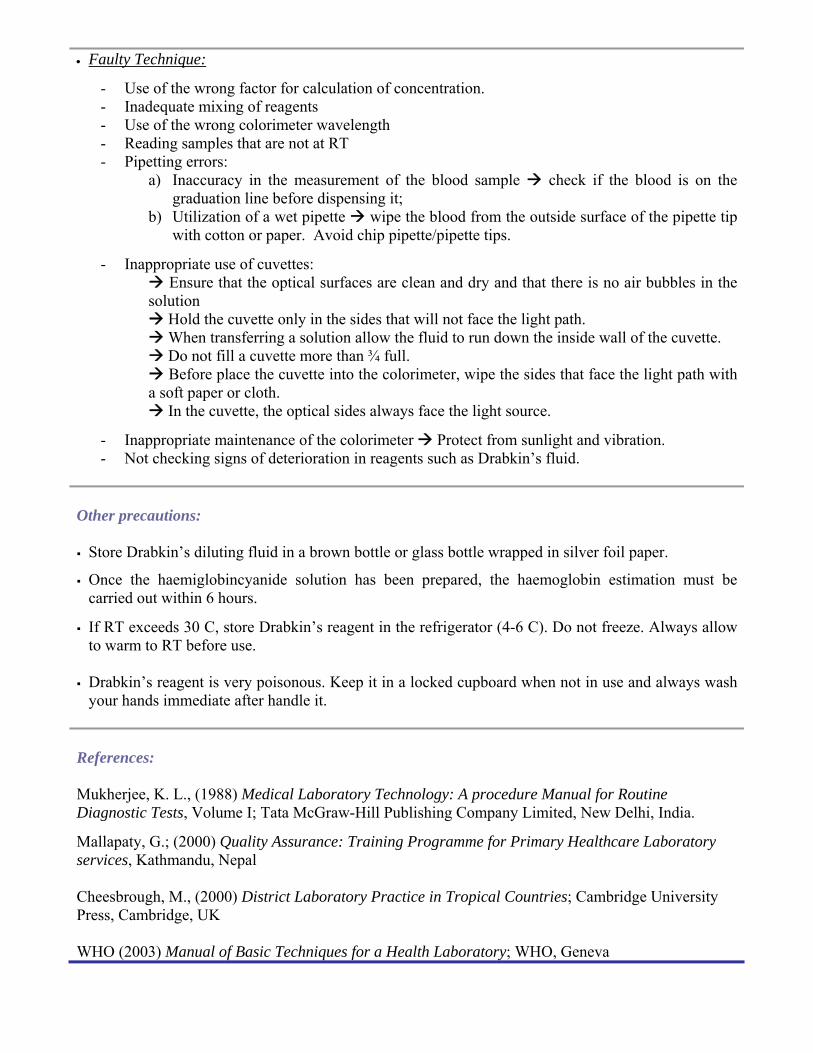
• Faulty Technique:
- Use of the wrong factor for calculation of concentration. - Inadequate mixing of reagents - Use of the wrong colorimeter wavelength - Reading samples that are not at RT - Pipetting errors:
a) Inaccuracy in the measurement of the blood sample check if the blood is on the graduation line before dispensing it;
b) Utilization of a wet pipette wipe the blood from the outside surface of the pipette tip with cotton or paper. Avoid chip pipette/pipette tips.
- Inappropriate use of cuvettes: Ensure that the optical surfaces are clean and dry and that there is no air bubbles in the
solution Hold the cuvette only in the sides that will not face the light path. When transferring a solution allow the fluid to run down the inside wall of the cuvette. Do not fill a cuvette more than ¾ full.
Before place the cuvette into the colorimeter, wipe the sides that face the light path with a soft paper or cloth.
In the cuvette, the optical sides always face the light source.
- Inappropriate maintenance of the colorimeter Protect from sunlight and vibration. - Not checking signs of deterioration in reagents such as Drabkin’s fluid.
Other precautions: Store Drabkin’s diluting fluid in a brown bottle or glass bottle wrapped in silver foil paper.
Once the haemiglobincyanide solution has been prepared, the haemoglobin estimation must be carried out within 6 hours.
If RT exceeds 30 C, store Drabkin’s reagent in the refrigerator (4-6 C). Do not freeze. Always allow to warm to RT before use.
Drabkin’s reagent is very poisonous. Keep it in a locked cupboard when not in use and always wash your hands immediate after handle it.
References: Mukherjee, K. L., (1988) Medical Laboratory Technology: A procedure Manual for Routine Diagnostic Tests, Volume I; Tata McGraw-Hill Publishing Company Limited, New Delhi, India.
Mallapaty, G.; (2000) Quality Assurance: Training Programme for Primary Healthcare Laboratory services, Kathmandu, Nepal Cheesbrough, M., (2000) District Laboratory Practice in Tropical Countries; Cambridge University Press, Cambridge, UK WHO (2003) Manual of Basic Techniques for a Health Laboratory; WHO, Geneva
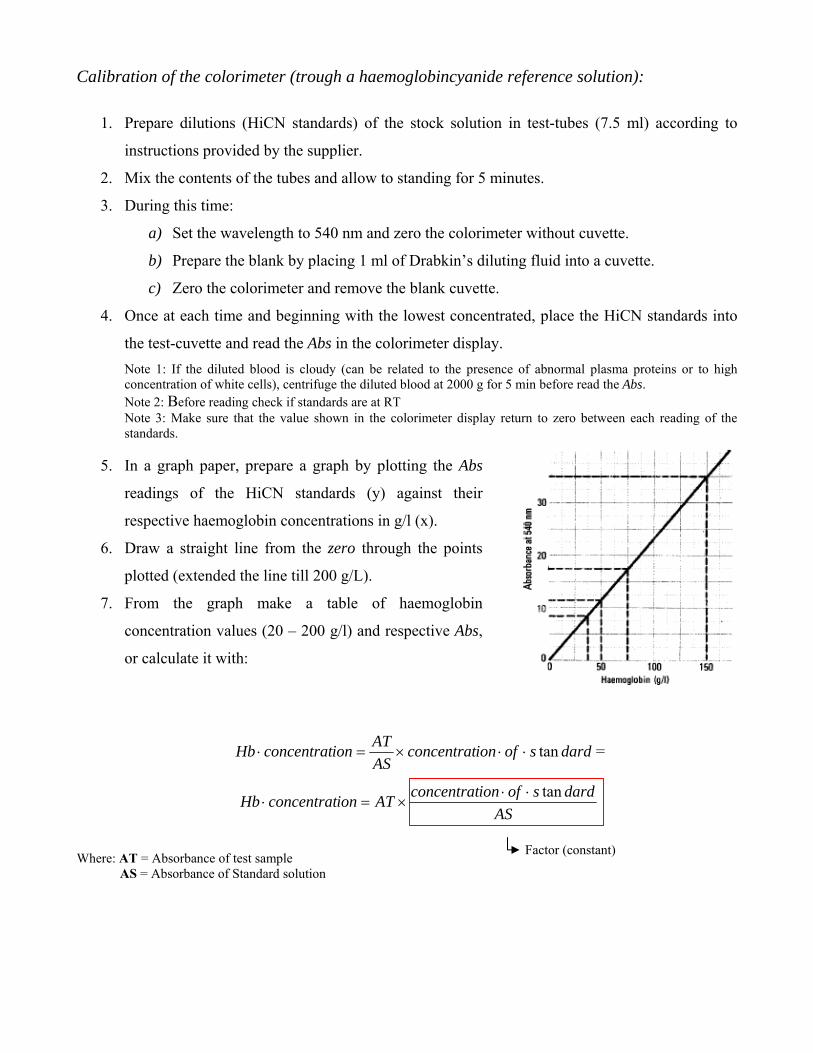
Calibration of the colorimeter (trough a haemoglobincyanide reference solution):
1. Prepare dilutions (HiCN standards) of the stock solution in test-tubes (7.5 ml) according to
instructions provided by the supplier.
2. Mix the contents of the tubes and allow to standing for 5 minutes.
3. During this time:
a) Set the wavelength to 540 nm and zero the colorimeter without cuvette.
b) Prepare the blank by placing 1 ml of Drabkin’s diluting fluid into a cuvette.
c) Zero the colorimeter and remove the blank cuvette.
4. Once at each time and beginning with the lowest concentrated, place the HiCN standards into
the test-cuvette and read the Abs in the colorimeter display. Note 1: If the diluted blood is cloudy (can be related to the presence of abnormal plasma proteins or to high concentration of white cells), centrifuge the diluted blood at 2000 g for 5 min before read the Abs. Note 2: Before reading check if standards are at RT Note 3: Make sure that the value shown in the colorimeter display return to zero between each reading of the standards.
5. In a graph paper, prepare a graph by plotting the Abs
readings of the HiCN standards (y) against their
respective haemoglobin concentrations in g/l (x).
6. Draw a straight line from the zero through the points
plotted (extended the line till 200 g/L).
7. From the graph make a table of haemoglobin
concentration values (20 – 200 g/l) and respective Abs,
or calculate it with:
dardsofionconcentratASATionconcentratHb tan⋅⋅×=⋅ =
ASdardsofionconcentratATionconcentratHb tan⋅⋅
×=⋅
Where: AT = Absorbance of test sample AS = Absorbance of Standard solution
Factor (constant)
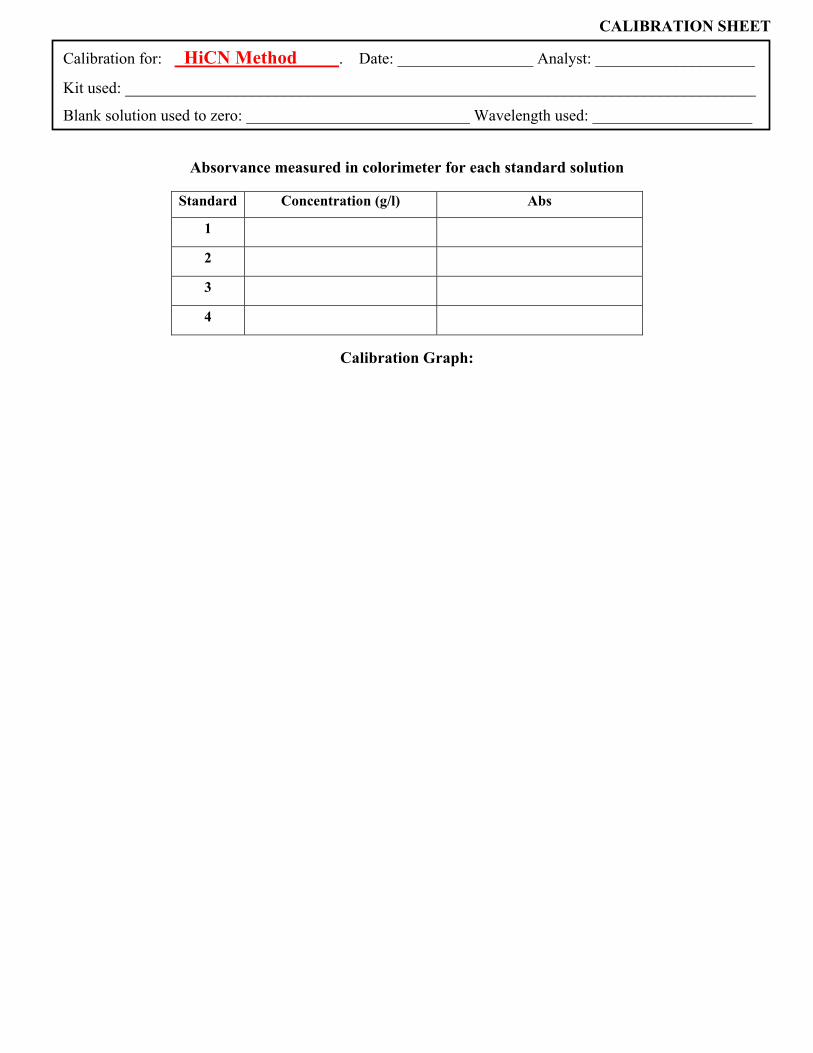
Absorvance measured in colorimeter for each standard solution
Calibration Graph:
Standard Concentration (g/l) Abs
1
2
3
4
Calibration for: HiCN Method . Date: _________________ Analyst: ____________________
Kit used: _______________________________________________________________________________
Blank solution used to zero: ____________________________ Wavelength used: ____________________
CALIBRATION SHEET
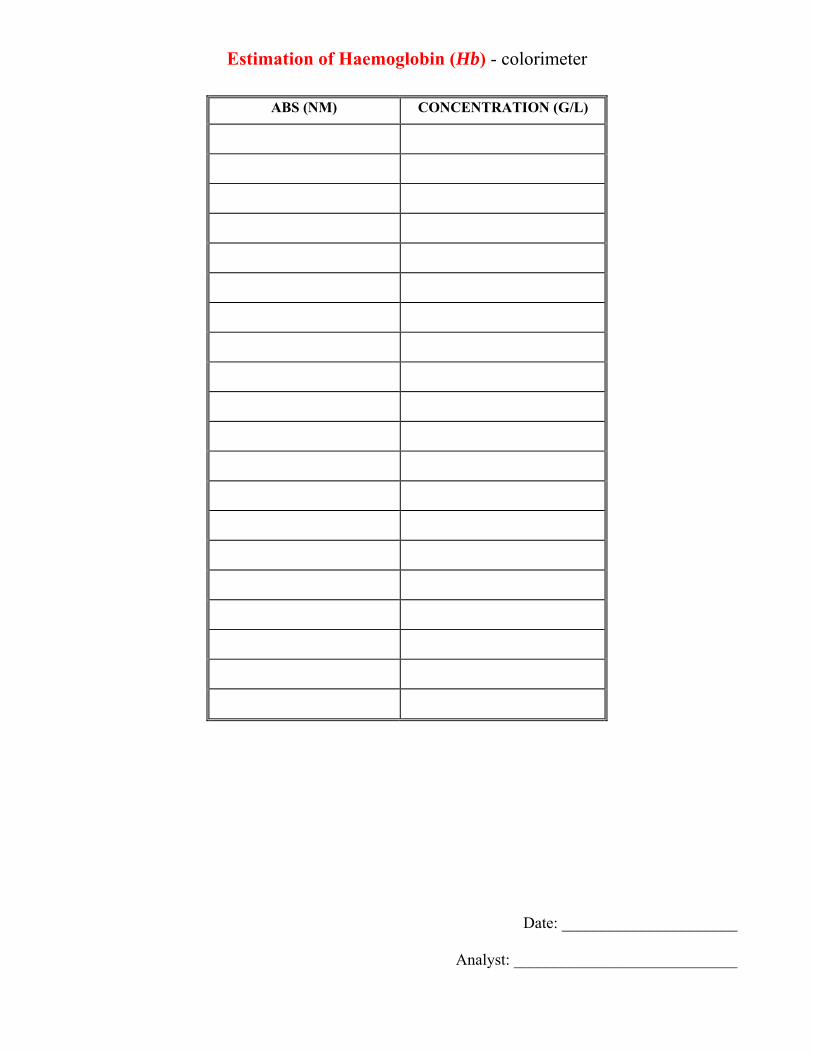
Estimation of Haemoglobin (Hb) - colorimeter
Date: ______________________
Analyst: ____________________________
ABS (NM) CONCENTRATION (G/L)


Quality assurance in Haematology:
Sample collection: Capillary blood (skin puncture): finger, ear-lobe or foot infant It is used immediate after collection and thus do no need addition of anticoagulants. Capillary blood is good for making a blood smear or for a single routine test (haematrocit determination or a single enumeration of blood cells). It’s ideal for infants because is less painfull.[1] It can be used for Haemoglobin estimation (Sahli-Method), Total WBC-Count, Differential WBC-count, Platelet count, Reticulocyte count, Blood film for Malaria or FIlaria. [2] Collection must be done according to the following indications:
Test method:
PLATELETS Estimation H – 02
Authorized signature: Issuing date: 11th February 2008
Next Revision date: 31st March 2008
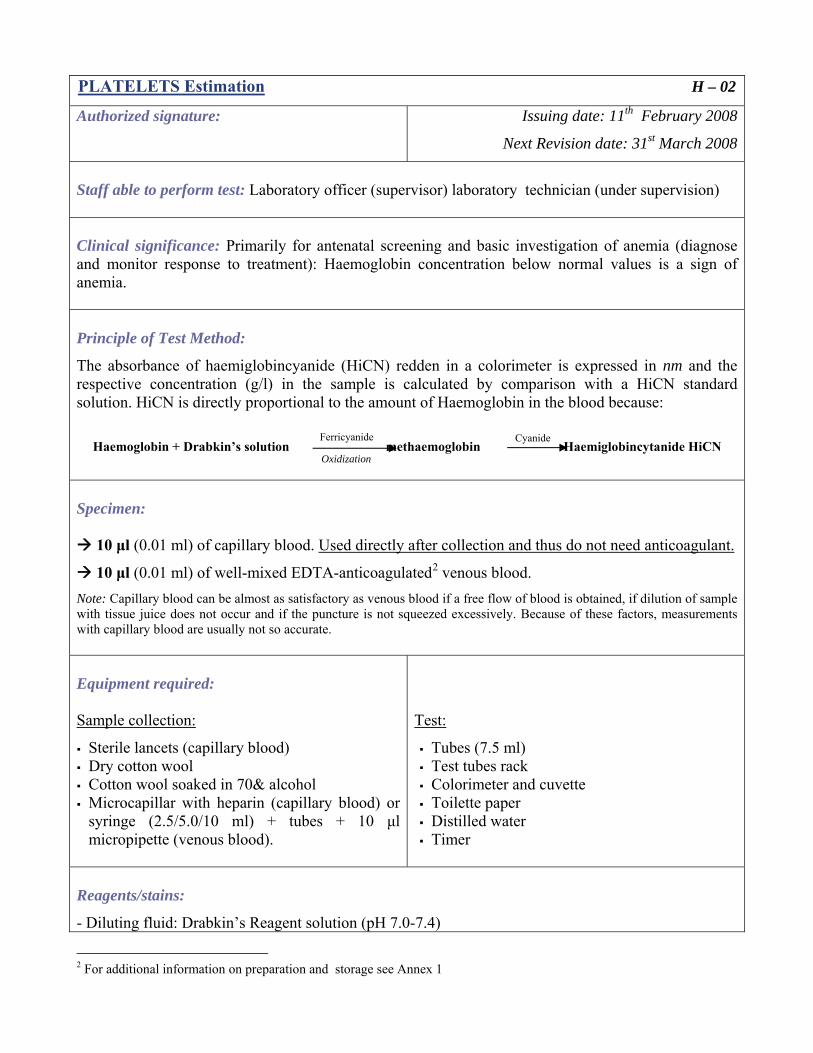
Staff able to perform test: Laboratory officer (supervisor) laboratory technician (under supervision) Clinical significance: Primarily for antenatal screening and basic investigation of anemia (diagnose and monitor response to treatment): Haemoglobin concentration below normal values is a sign of anemia. Principle of Test Method:
The absorbance of haemiglobincyanide (HiCN) redden in a colorimeter is expressed in nm and the respective concentration (g/l) in the sample is calculated by comparison with a HiCN standard solution. HiCN is directly proportional to the amount of Haemoglobin in the blood because:
Haemoglobin + Drabkin’s solution methaemoglobin Haemiglobincytanide HiCN
Specimen:
10 μl (0.01 ml) of capillary blood. Used directly after collection and thus do not need anticoagulant.
10 μl (0.01 ml) of well-mixed EDTA-anticoagulated2 venous blood. Note: Capillary blood can be almost as satisfactory as venous blood if a free flow of blood is obtained, if dilution of sample with tissue juice does not occur and if the puncture is not squeezed excessively. Because of these factors, measurements with capillary blood are usually not so accurate. Equipment required: Sample collection:
Sterile lancets (capillary blood) Dry cotton wool Cotton wool soaked in 70& alcohol Microcapillar with heparin (capillary blood) or syringe (2.5/5.0/10 ml) + tubes + 10 μl micropipette (venous blood).
Test:
Tubes (7.5 ml) Test tubes rack Colorimeter and cuvette Toilette paper Distilled water Timer
Reagents/stains:
- Diluting fluid: Drabkin’s Reagent solution (pH 7.0-7.4)
2 For additional information on preparation and storage see Annex 1
Oxidization
Ferricyanide Cyanide
- Haemiglobincyanide (HiCN) standard solution. NOTE: During hot season store Drabkin’s reagent in the refrigerator. Before use it, allow warming to RT. Drabkin’s solution is very poisonous.
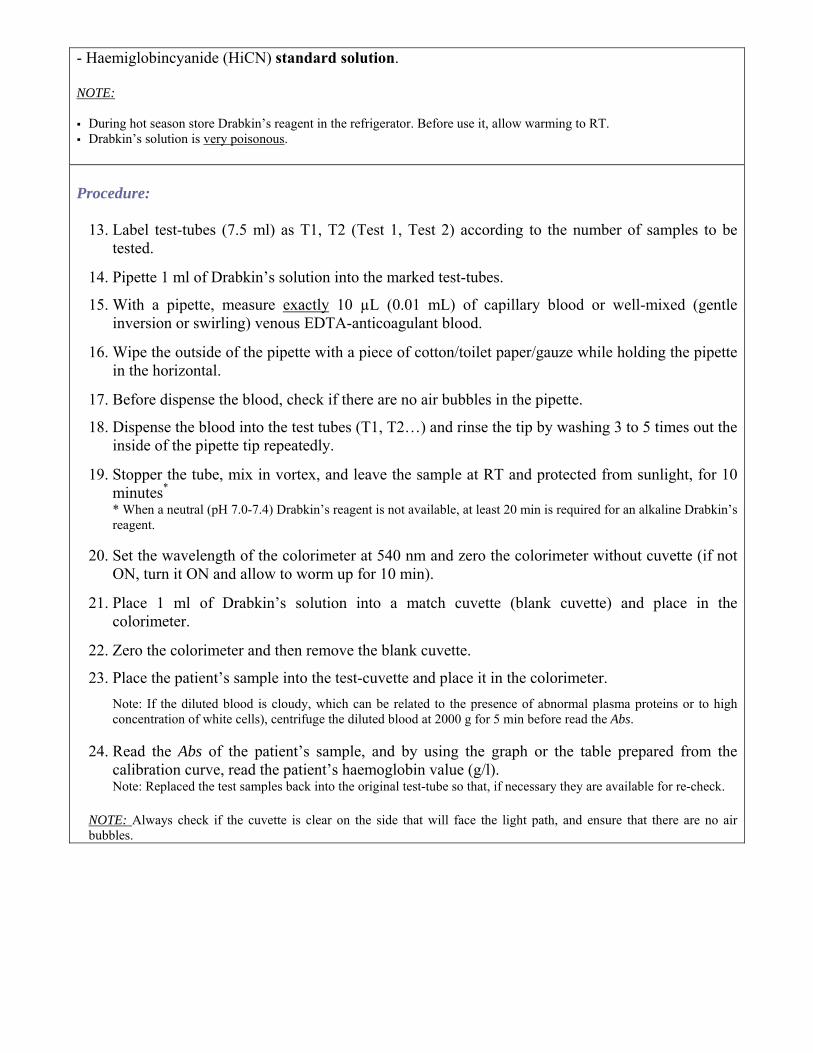
Procedure:
13. Label test-tubes (7.5 ml) as T1, T2 (Test 1, Test 2) according to the number of samples to be tested.
14. Pipette 1 ml of Drabkin’s solution into the marked test-tubes.
15. With a pipette, measure exactly 10 µL (0.01 mL) of capillary blood or well-mixed (gentle inversion or swirling) venous EDTA-anticoagulant blood.
16. Wipe the outside of the pipette with a piece of cotton/toilet paper/gauze while holding the pipette in the horizontal.
17. Before dispense the blood, check if there are no air bubbles in the pipette.
18. Dispense the blood into the test tubes (T1, T2…) and rinse the tip by washing 3 to 5 times out the inside of the pipette tip repeatedly.
19. Stopper the tube, mix in vortex, and leave the sample at RT and protected from sunlight, for 10 minutes*
* When a neutral (pH 7.0-7.4) Drabkin’s reagent is not available, at least 20 min is required for an alkaline Drabkin’s reagent.
20. Set the wavelength of the colorimeter at 540 nm and zero the colorimeter without cuvette (if not
ON, turn it ON and allow to worm up for 10 min).
21. Place 1 ml of Drabkin’s solution into a match cuvette (blank cuvette) and place in the colorimeter.
22. Zero the colorimeter and then remove the blank cuvette.
23. Place the patient’s sample into the test-cuvette and place it in the colorimeter. Note: If the diluted blood is cloudy, which can be related to the presence of abnormal plasma proteins or to high concentration of white cells), centrifuge the diluted blood at 2000 g for 5 min before read the Abs.
24. Read the Abs of the patient’s sample, and by using the graph or the table prepared from the calibration curve, read the patient’s haemoglobin value (g/l). Note: Replaced the test samples back into the original test-tube so that, if necessary they are available for re-check.
NOTE: Always check if the cuvette is clear on the side that will face the light path, and ensure that there are no air bubbles.

Reporting and interpretation of results:
Normal Values: Haemoglobin (Fe) (mmol/l) Haemoglobin concentration
(g/l)
Newborn infants 8.4 – 12.1 136 - 196 Infants (1 year) 7.0 – 8.1 113 - 130 Children (10 – 12 years) 7.4 – 9.2 115 - 148 Women 7.4 – 9.9 120 – 160 Men 8.1 – 11.2 130 - 180 Decrease Values of Haemoglobin: Sign of anemia.
Note: In women haemoglobin values drop during pregnancy. Increase Values of Haemoglobin: Due to haemoconcentration (loss of body fluids e.g. in severe diarrhea, vomiting), reduced oxygen supply (e.g. congenital heart diseases, emphysema) and rarely polycythaemia vera. Quality control Internal Quality Control (IQC) Procedures: Daily measurement of HiCN standard to check instrument performance. Check visible the Drabkin’s reagent: should be clean and pale in color yellow discard if turbid or without color.
Check photometric Drabkin’s reagent: When measured against water blank at 540 nm, it gives a zero reading.
External Quality Control (EQC):
The National Public Health Laboratories (NPHL - Teku) will provide a preserved whole blood control previously analyzed. The results will be reported in the laboratory records and also reported to NPHL for further comparison with standard values.
Sources of error: • Incorrect sample homogenization (mix properly) NOTE: Before testing anticoagulant venous blood it must be mix in the vortex for 2-5 minutes.
• Pipetting errors: Inaccuracy in the measurement of the blood sample check if the blood is on the graduation line before dispensing it; utilization of a wet pipette wipe the blood from the outside surface of the pipette tip with cotton or paper. Avoid chip pipette/pipette tips.
• Not ensuring that the optical surfaces of the cuvette are clean and dry and that there is no air bubbles in the solution a) Hold the cuvette only in the sides that will not face the light path. b) When transferring a solution allow the fluid to run down the inside wall of the cuvette. c) Do not fill a cuvette more than ¾ full. d) Before place the cuvette into the colorimeter, wipe the sides that face the

light path with a soft paper or cloth. e) Always face the optical faces to the light source. f) Ensure that the solution is at RT before reading the Abs.
• Inappropriate maintenance of the colorimeter. Protect from sunlight and vibration. • Not checking signs of deterioration in reagents such as Drabkin’s fluid. Other precautions: Store Drabkin’s diluting fluid in a brown bottle or glass bottle wrapped in silver foil paper.
Once the haemiglobincyanide solution has been prepared, the haemoglobin estimation must be carried out within 6 hours.
If RT exceeds 30 C, store Drabkin’s reagent in the refrigerator (4-6 C). Do not freeze. Always allow to warm to RT before use.
Drabkin’s reagent is very poisonous. Keep it in a locked cupboard when not in use and always wash your hands immediate after handle it.
References: Mukherjee, K. L., (1988) Medical Laboratory Technology: A procedure Manual for Routine Diagnostic Tests, Volume I; Tata McGraw-Hill Publishing Company Limited, New Delhi, India.
Mallapaty, G.; (2000) Quality Assurance: Training Programme for Primary Healthcare Laboratory services, Kathmandu, Nepal Cheesbrough, M., (2000) District Laboratory Practice in Tropical Countries; Cambridge University Press, Cambridge, UK WHO (2003) Manual of Basic Techniques for a Health Laboratory; WHO, Geneva
Haematology (QBC)
HEAMAGLOBIN Estimation H – 03
Authorized signature: Issuing date: 11th February 2008
Next Revision date: 31st March 2008
Staff able to perform test: Laboratory officer (supervisor) laboratory technician (under supervision) Clinical significance: Diagnosis of patients suffering from anaemia, hydraemia, (excessive fluid in the blood which accurs during pregnancy), dehydration, shock or burns. Principle of Test Method:
The blood (mixed with anticoagulant) is placed in a long capillary tube and centrifuged in a microhaematocrit centrifuge. The level reached by the column of erythrocytes is read with a scale reader. This method is preferable to that using a macro scale: it is quicker, and blood from the finger can be used. Specimen:
10 μl (0.01 ml) of capillary blood. Used directly after collection and thus do not need anticoagulant.
10 μl (0.01 ml) of well-mixed EDTA-anticoagulated3 venous blood. Note: Capillary blood can be almost as satisfactory as venous blood if a free flow of blood is obtained, if dilution of sample with tissue juice does not occur and if the puncture is not squeezed excessively. Because of these factors, measurements with capillary blood are usually not so accurate. Equipment required: Sample collection:
Sterile lancets (capillary blood) Dry cotton wool Cotton wool soaked in 70& alcohol Microcapillar with heparin (capillary blood) or syringe (2.5/5.0/10 ml) + tubes + 10 μl micropipette (venous blood).
Test:
Tubes (7.5 ml) Test tubes rack Colorimeter and cuvette Toilette paper Distilled water Timer
Reagents/stains:
- Diluting fluid: Drabkin’s Reagent solution (pH 7.0-7.4) - Haemiglobincyanide (HiCN) standard solution. NOTE:
3 For additional information on preparation and storage see Annex 1
During hot season store Drabkin’s reagent in the refrigerator. Before use it, allow warming to RT. Drabkin’s solution is very poisonous.
Procedure:
25. Label test-tubes (7.5 ml) as T1, T2 (Test 1, Test 2) according to the number of samples to be tested.
26. Pipette 1 ml of Drabkin’s solution into the marked test-tubes.
27. With a pipette, measure exactly 10 µL (0.01 mL) of capillary blood or well-mixed (gentle inversion or swirling) venous EDTA-anticoagulant blood.
28. Wipe the outside of the pipette with a piece of cotton/toilet paper/gauze while holding the pipette in the horizontal.
29. Before dispense the blood, check if there are no air bubbles in the pipette.
30. Dispense the blood into the test tubes (T1, T2…) and rinse the tip by washing 3 to 5 times out the inside of the pipette tip repeatedly.
31. Stopper the tube, mix in vortex, and leave the sample at RT and protected from sunlight, for 10 minutes*
* When a neutral (pH 7.0-7.4) Drabkin’s reagent is not available, at least 20 min is required for an alkaline Drabkin’s reagent.
32. Set the wavelength of the colorimeter at 540 nm and zero the colorimeter without cuvette (if not
ON, turn it ON and allow to worm up for 10 min).
33. Place 1 ml of Drabkin’s solution into a match cuvette (blank cuvette) and place in the colorimeter.
34. Zero the colorimeter and then remove the blank cuvette.
35. Place the patient’s sample into the test-cuvette and place it in the colorimeter. Note: If the diluted blood is cloudy, which can be related to the presence of abnormal plasma proteins or to high concentration of white cells), centrifuge the diluted blood at 2000 g for 5 min before read the Abs.
36. Read the Abs of the patient’s sample, and by using the graph or the table prepared from the calibration curve, read the patient’s haemoglobin value (g/l). Note: Replaced the test samples back into the original test-tube so that, if necessary they are available for re-check.
NOTE: Always check if the cuvette is clear on the side that will face the light path, and ensure that there are no air bubbles.

Reporting and interpretation of results:
Normal Values: Haemoglobin (Fe) (mmol/l) Haemoglobin concentration
(g/l)
Newborn infants 8.4 – 12.1 136 - 196 Infants (1 year) 7.0 – 8.1 113 - 130 Children (10 – 12 years) 7.4 – 9.2 115 - 148 Women 7.4 – 9.9 120 – 160 Men 8.1 – 11.2 130 - 180 Decrease Values of Haemoglobin: Sign of anemia.
Note: In women haemoglobin values drop during pregnancy. Increase Values of Haemoglobin: Due to haemoconcentration (loss of body fluids e.g. in severe diarrhea, vomiting), reduced oxygen supply (e.g. congenital heart diseases, emphysema) and rarely polycythaemia vera. Quality control Internal Quality Control (IQC) Procedures: Daily measurement of HiCN standard to check instrument performance. Check visible the Drabkin’s reagent: should be clean and pale in color yellow discard if turbid or without color.
Check photometric Drabkin’s reagent: When measured against water blank at 540 nm, it gives a zero reading.
External Quality Control (EQC):
The National Public Health Laboratories (NPHL - Teku) will provide a preserved whole blood control previously analyzed. The results will be reported in the laboratory records and also reported to NPHL for further comparison with standard values.
Sources of error: • Incorrect sample homogenization (mix properly) NOTE: Before testing anticoagulant venous blood it must be mix in the vortex for 2-5 minutes.
• Pipetting errors: Inaccuracy in the measurement of the blood sample check if the blood is on the graduation line before dispensing it; utilization of a wet pipette wipe the blood from the outside surface of the pipette tip with cotton or paper. Avoid chip pipette/pipette tips.
• Not ensuring that the optical surfaces of the cuvette are clean and dry and that there is no air bubbles in the solution a) Hold the cuvette only in the sides that will not face the light path. b) When transferring a solution allow the fluid to run down the inside wall of the cuvette. c) Do not fill a cuvette more than ¾ full. d) Before place the cuvette into the colorimeter, wipe the sides that face the

light path with a soft paper or cloth. e) Always face the optical faces to the light source. f) Ensure that the solution is at RT before reading the Abs.
• Inappropriate maintenance of the colorimeter. Protect from sunlight and vibration. • Not checking signs of deterioration in reagents such as Drabkin’s fluid. Other precautions: Store Drabkin’s diluting fluid in a brown bottle or glass bottle wrapped in silver foil paper.
Once the haemiglobincyanide solution has been prepared, the haemoglobin estimation must be carried out within 6 hours.
If RT exceeds 30 C, store Drabkin’s reagent in the refrigerator (4-6 C). Do not freeze. Always allow to warm to RT before use.
Drabkin’s reagent is very poisonous. Keep it in a locked cupboard when not in use and always wash your hands immediate after handle it.
References: Mukherjee, K. L., (1988) Medical Laboratory Technology: A procedure Manual for Routine Diagnostic Tests, Volume I; Tata McGraw-Hill Publishing Company Limited, New Delhi, India.
Mallapaty, G.; (2000) Quality Assurance: Training Programme for Primary Healthcare Laboratory services, Kathmandu, Nepal Cheesbrough, M., (2000) District Laboratory Practice in Tropical Countries; Cambridge University Press, Cambridge, UK WHO (2003) Manual of Basic Techniques for a Health Laboratory; WHO, Geneva
HEMATOCRIT or PCV (packed cell volume) H – 04
Authorized signature: Issuing date: 11th February 2008Next Revision date: 31st March 2008
Staff able to perform test: Laboratory officer (supervisor) laboratory technician (under supervision) Clinical significance: Hematocrit values, along with haemoglobin concentration and red cell count, is used to calculate the mean cell haemoglobin concentration (MCHC) and mean cell volume (MCV). These red blood/erythrocytes cells indices are used to investigate anemia. PCV is also used to diagnose polycychaemia vera and to monitor its treatment. Principle of Test Method:
The blood (mixed with anticoagulant) is placed in a long capillary tube and centrifuged in a microhaematocrit centrifuge. The level reached by the column of erythrocytes is read with a scale reader. This method is preferable to that using a macro scale: it is quicker, and blood from the finger can be used. Specimen:
10 μl (0.01 ml) of capillary blood. Used directly after collection and thus do not need anticoagulant.
10 μl (0.01 ml) of well-mixed EDTA-anticoagulated4 venous blood. Note: Capillary blood can be almost as satisfactory as venous blood if a free flow of blood is obtained, if dilution of sample with tissue juice does not occur and if the puncture is not squeezed excessively. Because of these factors, measurements with capillary blood are usually not so accurate. Equipment required: Sample collection:
Sterile lancets (capillary blood) Dry cotton wool Cotton wool soaked in 70& alcohol Microcapillar with heparin (capillary blood) or syringe (2.5/5.0/10 ml) + tubes + 10 μl micropipette (venous blood).
Test:
Tubes (7.5 ml) Test tubes rack Colorimeter and cuvette Toilette paper Distilled water Timer
Reagents/stains:
- Diluting fluid: Drabkin’s Reagent solution (pH 7.0-7.4) - Haemiglobincyanide (HiCN) standard solution. 4 For additional information on preparation and storage see Annex 1
NOTE: During hot season store Drabkin’s reagent in the refrigerator. Before use it, allow warming to RT. Drabkin’s solution is very poisonous.
Procedure:
37. Label test-tubes (7.5 ml) as T1, T2 (Test 1, Test 2) according to the number of samples to be tested.
38. Pipette 1 ml of Drabkin’s solution into the marked test-tubes.
39. With a pipette, measure exactly 10 µL (0.01 mL) of capillary blood or well-mixed (gentle inversion or swirling) venous EDTA-anticoagulant blood.
40. Wipe the outside of the pipette with a piece of cotton/toilet paper/gauze while holding the pipette in the horizontal.
41. Before dispense the blood, check if there are no air bubbles in the pipette.
42. Dispense the blood into the test tubes (T1, T2…) and rinse the tip by washing 3 to 5 times out the inside of the pipette tip repeatedly.
43. Stopper the tube, mix in vortex, and leave the sample at RT and protected from sunlight, for 10 minutes*
* When a neutral (pH 7.0-7.4) Drabkin’s reagent is not available, at least 20 min is required for an alkaline Drabkin’s reagent.
44. Set the wavelength of the colorimeter at 540 nm and zero the colorimeter without cuvette (if not
ON, turn it ON and allow to worm up for 10 min).
45. Place 1 ml of Drabkin’s solution into a match cuvette (blank cuvette) and place in the colorimeter.
46. Zero the colorimeter and then remove the blank cuvette.
47. Place the patient’s sample into the test-cuvette and place it in the colorimeter. Note: If the diluted blood is cloudy, which can be related to the presence of abnormal plasma proteins or to high concentration of white cells), centrifuge the diluted blood at 2000 g for 5 min before read the Abs.
48. Read the Abs of the patient’s sample, and by using the graph or the table prepared from the calibration curve, read the patient’s haemoglobin value (g/l). Note: Replaced the test samples back into the original test-tube so that, if necessary they are available for re-check.
NOTE: Always check if the cuvette is clear on the side that will face the light path, and ensure that there are no air bubbles.

Reporting and interpretation of results:
Normal Values: Haemoglobin (Fe) (mmol/l) Haemoglobin concentration
(g/l)
Newborn infants 8.4 – 12.1 136 - 196 Infants (1 year) 7.0 – 8.1 113 - 130 Children (10 – 12 years) 7.4 – 9.2 115 - 148 Women 7.4 – 9.9 120 – 160 Men 8.1 – 11.2 130 - 180 Decrease Values of Haemoglobin: Sign of anemia.
Note: In women haemoglobin values drop during pregnancy. Increase Values of Haemoglobin: Due to haemoconcentration (loss of body fluids e.g. in severe diarrhea, vomiting), reduced oxygen supply (e.g. congenital heart diseases, emphysema) and rarely polycythaemia vera. Quality control Internal Quality Control (IQC) Procedures: Daily measurement of HiCN standard to check instrument performance. Check visible the Drabkin’s reagent: should be clean and pale in color yellow discard if turbid or without color.
Check photometric Drabkin’s reagent: When measured against water blank at 540 nm, it gives a zero reading.
External Quality Control (EQC):
The National Public Health Laboratories (NPHL - Teku) will provide a preserved whole blood control previously analyzed. The results will be reported in the laboratory records and also reported to NPHL for further comparison with standard values.
Sources of error: • Incorrect sample homogenization (mix properly) NOTE: Before testing anticoagulant venous blood it must be mix in the vortex for 2-5 minutes.
• Pipetting errors: Inaccuracy in the measurement of the blood sample check if the blood is on the graduation line before dispensing it; utilization of a wet pipette wipe the blood from the outside surface of the pipette tip with cotton or paper. Avoid chip pipette/pipette tips.
• Not ensuring that the optical surfaces of the cuvette are clean and dry and that there is no air bubbles in the solution a) Hold the cuvette only in the sides that will not face the light path. b) When transferring a solution allow the fluid to run down the inside wall of the cuvette. c) Do not fill a cuvette more than ¾ full. d) Before place the cuvette into the colorimeter, wipe the sides that face the

light path with a soft paper or cloth. e) Always face the optical faces to the light source. f) Ensure that the solution is at RT before reading the Abs.
• Inappropriate maintenance of the colorimeter. Protect from sunlight and vibration. • Not checking signs of deterioration in reagents such as Drabkin’s fluid. Other precautions: Store Drabkin’s diluting fluid in a brown bottle or glass bottle wrapped in silver foil paper.
Once the haemiglobincyanide solution has been prepared, the haemoglobin estimation must be carried out within 6 hours.
If RT exceeds 30 C, store Drabkin’s reagent in the refrigerator (4-6 C). Do not freeze. Always allow to warm to RT before use.
Drabkin’s reagent is very poisonous. Keep it in a locked cupboard when not in use and always wash your hands immediate after handle it.
References: Mukherjee, K. L., (1988) Medical Laboratory Technology: A procedure Manual for Routine Diagnostic Tests, Volume I; Tata McGraw-Hill Publishing Company Limited, New Delhi, India.
Mallapaty, G.; (2000) Quality Assurance: Training Programme for Primary Healthcare Laboratory services, Kathmandu, Nepal Cheesbrough, M., (2000) District Laboratory Practice in Tropical Countries; Cambridge University Press, Cambridge, UK WHO (2003) Manual of Basic Techniques for a Health Laboratory; WHO, Geneva
MCHC – Mean Corpuscular Haemoglobin Concentration H – 05
Authorized signature: Issuing date: 11th February 2008
Next Revision date: 31st March 2008
Staff able to perform test: Laboratory officer (supervisor) laboratory technician (under supervision) Clinical significance: Diagnosis of patients suffering from anaemia, dehydration, shock or burns. Principle of Test Method:
The blood (mixed with anticoagulant) is placed in a long capillary tube and centrifuged in a microhaematocrit centrifuge. The level reached by the column of erythrocytes is read with a scale reader. This method is preferable to that using a macro scale: it is quicker, and blood from the finger can be used. Specimen:
10 μl (0.01 ml) of capillary blood. Used directly after collection and thus do not need anticoagulant.
10 μl (0.01 ml) of well-mixed EDTA-anticoagulated5 venous blood. Note: Capillary blood can be almost as satisfactory as venous blood if a free flow of blood is obtained, if dilution of sample with tissue juice does not occur and if the puncture is not squeezed excessively. Because of these factors, measurements with capillary blood are usually not so accurate. Equipment required: Sample collection:
Sterile lancets (capillary blood) Dry cotton wool Cotton wool soaked in 70& alcohol Microcapillar with heparin (capillary blood) or syringe (2.5/5.0/10 ml) + tubes + 10 μl micropipette (venous blood).
Test:
Tubes (7.5 ml) Test tubes rack Colorimeter and cuvette Toilette paper Distilled water Timer
Reagents/stains:
- Diluting fluid: Drabkin’s Reagent solution (pH 7.0-7.4) - Haemiglobincyanide (HiCN) standard solution. NOTE:
5 For additional information on preparation and storage see Annex 1
During hot season store Drabkin’s reagent in the refrigerator. Before use it, allow warming to RT. Drabkin’s solution is very poisonous.
Procedure:
49. Label test-tubes (7.5 ml) as T1, T2 (Test 1, Test 2) according to the number of samples to be tested.
50. Pipette 1 ml of Drabkin’s solution into the marked test-tubes.
51. With a pipette, measure exactly 10 µL (0.01 mL) of capillary blood or well-mixed (gentle inversion or swirling) venous EDTA-anticoagulant blood.
52. Wipe the outside of the pipette with a piece of cotton/toilet paper/gauze while holding the pipette in the horizontal.
53. Before dispense the blood, check if there are no air bubbles in the pipette.
54. Dispense the blood into the test tubes (T1, T2…) and rinse the tip by washing 3 to 5 times out the inside of the pipette tip repeatedly.
55. Stopper the tube, mix in vortex, and leave the sample at RT and protected from sunlight, for 10 minutes*
* When a neutral (pH 7.0-7.4) Drabkin’s reagent is not available, at least 20 min is required for an alkaline Drabkin’s reagent.
56. Set the wavelength of the colorimeter at 540 nm and zero the colorimeter without cuvette (if not
ON, turn it ON and allow to worm up for 10 min).
57. Place 1 ml of Drabkin’s solution into a match cuvette (blank cuvette) and place in the colorimeter.
58. Zero the colorimeter and then remove the blank cuvette.
59. Place the patient’s sample into the test-cuvette and place it in the colorimeter. Note: If the diluted blood is cloudy, which can be related to the presence of abnormal plasma proteins or to high concentration of white cells), centrifuge the diluted blood at 2000 g for 5 min before read the Abs.
60. Read the Abs of the patient’s sample, and by using the graph or the table prepared from the calibration curve, read the patient’s haemoglobin value (g/l). Note: Replaced the test samples back into the original test-tube so that, if necessary they are available for re-check.
NOTE: Always check if the cuvette is clear on the side that will face the light path, and ensure that there are no air bubbles.

Reporting and interpretation of results:
Normal Values: Haemoglobin (Fe) (mmol/l) Haemoglobin concentration
(g/l)
Newborn infants 8.4 – 12.1 136 - 196 Infants (1 year) 7.0 – 8.1 113 - 130 Children (10 – 12 years) 7.4 – 9.2 115 - 148 Women 7.4 – 9.9 120 – 160 Men 8.1 – 11.2 130 - 180 Decrease Values of Haemoglobin: Sign of anemia.
Note: In women haemoglobin values drop during pregnancy. Increase Values of Haemoglobin: Due to haemoconcentration (loss of body fluids e.g. in severe diarrhea, vomiting), reduced oxygen supply (e.g. congenital heart diseases, emphysema) and rarely polycythaemia vera. Quality control Internal Quality Control (IQC) Procedures: Daily measurement of HiCN standard to check instrument performance. Check visible the Drabkin’s reagent: should be clean and pale in color yellow discard if turbid or without color.
Check photometric Drabkin’s reagent: When measured against water blank at 540 nm, it gives a zero reading.
External Quality Control (EQC):
The National Public Health Laboratories (NPHL - Teku) will provide a preserved whole blood control previously analyzed. The results will be reported in the laboratory records and also reported to NPHL for further comparison with standard values.
Sources of error: • Incorrect sample homogenization (mix properly) NOTE: Before testing anticoagulant venous blood it must be mix in the vortex for 2-5 minutes.
• Pipetting errors: Inaccuracy in the measurement of the blood sample check if the blood is on the graduation line before dispensing it; utilization of a wet pipette wipe the blood from the outside surface of the pipette tip with cotton or paper. Avoid chip pipette/pipette tips.
• Not ensuring that the optical surfaces of the cuvette are clean and dry and that there is no air bubbles in the solution a) Hold the cuvette only in the sides that will not face the light path. b) When transferring a solution allow the fluid to run down the inside wall of the cuvette. c) Do not fill a cuvette more than ¾ full. d) Before place the cuvette into the colorimeter, wipe the sides that face the

light path with a soft paper or cloth. e) Always face the optical faces to the light source. f) Ensure that the solution is at RT before reading the Abs.
• Inappropriate maintenance of the colorimeter. Protect from sunlight and vibration. • Not checking signs of deterioration in reagents such as Drabkin’s fluid. Other precautions: Store Drabkin’s diluting fluid in a brown bottle or glass bottle wrapped in silver foil paper.
Once the haemiglobincyanide solution has been prepared, the haemoglobin estimation must be carried out within 6 hours.
If RT exceeds 30 C, store Drabkin’s reagent in the refrigerator (4-6 C). Do not freeze. Always allow to warm to RT before use.
Drabkin’s reagent is very poisonous. Keep it in a locked cupboard when not in use and always wash your hands immediate after handle it.
References: Mukherjee, K. L., (1988) Medical Laboratory Technology: A procedure Manual for Routine Diagnostic Tests, Volume I; Tata McGraw-Hill Publishing Company Limited, New Delhi, India.
Mallapaty, G.; (2000) Quality Assurance: Training Programme for Primary Healthcare Laboratory services, Kathmandu, Nepal Cheesbrough, M., (2000) District Laboratory Practice in Tropical Countries; Cambridge University Press, Cambridge, UK WHO (2003) Manual of Basic Techniques for a Health Laboratory; WHO, Geneva
Platelet count H – 06
Authorized signature: Issuing date: 11th February 2008
Next Revision date: 31st March 2008
Staff able to perform test: Laboratory officer (supervisor) laboratory technician (under supervision) Clinical significance: Diagnosis of patients suffering from anaemia, dehydration, shock or burns. Principle of Test Method:
The blood (mixed with anticoagulant) is placed in a long capillary tube and centrifuged in a microhaematocrit centrifuge. The level reached by the column of erythrocytes is read with a scale reader. This method is preferable to that using a macro scale: it is quicker, and blood from the finger can be used. Specimen:
10 μl (0.01 ml) of capillary blood. Used directly after collection and thus do not need anticoagulant.
10 μl (0.01 ml) of well-mixed EDTA-anticoagulated6 venous blood. Note: Capillary blood can be almost as satisfactory as venous blood if a free flow of blood is obtained, if dilution of sample with tissue juice does not occur and if the puncture is not squeezed excessively. Because of these factors, measurements with capillary blood are usually not so accurate. Equipment required: Sample collection:
Sterile lancets (capillary blood) Dry cotton wool Cotton wool soaked in 70& alcohol Microcapillar with heparin (capillary blood) or syringe (2.5/5.0/10 ml) + tubes + 10 μl micropipette (venous blood).
Test:
Tubes (7.5 ml) Test tubes rack Colorimeter and cuvette Toilette paper Distilled water Timer
Reagents/stains:
- Diluting fluid: Drabkin’s Reagent solution (pH 7.0-7.4) - Haemiglobincyanide (HiCN) standard solution. NOTE:
6 For additional information on preparation and storage see Annex 1
During hot season store Drabkin’s reagent in the refrigerator. Before use it, allow warming to RT. Drabkin’s solution is very poisonous.
Procedure:
61. Label test-tubes (7.5 ml) as T1, T2 (Test 1, Test 2) according to the number of samples to be tested.
62. Pipette 1 ml of Drabkin’s solution into the marked test-tubes.
63. With a pipette, measure exactly 10 µL (0.01 mL) of capillary blood or well-mixed (gentle inversion or swirling) venous EDTA-anticoagulant blood.
64. Wipe the outside of the pipette with a piece of cotton/toilet paper/gauze while holding the pipette in the horizontal.
65. Before dispense the blood, check if there are no air bubbles in the pipette.
66. Dispense the blood into the test tubes (T1, T2…) and rinse the tip by washing 3 to 5 times out the inside of the pipette tip repeatedly.
67. Stopper the tube, mix in vortex, and leave the sample at RT and protected from sunlight, for 10 minutes*
* When a neutral (pH 7.0-7.4) Drabkin’s reagent is not available, at least 20 min is required for an alkaline Drabkin’s reagent.
68. Set the wavelength of the colorimeter at 540 nm and zero the colorimeter without cuvette (if not
ON, turn it ON and allow to worm up for 10 min).
69. Place 1 ml of Drabkin’s solution into a match cuvette (blank cuvette) and place in the colorimeter.
70. Zero the colorimeter and then remove the blank cuvette.
71. Place the patient’s sample into the test-cuvette and place it in the colorimeter. Note: If the diluted blood is cloudy, which can be related to the presence of abnormal plasma proteins or to high concentration of white cells), centrifuge the diluted blood at 2000 g for 5 min before read the Abs.
72. Read the Abs of the patient’s sample, and by using the graph or the table prepared from the calibration curve, read the patient’s haemoglobin value (g/l). Note: Replaced the test samples back into the original test-tube so that, if necessary they are available for re-check.
NOTE: Always check if the cuvette is clear on the side that will face the light path, and ensure that there are no air bubbles.
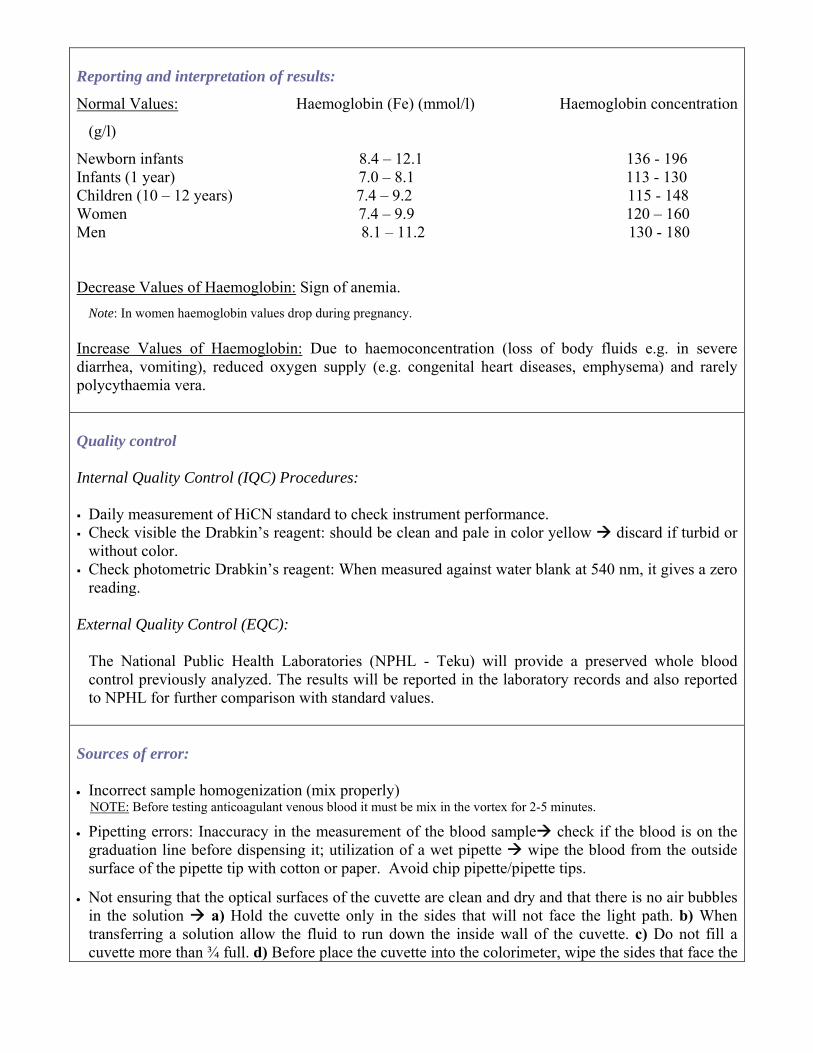
Reporting and interpretation of results:
Normal Values: Haemoglobin (Fe) (mmol/l) Haemoglobin concentration
(g/l)
Newborn infants 8.4 – 12.1 136 - 196 Infants (1 year) 7.0 – 8.1 113 - 130 Children (10 – 12 years) 7.4 – 9.2 115 - 148 Women 7.4 – 9.9 120 – 160 Men 8.1 – 11.2 130 - 180 Decrease Values of Haemoglobin: Sign of anemia.
Note: In women haemoglobin values drop during pregnancy. Increase Values of Haemoglobin: Due to haemoconcentration (loss of body fluids e.g. in severe diarrhea, vomiting), reduced oxygen supply (e.g. congenital heart diseases, emphysema) and rarely polycythaemia vera. Quality control Internal Quality Control (IQC) Procedures: Daily measurement of HiCN standard to check instrument performance. Check visible the Drabkin’s reagent: should be clean and pale in color yellow discard if turbid or without color.
Check photometric Drabkin’s reagent: When measured against water blank at 540 nm, it gives a zero reading.
External Quality Control (EQC):
The National Public Health Laboratories (NPHL - Teku) will provide a preserved whole blood control previously analyzed. The results will be reported in the laboratory records and also reported to NPHL for further comparison with standard values.
Sources of error: • Incorrect sample homogenization (mix properly) NOTE: Before testing anticoagulant venous blood it must be mix in the vortex for 2-5 minutes.
• Pipetting errors: Inaccuracy in the measurement of the blood sample check if the blood is on the graduation line before dispensing it; utilization of a wet pipette wipe the blood from the outside surface of the pipette tip with cotton or paper. Avoid chip pipette/pipette tips.
• Not ensuring that the optical surfaces of the cuvette are clean and dry and that there is no air bubbles in the solution a) Hold the cuvette only in the sides that will not face the light path. b) When transferring a solution allow the fluid to run down the inside wall of the cuvette. c) Do not fill a cuvette more than ¾ full. d) Before place the cuvette into the colorimeter, wipe the sides that face the

light path with a soft paper or cloth. e) Always face the optical faces to the light source. f) Ensure that the solution is at RT before reading the Abs.
• Inappropriate maintenance of the colorimeter. Protect from sunlight and vibration. • Not checking signs of deterioration in reagents such as Drabkin’s fluid. Other precautions: Store Drabkin’s diluting fluid in a brown bottle or glass bottle wrapped in silver foil paper.
Once the haemiglobincyanide solution has been prepared, the haemoglobin estimation must be carried out within 6 hours.
If RT exceeds 30 C, store Drabkin’s reagent in the refrigerator (4-6 C). Do not freeze. Always allow to warm to RT before use.
Drabkin’s reagent is very poisonous. Keep it in a locked cupboard when not in use and always wash your hands immediate after handle it.
References: Mukherjee, K. L., (1988) Medical Laboratory Technology: A procedure Manual for Routine Diagnostic Tests, Volume I; Tata McGraw-Hill Publishing Company Limited, New Delhi, India.
Mallapaty, G.; (2000) Quality Assurance: Training Programme for Primary Healthcare Laboratory services, Kathmandu, Nepal Cheesbrough, M., (2000) District Laboratory Practice in Tropical Countries; Cambridge University Press, Cambridge, UK WHO (2003) Manual of Basic Techniques for a Health Laboratory; WHO, Geneva
Leucocytes (White blood cells) Count H – 07
Authorized signature: Issuing date: 11th February 2008
Next Revision date: 31st March 2008
Staff able to perform test: Laboratory officer (supervisor) laboratory technician (under supervision) Clinical significance: Diagnosis of patients suffering from anaemia, dehydration, shock or burns. Principle of Test Method:
The blood (mixed with anticoagulant) is placed in a long capillary tube and centrifuged in a microhaematocrit centrifuge. The level reached by the column of erythrocytes is read with a scale reader. This method is preferable to that using a macro scale: it is quicker, and blood from the finger can be used. Specimen:
10 μl (0.01 ml) of capillary blood. Used directly after collection and thus do not need anticoagulant.
10 μl (0.01 ml) of well-mixed EDTA-anticoagulated7 venous blood. Note: Capillary blood can be almost as satisfactory as venous blood if a free flow of blood is obtained, if dilution of sample with tissue juice does not occur and if the puncture is not squeezed excessively. Because of these factors, measurements with capillary blood are usually not so accurate. Equipment required: Sample collection:
Sterile lancets (capillary blood) Dry cotton wool Cotton wool soaked in 70& alcohol Microcapillar with heparin (capillary blood) or syringe (2.5/5.0/10 ml) + tubes + 10 μl micropipette (venous blood).
Test:
Tubes (7.5 ml) Test tubes rack Colorimeter and cuvette Toilette paper Distilled water Timer
Reagents/stains:
- Diluting fluid: Drabkin’s Reagent solution (pH 7.0-7.4) - Haemiglobincyanide (HiCN) standard solution. NOTE:
7 For additional information on preparation and storage see Annex 1

During hot season store Drabkin’s reagent in the refrigerator. Before use it, allow warming to RT. Drabkin’s solution is very poisonous.
Procedure:
73. Label test-tubes (7.5 ml) as T1, T2 (Test 1, Test 2) according to the number of samples to be tested.
74. Pipette 1 ml of Drabkin’s solution into the marked test-tubes.
75. With a pipette, measure exactly 10 µL (0.01 mL) of capillary blood or well-mixed (gentle inversion or swirling) venous EDTA-anticoagulant blood.
76. Wipe the outside of the pipette with a piece of cotton/toilet paper/gauze while holding the pipette in the horizontal.
77. Before dispense the blood, check if there are no air bubbles in the pipette.
78. Dispense the blood into the test tubes (T1, T2…) and rinse the tip by washing 3 to 5 times out the inside of the pipette tip repeatedly.
79. Stopper the tube, mix in vortex, and leave the sample at RT and protected from sunlight, for 10 minutes*
* When a neutral (pH 7.0-7.4) Drabkin’s reagent is not available, at least 20 min is required for an alkaline Drabkin’s reagent.
80. Set the wavelength of the colorimeter at 540 nm and zero the colorimeter without cuvette (if not
ON, turn it ON and allow to worm up for 10 min).
81. Place 1 ml of Drabkin’s solution into a match cuvette (blank cuvette) and place in the colorimeter.
82. Zero the colorimeter and then remove the blank cuvette.
83. Place the patient’s sample into the test-cuvette and place it in the colorimeter. Note: If the diluted blood is cloudy, which can be related to the presence of abnormal plasma proteins or to high concentration of white cells), centrifuge the diluted blood at 2000 g for 5 min before read the Abs.
84. Read the Abs of the patient’s sample, and by using the graph or the table prepared from the calibration curve, read the patient’s haemoglobin value (g/l). Note: Replaced the test samples back into the original test-tube so that, if necessary they are available for re-check.
NOTE: Always check if the cuvette is clear on the side that will face the light path, and ensure that there are no air bubbles.

Reporting and interpretation of results:
Normal Values: Haemoglobin (Fe) (mmol/l) Haemoglobin concentration
(g/l)
Newborn infants 8.4 – 12.1 136 - 196 Infants (1 year) 7.0 – 8.1 113 - 130 Children (10 – 12 years) 7.4 – 9.2 115 - 148 Women 7.4 – 9.9 120 – 160 Men 8.1 – 11.2 130 - 180 Decrease Values of Haemoglobin: Sign of anemia.
Note: In women haemoglobin values drop during pregnancy. Increase Values of Haemoglobin: Due to haemoconcentration (loss of body fluids e.g. in severe diarrhea, vomiting), reduced oxygen supply (e.g. congenital heart diseases, emphysema) and rarely polycythaemia vera. Quality control Internal Quality Control (IQC) Procedures: Daily measurement of HiCN standard to check instrument performance. Check visible the Drabkin’s reagent: should be clean and pale in color yellow discard if turbid or without color.
Check photometric Drabkin’s reagent: When measured against water blank at 540 nm, it gives a zero reading.
External Quality Control (EQC):
The National Public Health Laboratories (NPHL - Teku) will provide a preserved whole blood control previously analyzed. The results will be reported in the laboratory records and also reported to NPHL for further comparison with standard values.
Sources of error: • Incorrect sample homogenization (mix properly) NOTE: Before testing anticoagulant venous blood it must be mix in the vortex for 2-5 minutes.
• Pipetting errors: Inaccuracy in the measurement of the blood sample check if the blood is on the graduation line before dispensing it; utilization of a wet pipette wipe the blood from the outside surface of the pipette tip with cotton or paper. Avoid chip pipette/pipette tips.
• Not ensuring that the optical surfaces of the cuvette are clean and dry and that there is no air bubbles in the solution a) Hold the cuvette only in the sides that will not face the light path. b) When transferring a solution allow the fluid to run down the inside wall of the cuvette. c) Do not fill a cuvette more than ¾ full. d) Before place the cuvette into the colorimeter, wipe the sides that face the

light path with a soft paper or cloth. e) Always face the optical faces to the light source. f) Ensure that the solution is at RT before reading the Abs.
• Inappropriate maintenance of the colorimeter. Protect from sunlight and vibration. • Not checking signs of deterioration in reagents such as Drabkin’s fluid. Other precautions: Store Drabkin’s diluting fluid in a brown bottle or glass bottle wrapped in silver foil paper.
Once the haemiglobincyanide solution has been prepared, the haemoglobin estimation must be carried out within 6 hours.
If RT exceeds 30 C, store Drabkin’s reagent in the refrigerator (4-6 C). Do not freeze. Always allow to warm to RT before use.
Drabkin’s reagent is very poisonous. Keep it in a locked cupboard when not in use and always wash your hands immediate after handle it.
References: Mukherjee, K. L., (1988) Medical Laboratory Technology: A procedure Manual for Routine Diagnostic Tests, Volume I; Tata McGraw-Hill Publishing Company Limited, New Delhi, India.
Mallapaty, G.; (2000) Quality Assurance: Training Programme for Primary Healthcare Laboratory services, Kathmandu, Nepal Cheesbrough, M., (2000) District Laboratory Practice in Tropical Countries; Cambridge University Press, Cambridge, UK WHO (2003) Manual of Basic Techniques for a Health Laboratory; WHO, Geneva
GRANULOCYTE Count and Percentage H – 08
Authorized signature: Issuing date: 11th February 2008
Next Revision date: 31st March 2008
Staff able to perform test: Laboratory officer (supervisor) laboratory technician (under supervision) Clinical significance: Diagnosis of patients suffering from anaemia, dehydration, shock or burns. Principle of Test Method:
The blood (mixed with anticoagulant) is placed in a long capillary tube and centrifuged in a microhaematocrit centrifuge. The level reached by the column of erythrocytes is read with a scale reader. This method is preferable to that using a macro scale: it is quicker, and blood from the finger can be used. Specimen:
10 μl (0.01 ml) of capillary blood. Used directly after collection and thus do not need anticoagulant.
10 μl (0.01 ml) of well-mixed EDTA-anticoagulated8 venous blood. Note: Capillary blood can be almost as satisfactory as venous blood if a free flow of blood is obtained, if dilution of sample with tissue juice does not occur and if the puncture is not squeezed excessively. Because of these factors, measurements with capillary blood are usually not so accurate. Equipment required: Sample collection:
Sterile lancets (capillary blood) Dry cotton wool Cotton wool soaked in 70& alcohol Microcapillar with heparin (capillary blood) or syringe (2.5/5.0/10 ml) + tubes + 10 μl micropipette (venous blood).
Test:
Tubes (7.5 ml) Test tubes rack Colorimeter and cuvette Toilette paper Distilled water Timer
Reagents/stains:
- Diluting fluid: Drabkin’s Reagent solution (pH 7.0-7.4) - Haemiglobincyanide (HiCN) standard solution. NOTE:
8 For additional information on preparation and storage see Annex 1

During hot season store Drabkin’s reagent in the refrigerator. Before use it, allow warming to RT. Drabkin’s solution is very poisonous.
Procedure:
85. Label test-tubes (7.5 ml) as T1, T2 (Test 1, Test 2) according to the number of samples to be tested.
86. Pipette 1 ml of Drabkin’s solution into the marked test-tubes.
87. With a pipette, measure exactly 10 µL (0.01 mL) of capillary blood or well-mixed (gentle inversion or swirling) venous EDTA-anticoagulant blood.
88. Wipe the outside of the pipette with a piece of cotton/toilet paper/gauze while holding the pipette in the horizontal.
89. Before dispense the blood, check if there are no air bubbles in the pipette.
90. Dispense the blood into the test tubes (T1, T2…) and rinse the tip by washing 3 to 5 times out the inside of the pipette tip repeatedly.
91. Stopper the tube, mix in vortex, and leave the sample at RT and protected from sunlight, for 10 minutes*
* When a neutral (pH 7.0-7.4) Drabkin’s reagent is not available, at least 20 min is required for an alkaline Drabkin’s reagent.
92. Set the wavelength of the colorimeter at 540 nm and zero the colorimeter without cuvette (if not
ON, turn it ON and allow to worm up for 10 min).
93. Place 1 ml of Drabkin’s solution into a match cuvette (blank cuvette) and place in the colorimeter.
94. Zero the colorimeter and then remove the blank cuvette.
95. Place the patient’s sample into the test-cuvette and place it in the colorimeter. Note: If the diluted blood is cloudy, which can be related to the presence of abnormal plasma proteins or to high concentration of white cells), centrifuge the diluted blood at 2000 g for 5 min before read the Abs.
96. Read the Abs of the patient’s sample, and by using the graph or the table prepared from the calibration curve, read the patient’s haemoglobin value (g/l). Note: Replaced the test samples back into the original test-tube so that, if necessary they are available for re-check.
NOTE: Always check if the cuvette is clear on the side that will face the light path, and ensure that there are no air bubbles.

Reporting and interpretation of results:
Normal Values: Haemoglobin (Fe) (mmol/l) Haemoglobin concentration
(g/l)
Newborn infants 8.4 – 12.1 136 - 196 Infants (1 year) 7.0 – 8.1 113 - 130 Children (10 – 12 years) 7.4 – 9.2 115 - 148 Women 7.4 – 9.9 120 – 160 Men 8.1 – 11.2 130 - 180 Decrease Values of Haemoglobin: Sign of anemia.
Note: In women haemoglobin values drop during pregnancy. Increase Values of Haemoglobin: Due to haemoconcentration (loss of body fluids e.g. in severe diarrhea, vomiting), reduced oxygen supply (e.g. congenital heart diseases, emphysema) and rarely polycythaemia vera. Quality control Internal Quality Control (IQC) Procedures: Daily measurement of HiCN standard to check instrument performance. Check visible the Drabkin’s reagent: should be clean and pale in color yellow discard if turbid or without color.
Check photometric Drabkin’s reagent: When measured against water blank at 540 nm, it gives a zero reading.
External Quality Control (EQC):
The National Public Health Laboratories (NPHL - Teku) will provide a preserved whole blood control previously analyzed. The results will be reported in the laboratory records and also reported to NPHL for further comparison with standard values.
Sources of error: • Incorrect sample homogenization (mix properly) NOTE: Before testing anticoagulant venous blood it must be mix in the vortex for 2-5 minutes.
• Pipetting errors: Inaccuracy in the measurement of the blood sample check if the blood is on the graduation line before dispensing it; utilization of a wet pipette wipe the blood from the outside surface of the pipette tip with cotton or paper. Avoid chip pipette/pipette tips.
• Not ensuring that the optical surfaces of the cuvette are clean and dry and that there is no air bubbles in the solution a) Hold the cuvette only in the sides that will not face the light path. b) When transferring a solution allow the fluid to run down the inside wall of the cuvette. c) Do not fill a cuvette more than ¾ full. d) Before place the cuvette into the colorimeter, wipe the sides that face the
light path with a soft paper or cloth. e) Always face the optical faces to the light source. f) Ensure that the solution is at RT before reading the Abs.
• Inappropriate maintenance of the colorimeter. Protect from sunlight and vibration. • Not checking signs of deterioration in reagents such as Drabkin’s fluid. Other precautions: Store Drabkin’s diluting fluid in a brown bottle or glass bottle wrapped in silver foil paper.
Once the haemiglobincyanide solution has been prepared, the haemoglobin estimation must be carried out within 6 hours.
If RT exceeds 30 C, store Drabkin’s reagent in the refrigerator (4-6 C). Do not freeze. Always allow to warm to RT before use.
Drabkin’s reagent is very poisonous. Keep it in a locked cupboard when not in use and always wash your hands immediate after handle it.
References: Mukherjee, K. L., (1988) Medical Laboratory Technology: A procedure Manual for Routine Diagnostic Tests, Volume I; Tata McGraw-Hill Publishing Company Limited, New Delhi, India.
Mallapaty, G.; (2000) Quality Assurance: Training Programme for Primary Healthcare Laboratory services, Kathmandu, Nepal Cheesbrough, M., (2000) District Laboratory Practice in Tropical Countries; Cambridge University Press, Cambridge, UK WHO (2003) Manual of Basic Techniques for a Health Laboratory; WHO, Geneva
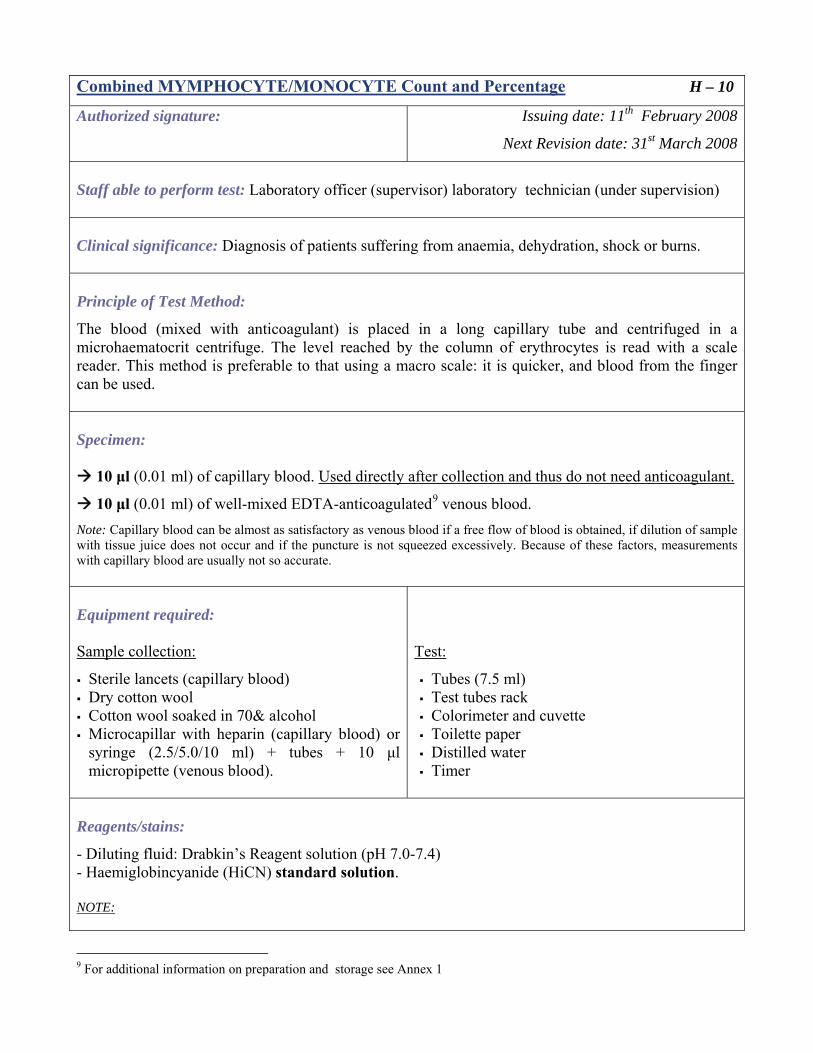
Combined MYMPHOCYTE/MONOCYTE Count and Percentage H – 10
Authorized signature: Issuing date: 11th February 2008
Next Revision date: 31st March 2008
Staff able to perform test: Laboratory officer (supervisor) laboratory technician (under supervision) Clinical significance: Diagnosis of patients suffering from anaemia, dehydration, shock or burns. Principle of Test Method:
The blood (mixed with anticoagulant) is placed in a long capillary tube and centrifuged in a microhaematocrit centrifuge. The level reached by the column of erythrocytes is read with a scale reader. This method is preferable to that using a macro scale: it is quicker, and blood from the finger can be used. Specimen:
10 μl (0.01 ml) of capillary blood. Used directly after collection and thus do not need anticoagulant.
10 μl (0.01 ml) of well-mixed EDTA-anticoagulated9 venous blood. Note: Capillary blood can be almost as satisfactory as venous blood if a free flow of blood is obtained, if dilution of sample with tissue juice does not occur and if the puncture is not squeezed excessively. Because of these factors, measurements with capillary blood are usually not so accurate. Equipment required: Sample collection:
Sterile lancets (capillary blood) Dry cotton wool Cotton wool soaked in 70& alcohol Microcapillar with heparin (capillary blood) or syringe (2.5/5.0/10 ml) + tubes + 10 μl micropipette (venous blood).
Test:
Tubes (7.5 ml) Test tubes rack Colorimeter and cuvette Toilette paper Distilled water Timer
Reagents/stains:
- Diluting fluid: Drabkin’s Reagent solution (pH 7.0-7.4) - Haemiglobincyanide (HiCN) standard solution. NOTE:
9 For additional information on preparation and storage see Annex 1
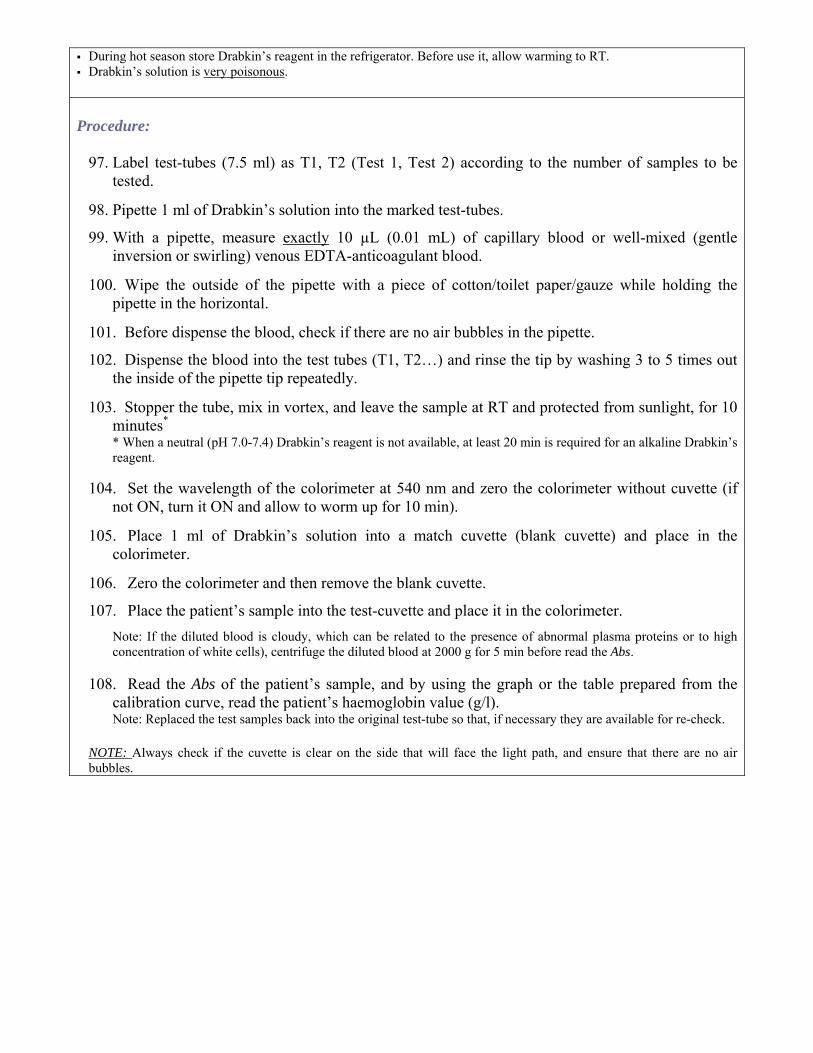
During hot season store Drabkin’s reagent in the refrigerator. Before use it, allow warming to RT. Drabkin’s solution is very poisonous.
Procedure:
97. Label test-tubes (7.5 ml) as T1, T2 (Test 1, Test 2) according to the number of samples to be tested.
98. Pipette 1 ml of Drabkin’s solution into the marked test-tubes.
99. With a pipette, measure exactly 10 µL (0.01 mL) of capillary blood or well-mixed (gentle inversion or swirling) venous EDTA-anticoagulant blood.
100. Wipe the outside of the pipette with a piece of cotton/toilet paper/gauze while holding the pipette in the horizontal.
101. Before dispense the blood, check if there are no air bubbles in the pipette.
102. Dispense the blood into the test tubes (T1, T2…) and rinse the tip by washing 3 to 5 times out the inside of the pipette tip repeatedly.
103. Stopper the tube, mix in vortex, and leave the sample at RT and protected from sunlight, for 10 minutes*
* When a neutral (pH 7.0-7.4) Drabkin’s reagent is not available, at least 20 min is required for an alkaline Drabkin’s reagent.
104. Set the wavelength of the colorimeter at 540 nm and zero the colorimeter without cuvette (if
not ON, turn it ON and allow to worm up for 10 min).
105. Place 1 ml of Drabkin’s solution into a match cuvette (blank cuvette) and place in the colorimeter.
106. Zero the colorimeter and then remove the blank cuvette.
107. Place the patient’s sample into the test-cuvette and place it in the colorimeter. Note: If the diluted blood is cloudy, which can be related to the presence of abnormal plasma proteins or to high concentration of white cells), centrifuge the diluted blood at 2000 g for 5 min before read the Abs.
108. Read the Abs of the patient’s sample, and by using the graph or the table prepared from the calibration curve, read the patient’s haemoglobin value (g/l). Note: Replaced the test samples back into the original test-tube so that, if necessary they are available for re-check.
NOTE: Always check if the cuvette is clear on the side that will face the light path, and ensure that there are no air bubbles.

Reporting and interpretation of results:
Normal Values: Haemoglobin (Fe) (mmol/l) Haemoglobin concentration
(g/l)
Newborn infants 8.4 – 12.1 136 - 196 Infants (1 year) 7.0 – 8.1 113 - 130 Children (10 – 12 years) 7.4 – 9.2 115 - 148 Women 7.4 – 9.9 120 – 160 Men 8.1 – 11.2 130 - 180 Decrease Values of Haemoglobin: Sign of anemia.
Note: In women haemoglobin values drop during pregnancy. Increase Values of Haemoglobin: Due to haemoconcentration (loss of body fluids e.g. in severe diarrhea, vomiting), reduced oxygen supply (e.g. congenital heart diseases, emphysema) and rarely polycythaemia vera. Quality control Internal Quality Control (IQC) Procedures: Daily measurement of HiCN standard to check instrument performance. Check visible the Drabkin’s reagent: should be clean and pale in color yellow discard if turbid or without color.
Check photometric Drabkin’s reagent: When measured against water blank at 540 nm, it gives a zero reading.
External Quality Control (EQC):
The National Public Health Laboratories (NPHL - Teku) will provide a preserved whole blood control previously analyzed. The results will be reported in the laboratory records and also reported to NPHL for further comparison with standard values.
Sources of error: • Incorrect sample homogenization (mix properly) NOTE: Before testing anticoagulant venous blood it must be mix in the vortex for 2-5 minutes.
• Pipetting errors: Inaccuracy in the measurement of the blood sample check if the blood is on the graduation line before dispensing it; utilization of a wet pipette wipe the blood from the outside surface of the pipette tip with cotton or paper. Avoid chip pipette/pipette tips.
• Not ensuring that the optical surfaces of the cuvette are clean and dry and that there is no air bubbles in the solution a) Hold the cuvette only in the sides that will not face the light path. b) When transferring a solution allow the fluid to run down the inside wall of the cuvette. c) Do not fill a cuvette more than ¾ full. d) Before place the cuvette into the colorimeter, wipe the sides that face the

light path with a soft paper or cloth. e) Always face the optical faces to the light source. f) Ensure that the solution is at RT before reading the Abs.
• Inappropriate maintenance of the colorimeter. Protect from sunlight and vibration. • Not checking signs of deterioration in reagents such as Drabkin’s fluid. Other precautions: Store Drabkin’s diluting fluid in a brown bottle or glass bottle wrapped in silver foil paper.
Once the haemiglobincyanide solution has been prepared, the haemoglobin estimation must be carried out within 6 hours.
If RT exceeds 30 C, store Drabkin’s reagent in the refrigerator (4-6 C). Do not freeze. Always allow to warm to RT before use.
Drabkin’s reagent is very poisonous. Keep it in a locked cupboard when not in use and always wash your hands immediate after handle it.
References: Mukherjee, K. L., (1988) Medical Laboratory Technology: A procedure Manual for Routine Diagnostic Tests, Volume I; Tata McGraw-Hill Publishing Company Limited, New Delhi, India.
Mallapaty, G.; (2000) Quality Assurance: Training Programme for Primary Healthcare Laboratory services, Kathmandu, Nepal Cheesbrough, M., (2000) District Laboratory Practice in Tropical Countries; Cambridge University Press, Cambridge, UK WHO (2003) Manual of Basic Techniques for a Health Laboratory; WHO, Geneva

Blood Chemistry
(Colorimeter)
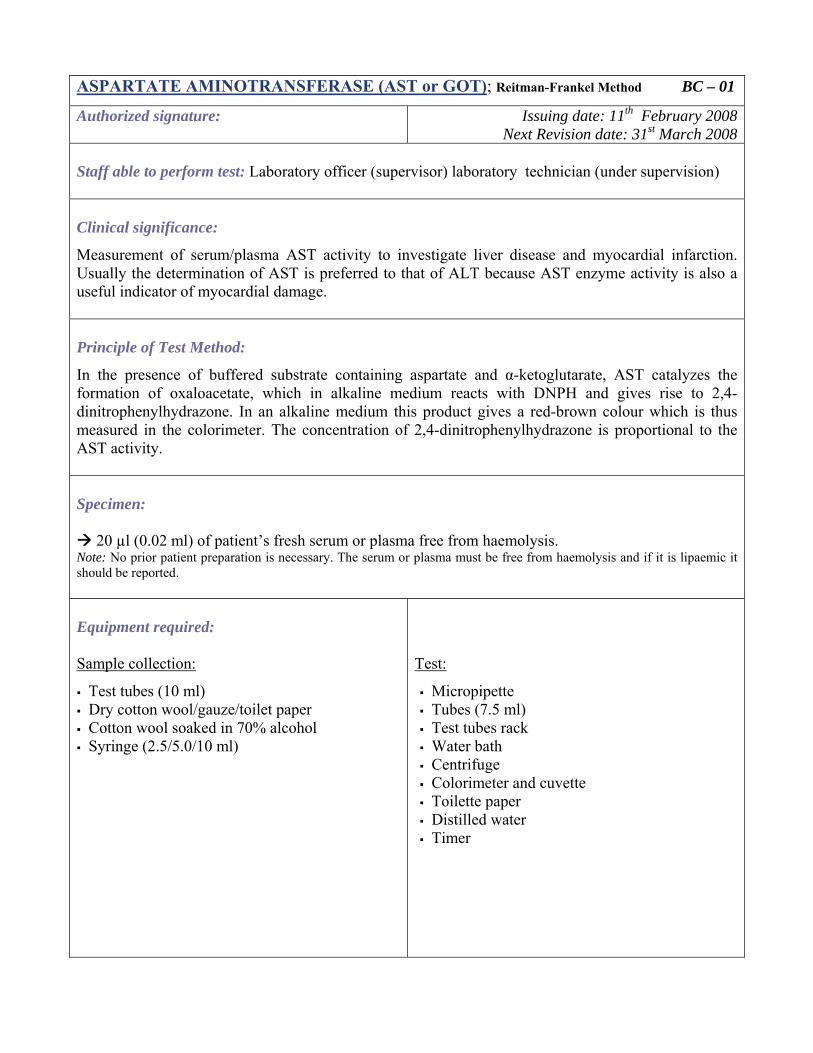
ASPARTATE AMINOTRANSFERASE (AST or GOT); Reitman-Frankel Method BC – 01
Authorized signature: Issuing date: 11th February 2008Next Revision date: 31st March 2008
Staff able to perform test: Laboratory officer (supervisor) laboratory technician (under supervision) Clinical significance:
Measurement of serum/plasma AST activity to investigate liver disease and myocardial infarction. Usually the determination of AST is preferred to that of ALT because AST enzyme activity is also a useful indicator of myocardial damage. Principle of Test Method:
In the presence of buffered substrate containing aspartate and α-ketoglutarate, AST catalyzes the formation of oxaloacetate, which in alkaline medium reacts with DNPH and gives rise to 2,4-dinitrophenylhydrazone. In an alkaline medium this product gives a red-brown colour which is thus measured in the colorimeter. The concentration of 2,4-dinitrophenylhydrazone is proportional to the AST activity. Specimen:
20 µl (0.02 ml) of patient’s fresh serum or plasma free from haemolysis. Note: No prior patient preparation is necessary. The serum or plasma must be free from haemolysis and if it is lipaemic it should be reported. Equipment required: Sample collection:
Test tubes (10 ml) Dry cotton wool/gauze/toilet paper Cotton wool soaked in 70% alcohol Syringe (2.5/5.0/10 ml)
Test:
Micropipette Tubes (7.5 ml) Test tubes rack Water bath Centrifuge Colorimeter and cuvette Toilette paper Distilled water Timer
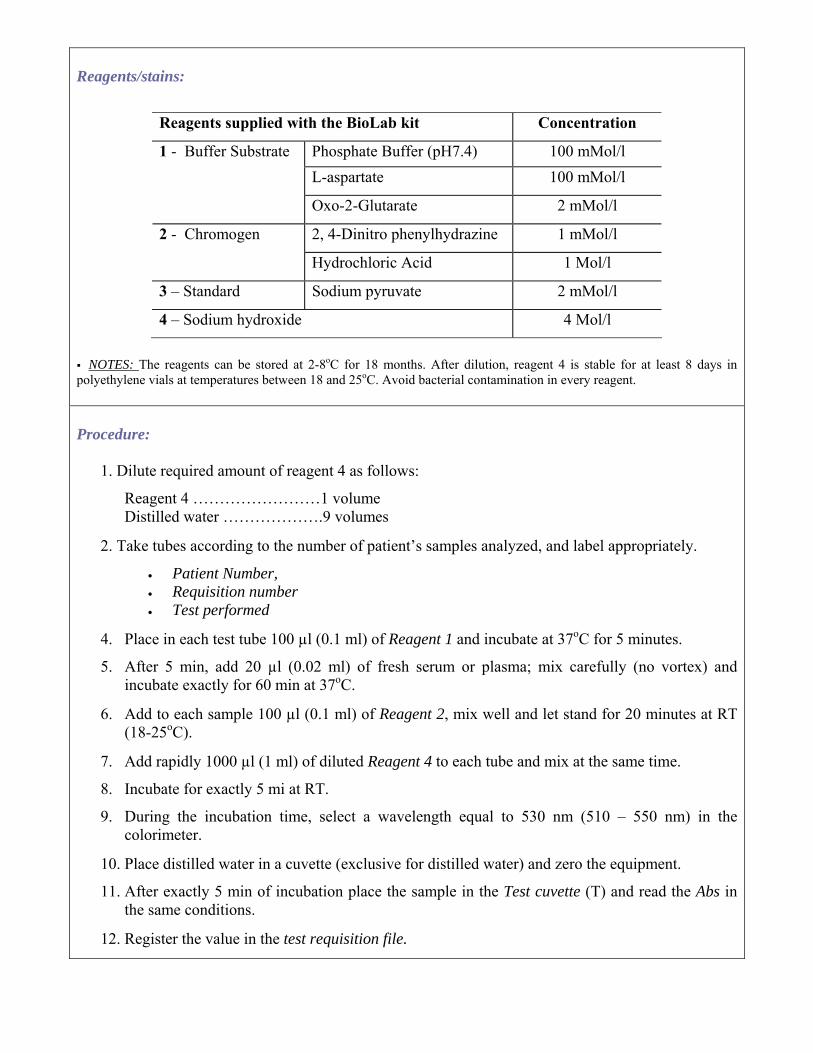
Reagents/stains:
Reagents supplied with the BioLab kit Concentration
Phosphate Buffer (pH7.4) 100 mMol/l L-aspartate 100 mMol/l
1 - Buffer Substrate
Oxo-2-Glutarate 2 mMol/l
2, 4-Dinitro phenylhydrazine 1 mMol/l 2 - Chromogen
Hydrochloric Acid 1 Mol/l
3 – Standard Sodium pyruvate 2 mMol/l
4 – Sodium hydroxide 4 Mol/l
NOTES: The reagents can be stored at 2-8oC for 18 months. After dilution, reagent 4 is stable for at least 8 days in
polyethylene vials at temperatures between 18 and 25oC. Avoid bacterial contamination in every reagent. Procedure:
1. Dilute required amount of reagent 4 as follows:
Reagent 4 ……………………1 volume Distilled water ……………….9 volumes
2. Take tubes according to the number of patient’s samples analyzed, and label appropriately.
• Patient Number, • Requisition number • Test performed
4. Place in each test tube 100 µl (0.1 ml) of Reagent 1 and incubate at 37oC for 5 minutes.
5. After 5 min, add 20 µl (0.02 ml) of fresh serum or plasma; mix carefully (no vortex) and incubate exactly for 60 min at 37oC.
6. Add to each sample 100 µl (0.1 ml) of Reagent 2, mix well and let stand for 20 minutes at RT (18-25oC).
7. Add rapidly 1000 µl (1 ml) of diluted Reagent 4 to each tube and mix at the same time.
8. Incubate for exactly 5 mi at RT.
9. During the incubation time, select a wavelength equal to 530 nm (510 – 550 nm) in the colorimeter.
10. Place distilled water in a cuvette (exclusive for distilled water) and zero the equipment.
11. After exactly 5 min of incubation place the sample in the Test cuvette (T) and read the Abs in the same conditions.
12. Register the value in the test requisition file.
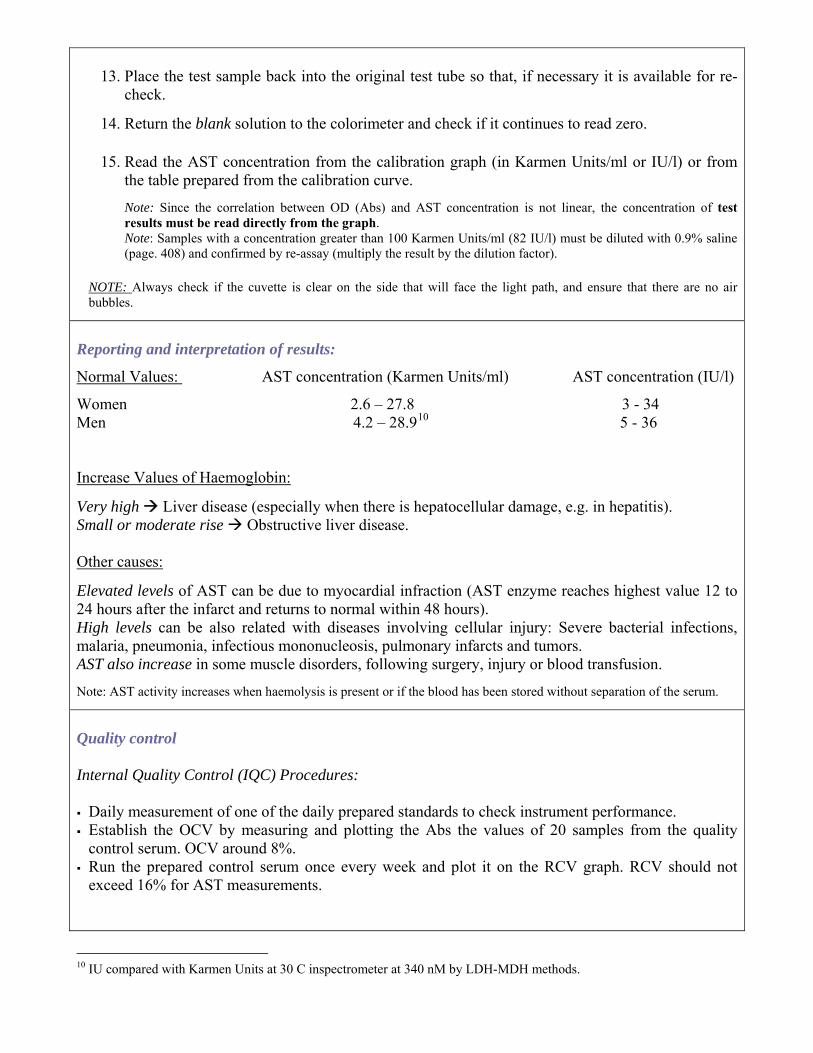
13. Place the test sample back into the original test tube so that, if necessary it is available for re-
check.
14. Return the blank solution to the colorimeter and check if it continues to read zero.
15. Read the AST concentration from the calibration graph (in Karmen Units/ml or IU/l) or from the table prepared from the calibration curve.
Note: Since the correlation between OD (Abs) and AST concentration is not linear, the concentration of test results must be read directly from the graph. Note: Samples with a concentration greater than 100 Karmen Units/ml (82 IU/l) must be diluted with 0.9% saline (page. 408) and confirmed by re-assay (multiply the result by the dilution factor).
NOTE: Always check if the cuvette is clear on the side that will face the light path, and ensure that there are no air bubbles.
Reporting and interpretation of results:
Normal Values: AST concentration (Karmen Units/ml) AST concentration (IU/l)
Women 2.6 – 27.8 3 - 34 Men 4.2 – 28.910 5 - 36 Increase Values of Haemoglobin:
Very high Liver disease (especially when there is hepatocellular damage, e.g. in hepatitis). Small or moderate rise Obstructive liver disease. Other causes:
Elevated levels of AST can be due to myocardial infraction (AST enzyme reaches highest value 12 to 24 hours after the infarct and returns to normal within 48 hours). High levels can be also related with diseases involving cellular injury: Severe bacterial infections, malaria, pneumonia, infectious mononucleosis, pulmonary infarcts and tumors. AST also increase in some muscle disorders, following surgery, injury or blood transfusion. Note: AST activity increases when haemolysis is present or if the blood has been stored without separation of the serum.
Quality control Internal Quality Control (IQC) Procedures: Daily measurement of one of the daily prepared standards to check instrument performance. Establish the OCV by measuring and plotting the Abs the values of 20 samples from the quality control serum. OCV around 8%.
Run the prepared control serum once every week and plot it on the RCV graph. RCV should not exceed 16% for AST measurements.
10 IU compared with Karmen Units at 30 C inspectrometer at 340 nM by LDH-MDH methods.
External Quality Control (EQC): The National Public Health Laboratories (NPHL - Teku) will provide a preserved whole blood control previously analyzed. The results will be reported in the laboratory records and also reported to NPHL for further comparison with standard values.
Sources of error: • Incorrect sample collection:
- Allow the blood to clot at RT and centrifuge as soon as possible (1 hour maximum after collection).
- Also remove the serum carefully without sucking up the red cells. - Carry out test as soon as possible after separation of the serum from the clot.
• Pipetting errors: Inaccuracy in the measurement of the blood sample check if the blood is on the
graduation line before dispensing it; utilization of a wet pipette wipe the blood from the outside surface of the pipette tip with cotton or paper. Avoid chip pipette/pipette tips.
• Not ensuring that the optical surfaces of the cuvette are clean and dry and that there is no air bubbles in the solution a) Hold the cuvette only in the sides that will not face the light path. b) When transferring a solution allow the fluid to run down the inside wall of the cuvette. c) Do not fill a cuvette more than ¾ full. d) Before place the cuvette into the colorimeter, wipe the sides that face the light path with a soft paper or cloth. e) Always face the optical faces to the light source. f) Ensure that the solution is at RT before reading the Abs.
• Inappropriate maintenance of the colorimeter. Protect from sunlight and vibration. Other precautions: Since the method is not linear, each kit should be controlled and calibrated for its activities.
A new calibration graph should be prepared and checked against controls every week, whenever new reagents are used or dubious results are obtained (a control should be run along with the test by adding serum to the step 4).
References: BioLAb Diagnostics Kit Instructions Mallapaty, G.; (2000) Quality Assurance: Training Programme for Primary Healthcare Laboratory services, Kathmandu, Nepal Cheesbrough, M., (2000) District Laboratory Practice in Tropical Countries; Cambridge University Press, Cambridge, UK WHO (2003) Manual of Basic Techniques for a Health Laboratory; WHO, Geneva
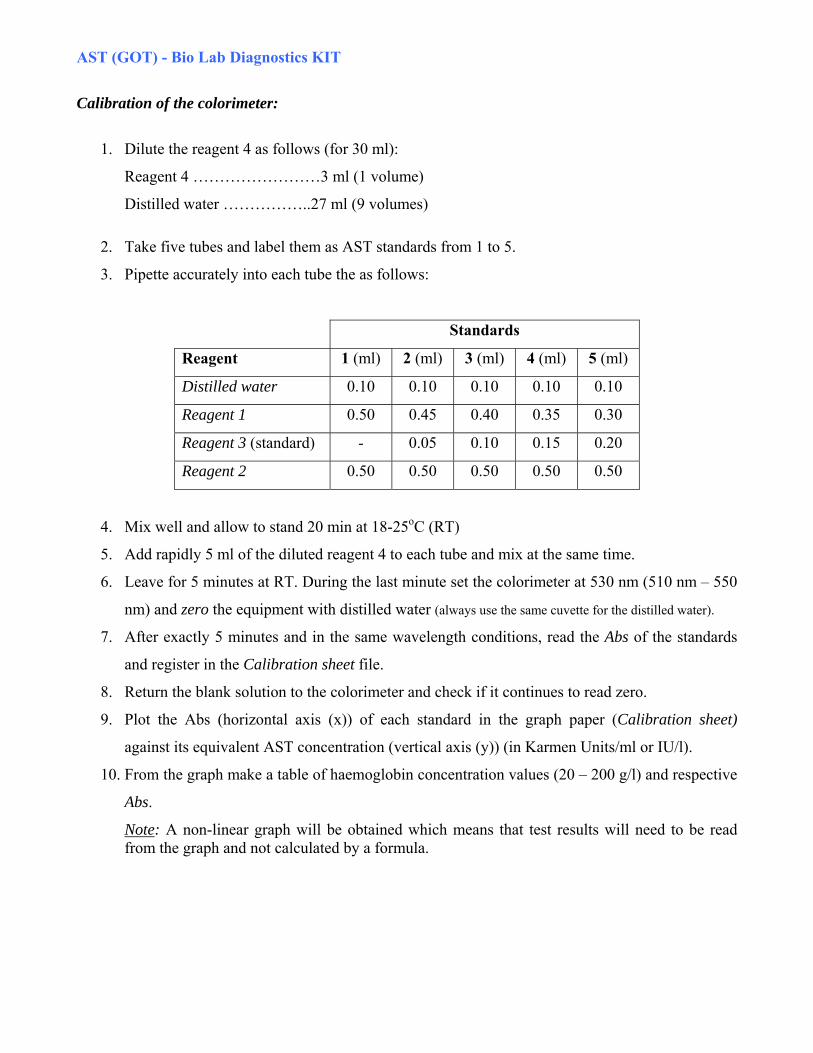
AST (GOT) - Bio Lab Diagnostics KIT
Calibration of the colorimeter:
1. Dilute the reagent 4 as follows (for 30 ml):
Reagent 4 ……………………3 ml (1 volume)
Distilled water ……………..27 ml (9 volumes) 2. Take five tubes and label them as AST standards from 1 to 5.
3. Pipette accurately into each tube the as follows:
Standards
Reagent 1 (ml) 2 (ml) 3 (ml) 4 (ml) 5 (ml)
Distilled water 0.10 0.10 0.10 0.10 0.10
Reagent 1 0.50 0.45 0.40 0.35 0.30
Reagent 3 (standard) - 0.05 0.10 0.15 0.20
Reagent 2 0.50 0.50 0.50 0.50 0.50
4. Mix well and allow to stand 20 min at 18-25oC (RT)
5. Add rapidly 5 ml of the diluted reagent 4 to each tube and mix at the same time.
6. Leave for 5 minutes at RT. During the last minute set the colorimeter at 530 nm (510 nm – 550
nm) and zero the equipment with distilled water (always use the same cuvette for the distilled water).
7. After exactly 5 minutes and in the same wavelength conditions, read the Abs of the standards
and register in the Calibration sheet file.
8. Return the blank solution to the colorimeter and check if it continues to read zero.
9. Plot the Abs (horizontal axis (x)) of each standard in the graph paper (Calibration sheet)
against its equivalent AST concentration (vertical axis (y)) (in Karmen Units/ml or IU/l).
10. From the graph make a table of haemoglobin concentration values (20 – 200 g/l) and respective
Abs.
Note: A non-linear graph will be obtained which means that test results will need to be read from the graph and not calculated by a formula.
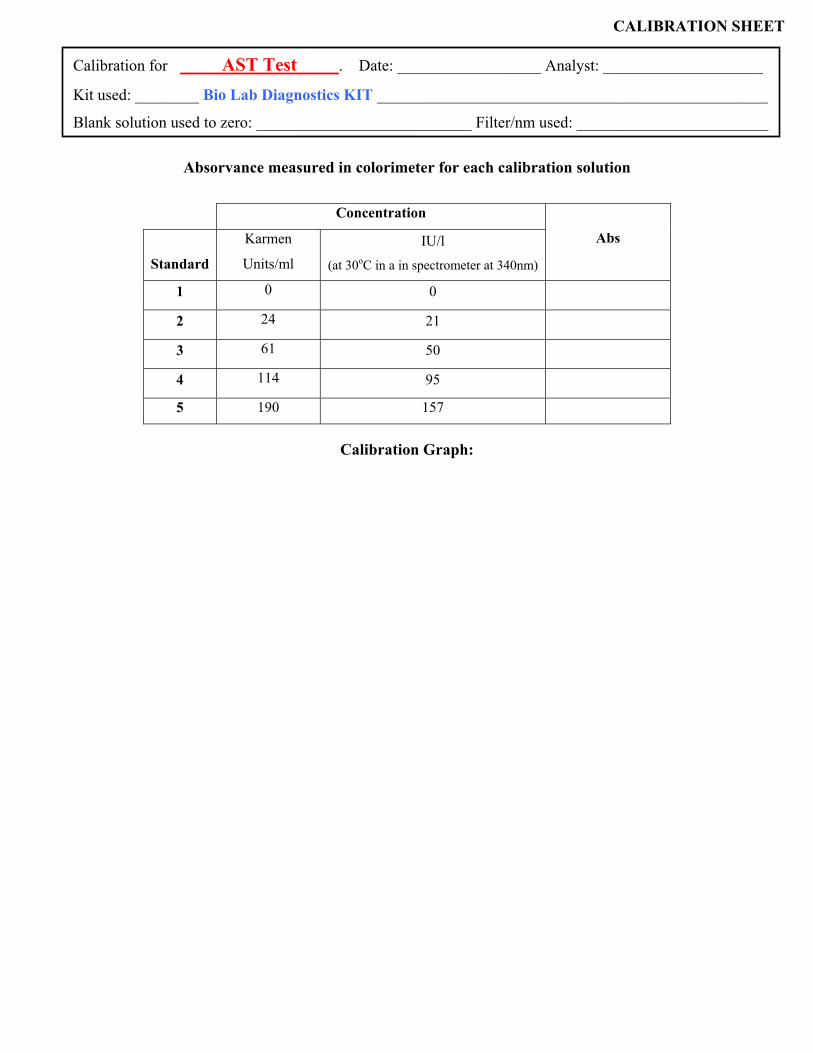
Absorvance measured in colorimeter for each calibration solution
Calibration Graph:
Concentration
Standard
Karmen
Units/ml IU/l
(at 30oC in a in spectrometer at 340nm)
Abs
1 0 0
2 24 21
3 61 50
4 114 95
5 190 157
Calibration for AST Test . Date: __________________ Analyst: ____________________
Kit used: ________ Bio Lab Diagnostics KIT _________________________________________________
Blank solution used to zero: ___________________________ Filter/nm used: ________________________
CALIBRATION SHEET

Estimation of AST- colorimeter
Date: ______________________
Analyst: ____________________________
ABS (NM) CONCENTRATION (G/L)
ALANINE AMINOTRANSFERASE (ALT or GPT) BC – 02
Authorized signature: Issuing date: 5th 28th March 2008
Next Revision date: 31st April 2008 Staff able to perform test: Laboratory officer (supervisor) laboratory technician (under supervision) Clinical significance:
Measurement of serum/plasma Alanine Aminotransferase Activity (ALT or SGPT) in a colorimeter to investigate liver disease. AST is found principally in the liver with only small amounts being present in other organs. Levels are raised when there is liver cells damage and during various hepatic disease states including hepatitis. Note: ALT measurement is more specific than AST for detecting liver cell damage. However the difference in the raised levels of the two enzymes is small and does not justify the measurement of both. Usually the measurement of AST is preferred to the measurement of ALT because AST enzyme activity is also a useful indicator of myocardial damage. ALT is usually measured under special circumstances.
Principle of Test Method:
ALT is a specific soluble enzyme localized in the cytosol of cells. It catalyses the transformation of L-Alanine and 2-Oxoglutarate into Pyruvate. The ALT or GPT activity controls the quantity of pyruvate formed, which can be assayed by the formation of a brown substance - 2,4 dinitro phenylhydrazone, in alkaline medium. The intensity of this colour is proportional to the quantity of pyruvate formed and thus to the catalytic activity of ALT.
Specimen:
20 µl (0.02 ml) of patient’s fresh serum or plasma. Note: No prior patient preparation is necessary. The serum or plasma must be free from haemolysis and if it is lipaemic it should be reported.
Equipment required: Sample collection:
Test tubes (10 ml) Dry cotton wool/gauze/toilet paper Cotton wool soaked in 70% alcohol Syringe (2.5/5.0/10 ml)
Test:
Micropipette Tubes (7.5 ml) Test tubes rack Water bath Centrifuge Colorimeter and cuvette Toilette paper Distilled water Timer
Reagents/stains:
Reagents supplied with the BioLab kit Concentration
Phosphate Buffer (pH7.4) 100 mMol/l L-alanine 200 mMol/l 1 - Buffer Substrate
Oxo-2-Glutarate 2 mMol/l
2, 4-Dinitro phenylhydrazine 1 mMol/l 2 - Chromogen
Hydrochloric Acid 1 Mol/l
3 – Standard Sodium pyruvate 2 mMol/l
4 – Sodium hydroxide 4 Mol/l
NOTES: The reagents can be stored at 2-8oC for 18 months. After dilution, reagent 4 is stable for at least 8 days in
polyethylene vials at temperatures between 18 and 25oC. Avoid bacterial contamination in every reagent. Procedure:
1. Dilute required amount of reagent 4 as follows (1 ml to 10 ml):
Reagent 4 ……………………1 volume Distilled water ……………….9 volumes
2. Take tubes according to the number of patient’s samples analyzed, and label appropriately.
• Patient Number • Requisition number • Test performed
3. Place in each test tube 100 µl (0.1 ml) of Reagent 1 and incubate at 37oC for 5 minutes.
4. After 5 min, add 20 µl (0.02 ml) of fresh serum or plasma; mix carefully (no vortex) and incubate exactly for 30 min at 37oC.
5. Add to each sample 100 µl (0.1 ml) of Reagent 2, mix well and let stand for 20 minutes at RT (18-25oC).
6. Add rapidly 1000 µl (1 ml) of diluted Reagent 4 to each tube and mix at the same time.
7. Incubate for exactly 5 mi at RT.
8. During the incubation time, select a wavelength equal to 530 nm (510 – 550 nm) in the colorimeter.
9. Place distilled water in a cuvette (exclusive for distilled water) and zero the colorimeter.
10. After exactly 5 min of incubation place the sample in the Test cuvette (T) and read the Abs in the same conditions.
11. Register the value in the test requisition file.
12. Place the test sample back into the original test tube so that, if necessary it is available for re-
check. Note: Test results will be different I a second measurement because the amount of pyruvate increases with time.
13. Return the blank solution to the colorimeter and check if it continues to read zero.
14. Read the ALT concentration from the calibration graph (in Karmen Units/ml or IU/l) or from the table prepared from the calibration curve.
Note: Since the correlation between OD (Abs) and ALT concentration is not linear, the concentration of test results must be read directly from the graph. Note: Samples with a concentration greater than 90 Karmen Units/ml (45 IU/l) must be diluted with 0.9% saline (page. 408) and confirmed by re-assay (multiply the result by the dilution factor).
NOTE: Always check if the cuvette is clear on the side that will face the light path, and ensure that there are no air bubbles.
Reporting and interpretation of results:
Normal Values: ALT concentration (Karmen Units/ml) ALT concentration (IU/l)
Women 1.3 – 16.0 3 - 34 Men 3.8 – 17.011 8 - 36 Increase Values of ALT:
High values Liver cells damage, hepatic disease states including hepatitis.
Quality control Internal Quality Control (IQC) Procedures: Before use the kit, the OCV value should be established by measuring and plotting the Abs values of 20 samples from the quality control serum (add serum after step 4).
Daily measurement of one of the daily prepared standards to check instrument performance. Run the prepared control serum once every week and plot it on the RCV graph.
External Quality Control (EQC): The National Public Health Laboratories (NPHL - Teku) will provide a preserved whole blood control previously analyzed. The results will be reported in the laboratory records and also reported to NPHL for further comparison with standard values.
Sources of error: • Incorrect sample collection:
- Allow the blood to clot at RT and centrifuge as soon as possible (1 hour maximum after collection).
11 Karmen Units compared with IUat 30 C inspectrometer at 340 nM by NADH-LDH methods.
- Also remove the serum carefully without sucking up the red cells. - Carry out test as soon as possible after separation of the serum from the clot.
• Pipetting errors: Inaccuracy in the measurement of the blood sample check if the blood is on the
graduation line before dispensing it; utilization of a wet pipette wipe the blood from the outside surface of the pipette tip with cotton or paper. Avoid chip pipette/pipette tips.
• Not ensuring that the optical surfaces of the cuvette are clean and dry and that there is no air bubbles in the solution a) Hold the cuvette only in the sides that will not face the light path. b) When transferring a solution allow the fluid to run down the inside wall of the cuvette. c) Do not fill a cuvette more than ¾ full. d) Before place the cuvette into the colorimeter, wipe the sides that face the light path with a soft paper or cloth. e) Always face the optical faces to the light source. f) Ensure that the solution is at RT before reading the Abs.
• Inappropriate maintenance of the colorimeter. Protect from sunlight and vibration. Other precautions: Since the method is not linear, each kit should be controlled and calibrated for its activities.
A new calibration graph should be prepared and checked against controls every week, whenever new reagents are used or dubious results are obtained (a control should be run along with the test by adding serum to the step 4).
References: BioLAb Diagnostics Kit Instructions Mallapaty, G.; (2000) Quality Assurance: Training Programme for Primary Healthcare Laboratory services, Kathmandu, Nepal Cheesbrough, M., (2000) District Laboratory Practice in Tropical Countries; Cambridge University Press, Cambridge, UK WHO (2003) Manual of Basic Techniques for a Health Laboratory; WHO, Geneva
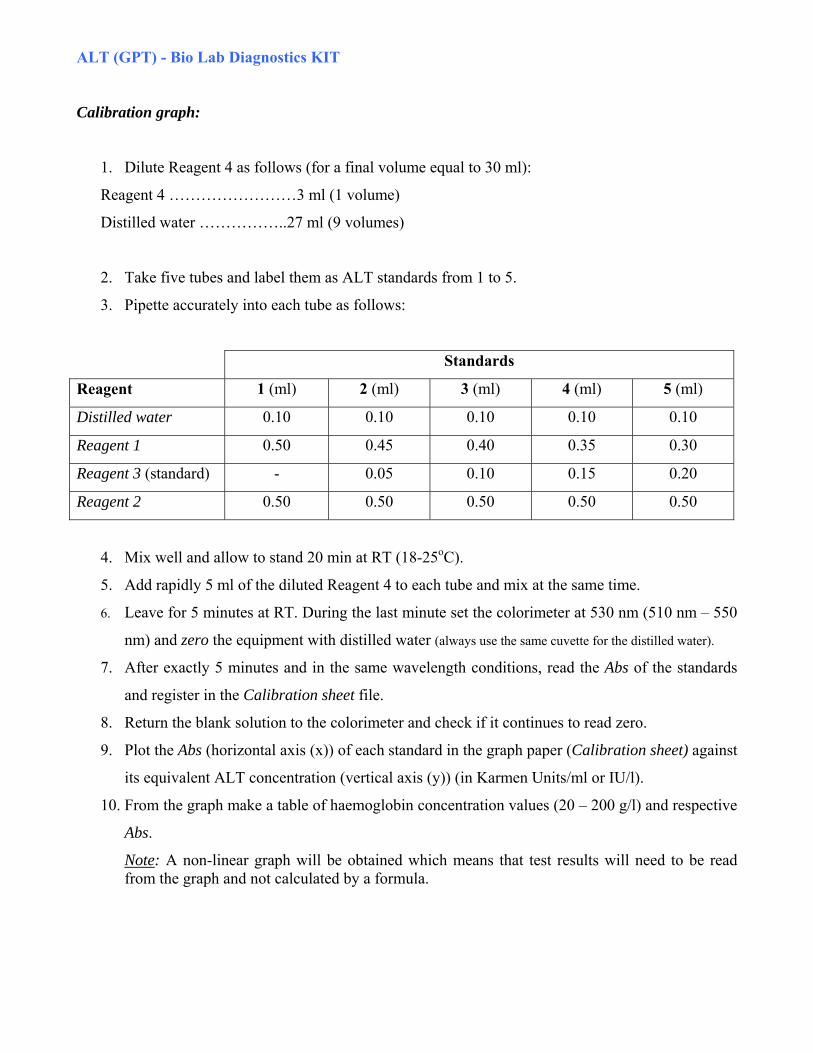
ALT (GPT) - Bio Lab Diagnostics KIT
Calibration graph:
1. Dilute Reagent 4 as follows (for a final volume equal to 30 ml):
Reagent 4 ……………………3 ml (1 volume)
Distilled water ……………..27 ml (9 volumes)
2. Take five tubes and label them as ALT standards from 1 to 5.
3. Pipette accurately into each tube as follows:
Standards
Reagent 1 (ml) 2 (ml) 3 (ml) 4 (ml) 5 (ml)
Distilled water 0.10 0.10 0.10 0.10 0.10
Reagent 1 0.50 0.45 0.40 0.35 0.30
Reagent 3 (standard) - 0.05 0.10 0.15 0.20
Reagent 2 0.50 0.50 0.50 0.50 0.50
4. Mix well and allow to stand 20 min at RT (18-25oC).
5. Add rapidly 5 ml of the diluted Reagent 4 to each tube and mix at the same time.
6. Leave for 5 minutes at RT. During the last minute set the colorimeter at 530 nm (510 nm – 550
nm) and zero the equipment with distilled water (always use the same cuvette for the distilled water).
7. After exactly 5 minutes and in the same wavelength conditions, read the Abs of the standards
and register in the Calibration sheet file.
8. Return the blank solution to the colorimeter and check if it continues to read zero.
9. Plot the Abs (horizontal axis (x)) of each standard in the graph paper (Calibration sheet) against
its equivalent ALT concentration (vertical axis (y)) (in Karmen Units/ml or IU/l).
10. From the graph make a table of haemoglobin concentration values (20 – 200 g/l) and respective
Abs.
Note: A non-linear graph will be obtained which means that test results will need to be read from the graph and not calculated by a formula.
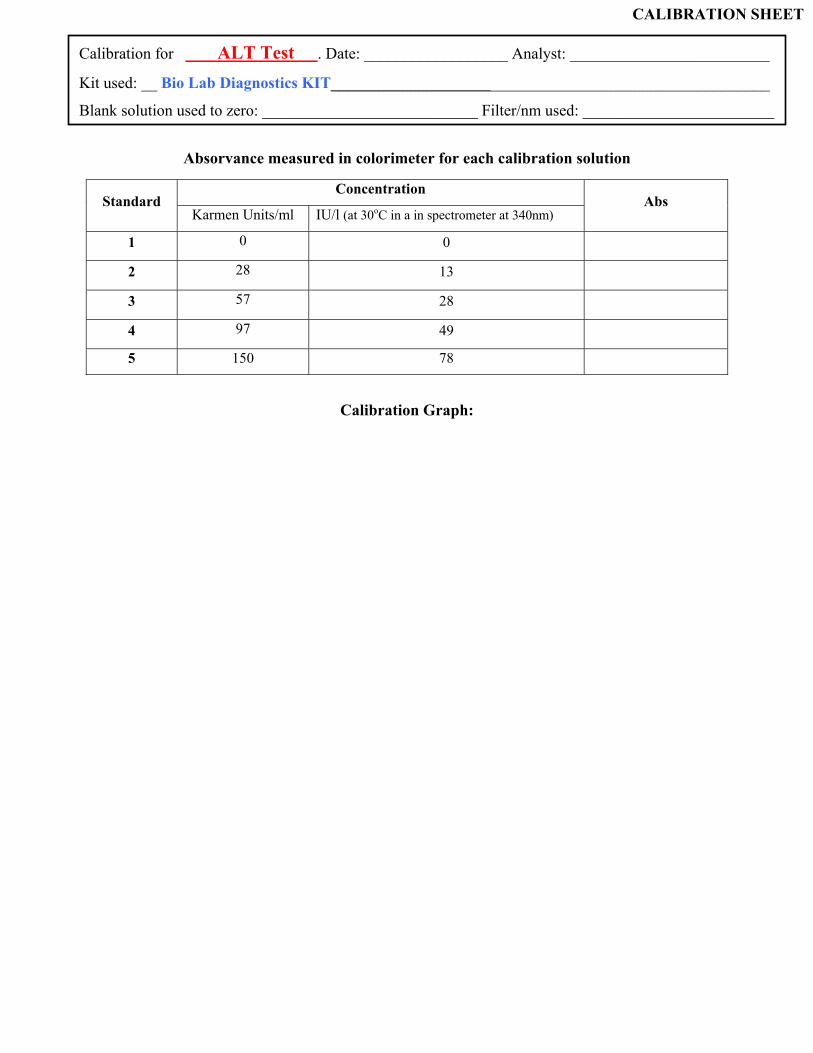
Calibration Graph:
Absorvance measured in colorimeter for each calibration solution
Calibration Graph:
Concentration Standard
Karmen Units/ml IU/l (at 30oC in a in spectrometer at 340nm) Abs
1 0 0
2 28 13
3 57 28
4 97 49
5 150 78
Calibration for ALT Test . Date: __________________ Analyst: _________________________
Kit used: __ Bio Lab Diagnostics KIT_______________________________________________________
Blank solution used to zero: ___________________________ Filter/nm used: ________________________
CALIBRATION SHEET
Estimation of ALT- colorimeter
Date: ______________________
Analyst: ____________________________
ABS (NM) CONCENTRATION (G/L)
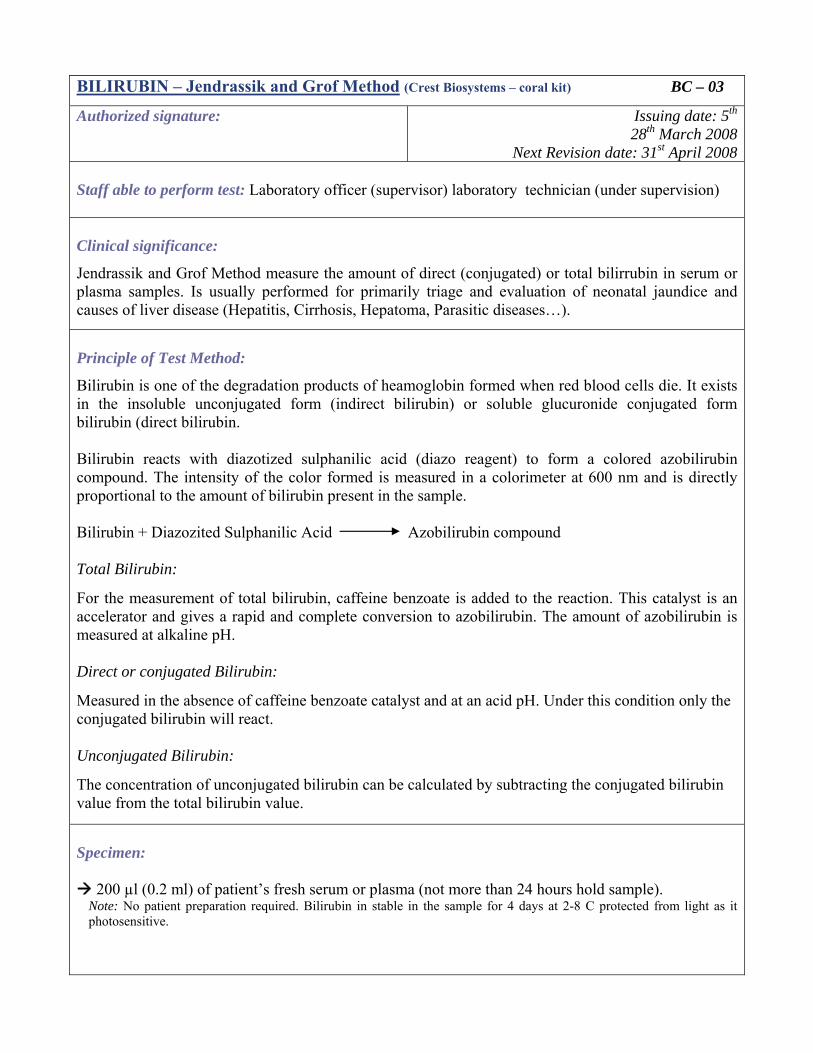
BILIRUBIN – Jendrassik and Grof Method (Crest Biosystems – coral kit) BC – 03
Authorized signature: Issuing date: 5th 28th March 2008
Next Revision date: 31st April 2008 Staff able to perform test: Laboratory officer (supervisor) laboratory technician (under supervision) Clinical significance:
Jendrassik and Grof Method measure the amount of direct (conjugated) or total bilirrubin in serum or plasma samples. Is usually performed for primarily triage and evaluation of neonatal jaundice and causes of liver disease (Hepatitis, Cirrhosis, Hepatoma, Parasitic diseases…).
Principle of Test Method:
Bilirubin is one of the degradation products of heamoglobin formed when red blood cells die. It exists in the insoluble unconjugated form (indirect bilirubin) or soluble glucuronide conjugated form bilirubin (direct bilirubin. Bilirubin reacts with diazotized sulphanilic acid (diazo reagent) to form a colored azobilirubin compound. The intensity of the color formed is measured in a colorimeter at 600 nm and is directly proportional to the amount of bilirubin present in the sample. Bilirubin + Diazozited Sulphanilic Acid Azobilirubin compound Total Bilirubin:
For the measurement of total bilirubin, caffeine benzoate is added to the reaction. This catalyst is an accelerator and gives a rapid and complete conversion to azobilirubin. The amount of azobilirubin is measured at alkaline pH. Direct or conjugated Bilirubin:
Measured in the absence of caffeine benzoate catalyst and at an acid pH. Under this condition only the conjugated bilirubin will react. Unconjugated Bilirubin:
The concentration of unconjugated bilirubin can be calculated by subtracting the conjugated bilirubin value from the total bilirubin value.
Specimen:
200 µl (0.2 ml) of patient’s fresh serum or plasma (not more than 24 hours hold sample). Note: No patient preparation required. Bilirubin in stable in the sample for 4 days at 2-8 C protected from light as it photosensitive.
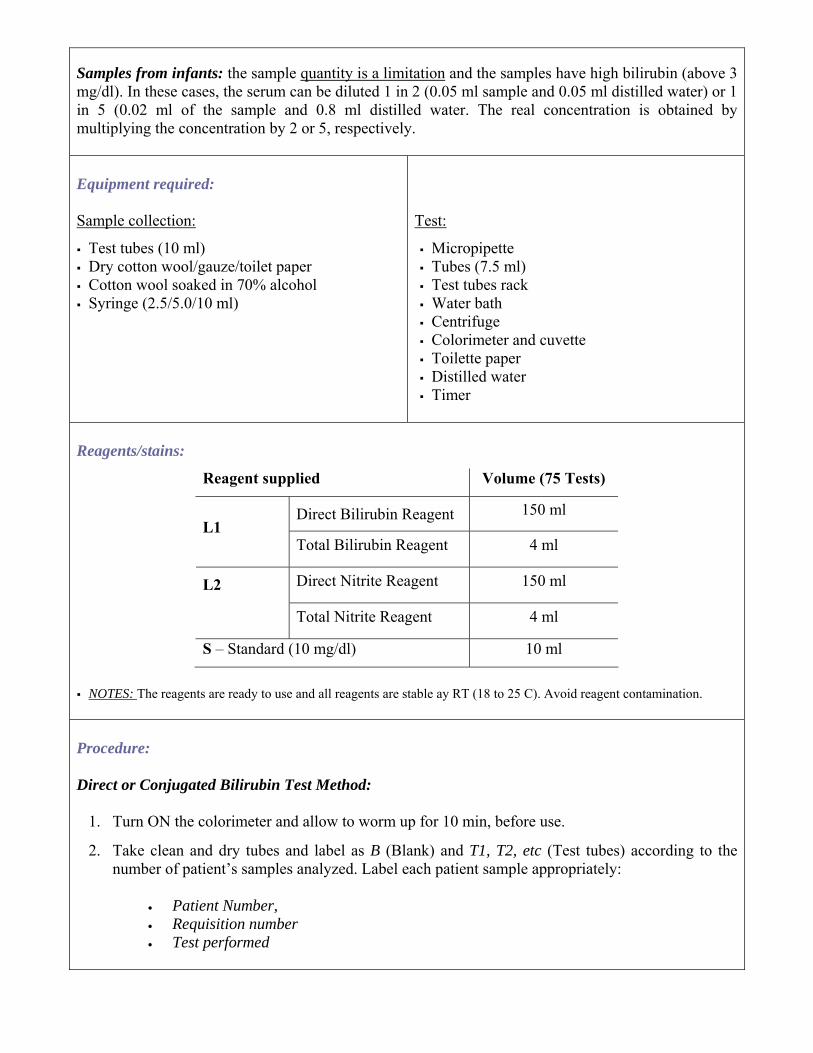
Samples from infants: the sample quantity is a limitation and the samples have high bilirubin (above 3 mg/dl). In these cases, the serum can be diluted 1 in 2 (0.05 ml sample and 0.05 ml distilled water) or 1 in 5 (0.02 ml of the sample and 0.8 ml distilled water. The real concentration is obtained by multiplying the concentration by 2 or 5, respectively. Equipment required: Sample collection:
Test tubes (10 ml) Dry cotton wool/gauze/toilet paper Cotton wool soaked in 70% alcohol Syringe (2.5/5.0/10 ml)
Test:
Micropipette Tubes (7.5 ml) Test tubes rack Water bath Centrifuge Colorimeter and cuvette Toilette paper Distilled water Timer
Reagents/stains:
Reagent supplied Volume (75 Tests)
Direct Bilirubin Reagent 150 ml L1
Total Bilirubin Reagent 4 ml
Direct Nitrite Reagent 150 ml L2
Total Nitrite Reagent 4 ml
S – Standard (10 mg/dl) 10 ml
NOTES: The reagents are ready to use and all reagents are stable ay RT (18 to 25 C). Avoid reagent contamination.
Procedure: Direct or Conjugated Bilirubin Test Method:
1. Turn ON the colorimeter and allow to worm up for 10 min, before use.
2. Take clean and dry tubes and label as B (Blank) and T1, T2, etc (Test tubes) according to the number of patient’s samples analyzed. Label each patient sample appropriately:
• Patient Number, • Requisition number • Test performed

3. Pipette accurately into the tubes as follows:
Addition sequence B (ml) T (ml)
L1 - Direct Bilirubin Reagent 1.00 1.00
L2 – Direct Nitrite Reagent - 0.05
Sample 0.10 0.10
Total Volume (ml) 1.10 1.15
The total volumes shouldn’t be the same????
4. Mix well and incubate at RT for exactly 5 min.
5. During the incubation time, select a wavelength equal to 546 nm (510-550 nm) in the colorimeter and zero the instrument with distilled water???.
6. After exactly 5 min place the blank sample in the Blank cuvette and zero the colorimeter.
7. Remove the Blank cuvette and measure immediately the Abs of the patient’s samples in a Test cuvette (specific for test samples).
Note: Replaced the test samples back into the original test-tube so that, if necessary they are available for re-check. However, since the reaction that converts bilirubin into Azobilirubin compound proceeds, the second reading will give a higher value of bilirrubin than the first reading.
8. Register the Abs of the patient’s sample, and subtract the Abs of the blank from the patient’s samples (ATsample = AbsT- AbsB).
Note: If the colorimeter was zero with the blank before read the Abs of the samples (step 6) this step is not necessary.
9. Read the bilirrubin concentration (mg/dl) by:
a) Using the graph or the table prepared from the calibration curve. b) Using the following formula:
dardsofionconcentratAS
ATsampleionconcentratBilirubinDirect tan⋅⋅×=⋅⋅
Where: ATsample = Abs of test(s) against respective blank (see step 6). AS = Abs of standard against distilled water (Abs obtained after zero the colorimeter with distilled water)
Note: In this procedure, the correlation between the OD (Abs) of the samples and respective bilirubin concentration is linear up to 20 mg/dl. If the bilirubin values exceed 20 mg/dl (working limit for linearity), dilute the sample with distilled water and repeat the assay. At the end of the assay the bilirubin concentration can be obtained as mentioned in step 10 and after multiplying the result by the proper dilution factor. E.g. If diluted 1 in 2 (0.05 ml sample and 0.05 ml distilled water) the real concentration is obtained by multiplying the concentration by 2. NOTE: Always check if the cuvette is clear on the side that will face the light path, and ensure that there are no air bubbles.

Total Bilirubin Test Method:
1. Turn ON the colorimeter and allow to worm up for 10 min, before use.
2. Take clean and dry tubes and label as B (Blank) and T1, T2, etc (Test tubes) according to the number of patient’s samples analyzed. Label each patient sample appropriately:
• Patient Number, • Requisition number • Test performed
3. Pipette accurately into the tubes as follows:
Addition sequence B (ml) T (ml)
L1 – Total Bilirubin Reagent 1.00 1.00
L2 – Total Nitrite Reagent - 0.05
Sample 0.10 0.10
Total Volume (ml) 1.10 ?? 1.15???
The total volumes shouldn’t be the same????
4. Mix well and incubate at RT for exactly 10 min.
5. During the incubation time, select a wavelength equal to 546 nm (510-550 nm) in the colorimeter and zero the instrument with distilled water???.
7. After exactly 5 min place the blank sample in the Blank cuvette and zero the colorimeter.
8. Remove the Blank cuvette and measure immediately the Abs of the patient’s samples in a Test cuvette (specific for test samples).
Note: Replaced the test samples back into the original test tube so that, if necessary they are available for re-check. However, since the reaction that converts bilirubin into Azobilirubin compound proceeds, the second reading will always give a higher value of bilirrubin than the first reading.
9. Register the Abs of the patient’s sample, and subtract the Abs of the blank from the patient’s samples (ATsample = AbsT- AbsB).
Note: If the colorimeter was zero with the blank before read the Abs of the samples (step 6) this step is not necessary.
10. Read the bilirrubin concentration (mg/dl) by:
a) Using the graph or the table prepared from the calibration curve. b) Using the following formula:
dardsofionconcentratAS
ATsampleionconcentratBilirubinTotal tan⋅⋅×=⋅⋅
Where: ATsample = Abs of test(s) against respective blank (see step 6). AS = Abs of standard against distilled water (Abs obtained after zero the colorimeter with distilled water)
Note: In this procedure, the correlation between the OD (Abs) of the samples and respective bilirubin
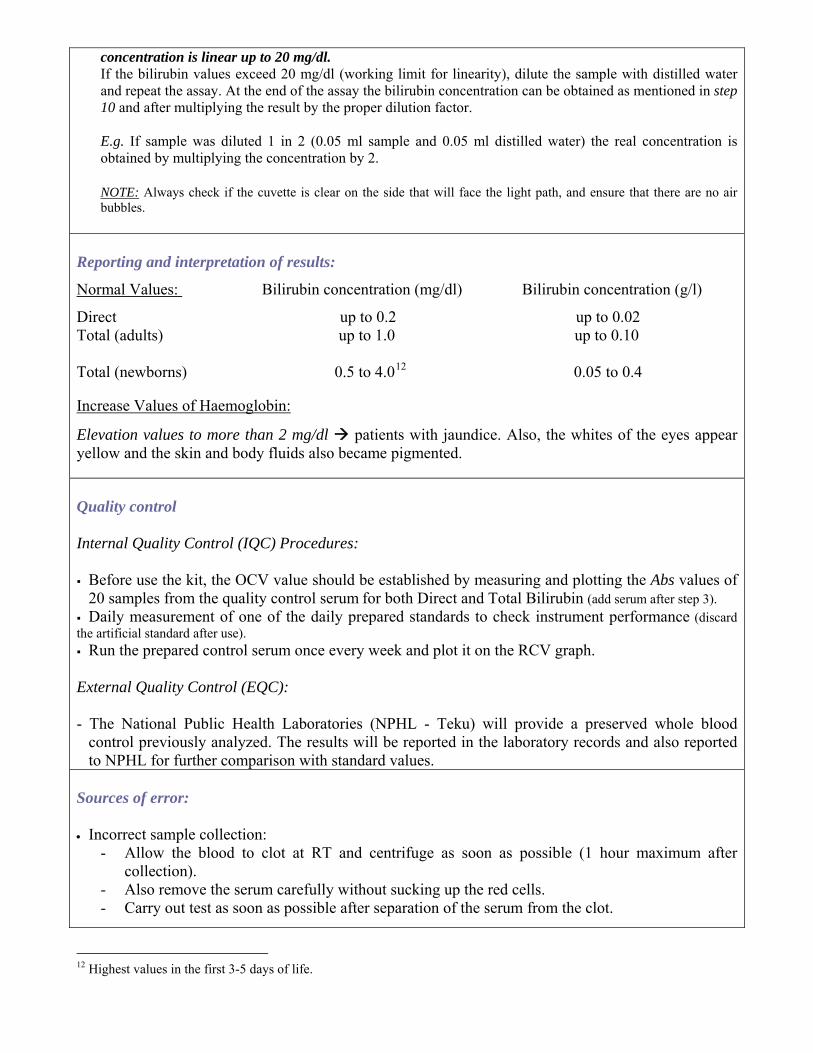
concentration is linear up to 20 mg/dl. If the bilirubin values exceed 20 mg/dl (working limit for linearity), dilute the sample with distilled water and repeat the assay. At the end of the assay the bilirubin concentration can be obtained as mentioned in step 10 and after multiplying the result by the proper dilution factor. E.g. If sample was diluted 1 in 2 (0.05 ml sample and 0.05 ml distilled water) the real concentration is obtained by multiplying the concentration by 2. NOTE: Always check if the cuvette is clear on the side that will face the light path, and ensure that there are no air bubbles.
Reporting and interpretation of results:
Normal Values: Bilirubin concentration (mg/dl) Bilirubin concentration (g/l)
Direct up to 0.2 up to 0.02 Total (adults) up to 1.0 up to 0.10 Total (newborns) 0.5 to 4.012 0.05 to 0.4 Increase Values of Haemoglobin:
Elevation values to more than 2 mg/dl patients with jaundice. Also, the whites of the eyes appear yellow and the skin and body fluids also became pigmented.
Quality control Internal Quality Control (IQC) Procedures: Before use the kit, the OCV value should be established by measuring and plotting the Abs values of 20 samples from the quality control serum for both Direct and Total Bilirubin (add serum after step 3).
Daily measurement of one of the daily prepared standards to check instrument performance (discard the artificial standard after use). Run the prepared control serum once every week and plot it on the RCV graph.
External Quality Control (EQC): - The National Public Health Laboratories (NPHL - Teku) will provide a preserved whole blood
control previously analyzed. The results will be reported in the laboratory records and also reported to NPHL for further comparison with standard values.
Sources of error: • Incorrect sample collection:
- Allow the blood to clot at RT and centrifuge as soon as possible (1 hour maximum after collection).
- Also remove the serum carefully without sucking up the red cells. - Carry out test as soon as possible after separation of the serum from the clot.
12 Highest values in the first 3-5 days of life.
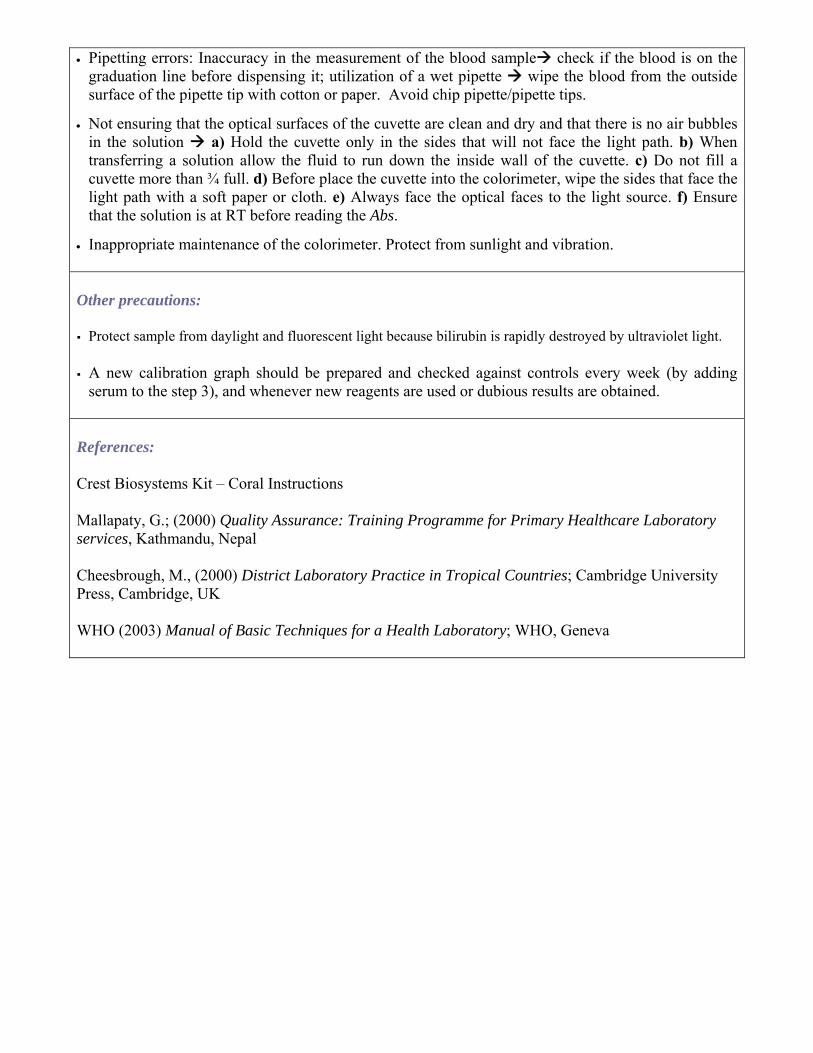
• Pipetting errors: Inaccuracy in the measurement of the blood sample check if the blood is on the graduation line before dispensing it; utilization of a wet pipette wipe the blood from the outside surface of the pipette tip with cotton or paper. Avoid chip pipette/pipette tips.
• Not ensuring that the optical surfaces of the cuvette are clean and dry and that there is no air bubbles in the solution a) Hold the cuvette only in the sides that will not face the light path. b) When transferring a solution allow the fluid to run down the inside wall of the cuvette. c) Do not fill a cuvette more than ¾ full. d) Before place the cuvette into the colorimeter, wipe the sides that face the light path with a soft paper or cloth. e) Always face the optical faces to the light source. f) Ensure that the solution is at RT before reading the Abs.
• Inappropriate maintenance of the colorimeter. Protect from sunlight and vibration. Other precautions: Protect sample from daylight and fluorescent light because bilirubin is rapidly destroyed by ultraviolet light.
A new calibration graph should be prepared and checked against controls every week (by adding serum to the step 3), and whenever new reagents are used or dubious results are obtained.
References: Crest Biosystems Kit – Coral Instructions Mallapaty, G.; (2000) Quality Assurance: Training Programme for Primary Healthcare Laboratory services, Kathmandu, Nepal Cheesbrough, M., (2000) District Laboratory Practice in Tropical Countries; Cambridge University Press, Cambridge, UK WHO (2003) Manual of Basic Techniques for a Health Laboratory; WHO, Geneva
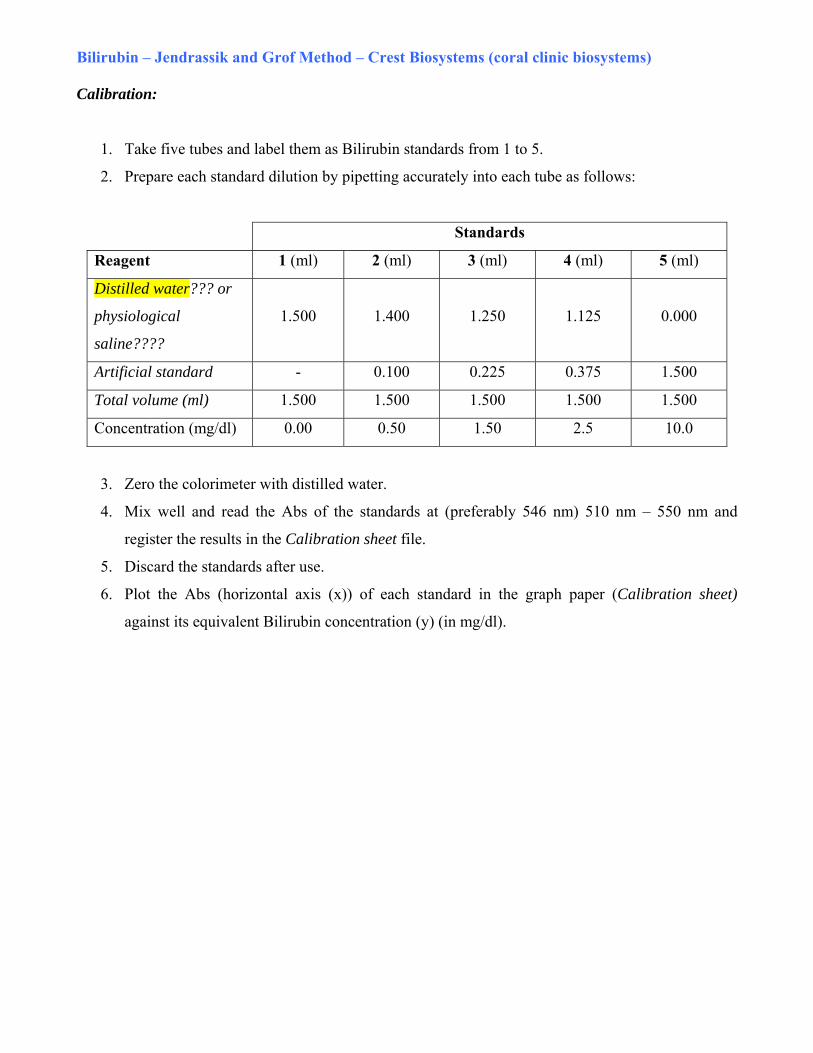
Bilirubin – Jendrassik and Grof Method – Crest Biosystems (coral clinic biosystems) Calibration:
1. Take five tubes and label them as Bilirubin standards from 1 to 5.
2. Prepare each standard dilution by pipetting accurately into each tube as follows:
Standards
Reagent 1 (ml) 2 (ml) 3 (ml) 4 (ml) 5 (ml)
Distilled water??? or
physiological
saline????
1.500 1.400 1.250 1.125 0.000
Artificial standard - 0.100 0.225 0.375 1.500
Total volume (ml) 1.500 1.500 1.500 1.500 1.500
Concentration (mg/dl) 0.00 0.50 1.50 2.5 10.0
3. Zero the colorimeter with distilled water.
4. Mix well and read the Abs of the standards at (preferably 546 nm) 510 nm – 550 nm and
register the results in the Calibration sheet file.
5. Discard the standards after use.
6. Plot the Abs (horizontal axis (x)) of each standard in the graph paper (Calibration sheet)
against its equivalent Bilirubin concentration (y) (in mg/dl).
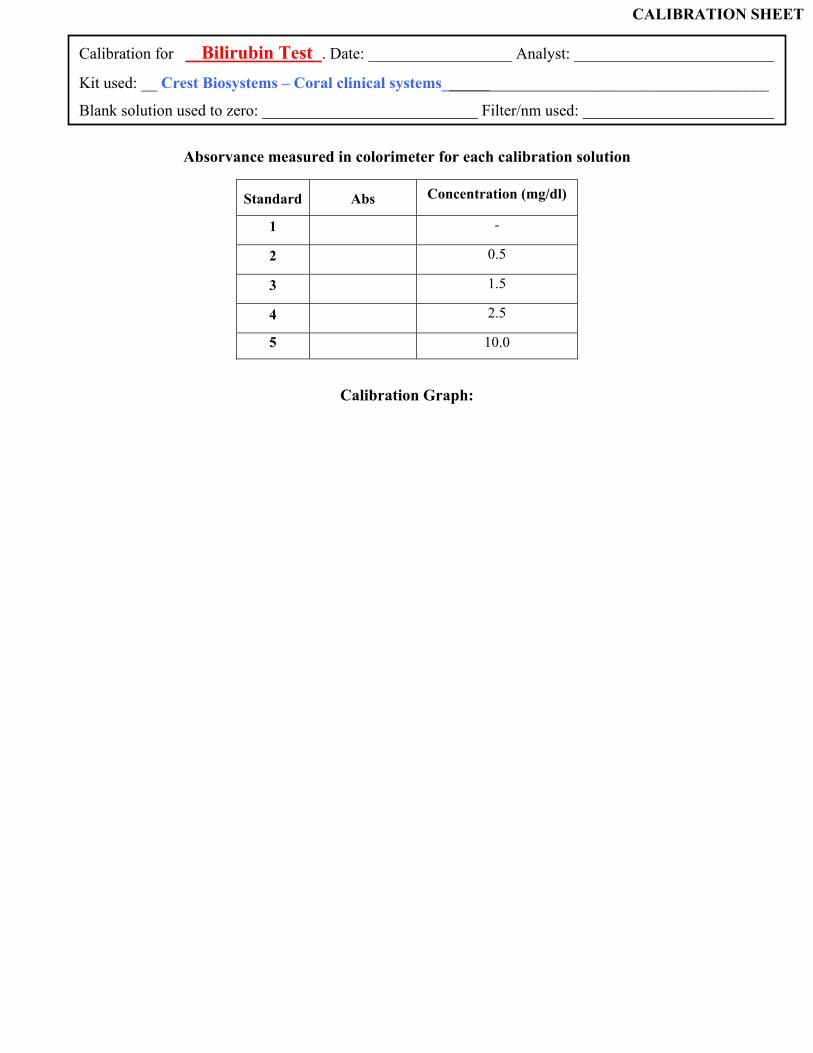
Calibration Graph:
Absorvance measured in colorimeter for each calibration solution
Calibration Graph:
Standard Abs Concentration (mg/dl)
1 -
2 0.5
3 1.5
4 2.5
5 10.0
Calibration for Bilirubin Test . Date: __________________ Analyst: _________________________
Kit used: __ Crest Biosystems – Coral clinical systems_________________________________________
Blank solution used to zero: ___________________________ Filter/nm used: ________________________
CALIBRATION SHEET

Estimation of Bilirubin - colorimeter
Date: ______________________
Analyst: ____________________________
ABS (NM) CONCENTRATION (G/L)
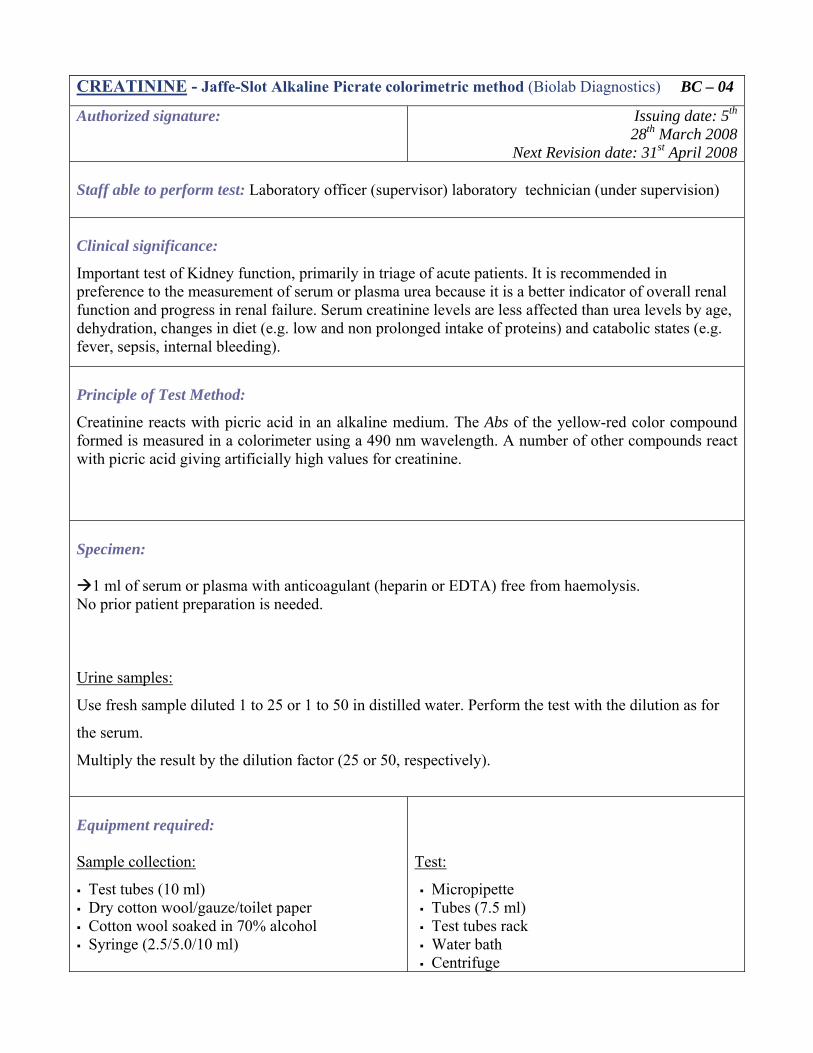
CREATININE - Jaffe-Slot Alkaline Picrate colorimetric method (Biolab Diagnostics) BC – 04
Authorized signature: Issuing date: 5th 28th March 2008
Next Revision date: 31st April 2008 Staff able to perform test: Laboratory officer (supervisor) laboratory technician (under supervision) Clinical significance:
Important test of Kidney function, primarily in triage of acute patients. It is recommended in preference to the measurement of serum or plasma urea because it is a better indicator of overall renal function and progress in renal failure. Serum creatinine levels are less affected than urea levels by age, dehydration, changes in diet (e.g. low and non prolonged intake of proteins) and catabolic states (e.g. fever, sepsis, internal bleeding).
Principle of Test Method:
Creatinine reacts with picric acid in an alkaline medium. The Abs of the yellow-red color compound formed is measured in a colorimeter using a 490 nm wavelength. A number of other compounds react with picric acid giving artificially high values for creatinine.
Specimen:
1 ml of serum or plasma with anticoagulant (heparin or EDTA) free from haemolysis. No prior patient preparation is needed.
Urine samples:
Use fresh sample diluted 1 to 25 or 1 to 50 in distilled water. Perform the test with the dilution as for
the serum.
Multiply the result by the dilution factor (25 or 50, respectively).
Equipment required: Sample collection:
Test tubes (10 ml) Dry cotton wool/gauze/toilet paper Cotton wool soaked in 70% alcohol Syringe (2.5/5.0/10 ml)
Test:
Micropipette Tubes (7.5 ml) Test tubes rack Water bath Centrifuge
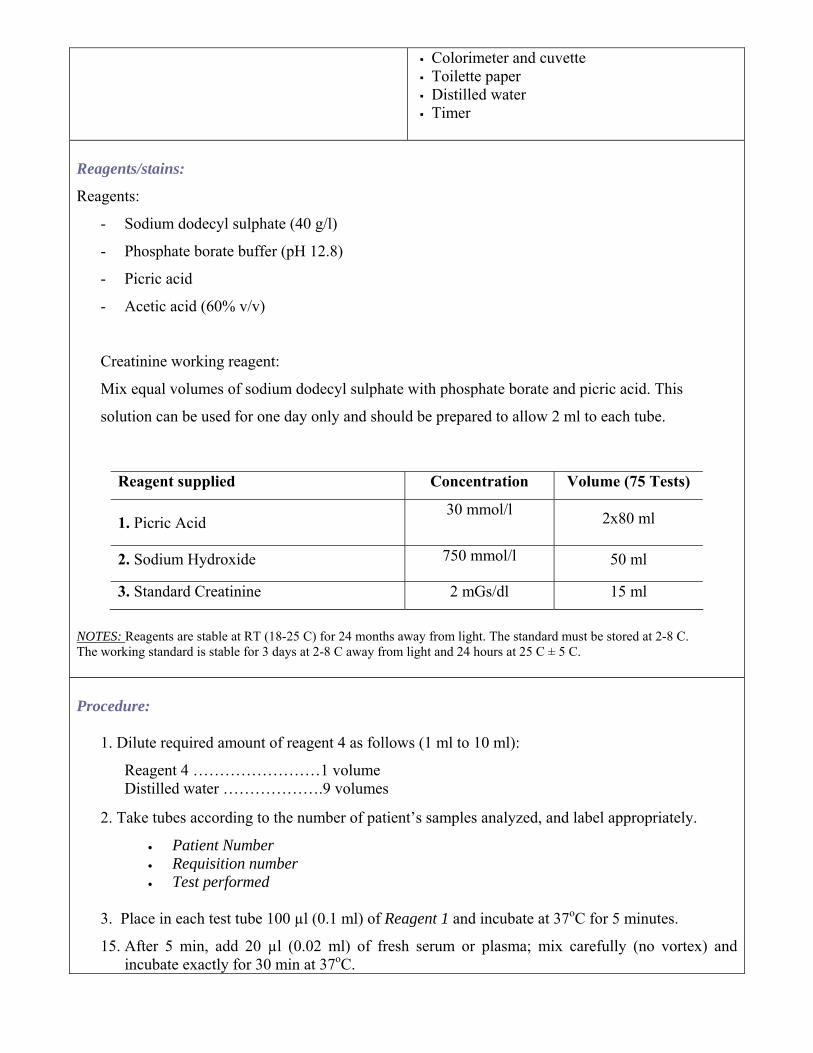
Colorimeter and cuvette Toilette paper Distilled water Timer
Reagents/stains:
Reagents:
- Sodium dodecyl sulphate (40 g/l)
- Phosphate borate buffer (pH 12.8)
- Picric acid
- Acetic acid (60% v/v)
Creatinine working reagent:
Mix equal volumes of sodium dodecyl sulphate with phosphate borate and picric acid. This
solution can be used for one day only and should be prepared to allow 2 ml to each tube.
Reagent supplied Concentration Volume (75 Tests)
1. Picric Acid 30 mmol/l 2x80 ml
2. Sodium Hydroxide 750 mmol/l 50 ml
3. Standard Creatinine 2 mGs/dl 15 ml
NOTES: Reagents are stable at RT (18-25 C) for 24 months away from light. The standard must be stored at 2-8 C. The working standard is stable for 3 days at 2-8 C away from light and 24 hours at 25 C ± 5 C. Procedure:
1. Dilute required amount of reagent 4 as follows (1 ml to 10 ml):
Reagent 4 ……………………1 volume Distilled water ……………….9 volumes
2. Take tubes according to the number of patient’s samples analyzed, and label appropriately.
• Patient Number • Requisition number • Test performed
3. Place in each test tube 100 µl (0.1 ml) of Reagent 1 and incubate at 37oC for 5 minutes.
15. After 5 min, add 20 µl (0.02 ml) of fresh serum or plasma; mix carefully (no vortex) and incubate exactly for 30 min at 37oC.

16. Add to each sample 100 µl (0.1 ml) of Reagent 2, mix well and let stand for 20 minutes at RT (18-25oC).
17. Add rapidly 1000 µl (1 ml) of diluted Reagent 4 to each tube and mix at the same time.
18. Incubate for exactly 5 mi at RT.
19. During the incubation time, select a wavelength equal to 530 nm (510 – 550 nm) in the colorimeter.
20. Place distilled water in a cuvette (exclusive for distilled water) and zero the colorimeter.
21. After exactly 5 min of incubation place the sample in the Test cuvette (T) and read the Abs in the same conditions.
22. Register the value in the test requisition file.
23. Place the test sample back into the original test tube so that, if necessary it is available for re-
check. Note: Test results will be different I a second measurement because the amount of pyruvate increases with time.
24. Return the blank solution to the colorimeter and check if it continues to read zero.
25. Read the ALT concentration from the calibration graph (in Karmen Units/ml or IU/l) or from the table prepared from the calibration curve.
Note: Since the correlation between OD (Abs) and ALT concentration is not linear, the concentration of test results must be read directly from the graph. Note: Samples with a concentration greater than 90 Karmen Units/ml (45 IU/l) must be diluted with 0.9% saline (page. 408) and confirmed by re-assay (multiply the result by the dilution factor).
NOTE: Always check if the cuvette is clear on the side that will face the light path, and ensure that there are no air bubbles.
Reporting and interpretation of results:
Normal Values: ALT concentration (Karmen Units/ml) ALT concentration (IU/l)
Women 1.3 – 16.0 3 - 34 Men 3.8 – 17.013 8 - 36 Increase Values of ALT:
Increased levels are associated with substantially impaired renal function. High values Liver cells damage, hepatic disease states including hepatitis.
Quality control Internal Quality Control (IQC) Procedures: Before use the kit, the OCV value should be established by measuring and plotting the Abs values of
13 Karmen Units compared with IUat 30 C inspectrometer at 340 nM by NADH-LDH methods.
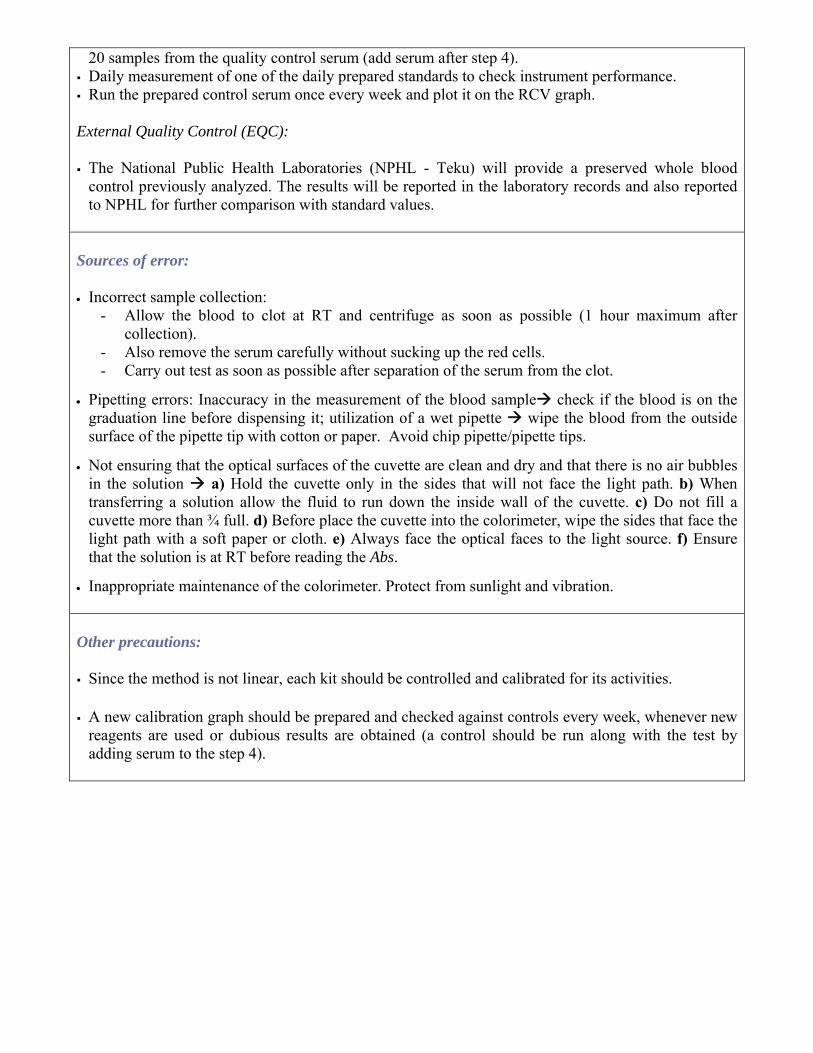
20 samples from the quality control serum (add serum after step 4). Daily measurement of one of the daily prepared standards to check instrument performance. Run the prepared control serum once every week and plot it on the RCV graph.
External Quality Control (EQC): The National Public Health Laboratories (NPHL - Teku) will provide a preserved whole blood control previously analyzed. The results will be reported in the laboratory records and also reported to NPHL for further comparison with standard values.
Sources of error: • Incorrect sample collection:
- Allow the blood to clot at RT and centrifuge as soon as possible (1 hour maximum after collection).
- Also remove the serum carefully without sucking up the red cells. - Carry out test as soon as possible after separation of the serum from the clot.
• Pipetting errors: Inaccuracy in the measurement of the blood sample check if the blood is on the
graduation line before dispensing it; utilization of a wet pipette wipe the blood from the outside surface of the pipette tip with cotton or paper. Avoid chip pipette/pipette tips.
• Not ensuring that the optical surfaces of the cuvette are clean and dry and that there is no air bubbles in the solution a) Hold the cuvette only in the sides that will not face the light path. b) When transferring a solution allow the fluid to run down the inside wall of the cuvette. c) Do not fill a cuvette more than ¾ full. d) Before place the cuvette into the colorimeter, wipe the sides that face the light path with a soft paper or cloth. e) Always face the optical faces to the light source. f) Ensure that the solution is at RT before reading the Abs.
• Inappropriate maintenance of the colorimeter. Protect from sunlight and vibration. Other precautions: Since the method is not linear, each kit should be controlled and calibrated for its activities.
A new calibration graph should be prepared and checked against controls every week, whenever new reagents are used or dubious results are obtained (a control should be run along with the test by adding serum to the step 4).
References: BioLAb Diagnostics Kit Instructions Mallapaty, G.; (2000) Quality Assurance: Training Programme for Primary Healthcare Laboratory services, Kathmandu, Nepal Cheesbrough, M., (2000) District Laboratory Practice in Tropical Countries; Cambridge University Press, Cambridge, UK WHO (2003) Manual of Basic Techniques for a Health Laboratory; WHO, Geneva
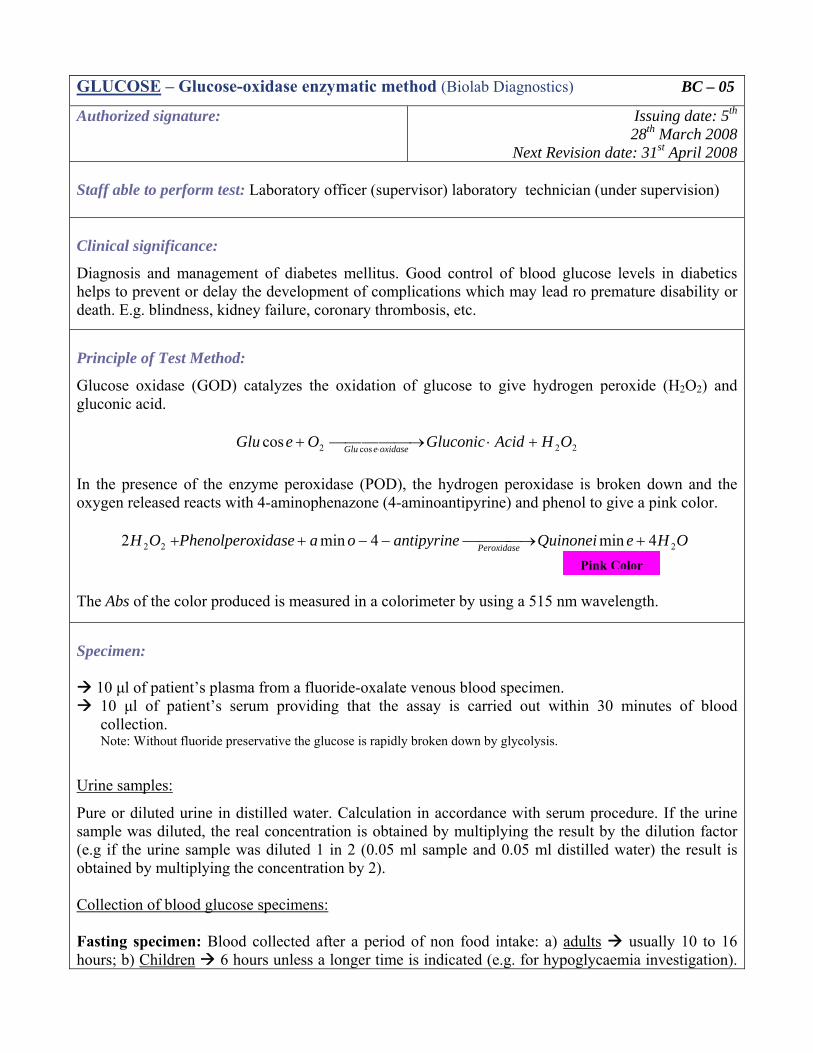
GLUCOSE – Glucose-oxidase enzymatic method (Biolab Diagnostics) BC – 05
Authorized signature: Issuing date: 5th 28th March 2008
Next Revision date: 31st April 2008 Staff able to perform test: Laboratory officer (supervisor) laboratory technician (under supervision) Clinical significance:
Diagnosis and management of diabetes mellitus. Good control of blood glucose levels in diabetics helps to prevent or delay the development of complications which may lead ro premature disability or death. E.g. blindness, kidney failure, coronary thrombosis, etc.
Principle of Test Method:
Glucose oxidase (GOD) catalyzes the oxidation of glucose to give hydrogen peroxide (H2O2) and gluconic acid.
22cos2cos OHAcidGluconicOeGlu oxidaseeGlu +⋅⎯⎯⎯⎯ →⎯+ ⋅
In the presence of the enzyme peroxidase (POD), the hydrogen peroxidase is broken down and the oxygen released reacts with 4-aminophenazone (4-aminoantipyrine) and phenol to give a pink color.
OHeQuinoneiantipyrineoaxidasePhenolperoOH Peroxidase 222 4min4min2 +⎯⎯⎯ →⎯−−++ The Abs of the color produced is measured in a colorimeter by using a 515 nm wavelength. Specimen:
10 μl of patient’s plasma from a fluoride-oxalate venous blood specimen. 10 μl of patient’s serum providing that the assay is carried out within 30 minutes of blood
collection. Note: Without fluoride preservative the glucose is rapidly broken down by glycolysis.
Urine samples:
Pure or diluted urine in distilled water. Calculation in accordance with serum procedure. If the urine sample was diluted, the real concentration is obtained by multiplying the result by the dilution factor (e.g if the urine sample was diluted 1 in 2 (0.05 ml sample and 0.05 ml distilled water) the result is obtained by multiplying the concentration by 2). Collection of blood glucose specimens: Fasting specimen: Blood collected after a period of non food intake: a) adults usually 10 to 16 hours; b) Children 6 hours unless a longer time is indicated (e.g. for hypoglycaemia investigation).
Pink Color
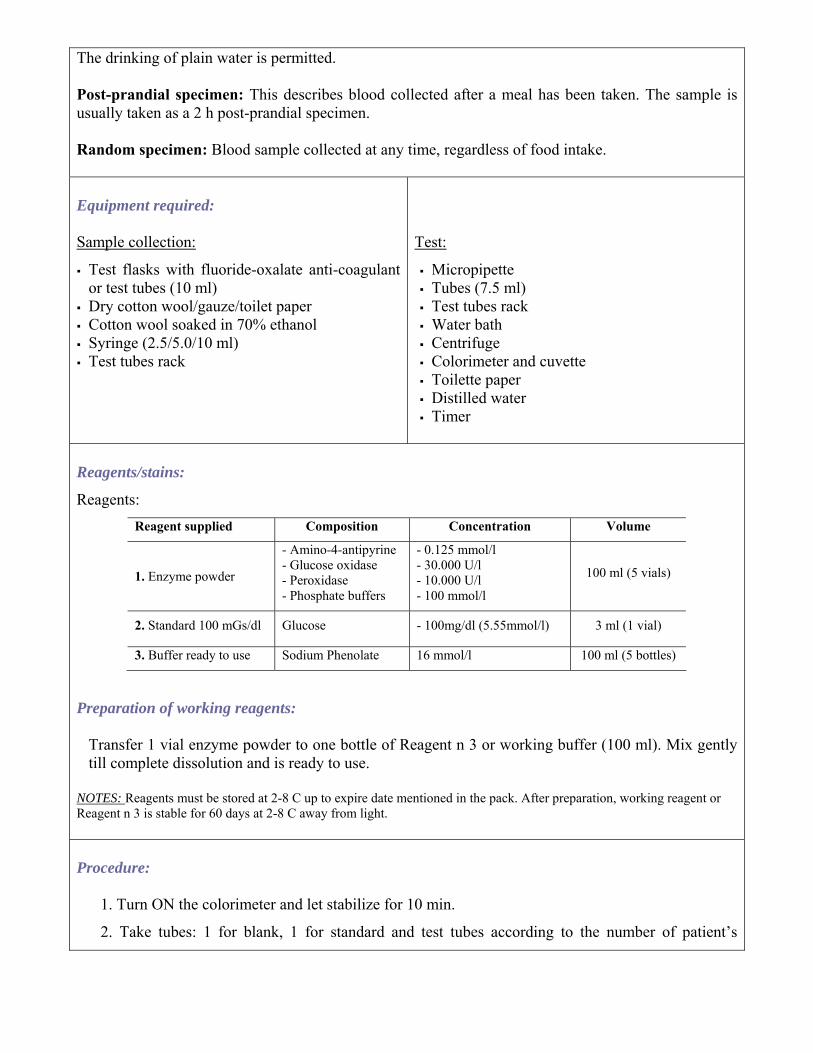
The drinking of plain water is permitted. Post-prandial specimen: This describes blood collected after a meal has been taken. The sample is usually taken as a 2 h post-prandial specimen. Random specimen: Blood sample collected at any time, regardless of food intake. Equipment required: Sample collection:
Test flasks with fluoride-oxalate anti-coagulant or test tubes (10 ml)
Dry cotton wool/gauze/toilet paper Cotton wool soaked in 70% ethanol Syringe (2.5/5.0/10 ml) Test tubes rack
Test:
Micropipette Tubes (7.5 ml) Test tubes rack Water bath Centrifuge Colorimeter and cuvette Toilette paper Distilled water Timer
Reagents/stains:
Reagents: Reagent supplied Composition Concentration Volume
1. Enzyme powder
- Amino-4-antipyrine - Glucose oxidase - Peroxidase - Phosphate buffers
- 0.125 mmol/l - 30.000 U/l - 10.000 U/l - 100 mmol/l
100 ml (5 vials)
2. Standard 100 mGs/dl Glucose - 100mg/dl (5.55mmol/l) 3 ml (1 vial)
3. Buffer ready to use Sodium Phenolate 16 mmol/l 100 ml (5 bottles)
Preparation of working reagents:
Transfer 1 vial enzyme powder to one bottle of Reagent n 3 or working buffer (100 ml). Mix gently till complete dissolution and is ready to use.
NOTES: Reagents must be stored at 2-8 C up to expire date mentioned in the pack. After preparation, working reagent or Reagent n 3 is stable for 60 days at 2-8 C away from light. Procedure:
1. Turn ON the colorimeter and let stabilize for 10 min.
2. Take tubes: 1 for blank, 1 for standard and test tubes according to the number of patient’s
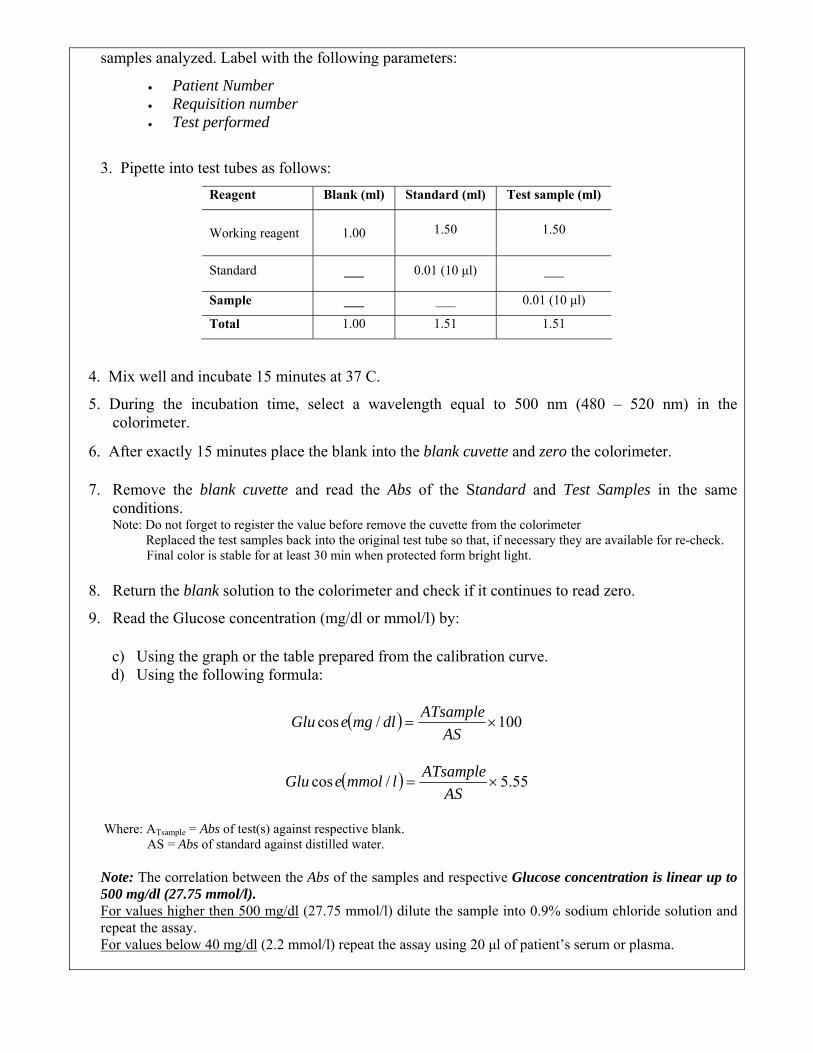
samples analyzed. Label with the following parameters:
• Patient Number • Requisition number • Test performed
3. Pipette into test tubes as follows: Reagent Blank (ml) Standard (ml) Test sample (ml)
Working reagent 1.00 1.50 1.50
Standard ___ 0.01 (10 μl) ___
Sample ___ ___ 0.01 (10 μl)
Total 1.00 1.51 1.51
4. Mix well and incubate 15 minutes at 37 C.
5. During the incubation time, select a wavelength equal to 500 nm (480 – 520 nm) in the colorimeter.
6. After exactly 15 minutes place the blank into the blank cuvette and zero the colorimeter.
7. Remove the blank cuvette and read the Abs of the Standard and Test Samples in the same conditions. Note: Do not forget to register the value before remove the cuvette from the colorimeter Replaced the test samples back into the original test tube so that, if necessary they are available for re-check. Final color is stable for at least 30 min when protected form bright light.
8. Return the blank solution to the colorimeter and check if it continues to read zero.
9. Read the Glucose concentration (mg/dl or mmol/l) by:
c) Using the graph or the table prepared from the calibration curve. d) Using the following formula:
( ) 100/cos ×=AS
ATsampledlmgeGlu
( ) 55.5/cos ×=AS
ATsamplelmmoleGlu
Where: ATsample = Abs of test(s) against respective blank. AS = Abs of standard against distilled water. Note: The correlation between the Abs of the samples and respective Glucose concentration is linear up to 500 mg/dl (27.75 mmol/l). For values higher then 500 mg/dl (27.75 mmol/l) dilute the sample into 0.9% sodium chloride solution and repeat the assay. For values below 40 mg/dl (2.2 mmol/l) repeat the assay using 20 μl of patient’s serum or plasma.
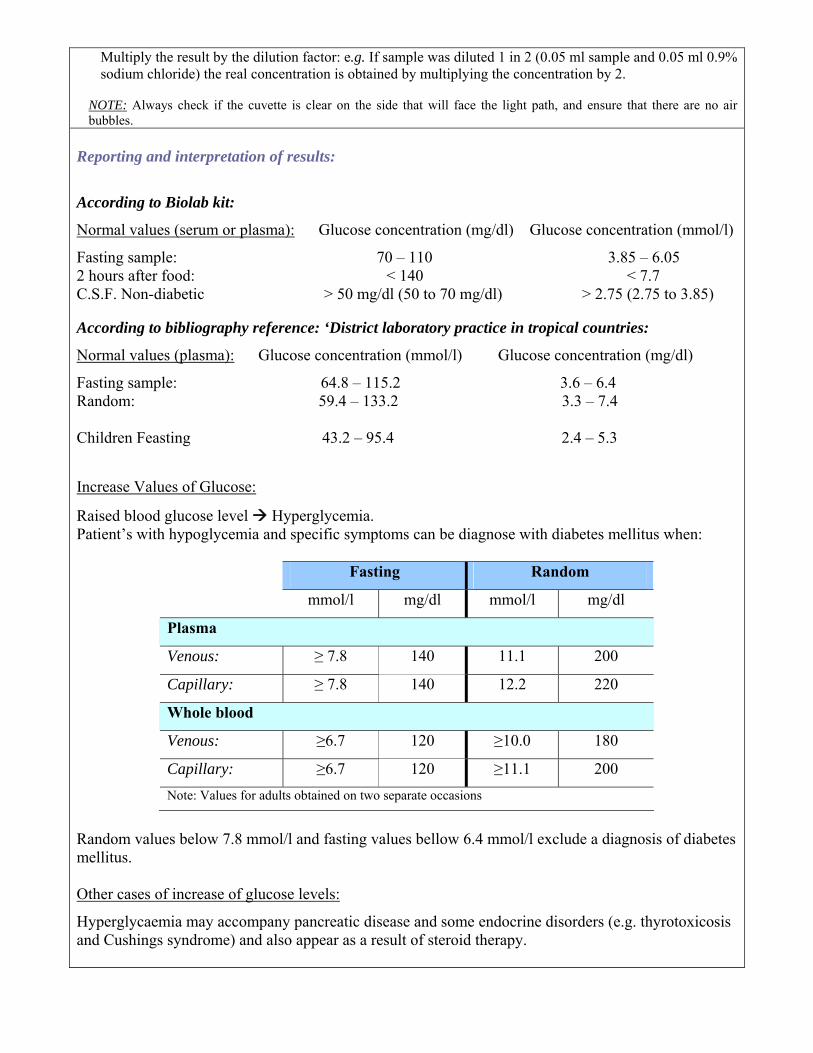
Multiply the result by the dilution factor: e.g. If sample was diluted 1 in 2 (0.05 ml sample and 0.05 ml 0.9% sodium chloride) the real concentration is obtained by multiplying the concentration by 2.
NOTE: Always check if the cuvette is clear on the side that will face the light path, and ensure that there are no air bubbles.
Reporting and interpretation of results:
According to Biolab kit:
Normal values (serum or plasma): Glucose concentration (mg/dl) Glucose concentration (mmol/l)
Fasting sample: 70 – 110 3.85 – 6.05 2 hours after food: < 140 < 7.7 C.S.F. Non-diabetic > 50 mg/dl (50 to 70 mg/dl) > 2.75 (2.75 to 3.85) According to bibliography reference: ‘District laboratory practice in tropical countries:
Normal values (plasma): Glucose concentration (mmol/l) Glucose concentration (mg/dl)
Fasting sample: 64.8 – 115.2 3.6 – 6.4 Random: 59.4 – 133.2 3.3 – 7.4 Children Feasting 43.2 – 95.4 2.4 – 5.3 Increase Values of Glucose:
Raised blood glucose level Hyperglycemia. Patient’s with hypoglycemia and specific symptoms can be diagnose with diabetes mellitus when:
Fasting Random
mmol/l mg/dl mmol/l mg/dl
Plasma
Venous: ≥ 7.8 140 11.1 200
Capillary: ≥ 7.8 140 12.2 220
Whole blood
Venous: ≥6.7 120 ≥10.0 180
Capillary: ≥6.7 120 ≥11.1 200 Note: Values for adults obtained on two separate occasions
Random values below 7.8 mmol/l and fasting values bellow 6.4 mmol/l exclude a diagnosis of diabetes mellitus. Other cases of increase of glucose levels:
Hyperglycaemia may accompany pancreatic disease and some endocrine disorders (e.g. thyrotoxicosis and Cushings syndrome) and also appear as a result of steroid therapy.

Decrease Values of Glucose (Hypoglycaemia): Persistent glucose values below 2.2 mmol/l (39.6 mg/dl) accompanied by symptoms such as fainting, fits, sweating, hunger, pallor, confusion, or violence, should be investigated.
Causes: Severe malnutrition, kwashiorkor, severe liver disease, alcoholic excess, insulin secreting tumours, Addison’s disease, certain drugs and following over treatment of diabetes.
Neonatal: newborn babies may suffer from hypoglycaemia when values fall below 1.1 mmol/l.
Infants at risk: underweight poorly nourished babies, twins, premature infants, and babies born of diabetes mothers.
Quality control Internal Quality Control (IQC) Procedures: Before use the kit, the OCV value should be established by measuring and plotting the Abs values of 20 samples from the quality control serum (add serum as described in step 3). Note: OCV should be around 3%
Run the standard with every assay (as described in procedure – step 3). Run the prepared control serum once every week and plot it on the RCV graph. Note: RCV must not exceed 6%
External Quality Control (EQC): The National Public Health Laboratories (NPHL - Teku) will provide a preserved whole blood control previously analyzed (every 4 to 6 months). The results will be reported in the laboratory records and also reported to NPHL for further comparison with standard values.
Sources of error: • Incorrect sample collection:
- Allow the blood to clot at RT and centrifuge as soon as possible (1 hour maximum after collection).
- Also remove the serum carefully without sucking up the red cells. - Carry out test as soon as possible after separation of the serum from the clot.
• Pipetting errors: Inaccuracy in the measurement of the blood sample check if the blood is on the
graduation line before dispensing it; utilization of a wet pipette wipe the blood from the outside surface of the pipette tip with cotton or paper. Avoid chip pipette/pipette tips.
• Not ensuring that the optical surfaces of the cuvette are clean and dry and that there is no air bubbles in the solution a) Hold the cuvette only in the sides that will not face the light path. b) When transferring a solution allow the fluid to run down the inside wall of the cuvette. c) Do not fill a cuvette more than ¾ full. d) Before place the cuvette into the colorimeter, wipe the sides that face the light path with a soft paper or cloth. e) Always face the optical faces to the light source. f) Ensure that the solution is at RT before reading the Abs.
• Inappropriate maintenance of the colorimeter. Protect from sunlight and vibration.
Other precautions:
A new calibration graph should be prepared whenever new reagents are used or dubious results are obtained and checked against controls every week, (a control should be run along with the test by adding serum to the step 3).
In vitro contamination of glucose or any oxidizer (e.e hydrogen peroxide) can leave to false results.
Use of contaminated water or pipette tips leads to elevated blank Abs and thus wrong results.
The test is sensitive to high temperatures (>37 C) or contamination of chemicals because the enzyme lose its specific activity.
References: BioLab Diagnostics Kit Instructions Mallapaty, G.; (2000) Quality Assurance: Training Programme for Primary Healthcare Laboratory services, Kathmandu, Nepal Cheesbrough, M., (2000) District Laboratory Practice in Tropical Countries; Cambridge University Press, Cambridge, UK WHO (2003) Manual of Basic Techniques for a Health Laboratory; WHO, Geneva
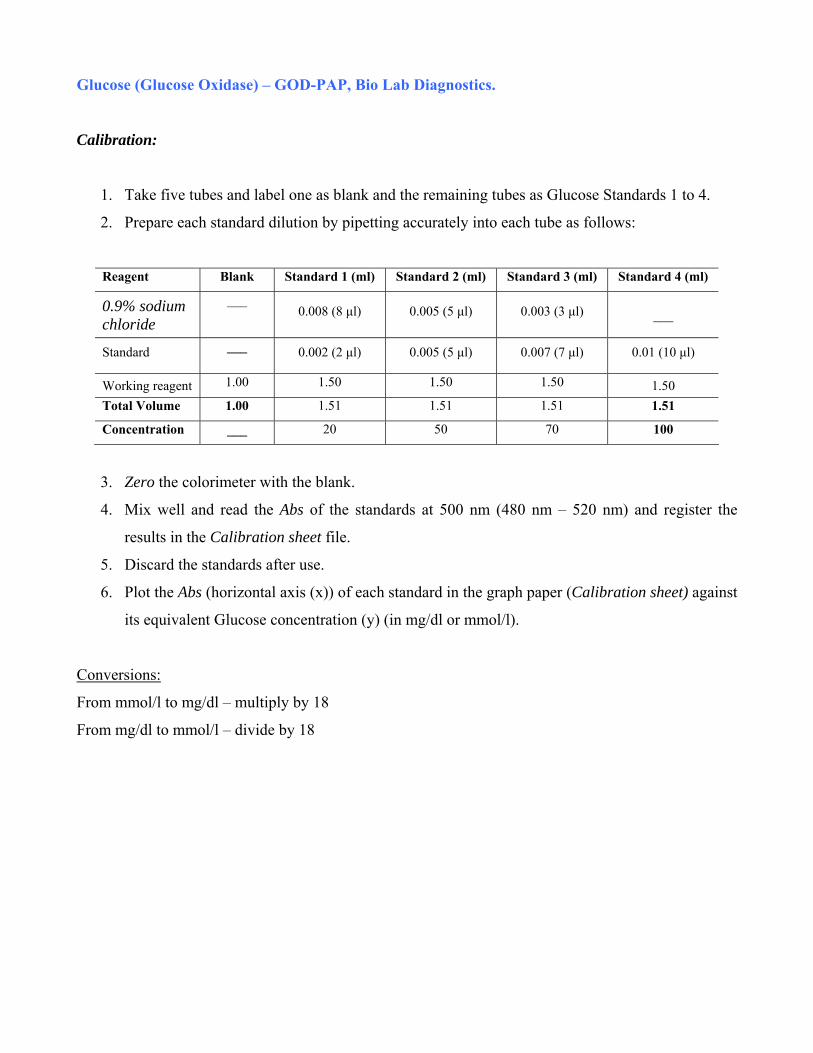
Glucose (Glucose Oxidase) – GOD-PAP, Bio Lab Diagnostics. Calibration:
1. Take five tubes and label one as blank and the remaining tubes as Glucose Standards 1 to 4.
2. Prepare each standard dilution by pipetting accurately into each tube as follows:
Reagent Blank Standard 1 (ml) Standard 2 (ml) Standard 3 (ml) Standard 4 (ml)
0.9% sodium chloride
___ 0.008 (8 μl) 0.005 (5 μl) 0.003 (3 μl) ___
Standard ___ 0.002 (2 μl) 0.005 (5 μl) 0.007 (7 μl) 0.01 (10 μl)
Working reagent 1.00 1.50 1.50 1.50 1.50 Total Volume 1.00 1.51 1.51 1.51 1.51
Concentration ___ 20 50 70 100
3. Zero the colorimeter with the blank.
4. Mix well and read the Abs of the standards at 500 nm (480 nm – 520 nm) and register the
results in the Calibration sheet file.
5. Discard the standards after use.
6. Plot the Abs (horizontal axis (x)) of each standard in the graph paper (Calibration sheet) against
its equivalent Glucose concentration (y) (in mg/dl or mmol/l).
Conversions:
From mmol/l to mg/dl – multiply by 18
From mg/dl to mmol/l – divide by 18
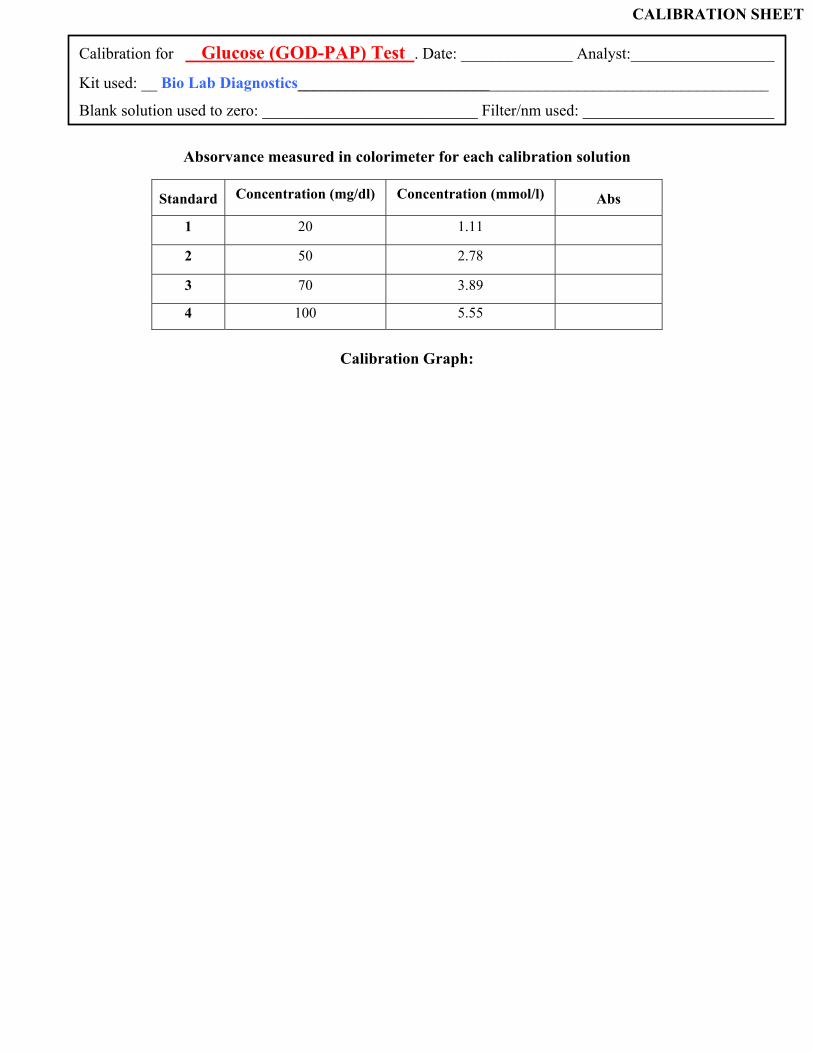
Calibration Graph:
Absorvance measured in colorimeter for each calibration solution
Calibration Graph:
Standard Concentration (mg/dl) Concentration (mmol/l) Abs
1 20 1.11
2 50 2.78
3 70 3.89
4 100 5.55
Calibration for Glucose (GOD-PAP) Test . Date: ______________ Analyst:__________________
Kit used: __ Bio Lab Diagnostics___________________________________________________________
Blank solution used to zero: ___________________________ Filter/nm used: ________________________
CALIBRATION SHEET
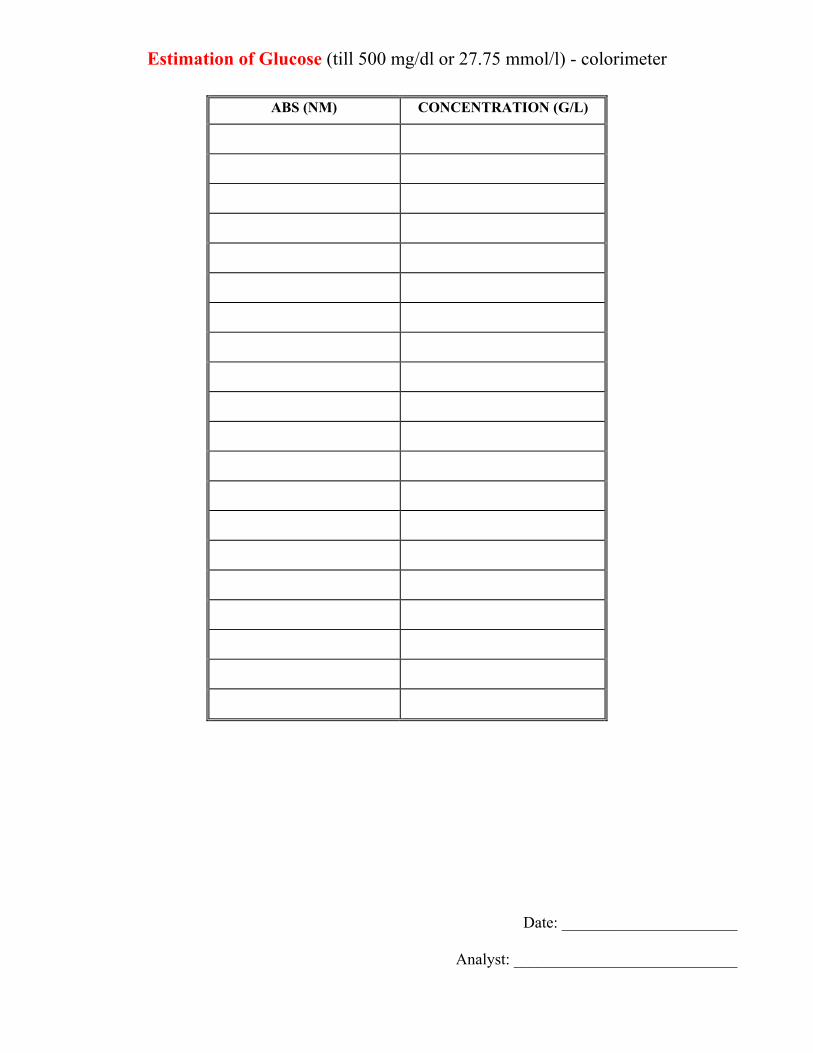
Estimation of Glucose (till 500 mg/dl or 27.75 mmol/l) - colorimeter
Date: ______________________
Analyst: ____________________________
ABS (NM) CONCENTRATION (G/L)
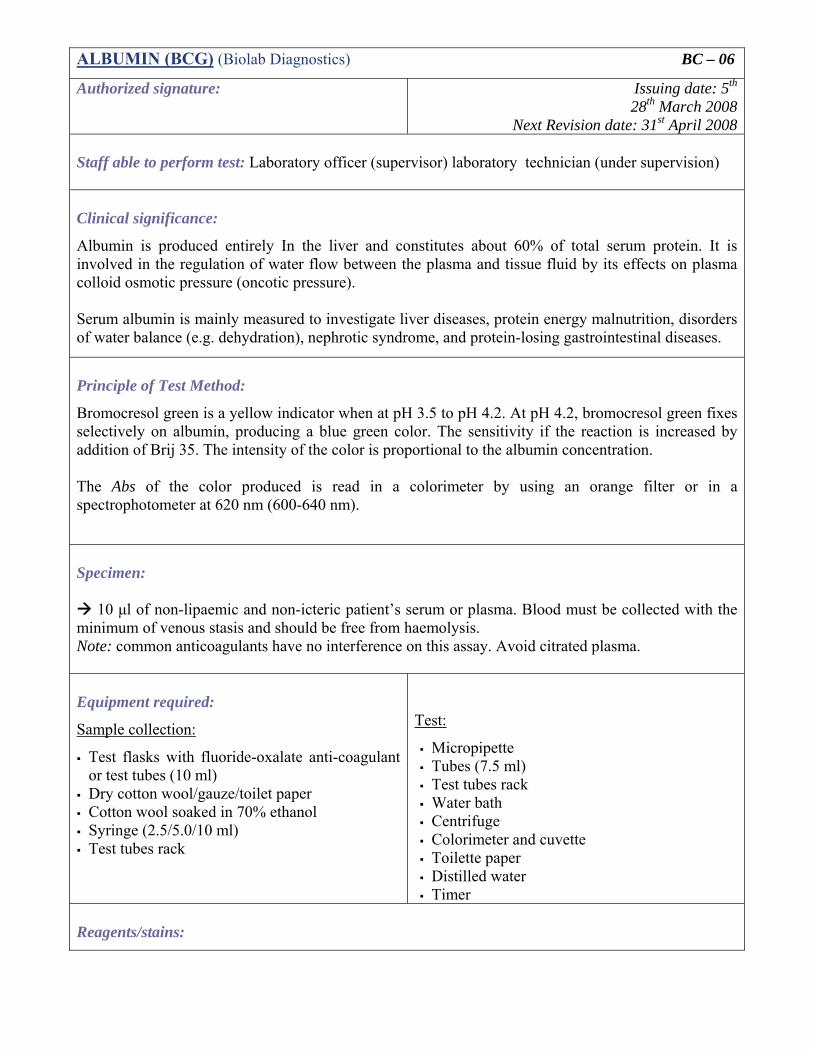
ALBUMIN (BCG) (Biolab Diagnostics) BC – 06
Authorized signature: Issuing date: 5th 28th March 2008
Next Revision date: 31st April 2008 Staff able to perform test: Laboratory officer (supervisor) laboratory technician (under supervision) Clinical significance:
Albumin is produced entirely In the liver and constitutes about 60% of total serum protein. It is involved in the regulation of water flow between the plasma and tissue fluid by its effects on plasma colloid osmotic pressure (oncotic pressure). Serum albumin is mainly measured to investigate liver diseases, protein energy malnutrition, disorders of water balance (e.g. dehydration), nephrotic syndrome, and protein-losing gastrointestinal diseases.
Principle of Test Method:
Bromocresol green is a yellow indicator when at pH 3.5 to pH 4.2. At pH 4.2, bromocresol green fixes selectively on albumin, producing a blue green color. The sensitivity if the reaction is increased by addition of Brij 35. The intensity of the color is proportional to the albumin concentration. The Abs of the color produced is read in a colorimeter by using an orange filter or in a spectrophotometer at 620 nm (600-640 nm).
Specimen:
10 μl of non-lipaemic and non-icteric patient’s serum or plasma. Blood must be collected with the minimum of venous stasis and should be free from haemolysis. Note: common anticoagulants have no interference on this assay. Avoid citrated plasma. Equipment required:
Sample collection:
Test flasks with fluoride-oxalate anti-coagulant or test tubes (10 ml)
Dry cotton wool/gauze/toilet paper Cotton wool soaked in 70% ethanol Syringe (2.5/5.0/10 ml) Test tubes rack
Test:
Micropipette Tubes (7.5 ml) Test tubes rack Water bath Centrifuge Colorimeter and cuvette Toilette paper Distilled water Timer
Reagents/stains:

Reagents: Reagent supplied Composition Concentration Volume
2. BCG Reagent - Bromocresol Green - Succinate Buffer pH 4.2 - Brij 35
- 750 μmol/l - 370 μmol/l - Trace
100 ml
4. Standard (Albumin) - Value of Albumin - 4.0 g/dl 2.5 ml
NOTES: All reagents are ready to use. BCG Reagent (No 2) is stable for 18 months at 18-25 C away from light
Albumin Standard is stable for 18 months at 2-8 C. This reagent should not be freeze
Procedure:
1. Turn ON the colorimeter and let stabilize for 10 min.
2. Take tubes: 1 for blank, 1 for standard and test tubes according to the number of patient’s
samples analyzed. Label patient’s samples with the following parameters:
• Patient Number • Requisition number • Test performed
3. Pipette into test tubes as follows: Reagent Blank (ml) Standard (ml) Test sample (ml)
Reagent No 2 1.00 1.50 1.50
Standard Reagent No 4 ___ 0.01 (10 μl) ___
Sample ___ ___ 0.01 (10 μl)
Total 1.00 1.51 1.51
4. Mix well and incubate 3 minutes at RT.
5. During the incubation time, select a wavelength equal to 620 nm (600 – 6400 nm) in the colorimeter.
6. After exactly 3 minutes place the blank into the blank cuvette and zero the colorimeter.
10. Remove the blank cuvette and read the Abs of the Standard and Test Samples in the same conditions. Note: Do not forget to register the value before remove the cuvette from the colorimeter Replaced the test samples back into the original test tube so that, if necessary they are available for re-check. Final color is stable for 1 hour when protected form bright light.
11. Return the blank solution to the colorimeter and check if it continues to read zero.
12. Read the Albumin concentration (g/dl) by:
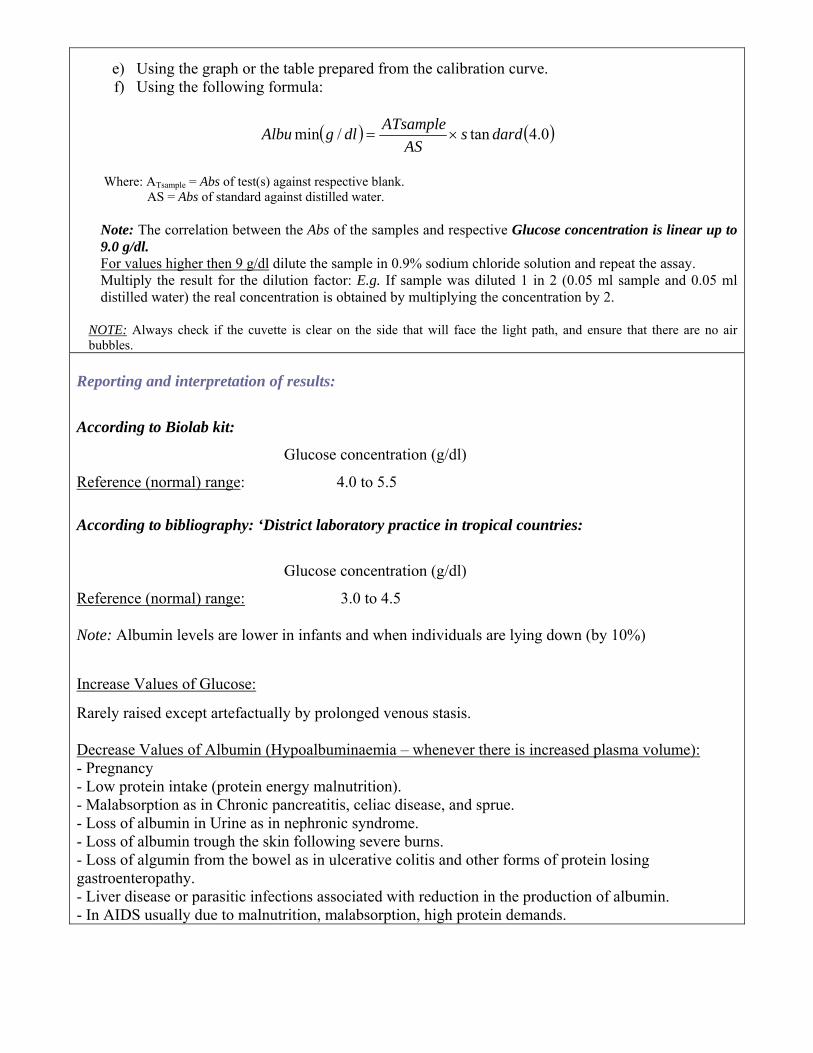
e) Using the graph or the table prepared from the calibration curve. f) Using the following formula:
( ) ( )0.4tan/min dardsAS
ATsampledlgAlbu ×=
Where: ATsample = Abs of test(s) against respective blank. AS = Abs of standard against distilled water. Note: The correlation between the Abs of the samples and respective Glucose concentration is linear up to 9.0 g/dl. For values higher then 9 g/dl dilute the sample in 0.9% sodium chloride solution and repeat the assay. Multiply the result for the dilution factor: E.g. If sample was diluted 1 in 2 (0.05 ml sample and 0.05 ml distilled water) the real concentration is obtained by multiplying the concentration by 2.
NOTE: Always check if the cuvette is clear on the side that will face the light path, and ensure that there are no air bubbles.
Reporting and interpretation of results:
According to Biolab kit:
Glucose concentration (g/dl)
Reference (normal) range: 4.0 to 5.5 According to bibliography: ‘District laboratory practice in tropical countries:
Glucose concentration (g/dl)
Reference (normal) range: 3.0 to 4.5 Note: Albumin levels are lower in infants and when individuals are lying down (by 10%) Increase Values of Glucose:
Rarely raised except artefactually by prolonged venous stasis. Decrease Values of Albumin (Hypoalbuminaemia – whenever there is increased plasma volume): - Pregnancy - Low protein intake (protein energy malnutrition). - Malabsorption as in Chronic pancreatitis, celiac disease, and sprue. - Loss of albumin in Urine as in nephronic syndrome. - Loss of albumin trough the skin following severe burns. - Loss of algumin from the bowel as in ulcerative colitis and other forms of protein losing gastroenteropathy. - Liver disease or parasitic infections associated with reduction in the production of albumin. - In AIDS usually due to malnutrition, malabsorption, high protein demands.
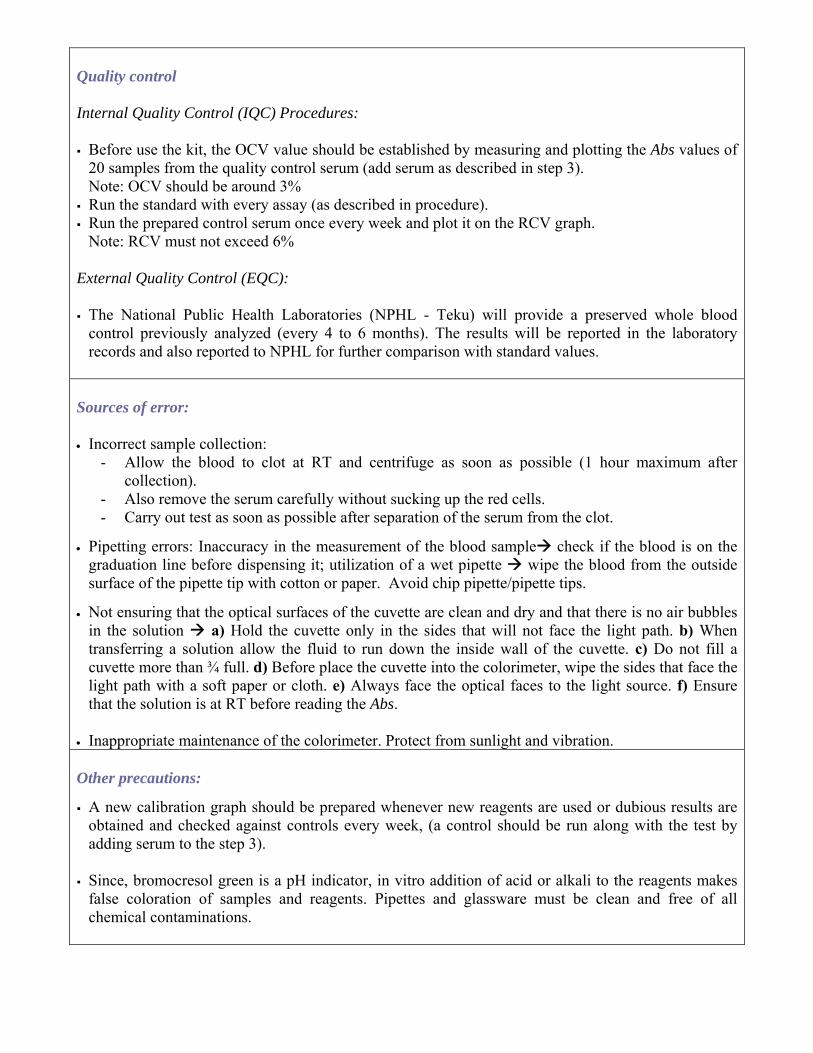
Quality control Internal Quality Control (IQC) Procedures: Before use the kit, the OCV value should be established by measuring and plotting the Abs values of 20 samples from the quality control serum (add serum as described in step 3). Note: OCV should be around 3%
Run the standard with every assay (as described in procedure). Run the prepared control serum once every week and plot it on the RCV graph. Note: RCV must not exceed 6%
External Quality Control (EQC): The National Public Health Laboratories (NPHL - Teku) will provide a preserved whole blood control previously analyzed (every 4 to 6 months). The results will be reported in the laboratory records and also reported to NPHL for further comparison with standard values.
Sources of error: • Incorrect sample collection:
- Allow the blood to clot at RT and centrifuge as soon as possible (1 hour maximum after collection).
- Also remove the serum carefully without sucking up the red cells. - Carry out test as soon as possible after separation of the serum from the clot.
• Pipetting errors: Inaccuracy in the measurement of the blood sample check if the blood is on the
graduation line before dispensing it; utilization of a wet pipette wipe the blood from the outside surface of the pipette tip with cotton or paper. Avoid chip pipette/pipette tips.
• Not ensuring that the optical surfaces of the cuvette are clean and dry and that there is no air bubbles in the solution a) Hold the cuvette only in the sides that will not face the light path. b) When transferring a solution allow the fluid to run down the inside wall of the cuvette. c) Do not fill a cuvette more than ¾ full. d) Before place the cuvette into the colorimeter, wipe the sides that face the light path with a soft paper or cloth. e) Always face the optical faces to the light source. f) Ensure that the solution is at RT before reading the Abs.
• Inappropriate maintenance of the colorimeter. Protect from sunlight and vibration. Other precautions:
A new calibration graph should be prepared whenever new reagents are used or dubious results are obtained and checked against controls every week, (a control should be run along with the test by adding serum to the step 3).
Since, bromocresol green is a pH indicator, in vitro addition of acid or alkali to the reagents makes false coloration of samples and reagents. Pipettes and glassware must be clean and free of all chemical contaminations.

References: BioLab Diagnostics Kit Instructions Mallapaty, G.; (2000) Quality Assurance: Training Programme for Primary Healthcare Laboratory services, Kathmandu, Nepal Cheesbrough, M., (2000) District Laboratory Practice in Tropical Countries; Cambridge University Press, Cambridge, UK WHO (2003) Manual of Basic Techniques for a Health Laboratory; WHO, Geneva
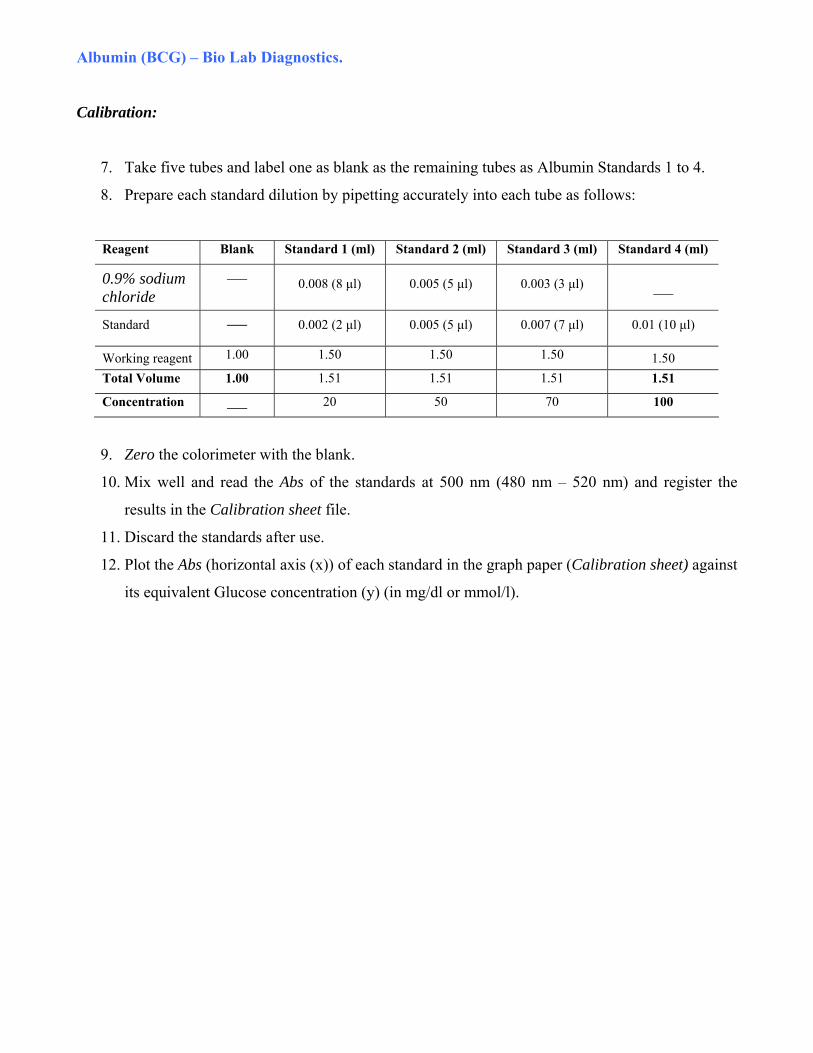
Albumin (BCG) – Bio Lab Diagnostics. Calibration:
7. Take five tubes and label one as blank as the remaining tubes as Albumin Standards 1 to 4.
8. Prepare each standard dilution by pipetting accurately into each tube as follows:
Reagent Blank Standard 1 (ml) Standard 2 (ml) Standard 3 (ml) Standard 4 (ml)
0.9% sodium chloride
___ 0.008 (8 μl) 0.005 (5 μl) 0.003 (3 μl) ___
Standard ___ 0.002 (2 μl) 0.005 (5 μl) 0.007 (7 μl) 0.01 (10 μl)
Working reagent 1.00 1.50 1.50 1.50 1.50 Total Volume 1.00 1.51 1.51 1.51 1.51
Concentration ___ 20 50 70 100
9. Zero the colorimeter with the blank.
10. Mix well and read the Abs of the standards at 500 nm (480 nm – 520 nm) and register the
results in the Calibration sheet file.
11. Discard the standards after use.
12. Plot the Abs (horizontal axis (x)) of each standard in the graph paper (Calibration sheet) against
its equivalent Glucose concentration (y) (in mg/dl or mmol/l).

Calibration Graph:
Absorvance measured in colorimeter for each calibration solution
Calibration Graph:
Standard Concentration (mg/dl) Concentration (mmol/l) Abs
1 20 1.11
2 50 2.78
3 70 3.89
4 100 5.55
Calibration for Glucose (GOD-PAP) Test . Date: ______________ Analyst:__________________
Kit used: __ Bio Lab Diagnostics___________________________________________________________
Blank solution used to zero: ___________________________ Filter/nm used: ________________________
CALIBRATION SHEET
Estimation of Glucose (till 9 g/dl) - colorimeter
Date: ______________________
Analyst: ____________________________
ABS (NM) CONCENTRATION (G/DL)
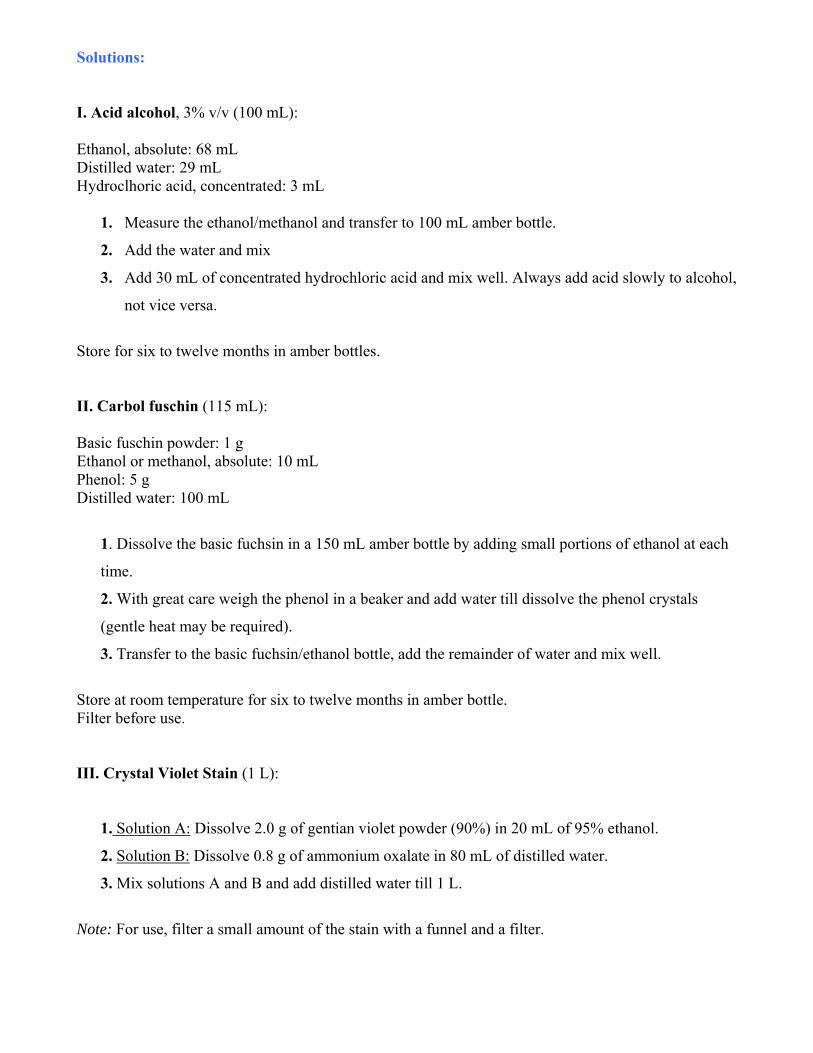
Solutions:
I. Acid alcohol, 3% v/v (100 mL): Ethanol, absolute: 68 mL Distilled water: 29 mL Hydroclhoric acid, concentrated: 3 mL
1. Measure the ethanol/methanol and transfer to 100 mL amber bottle.
2. Add the water and mix
3. Add 30 mL of concentrated hydrochloric acid and mix well. Always add acid slowly to alcohol,
not vice versa.
Store for six to twelve months in amber bottles. II. Carbol fuschin (115 mL): Basic fuschin powder: 1 g Ethanol or methanol, absolute: 10 mL Phenol: 5 g Distilled water: 100 mL
1. Dissolve the basic fuchsin in a 150 mL amber bottle by adding small portions of ethanol at each
time.
2. With great care weigh the phenol in a beaker and add water till dissolve the phenol crystals
(gentle heat may be required).
3. Transfer to the basic fuchsin/ethanol bottle, add the remainder of water and mix well.
Store at room temperature for six to twelve months in amber bottle. Filter before use. III. Crystal Violet Stain (1 L):
1. Solution A: Dissolve 2.0 g of gentian violet powder (90%) in 20 mL of 95% ethanol.
2. Solution B: Dissolve 0.8 g of ammonium oxalate in 80 mL of distilled water.
3. Mix solutions A and B and add distilled water till 1 L.
Note: For use, filter a small amount of the stain with a funnel and a filter.
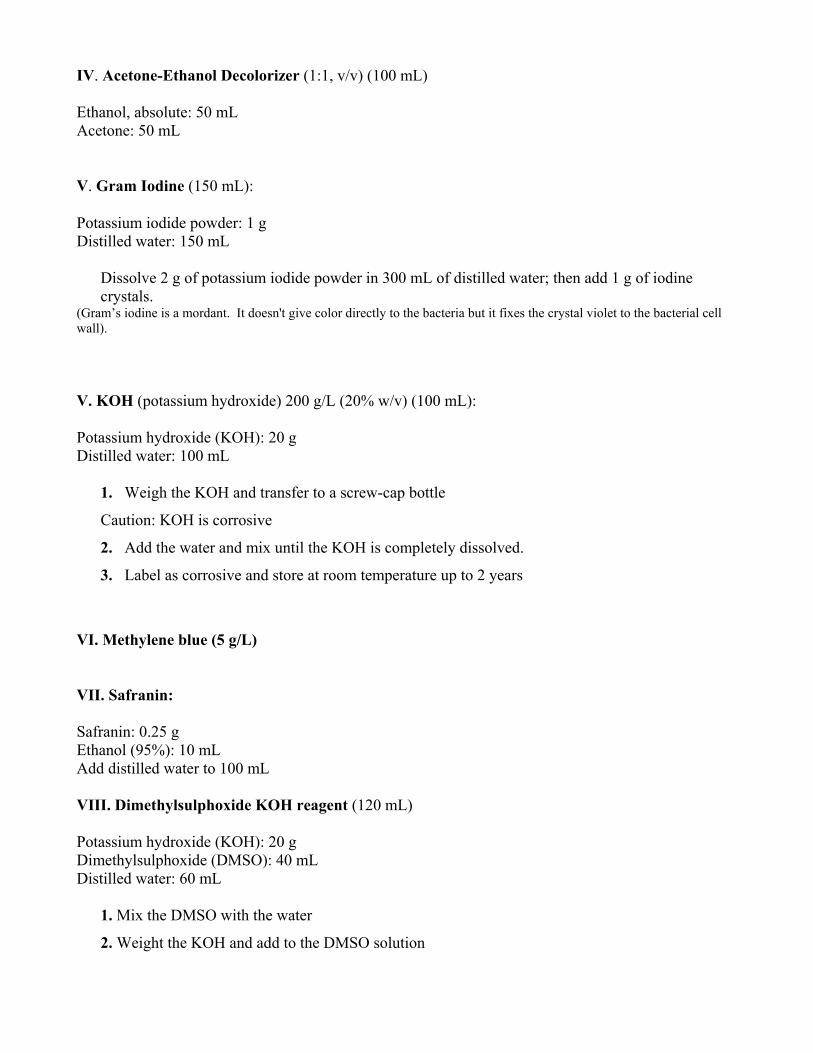
IV. Acetone-Ethanol Decolorizer (1:1, v/v) (100 mL) Ethanol, absolute: 50 mL Acetone: 50 mL
V. Gram Iodine (150 mL):
Potassium iodide powder: 1 g Distilled water: 150 mL
Dissolve 2 g of potassium iodide powder in 300 mL of distilled water; then add 1 g of iodine crystals.
(Gram’s iodine is a mordant. It doesn't give color directly to the bacteria but it fixes the crystal violet to the bacterial cell wall).
V. KOH (potassium hydroxide) 200 g/L (20% w/v) (100 mL): Potassium hydroxide (KOH): 20 g Distilled water: 100 mL
1. Weigh the KOH and transfer to a screw-cap bottle
Caution: KOH is corrosive
2. Add the water and mix until the KOH is completely dissolved.
3. Label as corrosive and store at room temperature up to 2 years
VI. Methylene blue (5 g/L)
VII. Safranin:
Safranin: 0.25 g Ethanol (95%): 10 mL Add distilled water to 100 mL
VIII. Dimethylsulphoxide KOH reagent (120 mL)
Potassium hydroxide (KOH): 20 g Dimethylsulphoxide (DMSO): 40 mL Distilled water: 60 mL
1. Mix the DMSO with the water
2. Weight the KOH and add to the DMSO solution

3. Mix until KOH is completely dissolved
4. Label the bottle as corrosive and store at room temperature out of direct sunlight
IX. NaCl (physiological saline) (0.9% w/v) (100 mL) Sodium chloride: 0.9 g Distilled water: up to 100 mL
Mix until completely dissolution and store at room temperature. Stable for several months. Do not use if contaminated.
XI. Ethanol (70%) (1 L)
Ethanol (99%): 700 mL Distilled water: 300 mL Can be stored in 1 L bottle water at room temperature XII. Ethanol (95%) (100 mL) Ethanol (99%): 95 mL Distilled water: 5 mL Can be stored in 0.5 L bottle water at room temperature Drabkin’s Reagent solution (pH 7.0-7.4): Diluted 20 µL of whole blood in 4 mL Photosensitive: store in amber containers or container wrapped in silver foil paper. The solution is typically yellow clear, DO NOT use if it becomes turbid.
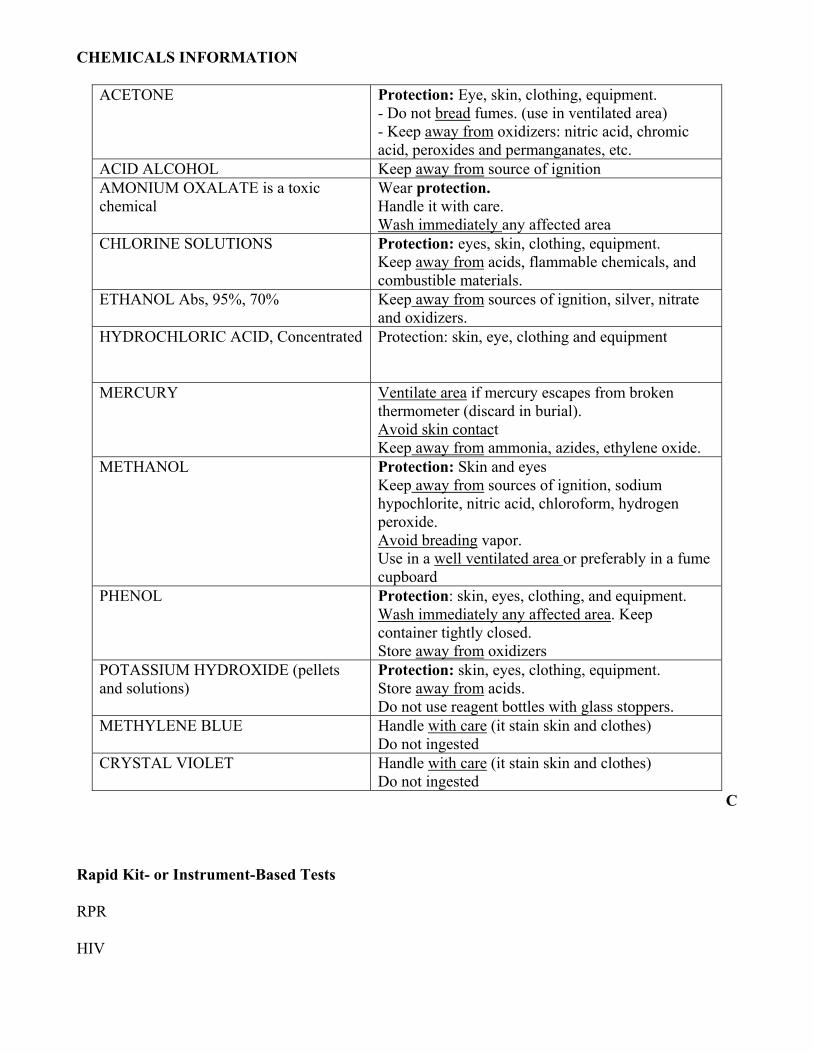
CHEMICALS INFORMATION
ACETONE
Protection: Eye, skin, clothing, equipment. - Do not bread fumes. (use in ventilated area) - Keep away from oxidizers: nitric acid, chromic acid, peroxides and permanganates, etc.
ACID ALCOHOL Keep away from source of ignition AMONIUM OXALATE is a toxic chemical
Wear protection. Handle it with care. Wash immediately any affected area
CHLORINE SOLUTIONS Protection: eyes, skin, clothing, equipment. Keep away from acids, flammable chemicals, and combustible materials.
ETHANOL Abs, 95%, 70% Keep away from sources of ignition, silver, nitrate and oxidizers.
HYDROCHLORIC ACID, Concentrated Protection: skin, eye, clothing and equipment
MERCURY Ventilate area if mercury escapes from broken
thermometer (discard in burial). Avoid skin contact Keep away from ammonia, azides, ethylene oxide.
METHANOL Protection: Skin and eyes Keep away from sources of ignition, sodium hypochlorite, nitric acid, chloroform, hydrogen peroxide. Avoid breading vapor. Use in a well ventilated area or preferably in a fume cupboard
PHENOL Protection: skin, eyes, clothing, and equipment. Wash immediately any affected area. Keep container tightly closed. Store away from oxidizers
POTASSIUM HYDROXIDE (pellets and solutions)
Protection: skin, eyes, clothing, equipment. Store away from acids. Do not use reagent bottles with glass stoppers.
METHYLENE BLUE Handle with care (it stain skin and clothes) Do not ingested
CRYSTAL VIOLET Handle with care (it stain skin and clothes) Do not ingested
C
Rapid Kit- or Instrument-Based Tests
RPR
HIV
Anti-ABD, pregnancy screening
Glucometer ($40 device, each non-reusable cuvette: $1)
QBC Diagnostics AutoRead Plus-- CBC with differential (generous donation from Dr. Levine and the team at qbcdiagnostics.com)
Dipstick Tests
Urine, protein/glucose, for use in antenatal screening
Urine, 9-panel, for use in UTI evaluation
Urine, beta-HCG for pregnancy
Urine for protein—essential practice in MCH L4 (strips)
RPR—essential practice in MCH L5
HIV—essential practice in MCH L6
Urine sediment microscopy: http://www.texascollaborative.org/spencer_urinalysis/ds_sub3.htm
Blood glucose
Testing Urine for HCG (pregnancy testing)
Routine Stool examination Annex 1 EDTA-anticoagulated blood