Gelatin Snow Globe - Edible Artists Network · is tutorial was rinted ro dible rtists etwor aaine...
5
This tutorial was printed from Edible Artists Network Magazine - www.edibleartistsnetwork.com Gelatin Snow Globe By Lourdes Reyes G e l a t i n S n o w G l o b e A T u torial by Lo urd es R ey es Tools: • Small, medium & large melon ballers • Parisian tool • Fine paintbrush • 3 eye droppers • Micro-spoon • Measuring spoons • Small mixing bowls • Edible airbrush colors • 24K gold leaf flakes • Mini star cutter • Small pointed spatula
Transcript of Gelatin Snow Globe - Edible Artists Network · is tutorial was rinted ro dible rtists etwor aaine...

This tutorial was printed from Edible Artists Network Magazine - www.edibleartistsnetwork.com
Gelatin Snow GlobeBy Lourdes Reyes
Gelatin Snow Globe
A Tutorial by Lourdes Reyes
Tools: • Small, medium & large melon ballers• Parisian tool• Fine paintbrush• 3 eye droppers• Micro-spoon• Measuring spoons• Small mixing bowls• Edible airbrush colors• 24K gold leaf flakes• Mini star cutter• Small pointed spatula
This tutorial was printed from Edible Artists Network Magazine - www.edibleartistsnetwork.com
Ingredients:• 8 cups water • 3 cups (600 g) granulated sugar (refined)• 7 Tbsp. (70 g) pure powdered gelatin• 1 cup cold water • 3/4 cup (80 g) powdered whole milk • 1 - 2 tablespoon any flavor you like for the water gelatin (must be clear)• 1/2 Tbsp. vanilla • 1/2 tsp. citric acid • Cake pan or mousse mold: half sphere, 7- 8 cups capacity
Directions:Moisten the mold and refrigerate. Immerse the gelatin in 1 cup of cold water to hydrate (bloom) and soften for 5 minutes before combining it with the sugar solution in the next step.
Combine 8 cups of water with the granulated sugar in a saucepan. Bring the mixture to a boil. When done, remove it from the heat. Dissolve the hydrated gelatin in the boiled water and sugar, stirring until no foam remains in the pan. Pour 2 cups of the liquid into a container and whisk in the powdered milk and vanilla flavor until dissolved. To the remaining liquid, add flavor and citric acid; stir to distribute. Note: You can change flavors if you wish. Use flavorings without color and not oil based.
Gelatin Recipe Note: Use measuring spoons and cups
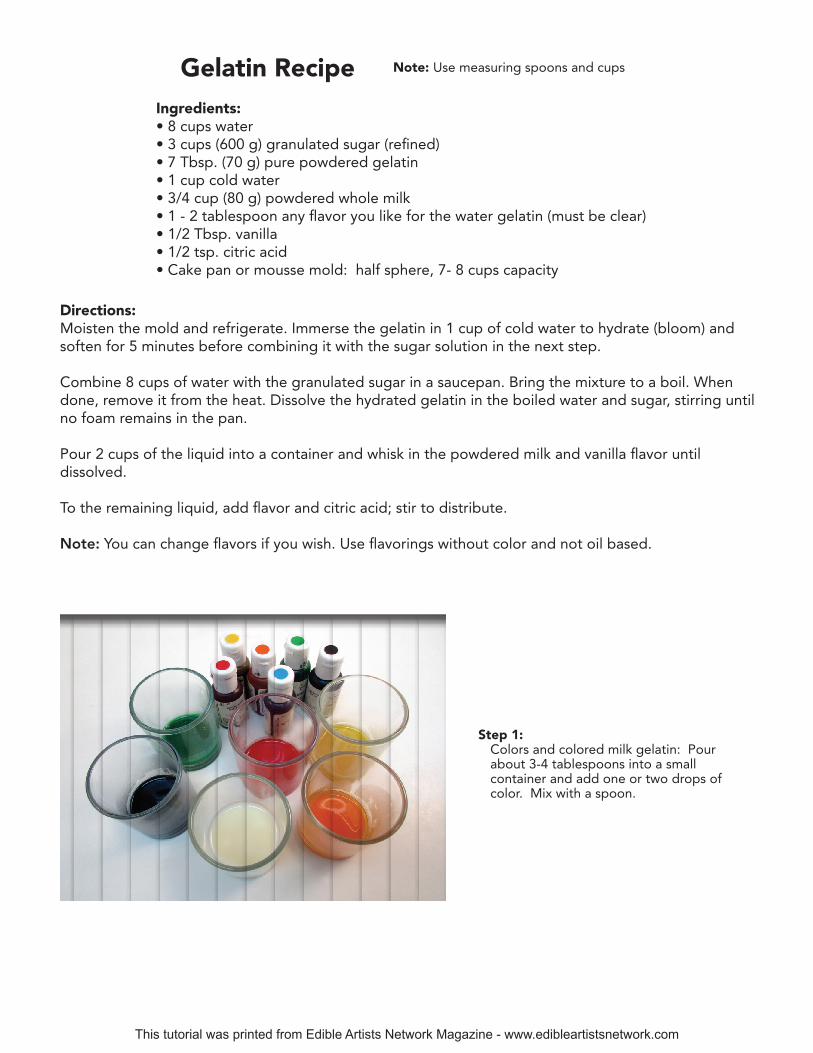
Step 1: Colors and colored milk gelatin: Pour about 3-4 tablespoons into a small container and add one or two drops of color. Mix with a spoon.

This tutorial was printed from Edible Artists Network Magazine - www.edibleartistsnetwork.com
Step 2: Add 2 cups of water gelatin to the mold or cake pan.
Step 5: Using the medium melon baller, make a hollow half sphere for the snowman’s body.
Step 8: Fill the snowman with milk gelatin.Step 9: Insert the micro-spoon and carve three leaves over the snowman’s head. Step 10:
Fill them using a dropper filled with green milk gelatin.
Step 3: Using a small parisian tool, make some irregular marks to simulate snow.
Step 6: Using the small parisian, make another hollow half sphere in the upper part of the first one, this will be smaller as it is the snowman’s head.
Step 4: Fill the marks with milk gelatin.
Step 7: Using a toothpick and the milk gelatin colors, make the eyes, nose and mouth. Make some green buttons on the body and the scarf, both done the same way as the snow and fill with red milk gelatin.

This tutorial was printed from Edible Artists Network Magazine - www.edibleartistsnetwork.com
Step 11: Sprinkle 24K golden leaf flakes over all the gelatin.
Step 14: Emboss a star in the top using the mini star cutter. Using the cutter, carefully hollow out the star area of gelatin.
Step 15: With a fine brush, cover the star bottom and sides with gold leaf.
Step 16: Pour a few drops of yellow milk gelatin into the star cut-out with an eye dropper.
Step 17: Make the tree ornaments with the mini melon baller.
Step 18: Fill in ornaments with red milk gelatin using the eye dropper. Let set. Pour one cup of clear gelatin over the entire design and refrigerate to set for about half hour. You can add more gold flakes.
Step 12: Pour over the gelatin 1 cup of clear gelatin. Refrigerate about half hour to set.
Step 13: When set, use the dropper with green gelatin to draw a triangle for your Christmas tree.

This tutorial was printed from Edible Artists Network Magazine - www.edibleartistsnetwork.com
Step 19: Insert about one fourth of the special spatula to make leaves and fill each one you make with green milk gelatin. Do not make all the leaves and then fill them because you will lose the indent.
Step 20: When you finish all the leaves, using a dropper cover just the tree surface with green milk gelatin.
Step 21: Then, cover the snow surface with milk gelatin.
Step 22: Make some little snowflakes with milk gelatin using a dropper. Let set in the fridge for 15 minutes.
Step 23: Add a drop of sky blue edible color to one cup of water gelatin and pour over design. Let set in the fridge for about half hour.
Step 24: Pour one cup of milk gelatin over the blue one, which must be set. Put it into the fridge for about half hour.
Step 25: Add a couple of drops of blue color to two cups of milk gelatin and mix. Pour over the white layer of gelatin. Now leave to set for two hours.
TO UNMOLD: Dip the mold in hot water for 10 seconds (more or less) and place a serving plate over its top. Invert the mold and plate together and then gently shake it to loosen the gelatin. Carefully lift the mold off the plate. If you are using a mousse mold, then you should dip the mold more than 10 seconds. If you use a metallic mold, then you dip it for 10 or less seconds.
Lourdes Reyes has been offering classes in sugar flowers, decorated cookies, 3D gelatin desserts, etc. and participating in international competitions since 1993. She has won many first place prizes in her homeland, Mexico, and abroad. In 2011, she was named one of the Top Ten Cake Decorators by Dessert Professional magazine. Her work has appeared in hundreds of magazines throughout the world. She is a certified instructor for Wilton and PME and has designed a complete line of mini cutters as well as her special sugar flowers Designer Line cutters.