Fuji Spray Pressure Pot & Compressor Spray Gun · Fuji Spray Pressure Pot & Compressor Spray Gun 2...
8
Fuji Spray Pressure Pot & Compressor Spray Gun 1 Fuji’s 2 ½ Gallon Pressure Pot & MPX-30 Gun – A Winning Combination! Getting familiar with the system by spraying water Introduction. Incorporating a pressure pot into your spraying arsenal is a smart move – and for several reasons. First, because your gun receives finish through a lightweight feed hose, you no longer carrying that heavy quart of finish in your gun hand. And a gun with only a feed hose attached is considerably more compact than one with a gravity or siphon cup. Furthermore, because the pressure pot can hold up to 10- times more finish than a cup, the days of stopping every 10 minutes or so to refill that quart-sized cup are history. Together, these features enable you to move along the job more quickly, efficiently, and comfortably. So, whether you’re doing this for a living or a serious hobby, a pressure pot is a wise investment. It’s been a few months since receiving my new Fuji 2 ½ gallon pressure pot and I’ve got to say that I’ve been quite impressed with its performance. So, here’s some of my ideas and tips I’ve found to be useful in getting the most out of it. Please note that although I’m using a reduced-pressure gun (a Fuji MPX-30) with the pressure pot, most of the points I’m raising are applicable to any reduced pressure or HVLP guns you may decide to team it with. And as you’ll see, there’s more to a pressure pot than spraying finishes.
Transcript of Fuji Spray Pressure Pot & Compressor Spray Gun · Fuji Spray Pressure Pot & Compressor Spray Gun 2...

Fuji Spray Pressure Pot & Compressor Spray Gun
1
Fuji’s 2 ½ Gallon Pressure Pot & MPX-30 Gun – A Winning Combination!
Getting familiar with the system by spraying water
Introduction. Incorporating a pressure pot into your spraying arsenal is a smart move – and for several
reasons. First, because your gun receives finish through a lightweight feed hose, you no longer carrying that
heavy quart of finish in your gun hand. And a gun with only a feed hose attached is considerably more
compact than one with a gravity or siphon cup. Furthermore, because the pressure pot can hold up to 10-
times more finish than a cup, the days of stopping every 10 minutes or so to refill that quart-sized cup are
history. Together, these features enable you to move along the job more quickly, efficiently, and
comfortably. So, whether you’re doing this for a living or a serious hobby, a pressure pot is a wise investment.
It’s been a few months since receiving my new Fuji 2 ½ gallon pressure pot and I’ve got to say that I’ve been
quite impressed with its performance. So, here’s some of my ideas and tips I’ve found to be useful in getting
the most out of it. Please note that although I’m using a reduced-pressure gun (a Fuji MPX-30) with the
pressure pot, most of the points I’m raising are applicable to any reduced pressure or HVLP guns you may
decide to team it with. And as you’ll see, there’s more to a pressure pot than spraying finishes.
Fuji Spray Pressure Pot & Compressor Spray Gun
2
Let’s get started!
Mating gun to Pressure Pot: Where to Start?
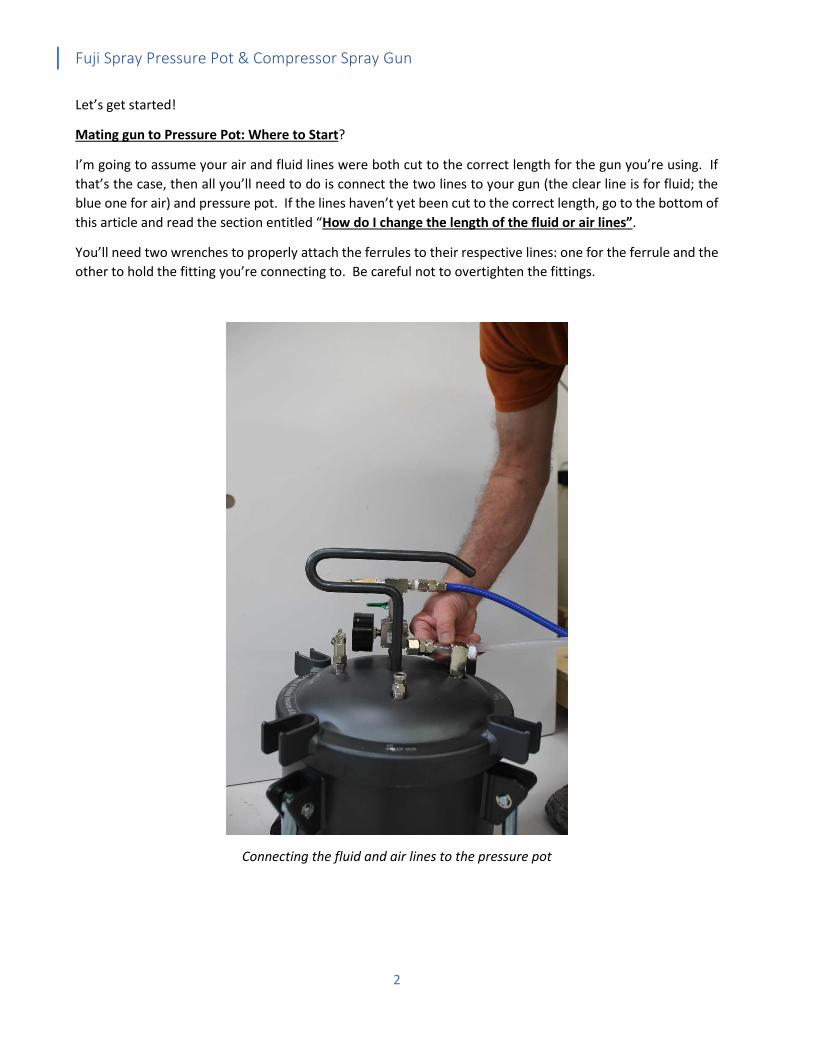
I’m going to assume your air and fluid lines were both cut to the correct length for the gun you’re using. If
that’s the case, then all you’ll need to do is connect the two lines to your gun (the clear line is for fluid; the
blue one for air) and pressure pot. If the lines haven’t yet been cut to the correct length, go to the bottom of
this article and read the section entitled “How do I change the length of the fluid or air lines”.
You’ll need two wrenches to properly attach the ferrules to their respective lines: one for the ferrule and the
other to hold the fitting you’re connecting to. Be careful not to overtighten the fittings.
Connecting the fluid and air lines to the pressure pot
Fuji Spray Pressure Pot & Compressor Spray Gun
3
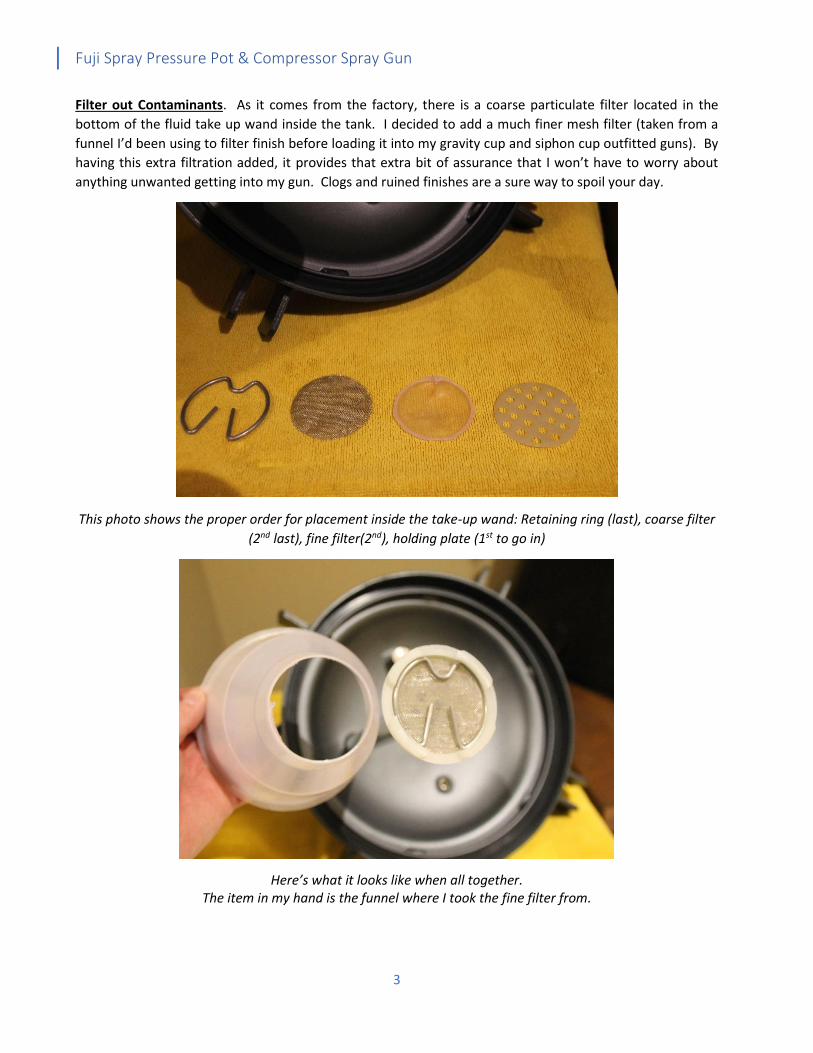
Filter out Contaminants. As it comes from the factory, there is a coarse particulate filter located in the
bottom of the fluid take up wand inside the tank. I decided to add a much finer mesh filter (taken from a
funnel I’d been using to filter finish before loading it into my gravity cup and siphon cup outfitted guns). By
having this extra filtration added, it provides that extra bit of assurance that I won’t have to worry about
anything unwanted getting into my gun. Clogs and ruined finishes are a sure way to spoil your day.
This photo shows the proper order for placement inside the take-up wand: Retaining ring (last), coarse filter
(2nd last), fine filter(2nd), holding plate (1st to go in)
Here’s what it looks like when all together. The item in my hand is the funnel where I took the fine filter from.

Fuji Spray Pressure Pot & Compressor Spray Gun
4
Setting the pail of finish into the pot
Stirring the Finish is still Required. Don’t forget to properly stir the finish
prior to loading the pot (not that I would ever do such a thing, right?!).
Once you’re ready to load the pot, I’d like to point out one of the main
advantages to having a 2 ½ gallon pressure pot over a smaller one: the
ability to place one-gallon buckets of finish directly into the pot. This saves
quite a bit of time when it comes to cleaning up, as there’s no finish on the
inside of the bucket to contend with. Again, time = money. Even if you’re
not doing this for a living, there’s no logic in wasting your time.
Put a Lid on It. Okay, so the pot’s now loaded with finish and
you’ve followed the manual’s instructions about properly
tightening the lid and connecting the main air supply. Close
the pressure relief valve, then go ahead and set your air
compressor to the recommended 60 PSI pressure. I can’t
understand why anyone would want to exceed that level… but
whatever you do, NEVER exceed 80 PSI. Now go ahead and
slowly open the pot’s air shut-off valve while checking the
pot’s air pressure gauge. Your pot’s pressure should be set to
20 PSI, which should certainly be more than enough to satisfy
your gun’s fluid requirements. The pot came with a locking
ring on the pressure regulator knob, designed to help lock the
pressure setting in once you’ve got it set.
Fuji Spray Pressure Pot & Compressor Spray Gun
5
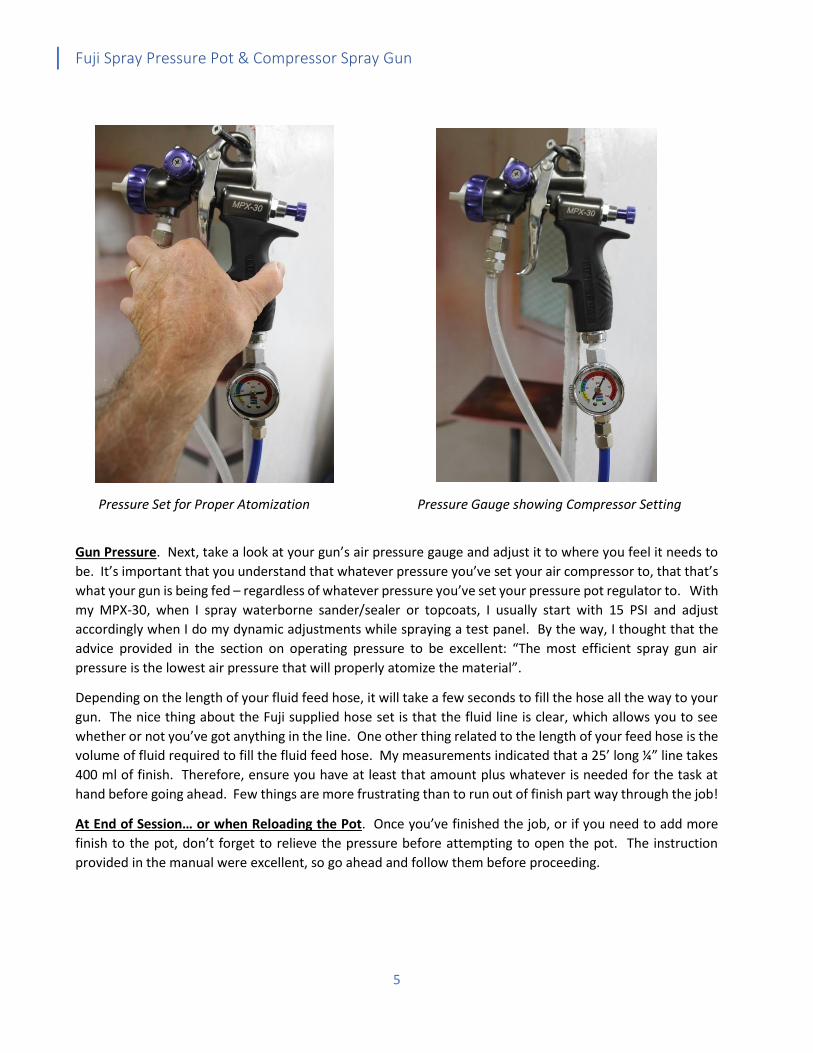
Pressure Set for Proper Atomization Pressure Gauge showing Compressor Setting
Gun Pressure. Next, take a look at your gun’s air pressure gauge and adjust it to where you feel it needs to
be. It’s important that you understand that whatever pressure you’ve set your air compressor to, that that’s
what your gun is being fed – regardless of whatever pressure you’ve set your pressure pot regulator to. With
my MPX-30, when I spray waterborne sander/sealer or topcoats, I usually start with 15 PSI and adjust
accordingly when I do my dynamic adjustments while spraying a test panel. By the way, I thought that the
advice provided in the section on operating pressure to be excellent: “The most efficient spray gun air
pressure is the lowest air pressure that will properly atomize the material”.
Depending on the length of your fluid feed hose, it will take a few seconds to fill the hose all the way to your
gun. The nice thing about the Fuji supplied hose set is that the fluid line is clear, which allows you to see
whether or not you’ve got anything in the line. One other thing related to the length of your feed hose is the
volume of fluid required to fill the fluid feed hose. My measurements indicated that a 25’ long ¼” line takes
400 ml of finish. Therefore, ensure you have at least that amount plus whatever is needed for the task at
hand before going ahead. Few things are more frustrating than to run out of finish part way through the job!
At End of Session… or when Reloading the Pot. Once you’ve finished the job, or if you need to add more
finish to the pot, don’t forget to relieve the pressure before attempting to open the pot. The instruction
provided in the manual were excellent, so go ahead and follow them before proceeding.
Fuji Spray Pressure Pot & Compressor Spray Gun
6
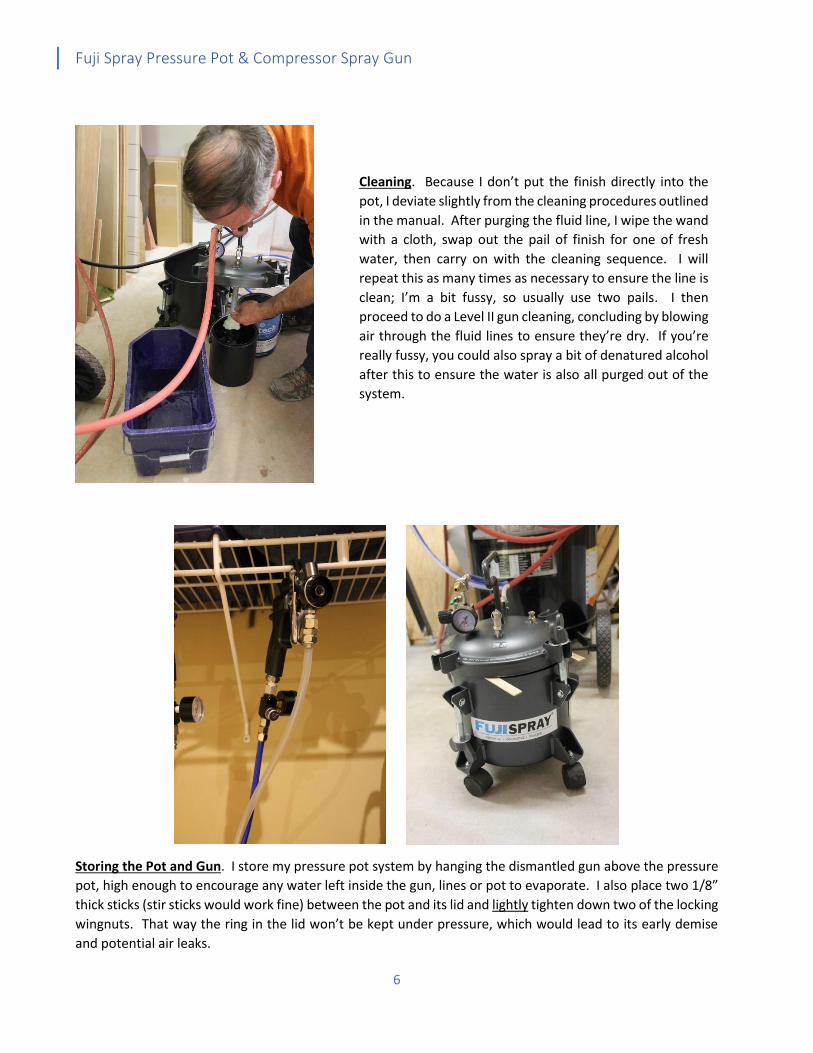
Storing the Pot and Gun. I store my pressure pot system by hanging the dismantled gun above the pressure
pot, high enough to encourage any water left inside the gun, lines or pot to evaporate. I also place two 1/8”
thick sticks (stir sticks would work fine) between the pot and its lid and lightly tighten down two of the locking
wingnuts. That way the ring in the lid won’t be kept under pressure, which would lead to its early demise
and potential air leaks.
Cleaning. Because I don’t put the finish directly into the
pot, I deviate slightly from the cleaning procedures outlined
in the manual. After purging the fluid line, I wipe the wand
with a cloth, swap out the pail of finish for one of fresh
water, then carry on with the cleaning sequence. I will
repeat this as many times as necessary to ensure the line is
clean; I’m a bit fussy, so usually use two pails. I then
proceed to do a Level II gun cleaning, concluding by blowing
air through the fluid lines to ensure they’re dry. If you’re
really fussy, you could also spray a bit of denatured alcohol
after this to ensure the water is also all purged out of the
system.

Fuji Spray Pressure Pot & Compressor Spray Gun
7
Other Valuable Uses of the Pressure Pot. As if the many advantages a pressure pot provides to your spraying
process isn’t enough, there are other things a pressure pot can do for you. Highest on my list is pressure-
saturating wood with dyes or tinted epoxy. The above photo shows me placing two maple handles into a jar
of red dye. The jar and its two pieces of wood will be placed into the pressure pot and kept there overnight
to ensure the wood becomes fully saturated with the dye. I have found that 40 PSI is adequate for this
process, and understand that the same pressure works well for saturating wood with coloured epoxy. This
process if favoured by pen turners, whose blanks often feature exciting effects which may only be achieved
through this process.
How do I change the length of the fluid or air lines? My system arrived with a 25’ fluid/air combination line,
which was about 8’ longer than required for my operation. Because it’s easy to cut these bonded hoses using
a knife, I was able to take off the necessary length quite easily. But don’t forget to remove the same length
from each of them or you could run into problems (see the right-hand photo below). Also, if you change to
a different gun, or if one of the lines become worn or breaks (very unlikely, however “stuff” happens!) you
can simply cut the line(s) and reconnect the fittings. First, carefully measure the distance between the two
inlets (air at the bottom and fluid underneath the nozzle end) before cutting each to length. In all cases, the
lines should not have any undue pressure on them which could cause kinking… and reduced flow… or
unnecessary strain on the lines that would make the gun feel awkward in your hand.

Fuji Spray Pressure Pot & Compressor Spray Gun
8
Summary. Having a pressure pot significantly improved my ability to quickly, efficiently and more
comfortably tackle kitchen cabinets and boardroom tables and such high-volume jobs. So, if you’re looking
to increase the through-put of your finishing and add pressure-saturation to your lexicon, a pressure pot may
be just the ticket you’re looking for. It certainly worked for me!
Removing and reconnecting hose ferrules is easily done with two
wrenches as shown
Potential kinking (L)
Correctly adjusted hose
length (R)
You can also adjust the pressure pot output lines