
FREE GAME - WordPress.com During the game, each player gets to decide what his or her character does...
25
FREE GAME OWEN K.C. STEPHENS FREE
Transcript of FREE GAME - WordPress.com During the game, each player gets to decide what his or her character does...

F R E E G A M E
O W E N K . C . S T E P H E N S
FREE
02
Table of Contents
How Do We Play? pg 03
The Game Session pg 04
The Smugglers of Naboo pg 05
Area 1: Jungle Clearing pg 06
Area 2: The Shrine Entrance pg 010
Area 3: The Guard Room pg 015
Area 4: The Power Generator pg 017
Area 5: The Storage Room pg 018
Area 6: The Barracks pg 020
Area 7: Saidle’s Chamber pg 020
Character Sheets: Booklet Middle
DESIGN CARTOGRAPHY
OWEN K. C. STEPHENS ROB LAZZARETTI
EDITING TYPESETTING
BRIAN CAMPBELL MARK GOETZ
EDITOR AT LUCAS LICENSING LTD CREATIVE DIRECTOR
BEN HARPER THOMAS M. REID
COVER ILLUSTRATION GRAPHIC DESIGNERS
ADAM HUGES MARK GOETZ, TRISH YOCHUM
Cre
dit
s
How Do We Play?What Is This?With this booklet, you and your friends can experience Star Wars roleplaying in an easy-to-learnformat. You’ll use your imagination to portray a daring hero living in the Star Wars universe.If you’ve ever wanted to be a noble Jedi, fierce Wookiee, or crafty scoundrel, this game is for you.
This "fast-play" version of the game is designed to give you a feel for the Star WarsRoleplaying Game. The full game contains all sorts of additional options, including rules forcreating heroic characters and designing your own adventures in the Star Wars universe.
We call this a fast-play game because you can begin playing it right away. Gather yourfriends and get ready for an adventure set long ago in a galaxy far, far away.
How Do We Play?Unlike other games, the Star Wars Roleplaying Game doesn’t have a board or playing pieces,and you don’t play it on a computer. You take the role of an imaginary hero, and the gametakes place in your imagination. This isn’t a solitary pursuit—you’ll need some of your friendsto help out. The Star Wars Roleplaying Game involves not only your character, but those ofyour friends as well.
Let’s Go! First, you need to get everything necessary to play:Your friends (up to five of them, including you),This booklet,A pencil or two,And a set of polyhedral dice with 4, 6, 8, 10, 12, or 20 sides.
Next, decide who will be the Gamemaster. The Gamemaster ("GM" for short) controls theevents of the game. That person also plays the creatures and opponents the charactersencounter. The GM is like a storyteller, so think about which of your friends would do thebest job telling a story. Most of the information in this booklet is for the GM.
After you decide who’ll be the Gamemaster, the rest of the players pick characters. Take thecharacter sheets and divide them up so that each player has a character. It’s okay forsomeone to take more than one character if there aren’t enough players.
Like the characters from the Star Wars movies, Rann I-Kanu, Arani Korden, Rorworr andGalak are heroes who go out and experience the events of a story. Your characters are thestars of the show; the Gamemaster is the director.
The GamemasterWhen you’re the GM, you coordinate the actions that take place in the game. You’re both amoderator and a referee. You tell the other players what their characters see and hear. Youhelp them resolve the success or failure of actions they take. You also choose actions forother characters in the story.
Sometimes the GM’s characters are the "bad guys." For instance, if the players want theircharacters to fight a bounty hunter they encounter, the Gamemaster decides what thebounty hunter does and resolves his actions. At the same time, the GM helps them determinewhich characters get hurt and how serious their wounds are.
03
04
During the game, each player gets to decide what his or her character does at any givenmoment. When the Gamemaster describes a group of battle droids marching into a desertedplaza, the players get to decide whether their characters attack, wait and see what the droidsdo, try to sneak away, or attempt anything else they can imagine.
The CharactersFor this game, characters are provided with the booklet. The character sheets show what eachcharacter looks like and what actions he or she can take (like striking with a lightsaber, firinga blaster, or operating a computer).
The heroes of this game usually act as a group, but each player portrays an individual character.Each one has motivations and desires that guide his or her actions. Each one has opinions onhow to aid the Republic and fight for the cause of justice.
The GM doesn’t get a character sheet. Instead, the rest of this booklet acts like a "charactersheet" for the Gamemaster. The GM plays all the other characters and creatures the playersmeet. The adventure in this booklet describes what might happen as a result.
At this point, the players should look at their character sheets for a few minutes. The GM should keep reading.
The Game SessionThis fast-play game leads you through a game session, presenting an adventure like thosefound in the Star Wars Roleplaying Game. The rules are introduced as you need them, so youdon’t have to memorize anything.
The adventure is divided into encounters. Each encounter has a number that corresponds toan area of the map. Each one has its own directions and rules, so you don’t need to readahead to the other encounters. However, if you have time, it’s helpful to skim ahead to get asense of what happens later in the story.
For each encounter, follow the directions, describe the situation as it occurs, and add yourown details. If you decide that an area has an aura of darkness that raises the hairs on acharacter’s neck, that’s okay. You’re the GM, so you should make your descriptions as vivid as possible.
When the players tell you what they want to do, you tell them whether they succeed or fail and what happens as a result. The directions and rules for each encounter will help youmake these decisions.
The game is based on dice-rolling and discussion. There’s no need to run around and actout events, although gestures and facial expressions might help convey what you’re trying tosay. A player can speak in the voice of his character ("I attack the smuggler") or refer to hischaracter in the third person ("Rorworr fires his bowcaster"). The GM can use different voiceswhile portraying the other characters (harsh, stern voices for the smugglers, or a nervous,mousy voice for the archeologist), or he can describe each scene like a narrator ("The archaeologist tells you his speeder has been stolen").
05
Gamemaster AdviceIn this booklet, you’ll find many things to help you manage the adventure. First, the map pro-vides a visual aid for the setting. It shows where the important locations are and how bigeach area is. You can also use the illustrations in this booklet to help describe the creatures ineach setting, just as the illustrations on the character sheets help you visualize each character.
As you flip through the booklet, you’ll see text in a round-cornered box. This is called"read-aloud" text. It’s meant to be read to the players to describe the setting and the situa-tion. Text in a square-cornered box tells you how to handle the battles that occur as thecharacters explore the setting. Don’t read it aloud to the players. It’s information to help youmanage fight scenes.
The Smugglers of NabooOnce the characters have looked over their character sheets, you can start to play. Begin byreading the read-aloud text to the players. In the numbered encounters, read-aloud textoften ends with a question posed to the players. Their answer to this question helps themdecide what their characters do.
Remember that the characters don’t all have to do the same thing. Galak can shoot a droidwhile Rann utilizes a Force power, even while Arani is trying to open a door. You tell themthe results of their actions: "Galak hits the droid, Rann’s Force power heals Rorworr, and Aranican’t get the door open." It’s easiest if the players take turns telling you what their charactersare doing. That way, you can handle each action individually.
When something isn’t covered in the rules, make up your own answer. That’s the GM’s job.If Rorworr’s player wants to hide behind a tree so he can attack a creature that’s running by,you need to decide whether that works.
Read the following text to the players:
Each of you controls a character: a Jedi, soldier, scout, or scoundrel. These characters live inthe Star Wars universe on the planet Naboo, before the events of The Phantom Menace. Youare all friends and know each other well. As valiant heroes, your characters are dedicated toaiding the Republic and ending all forms of injustice and evil.
As we play, I’ll describe the setting and the action as it occurs. You can tell me when yourcharacter wants to do something.
First, let’s have each of you introduce your character.
Have each player briefly describe his or her character so that everyone knows what everyoneelse can do. Then read the following text to the players:
The Galactic Republic is a vast nation spanning many star systems, including the planet ofNaboo. Jedi Knights serve as guardians and advisors to the Republic, for they are strong inthe Force. One such Jedi is Master Ali-Vor, a scholar who has come to Naboo to further thetraining of his Padawan learner, Rann I-Kanu. Master Ali-Vor regularly assigns tasks to Rann,who often enlists the aid of his friends.
06
Recently, Master Ali-Vor has been looking for smugglers who have been transporting rarecreatures off Naboo. He has asked all of you to look into reports that some of these criminalsare working out of a secret base near Theed, the capitol city of Naboo. Although Ali-Vordoesn’t consider these rumors valid, he believes the investigation will be good training forRann, as well as an opportunity to test the resourcefulness of his friends.
After a few days of checking around and asking questions, you received information aboutsmugglers from one of Arani’s trusted contacts. The contact suggested you should investigate anancient shrine hidden in the nearby jungle. She sketched a crude map to the site and handed itto Rorworr. Rorworr has used the map to lead you to near where the shrine can be found.
Proceed to the start of the adventure, Jungle Clearing.
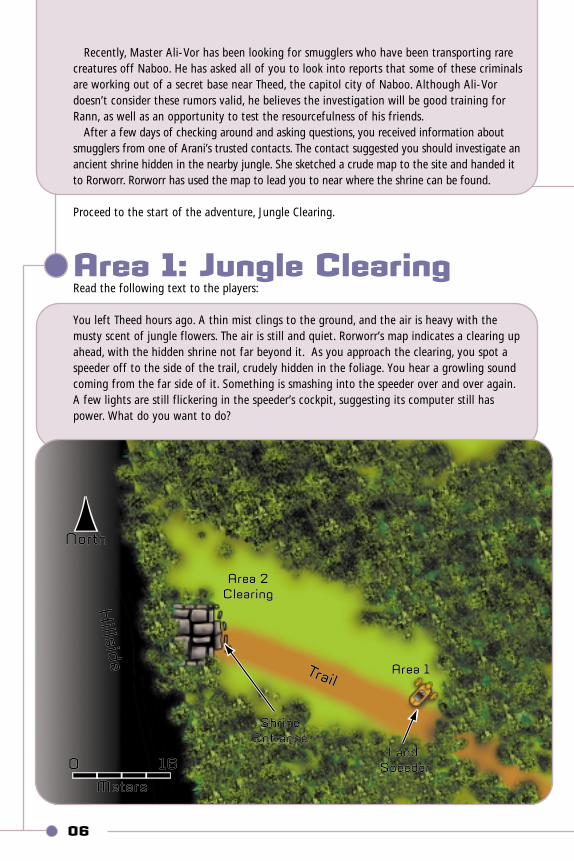
Area 1: Jungle Clearing Read the following text to the players:
You left Theed hours ago. A thin mist clings to the ground, and the air is heavy with themusty scent of jungle flowers. The air is still and quiet. Rorworr’s map indicates a clearing upahead, with the hidden shrine not far beyond it. As you approach the clearing, you spot aspeeder off to the side of the trail, crudely hidden in the foliage. You hear a growling soundcoming from the far side of it. Something is smashing into the speeder over and over again.A few lights are still flickering in the speeder’s cockpit, suggesting its computer still haspower. What do you want to do?
Area 1
Area 2
Clearing
Land
Speeder
Shrine
Entrance
Trail
Hills
ide
0 16
Meters
North
Area 1
Area 2
Clearing
Land
Speeder
Shrine
Entrance
Trail
Hills
ide
0 16
Meters
North
A Naboo archeologist piloted the speeder here to investigate the nearby shrine. When hewalked up to see who was moving into the ancient building, a band of smugglers captured himand left his vehicle behind. Now a short-tempered creature called a veermok is prowling on thefar side of the abandoned speeder. The veermok is a predator native to Naboo. It’s a littlesmaller than a lion, with powerful legs and sharp claws. If it senses the characters, it attacks.
The characters have many options at this point. Some common choices are detailed below.
Walk Up and Look at the SpeederThis is a bold, heroic course of action, though not a particularly cautious one. If thecharacters approach the speeder, the veermok notices them and leaps to attack. Refer toHandling the Fight, below.
Try to Determine What’s Attacking the SpeederThis is a very reasonable course of action. If a player’s character wants to figure out whatkind of creature might be smashing into the speeder, that player rolls 1 twenty-sided die andadds the Survival bonus listed on his character’s sheet. If the total of the die and the bonus is 13 or higher, the character determines that the creature is a veermok prowling through itsterritory. Veermoks aren’t very smart, but they’re very territorial. (Because of this, some arecaptured illegally and sold as guard animals.) Since the creature is very angry, it will probablyattack the first character who approaches it. If the heroes ignore it, it might just leave themalone. Rorworr has the best chance of working this out, since he has the largest bonus to his Survival rolls.
Ignore the Speeder and Move OnAlthough not particularly heroic, this is a possible choice. If the characters stay away fromthe speeder, they won’t be attacked by the veermok. Then again, they won’t be able to lookinside the vehicle and figure out who brought it here. Make sure the players really want toignore the speeder before moving on to the next encounter.
LeaveThe characters can decide to turn around and head back toward Theed. If they abandon theirsearch, Master Ali-Vor will be very upset. Fortunately, Rorworr can bring them back with hismap a few hours later. By then, the veermok will be gone.
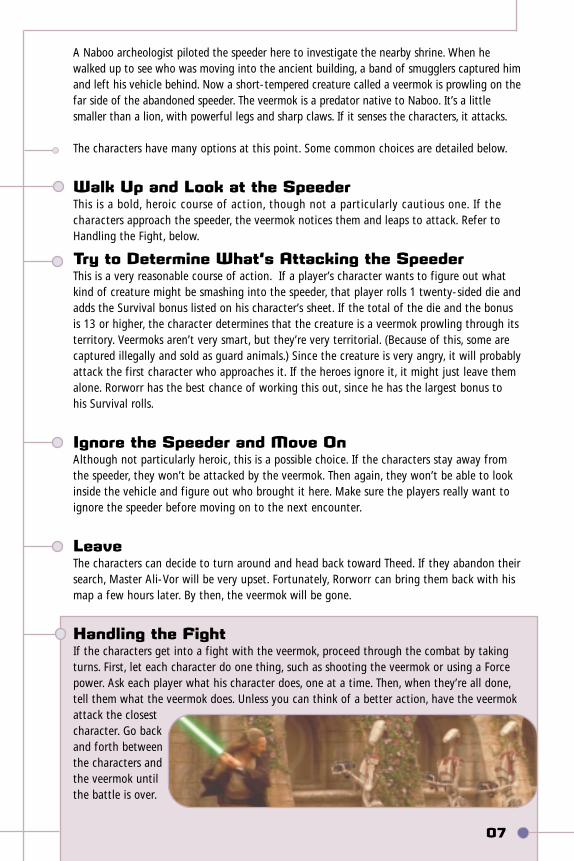
Handling the FightIf the characters get into a fight with the veermok, proceed through the combat by takingturns. First, let each character do one thing, such as shooting the veermok or using a Forcepower. Ask each player what his character does, one at a time. Then, when they’re all done,tell them what the veermok does. Unless you can think of a better action, have the veermokattack the closestcharacter. Go backand forth betweenthe characters andthe veermok untilthe battle is over.
07
08
Attacks: First, make an attack roll. When a player’s character attacks the veermok, thatplayer rolls 1 twenty-sided die and adds the character’s Attack bonus. If a player rolls a 14 or higher, the character hits. If the result is less than 14, it’s a miss. Move on to the nextcharacter after each attack.
Damage: If a character hits, the player rolls for damage. Determine how much damage the character deals by rolling the damage dice listed on the character sheet. Rorworr rolls 3 ten-sided dice for damage. Rann rolls 2 eight-sided dice, Galak rolls 3-six-sided dice andArani rolls 3 four-sided dice.
Wounds: Mark off damage from the veermok’s wounds, shown below. If the veermok haslost some but not all of its wounds, it’s injured. When you’ve marked all of the wound spaces,the veermok is dead and the fight is over.
Veermok:
Force Powers: Rann has Force powers he can use. When this happens, follow the instructionson Rann’s character sheet. Rann can use a Force power instead of attacking.
The Veermok’s Turn: When all the players have acted, it’s the veermok’s turn. The veermokattacks one character each turn. For each attack, roll 1 twenty-sided die and add 4. Check theDefense score of the character it’s attacking. If the result is equal to or higher than the character’sDefense score, the veermok hits, and you roll 1 six-sided die for damage. Have the player whosecharacter was hit mark off damage; that character is now injured. When a character’s lastwound box is filled, he is dead (and he can’t take any more actions).
Description: As you play through the battle, describe the action as if you were watching oneof the Star Wars movies. Tell the players about the sizzling hum of the lightsaber, loud explosionsfrom the blasters, and the vicious, snarling veermok as it howls and gnashes its teeth.
Once the veermok has been defeated, the characters have more options to choose from.
Examining the SpeederThe speeder is a typical one-person transport. Markings identify it as the property of Theed’sRoyal House of Learning. Its computer has been shot with a blaster and is just barely operational,but the speeder is otherwise in usable condition. If a player’s character wants to retrieveinformation from the damaged computer, the player rolls 1 twenty-sided die and adds thecharacter’s Computer Use bonus. If the total of the die and the bonus is 15 or greater, thefollowing information is retrieved.
The speeder belongs to Tasrah Boh, a professor of archeology from Theed. He’s kept hisjournal notes in his computer. His last entry is from several days ago. He left to investigatestrange activity he noticed in the shrine, but he has not returned to the speeder since.The shrine has been abandoned for centuries, but its interior is still in good condition.In addition to the obvious main entrance, there is a hidden entrance off to the side of theshrine. An ancient mechanical trap protects the hidden entrance.
Door
Secret Door
Statue
Junk Pile
Cage
Holochess Table
Bunk
= 4 Meters= 4 Meters
Area 2
Area 3
Area 4
Area 5
Area 6
Area 7
Computer
Generator
Table w/blaster rifles
North
Tasrah Boh
Door
Secret Door
Statue
Junk Pile
Cage
Holochess Table
Bunk
= 4 Meters
Area 2
Area 3
Area 4
Area 5
Area 6
Area 7
Computer
Generator
Table w/blaster rifles
Tasrah Boh
North
09
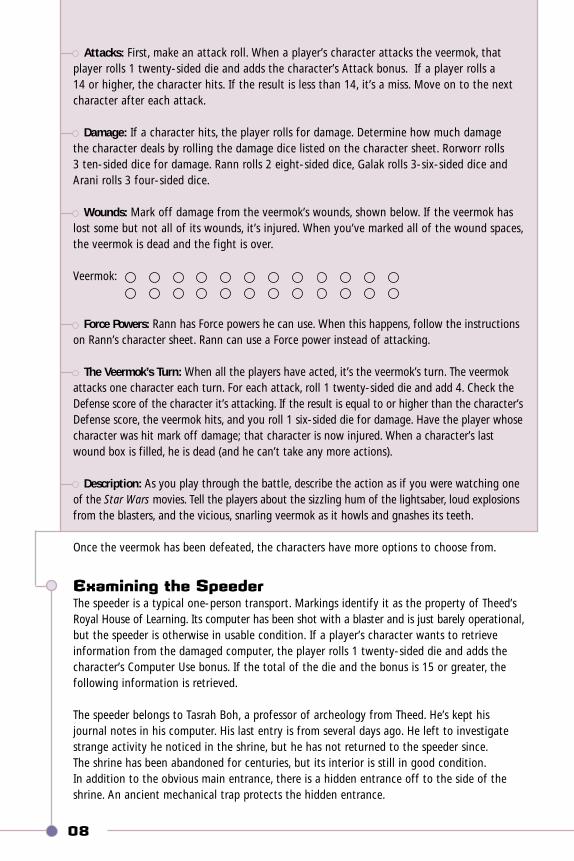
Locate the ShrineFrom here the heroes have no difficulty finding the shrine. When they get there, go to thedescription of Area 2: The Shrine Entrance.
010
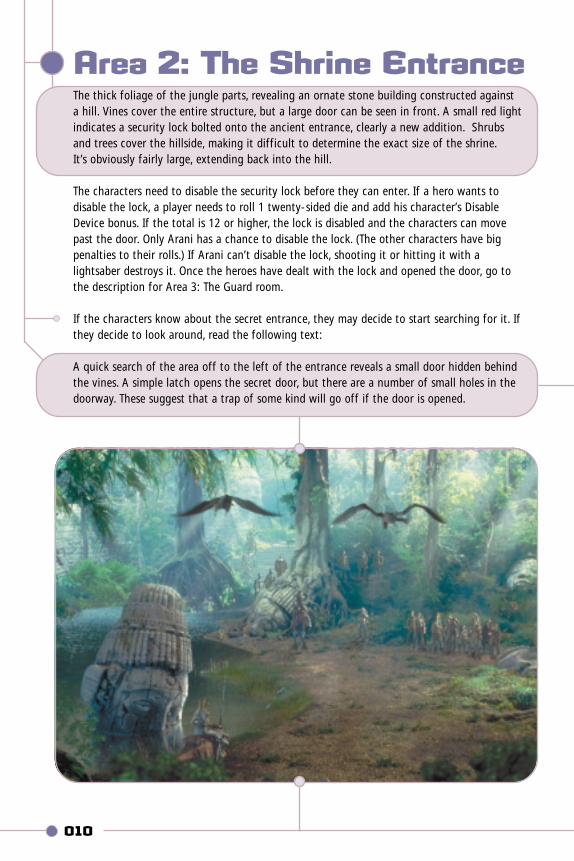
Area 2: The Shrine EntranceThe thick foliage of the jungle parts, revealing an ornate stone building constructed against a hill. Vines cover the entire structure, but a large door can be seen in front. A small red lightindicates a security lock bolted onto the ancient entrance, clearly a new addition. Shrubs and trees cover the hillside, making it difficult to determine the exact size of the shrine. It’s obviously fairly large, extending back into the hill.
The characters need to disable the security lock before they can enter. If a hero wants todisable the lock, a player needs to roll 1 twenty-sided die and add his character’s DisableDevice bonus. If the total is 12 or higher, the lock is disabled and the characters can movepast the door. Only Arani has a chance to disable the lock. (The other characters have bigpenalties to their rolls.) If Arani can’t disable the lock, shooting it or hitting it with alightsaber destroys it. Once the heroes have dealt with the lock and opened the door, go tothe description for Area 3: The Guard room.
If the characters know about the secret entrance, they may decide to start searching for it. Ifthey decide to look around, read the following text:
A quick search of the area off to the left of the entrance reveals a small door hidden behindthe vines. A simple latch opens the secret door, but there are a number of small holes in thedoorway. These suggest that a trap of some kind will go off if the door is opened.

010
Area 2: The Shrine EntranceThe thick foliage of the jungle parts, revealing an ornate stone building constructed against a hill. Vines cover the entire structure, but a large door can be seen in front. A small red lightindicates a security lock bolted onto the ancient entrance, clearly a new addition. Shrubs and trees cover the hillside, making it difficult to determine the exact size of the shrine. It’s obviously fairly large, extending back into the hill.
The characters need to disable the security lock before they can enter. If a hero wants todisable the lock, a player needs to roll 1 twenty-sided die and add his character’s DisableDevice bonus. If the total is 12 or higher, the lock is disabled and the characters can movepast the door. Only Arani has a chance to disable the lock. (The other characters have bigpenalties to their rolls.) If Arani can’t disable the lock, shooting it or hitting it with alightsaber destroys it. Once the heroes have dealt with the lock and opened the door, go tothe description for Area 3: The Guard room.
If the characters know about the secret entrance, they may decide to start searching for it. Ifthey decide to look around, read the following text:
A quick search of the area off to the left of the entrance reveals a small door hidden behindthe vines. A simple latch opens the secret door, but there are a number of small holes in thedoorway. These suggest that a trap of some kind will go off if the door is opened.

011
Rann I-KanuHuman Jedi Guardian
Rann I-Kanu is the Padawan learner of MasterAli-Vor. He is a seeker of justice and defender ofthe innocent. In combat, Rann uses a lightsaber,the weapon of a Jedi. He is also strong in theForce and has Force powers he can use.
During an adventure, Rann protects his teammates and helps defeat enemies.
Actions: Rann may attempt any of the following actions. When he does, roll 1 twenty-sided die and add the indicated bonus (or subtract the listed penalty). The GM will tell youwhether your total was high enough to succeed.
Attack: +3 bonus
Disable Device: -10 penalty
Jump: +3 bonus
Push: +2 bonus
Repair: -10 penalty
Survival: +3 bonus
Computer Use: +2 bonus
GalakHuman Soldier
Galak is a native of Naboo and a volunteer in theRoyal Security Service. He is very loyal to the peopleof Naboo, protecting them from criminals andenemies. He wears a combat jumpsuit, and hisnormal weapon is a blaster pistol. As a trainedsoldier, he is capable of using much larger weaponswhen called to do so.
During an adventure, Galak is extremely goodwith ranged weapons, providing fire support for therest of the team.
Actions: Galak may attempt any of the followingactions. When he does, roll 1 twenty-sided die andadd the indicated bonus (or subtract the listedpenalty). The GM will tell you whether your totalwas high enough to succeed.
Attack: +4 bonus
Disable Device: -10 penalty
Jump: +2 bonus
Push: +2 bonus
Repair: -10 penalty
Survival: +1 bonus
Computer Use: +1 bonus
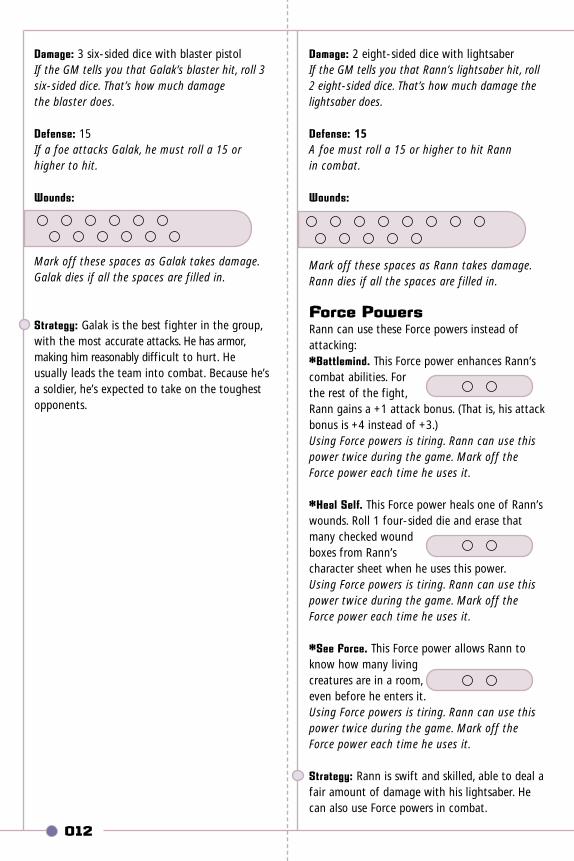
Damage: 3 six-sided dice with blaster pistolIf the GM tells you that Galak’s blaster hit, roll 3six-sided dice. That’s how much damage the blaster does.
Defense: 15If a foe attacks Galak, he must roll a 15 orhigher to hit.
Wounds:
Mark off these spaces as Galak takes damage.Galak dies if all the spaces are filled in.
Strategy: Galak is the best fighter in the group,with the most accurate attacks. He has armor,making him reasonably difficult to hurt. Heusually leads the team into combat. Because he’sa soldier, he’s expected to take on the toughestopponents.
012
Damage: 2 eight-sided dice with lightsaberIf the GM tells you that Rann’s lightsaber hit, roll2 eight-sided dice. That’s how much damage thelightsaber does.
Defense: 15A foe must roll a 15 or higher to hit Rann in combat.
Wounds:
Mark off these spaces as Rann takes damage.Rann dies if all the spaces are filled in.
Force Powers Rann can use these Force powers instead ofattacking:*Battlemind. This Force power enhances Rann’scombat abilities. Forthe rest of the fight,Rann gains a +1 attack bonus. (That is, his attackbonus is +4 instead of +3.)Using Force powers is tiring. Rann can use thispower twice during the game. Mark off theForce power each time he uses it.
*Heal Self. This Force power heals one of Rann’swounds. Roll 1 four-sided die and erase thatmany checked woundboxes from Rann’scharacter sheet when he uses this power.Using Force powers is tiring. Rann can use thispower twice during the game. Mark off theForce power each time he uses it.
*See Force. This Force power allows Rann toknow how many livingcreatures are in a room,even before he enters it.Using Force powers is tiring. Rann can use thispower twice during the game. Mark off theForce power each time he uses it.
Strategy: Rann is swift and skilled, able to deal afair amount of damage with his lightsaber. Hecan also use Force powers in combat.
013
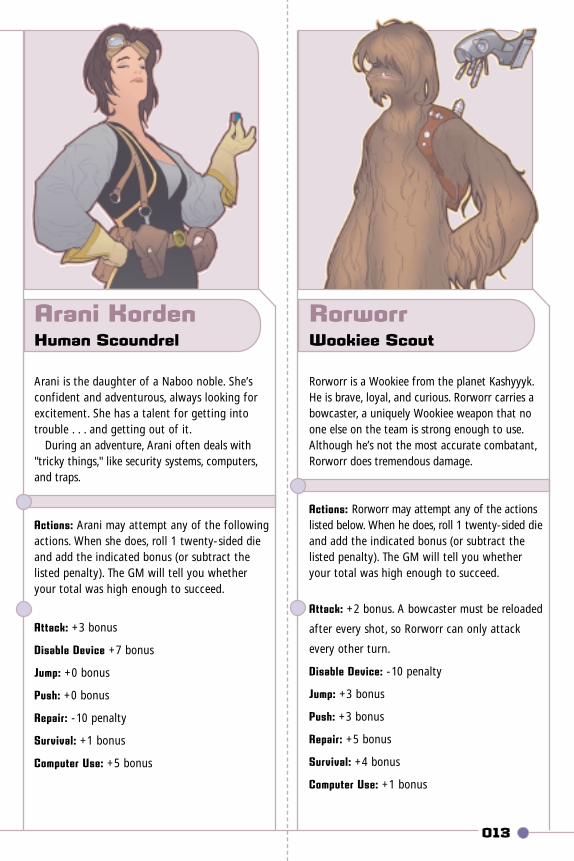
Arani KordenHuman Scoundrel
Arani is the daughter of a Naboo noble. She’sconfident and adventurous, always looking forexcitement. She has a talent for getting intotrouble . . . and getting out of it.
During an adventure, Arani often deals with"tricky things," like security systems, computers,and traps.
Actions: Arani may attempt any of the followingactions. When she does, roll 1 twenty-sided dieand add the indicated bonus (or subtract thelisted penalty). The GM will tell you whetheryour total was high enough to succeed.
Attack: +3 bonus
Disable Device +7 bonus
Jump: +0 bonus
Push: +0 bonus
Repair: -10 penalty
Survival: +1 bonus
Computer Use: +5 bonus
RorworrWookiee Scout
Rorworr is a Wookiee from the planet Kashyyyk.He is brave, loyal, and curious. Rorworr carries abowcaster, a uniquely Wookiee weapon that noone else on the team is strong enough to use.Although he’s not the most accurate combatant,Rorworr does tremendous damage.
Actions: Rorworr may attempt any of the actionslisted below. When he does, roll 1 twenty-sided dieand add the indicated bonus (or subtract thelisted penalty). The GM will tell you whetheryour total was high enough to succeed.
Attack: +2 bonus. A bowcaster must be reloaded
after every shot, so Rorworr can only attack
every other turn.
Disable Device: -10 penalty
Jump: +3 bonus
Push: +3 bonus
Repair: +5 bonus
Survival: +4 bonus
Computer Use: +1 bonus

014
Damage 3 four-sided dice with holdout blasterIf the GM tells you that Arani’s blaster hit, roll3 four-sided dice. That’s how much damage theblaster does.
Defense: 18If a foe attacks Arani, he must roll a 15 orhigher to hit.
Wounds:
Mark off these spaces as Arani takes damage.Arani dies if all the spaces are filled in.
Strategy: Arani can handle herself in a fight,but she’s not the best fighter in the group.She’s very fast and hard to hit, but doesn’t dodamage as well as she avoids it. Her expertisewith computers and security devices will makeher the best choice for many other challengesthe heroes will face.
Damage: 3 ten-sided dice with bowcaster. Abowcaster must be reloaded after every shot, soRorworr can only attack every other turn.If the GM tells you that Rorworr’s bowcasterhits, roll 3 ten-sided dice. That’s how muchdamage the bowcaster does.
Defense: 14If a foe attacks Rorworr, he must roll a 14 or higher to hit.
Wounds:
Mark off these spaces as Rorworr takes damage.Rorworr dies if all the spaces are filled in.
Strategy: Rorworr is good at fixing things andidentifying dangers in the wilderness. He’s also afair fighter and can back up others in combat.
015
A character opening the door without disabling the trap takes 1 six-sided die of damage.Mark the wounds on that character’s sheet. If a hero wants to disable the trap, a player needs to roll 1 twenty-sided die and add his character’s Disable Device bonus. If the total is 12 or higher, the trap has been disabled. Only Arani has a good chance of disarming the trap. (All the other characters have big penalties to their rolls.) Each character can make one attempt. Once the heroes have opened the secret door, go to the description for Area 3: The Guard room.
Area 3: The Guard RoomThe doorway opens into a large stone room. Glowlamps have been bolted onto the walls toprovide illumination. Power cables run along the ceiling and down the corridor leading fromthe room. In the middle of the room, there’s a hologame table and a few chairs. Four scruffy-looking men with facemasks and blasters stand near the table, their weapons ready in theirhands. What do you do?
These men are smugglers. If the heroes came in the front door, the smugglers attack themimmediately. If the heroes came in the secret door, they’ll have enough time to confer witheach other briefly before attacking.
Handling the FightPlay through the combat by taking turns (just like the fight with the veermok). If the charac-ters attack from the secret door, they surprise the smugglers and may each act twice beforethe smugglers get a turn. After that, the heroes and smugglers take turns normally.
Attacks: When a player’s character attacks a smuggler, the player rolls 1 twenty-sided dieand adds the character’s Attack bonus. He needs a 12 or higher to hit.
Damage: If the attack hits, determine how much damage the character does by rolling thedamage dice listed on the character sheet. Mark off the smugglers’ wounds below.
Wounds: Each smuggler has eleven wounds.
Smuggler #1: Smuggler #2: Smuggler #3: Smuggler #4:
When you’ve marked all of a smuggler’s wound spaces, he is dead (and can’t take any moreactions). When all the smugglers are dead, the fight is over.
Force Powers: Rann has Force powers he can use. When this happens, follow the instructionson Rann’s character sheet. Rann can use a Force power instead of attacking.
The Smugglers’ Turn: When all the players have acted, it’s the smugglers’ turn. Each smugglerattacks a different character each turn. For each attack, roll 1 twenty-sided die and add 1.
016
Check the Defense score of the defending character. If the result is equal to or higher thanthe character’s Defense, the smuggler hits; roll 3 six-sided dice for damage. Have the playerwhose character was hit mark off wounds. That character is now injured. When all of acharacter’s wound spaces have been marked, he is dead (and can’t take any more actions).
Description: As you play through the battle, describe the action. Tell everyone about thestartled smugglers scrambling for cover, or emulate their wild howls as they fire blasters atthe heroes.
Once the fight is over, the characters have options to choose from again.
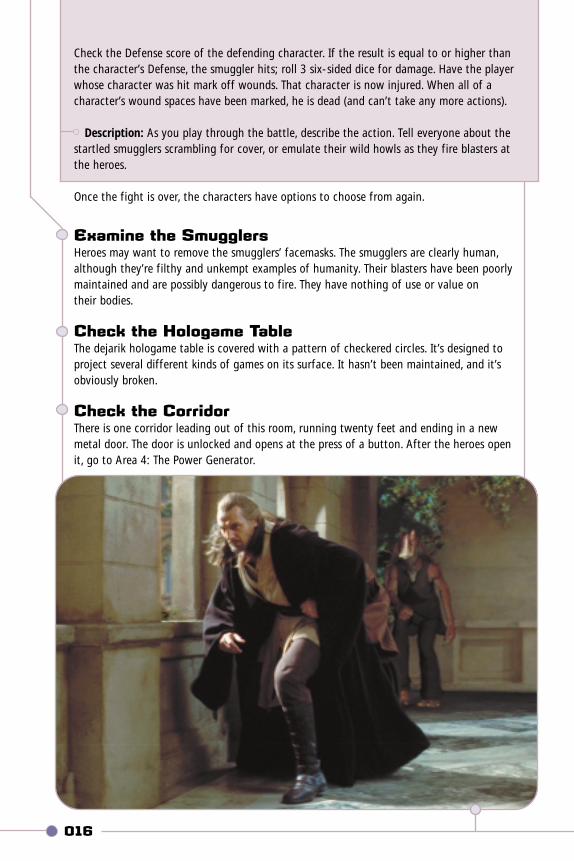
Examine the SmugglersHeroes may want to remove the smugglers’ facemasks. The smugglers are clearly human,although they’re filthy and unkempt examples of humanity. Their blasters have been poorlymaintained and are possibly dangerous to fire. They have nothing of use or value on their bodies.
Check the Hologame TableThe dejarik hologame table is covered with a pattern of checkered circles. It’s designed toproject several different kinds of games on its surface. It hasn’t been maintained, and it’sobviously broken.
Check the Corridor There is one corridor leading out of this room, running twenty feet and ending in a newmetal door. The door is unlocked and opens at the press of a button. After the heroes open it, go to Area 4: The Power Generator.
017
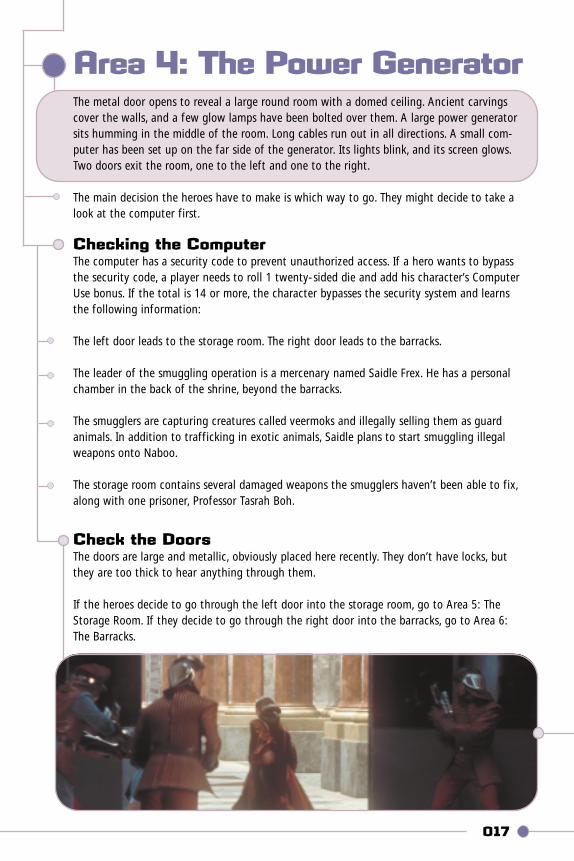
Area 4: The Power GeneratorThe metal door opens to reveal a large round room with a domed ceiling. Ancient carvingscover the walls, and a few glow lamps have been bolted over them. A large power generatorsits humming in the middle of the room. Long cables run out in all directions. A small com-puter has been set up on the far side of the generator. Its lights blink, and its screen glows.Two doors exit the room, one to the left and one to the right.
The main decision the heroes have to make is which way to go. They might decide to take alook at the computer first.
Checking the Computer The computer has a security code to prevent unauthorized access. If a hero wants to bypassthe security code, a player needs to roll 1 twenty-sided die and add his character’s ComputerUse bonus. If the total is 14 or more, the character bypasses the security system and learnsthe following information:
The left door leads to the storage room. The right door leads to the barracks.
The leader of the smuggling operation is a mercenary named Saidle Frex. He has a personalchamber in the back of the shrine, beyond the barracks.
The smugglers are capturing creatures called veermoks and illegally selling them as guardanimals. In addition to trafficking in exotic animals, Saidle plans to start smuggling illegalweapons onto Naboo.
The storage room contains several damaged weapons the smugglers haven’t been able to fix,along with one prisoner, Professor Tasrah Boh.
Check the DoorsThe doors are large and metallic, obviously placed here recently. They don’t have locks, butthey are too thick to hear anything through them.
If the heroes decide to go through the left door into the storage room, go to Area 5: TheStorage Room. If they decide to go through the right door into the barracks, go to Area 6:The Barracks.
018
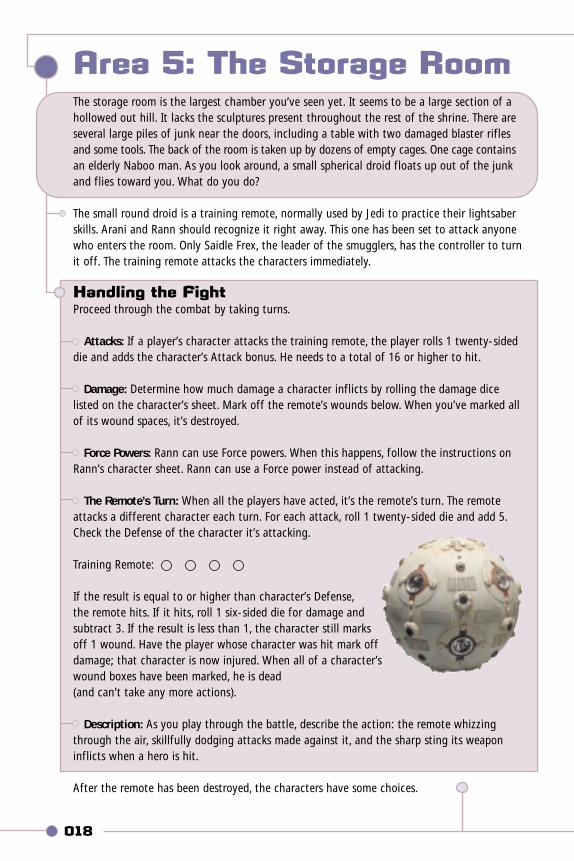
Area 5: The Storage RoomThe storage room is the largest chamber you’ve seen yet. It seems to be a large section of ahollowed out hill. It lacks the sculptures present throughout the rest of the shrine. There areseveral large piles of junk near the doors, including a table with two damaged blaster riflesand some tools. The back of the room is taken up by dozens of empty cages. One cage containsan elderly Naboo man. As you look around, a small spherical droid floats up out of the junkand flies toward you. What do you do?
The small round droid is a training remote, normally used by Jedi to practice their lightsaberskills. Arani and Rann should recognize it right away. This one has been set to attack anyonewho enters the room. Only Saidle Frex, the leader of the smugglers, has the controller to turnit off. The training remote attacks the characters immediately.
Handling the FightProceed through the combat by taking turns.
Attacks: If a player’s character attacks the training remote, the player rolls 1 twenty-sideddie and adds the character’s Attack bonus. He needs to a total of 16 or higher to hit.
Damage: Determine how much damage a character inflicts by rolling the damage dicelisted on the character’s sheet. Mark off the remote’s wounds below. When you’ve marked allof its wound spaces, it’s destroyed.
Force Powers: Rann can use Force powers. When this happens, follow the instructions onRann’s character sheet. Rann can use a Force power instead of attacking.
The Remote’s Turn: When all the players have acted, it’s the remote’s turn. The remoteattacks a different character each turn. For each attack, roll 1 twenty-sided die and add 5.Check the Defense of the character it’s attacking.
Training Remote:
If the result is equal to or higher than character’s Defense, the remote hits. If it hits, roll 1 six-sided die for damage and subtract 3. If the result is less than 1, the character still marksoff 1 wound. Have the player whose character was hit mark offdamage; that character is now injured. When all of a character’swound boxes have been marked, he is dead (and can’t take any more actions).
Description: As you play through the battle, describe the action: the remote whizzingthrough the air, skillfully dodging attacks made against it, and the sharp sting its weaponinflicts when a hero is hit.
After the remote has been destroyed, the characters have some choices.
Free Tasrah Boh The cage containing Tasrah Boh has a simple electronic lock. If a hero wants to open the lock,a player needs to roll 1 twenty-sided die and add his character’s Disable Device bonus. If the total is 8 or more, the lock opens.
Talk to Tasrah BohTasrah Boh is very grateful the heroes have come to rescue him. He’s an older, dignified manwho is not used to dealing with smugglers or being imprisoned. As the GM, you play the roleof Tasrah Boh for the short time he’s involved with the players. You decide what actions hetakes and what he says. Although Tasrah’s pretty shaken up, he does his best to answer any of the heroes’ questions.
Here are some questions characters might ask:Who are you?
"My name is Tasrah Boh. I’m a professor of archeology at the Naboo Royal House of Learning."What are you doing here?
"I spend a great deal of time looking at the ancient ruins of Naboo. I thought I saw some people moving equipment into this shrine and came to ask what they were doing. They captured me and shot my speeder."
Who are these people?"I have no idea what their names are, but I overheard their leader say they were planning to capture veermoks and sell them offworld. I’m quite sure that’s illegal!"
Who is their leader?"I only saw him briefly, but he is a large man in armor with a blaster pistol."
What do you want to do now?"I must get back to the House of Learning. By now, my colleagues must be terribly worried about me. And you four must finish rousting out this band of criminals before they hurt someone!"
At the end of the conversation, Tasrah Boh leaves to take his speeder back to Theed. Nothingthe heroes say can convince him to remain here or help them. He’s an elderly scholar and notmuch good in a fight.
Looking at the Blaster Rifles The two blaster rifles on the table are malfunctioning due to poor maintenance. If a herowants to repair a rifle, a player needs to roll 1 twenty-sided die and add his character’s Repairbonus. If the total is 15 or more, the character has repaired one rifle. A separate roll must bemade for each rifle. A character can make one attempt to fix each rifle.
A character using a blaster rifle does 3 eight-sided dice of damage instead of whateverdamage he has listed for his own weapon.
If the heroes have already defeat-ed Saidle Frex, this area is the endof the adventure. If they haven’t,they’ll need to backtrack to thepower generator (Area 4) andproceed to the barracks (Area 6).
019
020
Area 6: The BarracksThe door opens into a small, cramped room. A single glow lamp has been bolted to theceiling, providing dull illumination. Four broken statues sit in the corners of the room withsheets draped over them. There are five cots crammed into the room, with food, clothes, andtrash scattered on, around, and under them. There is a thick smell of stale food and sweat. A single door at the far end of the room leads out.
The heroes can search the room, or they can proceed directly to Area 7: Saidle’s Chamber.
Searching the Room It takes several minutes for the heroes to search the room thoroughly. The only useful itemsthe characters discover are four medpacs. Each medpac can restore 1 wound to one character.If a player uses a medpac, have him erase one of his character’s wound boxes. After a medpachas been used once, it’s useless.
When the heroes move through the door, go to Area 7: Saidle’s Chamber.
Area 7: Saidle’s ChamberAfter the heroes enter the room from the barracks (Area 6), read the following text:
You stand on a ledge in front of a deep crevice. A narrow metal catwalk spans the crevice,leading to a large open area. Many computers and consoles have been bolted to the walls.Dim glow lamps hang from the ceiling. At the far end of the room, a large, armored figurestands with his back to you, looking at one of the computer screens. Beside him is a smugglerwith a large vibro-ax in his hands.
The figures in the room are the mercenary Saidle Frex and the leader of the smugglers he’shired. As long as the characters don’t make much noise and stay off the metal catwalk, Saidleand his underling are too involved with the computer to notice them. If the heroes haven’ttaken the blaster rifles from the storage room (Area 5) and the medpacs from the barracks(Area 6), they might be better off going back for them before taking on Saidle. However, thedecision is up to the players. Let them decide what their characters want to do.
Sneak AwayIf the heroes haven’t attracted the mercenary’s attention, they can sneak away without difficulty.
021
Cross the CreviceThe heroes can either rush across the narrow catwalk or jump over the crevice. If a player’scharacter wants to jump across, that player rolls 1 twenty-sided die and adds his character’sJump bonus. If the total is 12 or higher, the character jumps across safely and can attack. If the total is less than 12, the character falls into the crevice. The character takes 1 six-sided dieof wounds and must spend an action climbing out before he can attack.
Attacking from the LedgeAny character with a blaster or a bowcaster may fire across the crevice without crossing it. IfRann is using his lightsaber, he must cross to attack.
If the characters attack without crossing the crevice, Saidle and the smuggler come acrossthe catwalk and fight back.
Push Someone into the CreviceIf the fight takes place on the catwalk or near the ledge, a character may attempt to push afoe into the crevice. Pushing a foe is a two-step process. First, a player rolls 1 twenty-sideddie and adds his character’s Attack bonus. If he hits, he does 1 four-sided die of damage. (IfRann attempts this, he may roll his normal lightsaber damage of 2 eight-sided dice).
If the attack succeeds, the player rolls 1 twenty-sided die again, this time adding the character’sPush bonus. If the total is 15 or higher, the character pushes his foe into the crevice. Roll 1 six-sided die and mark off that many wounds. Before the foe can attack again, he musttake one action to crawl out of the crevice.
Handling the FightProceed through the combat by taking turns.
Attacks: When a player’s character attacks a foe, the player rolls 1 twenty-sided dice andadds the character’s Attack bonus. If a character attacks Saidle, the player needs to a total of15 or higher to hit. When attacking the smuggler, only a 12 is required.
Damage: Determine how much damage a character does by rolling the dice listed on thecharacter’s sheet. Mark off the foe’s wounds below. When you’ve marked all of a foe’s woundspaces, he is dead (and can’t take any more actions).
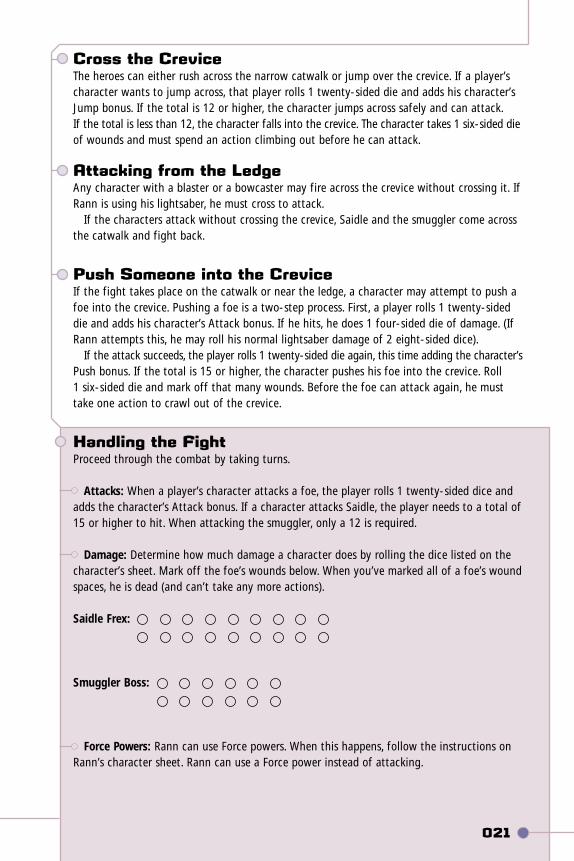
Saidle Frex:
Smuggler Boss:
Force Powers: Rann can use Force powers. When this happens, follow the instructions onRann’s character sheet. Rann can use a Force power instead of attacking.
022
The Opponents’ Turn: When all the heroes have acted, Saidle and the smuggler get a turn.First, pick a target for the smuggler. He’ll attack a character on the catwalk if possible.Because he’s using a vibro-ax, he can’t attack someone on the opposite side of the crevice.Roll 1 twenty-sided die and add 2. Check the Defense score of the character he’s trying to hit.If the total is equal to or higher than the character’s Defense, the smuggler hit. Roll 2 ten-sideddice, and have the player mark that many wounds on his character sheet; that character isnow injured. When all of a character’s wound spaces have been marked, he is dead (and can’ttake anymore actions).
Then pick a target for Saidle. Saidle attacks a different character than the smuggler. Roll 1 twenty-sided die and add 4. If Saidle’s result is equal to or higher than the character’sDefense, Saidle hit. Roll 3 six-sided dice, and have the player mark that many wounds off hischaracter’s sheet.
Using Medpacs: The heroes may have brought medpacs from Area 6. A medpac can restore1 wound to one character. If a player uses a medpac, have him erase one of his character’swound boxes. After a medpac has been used once, it’s useless.
Description: As you play through the battle, describe the action as you have in the previousfights. This is the climactic final scene of the adventure, and Saidle is the most dangerous opponent the heroes have faced yet. Dramatically describe the screech of blaster fire, the hugeswings of the smuggler’s vibro-ax, and Saidle’s loud curses as he does battle with the heroes.
After the fight, the characters may choose from any of the actions below.
Check the ComputerThe computer Saidle Frex was looking at contains information on his contacts in Theed, aswell as his employers in Hutt Space. Although there isn’t much the heroes can do with thisinformation, it might be very useful to Master Ali-Vor.
Check the SmugglerThe smuggler’s face is badly scarred under his facemask. He has a large vibro-ax in goodworking condition and 20 dataries. (These are Republic credits, used as money in the realm ofspace controlled by the Republic.) A hero may decide to take the vibro-ax; it does 2 ten-sideddice of damage.
Check Saidle FrexThe mercenary has some scarred battle armor, a blaster pistol, and 50 dataries (Republiccredits). He also has the controller to the training remote droid in Area 5: The Storage Room.If the characters have not yet destroyed the remote, they can use this controller to turn it off.
Congratulate your players.The heroes have defeated the veermok smugglers and rescued Tasrah Boh!

NOTES:

Get ready for yournext mission.
Look for these products at a book or hobby store near you or check out www.wizards.com/starwars for more information.
This fast-play game is just a quick introduction to roleplaying in the Star Wars universe.
The Star Wars Adventure Game offers you and your friendsa whole galaxy of adventure — with more Force powers,
more options and equipment, and more adversaries and allies.
And once you’ve completed those missions, you’ll be ready to explore the Star Wars Roleplaying Game, which lets you create your own characters and adventures.
The only limit to the game is your imagination.
©2001 Lucasfilm Ltd. & ® or TM where indicated. All rights reserved. Used under authorization.WIZARDS OF THE COAST is a registered trademark of Wizards of the Coast, Inc.
www.wizards.com www.starwars.com


![[GameMaster 리포트 #1] 모바일 게임 마케팅 사전예약 동향](https://static.fdocuments.net/doc/165x107/55cfd792bb61ebbf378b4568/gamemaster-1-.jpg)