Forces in Fluids: Pressure, Buoyancy, and Archimedes...
23
Forces in Fluids: Pressure, Buoyancy, and Archimedes’ Principle Ryan Hubbard Arellanes Jr. High School Grade Level: 8-12 Subject Area: Physical Science Project Summary: This is a collection of lessons to ultimately explain why objects either sink or float. We begin by discussing pressure in fluids, what causes it, and how it varies with the depth of the fluid. This leads into a discussion of the buoyant force and how it is created by differences in pressure. Archimedes’ Principle is then brought in to show how the magnitude of the buoyant force is related to the volume of fluid that the object displaces. All concepts and ideas are backed up with interesting demonstrations and activities using fairly common objects. The students will get hands-on experience with fluid displacement, buoyant force, and Archimedes’ Principle.
Transcript of Forces in Fluids: Pressure, Buoyancy, and Archimedes...

Forces in Fluids: Pressure, Buoyancy, and Archimedes’ Principle
Ryan Hubbard Arellanes Jr. High School
Grade Level: 8-12 Subject Area: Physical Science
Project Summary: This is a collection of lessons to ultimately explain why objects either sink or float. We begin by discussing pressure in fluids, what causes it, and how it varies with the depth of the fluid. This leads into a discussion of the buoyant force and how it is created by differences in pressure. Archimedes’ Principle is then brought in to show how the magnitude of the buoyant force is related to the volume of fluid that the object displaces. All concepts and ideas are backed up with interesting demonstrations and activities using fairly common objects. The students will get hands-on experience with fluid displacement, buoyant force, and Archimedes’ Principle.

Forces in Fluids 2
Introduction: Project Description: The teacher-directed, student input part of this project is based on
two of Powerpoint slideshows that I have created. The slides are graphic-rich and simply
worded. The reading level of the majority of students in my classes is fairly low, so I use
lecture and discussion, with heavy emphasis on visuals and demonstrations, to get the
concepts into the students. The pictures and demonstrations allow the students to see
what I am explaining and helps to bring the learning out of the textbook and into the “real
world”. Graphics automatically increase student engagement because they enjoy looking
at pictures and diagrams. A page full of text is a turn-off for many students.
Educational Value: Students have lots of experience with floating and sinking objects, so
it is natural for them to be curious about why it happens. (How can a boat that is made of
metal float?) The demonstrations only help to build on this enthusiasm and curiosity.
The two major hands-on lab investigations directly support and offer evidence for the
concepts that were presented in the slideshows. The students get to prove to themselves
that the ideas we have been discussing are true and correct, they don’t just have to take
my word for it. These two lab investigations have gone through extensive revision since
I first developed them. I have made changes each time I have used them and now I
believe them to be very solid, thorough, and engaging activities.
Lesson Plans:

Forces in Fluids 3
Teacher Tips:
Before beginning this unit, students should be comfortable with the concept of force
arrows, balanced forces, and unbalanced forces. It is helpful too, for the discussion of
fluids if they understand the nature of particle movement in liquids and gases. After the
two big lab investigations, be sure to leave time to discuss the results as a class and allow
students to share their findings/learning.
Lesson #1 Pressure in Fluids (3 days, 120-160 minutes depending on the
demonstrations) This lesson will establish/explain the forces involved in creating pressure in fluids. I use
the graphic-rich PowerPoint presentations as a lecture and note-taking guide. I also use
several “wow” demonstrations to offer evidence of the facts presented on the PowerPoint
slides.
Objectives:
Students will be able to explain why there is pressure in fluids, why pressure increases
when you go deeper in fluids, and will be able to explain the reasons behind several
observed pressure phenomena (demonstrations).
Establishing interest in the topic:
You can shoot suction-cup darts at the white board and ask why they stick, or simply ask
if students can feel the 15 pounds of weight pushing on every square inch of their body.
It is helpful to have a 15 pound weight (3 bags of flour taped together?) for them to feel
as reference. Also some square inch pieces of cardboard for reference so they can get a
real physical idea of the 15 pounds per square inch. (Atmospheric pressure is 14.7 psi at
sea level.) The students, of course are not able to feel this pressure, which leads into the
question of; Why not?
Lecture/Guided Note-taking:
In my classes, students copy information from the PowerPoint slides into their notebooks.
There is text that appears red and yellow on the slides. They highlight that text with two
different colors of highlighter. Use the PowerPoint slides and any diagrams/visuals in
your textbook to explain the definition and causes of pressure in fluids. The particles in a
fluid are free to move around so they create tiny forces as they push against a surface.

Forces in Fluids 4
Pressure on solids is different because the particles can’t move around each other. Also
use the diagrams to explain how depth of a fluid is related to the pressure (deeper = more
pressure). This is a good time to talk about air pressure and why we can’t feel it pushing
on us. It is also a good time to talk about pressure on your ears when you drive into/out
of the mountains.
Activity/Demonstration:
An excellent way for students to feel the true atmospheric pressure is to have them climb
into a jumbo sized plastic trash bag with the business end of a vacuum cleaner. Have a
student volunteer climb into a bag up to their neck (not over their head, please!) and have
the student hold the suction end of the vacuum. Wrap up the open end of the bag around
their neck and the vacuum hose, and keep it as sealed as possible. It does not have to be
perfectly tight, just don’t leave any big gaps. Turn on the vacuum and it will remove all
of the free air in the bag, as well as a good portion of the outward pressure from their
body. They will be able to feel the atmosphere pushing in on them in all directions. It is
very intense and unforgettable. A couple of good points to make: 1) Contrary to solid-
object pressure, the pressure they feel is not only on top, but it all directions. This is
because the particles are free to move around each other. 2) The vacuum is not pulling
the bag onto their body, it is taking pressure away so that they can feel the air pressure
pushing in.
An alternative, though not as much fun is to have a volunteer put their arm into a plastic
bag and submerge it into a 5 gal. bucket of water. The bag allows them to feel the
pressure isolated from the wetness, so it is more discernable.
Other demonstrations:
Suction cups: Suction cups stick only because atmospheric pressure pushes them against
a surface. They are not pulled by suction, but are pushed by pressure. Magdeburg
hemispheres (from Arbor Scientific) are basically large suction cups that are held
together by pressure and are very difficult to get apart.
Atmospheric mat: The atmospheric mat from Arbor Scientific is very impressive, it
always gets some “oohs” and “aahs”. It is basically a flat sheet of rubber that is held
against a surface by air pressure. I use it to pick up a wooden stool; the kids think it is a

Forces in Fluids 5
magic trick. You can also make your own from a piece of rubber gasket material from a
hardware store.
Karate chop lath breaker: You can lay a few sheets of newspaper over a thin wooden
stick (redwood lath) with the end of the stick (about 25 cm) poking out from the paper
and sticking out from the edge of a table. Hit the exposed stick end and students will
expect it to lift the newspaper. What actually happens is that the weight of the air on the
paper will hold it down and the stick will break. Please practice first and wear safety
glasses.
Upside-down cup: Another common demonstration of atmospheric pressure is to fill a
cup with water, place a piece of thick paper or cardboard on top, flip them both over and
the air pressure will push the paper up against the cup and keep the water from coming
out. Very simple, but they love to see this.
Can Crusher: The kids also love to see the “can crusher” demonstration. This is a simple
setup; you need some empty aluminum cans, a bunson burner of some sort, and a bowl of
very cold ice water. Pour a few mL of water into the can and heat it with the torch until
there is a nice jet of steam shooting out. Quickly flip the can upside-down into the bowl
of ice water. The cold water will immediately lower the pressure inside the can and it
will be instantly and dramatically crushed by the high atmospheric pressure on the
outside.
Homework/Independent Practice: See attached Pressure worksheet.
Video Support: The Bill Nye: Pressure video (25 min.) has some great visuals to demonstrate the ideas
discussed above. It is available for borrow or streaming through the county portal.
Lesson #2: Archimedes Principle and Buoyancy (50-60 minutes) This lesson will establish/explain the idea that there is an upward force on all objects in a
fluid. The PowerPoint presentations very graphic-rich and are intended as a lecture and
note-taking guide.
Objectives:
Forces in Fluids 6
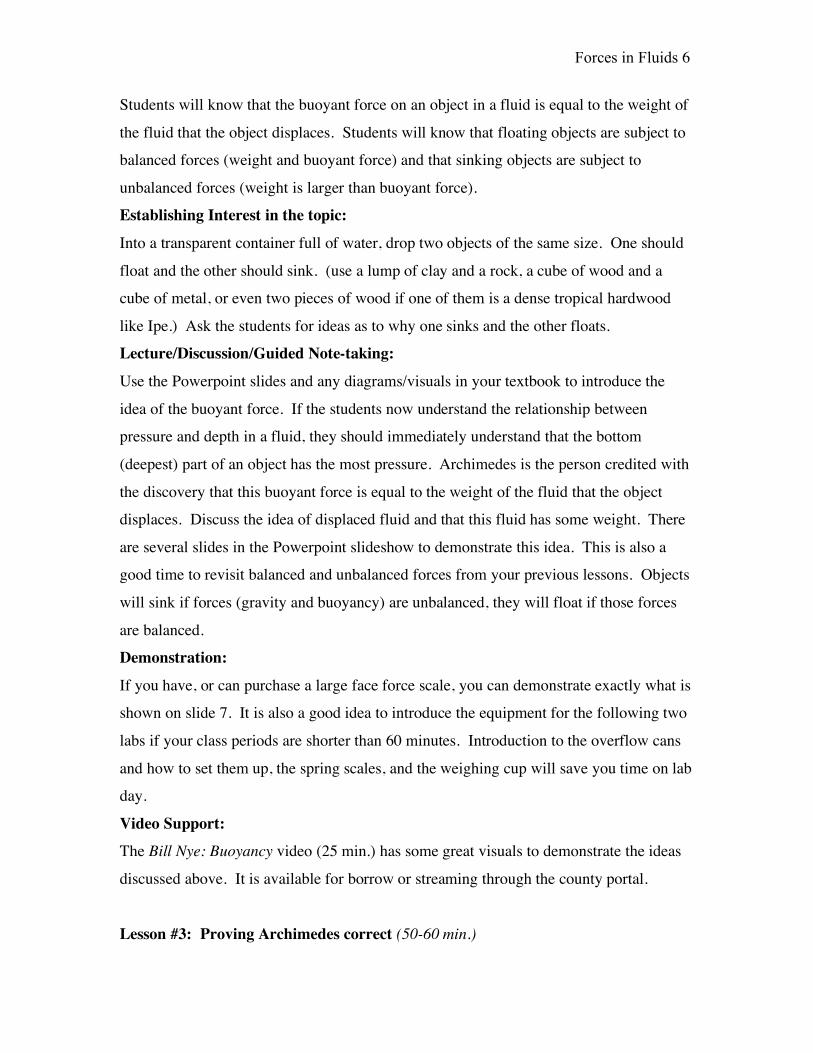
Students will know that the buoyant force on an object in a fluid is equal to the weight of
the fluid that the object displaces. Students will know that floating objects are subject to
balanced forces (weight and buoyant force) and that sinking objects are subject to
unbalanced forces (weight is larger than buoyant force).
Establishing Interest in the topic:
Into a transparent container full of water, drop two objects of the same size. One should
float and the other should sink. (use a lump of clay and a rock, a cube of wood and a
cube of metal, or even two pieces of wood if one of them is a dense tropical hardwood
like Ipe.) Ask the students for ideas as to why one sinks and the other floats.
Lecture/Discussion/Guided Note-taking:
Use the Powerpoint slides and any diagrams/visuals in your textbook to introduce the
idea of the buoyant force. If the students now understand the relationship between
pressure and depth in a fluid, they should immediately understand that the bottom
(deepest) part of an object has the most pressure. Archimedes is the person credited with
the discovery that this buoyant force is equal to the weight of the fluid that the object
displaces. Discuss the idea of displaced fluid and that this fluid has some weight. There
are several slides in the Powerpoint slideshow to demonstrate this idea. This is also a
good time to revisit balanced and unbalanced forces from your previous lessons. Objects
will sink if forces (gravity and buoyancy) are unbalanced, they will float if those forces
are balanced.
Demonstration:
If you have, or can purchase a large face force scale, you can demonstrate exactly what is
shown on slide 7. It is also a good idea to introduce the equipment for the following two
labs if your class periods are shorter than 60 minutes. Introduction to the overflow cans
and how to set them up, the spring scales, and the weighing cup will save you time on lab
day.
Video Support: The Bill Nye: Buoyancy video (25 min.) has some great visuals to demonstrate the ideas
discussed above. It is available for borrow or streaming through the county portal.
Lesson #3: Proving Archimedes correct (50-60 min.)

Forces in Fluids 7
This is a lab activity to establish that the buoyant force actually is equal to the weight of
the displaced fluid, and that objects will sink if their weight is greater than the weight of
the fluid that they displace.
Objectives: Students will prove to themselves that the buoyant force is equal to the weight of the
displaced water. Students will be able to draw a diagram of floating/sinking objects and
label the objects with appropriate force arrows.
Equipment needed (per group):
Spring Scale that reads in Newtons (0-5 Newton range)
Overflow can
Small beaker or cup
Small plastic cup with wire handle to hook on the spring scale (like a bucket
handle). You will have to build these. It is easy enough, and they can be
reused indefinitely.
(7) Large metal washers that will fit in the bottom of the small cup above
A small rock that will fit into the small cup above
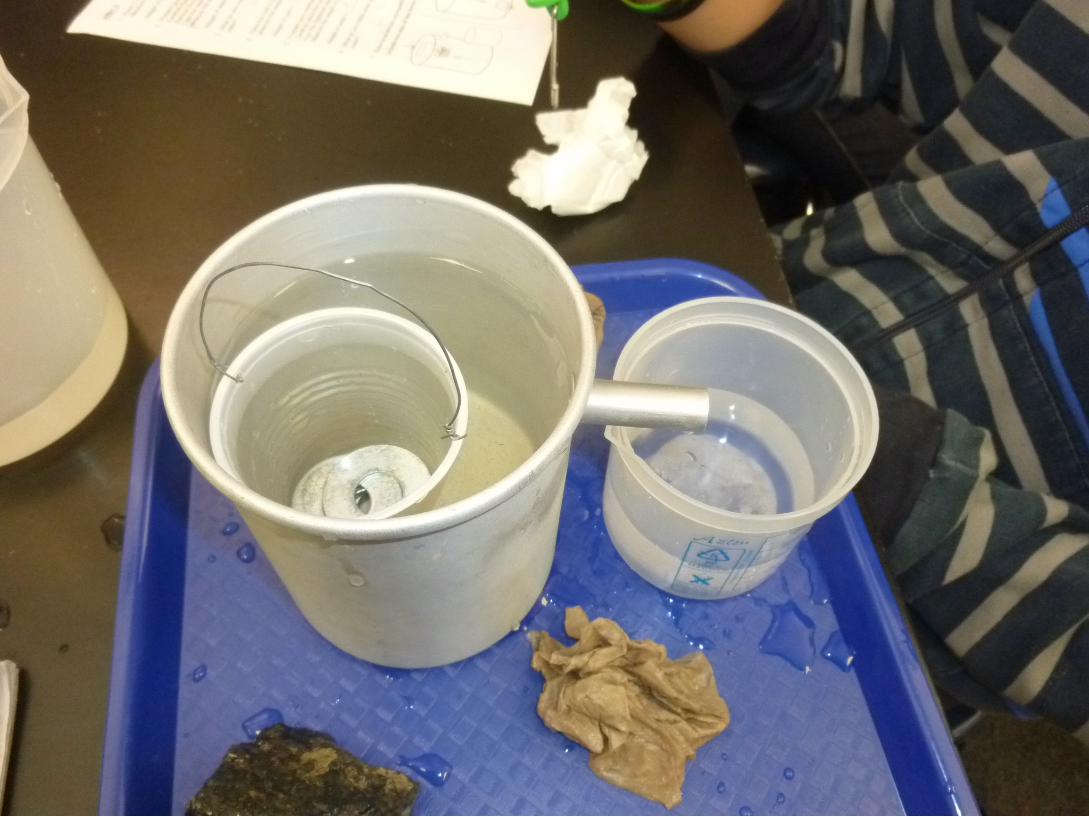
The procedures for this activity are described on the worksheet to accompany. There are
also some photos offered of the overflow can setup and the weighing cup/boat. A student
work sample is also included.
Lesson #4 More Support of Archimedes (50-60 minutes) This lab activity repeats some of the concepts from above, with more of an emphasis on
changing the shape of an object so that it displaces more water, and thus creates a larger
buoyant force.
Objectives:
Students will again prove that the buoyant force is equal to the weight of the displaced
water. They will also demonstrate that if an object displaces more water, it will create a
larger buoyant force. Students will be able to draw a diagram of floating/sinking objects
and label the objects with appropriate force arrows.
Equipment needed (per group):

Forces in Fluids 8
Spring Scale that reads in Newtons (0-5 Newton range)
Overflow can
Small beaker or cup
Small plastic cup with wire handle to hook on the spring scale (the same as
above)
Piece of modeling clay (enough to weigh more than 0.5 Newtons)
Students will follow the procedures on the worksheet that accompanies. A student
sample of the worksheet is included.
Lesson #5: Boat building skills test (40-50 min.)
To wrap up this unit, I have small groups of students (pairs) build a boat out of a piece of
aluminum foil. Each group gets one 20cm square sheet of heavy-duty foil and 15
minutes to design and build the boat of their choice. We then test the boats in a
transparent container in the front of the room to see which one can hold the most washers
(from lesson #3 above). The best boats, of course, are the ones that displace the most
water. At this time I also give the “Test Review” worksheet as homework and study
guide.
Student Impact: Objectives are described for each lesson above. Students will understand the science and
forces behind commonly observed phenomena- floating and sinking.
Assessment: The students’ performance on the homework worksheets and the two lab activities will
allow you to assess the level of understanding. You can also use the attached test as a
final assessment.
Standards:
Forces in Fluids 9
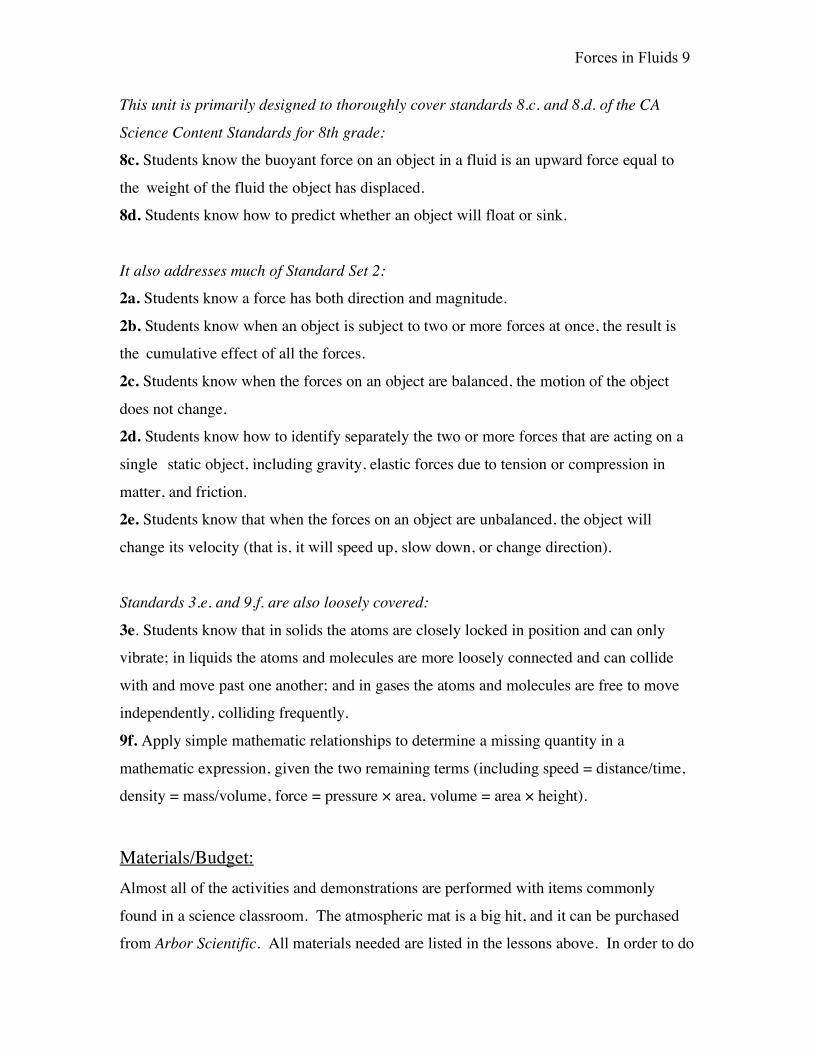
This unit is primarily designed to thoroughly cover standards 8.c. and 8.d. of the CA
Science Content Standards for 8th grade:
8c. Students know the buoyant force on an object in a fluid is an upward force equal to
the weight of the fluid the object has displaced.
8d. Students know how to predict whether an object will float or sink.
It also addresses much of Standard Set 2:
2a. Students know a force has both direction and magnitude.
2b. Students know when an object is subject to two or more forces at once, the result is
the cumulative effect of all the forces.
2c. Students know when the forces on an object are balanced, the motion of the object
does not change.
2d. Students know how to identify separately the two or more forces that are acting on a
single static object, including gravity, elastic forces due to tension or compression in
matter, and friction.
2e. Students know that when the forces on an object are unbalanced, the object will
change its velocity (that is, it will speed up, slow down, or change direction).
Standards 3.e. and 9.f. are also loosely covered:
3e. Students know that in solids the atoms are closely locked in position and can only
vibrate; in liquids the atoms and molecules are more loosely connected and can collide
with and move past one another; and in gases the atoms and molecules are free to move
independently, colliding frequently.
9f. Apply simple mathematic relationships to determine a missing quantity in a
mathematic expression, given the two remaining terms (including speed = distance/time,
density = mass/volume, force = pressure × area, volume = area × height).
Materials/Budget: Almost all of the activities and demonstrations are performed with items commonly
found in a science classroom. The atmospheric mat is a big hit, and it can be purchased
from Arbor Scientific. All materials needed are listed in the lessons above. In order to do

Forces in Fluids 10
the two big lab investigations, a set of overflow cans and force scales will be needed.
These are available from most of the big science teacher supply catalogs. A computer
with the ability to project is essential for the two PowerPoint slideshows.

Names ___________________________ Date ________________ Period _____ ____________________________
Lab Investigation: Buoyancy I PART I 1. If an object is floating, what does that tell you about the sizes of the weight force and the
buoyant force? 2. What did Archimedes figure out about the buoyant force? 3. Prepare the overflow can setup. Put 1 washer in the cup/boat and place it in the overflow can. Add another washer to the boat. Notice what happens. Add another washer to the boat. Notice what happens. Keep adding washers one-at-a-time until you have a total of 6. As you increase the weight of the boat, why does it displace more water? (Think about
the answers to #1 and #2 above!) 4. Draw the results of your test below. Include the water level, boat, and washers. Draw force
arrows representing the weight force and the buoyant force.
1 washer
6 washers

PART II 1. Place 7 washers in your cup boat.
Measure the weight of the boat (in Newtons!) with a force scale. Weight of boat = ______
2. Prepare your overflow can.
Carefully float the boat and washers in the overflow can and collect the displaced water. Remove the boat from the water. Take the washers out of the cup and pour the displaced water into the cup. Measure the weight of the water (in Newtons!) using the force scale. Weight of water = ______ (this weight is equal to the ________________________ )
3. What do you notice when you compare the weight of the floating boat with the weight of the
displaced water? 4. Place the rock in your cup boat.
Measure the weight of the rockf (in Newtons!) with a force scale. Weight of rock = ______
5. Prepare your overflow can.
Carefully place the rock directly into the overflow can and collect the displaced water. Pour the displaced water into the cup. Measure the weight of the water (in Newtons!) using the force scale. Weight of water = ______ (this weight is equal to the _________________________ )
6. What do you notice when you compare the weight of the sinking rock with the weight of the
displaced water? 7. Draw force arrows representing the weight of the displaced water and the weight of the object.
Include the size of the force (in Newtons!) for each arrow.
8. When objects float, the weight of the
object is ____________________ the
buoyant force.
9. When objects sink, the weight of the
object is ____________________ the
buoyant force.

Names ______________________________ Date ______________ Period _____ ______________________________
Lab Investigation: Buoyancy II
Activity 1. Put the clay in a cup and find the weight with a force scale. Weight of clay = ___________ 2. Roll your piece of clay into a ball. Prepare your overflow can setup. Place the clay ball in the overflow can and catch the displaced water. Measure the weight of the water with a force scale. Weight of water displaced by the ball = ___________ 3. Change the shape of your clay ball so that it will float. Test the boat in the beaker to make sure it floats before putting in the overflow can. Prepare your overflow can setup. Place the clay “boat” in the can and catch the displaced water. Measure the weight of the water with a force scale. Weight of water displaced by the boat = ___________________ 4. Remember! According to Archimedes, the weight of displaced water is equal to the __________________ _____________. Analysis 1. Did the clay ball float or sink? _____________
Which weighed more, the clay ball or the displaced water? _________________ The clay ball sank because objects will sink if the buoyant force is ___________ than the
weight of the object. 2. Did the clay boat float or sink? _______________
Which weighed more, the clay boat or the displaced water? _________________
The clay boat floated because objects will float if the buoyant force is _____________ the weight of the object.
3. The clay will float after you change its shape because it __________________ ________ ______________.
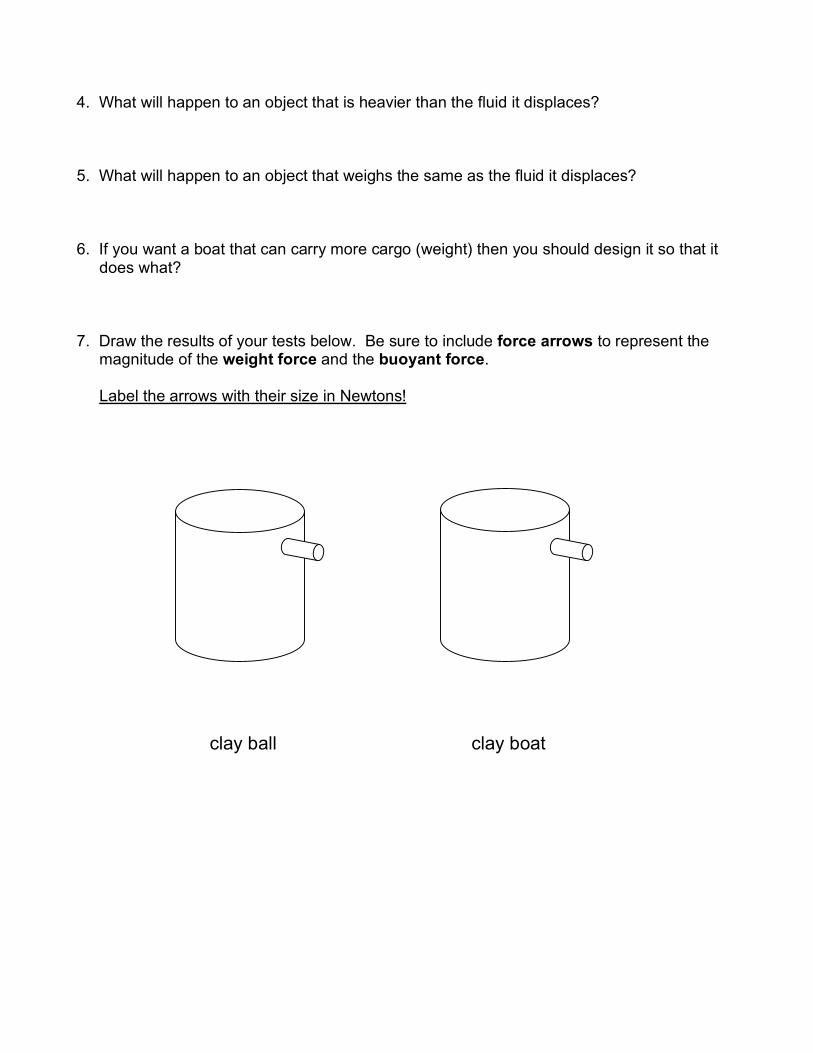
4. What will happen to an object that is heavier than the fluid it displaces? 5. What will happen to an object that weighs the same as the fluid it displaces? 6. If you want a boat that can carry more cargo (weight) then you should design it so that it
does what? 7. Draw the results of your tests below. Be sure to include force arrows to represent the
magnitude of the weight force and the buoyant force. Label the arrows with their size in Newtons!
clay ball clay boat

Name Date ...- Class
PressureI Understanding Main ldeas
Answer the following questions in the spaces provided.
l. What causes pressure in fluids?
2. What is the mathematical relationship between force, pressure, and area?
3. How does air pressure relate to elevation?
4. How does water pressure relate to depth?
5. List the locations in the drawing below in order fiom least pressure to greatestpressure.
<) Building Vocabularywrite an answer for each of the following questions in the spaces provided.
6. \,Vhat is pressure?
7. What is a fluid?
8. What is one pascal of pressure?

Name _______________________________ Date ________________ Period _______ A
Pressure and Buoyancy Test Examine the illustration of an iceberg below and answer the questions that follow.
1. At what point (a, b, or c) is the water pressure greatest on the iceberg? 2. Why is there more pressure at this point than the others? 3. An object weighs 20 N. It displaces a volume of water that weighs 15 N. a. What is the buoyant force on the object? b. Will this object float or sink? Explain your answer. 4. Draw a picture with force arrows that compares a floating object to a sinking object in water. 5. What creates more pressure, a 200N box with a base of 10m2 or a 300N box with a base of 30m2? Show your work! 6. Why can’t we feel the atmospheric pressure? 7. What did Archimedes figure out about the buoyant force?

Name _______________________________ Date ________________ Period _______ B
Pressure and Buoyancy Test 1. What creates more pressure, a 200N box with a base of 10m2 or a 300N box with a base of 30m2? Show your work! 2. What did Archimedes figure out about the buoyant force? Examine the illustration of an iceberg below and answer the questions that follow.
3. At what point (a, b, or c) is the water pressure greatest on the iceberg? 4. Why is there more pressure at this point than the others? 5. Draw a picture with accurate force arrows that compares a floating object to a sinking object in water. 6. An object weighs 20 N. It displaces a volume of water that weighs 15 N. a. What is the buoyant force on the object? b. Will this object float or sink? Explain your answer. 7. Why can’t we feel the atmospheric pressure?

Name ______________________________ Date ______________ Period _____
Forces in Fluids: Test Review
1. What do the particles of a liquid and a gas have in common? 2. What is a fluid? 3. What causes pressure in fluids? 4. What is the formula for calculating pressure? 5. Why does pressure increase when a fluid gets deeper? 6. Why don’t you feel the atmospheric pressure squeezing you right now? 7. What is stated by Archimedes principle? (Put it in your own words!) 8. What two forces determine whether an object will float or sink? 9. If an object is floating, what does that tell you about the forces acting on it?


![L-14 Fluids [3] Fluids at rest Fluid Statics Fluids at rest Fluid Statics Why things float Archimedes’ Principle Fluids in Motion Fluid Dynamics.](https://static.fdocuments.net/doc/165x107/56649ced5503460f949ba1d5/l-14-fluids-3-fluids-at-rest-fluid-statics-fluids-at-rest-fluid-statics.jpg)