Focus on Photography: A Curriculum Guide · This page is an excerpt from Focus on Photography: A...
120
This page is an excerpt from Focus on Photography: A Curriculum Guide Written by Cynthia Way for the International Center of Photography © 2006 International Center of Photography All rights reserved. Published by the International Center of Photography, New York. Printed in the United States of America. Please credit the International Center of Photography on all reproductions. This project has been made possible with generous support from Andrew and Marina Lewin, the GE Fund, and public funds from the New York City Department of Cultural Affairs Cultural Challenge Program. FOCUS ON PHOTOGRAPHY: A CURRICULUM GUIDE
-
Upload
hoangthuan -
Category
Documents
-
view
226 -
download
2
Transcript of Focus on Photography: A Curriculum Guide · This page is an excerpt from Focus on Photography: A...

This page is an excerpt from Focus on Photography: A Curriculum Guide
Written by Cynthia Way for the International Center of Photography
© 2006 International Center of Photography
All rights reserved.
Published by the International Center of Photography, New York.
Printed in the United States of America.
Please credit the International Center of Photography on all reproductions.
This project has been made possible with generous support from Andrew and Marina Lewin, the GE Fund, and public funds from the New York City Department of Cultural Affairs Cultural Challenge Program.
FOCUS ON PHOTOGRAPHY: A CURRICULUM GUIDE

Focus on PhotograPhy: a curriculum guide
Part IV
resources

This section is an excerpt from Focus on Photography: A Curriculum Guide
Written by Cynthia Way for the International Center of Photography
© 2006 International Center of Photography
All rights reserved.
Published by the International Center of Photography, New York.
Printed in the United States of America.
Please credit the International Center of Photography on all reproductions.
This project has been made possible with generous support from Andrew and Marina Lewin, the GE Fund, and public funds from the New York City Department of Cultural Affairs Cultural Challenge Program.
FOCUS ON PHOTOGRAPHY: A CURRICULUM GUIDE


F FOCUS ON PHOTOGRAPHY: A CURRICULUM GUIDE
Focus Lesson Plansand Actvities
INDEX TO FOCUS LINKS
Focus Links Lesson Plans
Focus Link 1 LESSON1:IntroductoryPolaroidExercises
Focus Link 2 LESSON2:CameraasaTool
Focus Link 3 LESSON3:PhotographicFieldTrip
Focus Link 4 LESSON4:DiscussingImages/DevelopingaProjectTheme
Focus Link 5 LESSON5:CreatingImages/Point-of-ViewActivity
Focus Link 6 LESSON6:EditingImages/ReflectionActivity
Focus Link 7 LESSON7:IntegratingtheGalleryVisit
Focus Link 8 LESSON8:LightingTechniques
Focus Link 9 LESSON9:IntegratingtheGuestArtistVisit
Focus Link 10 LESSON10:AssemblingtheFinalProject
Focus Links Focus Discussion Questions and Worksheets
Focus Link 11 BuildingVisualLiteracy:DiscussionQuestions
Focus Link 12 LookingatPhotographs/WhatDoYouSeeinthePictureFrame?
Focus Link 13 LookingatPhotographs/LearningPhotographicTerms
Focus Link 14 TheChoicesThatPhotographersMake
Focus Link 15 WhatIsthePhotographSaying?
� FocusLessonPlans
Part IV: Resources
Focus Links Focus Writing Activities
Focus Link 16 Point-of-ViewWritingExercise
Focus Link 17 Story-WritingWorksheet
Focus Link 18 Poetry-WritingWorksheet
Focus Link 19 WordPicture
Focus Link 20 WritingCaptions
Focus Link 21 WritingaReviewofanExhibition
Focus Link 22 WritinganArtist’sStatement
Focus Links Focus Hands-on Activities
Focus Link 23 PolaroidActivities
Focus Link 24 PhotographicAssignmentList
Focus Link 25 BirdsandWormsTreasureHunt
Focus Link 26 PolapanSlidePresentation
Focus Link 27 PolaroidTransfers
Focus Link 28 HandColoringPrints
Focus Link 29 SunPrints
Focus Link 30 Photograms
Focus Link 31 WritingWithLightonFilmorPaper
Focus Link 32 LiquidLightandOtherAlternativeProcesses
Focus Link 33 PinholePhotography
Focus Links Focus Reflection Activities
Focus Link 34 CritiqueYourImage
Focus Link 35 Storytelling
Focus Link 36 Speechwriting
Focus Link 37 ArtProjects
Focus Link 38 ResearchProjects
Focus Link 39 ImageBox
Focus Link 40 VisualDiary
Focus Link 41 PicturesandInterviews
Focus Link 42 CreateYourOwnExhibition
Focus Link 43 WhatMakesa“Good”Photograph?
Focus Link 44 SeeingActivity
FocusLessonPlans �
FOCUS LESSON PLANSThefollowinglessonplansarethebuildingblocksoftheFocussamplecurriculaandthecasestudies.Inthissection,thelessonsfollowasequencefora10-sessioncurriculum.Considerotherpossiblesequencesandadaptationsoftheselessonsforyourcurriculum.
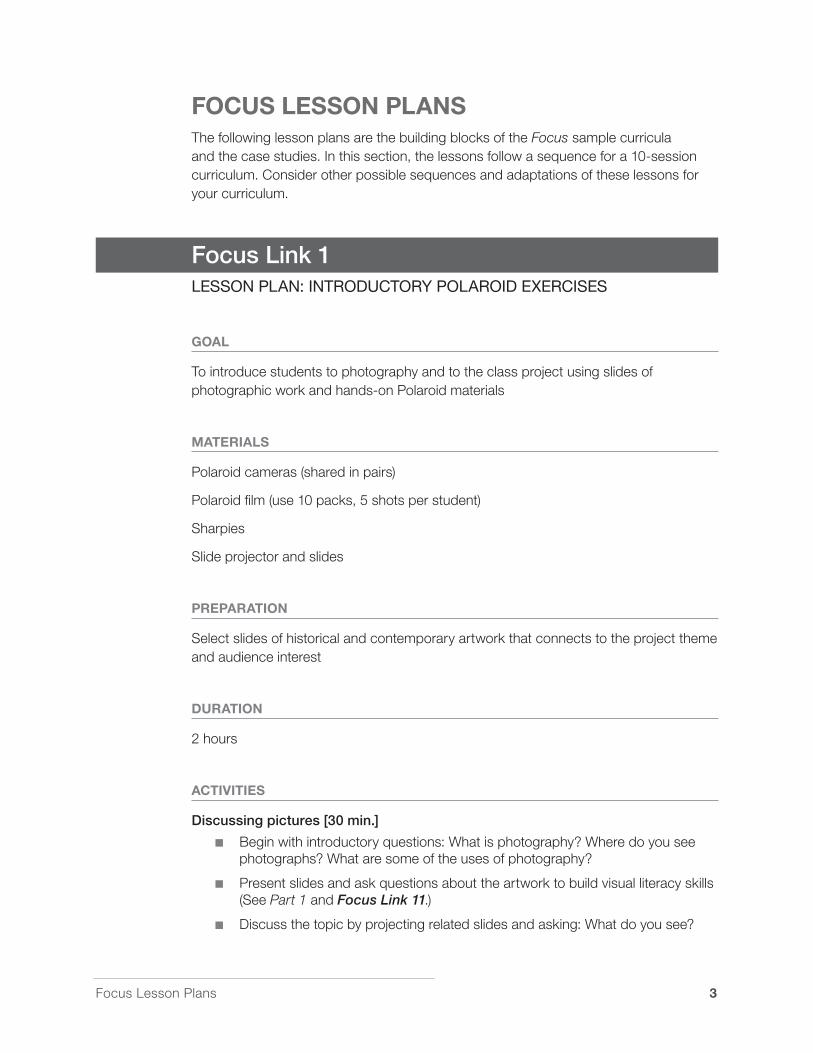
Focus Link 1Lesson PLan: Introductory PoLaroId exercIses
GOAL
Tointroducestudentstophotographyandtotheclassprojectusingslidesofphotographicworkandhands-onPolaroidmaterials
MATERIALS
Polaroidcameras(sharedinpairs)
Polaroidfilm(use10packs,5shotsperstudent)
Sharpies
Slideprojectorandslides
PREPARATION
Selectslidesofhistoricalandcontemporaryartworkthatconnectstotheprojectthemeandaudienceinterest
DURATION
2hours
ACTIvITIES
Discussing pictures [30 min.]
Beginwithintroductoryquestions:Whatisphotography?Wheredoyouseephotographs?Whataresomeoftheusesofphotography?
Presentslidesandaskquestionsabouttheartworktobuildvisualliteracyskills(SeePart 1andFocus Link 11.)
Discussthetopicbyprojectingrelatedslidesandasking:Whatdoyousee?

� FocusLessonPlans
Part IV: Resources
Discussthephotographyprojectanditstheme
Repeatwithseveralslides
Makesuretocoverexamplesoftechniquessuchaslighting,pointofview,composition,andframing
Creating images [60 min.]
DemonstratehowtouseaPolaroidcamera(Note:Youcanpre-loadthefilm.)
1 Chooseapointofview
� Presstheshutterrelease
� Letthepicturedevelop
Givethemtheassignment:
Workinginpairs,eachstudenttakesfiveportraitsoftheotherpersonfromdifferentpointsofview:
1 Abird’s-eyeview
� Aworm’s-eyeview
� Mysteryview:Pretendyou’readifferentanimalandtakeapicturefromthatpointofview
� Youreyeview
5 Surpriseme
WRAP-UP [�0 MIN.]
Putallthepicturesontablesfordiscussion
Discusscomposition,technique,surprisingaccidents,successes,andbloopers
FOLLOW-UP/HOMEWORK
Journal-writingexercise:
– Havestudentswriteanswerstothesequestionsintheirjournal:Howdoyouseeyourselfinthepictures?Describetheexperienceofcreatingthepictures.Whatdidyoufeel?Whatwasenjoyableoruncomfortable?

FocusLessonPlans 5
Focus Link 2Lesson PLan: camera as a tooL
GOAL
Tointroducestudentstothetoolsandtechniquesofa35mmcamera
MATERIALS
35mmcameras,traditionalordigital(canbesharedinpairs)
Sampleexposedrolloffilm
Samplecontactsheet
Sampleblack-and-whiteprints
PREPARATION
Createandmakecopiesofacamera-handlinghandoutfromthecamerainstructionbookoraphotographymanual
Testequipmentanduseyourtestfilm,contactsheet,andprintsassamples
DURATION
2hours
ACTIvITIES [� HRS.]
Demonstratehowtousethe35mmcamera(Note:Besuretoholdthecamerasoeveryonecanseeit.)
Explainwhatacameraisandhowitworks
Illustrateontheboardorwithahandouthowlighttravelsthroughthelens
Showthesamplefilm,contactsheet,andprintsasyoudescribetheprocessofmakingthefinalprint
Passoutthecamerasandahandoutexplainingbasiccameraparts
Showhowtoholdthecamera,usethestrap,andbecarefulnottoknockthelens
Gothroughthehandouttoshowthepartsofthecameraandhowtheyworktogether
� FocusLessonPlans
Part IV: Resources
Reviewthestepstocreateanimage,lettingstudentstake“blank”pictures
1 Chooseyourpointofview
� Checktheexposure:depthoffieldandshutterspeed
� Focus
� Frametheimage
5 Presstheshutterrelease
� Advancethefilm
Discusscomplicatedtechnicalelementssuchasshutterspeedandaperture
Letstudentsplaywiththecontrols
Showsampleimagesthatdemonstratetheuseoffastandslowshutterspeedandshallowanddeepdepthoffield
Reviewthecontrolsagain
WRAP-UP
Addressanyquestions
Trytodemystifythecameraandmakestudentscomfortablewithusingitasatool
ALTERNATIvES
Ifpossible,bringinanddemonstrateothertypesofcameras–fromlargeformattodigitaltopinhole
Showthatthecameraissimplyabox(SeeFocus Link 33forpinholephotography.)
Turntheclassroomintoacamerabycoveringwindowswithdarkpaperandallowingasmallholeinonepapertoprojectlightontoanoppositewall
Showanearlydrawingmadefromacameraobscura(SeeAppendix 2: A Brief History of Photography.)
Showslidesofimagesmadefromarangeofcamerastoillustratethedifferences
(Note:Technicalphotographyhandbooksusuallydescribeexamplesofdifferenttypesofcameras.Seethebibliography.)
FOLLOW-UP/HOMEWORK
Passoutemptyslidemounts
Askstudentstopracticelookingthroughtheslidemounttodevelopasenseofframing

FocusLessonPlans �
Focus Link 3Lesson PLan: PhotograPhIc FIeLd trIP
GOAL
Topracticecamerahandlingandphotographictechniques,preferablyinanoutdoorsetting
MATERIALS
35mmcameras,traditionalordigital(canbesharedinpairs)
35mmfilm(1rollpercamera)
PREPARATION
Selectasitethatconnectstotheprojectthemeandisaccessibleinthetimeallotted
Obtainanynecessarypermissions
DURATION
2hours
ACTIvITIES [� HRS.]
Reviewgroundrulesoffieldtrip
Discussassignment:
1 Focuson(topicshouldconnecttoclasstheme)
� Practicetechniques,suchasshutterspeed,stopmotion,andblur
Reviewhowtousethecameraandgettherightexposure
Handoutcameras
Loadfilm(Note:Ifshortontime,pre-loadthecameras.)
Proceedtosite
Repeatassignmentguidelines
Letstudentscreateimages—allowthemtoexplorefreelywhileassistingwithquestionsandhelpingthemfocusontheirassignment

� FocusLessonPlans
Part IV: Resources
WRAP-UP
Returntoschool
Rewindfilm
Collectfilmandlabelforprocessing
FOLLOW-UP/HOMEWORK
Bringinimagesfromnewspapersandmagazinesthatcatchyourattentionandconnecttotheprojecttheme
FocusLessonPlans �
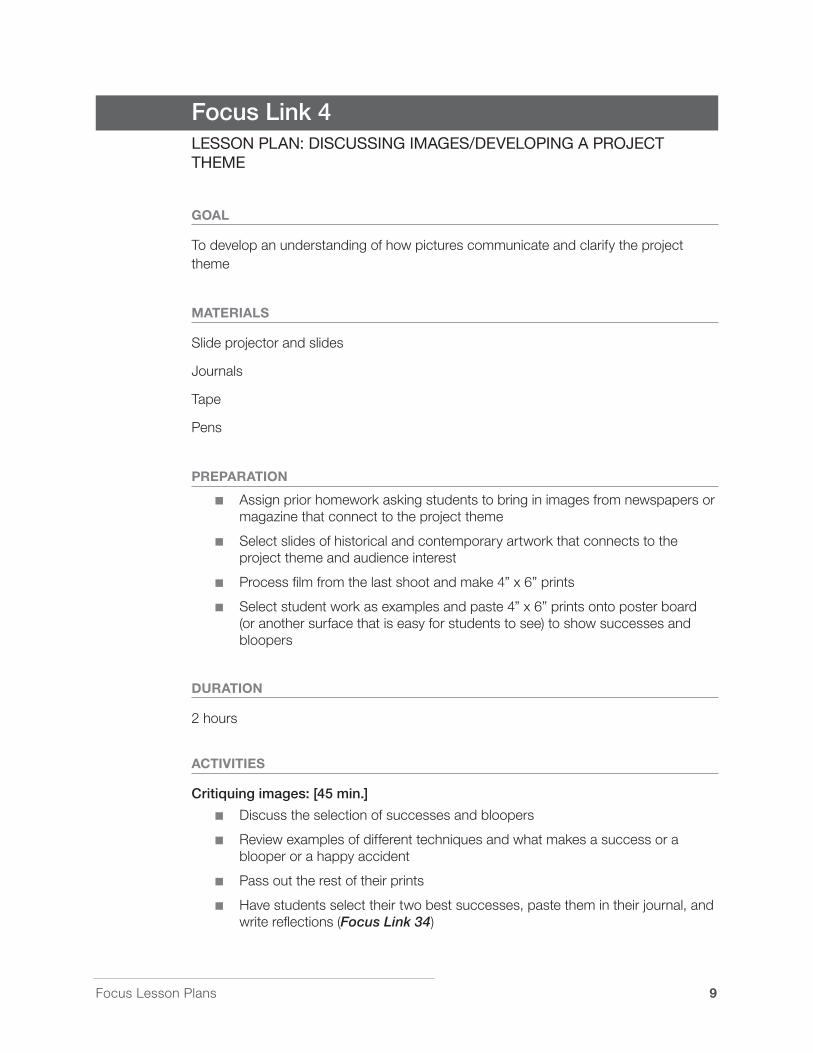
Focus Link 4Lesson PLan: dIscussIng Images/deveLoPIng a Project theme
GOAL
Todevelopanunderstandingofhowpicturescommunicateandclarifytheprojecttheme
MATERIALS
Slideprojectorandslides
Journals
Tape
Pens
PREPARATION
Assignpriorhomeworkaskingstudentstobringinimagesfromnewspapersormagazinethatconnecttotheprojecttheme
Selectslidesofhistoricalandcontemporaryartworkthatconnectstotheprojectthemeandaudienceinterest
Processfilmfromthelastshootandmake4”x6”prints
Selectstudentworkasexamplesandpaste4”x6”printsontoposterboard(oranothersurfacethatiseasyforstudentstosee)toshowsuccessesandbloopers
DURATION
2hours
ACTIvITIES
Critiquing images: [45 min.]
Discusstheselectionofsuccessesandbloopers
Reviewexamplesofdifferenttechniquesandwhatmakesasuccessorablooperorahappyaccident
Passouttherestoftheirprints
Havestudentsselecttheirtwobestsuccesses,pastethemintheirjournal,andwritereflections(Focus Link 34)

10 FocusLessonPlans
Part IV: Resources
Assignment:
Whatdoesthisimageshow?
Whatqualitiesdoyoulikethebest?Considerframing,lighting,composition,andcontent.
Whatdidyouhavetroublewith?Whatwouldyoudodifferentlynexttime?
Describetheexperienceofcreatingthisimage.Whatdidyoufeel?Whatwasenjoyableorchallenging?
Brainstorming the class project: [30 min.]
Reviewtheimagesthatstudentsselectedfrommagazines
Havestudentscreatecollagesintheirjournalandwriteabouthowtheimagesconnecttotheclassproject
Discussthecollagesandimages
Putkeywordsfromthediscussionontheboardtoclarifytheprojecttheme
Developing aesthetics: [30 min.]
Presentslidesshowingrelevanthistoricalandcontemporarywork,techniquestoworkon,andoptionsfortheclassproject
WRAP-UP [15 MIN.]
Prepareforthenextshoot
FOLLOW-UP/HOMEWORK
Suggestreadingrelatedtoclassproject(couldbejournalism,Internetresearch,poetry,fiction,historicalreport)

FocusLessonPlans 11
Focus Link 5Lesson PLan: creatIng Images/PoInt-oF-vIew actIvIty
GOAL
Toteachtheconceptofpointofview,encouragingstudentstomovearoundthesubjectmatterandcreateimagesthatexpresstheirperspective
MATERIALS
35mmcameras,traditionalordigital(canbesharedinpairs)
35mmfilm(1rollpercamera)
PREPARATION
Selectasitethatconnectstotheprojectthemeandisaccessibleinthetimeallotted
Getanynecessarypermissions
DURATION
2hours
ACTIvITIES: [� HRS.]
Reviewgroundrulesoffieldtrip
Discussassignment:
1 Focuson(topicshouldconnecttoclasstheme)
� Practiceframingandpointofview
� Takefiveimagesofeachchosensubjectfromdifferentpointsofview:
– Fromabove,abird’s-eyeview
– Frombelow,aworm’s-eyeview
– Fromoneside
– Fromtheotherside
– Repeatyourfavoriteataslightlydifferentangle
Reviewhowtousethecameraandgettherightexposure
Handoutcameras
Loadfilm(Note:Ifshortontime,preloadthecameras.)

1� FocusLessonPlans
Part IV: Resources
Proceedtosite
Repeatdirectionsfortheassignment
Letstudentscreateimages—assistwithquestionsandremindthemoftheirassignment
WRAP-UP
Returntoschool
Rewindfilm
Labelforprocessing
FOLLOW-UP/HOMEWORK
Findaphotographthatyoulike
Writeinyourjournalfromthepointofviewofthephotographer(Focus Link 16)
FocusLessonPlans 1�
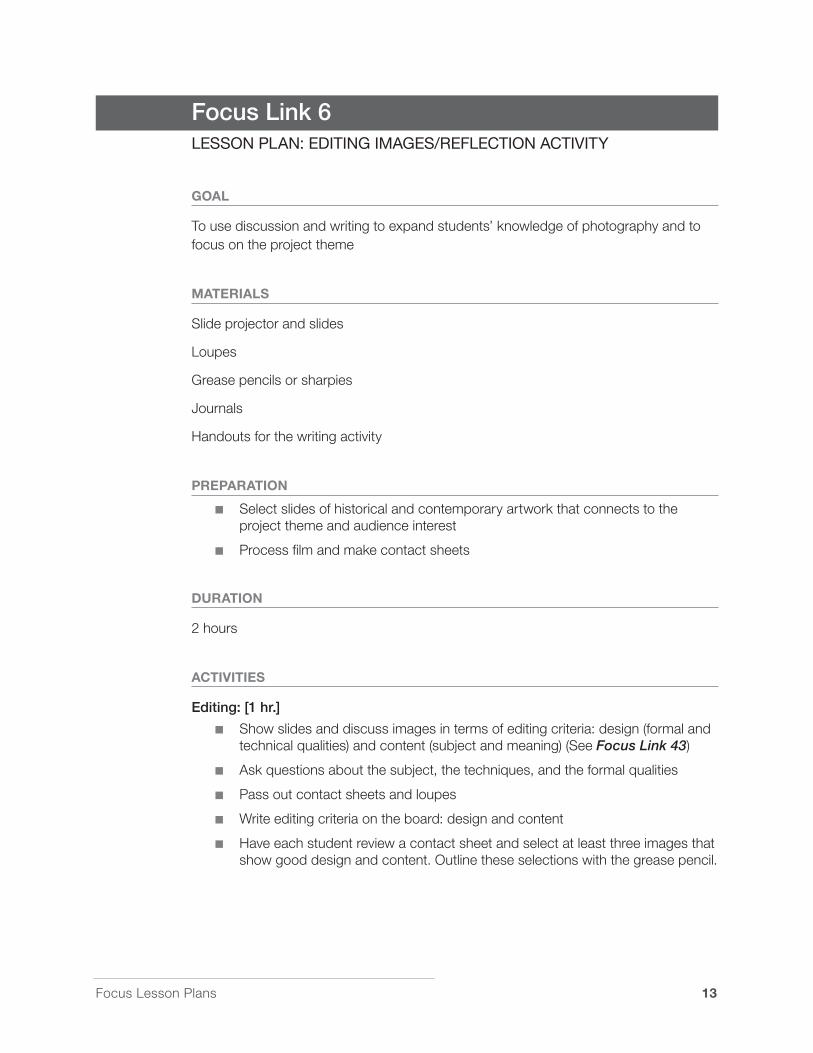
Focus Link 6Lesson PLan: edItIng Images/reFLectIon actIvIty
GOAL
Tousediscussionandwritingtoexpandstudents’knowledgeofphotographyandtofocusontheprojecttheme
MATERIALS
Slideprojectorandslides
Loupes
Greasepencilsorsharpies
Journals
Handoutsforthewritingactivity
PREPARATION
Selectslidesofhistoricalandcontemporaryartworkthatconnectstotheprojectthemeandaudienceinterest
Processfilmandmakecontactsheets
DURATION
2hours
ACTIvITIES
Editing: [1 hr.]
Showslidesanddiscussimagesintermsofeditingcriteria:design(formalandtechnicalqualities)andcontent(subjectandmeaning)(SeeFocus Link 43)
Askquestionsaboutthesubject,thetechniques,andtheformalqualities
Passoutcontactsheetsandloupes
Writeeditingcriteriaontheboard:designandcontent
Haveeachstudentreviewacontactsheetandselectatleastthreeimagesthatshowgooddesignandcontent.Outlinetheseselectionswiththegreasepencil.

1� FocusLessonPlans
Part IV: Resources
Writing exercise: [1 hr.]
Projectaslide
Passoutthestory-writingactivity(Focus Link 16)
Havestudentswriteacreativestoryfromtheperspectiveofsomeoneinthepicture
WRAP-UP
Prepareforthenextclass
FOLLOW-UP/HOMEWORK
Createadiaryforthecharacterinthecreativewritingexercise(Note:Useotherillustrativematerialslikeclippings,tickets,drawings,etc.)

FocusLessonPlans 15
Focus Link 7Lesson PLan: IntegratIng the gaLLery vIsIt
GOAL
Tobroadenstudents’awarenessoftheaestheticsofphotographybyshowingoriginalartworkinagalleryormuseum
MATERIALS
Handoutstouseinthegallery
Camerasandfilmtodocumentthetrip
PREPARATION
Selectexhibitionsinamuseumorgalleriesthatconnecttotheprojectthemeandaudienceinterest
Makeareservationwiththemuseumorgallery,notifyingitofthenumberofstudents,classproject,andgoalsforyourvisit
Arrangeforaguideifpossible
Arrangefortransportationandpermissions
Reviewconfirmationmaterials(Note:Ifthereareanyprogramchanges,besuretoletthemuseumknowaheadoftime.)
Integrating the gallery visit in lessons before the trip:
Preparestudentsbeforehandbypreviewingthematerialprovidedbythemuseumandbydoingpre-visitactivities(Forexample,showslidesbytheartistonvieworotherartists’workrelatingtothecontextoftheexhibition.)
Practicediscussingphotographstobuildvisualliteracyskills
Readmaterialrelatingtothecontextoftheshow
Askstudentswhattheyexpecttosee
Assignresearchtopicsrelatingtotheartworkonview
DURATION
2hours

1� FocusLessonPlans
Part IV: Resources
ACTIvITIES [� HRS.]
Tour the galleries [1 1/2hrs.]
Workwiththetourguidestocreateaneducationalexperiencethatconnectstotheclassprojectandaudienceinterest.Speakwiththeguidesbeforehand.Askquestionsduringthetour,ifnecessary,toshapetheexperience.
Attheendofthetour,reinforcetheideasyou’dlikestudentstocomeawaywith
Ifgoingonaself-guidedvisit,previewtheexhibitionyourselfandselectimagestodiscuss.Frameyourvisitwithathemeorquestion.Whenguidingstudentsthroughthegalleries,useFocusDiscussionQuestionsorgivethemanassignmentofthreethingstolookforandhavethemwriteintheirjournal.
Document the trip [30 min.]
Askstudentstophotographwhattheyseeinthenewsetting/neighborhoodthatconnectstotheprojecttheme
Documenttheexperienceoftakingafieldtripasifthepicturesweretoappearinaschoolnewspaper
Includepicturesshowingtheexperiencesoftravelingandviewingtheexhibition,classmates’expressions,orteachersinanewcontext
FOLLOW-UP/HOMEWORK
Write a review of the exhibition (Focus Link 21)
Integrating the gallery visit in sessions after the trip:
Doahands-onactivityrelatingtoatechniqueusedbytheartist—suchaslighting,Polaroid,orprintingtechniques
Discusstheexhibitionreviews
Havestudentsposeaquestionthattheyhaveabouttheexhibitionoranissueitraised

FocusLessonPlans 1�
Focus Link 8Lesson PLan: LIghtIng technIques
GOAL
Tofurtherstudents’understandingofandabilitytouselightingtechniques—theessentialelementinphotography
MATERIALS:
Hotlights(notstrobes)
Lightstands
Reflector
Extensioncord
Film
Cameras
TeachingcamerawithPolaroidbackandfilm,ifpossible
Sampleimages
PREPARATION
Testequipment
Preparesampleimagestoillustratelightingeffects(Note:Haveanextralightbulbonhand.)
DURATION
2hours
ACTIvITIES
Pinupsamplesofdifferentlightingtechniquesthattheclasswillcover
Havestudentsdiscusswhichdirectionthelightiscomingfromanddescribethedifferenteffectsandmoodscreatedbylighting
Setuphotlightsinaspaciousareaintheclassroom.Movechairsanddesks,ifnecessary.
Askforastudentvolunteertomodel.Movethelightstodifferentlocationsandheightstodemonstratelightingeffects.Addonslowly.Haveanotherstudentvolunteertopracticelightingthesubject.CreateaPolaroidofthatscene.Showtheresult.Repeatuntilyou’vecovereddifferenttechniqueswithdifferentvolunteers.
1� FocusLessonPlans
Part IV: Resources
Reviewandusevolunteerstodemonstratedifferentroles:photographer,model,stylist,props,lightingtechnician,andphotoassistant(whocanholdthereflectorandhandleothertasks)
Havestudentscalculatetheexposurewiththeircameras
Dividetheclassintoteamsofsixsothatstudentscanworktogether
Havethemcreatedifferentlightingscenariosforindividualandgroupportraits
Assignroles:photographer,model,stylist,props,lightingtechnician,andphotoassistant
Thosenotinthepictureorphotographyteamcandocumenttheshootorreviewhandouts.Or,ifyouhaveateachingassistantandequipment,youcanruntwolightingset-ups.
WRAP-UP
Addressquestionsandreviewtechniques
Preparefornextshoot
ALTERNATIvES
Bringinaguestartisttoassistyouwithtechniquesthatarenotinyourtraining
FOLLOW-UP/HOMEWORK
Reviewmagazinesforsamplesofdifferenttypesoflightingeffectsstudiedinclass

FocusLessonPlans 1�
Focus Link 9Lesson PLan: IntegratIng the guest artIst vIsIt
GOAL
Tobuildanunderstandingofaestheticsandtoexposestudentstotheworkofotherprofessionalartistswhoserveasgoodrolemodels
MATERIALS
Slideprojector(Note:Bringanextralightbulb)
PREPARATION
Selectanartistwhoseworkconnectstotheprojecttheme
Callandplanaheadoftimewiththeguestartist.Describetheclassproject,thestudents’interestsandskills,andthegoalfortheartist’svisit.Asktheartistwhatheorshewouldliketodo.Offersuggestionsandguidance.
Ifappropriate,preparestudentworkfortheartisttorevieworpreparematerialsneededforahands-onactivity
Confirmthemeetingplaceandtime.Provideanaccessiblephonenumberforanylastminutechanges.
Integrating the guest artist visit before the class:
Reviewtheguestartist’sworkandcareer
Askstudentstopreparequestionsfortheguestartist
Showworkbytheartistorotherartistsworkinginasimilarmannertosetthecontext
DURATION
2hours
ACTIvITIES [� HRS.]
Introducetheguestartistwhowillpresenthisorherworkandcareer
Encouragestudentstoaskquestionsorconductaninterview
Ifpossible,arrangefortheartisttoreviewaselectionofthestudents’work

�0 FocusLessonPlans
Part IV: Resources
Makesurethattheartistrespondswithbothpositiveandconstructivecritique
Bevigilantaboutthevocabularyusedanddefineanyunfamiliarterms
Conductanyactivityplannedwiththeartist
(Note:Arrangingtwoormoresessionswithanartistfacilitatesin-depth,activity-basedinteraction.)
WRAP-UP
Sumupwhatyou’dlikestudentstocomeawaywithfromthevisit
Allowtimeforstudentstoapproachtheartistindividually
Integrating the guest artist visit after the class
Conductanactivitythatconnectstotheartist’stechniquesorapproach
FOLLOW-UP/HOMEWORK
Researchtheworkofaphotographer
FocusLessonPlans �1
Focus Link 10Lesson PLan: assembLIng the FInaL Project
GOALS
Todrawtogethertheideas,techniques,andaestheticscoveredinthecourse
Toassembleafinalprojectthatcelebratesandsharesthestudents’accomplishmentswiththepublic
MATERIALS
Pinstopostimagesintheroomorbroadtablestoorganizeandviewimages
Foodandrefreshmentsfortheclasspartyduringthegroupcritique
PREPARATION
Makesurestudentshavecollectedtheirimagesintoajournalorportfolio
DURATION
2hours
ACTIvITIES [� HRS.]
Describethefinalproject.Showasample—apublicationorinvitationorevenslidesofaninstallation.Refertowhattheclasshascoveredandthepurpose.Acknowledgethatstudentshavedonewellandthisisachancetosharetheirimageswithothers.
Reviewthecriteriaforeditingthefinalproduct:designandcontent—relatingtotheprojecttheme
Havestudentsreviewtheirjournalsandportfoliosandpickoutthebestwork(Note:Thisreviewprocesscanalsotakeplaceoutsideofclasstimeinindividualmeetings.)
Havestudentsarrangetheirbestselectionsonatableorpinthemuponthewall
Thestudentsthencritiqueeachother’simagesandassemblesagroupeditofwhatshouldbeinthefinalproject.Remindthemofthecriteriaforthefinalproject—someworkisbetterforexhibition,someforpublication,andsometimesagroupshowisstrengthenedbymakingcertainselections.Trytoensurethateachindividualreceivesacknowledgementofhisorherwork.
Revieweachstudent’sselectionsandacknowledgehisorherprogress.Talkaboutwhichimagesworkbestandwhy.

�� FocusLessonPlans
Part IV: Resources
WRAP-UP
Announcewhentheinstallationorproductionoftheprojectwilltakeplace
Ifpossiblewithinyourdeadline,encouragestudentstosignupforjobsproducingthefinalproject

FocusLessonPlans ��
FOCUS ACTIvITIES
Focus dIscussIon questIons and worksheets
Thefollowingdiscussionquestionsandworksheetsaredesignedtoadvancevisualliteracyskills.Discussionscantakeplaceduringaclassroomslidepresentationorgalleryvisit.Worksheetsandactivitiescanreinforceelementsdiscussed.
�� FocusLessonPlans
Part IV: Resources
Focus Link 11buILdIng vIsuaL LIteracy: dIscussIon questIons
Tostartadiscussiononaphotograph,beginwiththebasic,introductoryquestionsfromLevel1A.Thenchoosequestionsfromotherlevelsdependingonhowyourstudentsrespond.Inaddition,youmayfindsomequestionsbettersuitedtothecontentorsalientfeaturesofaparticularimage.
Rememberthatanydialogueflowsinunpredictableways,andstudentsmayhaveavarietyofresponsesonmanylevels.Youmayenduprepeatingeachseriesofquestionsuntiltheaudienceisreadytomoveon.Thesequestionsofferguidancetoelicitadiscussionandbuildinterpretativeskills;theyareonlyasamplingofthemanywaysthateducatorscandiscussvisualart.
(SeePart I, Chapter 3forwaystoworkwithvariouslevelsofvisualliteracyandPart I, Chapter 2foradescriptionoftheelementsofphotography.)
Goal:Advancevisualliteracyskillsbasedonthestudents’responsesandlevel
(Note:AlwaysbeginyourdiscussionwiththesequenceinLevel1A,thenaddonasappropriate.)
Level 1A: Building observation skills
Whatdoyouseeinthispicture?
Canyoudescribeitmore?
Whatelsedoyousee?
Whatisgoingoninthispicture?
Whatinformationinthepicturemakesyousaythat?
Level 1B: Building vocabulary
Canyouguesswherethephotographerwasstandingwhenheorshetookthepicture?Abovethesubject,lookingdown?Orbelowthesubject,lookingup?Thisiscalledpointofview.
Whatisincludedinthepictureframe?Whatisnotincluded?Thisiscalledframing.
Describethecomposition.Whatshapesdoyousee?Whatotherpatternsdoyounotice?
FocusLessonPlans �5
Level 2A: Building technical knowledge
Whattechniquesdidthephotographeruse?
Whatisthepointofview?
Howisthepictureframed?
Describethequalityofthelighting.Whatdirectionisitcomingfrom?Doesitcreateapatternoflightandshadow?
Level 2B: Building an understanding of the choices photographers make
Whatchoicesdidthephotographermake?
Whydidthephotographerchoosetousethattechnique?
Whydidthephotographerchoosetocomposethepicturethisway?
Whatisthephotographer’spointofview?Whateffectdoesithave?
Whydidthephotographerchoosetoframethepicturethisway?
Whatdoesthecompositionemphasize?
Whatdoesthelightingdrawyourattentionto?
Level 3A: Understanding the context and intended use of the picture
Whatwasthephotographer’spurposeortheintendeduseforthisimage(e.g.,magazineassignment,photoessay,fineartexhibition)?
Canyoutellwhatgenreofphotographythisis?
Whatdoyouknowaboutthetimeperiodinwhichthisphotographwasmade?
Whatdoesthephotographcommunicateaboutthistimeperiod?
Canyoumakecomparisonstootherphotographersorartistsworkinginthistimeperiod?
Level 3B: Relating context to subject and meaning
Whatchoicesdidthephotographermake?Canyouguesswhy?
Whatisthephotographerdrawingyourattentionto?Howisthisaccomplished?
Whatisthephotographer’spointofview?Whateffectdoesithave?
Whatdoyounoticeaboutthesubject?Orthepeopleinthepicture?
Doyouhaveanyquestionsaboutthesubject?Orthestyleofthepicture?
Whatisthephotographsaying?Doesanyonehaveadifferentinterpretation?
�� FocusLessonPlans
Part IV: Resources
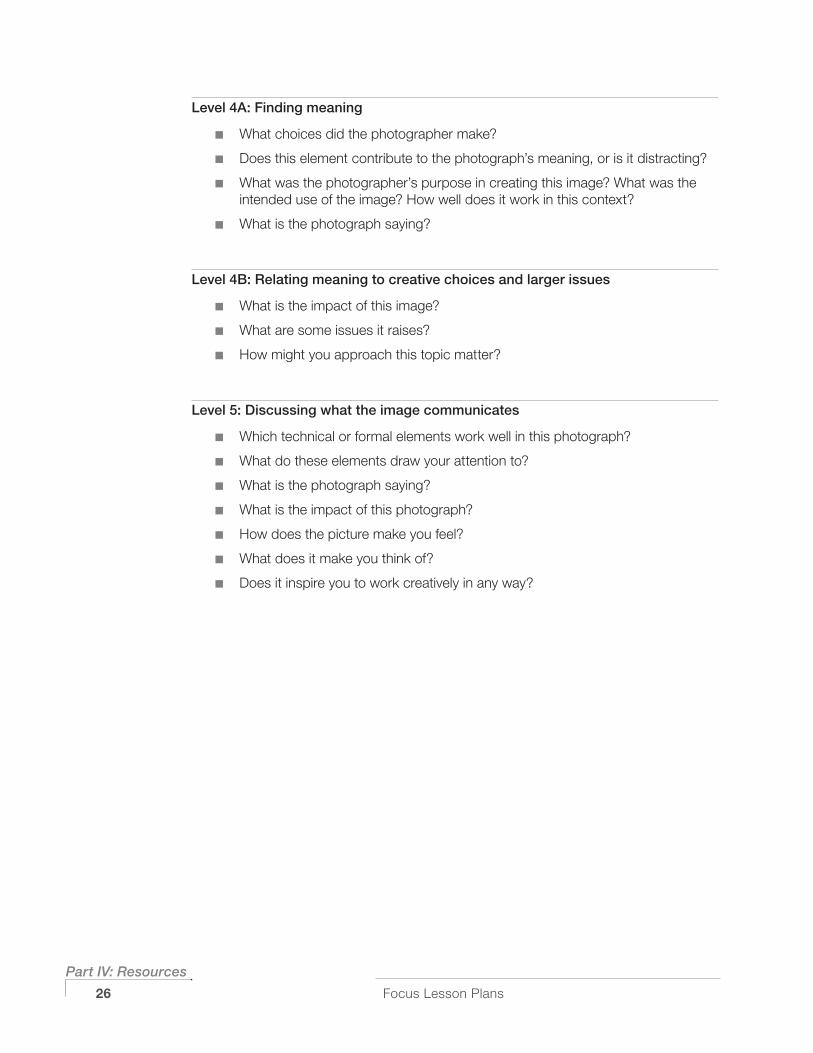
Level 4A: Finding meaning
Whatchoicesdidthephotographermake?
Doesthiselementcontributetothephotograph’smeaning,orisitdistracting?
Whatwasthephotographer’spurposeincreatingthisimage?Whatwastheintendeduseoftheimage?Howwelldoesitworkinthiscontext?
Whatisthephotographsaying?
Level 4B: Relating meaning to creative choices and larger issues
Whatistheimpactofthisimage?
Whataresomeissuesitraises?
Howmightyouapproachthistopicmatter?
Level 5: Discussing what the image communicates
Whichtechnicalorformalelementsworkwellinthisphotograph?
Whatdotheseelementsdrawyourattentionto?
Whatisthephotographsaying?
Whatistheimpactofthisphotograph?
Howdoesthepicturemakeyoufeel?
Whatdoesitmakeyouthinkof?
Doesitinspireyoutoworkcreativelyinanyway?
FocusLessonPlans ��
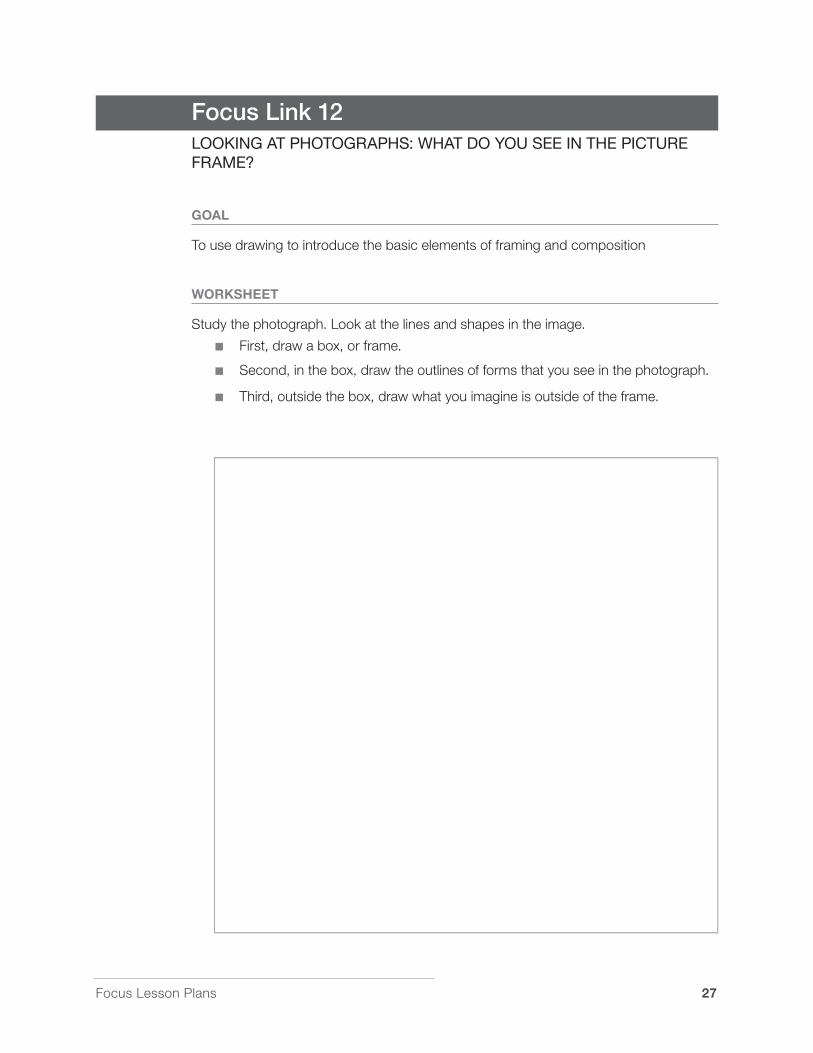
Focus Link 12LookIng at PhotograPhs: what do you see In the PIcture Frame?
GOAL
Tousedrawingtointroducethebasicelementsofframingandcomposition
WORKSHEET
Studythephotograph.Lookatthelinesandshapesintheimage.
First,drawabox,orframe.
Second,inthebox,drawtheoutlinesofformsthatyouseeinthephotograph.
Third,outsidethebox,drawwhatyouimagineisoutsideoftheframe.

�� FocusLessonPlans
Part IV: Resources
Focus Link 13LookIng at PhotograPhs: LearnIng PhotograPhIc terms
GOAL
Todevelopanunderstandingofthephotographictermswhilelookingatandanalyzingapicture
WORKSHEET
Subject(Who/Whatisinthepicture?)
Setting(Wherewasthepicturetaken?)
background(Whatisbehindthesubject?)
Foreground(Whatisinfrontofthesubject?)
FocuS(Isanypartofthepictureclearorblurry?)
Vantage Point/Point oF View(Wherewasthephotographerwhenheorshetookthepicture?Belowthesubject?Abovethesubject?Veryclose?Faraway?)
comPoSition(Describethelines,shapes,patterns,andcolorsintheimage.)
Lighting(Quality:Isthelightingsoftanddiffusedorhardandcontrasty?Direction:Whereisthelightcomingfrominthepicture?)
mood(Howdoesthepicturemakeyoufeel?)
meaning (Whatdoesthispicturesaytoyou?)

FocusLessonPlans ��
Focus Link 14the choIces that PhotograPhers make
GOAL
Tolearnthatphotographersmakechoicestocreatetheirimageandcommunicateamessage
WORKSHEET
comPoSition:Describetheshapes,lines,andpatternsinthepicture.
FocuS:Whatinformationisclearinthepicture?Whatisblurry?
Framing:Whatisincludedintheframeandwhatisn’t?Isanythingcropped?
background:Whatinformationisinbackofthesubject?
Foreground:Whatinformationisinfrontofthesubject?
Subject:Whatdoyouknowaboutthesubjectbasedontheinformationthatyouseeinthepicture?
PeoPLe:Clothing:Whataretheywearing?Whatdoestheirclothingtellabouttheirinterests,identity,orsocialgroup?
PoSe:Aretheystandingorsitting?Whatkindofbodylanguageandattitudedotheyhave?
exPreSSion:Describetheirexpression.Whatmighttheybefeelingorthinking?
action:Whataretheydoing?Canyouguesswhy?
�0 FocusLessonPlans
Part IV: Resources
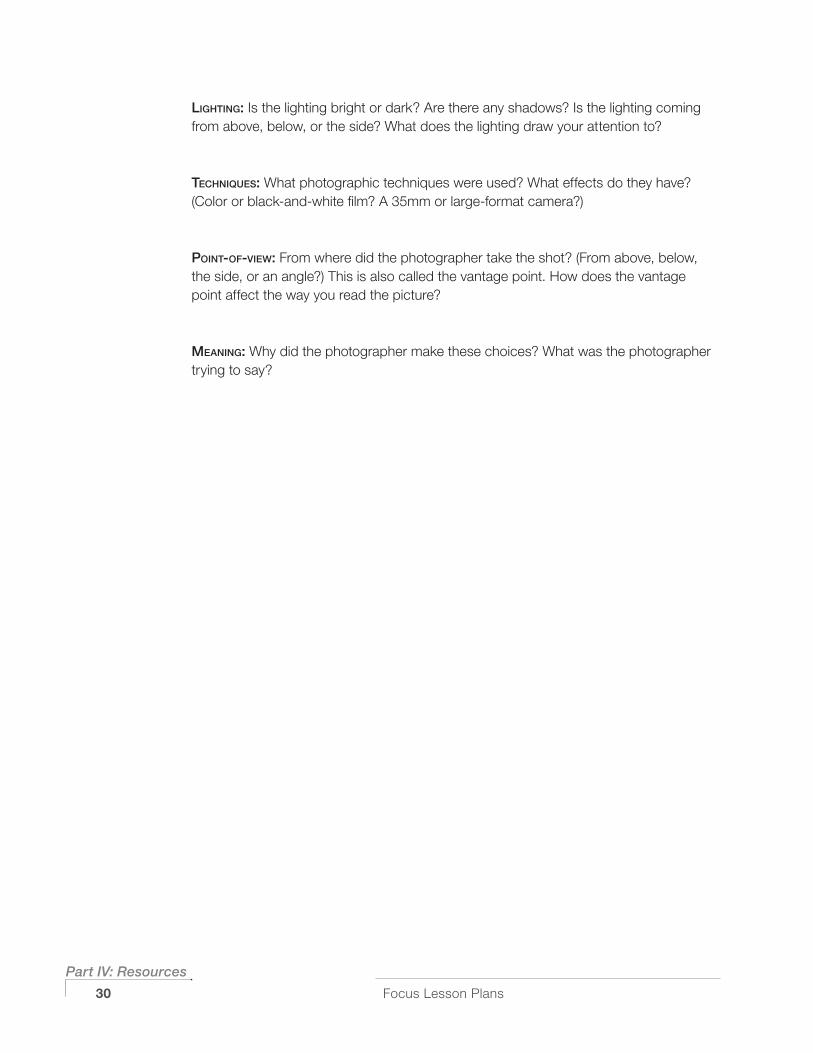
Lighting:Isthelightingbrightordark?Arethereanyshadows?Isthelightingcomingfromabove,below,ortheside?Whatdoesthelightingdrawyourattentionto?
techniqueS:Whatphotographictechniqueswereused?Whateffectsdotheyhave?(Colororblack-and-whitefilm?A35mmorlarge-formatcamera?)
Point-oF-View:Fromwheredidthephotographertaketheshot?(Fromabove,below,theside,oranangle?)Thisisalsocalledthevantagepoint.Howdoesthevantagepointaffectthewayyoureadthepicture?
meaning: Whydidthephotographermakethesechoices?Whatwasthephotographertryingtosay?
FocusLessonPlans �1
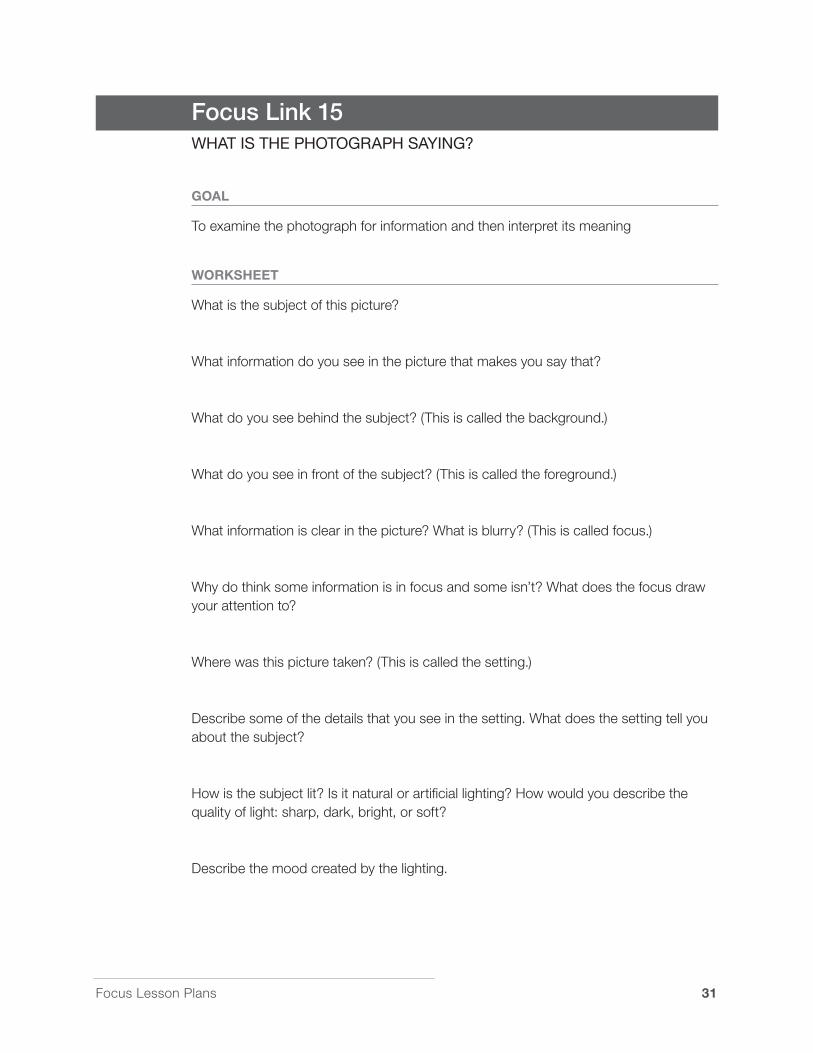
Focus Link 15what Is the PhotograPh sayIng?
GOAL
Toexaminethephotographforinformationandtheninterpretitsmeaning
WORKSHEET
Whatisthesubjectofthispicture?
Whatinformationdoyouseeinthepicturethatmakesyousaythat?
Whatdoyouseebehindthesubject?(Thisiscalledthebackground.)
Whatdoyouseeinfrontofthesubject?(Thisiscalledtheforeground.)
Whatinformationisclearinthepicture?Whatisblurry?(Thisiscalledfocus.)
Whydothinksomeinformationisinfocusandsomeisn’t?Whatdoesthefocusdrawyourattentionto?
Wherewasthispicturetaken?(Thisiscalledthesetting.)
Describesomeofthedetailsthatyouseeinthesetting.Whatdoesthesettingtellyouaboutthesubject?
Howisthesubjectlit?Isitnaturalorartificiallighting?Howwouldyoudescribethequalityoflight:sharp,dark,bright,orsoft?
Describethemoodcreatedbythelighting.

�� FocusLessonPlans
Part IV: Resources
Whichdirectionisthelightcomingfrom?
Doesthelightingdrawyourattentiontoanythinginthepicture?
Whatisincludedinthepictureframe?Whatisexcluded?
Wherewasthephotographerstandingwhenheorshetookthispicture?(Thisiscalledthepointofvieworthevantagepoint.)
Circleone:
Abovetheperson Belowtheperson
Totherightside Totheleftside
Howdoesthevantagepointaffectthewayyoulookatthepicture?
Iftherearepeopleinthephotograph,answerthesequestions:
Howwouldyoudescribetheirexpressions?
Whataretheywearing?
Whataretheydoing?
Whatmighttheybefeelingorthinking?Whatinthephotographsuggeststhat?
Everything in the picture—the details, composition, technical choices like focus, subject and setting, lighting, point of view, and the way the photographer sees the subject—all work together to communicate a message to the viewer.
Whatisthisphotographsayingtoyou?

FocusLessonPlans ��
FOCUS WRITING ACTIvITIES
Focus Link 16PoInt-oF-vIew wrItIng exercIse
GOAL
Fostertheunderstandingthatartists(includingstudents)cancommunicatetheirviewpointthroughphotography
Developempathy,anabilitytounderstandothersbyputtingyourselfintheirposition
Developwritingskills
WORKSHEET
1Writeastoryfromthepointofviewofsomeoneinthepicture.
Togetstarted,listanddescribesomeofthedetailsyouseeinthepicture.
Thinkaboutwherethepersonisandhowheorshemightfeel.(Forexample,ifsheisoutdoors,isthesunhotonherback?Lookatherexpression.Whatisshefeeling?)
Whatisthepersondoing?
Whatmighthappennext?
Nowtrytomakeyourstoryasvividasthephotographbyusinglotsofspecificdetails.

�� FocusLessonPlans
Part IV: Resources
�Writeastoryfromthepointofviewofthephotographer.
Imaginewhatthephotographerwasthinkingwhenheorshetookthepicture.
Whydidheorshewanttotakethispicture?
FocusLessonPlans �5
Focus Link 17 story-wrItIng worksheet
GOAL
Touseapictureasthebasisforastorybyfirstfindingvisualinformation,thenimaginingthe“before”and“after”
PREPARATION
Selectapicture(inagallery,fromtheInternet,aprojectedslideinaclassroom)
WORKSHEET
Listfivethingsyouseeinthepicture:
1
�
�
�
5
Describethesetting:
Action:Whatishappeninginthepicture?

�� FocusLessonPlans
Part IV: Resources
Whatdoyouthinkhappenedbeforethepicturewastaken?
Whatdoyouthinkwillhappennext?
Character:Describethepeopleinthepicture:theirexpression,clothing,andmood.
Whatarethepeopledoing?Why?
Theme:Thispicturetellsastoryabout
Youhaveeverythingyouneedtowriteyourstory:setting,action,character,andtheme.Now,writeacreativestorybasedonthispicture.Includelotsofdetails.

FocusLessonPlans ��
Focus Link 18Poetry-wrItIng worksheet
GOAL
Tousethephotographasasourceforconcretedetailstowritevividpoems
PREPARATION
Providephotographicsourcematerialintheformofslides,books,magazines,Internet,postcards,orgalleryexhibitionvisits
WORKSHEET
List10detailsthatyouseeinthephotograph.
1
�
�
�
5
�
�
�
�
10
Circleoneadjectiveandonenounthatbestdescribethecolorofthephotograph.
Adjectives: gray blue red gold black-and-white
Nouns: smoke rain mud sunshine feathers
Createyourowndescriptivenounsandadjectives:

�� FocusLessonPlans
Part IV: Resources
Ifyoucouldtouchsomethinginthephotograph,whatwoulditfeellike?Describetheobjectandthetexture.
Thinkoftwoadjectivestodescribethemoodcreatedbythephotograph.
Describeyourimpressionsofthisphotograph.Whatdoesthephotographmakeyouthinkof?Dreamof?
Writeapoembasedonwhatyouseeinthispicture.
Use10wordsfromanyofyouraboveanswerssomewhereinthepoem.

FocusLessonPlans ��
Focus Link 19word PIcture
GOAL
Tobuilddescriptivewritingskills
PREPARATION
Projectslidesintheclassroomoruseagoodqualityphotocopyfromabook
WORKSHEET
1 Wherewasthepicturetaken?Describethedetailsthatyouseeinthesetting.
� Whenwasthepicturetaken?Isthereanyinformationinthepicturethatindicatestimeofday?Ifnot,canyouguessbasedonthelighting?
� Describewhatthepeopleinthepicturelooklike.Describetheirexpression.
� Whatarethepeopleinthepicturedoing?
5 Whatdoyouseeinthecenteroftheimage?Ontheleft?Theright?Inthecorners?
� Whatisthemoststrikingfeatureofthisimage?Describeit.
Nowthatyouhavetakennotesonwhatyouseeintheimage,writeaparagraphdescribingtheimage.Yourwritingshouldbespecificandclearsothatyourwordscreateapictureinthereader’smind.
�0 FocusLessonPlans
Part IV: Resources
Focus Link 20wrItIng caPtIons
GOAL
Tobuildlanguageskillsandtodiscoverthethemeofaphotographbywritinganewcaptionforthepicture
PREPARATION
Providephotographicsourcematerialthatstudentscanstudycloseup
WORKSHEET
Pretendyouareacuratorandneedtowriteacaptionthattellstheviewerstheessentialinformationaboutthepicture.
Writeanewcaptionforthepicture.
Startbywritingwhatyouseeintheimage.
Isee…
Expandtowhatyouthinkthephotographissaying(thetheme).
Thisphotographyissayingthat…
Reviseyourwritingtocreateonesentencethattellsthethemeofthepicture.
Nowrevisethatsentencetomakesureyourcaptionisconciseandusesclearandspecificlanguage.

FocusLessonPlans �1
Focus Link 21wrItIng a revIew oF an exhIbItIon
GOAL
Toevaluateacollectionofphotographsandtowriteareviewofanexhibition
WORKSHEET
Agoodreviewoffersreadersasenseoftheexhibitionandwhattheywillgetoutofviewingtheexhibition.
Whatdidyouseeinthegallery?
Describetheartworkspecifically.Includeartists’names,techniquesused,andintention,ifdocumented.
Whichwerethestrongestandweakestimages?Why?Whatwasthehighlightforyou?
Whatwastheexperienceoftheexhibitionlike?
Evaluatethecuratorialwork.Howdidyouliketheinstallation—thesequenceofpictures,walltext,graphics,andtheatmosphere?Didtheinstallationcontributetotheoveralleffectordetract?
Wastheexhibitiongood?
Evaluatewhatyousaw.Howwelldidtheexhibitionexpandyourunderstandingofthesubject?
Wastheexhibitionworthseeing?
Whyshouldviewerscometotheexhibition?Whatwilltheygetoutofit?Howdoesitconnecttootherexhibitionsorissuesinart?

�� FocusLessonPlans
Part IV: Resources
Note:Readreviewsofexhibitions.Noticehowwritersdevelopalead—somethingtocatchthereader’sattention.Sometimesthisisadescriptionofanartworkonview,aquestionorissuepresentedbytheexhibition,orananalysisofhowtheexhibitioncomparestoaparticularbodyofworkoraddressesanissueinart.Reviewyouranswerstotheabovequestionsanddiscoveragoodlead.Makesurethereviewisclearlywrittenandbasedonaccurateinformation.Trytoanswerthequestion:Whyshouldviewersvisittheexhibition?

FocusLessonPlans ��
Focus Link 22wrItIng an artIst’s statement
GOAL
Tousewritingtohelpstudentsclarifywhattheirprojectsare,whytheyareinterestedinthem,andhowtheyaccomplishthem
WORKSHEET
Anartist’sstatementdescribestheartist’sintentions,workingmethod,andideas.Ithelpsreadersandviewersunderstandwhattheartistthinksandfeelsabouthisorherartworkandthereasonsforcreatingit.
Name:
Describeyourphotographyproject.Whatkindsofimagesarethey?
Whatareyoutryingtoshowandsayinyourimages?
Whydoyoulikephotography?
Whatinfluencedyoutocreatetheseimages?Arethereanyotherphotographers,artwork,ortopicsthatyouthoughtaboutwhenyouwerecreatingtheseimages?
�� FocusLessonPlans
Part IV: Resources
FOCUS HANDS-ON ACTIvITIES
Focus Link 23PoLaroId actIvItIes
GOAL
TousetheimmediacyofPolaroidmaterialstoteachbasicelementsofimagemaking:pointofview,framing,lighting,andcomposition
MATERIALS
Polaroid600PlusorSpectracameras(sharedinpairs)
Polaroid,color,orblack-and-whitefilm(5shotsperstudent)
Sharpies
PROCEDURE
Showexamplesoftechniquessuchaslighting,pointofview,composition,andframing.
DemonstratethestepstouseaPolaroidcamera(Youcanpre-loadthefilm.)
1 Chooseapointofview
� Presstheshutterrelease
� Letthepicturedevelop
Givethemtheirassignment:Takefivepictures
Possibleprojects:
Pointofview—bird’s-andworm’s-eye,tiltedframe,eye-level,surprise
Lighting—fromtheside,top,bottom,Rembrandt,silhouette
Makeatreasurehunt
Photographcluestoamystery
Thingsthatbeginwiththeletter
Passiton—takeapictureinresponsetothepicturetakenbypersonnexttoyou(theresponsecanbevisual,formal,technical,thematic;keepitimmediate),thenpassthecameraon

FocusLessonPlans �5
DrawonthePolaroid—withchopsticks,toothpicks,orapencap.Manipulatethesurfaceandcreatedesignsastheimagedevelops.
Storysequenceandbookmaking
Portraitsandwriting:Howdoyouseeyourself/thisperson?
Documentarypicturesandjournalisticwriting
Picturesandcreativewriting—poetryandshortstories

�� FocusLessonPlans
Part IV: Resources
Focus Link 24PhotograPhIc assIgnment LIst
TECHNIqUES
Stopmotion
Blur
Panning
Focus
Shallowanddeepdepthoffield
Pointofview(bird’s-eyeandworm’s-eye,etc.)
Lightandshadow
Frames—toframeapictureandtofindnaturalframesinwindows,doors,angles
Shapesandtones
Details
Silhouettes
TOPICS
Home
Anotherneighborhood
Peopleyouknow;peopleyoudon’tknow
Fashion,trends
Tracesofhistory
Somethingthatneedstochange
Somethingthatisbeautiful
Anissue
Aquestion
Anidea
Awish
Amystery
Amomentintime
Apeacefulplace
Risk/danger
Dreams
Thefivesenses
Naturalelements:earth,wind,fire,water
Nature/animals
Otherartforms
Pleasure
Humor
Fear
Asecret
Love
Asurprise!

FocusLessonPlans ��
Focus Link 25bIrds and worms treasure hunt
GOAL
Tobuildanunderstandingofpointofviewandtoencouragestudentstolookatafamiliarsettinginnewways—withtheeyesofphotographers
WORKSHEET
Point of View:Abird’s-eyeviewpointisfromabovelookingdown,andaworm’s-eyeviewpointisfrombelow,lookingup.
Whatotherpointsofviewcanyoufindandphotograph?
FIND: PHOTOGRAPH:
AStatue FromaWorm’s-EyeView
AReflection FromaBird’s-EyeView
ACircle,Triangle,Square FromaWorm’s-EyeVieworRectangle
ATreeBranch FromaWorm’s-EyeView
AShadow FromaBird’s-EyeView
AFlower FromaWorm’s-EyeView
AnInsect FromaBird’s-EyeView
APerson FromCloseup
AnAnimal FromFarAway
SurpriseMe! FromYourUniquePointofView
�� FocusLessonPlans
Part IV: Resources
Focus Link 26PoLaPan sLIde PresentatIon
GOAL
TogivestudentsasenseofprocessusingPolapanfilmandaprocessorthat
createsblack-and-whiteorcolorslides
MATERIALS
Polapanprocessor(Note:It’sgoodtohavetwosotheclasscanworkingroups.)
Polapan35mmfilm
Slidemounts
Scissors
Lighttable,ifavailable(Note:Youcanpurchaseasmallonethatfitsonadesk.)
PROCEDURE
CreateimagesusingPolapanfilm
ProcessfilmusingthePolapanprocessor(Note:Itsdirectionsareeasytofollow—putthefilmandprocessingpackintheprocessor,closethelid,turntheswitchtothenumberofexposures,andprocess.Ittakesjustafewminutes.)
Removethefilmandcutintoindividualimages
Ifyoucan,viewonalighttabletoedittheimages
Mounttheimagesbysnappingthemintotheslidemount
Projectyourslideshow
TIPS
Polapanblack-and-whitefilmhasagorgeoustonalrange—usethisprojecttostudypatternsoflightandshadow
Selectmusicappropriatetotheclassprojectfortheslideshow

FocusLessonPlans ��
Focus Link 27 PoLaroId transFers
GOAL
TocreateimageswithapainterlyeffectusingPolaroidtransfers—applyingwetphotographicemulsiontopaper
MATERIALS
Watercolorpaper
Rollers
Polaroidlarge-formatfilm—eitherexposedinadarkroomoruseaPolaroidprocessortocreateatransferfromcolorslidesontoPolaroidlarge-formatfilm
PROCEDURE
Dampenthesheetofpaper
CreatethePolaroidimage,eitherusingalarge-formatcamerathathasaPolaroidback,orbyusingthePolaroidprocessortogeneratethePolaroidimagefromanexistingslide
PeelapartthelayersofthePolaroidfilmsheet
Immediatelysettheimageemulsion-sidedownonthepaper
Usingtheroller,applytheimagetothepaper
Letdry
TIPS
Demonstratefirst
Organizeseparateworkareasforalargeclass
It’sgoodtohavetwoPolaroidprocessorssotheclasscanbedividedintogroups
Letallimagesdrydown.Sometimesaccidentslookevenmorepainterly.
RESOURCES
Crawford,William.Keepers of Light.NewYork:Morgan&Morgan,1979.
Arnow,Jan.Handbook of Alternative Photographic Processes.NewYork:VanNostrandReinholtCo.,1982.

50 FocusLessonPlans
Part IV: Resources
Focus Link 28hand coLorIng PrInts
Thisactivityharkensbacktothedayswhenhandcoloringwastheonlywaytocolorizeanimage.
GOAL
Toteachprinciplesofcolorandthecolorpalettebyaddingcolortoablack-and-whiteprint
MATERIALS
Black-and-whiteprints
Marshall’soilsornon-toxicpaintsforexperimentation
Handcoloringpencils
PROCEDURE
Createaworkarea
Applypencils,oils,orpaintstotheimages,followingtheproduct’sinstructions
TIPS
Mattefinishphotographicpaperworksbestforpencils
Usephotocopiesifprintsareunavailable
Mounttheresultingworkonmatboardandhavestudentscontinuetodrawonthatsurface,pullingoutmoreelementsofthedesignandcolor
RESOURCES
Crawford,William.Keepers of Light.NewYork:Morgan&Morgan,1979.
Arnow,Jan.Handbook of Alternative Photographic Processes.NewYork:VanNostrandReinholtCo.,1982.
FocusLessonPlans 51
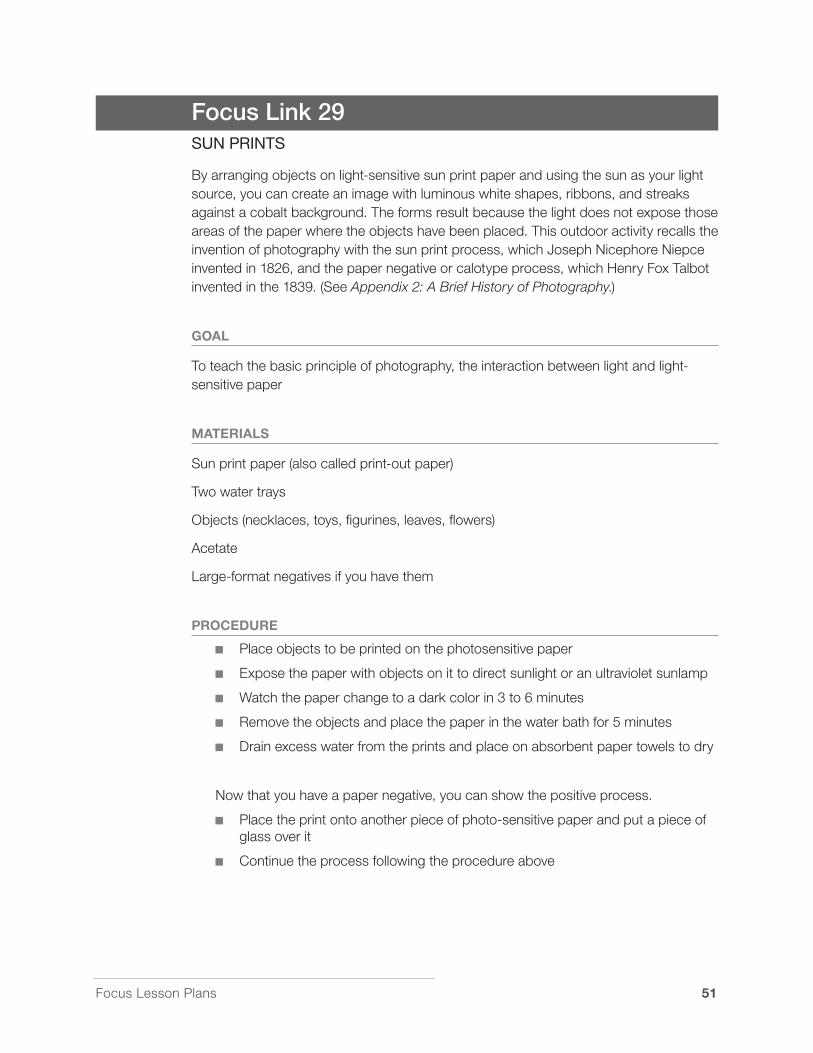
Focus Link 29sun PrInts
Byarrangingobjectsonlight-sensitivesunprintpaperandusingthesunasyourlightsource,youcancreateanimagewithluminouswhiteshapes,ribbons,andstreaksagainstacobaltbackground.Theformsresultbecausethelightdoesnotexposethoseareasofthepaperwheretheobjectshavebeenplaced.Thisoutdooractivityrecallstheinventionofphotographywiththesunprintprocess,whichJosephNicephoreNiepceinventedin1826,andthepapernegativeorcalotypeprocess,whichHenryFoxTalbotinventedinthe1839.(SeeAppendix 2: A Brief History of Photography.)
GOAL
Toteachthebasicprincipleofphotography,theinteractionbetweenlightandlight-sensitivepaper
MATERIALS
Sunprintpaper(alsocalledprint-outpaper)
Twowatertrays
Objects(necklaces,toys,figurines,leaves,flowers)
Acetate
Large-formatnegativesifyouhavethem
PROCEDURE
Placeobjectstobeprintedonthephotosensitivepaper
Exposethepaperwithobjectsonittodirectsunlightoranultravioletsunlamp
Watchthepaperchangetoadarkcolorin3to6minutes
Removetheobjectsandplacethepaperinthewaterbathfor5minutes
Drainexcesswaterfromtheprintsandplaceonabsorbentpapertowelstodry
Nowthatyouhaveapapernegative,youcanshowthepositiveprocess.
Placetheprintontoanotherpieceofphoto-sensitivepaperandputapieceofglassoverit
Continuetheprocessfollowingtheprocedureabove

5� FocusLessonPlans
Part IV: Resources
TIPS
Handlethepapercarefullyandonlyattheedgesduringthewetprocess.Thesurfaceisfragile.
Iftheprintscurlwhiledrying,placeheavybooksontoptoflattenthem;orironthem,afterplacingadampclothbetweentheprint(emulsion-sidedown)andtheiron.
FOLLOW-UP ACTIvITIES
Handcolortheprintsusingcoloredpencils,watercolorpaints,andmarkers.Addstickers.
Createcollageswiththesunprints.Thesunprintscanbecutupandgluedtogethertocreatenewimages.Recreatethepositiveandnegativeshapesincoloredpaperandcollagethemtogetherwiththecut-upsunprints.
Makepencilrubbingsoftheobjectsusedtomakethesunprints.Lookatthedifferencebetweenthetextureoftherubbingsandtheformsofthesunprints.
Makedecorativeframesoutofcardboard.Decoratethemwithsomeoftheobjectsusedintheprints.
Makeprintsofvaryingsizes—evenbodyprints—bypurchasingrollsofpaperoroversizedpaperandcuttingittothedesiredsizesinadarkroom
FocusLessonPlans 5�
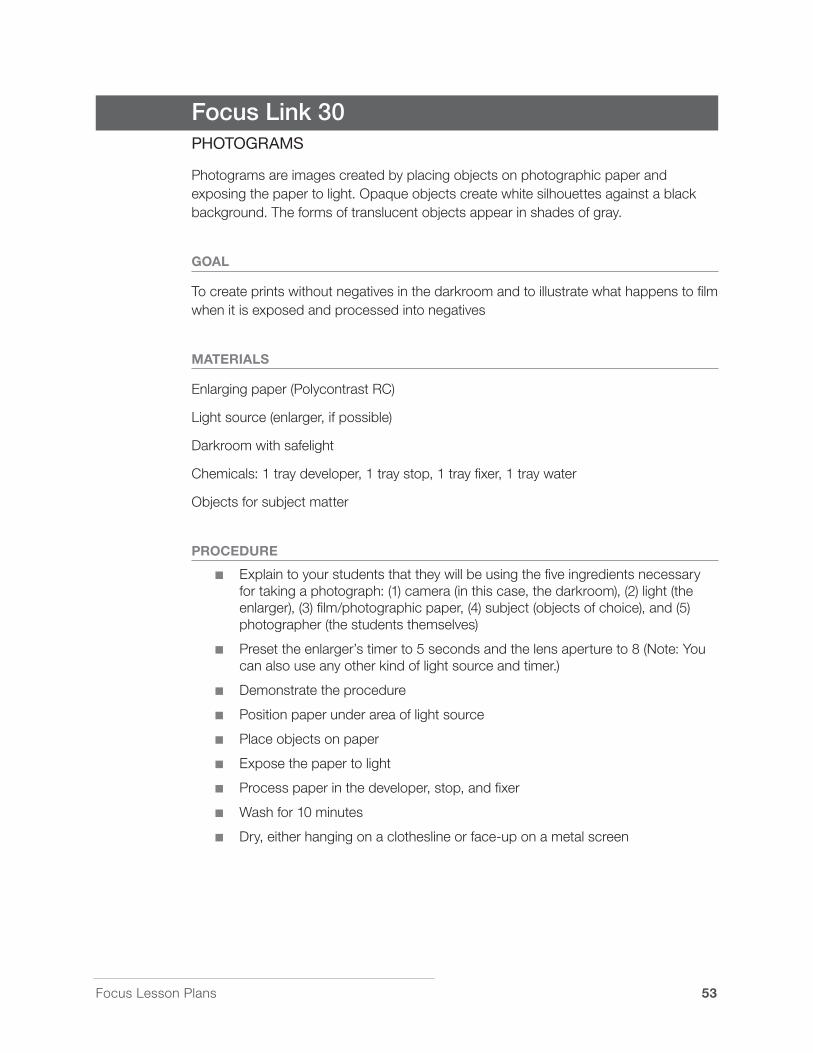
Focus Link 30Photograms
Photogramsareimagescreatedbyplacingobjectsonphotographicpaperandexposingthepapertolight.Opaqueobjectscreatewhitesilhouettesagainstablackbackground.Theformsoftranslucentobjectsappearinshadesofgray.
GOAL
Tocreateprintswithoutnegativesinthedarkroomandtoillustratewhathappenstofilmwhenitisexposedandprocessedintonegatives
MATERIALS
Enlargingpaper(PolycontrastRC)
Lightsource(enlarger,ifpossible)
Darkroomwithsafelight
Chemicals:1traydeveloper,1traystop,1trayfixer,1traywater
Objectsforsubjectmatter
PROCEDURE
Explaintoyourstudentsthattheywillbeusingthefiveingredientsnecessaryfortakingaphotograph:(1)camera(inthiscase,thedarkroom),(2)light(theenlarger),(3)film/photographicpaper,(4)subject(objectsofchoice),and(5)photographer(thestudentsthemselves)
Presettheenlarger’stimerto5secondsandthelensapertureto8(Note:Youcanalsouseanyotherkindoflightsourceandtimer.)
Demonstratetheprocedure
Positionpaperunderareaoflightsource
Placeobjectsonpaper
Exposethepapertolight
Processpaperinthedeveloper,stop,andfixer
Washfor10minutes
Dry,eitherhangingonaclotheslineorface-uponametalscreen

5� FocusLessonPlans
Part IV: Resources
vARIATIONS
Experimentwithexposuretimesanddifferentobjects
Movethelightsourcetodifferentanglessothatitcastsshadows
Createmultipleexposuresbyusingseveralshortexposuretimesononepieceofpaper,movingtheobjectsaroundeachtime
Drawonacetateanduseitasanegativeoverthepaper
ColorthedriedPhotogramwithcoloredpencilsorMarshall’sphotooils
Exposeanentiresheetofpapertolight;drawanimagewithabrushdippedindeveloper;processthroughthefixerandwash
ToneReversal:Putfinished(dry)Photogramfacedownincontactwithapieceofphotographicpaperandexposefor30seconds.Process.
Solarizetheimagebyturningonthedarkroomlightbriefly,reversingthetones
FocusLessonPlans 55
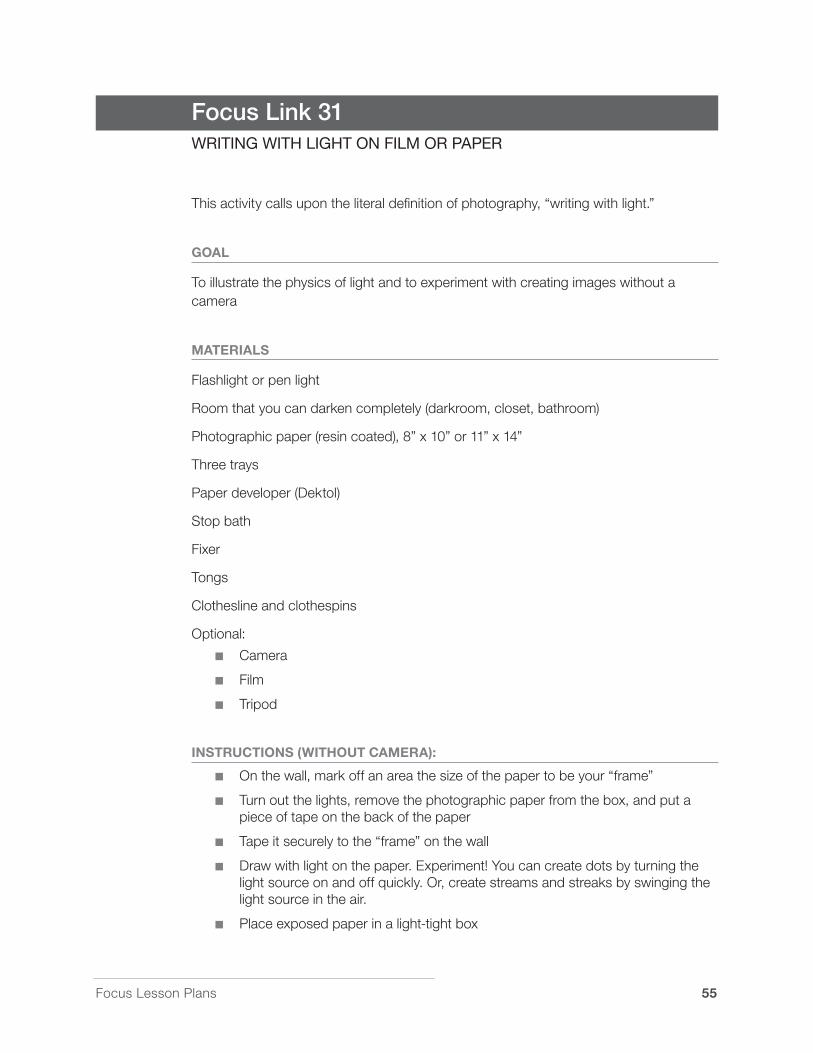
Focus Link 31wrItIng wIth LIght on FILm or PaPer
Thisactivitycallsupontheliteraldefinitionofphotography,“writingwithlight.”
GOAL
Toillustratethephysicsoflightandtoexperimentwithcreatingimageswithoutacamera
MATERIALS
Flashlightorpenlight
Roomthatyoucandarkencompletely(darkroom,closet,bathroom)
Photographicpaper(resincoated),8”x10”or11”x14”
Threetrays
Paperdeveloper(Dektol)
Stopbath
Fixer
Tongs
Clotheslineandclothespins
Optional:
Camera
Film
Tripod
INSTRUCTIONS (WITHOUT CAMERA):
Onthewall,markoffanareathesizeofthepapertobeyour“frame”
Turnoutthelights,removethephotographicpaperfromthebox,andputapieceoftapeonthebackofthepaper
Tapeitsecurelytothe“frame”onthewall
Drawwithlightonthepaper.Experiment!Youcancreatedotsbyturningthelightsourceonandoffquickly.Or,createstreamsandstreaksbyswingingthelightsourceintheair.
Placeexposedpaperinalight-tightbox
5� FocusLessonPlans
Part IV: Resources
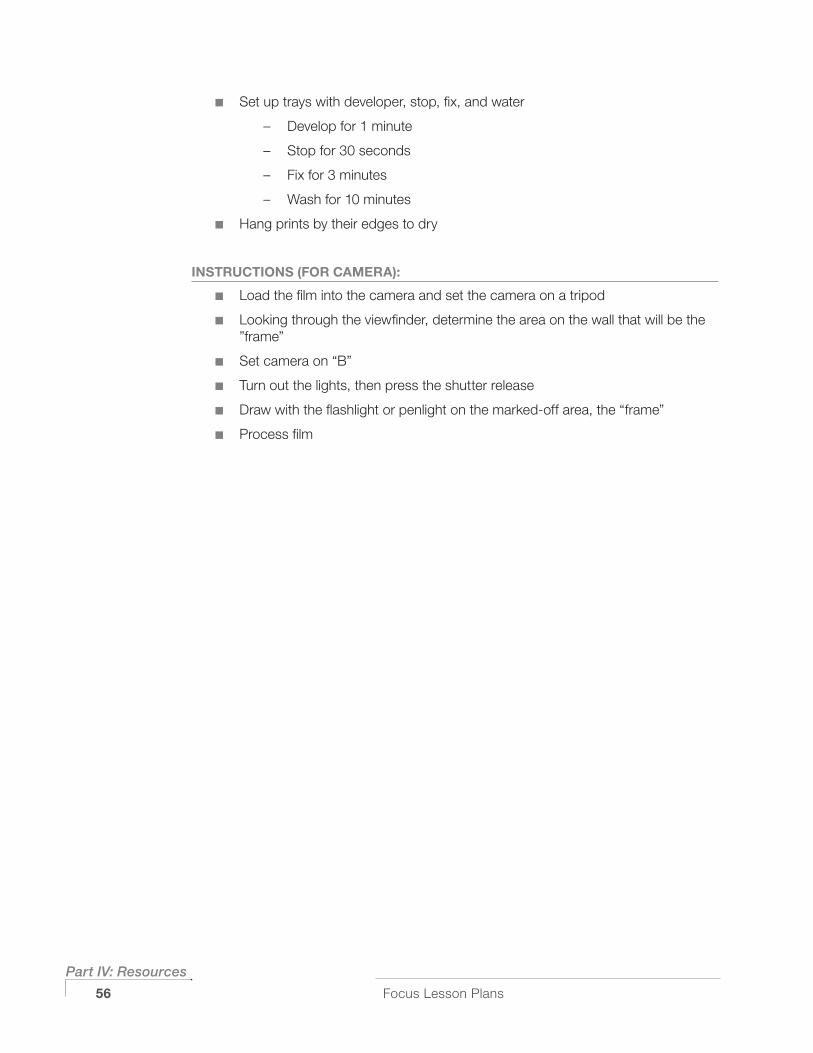
Setuptrayswithdeveloper,stop,fix,andwater
– Developfor1minute
– Stopfor30seconds
– Fixfor3minutes
– Washfor10minutes
Hangprintsbytheiredgestodry
INSTRUCTIONS (FOR CAMERA):
Loadthefilmintothecameraandsetthecameraonatripod
Lookingthroughtheviewfinder,determinetheareaonthewallthatwillbethe”frame”
Setcameraon“B”
Turnoutthelights,thenpresstheshutterrelease
Drawwiththeflashlightorpenlightonthemarked-offarea,the“frame”
Processfilm

FocusLessonPlans 5�
Focus Link 32LIquId LIght and other aLternatIve Processes
GOAL
Tocreateimagesonanyflatsurface,experimentingjustliketheinventorsofphotography
MATERIALS
Liquidlightorcyanotypemixture(store-boughtlight-sensitivemixturethatcanbeappliedtoanyflatsurfacetocreateanimage)
Watercolororabsorbentpaper
Objectswithflatsurfaces(leaf,fabric,Plexiglas,metalcan)
PROCEDURE
Inadarkroom,applyliquidlighttotheobject’ssurface
Letdry
Useanenlargertoprojecttheimageontothesurface
Processintraysandletdry
TIPS
Experimentwithexposuretimesonthetreatedmaterialsthatmakegoodtests,savingyourbestmaterialsforlast
RESOURCES
Crawford,William.Keepers of Light.NewYork:Morgan&Morgan,1979.
Arnow,Jan.Handbook of Alternative Photographic Processes.NewYork:VanNostrandReinholtCo.,1982.
Coe,BrianandHaworth-Booth,Mark.A Guide to Early Photographic Processes.London:Victoria&AlbertMuseum,1983.

5� FocusLessonPlans
Part IV: Resources
Focus Link 33PInhoLe PhotograPhy
Thisactivitycallsupontheliteraldefinitionofcamera,“adarkbox.”
GOAL
Tocreateyourowncameraandlearnaboutthephysicsoflight
MATERIALS
Anybox:emptyoatmealboxes,photographicpaperboxes,shoeboxes,etc.
Aluminumfoil
Sharppin
Blackgaffertape
Blackspraypaint(tomaketheinsideoftheboxblack)
Roomthatyoucandarkencompletely(darkroom,closet,bathroom)
Photographicpaper(resincoated),5”x7”,8”x10”
Fourtrays:paperdeveloper(Dektol),stopbath,fixer,water
Tongs
Clotheslineandclothespins,orablotterbook
PROCEDURE FOR MAKING THE CAMERA
1 Firstpainttheinsideoftheboxblack(Blackabsorbslightrays.)
� Cutasmall,squareholeintoonesideofthebox,whereyouwouldlikethe“lens”tobe.Considerthatyourpaperwillbeoppositethislens.Keepthispieceofcardboardtomakeyourlenscover.
� Securelytapethefoilovertheholeontheinsideofthebox
� Prickthefoilwithaverysmallhole.Considerthatthesizeoftheholeaffectstheamountoflightcomingin,andthereforeyourfocus,imagequality,andexposuretime.
5 Takethesquarepieceofcardboardfromstep2.Tapeitoverthefoilontheoutsideoftheboxwithblacktape.Thiscreatesaflap,approximatingashutter.

FocusLessonPlans 5�
PROCEDURE FOR CREATING THE IMAGES
Workinginadarkroom(orachangingbox),placephotographicpaperinthebackofthepinholecamera(oppositethelens).Closethebox.
Securetapearoundtheedgesofthecameraboxandkeeptheflapdownasyoutakethecameraintolight
Gotoyourlocationandsetupthecamera
Exposethepaperbyliftinguptheflap.Recordyourexposuretime.(Ittakesalotoftestingtodeterminetherightexposure.)
Setuptrayswithdeveloper,stop,fix,andwater
– Developthepaperfor1minute
– Stopfor30seconds
– Fixfor3minutes
– Washfor10minutes
Hangprintsupbytheiredgestodry,orplacethemintheblotterbook
�0 FocusLessonPlans
Part IV: Resources
FOCUS REFLECTION ACTIvITIES
Theseactivitiesencouragereflectionontheimagesthatstudentshavecreatedorfound.Thisprocesshelpsstudentsunderstandphotographicskills,techniques,andaestheticsandhowimagescommunicate.
Focus Link 34crItIque your Image
GOAL
Toposequestionsthathelpstudentsanalyzethequalitiesoftheirownimagesindiscussionorwritingactivities
ACTIvITY
Whatdoesthisimageshow?
Whydoyoulikethisimage?
Howdidyoucreatethisimage?
Whatqualitiesdoyoulikethebest?Considerframing,lighting,composition,content,andsoforth.
Whatdidyouhavetroublewith?Whatwouldyoudodifferentlynexttime?
Describetheexperiencesofcreatingthisimage.Whatdidyoufeel?Whatwasenjoyableorchallenging?
FocusLessonPlans �1
Focus Link 35storyteLLIng
GOAL
Todiscoverhowvisualimagestellstoriesandwriteastoryoftheirown
SAMPLE ACTIvITIES
Creativestories:
Whatstorydoesthevisualimagetell?Lookingatanimage,discussthecharacter,setting,action,pointofview,andtheme.
Writestoriesinresponsetoanimage.Usespecificdetailsfromtheimageinyourstory.(Focus Link 17)
Alternatives(SeeChapter 14.)
Image-and-text artwork:
Howisthestoryenhancedanddirectedbyatitleorwordswrittenontheimage?
Howdoestheimageenhanceordirectyourreadingofthetext?
Combineimagesandtextinvariousarrangements,somewheretheimageleadsandotherswherethetextleads
Picture stories:
Sequenceaseriesofimages
Howdoesthestorychangeifyouputtwoormoreimagestogetherinasequence?
Whathappensinthespacebetweenimages?
Oral stories:
Whatisoralstorytelling?Theoldestformofstorytelling,oralstoriestellaboutaperson,place,oreventusingclearandvividlanguage.Thesestoriesaretoldaloudoverandoveragainuntiltheirformtakesshape.Often,oralstoriessoundpoeticbecausestorytellerspayattentiontorhythmandrhyme.Asinfiction,storytellersusedescriptivewordstocreateimagestoleadthelisteneralongandhighlightimportantideastoremember.Also,asindrama,thestoriesaremeanttobeperformedandtotakeshapeastheyarepracticed.
Usefamilyphotographsasinspirationforanoralstoryandinterview
Showafamilyphotographtoafamilymemberandask:Whatdoesthephotographremindyouof?
Askforspecificsaboutthesituation,people,andtimeperiod

�� FocusLessonPlans
Part IV: Resources
Begintomapouttheoralstorybymakinganoutlineofkeypointsintheorderyouwouldliketopresentthem
Identifykeyimagesthatyoucandescribetohighlightyourmainpoints
Thinkaboutafirstsentencethatintroducesyourstory(considerusingtheimageasastartingpoint)
Withataperecorderon,begintellingyourstory
Trytousesimple,clearsentences
Whenyoulistentoyourtape,trytoidentifyanypatternsofspeech,rhythm,orrhymethatnaturallyemerged.Bringouttheseelementswhenyoupracticeitagain.
FocusLessonPlans ��
Focus Link 36sPeechwrItIng
GOAL
Todevelopspeechwritingskillsandtospeakaboutpicturestootherstudents
ACTIvITY
Chooseapicturethatyoulikefromafamilyphotoalbum,magazine,historybookoryourownphotographicwork
Writeaspeechaboutwhatthephotographmeanstoyou
Somehintsonspeechwriting:
Introduction:Trytograbtheaudience’sattentionwithagoodopening—animage,aninterestinganecdote,themainidea
Body:Includelotsofinformationaboutthephotographandthestorybehindit
Conclusion:Repeatyourmainpoint
Note:Thiscouldalsobeaclassproject.Dividetheclassintopairsandletthemintervieweachotheraboutthemeaningofthephotograph.Eachstudentcouldwriteaspeechabouttheotherperson’sphotograph.

�� FocusLessonPlans
Part IV: Resources
Focus Link 37art Projects
GOAL
Torespondtoaphotographwithartprojectsandtobuildanunderstandingofdifferentmedia
SAMPLE PROjECTS
Takeaphotographinresponsetothegeometry,color,andsubjectmatterofanotherphotograph(Onestudentcancreateanimage,andthenpassthecameraon.)
Createanimageandtextjournalwithphotographsandpersonalstories
Draw,paint,andwritearoundoronaphotographoronacetateplacedontopofthephotograph
Createacollagebycuttingupdifferentimages(copiesoforiginals).Tapeorgluethemtoaposterboard.Addpaint,text,anddrawing.
Combinephotographyandwriting—poetry,fiction,andjournalism
Combinesoundandvideowithimageprojections

FocusLessonPlans �5
Focus Link 38research Projects
GOAL
Tousephotographstolearnabouttopicsinthecurriculum
SAMPLE PROjECTS
Researchtopicsandpeoplewhoarefeaturedintheexhibition
Researchcertaintimeperiodsandevents,collectillustrativeimages,andcreateavisualhistoryoranillustratedtimeline
Investigatethephotographichistoryoftopicsstudiedinschool.Forexample,ifyouarestudyingscience,youcouldresearchhowphotographerslikeEdwardMuybridge,HaroldEdgarton,andBerniceAbbotappliedphotographytostudyscience.Or,ifyouarefocusingontheachievementsofwomen,youcouldstudywomenphotographerswhohaveinfluencedthemediumsinceitsinceptionin1839.
Createanexhibitioncaption,usingtheworksheet.(SeeChapter 14formoreinformation.)
Exhibition Caption Worksheet
ResearchaphotographandtheartistbysearchingtheInternet,visitingalibrary,inquiringinthemuseumorgallery,orreadingaphotographybook.
Createanexhibitioncaptionincluding:
– thetitle
– dateofcreation
– photographer’sname
– photographer’sbiographicalinformation
– techniquesused
– photographer’sintention,ifknown
– theculturalsignificanceofthephotograph
Makesuretheinformationonthecaptionanswersthequestion:Whyisthisphotographonexhibition?

�� FocusLessonPlans
Part IV: Resources
Focus Link 39Image box
GOAL
Tocreateareceptacleforimagesandideasabouthowpicturescommunicateourhistory,culture,self-perceptions,andperceptionsofothers
MATERIALS
Cardboardboxes
Collectionofimagesfromvarioussourcesincludingmagazines,newspapers,familyalbums,andpersonalartwork
ACTIvITY
Createcategoriescorrespondingtothemesoraspectsofthecurriculum
Decoratetheoutsideofthecardboardboxes
Labelboxesaccordingtorelevantcategories
Contributeimagestotheboxesonanongoingbasis
Eachboxwillserveasavaluablevisualresourceformanycurriculartopicsrangingfromhistoricaleventstocurrentissues.Studentscanusetheimageboxtobringupissuesandquestionstheymayhaveonvarioustopics.
SAMPLE PROjECTS
Createillustratedtimelines
Highlighttopicscoveredinclass
Usetheimagesasabasisforbuildingvocabulary,languagedevelopment,andwritingskills
Usetheimageboxasastartingpointforartprojects.Studentsreachintheboxandthencreateartinresponsetowhattheyseeinthephotograph.
FocusLessonPlans ��
Focus Link 40vIsuaL dIary
GOAL
Tohelptodefinetheimpactofvisualimagesonstudents’lives
MATERIALS
Notebook,eitherpurchasedorhandmade
ACTIvITY
Introducethetheme
– Everyday,weseemanyimages—throughadvertisements,televisionshows,snapshots,andart.Whatdotheseimagesmeantous?Wheredoweseethem?Whatdoweseeinthem?
CreateaVisualDiary
– Makealistofwhereyouseeimagesinoneday,fromthetimeyougetuptowhenyougotobed
– Pastesomeoftheimagesinthediary,ordrawthem
– Inthediary,describetheimagesyousawandtheireffectonyou
– Discusstheimageandtheimpactusingthesequestionsasguidelines
The picture:
Whatdoyousee?
Whenandwherewasthepicturetaken?
Whatisgoingoninthepicture?
Whatstorydoesthepicturetell?
The impact:
Whatdoesthepicturemakeyouthinkof?
Howdoesitmakeyoufeel?
Whatdoesitmakeyouwanttohaveordo?
Doesitremindyouofanything?
Doesitfrightenyou?Doesitinspireyou?
Whatotherresponsesdoyouhave?

�� FocusLessonPlans
Part IV: Resources
Focus Link 41PIctures and IntervIews
GOAL
Tocreateimagesandtextthattogethertellthestoryofthepersonwhowasinterviewed
Todevelopinterviewing,writing,andphotographyskills
WORKSHEET
PART I: As a reporter, you will need a pad, a pencil, and a tape recorder, if possible.
Identifypeopleinyourfamily,neighborhood,school,orworkplacewhowillcollaboratewithyou.
Askthemtochooseapicturethatchangedtheirlife,inspired,amused,orfrightenedthem.
Interviewthem.Usingataperecorder,askthem,“Whatdoesthispicturemeantoyou?”Keepaskingthemmorespecificquestions.Listencarefullytothestorytheytell.
PART II: As a curator of your exhibition, you will need a copy of their picture, a frame for it, and a matching frame for the transcript of their interview.
Putthepictureinaframe.(Tocopyit,considerre-photographingit,makingaphotocopy,orscanningandprintingitdigitally.)
Transcribetheinterview.Selectthemosttellingpart.Editittofitononepage.
Createyourexhibition.

FocusLessonPlans ��
Focus Link 42create your own exhIbItIon
GOAL
Tocreateopportunitiestopresentstudentworktothepublic
ACTIvITY
Therearemanyoptionsforthefinalpresentationofworkforexhibition.Ifyoucan’tcutyourownmats,buypre-cutmats,orchooseaframethatdoesn’trequireamat.(Tips:UseNielsenframes,glassclipframes,orboxframes.)Ifyoudon’thaveframes,youcanalsomountitemsoncardboard.Ifyouusecardboard,considerusingthesamecolor,butkeepthecolorandthemarginsaboveandbelowthepictureconsistent.Considerusingthickfoamcoreandmountingthepicturetotheedgeofthesurfacesothereisnoborder.Covertheseimageswithplexiglass.
Createcaptions:Includethepicturetitle,thestudent’sname,andifpossibletheirage.Printcaptionsonheavycardstockorfoamcore.Usingdouble-sidedtapeorfuntack,mountthemonthewallnexttotheframedpicture.
Mountthepicturesonawallofyourschool,library,orcommunitycenter.Considertheaverageheightofyouraudience;keepthemiddleofthepictureattheaverageeyelevelofthestudentsinyourclass.
Tips:Whenyoucuratetheshow,lookcarefullyathowonepicturelooksnexttoanother.Keepinmindhowtheserelationshipscreatemeaningandhowthearrangementcreatesmovementthroughthespace;youarecreatinganexperiencefortheviewer!Trytogroupthepicturestoaddressaparticulartopic.Arrangethepicturessuchthattheshapesandanglesdrawtheviewer’sattentionintothespace,notoutofit.
Createwalltextthatexplainsthepurposeoftheproject,liststheartists’names,andthankthepeoplewhohelpedtomaketheprojecthappen.Arrangeforfoodandrefreshmentsfortheopening.

�0 FocusLessonPlans
Part IV: Resources
Focus Link 43what makes a “good‘’ PhotograPh?
Photographers make choices from among the elements of photography in order to get their message across. When creating and editing photographs, focus on technique and effect. A “good” photograph is one that “works” well, communi-cating a clear, interesting message.
thIngs to thInk about when makIng a PhotograPh
SUbjECT
Whatareyoutryingtosayaboutthesubjectinthisphotograph?
TECHNIqUE
Whattechniquescanyouusetodirectattentiontothesubject?
Howdoyouwanttocomposethephotograph?
Lighting:Whatdirectionisthelightcomingfrom?
Point of view:Wherecanyoupositionyourselfwhentakingthephotograph?
Framing:Howcanyouholdthecamera?(Vertical,horizontal,paralleltohorizon,ortilted?)
Timing:Whenshouldyoutakethephotograph?
Motion:Shouldanythingbemovinginthephotograph?Shoulditlookblurryorfrozeninspace?
Focus:Whatshouldbeseenclearlyinthephotograph?
Materials:Whatcamera,film,andequipmentdoyouneedforthisphotograph?
Tips:Createmorethanonephotograph.Approachthesubjectfromdifferentpointsofviewandvaryhowyouholdthecameraandframephotographs.Capturedifferentmomentsintime,especiallywhenphotographingpeopleormotion.

FocusLessonPlans �1
thIngs to thInk about when edItIng PhotograPhs
DESIGN
Technique:Describetheeffectsthatthetechniqueshaveontheresultingphotograph.
Composition:Whereisyoureyedrawn?Studyhowthecompositionkeepsyoureyebusywithitsangles,forms,shapes,andlines.Thinkabouthowthecompositioncreatesbalanceandstructure.Doesthecomposition“work,”effectivelycontributingtothemeaning?
Framing:Whatisincludedintheframeandwhatisexcluded?Isanythingcroppedinthephotograph?Doesthecroppinghelpdrawattentiontowhatthephotographissaying?Orisitdistracting?
Lighting:Whateffectdoesthelightinghave?Doesthelightinghighlightimportantinformation?Doesitcreateapatternoflightandshadowthataddstowhatthephotographissaying?
Focus:Howdoesfocusdirectyourattention?Ifthereisblur,isiteffective?
CONTENT
Subject:Whatisthesubjectofthephotograph?
Concrete Subject:Whatisthephotographof?Thisiswhatyouseeinthephotograph.
Abstract Subject:Whatisthephotographabout?Thisishowyouinterpretwhatyouseeinthephotograph.
Background:Whatshapes,tones,anddetailsdoyouseeinthebackground?Howdoesthebackgroundconnecttothesubject?
Foreground:Describewhatyouseeinfrontofthesubject.Whateffectdoestheforegroundhaveonhowyouseethesubject?
People:Fromtheirexpression,pose,andclothing,whatinformationdoyouhaveaboutwhotheyareandwhattheyaredoing?
Mood/Feeling:Howdoesthisphotographmakeyoufeel?Whatelements(lighting,colors,shapes,textures,thesubject)makeyoufeelthatway?

�� FocusLessonPlans
Part IV: Resources
Symbol/Metaphor:Canyouseeanysymbolsinthisphotograph?Wouldtheybefamiliartoothercultures?Isthereanythinginthephotographthatcouldbereadasametaphor?
Style & Genre:Whatistheintendedpurposeforthephotograph(e.g.,magazine,fineartexhibition)?Canyouplacethephotographinagenre:portraiture,stilllife,fashion,documentary,photojournalism,conceptual,narrative,etc.?
Meaning:Whatisthephotographsaying?
Describehowtheelementsofphotography—composition,photographicattributes,technique,style&genre—communicatethismeaning.
Whatquestionsorideasdoesthephotographmakeyouwonderabout?

FocusLessonPlans ��
Focus Link 44seeIng actIvIty
Selectaphotograph.Lookatitcloselyandthoughtfullyfor30seconds.(Timeyourself;itwillfeelmuchlongerthanyoumayexpect.)Thenusethefollowingquestionstoguideyour“seeing,”andwriteyourresponsesquicklyandfreely.Skipquestionsthataretoohardandcomebacktothemlater.Thisactivityshouldtakeabout20minutes.
FIRST IMPRESSIONS
Listtendetailsthatyouseeinthephotograph.
Whatelsedoyousee?
COMPOSITION
Whereisyoureyedrawn?
Describethepattern,shapes,andcolors.
Lookawayandthenlookatthephotographagain.Whatcaughtyoureyefirst?
Whydoesthatstandout?
PHOTOGRAPHIC ATTRIbUTES
Findthepatternoflightandshadow.Whatdoesthelightingdrawyourattentionto?
Describewhatisinfocus.
Whatotherphotographictechniquesdoyounotice?
Whatisthephotographer’spointofview?
CONTENT
Whatisthesubjectofthephotograph?
Whatquestionsdoyouhaveaboutthesubject?

�� FocusLessonPlans
Part IV: Resources
STYLE & GENRE
Useanadjectivetodescribethestyleofthephotograph.
Canyouguesswhatgenrethisphotographrepresents?Whatmakesyousaythat?
MEANING
Howdoesthephotographmakeyoufeel?Whatdoesthephotographmakeyouthinkof?
Whydoyouthinkthephotographermadetheseartisticchoices?
Whatdoyouthinkthephotographissaying?
LAST IMPRESSIONS
Lookoncemoreatthephotographandfindsomethingyouhaven’tdescribedyet.
Whatisyourreactiontothisexercise?Didanythingsurpriseyou?
SELF-ASSESSMENT
Whatareasweredifficulttoanswer?Photographicattributesandtechnique?Composition?Content?Styleorgenre?Meaning?

This section is an excerpt from Focus on Photography: A Curriculum Guide
Written by Cynthia Way for the International Center of Photography
© 2006 International Center of Photography
All rights reserved.
Published by the International Center of Photography, New York.
Printed in the United States of America.
Please credit the International Center of Photography on all reproductions.
This project has been made possible with generous support from Andrew and Marina Lewin, the GE Fund, and public funds from the New York City Department of Cultural Affairs Cultural Challenge Program.
FOCUS ON PHOTOGRAPHY: A CURRICULUM GUIDE


A FOCUS ON PHOTOGRAPHY: A CURRICULUM GUIDE
Appendix 1:Basics of Photography
What Is Photography?Ever since photography’s invention in 1839, people have been using
photography to describe the world around them. The word photography is derived from the Greek words: “photo,” which means light, and “graph,” which means writing. Photography is writing with light.
The camera is like a mirror with a memory. Every detail of what you see through the camera frame is reflected and recorded onto the film. When a photographer takes a picture, the shutter opens and closes like a door, letting light into the camera. When the shutter is slow, anything that is moving will leave blurry traces on the film. When the shutter is fast, motion is frozen in time and space.
Light traces the image onto the film. Silver salts in the film change when they are exposed to different amounts of light. Where there is a lot of light, the silver salts disappear and the image is white. Where there is less light, the silver salts hardly change, and the image is dark and dense. With the right exposure, the silver salts will transform in various degrees, creating an image rich with detail. In this way, you can see everything from the shadows to the highlights, almost as the scene appears before your eyes.
Photography seems like magic. But, photographs are possible because of scientific processes. Light causes chemical reactions in the film and the paper used to make prints. When the film is taken out of the camera, the image is latent—it’s there but you can’t see it yet. Photographers roll the film into a light-tight canister and pour in chemicals, which turn the invisible image into a visible image.

� APPENDIX 1: Basics of Photography
To make prints, photographers must work in a darkroom. The room is lit only by reddish safe lights, which do not cause chemical reactions on the paper. Photographers place the negative in an enlarger and shine light through it, projecting the image onto photographic paper. Then, photographers put the paper into a tray of chemicals to develop the print. This is when you can watch the image appear before your eyes. Photographers put the paper into the stop bath, to stop the developing, and into a fixer, to make the image last. Now, they are ready to look at the image outside of the darkroom.
Digital ImagingDigital imaging still relies on the essential ingredient of photography, light. With
computer technology, we can scan in images or create images with a digital camera, translating information cast by light into digital signals. Pixels on a computer screen are analogous to the grain on a photograph, or the silver salts. We can manipulate images using photo-imaging software and print out or post the resulting images on the web. The computer becomes your darkroom!
A FOCUS ON PHOTOGRAPHY: A CURRICULUM GUIDE
Appendix 2:A Brief History of Photography
Mid-Sixteenth Century—Camera ObscuraHundreds of years ago, artists discovered the camera obscura. They noticed
that light coming through a keyhole into a dark room cast an inverted image on the wall. They built a camera obscura by setting a lens into a two-foot square box and placing a sheet of glass opposite the opening.
With the camera obscura in hand, the artist could set up the equipment in the field. Through the camera frame, the artist saw the view that he or she wished to draw. Then the artist traced the image reflected on the glass frame with a high degree of detail. In this way, artists used an early form of a camera picture to give their drawings realistic perspective and detail.
1826—Early Experimentation: HeliographsJoseph Nicephore Niepce of France invented heliographs, or sun prints. This
was the first experiment that created a prototype of the photograph, removing the artist’s hand from the creation of the image and letting light draw the picture. Niepce placed an engraving onto a metal plate coated in bitumen, and then exposed it to light. The shadowy areas of the engraving blocked light, but the whiter areas permitted light to react with the chemicals on the plate. When Niepce placed the metal plate in a solvent, gradually an image, until then invisible, appeared.
2 APPENDIX 2: A Brief History of Photography
1839—The Invention of PhotographyOn a trip to Paris, Niepce visited the painter and theatrical set designer, Louis
Jacques Mande Daguerre, and showed him the heliographs. Daguerre was intrigued by the invention, and the two men became partners in photographic experimentation. Unfortunately, after four years of creating images and testing chemical processes, Niepce passed away.
In 1839, Daguerre invented a process that “fixed” the images onto a sheet of silver-plated copper. He polished the silver and coated it in iodine, creating a surface that was sensitive to light. Then, he put the plate in a camera and exposed it for a few minutes. After the image was painted by light, Daguerre bathed the plate in a solution of silver chloride. This process created a lasting image, one that would not change if exposed to light. When set next to a black velvety surface, the metal plate reflected the shadowy areas of the picture and the light areas seemed illuminated. The Daguerrotype rendered details with such accuracy it was called “a mirror with a memory.”
At the same time, William Henry Fox Talbot, an English botanist and mathematician, made a similar invention. He sensitized paper to light with a silver salt solution. Talbot placed objects such as a leaf or lace onto the paper and then exposed it to sunlight. The background became black, and the subject was rendered in gradations of gray. This was a negative image, and from the negative, photographers could now duplicate the image as many times as they wanted. Talbot made contact prints of this image, reversing the light and shadows to create a detailed picture. In 1841, he perfected this paper-negative process and called it a calotype, from the Greek, meaning “beautiful picture.”
News of Daguerre’s and Talbot’s discoveries sparked the curiosity of the scientist and astronomer, Sir John F.W. Herschel. In 1839 he perfected the process of fixing, or making permanent, the negative image. Herschel bathed the negative in sodium thiosulfite to dissolve the silver salts, so that they would not react with light any longer, and the image became permanent. He also coined the name we use today for these processes—photography, or “writing with light.”
Soon, photographers around the world used Daguerrotypes and calotypes to record architecture and nature with finite detail, to document historic events, and to create portraits of literary and social figures, friends, and family members.
1851—The Glass NegativeIn 1851, Frederick Scott Archer, an English sculptor, invented the wet plate. Using a
viscous solution of collodion, he coated glass with light-sensitive silver salts. Because it was glass and not paper, this wet plate created a more stable and detailed negative.
APPENDIX 2: A Brief History of Photography 3
However, the wet plate needed to be developed and fixed before it dried. In order to process the pictures quickly, the photographer had to carry a portable darkroom—with cumbersome black boxes, trays and tongs, bottles of chemistry and fragile glass plates—everywhere he or she went.
1850s—Tintypes, Cartes de visites, and Stereo Views
Throughout the 1850s, there were various technological improvements in paper, lenses, and cameras. These advancements made it easier for the general public to become involved in photography. Tintypes were pictures made on thin sheets of metal. Cartes de visites were small albumen prints on paper cards. A popular pastime was viewing pictures with a stereoscope that created a 3D effect. Because these pictures were inexpensive to make, they became common ways to carry pictures of scenic views, families, and individuals.
1860s—Realism and FantasyNewsworthy events were communicated with the aid of photography. In the 1860s,
many photographers, such as Matthew Brady, William Fenton, and Timothy O’Sullivan, became interested in documenting war. These photographs were seen in exhibitions, mounted in books, and used as sources for engravings for newspapers. They provided the most realistic and compelling records of the cruelties of war available at the time.
Many photographers explored the natural landscape with cumbersome camera equipment in tow. William Henry Jackson traveled for miles over backbreaking terrain to document the crystal mountain peaks and black lakes of hitherto unknown reaches of the American landscape. He was the first person to photograph the Old Faithful Geyser in Yellowstone Park, and his work helped to preserve some of America’s wilderness.
Photography enabled artists to create a representation of the physical world that was faithful to reality, but it was also seen as another medium for rendering allegories and works of art that followed the traditions of painting. Julia Margaret Cameron purposely blurred the image, using radiant lighting and soft focus to evoke the spiritual quality of the subject. She employed this method whether photographing social figures such as Lord Alfred Tennyson and Charles Darwin or portraying allegories with models who were often family members. Lewis Carrol photographed Alice Grace Weld, his friend and the inspiration for Alice in Wonderland, dressed up as Little Red Riding Hood. Henry Peach Robinson combined several negatives to re-enact dramatic scenes in myths and stories.

� APPENDIX 2: A Brief History of Photography
1870s—Capturing MotionIn 1869, Edward Muybridge invented a way to freeze motion. He created a shutter
inside the camera: two boards slipping past each other at the touch of spring. The film recorded the actions that took place during the split-second when the shutter was open. Muybridge conducted a series of studies on motion, photographing men vaulting over poles and horses galloping on a track. His work not only assisted artists in studying anatomical form in motion, but it was also a precursor to motion pictures.
1880s—Technological Advancements: The Dry Plate and the Hand-Held Camera
In 1879, experiments resulted in the dry plate, a glass negative plate with a dried gelatin emulsion. Dry plates could be stored for a period of time. Photographers no longer needed the cumbersome and time-consuming portable darkroom. In fact, photographers began hiring technicians to develop their photographs, and the art of photo finishing was born. In addition, dry processes absorbed light quickly—so rapidly in fact that the tripod could be stored in the closet and the camera held in the hand. With the speed of the film and the influx of hand-held cameras, action shots became more feasible.
In 1888, George Eastman, a dry plate manufacturer in Rochester, NY, invented the Kodak camera. For $22.00 an amateur could purchase a camera with enough film for 100 shots. After use, it was sent back to the company, which then processed it. The ad slogan read, “You press the button, we do the rest.” A year later, the delicate paper film was changed to a plastic base, so that photographers could do their own processing. (Now we have a resurgence of this company-processed invention with the disposable camera.)
The Turn of the Century—Pictorialism & Straight Photography
Many photographers were interested solely in the aesthetic possibilities of the medium. Pictorialists, such as Gertrude Kasebier and Alvin Langdon Coburn, took photographs that imitated the style of paintings. Using symbols, shimmering light, and soft focus to create impressionistic dots and streaks, pictorialists depicted a world that was one step removed from reality.

APPENDIX 2: A Brief History of Photography 5
Alfred Steiglitz, a New York-based photographer, was actively involved in writing, editing, lecturing, photographing, and organizing gallery shows to establish the reputation of photography as a fine art, from Pictorialism to avant-garde methods. Finally in 1924, the Museum of Fine Arts in Boston collected Steiglitz’s photographs; it was the first time that photographs were collected in a museum in the United States.
At the same time, many photographers became interested in photography as a tool to record customs and manners, the facets of their culture that they felt were disappearing at the turn of the century. With Kodak hand-held cameras and rolls of gelatin films, photojournalists burst onto the scene. They felt compelled to record life as it unfolded before their eyes, to bear witness to the world and their place in it.
1920s and 1930s—Experimentation In 1925, the invention of the Leica camera liberated photographers. Because the
Leica was small, light, and quick, they were now able to capture the activity of street life with greater accuracy and imagination. In responding to the momentous changes in the world around them, photographers experimented with different means of expression and techniques, such as surrealism, color, montage and F/64 straight photography. FSA Photographers Dorothea Lange, Walker Evans, Marion Post Wolcott, and others, traveled through America during the Depression, creating a visual document powerful enough to influence the government to change social welfare laws. Editorial and advertising photography became important venues for photography. Margaret Bourke-White, whose work ranged from industrial photography to portraits of such figures as Stalin, Roosevelt, and Churchill, created the cover photo for the first issue of Life Magazine in 1936.
19�0s and 1950s—Photography & PublishingPhotography books of all kinds became popular. Henri Cartier-Bresson published
The Decisive Moment; Robert Frank published The Americans. News magazines such as Life and Look helped to establish the importance of photography as a communication tool. During World War II, Robert Capa’s historic photographs of the amphibious landing on D-Day brought news of the event home in unforgettable imagery. Roy deCarava’s 1955 collaboration with Langston Hughes resulted in the publication, The Sweet Flypaper of Life.

6 APPENDIX 2: A Brief History of Photography
1960s and 1970s—Photography Comes of Age
Photography began to be shown in galleries and museums, collected in auction houses, published in books and magazines, and taught in universities. In 1974, Cornell Capa founded The International Center of Photography as a place where socially concerned photographic work could be seen as a creative art form. ICP’s current collections contain works from this exciting period by such notable artists as: Diane Arbus, Manuel Alvarez Bravo, Imogine Cunningham, Bruce Davidson, William Eggleston, Elliot Erwitt, Lee Friedlander, Nan Goldin, Helen Levitt, Joel Meyerowitz, Duane Michaels, Gordon Parks, and Andy Warhol.
1980s and 1990s—Contemporary Photography
Photographers use various techniques, including large-format Polaroid photography, advanced electronics, multi-media installations, and digital imaging, as well as early photographic processes and straight photography, to create works that question such topics as identity, society, issues of verity, combinations of image and text, and fact versus fiction. Some notable contemporary artists who have exhibited at ICP include: Chester Higgins, Jr., Annie Liebovitz, Mary Ellen Mark, David Levinthal, James Nachtwey, Lorie Novak, Eugene Richards, Joseph Rodriguez, Sebastio Salgado, Sandy Skoglund, Kiki Smith, and Carrie Mae Weems.
A FOCUS ON PHOTOGRAPHY: A CURRICULUM GUIDE
Appendix 3:Building a Traditional anda Digital Darkroom
Building a Traditional Darkroom To build a traditional darkroom, you will need a room that can be completely
darkened, working plumbing, and ventilation. Your darkroom needs enough space for a sink (long enough to fit four 11” x 14” trays and a water bath) and along the wall, a row (or two) of enlargers. (Underneath each enlarger could be drawers, shelves, or cabinets for storing notebooks, negatives, and paper.)
The sink needs to have temperature controls and proper drainage. You can store chemistry under the sink or in a nearby closet. Ideally, you would have a separate sink for film processing, as that can take place in a lit area. If you don’t have the space, you can alternate when film processing and printing activities are taking place.
You will need a print finishing area, where prints can be dried, pressed, and mounted. If you are going to use fiber paper, you need paper drying racks (shelves with screens on them), and a dry mount press.
If you want a studio, you need at least 12’ by 12’ space in which to set up lights. Against one wall, you can create a background or set up a seamless paper stand and drag down the color paper when you want to use it.

� APPENDIX 3: Building a Traditional and a Digital Darkroom
Itemized list for a traditional darkroom for 10 students
FILM DEvELOPING AREA
2 changing boxes for loading film
10 plastic reels/tanks
2 film washers
10 thermometers
Beakers/graduates (#)
Storage tanks for chemistry
1 Film dryer
Ventilation
Sink – 6 ft. (pre-plumbed & installed)
PRINTING AREA
10 Omega enlargers C760L
10 Negative carriers
10 Nikon lenses
10 Easels
10 Contact printers
10 Beseler timers
Gray-lab 300 timer
10 Filter sets
10 Grain focusers
Trays/tongs (12 plastic, 2 stainless steel, 11” x 14”)
Safelight Thomas
Print washing bin
Sink (pre-plumbed, 10 ft.)
FINISHING AREA
12 screens and racks for fiber printing
Dry mount press, 11” x 14”
Paper cutter
Light table (4 ft.)
Loups
Miscellaneous (tacking iron, mat cutter, scissors)
RC Print Dryer

APPENDIX 3: Building a Traditional and a �Digital Darkroom
STUDIO SET UP
2 Tripods
Backdrop stand/5 rolls seamless
Dynalights
Lowell hot lights
Case
Light stands
Omni portable hot lights
Light meter
Vivitar flash kits (# 10 or 2)
Polaroid-back large format camera
15 Cameras (35mm manual)
DISPLAY OF WORk
Projector
Wall screen
Frames/mounting
Homesote walls for viewing work prints

� APPENDIX 3: Building a Traditional and a Digital Darkroom
Digital Darkroom
In designing a program for 10 students, you could adapt the school’s current computer center for a digital imaging project.
LIST OF EqUIPMENT
Eleven computer stations with access to the Internet
Computer specs: 128 Ram to use Photoshop; enough space on hard drive for printer driver, digital camera software, software for image and text projects and Web projects; zip disc drive; network for educational purposes to share files and to view images all together. Recommended: larger monitor for teacher or data projector and screen, so that students can see demonstrations clearly.
One flat bed scanner
Photographic-quality printers
Five digital cameras, with manual control option, to be shared in pairs
Printing paper & ink cartidges
Zip disc to store final images and curriculum resources at school
Software for image manipulation, digital camera use, and Web projects

This section is an excerpt from Focus on Photography: A Curriculum Guide
Written by Cynthia Way for the International Center of Photography
© 2006 International Center of Photography
All rights reserved.
Published by the International Center of Photography, New York.
Printed in the United States of America.
Please credit the International Center of Photography on all reproductions.
This project has been made possible with generous support from Andrew and Marina Lewin, the GE Fund, and public funds from the New York City Department of Cultural Affairs Cultural Challenge Program.
FOCUS ON PHOTOGRAPHY: A CURRICULUM GUIDE

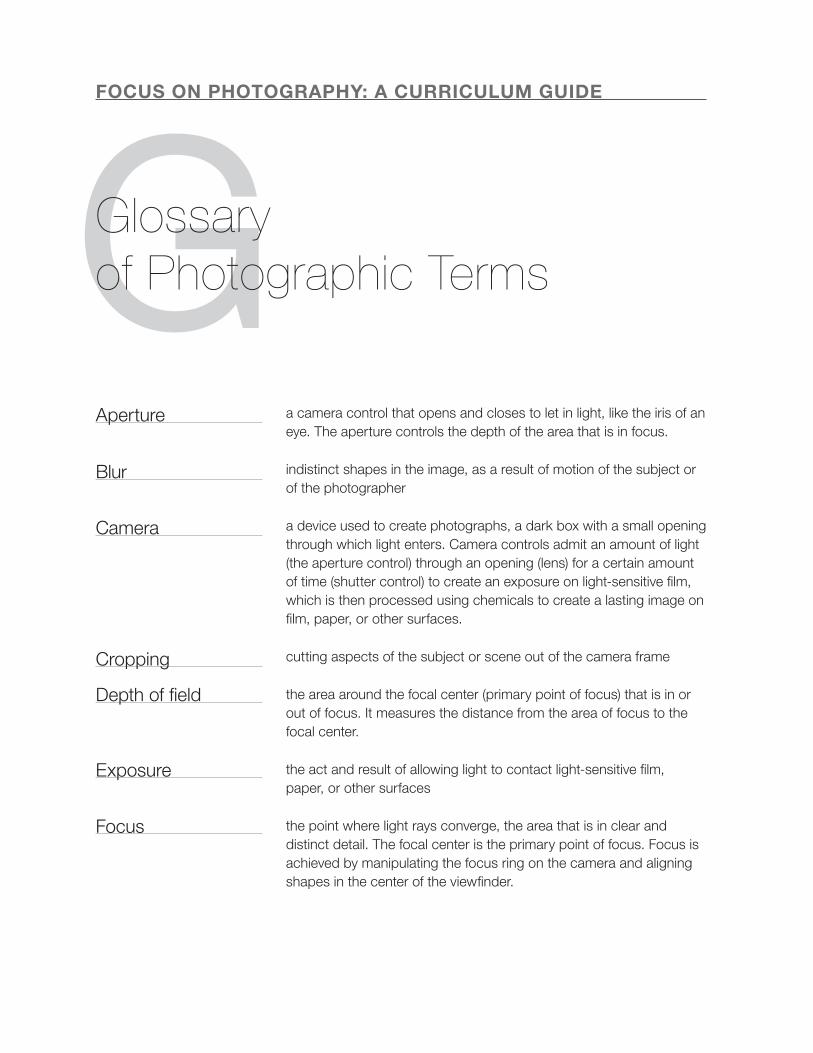
GFOCUS ON PHOTOGRAPHY: A CURRICULUM GUIDE
Glossaryof Photographic Terms
a camera control that opens and closes to let in light, like the iris of an eye. The aperture controls the depth of the area that is in focus.
indistinct shapes in the image, as a result of motion of the subject or of the photographer
a device used to create photographs, a dark box with a small opening through which light enters. Camera controls admit an amount of light (the aperture control) through an opening (lens) for a certain amount of time (shutter control) to create an exposure on light-sensitive film, which is then processed using chemicals to create a lasting image on film, paper, or other surfaces.
cutting aspects of the subject or scene out of the camera frame
the area around the focal center (primary point of focus) that is in or out of focus. It measures the distance from the area of focus to the focal center.
the act and result of allowing light to contact light-sensitive film, paper, or other surfaces
the point where light rays converge, the area that is in clear and distinct detail. The focal center is the primary point of focus. Focus is achieved by manipulating the focus ring on the camera and aligning shapes in the center of the viewfinder.
Blur
Camera
Aperture
Cropping
Depth of field
Exposure
Focus

� GLOSSARY OF PHOTOGRAPHIC TERMS
Framing using the camera frame to include and exclude information
the film or paper onto which light has recorded an image as an inverse of the natural image (areas that are dark are light and vice versa). Shining light through the negative and exposing light-sensitive surfaces creates positive images, such as prints, in which the forms have their natural look (dark areas are dark, light areas are light).
the space in the image that is not directly defined as positive space, the subject, or distinct shapes (e.g., the sky)
an image rendered by light and recorded onto a light-sensitive surface, typically using a camera
the art, craft, and process of rendering visual images onto a surface; a type of photographs (e.g., documentary photography)
a mechanism in the camera that functions like a door, opening and closing to let in light. It is triggered by the shutter release button on the camera. Shutter speed is the speed at which the door opens and closes, can be fast or show, and is measured on the shutter speed control in fractions of a second.
also point of view, the photographer’s perspective, created by how the photographer is positioned when taking the picture
Negative
Negative space
Photograph
Photography
Shutter speed
Vantage point
BTechnical Information
Arnow, Jan. Handbook of Alternative Photographic Processes. New York: Van Nostrand Reinholt Co., 1982.
Coe, Brian, and Mark Haworth-Booth. A Guide to Early Photographic Processes. London: Victoria & Albert Museum, 1983.
Crawford, William. Keepers of Light. New York: Morgan & Morgan, 1979.
Horenstein, Henry. Black & White Photography: A Basic Manual. 2d. Rev. ed. Boston: Little, Brown, and Company, 1998.
Horenstein, Henry. Color Photography: A Working Manual. Boston: Little, Brown, and Company, 1998.
London, Barbara, and John Upton. Photography. 5th Ed. New York: Harper Collins College Publishers, 1994.
FOCUS ON PHOTOGRAPHY: A CURRICULUM GUIDE
Bibliography
� BIBIOGRAPHY
Education Theory/Visual Literacy
Arnheim, Rudolf. Visual Thinking. Berkeley: University of California Press, 1969.
Adatto, Kiku. Picture Perfect: The Art and Artifice of Public Image Making. New York: BasicBooks, a Division of Harper Collins, Inc., 1993.
Barrett, Terry. Criticizing Photographs: An Introduction to Understanding Images. 2nd ed. Mountain View, Ca.: Mayfield Publishing Company, 1996.
Berger, John. About Looking. New York: Pantheon Books, 1980.
Berger, John. Ways of Seeing. New York: Penguin Books, 1977.
Broudy, Harry S. The Role of Imagery in Learning. Los Angeles: The Getty Education Institute for the Arts, 1987.
Coleman, A. D. The Digital Evolution, Visual Communication in the Electronic Age. Tucson: Nazraeli Press, 1998.
Darling-Hammond, Linda, Jacqueline Ancess, and Susannah Ort. Reinventing High School: Outcomes of the Coalition Campus Schools Project. American Education Research Journal 39 no.3 (2002): 639–673.
Dobbs, Steven Mark. Learning in and Through Art: A Guide to Discipline-Based Art Education. Los Angeles: The Getty Education Institute for the Arts, 1998.
Egan, Keiran. The Educated Mind: How Cognitive Tools Shape Our Understanding. Chicago: The University of Chicago Press, 1997.
Eisner, Elliot W. The Arts and the Creation of Mind. New Haven, CT: Yale University Press, 2002.
Eisner, Elliot W. The Enlightened Eye: Qualitative Inquiry and the Enhancement of Educational Practice. New Jersey: Prentice-Hall, Inc., 1998.
Fiske, Edward B., ed. Champions of Change: The Impact of the Arts on Learning. Washington DC: Arts Education Partnership, 1998.
Gardner, Howard. Art Education and Human Development. Los Angeles: The Getty Education Institute for the Arts, 1990.

BIBLIOGRAPHY �
Gardener, Howard. Frames of Mind: The Theory of Multiple Intelligences. New York: Harper Collins, 1990.
Gardener, Howard. Intelligence Reframed: Multiple Intelligences for the 21st Century. New York: Basic Books, 1999.
Housen, Abigail, and Phillip Yenewine. Visual Thinking Strategies: Learning to Think and Communicate Through Art. Basic Manual Grades K–2 and Basic Manual Grades 3–6. New York: Visual Understanding in Education, 2000. http://www.vue.org
Longley, Laura. 1999. Gaining the Arts Literacy Advantage. Educational Leadership 57 no.2 (October): 71–74. Virginia: Association for Supervision and Curriculum Develop-ment.
Maruyama, Tomoko. The Visual Classroom: Integrating Photography into the School Curriculum. San Diego: Museum of Contemporary Art, 2000.
Meltzer, Julie. Adolescent Literacy Resources: Linking Research and Practice. Provi-dence, RI: The Education Alliance at Brown University, 2002.
Mitchell, W. J. T. Picture Theory: Essays on Visual and Verbal Representation. Chicago: University of Chicago Press, 1994.
Muniz, Vik. Seeing Is Believing. New Mexico: Arena Editions, 1998.
Perkins, David. The Intelligent Eye: Learning to Think by Looking at Art. Santa Monica, CA: The Getty Education Institute for the Arts, 1994.
Sizer, Theodore. Horace’s School: Redesigning the American High School. Boston: Mariner Books, 1992.
Sontag, Susan. On Photography. New York: Anchor Books, 1990.
“Student–Centered High Schools: Helping Schools Adapt to the Learning Needs of Adolescents,” Perspectives on Policy and Practice. Providence, RI: LAB at Brown University, 2001.
Wilhelm, Jeffrey F. “You gotta BE the book”: Teaching Engaged and Reflective Reading with Adolescents. New York: Teachers College Press, 1995.

� BIBIOGRAPHY
History of Photography
David, Keith. An American Century of Photography, from Dry Plate to Digital. 2nd ed. Kansas City: Hallmarks Cards Inc., 1999.
Goldberg, Vickie and Robert Silberman. American Photography, A Century of Images. San Francisco: Chronicle Books, 1999.
Handy, Ellen, ed. Reflections in a Glass Eye: Works from the International Center of Photography Collection. New York: Bulfinch Press, 1999.
Metamorphosis: Photography in the Electronic Age. 136 (Summer, 1994). New York: Aperture Foundation, Inc.
Newhall, Beaumont. The History of Photography from 1839 to the Present. New York: Museum of Modern Art, 1982.
Rosenblum, Naomi. A History of Women Photographers. New York: Abbeville Press, 1994.
Rosenblum, Naomi. A World History of Photography. New York: Abbeville Press, 1997.
Scarzowski, John. Looking at Photographs. New York: Museum of Modern Art.
Willis, Deborah. An Illustrated Bio-Bibliography of Black Photographers, 1940-1988. New York: New Press, 1994.
Willis, Deborah. Picturing Us, African American Identity in Photography. New York: New Press, 1994.

BIBLIOGRAPHY �
Resources on the Web
ArtLex Art Dictionaryhttp://www.artlex.com/
ArtsConnectedEdhttp://www.artsconnected.org/
Arts Education Partnership (AEP)http://www.aep-arts.org/Artslink2.htm
ArtsEdgehttp://artsedge.kennedy-center.org/
The National Standards for Arts Educationhttp://artsedge.kennedy-center.org/professional_resources/standards/natstandards/
standards.html
The ArtsLiteracy Projecthttp://artslit.org/home.html
The Art Museum Image Consortiumhttp://www.amico.org
The Art Museum Networkhttp://www.amn.org
Creative Multimedia Resourceshttp://www.phenomenotions.org/curriculum/multimedia/resources.htm
Getty Arts Ed Net http://www.getty.edu/artsednet/
Kodak Digital Learning Center http://www.Kodak.com/US/en/digital/dlc/plus/chapter5/index.shtml
The Knowledge Loomhttp://knowledgeloom.org
Library of Congresshttp://www.loc.gov/
� BIBIOGRAPHY
List of museum online collectionshttp://www.arthistory.ucsb.edu/research/archives.php
MarcoPolo: Internet Content for the Classroomhttp://www.marcopolo-education.org/
Prints and Photographs Collection of the Library of Congresshttp://lcweb.loc.gov/rr/print
National Art Education Associationhttp://www.naea-reston.org
Timeline and Image Collections of the ICP and George Eastman Househttp://www.photomuse.org
F FOCUS ON PHOTOGRAPHY: A CURRICULUM GUIDE
List of Figures
The figures list includes student work produced in ICP programs and staff documentation of ICP programs (names provided when known), reprinted for educational purposes. In addition, we have reproduced several photographic works with permission of the artist or estate.
Book Cover Sequence
Students Creating Images, Staff documentation by Curtis Willocks, High School of Fashion Industries, 2001
Learning to Use the 35mm Camera with Teacher Karen Lindsay, Staff documentation by Nancy Wechter, 2001
Creating Images, Staff documentation, Re-Visions of El Barrio, 1998-1999
Portrait, Student work by Zoila Mendez, ICP Community Record Program at The High School of Fashion Industries, 2000-2001
Foreword
1. Birds in Flight, Student work by Rue Sakayama, ICP Internship Program, 1999
� LIST OF FIGURES
PART 1: VISUAL LITERACY
Cover Sequence
Joyce Theater Rehearsal, Student work by Joseph Gilmore, ICP at The Point, 1999
Students from ICP at The Point, Staff documentation by Mara Faye Lethem, 2000
Tapping Feet near Carnegie Hall, Student work, Portrait Rhythms, ICP Community Record Program at The Adolph S. Ochs School, 1997-1998
Chapter 1: Why Photographic Education?
2. Cornell Capa, Savoy Ballroom, 1939
3. Landscape, Student work by Darkeem Dennis, ICP Internship Program, 1999
4. Skateboarding, Student work by Ileia Burgos, ICP Internship Program, 1999
5. Grandmother, Student work by Eboni Peartree, ICP at The Point, 1999
6. Joyce Theater Rehearsal, Student work by Joseph Gilmore, ICP at The Point, 1999
Chapter 2: The Language of Photography
7. Vik Muniz, Action Photo I (After Hans Namuth), 1997–98
8. Example of Shallow Depth of Field, Student work, ICP Polapan Workshop, 1995
9. Example of Deep Depth of Field, Student work, ICP Polapan Workshop, 1995
10. Student work, Birds and Worms Workshop, 2000
Chapter 3: Visual Literacy: Concepts and Strategies
11. Ernst Haas, London, 1951
12. Students Touring ICP Galleries, Staff documentation by Erin Fallon, 2000

LIST OF FIGURES �
PART II: TEACHING PHOTOGRAPHY
Cover Sequence
Students Touring ICP Galleries, Staff documentation by Erin Fallon, 2000
Self-portrait, Student work by Olga Liptova, Teen Workshop, 2000
Capturing Motion, Student work, Portrait Rhythms, ICP Community Record Program at The Adolph S. Ochs School, 1997-1998
Chapter 4: Teaching the Basics: History, Technique, Aesthetics, and Practice
13. Creating a Polaroid Photograph, Staff documentation by Erin Fallon, Family Program, 2000
14. Self-Portrait, Student work by Arismende Paulino, ICP Internship Program, 1995
15. Photographer Chester Higgins, Jr. Meets with Students, Staff documentation, Academy of Community Education and Service, 1998-1999
16. Learning to Use the 35mm Camera with Teacher Karen Lindsay, Staff documentation by Nancy Wechter, 2001
17. Students Printing in Darkroom, Staff documentation by Adam Eidelberg, ICP at The Point, 1998
18. Creating a Polaroid Photograph, Staff documentation by Erin Fallon, Family Program, 2000
19. Student work, Birds and Worms Workshop, 2000
20. Creating Images, Staff documentation, Re-Visions of El Barrio, 1998-1999
21. Critiquing Images with Instructor Accra Shepp, Staff documentation, ICP Internship Program, 2000
Chapter 5: Strategies for Developing Projects
22. Portrait, Student work by Zoila Mendez, ICP Community Record Program at The High School of Fashion Industries, 2000-2001
23. Writing on a Portrait, Staff documentation, ICP Community Record Program at The Adolph S. Ochs School, 1998-1999
� LIST OF FIGURES
24. Students Creating Images, Staff documentation by Curtis Willocks, High School of Fashion Industries, 2001
25. Final Poster, Portrait Rhythms, ICP Community Record Program at The Adolph S. Ochs School, 1997-1998
26. Capturing Motion, Student work, Portrait Rhythms, ICP Community Record Program at The Adolph S. Ochs School, 1997-1998
27. Tapping Feet near Carnegie Hall, Student work, Portrait Rhythms, ICP Community Record Program at The Adolph S. Ochs School, 1997-1998
28. Student Writing, Staff documentation, ICP Community Record Program at The Adolph S. Ochs School, 1997-1998
29. Student work, ICP Community Record Program at The Adolph S. Ochs School, 1999-2000
30. Students from ICP at The Point, Staff documentation by Mara Faye Lethem, 2000
31. Students in the Studio, Staff documentation by Curtis Willocks, ICP Community Record Program at The High School of Fashion Industries, 2000
32. Portrait, Student work by Zoila Mendez, ICP Community Record Program at The High School of Fashion Industries, 2000-2001
33. Portrait, Student work, ICP Community Record Program at The High School of Fashion Industries, 2000-2001
34. The Point, South Bronx, Staff documentation by Mathew Monteith, 1997
35. Lab Manager Mara Faye Lethem Helping with Film Processing, Staff documentation by Michael Casserly, ICP at The Point, 1999-2000
36. Peer Educator Damion Castro Teaching Camera Handling, Staff documentation by Curtis Willocks, ICP at The Point, 1998-1999,
37. New York Fashion Show, Student work by Joseph Gilmore, ICP at The Point, 1999
38. Subway, Student work by David Viera, ICP at the Point, 2000
39. Bride, Student work, ICP at the Point, 2001
LIST OF FIGURES �
Chapter 6: Meeting Educational Goals
40. Learning Large-Format Photography, Staff documentation by Curtis Willocks, ICP at The Point, 1999
41. Self-portrait, Student work by Olga Liptova, Teen Workshop, 2000
42. ICP Publication of Student Work, ICP Community Record at The Earth School, 1995
43. Students Editing Pictures, Staff documentation by Karen Lindsay, 1997
44. Student Journal, Staff documentation by Curtis Willocks, ICP at The Point, 2000
45. Student Reflection on Art Work, ICP Community Record at The Earth School, 1995
46. Learning Large-Format Photography, Staff documentation by Curtis Willocks, ICP at The Point, 1999
Chapter 7: Documentary Photography Projects
47. Camel on Fifth Avenue, Three King’s Day Parade, Student work, Re-Visions of El Barrio, 1998
48. Student work by Ileia Burgos, ICP at the Point, 2000
49. Gate, Student work by David Conforme, ICP at The Point, 1998
50. Flower, Student work by Jorel Velez, ICP at the Point, 2000
51. Young Girl Peering out Window, Student work by Marcus Cave, ICP at the Point, 2000
52. Camel on Fifth Avenue, Three King’s Day Parade, Student work, Re-Visions of El Barrio, 1998
Chapter 8: Portraiture Projects
53. Student work by Rue Sakayama, ICP Internship Program, 1999-2000
54. Student work by Rue Sakayama, ICP Internship Program, 1999-2000
55. Student work by Tiffany Williams, ICP Internship Program, 1999-2000

� LIST OF FIGURES
PART III: CURRICULUM CONNECTIONS
Cover Sequence
Critiquing Images with Instructor Accra Shepp, Staff documentation, ICP Internship Program, 2000
Student work, ICP Community Record Program at The Academy of Community Education and Service in East Harlem, 1997-1998
Photo/Theater Activity, Student work, ICP Community Record Program at The Adolph S. Ochs School, 1999-2000
Chapter 9: Making Curriculum Connections
56. Going to Class, Student work, ICP Community Record Program at The Adolph S. Ochs School, 1999-2000
57. Creating Images, Staff documentation, ICP Community Record Program at The Earth School, 1995
Chapter 10: Photography & History
58. Student Portrait in the Photo/Theater, Photograph by Instructor Matthew Septimus, ICP Community Record Program at the Academy of Community Education and Service in East Harlem, 1998-1999
59. Robert Capa, U.S. Troops Landing on D-Day, Omaha Beach, Normandy Coast, June 6, 1944
60. Storyteller and Veteran Roy Godes, Staff documentation by Nancy Wechter, ICP Community Record Program at The Academy of Community Education and Service in East Harlem, 1998-1999
61. Toy Soldiers from Lighting Demonstration, Student work, ICP Community Record Program at The Academy of Community Education and Service in East Harlem, 1998-1999
62. Student Posing as Rosie the Riveter, Photograph by Instructor Matthew Septimus, ICP Community Record Program at The Academy of Community Education and Service in East Harlem, 1998-1999

LIST OF FIGURES �
63. Student Portrait in the Photo/Theater, Photograph by Instructor Matthew Septimus, ICP Community Record Program at The Academy of Community Education and Service in East Harlem, 1998-1999
64. Re-enacting a Historical Photograph, Photograph by Instructor Matthew Septimus, ICP Community Record Program at The Academy of Community Education and Service in East Harlem, 1998-1999
65. Photo/Theater Activity, Student work, ICP Community Record Program at The Academy of Community Education and Service in East Harlem, 1998-1999
66. Re-enacting Protests, Photograph by Instructor Matthew Septimus, ICP Community Record Program at The Academy of Community Education and Service in East Harlem, 1998-1999
Chapter 11: Photography & Social Studies
67. Lewis Hine, Immigration in the 1900s
68. Portraying Characters in a Photo/Theater, Photograph by Instructor Matthew Septimus, ICP Community Record Program at The Adolph S. Ochs School, 1999-2000
69. Portraying Characters in a Photo/Theater, Photograph by Instructor Matthew Septimus, ICP Community Record Program at The Adolph S. Ochs School, 1999-2000
70. Portraying Characters in a Photo/Theater, Photograph by Instructor Matthew
Septimus, ICP Community Record Program at The Adolph S. Ochs School, 1999-2000
71. Photo/Theater Activity, Student work, ICP Community Record Program at The Adolph S. Ochs School, 1999-2000
72. Photo/Theater Activity, Student work, ICP Community Record Program at The Adolph S. Ochs School, 1999-2000
73. Portraying Characters in a Photo/Theater, Photograph by Instructor Matthew Septimus, ICP Community Record Program at The Adolph S. Ochs School, 1999-2000
74. What Would You Bring to a New Country?, Student work, ICP Community Record Program at The Adolph S. Ochs School, 1999-2000
75–78. Picture Story, Student work, ICP Community Record Program at The Adolph S. Ochs School, 2000-2001

� LIST OF FIGURES
Chapter 12: Photography & Multicultural Education
79. Student work, ICP Community Record Program at The Academy of Community Education and Service in East Harlem, 1997-1998
80. Student work, ICP Community Record Program at The Academy of Community Education and Service in East Harlem, 1997-1998
81. Student work, ICP Community Record Program at The Academy of Community Education and Service in East Harlem, 1997-1998
82. Student work, ICP Community Record Program at The Academy of Community Education and Service in East Harlem, 1997-1998
83. Student work, ICP Community Record Program at The Academy of Community Education and Service in East Harlem, 1997-1998
84. Student work, ICP Community Record Program at The Academy of Community Education and Service in East Harlem, 1997-1998
85. Student work, ICP Community Record Program at The Academy of Community Education and Service in East Harlem, 1997-1998
86. Student work, ICP Community Record Program at The Academy of Community Education and Service in East Harlem, 1997-1998
Chapter 13: Photography & Literature
87. Portraying Characters in a Photo/Theater, Photograph by Instructor Matthew Septimus, ICP Community Record Program at The Academy of Community Education and Service in East Harlem, 1998-1999
88. Student work, ICP Community Record Program at The Academy of Community Education and Service in East Harlem, 1998-1999
89. Guest Artist Matthew Septimus Creating a Photo/Theater, Staff documentation, ICP Community Record Program at The Academy of Community Education and Service in East Harlem, 1998-1999
LIST OF FIGURES �
Chapter 14: Photography & Writing
90. Student work, ICP Community Record Program at The Adolph S. Ochs School, 1997-1998
91. Student work, ICP Community Record Program at The Adolph S. Ochs School, 1997-1998
92. Student work, ICP Community Record Program at The Adolph S. Ochs School, 1997-1998
93. Portraits and Poetry, Student work, ICP Community Record Program at The Creative Learning Community, 1994-1995
94. Portraits and Poetry, Student work, ICP Community Record Program at The Creative Learning Community, 1994-1995
Chapter 15: Photography & Other Art Media
95. Family Day, Student documentation, Re-Visions of El Barrio, 1995-1996
96. Student work, Re-Visions of El Barrio, 1995-1996
97. Student work, Re-Visions of El Barrio, 1996-1997
98. Student work, Re-Visions of El Barrio, 1996-1997
99. Student work, Re-Visions of El Barrio, 1996-1997
100. Student work, Re-Visions of El Barrio, 1996-1997
101. Student work, Re-Visions of El Barrio, 1998-1999
102. Student work, Re-Visions of El Barrio, 1998-1999
103. Student work, Re-Visions of El Barrio, 1998-1999
104. Student work, Re-Visions of El Barrio, 1999-2000
105. Family Day, Student documentation, Re-Visions of El Barrio, 1999-2000
106. Opening Reception, Staff documentation, Re-Visions of El Barrio, 1999-2000
107. Student work, Re-Visions of El Barrio, 1999-2000

10 LIST OF FIGURES
Chapter 16: Photography & Digital Imaging
108. CD Project, ICP Community Record Program at The Adolph S. Ochs School, 1998-1999
Chapter 17: Photography & Professional Applications
109. Student work by Ileia Burgos, ICP Internship Program, 2000-2001
110. Book Project, ICP Community Record Program at The Adolph S. Ochs School, 1998-1999
111. Post-it Project, Student work by Maren Congilione, ICP Internship Program, 1999-2000
112. Student work by Ileia Burgos, ICP Internship Program, 2000-2001
113. Student work by Beth Lasoff, ICP Internship Program, 2000-2001
114. Student work by Zoe Ellis, ICP Internship Program, 2000-2001
Afterword
115. Student from ICP at The Point, Staff documentation by Curtis Willocks, 2000
PART IV: RESOURCES
Cover Sequence
Lab Manager Mara Faye Lethem Helping with Film Processing, Staff documentation by Michael Casserly, ICP at The Point, 1999-2000
Student Writing, Staff documentation, ICP Community Record Program at The Adolph S. Ochs School, 1997-1998
Self-Portrait, Student work by Arismende Paulino, ICP Internship Program, 1995
ACKNOWLEDGMENTSIn the past nine years at ICP, I observed how the students in our photography
programs saw greater value in themselves with each photograph that they created. They were discovering that they had a new skill and greater confidence, that in the photograph they manifested their perspective, there for others to see. This wonderment happened over and over again, and yet each time I witnessed it, I found it deeply rewarding and truly extraordinary, an experience for which I am grateful.
For supporting this book and my work in Community Programs over the years, I’d like to express my appreciation to Phillip S. Block and Willis Hartshorn. For her dedication to Community Programs, I’d especially like to acknowledge Marie Spiller. Many staff at ICP have offered invaluable support during the production of this book, including: Lacy Austin, Ed Earle, Erin Fallon, Suzanne Nicholas, and Amy Poueymirou. Our reviewers, Sharon Dunn, Cathleen Kiebert-Gruen, Marielle Palombo, and Nancy Wechter, provided wonderful feedback. Special thanks to Jean Witter for her helpful editorial comments on the manuscript and to Patricia McGee for creating a wonderful graphic design. Our collective thanks to the generous foundations who supported Community Programs and this book.
Above all, I’d like to the thank all the faculty who contributed so much of themselves to Community Programs and this book, especially: Lina Bertucci, Allen Frame, Frank Franca, Karen Furth, Susan Kleckner, Deborah Klesenski, Mark LaRocca, Karen Lindsay, Dona Ann McAdams, Matthew Septimus, Nancy Wechter, and Curtis Willocks. I’m grateful to the many wonderful volunteers at ICP who offered a helping hand, moral support, and inspiration over the years.
I deeply enjoyed working with all of you and thank you once again for the great spirit that you brought to each project and shared with each student. My love and gratitude to all our inspiring students and aspiring photographers.
Cynthia Way

ABOUT THE INTERNATIONAL CENTER OF PHOTOGRAPHY (ICP)
As a museum and a school, the International Center of Photography (ICP) is dedicated to advancing the understanding of photography, its history, impact, and evolution. Founded in 1974, ICP is a true center, integrating exhibitions, collections, and education programs.
Community Programs actively reaches out to communities in an effort to make the creative and educational possibilities of photography more accessible. The three main divisions of Community Programs are Museum Education (gallery tours, workshops, and intergenerational programs), Teen Academy, and Community Partnerships. The variety of programs speaks to the medium’s ability to engage and inspire a diverse audience. The goals are to foster visual literacy, self-esteem, and empowerment.
The following Community Programs are referred to within Focus on Photography:
Museum Education
Guided Gallery Tours illuminate for audiences of all ages the ideas, techniques, and aesthetics embedded within ICP’s exhibitions. Experienced museum educators lead interactive tours engaging groups in interpretive activities, which can include drawing, writing, and conversation, geared to various levels and curriculum areas.
Polaroid Workshops use the immediacy of the medium to introduce audiences of all ages to elements of photographic expression.
Family Programs introduce children and adults to photography as they work together on activities.
Teachers’ Workshops explore the applications of photographic education and present effective ways to design photography programs.
Teen Academy
Teen Academy offers a range of opportunities for teenagers to explore the power of photography and discover their own voice while developing their photographic skills. The program includes seasonal 10-week black-and-white, color, and project-based photography courses as well as a yearlong pre-collegiate program (Internship). All classes include slide lectures, darkroom time, guest artist visits, field trips, and critiques, culminating in a final presentation for family and friends.
Community Partnerships
ICP at the Point is a thriving photography center in the South Bronx, launched in partnership with The Point Community Development Corporation. The program, featuring a classroom/studio, darkroom, business, and gallery, is dedicated to exploring the creative and practical aspects of photography and fostering entrepreneurship in the community.
The Community Record Partnerships provide in-depth, hands-on photographic instruction in collaboration with schools. Integrating academic curricula, classes include slide lectures, darkroom time, guest artist visits, field trips, and critiques, culminating in a final exhibition and/or publication.
Re-Visions of El Barrio is collaboration between ICP and partnering organizations from the East Harlem community. Using photography and other media, local youth learn to re-envision their identity and community.
Portable Digital Darkroom provides instruction to schools or organizations in the basic techniques of digital photography. Students and teachers work together with digital cameras and laptop computers in their discovery of photography. This program seeks to integrate writing and photography to realize the educational goals and curriculum of the partnership.
For more information on ICP’s Community Programs, please visit our website at www.icp.org.

ABOUT THE AUTHORAs ICP Coordinator of Community Programs for nine years, Cynthia Way designed
and managed all community programs, initiated new programs and collaborations, wrote educational material, and led extensive teacher trainings. Ms. Way implemented more than 40 partnerships with elementary, middle, and high schools, cultural institutions, and community centers throughout New York City.
Ms. Way holds a B.A. in Comparative Literature from Brown University and an M.F.A. in Fiction Writing from Columbia University. She has taught fiction writing at The New School in New York City. She also has co-designed and taught educators’ workshops at the Institute for Writing and Thinking at Bard College. For four and a half years, she worked as Senior Writer/Editor of educational publications in print and new media at Brown University’s Education Alliance. Currently, she is the Director of Education at the Williams College Museum of Art.


1133 Avenue of the Americas at 43rd Street New York, NY 10036
International Center of Photography