
FEniCS Containers Documentation - Read the Docs · FEniCS Containers Documentation, Release 1.0...
41
FEniCS Containers Documentation Release 1.0 FEniCS Project Jan 09, 2020
Transcript of FEniCS Containers Documentation - Read the Docs · FEniCS Containers Documentation, Release 1.0...
FEniCS Containers DocumentationRelease 1.0
FEniCS Project
Jan 09, 2020

Contents
1 Quickstart 3
2 Introduction 52.1 Installing Docker . . . . . . . . . . . . . . . . . . . . . . . . . . . . . . . . . . . . . . . . . . . . . 52.2 Running FEniCS in Docker . . . . . . . . . . . . . . . . . . . . . . . . . . . . . . . . . . . . . . . 52.3 Sharing files from the host into the container . . . . . . . . . . . . . . . . . . . . . . . . . . . . . . 62.4 Naming a container . . . . . . . . . . . . . . . . . . . . . . . . . . . . . . . . . . . . . . . . . . . . 7
3 Available FEniCS images 9
4 Suggested workflows 114.1 Separate container for each user project . . . . . . . . . . . . . . . . . . . . . . . . . . . . . . . . . 114.2 Multiple shells running in one container . . . . . . . . . . . . . . . . . . . . . . . . . . . . . . . . . 114.3 Restart an exited container . . . . . . . . . . . . . . . . . . . . . . . . . . . . . . . . . . . . . . . . 124.4 Run FEniCS in a Docker container like an application . . . . . . . . . . . . . . . . . . . . . . . . . 134.5 Compile a development version of FEniCS . . . . . . . . . . . . . . . . . . . . . . . . . . . . . . . 144.6 Reproduce my results . . . . . . . . . . . . . . . . . . . . . . . . . . . . . . . . . . . . . . . . . . 144.7 Share my container with a colleague . . . . . . . . . . . . . . . . . . . . . . . . . . . . . . . . . . . 154.8 Create a custom image for my project . . . . . . . . . . . . . . . . . . . . . . . . . . . . . . . . . . 164.9 Use graphical applications on Linux hosts . . . . . . . . . . . . . . . . . . . . . . . . . . . . . . . . 18
5 Running Jupyter notebooks 195.1 Docker for Mac, Docker for Windows and Linux users . . . . . . . . . . . . . . . . . . . . . . . . . 195.2 Docker Toolbox for Windows and Mac users . . . . . . . . . . . . . . . . . . . . . . . . . . . . . . 195.3 Finding out the access token . . . . . . . . . . . . . . . . . . . . . . . . . . . . . . . . . . . . . . . 205.4 Plotting . . . . . . . . . . . . . . . . . . . . . . . . . . . . . . . . . . . . . . . . . . . . . . . . . . 205.5 Further instructions . . . . . . . . . . . . . . . . . . . . . . . . . . . . . . . . . . . . . . . . . . . . 21
6 Performance 23
7 FEniCS development using Docker 257.1 Development quickstart . . . . . . . . . . . . . . . . . . . . . . . . . . . . . . . . . . . . . . . . . 257.2 Install the fenicsproject script . . . . . . . . . . . . . . . . . . . . . . . . . . . . . . . . . . . 257.3 Set up your FEniCS source tree . . . . . . . . . . . . . . . . . . . . . . . . . . . . . . . . . . . . . 267.4 Pull the FEniCS sources . . . . . . . . . . . . . . . . . . . . . . . . . . . . . . . . . . . . . . . . . 267.5 Create the Docker container . . . . . . . . . . . . . . . . . . . . . . . . . . . . . . . . . . . . . . . 267.6 Start the FEniCS Docker container . . . . . . . . . . . . . . . . . . . . . . . . . . . . . . . . . . . 27
i
7.7 Build FEniCS inside the Docker container . . . . . . . . . . . . . . . . . . . . . . . . . . . . . . . 27
8 Developer Notes 29
9 Troubleshooting 319.1 I can’t access the internet in the container . . . . . . . . . . . . . . . . . . . . . . . . . . . . . . . . 319.2 I can’t share a folder into the container . . . . . . . . . . . . . . . . . . . . . . . . . . . . . . . . . 319.3 My file permissions are wrong on the host . . . . . . . . . . . . . . . . . . . . . . . . . . . . . . . . 319.4 I’ve run out of space for new containers or images . . . . . . . . . . . . . . . . . . . . . . . . . . . 329.5 Still not working? . . . . . . . . . . . . . . . . . . . . . . . . . . . . . . . . . . . . . . . . . . . . 32
10 Contact 33
11 Background 35
12 Indices and tables 37
ii

FEniCS Containers Documentation, Release 1.0
An easy way to run FEniCS is to use our prebuilt, high-performance Docker images. This documentation explainshow to get quickly started with using FEniCS in Docker, as well as how to take advantage of more advanced featuresof Docker.
Contents 1

FEniCS Containers Documentation, Release 1.0
2 Contents

CHAPTER 1
Quickstart
To get started, follow these two steps:
1. Install Docker for your platform by following these instructions. Windows users must continue to use the DockerToolbox, not Docker for Windows, if they wish to use the FEniCS Docker script described below.
2. Install the FEniCS Docker script:
curl -s https://get.fenicsproject.org | bash
If using the Docker Toolbox (macOS versions < 10.10 or Windows versions < 10), make sure you run this andother commands inside the Docker Quickstart Terminal.
Note: Not working? Try the Troubleshooting section.
Once both Docker and the FEniCS Docker script have been installed, you can easily start a FEniCS session by runningthe following command:
fenicsproject run
The FEniCS Docker script can also be used to create persistent sessions (fenicsproject create myprojectfollowed by fenicsproject run myproject) or to run different versions of FEniCS fenicsproject rundev).
For all fenicsproject commands, the contents of the current directory will be shared into the project at ~/shared.
Note: Only folders under C:\Users on Windows and /Users on macOS can be shared into a project. On Linuxthere are no restrictions.
3
FEniCS Containers Documentation, Release 1.0
Warning: We strongly advise against sharing your entire home directory into a project, i.e. runningfenicsproject create in C:\Users\<username> or /Users/<username>. Make a logical folderfor each project, e.g. /Users/<username>/myproject.
To see more options, run the following command:
fenicsproject help
The above instructions will get you quickly up and running with FEniCS in Docker. We recommend continuing to theIntroduction if you want to learn more about using the docker command for greater control over running FEniCS ina container.
4 Chapter 1. Quickstart
CHAPTER 2
Introduction
Note: Want to get up and running quickly? Try the fenicsproject script in Quickstart.
Docker allows FEniCS and its dependencies to be packaged into a standard format for identical deployment almostanywhere. Docker containers are lightweight and are based on open standards that run on all major Linux distributions,macOS and Microsoft Windows platforms. For more information, visit https://www.docker.com/what-docker.
2.1 Installing Docker
Install Docker by following these instructions.
If using the Docker Toolbox (macOS versions < 10.10 or Windows versions < 10), make sure you run all commandsinside the Docker Quickstart Terminal.
2.2 Running FEniCS in Docker
Under macOS or Windows, start a Docker Quickstart Terminal.
For Linux, use a standard terminal. You may need to prepend sudo to the commands below. In addition, if you areexecuting docker via fenicsproject script, you must prepend it with sudo -E. This flag allows sudo to see theenviromental variables, such as $FENICS_SRC_DIR. To allow sudo-less use, refer to the installation instructionsfor your distribution to add your user to the docker group.
First check that Docker is working:
docker run hello-world
You should see a message saying that your Docker installation is working correctly.
5
FEniCS Containers Documentation, Release 1.0
Note: Not working? Check out the Troubleshooting section.
To pull the quay.io/fenicsproject/stable image:
docker pull quay.io/fenicsproject/stable:latest
To start FEniCS, run:
docker run -ti quay.io/fenicsproject/stable:latest
You will be presented with a prompt where you can run FEniCS:
fenics@0521831b5f28:~$
fenics is your username inside the container and the number 0521831b5f28 is the CONTAINER ID that Dockerhas assigned. This ID is unique to your computer and this container and will be different to the one above.
The DOLFIN poisson.py example can be run using:
cd ~/demo/documented/poisson/pythonpython3 demo_poisson.py
The results will be outputted to the file poisson.pvd in the same directory. How to open this file with a visualisationtool is covered in the next section.
2.3 Sharing files from the host into the container
Most users want to continue using the text editor, version control and other tools already installed on their computers,and just use the Docker container to run FEniCS.
To share files between the host system and the container, use:
docker run -ti -v $(pwd):/home/fenics/shared quay.io/fenicsproject/stable
Note: Users running Linux distributions with SELinux enabled (Redhat, CentOS, Fedora, and others) will need toadd the :z option to all subsequent host volume mounts -v, e.g.:
docker run -ti -v $(pwd):/home/fenics/shared:z quay.io/fenicsproject/stable
Note: Permissions issues on Linux? Check out the Troubleshooting section.
This command will run a new container with the current working directory $(pwd) shared with the container at thepath /home/fenics/shared from inside the container.
The syntax for the argument -v is /path/on/host:/path/in/container. Note that all paths are absolutepaths.
Now, you can edit your code on the host and run the following inside the container:
cd $HOME/sharedpython3 my_code.py
6 Chapter 2. Introduction
FEniCS Containers Documentation, Release 1.0
In this case, all files in my-work-directory will be shared into the container. Any files you place in the directory/home/fenics/shared in the container will be available on the host system at the current working directory$(pwd), and vice versa. We recommend keeping the source code and generated results for your projects in thisshared directory, easily accessible on the host machine.
Any files placed in any other directory than /home/fenics/shared in the container will remain in the containerand are not accessible on the host.
2.4 Naming a container
Every container can be given a name so it can be easily referred to it in the future by passing the --name flag to thedocker run command, e.g.:
docker run -ti -v $(pwd):/home/fenics/shared --name fenics-container quay.io/→˓fenicsproject/stable
The container can be be stopped and started:
docker stop fenics-containerdocker start fenics-containerdocker exec -ti -u fenics fenics-container /bin/bash -l
To see the name and other information of every container you have ever created:
docker ps -a
To see the information of only running containers:
docker ps
For more details on ways of working with Docker and FEniCS, check out Suggested workflows.
2.4. Naming a container 7

FEniCS Containers Documentation, Release 1.0
8 Chapter 2. Introduction

CHAPTER 3
Available FEniCS images
Please see the Bitbucket repository for a full list.
9

FEniCS Containers Documentation, Release 1.0
10 Chapter 3. Available FEniCS images
CHAPTER 4
Suggested workflows
Docker is an extremely powerful and flexible system for running containers. However, with that flexibility comes asteep learning curve that may raise difficulties for new users. In this section we cover some common workflows thatyou might find useful.
Advanced users may find the Docker Cheat Sheet useful for quick reference.
4.1 Separate container for each user project
We would like to have a separate container for each user project. Say we have two projects located at $HOME/project-1 and $HOME/project-2 on the host. We want project-1 to use the dev image with the developmentversion of FEniCS, and project-2 to use the stable image with the stable version of FEniCS. Also we would like toeasily know which container corresponds to which project.
Then we can run in one terminal:
cd $HOME/project-1docker run -ti --name project-1 -v $(pwd):/home/fenics/shared quay.io/fenicsproject/→˓dev
and in another terminal:
cd $HOME/project-2docker run -ti --name project-2 -v $(pwd):/home/fenics/shared quay.io/fenicsproject/→˓stable
Notice the --name argument, this allows us to assign an easy-to-remember name to our container, rather than theCONTAINER ID. We now have two containers with two different versions of FEniCS running.
4.2 Multiple shells running in one container
You can get a list of all running containers by running the command:
11

FEniCS Containers Documentation, Release 1.0
docker ps
On my system I have the following output:
CONTAINER ID IMAGE COMMAND CREATED→˓ STATUS PORTS NAMESed8960fcf652 quay.io/fenicsproject/dev "sudo /sbin/my_init -" 3 seconds→˓ago Up 2 seconds project-1
We would like to have another bash container running inside the container project-1. We can execute a newprocess in the container using the docker exec command:
docker exec -ti -u fenics project-1 /bin/bash -l
The -l is important and ensures that your environment in the container is setup correctly for FEniCS to run. Youcould also enter into an ipython3 prompt instantly using:
docker exec -ti -u fenics project-1 /bin/bash -l -c ipython3
The -c flag makes bash read the commands from the string.
4.3 Restart an exited container
Start a container in the normal way:
docker run -ti --name new-project -v $(pwd):/home/fenics/shared quay.io/fenicsproject/→˓dev
Now exit the bash shell in the container:
exit
You will be returned to the shell on the host system. By default, when you exit the running process the container isstopped, but not deleted. All of the data associated with the container new-project remains on your system. Thismeans we can restart this container right where we left it.
We can see a list of all running and stopped containers using the command:
docker ps -a
On my system I have the following output:
CONTAINER ID IMAGE COMMAND→˓ CREATED STATUS PORTS NAMES143043b0fdfd quay.io/fenicsproject/dev "sudo /sbin/my_→˓init -" 9 seconds ago Exited (0) 1 seconds ago→˓new-project
You may need to scroll the above code box to the right to see the NAMES field where you will see the recently exitedcontainer new-project.
To start the container new-project again simply run the command:
docker start new-project
We can make a new shell in the container using the command:
12 Chapter 4. Suggested workflows
FEniCS Containers Documentation, Release 1.0
docker exec -ti new-project -u fenics /bin/bash -l
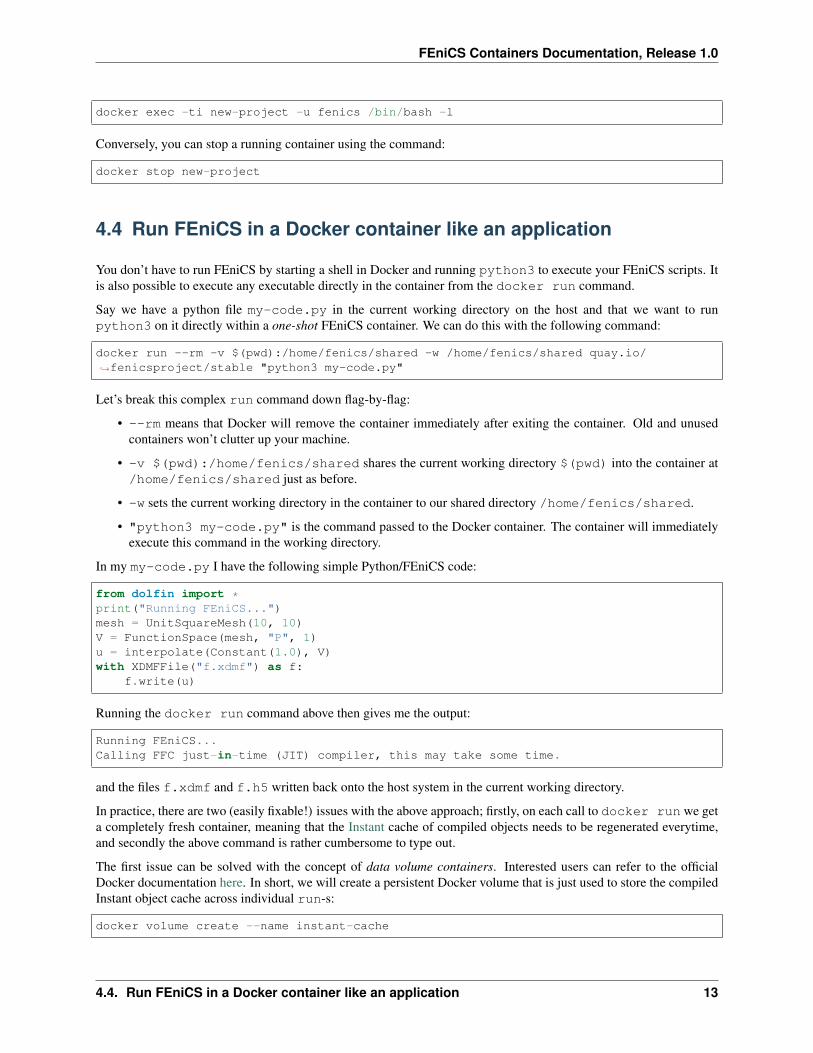
Conversely, you can stop a running container using the command:
docker stop new-project
4.4 Run FEniCS in a Docker container like an application
You don’t have to run FEniCS by starting a shell in Docker and running python3 to execute your FEniCS scripts. Itis also possible to execute any executable directly in the container from the docker run command.
Say we have a python file my-code.py in the current working directory on the host and that we want to runpython3 on it directly within a one-shot FEniCS container. We can do this with the following command:
docker run --rm -v $(pwd):/home/fenics/shared -w /home/fenics/shared quay.io/→˓fenicsproject/stable "python3 my-code.py"
Let’s break this complex run command down flag-by-flag:
• --rm means that Docker will remove the container immediately after exiting the container. Old and unusedcontainers won’t clutter up your machine.
• -v $(pwd):/home/fenics/shared shares the current working directory $(pwd) into the container at/home/fenics/shared just as before.
• -w sets the current working directory in the container to our shared directory /home/fenics/shared.
• "python3 my-code.py" is the command passed to the Docker container. The container will immediatelyexecute this command in the working directory.
In my my-code.py I have the following simple Python/FEniCS code:
from dolfin import *print("Running FEniCS...")mesh = UnitSquareMesh(10, 10)V = FunctionSpace(mesh, "P", 1)u = interpolate(Constant(1.0), V)with XDMFFile("f.xdmf") as f:
f.write(u)
Running the docker run command above then gives me the output:
Running FEniCS...Calling FFC just-in-time (JIT) compiler, this may take some time.
and the files f.xdmf and f.h5 written back onto the host system in the current working directory.
In practice, there are two (easily fixable!) issues with the above approach; firstly, on each call to docker run we geta completely fresh container, meaning that the Instant cache of compiled objects needs to be regenerated everytime,and secondly the above command is rather cumbersome to type out.
The first issue can be solved with the concept of data volume containers. Interested users can refer to the officialDocker documentation here. In short, we will create a persistent Docker volume that is just used to store the compiledInstant object cache across individual run-s:
docker volume create --name instant-cache
4.4. Run FEniCS in a Docker container like an application 13

FEniCS Containers Documentation, Release 1.0
We can then mount the persistent instant-cache image inside a one-shot container using the following command:
docker run --rm -v instant-cache:/home/fenics/.instant -v $(pwd):/home/fenics/shared -→˓w /home/fenics/shared quay.io/fenicsproject/stable "python3 my-code.py"
The argument -v instant-cache:/home/fenics/.instant mounts the data volume instant-cachecontainer into the one-shot container we use to execute our Python code. If you run the command twice, you willnotice on the second time that we do not need to just-in-time compile the Instant object that our Python script requires,because the cache is now stored inside the Docker volume.
The second issue, that the above is cumbersome to write out, can be solved simply using a shell script. You mightwant to try putting the following code:
!/bin/bashdocker volume create --name instant-cache > /dev/null 2>&1docker run --rm -v instant-cache:/home/fenics/.instant -v $(pwd):/home/fenics/shared -→˓w /home/fenics/shared quay.io/fenicsproject/stable "$@"
into a file fenics somewhere in your ${PATH} and making it executable chmod +x fenics. Then you cansimply run:
fenics "python3 my-code.py"
You could use the ideas in the above script to write your own custom launcher for FEniCS.
4.5 Compile a development version of FEniCS
The image quay.io/fenicsproject/dev-env makes it very easy to compile a development version of FEn-iCS, or start contributing to the development of FEniCS. We cover the latter in FEniCS development using Docker.
Let’s run the dev-env image and share the current working directory into the container at /home/fenics/build:
docker run -ti -v $(pwd):/home/fenics/build quay.io/fenicsproject/dev-env
You might be surprised how quick it was to download the image dev-env. This is because the image stable isactually built on top of the image dev-env. Docker can quickly work out that we have already downloaded all of thenecessary layers already when getting the stable image, and start the dev-env container almost instantly.
This environment contains everything we need to compile the latest version of FEniCS from the master branch.We provide a helper script fenics-update that will take care of pulling the source from git, compiling them, andinstalling them in the right locations. Using fenics-update is optional, you can pull and build FEniCS in anywayyou wish inside the container.
For more advanced usage, see FEniCS development using Docker.
4.6 Reproduce my results
Whether you are using the stable image, or have compiled a particular revision of FEniCS inside a dev-envcontainer, you might want to make sure that you can always get back to that specific version at some later date so youcan reproduce your results. Docker makes that easy.
First the simple case; we want to save a particular version of the stable image that will be used for all runs of code inpaper-1. We can do this using the tag directive:
14 Chapter 4. Suggested workflows
FEniCS Containers Documentation, Release 1.0
docker tag quay.io/fenicsproject/stable:latest my-name/fenics-stable:paper-1
Now, even if you decide to pull a newer version of FEniCS stable image:
docker pull quay.io/fenicsproject/stable:latest
The tag my-name/fenicsproject:paper-1 will always point to the version of FEniCS we have tagged, sowhen we do:
docker run -ti my-name/fenics-stable:paper-1
we will get the right version.
In the case we have compiled our own version of FEniCS for paper-2 in a dev-env image, the steps are slightly moreinvolved. Start with:
docker run -ti quay.io/fenicsproject/dev-env
and in the new container:
fenics-update
After the compile has finished, exit the container:
exit
Now, back on the host, we must commit the container. This freezes the modifications to the filesystem we made whenwe compiled FEniCS. Make a note from your terminal of the unique hash in the bash prompt of the container when itwas running e.g. fenics@88794e9fdcf5:~$ and then run, e.g.:
docker commit 88794
Docker will return a new hash, e.g.:
sha256:e82475ade54e046e950a7e25c234a9d7d3e77f3ba19062729810a241a50fc8a9
which we can then tag as before:
docker tag e824 my-name/fenics-dev:paper-2
Note that Docker can auto-complete hashes if you only provide the first few letters, making typing less cumbersome!
4.7 Share my container with a colleague
There are two main ways of doing this. The simplest is just to save your container in a tar file and send it to yourcolleague via your preferred file transfer method. First off exit your container and commit it:
exitdocker commit 88794
Docker will return a new hash, e.g.:
sha256:e82475ade54e046e950a7e25c234a9d7d3e77f3ba19062729810a241a50fc8a9
Now we can save to a tar file with:
4.7. Share my container with a colleague 15

FEniCS Containers Documentation, Release 1.0
docker save e82475 > my-fenics-environment.tar
Send the file my-fenics-environment.tar to your colleague, and she can load it into Docker using:
docker load < my-fenics-environment.tar
and wait for the import to finish. Your colleague can then start the image using:
docker run -ti e82475
Of course, your colleague can also tag the image for easy reference in the future.
The other option is to push your image up to a cloud repository like Dockerhub, or our preferred provider, quay.io.Both of these services will store images for you and allow others to pull them, just like our images.
First get an account on Dockerhub or quay.io.
In the case that you have chosen quay.io you need to login using docker login and the URL of the quay.iorepository:
docker login https://quay.io/v2/
In the case you have chosen Dockerhub, you can login without specifying a URL as Dockerhub is the default reposi-tory:
docker login
Then, you can push your image to the remote repository using docker tag and docker push:
docker tag e82475 quay.io/my-user/test-repo:latestdocker push quay.io/my-user/test-repo:latest
quay.io is the remote repository I want to push to, my-user is my username on quay.io and test-repo is thename of the repository I want to create. Dockerhub users can leave off the quay.io/ prefix as Dockerhub is thedefault remote repository.
Once the upload is complete anyone can pull your image from the repository:
docker pull quay.io/my-user/test-repo
and run it:
docker run -ti quay.io/my-user/test-repo
4.8 Create a custom image for my project
We probably haven’t included every Python module, every application and every small utility that you need for yourproject. However, we have done all the work of compiling and maintaing FEniCS.
You can build off of our work by learning to write your own Dockerfile that inherits FROM one of our pre-builtimages. We won’t go into all of the details of how to do this here, but can point you in the right direction. For fulldetails, take a look at the official Docker tutorials and manual pages.
Let’s say that we need to run scipy alongside FEniCS in Python scripts within a container. Because our image isbuilt to be as lean as possible, we don’t include scipy by default. However, you can add it easily.
16 Chapter 4. Suggested workflows

FEniCS Containers Documentation, Release 1.0
Begin by making an empty folder, for example my-docker-image/ and create a file called Dockerfile insideof it:
mkdir my-docker-imagecd my-docker-imagetouch Dockerfile
Then open up Dockerfile in your favourite text editor and add in the following text:
FROM quay.io/fenicsproject/stable:latestUSER rootRUN apt-get -qq update && \
apt-get -y upgrade && \apt-get -y install python3-scipy && \apt-get clean && \rm -rf /var/lib/apt/lists/* /tmp/* /var/tmp/*
USER root
Let’s go through each directive one-by-one. The FROM directive instructions Docker to build the new image us-ing quay.io/fenicsproject/stable:latest image as a base. The USER directive instructions Dockerto run all subsequent commands as the user root in the container. This method is preferred to using sudo in theDockerfile. Then, we RUN a few shell commands that update the apt-get cache and install scipy. Note thatwe clean up and delete the apt-get cache after using it. This reduces the space requirements of the final image.Finally, we switch back to the USER root. The reasons for switching back to the user root are outside the scope ofthis tutorial.
Save Dockerfile and exit back to the terminal, and then run:
docker build .
Docker will build the container using the instructions in the Dockerfile. After the build is complete Docker willoutput a hash, e.g.:
Successfully built 10c39a18651f
that you can tag your container for future use:
docker tag 10c39 quay.io/my-user/my-docker-image
We can now run the container in the usual way:
docker run -ti quay.io/my-user/my-docker-image
Now, inside the container, you should be able to use scipy and dolfin:
python3 -c "import scipy; import dolfin"
Congratulations, you’ve built your first Docker container!
This is just the beginning of what you can do to customise and build on our containers. In general, if you can install itin Ubuntu, you can install it in our container. For ideas, you can take a look at the source code of our Dockerfileshere and at the official Docker tutorials and manual pages.
4.8. Create a custom image for my project 17
FEniCS Containers Documentation, Release 1.0
4.9 Use graphical applications on Linux hosts
This allows X11 applications (e.g. matplotlib plot windows) to be displayed on Linux host systems. To enable this,first run xhost + and then append -e DISPLAY=$DISPLAY -v /tmp/.X11-unix:/tmp/.X11-unix tothe Docker run command. For example, you can run the stable version with:
xhost +docker run -ti -e DISPLAY=$DISPLAY \
-v /tmp/.X11-unix:/tmp/.X11-unix \quay.io/fenicsproject/stable
After exiting docker, execute xhost - on the host to restore X settings.
18 Chapter 4. Suggested workflows
CHAPTER 5
Running Jupyter notebooks
Jupyter notebooks allow you to create and share documents that contain live code, equations and visualisations. Formore information check out https://jupyter.org.
It only takes two commands to get a Jupyter notebook up and running with a FEniCS environment installed.
Note: The fenicsproject notebook myproject command automates the tasks outlined below. See Quick-start for instructions.
5.1 Docker for Mac, Docker for Windows and Linux users
First of all we run a new Docker container with the jupyter-notebook command specified and the default port8888 exposed on localhost:
docker run --name notebook -w /home/fenics -v $(pwd):/home/fenics/shared -d -p 127.0.→˓0.1:8888:8888 quay.io/fenicsproject/stable 'jupyter-notebook --ip=0.0.0.0'
The notebook will be available at http://localhost:8888 in your webbrowser. See Finding out the accesstoken for the next step.
5.2 Docker Toolbox for Windows and Mac users
First of all we run a new Docker container with the jupyter-notebook command specified and the default port8888 exposed on the IP of the virtual machine where docker is running:
docker run --name notebook -w /home/fenics -v $(pwd):/home/fenics/shared -d -p→˓$(docker-machine ip $(docker-machine active)):8888:8888 quay.io/fenicsproject/→˓stable 'jupyter-notebook --ip=0.0.0.0'
To find out the IP of the virtual machine:
19

FEniCS Containers Documentation, Release 1.0
docker-machine ip $(docker-machine active)
The notebook will be available at http://<ip-of-virtual-machine>:8888 in your web browser. See Find-ing out the access token for the next step.
5.3 Finding out the access token
Jupyter creates a unique access token (password) to ensure that only you can access the notebook. To find out thisaccess token run the following command on the host:
docker logs 3b4c7bcee5de
where the hash is your container ID (see docker ps).
Near the bottom of the output you should see something like:
Copy/paste this URL into your browser when you connect for the first time,to login with a token:
http://0.0.0.0:8888/?→˓token=b8d00059b0a71a94edd67d03d8ebecaa09d8c28eb7e7a0a9
In this case, the token is b8d00059b0a71a94edd67d03d8ebecaa09d8c28eb7e7a0a9. Copy your token tothe clipboard. Paste the token into the password field.
5.4 Plotting
Basic two and three-dimensional plotting are available from within the Jupyter notebook.
To see an example of what’s possible check out this notebook.
Note: Safari and Firefox are currently recommended for 3D plotting. Chrome has an intermittent issue where plotsmay not render.
For matplotlib plotting (2D), open up a new Jupyter notebook, and in the first cell type:
%matplotlib inline
Execute (Shift-Enter) the cell. In the next cell, we will load in the code from the DOLFIN Python Poisson demo:
%load ~/demo/documented/poisson/python/demo_poisson.py
Execute (Shift-Enter) the cell. In the same cell, the code from the demo_poisson.py file will be shown. Click inthe cell and execute (Shift-Enter) again. A plot of the solution variable u will appear.
For X3DOM plotting (3D), continuing from above, in a new cell type:
from IPython.display import HTMLHTML(X3DOM().html(u))
Execute (Shift-Enter) the cell. A 3D plot will appear that you can rotate and zoom using the mouse.
20 Chapter 5. Running Jupyter notebooks

FEniCS Containers Documentation, Release 1.0
5.5 Further instructions
The current working directory $(pwd) will be available in the Jupyter notebook interface. You might want to givethe container a name that you can easily rememember. In this example I have simply chosen notebook.
Note: This setup is secure by default. Users on your local network cannot access the web interface, even if they knowyour IP address.
With the flag -d we have placed the container into daemon mode. It will continue to run in the background until westop it:
docker stop notebook
To start it again just run:
docker start notebook
If you want to see the log output from the Jupyter notebook server type:
docker logs notebook
5.5. Further instructions 21

FEniCS Containers Documentation, Release 1.0
22 Chapter 5. Running Jupyter notebooks
CHAPTER 6
Performance
Running FEniCS in Docker may be faster than using a native build since our Docker images have been tuned forperformance, even when running Docker using virtualisation technologies on Mac and Windows.
A range of FEniCS performance tests using containers can be found in
Hale, J. S., Li, L., Richardson, C. N., and Wells, G. N. (2017). Containers for portable, produc-tive and performant scientific computing. IEEE Computing in Science and Engineering 19(6):40-50.[doi:10.1109/MCSE.2017.2421459] [arXiv:1608.07573]
23

FEniCS Containers Documentation, Release 1.0
24 Chapter 6. Performance
CHAPTER 7
FEniCS development using Docker
The FEniCS Docker images provide a convenient environment for FEniCS development since the images provide allFEniCS dependencies. Follow the instructions below to create an environment that let’s you pull, push, edit and buildFEniCS using Docker.
7.1 Development quickstart
On the host:
curl -s https://get.fenicsproject.org | bashexport FENICS_SRC_DIR=$HOME/dev/fenicsmkdir -p $FENICS_SRC_DIRcd $FENICS_SRC_DIRfor p in fiat instant dijitso ufl ffc dolfin mshr; do git clone git@bitbucket.→˓org:fenics-project/$p.git; donefenicsproject pull dev-envfenicsproject create my-dev-env dev-envfenicsproject start my-dev-env
Inside the container:
fenics-build
The workflow is to edit the code and interact with the git repositories on the host with your favourite tools, and thenbuild and run FEniCS inside the container.
7.2 Install the fenicsproject script
curl -s https://get.fenicsproject.org | bash
25
FEniCS Containers Documentation, Release 1.0
While it is possible to use straight docker commands to launch a development container, the script makes thingssignificantly easier. Read on for full details: Install the fenicsproject script.
7.3 Set up your FEniCS source tree
We will set up the FEniCS source tree on the host. This means you can use all of your usual development tools, likevim or emacs on the host, and just do the compilation and execution inside the container. You should also use gitpush and git pull on the host so that you can use your usual git SSH keys and setup.
We need to make a folder, e.g. $HOME/dev/fenics on the host system to hold the FEniCS source code:
export FENICS_SRC_DIR=$HOME/dev/fenicsmkdir -p $FENICS_SRC_DIR
You can make this setup permanent by setting the environment variable export FENICS_SRC_DIR=$HOME/dev/fenics in your $HOME/.profile or similar file. Feel free to choose another directory for your FEniCSsources.
7.4 Pull the FEniCS sources
cd $FENICS_SRC_DIRgit clone [email protected]:fenics-project/fiat.gitgit clone [email protected]:fenics-project/instant.gitgit clone [email protected]:fenics-project/dijitso.gitgit clone [email protected]:fenics-project/ufl.gitgit clone [email protected]:fenics-project/ffc.gitgit clone [email protected]:fenics-project/dolfin.gitgit clone [email protected]:fenics-project/mshr.git
Alternatively, the following short form can be used in place of the string of clones:
for p in fiat instant dijitso ufl ffc dolfin mshr; do git clone git@bitbucket.→˓org:fenics-project/$p.git; done
Note that we pull the sources from outside the Docker container (which we have yet to create). This ensures that wepull using the ssh protocol (rather than the https protocol) and it ensures that you can interact with the repositoriesusing your normal credentials (keys) on the host system. If you are using other repositories than the standard ones (inparticular forks not owned by fenics-project), make suitable adjustments to the git clone commands above.
7.5 Create the Docker container
We will now setup the development container using the fenicsproject script.
fenicsproject pull dev-envcd $FENICS_SRC_DIRfenicsproject create my-dev-env dev-env
The first command pulls the latest FEniCS dev-env image containing all the dependencies you need for buildingFEniCS such as PETSc and MPI. This will happen automatically when you run the fenicsproject createcommand below, but if you have previously used the dev-env image, make sure to run the fenicsprojectpull command to get the very latest version of the dev-env image.
26 Chapter 7. FEniCS development using Docker
FEniCS Containers Documentation, Release 1.0
The second command enters the FEniCS source directory. This is not strictly necessary for our purposes, but thefenicsproject script will complain if the fenicsproject create command is issued from the home di-rectory. Feel free to enter some other directory which will then be shared to $HOME/shared inside the Dockercontainer. The source directory will automatically be shared anyway at $HOME/local/src.
The third command creates a container named my-dev-env that you will be using for FEniCS development. Youmay of course choose another name for this container.
7.6 Start the FEniCS Docker container
fenicsproject start my-dev-env
This command will fire up the Docker container and we are ready to get going. The FEniCS source directory that wecreated previously will be shared into the directory $HOME/local/src inside the container.
7.7 Build FEniCS inside the Docker container
To build all of the FEniCS components from the source you have shared into the container, simply run the followingcommand inside the container:
fenics-build
Both commands build all the sources residing in $HOME/local/src and install the results into $HOME/local.Once all components have been built, you may run FEniCS programs without changing any paths or setting any otherenvironment variables. Everything is already setup correctly to point at the $HOME/local installation directory.
Note that there is also a command named fenics-pull. This will pull all the FEniCS sources into $HOME/local/src by entering each source directory and calling git pull. This means that the command will pull thesources for the default remote for the particular branch that each repository happens to be located at.
During development, you will likely need to rebuild and install a particular component repeatedly. For example, tore-build ffc:
fenics-build ffc
7.6. Start the FEniCS Docker container 27
FEniCS Containers Documentation, Release 1.0
28 Chapter 7. FEniCS development using Docker

CHAPTER 8
Developer Notes
The image base defines the end-user experience for all containers, including creating the fenics user, setting defaultENTRYPOINT and CMD variables, and setting the version of phusion/baseimage to use. All other images shouldultimately inherit FROM this image.
The image dev-env-base includes the fenics.conf helper script, the fenics.env.conf environment vari-able script, and sets the version numbers of the packages to compile in the child images. All dev-env-{variant}should inherit FROM this image.
29

FEniCS Containers Documentation, Release 1.0
30 Chapter 8. Developer Notes

CHAPTER 9
Troubleshooting
9.1 I can’t access the internet in the container
Docker images default to using the Google Domain Name Servers (DNS). Access to these may be blocked on somenetworks, resulting in no internet access in the container. In this case, you can set the address of the DNS using theDocker option --dns, e.g.:
docker run --dns=4.4.4.4 -ti fenicsproject/dev-env:latest
and replace 4.4.4.4 with the address of your local DNS.
For setting the DNS system-wide, see <https://docs.docker.com/engine/admin/systemd/> and <https://stackoverflow.com/questions/33784295/setting-dns-for-docker-daemon-using-systemd-drop-in/>.
9.2 I can’t share a folder into the container
macOS: By default, only files and directories under /Users/ can be shared into a container using the -v flag.
Windows: By default, only files and directories under C:\Users can be shared into a container using the -v flag.
9.3 My file permissions are wrong on the host
Note: The fenicsproject script automates this step.
Note: This step is not necessary on macOS or Windows hosts.
Pass your host UID and GID to the container as environment variables, e.g.:
31
FEniCS Containers Documentation, Release 1.0
docker run -ti --env HOST_UID=$(id -u) --env HOST_GID=$(id -g) quay.io/fenicsproject/→˓stable
By default, the fenics user in the container has UID=1000 and GID=1000. When you create a file inside thecontainer its ownership will be identical to that of the fenics user inside the container. The problem is that the UIDand GID on the host may be different. This results in files that are not readable or writeable on the host. The abovecommand modifies the UID and GID of the user fenics inside the container at runtime to match the current user onthe host.
9.4 I’ve run out of space for new containers or images
Users using the Docker Toolbox on macOS and Windows are actually running the Docker containers inside a VirtualMachine. If you pull too many images from Dockerhub then you may fill up the virtual machine’s disk drive.
You can see how much space you have left using the following command:
docker-machine ssh $(docker-machine active) sudo df -h /dev/sda1
You should see something like this:
Filesystem Size Used Available Use% Mounted on/dev/sda1 75.8G 45.8G 26.2G 64% /mnt/sda1
If the Use% column is greater than 90%, then you should follow the steps outlined below. Remember that files sharedinto the container from the host will not be deleted when you delete a container.
To cleanup, you first need to remove containers you are no longer using. To list all containers, type:
docker ps -a
You can then remove unwanted containers using:
docker rm <name>
where <name> is the name of the container shown in the output of docker ps -a. Note that containers typicallydo not take up much space, but the images they are based on can be hundreds of megabytes each.
Now, you can clean up unused or dangling images (images not associated with a container) by running:
docker rmi $(docker images -q --filter "dangling=true")
Note that if an image is associated with a container it cannot be deleted. So it is important to rm some containers first.
9.5 Still not working?
Support requests can be sent to the FEniCS Support mailing list ([email protected]).
32 Chapter 9. Troubleshooting
CHAPTER 10
Contact
Support requests can be sent to the FEniCS Support mailing list ([email protected]).
For development-related questions and suggestions, use the FEniCS Development mailing list ([email protected]). Bugs can be registered on the Bitbucket Issue Tracker (https://bitbucket.org/fenics-project/docker/issues).
33

FEniCS Containers Documentation, Release 1.0
34 Chapter 10. Contact
CHAPTER 11
Background
Background on the use of containers with FEniCS, including performance data, is available in
Hale, J. S., Li, L., Richardson, C. N., and Wells, G. N. (2017). Containers for portable, produc-tive and performant scientific computing. IEEE Computing in Science and Engineering 19(6):40-50.[doi:10.1109/MCSE.2017.2421459] [arXiv:1608.07573]
35

FEniCS Containers Documentation, Release 1.0
36 Chapter 11. Background

CHAPTER 12
Indices and tables
• genindex
• search
37


![Extension of 2D FEniCS implementation of Cosserat non ... · The objective of the internship is the extension of the existing 2D FEniCS implementation of Cosserat elasticity [9] to](https://static.fdocuments.net/doc/165x107/604d6997ec52f606395b1501/extension-of-2d-fenics-implementation-of-cosserat-non-the-objective-of-the-internship.jpg)