FAQ: our answers to frequently asked questions about 365 ...FAQ: our answers to frequently asked...
17
1. How can I localize an address? When adding a new customer and/or location to your administration, it can be useful to indicate where the site is located. With 365 for Transportation, no more than a simple mouse-click is enough to visualize this on a map. Just use the ‘Map’ buttons to locate or show the address on a map. Give it a try and follow the steps below: 1. Once you have filled out the address details, click on “Show on Map”. FAQ: our answers to frequently asked questions about 365 for Transportation.
Transcript of FAQ: our answers to frequently asked questions about 365 ...FAQ: our answers to frequently asked...
1. How can I localize an address?
When adding a new customer and/or location to your administration, it can be useful to indicate where the site
is located. With 365 for Transportation, no more than a simple mouse-click is enough to visualize this on a
map. Just use the ‘Map’ buttons to locate or show the address on a map. Give it a try and follow the steps
below:
1. Once you have filled out the address details, click on “Show on Map”.
FAQ: our answers to frequently asked
questions about 365 for Transportation.

2. A pop-up screen opens. Confirm that you want to show this address on the map and click on “OK”.
3. 365 for Transportation opens a new tab with the requested map. Via the information box on the left, you can
share the information. But you can also look up the GPS coordinates.

2. How do I prevent the system to create duplicate addresses?
Keeping your database clean is key – but at the same it can be a challenge. Luckily, 365 for Transportation
includes Duplicate Search functionality to (automatically) search for duplicates every time you create business
contacts and help you in maintaining a clean database. This is very useful when you need to manage many
addresses and you want to prevent duplicates in your database. How it works? Follow these simple steps to set
up the Duplicate search for addressess:
1. In the Search box, enter Duplicate String Setup.
2. In the Field field, select the field that you want the search string to be made up of.
- In the Part of Field field, specify the part of the field that you want the string to be made up of;
- In the Length field, enter the number of characters that you want the string to be made up of.
Repeat these steps to set up as many duplicate search strings as you want.
If the search hit percentage you have defined in the Transport Setup window is 60%, when six or more of these
ten strings are identical to another address’s search strings, then the two addresses are considered to be
duplicates.
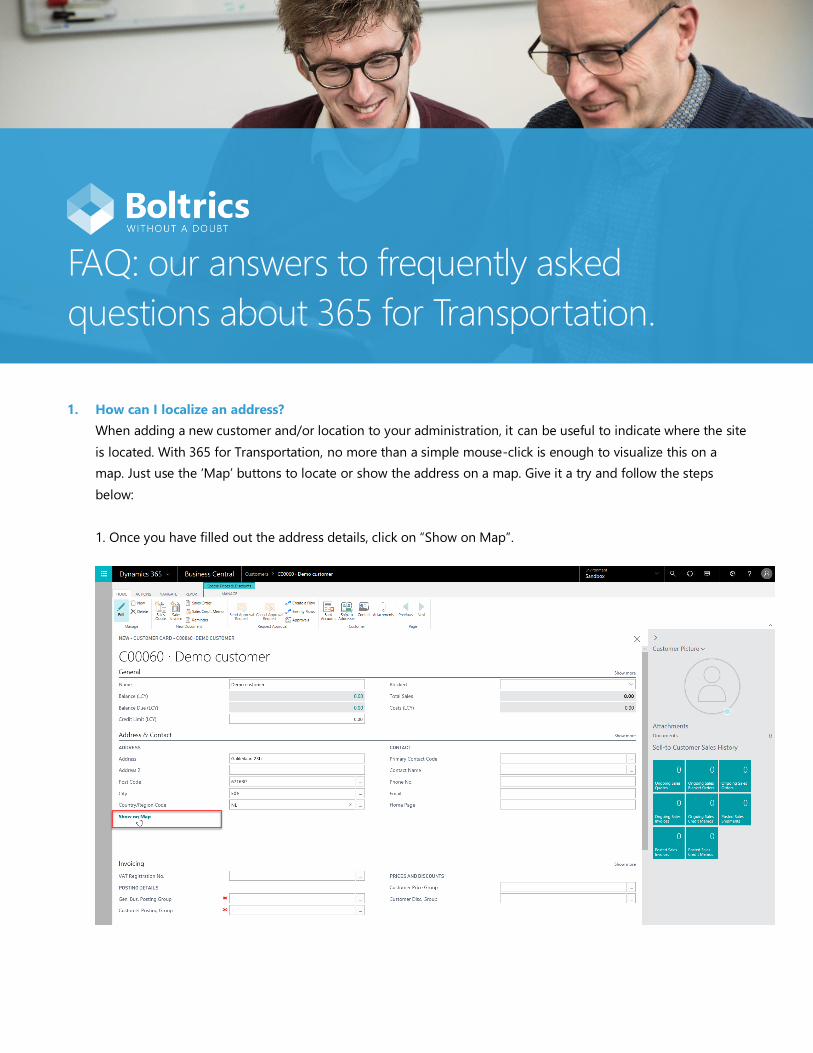
3. I already have added and/or uploaded addresses in my database before I set up the Duplicate Search
functionality. Can I still easily detect and merge duplicates?
Duplicate records can creep into your data when you or your colleagues enter data manually or import data in
bulk. Dynamics 365 helps you address potential duplicates by providing duplicate detection for accounts,
contacts, addresses and resources. Follow these steps if you already have addresses in your database before
you have set up the Duplicate search strings for addresses:
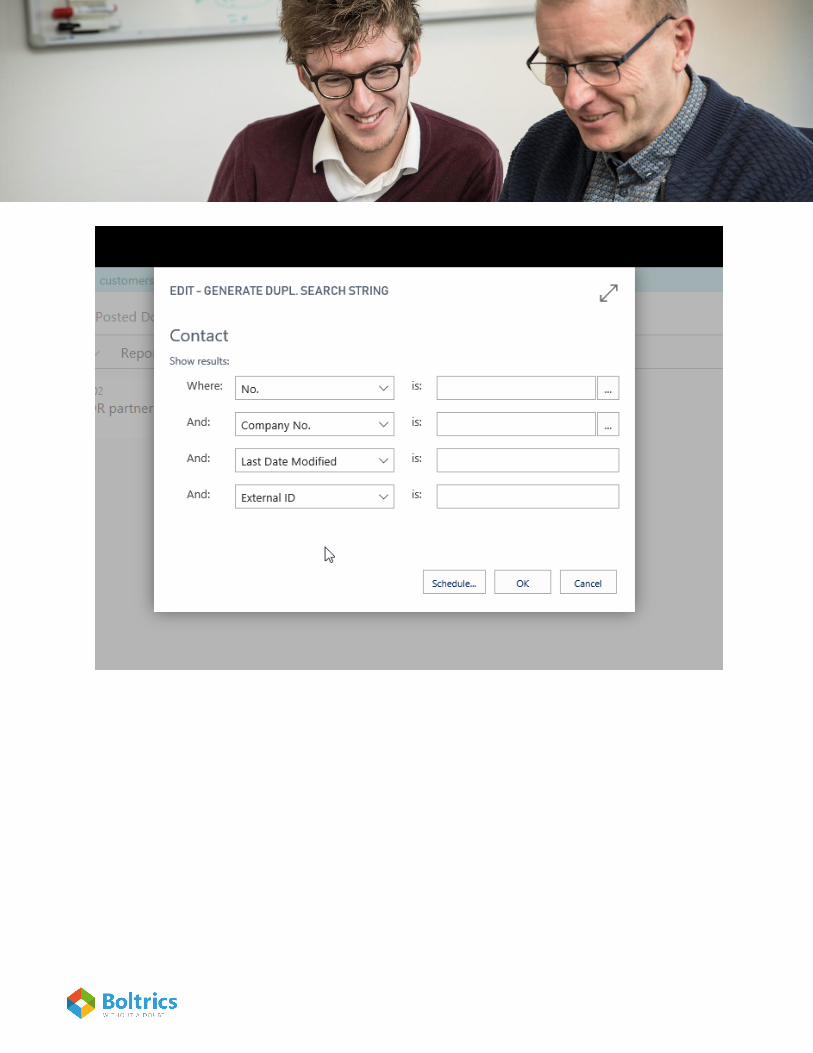
In the Search box, enter Generate Duplicate Address Search String, and then choose the related link.
You can now see a list of duplicates in the Address Duplicates window, search for Double addresses in the
search box. You can specify that two contacts are separate contacts. If the two addresses are actually true
duplicates, you can choose to Block the Duplicate address from the Address Duplicates Window. If the Address
you choose to block has the initial status, you will be asked if the address has to be removed. If you do not
want to remove the address the Status of the address will be changed to blocked.
The Address Duplicate window will automatically open when you have created a new address that is
considered to be a duplicate.
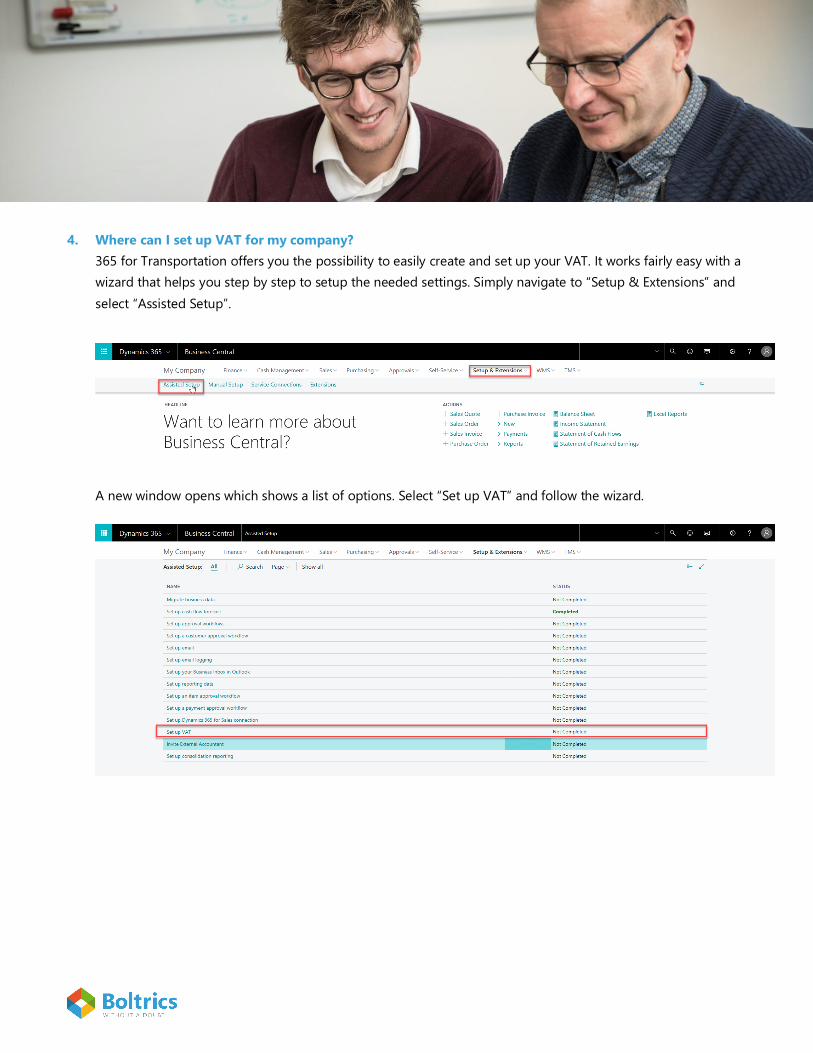
4. Where can I set up VAT for my company?
365 for Transportation offers you the possibility to easily create and set up your VAT. It works fairly easy with a
wizard that helps you step by step to setup the needed settings. Simply navigate to “Setup & Extensions” and
select “Assisted Setup”.
A new window opens which shows a list of options. Select “Set up VAT” and follow the wizard.

5. How can I generate an invoice?
Of course, you don’t want to give your services away for free. With the following steps, you can easily add the
revenues to your order.
1. To create a new invoice via your homepage, click on “Sales” and next click on “Sales invoices” as shown in
the screenshot below.
2. Next click on “New”.
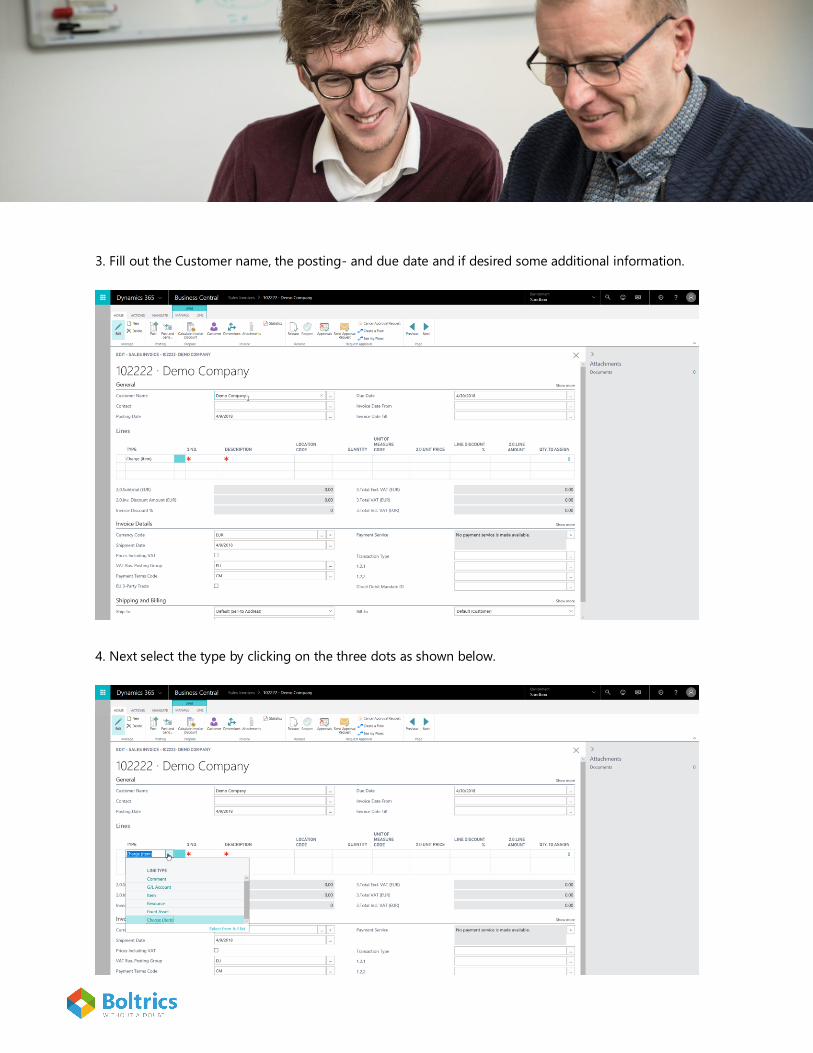
3. Fill out the Customer name, the posting- and due date and if desired some additional information.
4. Next select the type by clicking on the three dots as shown below.

5. Next select the corresponding description and number.
6. Fill out the quantity and the unit of measure code. In this example, we selected “Pallet”.

7. After selecting the unit of measure code, fill out the unit price – and if applicable – the line discount. The
system will automatically calculate the subtotal.
8. After filling out the necessary information, click on “Post” to prepare the invoice.
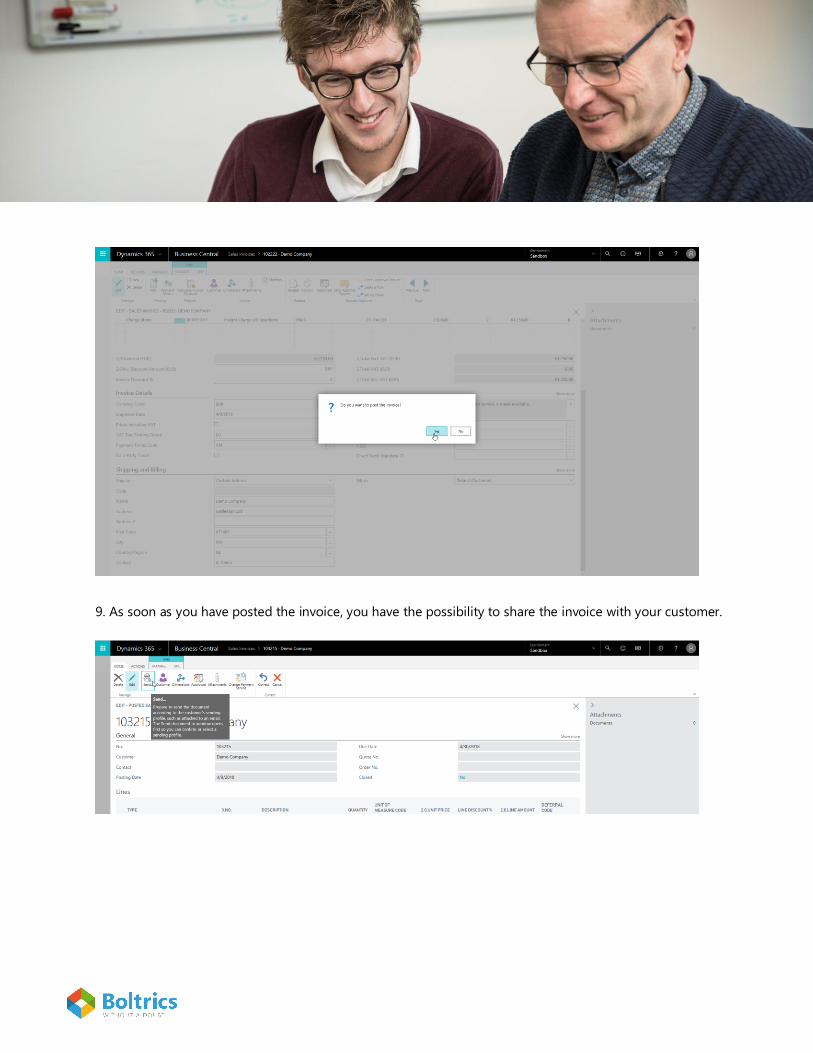
9. As soon as you have posted the invoice, you have the possibility to share the invoice with your customer.
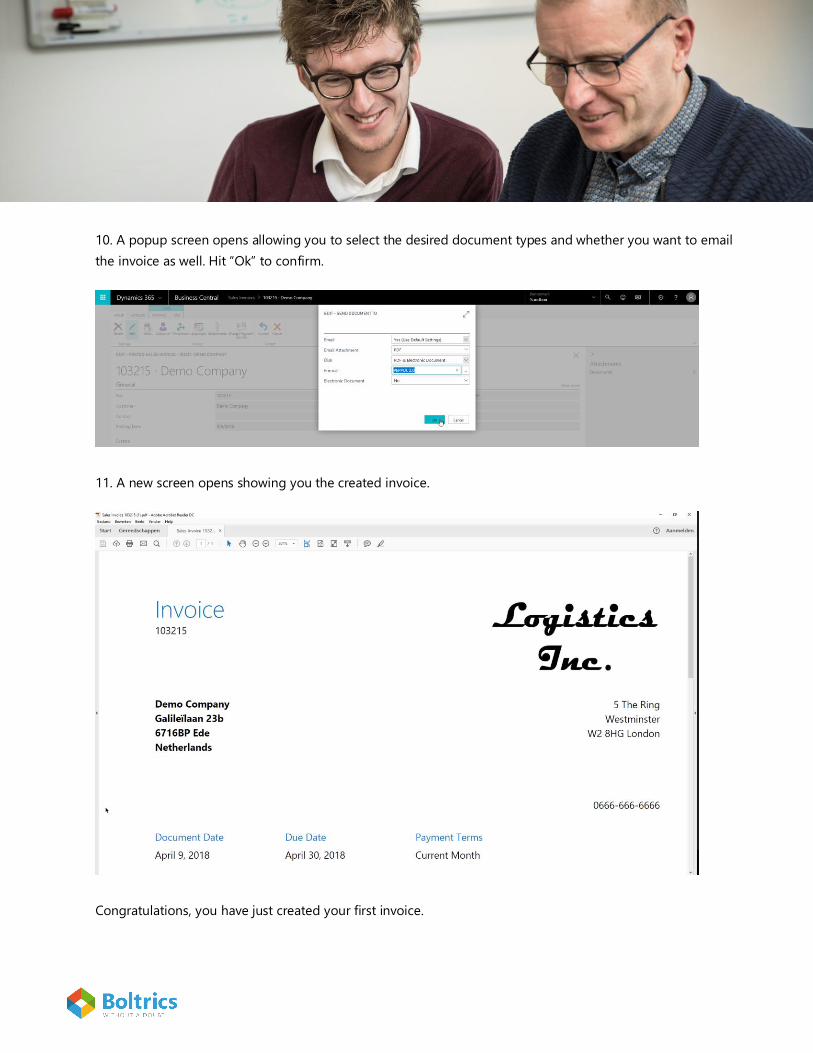
10. A popup screen opens allowing you to select the desired document types and whether you want to email
the invoice as well. Hit “Ok” to confirm.
11. A new screen opens showing you the created invoice.
Congratulations, you have just created your first invoice.

6. How can I adjust my General Ledger Setup?
In General Ledger Setup – which you can easily find via the search bar, the important basic financial
configuration is set for all posting and financial reports. It would be wise to consult adjustments with your
financial consultant.
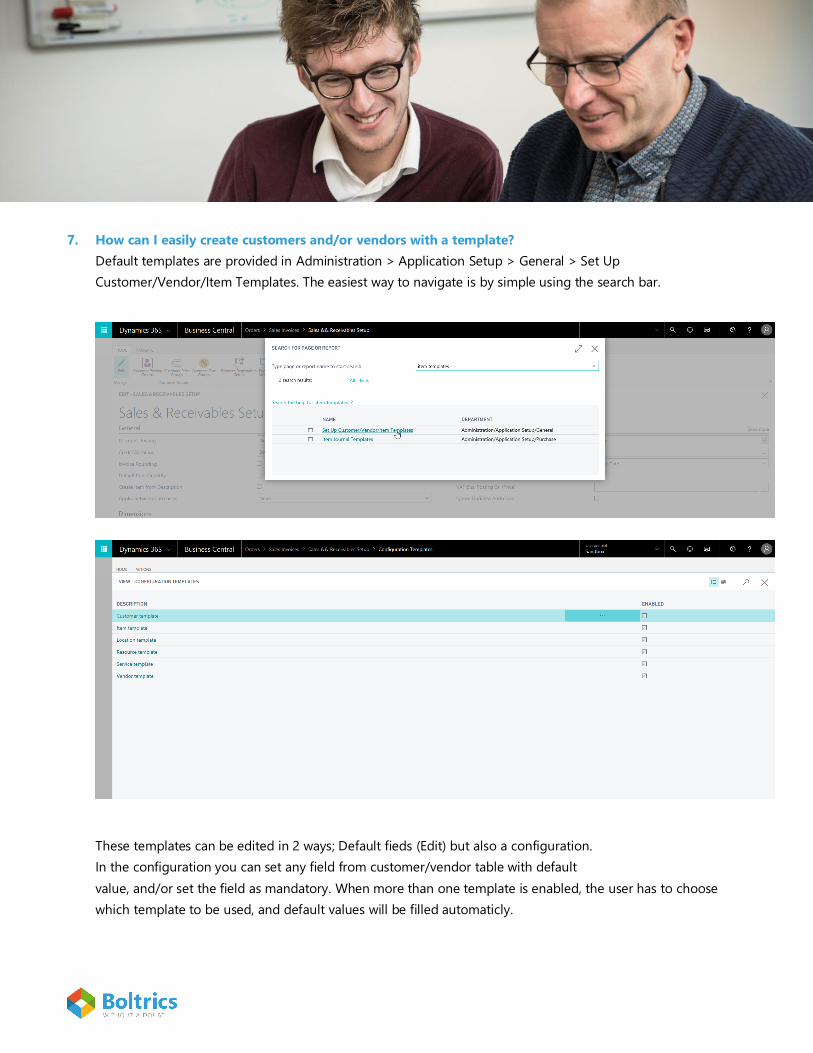
7. How can I easily create customers and/or vendors with a template?
Default templates are provided in Administration > Application Setup > General > Set Up
Customer/Vendor/Item Templates. The easiest way to navigate is by simple using the search bar.
These templates can be edited in 2 ways; Default fieds (Edit) but also a configuration.
In the configuration you can set any field from customer/vendor table with default
value, and/or set the field as mandatory. When more than one template is enabled, the user has to choose
which template to be used, and default values will be filled automaticly.

8. Where can I record payment terms?
365 for Transportation offers out-of-the-box multiple payment terms. But it is also possible to define an
alternative payment term that applies to one or multiple customers. Follow the steps below to create your own
payment terms.
1. When creating a new customer or when adding additional information, you can find the tab “Payments”.
When creating a new customer, this field contains by default no data. Click on to select a payment term
that applies or to create a new one.
2. Once you have clicked on a drop-down menu shows a list of available options. Here you can click on
“Select from full list” in order to see all available options. Does this list not include the needed payment term?
Click on “New” to create a new payment term.

3. A pop-up screen opens. Here you can create a new line to indicate the payment term.
Once you have filled out the necessary information, simply click on “OK” to confirm. From this moment, you
can use your newly created payment term.
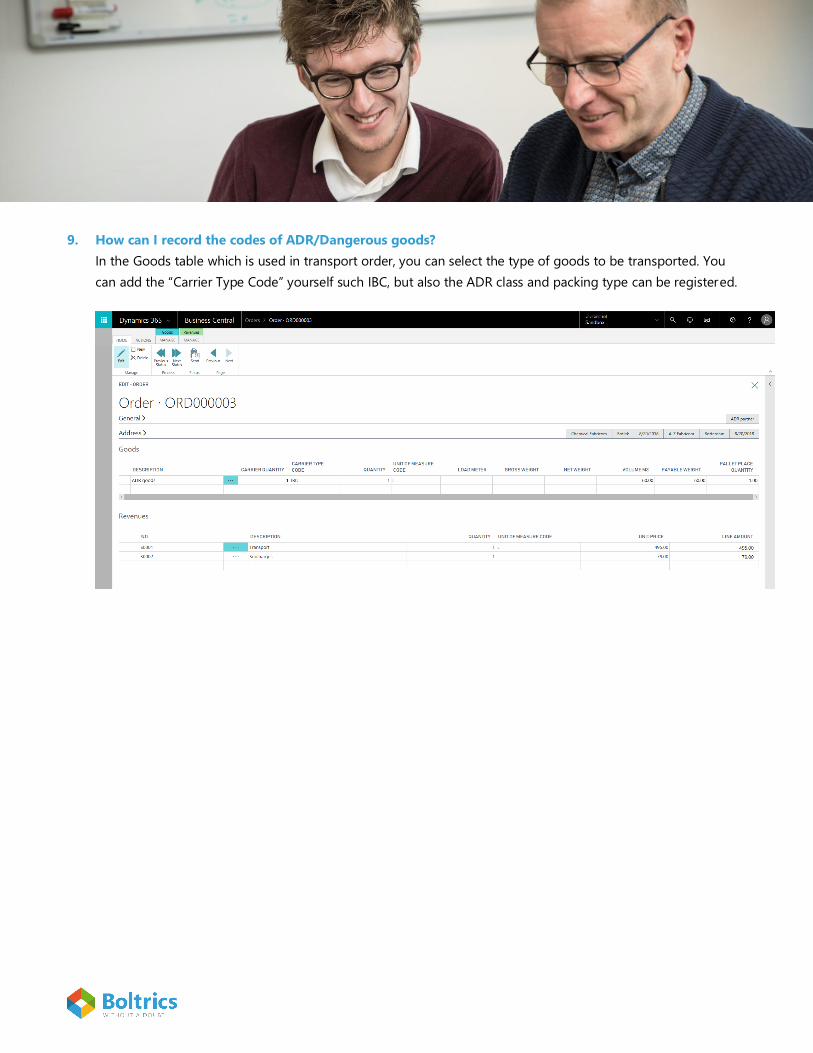
9. How can I record the codes of ADR/Dangerous goods?
In the Goods table which is used in transport order, you can select the type of goods to be transported. You
can add the “Carrier Type Code” yourself such IBC, but also the ADR class and packing type can be registered.