

Fallout.3.Game.guide
270
Fallout 3 Game Guide by guides.gamepressure.com Html version of this guide can be found at: http://guides.gamepressure.com/fallout3 User comments for this guide can be submitted and read at: http://guides.gamepressure.com/fallout3/comments.asp More game guides can be found at: http://guides.gamepressure.com Copyright © GRY-OnLine.pl for Gamepressure.com. All Rights Reserved. All trademarks, brands, logos and images are copyrighted by their respective owners. This document or any of its part may not be reproduced, modified or merged with other documents. [12/11/2008]
-
Upload
dat-nguyen -
Category
Documents
-
view
108 -
download
5
Transcript of Fallout.3.Game.guide

Fallout 3
Game Guide by guides.gamepressure.com
Html version of this guide can be found at: http://guides.gamepressure.com/fallout3
User comments for this guide can be submitted and read at: http://guides.gamepressure.com/fallout3/comments.asp
More game guides can be found at: http://guides.gamepressure.com Copyright © GRY-OnLine.pl for Gamepressure.com. All Rights Reserved. All trademarks, brands, logos
and images are copyrighted by their respective owners. This document or any of its part may not be reproduced, modified or merged with other documents. [12/11/2008]

Table of Contents: Introduction .......................................................................................................................................4
Main quests...........................................................................................................................6 Main quests 1: Baby steps ................................................................................................................6 Main quests 2: Growing up fast.........................................................................................................7 Main quests 3: Future imperfect........................................................................................................9 Main quests 4: Escape!...................................................................................................................11 Main quests 5: Following in his footsteps........................................................................................17 Main quests 6: Radio Galaxy News ................................................................................................21 Main quests 7: Scientific Pursuits ...................................................................................................24 Main quests 8: Tranquility Lane ......................................................................................................29 Main quests 9: The waters of life ....................................................................................................36 Main quests 10: Picking up the trail ................................................................................................43 Main quests 11: Finding the garden of eden...................................................................................47 Main quests 12: The American Dream............................................................................................51 Main quests 13: Take it back! .........................................................................................................56 Main quests 13: Take it back! - Endings .........................................................................................60
Side quests .........................................................................................................................63 Megaton: The power of the atom ....................................................................................................63 Megaton: The wasteland survival guide (first chapter)....................................................................66 Megaton: The wasteland survival guide (second chapter)..............................................................71 Megaton: The wasteland survival guide (third chapter) ..................................................................75 Megaton: Blood ties ........................................................................................................................80 Grayditch: Those!............................................................................................................................85 Rivet City: The replicated man ........................................................................................................90 Rivet City: Stealing independence ..................................................................................................93 Capitol Wasteland: Head of state....................................................................................................98 Museum of History: Reilly’s Rangers ............................................................................................102 Musem of History: You gotta shoot ‘em in the head .....................................................................108 Canterbury Commons: The superhuman gambit ..........................................................................110 Paradise Falls: Strictly business ...................................................................................................114 Big Town: Big trouble in Big Town ................................................................................................115 Tenpenny Tower: Tenpenny Tower ..............................................................................................119 Vault 101: Trouble on the homefront.............................................................................................125 Little Lamplight: Rescue from paradise.........................................................................................130 Agatha’s house: Agatha’s song.....................................................................................................136 Girdershade: The Nuka-Cola Challenge .......................................................................................141 Oasis: Oasis..................................................................................................................................143
Capitol Wasteland.............................................................................................................148 Maps of the world..........................................................................................................................148 Detailed maps ...............................................................................................................................168 Main locations ...............................................................................................................................176 Enemies ........................................................................................................................................213 Threats ..........................................................................................................................................217 Vault-Tec Bobbleheads.................................................................................................................219 List of achievements .....................................................................................................................230

Hints...................................................................................................................................233 Character creation and development ............................................................................................233 Perks .............................................................................................................................................238 Hidden perks .................................................................................................................................255 Combat..........................................................................................................................................257 Equipment .....................................................................................................................................261 Other .............................................................................................................................................269

Introduction
Welcome to the unofficial guide to “Fallout 3” video game. This guide will help you insurviving in the unpleasant territories of the Capitol Wasteland. I’ve created this survival kit not only to help less experienced players, but also to satisfy fans of the series. A lot of eastereggs and bonus items have been described, so you won’t have to look for them on your own. This guide has been divided into three separate parts. The first chapter of the guide is focused only on describing quests you’re given by non-player characters. I’ve described all the main quests required to finish the game, as well as side missions you’ll receive during your time spent in Capitol Wasteland. I guess I should tell you right now that “Fallout 3” has a much more complex quest system than the previous Bethesda game – “Oblivion”. Most of the quests have at least two diffrent endings, as well as a very unlinear structure. You can also use perks and skills to modify their progress by unlocking new conversation options orreceive unique rewards from the non-player characters. Obviously my guide contains all ofthat, so you don’t worry that you’ll miss something important or interesting. The second chapter of the guide focuses primarily on the game world. More than two dozen maps havebeen made. These maps show the wasteland, as well as focus on smaller areas (mostly cities)occupied by friendly characters. The sole purpose of creating them was to allow you to travelthrough the wasteland more freely, so you won’t spend a lot of time trying to find new locations. In addition to areas of the map, I’ve also said a few things about potential dangersyou may encounter while travelling through Capitol Wasteland. This includes enemyencounters, as well hazards such as radiation or poison. The final section of this chapter listsall available achievements, as well points out where to look for bonus items. You can try and search for Vault-Tec bobbleheads and unique weapon schematics. The third chapter of the guide contains a lot of hints on how to create your character, how to make him stronger andmore useful with every level he achieves (including choosing the best perks), how to fight andhow to maintain your inventory. I’ve used four different colors in my guide in order to make the reading process a lot easier,especially if you’re looking for an information concerning an item or a non-player character. The brown color was used to mark movable objects. Obviously this includes NPC’s, but I’ve

also marked monsters and robots. The blue color marks visited locations. I’ve used it not only to pin point main areas, but to let you know about secondary locations as well. Thegreen color should help you in finding new items. The orange color marks the places where using a perk is possible or when you’re rewarded with a unique perk that you wouldn’t beable to receive any other way. Have fun playing the game! Stranger

Main quests Main quests 1: Baby steps
MAIN QUEST 1: Baby steps Received from: automatically when you’ve started the game [Vault 101] Solution: The entire Vault 101 is much like a tutorial area. You’ll spend from one to twohours here and you’ll use this time to familiarize yourself with the basics. You start the gamein the womb of your mother. This is where you’ll have to make your first decision whetheryou want to control a boy or a girl. You must also pick the first name for your character. Nowuse a friendly creator to modify looks of your main hero. The second phase of this quest begins a year after you were born. Approach your father(James) and allow him to pick you up. Once James has left this room, open the door of the coop, so you’ll be allowed to move freely inside this room. All you have to do is to find a smallbook, listed as S.P.E.C.I.A.L. for you (screen). Interacting with the book will open a newwindow. This is where you’ll make several important decisions. You must redistribute pointsto seven main characteristics. I would strongly recommend that you read the third chapter of the guide before moving on, because I’ve posted a lot of hints there on how to create agood hero. You should also know that you’ll be allowed to change everything when leaving the vault. James will come back in a few seconds. Listen to what he has to say and followhim to a nearby corridor. This is where the quest will come to an end.

Main quests 2: Growing up fast
MAIN QUEST 2: Growing up fast Received from: James [Vault 101] Solution: This quest begins when you’re 10 years old and you’re having a birthday party.Start off by listening to what James and the Overseer have to say. Notice that you’ve beenrewarded with a Pip-Boy 3000. Now you’ll have to talk to Amata. It doesn’t really matter whether you’re polite to her or not, because either way you will receive a gift from her. It’sgoing to be a comic book about the adventures of Grognak the Barbarian. I strongly recommend that you open your inventory and read this book, because your melee weaponsability will be increased by one point. Now you may start talking to other party guests. Old Lady Palmer will give you a sweetroll and Stanley will give you a kid’s baseball cap. There’s going to be an incident during the party. One of the robots will destroy the birthdaycake by mistake and this will make the local bully who goes by the name of Butch very angry. You’ll have to talk to him and the conversation can have a different outcomedepending on your answers. You can give him your sweetroll, you can try convincing him that you should share the cake, you can destroy the sweetroll by spitting on it or you can even insult his mother. If you choose the last option, Butch will attack you (screen).Thankfully, you won’t have to worry about him hurting you. Once the situation has beenresolved, talk to Amata again.
James will soon inform you that he has prepared a reward for you and that you should meethim in the reactor room. Try leaving this room and you’ll come across Beatrice. Once again, you don’t have to be polite, because it won’t change anything. Notice that you’ve received a birthday poem. Read it if you want to and exit the room. Proceed to the lower level. Reachthe reactor room (screen) and talk to Jonas. Wait for James to show up. He will give you a BB Gun and some BBs. Now you must follow James to the southern corridor. This is where you’ll be allowed to test your new toy and you’ll familiarize with the basics of the battle system at the same time.

Choose the BB Gun from your inventory and use it to destroy three targets. Once this is done, you will have to kill a radroach which is nothing more than an oversized bug. Make afew steps forward to find the creature. You can still use this view of you can activate theV.A.T.S. system. Return to James once the radroach is gone. Wait for Jonas to take a picture of you and your father.

Main quests 3: Future imperfect
MAIN QUEST 3: Future imperfect Received from: James [Vault 101] Solution: Once again, a few years have passed since your last quest. You’re now sixteen and you’ll have to take the G.O.A.T. Talk to James about that. You can also inquire him aboutthe Vault or your mother. Before you decide to head to your destination, check yoursurroudings. You may use the computer to access experiments data and medical files of theinhabitants of Vault 101. You can also take your first bobblehead – medicine (screen). Picking it up will result in your medicine skill being increased by 10 points.
Go to the main corridor and you’ll meet Butch, as well as members of his gang. It looks that Tunnel Snakes don’t want to leave Amata alone. You can resolve this problem if you want toor you can focus only on completing your quest. If you decide to talk to Butch, you can convince him to stop harrasing Amata or you can encourage him to continue with his actions. You can defend Amata by fighting him or you can threaten him that you’ll report this situation to the Overseer. Alternatively you could talk to Wally Mack. It would be possible to convince him that Butch is not the leader of the Tunnel Snakes and that he shouldn’t make all the decisions by himself. This would result in a conflict inside the group. Eventually you’ll have to get to an area where the G.O.A.T. will take place. Talk to Mr Brotchthere. You can persuade him to provide assistance in skipping the exam (screen) or you can be a model student and agree to take the test. If you’ve decided to start the test, you’ll have to find an empty desk. Sit down and answer ten (well... nine ;-)) questions. Once the test has ended, go back to Brotch for results. Depending on your answers Brotch will choose specializations for you, however you can ignore his recommendations and choose three skillson your own. Also, it’s going to be similiar to the main characteristics, because you’ll beallowed to change your decision before leaving Vault 101. Exit the room and you’ll complete this quest.


Main quests 4: Escape!
MAIN QUEST 4: Escape! Received from: Amata [Vault 101] Solution: Finally it’s getting more interesting. The action of this quest takes place three yearsafter you took the G.O.A.T. Amata will storm into the room. She will inform you that Jameshas escaped and that Jonas has been killed. I would recommend answering politely, becauseshe will hand over ten bobby pins to you (used to open locks). Listen to her escape plan.Amata will also give you a 10mm pistol with some ammunition. You could say to her thatshe should keep the weapon, but it wouldn’t do you any good. VAULT 101
Map legend: 1 – starting area; 2 – first guard; 3 – Butch; 4 – Butch’s mother; 5 – mess hall; 6 – officer Gomez; 7 – infirmary; 8 – small office; 9 – exit to: Vault 101 - atrium Notice that you’re standing inside a small room (1 on the map). It would be a good idea toinspect your surroundings. You may consider picking up a BB gun, but a baseball bat is a more interesting alternative. Check the drawers and the first aid station on the wall. CollectMed-X and ten stimpacks. Exit the room and notice that one of the guards is being attacked by radroaches (2 on the map). Don’t waste your ammunition on him. Instead, wait to see who’s won and use the baseball bat to succeed. I’d strongly recommend that you inspectKendall’s body. Pick up and wear two items – Vault 101 security helmet and Vault 101 security armor.

You will meet Butch (3 on the map) on your way to your current destination. You’ll find out that his mother is being attacked by radroaches and that he needs your help to save her. You can ignore his problem or you can provide much needed assistance. If you’ve decided to help him, you may convince Butch that he’s able to take out the creatures on his own. He can use his bare hands ore on your weapons (BB gun or the baseball bat). You can also head there yourself (4 on the map). I would recommend helping him out, because as a rewardButch will hand over a Tunnel Snake outfit. You may continue moving north. Notice that you’ll pass through a small mess hall along the way (5 on the map). Kill the radroaches or ignore them. Eventually you’re going to be stopped by Gomez (6 on the map). You may kill him, because you won’t lose any karma over it. Soon you’ll get to Stanley. Explore the infirmiary (6 on the map) and the northern office (7on the map) if you forgot to take the figurine. Proceed to the eastern door (9 on the map) andagree to travel to Vault 101 – atrium.

VAULT 101 - ATRIUM
Map legend: 1 – starting area and exit to: Vault 101; 2 – guards and exit to: Vault 101 –entrance; 3 – southern door; 4 – administration room; 5 – Amata and the Overseer; 6 – body of Jonas; 7 – Overseer’s terminal; 8 – exit to: Vault 101 - entrance You start in the middle of the base (1 on the map). Move to the south carefully. Two enemyguards (O’Brian and Richards) are stationed to the east (2 on the map). You could kill them with the pistol you received from Amata, however you wouldn’t be able to access the door they’re guarding, so you’ll be doing this only to collect their supplies. Proceed to the southerndoor (3 on the map; screen). Get rid of new radroaches. Remember to use good melee weapons against them. In addition to the bugs you’ll also have to take out security chief Hannon. Once he’s gone, proceed to the upper balcony and head west. One of the civilians will be shouting at you, but you my as well ignore him. Enter the server room and get rid of a few additional radroaches. You can also inspect the body of Floyd Lewis while you’’re there. Proceed to the western passageway (4 on the map).

Eventually you’ll reach a cell area (5 on the map). Notice that Amata is being interrogated byher father. You’ve got two choices here – you can enter the room in order to resolve this problem or you can ignore it and keep heading towards Overseer’s office. If you decide toenter the room, you will have to kill a new guard who is going to be sent to attack you by the Overseer himself. Alternatively Amata can kill him if you let her keep her the pistol, but it’s highly unlikely that you didn’t want to use it. You may talk to the Overseer or you can kill him in order to loot his body for much needed items. Don’t even think about surrendering, because the second you hand over your weapons he’ll decide to attack you. The finalavailable solution is to persuade him to granting you access by saying that you’ll hurt Amataif he won’t comply (screen). Either way, you should be able to get your hands on two items –Overseer’s terminal password and Overseer’s office key. You may explore the rest of the room if you want to. Make sure that you’ve opened all drawers and lockers, because you’ll find more guns, as well suits and ammunition. Proceedto the north. Inspect the body of Jonas (6 on the map) and you’ll get your hands on a note from Dad. Obviously you should play the tape using your Pip-Boy 3000.

You can check the surrounding area beforing heading over to Overseer’s office. This is crucial if you’ve decided to ignore him and not to rescue Amata from the interrogation. You will come across several interesting items, including bobby pins. Talk to Amata, however she’ll ignore you if you killed her father. Check the drawers and you’ll find a copy of a key to Overseer’s office. Obviously if you have the key from the Overseer, you won’t have to take the second one, because they’re identical. Proceed to the southern room and use one of the keys to open the door. Once again, check your surroundings and you’ll find the password to the terminal among other things (medicine, ammunition). Approach a large terminal (7 onthe map) and use it (screen). Click on other functions if you want to, however the most important thing is to open the secret underground passageway. Move back a little and wait for the secret tunnel to reveal itself. Proceed downwards. Use theswitch and kill a single radroach. Use the door (8 on the map) to get to Vault 101 –entrance.

VAULT 101 - ENTRANCE
Map legend: 1 – starting area and exit to: Vault 101 – atrium; 2 – control panel; 3 – exit to: Vault 101 – atrium; 4 – main exit from the vault Proceed south. Use a new switch to unlock the passageway to the main room. Obviously youmust approach the main control panel (2 on the map; screen). Press the button and wait fora large hatch to start moving. Amata will arrive here in a few seconds and obviously you cantalk to her. You are also going to be attacked by two additional guards. You may kill them or you may start running towards the exit. If you decide to eliminate them, take your time toexplore all nearby rooms. In order to finish this quest you must get to the exit (4 on the map). This is where you’ll be given your final chance to change something with your character. I would recommend savingyour progress here, so you won’t have to repeat the start if you decide to play the game witha different character. Use the wooden door to get to Capitol Wasteland. Make a few steps forward and you’ll receive a confirmation that this quest has ended.
Main quests 5: Following in his footsteps
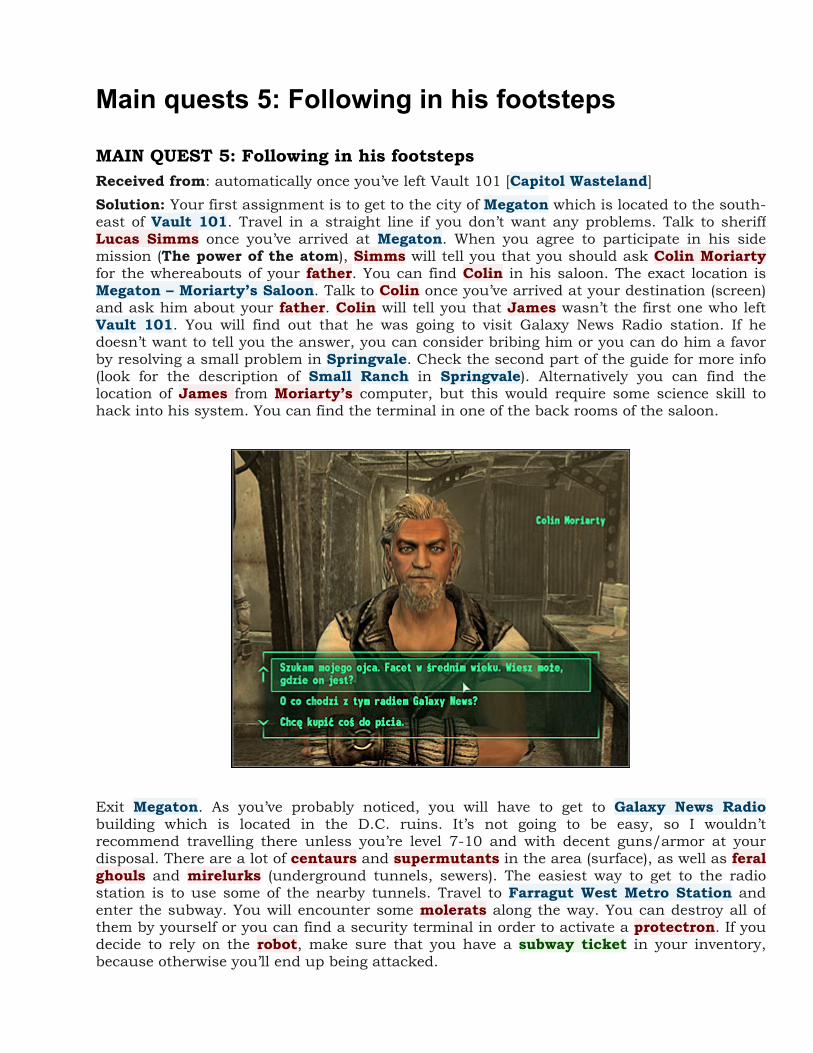
MAIN QUEST 5: Following in his footsteps Received from: automatically once you’ve left Vault 101 [Capitol Wasteland] Solution: Your first assignment is to get to the city of Megaton which is located to the south-east of Vault 101. Travel in a straight line if you don’t want any problems. Talk to sheriffLucas Simms once you’ve arrived at Megaton. When you agree to participate in his side mission (The power of the atom), Simms will tell you that you should ask Colin Moriartyfor the whereabouts of your father. You can find Colin in his saloon. The exact location is Megaton – Moriarty’s Saloon. Talk to Colin once you’ve arrived at your destination (screen) and ask him about your father. Colin will tell you that James wasn’t the first one who leftVault 101. You will find out that he was going to visit Galaxy News Radio station. If hedoesn’t want to tell you the answer, you can consider bribing him or you can do him a favorby resolving a small problem in Springvale. Check the second part of the guide for more info(look for the description of Small Ranch in Springvale). Alternatively you can find the location of James from Moriarty’s computer, but this would require some science skill tohack into his system. You can find the terminal in one of the back rooms of the saloon.
Exit Megaton. As you’ve probably noticed, you will have to get to Galaxy News Radiobuilding which is located in the D.C. ruins. It’s not going to be easy, so I wouldn’t recommend travelling there unless you’re level 7-10 and with decent guns/armor at your disposal. There are a lot of centaurs and supermutants in the area (surface), as well as feral ghouls and mirelurks (underground tunnels, sewers). The easiest way to get to the radio station is to use some of the nearby tunnels. Travel to Farragut West Metro Station and enter the subway. You will encounter some molerats along the way. You can destroy all of them by yourself or you can find a security terminal in order to activate a protectron. If you decide to rely on the robot, make sure that you have a subway ticket in your inventory, because otherwise you’ll end up being attacked.

Eventually you’ll get to an area occupied by large numbers of feral ghouls. There’s a security terminal in one of the side rooms. Using it doesn’t require any skill and you can use it toopen a safe with items of great value. There’s a closed gate blocking your way. Use bobby pins to open it or go back to one of nearby offices in order to find a proper key. Either way, you will have to deal with all ghouls before moving on. I would recommend shooting at thegenerators, because the explosion should kill them or at least most of them. Eventually youshould be able to reach an exit which leads to Tenleytown / Friendship Station. Use it. Sadly, you will come across a single supermutant here, so be careful while trying to kill it. Keep shooting at the ghouls as well. Get to the southern exit (screen). It leads to Chevy Chase – North.

Notice that you’ve left the subway tunnels to the north of the Galaxy News Radio building. You will soon encounter paladins from the Brotherood of Steel. DON’T attack them, because they’re your potential allies at the moment. Instead, help them in defeating the firstgroup of supermutants. Stay in the back, however try dealing the last shot to each supermutant and you’ll gain much needed experience. Once it’s safe, talk to Sarah Lyons(screen). You will find out that her squad is heading towards the radio station building, so itwould be a good idea to join the paladins. The group will soon enter a large and partiallydestroyed building. There are a lot of supermutants here, but your new colleagues will deal with all monsters. Stay in the back and you’ll be safe. I would recommend inspecting thebody of knight Jennings. You can’t wear his power armor just yet and I wouldn’t recommend carrying it, because it’s very heavy. Don’t worry – you will receive proper training in power armor usage during one of the upcoming main quests. For the moment the onlything you should consider taking is his laser pistol.
It shouldn’t take too long for you to reach Galaxy News Radio building. You must helppaladins in defeating the final group of supermutants, including a very powerful supermutant master. Once it’s done, wait for a behemoth to show up. Locate a body of a killed paladin quickly (screen) and take his weapon – a fatman. This gun fires mininukes at the target. Choose the fatman from your inventory and fire at least one nuke at the behemoth. If you’re successful, the beast should lose at least half of its health. You can fireagain at the behemoth or you can use other weapons to finish it off. Minigun is always a good idea, as well as a rocket launcher. Prevent the monster from getting too close, because you would have been killed with one successful blow. Check the body of the behemoth once it’s dead and you’ll gain access to a lot of random items. You may also scout the area for bodies of other fallen paladins. Most of them were carrying good weapons.

You may talk to Sarah Lyons again when it’s safe and she’ll thank you for all the help you’ve done in defeating the supermutants. Proceed towards a large building. Use the intercom andafter a while you will be granted access to the radio station. You can explore the entirebuilding if you want to and you can also talk to present brotherhood members. In order to fullfill your current challenge you must use the stairs to get to the first floor. Locate a singledoor which leads to RGN Studios. The person you’ll have to talk to is Three Dog. You can convince him to tell you where James has gone (screen), but you must have a high speechvalue to succeed in this challenge. You can also agree to doing him a favor. You’ll find out about the transmitter and how to repair it. Proceed to the description of the next main quest.

Main quests 6: Radio Galaxy News
MAIN QUEST 6: Radio Galaxy News Received from: Three Dog [Galaxy News Radio – RGN Studios] Solution: Important! If by any chance Three Dog is dead, then you won’t be allowed to fullfill this particular assignment. You will have to find Rivet City on your own. After that, your task will be to find Doctor Li and to ask her for help. This will automatically trigger a new main quest – Scientific Pursuits. The similiar situation is when you’ve decided to visit Rivet City early during the course of the game. If you activate Scientific Pursuits there, you won’t have to complete this assignment, because you’ll already know where James has went, so Three Dog won’t offer any useful knowledge. Your first assignment will be to find a missing dish. In order to do that you will have to travelto the Museum of Technology. Make sure that you’re fully prepared for this mission, because this time you will be killing supermutants without brotherhood’s assistance. Don’t forget to take the fatman for this mission with at least 5-10 mininukes. You should reach the museum area through the subway tunnels. You can use several different passageways, however I would recommend that you start from Anacostia Crossing. This station is locatedto the north of Rivet City. Kill all enemy units, use the stairs and open a large metal gate toget to the tunnels. I guess you won’t be surprised to hear that you will have to kill a lot of bandits inside. Use your map to find the correct route. Try getting to the Museum Station. Use the gate (screen) to reach the Mall area. Notice that you’ve left the tunnels very close to the Museum of Technology.
You will have to be extremely carefule outside the museum, because this entire area isswarming with supermutants. You can engage them in battle or you may proceed directly to the museum building. Travel to Musem of Technology – atrium. I’d strongly recommendthat you choose one of the strongers guns from your inventory. This time it’s not going to bepossible to run away. If you don’t want to fight all the mutants, consider remaining unnoticed, but you must have a high sneak skill and a stealth boy in your inventory to

prevail. You can also hack into a computer terminal in order to activate museum turrets. Once you’ve defeated all monsters, proceed to the first floor. In order to get to your currentdestination you will have to travel through a fictional vault (screen). It shouldn’t be a problem, especially since there’s no one inside. Exit the vault and proceed to the nearestdoor. You’ll get to Museum of Technology – west wing.
If you didn’t spend any points to expansion of your science and lockpicking skills, you maychoose the most obvious route to your current destination. Sadly, this means you’ll have togo through A LOT of dangerous monsters. Use guns such as a fatman, a plasma rifle and a rocket launcher against them. The dish itself is protected by a very strong group ofsupermutants. Check the location of this object on my screen. If you can hack or lockpick,there is more room for being creative.There’s a corridor in the north-west section and you canget there through the planetarium. Open the lock with a bobby pin or hack the terminal. Sadly, if you decide to use the computer, enemy supermutants will appear inside theplanetarium and you’ll have to kill the monsters before moving on. Once you’re in this corridor, look for a door to your right. Head to the upper floor and find a new terminal. Use it to activate more turrets.

It doesn’t really matter whether you’ll decide for an open battle or sneak around, because you must get your hands on the dish. Once it’s in your possession move back the same way youcame and avoid other supermutants if possible. Now you must travel to The Washington Monument. Thankfully, it’s going to be much easier here, because the monument is being defended by brotherhood units, so even if you’re chased by supermutants, you can allow your colleagues to get rid of the monsters. Activate the security terminal and open the maingate (you won’t have to hack into the system). Proceed to the door and enter The Washington Monument. Once inside, find an elevator and use it to get to the top. Approacha small radio (screen) and press the action key. Obviously you must install the dish from the museum. Also, if you’re science skill is high enough, you will be allowed to make the transmitter more effective so it’ll broadcast to a much larger area from now. Once you’ve installed the dish, leave the monument and go back to the Galaxy News Radio building. Obviously you’ll have to talk to Three Dog again. Ask him where to look for your father. Three Dogwill answer to your question and he will also inform you about his stash in Hamilton’s hideout.

Main quests 7: Scientific Pursuits
MAIN QUEST 7: Scientific Pursuits Received from: Doctor Li [Rivet City – Science Lab] or Three Dog [Galaxy News Radio –RGN Studios] Solution: Important! If you decide to start this mission before completing previousassignments, quests Following in his footsteps and Galaxy News Radio are going to be automatically completed/cancelled. I wouldn’t recommend doing that, because not only you’llmiss out on a lot of fun, but you also won’t get your hands on previous rewards andexperience points. If you’ve agreed to help out Three Dog, you will receive this challenge once you’ve activated the transmitter at The Washington Monument. The most obvious solution: I assume that you’ve already unlocked Rivet City. Otherwise you’re going to have to travel thereon foot. I would recommend staying near the river, however you can also use some of the subwaytunnels. Once you’ve arrived at Rivet City, you will have to go to the Science Lab. You can get there from the upper or from the middle deck. Locate Doctor Li and talk to her. Obviously you can ask her a few questions concerning your parents or Project Purity. You can also convince Li to hand over a few stimpacks to help out on your quest. The most important thing for you to knowabout is that James has travelled to the Jefferson Memorial building, because that’s where the old lab is located. Leave Rivet City. Obviously you must now travel to Jefferson Memorial which is located to the west. There are large balconies leading to your destination, but you shouldn’t be in a lot of hurry, because they’re occupied by supermutants (screen). You won’t encounter too many monsters and you’ll be dealing with the weaker kind, so it shouldn’t be a problem. Locate asmall entrance to the monument and head over to Jefferson Memorial – gift shop.
Once you’re inside the memorial, kill one of the supermutants and proceed to the rightcorridor. Notice that a turret has been set up in front of you. The turret is shooting at the supermutants (screen), so you shouldn’t destroy it. Instead, attack the monsters from the

distance and wait for them to get here. You can also inspect some of the surrounding rooms while the turret is busy killing your foes. Once you feel it’s safe, destroy the turret. I would recommend using a combat shotgun or an EM grenade against it. Kill all of the remaining creatures and proceed towards Jefferson Memorial – rotunda.
You’ve just entered the main room of this entire research complex. Be careful, though. Thereare several monsters here. Start off by killing a relatively weak centaur. Sadly, the main part of the structure is being guarded by a very powerful supermutant. You can use your plasma rifle against it or you can try avoiding the creature. Either way, you will have to locate several holotapes. Check the screen if you don’t know where to look for them. Listen to the tapes with the help of your Pip-Boy and you’ll find out that James has travelled to Vault 112. Obviously that’s where you’ll have to travel next. Notice that the Vault hasn’t appeared on your list as a main area. This is going to be a long trip, so make sure that you’re fullyequipped. You should also take some rest in Megaton or Tenpenny Tower.

Alternative solution: There is also an alternative solution concerning your father’s whereabouts. All you have to do is to find the sufficient number of holotapes connected to the Project Purity program. Here’s a list of these tapes and some brief notes on where to look for them:
LOCATION AND EXPLANATION HOLOTAPES
Jefferson Memorial – basement – watch out for supermutants – there are a lot of them in the basement
7
Jefferson Memorial – rotunda – this is the exact same spot you had to visit after receiving intel from Doctor Li
3
Rivet City – Doctor Li’s quarters – you shouldn’t have any problems collecting those
3
TOTAL: 13 holotapes
As you’ve probably noticed, the largest number of holotapes is hidden inside Jefferson Memorial – basement. In order to get there you must reach the gift shop. There’s a single door leading to the basement (screen). Find at least ten tapes, because only then you’ll beallowed to travel to Vault 112.

Reaching Vault 112: Obviously you should be moving towards your target in a straight line, so it won’t take too long for you to get there. I would also recommend that you start somewhere near Vault 101or Megaton, because you probably didn’t uncover too many locations in the west. Don’t entera large valley along the way, because it leads to Evegreen Mills and this area is swarming with slavers. I’m sure you didn’t want to go in there unprepared. Keep heading towards your destination until Smith Casey’s Garage has appeared on your map. I would recommend thatyou secure the area to the north, near the trucks. Kill anyone that you can find and proceedto the inside of Smith Casey’s Garage. There are some radroaches and molerats here. Use a melee weapon to get rid of them, instead of wasting ammuntion. Proceed to the main areaof the garage and use a switch on the wall (screen). This will allow you to unlock a hiddenentrance. Go down to the bunker and eventually you’ll come across a door leading to Vault 112.
Once you’re inside Vault 112, approach a large panel and use it to unlock the entrance tothe main section of the vault. Explore all surrounding rooms and eventually you’ll come across a firendly robobrain. Don’t attack it. Instead, allow it to give you a Vault 112 jumpsuit. I would strongly recommend that you wear the jumpsuit before moving on, especially since you won’t find any hostiles anytime soon. Proceed to the next corridor. Youmay head over to your destination right away or you can spend some time looking aroundand collecting supplies. Take special attention in visiting the infirmary. If you’re skilled enough, you will also be able to hack into the terminal located near the equipment room(screen). There are a lot of interesting items inside, including ammunition, drugs and medicalsupplies.

It’s important that you’re quite thorough while exploring the equipment room, because you’llfind a holotape with a password to Overseer’s room. You can go there, but besides a safe and his capsule you won’t find anything of interest. Go back to the main room and use thestairs to get to the lower level. Find an empty capsule (screen) and press the action key toopen it. Wait for a few seconds and press the action key once again. Wait for your main character to take a seat. The capsule will close and you’re going to be transported to a very interesting area.

Main quests 8: Tranquility Lane
MAIN QUEST 8: Tranquility Lane Received from: automatically upon completion of Scientific pursuits [Vault 112] Solution: This is by far one of the most interesting quests in the entire game, because ittakes place entirely inside a virtual environment, created by one of the scientists of Vault 112. Notice that you’re playing a role of a young boy and instead of Pip-Boy you only have a watch. Wait for George Neusbaum to welcome you as a new guest of Tranquility Lane. Once this conversation has ended, you will have to decide how to play this out. Positive outcome: Good ending is definately easier to reach, because you’ll only have to perform a few simple tasks. I have to warn you, though, because you’ll miss out on several funny and interesting scenes. Ignore Betty entirely and instead try searching for Old Lady Dithers. She’s probably the only person who suspects this is not real environment you’re living in. Dithers will metion an abandoned house and that all tenants of Tranquility Lane are forbidden to go inside that building. Obviously you will have to disobey. Find an Abandance House and use the front door to take a peek inside. Take your time to inspect your surroundings. Notice afew interactive items in the room. By touching them you’ll hear distinct sounds. The objective here is to touch the objects in a correct order. Here it is: radio, pitcher, dwarf, pitcher, cinder block, dwarf, bottle. The last object can be found near the door, so you’ll have to turn around (screen).
If you entered the correct code, you will notice that a computer terminal has appeared toyour right. Obviously you must approach the terminal. Press the action key to use it. Choose the Chinese invasion program from the main menu (it’s the first option on the list – screen). Note that you’ll have to read the documentation (second option in the menu) before you’ll beallowed to execute Chinese invasion. Once this is done, leave the building and look at what

you’ve done. The citizens of Tranquility Lane are being hunted down by Chinese soldiers. Thankfully, you won’t have to worry about being attacked, because the soldiers will ignore your actions entirely. Head over to the playground and talk to Betty. Ignore her answers, because she (or rather he) can’t harm you anymore. Ask Betty about your father, about the G.E.C.K. and the virtual environment. In order to leave Tranquility Lane you must use a small door which will appear next to Betty.
Negative outcome: Ignore Old Lady Dithers entirely and be rude towards her if she tries talking to you. Instead,head over to Betty. You can find her near the playground (central area of the map). You willhave to perform four dirty deeds for Betty before she allows you to leave. The first task willrequire you to make Timmy Neusbaum cry. You can find Timmy outside the Neusbaum residence and you’ll recognize him from the rest of the group by the fact that he’s selling soda. There are four ways of making him cry. First of all, you can talk to Timmy and use your speach skill to convince him that his parents are taking divorce because of him. Youcan also inspect Neusbaum residence and you’d find military school brochure. Go back to Timmy, show him the brochure and suggest that his parents want to send him there. You can also kill one of Timmy’s parents which shouldn’t be difficult, especially since the personyou’re about to attack won’t fight back. Finally, you may attack Timmy himself (screen). A few punches will be more than enough.

Return to Betty. You will be allowed to ask her one question (about James, about her true identity or about Tranquility Lane), but it doesn’t really matter which one it’s going to be. Don’t even think about attacking Betty and don’t make her angry, because you would have died and you can’t kill her using standard methods of engagement. The second challenge forBetty is going to be a little more complicated, because you’ll have to make Rockwell’smarriage fall apart. Head over to Rockwell’s residence. Before you talk to Janet or Roger, use the stairs to get to the first floor. Find the bedroom and pick up Janet Rockwell’s diary. Read it and you’ll find out that Janet has some doubts whether her husband is cheating on her or not. You may now talk to her or to Roger. If you’re convincing enough, you can win this speech challenge right away by making Janet believe that her husband is a cheater. Otherwise leave Rockwell’s residence.

Head on to Simpson’s residence. You can to talk to Martha Simpson if you want to, however this is optional. Once again, you must use the stairs to get to the upper floor. Findthe bedroom and take underwear from Martha’s bed. Go back to Rockwell’s residence, however this time you should proceed directly to the basement. Find Roger’s desk and place the underwear on the desk (screen). Once this is done, go back up and locate Janet. Tell her about the item you “found” in the basement and follow her to that location. Once Janet has made the discovery, you’ll have to talk to her again. You can convince her that her husbandcheated on her or that he likes to wear such clothes. Either way, you’ll get the job done.
There’s also a different way to complete this part of the main quest and that is to murderMartha Simpson. Start inside Rockwell’s residence. This time you’ll have get to the kitchen which is located near the basement. Notice a rolling pin on the kitchen table (screen). Obviously you must take this item with you. Exit the house and proceed to Simpson’s residence. Find Martha and use your newly acquired rolling pin (not the fists!) to kill her.Once this is done, go back to Rockwell’s residence and show the rolling pin to Roger. Convince him that his wife has murdered Martha, because she was suspecting that he had an affair with the neighbour. Return to Betty once you’ve completed this task. Just as before, she will allow you to ask one question.

The third assignment from Betty will require you to kill Mabel Henderson. The trick is that it can’t be a typical death. You will have to be creative in order to prevail. Look around andask a few of your new neighbours about Mabel. You’ll find out that she’s an excellent cook. Now you can find Mabel and ask her to make you a pie. Run to her house – Henderson’s residentce. You can kill her using four different objects. If you want her death to be in thekitchen then you must examine her oven. Interact with this object, move back and wait forMabel to get here. She will die in flames (screen).
The second option will require you to reprogram a cleaning robot which can be found nearthe entrance. Wait for Mabel to arrive and hack into a security terminal which is located inthe kitchen. First of all, you must disable the protection system. Once this is done, order therobot to “clean” the place. Don’t forget to disable it once Mabel is gone. The third solution is to mess with a large chandelier located in the saloon. Click on this object and choose aninteraction with the chain. The chandelier will fall down when Mabel is standing beneath it,

killing her on the spot. The final solution will require you to go up the stairs. Find a skateboard (screen) and press the action key. Push the skateboard towards the stairs. Nowyou must patiently wait for Mabel to use the stairs. She will fall down and break her neck. Itdoesn’t really matter how she dies, because eventually you’ll have to return to Betty to continue on with the main quest.
The final assignment is by far the most enjoyable one, because you’re going to become thePint-Sized Slasher, a fictional serial killer. Head over to an Abandoned home, however don’t enter it. Instead turn right and locate a dog kennel. Interact with this object and yourcharacter will automatically wear two objects – a slasher knife and a slasher mask. You may finally proceed with the killings. You must kill everyone you encounter with the exception ofBetty and a large dog. If you’re having problems locating missing people, check areas near the fence, because that’s where they like to hide. Once everyone is dead, Betty (Braun) will allow you to leave Tranquility Lane. Turn right and use a small door to get out of here. It’s time to go back to the real world, Neo.

Ending the quest Once you’ve safely returned to Vault 112 you can talk to James who’s also been released from the virtual world. Listen to what he has to say about the virtual environment and his usefulness to the finalization of the Purity project. I would recommend that you agree to hisproposal to travel together to Rivet City.

Main quests 9: The waters of life
MAIN QUEST 9: The waters of life Received from: James [Vault 112] Solution: Obviously your first assignment here is to leave Vault 112. You can use the sameroute as before and you won’t encounter any hostile units along the way. Don’t forget to dropthe jumpsuit, because you won’t need it anymore. Put on your previous armor before leaving the vault. Once you’ve left the garage you can fast travel to Rivet City, even if you’re with your father. You must get to Doctor Li and that means you have to travel to the Science labyou’ve visited before. Proceed to Doctor Li and listen to a longer conversation between her and your father (screen). Once the conversation has ended, talk to your father again. Once again, you’re allowed to choose between travelling together and reaching your next destination alone. You will have to go back to Jefferson Memorial. Talk to James once you’re there (use fast travel or go there on foot) and he will order to go inside and secure themonument.
You must travel to the same location as before – Jefferson Memorial – gift shop. I assume that you’ve secured this area during your last visit to the memorial, as well as the rotunda. As a result there’s going to be only one more area for you to explore. Look at the screen –you’ll find a new door there which leads to Jefferson Memorial – basement. I guess you won’t be surprised to hear that there are some centaurs in the basement, as well as supermutants. You will be dealing with stronger versions of these monsters, so you’ll have to be ready to engage them at any time. Eliminate all monsters and exit the building. Find James and inform him that it’s safe to go inside. Now you’ll have to follow him and otherscientists. James will go to Jefferson Memorial – rotunda and obviously you’ll have to head over there as well.

Locate James once you’ve entered rotunda. Obviously you must talk to him, because he will grant you with several assignments. Your first task will be to flood the water out of thebasement. Exit rotunda and proceed to the southern door to get to the basement again. Thankfully, this area hasn’t been populated by any new monsters since the last time you were here. Notice that signs have been placed on the nearby walls and you can use them tonavigate your way through this maze. At the moment you should be going where the Flood control sign tells you to. Once you’ve arrived at your destination use the intercom to receive specific orders. Approach a small switch (screen) and use it. You may go back to therotunda.
Talk to James again. This time you’ll be given three fuses and you’ll have to go with them tothe basement. Head over there right away. Just as before, use signs for quick navigation.The sign you’re looking for is Fuse Access A1. You can use the intercom after reaching the

goal area to talk to James, however this is optional. Instead, approach a large fuse box andplace the fuses in correct slots. Don’t go back up, because you can to talk to James through the intercom. This time he’ll order you to get to the server room. The sign you’re looking for isMainframe. Approach a large metal gate (screen) and wait for it to be opened. After thatlocate a new switch and use it to boot up the main computer. Talk to James through the intercom again and he’ll give you a new assignment.
The final assignment from James is to flood one of the main pipes. This means you will haveto go back to the gift shop, however stay clear of the rotunda for the moment. Instead you will have to get to a small grate which is located in the eastern section of the map (screen).Confirm that you want to travel to Pump control and you’ll find yourself standing inside a long tunnel. Keep heading forward until you’ve reached a hatch leading to the Capitol wasteland. Approach the red valve and use it. Notice that Enclave soldiers have appeared inside Jefferson Memorial. Sadly you can’t go back the same way you came before so use asecond hatch which will transport you to Sift pump.

You will have to be extremely careful once you’ve reached a large shaft. Aim for lower objects and avoid larger drops at all costs. Eventually you’ll get to a hatch which leads to thebasement of the Jefferson Memorial building. Jump down quickly once you’ve arrived at your destination, so your presence won’t be noticed by enemy troops. Now you’ll have to choose a good weapon from your inventory. Make your way to the upper level of thebasement and kill anyone who stands in your way (screen). It’s not going to be easy, because Enclave soldiers are using excellent armors and they’re equipped with laser/plasma rifles. Don’t forget to loot their bodies for items of great value. You must fight your way back to thedoor leading to the gift shop.
You’ll encounter new Enclave soldiers here as well. I wouldn’t recommend moving too fast. Try securing one room at a time and prevent your character from engaging too many hostile units. Obviously you will have to secure the entire surrounding area before moving on. Once

this is done, proceed to Jefferson Memorial – rotunda. Notice that you aren’t allowed to use your guns in this room. Thankfully, it won’t be a problem, because you won’t be attacked by anyone while you’re here. Approach Doctor Li. Listen to a very interesting conversation between your father and one of Enclave’s high ranked officers. The situation here willresolve with James sacrificing his life to prevent the Enclave from getting their hands on the device. Talk to Doctor Li again when you’re given such an opportunity. She will ask you to escort her and some other scientists to safety. Follow Doctor Li back to Jefferson Memorial – gift shop. Listen to what Li has to say and follow her instructions by locating amanhole. Check my screen if you’re having difficulties doing that. Descend to Taft tunnels. You weren’t able to use this manhole before, but now’s your chance.
I would recommend that you talk to Li again, because she will mention that she has plans toreach the Citadel. It would also be wise to order her to stay put. You should always scout thearea ahead alone and only then allow her and the scientists to move forward. You could also ask Daniel help (you must have a pistol in your inventory), but he wouldn’t be a big help and you would only risk his life. Keep heading west. It’s extremely important that you secure one of the southern rooms before moving on (screen). There are a lot of Enclave soldiersnearby. Enemy units are occupying ground floor, as well as using upper balconies. Use oneof your most powerful guns against them. A rocket launcher is perfect here to eliminate distant targets. Once they’re gone, locate a computer terminal. You can hack it yourself or you can try opening the metal door with your lockpicking skills, but it’s best to allow Li to get here. She will open this passageway in just a few seconds. It was important to kill Enclave soldiers earlier, so now she won’t be disturbed by anyone.

Be careful, because some of the nearby corridors are occupied by feral ghouls. I assume that eliminating them is not a problem for you, however you must prevent the monsters from attacking your scientists. Just as before, you should order Li and her crew to remain near the opened metal door. Scout the area alone and return to her only if you’re certain that you’ve killed all ghouls. You must locate a door leading to a new section of Taft tunnels. Once you’ve arrived at your destination, Li will stop you. It turns out that Garza has some problems with his heart and you’ll have to resolve this situation before moving on anyfurther. If you plan on having negative karma, you can convince Li that she should leave Garzabehind (screen), because he will only slow down the rest. You can also convince Garzahimself that he should agree to being left behind. If you don’t want to talk to anyone you can kill Garza with one of your weapons. You aren’t going to be attacked by other scientists, but obviously they won’t like the idea of you killing one of their colleagues. If you plan on having positive karma, give five stimpacks to Li. I assume that you have more than that in yourinventory. Otherwise you would have to scout both tunnel maps for additional medicalsupplies. The last possible solution is to convince Li to give buffout to Garza instead of stimpacks, but you must have the drugs in your possession (at least three units of buffout) for this to work.

You may explore the area ahead. Be careful when entering a larger room (screen), because the area is swarming with Enclave soldiers and they’ll surprise you if you’re not careful enough. Use a plasma rifle, a rocket launcher or frag grenades to get rid of them quickly.Watch out for other feral ghouls while exploring nearby corridors. Some of the ghouls will take you by surprise, so don’t be scared if they immediately approach you. The objective hereis to get to the western section of the tunnels. There’s a large stash nearby, but to get to it you must unlock a door. Find a safe inside and open it. Finally proceed to a large metal gate.Use a switch on the wall to open the gate. DON’T attack the brotherhood soldier. Instead, escort the scientists to this location. Look around for medical supplies and ammunition. Youmay proceed north. Use the ladder to return to Capitol Wasteland. Once you’ve reached the ground, you must follow Li to the Citadel. Wait for her to negotiate the terms of beingallowed inside this complex. Follow Li again and after a short while this quest will come to an end.

Main quests 10: Picking up the trail
MAIN QUEST 10: Picking up the trail Received from: Doctor Li [Citadel] Solution: The first part of this mission is going to be very simple. All you have to do is tofollow Doctor Li. Eventually you’ll get to a gate which leads to Citadel – courtyard. Travel to that location. Once you’re inside the Citadel, listen to a conversation between Doctor Li and Elder Lyons. Talk to Li and Lyons when you have the chance. Li will order you to findScribe Rothchild in order to gain access to the archives. In order to find Rothchild you must travel to Citadel – lab. You can access this area from the courtyard or from the A ring. It shouldn’t take too long for you to find Rothchild (screen). Inform your new ally that you must find a working G.E.C.K. Rothchild will say that you’ll have to access a Vault-Tec computer in order to find out which vault has received the G.E.C.K. Proceed to Citadel – A ring.
You can find the Vault-Tec computer in the southern area of the A ring. Locate a working station and use it to gain access to the system. You’ll have to start off by ordering the computer to display the list of all vaults built in the Capitol Wasteland. Choose Vault 87and display the list of equipment for this vault. You should notice that G.E.C.K. among other things. You may go back to Scribe Rothchild, so this means you’ll have to go to Citadel –lab again. Ask Rothchild to show you where Vault 87 is located. Approach a large map (screen) and notice several vault icons. The same locations will be added to your Pip-Boy. Talk to Rothchild again. He will warn you that it’s not going to be easy to get to Vault 87. You must return to Capitol Wasteland and this means you’ll have to exit the Citadel.

Rothchild has suggested that you should visit a town called Little Lamplight which is located to the south-east of Vault 87. Obviously you should follow his advice. If you haven’t visited this area before, start the trip from Smith Casey’s garage, because it’s probably the closest marker on your map. Once you’ve arrived at Little Lamplight ignore the buildings located on the surface. Proceed to a small entrance near the rocks (screen). It leads to Little Lamplight – caverns. Try moving forward and after a short walk you are going to be stopped by Mayor MacCready. He’s in charge of this town populated entirely by children. You must resolve this situation peacefully, however there are two ways for you to gain access to an underground town. If you have a high speech skill you can convince the mayor to allow you to get to Vault 87, because you’re on a very important mission. Otherwise you will have to do him a little favor. MacCready will mention that a few kids have been kidnapped by the slavers. You must rescue them. Read the description for Rescue from paradise quest if you want to find out how to do this.
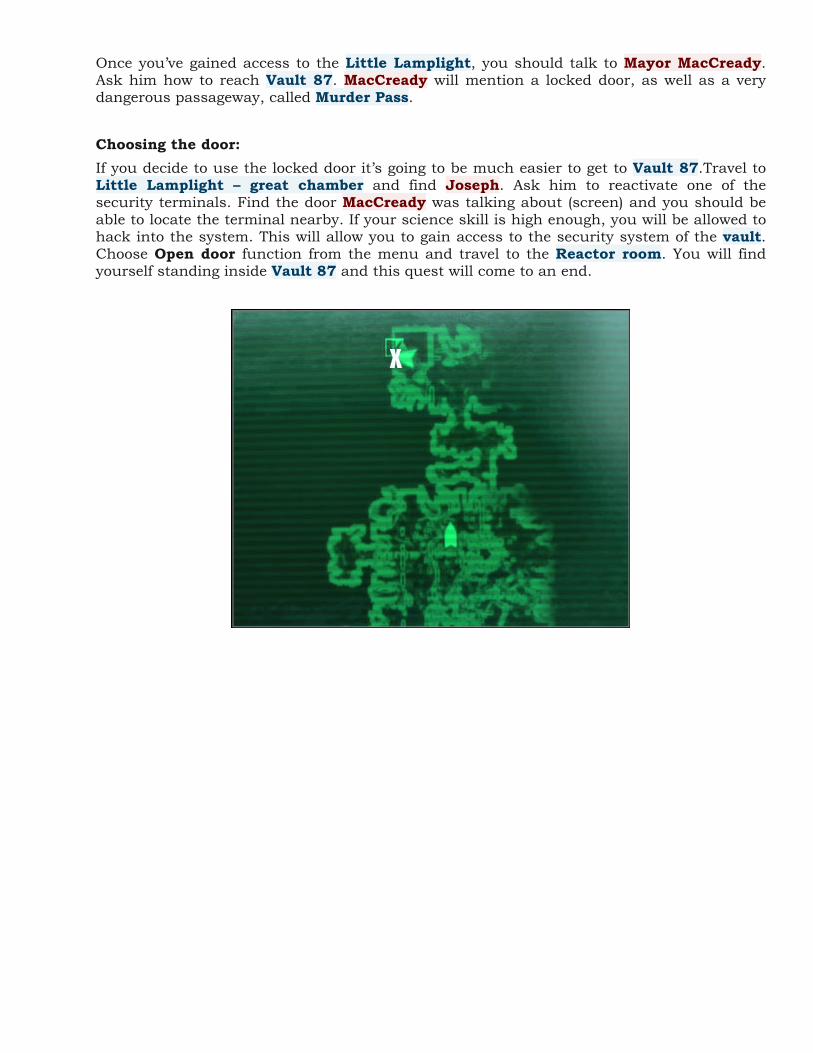
Once you’ve gained access to the Little Lamplight, you should talk to Mayor MacCready. Ask him how to reach Vault 87. MacCready will mention a locked door, as well as a verydangerous passageway, called Murder Pass. Choosing the door: If you decide to use the locked door it’s going to be much easier to get to Vault 87.Travel to Little Lamplight – great chamber and find Joseph. Ask him to reactivate one of the security terminals. Find the door MacCready was talking about (screen) and you should be able to locate the terminal nearby. If your science skill is high enough, you will be allowed tohack into the system. This will allow you to gain access to the security system of the vault. Choose Open door function from the menu and travel to the Reactor room. You will find yourself standing inside Vault 87 and this quest will come to an end.

Choosing Murder Pass: Travelling through the Murder Pass is more dangerous, but it’s the only way if you can’t hack the terminal. It would be a good idea to ask MacCready to show you the way to the entrance to Murder Pass. It’s located in the northern section of the caves. Once you’vearrived wait for him and the Princess to open a large gate for you. Proceed to a new door andconfirm that you want to travel to Murder Pass. Get ready, because these caves are being occupied by a lot of supermutants. It’s not going to be easy, especially since they like to travel in groups and you’ll also be dealing with their more powerful versions. Avoid largerrooms and instead choose smaller passageways. Keep heading north until you’ve reached an entrance to the vault (screen). Open the door. Watch out for a pressure plate to your right, because it’s a trap. Move to the north and find the entrance to the Reactor room.

Main quests 11: Finding the garden of eden
MAIN QUEST 11: Finding the garden of eden Received from: automatically after entering Vault 87 [Vault 87 – reactor room] Solution: It doesn’t matter which passageway you’ve decided to choose, because you’ll end up standing inside a Reactor room. I guess you won’t be surprised to hear that the surrounding area is being patrolled by supermutants (and also by a few radroaches). You can focus on eliminating all of them or you can get to an exit as soon as possible. Your nextdestination is Vault 87 – crew quarters. Once again, you will have to shoot your waythrough enemy patrols. Not much will change here since you’ve entered this vault. Use the stairs to reach upper levels of this structure and eventually you’ll get to a door leading toVault 87 – lab. Be on a look out for ammo stashes, hidden rooms and locked safes. Openingmost of the locked rooms will require high science and lockpicking skills, but you’ll be rewarded with a lot of useeful items. Watch out for a larger group of supermutants (screen) you’ll encounter on your way to your current destination. Use a minigun or a rocket launcher to get rid of them.
Once you’ve reached the science lab you will encounter even more supermutants. I wouldn’t recommend moving too fast, because you wouldn’t want to be surrounded by a larger group of these creatures. There are also a few centaurs in the area, but killing them is always very easy. Eventually you should be able to get to the test chambers. You won’t have to inspect every chamber, but it’s possible. Keep heading forward until you get to isolation rooms.Check the left isolation room (screen) and you’ll encounter a friendly (yes! a friendly!)supermutant named Fawkes. Talk to the creature through the intercom and you’ll find out that Fawkes will help you in finding the G.E.C.K. if you decide to release him. You may allow him to live but without helping him, you may kill him from where you stand or you can agreeto free him. I would strongly recommend that you rescue him, especially if you’re playing as a good character, because Fawkes will be able to join you as a teammate in the near future.Check other isolation rooms if you want to before making your final decision on what to dowith Fawkes.

You can open the isolation rooms by hacking into the central security terminal and choosing a correct option from the main menu, or by approaching a large fire console (screen). If youpress one of the buttons you’ll hear an alarm and all the isolation rooms will be opened.Don’t forget to kill the creatures from other chambers if you don’t want to engage in an open combat. Go back to Fawkes. Once again, you may kill him or you may allow him to lead youto the G.E.C.K. Thankfully, you don’t have to worry about Fawkes escaping him or turninghostile, because he’s considered a good character. Obviously you will encounter moresupermutants on your way to your final destination. Protect your new ally by attacking the creatures alone. There’s a small room near the goal area. I would recommend exploring it if you have the proper skills to open the door. You will find a lot of medical supplies inside, butit’s even more important to collect a radiation suit, especially if you’re travelling withoutFawkes.

Eventually you’ll have to get to an area located near radiated corridors (screen). This is whereyou’ll have to make a decision on how to resolve the problem with the G.E.C.K. If you’re travelling one, the only solution is to put on the radiation suit in order to increase yourchances of surviving. You will also have take a few Rad-X’s and RadAway’s when you go back to the safe area. If you’re accompanied by Fawkes you will only have to wait for him to get here. Fawkes will automatically go to the next tunnel in order to acquire G.E.C.K.
If you’re travelling without Fawkes, you must turn right once you’ve entered the hazardousarea. Run forward and don’t stop at nothing, because you’ll be dealing with an extremelylarge doses of radiation. Proceed to the left room and open a large container (screen). You willsoon notice a large briefcase which is a G.E.C.K. Press the action key. DON’T activate the device, because you would have been killed on the spot. Instead, choose to take the G.E.C.K. Go back to the safe area. If you sent Fawkes to acquire the G.E.C.K. for you, all you have to do is to wait for hisreturn. He will hand over the device to you without any problems. You may now start moving back to the surface. Sadly, you won’t be allowed to leave Vault 87, because once you’ve reached one of the southern rooms you’re going to be surprised byEnclave soldiers. Sadly you can’t stop them from capturing you. Wait for them to transportyou to Raven Rock which is their base of operations.


Main quests 12: The American Dream
MAIN QUEST 12: The American Dream Received from: President Eden [Raven Rock – level 3] Solution: You will regain consciousness after a short while. Colonel Autumn will interrogate you in order to extract the data needed by the Enclave. It’s extremely important that you don’t tell him the right code (216), because once it’s been verified you would have been shot on sight. You can make him angry, though. Tell him a false code and you’ll soon find out that there’s one Enclave soldier less for you to fight with. You can also ignore Autumn entirely by not giving him any straight answers, because he’ll talk to president Eden soon enough. I guess you might be a little surprised by the fact that Eden has ordered Autumn to release you. The first thing you need to do is to reacquire your equipment. Open the nearest locker,put on your armor and reassign shortcut keys to your favorite weapons. Once this is doneyou may try leaving the room, however you’re going to be stopped by one of Enclave officers. There are many different ways for you to deal with this problem. The easiest ways to get rid ofhim are to be charismatic, threaten him with brutal force or win a speech challenge (screen).If all of this fails you can kill him with one of your primary weapons or you can bribe him and in exchange he’ll leave you alone. Aside from the outcome you should remain where you are for a little while. Wait for Eden to give an order by radio to all Enclave troops that they should leave you alone. You could engage Enclave soldiers right away, but as you see it’s not necessary at the moment.
Raven Rock may seem like a large maze, but there are a lot of maps which will provide assistance in navigating your way through this base. Raven Rock is divided into three levels. Your current objective is to get to the second level of the complex, however you can alsospend some time exploring level three (including chatting with one of your friends from Megaton). Avoid the areas under the catwalks, because there are radroaches out there and you would also have to deal with laser traps. When you try to leave level three you will hearcolonel Autumn over the radio (screen). It looks like he’s disobeying Eden’s order, because

he just told everyone in the base that you’re considered to be a threat. Sadly, this meansyou’ll have to be very careful from now on, because a lot of Enclave soldiers will stand in your way. You can ignore the scientists entirely, because they’re not armed. Focus oneliminating soldiers. At least one of them wears Tesla armor and Tesla helmet. Steal those things. You should also be on a look out for plasma rifles and ammunition. Furthermore, there are Enclave crates scattered throughout the entire base. Make sure to open each crate,because they contain extremely valuable items, including plasma grenades. Use one of two available passageways to get to Raven Rock – level 2.
It doesn’t really matter which door you’ve decided to choose, because you’ll end up in section2A. There are more laboratories here which is a good thing, because there aren’t too manyEnclave soldiers in the area. Still, you must prevent them from surprising you, especiallysince their weapons can inflict massive injuries. Head over to the next zone – 2B. If you decide to explore all surrounding rooms, you will come across Anna Holt. Maybe you remember her from your last stay in Rivet City. She also accompanied you to the Jefferson Memorial. It turns out that Anna is working willingly with the Enclave. The best solution here is to ignore her, because she won’t give you any valuable information and you won’t achieve anything by killing her. Keep heading north. Be careful, though. Two Enclave soldiers will leave the eastern room (screen). Use a rocket launcher or even a fatman to kill them without having to worry about them fighting back. There are more Enclave crates in this area, but a strong force field blocks access to them. You can resolve this by hacking intoa nearby terminal and deactivating the field. You should also inspect Autumn’s quarters, because you will find a very interesting item – bobblehead – energy weapons. Collecting this figurine will allow you to increase your energy weapons skill by 10 points.

Proceed to a small corridor leading to section 2C. Your next objective is to find a door leadingto Raven Rock – control room. Once you’ve arrived at your new destination, you will noticethat friendly sentry bots are fighting with Enclave units. Obviously you should help the machines in getting gid of the foes, especially since they won’t be able to kill all Enclave soldiers on their own. Proceed to the northern section of the base and you’ll end up in sector 1A. After reaching a large room use the stairs and proceed to the highest level. You will be given an opportunity to talk to president Eden who is an... intelligent machine! This conversation can go many different ways depending on the answers you’ll decide to choose. First of all, you can convince Eden to self-destruct (screen). You can achieve a similiar effect if you choose answers based on your high intelligence. Eventually Eden will make an error and won’t be able to give you a straight answer. Alternatively you can agree tohis proposal and for him to continue functioning in that from. Even if you plan on staying onthe good side you should listen to his plan to eliminate all beings with traces of mutation intheir bodies.

Notice that a large vial of FEV virus has been ejected from the computer. Pick it up even ifyou don’t want to cooperate with the Enclave. Don’t worry, because you’ll make your final decisions when the time is right. For now you must focus on leaving Raven Rock in one piece. Choose a nearby hatch to get to Raven Rock – level 1. Just as before, large groups of Enclave soldiers will stand in your way. The good news is that you’ll have robots and defense turrets on your side, so it should make these fights a little easier. Be on a look out for a shipping container along the way. You can hack into one of the terminals to open thecontainer. There’s a deathclaw inside the container (screen) and the creature will help you in getting rid of enemy units. Keep heading towards section 1B and finally you must proceedto 1A. Don’t forget to deactivate a new force field along the way, because this will allow you toinspect several other Enclave crates. It’s very important, because one of the crates contains a powerful Gatling laser. As for the enemies, watch out for the final Enclave soldier. He’s carrying a rocket launcher, so he should be considered a serious threat. Keep going forwarduntil you can travel to Capitol Wasteland.
If you rescued supermutant Fawkes during the previous main quest, you will now noticehim shooting at Enclave soldiers in front of the Raven Rock facility (screen). I’m sure that you’ll be thrilled to see him, especially since he’ll eliminate most of the targets for you. Also, ifyou’re playing as a good character he can start travelling with you as your new teammate. I’d strongly recommend that you agree to his proposal. Not only is she powerful and strong, but he also carries a Gatling laser. As for Raven Rock itself, move back to a safe distance if you ordered Eden to self-destruct, because a large explosion will take place here. You willalso have to avoid vertibirds, but the pilots should be focused on other activities. Your final goal for this quest is to go back to Citadel. It shouldn’t be a problem, becauseyou’ve been there before, so you can fast travel. Enter the courtyard and find Elder Lyons. If you’re having difficulties finding him, try searching for him in the lab.


Main quests 13: Take it back!
MAIN QUEST 13: Take it back! Received from: Elder Lyons [Citadel - lab] Solution: When you arrive at the laboratory you’ll notice that Sarah is talking to her father. Wait for this conversation to end and talk to Elder Lyons yourself. You must inform him that G.E.C.K. is in Enclave’s possession and you’ll find out that Enclave forces are probably inside the Purity project chamber. Don’t tell Lyons about the FEV virus you’ve acquired inRaven Rock, because as I said you will be allowed to choose an ending not soon from nowand it would be unwise to block one of the possible variations. The Brotherhood of Steelwill finally decide to proceed with the assault and obviously you’re going to be a part of it. Listen to the plan and talk to Sarah Lyons. She will inform you that you’ve been promoted and as a result you can take a power armor set or a recon armor set. In both cases you’ll receive an armor and a helmet. Take your time to put on a new armor, unless you’re alreadyusing something more interesting. Talk to Sarah again and confirm that you’re ready to begin the invasion (screen).
It’s rather important that you listen to Sarah’s plan. You can also take a closer look at thelarge robot which is going to be used during the invasion. It’s being transported to the surface at the moment. Follow Sarah Lyons to Citadel – courtyard. As you’ve probably noticed, a crane is being used to transport the robot to the outside. Obviously you will have to get there in order to join the fights. Use the main gate to return to Capitol Wasteland. Don’t be surprised by the fights taking place between Enclave and Brotherhood of Steelunits. Sarah suggests that you should stay near the robot and it is a good advice (screen). Notice that the robot is moving towards Jefferson Memorial. If it stops, scout the area ahead and eliminate Enclave units who may block its way.

You will probably have to secure a road leading to a nearby bridge. Once this is done, goback to the front of the Citadel and wait for the robot to start moving towards the bridge. It shouldn’t take too long for the machine to reach the first force field which is going to beneutralized after a short while (screen). Now you will have to be patient and continue movingslowly towards your final destination. I wouldn’t recommend staying too close to the robot, because it’s going to be a target for enemy artillery and you wouldn’t want to find yourselfin the crossfire. You can eliminate visible Enclave units, but they’ll probably they anywaybefore you get too close to them.
Continue moving close to the robot until you’ve reached the second force field. Ignore thefact that the robot will lose balance for a second or two, because it’ll return to full shapeafter a short while. Now it would be a good idea to secure the area around Jefferson Memorial (screen). You don’t have to kill all Enclave soldiers, however it’s recommended, so

you won’t have to worry about being attacked while trying to get inside the monument. Eventually you’ll have to use the door leading to Jefferson Memorial – gift shop. Notice that a second quest (Project Impurity) has appeared on your list at the same time. Ignore it,because it’s only a small reminder that you’ll be able to get to an alternative ending. Keep reading and you’ll know everything soon enough.
You’ll have to be very careful inside Jefferson Memorial, because the museum is being guarded by at least TWO large groups of Enclave soldiers. There are also single enemy units here and there. I would recommend that you use your most powerful weapons to kill enemy soldiers, including the fatman (screen). The main reason is that you won’t have to preserve your ammo supplies anymore, because you’re very close to the end. Leave only a few projectiles in your inventory, because you may need them for the last fight. Your objective isto get to the door leading to Jefferson Memorial – rotunda. It’s EXTREMELY IMPORTANT that you save your progress before entering rotunda, because you won’t be allowed to go back!

You’ll be stopped by colonel Autumn once you’ve entered this final area. I guess you may be surprised to hear that you won’t have to kill him. Instead, you may resolve this problem in a peaceful manner, but only if you’ve destroyed Raven Rock and if you succeed in a speech challenge (screen). If you decide to fight, get ready to kill Autumn, as well as two of hisbodyguards. It’s very important that they die quickly, because they’re using powerful Gatling guns. Either way, once the problem with Autumn has been resolved use the stairs to get to theupper balcony and join Sarah. Listen to a transmission from Doctor Li and you’ll find out that you’ll have to activate the purifier in the next few minutes or otherwise it’s going to explode. Save your game and wait for Sarah to talk to you. Here’s where you’ll decide how to end the game...

Main quests 13: Take it back! - Endings
ENDINGS Additional info: If you decide to go inside instead of Sarah, you can’t rely on Fawkes helping you out, even if he’s a member of your team. Fawkes will refuse to go instead of you, forcing you to sacrifice yours or Sarah’s life. It’s even funnier when you notice that he actuallyentered the chamber, but he’ll be standing next to you, doing nothing. First ending – Agree to enter the room and input the correct code I think this is the most obvious ending for a good character and the best way to solve theproblem with the purifier. During the conversation with Sarah agree to take on a suicidemission. Enter the chamber and wait for her to lock you in. Approach the control panelquickly (screen). Use the panel to input three digits – 2 1 6. Finish this off by pressing ENTER (on the console, not on your keyboard ;-)).
Second ending – Agree to enter the room, apply the virus and input the correct code You’ll be doing the exact same things with one exception. Once you’ve agreed to enter thechamber wait for Sarah to lock you in. Ignore the console for the moment and approach asecond panel which can be found in front of you (screen). Press the action key and apply thevirus from Raven Rock. Now you may go the console, input 2 1 6 and confirm your request.

Third ending – Refuse cooperation with Sarah / don’t give her the code This is by far the worst solution to the problem. You may consider talking to Sarah to refuse her personally (screen), however it’s not necessary. You can wait outside the chamber or onceyou’ve agreed to go in and changed your mind. After about one minute (real time) the purifieris going to explode, killing you, Sarah and destroying Jefferson Memorial.

Fourth ending – Send Sarah to the chamber This should be your choice if you’re playing as a bad character. During your conversationwith Sarah convince her that she should enter the chamber instead of you. Tell her thecorrect combination (2 1 6) and unlock a passageway for her with a switch on the wall. Nowyou must only wait for Sarah to input the code (screen) and you can enjoy the ending. Youcan also apply the virus to the right console, but you must do this before you talk to her.

Side quests Megaton: The power of the atom
Megaton: The power of the atom Received from: Lucas Simms [Megaton] Solution: The nuclear bomb can be found in the middle of Megaton and you’ll find out about it during your first conversation with Lucas Simms. He’s going to be the first person you’ll meet after reaching Megaton. It would be wise to use your speech skill to demand a higherreward (100 bottle caps) for the job. You can also agree to do this for free if you desperatelywant to raise your karma. Before you decide to disarm the bomb, you should take your timeand go to Megaton – Moriarty’s Saloon. Find Mr Burke and listen to his solution to the problem. Just like with Lucas Simms, if you win a speech challenge you’ll make him agree to a bigger reward. Remember that even if you listen to what Burke has to say, you don’t necessarily have to become his puppet. You can always change your mind. There are twodifferent (VERY different) ways to complet this quest. Positive outcome – disarming the bomb and getting rid of Burke: Before you decide to disarm the bomb, go back to Lucas Simms and tell him that Mr Burkehas offered you to trigger the bomb. Now you can follow the sheriff to Megaton – Moriarty’s Saloon. Once you’ve arrived, you will witness a confrontation between Simms and Burke. You should save your progress here, because Burke will try to kill Lucas. You can prevent this from happening by shooting at him when he tries to reach for his gun. You’ll notice it when Lucas has turned his back on him and Burke is about to stand up (screen). I guess you may be surprised to find out that you’ll raise your karma for killing Burke. You can also inspect his body, but the only valuable object he was carrying is a silenced 10mm pistol.

You may finally exit the saloon and go to the crater. Like I’ve already said, the crater is located in the center of Megaton. Make sure that you’ve raised your explosives skill to at least 25 points. If you didn’t and you don’t want to wait for the next level-up or you don’t want to raise explosives, you can acquire and use mentats. In order to do that you must find Leo Stahl. You can find out more about him from the second chapter of my guide(description of Megaton). Approach the bomb, press the action key and choose the secondoption from the list (screen) to disarm the bomb. You’ll be successful and you can go back toLucas Simms (or – if he’s dead – to his son Harden) to tell the good news. You will be rewarded with bottle caps (500 if you won the speech challenge) and you’ll also receive a keyto your house in Megaton. Cool reward, huh?
Negative outcome – destroying Megaton: Once you’ve talked to Burke and agreed to help him out leave the saloon and approach the bomb. I have to remind you that your character must have at least 25 points spent on explosives, because otherwise he wouldn’t be able to interact with the bomb. Don’t forget thatyou find a workaround to this problems by buying drugs from Leo. Approach the bomb,press the action key and choose the last option from the list in order to arm the bomb. You may now exit Megaton. Your next objective is to get to Tenpenny Tower, because Burke is waiting for you there. Tenpenny Tower can be found in the lower left corner of the map.Once you’ve arrived listen to a short dialog between one of the guards and a ghoul who goes by the name of Roy Phillips. Approach the intercom (screen) and tell the guard that you’re here to talk to Burke. Enter the building complex. Listen to what chief Gustavo has to say and proceed to the tower.

Once you’re inside Tenpenny Tower proceed forward until you get to an elevator. Use theelevator to reach Penthouse suites. Once you’re there, find the door that’s protected by one of the guards. Talk to the guard and inform him that you’re here to see Mr Burke. Wait for the guard to open the door for you, enter the apartment and locate a passageway to the topof Tenpenny Tower. Once you’ve arrived at your final destination, you can chat withAllistair Tenpenny or you can proceed directly to Burke. Turn right once you’ve talked to Burke and you should notice a remote detonator on thetable (screen). Activate the detonator and you’ll be rewarded with an excellent nuclear explosion. Talk to Burke and he’ll reward you with bottle caps (probably 1000 of them). Youwill also receive a key to your new apartment in Tenpenny Tower. You should notice thatyour karma has been dropped significantly. In addition to that, on your personal map Megaton has been replaced with Ruins of Megaton. If you decide to travel there you’ll encounter Moira. Apparently she doesn’t know that she’s become a ghoul. :-)

Megaton: The wasteland survival guide (first chapter) Megaton: The wasteland survival guide Received from: Moira Brown [Megaton – Craterside Supply Store] Solution: You can agree to help Moira write the survival guide during your first conversation with her. First of all, you will have to share your knowledge with her, because she’ll be curious how was it to spend your entire childhood locked inside Vault 101. In exchange for your knowledge she will hand you over a very cool jumpsuit. Now you may proceed with the first part of this mision. I haveto warn you – it’s the longest quest in the entire game. It’s been divided to three parts whichrepresent separate chapters of Moira’s book. Important! You can persaude Moira to drop this project, however this is only possible if you’ve done at least one task for her. You must also have a high speech skill in order to have some chances insucceeding. If you convince her she will reward with a perk, called Dreamcrusher. I strongly recommend that you help her out, because not only you’d miss out on a lot of interesting adventures but you would lose a chance to gain experience points and receive valuable rewards. First chapter, first assignment: Let’s start with something very simple, shall we? Moira will ask you to find out more about the negative effects of radiation. If your science skill is high, you can answer to a number ofquestions and you’ll get the job done. I wouldn’t recommend doing that, because you won’tbe given an opportunity to fullfill an optional challenge for this assignment. As a result, youshould listen to her plan and agree to it. Leave Moira’s store and get down to the crater. Stand in the water (screen) and wait until you’ve received at least 200 rads. If you want to receive a reward for an optional objective you’ll have to be more patient, because the limit here is 600 rads. You can check this in your Pip-Boy or you can wait for a confirmation to be displayed on your screen. Go back to Moira once you’ve exposed yourself to enough radiation. Moira will heal you and she’ll give you a few drugs (Rad-X and RadAway). If you completed the bonus objective, you will also be rewarded with a cool perk, called Rad Regeneration. From now on each time you expose yourself to enough radiation your limbs will heal automatically without having to visit a doctor.

First chapter, second assignment: In order to fullfill this particular assignment for Moira you must travel to a location called the Minefield. The name clearly suggests that you must be extremely careful, because thereare a lot of landmines in the area. Each time you’ve gotten close to a mine you will have about two seconds (depending on your explosives skill) to disarm it (screen) by looking at itand pressing the action key. Notice that you’ve been presented with a unique opportunity toscore some extra cash. Each landmine is worth 25 bottle caps and even if you don’t want to sell it, you can use it against your enemies. Watch out for areas where there are more minesin close promixity, because you may trigger one of them by mistake. As long you’re careful and save your progress often you should be fine.
Aside from the mines, you will also have to watch out for Arkansas. He’s a sniper and he’ll be using his sniper rifle to hunt you down from one of the destroyed buildings (screen). Youwill find him near the playground which will make your job more difficult, because you’ll have to go there to fullfill the main part of the quest for Moira. Try approaching that area from the other side. You can also surprise him and kill him. Don’t forget to take his gun. You can also inspect the highest floor of the building he was hiding in. There are a lot of ammocrates there. Ignore Arkansas if you don’t want any trouble, because he’s a part of Strictly business subquest. Killing Arkansas won’t cancel that quest, but you won’t be able to receive a reward for capturing him. Either way, go to the playground and retreat after receiving a confirmationand picking up at least one landmine. Go back to Moira and present her with a new toy. You will also have to answer to a few of her questions. Moira will then give you a couple of frag grenades, as well as a schematic for a bottlecap mine.


First chapter, third assignment:
Map legend: 1 – exits to: Capitol Wasteland; 2 – food (main objective); 3 – computer terminal; 4 – medical supplies (side objective) and a second terminal The final assignment for the first chapter of Moira’s survival guide is to visit a nearby supermarket in order to findout whether you can find food and medicine (optional) inside the store. Leave Megaton and begin your journey towards Super-Duper Mart. Be careful, because you may encounter a single deathclaw, as well as raiders outside the supermarket.You can use one of two available entrances (1 on the map). Once inside the Super-Duper Mart you’ll come across even more bandits. Raiders are well equipped, so you should visit this place only when you’ve acquired decent guns and a good armor. If you don’t want anytrouble just head over to the northern part of the store (2 on the map) and after finding somefood (screen) you will fullfill the main objective.

If you want to complete the side objective as well you will have to secure the entire store. Beon a look out for valuable items – landmines, stimpacks and ammunition. Obviously you will also have to dispatch of a lot of raiders. Proceed to a computer terminal (3 on the map).You can hack into the system with your science skill. This will allow you to unlock the doorto the back room. If you aren’t good at hacking computers, try opening the door with yourlockpicking skills or look around the store for a key. Either way, you must unlock this new area. Proceed to the western wall and you’ll find a first aid box on the wall. Inspect this object and you’ll fullfill the side objective. Sadly, more raiders will arrive inside Super-Duper Martin the meantime. The easiest way to get rid of them is to use a second computer terminal (4 on the map). Once you’ve successfully hacked into the system you will be allowed to activate a friendly protectron (screen). This robot probably won’t kill all the raiders, so you’ll have to deal with the remains yourself. Exit the store and go back to Moira. She will give you a fewiguana bits, as well as a food sanitizer. There’s also a second reward for completing the chapter of her book – a couple of stimpacks.

Megaton: The wasteland survival guide (second chapter) Second chapter, first assignment: Let’s start this chapter by dealing with a molerat problem. Talk to Moira and she will give you a very interesting melee weapon, called repellent stick. You’ll also find out that if youwant to achieve the best result for her, you will have to use this weapon to kill at least tenmolerats. Moira will also say that the best area to find a lot of molerats is a Tepid Sewer, however this isn’t a requirement. You can explore other sewers or spend some time aroundMegaton and you’ll probably encounter enough molerats to get the job done. If you want to follow her instructions, get ready for a long journey. Tepid Sewer is located near D.C. ruinsand it’s a very dangerous area. You can enter the sewers through a small door (screen).
You shouldn’t have any major problems locating and killing three molerats. Make sure that you’re using the repellent stick (mace) to kill them, because otherwise you won’t score any points for the kills. In order to get to a new area of the sewer safely you should considerhacking into a security terminal (screen). This will allow you to disable the turrets. I wouldn’t recommend reprogramming them, because you want all the remaining molerats to be still alive. Continue your exploration of this locarion. You shouldn’t have any major problems finding seven remaining molerats, however you will encounter raiders as well. Obviously youwill have to deal with them. Don’t forget to check their rooms, including braking into safes,because you’ll get your hands on a lot of useful items, including ammunition and a Stealth Boy. There’s also a second terminal in the sewers. If you manage to hack into it, you’ll unlock a stash with frag grenades and a power fist. Go back to Moira once you’ve done killing and exploring and tell her about your progress. Moira will reward you with jet and psycho. You should also know that even though she took the repellent stick, you’ll be allowed to buy that weapon from her.

Second chapter, second assignment: Now you should consider taking an easier assignment. Your job will be to test negative effectsof inflicting major injuries. Once again, if you’re not in a mood and you don’t want to followMoira’s instructions, you can answer to some of her questions, but only if you’ve spent enough points on medicine. In order to fullfill both goals you must perform two tasks. Youmust injure one of your limbs and you must lose more than 50% of your health points. I’msure that you won’t have any problems with that. Leave Moira’s store. Use a grenade or a rocket launcher to injure one of your legs or hands (screen). Make sure that you’re not standing too close to the explosion, so you won’t die. As for the health, jump from the balcony you’re standing on. Crawl back to Moira and allow her to inspect your wounds. You’ll return to full shape in a second and you’ll also receive your rewards. Moira will give you a couple of Med-X drugs and an environmental suit.

Second chapter, third assignment: Your final task for this chapter of the guide will be to become a mirelurk observer. In order to do that you must travel to a location which you may have visited before – Anchorage War Memorial. Once you’ve arrived at your new destination, use one of the doors to get to themausoleum. Remember that you won’t be allowed to attack any of the mirelurks if you want to receive a reward for an optional challenge. Thankfully, these monsters aren’t too quick and you can always use a Stealth Boy to move in the shadows. Proceed to the lower leveland find a door leading deeper into the underground. You will finally reach a much largerchamber (screen). Jump down (try landing in the water) or use the stairs to get to the lowerlevel.
All you have to do here is to approach some eggs. Press the action key and choose the secondoption from the list (screen) in order to plant a small device amongst the eggs. You may now go back to the surface. I would recommend choosing the same path as before. Obviously youmust avoid getting too close to the mirelurks, because their attacks can be quite deadly.Once you’ve returned to the surface travel to Megaton and go to Moira. You will receive rewards for this assignment, as well as for the completion of the second chapter of the guide.Moira will give you a few Stealth-Boy units, some ammunition and a shady hat (bonuses to sneaking and perception).


Megaton: The wasteland survival guide (third chapter) Third chapter, first assignment: The first assignment of the final chapter of Moira’s guide will require you to become a historian. Moira will sent you to Rivet City in order to find out something about how itbegan to exist. Once you’ve arrived at Rivet City you must get on board of a huge aircraft carrier. Your task here will be to talk to some of the people who know a lot about the history of this city. You must locate and ask Seagrave Holmes (tell him that Vera has sent you) and Bannon. Both of these gentlemen can be found during the day in the Rivet City Market. You can also go and ask Belle Bonny and she will mention that Bannon is the person you need to talk to. You can find her in the Muddy Rudder bar in the lower deck of the ship. This will allow you to fullfill the main part of this objective. If you want to dig deeper and find out the true story of Rivet City you will have to find Pinkerton. Check the second chapter of my guide (description of Rivet City) in order to find out how to reach his hideout. During the conversation with Pinkerton you must be very convincing, because only then he’ll tell you the story. Don’t forget to ask him for some kindor a proof (screen) and he’ll give you Rivet City historical record. Once this item is in your possession you may leave Pinkerton’s hideout. Go back to Megaton and talk to Moira. The funny thing is that you can convince her that Rivet City was once inhabited by a powerful civilization of underwater creatures. :-) Moira will give you a few mentats for your troubles. She will also promise that she will ask some of the traders in Rivet City to lower their prices for you.

Third chapter, second assignment: This time you’ll have to travel to RobCo facility, however if you have a perk called Robotics expert you can avoid this trip and also you won’t lose a reward for an optional assignment. The factory can be found in the lower left corner of the map of Capitol Wasteland. It’s nearTenpenny Tower. Once you’ve arrived at the plant use the main door to get to RobCo facility. The first level of the factory is taken over by rodents and insects, so it shouldn’t be a problem to get rid of them, even with a melee weapon. Eventually you’ll have to get to a doorleading to RobCo facility – offices and cafeteria. It shouldn’t get harder here, however thefactory is a multi-story building, so you can’t rely on your personal map. Eventually you must get to the central server room (screen) which can be found on the upper floor.
Approach the main computer of the factory and install the processor you’ve received fromMoira. This will allow you to fullfill the main assignment. Sadly, installing the CPU will activate protectrons and security turrets throghout the entire factory. Kill the firstmachine, because it will active itself in this room. As for other robots, it would be a good idea to reprogram the mainframe (screen). This will make leaving the factory a lot easier andyou’ll also fullfill the optional assignment. If you don’t have necessary skills to reprogram the computer, fight your way out. Either way you must return to Moira. She will hand over acouple of pulse grenades (great against robots!), as well as a big book of science.

Third chapter, third assignment: The final assignment given to you by Moira will require you to visit one of local libraries.Your target for this mission is the Arlingon Library which can be found in the southern area of the map. I wouldn’t recommend trying to get there through the metro tunnels, because itwould be extremely dangerous. Instead start your journey near Megaton and head south-east. After that you should stay close to the southern edge of the map, because there’s a road here (screen) which leads directly to the library. You will probably encounter a few raidersalong the way, but it’s nothing compared to what you would have to do in the sewers. Approach the main door of the library and travel to the foyer.
You will be greeted by Scribe Yearling upon entering the library. Listen to her proposal.Yearling will pay you 100 bottle caps for each pre-war book you manage to find and deliver to her. You should also ask her to help you in gaining access to the archives of this library.

The main objective can be completed easily. All you have to do is to locate a check-in terminal (screen). Use it and choose Access card catalog option from the main menu. In order to complete the side objective you must explore the rest of the library. Notice thatbrotherhood soldiers are fighting with raiders throughout this entire bvuilding complex. Obviously you should help your allies in getting rid of the bandits, however you can alsowait for the fights to end if you feel unsure of your success. Locate a door leading toArlington Library media archive.
You will witness a lot of fights taking place in the archives as well. Prevent your characterfrom getting shot at from too many directions and attack the bandits once they’ve been wounded by brotherhood soldiers, so it won’t take too long for you to finish them off. You will have to get to the top floor of the library. Sadly, there isn’t only one staircase you could use. As a result, you will have to secure each floor before moving on to the next one. Be on alook out for security terminals and watch out for traps. There are a lot of landmines in the area and you may also end up being attacked by security turrets. Your objective can befound in a large corner room. Check a nearby terminal to open a safe. Thankfully you don’t need any skills to access the final computer (screen). Choose an option from the list toupload the data to your Pip-Boy. You may finally return to Moira. She will reward you withbottle caps and with a book – Lying: Congressional Style.

And that’s it – the survival guide is ready to be published. Moira will thank you for all thehelp you’ve done. You will receive two items from her – a mininuke and the first issue of the Wasteland Survival Guide. Furthermore, you’ll be given a new perk, but the quality of theperk will depend on how many side objectives you’ve finished. You can get one of three perks – Junior survivor, Survival expert or Survival guru.

Megaton: Blood ties
Megaton: Blood ties Received from: Lucy West [Megaton] Solution: You can find Lucy in one of three locations. She spends most of her free timeinside Moriarty’s saloon. You can also bump into her while exploring streets of Megaton. Finally, you can visit Lucy West’s house which can be found near your potential house inMegaton. Lucy will ask you to do her a favor. She needs a letter to be delivered to herparents. You may leave Megaton. Lucy’s parents are living in Arefu which is located to the north. I guess you may have some problems finding it. Look for a large bridge and you’ll get there. Ignore the fact that you’re going to be attacked by Evan King while trying to get to thevillage, because he thought you were one of the hostiles. Talk to the old man and you’ll find out that the villagers are having problems with members of the Family. Evan will ask you to check all houses to make sure that citizens of Arefu are doing OK.
There are three houses for you to check. Thankfully, there’s nothing you should be worried about, because inhabitants of Arefu won’t be hostile towards you. Find an ammo stash nearEvan and start the tour once you’ve acquired ammunition. Go to Arefu – Ewers residence. You can only knock at the door at first, but if you play this out correctly you’re going to be let inside. Talk to Ken Ewers and to his wife Brailee. Once you know everything is fine leave this residence and proceed to the next one. Go to Arefu – Schenzy residence. Just as before, you must knock on the door and wait for the tenant to let you in. Talk to Karen Schenzy and go back to the bridge area. Your final area of interest is Arefu – West residence. Once inside, check bodies of two people. It appears they are Lucy’s parents(screen). You can find how they were killed if you spent a lot of points building up medicineskill. Notice a bloody sign on the wall and go back to Evan King. Tell him the bad news concerning Lucy’s parents and you’ll find out that their son Ian is also missing. You willhave to put your efforts into finding him.

Finding the Family: During your conversation with Evan King you’ll find out about three locations which are considered to be potential hideouts of the Family. You can ignore two of them, because you won’t find anything of interest there. Proceed directly to Northwest Seneca Station. Use the stairs to get to the subway. Explore the surrounding area and you’ll meet a friendly ghoulwho goes by the name of Murphy. Proceed to the side room. Watch out for radiation andapproach the manhole quickly, so you won’t expose yourself too much. The manhole willallow you to get to Meresti – service tunnel. You can also get to the tunnels if you findMeresti trainyard, however you would have to spend more time exploring Capitol Wasteland.
You will find yourself standing inside a subway tunnel. There’s a single mirelurker in the area and you must kill it before moving on. You must be extremely careful while going

through the tunnels, because there are A LOT of traps in the area. You can disarm all ofthem or only a few of them, depending on your explosives skill. Watch out for landmines and for the ropes (screen). They are tied to grenades or other obstacles. There are also a few bear traps, so make sure that you don’t step on one of them. The most dangerous trap is a smallcart which will explode when you get near it. You must be heading north-west until you find a small passageway between the carriages.
You will get to a small checkpoint after a short while. Talk to Robert. If you’re persuasive enough, you may convince him to let you through. You can also bribe him (100 bottle caps), show him the letter from Lucy or kill him. If you decide to eliminate him, you would have touse a terminal to unlock entrance to a nearby subway station. You should also know that ifyou’ve chosen Cannibal perk he will notice you as one of his own and you won’t even have to tell him why you’re here. Either way, proceed to a door leading to Meresti subway station. Finding Ian: The person you need to talk to is Vance. He considers him to be a leader of this group of“vampires”. You can exchange knowledge with him and find out more about his organization. Sooner or later you’re going to have to ask him about Ian (the missing boy from Arefu). You’ll find out that Ian has agreed to joined the Family and he’s the one reponsiblefor the death of this parents. Obviously if you have nothing against killing members of the Family you may start shooting at Vance and his colleagues before you even get to Ian. This will also solve the problem of other inhabitants of Arefu. I would recommend that you resolve this problem peacefully and you can do this byrequesting an audience with Ian. You can show Vance a letter from Lucy (screen). Thankfully, even if he doesn’t agree to your proposal, you can find a workaround to thissituation. You can obtain access to Ian’s room from other members of the Family – Holly, Karl, Justin or Brianna. In each case you must use certain skills or perks to prevail,however I’m sure that you’ll eventually succeed in obtaining the password.

Proceed to an area where Ian is currently standing. Use the password to open his room and try talking to him. You can convince Ian to stay with the Family or you can persaude him to return to his friends in Arefu. This can be done by winning a speech challenge or byshowing him a letter from Lucy (screen). Either way, you must go back to Vance to inform him about Ian’s final decision. Resolving the problem with attacks on Arefu citizens: This is also a good moment to resolve the problem with attacks on Arefu. Vance can be persuaded to stop these attack quite easily, however you can also propose that he signs atreaty with the villagers. You can use speech, medicine or intelligence to back up your proposal. Vance will agree to protect the villagers in exchance for shipments of fresh blood. He will also give you a very unique item – a schematic for a shishkebab.

Vance will also ask you to deliver his proposal to the citizens of Arefu. Obviously this meansyou’ll have to return to the surface. Once you’re there, open your personal map and fast travel to Arefu. Talk to Evan King and tell him about Vance’s proposal (screen). Evanshould agree to his terms and this means you must head back to the lair. Tell Vance the good news and he’ll reward you with a very interesting perk, called Hematophage. What this perk does is that it heals your character by 20 points each time you’ve consumed a blood pack (normally it would only regenerate 1 point of your health).

Grayditch: Those!
Grayditch: Those! Received from: Bryan Wilks [Grayditch / Capitol Wasteland] or Doctor Lesko [Marigold station] Solution: There are two ways of activating this quest. The less obvious scenario assumesthat you’ve decided to visit Marigold station without talking to Bryan Wilks. In that case you’ll have to get to Doctor Lesko’s hideout. If that happens, Lesko will send you to Grayditch in order to find Bryan Wilks. The more likely scenario is that you’re going to come across Bryan Wilks. He lives in Grayditch, but he may approach you when you’re close enough to that town (for example –when visiting a Super-Duper Mart). Either way, you’ll have to talk to him and listen to his problem. Bryan will ask you to find his father and he will also tell you that the entire Grayditch area has been overrun with killer ants. If you steer the conversation in the right direction (speech, Child at heart perk – screen) Bryan will give you a shack key and he’ll inform that it opens a stash which can be found at the back of the diner. Head over toGrayditch when you’re ready to take care of the ant problem.
Once you’ve reached Grayditch you’ll have to be ready to get rid of a lot of fire ants. They’re hard to kill, especially if you visit this location early during the course of the game. You may try using various assault rifles against them, however I would recommend switching to frag grenades and landmines. If you’re persistent and want to use guns aim for the antennae,but only if you’re dealing with groups and not single ants. Find Wilk’s house and enter it to find out what has happened to Bryan’s father. It won’t take you too long to find body of Fred Wilks. Examine the body, as well as the rest of the house. You will find a chinese assault rifle amongst other things. Go outside. Wilks is taking cover inside a tall shelter near thediner (screen). Talk to Bryan and you’ll be given a new objective – you’ll have to find anddestroy the source of these mutations.

Make sure that you’ve checked the container behind the diner. I would only like to remind you that you can obtain a key for this stash from Bryan. There are a lot of frag grenadesinside the dumpster and obviously you should start using them against the ants. You can also visit a small shack which is located near the shelter. In order to open it you would have to use a key obtained from Fred’s body. You’ll soon notice that doctor Lesko lives here. You can access his terminal if you want to (screen). Hack into the system or listen to a holotapefound on the table. You’ll find out about experiments carried out by Lesko. Go back to Grayfield and proceed south. Find the entrance to the Marigold station and use the stairs to get to the subway.
Other dangers are waiting for you in the tunnel, because you’ll be going against fire ants. You can fight with them or you can focus only on reaching southern area of the map. Look atmy screen – this is the room you’ll have to reach in continue with this quest. Try opening the

door and you’ll be greeted by Doctor Lesko (assuming you don’t know him). Talk to thescientist and listen to his ideas on how to solve the problem with the ants. If you’re an intelligent person you can share a few ideas with him and he’ll be impressed. Lesko will ask you to fight your way to the nest of an ant queen. You won’t have to refuse him right away if you don’t like his idea to keep the queen alive, because you’ll make your final decision once you’re close to the nest. If you decide to kill Lesko, you must use his terminal to open a door to the hatchery. I wouldn’t recommend getting rid of the scientist, because you’ll miss out on a chance of receiving a very cool reward. Proceed to the southern door and travel toMarigold station – hatchery.
There’s only one passageway leading to the queen’s hatchery, so you can’t get lost. Obviously you’ll be dealing with fire ants along the way. I have to warn you, because you’ll come across stronger variations of these creatures. You will probably have to kill at least two out of fiveguardians mentioned by Lesko. Once you’ve reached the nest (screen) you’ll have to decide how to act next. You can kill the queen using your most powerful guns. Even then it’s nothing to be an easyassignment. You must watch out for queen’s attack and you can’t get to close to themonster or you’ll receive large doses of radiation. It’s important that you keep moving. You can use the terminal which is located to the right of the queen. In this case you can approve Lesko’s decision or you can destroy the mutagen which will cancel his plans. If you want tofollow Lesko’s instructions ignore the queen entirely and eliminate all the remaining guardians. Remember that there’s a total of five of them and you can find their locations onyour personal map.

Once you’ve dealt with the problems in the hatchery, go back to the Marigold station using the same passageway as before. Inform Lesko about your progress. Thankfully, even if youkilled the queen or (not AND!!) destroyed the mutagen you can still convince him that it was the right thing to do. Lesko will hand over his lab coat and you’ll also be given a choicebetween two perks (screen). If you choose Ant Might your strength will increase by one point and if you choose Ant Sight your perception will increase by 1 point. You will also become more resistant to fire which is a good thing, especially if you’ll encounter fire antsin the future (or raiders equipped with flamethrowers :-)).
You may go back to Grayditch. Find Bryan Wilks again and talk to him. You can convince Bryan to stay in Grayditch or you can promise that you’ll find him a new home. If you ask him about relatives, he will mention that his cousin Vera lives in Rivet City. This isn’t the only solution, but the most obvious one. Vera can be found in Rivet City – upper deck. Go

to hotel Weatherly. Vera will probably be standing in the main room, however you may have to find her in her quearters (a small room in the back). Talk to Vera and inform her about Bryan’s situation (screen). She will gladly agree to having him over. Return to Grayfield and inform the boy about your progress. If you don’t want to go to Vera you can head over to Little Lamplight. Talk to Mayor MacCready about Bryan’s unfortunate situation. The mayor won’t be thrilled to having anew tenant, but you can convince him to change his mind if you win a speech challenge orby using Child at heart perk. If you plan on receiving a negative outcome, you may also sellBryan to the slavers. In this case you’d have to speak to Eulogy in Paradise Falls. Make him an offer and he’ll pay you 100 or 300 bottle caps for delivering Bryan to him.

Rivet City: The replicated man
Rivet City: The replicated man Received from: automatically after finding a clue about replicant’s existence or from Doctor Zimmer [Rivet City – science lab] Solution: The most obvious way to begin this quest is to talk to Doctor Zimmer. You can find him in the science lab located in Rivet City. I assume that you’ll find clues of android’sexistence long before you take trip to Rivet City. Here’s a list of places and non-player characters who may have some information concerningthe android: Megaton – clinic (Doctor Church), Megaton – Craterside Supply Store(Moira), Megaton – Nathan’s and Manya’s home (Manya), Rivet City – upper deck (talk to Doctor Preston about face reconstructions, you can also go and look for Sister), Rivet City – Rivet City market (Seagrove Holmes – you have to be persuasive or give him a bribe to find out about Pinkerton), Little Lamplight (Lucy), Little Lamplight – gift shop, Paradise Falls (Grouse), Paradise Falls – Cutter’s clincic (Cutter), Paradise Falls – Eulogy’s quarters (Eulogy), Tenpenny Tower (Herbert Dashwood and Doctor Banfield), Big Town(Red), The Underworld – Chop shop (Doctor Barrows), The Underworld (Winthrop), Citadel (Scribe Bowditch). Thankfully you won’t have to visit all these locations nor to ask all related NPC’s. I would recommend that you stop your search once you find out thatPinkerton might have more information concerning the replicated man. You’ll find about this during your stay in Rivet City. I should also tell you that you’ll find a lot of holotapes in some of these locations and you can listen to the recordings to find out more about the android. One of these tapes inpossession of Doctor Zimmer. You can also report to him each time you’ve found out something new, but he won’t reward you for small finds. During your stay in Rivet City you may also find Victoria Watts. She will propose analternative solution to the android problem (screen). Victoria will give you an android partand suggest that you should show this object to Zimmer, convincing him that the androidhas been destroyed. You can find out more about Victoria and her organization if you want to. If you decide to comply with her wish, show the part to Doctor Zimmer and you’ll end this quest with only 50 bottle caps more in your inventory and not knowing who the androidreally is.

Finding out who the replicated man is: It’s going to be much more interesting if you decide to find out the true identity of theandroid. In order to do that you must find Pinkerton, because he’s going to be mentioned by a few people. Check the second chapter of my guide (description of Rivet City) if you want to know how to get to get his hideout. During your conversation with Pinkerton ask the old man about face resconstructions and about android’s memory losses (screen). You’ll find out that he goes by the name of Harkness. Pinkerton will give some documents which are going to be proof to what he’s saying. He’ll also give you a code which will allow you to make theandroid remember everything again. You may go back to Rivet City.
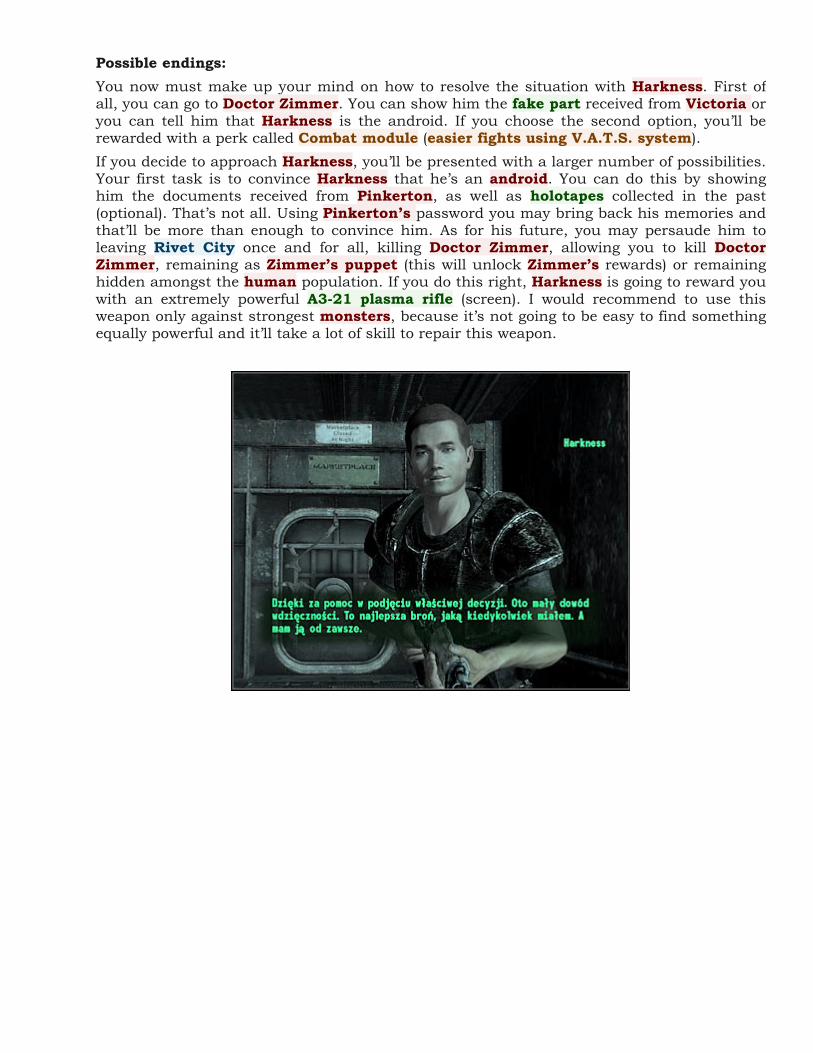
Possible endings: You now must make up your mind on how to resolve the situation with Harkness. First of all, you can go to Doctor Zimmer. You can show him the fake part received from Victoria or you can tell him that Harkness is the android. If you choose the second option, you’ll be rewarded with a perk called Combat module (easier fights using V.A.T.S. system). If you decide to approach Harkness, you’ll be presented with a larger number of possibilities.Your first task is to convince Harkness that he’s an android. You can do this by showing him the documents received from Pinkerton, as well as holotapes collected in the past (optional). That’s not all. Using Pinkerton’s password you may bring back his memories andthat’ll be more than enough to convince him. As for his future, you may persaude him toleaving Rivet City once and for all, killing Doctor Zimmer, allowing you to kill Doctor Zimmer, remaining as Zimmer’s puppet (this will unlock Zimmer’s rewards) or remaininghidden amongst the human population. If you do this right, Harkness is going to reward youwith an extremely powerful A3-21 plasma rifle (screen). I would recommend to use this weapon only against strongest monsters, because it’s not going to be easy to find something equally powerful and it’ll take a lot of skill to repair this weapon.

Rivet City: Stealing independence
Rivet City: Stealing independence Received from: Abraham Washington [Rivet City – Middle deck] Solution: You can find Abraham Washington inside a museum which is located in one ofthe cabins on the middle deck of the ship. He may be standing in the main room, nearexhibits, or he may be sleeping in his private charmber. Abraham will ask you to acquire avery unique item for him – the famous Declaration of Independence. In order to get your hands on this object you must first travel to National Archives. Don’t forget to ask Abrahamto mark this area on your personal map, because I asuume you haven’t been there before. Sadly, in order to get to National Archives you must travel through a battlefield filled with supermutant units. It would be a good idea to ignore the monsters and make a run for it.I’m sure that you won’t have any major problems finding the monument (screen). Use thestairs and open the main door to get to the ground floor of National Archives.
Exploring main floor of National Archives: Once you’ve entered National Archives and explored the first room you should notice anentrance to a large rotunda in front of the main door. Don’t go there just yet. Instead, focus on securing other rooms of National Archives. I guess you won’t be surprised to hear that you’ll be dealing with a lot of supermutants (and the most dangerous kind). Make sure that you search each room for additional supplies. You may come across mines and grenadeshidden inside large boxes (screen). Use these objects against supermutants, especially if you don’t have too much ammunition for your most powerful weapons. You must also watch outfor landmines. They are well hidden and you can step on one if you’re not careful enough.

Once you’ve secured the entire ground floor proceed to the oval chamber. Upon entering thisroom you’ll hear Sydney calling out to you. Listen to her warning – there are a lot oflandmine traps in this room. Before you’ll have a chance to talk to Sydney you will have to defend this area against several supermutant attacks. The first group will arrive in about 20seconds and you should place a lot of landmines in front of the rotunda in the meantime. Once the battle has started focus on eliminating supermutants equipped with rocket launchers (screen). I would also recommend that you try and keep Sydney alive, however you won’t fail the quest if she dies. Defend this area against several waves of attacks. Talk toSydney once it’s safe and she’ll offer that you should find the declaration together. I would recommend that you agree to her proposal, because at the end of the quest you’ll be able to get rid of her without losing karma.

Finding Declaration of Independence: Don’t exit this room. Instead, take your time and disarm all landmines located inside the rotunda. It shouldn’t be a problem, as long as you don’t move too fast and don’t trigger one ofthe mines by mistake. After that approach a security terminal (screen) and use Sydney’spassword to access it. You may proceed to the central area of the rotunda. Look down andpress the action key to get inside an elevator. Wait for the elevator to transport you to theeastern security wing. Once you’ve reached a new area, you should prepare yourself beforemoving on. Create shortcuts for pulse grenades and pulse mines, because you’re going to need those to take care of a lot of robots. The entire basement is swarming with hostilemachines, but only Mister Gutsy and sentry bot are two types of robots you should be afraid of. The main reason is that they’re using laser and plasma rifles, flamethrowers, rocket launchers and miniguns to hunt you down. Make sure to check each room you pass by, because there’s a high probability of finding more explosives. You can also search foradditional artifacts for Abraham Washington, but it’s optional.
Find a staircase which leads to a lower level. Keep heading north, because that’s where the main security vault is located. Find a door leading to the safe. Upon entering this newlocation you are going to be stopped by a robot who thinks that he is Button Gwinnett. You will have to decide how to act next. Negative outcome: If you plan on lowering your karma you will have to acquire the original Declaration of Independence at all costs. By steering the conversation in a right way you can make Button attack you. Sadly, not only you would have to destroy this one machine, but you would also have to take out two security turrets. Check Button’s remains and you’ll find a holotapewith a password to the main vault. Find a security terminal and use it to open all availablepassageways. Enter the vault (it was behind Button) and open the middle safe (screen). Take the Declaration of Independence with you. Alternatively during your conversation withButton you could pose as Thomas Jefferson. This can only be succesful if you’ve spent a lot of points on speech and if you succeed in a challenge. Button would hand over thedocument to you without any additional problems. Once the declaration is in your possession go back the same way you came before or

proceed towards an unexplored passageway, located to the left of Button. Ignore the room with the capsules and move forward. Eventually you’ll get to an elevator. Use it go back to the main floor of National Archives. Exit this monument and fast travel to Rivet City. Go to Abraham Washington and hand him over the original document, as well as other artifactsyou may have found during your stay in National Archives.
Positive outcome: If you want to raise your karma you will have to convice Button during your first conversation with him that he should manufacture a duplicate of the Declaration of Independence. In order for this to work you may want to mention the communists. Buttonwill give you a small assignment. You must go to Arlington Library in order to acquire anink, needed to forge a duplicate. You can find a lot of hints on how to reach the library inThe wasteland survival guide quest description. You will find the ink in the exact same room where the computer you had to access for Moira was located – Arlington Library media archive. You can find the ink inside a large box (screen). Take it and go back toButton. Hand him over the ink and you’ll receive a copy of the Declaration of Independence in a short while. Use the same passageway I’ve mentioned before (the one with a lot of capsules on both sides of the corridor).

Going back to Rivet City: Like I’ve already said, you can try and get rid of Sydney before going back to Rivet City. Obviously you could kill her, but this would result in losing a lot of karma points. Insteadafter leaving National Archives you may allow her to join you in a fight with supermutants. There are a lot of those outside the monument, so it shouldn’t take you too long to find them. Wait for Sydney to be killed and examine her body. Sydney was carrying a very interesting submachine gun, called Sydney’s 10mm “Ultra” SMG. Take it and retreat from the battlefield. If you want to keep her alive, fast travel to Rivet City the second you’ve leftNational Archives. Obviously you must return to the aircraft carrier. Go to Abraham Washington and hand him over the declaration (fake or original). Abraham will reward you with a schematic for a railway rifle. If you came back with Sydney, you’ll have to share the reward. If you came back alone, you’ll get all the caps.

Capitol Wasteland: Head of state
Capitol Wasteland: Head of state Received from: Hannibal Hamlin [Temple of the Union] or Leroy Walker [LincolnMemorial] Solution: There are two ways for you to begin this quest. You can start by visiting Temple of the Union or Lincoln Memorial. I would recommend starting with the temple, because it’s much more accessible, it’ll take you less time to do what has to be done and you’ll know that you’ve reached all available endings. Don’t forget to check the second chapter of my guide for some additional information on how to get to the Temple of the Union. Once you’ve agreed to help, Hannibal will present you with two separate tasks. Start off by going to Cabel Smith. Talk to him and you’ll find out that he needs a picture or a painting of Abe Lincoln’s statue. In order to acquire such data you are sent to the Museum of History. Leave the Temple of the Union (you can’t fast travel while you’re inside or in close promixity to the temple) and plan your route. Onceyou’ve arrived at your destination, head on to the main gate and enter the Museum of History. Ignore the main hall and proceed to a door leading to Museum of History – lower levels. There are a lot of feral ghouls waiting for you there. Watch out for a new typesghouls called glowing ones (screen). They can be quite deadly if you allow them to get closer.You should also avoid fighting too many monsters at the same time.
You will now have to explore the entire lower level of the museum. Be on a look out for safes and ammo stashes. You can also focus on finding collectibles connected to Abe Lincoln.Watch out for unpleasant surprises, such as bear traps. Eventually you’ll have to get to a door leading to Museum of History – offices. Not much will change here, besides the factthat you’ll be dealing with even more hostile creatures. Check the screen – take Abe Lincoln’s figurine, because you might need it to finish a small part of this quest. You mayignore searching for it if you’ve already acquired something else tied to Abe Lincoln.

Your next objective is to fight your way to the southern section of the offices. There’s a locked door blocking your way. Use bobby pins to open it or locate a security terminal and hack into it. If you have a high science kill you may also consider reprogramming the turretsin order to get rid of other feral ghouls without actually having to fight them. Your objectivecan be found in the southern room, near the stairs leading to the upper floor. Look at my screen if you’re having some difficulties finding the painting. Take Lincoln Memorial posterand go back to the Temple of the Union. Talk to Caleb. He will now direct you to Lincoln Memorial.

Once you’ve reached your current destination, try getting closer to the monument and you’re going to be stopped by Silas. I wouldn’t recommend attacking him nor his colleagues, because you will be given an opportunity to choose an ending for this quest. Follow Silas to the back room, marked as Memorial maintenance room. You’ll meet Leroy Walker here who is the leader of the slavers. Talk to him and decide what is your next decision going to be. Possible endings: If you plan on lowering your karma you’ll want to join the slavers. This means you’ll have to tell Leroy where Temple of the Union is located (screen). It was important that you visitedthis area in the past, so you won’t have to lose time searching for it now. You can alsomention that you’ve found artifact or artifacts tied to Abe Lincoln. Hand him over the action figurine found in the Museum of History, as well as other objects you may have collected.You must now travel to the Temple of the Union in order to help the slavers to get rid of Hannibal and his friends. Obviously you shouldn’t waste your time trying to go there on foot. Insetad, fast travel to the temple and wait a few hours (or even a day) if Leroy and his crew didn’t show up. Join the fight, but let Leroy kill Hannibal and he’ll reward you with 100 bottle caps.
If you plan on raising your karma you must help Hannibal and his friends to secure the memorial by getting rid of the slavers. You’ll have to secure the entire area before you’ll be allowed to go back to the temple. I wouldn’t recommend choosing main stairs to the building,because they’re well guarded. Instead, circle the structure and look for larger boulders(screen). Be careful while trying to get on top of them, because there may be traps(landmines) out there. Use your primary weapons to get rid of all slavers. It shouldn’t be a problem, as long as you don’t fight more of them at the same time. Wait for a confirmationand go back to the Temple of the Union. You must inform Hannibal about two things – that there weren’t any supermutants in the area and that you’ve been able to kill all slavers. Hannibal will ask you to meet him near the memorial. Wait one day and go there, butinstead of travelling to Lincoln Memorial choose a nearby subway station from your list –Mall northwest metro station. Hannibal will thank you for all the help you’ve done and he will also reward you with a schematic for a dart gun. You may sell him Abe’s figurine if you want to, but you won’t get a lot of bottle caps for it.


Museum of History: Reilly’s Rangers
Museum of History: Reilly’s Rangers Received from: Reilly [Museum of History – Underworld] or automatically when you’re close enough to Our Lady of Hope hospital [Capitol Wasteland] Solution: There are two ways for you to begin this mission. I doubt that you would want tovisit Our Lady of Hope hospital on your own, but if you do find your way to that locationyou’ll be allowed to listen to a distress call from Reilly’s rangers. Remember that you must use your Pip-Boy to do this. The more probable employer is Reilly herself. The best momentto visit the Underworld is during your stay in the Museum of History. After being greeted in the Underworld and talking to the ghouls head over to the Chop Shop. Find unconscious Reilly and force one of the doctors to wake her up. You can also heal her yourself, butobviously you must have a high medicine skill to succeed. Finding Reilly’s rangers hideout: During your first conversation with Reilly you should listen to what she has to say aboutother rangers and about an ambush. Reilly will ask you to save her colleagues and she will also tell you how to get to their main outpost. The place you should be looking for is calledReilly’s rangers compound and it’s located to the east of Museum of history. Getting to that area won’t be easy. Obviously you will have to use subway tunnels, because a lot ofmain streets are blocked with debris. Start your trip near Metro central and end it near Seward Square – north. You don’t have to visit Reilly’s rangers compound right away, however I wouldn’t recommend ignoring it, because at the end of this mission you’ll still haveto go there. I guess you won’t be surprised to hear that there are a lot of monsters near the compound and you’ll have to kill most of them before moving on. Be on a look out for a small alley. Eventually you’ll get to a locked door (screen). Use a code provided by Reilly to gain access to the compound. Once inside spend some time finding ammunition and collectingother supplies. There’s also a free bed here.

Finding Statesman Hotel: As for means of reaching the hotel, you should follow Reilly’s detailed instructions. This means you must begin your journey near Dupoint – north east and you must end it near Vernon Square. Get ready to eliminate a lot of supermutants on your way to your final destination (Reilly’s rangers). I would recommend completing The replicated man quest before taking on this assignment, because you’ll have a plasma rifle at your disposal. Findthe antenna mentioned by Reilly or proceed to the hospital right away (screen). Be careful,though. There are a lot of landmines in front of the entrance, so you’ll have to be careful while trying to enter this area. Open the door to get to the ground floor of Our Lady of Hope hospital.
I guess you won’t be surprised to hear that the entire hospital is swarming withsupermutants. You should also know that you’ll be dealing mostly with brute and mastervariations of these monsters. As for ground floor, most of the beasts have gathered in the main reception hall (screen). You can use standard means of engagement to get rid of themor you may hack into one of the terminals to activate turrets. Sadly, the turrets won’t kill all the creatures for you, so sooner or later you’ll have to attack them on your own. I wouldrecommend that you inspect the entire ground floor of the hospital. The southern area of themap is the most interesting one, because there are a lot of medical supplies scatteredthroughout the facility. If you’re skilled enough, you can also break into a large stash andyou’ll get your hands on a lot of useful supplies. Head on to the stairs once you’re donekilling and exploring. Locate a door leading to the second floor of Our Lady of Hope hospital.
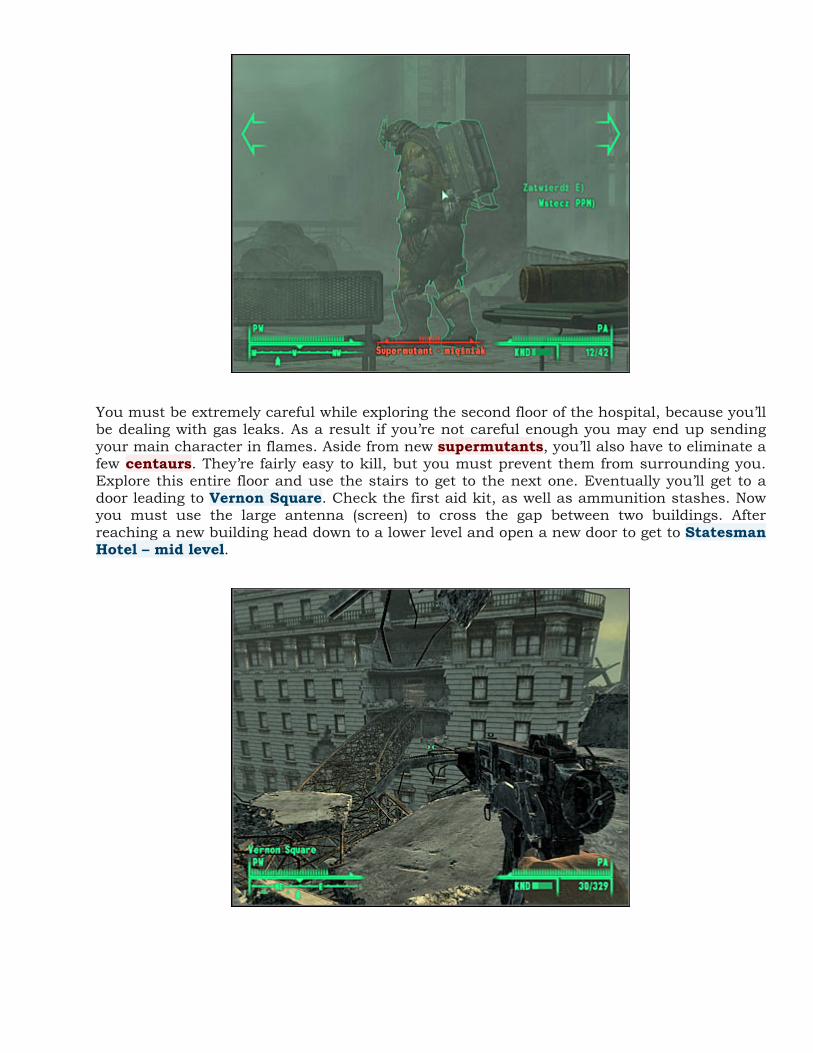
You must be extremely careful while exploring the second floor of the hospital, because you’ll be dealing with gas leaks. As a result if you’re not careful enough you may end up sending your main character in flames. Aside from new supermutants, you’ll also have to eliminate a few centaurs. They’re fairly easy to kill, but you must prevent them from surrounding you.Explore this entire floor and use the stairs to get to the next one. Eventually you’ll get to adoor leading to Vernon Square. Check the first aid kit, as well as ammunition stashes. Nowyou must use the large antenna (screen) to cross the gap between two buildings. Afterreaching a new building head down to a lower level and open a new door to get to Statesman Hotel – mid level.

Joining Reilly’s Rangers: Watch out for a rope in the first corridor, because if you move it you’ll trigger a nasty trap.There are also a lot of other traps inside the hotel, so you should be moving slowly in order toavoid activating them. Remember that your objective is to get to get to the roof of the hotel, so you must be on a look out for staircases to get to upper floors of the structure. Once you’ve reached the first staircase you’ll find Theo. Check his body and use a code handed over toyou by Reilly to open his ammo box. There’s a LOT of ammunition inside the box andobviously you should take it all, especially since the ammunition doesn’t weigh anything in the game. Keep pushing towards upper floors. You’ll eliminate a lot of supermutants along the way. Be on a look out for closed rooms, safes and stashes. If you’re skilled in lockpickingyou’ll get your hands on some new equipment, including better guns, medicine, ammunitionand explosives.
Your next area of interest is Statesman Hotel – restaurant. If you’re skilled at repairingthings, you will be presented with an opportunity to repair a service elevator. Otherwise youwill have to go to the northern area of the hotel in order to find a new staircase. Either way, you’ll have to get to the restaurant and you’ll start the game in the northern section of the building. Obviously this means you must go south, because that’s where the main room ofthe restaurant is located. I guess you won’t be surprised to hear that this room is beingguarded by new supermutants. Watch out for a supermutant master (screen), because he’s equipped with a very powerful minigun. Use a rocket launcher or a fatman to get rid of him without having to engage him in an open combat. You could try sneaking around and usingexplosives against him, but it won’t be necessary. Defeat all supermutants and use the stairs to get to the upper balcony. Now you must find a door leading to the roof of Statesman Hotel.

Evacuation: Thankfully you won’t encounter any monsters on the roof. Your objective is to get to the highest point of the roof, because that’s where Reilly’s rangers are hiding. Approach them and wait for one of them (Butcher) to talk you. Butcher will tell you that in order to leave the hotel they must activate a nearby service elevator. This can only be done with a fission battery and you must acquire such an object. Go back to Statesman Hotel – restaurant. Thankfully, it’s very easy to find the battery. Jump down from the balcony and look for asmall room (screen). There’s a destroyed protectron inside. Examine the machine and you’ll get your hands on the missing part. Go back to the roof and give the battery to Donovan. You can also talk to other rangers and hand over ammunition to them. I would recommenddoing this, because you’ll receive additional bonuses for rescuing all of them. Wait forDonovan to repair the elevator and use it to get to the ground floor of the Statesman Hotel.

Once you’ve reached the ground floor get ready for the final battle to take place. It’s not going to be easy, because you must prevent the supermutants from killing your friends. Start off by killing at least one supermutant. Once the creature has been killed, focus on the lower level, because one of the creatures is carrying a minigun (screen). It’s extremely important that this supermutant dies quickly. Kill all monsters, loot their bodies and leave the hotel. You should receive instructions that you must meet up with the rest of the rangers in Reilly’s rangers compound. If you’ve been there before you can fast travel without anyadditional problems. Notice that Reilly has arrived in the compound in the meantime. Talkto her. If you saved all of her colleagues, she will give you a reward. You can choose betweena minigun and Ranger battle armor. I’d strongly recommend taking the armor, because youcan acquire the minigun from one of the supermutants. You can talk to Reilly again, as well as to her colleagues. Reilly will ask you to help her in mapping the Capitol Wasteland. For each unlocked primary location she can give you 20 bottle caps. That’s a lot of money, considering that all you have to do is to visit new areas.

Musem of History: You gotta shoot ‘em in the head
Musem of History: You gotta shoot ‘em in the head Received from: Mr Crowley [Museum of History – Underworld] Solution: Mr Crowley is a ghoul and he can be found somewhere in the Underworld (he spents most of his time in Carol’s place). Crowley will ask you to kill four men who don’t like ghouls. He will give you their exact locations and you’ll also find out that he can give you a bonus if they die from a shot to the head. In order to make this happen you’ll receive asniper rifle. I would recommend that you visit each person on the list in order to find outmore about Crowley’s true intentions. It turns out that he needs to get his hands on thekeys and he doesn’t care about anything else. Dave from the Republic of Dave is very helpful. Once you’ve acquired enough information go back to Crowley and if you’re convincing enough he’ll change his mind. From now on he’ll only need their keys (screen), so you won’t have to kill them. This also means you can ignore Tenpenny, because he’s the only one without a key.
Your targets are: Allistair Tenpenny from Tenpenny Tower, Dukov from Dukov’s Place, Dave from the Republic of Dave and Ted Strayer from Rivet City. Like I’ve already said, only three targets carry unique keys. In each case you can convince a target that he shouldhand over his key peacefully (screen). This can be done by winning a speech challenge or byoffering a bribe. Alternatively you can shoot first and ask questions later, but obviously suchactions would result in karma losses. I should tell you that the keys are needed to gain access to a secret lab hidden in Fort Constantine. As for Allistair Tenpenny, you must execute him if you want to follow Crowley’sinstructions, however you shouldn’t be surprised to hear that the old man will offer you more money (200 bottle caps or more if you use speech) for Crowley’s head. The quest can be ended with Crowley’s death or after you deliver Crowley all three keys from other targets (they can either be dead or alive). You can lie to Crowley that you’ve killed someone even ifyou allowed such a person to live.

If you want to find out more about why Crowley needs all the keys so much go to the secondchapter of my guide and read the description of Fort Constantine. Thankfully, even if yougive Crowley all the keys and end the quest you can still kill him and take back yourpossessions. I wouldn’t recommend attacking him while he’s still in the Underworld, because that would make other ghouls hostile towards your character. You can wait for him to leavethe Underworld and shoot him in the main hall of the museum or you can follow him to Fort Constantine and assassinate him there.

Canterbury Commons: The superhuman gambit
Canterbury Commons: The superhuman gambit Received from: Uncle Roe [Canterburry Commons] Solution: During your first stay in Canterburry Commons you will witness fights taking place between AntAgonizer and The Mechanist. Wait for them to be over and locate Uncle Roe. Talk to Ernest and you’ll be presented with an opportunity to help out Canterburry Commons citizens in ending this dispute. Your first assignment will be to find out wheredoes the “superheroes” live. Obviously you can use my guide to locate their lairs quickly, butif you prefer everything done by the book find Derek Pacion and ask him about theAntAgonizer and The Mechanist (screen). You can also spend some time talking to otherCanterburry Commons citizens, including Joe Porter. Furthermore, a lot of information about these characters (including their true identitites) is stored in the main building ofHubris Comics. Going back to Derek, you will find out that the AntAgonizer has her lair to the north of Canterburry Commons. As for The Mechanist, he can be found on top of a nearby hill.
AntAgonizer: There are many different ways to end this quest, but let’s divide possible endings depending on the superhero you want to deal with in the first place. The entrance to AntAgonizer’s lairis clearly visible on your personal map, however I wouldn’t recommend choosing it, because you would have to fight your way through a large number of ants. There are also a lot oftraps leading to her lair. Instead focus on finding an alternative entrance. Look at my screenand after getting there be on a look out for a sewer grate. Use a bobby pin to open it. Either way you must get to AntAgonizer’s lair. Find her sitting on her throne and approach her toinitiate a conversation.

Obviously you can kill the AntAgonizer which seems to be the best solution if you’re playing as a bad character and plan on lowering your karma. Killing her would be easy, because her armor can’t sustain a lot of damage. After the fight you would have to leave the lair viatunnels or the sewer grate. If you decide to kill her you can go back to Uncle Roe once she’s dead to confirm your victory. A more interesting solution is to convince her to organize anattack on The Mechanist. In this case you would have to travel to the Robot Repair Centerand assist her ants in dealing with The Mechanist. The most interesting way to solve this problem is to convince her that she made a mistake and that she still has a second chance(screen). It’s not easy to persuade her. You can rely on very high speech skill or you can useLady killer perk. Alternatively you can call out to her by her real name, but you must know her identity from Joe Porter of from Hubris Comics.

The Mechanist: As for The Mechanist, it gets more complicated here. You can find this superhero inside the Robot Repair Center which is located on top of a large hill near Canterburry Commons. Use the main entrance to get to the center. There are two ways for you to reach Mechanist’slair. The easier way to get to his forge is to use a nearby elevator (screen). Sadly, if you didn’t spend A LOT of points into your lockpicking skill you won’t be allowed to pick the lock. Thesecond route will require you to travel through the entire factory and this means you’ll have to deal with a lof of machines. Watch out for security bots, because they’re using powerful weapons to hunt you down. You’ll also have to eliminate several defense turrets. I would recommend using pulse grenades and a rocket launcher to deal with the robots. You could try running, but it’s very risky, especially if you take the wrong turn and end up beingsurrounded by hostile robots.
You can also make your life a little easier by finding two security terminals. Hack into thesystem to disable the turrets and you won’t have to worry about those anymore. Eventuallyyou’ll have get to the upper balconies. Check the office area and collect valuable equipment. You must find a door leading to Mechanist’s forge. Once you’ve arrived at the forge, turn left and approach a small coffee machine (screeen). Press the action key and you’ll notice that one of the walls has started moving. Wait for a passageway to reveal itself and go talk to The Mechanist.

The situation here is going to be very similiar to the AntAgonizer. You can kill The Mechanist, however it’s not going to be easy, because his armor is a little stronger.Furthermore, you can convince him to organize an attack on the AntAgonizer. Thankfully you wouldn’t have to travel to her lair, because she would appear inside the facility after you’ve left the forge. The best solution is to convince him that his actions threaten safety ofCanterburry Commons (screen). Additional info / endings: Depending on the outcome of your actions you may acquire AntAgonizer’s costume, AntAgonizer’s helmet, Mechanist’s costume and Mechanist’s helmet. Both armors are kind of weak, but you should take special attention in the helmets, because they provide goodprotection. You can also receive special rewards from the superheroes for killing a competitor. Don’t forget to go back to Uncle Roe for your reward. You’ll receive the exact amount of bottle caps he promised, but you’ll also receive a bonus if you didn’t kill any of the superheroes.

Paradise Falls: Strictly business
Paradise Falls: Strictly business Received from: Grouse [Paradise Falls] Solution: This quest can only be activated if you’re persuasive enough during your conversation with Grouse. If so he’ll agree to you doing him a favor. This usually occurswhen you want to gain access to Paradise Falls and you can’t go in just like that, because you’re playing as a good character. Grouse will give you a device called mesmetron. This gun can paralyze its victims for a short period of time. You may use mesmetron on ordinary people, but you’ll have to remember that you won’t receive a lot of ammunition and Grousesells additional supplies for ridiculous prices. In addition to the gun you’ll also receive your first slave collar and an instructional manual on how to use it. Remember that in order to gain access to Paradise Falls you have to capture only one person from the list, however youwill be rewarded 250 caps for each slave you catch for Grouse. Grouse will order you to hunt down and capture four people: Susan Lancaster from Tenpenny Tower, Red from Big Town, Arkansas from the Minefield and Flak from Rivet City. Only Flak isn’t tied directly to any other quests, so you might want to considerchoosing him to be your primary target. Susan may come in handy during Tenpenny Tower quest, Red needs to be rescued from the supermutants in order to fullfill Big trouble in Big Town assignment and Arkansas might have died during your first visit to the Minefield(Moira will request for you to visit this location while trying to complete The wasteland survial guide quest). You should also know that Arkansas is the only person from the list to be hostile towards you by default. The most important thing for you to know about is that you should attack your target whilethere’s no one in the vicinity. Fire once and press the action key to initiate a conversation.Choose the second answer from the list (screen) and you’ll automatically make your target wear a collar. Now you’ll have to order your victim to move quickly to Paradise Falls before he or she dies as a result of an exploding head. If your actions are noticed, try running away as soon aspossible or remain unnoticed and wait for the situation to calm down. Go back to Grouse once you’ve captured your first slave. He will reward you with 250 caps and you’ll receive a new collarfrom him. You can also ask him to let you in if you don’t want to capture any other civilians.

Big Town: Big trouble in Big Town
Big Town: Big trouble in Big Town Received from: Dusty [Big Town] Solution: During your first visit to Big Town you should talk to a guard called Dusty. He can usually be found near the draw bridge. Dusty will tell you about problems with supermutants. You’ll also find out that a couple of civilians have been kidnapped. You can ask one of the villagers for the location of the supermutant camp and a new marker will appear on your personal map – Germantown police headquarters. This is where you’ll need to go right now. I assume you haven’t unlocked any other locations in the vicinity, so you’llprobably have to travel on foot. Once you’ve arrived at your new destination find the main building and get closer to it. Ignore the door leading to the ground floor, because it’s locked and you would have some serious problems opening it. Instead head on to the stairs (screen)to get to an entrance on the first floor. Open the door to get to Police headquarters – first floor.
Obviously there are a lot of supermutants inside police headquarters. You’ll be dealing mostly with stronger variations of these creatures, so you shouldn’t come here unless youhave powerful weapons at your disposal. The first group of supermutants (screen) can be defeated quite easily. Approach them undetected and use frag grenades to kill both creatures before they have a chance to fight back. Continue exploring the headquarters. Beon a look out for security terminals, safes and closed lockers. Opening these objects not onlywill allow you to gather more supplies, but you’ll also gain experience points. Watch out for traps. There are a lot of landmines inside the precinct and you may have some problemsspotting them. Find a door leading to Police headquarters – ground floor. Thankfully, you can open the door without showing off how good you are at lockpicking.
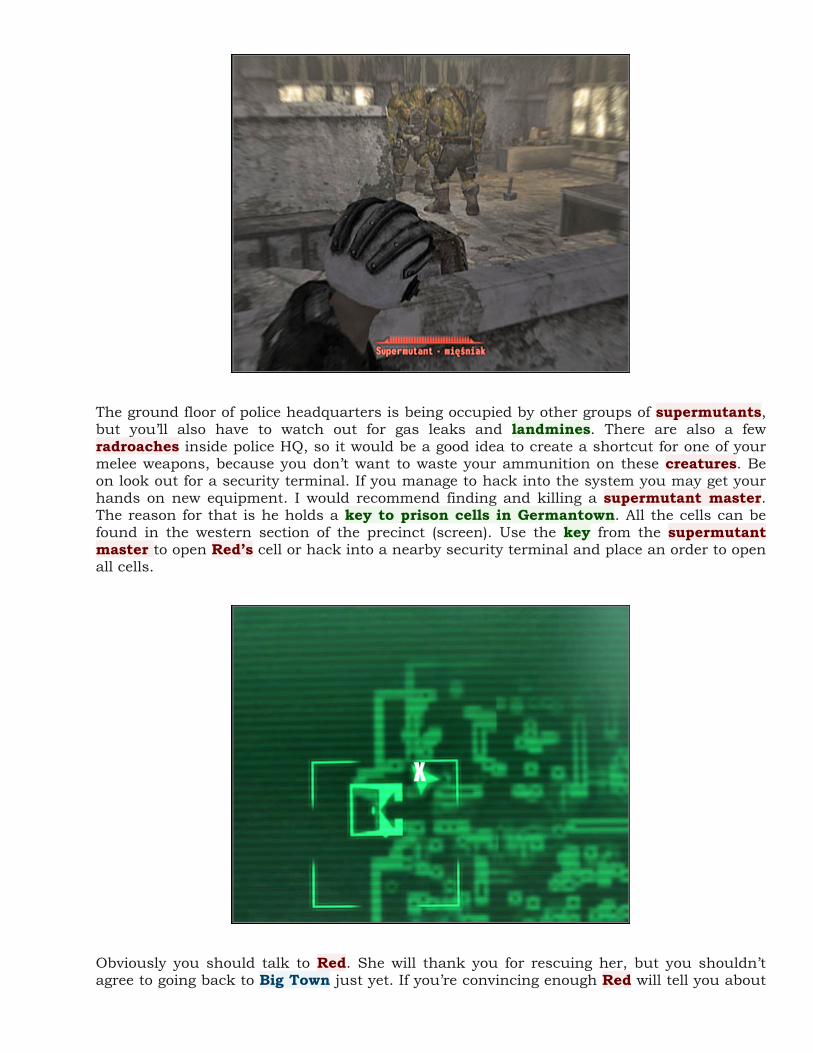
The ground floor of police headquarters is being occupied by other groups of supermutants, but you’ll also have to watch out for gas leaks and landmines. There are also a fewradroaches inside police HQ, so it would be a good idea to create a shortcut for one of yourmelee weapons, because you don’t want to waste your ammunition on these creatures. Be on look out for a security terminal. If you manage to hack into the system you may get yourhands on new equipment. I would recommend finding and killing a supermutant master. The reason for that is he holds a key to prison cells in Germantown. All the cells can be found in the western section of the precinct (screen). Use the key from the supermutant master to open Red’s cell or hack into a nearby security terminal and place an order to openall cells.
Obviously you should talk to Red. She will thank you for rescuing her, but you shouldn’t agree to going back to Big Town just yet. If you’re convincing enough Red will tell you about

one more survivor, a young boy who goes by the name of Shorty. You’ll find out thatShorty has been taken to the kitchen which is located in the basement of the police precinct.Order Red to remain here for a little while longer and begin searching for Shorty. The stairs to the basement are located in the northern area of the map. Open the door to get to Police headquarters – basement. Ignore the mess hall, because there are only a few radroaches out there. Instead proceed west. Kill a supermutant who was guarding Shorty. Talk to the boy (screen) and order him to follow your lead. Now you must go back to Red’s cell. She should also begin following you. Exit the headquarters. You may use the same path as beforeor you may look for an alternative way out. Important! If Red and Shorty die before you’ll be able to return them to their homes, go toBig Town alone and talk to Pappy. He should give you a small reward for your trouble, butobviously you should do your best and escort them to safety.
You could travel with Red and Shorty on foot, but it would be extremely risky, especiallysince they can’t fight and they won’t follow your instructions. Instead fast travel to Big Town. Enter the village once again and talk to Red. She wants to reward you with 300 bottle caps,but you can refuse and take nothing for your trouble if you want to raise you karma. On theother hand, you may win a speech challenge and request more money from her. You will soon find out that supermutants have begun preparations to attack the village.Obviously you should consider staying inside Big Town and helping the villagers, because they won’t be able to protect themselves on their own. Furthermore, if you have enough skill you can teach them how to operate melee weapons, firearms or explosives. It’s not a requirement, but it would make the upcoming battle easier. The most important thing for youto remember about is to place a lot of landmines on the bridge leading to Big Town (screen). You have about 30 seconds, so you can’t place too many of them. While you’re near thebridge you can also try repairing destroyed robots. Thankfully, you’re going to be attacked bythe weakest kind of supermutants. You should still focus on protecting the villagers. Talk to some of the inhabitants of Big Town once the battle has ended and you’ll earn their gratitude.


Tenpenny Tower: Tenpenny Tower
Tenpenny Tower: Tenpenny Tower Received from: Chief Gustavo [Tenpenny Tower] Solution: You will probably be given a chance to begin this quest early during the course ofthe game (if you decide to help Burke), however I would recommend waiting. It’s not that you have to deal with powerful monsters, but in order to ensure your victory you may need a lotof points spent in lockpicking, science or speech. I think that when you advance to the 10thlevel of experience you may give it a shot. In order to begin this quest you must gain accessto the inner area of Tenpenny Tower. Listen to a short conversation between a guard and a ghoul when you arrive here for the first time (screen). Use the intercom and convince theguard to let you in. Talk to chief Gustavo who should automatically approach you. If not,you can usually find him near the barracks or at the front desk, inside the tower. Listen toGustavo complaining about a ghoul problem and offer your help in getting rid of thesecreatures. Don’t worry – even if you plan on helping the ghouls you will have a chance tochange your mind in the near future. You can also convince Gustavo to increase the reward for taking care of the ghouls. Not only can you receive more caps from him, but he may also give you an assault rifle, so it’s definately worth to negotiate terms with him.
The area you need to get to is Warrington trainyard. Gustavo will only mention thetrainyard during the initiial conversation, so you’ll have to ask him to mark the location on your map. Ignore Warrington station for the moment, because you can’t access it from the surface. Once you’ve reached the trainyard use the door to get to the subway tunnels. The surrounding corridors are being occupied by feral ghouls. I would recommend using a shotgun against them, because it’s very effective at close range. Prevent the monsters from surprising you. You should also watch out for radiation – don’t go near any barrels and you should be fine. Eventually you’ll get to an area where you’ll be greeted by Michael Masters. Follow his instructions and holster your weapon. Talk to Masters, but you won’t have to ask him about anything in specific, because he’s only a guard. Head back down and proceed towards an opened gate. You should be able to get to a small room (screen). This is where theghouls are hiding. Go in and make up your mind on how you want to play this out.

Positive / neutral outcome: During your initial conversation with Roy you’ll find out that it’s his dream to find a place forhim and other ghouls inside Tenpenny Tower. Promise Roy to help him in that matter and return to the tower. Enter the building and use the elevator to reach the apartments. Nowyou’ll have to get to an apartment owned by Tenpenny himself. As you’ve probably noticed, the door is being guarded by one of his men. You can use persuasion, steal the key from the guard or from chief Gustavo, kill the guard or brake-in. Either way, you must get to an elevator which will take you to the top of the tower. Once you’ve arrived at your newdestination, talk to Tenpenny and explain him the situation with the ghouls (screen). You’ll find out that Tenpenny will agree to welcome them inside his establishment as long as someof his tenants won’t mind.

Tenpenny will give you a list of people who need to be persuaded into letting the ghouls live in the tower. They are Anthony Ling, Lydia Montenegro, Susan Lancaster, Edgar Wellington II and Micky Wellington. The most obvious solution here is to use your highspeech skill in order to win a speech challenge. Each time the conversation is going to bevery similiar. Using your persuasive skills you must convince the tenants to agree to your proposal (screen). Notice that you will receive posivite karma for every successful speechchallenge. If you don’t mind losing some karma you may use your primary weapon to killeach person on the list, but you must eliminate them silently (for example – during the sleep), so they won’t raise an alarm and they won’t turn other tenants against you. There’s also a third way to resolve this situation. You can get rid of Anthony Ling and Lydia Montenegro by opening safes in their stores. As a result, they will be accused of stealing andthrown out of the tower. As for the remaining three, go to Susan Lancaster’s apartment and find a love letter she received from Edgar Wellington II. Read the letter and find Micky Wellington. Show the letter to Micky and you won’t have to worry about her, Edgar nor Susan anymore. Once you’ve convinced or killed all five tenants go back to Tenpenny and say that you’ve finished the job. Tenpenny will hold on to his promise, so you can go back to the sewers.Talk to Roy and tell him the good news. Roy will give you a valuable artifact, called ghoul mask. Basically what this item does is that it makes feral ghouls ignore you.
Negative endings: The most obvious negative solution is for you to kill all the ghouls (screen) located in thesubway. Doing this you’ll grant Gustavo’s wish. You shouldn’t have any problemseliminating these creatures. There are only a few of them and they’re not using state of theart equipment. Make sure that Roy is amongst the killed. Once you’ve killed the ghouls and looted their bodies go back to Gustavo. Talk to him and he’ll reward with the exact amount of caps he promised before.

There’s also an alternative negative solution to this quest, but it requires you to ally yourself with the ghouls in order to help them in taking over Tenpenny Tower. If you’re feeling cocky you cankill all the inhabitants yourself. I have to warn you – it’s not going to be easy, because the tower is being protected by a lot of armed guards. I would recommend listening to what the ghouls have planned. Roy Phillips will ask you to open an underground passageway for him, connecting thetower to the subway. This will allow Roy to smuggle a large group of feral ghouls into the city in order to begin mass murder. For now you must return to Tenpenny Tower, because you can’t go anywhere with this assignment from here. Your first assignment after returning to the tower will be to acquire basement key. You can try andpickpocket Gustavo, however it’s not going to be easy during the day. The best moment to stealfrom him is to wait for him to go to sleep (screen). You should succeed as long as there aren’t anyother guards in the area. Take the key to Tenpenny generator room. If you don’t want to wait forGustavo to go to sleep, you can find Herbert Dashwood, because he holds a spare key. Convince him (speech) to give you the key or steal it from him if you’re skilled enough.

Make sure that you’re standing outside, but inside the perimeter. Look at the screen – go there and use your newly acquired key to open a door leading to the generator room. There’s a security terminal nearby and you can hack into the system. Thankfully it’s a very easy task, because this system uses one of the weakest protections against hackers. ChooseOpen the containment door option from the main menu. If you don’t have any science skills, you can ignore the terminal entirely and use one of your guns to blow up a nearbygenerator. Either way, you must open this passageway. Approach the window and listen toRoy. Agree to meet him near the main entrance to the tower. Go back the same way youcame and proceed to the main door. This is also a good moment to choose a good weaponfrom your inventory. I would recommend using a shotgun, especially since that feral ghoulswill do all the dirty work for you.
Roy will now give you a very interesting artifact, called a ghoul mask. Put it on. The mask will protect you against feral ghouls, because as long as you don’t bump into them they’llignore you. You can enter the tower. Assist Roy and his ghouls in taking over this entirebuilding complex (screen). Obviously this means you’ll have to hunt down and kill everyinhabitant of the Tenpenny Tower. There are three levels for you to secure. Start off withthe ground floor. Make sure you’ve checked all stores, as well as the clinic and the bathroom.After that use the stairs to get to the upper apartments. Finally go back to the main hall anduse the elevator to get to the upper suites. I guess you won’t be surprised to hear thatTenpenny will be amongst the killed, however someone else will probably kill him for you. Find Roy once the battle has ended and he’ll thank you for your help in securing the tower.


Vault 101: Trouble on the homefront
Vault 101: Trouble on the homefront Received from: automatically during exploration of Capitol Wasteland, but only if you’re a few miles away from Vault 101 [Capitol Wasteland] Solution: The important thing for you to know about is that you’ll only be allowed to participate in this assignment after leaving the Citadel (once you’ve completed Waters of life quest). Head over to the area where you’ve started the game (for example – to Megaton). Once you’ve arrived you should notice that your Pip-Boy has caught an emergency transmission. Open the Pip-Boy and choose radio from the menu. You’ll notice that Vault 101’s emergency frequency (screen) has been added to the list. Click on it and listen to a transmission fromAmata. It would be wise to comply to her request and to return to your place of birth as soonas possible. Choose Vault 101 from your personal map to fast travel to that location. Enterthe vault and approach the control panel to open it. Kill a radroach and proceed to a doorlocated in front of the entrance.
You’ll be stopped by an officer (Armstrong or Gomez) in the next room. You can ask him to guide you to certain areas of interest. You’ll find out that rebels are raising against theOverseer. If you want to end this quest quickly, you can also ask the officer to keep your appearance a secret. You would then have to leave Vault 101 without anyone else knowing that you’ve visited this place. Obviously I wouldn’t recommend ignoring this quest, becauseyou won’t receive any bonuses for exiting the vault and leaving its inhabitants with theirproblems. You can also make a similiar decision later on – after talking to the Overseer or Amata. You don’t have to ask the guard to guide you anywhere, because you’re not far from your objectives and you should still remember the layout of the vault from the tutorialsection of the game. Find a door leading to Vault 101 – atrium. Once you’re there, ignore other guard firing at a citizen and turn left. Use the stairs to get to the upper balcony. Startmoving towards Overseer’s office. Be careful, though. Officer Wilkins will attack you in the

server room and you must get rid of him (screen) before moving on. Check his body and you’ll find a password to a prison cell.
You should consider visiting cells on your way to Overseer’s office. This is the area where Amata was interrogated during the tutorial section. Notice that Mr Brotch is being held against his will. Use the newly obtained password to free him. Otherwise you would have to hack into the terminal or use a bobby pin directly on his cell. Rescuing Brotch won’t interfere with the possible endings of this quest. Instead you’ll find out that some of theguards are planning to deal with the rebels using brute force. Go back to a nearby securityterminal and click on a TOP SECRET message (screen). Open your Pip-Boy and read plans of the raid.

Meeting the Overseer: There are two opposing sides of this conflict – the Overseer and the rebels led by Amata. The Overseer can be found in his quarters. You’ve been there before, so you shouldn’t have anymajor problems navigating your way through tight corridors. The easiest solution to the problem is to kill him, so the rebels will automatically seize control over Vault 101. After that you would have to inform Amata that you killed her father (or another Overseer – if herfather is already dead). She wouldn’t be pleased with the outcome and you would also lose alot of karma points. The best possible solution is to convince the Overseer that he should agree to what the rebels are planning to do and to step down from command. There are twoways for you to achieve this goal – you can be very persuasive or you can inform theOverseer about what the raid planned by some of the guards (screen). Go to rebels base to share good news.
Meeting the rebels: In order to get to Amata and other rebels you would have to choose one of a few availablepassageways leading to Vault 101 – lower level. Explore the northern area of the map and eventually you’ll find a corridor leading to their outpost. You’re going to be stopped by Butchalong the way, however you may ignore him entirely if you want to. Amata can be found in the clinic, near your father’s office. Your choices are to convince Amata and her friends to stay inside Vault 101 (screen) or to oppose to Overseer’s wish and leave the vault or sign treaties with nearby settlements. It’s much easier to suggest Amata that she should stay putif you’ve managed to hack into Overseer’s terminal and if you’ve read messages he received from the Enclave.

Ending the quest: It doesn’t really matter which side you’ll decide to help, because either the Overseer or Amata will banish you from Vault 101, even if you manage to find a positive solution. If youagree to help either side you will receive a reward – a modified utility jumpsuit. You may leave Vault 101 and once you’ve stepped through the door leading to Capitol Wastelandyou’ll also complete this quest.
Alternative solution: If you plan on choosing the worst possible ending you can obviously start killing all theinhabitants, but there’s also an easier way to make them leave Vault 101. Proceed to Vault 101 – lower levels, but ignore rebel’s outpost. Instead locate the stairs leading to the lower floor and eventually you’ll find an entrance to the reactor chamber. Explore your surroundings. You must get to a large console (screen). You’ve got two choices here – you can access the system with a key stolen from Stanley or you can become a hacker and break into the computer system. Once you’ve gained access to the main computer activate thewater chip, switch to manual control and inititate cleaning procedure.

The consequence of your doings is that Vault 101 has been put into critical status and all the inhabitants are forced do evacuate it. Obviously you’ll lose a lot of karma points by doing this. You may start moving towards the exit. Soon you’ll encounter the Overseer. You can convince him that someone else has sabotaged the vault (screen) or you can confirm that it was you who damaged the reactor. If you’re straight with him he’ll attack you once theconversation is over. Amata will be waiting for you near the main exit. You can also lie toher, but she won’t attack you even if you tell her the truth. Make sure that you’re the last person to leave Vault 101.

Little Lamplight: Rescue from paradise
Little Lamplight: Rescue from paradise Received from: Mayor MacCready [Little Lamplight - caves] Solution: You may have to complete this assignment in order to continue with Picking up the trail quest. There are many different ways to achieve your goals. You can try to improveyour karma or you can do your best in being a bad person. Positive outcome #1: The most obvious way to rescue the children is to kill all the slavers in Paradise Falls. Sadly it’s not going to be too pleasant, especially if you’re trying to do this early during the courseof the game. You should know that you won’t lose karma over killing slavers. Instead you’ll have to prevent them from surrounding you, because it’s going to be much harder to fightback. Start off by eliminating Grouse and a couple of his buddies. Forty should be amongst the dead, especially since he’s the one carrying a key to prison cells. You can talk to Sammy before moving deeper into Paraidse Falls. Now you’ll have to get to the inner compound. Here’s where some of the most difficult fights will take place. I would recommendhaving someone to assist you, because you may not survive alone. Watch out for theinhabitants of Paradise Falls – they’re well equipped and they’ll want to hunt you down.Also, one of the slavers is carrying a minigun (screen). Kill him before he does too much damage.
Once you’ve eliminated all the slavers and looted their bodies you may proceed towards thepens, because that’s where the children are being held (screen), among other civilians. Use the key obtained from Forty or Eulogy to open the pen. Make sure that you’re talking to each person you try to rescue. Squirrel and Penny should be among the civilians. Tell them to meet you outside the main building complex. You’ll also find Sammy there. Talk to him and after a short conversation all the kids will go back to Little Lamplight (on their own).

Positive outcome #2: This version requires you to gain access to Paradise Falls without actually killing anyone. As a result, you will have to convince Grouse to let you in. Read additional hints or the second chapter of my guide (Paradise Falls description) to find out more about the situation. Onceyou’ve arrived at the main compound don’t talk to Eulogy. Instead proceed directly to the pens where the slaves are being held, including the children you’ll have to rescue. In addition to what you’re doing you should wait until it’s night, because it’ll be much easier tocontinue with your activities. It’s not a requirement if you’re not patient. Talk to Sammy(screen) and offer him help in rescuing him and other children from Little Lamplight. Sammy will tell you that Squirrel has a plan. Wait for the other kid to get here and listen toSquirrel’s plan. Your first objective will be to hack into a computer terminal, located in themain building of the base.

Start off by going to Paradise Falls – Eulogy’s quarters. The terminal mentioned by Squirrelcan be found in a large room, in one of the corners (screen). Make sure that you’re not caught while trying to gain access to the system. Once you’re in the main menu updatenetwork links and that’ll do the trick. You can open a nearby safe if you want to, however you would only find bottle caps inside. Instead focus on obtaining a key to prison cells. You can find the key on a table near a large bed or you can steal one from Forty. Go back to Squirrel and tell him the good news. Now you’ll be asked to get rid of the guards.
It’s important to play this out during the night, because you won’t have to deal with moreguards. The surrounding area should only be patrolled by Forty and obviously you must get rid of him somehow. There are three ways for you to solve this problem. The easiest solutionis for you to convince Forty (screen) that he’s sent to do all the dirty work for Eulogy and his buddies. As a result, Forty will leave his duties and go talk to his boss about a promotion. You can go to Eulogy’s quarters and find a prostitute who goes by the name of Crimson. Talk to her and convince her to find the “lonely” guard (speech challenge) or pay 100 bottle caps for her services. Once Forty has been taken care of, go back to Squirrel.

Squirrel and Sammy are now ready to leave Paradise Falls. Sadly, you’ll find out that a little girl Penny doesn’t want to get out of here without her adult friend Rory. Talk to the girl –she can be found inside the exact same pen where Squirrel and Sammy were being held. You can convince Penny to forget about her new friend (speech or Child at heart perk) or you can agree to help Rory escape. It’s important that you have a key to prison cells in your possession (the one you obtained from Eulogy’s quarters or Forty). Rory is trapped inside a small shelter (screen). Open the shelter and tell him the good news. I wouldn’t recommend escorting him to the exit, because it only takes one hostile guard to alarm the camp. Instead order him to escape on his own, even if it means him getting shot by the slavers (you won’t lose karma over it).
You can go back to Penny. Tell her that you’ve managed to save her friend Rory. Thankfully, even if Rory dies during his escape you will still be allowed to convince Penny that it’s time

to leave. Wait for Penny to escape from Paradise Falls on her own. Use the well-known path to get to the checkpoint with Grouse. Proceed to the meeting point (screen) where you’ll find all three children. Talk to Sammy and he’ll thank you for your help in rescuing him andother kids.
Negative outcome #1: In this case you’ll probably want to end other side quest in the first place – Strictly business. Just a quick reminder – you need to enslave at least one civilian from the list provided to you by Grouse. This will allow you to ask Grouse to let you in. Proceed to the inner area of Paradise Falls and ignore a kid with an exploding head along the way. Youmust talk to Eulogy Jones who is the leader of the slavers and you can find him in his quarters. Ask Eulogy to let you buy a few slaves from Little Lamplight. Eulogy will probably demand 2000 bottle caps for Sammy, Squirrel and Penny, but if you’re good at bartering you can offer him 1200 caps (screen). Once you’ve made the deal head outside andfind the kids. They should automatically go back to Little Lamplight after a short conversation. Don’t forget that you can talk to Eulogy again to acquire more slaves from Little Lamplight once you gain access to the caves. Other endings/additional hints: A less obvious solution is to bribe Grouse to let in you inside Paradise Falls, however this can only be done if you haven’t agreed to round up other slaves (Stricly business quest). Otherwise such a dialog option won’t appear on your list of topics. In addition to that youmust have a high speech skill in order to persaude Grouse, as well as Eulogy to sell you the kids. If you have negative karma you will be allowed to enter Paradise Falls without having to kidnap any civilians nor killing the slavers. All you have to do is to talk to Grouse and out of respect to your dirty deeds he will let you in. Once again, this can only be done if you haven’t decided to finish Strictly business quest which sole surpose was to gain access to thefacility.


Agatha’s house: Agatha’s song
Agatha’s house: Agatha’s song Received from: Agatha [Agatha’s house] Solution: This quest is activated during your first conversation with Agatha. The old lady’sshack can be found to the north-east of Big Town and in order to get there you must cross a large gap using a draw bridge. Listen to Agatha’s story and don’t interrupt her. You’ll findout that the one thing that would make her happy is a violin. If you have a Lady killer perk or high speech skill you can suggest to Agatha that she should offer you some kind of a reward. As a result, you will be given a key to an ammo stash. Thankfully you don’t have to look for the stash, because it’s in this room (screen). You’ll find a lot of supplies inside and I’m sure that you’ll use them to complete the quest.
Finding Vault 92: There are two ways to complete this quest – a quicker way and a longer journey. You cantake the quicker way if you don’t want to waste any time trying to find Vault 92. You can find out where it is by reading my guide, by achieving 20th level of experience and choosingan Explorer perk or after your first visit to the Citadel. In such case you may proceed directly to Vault 92. If you want to be more thorough, you can spend some time trying to findthe location of the vault. The easiest way to do that is to go to Vault-Tec Corporationheadquarters. This building is located in D.C. ruins which means it’s not going to be easy toget to it. I would recommend using subway tunnels. Start from Chevy Chase – north (you’ve probably unlocked this station while trying to get to Galaxy News Radio). Travel east in order to get to Chevy Chase – east. Use the gate to down into the tunnels (Metro junction). Now you must proceed to Vernon Square – north. If you’ve done everything according to the plan, you’ll end up exiting the subway and standing in front of Vault-Tec headquarters(screen). Obviously you’ll kill a lot of creatures along the way, including supermutants and mirelurks.

Proceed to the front door and confirm that you want to travel to Vault-Tec – guest relations. Sadly, you will have to acknowledge tha fact that the entire base is going to be defended byhostile robots. This is definately going to make your progress harder. I would recommend that you equip yourself with a lot of pulse grenades and landmines before proceeding withthe quest. Watch out for Mister Gutsy’s and sentry bots (screen), because they’re capable of inflicting major injuries to your main character. Don’t forget to inspect each room, crate, locker and safe you’ll find along the way. Eventually you must get to a section called Vault-Tec – administration. You can get there through Vault-Tec – corproate offices or you can try jumping towards an upper balcony from a destroyed stairway.
Once you’ve reached Vault-Tec – administration your next goal will be to find three security terminals. Look at my screen if you don’t want to waste any time searching for them on yourown. You should also know that they’re located on different floors so if you don’t see any

stations in front of you travel to a different floor. Each time you must use a computer. Clickon an option which will approve access to the mainframe. In addition to the stations you’ll encounter a masterbrain among other robots. Destroy the masterbrain and press the action key while standing over the wreckage. Doing this will allow you to shut down other machinesin the area and obviously this will make your progress a lot easier. Once you’ve used all three terminals proceed to a door with a large green lamp. Open the door and approach themainframe. Use the main computer to acquire information on Vault’s locations and access codes. You may exit Vault-Tec headquarters.
Exploring Vault 92: Vault 92 can be found near the northern edge of the map. To get there you’ll probably need to make preparations for a long trip. I would recommend approaching your target from thesouth, however this doesn’t necessarily protect you against encounters with extremelydangerous deathclaws. Avoid getting too close to these monsters, because they’re deadly in an open combat. The main entrance is located among the rocks, so you’ll have to look arounda little to find it. Approach the door and confirm that you want to travel to Vault 92. There are some mediccal supplies near the entrance. Take them and begin your exploration of thecrypt. Eventually you’ll have to get to the central area of the vault (screen). Watch out fortraps (including landmines). Be on a look out for mirelurks (including the most dangerous kind – mirelork hunters) and bloatflies (watch out for their stingray). You can spend sometime going to crew quarters or Overseer’s office, however this is optional. Your area of interest should be Vault 92 – sound testing.

I guess you won’t be surprised to hear that you’ll encounter even more monsters in the sound testing area. Among known creatures you’ll also come across mirelurk kings. It’s probably going to be one of your first encounters with these monsters, so take your time to know them better and exploit their weaknesses. I would also recommend exploring this areawith an ally, because it may be difficult to survive alone. Look at the screen – that’s where you’ll find the violin. In order to get to the studio you must use a nearby computer. Gainaccess (you won’t have to prove your hacking skills) and proceed to your target to collect aSoil Stradivarius.

Ending the quest: You may leave Vault 92. Obviously you should choose the same path you’ve used before, especially since you won’t encounter any new hostile units along the way. Fast travel to Agatha’s house after exiting Vault 92. Enter the shack and inform the old lady that you were able to acquire a violin for her. I’m sure that you’ll be surprised with Agatha’s reward. In exchange for the violin she will play songs for you and other wastelanders. Check your radio and you’ll notice that Agatha’s station has been added to the list (screen). That’s not all. You can talk to Agatha again once the quest has been officially ended. If you’re persuasive enough you’ll find out that she’ll appreciate if you go and look for a sheet music book. Agatha will say that the most probable location of one of these objects is the Arlington Library (child literature section – not the media archive), but you can also acquire a sheet music book from several other locations, including Roosevelt’s Academy, National Archives, Statesman Hotel (roof), Vault 92 (that’s where you’ve found the violin) and Springvale School. It doesn’t really matter where you’ll decide to look. Go back with thesheet to Agatha. You can agree to handing it over for free, but I would recommend taking areward from her. Agatha will give you a unique weapon. It’s going to be a Magnum pistolcalled Blackhawk.

Girdershade: The Nuka-Cola Challenge
Girdershade: The Nuka-Cola Challenge Received from: Sierra Petrovita [Girdershade – Sieera Petrovita’s house] Solution: I would recommend that you start this objective soon after you’ve left Vault 101and visited Megaton, because your job will be to collect certain items and you’ll want to “unload” them from time to time. In order to activate this quest you must visit a very smallvillage which goes by the name of Girdershade. The village is located to the south-west of Smith Casey’s garage. Locate Sierra Petrovita’s house once you’ve arrived at your destination. Talk to Sierra. You can agree to take a full Nuka-Cola tour (you would berewarded with an ice cold Nuka-Cola) or if your’re skilled enough you can convince Sierra to focus on explaining your assignment (screen). Sierra will ask you to deliver at least 30 bottles of Quantum Nuka-Cola, so she’ll be able to fill her fridge. Ask her about the reward and ifyou’re convincing enough you’ll find out that in exchange she can reward with a schematic for a nuka-grenade.
Exit the building once you’ve agreed to help Sierra in finding the bottles. You are going to be automatically stopped by Ronald Laren, who will make you a counteroffer. Ronald will ask you to bring him all the bottles of Quantum Nuka-Cola you find, instead of giving them to Sierra. His initiial offer is pathetic, because he offers the same amount of caps as Sierra, but if you have a high speech skill you can persuade him to double that. As for the bottles, theyare scattered throughout the entire wasteland. Usually each primary locations holds at least1-2 bottles and they can be found in strange places. Thankfully, they’re easy to spot, becausethey’re glowing (screen). You can speed up this process if you decide to take a short trip toNuka-Cola facility which can be found in the southern section of the big map. You would have to deal with a lot of robots and mirelurks inside the facility. It’s also a good idea to beon a look out for Nuka-Cola trucks, because they usually store more than one bottle. Youshouldn’t have any problems finding 30 bottles, because there are over 90 of them total, so you only have to find 1/3.

Once you’ve collected enough bottles go back to Girdershade. It’s important that you decide at the beginning to whom you’d like to give the bottles. If you give enough bottles to Sierrayou will not only receive bottle caps, but she’ll also give you a schematic for a nuka-grenade. If you decided to give bottles to Laren he will go to Sierra and lie that he foundthem all. You should also know that you can continue this process even when this quest is over, but I’m sure that you’ll find better ways to earn some serious money.

Oasis: Oasis
Oasis: Oasis Received from: Tree Father Birch [Oasis] Solution: This quest is going to be added to your list of active assignments during yourinitial conversation with Tree Father Birch. Oasis, as the name would suggest, is located in a very secluded area, near the northern edge of the map. Be careful, because you’ll probably encounter a lot of raiders while trying to get there. There are also powerful monsters in the area. Approach your destination from the west and choose a small passageway between therocks (screen). You’ll soon know that you’re heading in the right direction, because you’ll see plants and trees in front of you. Talk to Tree Father Birch and he’ll let you in. Use the wooden gate to enter Oasis.
Audience with Harold: Once you’ve reached this new destination you should take your time to plan your next move.Holster your weapon and order your ally to remain near the gate, so you won’t have any problems with him (or her) trying to follow you. Tree Father Birch is sitting on his throne.Talk to him and agree to take part in a ceremony. Once the conversation has ended moveback and proceed to a small pedestal (screen). Wait for other villagers to gather around yourposition. You can now drink from the basin by choosing a correct action from the list (pressthe action key while facing the pedestal). You’ll lose consciousness and you’ll be transportedto Oasis – grove.

You don’t have to explore the area, because you wouldn’t find anything of interest. Insteadapproach a large tree and try... talking to it. You’ll soon find out that the tree is actually ourold friend Harold. Take your time to listen to his problems and he’ll tell you that he can’tstand staying in one spot for decades. Harold will ask you to end his suffering. You’ll find out that there are two ways to kill him, but he wouldn’t want to die in flames. Instead, he’ll ask you to destroy his heart. Agree if you don’t plan on doing that, because you’ll make your finaldecision after getting to the heart. Negative solution: If you plan on lowering your karma significantly, you can get rid of Harold by making his worst nightmares come true. In order to do that you must set him on fire (screen). You cando this by using a flamethrower, a fatman or other weapons of this kind. Sadly, not onlyyou won’t receive any rewards for killing Harold, but you’ll also make all the villagers hostile towards your character. If you plan on getting to a neutral or a positive ending, leave thisarea once you’ve talked to Harold. Go back to the main section of the Oasis.

Finding the heart: Once you’ve returned to the Oasis you should talk to Tree Father Birch. You’ll find out that he wants to stop the tree from growing in order to save the Oasis from being noticed by other wastelanders. Now find Leaf Mother Laurel. She wants to increase the growth of Harold in order to share this wonder with the rest of the world. Either way, you will gain possession oftwo potions. Birch’s sap may be used to stop Harold’s growth and Laurel’s liniment will increase his growth. Like I’ve already said, you can make up your mind after reaching yourcurrent destination. For now focus on finding Branchtender Cypress and ask him to give you a key to the caves. You may finally go to a passageway (scren) leading to Oasis – caves.
The caves are being occupied by radroaches and mirelurks (all kinds – standard, huntersand rare kings). Use some of the most powerful weapons to prevent mirelurks from getting too close. Eventually you’ll get to a small pond (screen). Jump into the water and use anunderwater tunnel to get to a new area of the caves. Don’t forget to use RadAway after leaving the water, because you’ll probably receive large doses of radiation. Find a small doorleading to Flooded chambers. From now on you’ll encounter even more mirelurk hunters. Keep pushing forward until you’ve reached the heart of the big tree.

Other endings: Approach the heart and press the action key. You’ll be presented with a list of three actions. If you decide to destroy Harold’s heart you will also destroy the tree he was living in. I’m sure that you’ll be interested to hear that choosing this outcome is awarded with a Barskinperk. Go back to the grove and talk to Tree Father Birch. You can use Birch’s sap to stop Harold’s growth. Obviously this will make Tree Father Birch very happy. You can find him near Harold, in the grove. You can to talk to him and to Harold. The rewards are druid’s outfit and a rocket launcher. The best possible solution is to use Laurel’s liniment, increasing Harold’s growth. Once again, you must go back to the grove. Talk to Harold and to Leaf Mother Laurel. The old lady will inform you that certain inhabitants of the Oasis have prepared gifts for you. The rewards are villager’s hood and Brotherhood outcast power armor. You should also know that before leaving the village it would be wise to talk to a girl who goes by the name of Sapling Yew. For your help you’ll receive a bear charm (speech increased by 10 points –worn automatically). Either way, after choosing an action from the list you must exit the caves. You could go backthe same way you’ve used before, but there’s a quicker path. Find an unexplored passagewaynear the heart. It leads to the Damp cave. Keep heading forward until you’ve reached a new pond (screen). Kill other mirelurks from a safe distance before jumping down. Head to thewater and swim through an underwater tunnel. Eventually you’ll get to a door leading toOasis – grove.


Capitol Wasteland Maps of the world
Main maps


Detailed map – sector 1
Map legend: 1 – Raven Rock 2 – MDPL-05 Power Station 3 – SatCom Array NW-07c 4 – Abandoned Car Fort 5 – SatCom Array NW-05a 6 – Broadcast Tower KB5 7 – Deatchlaw Sanctuary 8 – Mount Mabel Campground 9 – Ford Constantine 10 – SatCom Array NN-03d 11 – Dickerson Tabernacle Chapel 12 – Mason Dixon Salvage 13 – Drowned Devil’s Crossing 14 – WKML Broadcast Station 15 – The Silver Lining Drive-In 16 – Faded Pomp Estates 17 – Roosevelt Academy
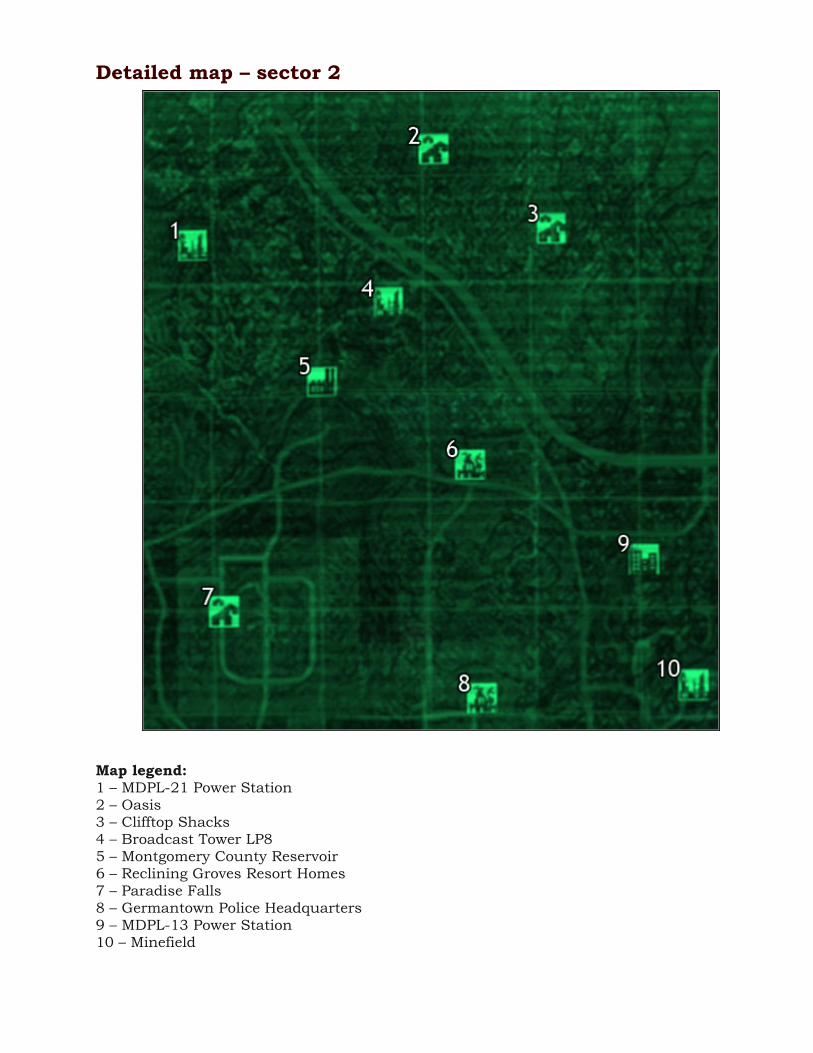
Detailed map – sector 2
Map legend: 1 – MDPL-21 Power Station 2 – Oasis 3 – Clifftop Shacks 4 – Broadcast Tower LP8 5 – Montgomery County Reservoir 6 – Reclining Groves Resort Homes 7 – Paradise Falls 8 – Germantown Police Headquarters 9 – MDPL-13 Power Station 10 – Minefield

Detailed map – sector 3
Map legend: 1 – Vault 92 2 – Old Olney 3 – The Republic of Dave 4 – Chaste Acres Dairy Farm 5 – MDPL-16 Power Station 6 – Greener Pastures Disposal Site 7 – Relay Tower KX-B8-11 8 – Grisly Diner 9 – Temple Of The Union

Detailed map – sector 4
Map legend: 1 – Shalebridge 2 – MDPL Mass Relay Station 3 – Five Axles Rest Stop 4 – Broadcast Tower KT8 5 – Rockbreaker’s Last Gas 6 – Vault 87 7 – Everglow National Campground 8 – Little Lamplight 9 – Jalbert Brothers Waste Disposal 10 – VAPL-58 Power Station 11 – Fort Bannister

Detailed map – sector 5
Map legend: 1 – Arefu 2 – Northwest Seneca Station 3 – Hallowed Moors Cemetery 4 – Meresti Trainyard 5 – Agatha’s House 6 – Hamilton’s Hideaway 7 – Moonbeam Outdoor Cinema 8 – Fordham Flash Memorial Field 9 – Big Town 10 – Kaelyn’s Bed & Breakfast 11 – Vault 106 12 – Jury Street Metro Station 13 – Springvale School 14 – Springvale 15 – Vault 101

Detailed map – sector 6
Map legend: 1 – AntAgonizer’s Lair 2 – Canterbury Commons 3 – Robot Repair Center 4 – Scrapyard 5 – Wheaton Armory 6 – Vault 108 7 – Corveg Factory 8 – Bethesda Ruins 9 – Chryslus Building 10 – Rock Creek Caverns

Detailed map – sector 7
Map legend: 1 – Yao Guai Tunnels 2 – Charnel House 3 – Smith Casey’s Garage 4 – Evergreen Mills 5 – Girdershade 6 – Jocko’s Pop & Gas Stop 7 – VAPL-66 Power Station 8 – VAPL-84 Power Station 9 – F. Scott Key Trail & Campground 10 – Dunwich Building 11 – RobCo Facility 12 – Warrington Trainyard 13 – Tenpenny Tower 14 – Warrington Station

Detailed map – sector 8
Map legend: 1 – Megaton 2 – Fort Independence 3 – Fairfax Ruins 4 – Red Racer Factory 5 – Cliffside Cavern 6 – The Overlook Drive-In 7 – Andale 8 – Nuka-Cola Plant

Detailed map – sector 9
Map legend: 1 – Super-Duper Mart 2 – Wilhelm’s Wharf 3 – Sewer Waystation 4 – Flooded Metro 5 – Arlington Cemetery North 6 – Grayditch 7 – Mama Dolce’s 8 – Arlington Cemetery South 9 – Marigold Station
10 – Falls Church Metro 11 – Falls Church North 12 – Falls Church East 13 – Citadel 14 – Hubris Comics 15 – Mason District South 16 – Alexandria Arms 17 – Flooded Metro 18 – Arlington Library

Detailed map – sector 10
Oznaczenia na mapie: 1 – Farragut West Metro Station 2 – Chevy Chase North 3 – Friendship Heights 4 – Chevy Chase East 5 – National Guard Depot 6 – Vernon Square North 7 – Vault-Tec Headquarters 8 – Takoma Industrial Factory 9 – Takoma Park 10 – Vernon Square East 11 – Galaxy News Radio 12 – Dupont North-East 13 – Dupont West 14 – Dupont Station

15 – Georgetown West 16 – Dupont East 17 – Georgetown North 18 – Vernon Square Station 19 – Statesman Hotel 20 – Our Lady Of Hope Hospital 21 – Anchorage Memorial 22 – Dry Sewer 23 – Dukov’s Place 24 – Georgetown South 25 – The Mall North-West 26 – Lincoln Memorial 27 – The Mall South-West 28 – Georgetown East 29 – Museum Of History 30 – The Washington Monument 31 – White House 32 – Pennsylvania Avenue North-West 33 – The Mall North-East 34 – The National Archives 35 – Museum Of Technology 36 – Capitol Building 37 – Pennsylvania Avenue South 38 – Pennsylvania Avenue North 39 – Metro Central 40 – Pennsylvania Avenue East 41 – Seward Square North-West 42 – Seward Square North 43 – Reilly’s Rangers Compound 44 – Seward Square South-East 45 – Irradiated Metro 46 – L’enfant Plaza 47 – L’enfant South 48 – Anacostia Crossing Station 49 – Rivet City 50 – Jefferson Memorial

Alphabetical list of primary locations LOCATION NAME SECTOR
Abandoned Car Fort 1
Agatha’s House 5
Alexandria Arms 9
Anacostia Crossing Station 10
Anchorage Memorial 10
Andale 8
AntAgonizer’s Lair 6
Arefu 5
Arlington Cemetery North 9
Arlington Cemetery South 9
Arlington Library 9
Bethesda Ruins 6
Big Town 5
Broadcast Tower KB5 1
Broadcast Tower KT8 4
Broadcast Tower LP8 2
Canterbury Commons 6
Capitol Building 10
Charnel House 7
Chaste Acres Dairy Farm 3
Chevy Chase East 10
Chevy Chase North 10
Chryslus Building 6
Citadel 9
Cliffside Cavern 8
Clifftop Shacks 2
Corveg Factory 6
Deatchlaw Sanctuary 1
Dickerson Tabernacle Chapel 1
Drowned Devil’s Crossing 1
Dry Sewer 10
Dukov’s Place 10
Dunwich Building 7

Dupont East 10
Dupont North-East 10
Dupont Station 10
Dupont West 10
Everglow National Campground 4
Evergreen Mills 7
F. Scott Key Trail & Campground 7
Faded Pomp Estates 1
Fairfax Ruins 8
Falls Church East 9
Falls Church Metro 9
Falls Church North 9
Farragut West Metro Station 10
Five Axles Rest Stop 4
Flooded Metro (x2) 9
Ford Constantine 1
Fordham Flash Memorial Field 5
Fort Bannister 4
Fort Independence 8
Friendship Heights 10
Galaxy News Radio 10
Georgetown East 10
Georgetown North 10
Georgetown South 10
Georgetown West 10
Germantown Police Headquarters 2
Girdershade 7
Grayditch 9
Greener Pastures Disposal Site 3
Grisly Diner 3
Hallowed Moors Cemetery 5
Hamilton’s Hideaway 5
Hubris Comics 9
Irradiated Metro 10
Jalbert Brothers Waste Disposal 4

Jefferson Memorial 10
Jocko’s Pop & Gas Stop 7
Jury Street Metro Station 5
Kaelyn’s Bed & Breakfast 5
L’enfant Plaza 10
L’enfant South 10
Lincoln Memorial 10
Little Lamplight 4
Mama Dolce’s 9
Marigold Station 9
Mason District South 9
Mason Dixon Salvage 1
MDPL Mass Relay Station 4
MDPL-05 Power Station 1
MDPL-13 Power Station 2
MDPL-16 Power Station 3
MDPL-21 Power Station 2
Megaton 8
Meresti Trainyard 5
Metro Central 10
Minefield 2
Montgomery County Reservoir 2
Moonbeam Outdoor Cinema 5
Mount Mabel Campground 1
Museum Of History 10
Museum Of Technology 10
National Guard Depot 10
Northwest Seneca Station 5
Nuka-Cola Plant 8
Oasis 2
Old Olney 3
Our Lady Of Hope Hospital 10
Paradise Falls 2
Pennsylvania Avenue East 10
Pennsylvania Avenue North 10

Pennsylvania Avenue North-West 10
Pennsylvania Avenue South 10
Raven Rock 1
Reclining Groves Resort Homes 2
Red Racer Factory 8
Reilly’s Rangers Compound 10
Relay Tower KX-B8-11 3
Rivet City 10
RobCo Facility 7
Robot Repair Center 6
Rock Creek Caverns 6
Rockbreaker’s Last Gas 4
Roosevelt Academy 1
SatCom Array NN-03d 1
SatCom Array NW-05a 1
SatCom Array NW-07c 1
Scrapyard 6
Seward Square North 10
Seward Square North-West 10
Seward Square South-East 10
Sewer Waystation 9
Shalebridge 4
Smith Casey’s Garage 7
Springvale 5
Springvale School 5
Statesman Hotel 10
Super-Duper Mart 9
Takoma Industrial Factory 10
Takoma Park 10
Temple Of The Union 3
Tenpenny Tower 7
The Mall North-East 10
The Mall North-West 10
The Mall South-West 10
The National Archives 10

The Overlook Drive-In 8
The Republic of Dave 3
The Silver Lining Drive-In 1
The Washington Monument 10
VAPL-58 Power Station 4
VAPL-66 Power Station 7
VAPL-84 Power Station 7
Vault 101 5
Vault 106 5
Vault 108 6
Vault 87 4
Vault 92 3
Vault-Tec Headquarters 10
Vernon Square East 10
Vernon Square North 10
Vernon Square Station 10
Warrington Station 7
Warrington Trainyard 7
Wheaton Armory 6
White House 10
Wilhelm’s Wharf 9
WKML Broadcast Station 1
Yao Guai Tunnels 7

Other SUBWAY TUNNELS:
Take notice that some of these subway stations might not be accessible. You should alsoknow that most of the tunnels are being occupied by feral ghouls, raiders, molerats andsupermutants.

MAP OF RAVEN ROCK:
Raven Rock is divided into three separate sectors and you can use passageways marked asyellow lines to travel between them.

Detailed maps
Big Town
Map legend: 1 – draw bridge leading to the main area of the city; 2 – doors to Town hall; 3 –door to The Clubhouse; 4 – door to Common house; 5 – doors to Red’s clinic

The Underworld
Map legend: 1 – gate to Museum of History – entrance; 2 – doors to Ninth Circle; 3 – doors to Chop Shop; 4 – doors to Carol’s place; 5 – Underworld Outfiiters; 6 - toilets

Megaton
Map legend: 1 – main gate to Capitol Wasteland; 2 – Lucas Simms’s house; 3 – water processing plant; 4 – Craterside Supply; 5 – restrooms; 6 – clinic; 7 – Children of Atom; 8 –armory; 9 – Moriarty’s Saloon; 10 – Billy Creel’s house; 11 – common house; 12 – Nathan andManya’s house; 13 – Lucy West’s house; 14 – Mr Burke’s house; 15 – Jericho’s house; 16 –The Brass Lantern; 17 – your house (if you resolve Megaton’s problem by disarming the bomb)

Rivet City RIVET CITY MARKET
Map legend: 1 – doors to Capitol Wasteland; 2 – door to Upper/Middle deck; 3 – Flak ‘N Shrapnel’s; 4 – Rivet City Supply; 5 – Gary’s Galley; 6 – A Quick Fix; 7 – Potomac Attire

UPPER DECK
Map legend: 1 – door to Rivet City market; 2 – door to staircase; 3 – door to Science lab; 4 –Weatherly hotel; 5 – Rivet City clinic

MIDDLE DECK
Map legend: 1 – door to Rivet City market; 2 – door to staircase; 3 – doors to Science lab; 4 –common room; 5 – museum (Capitol Preservation Society); 6 – Saint Monica’s church

Tenpenny Tower LOBBY
Map legend: 1 – main gate to Capitol Wasteland; 2 – entrance to the subway; 3 – elevator to Penthouse suites; 4 – doors to Tenpenny suites; 5 – Cafe Beau Monde; 6 - Boutique Le Chic; 7 – clinic – Welness Center; 8 – Federalist Lounge; 9 – New Urban Apparel; 10 - restrooms

PENTHOUSE SUITES
Map legend: 1 – elevator to the Lobby; 2 – your apartment (only if you decide to followBurke’s orders and destroy Megaton); 3 – Allistair Tenpenny’s apartment; 4 – door to Tenpenny Tower (top floor)
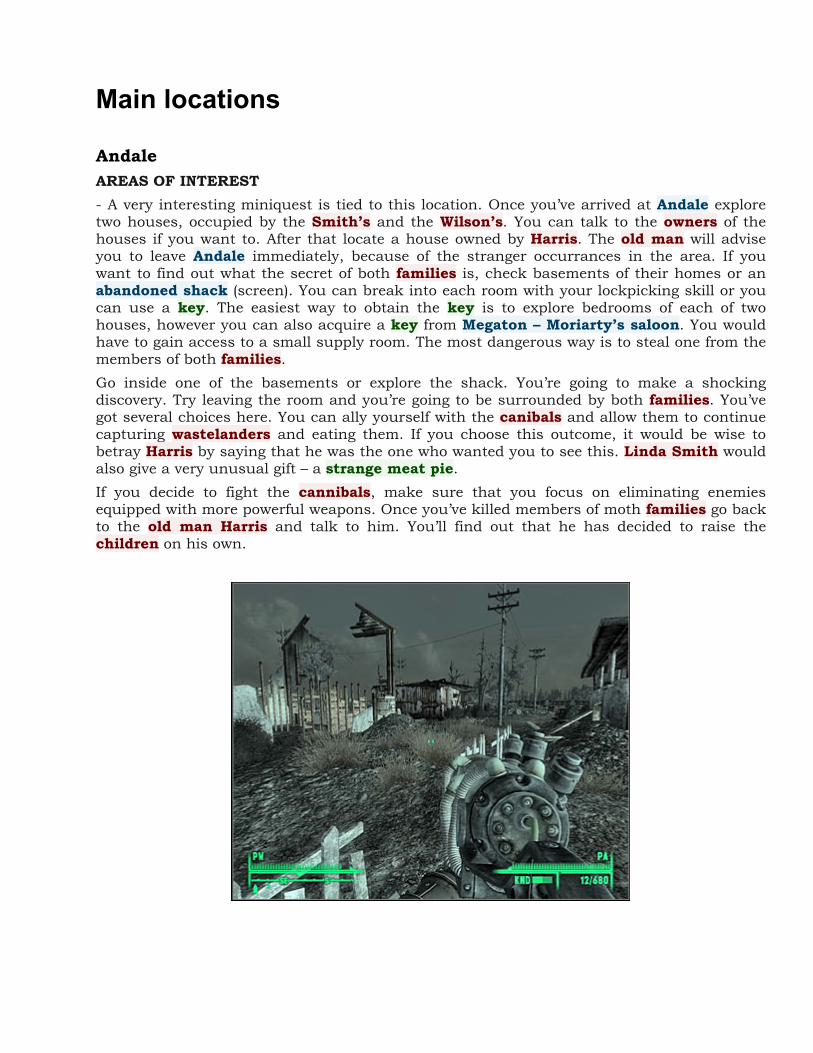
Main locations
Andale AREAS OF INTEREST - A very interesting miniquest is tied to this location. Once you’ve arrived at Andale explore two houses, occupied by the Smith’s and the Wilson’s. You can talk to the owners of the houses if you want to. After that locate a house owned by Harris. The old man will advise you to leave Andale immediately, because of the stranger occurrances in the area. If youwant to find out what the secret of both families is, check basements of their homes or an abandoned shack (screen). You can break into each room with your lockpicking skill or you can use a key. The easiest way to obtain the key is to explore bedrooms of each of two houses, however you can also acquire a key from Megaton – Moriarty’s saloon. You would have to gain access to a small supply room. The most dangerous way is to steal one from the members of both families. Go inside one of the basements or explore the shack. You’re going to make a shocking discovery. Try leaving the room and you’re going to be surrounded by both families. You’ve got several choices here. You can ally yourself with the canibals and allow them to continue capturing wastelanders and eating them. If you choose this outcome, it would be wise tobetray Harris by saying that he was the one who wanted you to see this. Linda Smith would also give a very unusual gift – a strange meat pie. If you decide to fight the cannibals, make sure that you focus on eliminating enemiesequipped with more powerful weapons. Once you’ve killed members of moth families go back to the old man Harris and talk to him. You’ll find out that he has decided to raise thechildren on his own.
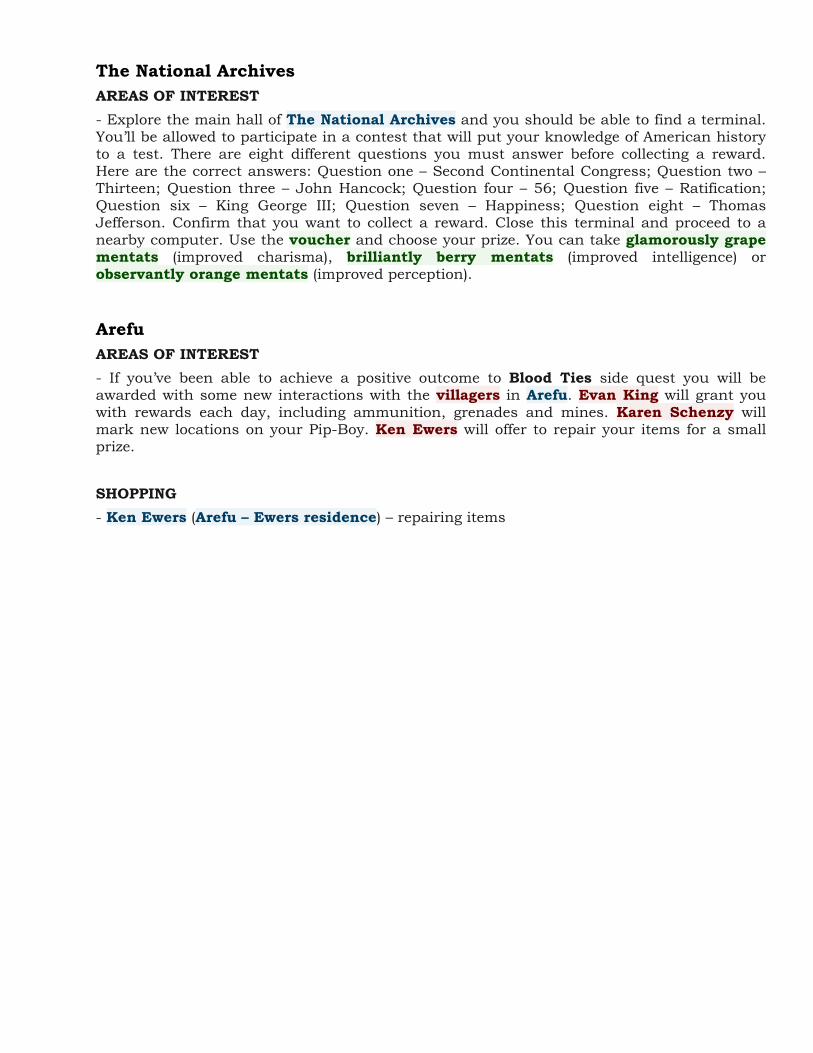
The National Archives AREAS OF INTEREST - Explore the main hall of The National Archives and you should be able to find a terminal. You’ll be allowed to participate in a contest that will put your knowledge of American historyto a test. There are eight different questions you must answer before collecting a reward.Here are the correct answers: Question one – Second Continental Congress; Question two –Thirteen; Question three – John Hancock; Question four – 56; Question five – Ratification; Question six – King George III; Question seven – Happiness; Question eight – Thomas Jefferson. Confirm that you want to collect a reward. Close this terminal and proceed to anearby computer. Use the voucher and choose your prize. You can take glamorously grape mentats (improved charisma), brilliantly berry mentats (improved intelligence) or observantly orange mentats (improved perception).
Arefu AREAS OF INTEREST - If you’ve been able to achieve a positive outcome to Blood Ties side quest you will beawarded with some new interactions with the villagers in Arefu. Evan King will grant you with rewards each day, including ammunition, grenades and mines. Karen Schenzy will mark new locations on your Pip-Boy. Ken Ewers will offer to repair your items for a small prize. SHOPPING - Ken Ewers (Arefu – Ewers residence) – repairing items

Capitol building AREAS OF INTEREST - I’m sure you’ll have lots of problems trying to get to the Capitol building. You’ll probably have to go through a large battlefield populated by the strongest variations of supermutants. I wouldn’t recommend going there unless you’re wearing a good armor and using mostpowerful weapons. You should also have an ally at your side. The area around Capitol building is defended by supermutants, Enclave units and even Talon mercenaries. There are two main entrances to the building, however I would recommend gaining access to thewestern wing. There are even more enemy units waiting for you inside. Keep pushingforward until you’ve reached a rotunda. Notice a large behemoth (screen). In order to slaythis beast you should use a fatman. Fire at least two mini-nukes at the target. If you don’t have a fatman, inspect the body of a killed mercenary. Obviously you should examine behemoth for additional supplies. You’ll be rewarded with random items.
Canterbury Commons AREAS OF INTEREST - During your first visit to Canterbury Commons you’ll witness a large battle taking place between two armies. They are being controlled by The Mechanist and the AntAgonizer. I wouldn’t recommend attacking the creatures nor the superheroes. Allow them to leave thecity. You’ll deal with both sides during Superhuman Gambit quest. SHOPPING - Uncle Roe (Canterburry Commons) – repairing items - Joe Porter (Canterburry Commons) – selling food

Hallowed Moors cemetery AREAS OF INTEREST - You should consider inspecting this area while completing a side quest connected to Big Town. There are a lot of supermutants and centaurs outside the church and a small group is also present in the chapel. Make sure that you’ve been able to slay all the beasts. Find an imprisoned civilian (screen) and rescue him (or her). You can do this by approaching yourtarget, pressing the action key and choosing to untie the civilian. You won’t receive any items for this, but your karma will be slightly increased. I would also recommend that youact in an identical manner each time you come across a slave camp ruled by supermutantsor slavers. Make sure to explore the surrounding area for guns and ammunition!
Citadel AREAS OF INTEREST - I’d strongly recommend that you talk to Elder Lyons during your first stay in the Citadel. Ask him to allow you to participate in a training. Lyons will send you to talk to Gunny who can be found in the courtyard. Talk to Gunny and you’ll receive a Power armor training perk. From now on you may use power armors used by Brotherhood of Steel, Enclave and other fractions. - Find Durga in the armory (science laboratory). You’ll find out that you won’t be allowed to trade with Brotherhood of Steel unless you’ve received clearance from Elder Lyons. Talk to the old man and ask him to grant you access to the supplies. - Scribe Rotchild can tell you something about a large robot called Liberty Prime which is being built by the brotherhood. You can also read data from a nearby terminal. You won’t have to repair the robot and you should also know that it’ll be used at the end of the game. - Scribe Jameson will make you a proposal, concerning finding items connected to thebrotherhood. You will be given a chance to collect holotags and holotapes tied to Broherhood soldiers. For each finding you’ll receive bottle caps or useful supplies. - If you go to Citadel – B ring you should be able to come across a malfunctioning robot, called Sawbones. If you allow the machine to diagnoze your body you will receive massiveinjuries by mistake. You can resolve this problem by sharing your knowledge in science. Ifyou succeed, not only you’ll teach Sawbones to operate patients properly, but you’ll also be

given a free healing. - Try talking to Knight Captain Gallows. He won’t answer and you should also avoid saying anything. Choose not to say a word a few times and he’ll end your “conversation” by informing you that apparently you understand each other. You may now talk to one of otherpaladins and you’ll be informed that there’s a bet on finding out his real name. Go back to Gallows and try to extract that information from him. He should tell you that his name isIrving, as long as you’re persuasive enough. Go back to paladin Glade with this information and he’ll reward you with 1000 bottle caps. TEAM - Cross – You should encounter Star Paladin Cross during your first visit to the Citadel. Cross will make a proposal to travel as a team, but only if you’re playing as a good character. Otherwise she’ll refuse to cooperate. I would recommend accepting her offer. SHOPPING - Scribe Peabody (Cytadela) – repairing items - Scribe Rotchild (Cytadela) – repairing items - Scribe Bowditch (Cytadela) – repairing items - Knight Captain Durga (Cytadela – laboratorium) – selling and repairing items OTHER SERVICES - Sawbones (Cytadela – okrêg B) – healing (only if you repair him)
Big Town AREAS OF INTEREST - In order to receive healing from Red you must first save her, because she’s been kidnapped by the supermutants. Read the description for Big trouble in Big Town side quest on how to do it. Talk to Pappy once you’ve completed this mission and he’ll offer you better prices forhis goods and services (repairing items). - Make sure that you visit Red’s clinic in Big Town. Look around the clinic and you’ll notice a dying boy (Timebomb) on the table. You can end his suffering, but a better solution is totry and heal him. Obviously your medicine skill must be high in order for the operation onTimebomb to end with a success. The boy will thank you for helping him, but Red’s reward is something you should be looking forward to. She will heal your injuries for free (!!) fromnow. Sadly this doesn’t apply to fighting off the radiation. - Once you’ve officially completed Big trouble in Big Town quest you can ignore helping the villagers in dealing with a supermutant counterattack. If you return here later on during thecourse of the game they’ll probably be dead and you may also encounter a man stealing away their collectibles. SHOPPING - Pappy (Big Town) – selling and repairing items OTHER SERVICES - Czerwona (Big Town) – healing, lowering radiation, selling medical supplies

Evergreen Mills AREAS OF INTEREST - Inspect the central area of Evergreen Mills and you’ll notice a large pen. You’ll also find out that a huge supermutant behemoth is being held inside the pen. I would recommend thatyou free the beast, because it’ll kill a lot of slavers for you. Obviously you can also open the pen to kill the behemoth. Use a minigun, a rocket launcher or a fatman (preferred choice) to eliminate it. Just make sure that it doesn’t get too close and you should be fine. - If you decide to go to Evergreen Mills – Bazaar you’ll meet a friendly trader who goes by the name of Smiling Jack. Obviously you can trade with him, but I would recommend killing him, especially since you won’t lose any karma over it. Instead you’ll gain possession of hisitems (including the ones in his locker). - Slaves are being held outside the factory and you can spend some time trying to free them.In order to do that you must gain possession of a key to slaver pens in Evergreen Mills. Don’t forget to open both cages. Freeing the slaves will increase your karma. SHOPPING - Smiling Jack (Evergreen Mills – Bazaar) – selling and repairing items
Nuka-Cola plant AREAS OF INTEREST - I would recommend that you visit the Nuka-Cola plant soon after you’ve decided to take on Nuka-Cola challenge. There aren’t too many Nuka-Cola Quantum bottles inside the facility,but instead you may find out where to look for the shipments. Your objective is to get to thenorthern part of Nuka-Cola plant – factory floor section. You should know that the factory is being protected by a lot of robots, including semi-powerful protectrons. You must find a robot called Milo. The robot is a working as a shipping foreman. During the initial conversation you can pretend to be the owner of the factory (screen) and order him to giveyou shipping numbers. Milo will then give you a password to a nearby terminal. Enter thenext room and access the terminal. Find out where the bottles of Quantum Nuka-Cola were sent. You should receive info on three locations.

- Once you’ve acquired the information on the shipments from the computer you can beginyour search of the crates or you can continue exploring the factory. I would recommend thatyou eliminate Milo, because you won’t receive bad karma and instead you’ll be allowed tocollect two items – a research department safe key and an access code to the terminal in the store. There’s a passageway nearby and it leads to Nuka-Cola plant – offices. Go there now, but be careful, because you’ll be dealing with a very powerful version of mirelurks. Use your strongest guns to take them down and don’t travel alone. Proceed to a lower floor andthen go to the room located in the south-west (screen). Find the body of Winger Mercier. Examine it, take the note and read it. You’ll find out about the formula for Nuka-Cola Clearand about planned meeting near Red Racer Factory.
Make sure that the key is in your possession and go back to Nuka-Cola plant – factory floor. Head back to the main entrance to the factory and explore one of the western rooms.

It’s going to be a rather small laboratory (Research Department). Locate a safe on the wall(screen) and use your newly acquired key to open it. Take RadAway and the formula for Nuka-Cola Clear. You may exit the factory. Proceed to the Red Racer factory which is located to the north of Nuka-Cola plant. Once you’ve arrived you’re going to be stopped byGoalie Ledoux. You can inform members of this organization about Mercier’s death or you can do business with them right away. In exchange for the formula members of this gangwill award you with 250 bottle caps, but you can convince them (speech) to pay you 400caps.
RobCo facility TEAM - Tinker Joe can be found outside RobCo facility. I would recommend talking to him, becausehe can sell a robot, called Sergeant RL-3. This is only available if you’re playing as a neutral character. Sergeant can bea nice addition to the team, but sadly you will have to pay for him.Tinker Joe will demand 1000 bottle caps. SHOPPING - Tinker Joe (RobCo facility) – selling items

Falls Church metro AREAS OF INTEREST - During your first visit to Falls Church metro station you’ll probably encounter abrohterhood paladin who goes by the name of Hoss. He will ask you to rescue a rookie calledPek. In order to do that you must go to an Office building which can be found to the south of the subway exit. Look at my screen if you’re having some difficulties finding the building. Obviously you shouldn’t be surprised to encounter supermutants inside the building. Pek’sbody is inside one of the northern rooms. You can brake into this room or you can look for a key. Go back to Hoss. He will thank you for delivering the news and he’ll reward you with 100 caps.
Fort Bannister AREAS OF INTEREST - Fort Bannister is the main headquarters of Talon Corporation. This means there are a lot of mercenaries in the area. Furthermore, some of them are using rocket launchers to hunt you down. You must eliminate them before they do any real damage. There are also defense turrets and guard dogs, but they don’t pose a serious threat. Sadly, the fort itself doesn’tcontain any unique items, similiar to T-51 armor from Fort Constantine. Nevertheless, you will come across a brand new fatman if you decide to explore the central bunker. - Instead of wasting your time inside the fort I would recommend moving west, because you’ll find a large crater in this area (screen). Obviously you should explore the crater. There’s asmall radiation in the area (1-2 rads per second), but it’s worth your efforts, because you’ll find an alien blaster and some fusion cells. An identical weapon can also found in Greener Pastures so make sure to explore both in order to stack up on ammunition.

Fort Constantine AREAS OF INTEREST - I’m sure that your main motivation to visit this place will be to acquire one of Vault-Tec bobbleheads. This isn’t the only item you should be interested in. Fort Constantine is tied directly to a subquest called You gotta shoot ‘em in the head, so before you decide toexplore the inside of the fort make sure that you have three special keys – from Dave, Ted Strayer and Dukov. Don’t forget that you can acquire the keys from Crowley if you gave them to him earlier. Once you’ve reached Fort Constantine you should ignore a large road leading to the top ofthe hill, because you would have to fight a lot of robots along the way. Instead you choose locate a small hut which will lead you to Fort Constantine – CQ quarters. Enter the building and use the stairs to get down to the basement. Examine the contents of the safe.Collect a figurine and launch codes. Now you may proceed towards the first locked door (screen). Use one of the keys to open the door and travel to Launch control bunker.

Keep pushing forward and eliminate anyone who stands in your way. You’ll be dealing with all sorts of robots, including robobrains and sentry bots. Don’t forget to explore surrounding rooms, because most of them contain useful items. Each time you’ve exploredan area use the stairs to get to the next one. Eventually you’ll get to a door where you’ll have to use the second key from Crowley’s quest. Travel to Bomb storage. Proceed to the left door after reaching this new area. Use the final third key and you’ll find yourself standing inside some kind of a laboratory. Collect the fatman and a few mininukes. After that approach the terminal (screen) and unlock access to a prototype armor. You may finallycollect T-51b power armor and T-51b helmet. Now you have to decide whether you want tokeep exploring the fort on your own or go back to the surface.
Fort Independence AREAS OF INTEREST - Fort Independence is the main base for brotherhood outcasts. They should be neutraltowards you when you visit this area for the first time, however this can change if you decideto enter the fort. Once you’ve arrived at Fort Independence you’re going to be greeted byDefender Morgan. You can talk to her right away or you can assist brotherhood outcasts in dealing with the raiders. If you’re polite enough, Morgan will allow you to talk to Protector Casdin. - Protector Casdin will have an interesting assignment for you. He’s interested in acquiringnew technology and he’ll pay you for each invention you decide to bring him. You should alsoknow that he can pay you in 5.56mm ammunition, stimpacks, frag grenades and RadAway’s. Casdin is interested mostly in various types of power armors, including the unique models. You can also bring him motion sensors, laser rifles and plasma rifles. I wouldn’t recommend giving him an alien blaster which you may have found by now, because you’ll need this weapon to take down strong creatures and his reward isn’t good enough. - If you want to take a peek into Fort Independence, you’ll have to acknowledge the fact that all brotherhood outcasts are going to become hostile towards you. In this case you shouldstart by eliminating all the people standing in front of the entrance, including Morgan and Casdin. Check their bodies and you’ll find an access card to the fort. Use the card to gain access to Fort Independence. I guess you won’t be surprised to hear that more brotherhood

outcasts will be waiting for you inside the fort. You shouldn’t fight more than two of them at the same time, because they’re heavilly armored and they’re using powerful guns. Located adoor leading to a Lower level. Continue exploring the fort. Your final destination should bean armory. Look at my screen if you somehow can’t find it. There are a lot of useful items inside the armory, including a minigun and plasma rifles. The most precious item here is a weapon called Miss Launcher. Basically it’s a rocket launcher, but it works more like a grenade launcher. Don’t forget to collect ammunition, explosives and medical supplies fromthe armory.
Girdershade AREAS OF INTEREST - During your conversation with Ronald Laren you can hand him over a package from Garza(Rivet City). It’s going to be a naughty nightwear which you’ve probably collected while trying to complete Those! quest. Obviously you should ask Ronald to pay you for your trouble, but this can only be achieved by winning a speech challenge. - Sierra Petrovita will mention a secret recipe and one of the ingridients is going to be aNuka-Cola Quantum. This can only be achieved if you’re persuasive enough. If you succeed, you’ll gain possession of a recipe for Mississippi quantum pie.
Grayditch AREAS OF INTEREST - Once you’ve completed Those! subquest and if you didn’t make doctor Lesko angry you can visit the scientist. You can find him in his house. The exact location is Grayditch –abandoned shack. Lesko will have a proposition for you. If you agree to help him, he will payyou 40 bottle caps for each fire ants nectar you bring him. I would recommend that youbegin collecting nectar much earlier, so you won’t have to waste time trying to find deadants.

Hubris Comics AREAS OF INTEREST - I would recommend visiting Hubris Comics building if you want to find out true identitiesof the superheroes from Canterburry Commons. Besides that, there’s also one more interesting thing to do here. Enter the main building, marked as Hubris Comics –publishing. Get ready to dispose of large numbers of feral ghouls. Your objective is to proceed to the eastern section of the building. Locate a room with a Beta testing sign on the wall. Enter the room and proceed to a lower level. Watch out for traps! Find an activecomputer – Reign of Grelok (beta). Obviously you can use it to take part in the game.
This is a very simple game. The objective is to choose proper actions from the list. Here’s the list of actions you must choose in order to succeed: 1) Travel north; 2) Look around; 3)Examine the blinking object; 4) Travel south; 5) Travel west; 6) Look around; 7) Talk to the wizard; 8) Travel east; 9) Travel south; 10) Look around; 11) Talk to the blacksmith; 12)Travel north; 13) Travel north; 14) Use magical sword on Grelok. Don’t expect nothing more than a simple congratulations screen. You can retry the game if you want to, because there are some optional tasks you may participate in.

Dickerson Tabernacle Chapel AREAS OF INTEREST - If you try to get closer to the chapel, you’re going to be automatically attacked by a snipercalled Drifter (screen). I would recommend running towards the chapel and eliminating himfrom a smaller distance. Inspect his dead body and you’ll gain possession of an excellentreservist’s rifle. Also, if you haven’t been to the Oasis yet, it’ll be marked on your personal map.

Vault 101 (return) AREAS OF INTEREST - I’m sure that you remember robot Andy from your birthday party. During your second stayin Vault 101 you’ll find Andy in the clinic (where you father had his office). If you ask Andywhat’s going on, you’ll find out that he’s been reprogrammed to become a medical robot. Judging by the state of his patient, he’s not good at what he’s doing. :-) - I would also recommend that you inspect the main office in the clinic. That’s where Jameshad his office. Notice a tablet on the wall (screen). You weren’t able to open it before, but now’s your chance. Obviously you must raise your lockpicking skill to succeed. There are some bottle caps hidden inside, as well as a holotape, however you should be only interested in a schematic for a rock-it launcher.
OTHER SERVICES - Butch (Vault 101 – lower level) – changing hair
Vault 106 AREAS OF INTEREST - You’ll probably want to visit this vault only for one purpose – to acquire a Vault-Tec bobblehead. You won’t find any other valuable items inside the vault. Instead, you’ll witness a lot of hallucinations, especially near the reactor. You can look around for Overseer’s notes on the situation and you’ll find out that the hallucinations are an effect of a gas beingreleased into the system. You’ll probably encounter at least a few vault inhabitants, but they’ll be hostile towards you. Thankfully, they’re easy to kill and you won’t receive negativekarma for eliminating them.

Krypta 108 AREAS OF INTEREST - Just as before, you should consider taking a trip to this crypt only if you have plans ofacquiring a Vault-Tec bobblehead (this particular one is very valuable, because it can raiseyour charisma by one point). The inside of the vault is being occupied by cloned citizens. I guess you won’t be surprised to hear that they’ll be hostile towards you. Eliminating thearmy of clones shouldn’t be a problem. You can search for information about them, howeverit’s optional.
Little Lamplight AREAS OF INTEREST - Knock Knock is a sheriff around here. You can listen to her telling you a joke (usually abad one ;-)) or you can repay by telling a story. At the beginning of the game you’re only allowed to tell the story of your escape from Vault 101, however new options will become available upon completion of Following in his footsteps and American dream quests. - You may encounter Sticky near the entrance to the Little Lamplight. Sticky will ask you to take him to Big Town, because he’s too old to live here and he’s been banished by the restof the kids. You can agree to help him, but he would only have a party hat for you. :-) - Zip tends to travel throughout the entire Little Lamplight. You can agree to do business with him if you manage to catch him. If you have a Nuka-Cola bottle he can give you something else in return. Usually it’s ammunition or a stimpak. - Biwwy wants to you sell you his wazer wifle. You can pay him 500 bottle caps for this weapon or you can persaude him to give you the gun for free (Child at heart perk is requried here). The rifle is very good and you should take effort in acquiring it. - Princess can be found near the northern exit (it’s the one leading to Murder pass). You’ll probably notice that she has a nasty attitude. Once you’ve rescued the kids from Paradise Falls talk to Sammy and if you’re convincing enough you’ll find out some interesting factsabout the Princess. Return to her and use that knowledge against her. For example, you cantell her that the mayor is in love with Lucy. SHOPPING - Knich Knack (Little Lamplight – Knick Knack’s souvenirs) – selling and repairing items - Eclair (Little Lamplight – caves) – selling food OTHER SERVICES - Lucy (Little Lamplight – caves) – healing, lowering radiation, selling medical supplies - Joseph (Little Lamplight – caves) – changing hair

Megaton AREAS OF INTEREST - You’ll probably encounter Michael Masters near the entrance to Megaton. You can give him some refined water and in return you’ll notice that your karma has been increased. - Confessor Cromwell can be found near the large bomb or inside Megaton – Children of the Atom church. You can find out more about his organization and about his beliefs or youcan decide to contribute by giving him caps (no more than 100 at a time). Doing so willincrease your karma by the exact number of caps you’ve given him. - Walter can be found in Megaton – Water processing plant. Talk to him and you’ll find out that he has some problems with a few leaks. Agree to help him and use my map (screen) to locate these areas. You should know that your repair skill must be raised to at least 30points in order for the actions to succeed. Each time you must approach a leak and press theaction key. Once you’ve done your chores, go back to Walter and he’ll reward you with 200 caps. From now on you can also deliver scrap to him, because he’ll need it to make additional repairs.
- Doc Church can be found in Megaton – clinic. Talk to him and if you win a speech challenge or show off with a high knowledge in medicine he’ll mention that one of theinhabitants of Megaton is a drug addict. Once you’ve acquired this knowledge go toMegaton – Water processing plant at night. Ignore Walter and proceed to a small room in the back. Talk to Leo Stahl and inform him that you know about his addiction. There aremany ways to solve this problem. You can threaten Leo that you’ll tell the rest of the folksabout the secret and demand drugs or money in return. You can also help him fighting offthe addiction. If you convince him to stop using drugs, he will give you a key to his stash.Collect drugs, because they’re very valuable. - Once you found your way to Megaton – Moriarty’s saloon you can spend some time in the back. You should be able to find Moriarty’s terminal. The password is lotsacaps and you can receive it from Nova. There are a lot of interesting information on Megaton citizens and guests in the computer. One of the messages is about James (your father). - There’s a computer terminal in Megaton – The Brass lantern. If you manage to hack into the system you’ll be allowed to open a nearby safe. There are 300 bottle caps in the safe.

Naturally taking the money will lower your karma and you’ll also have to avoid being seen. - Opening the door to Megaton – Armory is not going to be easy, because the lock is verysophisticated. You’ll probably want to return here later on. There’s a hostile robot called Deputy Steel inside. Destroy the robot with your primary weapon or hack into the terminalquickly, because you’ll be allowed to disable it. Obviously you’ll find a lot of guns andsupplies inside the armory. Don’t forget to examine the contents of the safe. - If you have nothng against using cheats (game codes) to find easter eggs, use noclip to flytowards a sniper called Stockholm. He’s stationed above the main entrance to Megaton. He will be very surprised to see that you found your way to his post. :-) TEAM - Jericho – He can be found wandering the streets of Megaton, spending his free time in Moriarty’s saloon or resting in his house. You must be playing as a negative character,because otherwise he won’t agree to your offer. Also, even if he does, he’ll require you to pay 1000 bottle caps for his services. Nonetheless, you should consider teaming up with him,especially if you want to haver a good companion from the start of the game. SHOPPING - Jenny Stahl (Megaton) – selling food - Gob (Megaton – Moriarty’s saloon) – selling food (be polite towards him – you’ll raise karma and get better prices for his goods) - Moira Brown (Megatona – Craterside supply) – selling and repairing items, decorating your house in Megaton OTHER SERVICES - Doktor Church (Megaton – Clinic) – healing, lowering radiation, selling medical supplies - Nova (Megaton – Moriarty’s saloon) – providing bed
Meresti trainyard AREAS OF INTEREST - You can acquire two unique weapons while exploring the trainyard, however this can onlybe done if you agree to lowering your karma. The first weapon can be found in a locker inVance’s quarters. You must have a key or 75 points spent on lockpicking to gain access tothe locker. Open it and take vampire’s edge. As for the other weapon, you’ll have to take it directly from Vance. It’s a shishkebab – one of the weapons you can manufacture yourself ifyou find proper plans. SHOPPING Karl (Meresti trainyard) – selling and repairing items
Museum of history AREAS OF INTEREST - During your first visit to Museum of history – Underworld you are going to be greeted by a friendly ghoul called Winthrop. He’ll tell you that the Underworld is the home for the ghouls. You can agree to his proposal – he’ll give you RadAway, Rad-X or a stimpak for every 5 scraps of metal you bring him. - Go to the Chop Shop and examine Reilly’s body. She can be found lying on one of thebeds. Listen to a short statement made by doctor Barrows and force him to wake up Reilly. As a reward you’ll be allowed to start Reilly’s Rangers subquest and you’ll also receive a key to Reilly’s hideout. - During your conversation with Carol (she lives in Carol’s place) you can mention Gob – a friendly ghoul you’ve met in Megaton. - Azhurkal will be more than happy to buy Soil Stradivarius (violin) from you. This item isrequired to complete Agatha’s song subquest. His initial offer is going to be 200 bottle caps,but you can try negotiating with him. I would recommend selling him the violin only if you plan on recruiting Charon. The reason is simple – Charon is going to kill his master when he joins you and this will allow you to take back the violin from Azhurkal. You can also use your stealth skills to steal the Soil Stradivarius, but that would result in minor karma losses. TEAM - Charon – Azhurkal from the Ninth Circle bar will make you an offer. He’ll mention thatCharon is his slave and that you’ll be allowed to buy him from him. This can go two ways.The easier solution would be to pay Azhurkal. He’ll demand 2000 caps, but you’ll be able to lower that amount significantly if you win a speech challenge. Alternatively you can agree tokill Greta, however the trick is that you can’t be seen by any other ghouls. I would recommend waiting for her to exit the Underworld before attacking her. Either way, after acquiring the contract talk to Charon and share the news. Don’t be surprised that he’ll kill his former master. Thankfully he’ll be more than happy to join you and he won’t kill you inyour sleep. ;-) SHOPPING - Winthrop (Museum of history - Underworld) – repairing items and selling medical supplies - Azhurkal (Museum of history - Underworld) – selling drinks and drugs - Tulip (Museum of history - Underworld) – selling items - Greta (Museum of history - Underworld) – selling food OTHER SERVICES - Doctor Barrows (Museum of history - Underworld) – healing, lowering radiation, selling medical supplies - Carol (Museum of history - Underworld) – providing bed - Snowflake (Museum of history - Underworld) – changing hair

Wilhelm’s wharf AREAS OF INTEREST - During your conversation with Grandma Sparkles (she’s sitting by one of the tables) you can find out about a group of men. She’ll tell you that they’ve passed nearby and that theywere looking for a Vault citizen. You can brake into her hut if you want to. Aside from ahunting rifle, you won’t find anything of interest. SHOPPING - Grandma Sparkles (Wilhelm’s wharf) – selling food
Paradise Falls AREAS OF INTEREST - While trying to gain access to Paradise Falls you’re going to be stopped by a slaver who goes by the name of Grouse. You can perform a task for him (Structly business) and the reward would be gaining access to the inner compound. The exception is when you’re playing as a very bad character. You would have been recognized instantly as a friend of the slaversand you wouldn’t have any problems entering the compound. Alternatively you could trywinning a speech challenge in order to avoid the subquest, but it’s very difficult to succeed. - Pronto can be found in Paradise Falls – Lock and load. You’ll find out that he’s anunexperienced trader. Pronto will make you an offer. If you deliver him some weapons, hewill pay you back by making you his business partner. He’ll also promise that he’ll acquire better guns when his business grows overtime. - You can be a witness to an execution made on a slave by the name of Frank. He was a bartender owned by Ymir. TEAM - Clover – She’s one of Eulogy’s prostitutes. If you’re playing as a bad character you will be allowed to make her an offer to join your team. In order to confirm your request you must talk to Eulogy and ask him to sell Clover. His initial reward is going to be 1000 bottle caps,but you’ll be allowed to barter with him. SHOPPING - Pronto (Paradise Falls – Lock and load) – selling guns and repairing items - Frank (Paradise Falls) – selling drinks OTHER SERVICES - Cutter (Paradise Falls – Cutter’s clinic) – healing, lowering radiation, selling medicalsupplies and drugs

Reilly’s rangers compound AREAS OF INTEREST - You’ll probably visit this area for the first time while trying to complete Reilly’s rangerssubquest. I would strongly recommend that you talk to Reilly in the first place. You can find her in the Underworld (Museum of history). The main reason is that you’ll be granted access to the compound, without having to brake in. - Notice that you won’t be able to meet other rangers unless you’ve successfully completedReilly’s rangers assignment. - Once you’ve completed the quest and returned to the compound talk to Reilly again. If you’re polite you’ll be given a second assignment. Reilly will ask you to provide assistance in creating a map of Capitol Wasteland. You should be able to receive a device calledGeoMapper. This item will automatically upload new primary locations from your Pip-Boy. I would recommend visiting Reilly from time to time in order to collect rewards (bottle caps)for unlocked locations. - You can inspect the area to the west of Reilly’s rangers compound if you want to. Look for a small alley between two buildings. You should notice that some lunatic is shouting random words. Follow his voice to get closer to his hideout. Order your companion to stay behind andapproach the target area alone. You must be extremely careful, because if you’re spotted, thelunatic will blow up this entire area. Approach the western building (screen) and throw agrenade at the madman. Once he’s gone you may begin collecting nearby items. You willcome across unactive landmines, as well as several mininukes for your fatman!
SHOPPING - Donovan (Reilly’s rangers compound) – repairing items OTHER SERVICES - Butcher (Reilly’s rangers compound) – healing, lowering radiation

Raven Rock AREAS OF INTEREST - Upon leaving Enclave’s base you can meet Fawkes, however this will only occur if you saved him in Vault 87. The beast will not only help you in defeating some of the remainingEnclave soldiers, but will also make an offer to join you. Be warned – you must be playing as a good character, because otherwise Fawkes will only clear the area. DRU¯YNA - Fawkes – If you rescued Fawkes during your exploration of Vault 87 you will be allowed to meet him after you successfully escaped from Raven Rock. Like I’ve already said, you musthave positive karma. He is by far the best teammate you can have. Fawkes is not only strong, but he’s also carrying an extremely powerful Gatling laser.
The Republic of Dave AREAS OF INTEREST - During your visit to The Republic of Dave you are going to be greeted by a young girlnamed Rachael. It shouldn’t be too difficult to convince her to let you in. You can now askher to take you directly to president Dave or you can find him on your own. Dave can be found inside The Capitol building. - You can ask president Dave to grant you with an asylum. This can be done by giving him250 bottle caps or by bringing him a hunting rifle. I’d strongly recommend choosing the second possibility, because the rifle is used by many bandits, raiders and supermutants, so it shouldn’t be a problem to get one. Alternatively you can convince him that you’re an ambassador of the wasteland. As a result, you won’t have to pay him and you don’t have to worry about leaving the republic after 24 hours. - An interesting miniquest is tied to Dave and an upcoming election in his small republic. Iguess you won’t be surprised to hear that there are a lot of different ways to end this quest.The most obvious solution is to assist Dave in being reelected as a president. In order to dothat you must talk to four citizens of his republic – Bob, Shawna, Jessica and Rosie. In each case you must convince the citizen to vote (screen). Now you must wait for each personto get to the Capitol building and to put the vote in the urn. The votes will then be countedand Dave will win. The reward for helping him is pathetic – 25 bottle caps.

If you don’t want to help Dave in getting reelected, you can convince Bob or Rosie to take part in the election as other candidates. Sadly, in order to persuade them you must win aspeech challenge. Think about who should win and order everyone to give their votes. Goback to the Capitol building and inform Dave that the urn has been filled with votes. FollowDave to the urn and wait for him to unlock it. Open the urn quickly (screen) and if you’re lucky, he won’t have a chance to take all the votes from the urn. Notice that despite othercandidates he’s still in the lead. Take his votes from the urn and leave only one vote inside –for the person you want to win. Dave will be furious that he lost the election and he’ll inform everyone that he’s leaving his republic and going to Old Olney. Talk to the new president and you’ll receive a password to Dave’s safe containing Ol’ Painless rifle. Sadly, if you decideto steal the rifle you’ll lower your karma.

- If you agreed to help Crowley (You gotta shoot ‘em in the head subquest) you can to talkto Dave about the keys and you’ll find out that they’re needed to gain access to Fort Constantine. - Before you decide to mess with the election you might want to consider visiting Dave’s museum during afternoon hours. If you came at the right time, you can take part in a lectureabout Dave’s greatness.
Rivet City AREAS OF INTEREST - You should be able to encounter a beggar named Carlos near the bridge leading to Rivet City. The situation here is very similiar to Megaton – you can him refined water and in “exchange” you’ll raise your karma. - Try searching for Mei Wong. She can be found on the top deck of the ship or in Rivet City – Middle deck. Talk to Mei and listen to her story about the slavers. You can give her 25 bottle caps, so that she can purchase a weapon to defend herself. In exchange she’ll inform about the Temple of the Union. It’s a safe haven for the ex-slaves. If you’re playing as a bad character you can share this knowledge with Sister. - Father Clifford can be found in Rivet City – Bridge, Rivet City – Upper deck or Rivet City – Middle deck. During your initial conversation with him you’ll find out that he’s running Saint Monica’s church in Rivet City. You can agree to contribute by giving himbottle caps (max 100 caps at a time). Similiar to Megaton, the amount of caps given to him is equal to amount of karma points gained by performing this good deed. - During your conversttion with Bannon you’ll find out that Seagrave Holmes is trying to take his place in the city hall. Bannon will ask you to find evidence that would implicateHolmes in shady dealings. Visit Seagrave’s quartes and if you’re thorough, you will come across information that ties him to the slavers. You can use this knowledge both ways. If youshare the information with Danvers you will help Bannon and he’ll lower his prices. If youinform Danvers about an exortion attempt you will help Seagrave and he’ll lower his prices. - Vera Weatherly can be found in Rivet City – Upper deck. Talk to her and she can share gossip about her neighbours. You’ll find out that Paulie Cantelli is a junkie trying to fight off his drug problem. She will also tell you about Lopez trying to commit suicide and about Angela Staley being in love with Diego. - Paulie Cantelli (mentioned by Vera) can usually be found in his quarters in Rivet City –Middle deck. You can give him psycho if you want to lower your karma. - During your first conversation with Angela Staley you’ll find out that she’s in love withDiego. Sadly they can’t be together, because the boy is an acolyte in Saint Monica’s Church. You can solve this problem trying to achieve a good or a bad ending. First of all, you canconvince Diego that the church should be the most important thing for him and that heshould keep ignoring Angela. You can talk to Father Clifford and convince him (by lying) that Angela and Diego are sleeping together. If you want to find a positive outcome, youmust gain possession of ant queen pheromones. You can acquire the pheromones if you decide to kill the queen located in Grayditch sewers (Those! subquest). You can also travel to Shalebridge (the queen can be found in Shalebridge tunnels – hill) or to Corveg factory. Give the pheromones to Angela (screen). Sadly, she won’t give you anything in return, so you’re doing this for your personal satisfaction.

- Lopez can be found on the top level of the tanker. Exit the tower and you should notice himstanding near the railing (screen). You can convince Lopez to commit suicide, but you would lose a lot of karma points. A better solution is to convince him to leave this area. This canonly be done if you talked to Ted Strayer (he can also be found in Rivet City). If you save his life, you’ll gain karma. Otherwise you’ll lose a few points.
- Pinkerton will be mentioned by a few of Rivet City citizens and reaching him is required to fullfill two subquests. Obviously it won’t be easy to find him. Head over to Rivet City market and choose a passageway leading to a torn part of the ship. You should be standingin front of a large gap (screen). Jump into the water and swim towards an underwaterpassageway. It’ll lead you to a door to Rivet City – Broken bow. You’ll be dealing with a lotof flooded corridors in this side of the ship. There are also a few mirelurks for you to take care of. Watch out for Pinkerton’s traps, because they’re difficult to spot. Finding his

hideout shouldn’t be hard from here. Don’t forget to take at least one RadAway after you leave the water.
- Remember the naughty nightwear you found in Marigold Station? You can give the lingerie to Garza and he’ll ask you to bring this item to Ronald Laren. Ronald can be found in Girdershade (Nuka-Cola challenge quest). - If explore the top level of the bridge tower you should notice a sealed hatch. You might be able to open the hatch, but you have to raise your lockpicking skill to succeed. You’ll find a single defense turret inside the room. Destroy it and explore this room carefully. There are alot of useful items in the area. - Aside from the main assignment, Abraham Washington from Rivet City – Middle deckcan reward you for bringing him artifacts tied to the history of the United States. Most ofthese items can be found inside The National Archives and Museum of history. The only exception is the Soil Stradivarius – violin for Agatha (Agatha’s song quest) found inside Vault 92. Obviously if you decide to give the violin to Abraham, you won’t be able to complete the old lady’s quest. TEAM - Butch can be found in Rivet City, but only if you’ve chosen the best outcome to Troubles on the homefront subquest. This means you had to get rid of the Overseer and to convince Vault 101 citizens that it’s safe to leave the crypt. The exact location of Butch is Rivet City – Muddy Rudder. You must be playing as a neutral character in order to be able to askButch to join you and to receive a confirmation from him that he’ll follow you. Butch is a good teammate, so you should consider hiring him. SHOPPING - Flak and Shrapnel (Rivet City market) – selling guns and repairing items - Mr Buckingham and Vera Weatherly (Rivet City – Upper deck) – selling food - Seagrave Holmes (Rivet City market) – selling items - Gary Staley (Rivet City market) – selling food

- Bannon (Rivet City market) – selling clothes and repairing items - Cindy Cantelli (Rivet City market) – selling medical supplies and drugs - Belle Bonny (Rivet City – Muddy Rudder bar) – selling drinks OTHER SERVICES - Doctor Preston (Rivet City – Upper deck) – healing, lowering radiation, selling medical supplies - Pan Buckingham and Vera Weatherly (Rivet City – Upper deck) – providing bed - Pinkerton (Rivet City – Broken bow) – changing appearance - Butch (Rivet City – Muddy Rudder bar) – changing hair (only if you „released” othercitizens from Vault 101)
Rockbreaker’s Last Gas AREAS OF INTEREST - You won’t find any items of interest in the immediate vicinity of the gas station. Instead youshould travel west using directions provided by my map (screen). Eventually you’ll get to asmall shack located on top of a large mountain. Enter an Abandoned shack and take your time to explore the surroundings. One of the lockers can only be opened if your lockpickingskill has been raised to the maximum. If you do manage to finally open it, you will gainpossession of an excellent Victory sniper rifle. Watch out while exiting the shack, becauseyou may be attacked by Talon mercenaries.

Deathclaw sanctuary AREAS OF INTEREST - Obviously this entire area is swarming with deatchlaws. You will encounter these beastsnot only inside the caves, but near the entrance as well. Still you should consider travellingto the sanctuary when you have the chance. The main reason for that is to collect one of the bobbleheads, but you’ll also find two cool weapons in the sanctuary – a ripper (melee weapon) and a Gatling laser. Sadly you’ll have to explore the entire cave system to get tothem.
National Guard depot AREAS OF INTEREST - A lot of security measures have been put in place in order to ensure the safety of this depot.You will have to watch out mostly for sentry bots, because they can inflict a lot of damage and they’re not easy to kill if you don’t have enough EM mines at your disposal. Yourobjective will be to get to the armory, because you will find miniguns, rocket launchers, armors, medical supplies and drugs inside. - I guess you may not notice that the armory has been divided into two parts. The first part is relatively accessible. Sadly, in order to get to the second part you will have to acquire fiveholotapes. Here’s where you should look for them:
First holodisk – Hallowed Moors cemetary
Once you’ve reached the cemetary and eliminated all hostile creatures proceed to a destroyed chapel. The holodisk can be
found inside a small ambo (screen). Make sure that you release the prisoners while you’re there, however you can also decide to run away the second you have the disk.
Second holodisk – Grisly diner Watch out for traps! There are a lot of them
outside the diner and also inside the building, near the counter. You should
also know that raiders may arrive here in a short while. The holodisk can be found at
the back of the diner, on the table (screen). You should also collect a rocket launcher, as well as medical supplies and defused
landmines.

Third holodisk – Anchorage Memorial The object you’re looking for can be found to the north of the memorial. Be on a look out for a yellow truck. You should know that there are a lot of supermutants and
centaurs in the area, so it won’t be easy to get it. Eliminate the monsters from a larger distance if possible. Don’t forget that you can also blow up nearby vehicles. As for reaching the disk, you can swim to it or
you can use the bridge. The tape is inside a large yellow tent.
Fourth holodisk – Rockbreaker’s Last Gas
You must travel to an abandoned shack which can be found on top of a large hill,
to the west of the gas station. Check Rockbreaker’s Last Gas description for
more info. The holodisk is located inside the shack (screen).
Fifth holodisk – VAPL-58 power station You must travel to the north of the power
station. Eventually you’ll be able to get to a small camp with two hostile wastelanders. Get rid of them – it shouldn’t be a problem.
The holodisk can be found on one of the shelves (screen).
Once you’ve acquired all five holodisks and listened (it’s very important!!) to the recordings you may go back to the National Guard depot. Head on to the armory and locate a securityterminal on the wall (screen). You now know the password, so you can use it to unlock apassageway. Don’t be scared if you see a feral ghoul heading your way. Kill the creature and check your surroundings. The most important object for you to collect is an experimental MIRV. It might seem that this weapon is worse than a standard fatman, but the main difference is that it fires a few nukes at the same time!

Springvale AREAS OF INTEREST - You may have to resolve the situation with Silver if everything else fails while trying to acquire the necessary information from Moriarty. First of all, you must travel to Springvale. Locate a Small ranch. Enter the building and talk to Silver in order to find out about her debt. You can agree to pay the money for her or you can convince her to hand over all of hermoney – 400 bottle caps. Alternatively you could kill her, but obviously this would lower your karma.
Marigold station AREAS OF INTEREST - Explore the eastern side of the tunnels and you’ll come across a security terminal (1 on the map). You can use your hacking skills to get inside or you can find a key found in the western section of the map (2 on the map). Either way, head inside. Locate a small safe andtake the naughty nightwear. :-) You can also pick up a ripper – it’s a very useful meleeweapon. Try leaving this room and you’re going to be stopped by the owner of the lingerie you’ve just stolen. Kill him or convince him (win a speech challenge) to let you keep yourfinding.

Jury Street metro station AREAS OF INTEREST - Once you’ve reached Jury Street metro station proceed west and get to an area shown on my map (screen). You will have to defeat a couple of supermutants, however you may receiveassistance from Brotherhood of Steel soldiers. After you killed all the creatures wait for a superbehemoth to arrive in this area. Use the fatman or other powerful weapons to kill the beast. It’s also good to have a companion at your side, because he or she may distract thecreature. Don’t forget to examine the body of the behemoth, because you’ll be rewarded with random items.
- You should also consider exploring the subway tunnels, because interesting experimentstake place down there. Use the stairs to get to the tunnels and confirm that you want to

travel to Jury Street station. You will encounter a lot of raiders inside. Keep pushing south and be on a look out for a door on the eastern wall. Approach the door and confirm that youwant to go to Jury Street – tunnels. Once you’ve arrived at your new destintion, proceed tothe nearest room which is going to be a small laboratory. Locate and kill Ryan Brigg and inspect his body in order to acquire a key to his safe. You can also hack into a nearbycomputer terminal if you want to find out more about the experiments. Thr most importantobject here is a wonder meat maker (screen). You can use this device to manufacturemolerat wonder meat. The meat can then be used to fight off the radiation and to heal yourcharacter. In order to begin the manufacturing process you must have two items in yourpossession – a wonderglue and mole rat meat.
Northwest Seneca station, Temple of the Union, Takoma Park – factory district AREAS OF INTEREST - A ghoul who goes by the name of Murphy is going to offer you a deal. He’ll pay you for eachsuger bomb you deliver to him. Don’t forget to win a speech challenge, so he’ll have to payyou more than he originally planned. You can also ask him about ultrajet which is his current project.
Temple of the Union AREAS OF INTEREST - When you arrive at the Temple of the Union for the first time you will probably have to chat with Simone Cameron. It shouldn’t be a problem for her to allow you to gain access tothe temple. You must now go talk to Hannibal Smith, because unless you agree to protect the temple and its inhabitants, he won’t allow you to leave this area. Hannibal will give you a special key, used to open the main gate. You should also know that you won’t be allowed to travel in the vicinity of the temple.

Takoma Park – factory district AREAS OF INTEREST - This entire area is swarming with the supermutants and you should also know that you’ll be dealing with the strongest variations of these creatures. As a result I wouldn’t recommend travelling to this location unless you’re prepared. Ignore the factory itself, because youwouldn’t find anything of interest there. Instead travel west and eventually you’ll encounter abehemoth (screen). Obviously you should use a fatman or a minigun to dispose of the beast. Watch out for other supermutants while trying to eliminate the behemoth and examine its body when it’s all over.
Tenpenny Tower, Greener Pastures disposal site, Wheaton armory AREAS OF INTEREST - Michael Masters and Besse Lynn can appear as traders if you managed to negotiate a dealto let the ghouls inside Tenpenny Tower. These two will replace Lydia Montenegro and Anthony Ling. - If you hack into a security terminal in the Federalist Lounge you may lower prices for all the drinks offered to you by Shakes. The differences will be substantial, so you shouldn’t ignore this possibility. SHOPPING - Chief Gustavo (Tenpenny Tower) – selling items - Margaret Primrose (Tenpenny Tower – lobby) – selling food - Lydia Montenegro (Tenpenny Tower – lobby) – running a boutique and decorating your apartment in Tenpenny Tower - Shakes (Tenpenny Tower – lobby) – selling drinks - Anthony Ling (Tenpenny Tower – lobby) – selling clothes - Michael Masters (Tenpenny Tower – lobby) – running a boutique, decorating your apartment in Tenpenny Tower and selling guns - Besse Lynn (Tenpenny Tower – lobby) – selling clothes

OTHER SERVICES - Doctor Banfield (Tenpenny Tower - lobby) – healing, lowering radiation, selling medical supplies
Greener Pastures disposal site AREAS OF INTEREST - Proceed to the west of the disposal site. Check my screen for an exact location. Inspect thearea around the rocks and you’ll come across a... flying saucer! Make sure that you haveRad-X and RadAway in your possession, because you’ll be dealing with small radiation (1-2 rads per second). Look around and find a body of an alien being. Ignore the body and collectan alien blaster. It’s a very powerful weapon, but it’s difficult to find ammunition for it. Make sure that you’ve collected all the power cells before leaving the area.
Wheaton armory AREAS OF INTEREST - The armory is being controlled by the raiders and getting rid of them isn’t going to be easy, because there are large numbers of them. If you’ve already been to the Citadel, you can meet brotherhood outcasts and they’ll probably help in you in getting rid of the bandits. You won’t find any unique weaponry inside the armory, however there are a lot of supplies for youto collect. I’m talking about miniguns, sniper rifles, plasma grenades, rocket launchersand other useful toys. - A small ranch is located to the north of Wheaton armory and it’s the main outpost for thelawbringers. This organization is being led by Sonora Cruz. You can think of them as a positive version of Littlehorn’s fraction. Check my screen if you’re having some difficulties finding the ranch. In order to receive an audience with Sonora you must first acquireLawbringer perk. Enter the farm and listen to Sonora’s proposal. She can pay you five bottle caps for every finger of a bad person you bring her.

Scrapyard, Other – Capitol Wasteland AREAS OF INTEREST - Littlehorn can be found inside a small hut, located in the Scrapyard. If you chose Contract killer perk you will be allowed to enter the building and talk to him. Littlehorncan pay you five bottle caps for each ear of a good person you deliver to him. TEAM - During your exploration of the northern section of the Scrapyard you’ll probably hear gunshots. Inspect that area and you’ll witness a battle taking place between a dog and a group of raiders. The animal is our favorite Dogmeat (screen) and it’ll be able to join your team. During the “conversation” with the dog be very friendly towards the animal by choosing the first answer from the top. You should know that Dogmeat is added as an additional ally, so you won’t have to leave your current companion behind.

Other – Capitol Wasteland MERCENARY / LAWBRINGER ATTACKS If you’re not playing as a neutral character, you must acknowledge the fact that you’ll beattacked by other wastelanders from time to time. If you’re a good character you’ll be dealing with Talon company mercenaries and if you’re a bad person you must be ready to kill thelawbringers sent to kill you. These fights are usually difficult and you should avoid them ifpossible, especially if you’re standing in a bad spot when the battle has started. FLYING MACHINES – VERTIBIRDS You won’t encounter any vertibirds at the beginning of the game. The situation will changewhen you finish The waters of life quest. From now on you’ll be dealing with the flyingmachines right until the end, unless you destroy Raven Rock while trying to fullfill American dream quest. Vertibirds usually appear near Enclave outposts, however you may also be attacked by one of the flying machines if you decide to destroy a flying eye created by the Enclave or if you dispose of a large group of Enclave soldiers. I would recommend staying away from the areas where the vertibirds are landing, however you may also use yourmost powerful weapons to destroy them (screen).
TRADE ROUTES During your conversation with Uncle Roe from Canterburry Commons you’ll find out about the existence of wandering traders here in Capitol Wasteland. If your barter speech is high enough, you will be allowed to make Roe a bussiness proposal. You can suggest that all themerchants should increase their specializations and that they should expand thirbusinesses by hiring better protection and using more brahmins. Roe will now give you three documents – a contract, a map of the caravan route and the names of all the traders. You can now return to him each time you’ve gathered enough money to spend on the trader of your choosing. Here’s the list of traders and their specializations: Harith – guns, Crow – armors, Doc Hoff – medical supplies and food, Crazy Wolfgang – scrap and other items. If you decide to invest into traders, their stock will grow overtime. You will also unlock access to mininukes, as well as three unique weapon schematics.

As for the route of all the caravans, here it is: Canterburry Commons, Temple of the Union(it must be safe in the area for the merchant to appear), Agatha’s house, Paradise Falls (it must be safe in the area for the merchant to appear), Arefu, Evergreen Mills (it must be safe in the area for the merchant to appear), Megaton, Rivet City. You can kill each of the wandering traders if you want to. In that case you’ll gain possession of a lot of goods – you can collect items from the caravan and you can take the key to the main stash. It’s located in Canterburry Commons, so you’ll have to travel there to get to the best stuff.

Enemies
List of enemies Important! This list contains only those beings (intelligent or not) which are hostile towardsyou by default. Rest of the population is usually neutral or friendly, however obviously this change as a result of your actions. You should also know that some of the creatures(including mirelurks and supermutants) appear in different forms. Legend: NAME – name of a creature or of a group of creatures; ADDITIONAL INFO – a short description of what you should expect and how to react; THREAT – threat level on a scalefrom 1 to 10 – in many cases these values vary depending on types of enemy units.
NAME ADDITIONAL INFO THREAT LVL
Behemots The game world is populated only by five of these creatures and obviously they’re extremely difficult to
kill. Avoid melee combat at all costs and use a fatman, a rocket launcher or a minigun to kill them.
10
Bloatflies Nothing you should be worried about. Just make sure that you’re not moving towards them in a
straight line and you should be fine. One hit from almost every weapon should do the trick.
2
Centaurs These monsters are very easy to kill, as long as you avoid the acid. Use a shotgun or a hunting rifle to
kill them.
4
Deathclaws These beasts are extremely powerful and they can rip you apart in a manner of seconds if you allow them to get closer to your character. Aim for their legs in order to increase your chances of success.
9
Defense turrets You don’t have to worry about the turrets too much. Some of the devices are equipped with rocket
launchers, but the good news is that you’ll need to fire only a few shots to destroy them. You can also search for security terminals if you want to disable
or reprogram them.
4-5
Enclave scientists For most of the time they’re not using any weapons, however you may also encounter armed scientists. You shouldn’t ignore them, because thay may be
carrying plasma pistols.
2-6
Enclave soldiers The good news is that Enclave soldier won’t appear unless you’ve been to their base. Watch out for
soldiers equipped with powerful armors and weapons, including plasma rifles.
5-9
Feral ghouls For most of the time you’ll be dealing with the weakest kind of feral ghouls and in this case 1-2 shots will be more than enough to kill them. You
3-6

must watch out for the glowing versions, because not only they’re more powerful, but they can also
harm you with large doses of radiation.
Giant ants The „standard” ants are fairly easy to kill, even if they take you by surprise. Fire ants are much more dangerous, especially if you allow them to get closer to your character. Use grenades or a sniper rifle to
kill them. And don’t forget about the queen! :-)
3-6
Mirelurks The differences here can be quite significant, depending on the type of creature you’ve
encountered. You should know that mirelurks have a very strong armor, so you should use heavy guns or explosives against them. This is very important
when you’re fighting kings of hunters.
6-9
Mister Gutsy Gutsy is one of the less pleasant robots. Not only it’s hard to kill, but it’s usually equipped with a
flamethrower or a plasma rifle. As a result you must be careful while trying to get rid of it.
8
Molerats Molerats are relatively easy to kill even if you’re starting the game, however you must acknowledge the fact that they’re very fast, so they can jump at
your throat in a manner of seconds. Use a ripper or other melee weapons to hunt them down. Remember that Moira can sell you a weapon used to kill these
creatures.
2
Protectrons Most of the protectrons are fairly easy to dismantle. You may have to spend a little more than time than with robobrains, but still it’s not a big deal. Use the
fact that they’re very slow.
6
Radroaches You’ll be dealing with these small insects while exploring crypts, sewers and other types of tunnels. Don’t waste your ammuniton on them. Instead use a
melee weapon.
1
Radscorpions Radscorpions are somewhat similiar to mirelurks, because their cuirass can withstand a lot of damage. You should also know that they’re very fast and that
they can poison you with one hit. I would recommend running away, especially if your
character isn’t strong enough.
5-8
Raiders There are many raider fractions populating Capitol Wasteland. The weakest groups are only equipped with pistols and melee weapons, but you may also
encounter raiders with sniper rifles or flamethrowers.
2-5
Robobrains Robobrain is one of the weaker types of robots. They usually carry laser guns, but the good news is that
they explode after a few hits.
5

Sentry bots This is by far the most dangerous version of the mechanical adversaries. Sentry bots are equipped
with some of the most powerful weapons, including miniguns, flamethrowers and rocket launchers. You must be extremely careful while trying to eliminate
them. Don’t forget to use EM mines or pulse grenades!
9
Slavers Most of the slavers should be neutral towards you by default, however there are exceptions (for example – in Evergreen Mills). Use a combat
shotgun to kill them or a sniper rifle if you want to attack them from a distance.
3-6
Supermutants There are a few species of supermutants. When you’re dealing with the weakest kind you may even
consider using shotguns. Brutes and masters on the other hand will require you to use your best arsenal.
6-9
Talon Company mercenaries
I guess you may be surprised to hear that they won’t be easy to kill, because they’ll appear even very early
during the course of the game and you’ll also be dealing with groups instead of single soldiers.
7-9
Vault inhabitants You may encounter hostile Vault citizens if you decide to visit other crypts located in the Capitol
Wasteland. Thankfully, they’re easy to kill, even if you’re dealing with a lot of them at the same time.
2-3
Wild dogs I guess you may have some problems with the dogs, especially early during the course of the game, when
you’re using standard armors. When you get stronger they become almost harmless and one shot
will be more than enough to kill them.
3-4
Yao guais Yao guais are an apocalyptic version of bears. These creatures are only slightly less dangerous than
deathclaws. They’ve very agile and they can inflict massive injuries if you allow them to get closer to
your character.
7

Behemoths are the strongers creatures in Capitol Wasteland. Thankfully you’ll only meet a five of those during the game.

Threats
Radiation and poison Getting poisoned is a very rare occurence in the game and it can happen if you’re attacked by a radscorpion. I’ve already said that radscorpions are relatively hard to kill, so the bestoutcome is to outrun them, especially if you don’t have powerful weapons or explosives in your possession. The best way to protect yourself against the effects of a poisoning is toincrease your endurance. This will allow your organism to “swallow” a lot of poison, limiting your health losses. You definately have more choices when it comes to fighting off the radiation and protecting yourself against it. Thankfully the radiation is not as nasty as in “S.T.A.L.K.E.R.” series,because you will be allowed to continue your journey even when you’ve been exposed to large doses. The best solution here is to wear antiradiation suits each time you plan on visiting anirradiated area or when you want to swim somewhere. This can only work when you expectto encounter radiation. Otherwise you will have to rely on other means of protecting yourself.A good solution is to use Rad-X and AntiRad medical drugs. The first one can make yourorganism more immune to the effects of the radiation. As for RadAway, it can lower theamount of radiation you’ve already received. You can also seek out help at local doctors, but sadly you must pay a lot of bottle caps for their services. As a result I would recommend notselling radiation drugs, because you never know when you might need them. In order to find out how much radiation you’ve already received you must open your Pip-Boy. 1000 rads is a lethal dosage, however receiving less radiation can also have bad side effects.For example, your endurance, agility and strength may be lowered significantly and this willonly make your progress more difficult. During the exploration of Capitol Wasteland avoid highly radiated areas. Each time you’ll be presented with an information on how many radsyou’re receiving per second. 10 rads and below is acceptable, however you must still monitoryour health, so you won’t die by mistake.
You can see in the upper right corner of the screen how much radiation you’re receiving per
second. Avoid exploring areas with high radiation.
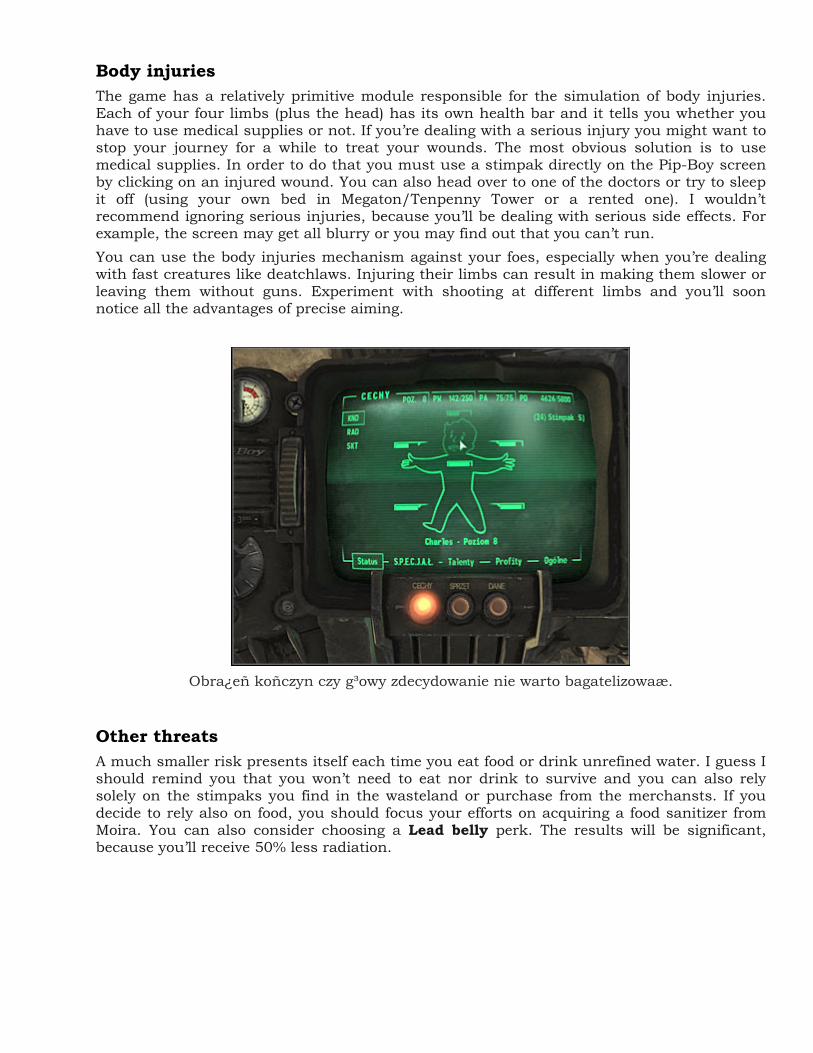
Body injuries The game has a relatively primitive module responsible for the simulation of body injuries.Each of your four limbs (plus the head) has its own health bar and it tells you whether youhave to use medical supplies or not. If you’re dealing with a serious injury you might want to stop your journey for a while to treat your wounds. The most obvious solution is to usemedical supplies. In order to do that you must use a stimpak directly on the Pip-Boy screen by clicking on an injured wound. You can also head over to one of the doctors or try to sleepit off (using your own bed in Megaton/Tenpenny Tower or a rented one). I wouldn’t recommend ignoring serious injuries, because you’ll be dealing with serious side effects. For example, the screen may get all blurry or you may find out that you can’t run. You can use the body injuries mechanism against your foes, especially when you’re dealing with fast creatures like deatchlaws. Injuring their limbs can result in making them slower or leaving them without guns. Experiment with shooting at different limbs and you’ll soon notice all the advantages of precise aiming.
Obra¿eñ koñczyn czy g³owy zdecydowanie nie warto bagatelizowaæ.
Other threats A much smaller risk presents itself each time you eat food or drink unrefined water. I guess Ishould remind you that you won’t need to eat nor drink to survive and you can also rely solely on the stimpaks you find in the wasteland or purchase from the merchansts. If youdecide to rely also on food, you should focus your efforts on acquiring a food sanitizer fromMoira. You can also consider choosing a Lead belly perk. The results will be significant, because you’ll receive 50% less radiation.

Vault-Tec Bobbleheads Figurine – Melee weapons: Virulent underchambers [Dunwich building] Effects: Melee weapons skill raised by 10 points. Additional info: Acquiring this figure isn’t going to be simple. Dunwich building is occupied by feral ghouls, also the strongest glowing kind. Your objective will be to get to Dunwichbuilding – Virulent underchambers section. In order to do to that you must travel throughDunwich building – Abandoned ruins of Dunwich.
Figurine – Big guns: CQ quarters [Fort Constantine] Effects: Big guns skill raised by 10 points. Additional info: You won’t have to enter the main area of the fort. The figurine can be found inside a small building guarded by a few robots.

Figurine – Energy weapons: Raven Rock – level 2 [Raven Rock] Effects: Energy weapons skill raised by 10 points. Additional info: I would strongly recommend that you take this figurine before leaving RavenRock, especially if you plan on blowing up this base.
Figurine – Small guns: National Guard armory [National Guard depot] Effects: Small guns skill raised by 10 points. Additional info: Getting your hands on this figurine is going to be extremely difficult, becausethe depot is being guarded by powerful robots. You must find a switch in order to gain accessto the armory.

Figurine – Charisma: Cloning lab [Vault 108] Effects: Charisma raised by 1 point. Additional info: Vault 108 is swarming with cloned citizens and they’re going to be hostile towards you by default. Eliminate them on your way to your destination. You must first getto Vault 108 – entrance in order to be able to proceed to Vault 108 – cloning lab.
Figurine – Barter: Bazaar [Evergreen Mills] Effects: Barter skill raised by 10 points. Additional info: Your first objective is to locate a large factory. Enter the building and find adoor leading to Evergreen Mills – Bazaar. You should also know that this entire area is swarming with enemy troops (slavers).

Figurine – Intelligence: Science lab [Rivet City] Effects: Intelligence raised by 1 point. Additional info: This figurine can be found in the exact same room where Li and Zimmer arelocated.
Figurine – Explosives: Sealed cistern [WKML broadcasting station] Effects: Explosives skill raised by 10 points. Additional info: I assume that you may have a lot of problems locating the cistern. Ignore themain building of the broadcasting station and proceed south. Head down the cliff and find agrate leading to the cistern (screen). The figurine can be found inside, next to a body and alarge radio.

Figurine – Medicine: Clinic [Vault 101] Effects: Medicine skill raised by 10 points. Additional info: I would strongly recommend collecting this figurine at the beginning of thegame, because after dealing with two initial tutorial segments you’ll find yourself standingnext to it. If you miss it somehow, you can take it later when you decide to return to Vault101.
Figurine – Repair: Evan King’s house [Arefu] Effects: Repair skill raised by 10 points. Additional info: The situation here is similiar to Lucas Simms’s house from Megaton. The most important thing is that you focus only on taking the figurine, because otherwise Evanmay think of you as a thief.

Figurine – Science: Living quarters [Vault 106] Effects: Science skill raised by 10 points. Additional info: Once you’ve reached Vault 106 – entrance you have to use the terminal to unlock access to the living quarters. Ignore strange visions while exploring the crypt, butwatch out for inhabitants of the vault.
Figurine – Lockpicking: Eastern Bethesda offices [Bethesda ruins] Effects: Lockpicking skill raised by 10 points. Additional info: Don’t go to the western building my mistake, because it’s more exposed andyou’ll probably arrive there in the first place. There are a lot of raiders outside the buildingand the structure itself is being protected by a few turrets.

Figurine – Perception: Museum of Dave [The Republic of Dave] Effects: Perception raised by 1 point. Additional info: I would recommend that you synchronize taking the figurine with perform aminiquest for Dave.
Figurine – Speech: Eulogy’s quarters [Paradise Falls] Effects: Speech skill raised by 10 points. Additional info: In order to acquire this figurine you must first gain access to the innercompound of Paradise Falls. This probably means you’ll have to perform a task for Grouse. You can also kill the slavers if you’re a good person. If you’re a bad character, you’ll have an easier entry (without completing any quests). The figurine can be found in the main room ofEulogy’s quarters.

Figurine – Strength: Lucas Simms’s house [Megaton] Effects: Strength raised by 1 point. Additional info: I wouldn’t recommend trying to break into Simms’s shack, because youmight get caught. Instead try waiting for him to return to his home and follow him to that location. The figurine is located in his bedroom, on the first floor.
Figurine – Sneaking: Den [Yao guai tunnels] Effects: Sneaking skill raised by 10 points. Additional info: As the name of the location would suggest, you will be dealing with a lot offierce creatures while trying to get to the figurine. Examine the central area of the den andeventually you’ll find this object.

Figurine – Luck: Arlington House [Arlington cemetary] Effects: Luck raised by 1 point. Additional info: There are two zones for you to choose from when you want to fast travel –Arlington cemetary north and Arlington cemetary south. Either way, you must locate abuilding in the central area of the cemetary (screen). The figurine is in the basement.
Figurine – Unarmed: Rockopolis [Capitol wasteland] Effects: Unarmed skill raised by 10 points. Additional info: This is by far the most difficult figurine to find, mostly because Rockopolisisn’t a primary location, so it won’t be marked on your personal map. Look at the first screen for precise bearings. You must travel to Girdershade or Smith Casey’s carage and begin yourjourney from there. You’ll know that you’ve arrived at your destination when you meet ajunkie. Approach a large rock near his location and press the action key to travel to Rockopolis.

Figurine – Endurance: Deathclaw sanctuary [Deathclaw sanctuary] Effects: Endurance raised by 1 point. Additional info: Obviously the entrance to the sanctuary is being guarded mostly bydeathclaws, but you may also encounter Enclave soldiers and scientists.
Figurine – Agility: Office [Greener Pastures disposal site] Effects: Agility raised by 1 point. Additional info: Watch out for dangerous radiation and proceed to the office building withoutany hesitation. There are a few radroaches inside – kill them with a melee weapon.

Family reunion... at last! :-)

List of achievements This chart has been divided into three columns. The first column displays the name of theachievement. The second column (RWD - reward) tells you how many points you can achieve bycompleting it. The final third column tells you what to do in order to collect the achievemnt.
ACHIEVEMENT RWD REQUIREMENTS
Agatha's Song 20 Complete Agatha’s song quest (gained automatically upon completion).
Ambassador of Peace 20 Advance to the 14th level of experience with good karma.
Big Trouble in Big Town 20 Complete Big trouble in Big Town quest (gained automatically upon completion).
Blood Ties 20 Complete Blood Ties quest (gained automatically upon completion).
Data Miner 20 Successfully hack into at least 50 computer terminals.
Doesn't Play Well with Others 20 Kill at least 300 people.
Escape! 20 Complete Escape! quest (gained automatically upon completion).
Finding the Garden of Eden 20 Complete Finding the Garden of Eden quest (gained automatically upon
completion).
Following in His Footsteps 20 Complete Following in his footsteps quest (gained automatically upon completion).
Galaxy News Radio 20 Complete Galaxy News Radio quest (gained automatically upon completion).
Harbinger of War 20 Advance to the 14th level of experience with bad karma.
Head of State 20 Complete Head of state quest (gained automatically upon completion).
Keys are for Cowards 20 Successfully open at least 50 locks.
Last, Best Hope of Humanity 30 Advance to the 20th level of experience with good karma.
Mercenary 10 Advance to the 8th level of experience with neutral karma.
Oasis 20 Complete Oasis quest (gained automatically upon completion).
One-Man Scouting Party 20 Find at least 100 primary locations in the Capitol wasteland.

Paradigm of Humanity 30 Advance to the 20th level of experience with neutral karma.
Picking up the Trail 20 Complete Picking up the trail quest (gained automatically upon completion).
Pinnacle of Survival 20 Advance to the 14th level of experience with neutral karma.
Protector 10 Advance to the 8th level of experience with good karma.
Psychotic Prankster 10 Put an explosive (grenade or landmine) into someone’s pocket. You can’t be caught and don’t forget to move back to a safe distance!
Reaver 10 Advance to the 8th level of experience with bad karma.
Reilly's Rangers 20 Complete Reilly’s rangers quest (gained automatically upon completion).
Rescue from Paradise 20 Complete Rescue from Paradise quest (gained automatically upon completion).
Scientific Pursuits 20 Complete Scientific pursuits quest (gained automatically upon completion).
Scourge of Humanity 30 Advance to the 20th level of experience with negative karma.
Silver-Tongued Devil 20 Win at least 50 speech challenges.
Slayer of Beasts 20 Kill at least 300 monsters.
Stealing Independence 20 Complete Stealing independence quest (gained automatically upon completion).
Strictly Business 20 Complete Strictly business quest (gained automatically upon completion).
Take it Back! 40 Complete Take it back! quest (gained automatically upon completion).
Tenpenny Tower 20 Complete Tenpenny Tower quest (gained automatically upon completion).
The American Dream 20 Complete The American Dream quest (gained automatically upon completion).
The Bigger They Are… 20 Kill all five supermutant behemoths. They can be found in the following locations:
Capitol Building, Evegreen Mills, Galaxy News Radio, Jury Street metro station,
Takoma – factory district. Check the description of each location to
find out more about where to find the behemoth.
The G.O.A.T. Whisperer 10 Complete Future imperfect quest (gained automatically upon completion).

The Nuka-Cola Challenge 20 Complete The Nuka-Cola challenge quest (gained automatically upon completion).
The Power of the Atom 20 Complete The power of the atom quest (gained automatically upon completion).
The Replicated Man 20 Complete The replicated man quest (gained automatically upon completion).
The Superhuman Gambit 20 Complete The Superhuman gambit quest (gained automatically upon completion).
The Wasteland Survival Guide 20 Complete The Wasteland survival guide quest (gained automatically upon
completion).
The Waters of Life 20 Complete The waters of life quest (gained automatically upon completion).
Those! 20 Complete Those! quest (gained automatically upon completion).
Tranquility Lane 20 Complete Tranquility Lane quest (gained automatically upon completion).
Trouble on the Homefront 20 Complete Trouble on the homefront quest (gained automatically upon completion),
Vault 101 Citizenship Award 10 Begin Growing up fast quest.
Vault-Tec C.E.O. 30 Find all 20 Vault-Tec bobbleheads.
Weaponsmith 30 Create all seven customized weapons using acquired schematics. You must
manufacture at least one of each of these weapons. Keep reading my guide if you want to find out where to look for the schematics.
Yes, I Play with Dolls 10 Find 10 Vault-Tec bobbleheads.
You Gotta Shoot 'Em in the Head 20 Complete You gotta shoot ‘em in the head quest (gained automatically upon
completion).

Hints Character creation and development
Introduction Before you start the game you need to make up your mind on how difficult do you want the game to be. If you don’t feel like an expert in RPG games I would recommend playing on thenormal difficulty setting. You’ll still encounter a lot of difficult moments, but on the other hand your character will grow stronger without any major problems and without you havingto worry about choosing correct stats and skills. If you think you’re a hardcore RPG gamerchoose one of the highest settings. Bear in mind, though – enemy units will inflict more injuries and your character will have to work even harder to eliminate his foes. You should also know that the amount of experience points received for each kill depends on thedifficulty level, so theoretically you should advance even faster. I would recommend that you finish the game at least twice (or three times if you’re going for all achievements) and obviously each time you start a new game you should pick an entirelydifferent character. I would recommend playing as a negotiator with high karma, speechskills and perks tied to new dialog options and with a dumb evil warrior who doesn’t mind being hated by everyone else in the Capitol wasteland. Obviously these are only mysuggestions and I’m sure that you’ll find your own solutions.
Vault 101 exit is the location where you can make final decisions on how your character
should look like.

Main stats This chart can tell you more about seven primary statistics and can provide assistance infinding out how many points should be spent on them.
STAT NAME ADVANTAGES OF SPENDING POINTS
STRENGTH Increased maximum carrying capacity (by 10kg for each invested point); inflicting bigger injuries during melee combat; additional growth of Small Guns (two skill points for each invested point)
PERCEPTION Enemy units appear on personal radar much faster; additional growth of Energy weapons, Explosives and Lockpicking (two skill points for
each invested point)
ENDURANCE Increased resistance to poison and radiation; longer health bar (20 points for each invested point); additional growth of Big guns and
Unarmed (two skill points for each invested point)
CHARISMA Friendlier NPC’s and more interactions with them; additional growth of Barter and Speech (two skill points for each invested point)
INTELLIGENCE More skill points to redistribute each time you advance to a higher level of experience (11 as a base value and 1 more for every invested point); additional growth of Medicine, Repair and Science (two skill
points for each invested point)
AGILITY More action points while using V.A.T.S. system during combat (2 additional action points for each invested point); additional growth of Small Guns and Sneaking (two skill points for each invested point)
LUCK Additional points to all skills (minimum – 1, maximum – 5); increased chances of inflicting critical hits to enemy units (1% more for every
invested point)
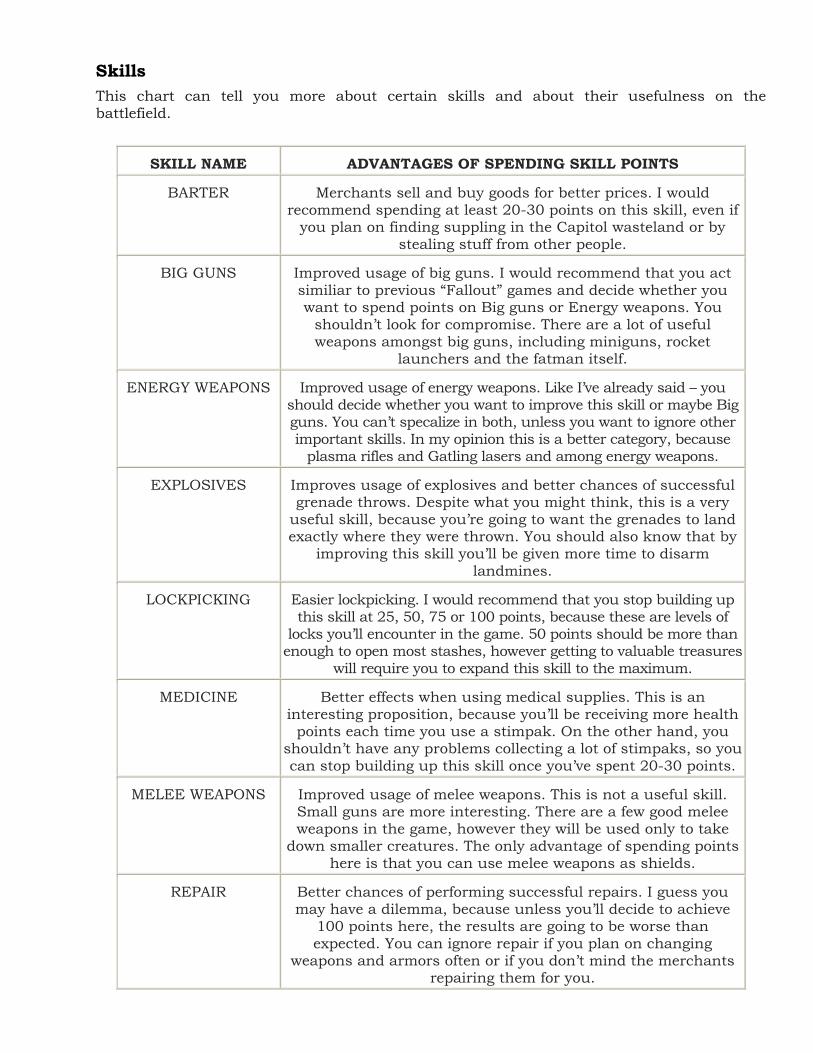
Skills This chart can tell you more about certain skills and about their usefulness on the battlefield.
SKILL NAME ADVANTAGES OF SPENDING SKILL POINTS
BARTER Merchants sell and buy goods for better prices. I would recommend spending at least 20-30 points on this skill, even if
you plan on finding suppling in the Capitol wasteland or by stealing stuff from other people.
BIG GUNS Improved usage of big guns. I would recommend that you act similiar to previous “Fallout” games and decide whether you want to spend points on Big guns or Energy weapons. You
shouldn’t look for compromise. There are a lot of useful weapons amongst big guns, including miniguns, rocket
launchers and the fatman itself.
ENERGY WEAPONS Improved usage of energy weapons. Like I’ve already said – you should decide whether you want to improve this skill or maybe Big guns. You can’t specalize in both, unless you want to ignore other important skills. In my opinion this is a better category, because
plasma rifles and Gatling lasers and among energy weapons.
EXPLOSIVES Improves usage of explosives and better chances of successful grenade throws. Despite what you might think, this is a very
useful skill, because you’re going to want the grenades to land exactly where they were thrown. You should also know that by
improving this skill you’ll be given more time to disarm landmines.
LOCKPICKING Easier lockpicking. I would recommend that you stop building up this skill at 25, 50, 75 or 100 points, because these are levels of
locks you’ll encounter in the game. 50 points should be more than enough to open most stashes, however getting to valuable treasures
will require you to expand this skill to the maximum.
MEDICINE Better effects when using medical supplies. This is an interesting proposition, because you’ll be receiving more health
points each time you use a stimpak. On the other hand, you shouldn’t have any problems collecting a lot of stimpaks, so you can stop building up this skill once you’ve spent 20-30 points.
MELEE WEAPONS Improved usage of melee weapons. This is not a useful skill. Small guns are more interesting. There are a few good melee weapons in the game, however they will be used only to take
down smaller creatures. The only advantage of spending points here is that you can use melee weapons as shields.
REPAIR Better chances of performing successful repairs. I guess you may have a dilemma, because unless you’ll decide to achieve
100 points here, the results are going to be worse than expected. You can ignore repair if you plan on changing
weapons and armors often or if you don’t mind the merchants repairing them for you.

SCIENCE Possibility of braking into more sophisiticated computer systems. This skill shouldn’t be your priority, because even if you spend a small amount of points you’ll still be able to hack into most systems. The only reason to put points into it will be
to unlock cool perks for your character.
SMALL GUNS Improved usage of small guns. This is an extremely useful ability and you should keep investing points in it right from the
start. The main reason is that a lot of powerful weapons are considered to be small guns. I’m talking about combat
shotguns, hunting rifles and even sniper rifles.
SNEAKING Easier to stay in the shadows and improved chances of stealing. You probably won’t be using this skill too often, because there
aren’t many opportunities to surprise enemy units. As for pickpocketing, you can spend a few points if you’re frustrated
by the fact that most steal attempts end in a failure.
SPEECH Ability to convince others to your way of thinking by winning speech challenges. This is the most important skill for an intelligent character who resolves problems with a good
response and not brute force. Even if you’re not into talking to NPC’s, you should still spend 10-20 points and you’ll notice the
difference.
UNARMED Improved melee combat. Similiar effects to Melee weapons only this time you aren’t allowed to use any weapons. The only real
exception are brass knuckles. You’ll probably find a good unique knuckle during the course of the game, but nonetheless
you should ignore this skill and spend points on something else.

Additional hints It’s very important that you make up your mind on how your character should look likebefore leaving Vault 101. You can still change almost everything (apart from quest decisions)while you’re inside, including choosing new skill specializations and amount of points spent on each primary stat. Here’s a list of hints on how you should build your character. MAIN STATS There are seven primary statistics to choose from and the value of each statistic can range on a scale from 1 to 10, however I would recommend avoiding extremely low and extremely highvalues. If you decide to give only 1-2 points to a statistic you’ll probably be dealing with major side effects and the only exception is Luck, because you may decide to ignore it without having to worry about serious repercussions. Endurance may also seem like a lessimportant statistic, but I would recommend spending at least 6-7 points on it. Otherwise you may have some serious problems trying to keep your main character alive. As for otherprimary statistics, it all depends on how you want to play your game. If you want to become afierce warrior you should invest in Strength. If you want to rely on your speech skill andcunning you should invest in Charisma and Intelligence. Don’t forget about Agility, especially if you plan to use the V.A.T.S. system often. You shouldn’t spend 10 points on any of the statistics, because there are Vault-Tec bobbleheads which will allow you to achieve the same effect and you can’t have more points than 10. That’s not all. Strength, Perception and Endurance may also receive additionalpoints thanks to hidden perks and you can also consider choosing Intense training perk eachtime you advance to a higher level of experience. As a result 8 points seems like a safe value,especially if you’re convinced on how you want to develop your character. SKILLS There are many difficult decisions to be made here. You can choose up to threespecializations. Despite how you want to play the game Small guns should be amongst thethree, because it’s the most useful skill in the game, even if you’re trying to avoid combat most of the time. As for two other specializations, if you want to become a bully you shouldinvest in Energy weapons, Big guns or Explosives. A character relying on his intelligenceshould choose between Speech, Science and Lockpicking. Each skill can achieve a maximum of 100 points and unlike the previous game you can’t exoabd it beyond 100. The situation here is similiar to the primary skills – there is one Vault-Tec bobblehead for each skill and it can raise the skill by 10 points. You should also know that you can develop skills thanks to books and certain perks.

Perks Here’s the list of all primary perks which will become available each time you advancedto ahigher level of experience. Notice some of the perks have strict requirements, not only when itcomes to achieving certain level, but also having developed skills. It’s up to you whether youwant to focus on fullfilling these requirements or not. Some of the perks are available morethan once and obviously each time you choose them again the effects of having them will bestronger. Chart description: lvl – required level of experience; ranks – how many times you can choose this perk; req – additional requirements
INTENSE TRAINING – lvl2; ranks: 10 (!!) Effects: Each time you receive one point to
be spent on a primary statistic (S.P.E.C.I.A.L.) of your choice
Additional info: I think this is a very interesting perk, especially if you want to
have a character who specializes in all sorts of activities and doesn’t have any weak spots. Don’t forget not to spend points on stats which can be acquired using other means (for example – after
collecting a bobblehead or after fullfilling a quest).
LADY KILLER / BLACK WIDOW – lvl2; ranks: 1
Effects: 10% extra damage dealt to characters of different gender, new dialog
options Additional info: Black widow is by far more interesting than Lady killer, because there
are more men occupying the wasteland and the 10% bonus is a lot, especially when dealing with stronger foes. New
dialog options might seem like a good idea, but won’t be many of them and usually you’ll achieve more by winning a speech
challenge.

LITTLE LEAGUER – lvl2; req: Strength 4; ranks: 3
Effects: Each level raises your Melee weapons and Explosives skills by 5 points.
Additional info: A relatively weak perk, especially since you should spend 3 points
to notice effects of your actions (15% bonus).
SWIFT LEARNER – lvl2; req: Intelligence 4; ranks: 3
Effects: Each level raises the amount of gathered experience points by 10%.
Additional info: Similiar situation to Here and now perk. You should only be
interested in this perk if you want to advance as fast as possible. I assure that you won’t need it and that you’ll get to the 20th level of experience without its help.
Spend your perk point on something else.
DADDY’S BOY / DADDY’S GIRL – lvl2; req: Intelligence 4; ranks: 3
Effects: Each level raises your Medicine and Science skills by 5 points
Additional info: Similiar skill to Little leaguer, byt obviously you can count on
other skills being raised. I would recommend ignoring this perk, because you can get a similiar amount of skill
points by finding books or bobbleheads.
GUN NUT – lvl2; req: Intelligence 4, Agility 4; ranks: 3
Effects: Each level raises your Small guns and Repair skill by 5 points
Additional info: In this case you should really consider investing at least one point, because both skills are very useful. You’ll be using small guns very often and the
possibility of repairing them is also important.

THIEF – lvl2; req: Agility 4, Luck 4; ranks: 3
Effects: Each level raises your Sneaking and Lockpicking skills by 5 points
Additional info: Obviously you should consider choosing this perk only if you’re planning on playing as a thief. Otherwise
you can ignore it.
CHILD AT HEART– lvl4; req: Charisma 4; ranks: 1
Effects: new dialog options when talking to children
Additional info: This isn’t a useful skill, becaus the only thing it does is that it
opens new dialog options. Take it only if you want to play as a negotiator. In such
case you should choose it along with Lady killer / Black widow perk. Otherwise you should spend a point of something else. You should also know that there aren’t
many kids in Capitol wasteland. The only area worth mentioning is Little lamplight.
ENTOMOLOGIST – lvl4; req: Intelligence 4, Science 40; ranks: 1
Effects: 50% additional damage to insects Additional life: You may be surprised to
hear that it’s an interesting perk. Eliminating radroaches is a piece of cake,
however you can have more problems getting rid of radscorpions and fire ants. This is when this perk comes into play.
EDUCATED – lvl4; req: Intelligence 4; ranks: 1
Effects: Three additional skill points to redistribute each time you’ve advanced to a
higher level of experience Additional info: Unlike Swift learner this
is an extremely useful perk and you should take it when you advance to the 4th level of experience, so you won’t lose any bonuses. Having additional skill points is always a
good thing.

COMPREHENSION – lvl4; req: Intelligence 4; ranks: 1
Effects: Two skill point instead of one after reading a book
Additional info: This is an interesting propisition, but only if you like to explore your surroundings in search of books and other valuable items. This will make your progress a lot smoother. If you don’t plan on collecting many books you may ignore
this perk.
SCOUNDREL – lvl4; req: Charisma 4; ranks: 3
Effects: Each level raises your Barter and Speech skills by 5 points
Additional info: This is one of the better skill-related perks. You’ll be able to
accomplish a lot with high speech skills, especially if you’re playing as an intelligent
person. As for barter, you can get better prices from merchants. Consider spending
at least one point on this perk, unless you’re absolutely not interested in any
forms of interactions with NPC’s.
IRON FIST – lvl4; req: Strength 4; ranks: 3
Effects: Each level raises your Unarmed skill by 5 points
Additional info: Pathetic perk and something you should NOT be interested in. Not only you’ll receive a bonus to only
one skill, but it’s also a useless one, because instead of raising it you should be
more interested in Small guns or even Melee weapons.
DEMOLITION EXPERT – lvl6; req: Explosives 50; ranks: 3
Effects: 20% extra damage dealt using explosives (grenades, mines and rockets)
Additional info: You should consider choosing this perk if you plan on raising Explosives (mines, grenades) or Big guns (rocket launcher) to the maximum. The difference is a significant one, especially when you achieve the final third rank
(60%!).

LEAD BELLY – lvl6; req: Endurance 5; ranks: 1
Effects: While drinking unrefined water you receive 50% less radiation
Additional info: Dreadful idea for a perk. I’m sure that you won’t have any problems
collecting enough stimpacks and even if you drink bad water by mistake you can
always use RadAway to fight off the radiation.
BLOODY MESS – lvl6; ranks: 1 Effects: Increased damage made by all of
kinds of weapons by 5%, bloody executions Additonal info: You may be interested in seeing bloody executions, but other than that it’s not a good perk. The difference in damage dealt to your enemies is very small
and you can achieve much more by making a turn last longer or simply by
using better guns.
FORTUNE FINDER – lvl6; req: Luck 5; ranks: 1
Effects: You find nearly twice as much bottle caps as before
Additional info: Despite what you might think, it’s not a useful perk, because you won’t have major problems with money in the game. Spend your point on something
more interesting.
GUNSLINGER – lvl6; ranks: 1 Effects: Improved accuracy while using
V.A.T.S. system and a one-handed weapon Additional info: It’s not easy to make a
decision whether this is a useful perk or not. You shouldn’t waste perk points if you only have standard guns in your disposal. If you’ve managed to find a unique weapon of that kind you may consider choosing it. Notice that it doesn’t have to be a pistol.
You can also use this perk with submachine guns and sawed-off shotguns.

TOUGHNESS – lvl6; req: Endurance 5; ranks: 1
Effects: Improved damage resistance by10% (no more than 85% total)
Additional: A very interesting perk. You may find it useful early during the course
of the game, however it’ll become less useful when you obtain one of the power
armors. Still you should consider spending a single point on it – maybe not right away
but after reaching level 7-8.
IMPARTIAL MEDIATION – lvl8; req: Charisma 5; ranks: 1
Effects: Speech increased by 30 points, however only if you’re playing as a neutral
character Additional: I guess the description says everything you need to know. Consider
spending a point on this perk only if you: a) plan on winning a lot of speech
challenges b) plan on playing as a neutral character. Prevent your actions from making you a good or a bad person, because you’ll automatically lose all
bonuses provided by this perk.
COMMANDO – lvl8; ranks: 1 Effects: Improved accuracy while using
V.A.T.S. system and a rifle. Additional info: This is a much more
interesting perk than Gunslinger, mostly because rifles are more powerful and you’ll
be using them almost all the time. Improved accuracy will allow you to go for
more headshots. You should also know that the bonus applies to all kinds of rifles,
including plasma rifles!
STRONG BACK – lvl8; req: Strength 5, Endurance 5; ranks: 1
Effects: Maximum encumberance increased by 22kg
Additional info: I wouldn’t advise to spend any points on this perk, because the limits
are very high, even if you only gave 5-6 points to Strength. It’s best to leave
unwanted items at your home or to sell them.

RAD RESISTANCE – lvl8; req: Endurance 5; ranks: 1
Effects: Increased radiation resistance by 25%
Additional info: This is a very unpractical perk, because you can achieve similiar effects by using Rad-X or by wearing a
protective suit. Fighting off the effects of radiation is also very easy and relatively
cheap.
SIZE MATTERS – lvl8; req: Endurance 5; ranks: 3
Effects: Each level raises your Big guns skill by 15 points
Additional info: It’s an interesting perk, however it only modifies one skill. Still, 15 points per level is a lot. You can achieve similiar effects by choosing a perk that
increases the amount of skill points with each level up or by finding enough books on Big guns. The decision is up to you. I would recommend spending at least one
point on this perk, if not more.
SCROUNGER – lvl8; req: Luck 5; ranks: 1
Effects: You can find nearly twice as much ammunition in crates, lockers etc.
Additional info: I guess you may have a serious dilemma here. Finding ammuntion for better weapons is often difficult and not
all the merchants are offering it. Choose this perk if you plan on using rare
weapons or if you don’t mind wasting a lot of ammo on enemy beings.
NIGHT PERSON – lvl10; ranks: 1 Effects: Bonus to Perception and
Intelligence (2 each but no more than 10) at night
Additional info: This might seem as an interesting perk, but I wouldn’t
recommend travelling only at night, because not only you’ll become more likely to surprised by hostile creatures, but you’ll also have some serious problems finding
the landmarks.
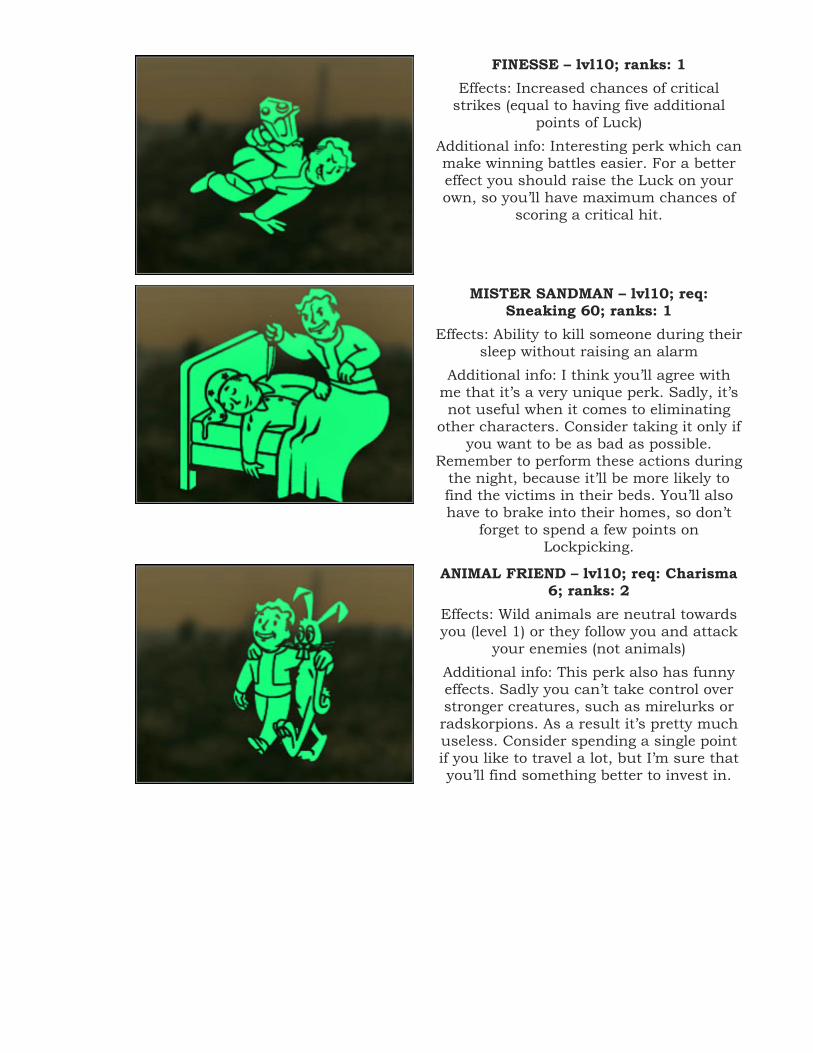
FINESSE – lvl10; ranks: 1 Effects: Increased chances of critical
strikes (equal to having five additional points of Luck)
Additional info: Interesting perk which can make winning battles easier. For a better effect you should raise the Luck on your own, so you’ll have maximum chances of
scoring a critical hit.
MISTER SANDMAN – lvl10; req: Sneaking 60; ranks: 1
Effects: Ability to kill someone during their sleep without raising an alarm
Additional info: I think you’ll agree with me that it’s a very unique perk. Sadly, it’s not useful when it comes to eliminating
other characters. Consider taking it only if you want to be as bad as possible.
Remember to perform these actions during the night, because it’ll be more likely to find the victims in their beds. You’ll also have to brake into their homes, so don’t
forget to spend a few points on Lockpicking.
ANIMAL FRIEND – lvl10; req: Charisma 6; ranks: 2
Effects: Wild animals are neutral towards you (level 1) or they follow you and attack
your enemies (not animals) Additional info: This perk also has funny effects. Sadly you can’t take control over stronger creatures, such as mirelurks or radskorpions. As a result it’s pretty much useless. Consider spending a single point if you like to travel a lot, but I’m sure that you’ll find something better to invest in.

NERD RAGE! – lvl10; req: Science 50, Intelligence 5; ranks: 1
Effects: Increased damage resistance by 50% and Strength to 10 points whenever the number of health points drops below
20% Additional info: Both bonuses are very
interesting, but not too practical. There are battles where you’ll probably balance
between life and death, but for most of the time you’ll probably want the health bar to
remain at a safe level. Remember that there are only 20 levels in the game, so you should focus on choosing only best
perks.
MYSTERIOUS STRANGER – lvl10; req: Luck 6; ranks: 1
Effects: Mysterious stranger appears on the battlefield during some of the V.A.T.S.
battles Additional info: This is also a very weird perk and I’m sure that you’ll want it only
to see how the stranger looks like. I wouldn’t recommend taking it, unless
you’re playing as a character who tends to avoid battles whenever possible.
HERE AND NOW – lvl10; ranks: 1 Effects: You automatically advance to a
higher level of experience Additional info: Definately the worst perk you can think of, because you won’t any problems reaching the final 20th level of
experience on your own. If you choose this perk, you’ll lose an opportunity to take a different perk. If you’re stubborn, make
sure that you’re not taking it if you already scored a lot experience points for the new
level (for example – after completing a quest).

SILENT RUNNING – lvl12; req: Agility 6, Sneaking 50; ranks: 1
Effects: Sneaking increased by 10 points and the ability to run while staying hidden
Additional info: I wouldn’t say this is a useful perk, because there aren’t many
opportunities where you’ll want to remain hidden. If you like being stealthy you may
consider taking it, but otherwise spend your points on something better.
ROBOTICS EXPERT – lvl12; req: Science 50; ranks: 1
Effects: Damage done to robots increased by 25% and the ability to shut them down Additional info: This is an interesting perk,
because most robots you’ll encounter in the game are difficult to destroy, especially
if you’re not carrying any EM mines or pulse grenades. A significant damage
bonus is also something you shouldn’t ignore.
CANNIBAL – lvl12; ranks: 1 Effects: Ability to eat human flesh while
staying hidden Additional info: You should take this perk only if you plan on playing as a very bad character. It’s not too practical, because
each time you eat human flesh you’ll only regain a few health points and there won’t be any other bonuses. A much better perk
is received from Vance and it allows to drink human blood.
PYROMANIAC – lvl12; req: Explosives 60; ranks: 1
Effects: Increased damage with fire-based weapons by 50%
Additional info: By fire-based weapons I mean mostly the flamethrower, but also a Shishkebab and a Nuka-grenade. Not that bad, especially if you like to play with fire.

SNIPER – lvl12; req: Agility 6, Perception 6; ranks: 1
Effects: Increased chances of a successful headshot while using V.A.T.S. system
Additional info: As you’ve probably noticed, the requirements for this perk are relatively big, but you should try and get it. The main reason is that most of the
headshots end with your enemy dying. The only real exceptions are when you’re
attacking supermutants or heavilly armed soldiers. Remember that you’ll receive
bonus only for a V.A.T.S. kill, so you can’t rely on fighting in real time.
FAST METABOLISM – lvl12; ranks: 1 Effects: Increased regeneration by 20%
when using stimpacks. Additional info: This might seem like an interesting perk, because the stimpacks
are the common means to replenish health supplies, however spending an entire point on this is a little too much, especially since you shouldn’t have problems with running
out of medical supplies.
LIFE GIVER – lvl12; req: Endurance 6; ranks: 1
Effects: Health bar 30 points longer Additional info: You should only invest in this perk if you’ve already chosen Nerd Rage! Otherwise I wouldn’t recommend
taking it, because it’ll be too weak.
CHEMIST – lvl14; req: Medicine 60; ranks: 1
Effects: All chemical substances in your organism last twice as long
Additional info: This is an interesting perk, because not only it affects popular drugs, but it also works with Med-X, Rad-X and
RadAway. You can also count on the Stealth Boy protecting you for a longer
period of time which may come in handy while trying to stay in the shadows.

CYBORG – lvl14; req: Medicine 60, Science 60; ranks: 1
Effects: Increased resistance to radiation, damage and poison by 10%, Energy weapons skill raised by 10 points
Additional info: As you’ve probably noticed, this skill is versatile. You can
count on a lot of interesting bonuses. Not only you’ll be better protected, but you’ll also inflict more serious wounds with a plasma rifle or other energy guns. Don’t forget not to put 100 points into Energy
weapons, so you won’t put one of the bonuses to waste. The only downside is that you must raise the Medicine skill to 60 points in order to unlock this perk.
MASTER TRADER – lvl14; req: Charisma 6, Barter 60; ranks: 1
Effects: Merchants lower their prices by 25%
Additional info: The difference is quite significant, however you’ll only notice this when buying most expensive armors and guns. I would recommend ignoring this
perk and acquiring the best equipment on your own. You should know that you won’t
have any serious problems getting your hands on a lot of money, as long as you sell whatever you found and explore new
locations.
LIGHT STEP – lvl14; req: Perception 6, Agility 6; ranks: 1
Effects: Immunity to landmines and other floor traps
Additional info: This is a very bad perk. I assume that at level 14th you’ve been able to raise your Explosives skill, so you don’t
have to worry about not being able to disarm traps. Furthermore, you should
take your time in defusing landmines and other objects, because they’ll be added to
your inventory.

LAWBRINGER – lvl14; ranks: 1 Effects: Ability to take fingers of bad
people and to collect rewards for them Additional info: You should only be
interested in this park if you want to build up a good character. You can track down and kill not only people (Talon company
mercnearies, slavers, Enclave soldiers and others), but intelligent ghouls as well. If you want to find out where to deliver all fingers talk to Lucas Simms in Megaton. He will direct you to Sonora Cruz. This
woman can be found to the north of Wheaton armory.
CONTRACT KILLER – lvl14; RANKS: 1 Effects: Ability to collect ears of good
people and to exchange them for bottle caps
Additional info: This is a negative version of the Lawbringer perk. You should
choose it only if you’re playing as a bad character. Sadly, the list of potential
candidates for execution is smaller. You can kill some of the merchants,
Brotherhood of Steel members, slaves and friendly ghouls. In order to receive your reward (5 caps for every ear) you must
travel to the Scrapyard and talk to Littlehorn.
ADAMANTIUM SKELETON – lvl14; ranks: 1
Effects: All four limbs receive only half of damage they should
Additional info: You should know by now that your limbs are being broken or badly damaged not that often as you would have suspected. As a result I see no reason to waste one point on this perk, especially since you can always go to the doctor or
heal by yourself.

TAG! – lvl16; ranks: 1 Effects: Fourth skill specialization becomes
available to you Additional info: Not that good as you
would have anticipated, because by the time you’ve reached level 16 most of the skills you’re interested in should already
be at maximum or somewhere near the top value.
CHEM RESISTANT – lvl16; req: Medicine 60, ranks: 1
Effects: 50% less chances of getting addicted to drugs
Additional info: Pointless perk, because as I’ve mentioned many times before the results of getting an addiction are way “smoother” than in previous “Fallout”
games. Furthermore, you should have a fairly strong characte by nowr that won’t
need to rely on drugs in order to win battles.
ACTION BOY / ACTION GIRL – lvl16; req: Agility 6; ranks: 1
Effects: 25 additional action points during V.A.T.S. battles
Additional info: This is by far the most interesting perk you can get your hands on after reaching level 16. 25 points will make
a huge difference, especially when using Small guns and Melee weapons. In most cases you’ll get one extra attack per turn. Choose this perk as soon as you have the
chance
BETTER CRIITCALS – lvl16; req: Perception 6, Luck 6; ranks: 1
Effects: Critical hits take 50% more damage (when successful)
Additional info: It’s not a coincidence that this perk appears so late during the game,
because so far most of the headshots ended with an instan kill. You may have discovered recently, though, that more powerful enemies require you to fire at
their heads at least twice. I would recommend that you reconsider
purchasing this perk, however it’s not a necessity.

INFILTRATOR – lvl18; req: Lockpicking 70, Perception 7; ranks: 1
Effects: One more try to open a destroyed lock
Additional hit: Useless perk unless you weren’t careful in the past. As long as you were thinking of what you were doing, you shouldn’t brake any locks. Take this perk only if you know that you’ve accidentally
destroyed a lock to a very valuable treasure.
COMPUTER WHIZ – lvl18; req: Science 70, Intelligence 7; ranks: 1
Effects: One more try to break into a computer system using your Science skill
Additional hit: Similiar idea to the Infiltrator perk, however this time you are
given one more chance to hack into a closed system. I assume that you were
careful and cancelled your login attempts before clicking on the last word. This
method prevents the system from being locked down.
PARALYZING PALM – lvl18; req: Unarmed 70; ranks: 1
Effects: Ability to paralyze an opponent for 30 seconds using a special unarmed
attack Additional hit: Interesting perk, but once
again – not practical. The main disadvantage is that you’ll have to
acknowledge a lot of restrictions – you can’t use any weapons (only knuckles) and
you must activate V.A.T.S. module. If you’re still interested go ahead and and try
– you’ll be pleasantly surprised. :-)
CONCENTRATED FIRE – lvl18; req: Energy weapons 60, Small guns 60;
ranks: 1 Effects: Each successful hit increases a
chance of the next one by 5% Additional hints: I guess you may have
some problems understanding what this is all about. Obviously the best results can
be achieved if you hit a target a few times, but I’m sure that most of your enemies die relatively quickly at this point of the game.
As a result you may skip this skill and spend a point on something more useful.

NINJA – lvl20; req: Melee weapons 80, Sneaking 80; ranks: 1
Effects: Increased chances of a critical hit by 15% when using Melee Weapons or
being unarmed, criticals stronger by 25% when attacking enemy units by surprise
Additional hints: Final perk for a character who wishes to stay in the shadows
whenever possible. If you prefer open combat ignore this perk.
EXPLORER – lvl20; ranks: 1 Effects: All primary locations are
automatically unlocked Effects: I would recommend that you cheat a little and save your progress just before you’re about to advance to the final 20th level. Once you’ve done that and chosen
this perk create a savegame and go back to the previous save. Results? You won’t lose
a chance to find out where all the main locations are and you will be allowed to
choose a better final perk. Sadly you can’t fast-travel to newly unlocked locations – you must get there on foot at least once.
GRIM REAPER’S SPRINT – lvl20; ranks: 1
Effects: Killing an enemy using the V.A.T.S. system replenishes your action
points Additional info: This is by far the best perk
you can get in the entire game. I’m sure that you’ll find it very useful. The results
can only be witnessed when fighting a larger group of enemy units. Eliminating one target will allow you to immediately attack the next one. As a result you will only have to remember about reloading your weapon, so you won’t run out of
ammo at a crucial moment.

SOLAR POWERED – lvl20; req: Endurance 7; ranks: 1
Effects: Two additional points of Strength and a slow regeneration of health while
travelling during the day Additional info: Interesting perk which may come in handy while exploring the Capitol wasteland. I would recommend
choosing Grim reaper’s sprint perk instead, however if you don’t like to use
the V.A.T.S. system, you can take this one.

Hidden perks Aside from the main perks listed before there are also eleven hidden perks which you will beallowed to acquire during the course of the game. You can’t have them all, but most of them are going to be easy to acquire. Here’s the list of all hidden perks with a short description ofwhat they can provide and how to get to them.
NAME HOW DOES IT WORK HOW TO GET IT
Rad limb healing Achieving a critical radiation value (at least 400 rads) will allow you to
heal your broken limbs automatically. Cool but dangerous!
:-)
You must fullfill a bonus task for Moira while doing the first mission of the first chapter of
her book (The Wasteland survival guide subquest). This
means you must expose yourself to at least 600 rads.
Survival expert Your primary bonus is that your resistance to radiation and poison
is increased by 4%. Aside from that, you can increase your damage resistance, increase
chances of a critical hit, make the health bar bigger or receive a few
points in Science. It all depends on how you’ll answer to Moira’s
question.
This reward is tied to The Wasteland survival guide
subquest. Number of fullfilled optional objectives must vary
between 5 and 8. The reward is handed over to you at the end
of the quest.
Barskin Both bonuses are very useful – Endurance stat gets 1 point (as a
result you shouldn’t try to maximize it at all costs) and your damage resistance is increased by
10 points.
You can receive this perk from Harold, but only if you end his
suffering by destroying his heart. Check the description of Oasis subquest for more info
on how to do that.
Survival guru Your primary bonus is that your resistance to radiation and poison
is increased by 6%. Aside from that, you can increase your damage resistance, increase
chances of a critical hit, make the health bar bigger or receive a few
points in Science. It all depends on how you’ll answer to Moira’s
question.
This reward is tied to The Wasteland survival guide
subquest. You must complete all nine optional objectives. The reward is handed over to you at
the end of the quest.
Hematophagy Drinking human blood allows you to regain 20 health points instead of 1. Not a big deal, however you
will find a lot of blood packs in the wasteland. You should know that you won’t receive any penalties for
You can receive this ability from Vance as a reward for helping him in completing Blood ties subquest and
sending his request to Arefu citizens. Make sure that you

drinking human blood which can’t be said about the canibalism.
Sadly the blood packs are added to your weight limit, so you can’t
carry too many of them.
ask him for the reward!
Ant might Your Strength is increased by one point. Obviously you shouldn’t
maximize this stat on your own, so you won’t lose the bonus. In addition you’ll receive better
protection from fire.
This reward can be achieved if you help Lesko (Those!
subquest) to solve the ant problem. The alternative is Ant
sight perk.
Mrówczy wzrok Your Perception is increased by one point. Obviously you shouldn’t maximize this stat on your own, so
you won’t lose the bonus. In addition you’ll receive better
protection from fire.
This reward can be achieved if you help Lesko (Those!
subquest) to solve the ant problem. The alternative is Ant
might perk.
Dream crusher 30% lower prices for the good selled to you by Moira. In addition to that you receive better chances
of inflicting critical wounds.
You must begin The Wasteland survival guide
subquest, complete at least one assignment and convince Moira (speech) to cancel this project.
Junior survivor Your primary bonus is that your resistance to radiation and poison
is increased by 2%. Aside from that, you can increase your damage resistance, increase
chances of a critical hit, make the health bar bigger or receive a few
points in Science. It all depends on how you’ll answer to Moira’s
question.
This reward is tied to The Wasteland survival guide
subquest. You must complete less than five optional
objectives. The reward is handed over to you at the end
of the quest.
Wired reflexes 10% better chances of a successful hit while using the V.A.T.S.
module. Not much, so you’re better off trying to get to the positive ending of the quest which is
rewarded with an ultracool plasma rifle. :-)
This reward is handed over to you by Zimmer after
completing The replicated man subquest and revealing personality of the android to
him. Obviously this is a negative outcome.
Power armor training
A very useful perk, because power armors are the best ones you can
find in the Capitol wasteland. Brotherhood of Steel and Enclave are using these armors, however you may also come across unique
objects.
You must enter The Citadel and this can obly be done when you get to the end of Waters of
life quest. Find Gunny and after you’ve received approval from Elder Lyons ask him to teach you how to use power
amors.

Combat
Basics “Fallout 3” gives you a choice between real-time combat and a turn-based system called V.A.T.S. This module provides you with a certain amount of action points each time you starta new turn. None of these systems work is an ideal tool, so I would recommend using them both, depending on the current situation on the battlefield. V.A.T.S. system is a better choice when you’re fighting at a very close range. This usually occurs when you’re trying to take down enemies equipped with some kind of weapons. Acombat shotgun is by far the most useful gun at close range and you should consider usingit with the V.A.T.S. module. You’ll soon notice that you can win even when trying to takedown dangerous opponents. Don’t forget that each action takes a few points. It’s fairly obvious that you can’t fire too much before you end the turn. The amount of points requiredto take an action depends on its size and firepower. For instance, a pistol requires less pointsthan a rifle and a rifle requires less points than a rocket launcher. You must find a compromise betwen firepower and the possibility of attacking your enemies serveral timesbefore your action points run out. When you’re planning to eliminate your enemies from a large distance you shouldn’t useV.A.T.S. The reason is simple – you’ll soon notice that your weapon become less effective,because there’s a smaller chance of hitting the target. As a result you would be wasting your ammo and you would also allow your enemies to get closer. I would recommend that in real-time combat you rely on all kinds of rifles, especially hunting rfles and sniper rifles. They’re easy to get so you shouldn’t have any problems repairing them on your own. You’ll also finda lot of ammunition. You should also know that if you find a battle to be too difficult, you can always try andholster your weapon before you’re attacked by your enemies. If you’re lucky they will allow you to surrender, however you must be going against intelligent creatures, because otherwiseyou’ll fail miserably.
V.A.T.S. system should be used to win battles at a close range.

Useful hints AIMING FOR A CERTAIN PART OF THE BODY I’m sure you won’t be surprised to hear that you’re allowed to aim for different parts of thebody while using the V.A.T.S. system to eliminate your enemies. You probably won’t have a chance to do this in real-time combat, especially when you’ll be dealing with moving targets. The only real exception here is shooting at a motionless object with a sniper rifle. Obviously for most of the time you should be aiming for heads of the people or the creatures you’re fighting with. The main reason is that a successful headshot takes away A LOT of health points and usually it allows you to kill your enemy with only one blow. This becomesespecially important when going against larger groups of raiders and feral ghouls. Sadly notalways you’re able to pull off a headshot, because you may be dealing with nasty obstacles oryou may just be standing too far away from your target and this is when you’ll receive less chances for the shot to precise. In such cases instead of aiming for the head you can targetother limbs. Shooting at the corpus is always a good idea when you’re going for a hit, however this area is often better protected against your attacks. If you’re dealing with supermutants and deathclaws you should cconsider shooting at the legs so you won’t have toworry about these creatures getting dangerously close to you. If you’re going against armedopponents, target their hands of legs so they won’t be able to keep shooting at you after a successful hit. Capitol wasteland is also inhabited by monsters with no distinguishable heads. This meansyou must find their other weak spots and to exploit them. For istance, while fighting the antsyou should be aiming for their antennae. It shouldn’t take you too long to observe their reactions and to take appropriate measures.
Before you start shooting at an enemy character, make sure that you have a chance of
actually hitting the target, especially the head area.

USING GRENADES AND LANDMINES I’ve mentioned many times before that grenades are very useful in the game, even if you’regoing against supermutants or robots (in this case you should arm yourself with pulsegrenades instead of frag grenades). The most important thing for you to remember about is that grenades must always land exactly where you want to them, so don’t throw them if you have less than 70-80% chances of success. Not only you’ll lose a grenade with a bad throw,but you may injure your allies or even your main character by mistake. Make sure thatyou’ve spent a lot of point developing Explosives skills and don’t forget to always stand in the open, so that grenades won’t bounce off walls and other large objects. Landmines are also very interesting part of your gear. You’ll find a lot of these objects in Capitol wasteland and you shouldn’t sell them, however carrying a lot of landmines may havea negative effect on the sze of your inventory. Take your time to place the landmines in areasthat are about to be populated by enemy ceatures. You can also start moving backwards andthrow them so they’ll land in front of you, but this only works when you’re fighting relatively slow creatures like large ants or mirelurks.
Mines and grenades are very useful when trying to get rid of enemy forces.
USING SURROUNDING OBJECTS TO YOUR ADVANTAGE The environment can play an important role while trying to eliminate enemy units, especiallywhen taking a trip to the D.C. ruins. You should notice that there are a lot of destroyed carsin the game and you can blow them up to seriously injure nearby hostile units. Obviouslyyou should prevent your enemies from doing that and not use wrecked cars for protection,becuase sooner or later they’re going to be destroyed. You should also be on a look out forpower generators. There are a lot of them in the sewers and near larger settlements. Anexplosion of the generator is much smaller, but it can also do some damage.

Eksplozje w otoczeniu mog¹ Ci równie dobrze pomóc, co zaszkodziæ.
Seeking help elsewhere You can also make your battles easier by using all sorts of drugs. Jet is by far the most popular drug in the game, mostly because it’s easy to find and not that expensive if you wantto buy some from a doctor or a junkie. Don’t forget that this is still a drug, so you can get addicted each time you take some jet. Addiction isn’t life threatening, but it can lower your Agility and this means it’ll have the opposite effect (taking away action points instead ofgiving them). The standard version of jet adds 30 action points and that’s a lot. You can also interact with a ghoul named Murphy with hopes of getting your hands on ultrajet. A safer way to gain advantage over your opponents is to drink a Nuka-Cola Quantum. Each time you’ve done that you’ll receive 20 additional action points. Remember to fullfill Nuka-Cola challenge quest in the first place, because you won’t be given new bottles in exchange for those you’ve already wasted and you’ll have more problems reaching the limit of 30bottles being delivered to Sierra.
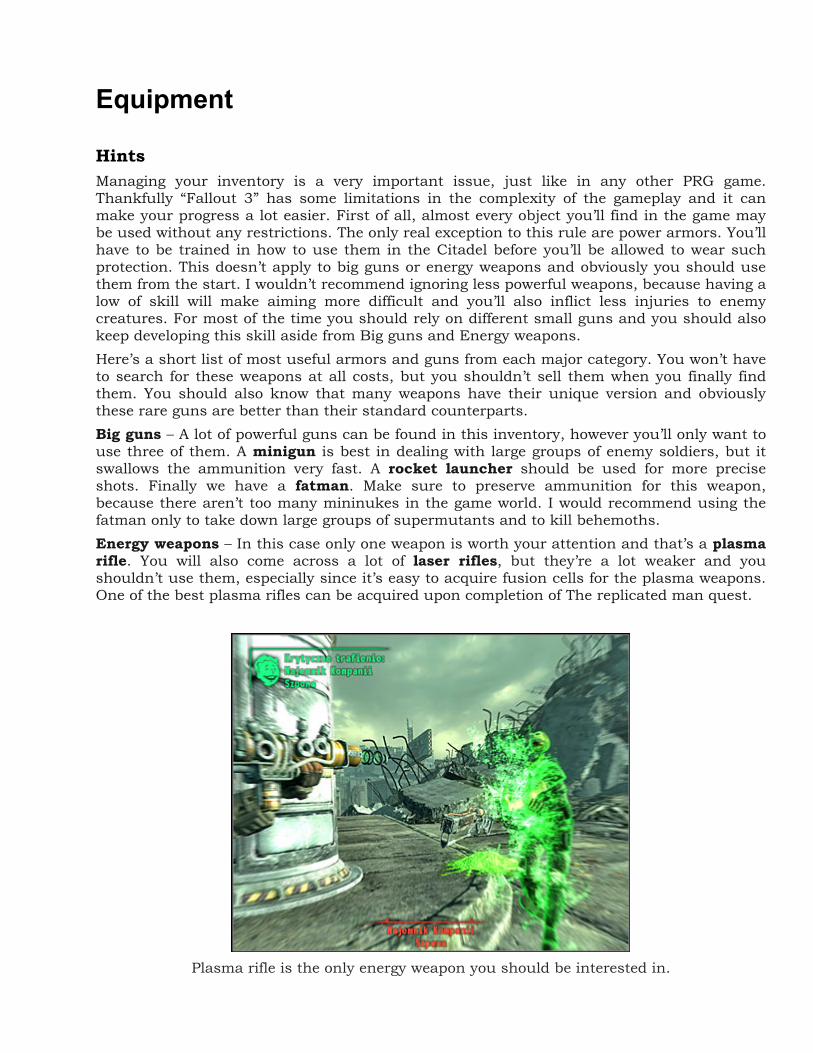
Equipment
Hints Managing your inventory is a very important issue, just like in any other PRG game.Thankfully “Fallout 3” has some limitations in the complexity of the gameplay and it canmake your progress a lot easier. First of all, almost every object you’ll find in the game may be used without any restrictions. The only real exception to this rule are power armors. You’ll have to be trained in how to use them in the Citadel before you’ll be allowed to wear suchprotection. This doesn’t apply to big guns or energy weapons and obviously you should use them from the start. I wouldn’t recommend ignoring less powerful weapons, because having alow of skill will make aiming more difficult and you’ll also inflict less injuries to enemycreatures. For most of the time you should rely on different small guns and you should alsokeep developing this skill aside from Big guns and Energy weapons. Here’s a short list of most useful armors and guns from each major category. You won’t haveto search for these weapons at all costs, but you shouldn’t sell them when you finally find them. You should also know that many weapons have their unique version and obviously these rare guns are better than their standard counterparts. Big guns – A lot of powerful guns can be found in this inventory, however you’ll only want to use three of them. A minigun is best in dealing with large groups of enemy soldiers, but itswallows the ammunition very fast. A rocket launcher should be used for more precise shots. Finally we have a fatman. Make sure to preserve ammunition for this weapon,because there aren’t too many mininukes in the game world. I would recommend using thefatman only to take down large groups of supermutants and to kill behemoths. Energy weapons – In this case only one weapon is worth your attention and that’s a plasma rifle. You will also come across a lot of laser rifles, but they’re a lot weaker and youshouldn’t use them, especially since it’s easy to acquire fusion cells for the plasma weapons.One of the best plasma rifles can be acquired upon completion of The replicated man quest.
Plasma rifle is the only energy weapon you should be interested in.

Small guns – This is definately the largest category. There are a lot of interesting guns here,created for characters of different specializations. The most useful weapons in the game are combat shotguns, because they’re cheap to buy and repair and they’re extremely powerful(for a small gun) at close range. If you prefer to attack your enemies from a distance, considerchoosing chinese assault rifles, hunting rifles and sniper rifles. Melee weapons – I have to say I’m not too fond of this category, however there are a fewitems you may be interested in getting your hands on. Sledgehammers are the most powerful melee weapons in the game world and they’re very effective at close range. My personal favorite is a ripper, mostly because it’s blocks some of the attacks made by other characters, especially if you’re fighting in real-time. Unarmed combat – Sadly you won’t be given a large choice of weapons for unarmed combat. There are a few types of knuckles in the game. Don’t bother using them unless you’ve found a unique weapon.
Ripper is good in close combat. Notice that it blocks enemy attacks.
Explosives – My favorites in this category are frag grenades and landmines, because there are tons of them in the Capitol wasteland. Make sure that you’re not carrying too many of them. You should also focus your attention on acquiring schematics for a Nuka-grenade, because it’s going to be a nice alternative to the fatman. Use pulse grenades and EM mines to destroy enemy robots. There are also plasma grenades, but they’re expensive and rare, soyou may as well ignore them. Armors – I would recommend that you have two armors at your disposal at all times. Astronger armor should be used during the battles. For most of the time you’ll be just fine if you use one of many different leather combat armors, however you should also focus onunlocking access to power armors. Here you can choose between models used by Enclaveand Brotherhood of Steel. but there are also a few unique power armors. As for the secondaryarmor, you should take a protection suit with you. I’m sure that you’ll find many of those in the wasteland and they’re purpose is to defend you against negative effects of the radiation. They may come in handy while trying to get to an irradiated area of the map.
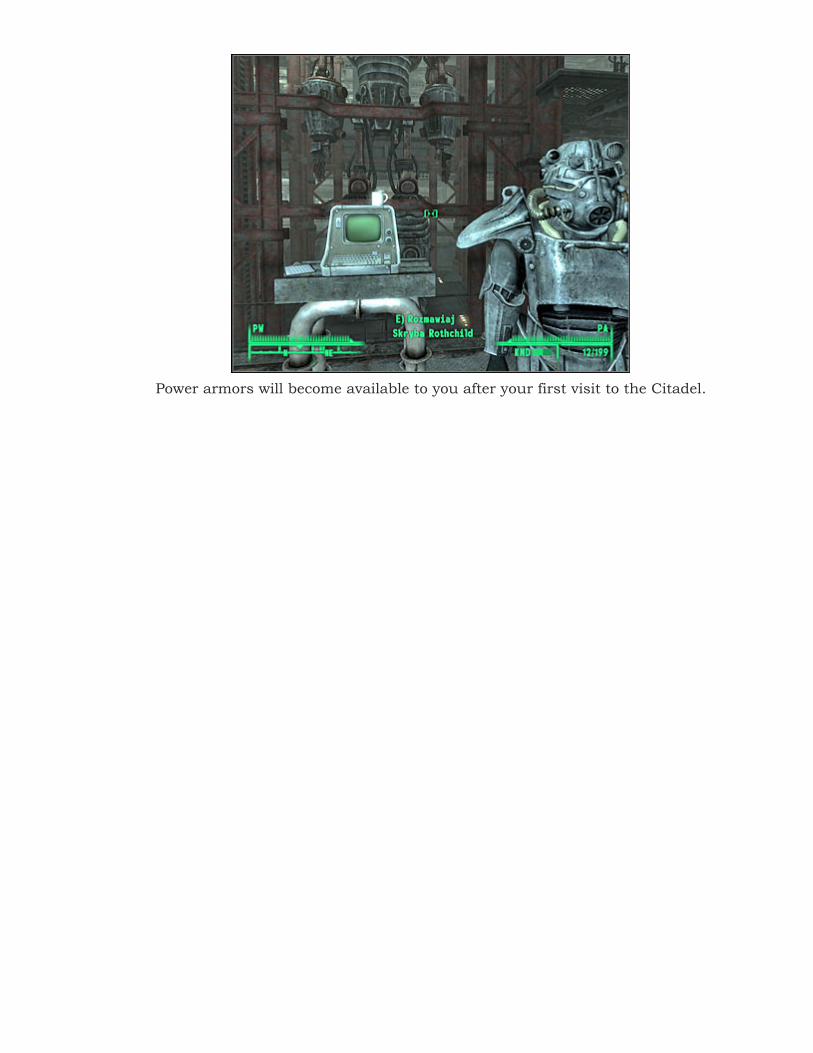
Power armors will become available to you after your first visit to the Citadel.

Storing equipment and doing repairs One of the most important things about difficulty level of “Fallout 3” is that your gear loses its durability during the course of the game. You can observe the changes in the state of your items directly from the Pip-Boy menu, but it gets even harder when you want to dosomething about it. You can’t ignore this problem, because items in bad state offer badprofits from having and using them. This is especially crucial when it comes to weaponry, because you can lose a lot of damage points and a result you have to focus more attention onscoring perfect shots to nullify the difference. Each time your equipment has derroriated you must make a decision how to solve thisproblem. The most obvious solution is to invest points in development of the Repair skill.Sadly there are a few things you must remember about. The scale of repairs that can be done correlate to advancement of your skill, so you won’t be able to bring back the original state of your gear at first. Also, you must have a spear item of the same type in your inventory tomake the repairs possible. A much easier solution to the durability problem is to ask one of the merchants to make necessary adjustments. This is often expensive and the merchantswill probably stop at 50-55% durability, so you can’t rely on their skills entirely and eventually you should start spending points on Repair.
Friendly merchants can repair your equipment... for a price.
Most of the items in your inventory have a certain weight value, especially when we’re talking about weapons and armor. You can’t carry too many items, because your character won’t beable to run or even move. The maximum limit isn’t a sttict one, especially since ammunitiondoesn’t weigh a thing. Nevertheless, you will often have to find a compromise. A good idea is to hand over items to your team members and I’m sure that you’ve discovered this possibility on your own if you remember previous “Fallout” games. You should also store less important items in your house in Megaton or in your apartment in Tenpenny Tower. I wouldrecommend that you visit merchants often and sell them unwanted goods. Make sure not tovisit only one person, because it’ll take some time for the merchants to gather enough bottle caps to be able to buy your gear. If you’re desperate, try buying something for them, insteadof just taking the caps.

Store your items in your house (Megaton) or apartment (Tenpenny Tower).

Unique weapon schematics You will be allowed to create seven custom weapons throghout the course of the game,however this entire mechanism is more complex than you might have anticipated. There’s a total of 23 weapon schematics for you to find. You won’t have to get to all the schematics for each of the seven weapons, but the more you collect the better the quality of the weapon isgoing to be. I would recommend having at least two schematics before proceeding with theassembling. In order to begin the process you must locate a workbench. This usually meansvisiting a merchant (Moira for example) or a laboratory. Also, you must make sure that youhave all the ingridents, because otherwise you wouldn’t be able to make a gun. The following chart display the names and ingridents required to create all seven customweapons. You’ll also find out how many schematics there are for each gun. Legend: NAME – name of the custom weapon you can create using a workbench; REQUIREMENTS – ingridients required to create a gun – you can’t proceed if something is missing from the list; NMBR – number of schematics that may be found during yourexploration of the wasteland – it’s either 3 or 4 and you need at least 1 to succeed
NAME REQUIREMENTS NMBR
Railway rifle crutch x1, steam gauge assembly x1, fission battery x1, pressure cooker x1
3
Bottlecap mine lunch box x1, bottle caps x10, cherry bomb x1, sensor module x1
4
Nuka-grenade Quantum Nuka-Cola x1, Abraxo cleaner x1, turpentine x1, tin can x1
3
Rock-it launcher vacuum cleaner x1, conductor x1, leaf blower x1, firehose nozzle x1
4
Dart gun surgical tubing x1, radscorpion poison gland x1, paint gun x1, toy car x1
3
Deathclaw gauntlet wonderglue x1, leather belt x1, medical brace x1, deathclaw hand x1
3
Shishkebab motorcycle gas tank x1, pilot light x1, lawnmower blade x1, motorcycle handbrake x1
3

Custom weapons can be made using a workbench. Try fisiding Moira’s store for one of these. This second chart displays the exact list of locations where you should look for theschematics.
NAME SCHEMATICS
Railway rifle First schematic: Museum of History – Underworld (trader) Second schematic: Rivet City (reward for Stealing
independence quest) Third schematic: MDPL-13 power station
Bottlecap mine First schematic: Jocko’s Pop & Gas Stop Second schematic: Little lamplight (trader)
Third schematic: Megaton (reward for The Wasteland survival guide quest)
Fourth schematic: Tenpenny Tower (Herbert Dashwooda’s safe)
Nuka-grenade First schematic: Girdershade (reward for Nuka-Cola challenge quest)
Second schematic: Cliffside cavern Third schematic: Wandering trader – Doc Hoff
Rock-it launcher First schematic: Vault 101 (hidden stash in the clinic) Second schematic: Megaton (trader) Third schematic: Rivet City (armory)
Fourth schematic: Wandering trader – Crazy Wolfgang

Dart gun First schematic: MDPL-05 power station Second schematic: Temple of the Union (reward for Head of
State quest) Third schematic: Tenpenny Tower (trader)
Deathclaw gauntlet First schematic: F. Scott Key Trail & Campground Second schematic: Wounded deatchlaw (random encounter –
check the body of the monster) Third schematic: Rivet City (solving Bannon’s problem)
Shishkebab First schematic: Meresti trainyard Second schematic: Small campsite between Fort Constantine
and SatCom NN-03d antenna Third schematic: Wandering trader - Harith

Other
Dirty deeds STEALING AND CONSEQUENCES OF SUCH ACTIONS There are two ways to steal. You can steal items from safes, lockers and other stashes usingyour lockpicking skill or you can steal directly from other characters. Pickpocketing is far more dangerous, becuase if you didn’t develop your skills to high values there’s a highpossibility of getting caught. The only advantage of pickpocketing is that most NPC’s carryvaluable items or keys which will grant you access to their homes. If you plan on stealing from the environment, the most important thing to remember about isthat you aren’t seen by anyone. This applies to opening locks and taking items from yoursurroundings. If you’re caught you’ll lose all the items you’ve taken and if it was a neutral character you may engage yourself in a firefight. The most extreme outcome is that you’re banished from a city. Thankfully this a rare occurence and it lasts only a few days. Each time you steal something (it doesn’t really matter how) you’ll lose a few karma points. The differences are very small for single objects, but if you keep up with your dirty deeds youmay end up being a very bad character. Lower karma usually makes your survival in thewasteland more difficult, but it’s your choice. If you want to be a bad boy there’s nothing in your way to pursue such goals. OPENING LOCKS AND BREAKING INTO COMPUTER SYSTEMS You can find out easily whether you can collect an object from your environment without anypenalties or not. If the name of the object is displayed in red then it means you must steal itand you’ll lose karma if you do that. Each time you plan on opening a lock you should save your current progress, because youcan brake the lock if you press the wrong button or you can lose a lot of bobby pins if you’re dealing with a very sophisticated mechanism. Thankfully it’s much easier when you’re dealing with computer terminals. Remember that you can always quit before making a finalguess of the password. When you hack into the terminal again you’ll notice that you’ve been given a few tries. If you brake a lock or disable a terminal by mistake you can always choose perks which will help you in accessing these objects again, but it’s a waste of perk points.