Faculty Innovator Grant 2018 Center for Learning and ... · Old Dominion University lecture, the...
35
Faculty Innovator Grant 2018 Center for Learning and Teaching Final Report Form Faculty Innovator Grant 2018: Final Report Page 1 of 5 Center for Learning and Teaching Old Dominion University Primary Faculty Name: Ayman Elmesalami Department: Computer Science Email Address: [email protected] Office Phone Number: Project Title: (10 words or less) Coding/programming is fun with tiny computers (credit-card size) - the “Raspberry Pi” computers Other faculty: Faculty Name: Department Email Address Office Phone Number Soad Ibrahim Computer Science [email protected]
Transcript of Faculty Innovator Grant 2018 Center for Learning and ... · Old Dominion University lecture, the...
Faculty Innovator Grant 2018 Center for Learning and Teaching
Final Report Form
Faculty Innovator Grant 2018: Final Report Page 1 of 5
Center for Learning and Teaching
Old Dominion University
Primary Faculty Name: Ayman Elmesalami
Department: Computer Science
Email Address: [email protected]
Office Phone Number:
Project Title: (10 words or less)
Coding/programming is fun with tiny computers (credit-card size) - the “Raspberry Pi” computers
Other faculty:
Faculty Name: Department Email Address Office Phone Number
Soad Ibrahim Computer Science [email protected]

Faculty Innovator Grant 2018 Center for Learning and Teaching
Final Report Form
Faculty Innovator Grant 2018: Final Report Page 2 of 5
Center for Learning and Teaching
Old Dominion University
1. Describe the specific teaching and learning issues being addressed by the proposal. Many students, especially women and minorities, characterize the computer science as a discipline for people who like to stare at screens for long time. Even though, modern desktop and laptop computers are very powerful, finding interesting applications for programming is still difficult and a challenging task. The problem is the lack of the real-world applications, which students can feel, see, hear, or touch. It is usually difficult to increase the students’ interest in computer programming without finding real-world problems and apply a solution. If students can feel and understand the reasons for which they write the computer programs, they can easily implement a solution. In fact, it is difficult for students to appreciate the power of Computer Science (CS) as a problem-solving field without real-world experiments. Furthermore, students in Computer Science may drop-out or turn away from the field because it does not offer an opportunity for students to communicate with each other during labs like other majors. In this project, we applied active project based learning techniques in two of our computer science courses to make the courses’ material more interesting. At the end of the projects, students obtained a deeper knowledge through active exploration of real-world problems and many of them enjoy the challenges they face when developing solutions. These projects studied the impact of hands-on project-based learning using Raspberry Pi. 2. Describe the revised specific teaching and learning issues being addressed by the proposal (if applicable): 3. Describe the development activities involved addressing the learning or teaching issue. We incorporated the Raspberry Pi projects with two of the Computer Science courses CS150 Problem Solving and Programming I and CS250 Problem Solving and Programming II. The main language used for developing projects for Raspberry Pi is Python. There is a rich library of open source python packages that are specifically written for Raspberry Pi, but because the two selected courses are geared towards students learning C++, teaching Python specifically to create Raspberry Pi projects at the same time should have increased the work load and may overwhelmed students. WiringPi, C library, was used to develop Raspberry Pi projects for the chosen Problem-Solving courses. Students do not have to have prior experience with WiringPi because its functions and their use were explained and demonstrated during the lab time by the instructors. The students were given C++ programming assignments and were told to complete the Raspberry Pi part during the lab time in order to receive further help from the lab instructors. In the lab, the instructors, gave a lecture about Raspberry Pi and its uses in real world. The instructors also explained GPIO pins, breadboards, resistors, voltage, and demonstrated how to connect LEDs to Raspberry Pi GPIO pins. At the end of the
Faculty Innovator Grant 2018 Center for Learning and Teaching
Final Report Form
Faculty Innovator Grant 2018: Final Report Page 3 of 5
Center for Learning and Teaching
Old Dominion University
lecture, the students were shown a simple C++ project that turns an LED on and off using WiringPi library. CS150 Project: The objective is to learn about control flow and functions in C++ while using Raspberry Pi’s GPIO port as an output device. The project is a quiz program that prints a random number between 1 and 500 on the screen; the user is asked to guess whether the random number is a prime number or not. If the answer is correct, a green LED lights up and the program prints “You Win!” on the screen. If the answer is wrong, a red LED lights up and the program prints “You lose!” on the screen. The program, then, asks the user if he or she wants to continue playing or exit the game. If the user chose to continue, both LEDs are turned off and the computer generates a different random number and asks the user to guess again. The program continues to run until the user chooses to exit. CS250 Project: The objective is to learn about ADTs in C++ while using Raspberry Pi’s GPIO port as an output device. Three LEDs of different colors are connected to the GPIO ports. The project is a simulation of a credit card company management software. The students were asked to write a program that has at least one ADT (account class) with the following data members: credit card number, customer name, credit limit, and balance. Customers’ data is stored in a binary file. A customer can pay the total amount of his/her balance or part of it. The customer can also make a purchase using the credit card. The user can create, modify, and delete accounts. All new accounts are created with a specific credit limit. 4. Describe the learning outcomes attained by the project. Upon the completion of the Raspberry Pi projects, students were able to:
• assemble the Pi computers
• operate the Pi using different interfaces
• run Linux commands for the Pi
• write programs for devices other than the traditional desktop computers
• write programs for the Pi
• control external devices using the Pi
• collaborate with other team members in the same programming project
• present the programming problem and the solution
• break a programming task down into its essential steps to implement a practical solution for the most complicated real-world problems
These outcomes reflected more interest from students in computer science and computer programming, especially students from minorities and women. This was clear in the feedback which the instructors received from students who participated in the projects. 5. Describe unexpected outcomes, if any.
Faculty Innovator Grant 2018 Center for Learning and Teaching
Final Report Form
Faculty Innovator Grant 2018: Final Report Page 4 of 5
Center for Learning and Teaching
Old Dominion University
6. Describe the impact of the completed project on your colleagues, department, college, or community. The two presented projects for CS150 and CS250 should serve and benefit many classes offered by ODU at the College of Sciences and the College of Engineering, as follows: CS: The computer science department offers numerous undergraduate and graduate programming classes, which can benefit from the projects. The projects can serve the following classes from the computer science, CS150, CS170, CS250, CS252, CS270, CS330, CS355, CS361, CS471, CS455, CS495, CS555, CS595, and CS697. Other instructors from the computer science department can share the Pi devices, which we will buy for this project. The two participating faculty teach many of these classes in multiple format (face-to-face, online, and hybrid), and they will test the project in classes which they offer in 2018. ECE: The electrical and computer engineering department can apply the same proposed Pi technology to many classes, especially those courses which involve programming to control hardware components. The projects could be applied to the following classes from the electrical and engineering department, ECE241, ECE341, ECE346, ECE355, ECE395, ECE407, ECE443, ECE455, ECE462, ECE507, ECE543, ECE555, and ECE562. The Pi can be also used in many electronic projects at the ECE department. 7. Describe how the project can be a model, template, or prototype for use by other instructors. We attached a PP presentation with this final project. The presentation includes a detailed information on how to implement the two projects. We are also working on a publication paper from the project. 8. Describe the technology used to help address the issues described in the proposal. Raspberry Pi 3 Model B is an affordable single board computer. Raspberry Pi 3 Model B was used in our experiment. It only costs $35, but there are other items needed to complete the projects, like the Pi case, micro USB power adapter, preloaded SD card (16 GB), HDMI cable, breadboard, jumper wires kit, LED lights kit, resistors kit. It is possible to buy a kit that includes everything needed for these projects, but we ordered the equipment separately to cut cost and offer the students the opportunity to assemble the devices manually. We bought the SD cards preloaded with Raspbian operating system to allow the students to focus on their problem-solving projects instead of installing operating system on the Raspberry Pi. Computer monitors, keyboards, and
Faculty Innovator Grant 2018 Center for Learning and Teaching
Final Report Form
Faculty Innovator Grant 2018: Final Report Page 5 of 5
Center for Learning and Teaching
Old Dominion University
mice are also used at no cost because the Computer Science lab is equipped with these devices that support the HDMI input.
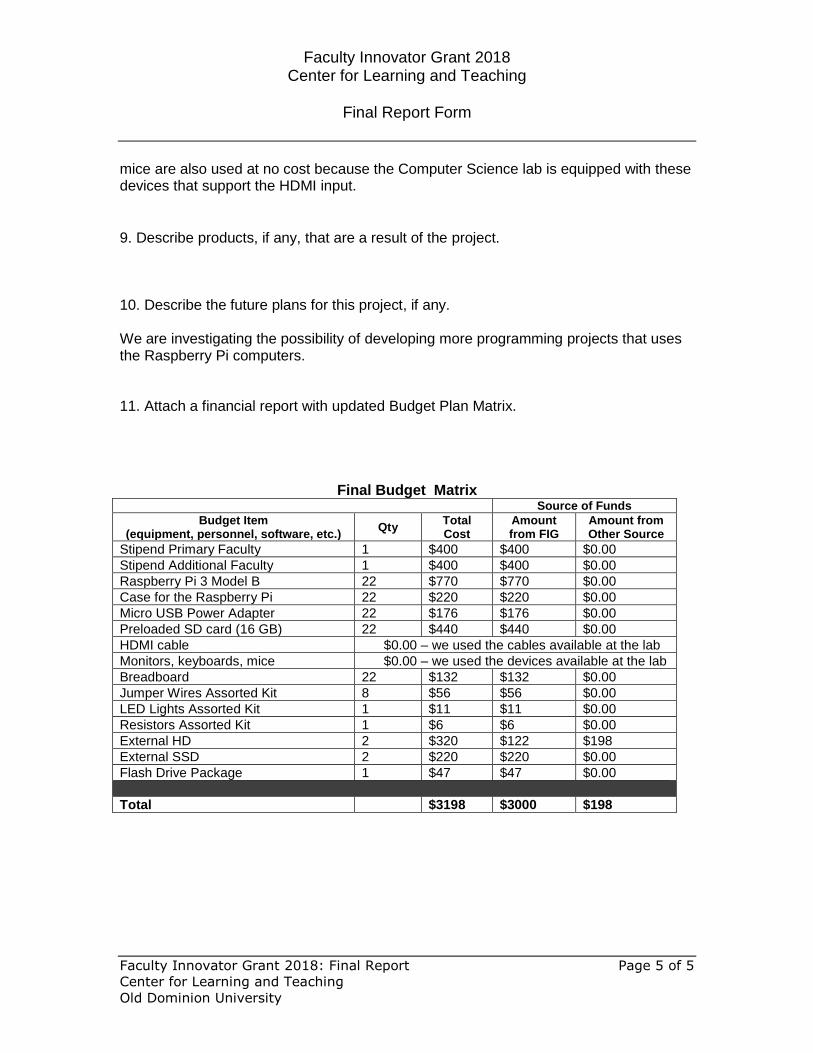
9. Describe products, if any, that are a result of the project. 10. Describe the future plans for this project, if any. We are investigating the possibility of developing more programming projects that uses the Raspberry Pi computers. 11. Attach a financial report with updated Budget Plan Matrix.
Final Budget Matrix Source of Funds
Budget Item (equipment, personnel, software, etc.)
Qty Total Cost
Amount from FIG
Amount from Other Source
Stipend Primary Faculty 1 $400 $400 $0.00
Stipend Additional Faculty 1 $400 $400 $0.00
Raspberry Pi 3 Model B 22 $770 $770 $0.00 Case for the Raspberry Pi 22 $220 $220 $0.00 Micro USB Power Adapter 22 $176 $176 $0.00 Preloaded SD card (16 GB) 22 $440 $440 $0.00 HDMI cable $0.00 – we used the cables available at the lab
Monitors, keyboards, mice $0.00 – we used the devices available at the lab
Breadboard 22 $132 $132 $0.00 Jumper Wires Assorted Kit 8 $56 $56 $0.00 LED Lights Assorted Kit 1 $11 $11 $0.00 Resistors Assorted Kit 1 $6 $6 $0.00 External HD 2 $320 $122 $198 External SSD 2 $220 $220 $0.00 Flash Drive Package 1 $47 $47 $0.00
Total $3198 $3000 $198

Coding/programming is fun with tiny computers (credit-card size) - the
“Raspberry Pi” computers
CS150 & CS250 Problem Solving I & II
Computer Science Dept
Old Dominion University
by
Dr. Ayman Elmesalami
Dr. Soad Ibrahim

What is Raspberry Pi?• A low cost, $35, credit-card sized computer
• Originally designed for educational purposes
• Early concept started in 2006. Officially launched in 2012
• Used in IoT, Internet of Things, a network of Internet connected objects (things) able to collect and exchange data.
• Used in embedded systems, computer system with a dedicated function within a larger mechanical or electrical system.
• Embedder systems Interface to surrounding environment through sensors and actuators.
Input (Sensor) → Raspberry Pi → Output (indicator or actuator)
• Examples: Motion detectors, home automation, security systems, smart cities, leak detectors, etc.
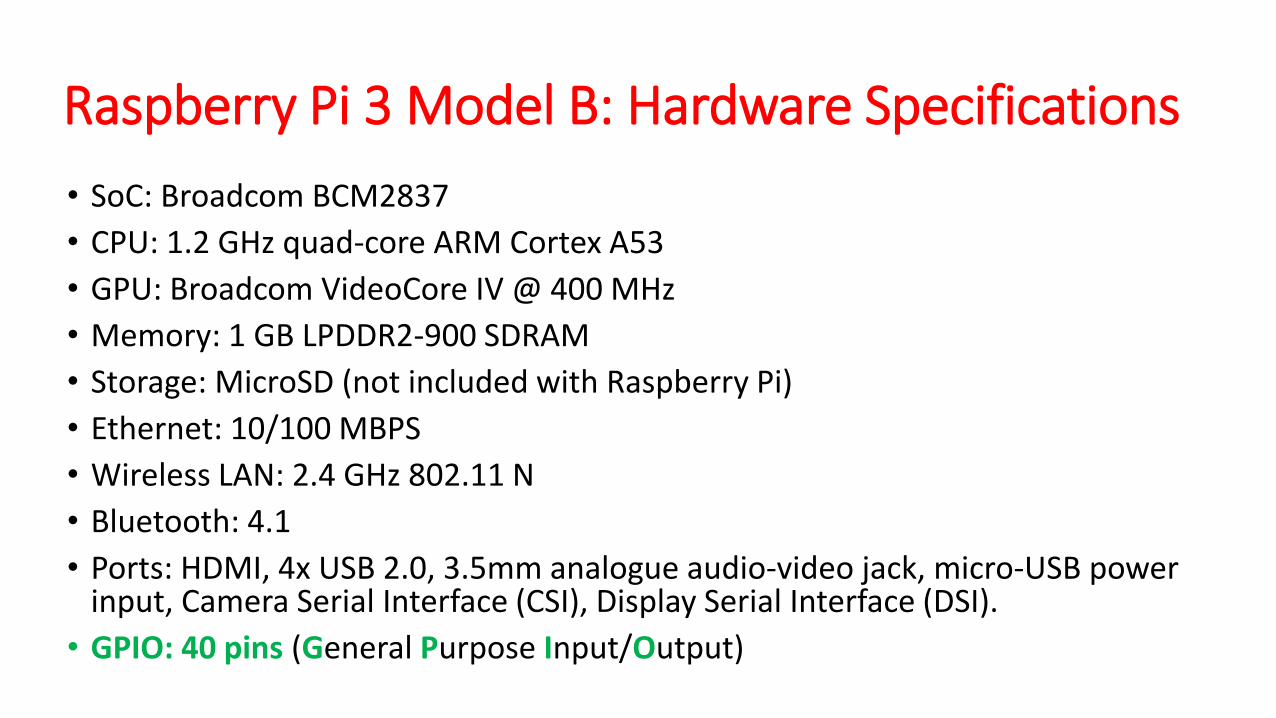
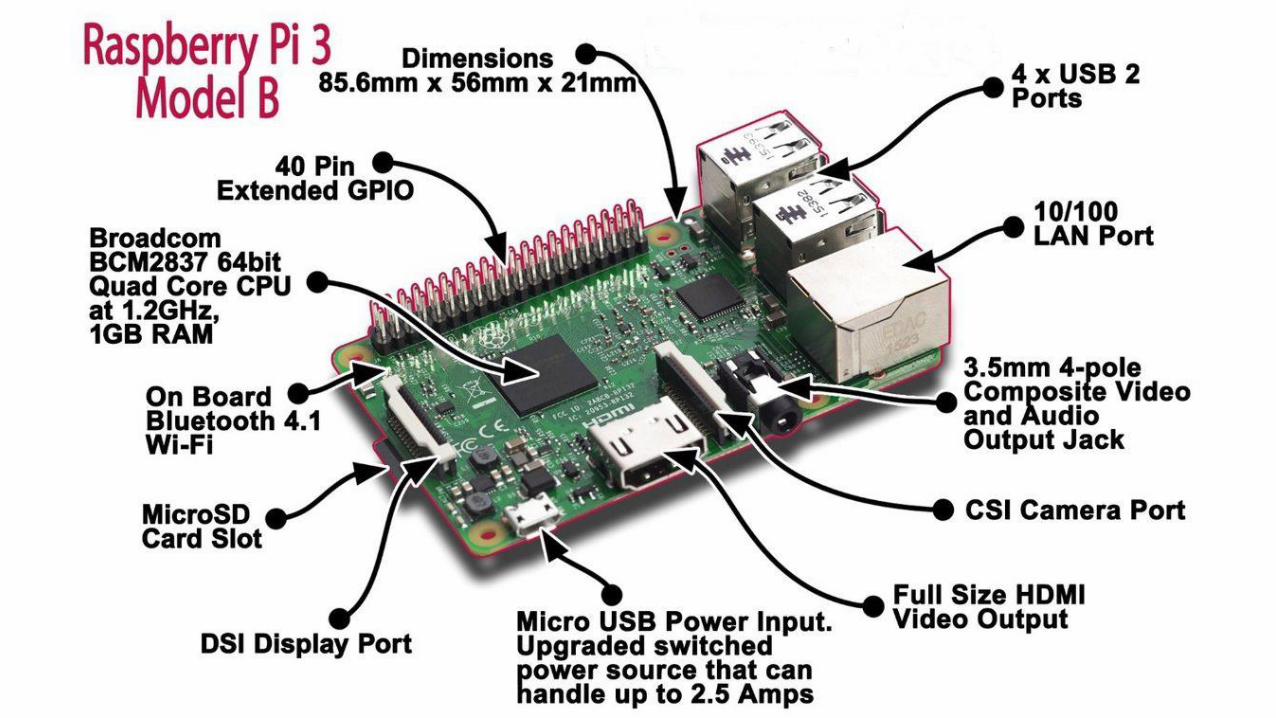
Raspberry Pi 3 Model B: Hardware Specifications
• SoC: Broadcom BCM2837
• CPU: 1.2 GHz quad-core ARM Cortex A53
• GPU: Broadcom VideoCore IV @ 400 MHz
• Memory: 1 GB LPDDR2-900 SDRAM
• Storage: MicroSD (not included with Raspberry Pi)
• Ethernet: 10/100 MBPS
• Wireless LAN: 2.4 GHz 802.11 N
• Bluetooth: 4.1
• Ports: HDMI, 4x USB 2.0, 3.5mm analogue audio-video jack, micro-USB power input, Camera Serial Interface (CSI), Display Serial Interface (DSI).
• GPIO: 40 pins (General Purpose Input/Output)
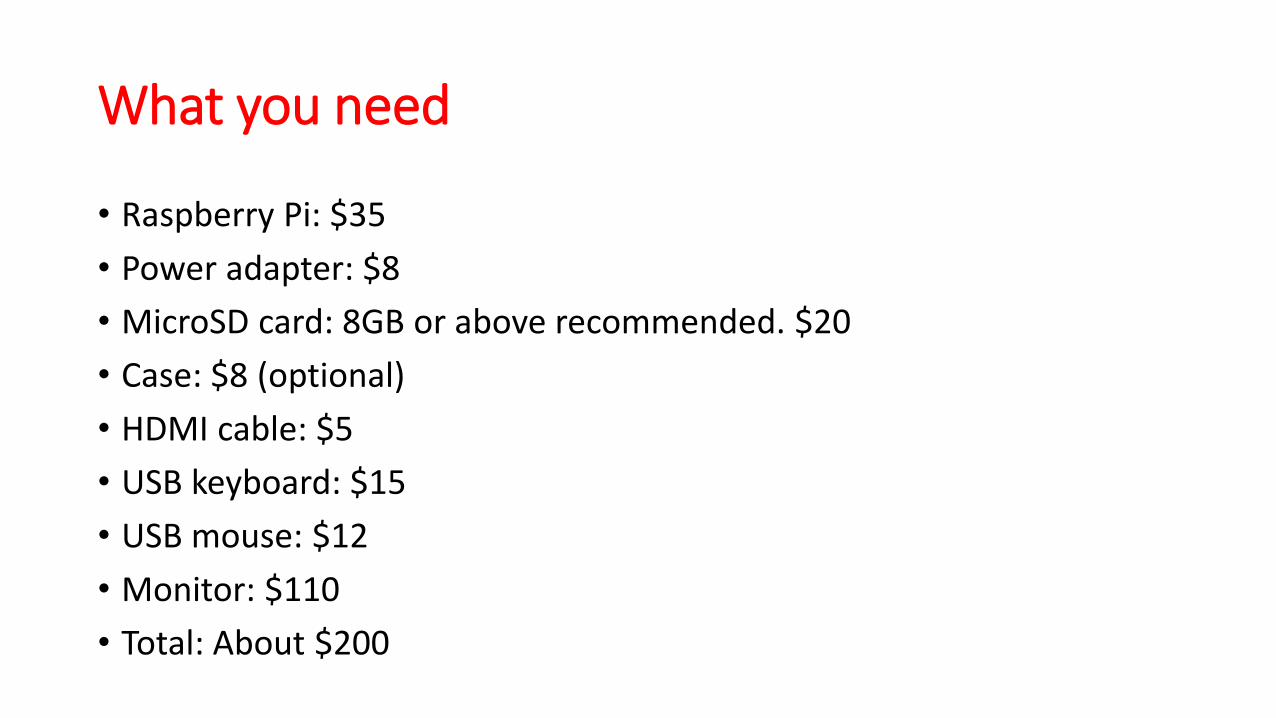
What you need
• Raspberry Pi: $35
• Power adapter: $8
• MicroSD card: 8GB or above recommended. $20
• Case: $8 (optional)
• HDMI cable: $5
• USB keyboard: $15
• USB mouse: $12
• Monitor: $110
• Total: About $200
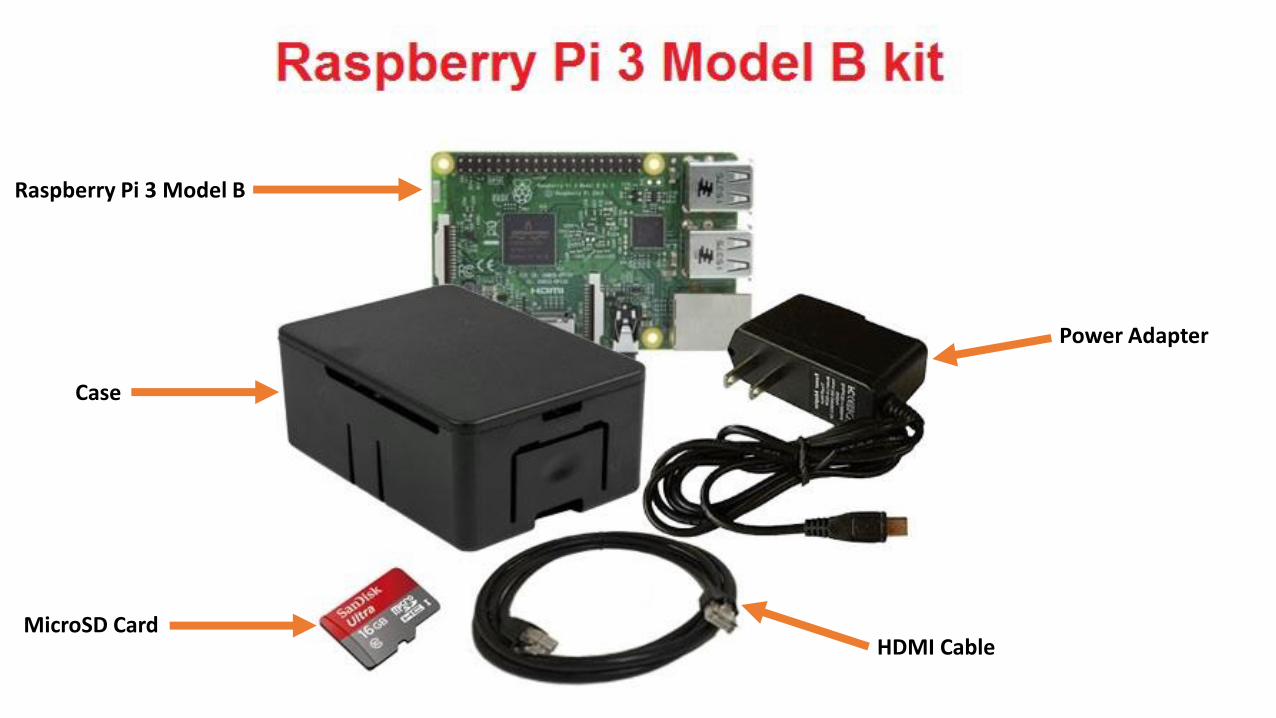
Raspberry Pi 3 Model B
Power Adapter
MicroSD CardHDMI Cable
Case

Connection Checklist
• Insert SD Card
• Connect HDMI cable to the monitor
• Connect Keyboard & Mouse
• Connect Network
• Connect Headphones
• Connect Power…wait
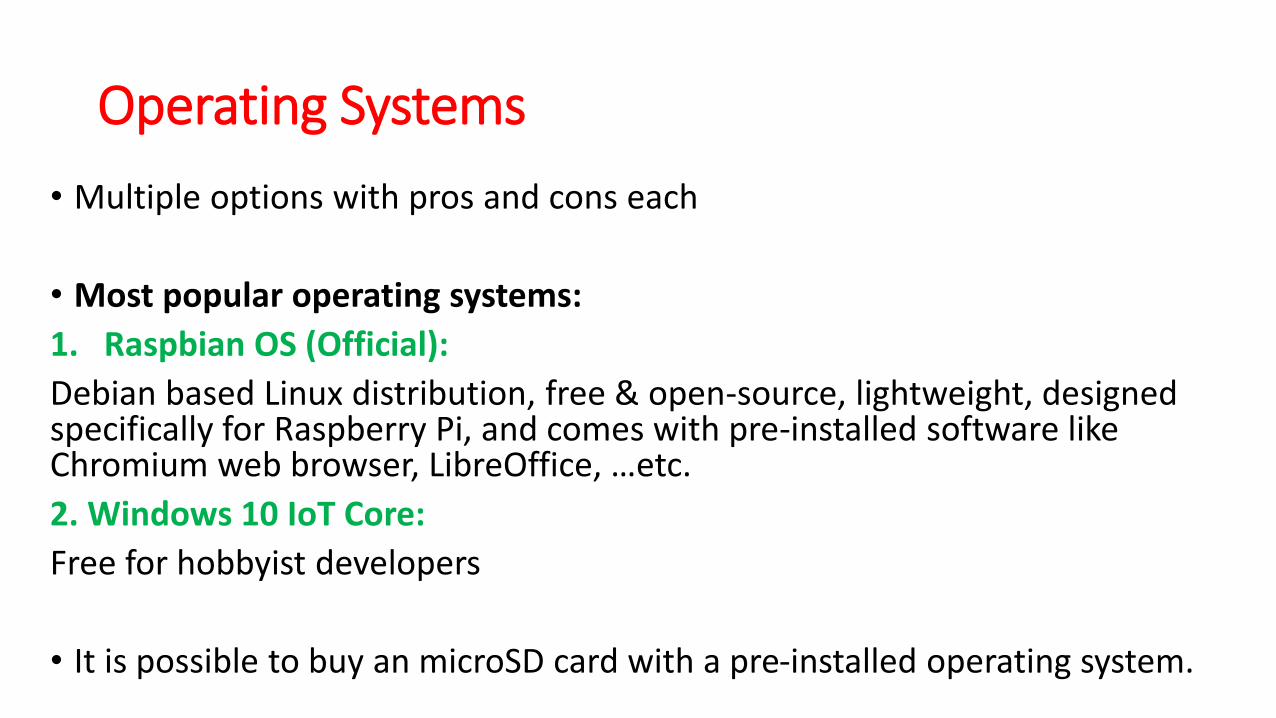
Operating Systems
• Multiple options with pros and cons each
• Most popular operating systems:
1. Raspbian OS (Official):
Debian based Linux distribution, free & open-source, lightweight, designed specifically for Raspberry Pi, and comes with pre-installed software like Chromium web browser, LibreOffice, …etc.
2. Windows 10 IoT Core:
Free for hobbyist developers
• It is possible to buy an microSD card with a pre-installed operating system.
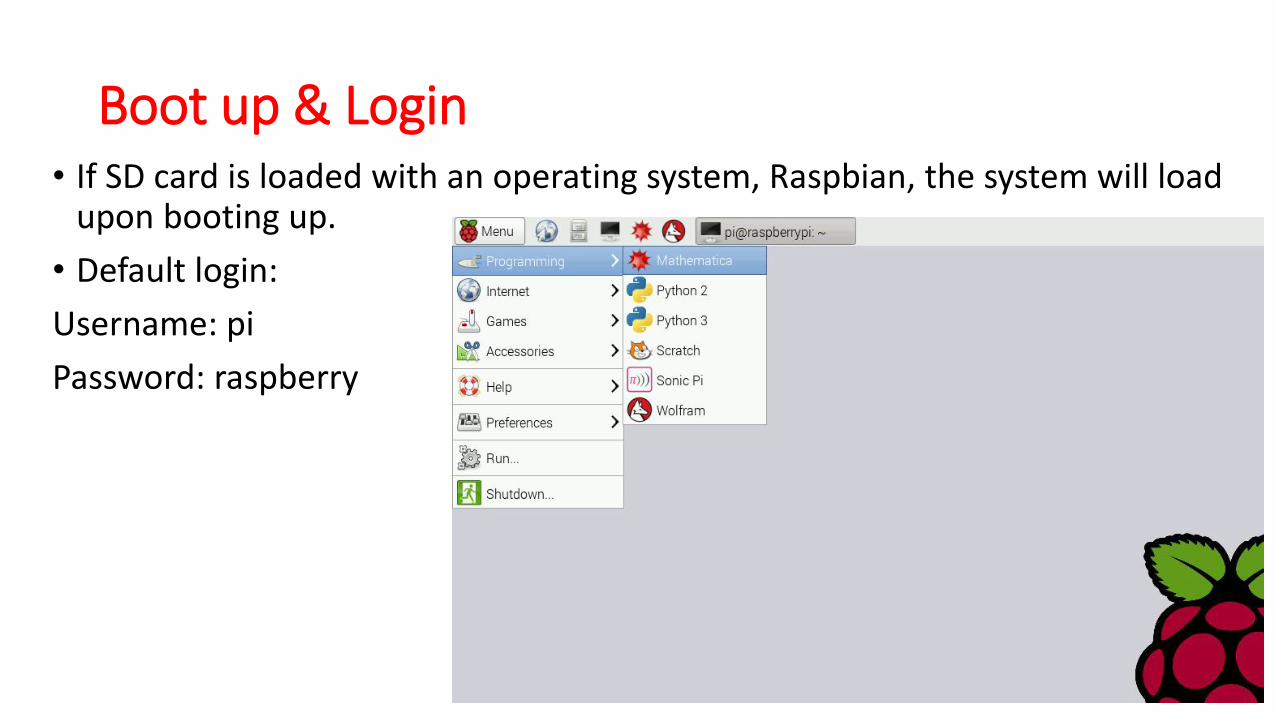
Boot up & Login• If SD card is loaded with an operating system, Raspbian, the system will load
upon booting up.
• Default login:
Username: pi
Password: raspberry
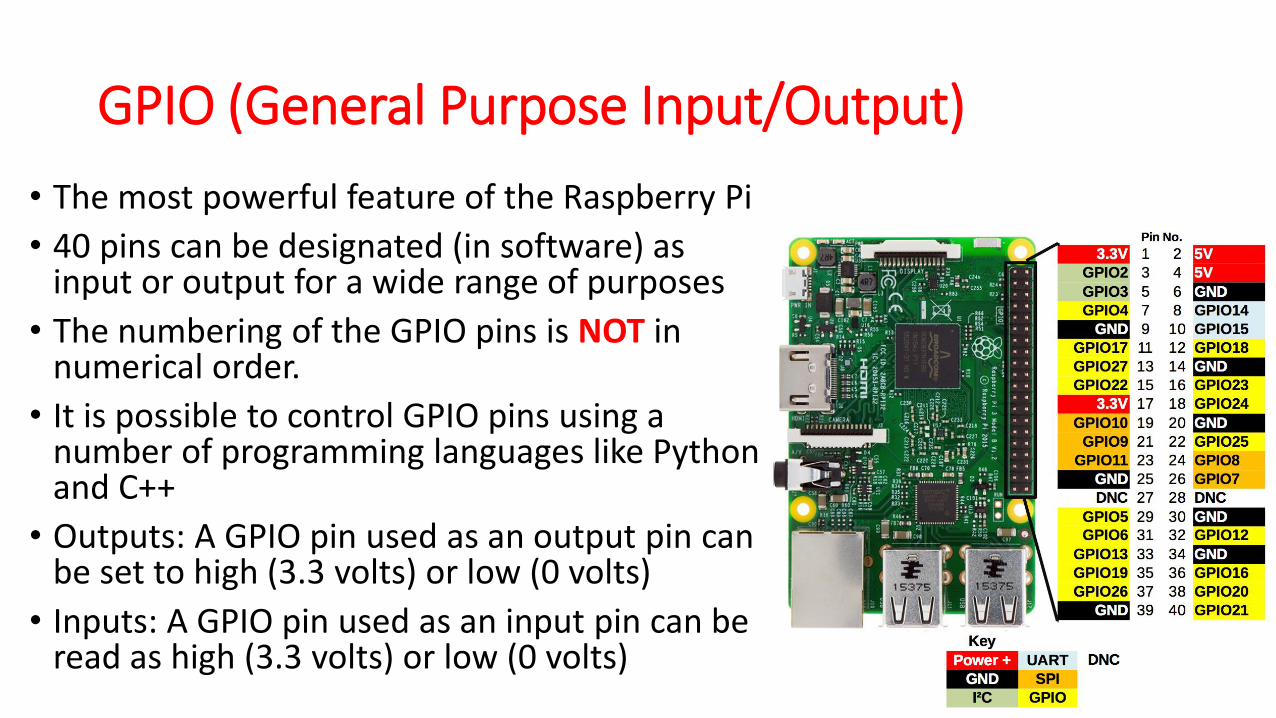
GPIO (General Purpose Input/Output)
• The most powerful feature of the Raspberry Pi
• 40 pins can be designated (in software) as input or output for a wide range of purposes
• The numbering of the GPIO pins is NOT in numerical order.
• It is possible to control GPIO pins using a number of programming languages like Python and C++
• Outputs: A GPIO pin used as an output pin can be set to high (3.3 volts) or low (0 volts)
• Inputs: A GPIO pin used as an input pin can be read as high (3.3 volts) or low (0 volts)
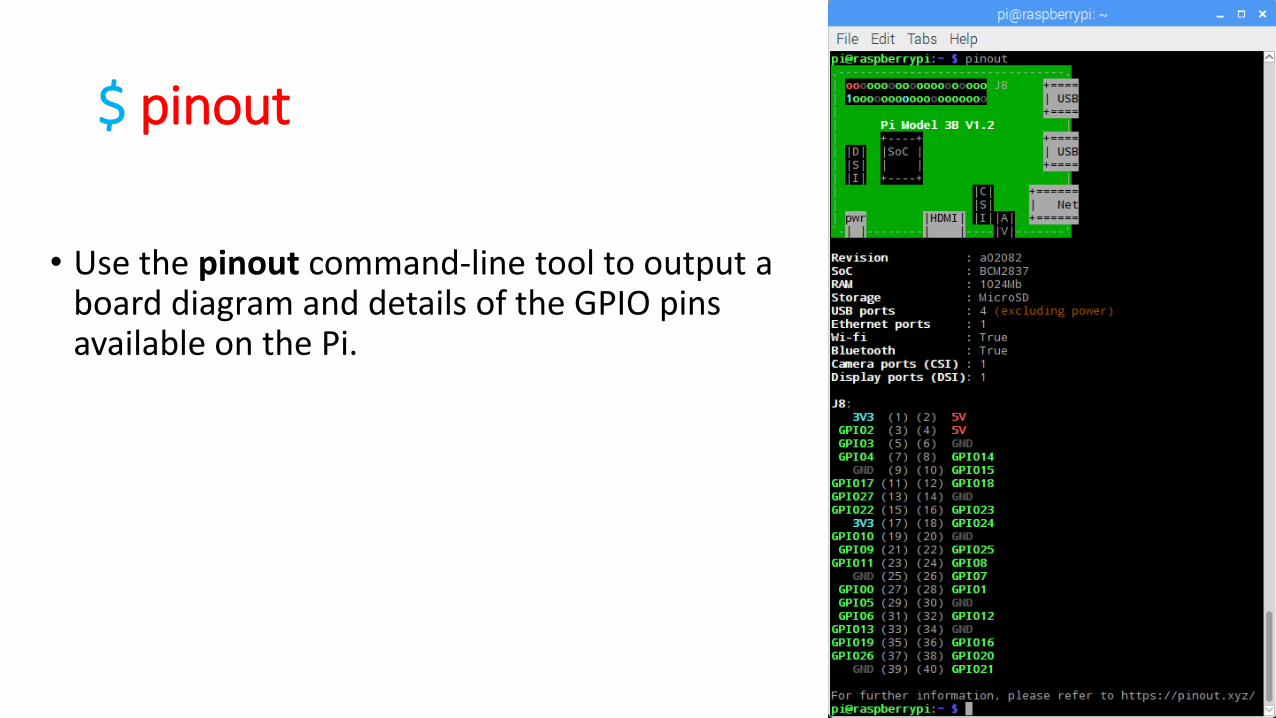
$ pinout
• Use the pinout command-line tool to output a board diagram and details of the GPIO pins available on the Pi.
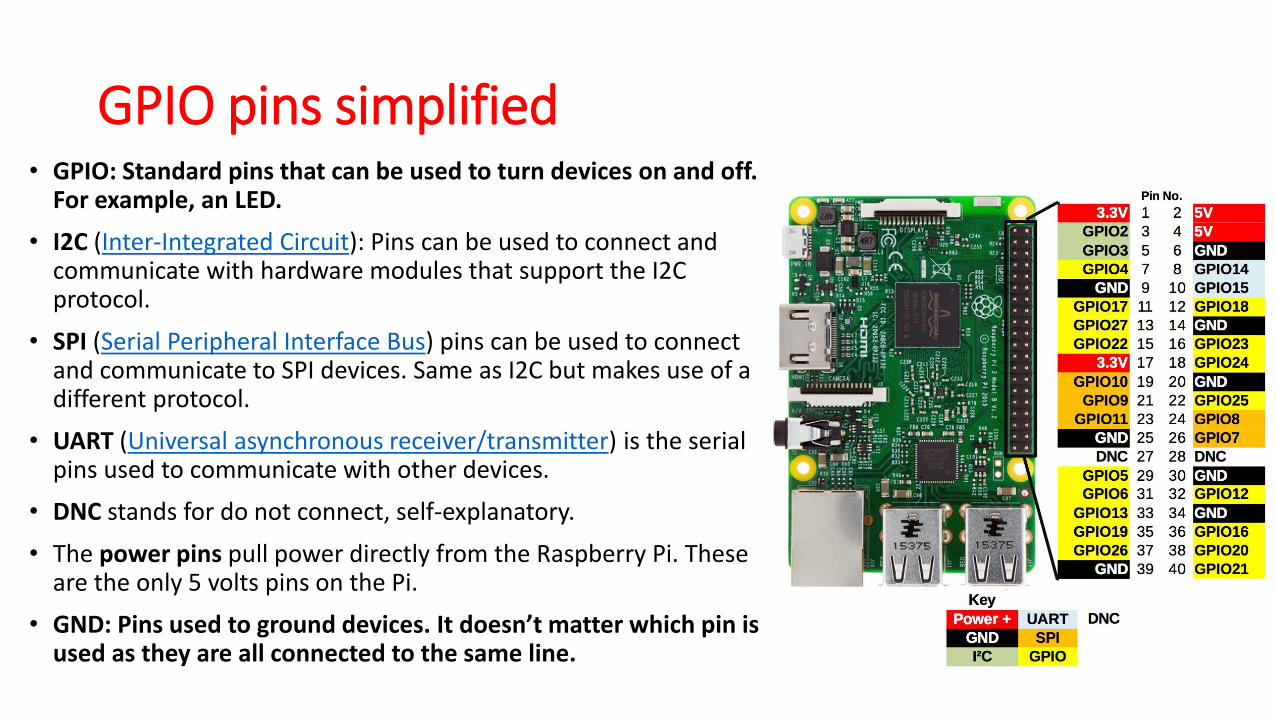
GPIO pins simplified• GPIO: Standard pins that can be used to turn devices on and off.
For example, an LED.
• I2C (Inter-Integrated Circuit): Pins can be used to connect and communicate with hardware modules that support the I2C protocol.
• SPI (Serial Peripheral Interface Bus) pins can be used to connect and communicate to SPI devices. Same as I2C but makes use of a different protocol.
• UART (Universal asynchronous receiver/transmitter) is the serial pins used to communicate with other devices.
• DNC stands for do not connect, self-explanatory.
• The power pins pull power directly from the Raspberry Pi. These are the only 5 volts pins on the Pi.
• GND: Pins used to ground devices. It doesn’t matter which pin is used as they are all connected to the same line.
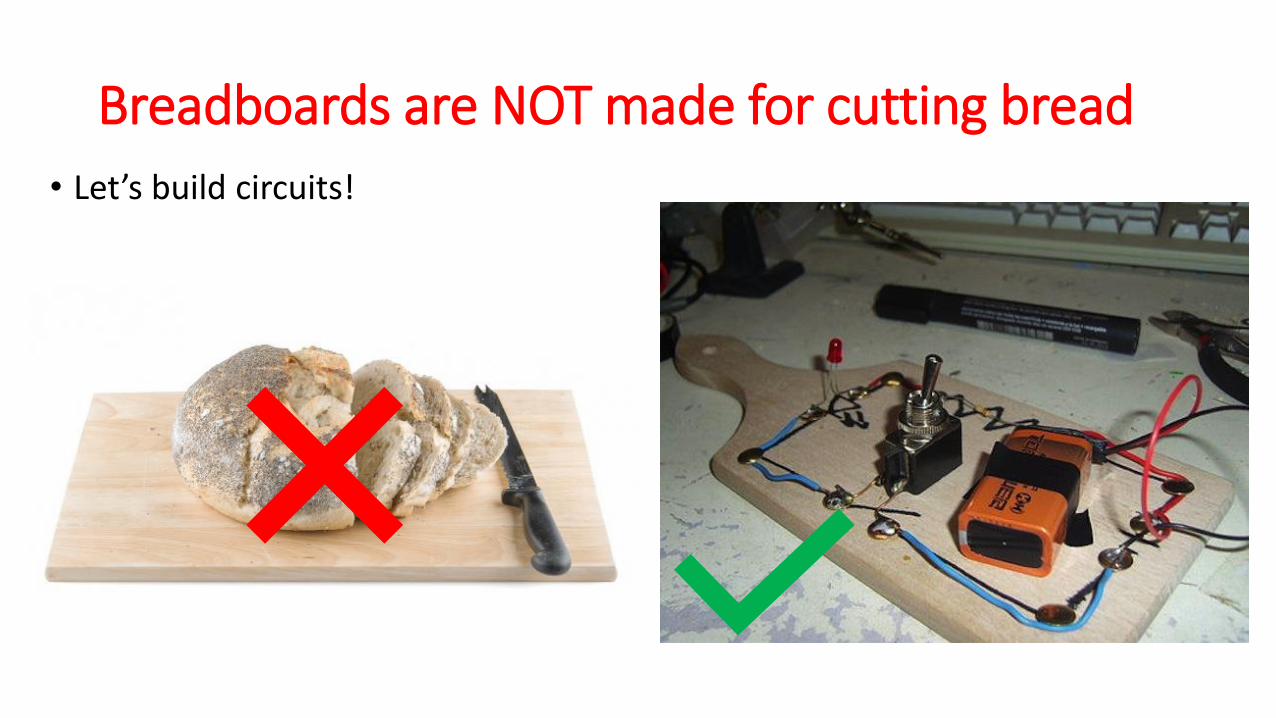
Breadboards are NOT made for cutting bread
• Let’s build circuits!

Breadboards are made for prototyping
• Building circuits with breadboards

Before connecting Anything!
• LEDs should have resistors, in series, to limit the current passing through them.
• Do NOT use 5 volts for 3.3 volts components.
• Do NOT connect motors directly to the GPIO pins (motors must be connected using an H-bridge circuit)

Connecting LED to Raspberry Pi GPIO
• Using numerical order, physical numbering, for GPIO pins.
• Pin 6 (GND) is connected to ground rail.
• Pin 12 (GPIO18) is connected to the voltage rail.
• A resistor is connecting the voltage channel to the positive end on the LED (long leg).
• The negative end (short leg) of the LED is connected to the ground rail.

Choosing the right resistor• The formula to calculate the correct resistor to
use is given by Ohms law:
Where:
Vs is supply voltage (3.3 Volts for Raspberry Pi)
Vf is the LED forward voltage across the LED
I is the desired current in Amps
R is the resistance in Ohms
Note: Resistors are color coded

LEDs forward voltage
• Typically between 1.8 and 3.3 volts.
• It varies by the color of the LED.
• A red LED typically drops 1.8 volts
• Voltage drop normally rises as the light frequency increases, so a blue LED may drop from 3 to 3.3 volts.

Maximum current draw for GPIO pins• The GPIO pins can draw 50mA safely, that is 50mA distributed across all pins.
• An individual GPIO pin can only draw 16mA safely
• Applying Ohms law for LED with a voltage drop of 1.8 Volts
R = (3.3 – 1.8)/0.016 = 93.75 Ohms
• Choosing a resistor slightly higher than 100 Ohms will still work but will cause the LED to dim.
• Much higher resistors will prevent the LED from working.
• Choosing a lower resistor or connecting LEDs without resistors may permanently damage the pins or the Pi.
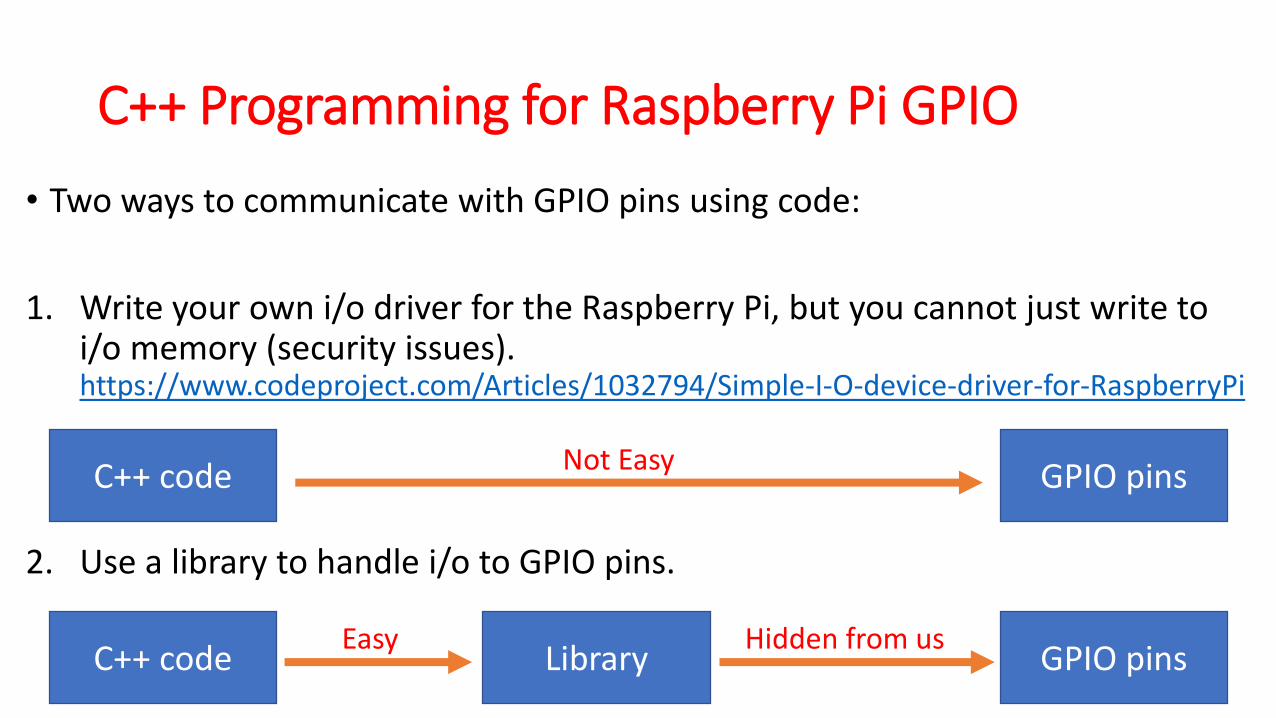
C++ Programming for Raspberry Pi GPIO
• Two ways to communicate with GPIO pins using code:
1. Write your own i/o driver for the Raspberry Pi, but you cannot just write to i/o memory (security issues). https://www.codeproject.com/Articles/1032794/Simple-I-O-device-driver-for-RaspberryPi
2. Use a library to handle i/o to GPIO pins.
C++ code GPIO pinsLibrary
C++ code GPIO pinsNot Easy
Easy Hidden from us
Wiring Pi GPIO Interface library for the Raspberry Pi
• PIN based GPIO access library written in C for the BCM2835, BCM2836 and BCM2837 SoC devices used in all Raspberry Pi.
• Includes a command-line utility gpio which can be used to program and setup the GPIO pins.
• Official Web site http://wiringpi.com/

Wiring Pi download and installation• First, check that wiringPi is not already installed. In the terminal, run:
$ gpio –v
• If installed as a package, remove the package:$ sudo apt-get purge wiringpi$ hash –r
• Install GIT if not installed:$ sudo apt-get install git-core
• If you get any errors, make sure your Pi has the latest version of Raspbian$ sudo apt-get update$ sudo apt-get upgrade
• Use GIT to obtain WiringPi$ cd$ git clone git://git.drogon.net/wiringPi
• If you have already used the clone operation for the first time, fetch an updated version$ cd ~/wiringPi$ git pull origin
• To build/install, run:$ cd ~/wiringPi$ ./build
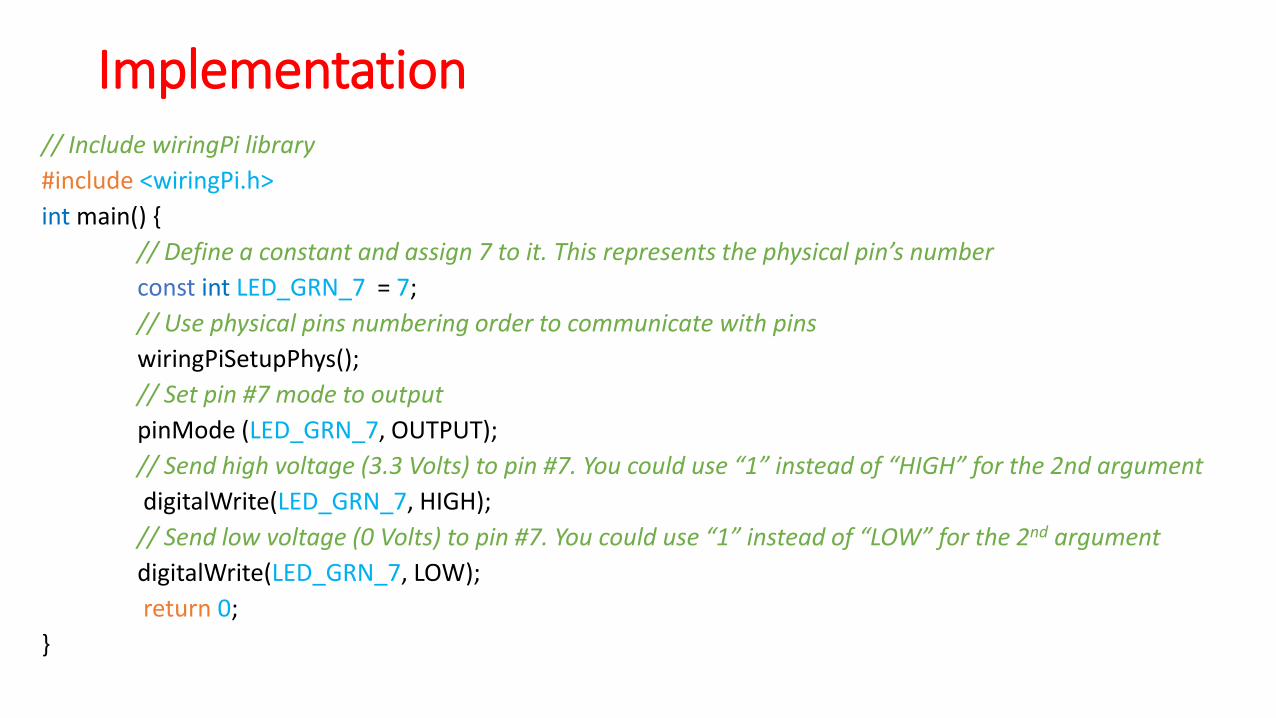
Implementation// Include wiringPi library
#include <wiringPi.h>
int main() {
// Define a constant and assign 7 to it. This represents the physical pin’s number
const int LED_GRN_7 = 7;
// Use physical pins numbering order to communicate with pins
wiringPiSetupPhys();
// Set pin #7 mode to output
pinMode (LED_GRN_7, OUTPUT);
// Send high voltage (3.3 Volts) to pin #7. You could use “1” instead of “HIGH” for the 2nd argument
digitalWrite(LED_GRN_7, HIGH);
// Send low voltage (0 Volts) to pin #7. You could use “1” instead of “LOW” for the 2nd argument
digitalWrite(LED_GRN_7, LOW);
return 0;
}
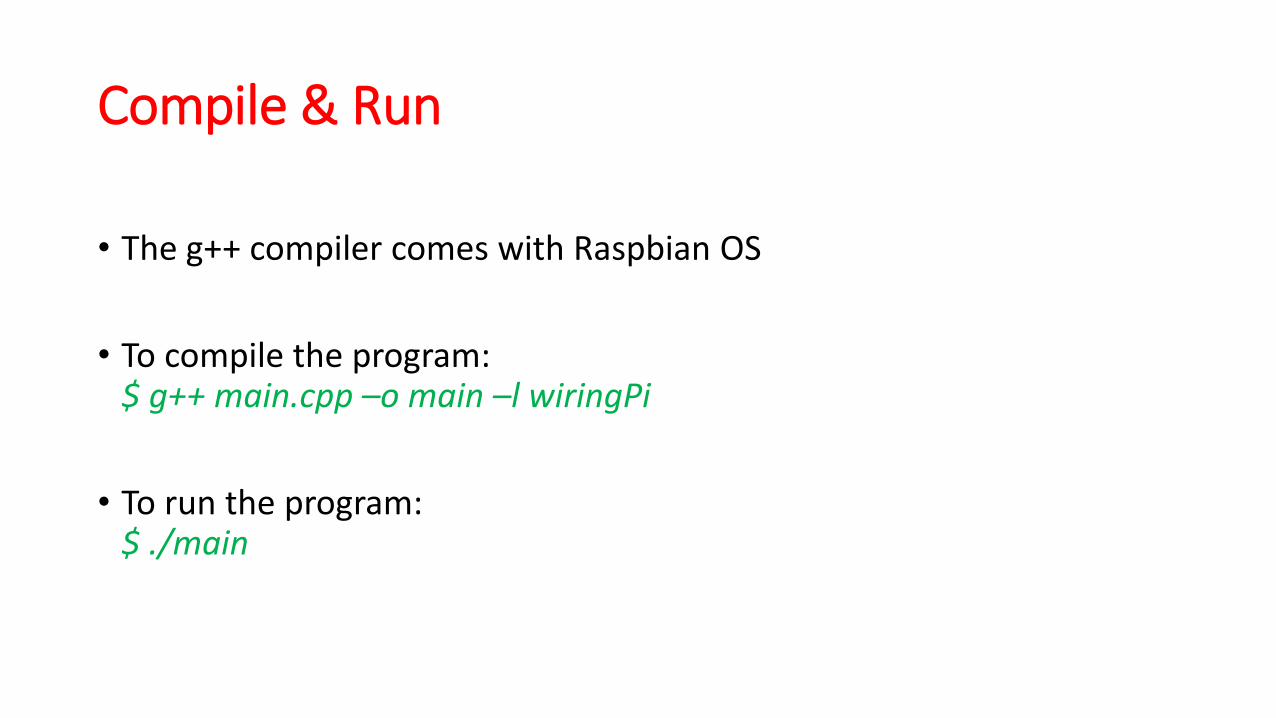
Compile & Run
• The g++ compiler comes with Raspbian OS
• To compile the program:$ g++ main.cpp –o main –l wiringPi
• To run the program:$ ./main
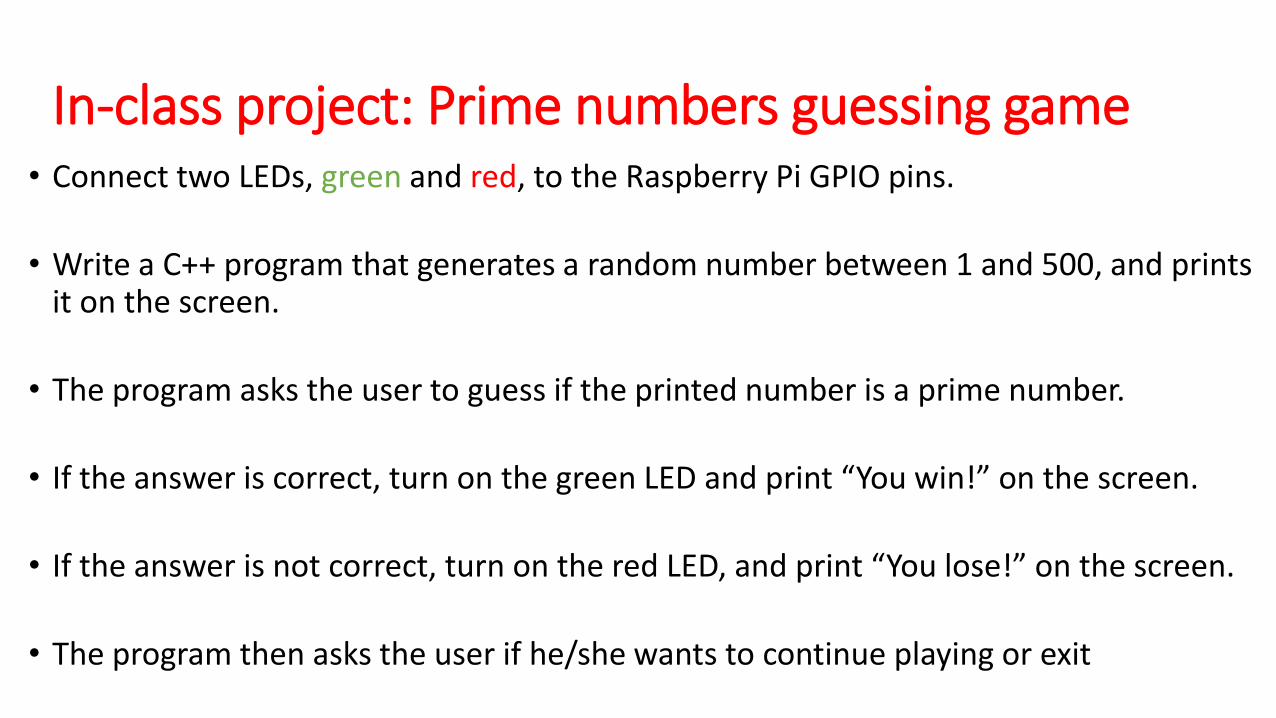
In-class project: Prime numbers guessing game• Connect two LEDs, green and red, to the Raspberry Pi GPIO pins.
• Write a C++ program that generates a random number between 1 and 500, and prints it on the screen.
• The program asks the user to guess if the printed number is a prime number.
• If the answer is correct, turn on the green LED and print “You win!” on the screen.
• If the answer is not correct, turn on the red LED, and print “You lose!” on the screen.
• The program then asks the user if he/she wants to continue playing or exit
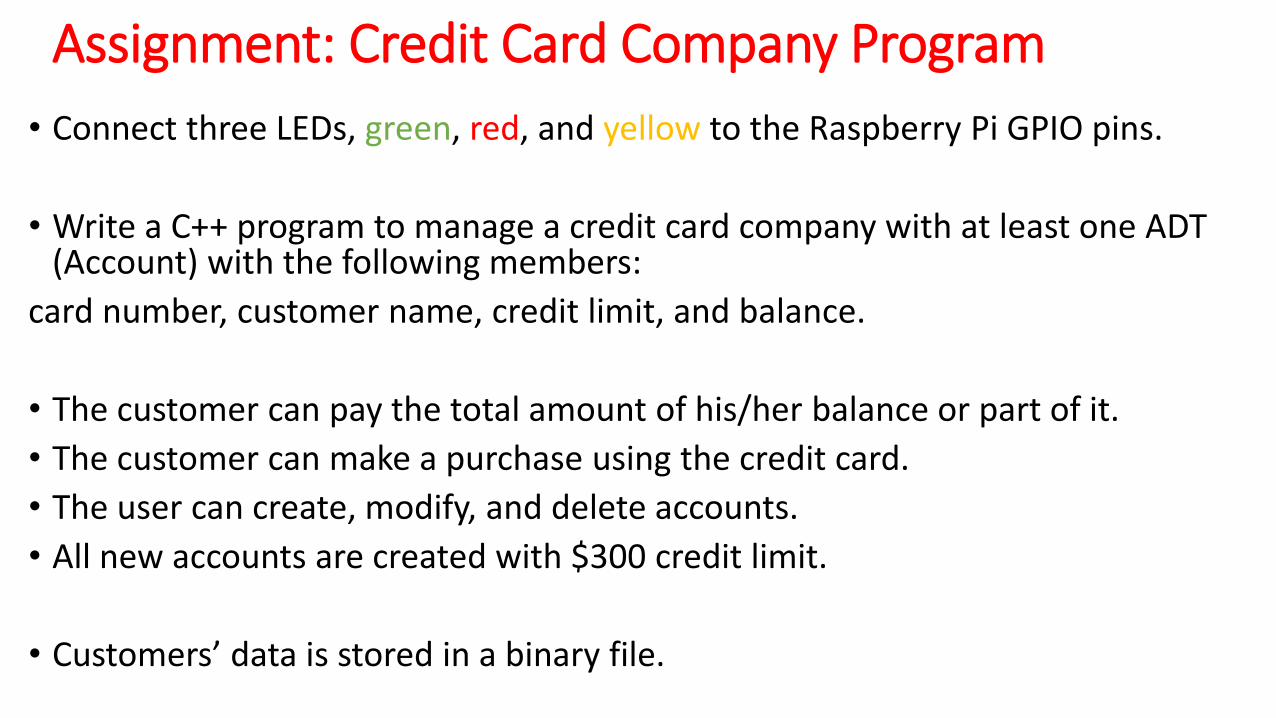
Assignment: Credit Card Company Program
• Connect three LEDs, green, red, and yellow to the Raspberry Pi GPIO pins.
• Write a C++ program to manage a credit card company with at least one ADT (Account) with the following members:
card number, customer name, credit limit, and balance.
• The customer can pay the total amount of his/her balance or part of it.
• The customer can make a purchase using the credit card.
• The user can create, modify, and delete accounts.
• All new accounts are created with $300 credit limit.
• Customers’ data is stored in a binary file.

Assignment: Credit Card Company Program Cont’d
• The program’s main menu has the following options:
1. Create a new account
2. Pay balance
3. Make a purchase
4. Check balance
5. Edit an account
6. Close an account
7. View all accounts
8. Exit
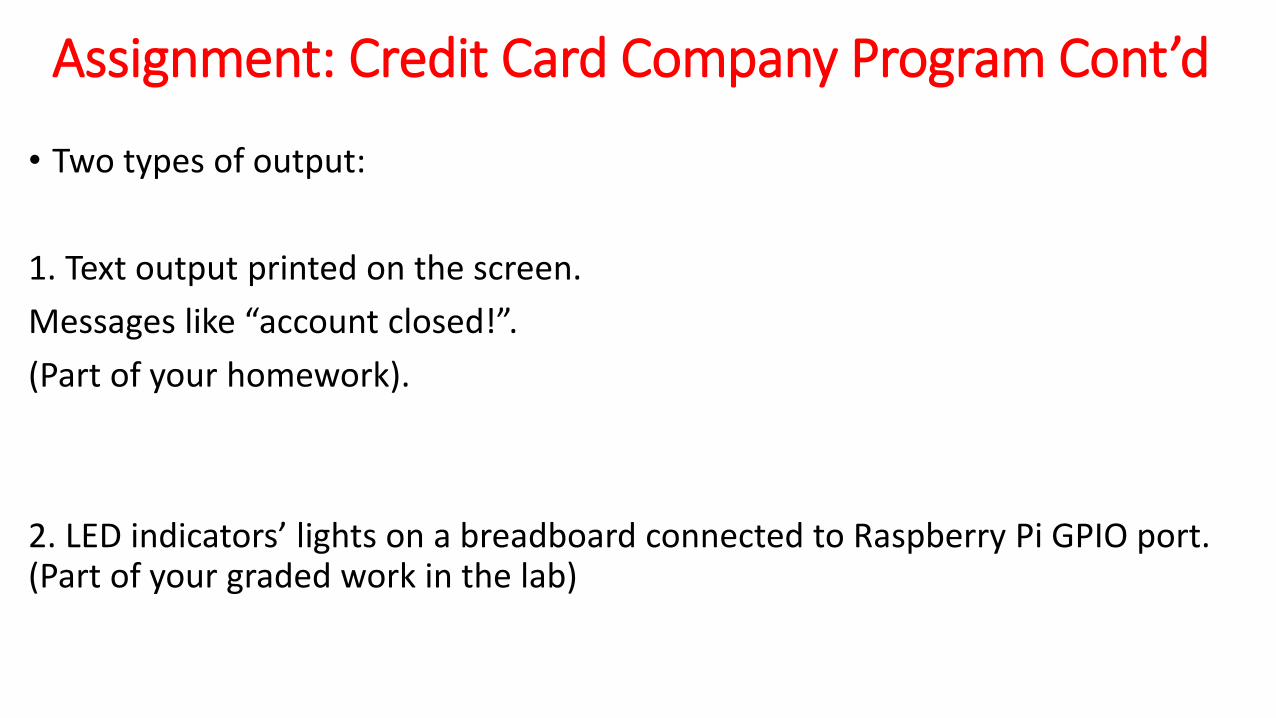
Assignment: Credit Card Company Program Cont’d
• Two types of output:
1. Text output printed on the screen.
Messages like “account closed!”.
(Part of your homework).
2. LED indicators’ lights on a breadboard connected to Raspberry Pi GPIO port. (Part of your graded work in the lab)
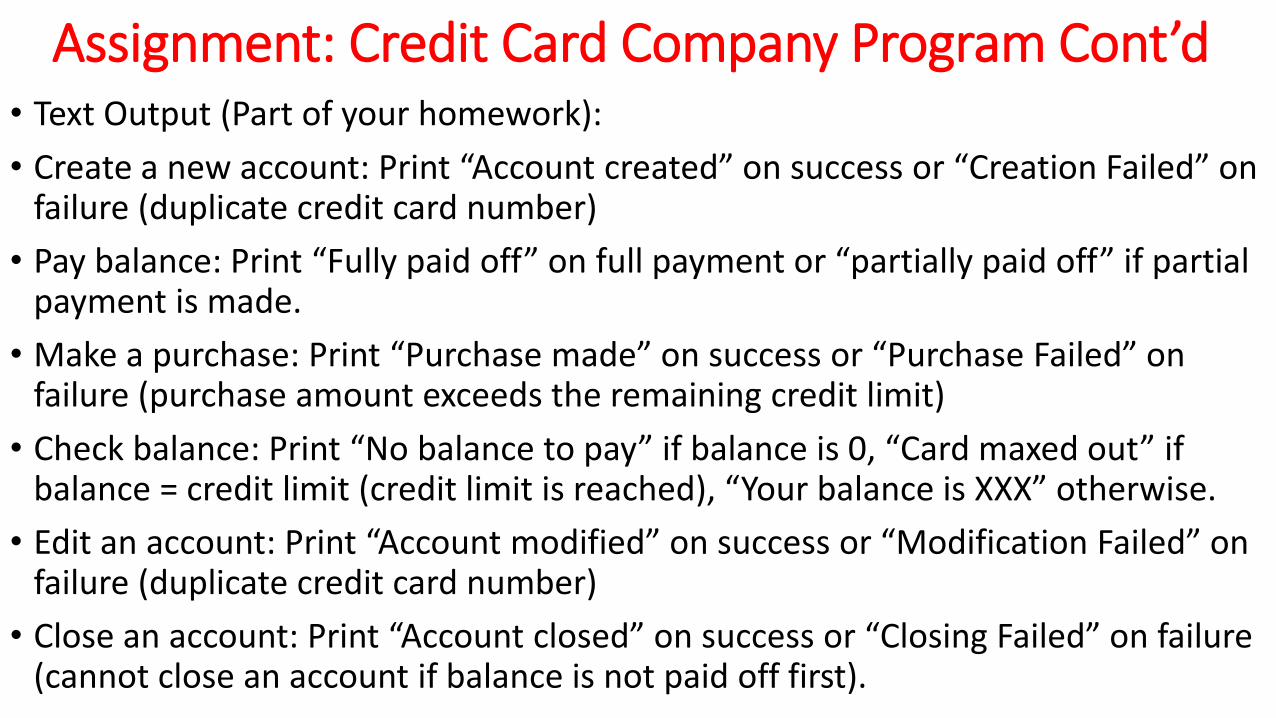
Assignment: Credit Card Company Program Cont’d• Text Output (Part of your homework):
• Create a new account: Print “Account created” on success or “Creation Failed” on failure (duplicate credit card number)
• Pay balance: Print “Fully paid off” on full payment or “partially paid off” if partial payment is made.
• Make a purchase: Print “Purchase made” on success or “Purchase Failed” on failure (purchase amount exceeds the remaining credit limit)
• Check balance: Print “No balance to pay” if balance is 0, “Card maxed out” if balance = credit limit (credit limit is reached), “Your balance is XXX” otherwise.
• Edit an account: Print “Account modified” on success or “Modification Failed” on failure (duplicate credit card number)
• Close an account: Print “Account closed” on success or “Closing Failed” on failure (cannot close an account if balance is not paid off first).

Assignment: Credit Card Company Program Cont’d
• Raspberry Pi LED lights output (Not part of your homework, added during lab):
• Create a new account: Green LED lights up on success, Red on failure (duplicate credit card number)
• Pay balance: Green LED lights up if paid in full, Yellow if partial payment is made.
• Make a purchase: Green LED lights up on success, Red on failure (purchase amount exceeds remaining credit limit)
• Check balance: Green LED lights up if balance is 0 (all paid off), Red if credit limit is reached, Yellow otherwise.
• Edit an account: Green LED lights up on success, Red on failure (duplicate credit card number)
• Close an account: Green LED lights up on success, Red on failure (cannot close account if balance is not paid off first).