eServices User Guide - Microsoft Azure€¦ · eServices User Guide . Table of Contents About...
27
eServices User Guide
Transcript of eServices User Guide - Microsoft Azure€¦ · eServices User Guide . Table of Contents About...
eServices User Guide
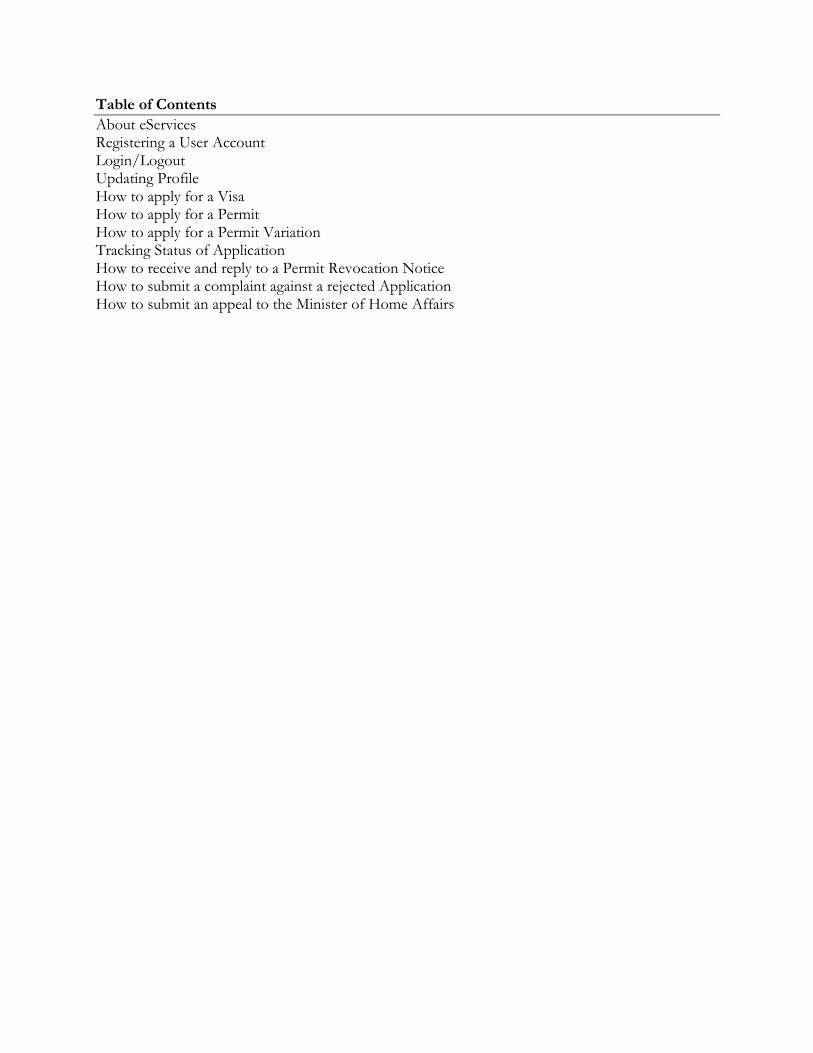
Table of Contents
About eServices Registering a User Account Login/Logout Updating Profile How to apply for a Visa How to apply for a Permit How to apply for a Permit Variation Tracking Status of Application How to receive and reply to a Permit Revocation Notice How to submit a complaint against a rejected Application How to submit an appeal to the Minister of Home Affairs

1. About eServices
E-Services is an online portal for all customer services that allows the Department of Immigration’s
clients to open an account and get secure, controlled access to visa and permit applications, through
a personalized virtual workplace.
Using the e-Services, the Applicants (or their Agents) are be able to find a specific e-visa or e-permit
service (initial application or variations) and complete an application form, with some profile data
being automatically pre-filled upon their authentication.
The applicant isable to attach any number of the supporting documents in png, jpg and tiff format.
The list of supporting documents for each type of application can be accessed from
www.zambiaimmigration.gov.zm.
Through their personal workplace, the clients areable to track the status of their visa or permit
application, receive communications from the Department of Immigration and provide additional
information as required to complete the review of their case.
Payment of permit and visa application fees can be made on this portal through a secure web-based
payment platform, using a wide range of debit and credit cards.
The eServices portal can be accessed on the Department’s website www.zambiaimmigration.gov.zm
and following the eservices link, or directly via hyperlink
http://eservices.zambiaimmigration.gov.zm.
What services can be accessed on the e-services platform?
1. Visas;
2. New applications [All Permit types, with the exception of Temporary Permits];
3. Extension/renewal and variations [All Permit types, with the exception of Temporary Permits];
4. Complaints and Appeals; and
5. Tracking status of application.
2. How to Register a User Account
In order to be able to submit applications online you need to register on the
system(https://eservices.zambiaimmigration.gov.zm/#/sign-up ) and access web site functionality
under your personal user account. A user account can be created for an individual applicant, a
representative as an Employer, a Practicing Lawyer, or a Registered Immigration Consultant.
IMPORTANT NOTE: In order to proceed with submitting applications you must first complete
your personal profile information or representative information (Employer, Practicing Lawyer or
Registered Immigration Consultant).
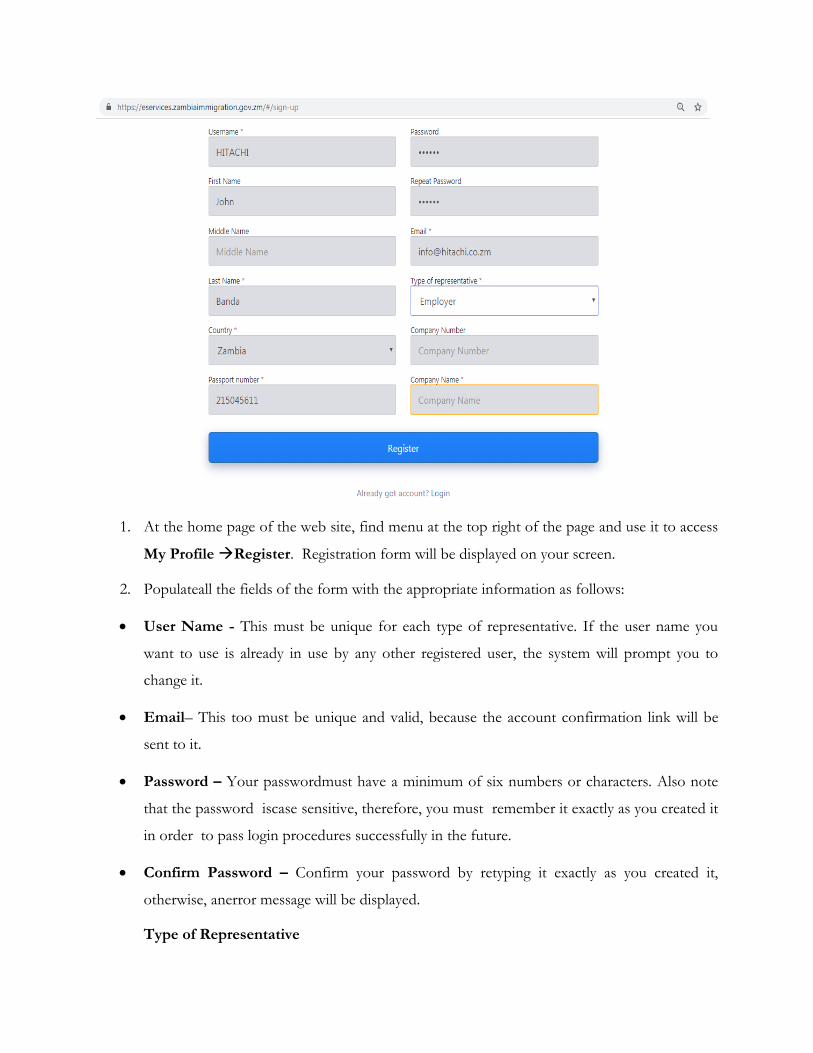
1. At the home page of the web site, find menu at the top right of the page and use it to access
My Profile →Register. Registration form will be displayed on your screen.
2. Populateall the fields of the form with the appropriate information as follows:
• User Name - This must be unique for each type of representative. If the user name you
want to use is already in use by any other registered user, the system will prompt you to
change it.
• Email– This too must be unique and valid, because the account confirmation link will be
sent to it.
• Password – Your passwordmust have a minimum of six numbers or characters. Also note
that the password iscase sensitive, therefore, you must remember it exactly as you created it
in order to pass login procedures successfully in the future.
• Confirm Password – Confirm your password by retyping it exactly as you created it,
otherwise, anerror message will be displayed.
Type of Representative
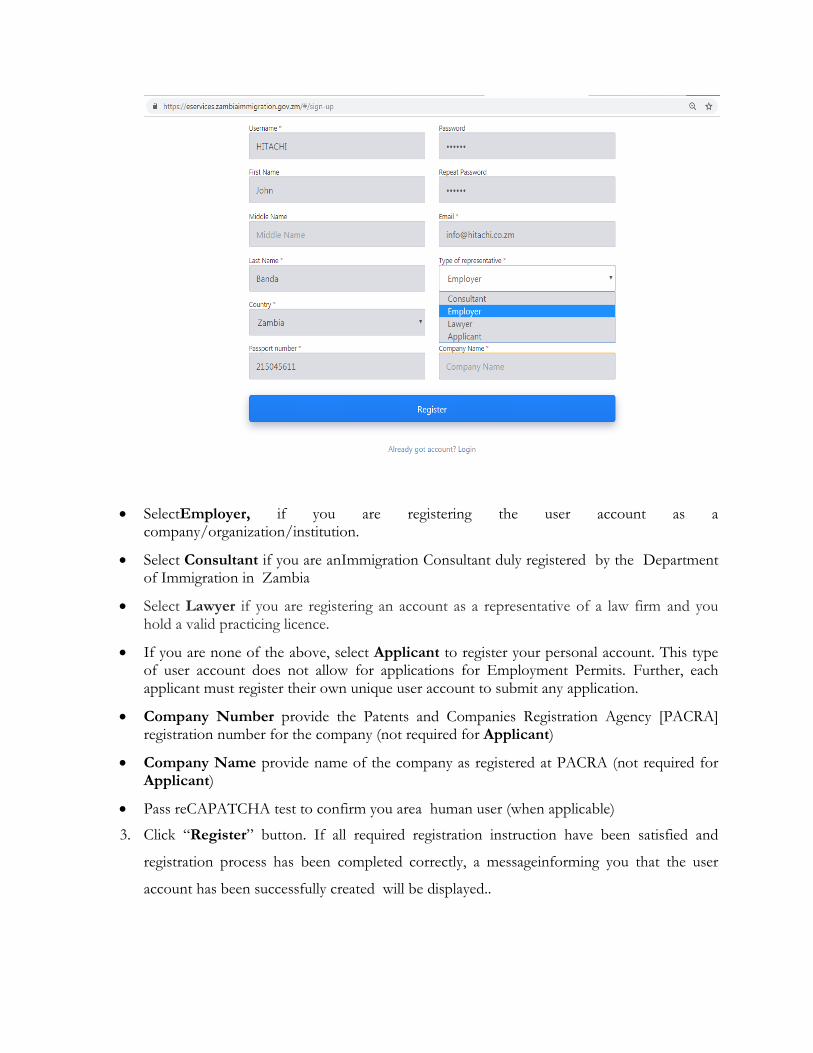
• SelectEmployer, if you are registering the user account as a company/organization/institution.
• Select Consultant if you are anImmigration Consultant duly registered by the Department of Immigration in Zambia
• Select Lawyer if you are registering an account as a representative of a law firm and you hold a valid practicing licence.
• If you are none of the above, select Applicant to register your personal account. This type of user account does not allow for applications for Employment Permits. Further, each applicant must register their own unique user account to submit any application.
• Company Number provide the Patents and Companies Registration Agency [PACRA] registration number for the company (not required for Applicant)
• Company Name provide name of the company as registered at PACRA (not required for Applicant)
• Pass reCAPATCHA test to confirm you area human user (when applicable)
3. Click “Register” button. If all required registration instruction have been satisfied and
registration process has been completed correctly, a messageinforming you that the user
account has been successfully created will be displayed..

4. Access your emailaccount provided during registration to receive the “Confirm your
account” message that has been sent to you.Open it and click the confirmation link to
activate the account.
NOTE: Once successfully registered, user accounts for Employers, Immigration Consultants and Practicing Lawyers will remain locked after the initial registration process. These three categories of users must visit Immigration Headquarters in person or the nearest Regional Immigration Office and present the certified copies of the following documents to have their account unlocked:
✓ Certificate of Incorporation;
✓ Introductory Letter on Company Letter head informing the Director General that the holder has been authorized to oversee the activation of the account;
✓ Valid proof of membership to the Association of Professional Immigration Consultants [Only for Consultants]; and
✓ Practicing certificates.
Only after successfully completing this process will the account be unlocked for use. 3. Login / Logout the System
Please remember to log in the system before you start your work, otherwise the access to system functionality will be denied.
How to Login the System
To login the system use your User Name and Password you have chosen during
registration procedure.
1. Open web site page
2. In the right top corner of the page click My Profile→Login
SecureLogin form displays as shown below
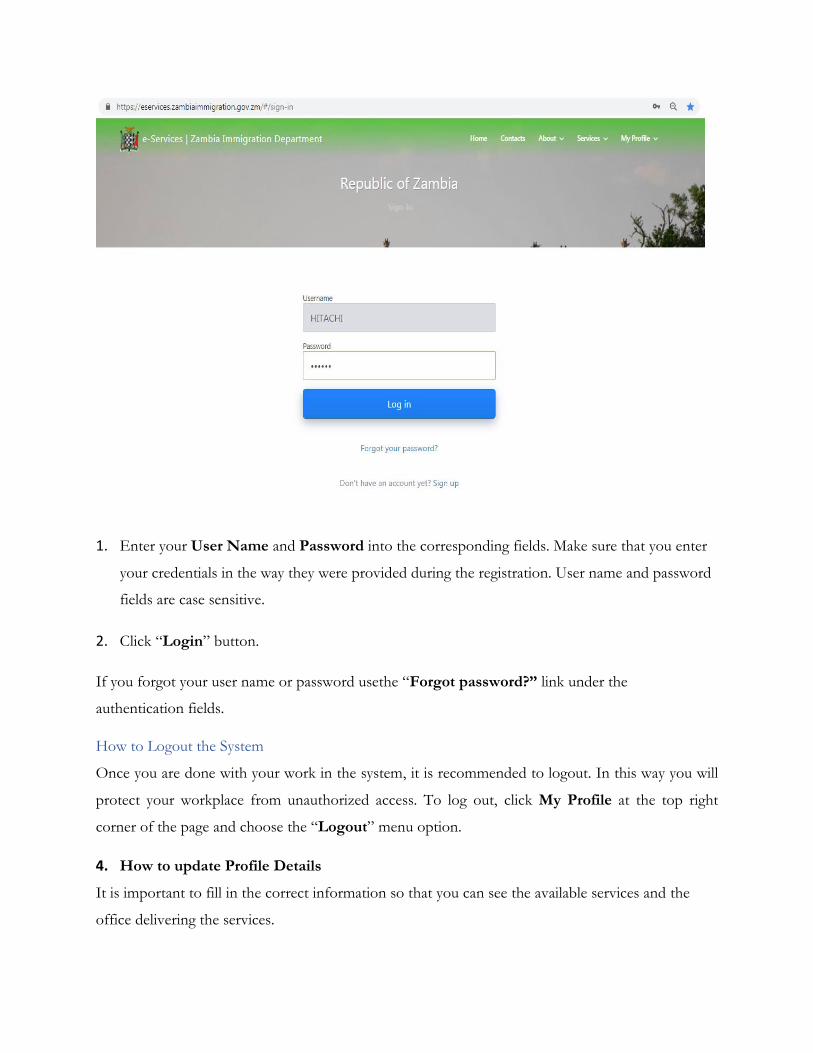
1. Enter your User Name and Password into the corresponding fields. Make sure that you enter
your credentials in the way they were provided during the registration. User name and password
fields are case sensitive.
2. Click “Login” button.
If you forgot your user name or password usethe “Forgot password?” link under the
authentication fields.
How to Logout the System
Once you are done with your work in the system, it is recommended to logout. In this way you will
protect your workplace from unauthorized access. To log out, click My Profile at the top right
corner of the page and choose the “Logout” menu option.
4. How to update Profile Details
It is important to fill in the correct information so that you can see the available services and the
office delivering the services.
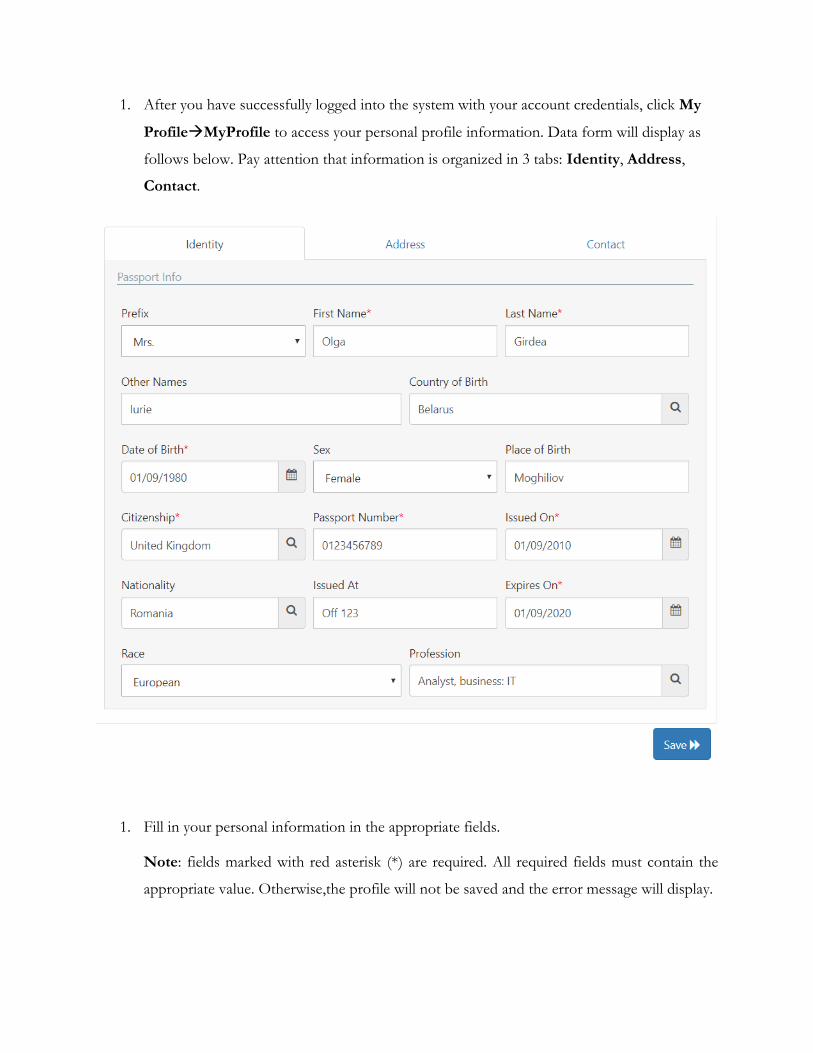
1. After you have successfully logged into the system with your account credentials, click My
Profile→MyProfile to access your personal profile information. Data form will display as
follows below. Pay attention that information is organized in 3 tabs: Identity, Address,
Contact.
1. Fill in your personal information in the appropriate fields.
Note: fields marked with red asterisk (*) are required. All required fields must contain the
appropriate value. Otherwise,the profile will not be saved and the error message will display.
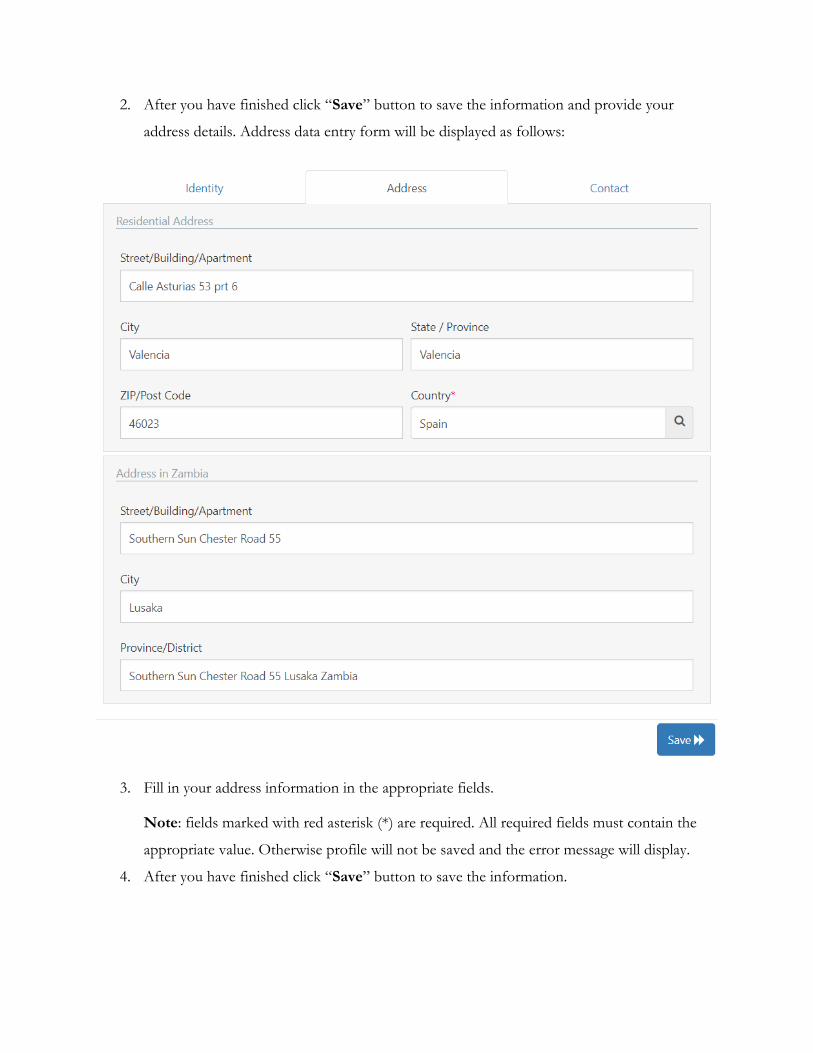
2. After you have finished click “Save” button to save the information and provide your
address details. Address data entry form will be displayed as follows:
3. Fill in your address information in the appropriate fields.
Note: fields marked with red asterisk (*) are required. All required fields must contain the
appropriate value. Otherwise profile will not be saved and the error message will display.
4. After you have finished click “Save” button to save the information.

5. Open “Contact” tab and provide your up-to-date contact information, so that the
Immigration Department could reach you for questions and notices. Otherwise, you may
miss some important information. Click “Save” after you have finished.
5. How to Apply for a Visa
1. Once logged in, go to My Workplace. You will see your selected e-service in the Available
Visas section. Click on your e-service, to make sure it is highlighted, then click on the “Apply
for Visa” button. In the New Case form, provide other details as needed, then click “Next”.
2. Complete the Application for Visa (Form 16), click “Next”.
3. Review the application requirements, scan and upload the required documents, click “Next”.
4. Note: All documents must be in jpeg, tiff or png formats.
5. Preview the completed application form as a PDF file (you can print or save it for your records).
If all information is correct, click “Confirm”.
6. Preview the system-generated Electronic Bill in PDF format (you can print or save it for your
records). If you accept the fees and have your credit card ready, click on the “Pay Online”
button.
Note: at this point, you will be redirected to the bank site for secure payment processing.
7. Enter your billing details, click on the “Pay Now” button.
Note: upon completion of payment, you will be returned to the Payment Receipt page
8. Review your payment confirmation message, print or download Payment Receipt in PDF
format, for your records. You will also receive your Receipt by email address you have provided.
9. You will see the number of the application case you have submitted. To complete the
application process, click on the “Finish” button.
Note: To check the status of your application you must login into the ZIMS 3.0 e-Services Portal, My
Workplace / Applications.
6. How to Apply for a Permit
1. Once logged in, go to My Workplace. You will see your desired e-service in the Available
Permits section. Click on the e-service, to make sure it is highlighted, then click on “Apply for
Permit” button. In the New Case form, select the case category, provide other details as
needed, click “Next”.
2. Complete the Application for the selected permit and click “Next”.
3. Review the application requirements, scan and upload the required documents in
formats(jpeg,png or tiff), click “Next”.
4. Preview the completed application form as a PDF file (you can print or save it for your records).
If all information is correct, click “Confirm”.
5. Preview the system-generated Electronic Bill. If you accept the fees and have your debit or
credit card ready, click on the “Pay Online” button.
Note: at this point, you will be redirected to the bank site for secure payment processing.
6. Enter your billing details, click “Next”and then click“Pay”button. Selectyour card type
depending on the card you hold as either Visa,Mastercard,Amexetc and enter Card
Number,Expiration Dateand CVV Codeto make payment
Note: upon completion of payment, you will be returned to the Payment Receipt page
7. Review your payment confirmation message, print or download Payment Receipt in PDF
format, for your records. Click “Finish”.
8. To complete the application process, click on the “Finish” button. You will see the number of
the application case you have submitted in the “Submitted” folder at your Workplace.
7. How to Apply for Permit Variation
You can apply for variation of a permit that has been already issued, either it is valid or expired. The
eServices portal also allows you to apply for multiple variations to a single Permit, for example
renewal, change of occupation and change of employer, all within one application. The payment for
all services you select will be combined in one bill.
To apply for a variation of a permit, do the following:
1. Once logged in, go to My Workplace. You will see alink under Available Permits as find a
Permit and Apply for a Variation.
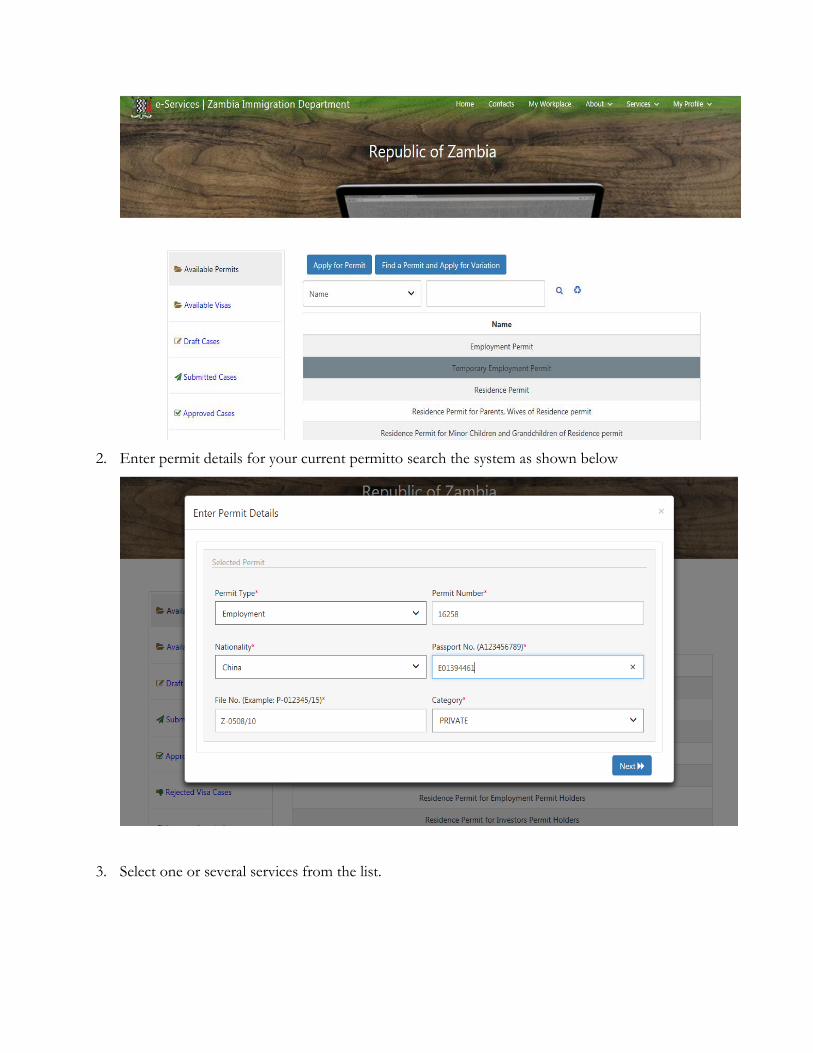
2. Enter permit details for your current permitto search the system as shown below
3. Select one or several services from the list.
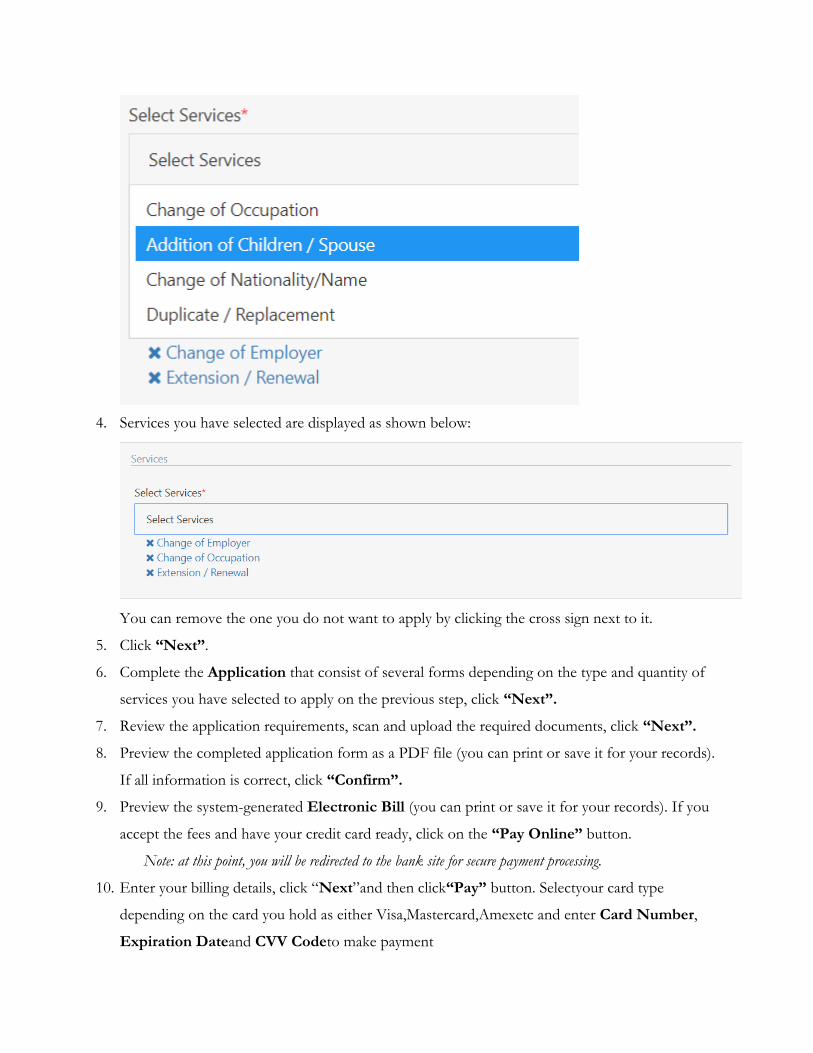
4. Services you have selected are displayed as shown below:
You can remove the one you do not want to apply by clicking the cross sign next to it.
5. Click “Next”.
6. Complete the Application that consist of several forms depending on the type and quantity of
services you have selected to apply on the previous step, click “Next”.
7. Review the application requirements, scan and upload the required documents, click “Next”.
8. Preview the completed application form as a PDF file (you can print or save it for your records).
If all information is correct, click “Confirm”.
9. Preview the system-generated Electronic Bill (you can print or save it for your records). If you
accept the fees and have your credit card ready, click on the “Pay Online” button.
Note: at this point, you will be redirected to the bank site for secure payment processing.
10. Enter your billing details, click “Next”and then click“Pay” button. Selectyour card type
depending on the card you hold as either Visa,Mastercard,Amexetc and enter Card Number,
Expiration Dateand CVV Codeto make payment
Note: upon completion of payment, you will be returned to the Payment Receipt page
11. Review your payment confirmation message, print or download Payment Receipt in PDF
format, for your records. Click “Finish”.
12. To complete the application process, click on the “Finish” button. You will see the number of
the application case you have submitted.
Note: To check the status of your application by logging into the ZIMS 3.0 e-Services Portal, My Workplace.
8. How track status of Application
The applications you create within your Workplace are organized in folders according to their
current status. For example, if you have just started the application it is considered being a draft and
will display in the “Draft” folder under the Applications section. As soon as you submit it, the
record of your application will automatically move to the “Submitted” folder. After the application
has been processed, you will see it either at “Rejected” or “Approved” folder depending on the
decision made.
You will find the following folder at your Workplace:
Applications:
Drafts folder – you can find your application here until you submit it. If you have started an
application and for some reason could not finish it, open the “Drafts” folder and resume
your application by clicking the “Resume” button.
Submittedfolder - As soon as you submit it, the record of your application will
automatically move to the “Submitted” folder.
Visa:
Approved folder – after being processed and approved by ZDI, your visa application will be
moved from “Submitted” to “Approved” folder.
Rejected folder - after being processed and rejected by ZDI, your visa application will be
moved from “Submitted” to “Rejected” folder.
Valid folder – contains all valid visa records.
Expired folder – contains all the expired visa records.
Permit:
Approved folder- after being processed and approved by ZDI, your permit application will
be moved from “Submitted” to “Approved” folder.
Reverted folder – when your application is being processed by ZDI the Immigration officer
may request some information upon your application. If you see your application in the
“Reverted” folder, you need to make the required changes to it (e.g. upload documents,
make corrections, etc) and resubmit the application to ZDI once again.
Rejected folder - after being processed and rejected by ZDI, your permit application will be
moved from “Submitted” to “Rejected” folder. From here you can request re-processing
of your application by clicking “File Complaint” button or appeal to the Minister of Home
Affairs by clicking the “Appeal to Minister” button.
Valid folder – contains all valid permit records. From this folder you can apply for variation
of permits.
Expired folder – contains all expired permit records.
Notice folder – contains Notices to Revoke an Immigration Permit. You can file your
objections by uploading documents you consider appropriate that will be processed by ZDI

9. How to Receive and Reply to a Permit Revocation Notice
When Immigration Officer decides that a permit has to be revoked, you will receive an official
document Form 34 Notice of Intention to Revoke to the “Notice” folder under the Permits
section of your Workplace.
If Permit holder decides to submit representation in writing against the notice, do the following:
1. Once logged in, go to My Workplace.
2. Click on your notice record and click the “Open Notice” button.
3. Notice of Intention to Revoke will display in PDF format. You can download it for your
records or print it out.
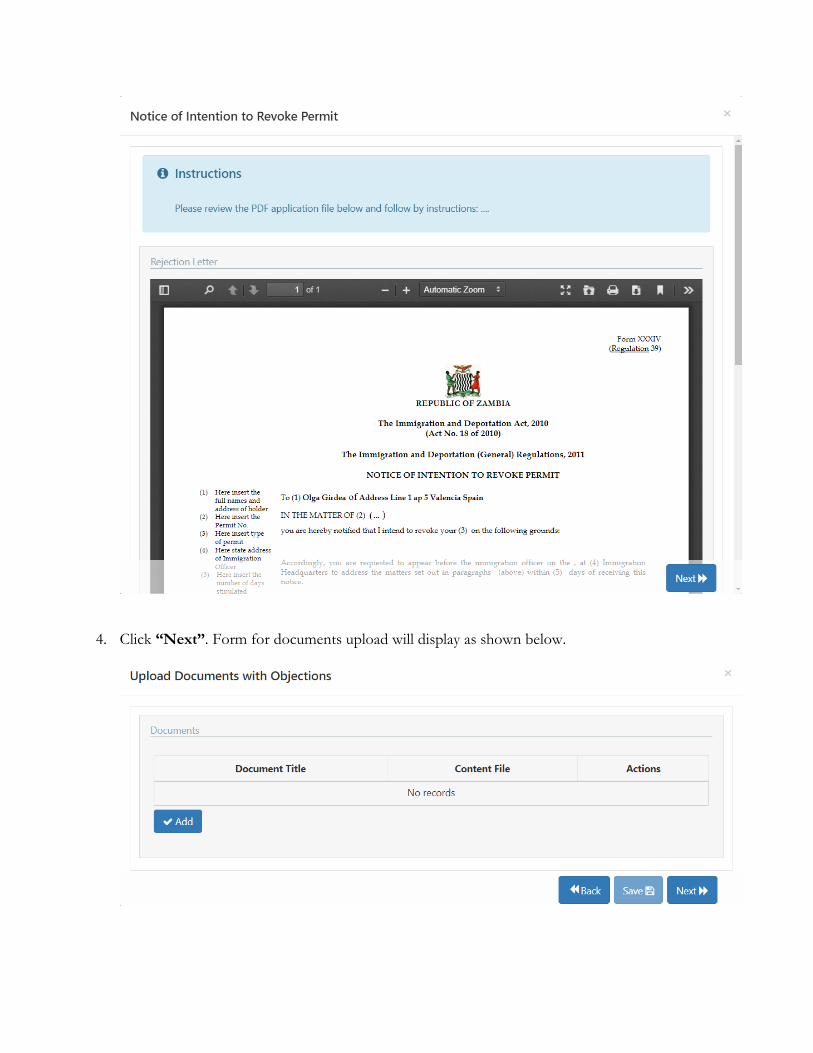
4. Click “Next”. Form for documents upload will display as shown below.
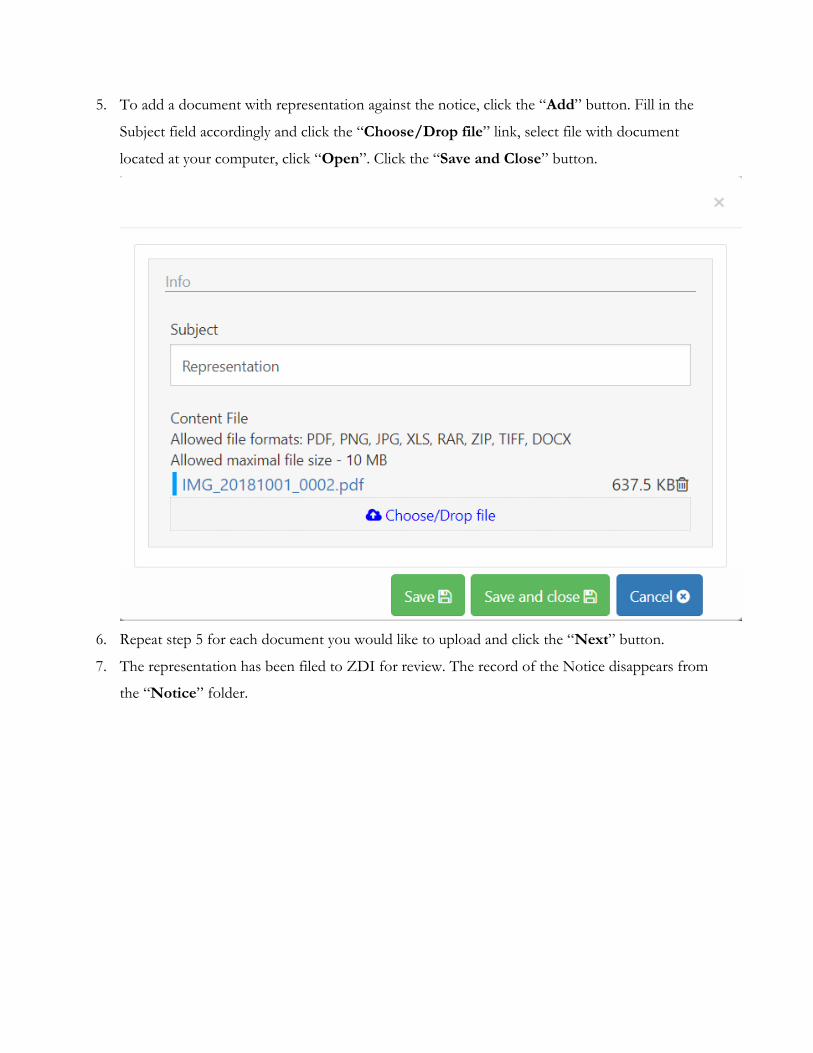
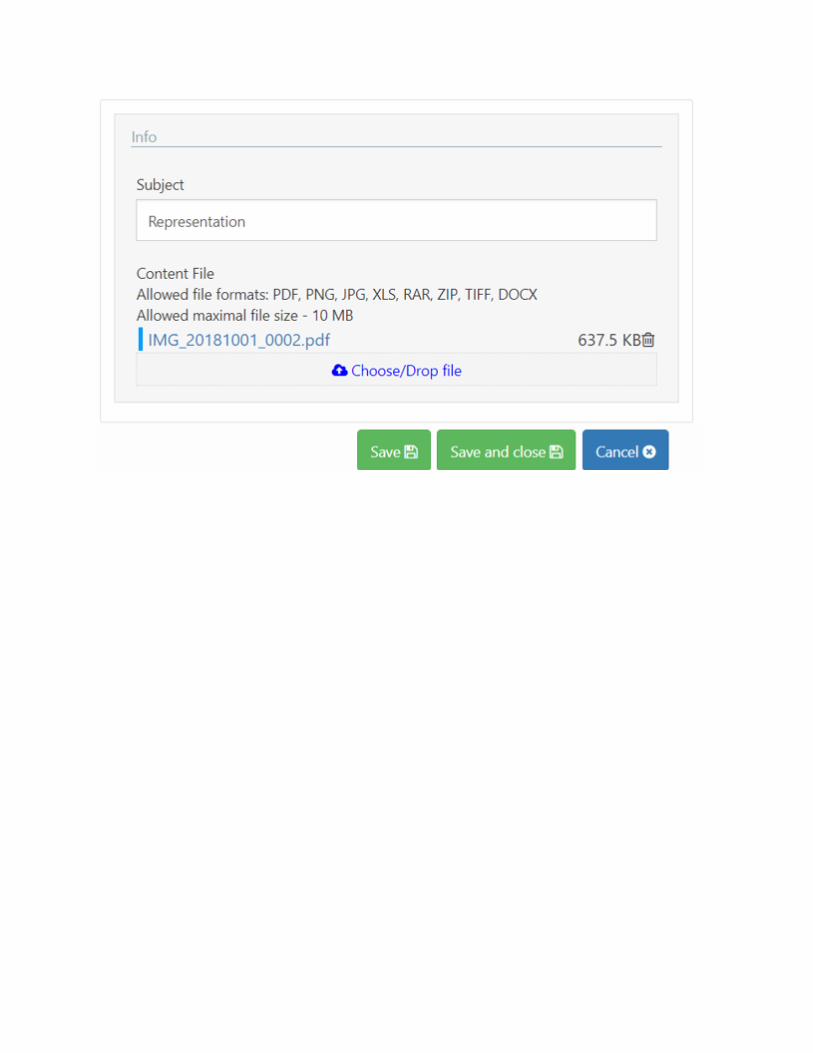
5. To add a document with representation against the notice, click the “Add” button. Fill in the
Subject field accordingly and click the “Choose/Drop file” link, select file with document
located at your computer, click “Open”. Click the “Save and Close” button.
6. Repeat step 5 for each document you would like to upload and click the “Next” button.
7. The representation has been filed to ZDI for review. The record of the Notice disappears from
the “Notice” folder.
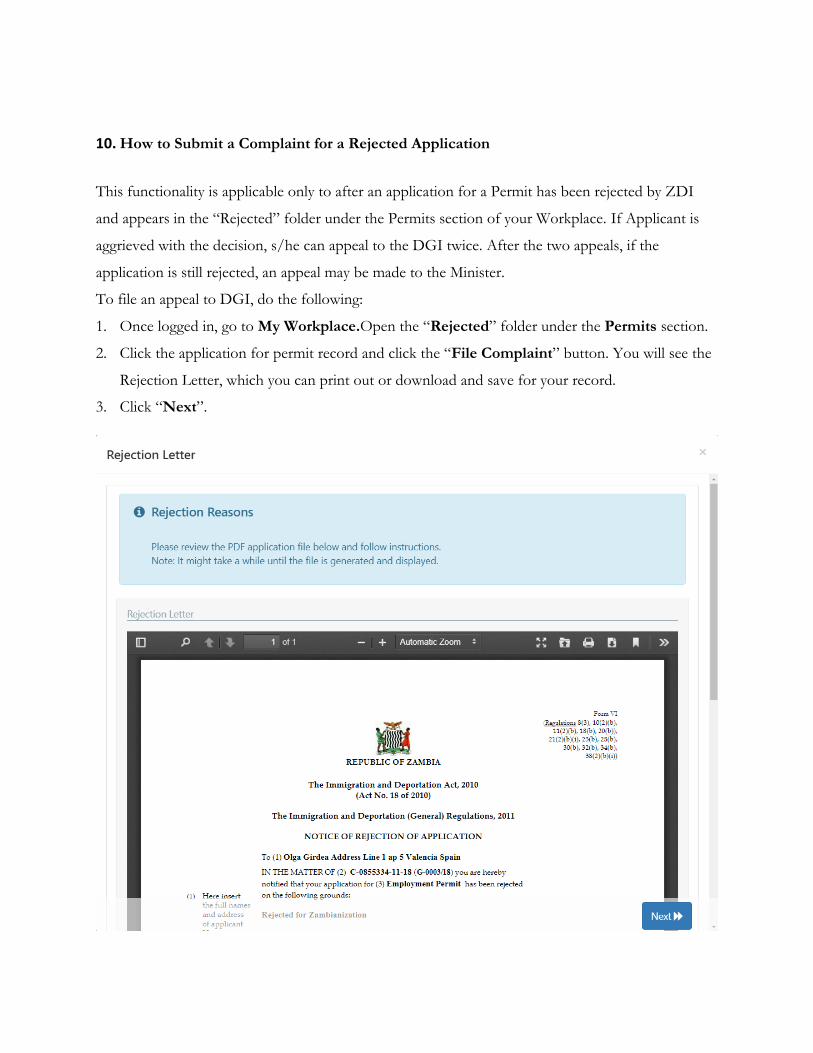
10. How to Submit a Complaint for a Rejected Application
This functionality is applicable only to after an application for a Permit has been rejected by ZDI
and appears in the “Rejected” folder under the Permits section of your Workplace. If Applicant is
aggrieved with the decision, s/he can appeal to the DGI twice. After the two appeals, if the
application is still rejected, an appeal may be made to the Minister.
To file an appeal to DGI, do the following:
1. Once logged in, go to My Workplace.Open the “Rejected” folder under the Permits section.
2. Click the application for permit record and click the “File Complaint” button. You will see the
Rejection Letter, which you can print out or download and save for your record.
3. Click “Next”.
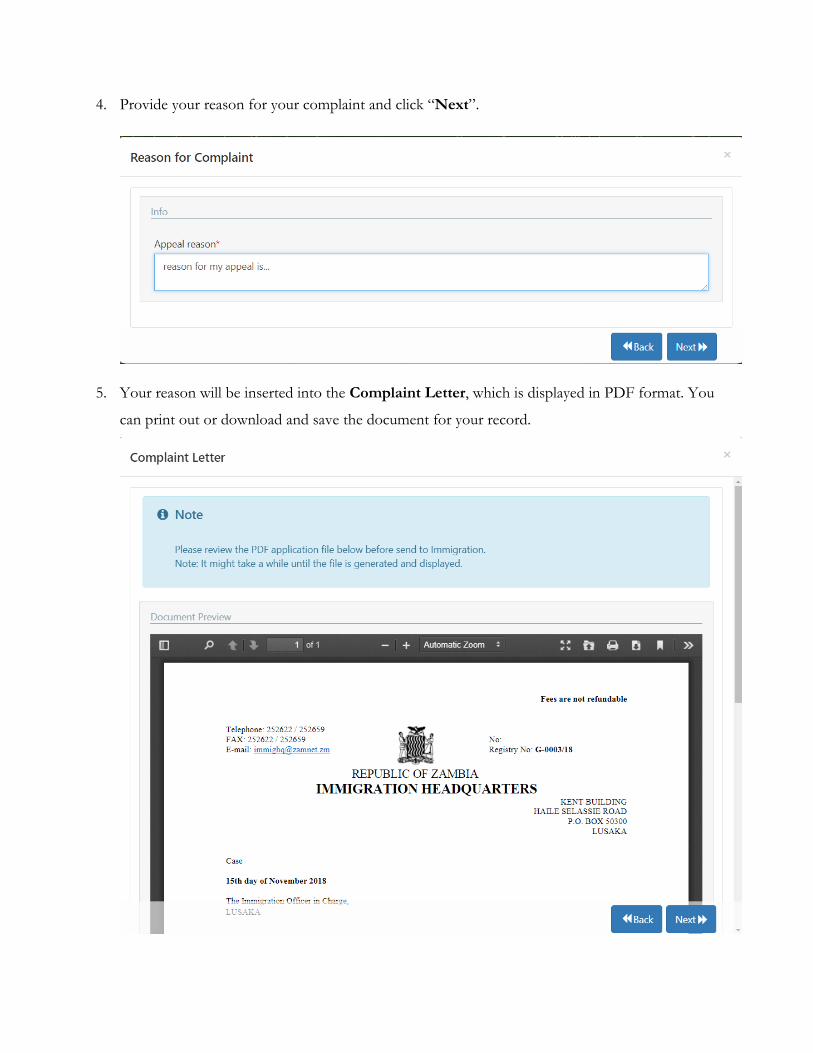
4. Provide your reason for your complaint and click “Next”.
5. Your reason will be inserted into the Complaint Letter, which is displayed in PDF format. You
can print out or download and save the document for your record.
6. Click the “Next” button.
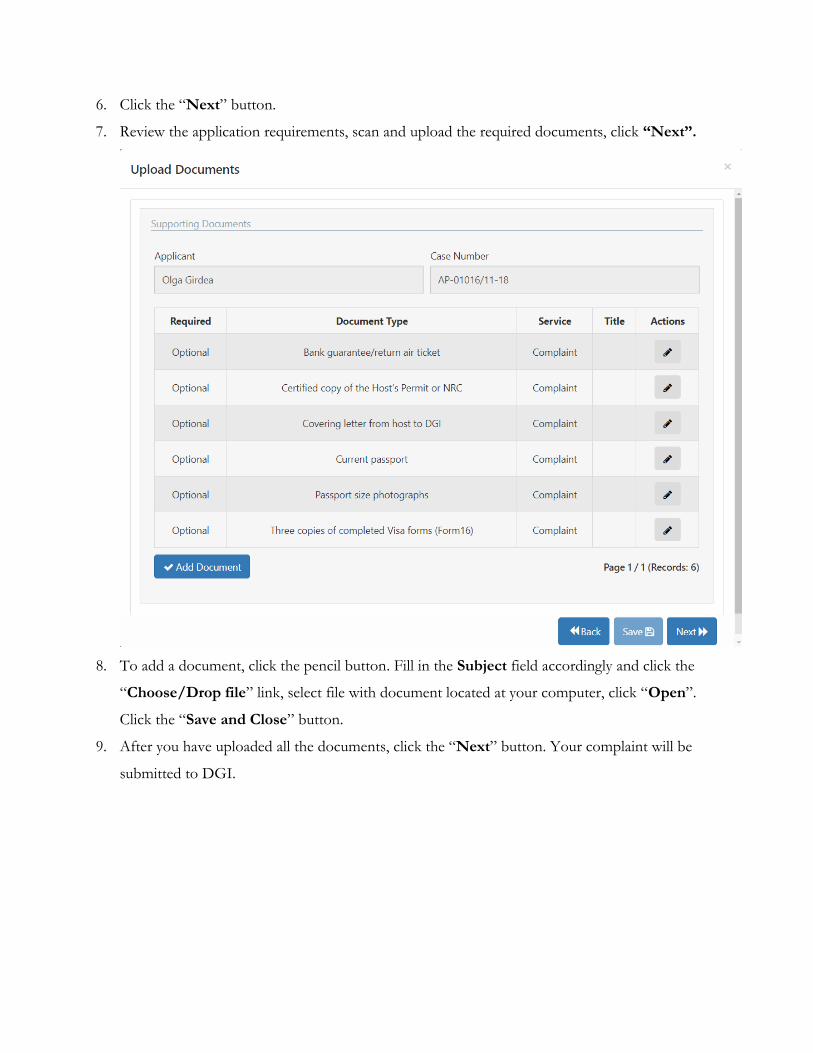
7. Review the application requirements, scan and upload the required documents, click “Next”.
8. To add a document, click the pencil button. Fill in the Subject field accordingly and click the
“Choose/Drop file” link, select file with document located at your computer, click “Open”.
Click the “Save and Close” button.
9. After you have uploaded all the documents, click the “Next” button. Your complaint will be
submitted to DGI.

11. How to Submit an Appeal to the Minister of Home Affairs
This functionality is applicable only to after an application for a Permit has been rejected by ZDI
and appears in the “Rejected” folder under the Permits section of your Workplace. If Applicant is
aggrieved with the decision, s/he can appeal to the DGI twice. After the two appeals, if the
application is still rejected, an appeal may be made to the Minister.
To file an appeal to Minister of Home Affairs, do the following:
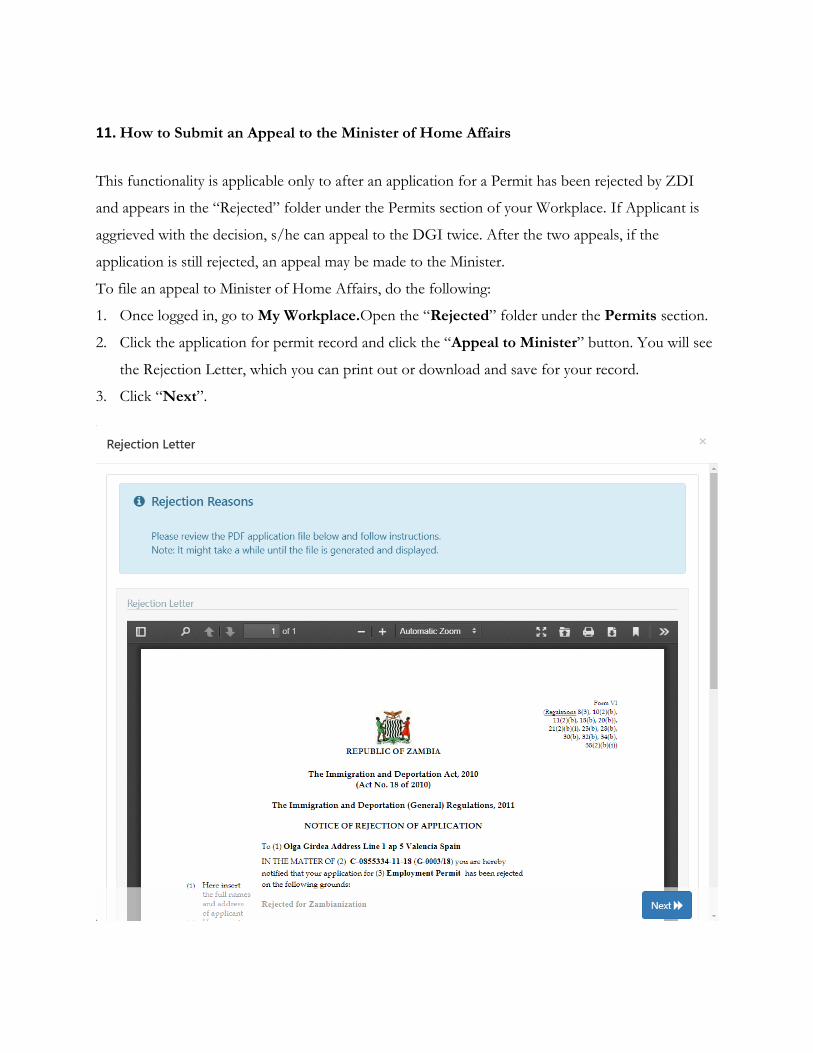
1. Once logged in, go to My Workplace.Open the “Rejected” folder under the Permits section.
2. Click the application for permit record and click the “Appeal to Minister” button. You will see
the Rejection Letter, which you can print out or download and save for your record.
3. Click “Next”.
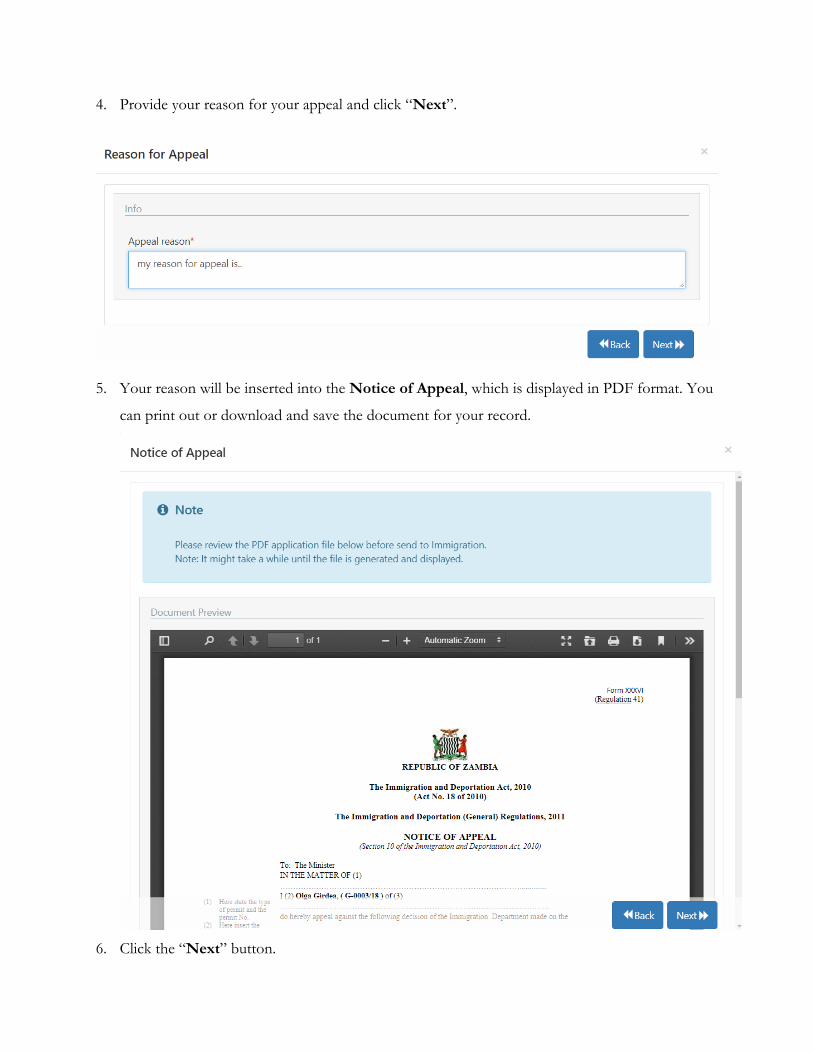
4. Provide your reason for your appeal and click “Next”.
5. Your reason will be inserted into the Notice of Appeal, which is displayed in PDF format. You
can print out or download and save the document for your record.
6. Click the “Next” button.
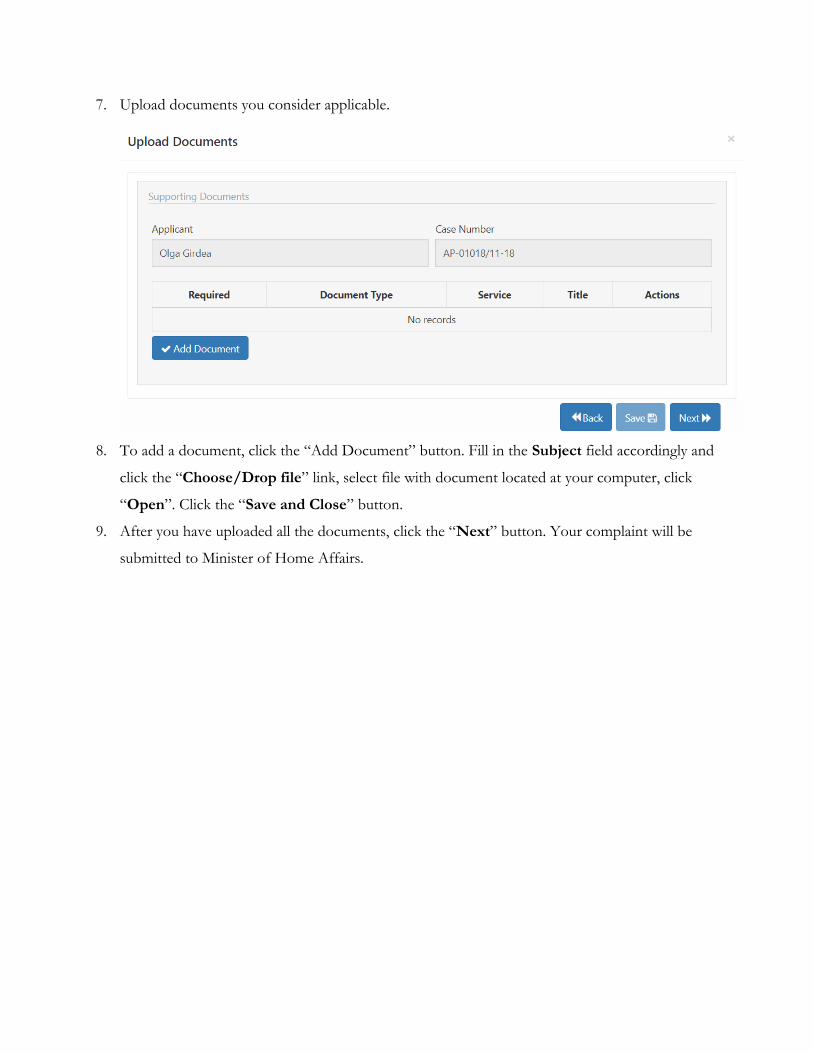
7. Upload documents you consider applicable.
8. To add a document, click the “Add Document” button. Fill in the Subject field accordingly and
click the “Choose/Drop file” link, select file with document located at your computer, click
“Open”. Click the “Save and Close” button.
9. After you have uploaded all the documents, click the “Next” button. Your complaint will be
submitted to Minister of Home Affairs.