
ERGONOMICS in the LABORATORY The Art & Science of Fitting the Work to the Person Click for Next.
33
ERGONOMICS ERGONOMICS in the in the LABORATORY LABORATORY The Art & Science of Fitting the Work to the Person Click for Next
-
Upload
adrian-murphy -
Category
Documents
-
view
222 -
download
0
Transcript of ERGONOMICS in the LABORATORY The Art & Science of Fitting the Work to the Person Click for Next.

ERGONOMICS ERGONOMICS in the in the
LABORATORYLABORATORY
ERGONOMICS ERGONOMICS in the in the
LABORATORYLABORATORY
The Art & Science
of Fitting the Work to the PersonClick for
Next

Why Ergonomics ?Why Ergonomics ?
To Prevent disorders of the soft-tissues such as muscles, tendons, nerves, blood vessels,
& joints.
Common Disorders in Laboratory Workers:
• Carpal Tunnel Syndrome• Tendonitis• Back Strain/Sprain• …and others
Click for Next
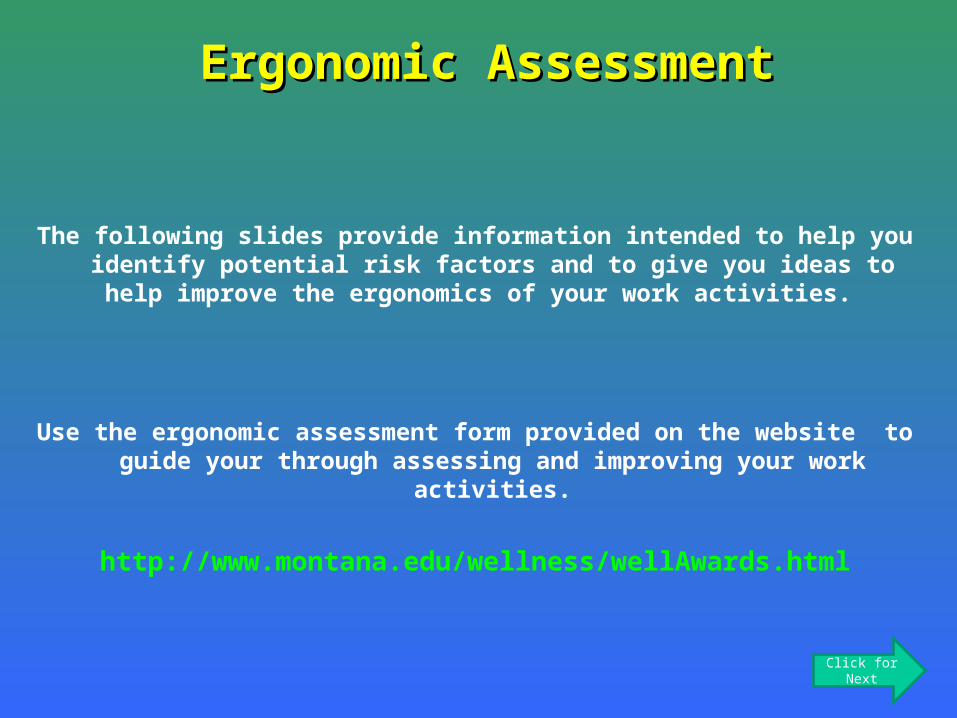
Ergonomic AssessmentErgonomic Assessment
The following slides provide information intended to help you identify potential risk factors and to give you ideas to help
improve the ergonomics of your work activities.
Use the ergonomic assessment form provided on the website to guide your through assessing and improving your work
activities.
http://www.montana.edu/wellness/wellAwards.html
Click for Next
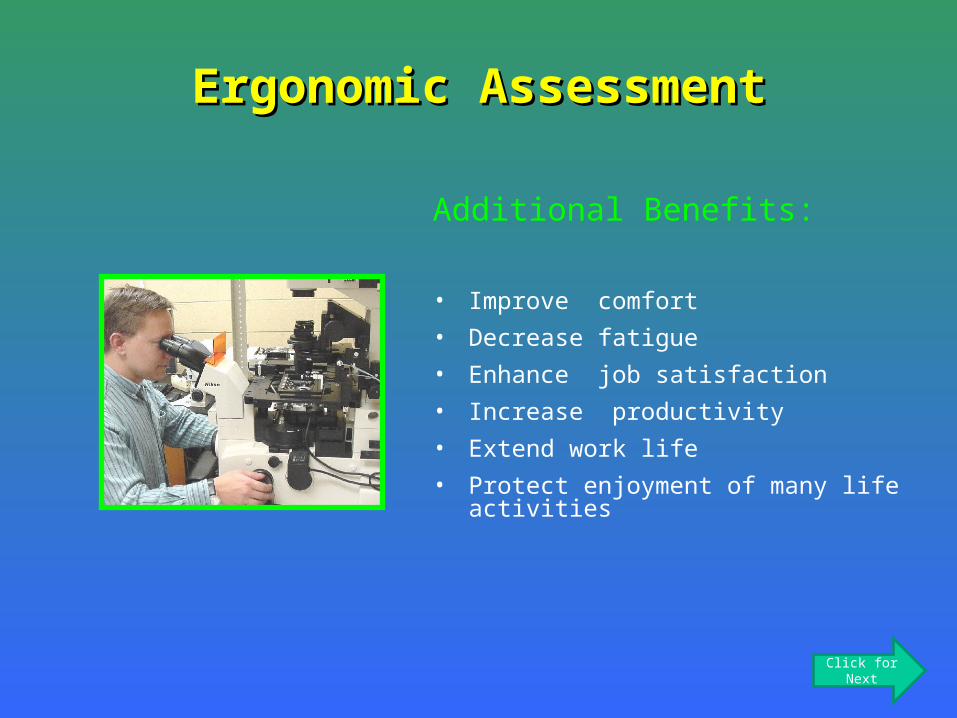
Ergonomic AssessmentErgonomic Assessment
Additional Benefits:
• Improve comfort
• Decrease fatigue
• Enhance job satisfaction
• Increase productivity
• Extend work life
• Protect enjoyment of many life activities
Click for Next

Key Risk FactorsKey Risk Factors
+
RepetitionAwkward Postures
Force
Click for Next

Risk FactorsRisk Factors
Each risk factor is significant; however, discomfort or injury is more likely to develop when two or more of these factors are combined Andthe risk exposure is sustained over time.
Time
Click for Next

Minimize Risk FactorsMinimize Risk Factors
The Goal of this ergonomics self-assessment is to help you identifyANDreduce, eliminate, or safely manage potential risk factors in your work environment.
Click for Next
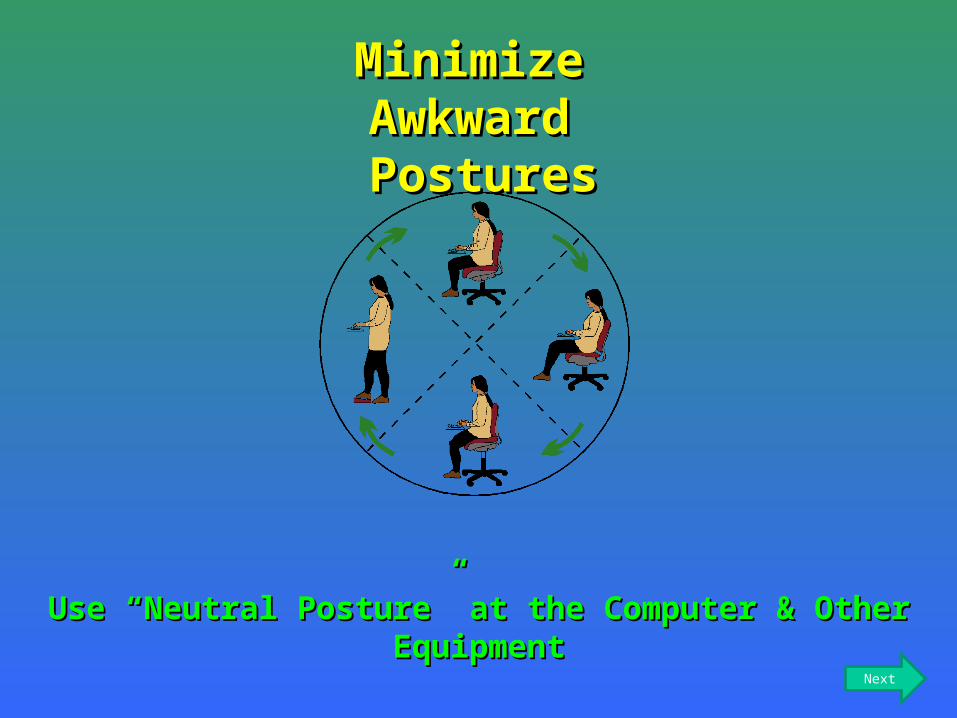
Minimize Minimize Awkward Awkward PosturesPostures
Use “Neutral Posture” at the Computer & Other Use “Neutral Posture” at the Computer & Other EquipmentEquipment
Next
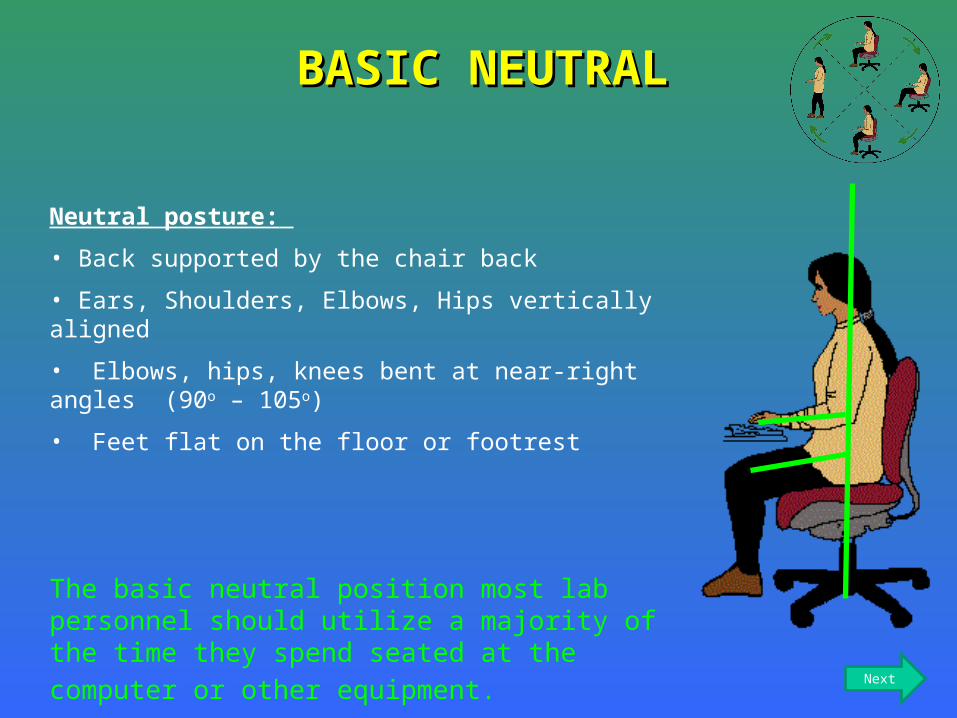
Neutral posture:
• Back supported by the chair back
• Ears, Shoulders, Elbows, Hips vertically aligned
• Elbows, hips, knees bent at near-right angles (90o – 105o)
• Feet flat on the floor or footrest
The basic neutral position most lab personnel should utilize a majority of the time they spend seated at the
computer or other equipment.
BASIC NEUTRALBASIC NEUTRAL
Next
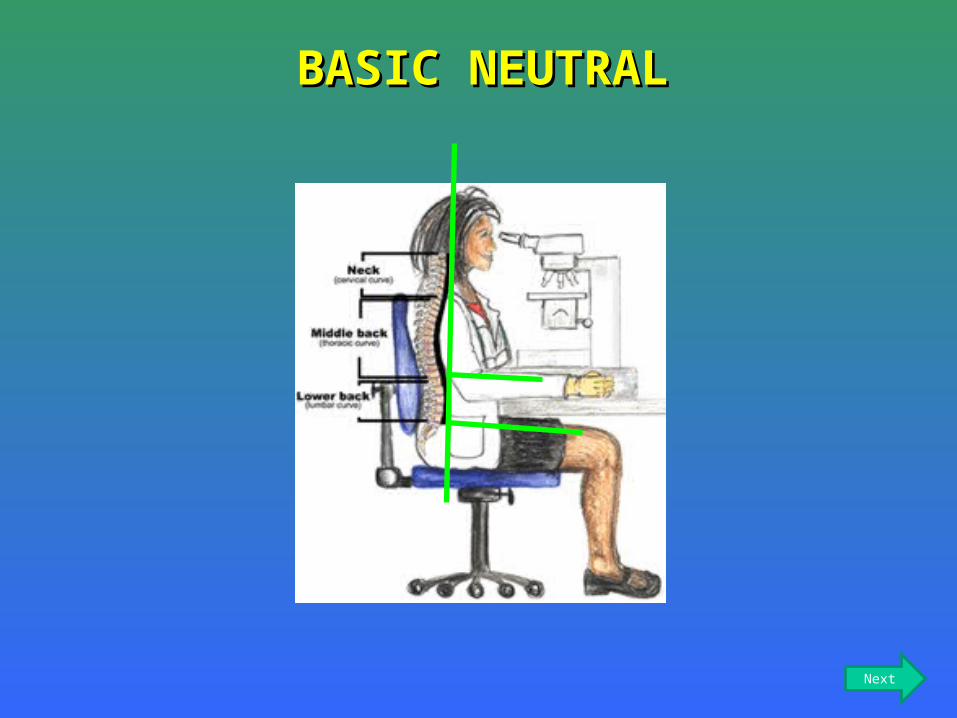
BASIC NEUTRALBASIC NEUTRAL
Next

Forward tilt posture:
Raise the chair height a few inches and tilt the front downward slightly (8o - 10o)
Back ReliefBack Relief
Opens hip angle allowing legs to support some weight.
Good position for lab work at a microscope or in a safety hood;
Not recommended if you have knee or foot problems.
May be used occasionally throughout the day by most people;
but is not recommended for long periods at a time.Next
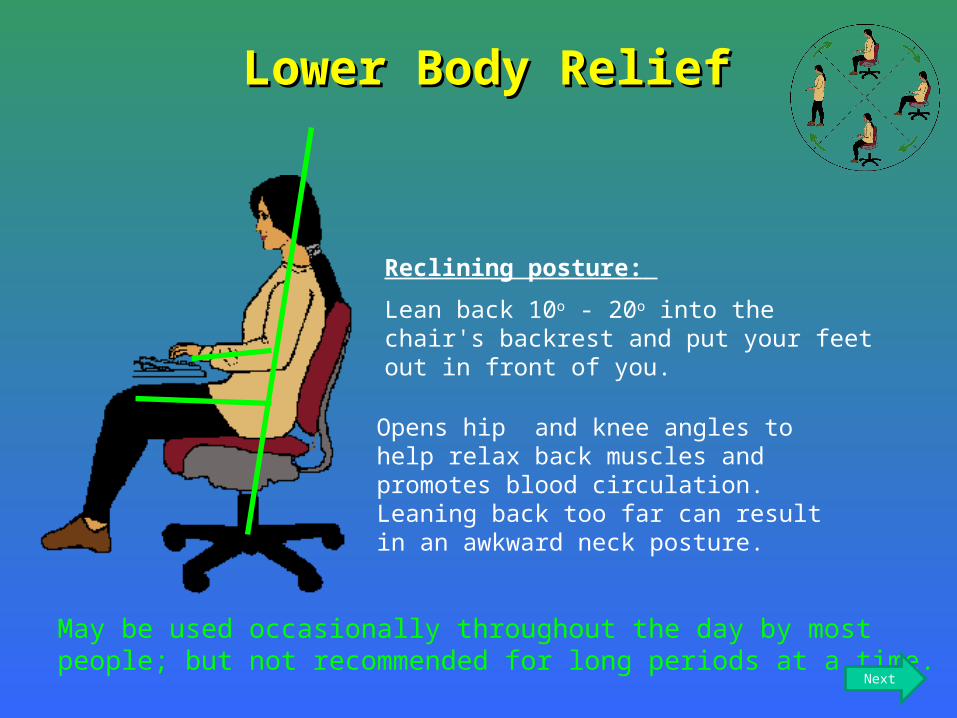
Reclining posture:
Lean back 10o - 20o into the chair's backrest and put your feet out in front of you.
Lower Body ReliefLower Body Relief
Opens hip and knee angles to help relax back muscles and promotes blood circulation. Leaning back too far can result in an awkward neck posture.
May be used occasionally throughout the day by most people; but not recommended for long periods at a time.
Next
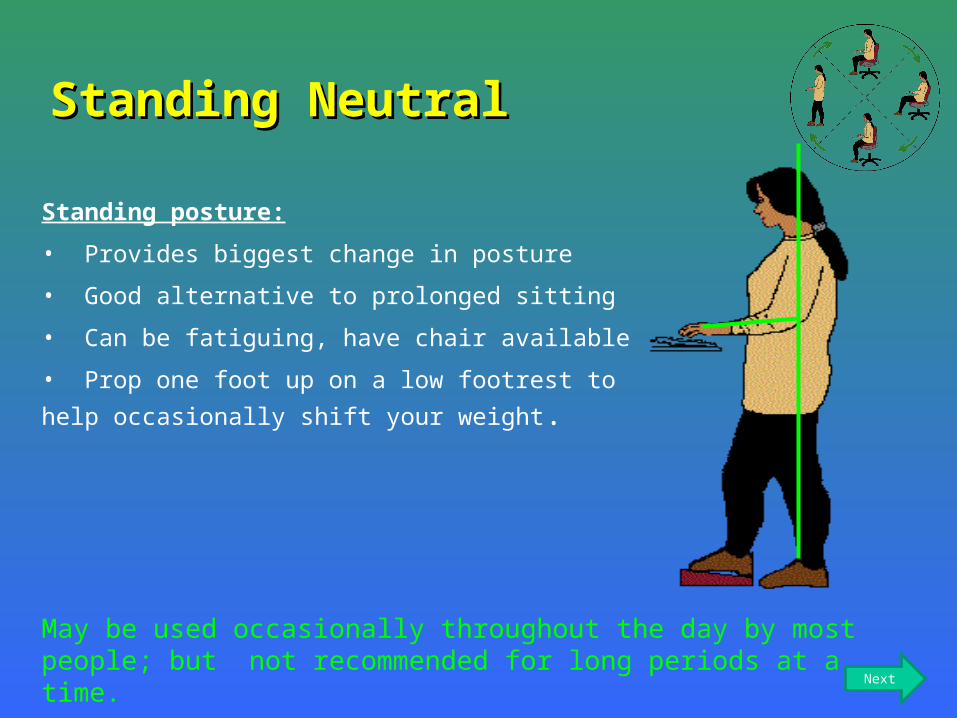
Standing posture:
• Provides biggest change in posture
• Good alternative to prolonged sitting
• Can be fatiguing, have chair available
• Prop one foot up on a low footrest to help
occasionally shift your weight.
Standing NeutralStanding Neutral
May be used occasionally throughout the day by most people; but not recommended for long periods at a time.
Next

Adjust Your Chair
• Adjust your chair to achieve a neutral position – keep trying, it is an ongoing process!
• Fix (or have fixed) a malfunctioning chair
• Use a lumbar cushion for additional support or if chair lacks adequate back support or seat is too deep
• Pad armrests that are hard or that have square edges
• Remove armrests if they contribute to awkward postures
• Use a foot rest or keyboard platform to help achieve neutral position if necessary
Minimize Awkward Minimize Awkward Body PositionBody Position
Next

Minimize Awkward Minimize Awkward Body PositionBody Position
Ideal Chair Features1. 5-Caster Base
2. Height adjustability
3. Seat depth adjustability – either seat slides, back moves fore/aft , or chair is available in numerous sizes
4. Rounded edge to the front of the seat
5. Backrest adjustability – up/down, angle, and flex
6. Armrests are padded and adjustable – up/down, in/out and/or removable
Next

Minimize Awkward Minimize Awkward Body PositionBody Position
Next
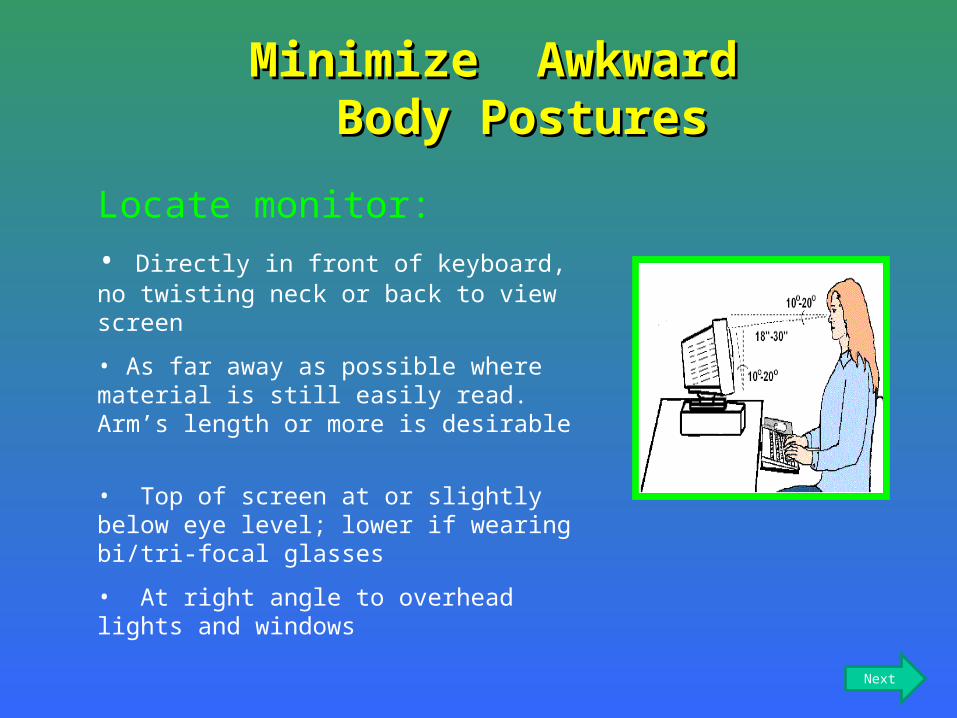
Locate monitor:• Directly in front of keyboard, no twisting neck or back to view screen
• As far away as possible where material is still easily read. Arm’s length or more is desirable
• Top of screen at or slightly below eye level; lower if wearing bi/tri-focal glasses
• At right angle to overhead lights and windows
Minimize Awkward Minimize Awkward Body PosturesBody Postures
Next
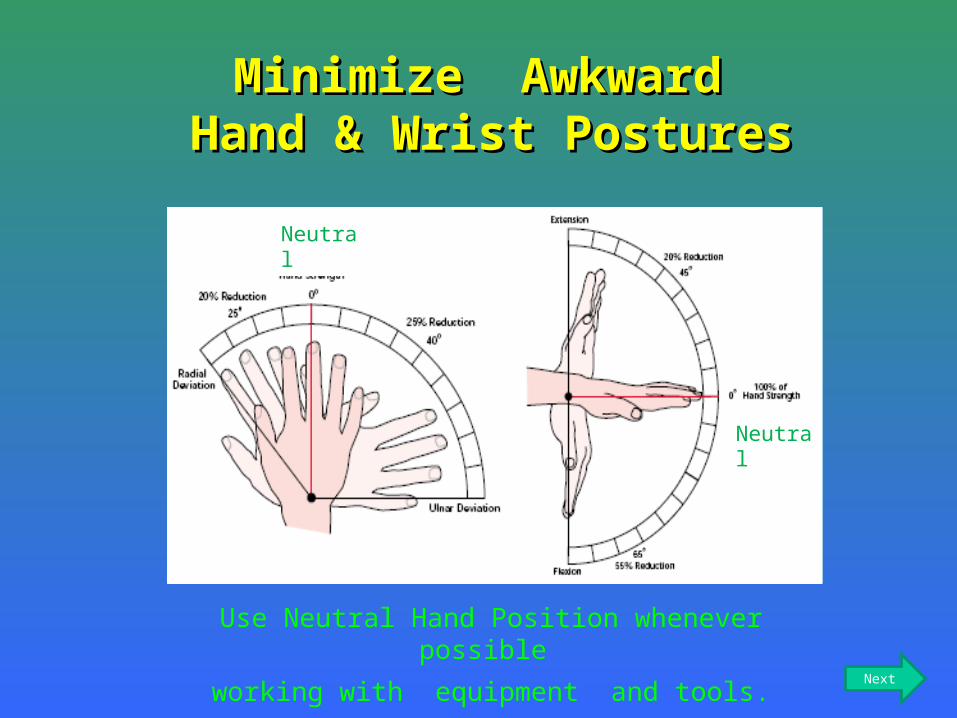
Minimize Awkward Minimize Awkward Hand & Wrist PosturesHand & Wrist Postures
Use Neutral Hand Position whenever possible
working with equipment and tools.
Neutral
Neutral
Next

Minimize Awkward Minimize Awkward Hand & Wrist PosturesHand & Wrist Postures
Neutral
Awkward
Neutral
AwkwardAwkward
Neutral
Awkward
Neutral
Next
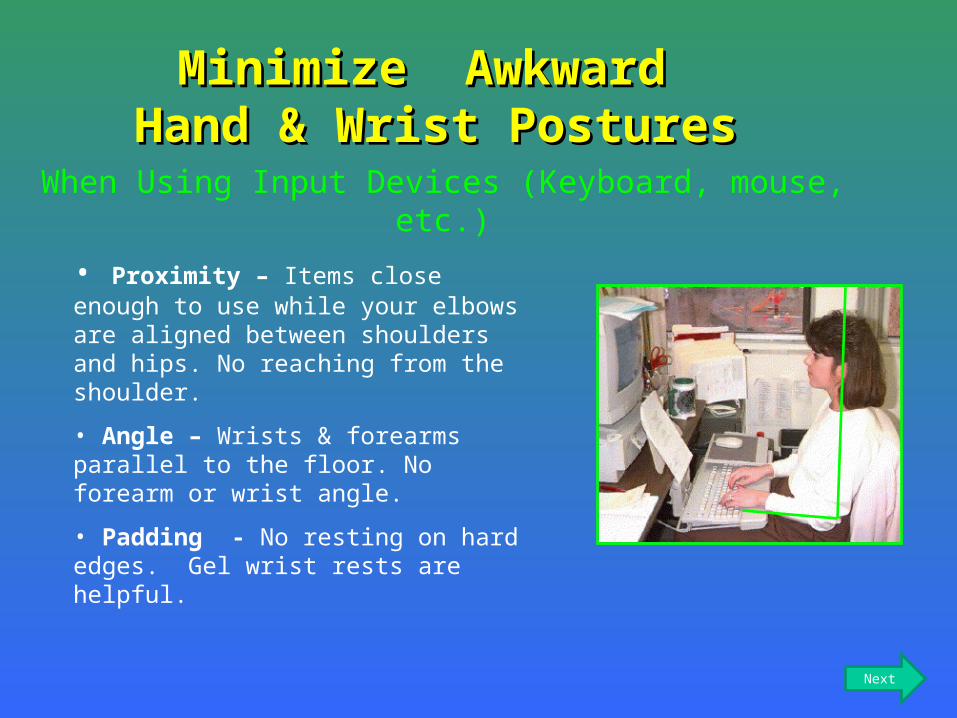
When Using Input Devices (Keyboard, mouse, etc.)
• Proximity – Items close enough to use while your elbows are aligned between shoulders and hips. No reaching from the shoulder.
• Angle – Wrists & forearms parallel to the floor. No forearm or wrist angle.
• Padding - No resting on hard edges. Gel wrist rests are helpful.
Minimize Awkward Minimize Awkward Hand & Wrist PosturesHand & Wrist Postures
Next
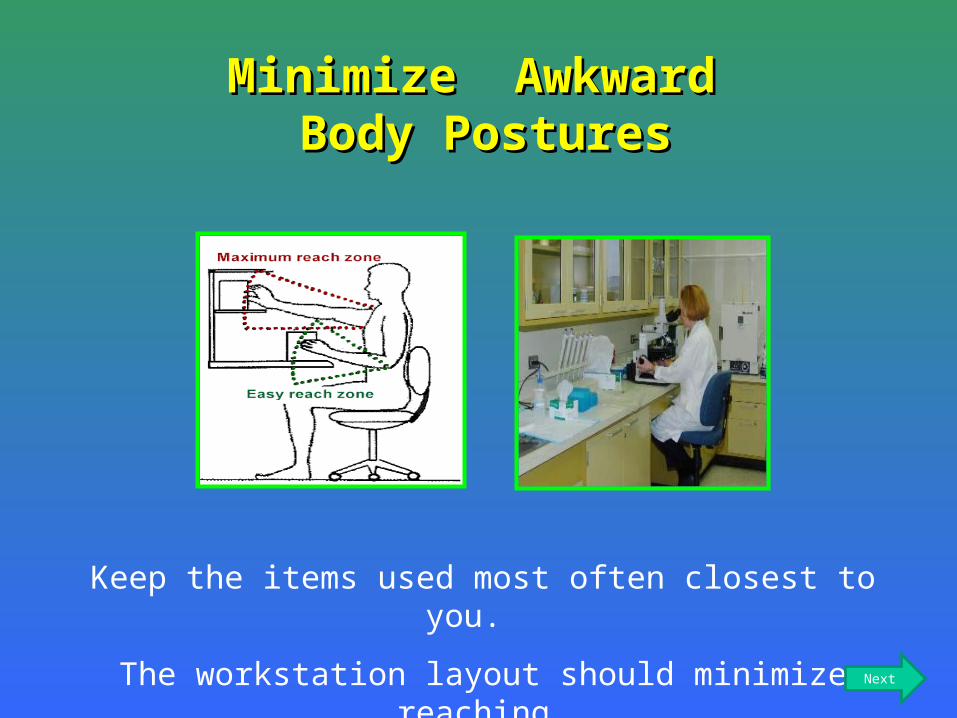
Keep the items used most often closest to you.
The workstation layout should minimize reaching.
Minimize Awkward Minimize Awkward Body PosturesBody Postures
Next
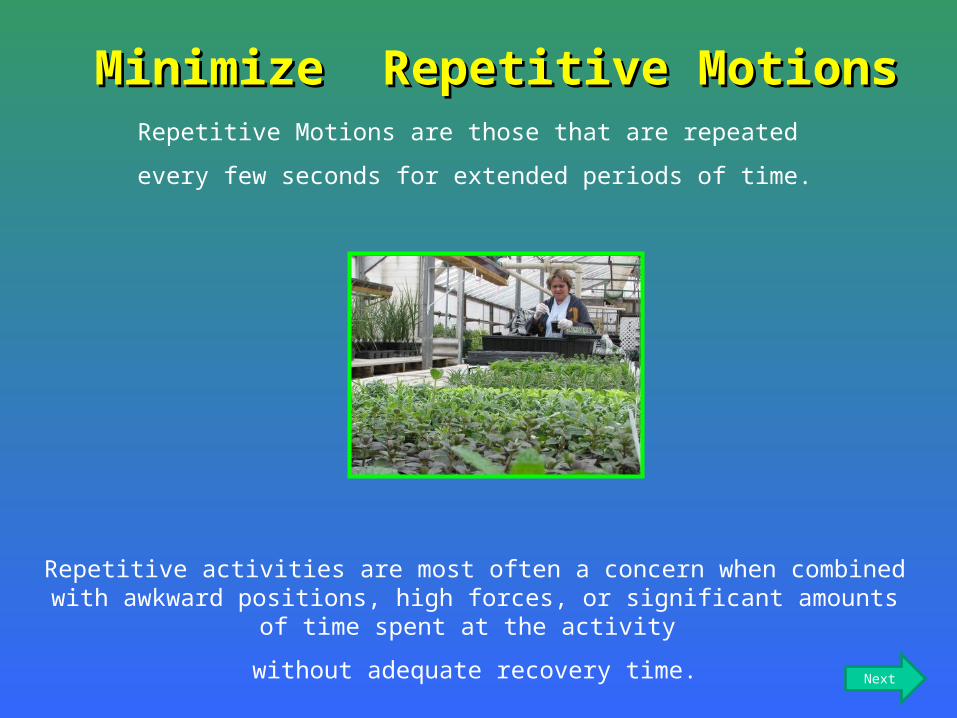
Repetitive Motions are those that are repeated
every few seconds for extended periods of time.
Repetitive activities are most often a concern when combined with awkward positions, high forces, or significant amounts of time spent at
the activity
without adequate recovery time.
Minimize Repetitive MotionsMinimize Repetitive Motions
Next
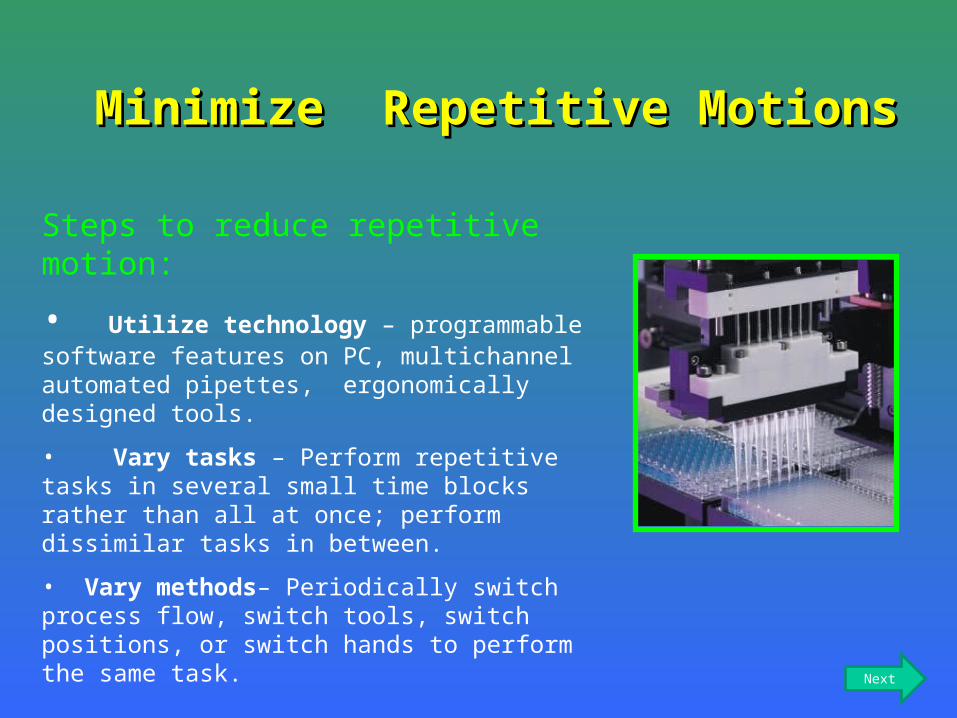
Steps to reduce repetitive motion:
• Utilize technology – programmable software features on PC, multichannel automated pipettes, ergonomically designed tools.
• Vary tasks – Perform repetitive tasks in several small time blocks rather than all at once; perform dissimilar tasks in between.
• Vary methods– Periodically switch process flow, switch tools, switch positions, or switch hands to perform the same task.
Minimize Repetitive MotionsMinimize Repetitive Motions
Next
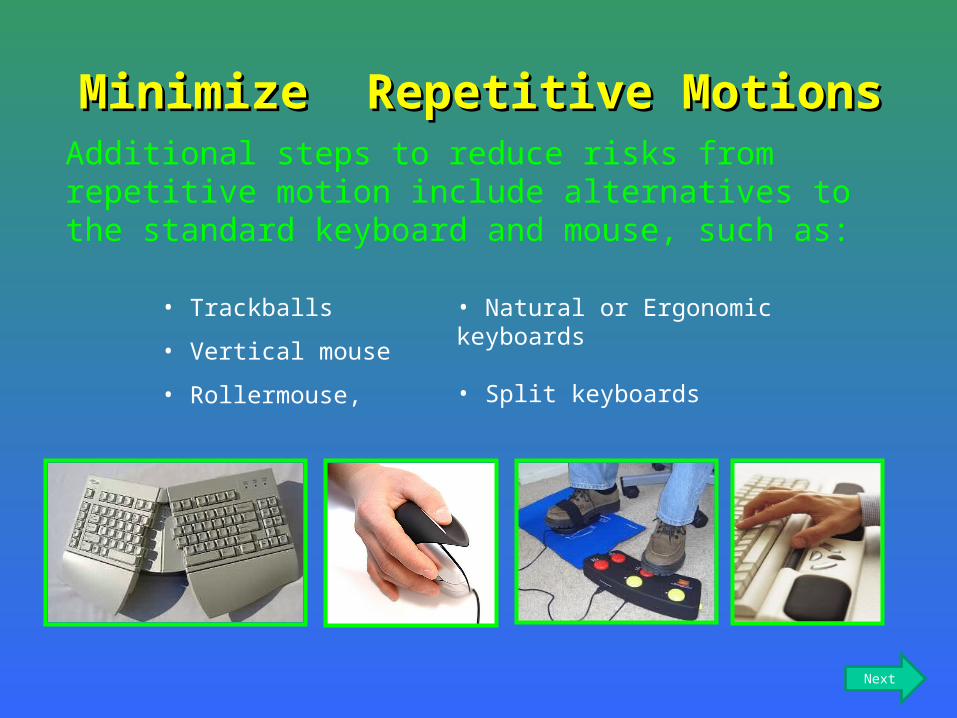
• Trackballs
• Vertical mouse
• Rollermouse,
Minimize Repetitive MotionsMinimize Repetitive MotionsAdditional steps to reduce risks from repetitive motion include alternatives to the standard keyboard and mouse, such as:
• Natural or Ergonomic keyboards • Split keyboards
Next
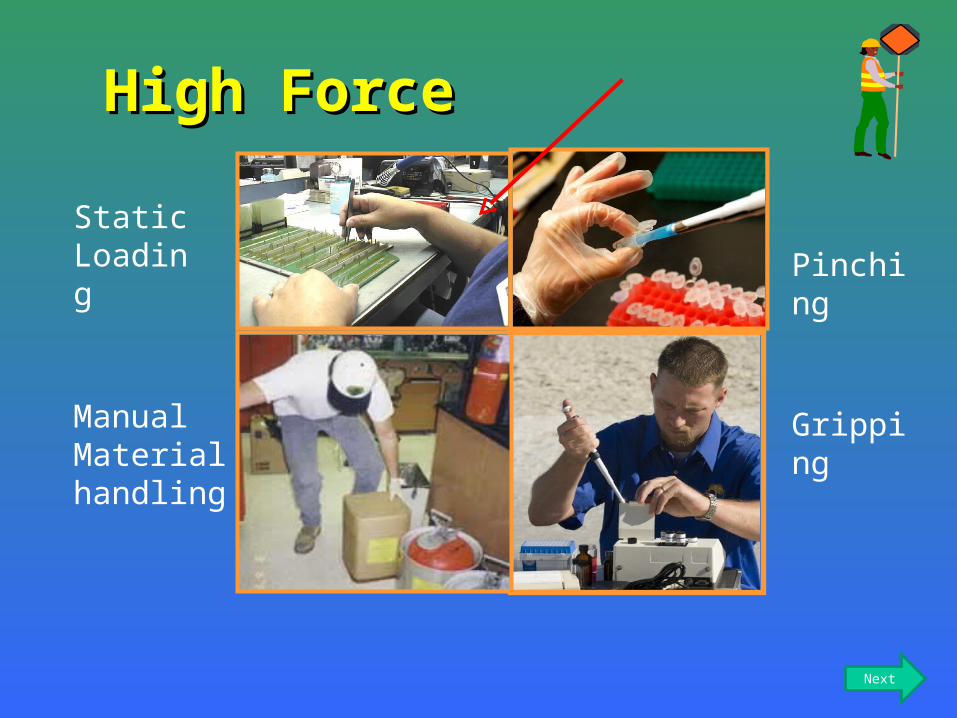
High ForceHigh Force
Pinching
Gripping
Manual Material handling
Static Loading
Next
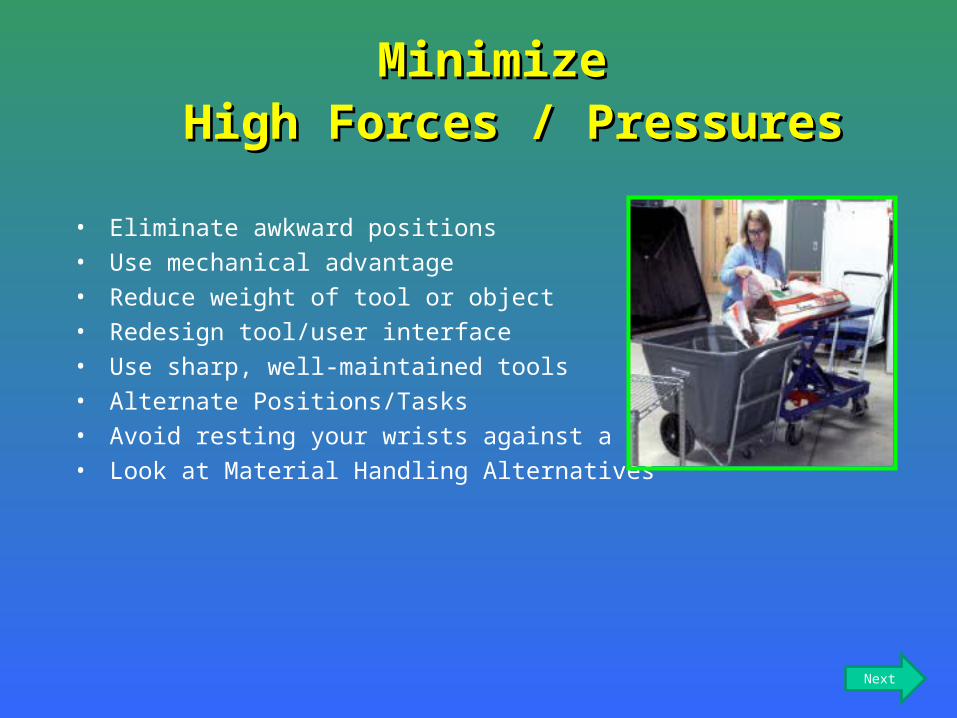
• Eliminate awkward positions• Use mechanical advantage• Reduce weight of tool or object• Redesign tool/user interface• Use sharp, well-maintained tools• Alternate Positions/Tasks• Avoid resting your wrists against a desk edge • Look at Material Handling Alternatives
MinimizeMinimize High Forces / PressuresHigh Forces / Pressures
Next
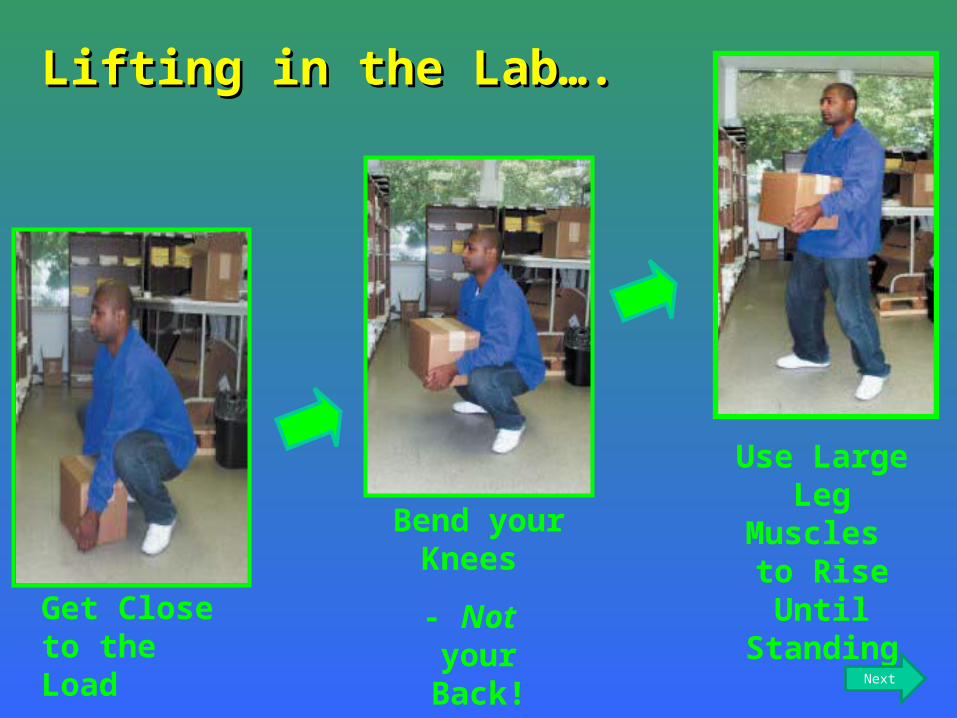
Get Close to the Load
Bend your Knees
- Not your Back!
Lifting in the Lab….Lifting in the Lab….
Use Large Leg
Muscles to Rise Until
StandingNext
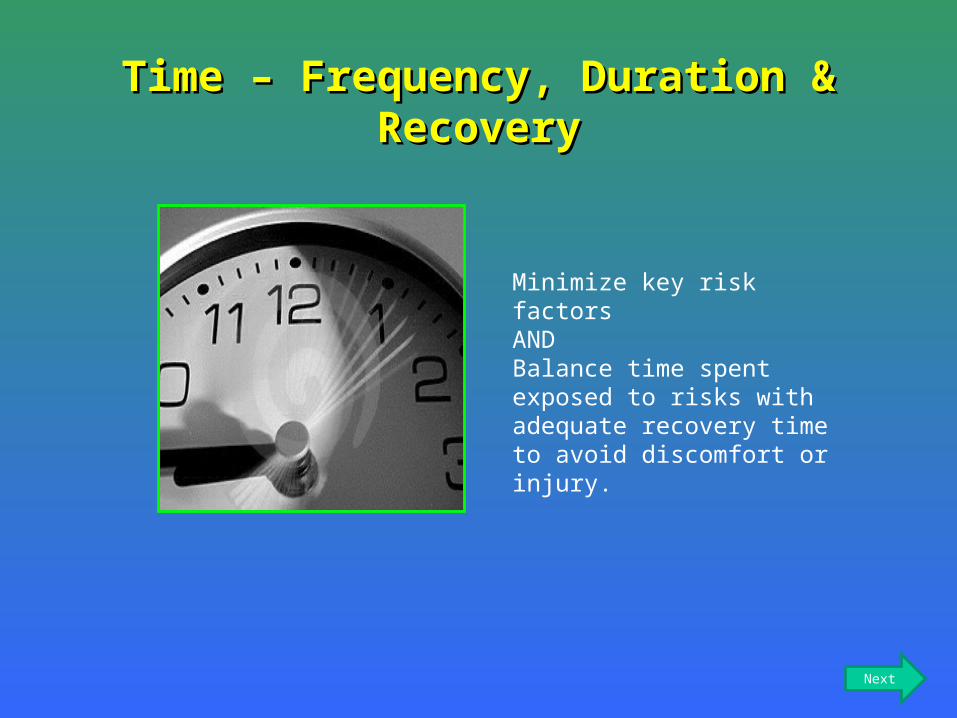
Time – Frequency, Duration & Time – Frequency, Duration & RecoveryRecovery
Minimize key risk factors AND Balance time spent exposed to risks with adequate recovery time to avoid discomfort or injury.
Next
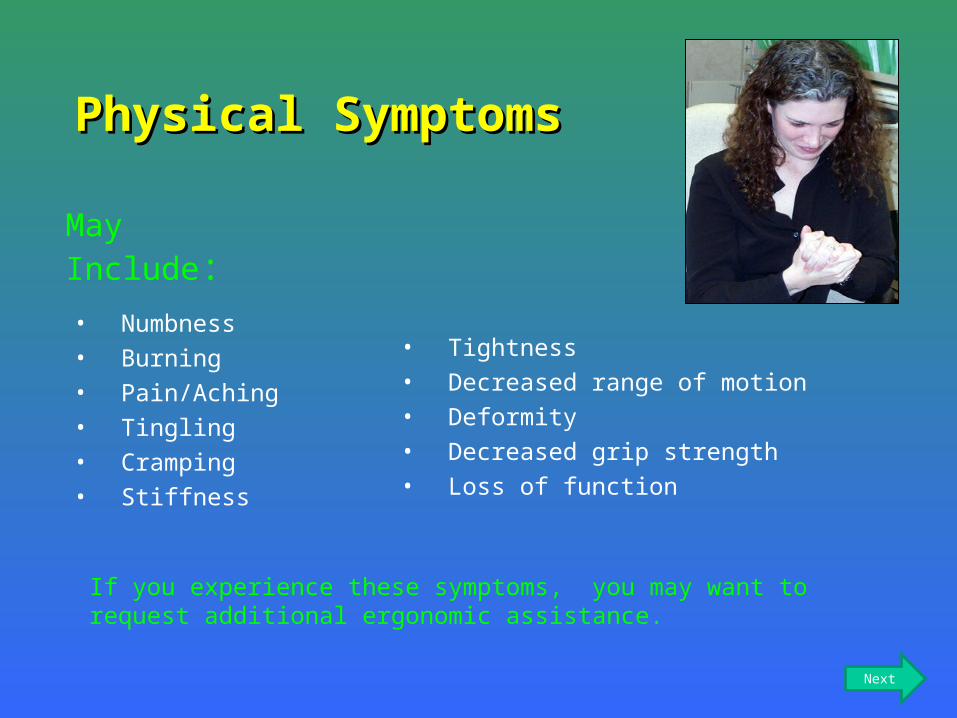
• Numbness• Burning• Pain/Aching• Tingling• Cramping• Stiffness
Physical Symptoms Physical Symptoms
• Tightness• Decreased range of motion• Deformity• Decreased grip strength • Loss of function
May Include:
If you experience these symptoms, you may want to request additional ergonomic assistance.
Next
Early Intervention is CriticalEarly Intervention is Critical
EE arlyarly
RR esponse esponse
GG ains ains
OO pportunity pportunity
• Reduce/Eliminate risks• Prevent Pain• Avoid or minimize need for
medical treatment• Happier employees• Higher productivity• Financial Savings by avoiding
time away from work
Next
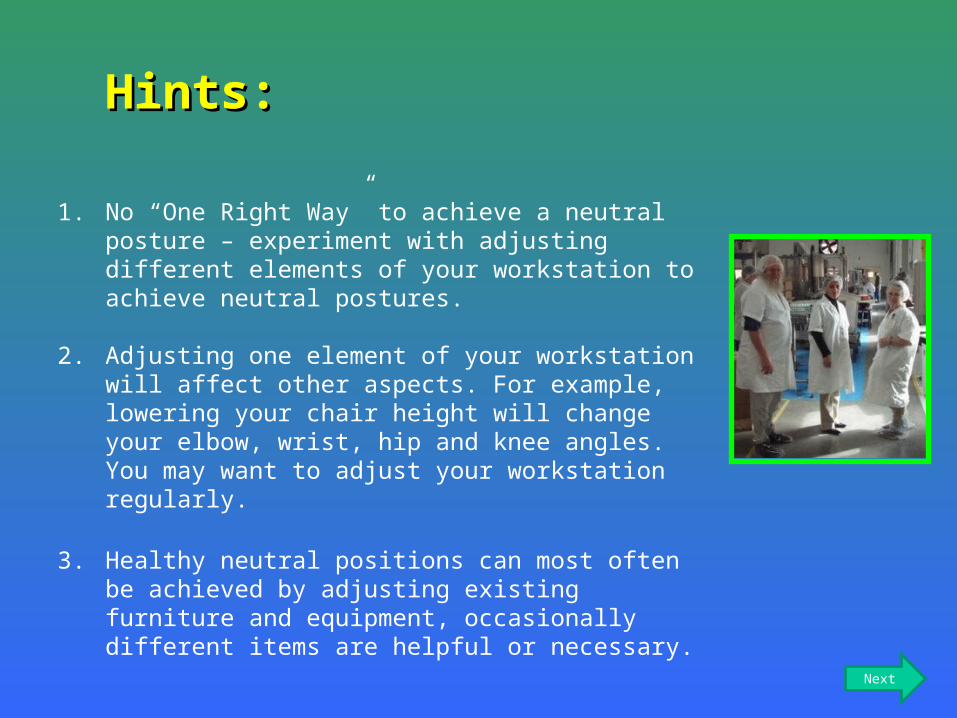
Hints:Hints:
1. No “One Right Way” to achieve a neutral posture – experiment with adjusting different elements of your workstation to achieve neutral postures.
2. Adjusting one element of your workstation will affect other aspects. For example, lowering your chair height will change your elbow, wrist, hip and knee angles. You may want to adjust your workstation regularly.
3. Healthy neutral positions can most often be achieved by adjusting existing furniture and equipment, occasionally different items are helpful or necessary.
Next
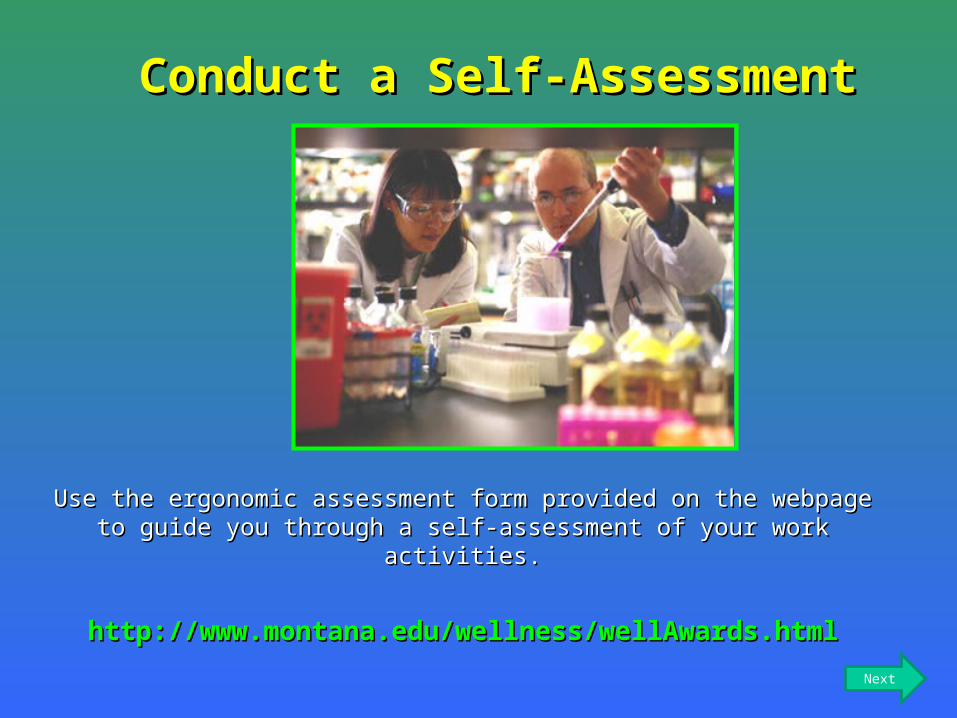
Use the ergonomic assessment form provided on the webpage to Use the ergonomic assessment form provided on the webpage to guide you through a self-assessment of your work activities.guide you through a self-assessment of your work activities.
http://www.montana.edu/wellness/wellAwards.htmlhttp://www.montana.edu/wellness/wellAwards.html
Conduct a Self-AssessmentConduct a Self-Assessment
Next

Consult additional resources on this website.Consult additional resources on this website.
Contact your Wellness Coordinator for additional Contact your Wellness Coordinator for additional assistance and resourcesassistance and resources
Questions or Concerns?Questions or Concerns?
http://www.montana.edu/wellness/http://www.montana.edu/wellness/wellAwards.htmlwellAwards.html
END