Ereader Sony PRSt1
242
©2011 Sony Corporation 4-288-614-32(3) PRS-T1 User Guide Digital Book Reader Click for instant access! Table of Contents
-
Upload
antonio-silva -
Category
Documents
-
view
55 -
download
1
Transcript of Ereader Sony PRSt1

©2011 Sony Corporation 4-288-614-32(3)
PRS-T1User Guide
Digital Book Reader
Click for instant access!
Table of Contents

2Table of Contents
Table of Contents
Getting started .................................................5
Welcome! ...................................................................... 5
Wireless Connectivity .............................................12
Battery ..........................................................................32
Turning the Power On/Off ....................................40
Parts and Controls ....................................................43
Basic Operations .............................................50
[Home] Screen ...........................................................50
Adding Content ..............................................65
Adding Content ........................................................65
Browsing Content Lists ..................................68
Content Lists ..............................................................68

3Table of Contents
Reading ...........................................................82
Reading Books...........................................................82
Organizing ................................................... 119
Organizing Your Content .....................................119
Using Collections ...................................................126
Other Applications ...................................... 135
All Notes ....................................................................135
Handwriting .............................................................138
Web Browsing .........................................................145
Dictionary .................................................................164
Text Memo ................................................................169
Pictures ......................................................................174

4Table of Contents
Audio ..........................................................................183
Settings ........................................................ 189
Changing the Settings .........................................189
Other Information ....................................... 199
Troubleshooting .....................................................199
Precautions ...............................................................213
Legal Notice .............................................................233
Appendix ...................................................................236

Getting started
5Table of Contents
Welcome!About your Reader™Enjoy the most natural and intuitive reading experience Sony has to offer. This is e-reading.
Unplug and unwind. Wi-Fi® functionality lets you download books directly via your Reader™.
Superior touchscreen. Bookmark, highlight and take notes on the high-contrast e-paper screen. Read clearly under direct sunlight.
Zoom. Easily adjust the font size, or zoom into images for a closer look.
Dictionary and Wikipedia®. Simply tap and hold a word to look up its definition, translate it or learn more from the Wikipedia Web site.
You can also:Personalize the standby screen with either your
favorite pictures or the cover of the last-read book.Create your own collections and organize your
books by bestsellers, favorites, genre and more.
Getting started

Welcome!
6Table of Contents
About this guidePlease read the Quick Start Guide in this package to help you get started.This User Guide describes key features of your Reader. You can also find this guide in [Books] on your Reader. You can find the User Guide in your language at the support PC Web site.http://support.sony-europe.com/eBook/PRS
NoteScreenshots in the User Guide may depict screens
different from your Reader.

Welcome!
7Table of Contents
Searching for a specific topic in this User GuideUse the [Table of Contents] feature of your Reader to search for topics, and then tap a topic to jump to it.While viewing this User Guide on your Reader, press the (Menu) button tap [Navigate Page] [Table of Contents] to view the Table of Contents.You can also tap the page number at the bottom of the screen tap [Table of Contents].

Welcome!
8Table of Contents
Jumping to a linked section in this User GuideTap the link to a chapter or section indicated with a highlight to open the page.To return to the page you were previously viewing, while viewing a book, tap after tapping a link.To hide the / icons, press the (Back) button.
Changing the font sizeYou can adjust the font size to improve legibility. See Details.

Welcome!
9Table of Contents
Reader Features and Functions
Transferring content from your computerEnjoy books, music and pictures by transferring them to the Reader from your computer. See Details.

Welcome!
10Table of Contents
Useful features
Wi-Fi network access Details
Wikipedia DetailsUse the Web browser for internet access DetailsAnnotation Details
Add bookmarks DetailsHighlight words DetailsHandwrite notes on a page DetailsResize
Adjust font size DetailsChange the page view mode DetailsZoom in Details
Adjust content view Details
Search
Find notes DetailsFind pages with a keyword DetailsSearch content via keyword DetailsJump to pages Details

Welcome!
11Table of Contents
Dictionary Details
Look up words while reading DetailsLook up words in a dictionary DetailsList previously looked-up words DetailsCollections Details
Supplementary applications
Handwriting DetailsText memo DetailsPicture viewer DetailsAudio player Details

Welcome!
12Table of Contents
Wireless Connectivity
Join a Wi-Fi® NetworkTo connect to the internet wirelessly, set up a wireless (Wi-Fi®) internet connection with the following steps.
Preparing to set up a Wi-Fi connectionBefore connecting to an access point, turn on [Wi-Fi] on the Reader.

Wireless Connectivity
13Table of Contents
1 Press the (Home) button tap [Settings] [Wireless Network Settings].
2 Confirm that there is a check in the box to the right of [Wi-Fi].A check indicates that [Wi-Fi] is turned on. Wi-Fi is turned on by default.Alternatively, you can tap the status bar [Wi-Fi].

Wireless Connectivity
14Table of Contents
TipTurn off [Wi-Fi] when it is not in use in order to extend
the battery life of the Reader.If you do not perform any wireless operations for more
than 5 minutes, the wireless feature automatically enters standby mode. See Details.
Wi-Fi status iconsThe following icons in the status bar indicate the status of the Wi-Fi connection.Icon Status
Wi-Fi is activated. The number of bars indicates the Wi-Fi signal strength.The Wi-Fi network feature of the Reader is in standby mode. See Details.There is no Wi-Fi access point.
The [Wi-Fi] setting is turned off.

Wireless Connectivity
15Table of Contents
Choosing a connection typeDepending on your Wi-Fi environment, connect to an access point via one of the following methods.The following questions will determine the most suitable case for setting the Reader’s Wi-Fi network connection.
Internet

Wireless Connectivity
16Table of Contents
*WPS: Wi-Fi Protected Setup
TipTo enter an SSID (Service Set Identifier) or a password, tap
the input area to display the on-screen keyboard.For alphanumeric entry, press and hold the “?123” key.

Wireless Connectivity
17Table of Contents
Case AA WPS-compatible Wi-Fi router with WPS button DetailsCase BA WPS-compatible Wi-Fi router with PIN input DetailsCase CConnecting to a Wi-Fi router without WPS support DetailsCase DConnecting to an available Wi-Fi network DetailsManual setupSet up a Wi-Fi network connection manually; connect to an access point for which the SSID is set to be invisible. See Details.

Wireless Connectivity
18Table of Contents
Case A: A WPS-compatible Wi-Fi router with WPS buttonThe Reader is compatible with WPS (Wi-Fi Protected Setup), which lets you easily make a Wi-Fi connection using the “WPS” or “Connect” button on your WPS-compatible Wi-Fi router. Make sure to turn on [Wi-Fi] and tap [Wi-Fi Settings] on the [Wireless Network Settings] screen. Alternatively, you can turn on [Wi-Fi] by tapping the status bar and tapping [Wi-Fi Settings].
1 Tap [WPS Push-Button Configuration] [Start].
2 On your Wi-Fi router, press the “WPS” or “Connect” button within 2 minutes.*The Reader automatically attempts to establish a

Wireless Connectivity
19Table of Contents
Wi-Fi connection.* The name of the button on your Wi-Fi router may vary.
“WPS” or “Connect” button
3 After the Reader screen shows the setup completion, tap [OK].The wireless connection status is displayed in the status bar. See Details.
For more technical notes, see Details.

Wireless Connectivity
20Table of Contents
Case B: A WPS-compatible Wi-Fi router with PIN inputIf your WPS-compatible Wi-Fi router does not support push-button configuration, connect by using a PIN (Personal Identification Number). Make sure to turn on [Wi-Fi] and tap [Wi-Fi Settings] on the [Wireless Network Settings] screen. Alternatively, you can turn on [Wi-Fi] by tapping the status bar and tapping [Wi-Fi Settings].
1 Tap [Add Wi-Fi Network] [WPS PIN Method] [Start].
A PIN will be shown on the screen of the Reader.Enter the PIN into your Wi-Fi router.

Wireless Connectivity
21Table of Contents
Refer to your Wi-Fi router’s instruction manual for further details.
2 After entering the PIN, tap [OK] on the Reader. Your Wi-Fi router’s SSID (Service Set Identifier) is displayed in the [Wi-Fi Networks] list on the [Wi-Fi Settings] screen.
3 Tap your Wi-Fi router’s SSID [Connect].The Reader connects to the wireless network.The wireless connection status is displayed in the status bar. See Details.
For more technical notes, see Details.

Wireless Connectivity
22Table of Contents
Case C: Connecting to a Wi-Fi router without WPS supportMake sure to turn on [Wi-Fi] and tap [Wi-Fi Settings] on the [Wireless Network Settings] screen. Alternatively, you can turn on [Wi-Fi] by tapping the status bar and tapping [Wi-Fi Settings].
1 Tap [Scan].The available access points are listed under [Wi-Fi Networks].

Wireless Connectivity
23Table of Contents
Item Description Network SSID
Security type
Page indicator
Page turn icon
Wi-Fi is activated and the Reader detects an unsecured network.
Wi-Fi is activated and the Reader detects a secured network. The Wi-Fi router to which you want to connect requires a password. A password may also be called a WEP key/WPA key/encryption key/network key, etc.
2 Tap your Wi-Fi router’s SSID (Service Set Identifier) in the [Wi-Fi Networks] list. For details on determining your Wi-Fi router’s SSID, refer to your Wi-Fi router’s instruction manual.
3 If prompted for a password, tap the input area and type in the password using the on-screen keyboard.
4 Tap [Connect].

Wireless Connectivity
24Table of Contents
The Reader connects to the Wi-Fi network.The wireless connection status is displayed in the status bar. See Details.
For more technical notes, see Details.
Case D: Connecting to an available Wi-Fi networkSome public wireless access points, or “hotspots”, are open and you can simply connect to them. Make sure to turn on [Wi-Fi] and tap [Wi-Fi Settings] on the [Wireless Network Settings] screen. Alternatively, you can turn on [Wi-Fi] by tapping the status bar and tapping [Wi-Fi Settings].

Wireless Connectivity
25Table of Contents
1 Tap [Scan].The available access points are listed under [Wi-Fi Networks].
Item Description Network SSID
Security type
Page indicator
Page turn icon
Wi-Fi is activated and the Reader detects an unsecured network.

Wireless Connectivity
26Table of Contents
Item Description
Wi-Fi is activated and the Reader detects a secured network. The Wi-Fi router to which you want to connect requires a password. A password may also be called a WEP key/WPA key/encryption key/network key, etc.
2 Tap your Wi-Fi router’s SSID (Service Set Identifier) in the [Wi-Fi Networks] list.
3 If prompted for a password, tap the input area and type in the password using the on-screen keyboard.
4 Tap [Connect].The wireless connection status is displayed in the status bar.
5 The [Browser] application may start automatically to connect to a public access point. Otherwise, start the [Browser] application manually; press the (Home) button, tap [Browser].

Wireless Connectivity
27Table of Contents
6 The browser screen may show further information about completing the connection. Follow any instruction(s) where applicable.
For more technical notes, see Details.

Wireless Connectivity
28Table of Contents
Manually setting a Wi-Fi connectionYou can set up a Wi-Fi network connection manually by inputting the required information for connection. Make sure to turn on [Wi-Fi] and tap [Wi-Fi Settings] on the [Wireless Network Settings] screen. Alternatively, you can turn on [Wi-Fi] by tapping the status bar and tapping [Wi-Fi Settings].
1 Tap [Add Wi-Fi Network].
2 Tap [Manual Registration].
3 Tap the [SSID] input area and type in using the on-screen keyboard.

Wireless Connectivity
29Table of Contents
4 Tap the [Security Method] menu (the default value is [Open]), and then tap the supported security type.
5 Tap the [Password] input area and type in your password using the on-screen keyboard, and then tap [OK] [Save].
6 Tap the saved network SSID in the [Wi-Fi Networks] list on the [Wi-Fi Settings] screen.
7 If prompted for a password, tap the input area and type in the password using the on-screen keyboard.
8 Tap [Connect].The Reader connects to the Wi-Fi network.The Wi-Fi connection status is displayed in the status bar. See Details.
For more technical notes, see Details.

Wireless Connectivity
30Table of Contents
General notes on Wi-Fi connectivityTap and hold a network SSID in the [Wi-Fi Networks] list to
display the access point’s status and related information.Before connecting to a wireless network, check all
requirements, user name and/or password details with the internet/Wi-Fi service provider.
You can configure up to 20 Wi-Fi network connections.The Reader does not support certain custom Wi-Fi network
security systems. For details, contact the internet/Wi-Fi service provider.
If you edit the password of a Wi-Fi network to which you are currently connected, the Reader will attempt to reconnect to the Wi-Fi network using the new password.
To use a static IP address, press the (Menu) button tap [Advanced] in the [Wi-Fi Settings] tap [Use Static IP]. Do not change this setting unless instructed to by a network administrator, as the Wi-Fi network connection may not be established correctly.

Wireless Connectivity
31Table of Contents
If an access point’s SSID (Service Set Identifier) is private, enter Wi-Fi connection information manually.
The access point may filter access by MAC address. Check the MAC address by pressing the (Home) button tap
[Settings] [About] [Device Information], then register the MAC address with the access point to establish a Wi-Fi connection.
When you are connected to a Wi-Fi network, you can also display speed, security and other Wi-Fi network details by pressing the (Menu) button and tapping [Connection Information] in the [Wi-Fi Settings] screen.
An access point, once configured, can be connected to again simply by tapping it in the [Wi-Fi Networks] list and tapping [Connect].

Wireless Connectivity
32Table of Contents
Battery
Charging the ReaderThe charge/battery status icon at the right side of the status bar shows the battery level. See Details.If it is low, choose one of the methods in the following sections to charge the Reader.
USB connectorCharge/Busy indicator

Wireless Connectivity
33Table of Contents
Charging via your computer
1 Power on your computer.
2 Connect the Reader to your computer with the supplied USB cable.Wait until the [USB connected] screen is displayed on the Reader.

Battery
34Table of Contents
Method DescriptionData transfer mode
You can transfer files from your computer to the Reader while charging. The Reader cannot be operated.After the USB storage screen is displayed on the Reader, it is detected on your computer, and the “READER” drive appear on your computer.When the icon* turns into the icon, charging is complete. When charging is complete, disconnect the USB cable from the Reader and your computer.After a short time, the [Home] screen will appear.* This icon is only displayed when the Reader is in data transfer mode.
Charging mode
Press the (Home) button. The [Home] screen appears. When the icon turns into the icon, charging is complete.In this mode, the Reader is not detected by your computer. When charging is complete, disconnect the USB cable from the Reader and your computer.
NoteDo not set the Reader to data transfer mode while
downloading via a wireless connection.Your computer must be turned on to charge the Reader.

Battery
35Table of Contents
The Reader will not be charged if your computer enters sleep mode or standby mode. Keep your computer turned on with a stable and continuous power supply while charging the Reader.
The (Power) button cannot be used when the Reader is connected to your computer and charging.
If you turn off the Reader by tapping [Settings] [Device Shutdown] while in charging mode, the Reader will stop charging.
TipYou can also charge the Reader using the AC Adapter
(PRSA-AC1A, sold separately). This method of charging will take approximately 2 hours to fully charge the battery.
To change from charge mode to data transfer mode, tap the status bar to display the notification window tap [USB connected].

Battery
36Table of Contents
Battery status indicatorThe battery status indicator shows the charging status or approximate remaining charge of the battery.

Battery
37Table of Contents
Icon Description Four bars indicate a fully charged or almost-fully
charged battery. The number of bars decreases with the battery’s charge. Zero bars indicate that the battery has almost no remaining charge.
The battery is fully charged.
The battery is charging.

Battery
38Table of Contents
Maximizing Battery LifeThere are many ways to conserve battery power. To extend battery life:If you have no plans to use the Reader, completely
power off the Reader.Do not leave the Reader with the battery depleted
for a prolonged period of time. Battery capacity may be affected.
Use and store the Reader at room temperature, or within the recommended temperature range of 5°C to 35°C (41°F to 95°F).
Turn off Wi-Fi when no wireless communication is necessary.

Battery
39Table of Contents
Power-consuming operationsThe following may require more power than normal reading operations.Wi-Fi communicationsConstantly updating the [Wi-Fi Networks] listDisplaying graphic-intensive books, files or Web sitesPlaying audioDisplaying a slideshow with a short interval settingUsing a microSD cardFrequent insertion and removal of a microSD cardHaving a large volume of content stored on a
microSD cardAnnotations, keyword searches and dictionary
searches

Turning the Power On/Off
40Table of Contents
Turning the Power On/Off
Turning the Power On/Off
(Power) buttonCharge/Busy indicator
Turning on the power
1 Press the (Power) button.If the battery is completely depleted, power will not be supplied to the (Power) button, and you may not be able to turn on the Reader. In this case, the Charge/Busy indicator may blink red 3 times. Connect the Reader to your computer via the supplied USB cable; the Reader will automatically turn on approximately 5 minutes later. Wait until the Reader turns on before trying to operate it.

Turning the Power On/Off
41Table of Contents
Shutting down/turning off the power completely
1 Press and hold the (Power) button for about 3 seconds.
2 Tap [Yes] to turn off the Reader.Completely turning off the Reader can preserve battery power longer than sleep mode when you are not using the Reader for a prolonged period of time.
The same operation can be done via [Settings].
1 Press the (Home) button tap [Settings] [Device Shutdown] [Yes].

Turning the Power On/Off
42Table of Contents
Sleep modeTo save battery life and prevent unintentional operation of the touchscreen, set the Reader to sleep mode by pressing the (Power) button. The standby screen appears. You can personalize the standby screen. See Details.To wake the Reader, press the (Power) button again.
Automatic power-saving modesThe Reader will enter sleep mode after 10 minutes of inactivity. After 3 days in sleep mode, the Reader will shut down/power off automatically. The automatic power-saving modes cannot be turned off.

Parts and Controls
43Table of Contents
Parts and ControlsOverviewThis section describes the features and controls of the Reader.

Parts and Controls
44Table of Contents
Touchscreen (Menu) button (Back) button (Home) button< > (Page turn) buttons

Parts and Controls
45Table of Contents
Charge/Busy indicator (Power) button Headphone jack Micro USB connectorRESET buttonmicroSD card slot

Parts and Controls
46Table of Contents
Supplied accessoriesUSB cable × 1Stylus × 1
Use the stylus for drawing and tapping on the touchscreen.

Parts and Controls
47Table of Contents
Buttons
(Power)Turns the Reader on/off, and sets it to sleep mode. See Details.
< > (Page turn)When reading a book: Press either button to turn the page back or forward, respectively. Press and hold either button to turn pages continuously.When using the Web browser: Press either button to scroll the page up or down, respectively.

Parts and Controls
48Table of Contents
(Home)Displays the first page of the [Home] screen.
(Back)Returns to the previous screen, or returns to the content list from a book. Also closes the on-screen keyboard or a dialog box/navigation bar/tool bar.
(Menu)Displays the available option items.

Parts and Controls
49Table of Contents
microSD Card SlotThe microSD card slot is located on the lower-right side of the back of the Reader. Hold the microSD card with the contacts facing down and the arrow pointing toward the microSD card slot, and then insert it until it clicks into place. The access indicator lights up in orange while the Reader is accessing the microSD card.Close the slot cover when using a microSD card.You can format the microSD card if necessary. See Details.
Access indicatorSlot cover

Basic Operations
50Table of Contents
[Home] ScreenApplications and the [Home] ScreenPress the (Home) button to display the [Home] screen. The [Home] screen has the following applications.Applications appear on the first and second page of the [Home] screen.The displayed icons may vary depending on the country/region setting.
Basic Operations
[Home] Screen
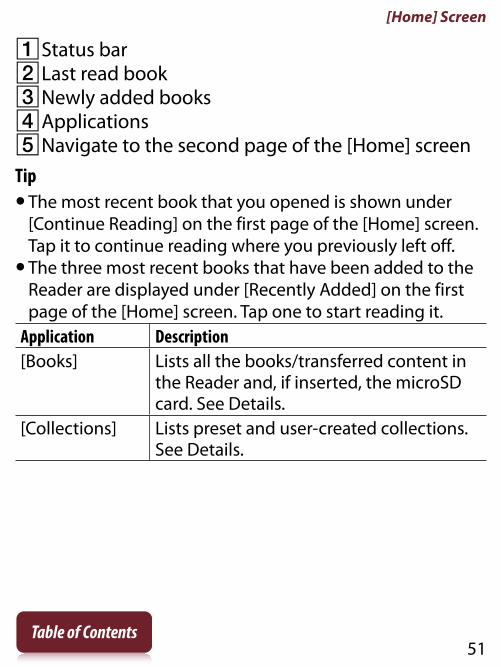
51Table of Contents
Status barLast read bookNewly added booksApplicationsNavigate to the second page of the [Home] screenTipThe most recent book that you opened is shown under
[Continue Reading] on the first page of the [Home] screen. Tap it to continue reading where you previously left off.
The three most recent books that have been added to the Reader are displayed under [Recently Added] on the first page of the [Home] screen. Tap one to start reading it.
Application Description[Books] Lists all the books/transferred content in
the Reader and, if inserted, the microSD card. See Details.
[Collections] Lists preset and user-created collections. See Details.

[Home] Screen
52Table of Contents
Application Description[All Notes] Lists the bookmarks/annotations made
on the books. See Details.[Handwriting] Allows you to use a drawing pad for
drawing. See Details.[Browser] Launches the Web browser. See Details.[Dictionary] Allows you to look up a word in the
dictionary. See Details.[Text Memo] Allows you to use a notepad for typing
memos. See Details.[Pictures] Shows pictures in the Reader and, if
inserted, the microSD card. See Details.
[Audio] Lists and plays the albums and songs that you have in the Reader. See Details.
[Settings] Displays the items for setting the Reader. See Details.

[Home] Screen
53Table of Contents
Status barThe status bar shows the current status of the Reader, such as Wi-Fi status, the battery level and the status of downloading files.The following items are displayed in the status bar.

[Home] Screen
54Table of Contents
Icon Indication
Connected via the USB cable.
Connecting to a network.
A download is in progress. When multiple downloads are in progress, the number of downloads is displayed next to this icon.A download has completed.If downloading fails, the (Fail) icon is displayed.The icon disappears when you open the notification window and tap [Clear], or when you tap the downloaded items in the [Notification] list.An audio track is currently being played.
Updating database.
Wi-Fi network signal strength. See Details.
Current battery level. See Details.
NoteDepending on the situation, not all icons will be displayed
at once.

[Home] Screen
55Table of Contents
TipWhen you press the (Menu) button from the [Home]
screen, the time is displayed at the left side of the status bar for approximately 5 seconds.
Notification windowTapping on the status bar reveals the notification window, which contains network-related items and other current operations.

[Home] Screen
56Table of Contents
Item Description
Turn [Wi-Fi] on/off. See Details.
Go to the [Wi-Fi Settings] screen. See Details.
Displays the status of items that are downloading from the Web.
Displayed when an audio track is currently playing. Tap to jump to the audio player. See Details.
Enter data transfer mode. See Details.
Item for which downloading has completed. Tap to open the item.
Displayed when notifications are displayed. Tap to clear the notification list. The (Download complete) icon also disappears from the status bar.
Depending on the status of the Reader, other items may also appear in the notification window.Press the (Menu) button to close the notification window

[Home] Screen
57Table of Contents
Touchscreen OperationsThe touchscreen recognizes the following gestures. You can also use the supplied stylus for more precise touchscreen operation.Operation with the stylus makes it easier to select small items or specific areas of text.
TapTap an icon, a button or a menu item and raise your finger quickly to select or perform an action.

[Home] Screen
58Table of Contents
Tap and holdTap and hold your finger to select a word and display a pop-up menu for further operations.

[Home] Screen
59Table of Contents
Tap, hold and dragTouch and hold your finger to the display and drag your finger; you can select a group of text and display a pop-up menu for further operations.

[Home] Screen
60Table of Contents
SwipeSlide your finger gently and swiftly on the touchscreen to turn the page; you can turn the page forward by swiping to the left, or backward by swiping to the right. You can also navigate pages of content lists.

[Home] Screen
61Table of Contents
Swipe and holdTo turn multiple pages continuously, swipe and hold your finger on the screen. Release your finger to stop.
PinchPinch your fingers in or out to zoom in or out of the current page or image.
NoteTo exit zoom mode, press the (Back) button.
DragTouch and drag your finger to reposition a zoomed-in page or image. The page or image is repositioned after you release your finger.

[Home] Screen
62Table of Contents
On-Screen KeyboardThe on-screen keyboard is used when you need to type. If the keyboard does not automatically appear, tap the input area on the screen.
On-screen keyboard layout
Input areaKeyboard historyCurrent word input box

[Home] Screen
63Table of Contents
Shift key/[ALT][?123]/[ABC]Space (Search icon)/ (Line feed icon)/[Go]BackspaceTo Do thisInput text Tap the input area.Delete a character Tap .Finish typing Tap [Go]/[Done].Insert line feed Tap the key. The key is
enabled only when multi-line input is available.
Switch the keyboard type
Tap [?123] to display the symbol keyboard. Tap [ALT] to switch to additional characters. Tap [ABC] to return to the alphabetical keys.
Switch between QWERTY input and Cyrillic character input
Tap and hold [?123]/[ABC].
Capitalize a single letter Tap . Tap and hold to activate caps lock. To cancel, tap again.
Enter a space Tap the space key.

[Home] Screen
64Table of Contents
To Do thisEnter a previously registered word
A list of words you registered to the keyboard history* displayed next to the current word input box. Tap the desired word to enter it.Tap and hold the current word input box to register the word in it to the keyboard history. (The word must consist of at least 3 letters.)
Move the cursor in the input area
Tap the location to which you want to move the cursor.
Type extended characters
Tap and hold a key and choose one from the keys.
* To clear the keyboard history, press the (Home) button tap [Settings] [Initialization] [Clear Keyboard History].
NoteThe available types of keyboards and input methods differ
depending on the application.

Adding Content
65
Adding Content
Table of Contents
Adding ContentAdding Content
Transferring content via drag-and-dropYou can directly transfer content by drag-and-drop to your computer.
1 Connect the Reader to your computer using the supplied USB cable.Make sure the Reader is in [Data Transfer Mode]. See Details.
2 For Windows users, click on the “Start” menu “Computer” (“My Computer” for Windows XP users double-click the “READER” drive, and then drag and drop your data onto the “READER” drive.For Mac users, double-click the “READER” drive, and then drag and drop your data onto the “READER” drive.

Adding Content
66Table of Contents
3 When transfer is complete, use the safely remove hardware function of your computer before disconnecting the USB cable from the Reader and your computer. After a short time, the [Home] screen will appear.Content will be sent to its corresponding application based on the file format of the content.Personal documents other than pictures and audio files will be sent to the [Books] application.
NoteContent transferred via drag-and-drop may not be
displayable on the Reader, or thumbnails of the content may not be properly displayed on the Reader.
Do not delete any system default folders created by the Reader on the “READER” drive or the microSD card.
If you disconnect the USB cable while data is being transferred, data corruption may occur. To disconnect the Reader or the microSD card when the Reader is connected to your computer, make sure to use the safely remove hardware function of your computer, and then disconnect the USB cable.
Do not format the Reader or your microSD card via your computer. If you have formatted the Reader or microSD card on your computer, the Reader may not be able to

Adding Content
67Table of Contents
display transferred content. In this case, use the Reader’s [Format Memory] function to reformat the Reader and your microSD card. See Details.
TipWhen you transfer data to the microSD card, insert the
microSD card to the Reader in Step 1, and drag-and-drop to the microSD (removable disk) drive in Step 2 above.
For details on the system requirements for the Reader, see Details.
For details on supported file formats, see Details.

Browsing Content Lists
68Table of Contents
Content ListsBrowsing Content List PagesThe Reader organizes content by content type and file format using applications. For example, books or your personal documents (such as PDF files or text files) are stored in the [Books] application, and pictures in the [Pictures] application, etc.Content list pages allow you to sort content, as well as search content on the Reader.The following instructions use the [Books] application as an example.
Browsing Content Lists

Content Lists
69Table of Contents
Tool icons DetailsStatus iconsPage indicatorPage navigation iconTipDepending on the application, several tools are available
for content list pages. See Details.

Content Lists
70Table of Contents
Status iconsIcon Description
The item is stored on the microSD card.The item is protected from deletion. See Details.The item has not been opened.*
* This icon is displayed for books only.

Content Lists
71Table of Contents
NavigationNavigation method
Description
Page indicator
Display the page jump panel. See Details.
Page navigation icon or the < (Previous) button
View the previous page or item.
Page navigation icon or the > (Next) button
View the next page or item.

Content Lists
72Table of Contents
Browsing in Thumbnail View and List ViewContent can be displayed as individual thumbnails or in a list.The following instructions use the [Books] application as an example.
Thumbnail view iconList view icon
1 Press the (Home) button tap [Books].
Content Lists
73Table of Contents
2 Tap or .* displays thumbnails of content. displays a list of content.
* Some applications only allow list view.
Adjusting the title viewThe titles of some books may be cut off if they are too long. To avoid this, you can set the Reader to display titles across two lines instead of one line.

Content Lists
74Table of Contents
List view
1 Press the (Home) button tap [Books] (List view) press the (Menu) button tap [Title (2 Line View)].Titles are displayed on two lines.
To revert to the one-line view, repeat Step 1 and tap [Title (1 Line View)].

Content Lists
75Table of Contents
Using the Page Jump Panel in Content List PagesContent list pages can be turned conveniently via the page jump panel.
Page jump barPage skip icon

Content Lists
76Table of Contents
To use the page jump bar
1 When viewing a content list page, tap the page indicator at the bottom of the screen.
2 Tap and slide the bar left or right to navigate back or forward.Press the (Back) button to hide the page jump panel.
Skipping 10 pages at a timeWhen the page jump bar is displayed, tap << or >> (Page skip) to skip back 10 pages or skip forward 10 pages at a time.

Content Lists
77Table of Contents
Finding Content with a KeywordYou can find a specific item quickly with a keyword search.You can locate a book or author of a book on the Reader via the [Books] application, or search for annotations via the [All Notes] application, etc.The following instructions use the [Books] application as an example.
Search icon
1 Press the (Home) button tap [Books].
2 Tap ; the keyword input area and the on-screen keyboard appear.

Content Lists
78Table of Contents
3 Input a search keyword and tap .The view shows only the items that satisfy the search criteria.To exit the search result view, press the (Back) button.
NoteSome applications do not support keyword searching.The available search target varies among content types.

Content Lists
79Table of Contents
ToolsBelow is a list of the tools available on each application’s content list page.Not all tools are available in each application.Tool icon Description
Changes the view between the thumbnail view and the list view. See Details.
Changes the sort order.
Finds content with a keyword. See Details.
Creates a new collection.
Specifies the notes type to view in the list.
Creates a new drawing.
Creates a new memo.

Content Lists
80Table of Contents
Using (Menu) ItemsBelow is a list of option items available when you press the (Menu) button on each application’s content list page.Not all options are available in each application.Option Description[Add to Collection] Adds one or more books to a
collection. See Details.[Delete Books] Deletes one or more books from the
Reader. See Details.[Protect Books] Protects one or more books from
deletion. See Details.[Title (1 Line View)]/[Title (2 Line View)]
Displays the full title string without truncating it. See Details.
[Add Content] Adds items to a collection that you have created. See Details.
[Remove Content] Removes items from a collection that you have created. See Details.

Content Lists
81Table of Contents
Option Description[Rename Collection]
Renames a collection. See Details.
[Delete Notes] Deletes one or more notes.[Delete Memos] Deletes one or more text memos. See
Details.[Protect Memos] Protects one or more text memos. See
Details.[Delete Drawings] Deletes one or more drawings. See
Details.[Protect Drawings] Protects one or more text memos/
drawings. See Details.[Delete Pictures] Deletes one or more pictures. See
Details.[Settings] Changes the slideshow interval. See
Details.[Delete Audio] Deletes one or more audio tracks. See
Details.

Reading
82
Reading
Table of Contents
Reading BooksOpening a Book
1 Press the (Home) button tap [Books].The [Books] content list opens. See Details.
2 Tap a book.The book opens.You can also open a book by tapping and holding the book you want to open.
To navigate within a book, see Details.

Reading Books
83Table of Contents
Page NavigationThere are several ways to navigate through books.
Tap to add a bookmark DetailsTap and hold to add a note
Draw a handwritten note DetailsTap and hold to open option items DetailsSwipe the screen to turn the pageTap to open the page navigation panel.

Reading Books
84Table of Contents
Using the page navigation panel
Page indicator
1 Tap the page indicator, or press the (Menu) button tap [Navigate Page] to open the page navigation panel.

Reading Books
85Table of Contents
Using the paging bar
Paging barSlider
Tap on a point on the paging bar to jump to a page that corresponds with that point.
Tap and drag the slider.To close the page navigation panel, press the (Back) button.Using [Table of Contents]
1 Tap [Table of Contents].To return to the book page, press the (Back) button.
2 Tap to open the selected chapter or section.

Reading Books
86Table of Contents
Using [Enter Page #]
1 Tap [Enter Page #] to enter the page number with the on-screen numeric keyboard, and tap [OK].
Jumping to viewed pages
1 Tap [Previous View].The / (Page history) icons are displayed.
2 Tap to go backward in the page display history. Tap to go forward in the page display history.
To cancel page history, press the (Back) button.TipThis is the same operation for when you tap on a
highlighted link.

Reading Books
87Table of Contents
Appearance
Changing the orientationYou can view books in either portrait or landscape mode.
1 When viewing a book, press the (Menu) button tap [More] [Orientation].The screen orientation changes.
Portrait modeLandscape mode

Reading Books
88Table of Contents
NoteThe orientation can be changed for the [Books], [Browser]
and [Pictures] applications. Changing the orientation in one application does not affect the orientation setting of the other applications.
Changing the font and font sizeYou can change the font and font size to your preference.
1 When viewing a book, press the (Menu) button tap [Font].The font bar is displayed.
2 To change the font size, tap on one of the font size icons. The book will be updated to apply the specified font size.Press the (Back) button when done.

Reading Books
89Table of Contents
3 To change the font, tap [Original] and select from one of the fonts in the list.Press the (Back) button when done.
The book will be updated to apply the specified font and font size.
NoteThe font size and font of some content with embedded
fonts may not change.When you select other than the [Original] font,
performance may be slightly lower when opening books or turning pages.
When you select other than the [Original] font, boldface/italics/italicized boldface may not be displayed correctly.
TipYou can change the default font for all content in the
[Books] application. See Details.

Reading Books
90Table of Contents
About PDF filesThe Reader provides the ability to display most text-based PDF files in several font sizes. Documents are displayed in the default font position with their original layouts.
Due to the complex nature of PDF files, in certain situations when you change the font size, only text will appear. This is because some tables and graphics may be reformatted and altered during the reflow process.Also, in cases where PDF files are created using image data only, there is no text to reflow or resize. In these cases, if retaining the original layout of a PDF file is required, Sony recommends that you view the PDF file at its original font size.
To display the original layout

Reading Books
91Table of Contents
NoteIf you modified the default font size with [Font Size
Preference] under [Settings], return it to its original layout to view PDF files normally.
To view the document in a different size, use the zoom in function.
When you view PDF files in other than their original layout, some functions such as highlighting or searching may not work correctly.

Reading Books
92Table of Contents
Changing the page modeYou can change the page viewing style for PDF files. This is convenient for viewing pages with text arranged in columns.This mode remains active as you continue reading. The setting applies only to the currently open book.
1 When viewing a book, press the (Menu) button tap [Customize View] [Page Mode].The [Page Mode] screen appears.
2 Choose from one of the following options.Option Description[Original] Set to the default view.[2-Column Split]
Splits the page into two columns and two rows.
[3-Column Split]
Splits the page into three columns and two rows.
[Fit Landscape Width]
Displays the page fit to landscape view.
NoteIn order to attach a handwritten note, the page mode
needs to be restored to [Original].

Reading Books
93Table of Contents
Cropping a pageYou can crop the page margins to create a wider viewing area. This is convenient for viewing pages that have large margins.This mode remains active as you continue reading. The setting applies only to the currently open book.
1 When viewing a book, press the (Menu) button tap [Customize View] [Crop Page].
2 Choose from one of the following options.

Reading Books
94Table of Contents
Option Description[Uncrop] Disables cropping.[Manual] Allows you to adjust the crop area
manually by dragging arrows at the corners. Tap [Done] to set the area, or tap [Cancel] to cancel editing the crop area.
[Auto] Automatically crops the margins of a document.

Reading Books
95Table of Contents
Adjusting the brightness and contrastA page that is hard to read, such as a scanned or color-converted document, can be made more readable by adjusting the brightness and contrast. This mode remains active as you continue reading. The setting applies only to the currently open book.
1 When viewing a book, press the (Menu) button tap [Customize View] [Adjust View].
2 Choose from one of the following options.Option Description[Original] Displays the page in the original quality.[Saturated] Improves readability by emphasizing
contrast.[Details] Backlight compensation; brings up details
in a dark area.[Brighter] Increases the brightness.[Darker] Decreases the brightness.

Reading Books
96Table of Contents
Option Description[Custom] Create a custom setting. Tap (Settings)
to adjust (Contrast) and (Brightness).
ContrastBrightnessSliderLowerHigherTap (Lower) or (Higher), or tap on the slider.Tap [Restore] to revert to the previously saved custom settings.
Press the (Back) button when done.

Reading Books
97Table of Contents
Zooming inUse the zoom function when you want to temporarily zoom in on part of a page.The viewer shows the zoom bar and viewing position indicator while in zoom mode. Pinch out to zoom in.Pinch in to zoom out.
To exit zoom mode, press the (Back) button.

Reading Books
98Table of Contents
Annotations
Bookmarking a pageYou can bookmark a page and take a note so that you will remember what the bookmark is for.
1 Tap the top right corner of the page.
TipTo search, sort and view all annotations across all books,
use the [All Notes] application. See Details.To search annotations for the currently open book, press
the (Menu) button tap [Notes].
Adding text notes
1 Tap and hold the bookmark.
2 Tap [by Keyboard].
3 Type the notes using the on-screen keyboard.
4 Tap [Save].The icon appears on the bookmark, indicating that a note is attached.

Reading Books
99Table of Contents
Adding handwritten notes
1 Tap and hold the bookmark.
2 Tap [by Drawing].
3 Draw with the stylus or your finger on the drawing pad.To erase, tap (Erase), and then tap the line(s) you want to erase.
4 Tap [Save].The icon appears on the bookmark, indicating that a note is attached.

Reading Books
100Table of Contents
Notes on handwritingWhile writing, make sure that you are not touching another
area on the touchscreen; this could affect the notes that you write with the stylus or your finger.
To ensure that your notes are correctly saved, do not handwrite notes too close to the edge of the touchscreen.
If you experience difficulties when handwriting or drawing on the Reader: avoid applying excessive pressure to the
touchscreen. try not to handwrite or draw too quickly. this functionality is not designed for very detailed
drawings or for writing small characters.

Reading Books
101Table of Contents
Editing notes
1 Tap and hold on the bookmark. The notepad or the drawing pad opens.
2 Tap [Edit].The on-screen keyboard or the drawing pad opens.
3 Edit the note.
4 Tap [Save].The notepad or the drawing pad closes, returning to the viewer.
Removing a bookmark
1 Tap the bookmark.
TipThis will remove the bookmark and any note attached to it.
To delete only a note, tap and hold the icon and tap [Delete] [Yes].
To delete all bookmarks in the current book, press the (Menu) button tap [Notes]. See Details.
To delete annotations across all books, use the [All Notes] application. See Details.

Reading Books
102Table of Contents
Highlighting words on a pageYou can highlight words and take notes.
1 Tap and hold the first word and drag across to the last word of the section you would like to highlight.The pop-up menu appears.
Pop-up menu
2 Tap [Highlight].The selected words are now highlighted.

Reading Books
103Table of Contents
TipTo search, sort and view all annotations across all books,
use the [All Notes] application. See Details.To search annotations for the currently open book, press
the (Menu) button tap [Notes]. See Details.
Adding text notes or handwritten notes to a highlight
1 Tap and hold a highlighted word.The pop-up menu appears.
2 Select [Add Note].
3 Select from [by Keyboard] and [by Drawing].Create a note. For a text note, see Details.For a handwritten note, see Details.
4 Tap [Save].The icon appears at the beginning of the highlight, indicating that a note is attached.Editing notes on a highlight
1 Tap and hold at the beginning of the highlight.The pop-up menu appears.

Reading Books
104Table of Contents
2 Tap [Edit Note].The on-screen keyboard or the drawing pad opens.
3 Edit the note.
4 Tap [Save].The notepad or the drawing pad closes, returning to the viewer.
Removing highlights
1 Tap and hold at the beginning of the highlight.The pop-up menu appears.
2 Tap [Remove Highlight].
3 Tap [Yes] when prompted.
TipThis will remove the highlight and any note attached to it.
To delete only a note, tap and hold the icon, tap [Edit Note] [Delete] [Yes].
To delete all annotations in the current book, press the (Menu) button tap [Notes]. See Details.
To delete annotations across all books, use the [All Notes] application. See Details.

Reading Books
105Table of Contents
Handwriting a note on a pageYou can use the stylus or your finger and draw directly on a page.
1 Press the (Menu) button.
2 Tap [Handwriting] and use the stylus or your finger to draw a line.
NoteWhile writing, make sure that you are not touching another
area on the touchscreen; this could affect the notes that you write with the stylus or your finger.
To ensure that your notes are correctly saved, do not handwrite notes too close to the edge of the touchscreen.

Reading Books
106Table of Contents
If you experience difficulties when handwriting or drawing on the Reader: avoid applying excessive pressure to the
touchscreen. try not to handwrite or draw too quickly. this functionality is not designed for very detailed
drawings or for writing small characters.
To delete a drawn lineTap (Erase) and drag across the drawn line.Press the (Back) button when you are done to continue reading.
TipTo delete all annotations in the current book, press the
(Menu) button tap [Notes]. See Details.To delete annotations across all books, use the [All Notes]
application. See Details.

Reading Books
107Table of Contents
Hiding annotationsYou can set the viewer to show or hide the annotations that you have made to the book. This is convenient for when a highlight overlaps with a link.
1 Press the (Menu) button.The option items appear.
2 Tap [More].
3 Tap [Settings].
4 Tap [Show Notes].Check the checkbox to show annotations.Uncheck it to hide annotations.
5 Press the (Back) button when done.

Reading Books
108Table of Contents
Finding annotations within a bookYou can search and view all annotations (bookmarks/highlights/handwritten notes) in the currently open book.To search, sort and view all annotations across all books, use the [All Notes] application. See Details.
1 Press the (Menu) button tap [Notes].The annotations in the book are listed.Press the (Back) button to return to the book.
Note iconsFilter note typeSearch icon

Reading Books
109Table of Contents
Headline (the highlighted text, the text note, the beginning text of the bookmarked page, or the beginning text of the page with the handwritten note)
Page number of the notePress the (Back) button to return to the book.
2 Tap a note in the list.The page containing the selected note is displayed.
Note iconsBookmark onlyBookmark with text notesBookmark with handwritten notesHandwritten note on a pageHighlight onlyHighlight with text notesHighlight with handwritten notes
Filtering
1 Tap (Filter) tap one of the annotation types.Annotations of the type that you select are shown.

Reading Books
110Table of Contents
Searching for notes via keywordYou can perform a search for all or one of the specific note types.The search target changes depending on the type of annotation that is being searched.Item type TargetFor [Bookmark] items
Bookmarks only: The first 100 characters of bookmarked pages are searched.
Bookmark text notes: Entire text notes are searched.
Bookmark handwritten notes: The first 100 characters of bookmarked pages are searched.
For [Handwriting] items
The first 100 characters of pages with handwriting on them are searched.
For [Highlight] items
Highlights only: The highlighted words are searched.
Highlight text notes: Entire text notes are searched.
Highlight handwritten notes: The highlighted words are searched.
1 Tap (Search).

Reading Books
111Table of Contents
2 Type a search keyword using the on-screen keyboard.
3 Tap (Search) next to the search box.The [Search Results] view is shown.
The view shows notes that satisfy the search criteria.Press the (Back) button to return to the [Notes] list.
NoteIf you apply a filter before searching, the search will be
performed only on the filtered items.
To delete annotations
1 Press the (Menu) button tap [Delete Notes]. See Details.
To delete all annotations
1 Press the (Menu) button tap [Delete Notes] press the (Menu) button tap [Select All] [Done] [Yes].

Reading Books
112Table of Contents
Using (Menu) ItemsPress the (Menu) button from the [Notes]/[All Notes] list to select an option.Option Description[Delete Notes]
Deletes one or more notes from the Reader. See Details.

Reading Books
113Table of Contents
Using the DictionaryThe Reader has built-in dictionaries to assist you with looking up the definition of a word on a page.You can choose one of several bilingual dictionaries to use. See Details.Only the dictionaries included on the Reader can be used. New dictionaries cannot be installed or added.
1 Tap and hold a word on a page.The dictionary panel is displayed at the bottom.
Title of the current dictionary. Tap to change the dictionary.

Reading Books
114Table of Contents
Definition area. Tap to open the dictionary viewer. See Details.
Tap to display a list of candidate words. See Details.
2 Tap the definition area. The definition is displayed in the dictionary viewer.To go to the next page, either swipe or press the < or > (Page turn) buttons.Press the (Back) button to return to the book page.

Reading Books
115Table of Contents
Finding Pages with a KeywordYou can find pages that contain specific words using a keyword search.
1 Tap and hold a word, and tap [Search] in the pop-up menu.
2 A page that includes the keyword for which you searched is displayed.Tap or to display to the previous/next page that contains the selected keyword.To cancel, press the (Back) button.

Reading Books
116Table of Contents
TipYou can find the definition of a word and more at the
Wikipedia and Google Web sites. Tap and hold a word tap [Wikipedia] or [Google] on the option menu. The [Browser] application will open to the Wikipedia or Google Web site and search for the word. (A Wi-Fi network connection is necessary. See Details.) To return to the book, press the (Menu) button tap [Continue Reading].
You can also directly enter the keyword for a search.
1 When viewing a book, press the (Menu) button tap [More] [Search], and enter the keyword using the on-screen keyboard.
NoteWhen using the Book Viewer’s keyword search, Latin
alphabet searches make no distinction between uppercase and lowercase letters, but Cyrillic alphabet searches make this distinction.
Searches from other than the [Books] content list, such as from the [Collection] or [Notes]/[All Notes] lists, make no distinction between uppercase and lowercase letters, including when searching in Cyrillic.

Reading Books
117Table of Contents
Changing Book Page SettingsThe following settings are available for the current book issue you are reading.
1 When viewing a book, press the (Menu) button tap [More] [Settings].
2 Choose from one of the following options.Option Description[Show Notes] This is convenient when notes are
obscuring your view of the text. See Details.
[Info] Information for the book that is currently open is displayed.
To return to the book, press the (Back) button.

Reading Books
118Table of Contents
Using (Menu) ItemsBelow is a list of option items available when you press the (Menu) button from the book viewer.Option Description[Navigate Page] Selects a method for navigating
through a book. See Details.[Notes] Displays a list of annotations in the
book. See Details.[Font] Changes the font and font size. See
Details.[Customize View] Adjusts the page mode (see Details),
crops the page margins (see Details) or adjusts the brightness (see Details).
[Adjust View] Adjusts the page mode. See Details.[Handwriting] Allows you to draw on a page. See
Details.[More] Displays more option items.[Search] Finds pages with a keyword. See
Details.[Orientation] Changes to portrait or landscape
mode. See Details.[Settings] Changes book settings. See Details.

Organizing
119
Organizing
Table of Contents
Organizing Your ContentDeleting a Single ItemYou can delete individual items.The following instructions use the [Books] application as an example; this feature is also available in other applications.
1 Press the (Home) button tap [Books].
2 Tap and hold an item.The option items appear.
3 Tap [Delete].
4 Tap [Yes] when prompted.The item is deleted from the Reader.
NoteDepending on the application, it may not be possible to
delete certain files.Sony recommends that you create a backup of the
contents of the Reader before deleting an item.

Organizing Your Content
120Table of Contents
Deleting Multiple Items at OnceYou can delete multiple items at once. This is convenient for clearing up space on the Reader.The following instructions use the [Books] application as an example; this feature is also available in other applications.
1 Press the (Home) button tap [Books].
2 Press the (Menu) button.

Organizing Your Content
121Table of Contents
3 Tap [Delete Books].Boxes appear next to the thumbnails or list entries.
BoxProtect iconSelected number of items

Organizing Your Content
122Table of Contents
4 Tap to check the items to delete.You can press the (Menu) button tap [Select All] if you wish to delete all items.
5 Tap [Done].
6 Tap [Yes] when prompted.The selected items are deleted from the Reader.
NoteDepending on the application, it may not be possible to
delete certain files.Sony recommends that you create a backup of your files.

Organizing Your Content
123Table of Contents
Protecting a Single ItemYou can protect an item so that you will not delete it accidentally.The following instructions use the [Books] application as an example; this feature is also available in other applications.
1 Press the (Home) button tap [Books].
2 Tap and hold an item.The option items appear.
3 Tap [Protect].You can remove the protection from the item in the same manner. Tap [Unprotect] in Step 3 above.
NoteThis protection feature works only on the Reader. Protected
content may still be deleted via your computer.

Organizing Your Content
124Table of Contents
Protecting Multiple Items at OnceYou can protect one or more items at once.The following instructions use the [Books] application as an example; this feature is also available in other applications.
1 Press the (Home) button tap [Books].
2 Press the (Menu) button tap [Protect Books].Boxes appear next to the thumbnails or list entries.

Organizing Your Content
125Table of Contents
BoxProtect iconSelected number of items
3 Tap the box of the item to be protected.Selected items are indicated with a protect icon.You can press the (Menu) button and tap [Select All] if you wish to protect all items.
4 Tap [Done].The protect icon appears next to the protected items. You can remove protection in Step 3 above by tapping items with the protect icon.
NoteThe protection feature works only on the Reader. Protected
content may still be deleted via your computer.

Using Collections
126Table of Contents
Using CollectionsCreating a CollectionA collection is a custom set of books and other items that you create from items on the Reader. It is a unique and convenient way to organize your items.You can organize and personalize your content by creating collections by subject matter, date, genre or anything that best suits your purpose.

Using Collections
127Table of Contents
1 Press the (Home) button tap [Collections].
Create a new collectionSearch by collection name
2 Tap .
3 Enter a collection name using the on-screen keyboard and tap [OK].
4 Select the location to store the collection.A new collection is added to the [Collections] list.

Using Collections
128Table of Contents
Adding Items to a CollectionYou can add items to existing collections.
From the [Collections] application
1 Press the (Home) button tap [Collections].
2 Tap a collection that you have created.
3 Press the (Menu) button tap [Add Content] [Books].
4 Select one or more books from the list.Selected items are indicated with a check.
5 Tap [Done].
From the [Books] application
1 Press the (Home) button tap [Books].
2 Press the (Menu) button tap [Add to Collection].
3 Tap a collection that you have created that appears in the list.

Using Collections
129Table of Contents
4 Select one or more books that you wish to add.Selected items are indicated with a check.
5 Tap [Done].
NoteA collection and its items must be stored in the same
location. For example, if the book is stored on the Reader’s internal memory, you may not add items stored on a microSD card to the collection.
Using Collections
130Table of Contents
Removing Items from a CollectionYou can remove one or more items from a collection that you have created.
1 Press the (Home) button tap [Collections] tap a collection that you have created press the (Menu) button tap [Remove Content].You can also tap and hold an item tap [Remove].
2 Tap one or more items.Selected items are indicated with a check.
3 Tap [Done].
4 Tap [Yes] when prompted.The selected item(s) will be removed from the collection.

Using Collections
131Table of Contents
NoteIf you have deleted an item from [Books], it will be
automatically removed from all of the collections with which it was associated.
Removing items from a collection does not delete them from the Reader or their stored locations.
TipYou can remove all items at once. After completing Step 1
above, press the (Menu) button [Select All].

Using Collections
132Table of Contents
Renaming a CollectionYou can change the name of a collection.
1 Press the (Home) button tap [Collections] tap a collection that you have created press the (Menu) button tap [Rename Collection].You can also tap and hold a collection that you have created tap [Rename].
2 Enter a new name for the collection using the on-screen keyboard.
3 Tap [OK].

Using Collections
133Table of Contents
Deleting a CollectionYou can delete a collection that you have created.
1 Press the (Home) button tap [Collections] press the (Menu) button tap [Delete Collections].You can also tap and hold a collection that you have created tap [Delete].
2 Tap the collection to be deleted.Selected items are indicated with a check.
3 Tap [Done].
4 Tap [Yes] when prompted.The selected item(s) will be removed from the collection.
NoteDeleting a collection does not delete content from the
Reader or their stored locations.

Using Collections
134Table of Contents
Using (Menu) ItemsBelow is a list of option items available when you press the (Menu) button from a collection list.Option Description[Delete Collections]
Deletes collections that you created. See Details.

Other Applications
135
Other Applications
Table of Contents
All Notes
Finding Annotations Across All BooksYou can use [All Notes] to find annotations across all books. The application stores all annotations including bookmarks, highlights and drawings that you have added on pages. Tap an item in the list to jump to the page on which that annotation is located.
1 Press the (Home) button tap [All Notes].

All Note
136Table of Contents
Note icons DetailsFilter note type DetailsSort icon; sort by date, title or file nameSearch icon DetailsHeadline (the highlighted text, the text note, the
beginning text of the bookmarked page, or the beginning text of the page with the handwritten note)
Annotation creation date, book title, page number

All Note
137Table of Contents
2 Tap a note in the list.The page containing the selected note is displayed.
To return to [All Notes], press the (Back) button.To delete annotations, see Details.

Handwriting
138Table of Contents
HandwritingCreating a DrawingYou can use the [Handwriting] application to create a drawing.
1 Press the (Home) button tap [Handwriting].
Create a new drawing.
2 Tap at the upper-right corner of the screen.The canvas opens.
3 Draw in the drawing area with the supplied stylus or your finger.

Handwriting
139Table of Contents
Pencil toolEraser toolDrawing areaTo erase a line, tap tap or stroke a part of the line.
4 Tap [Save].
NoteWhile writing, make sure that you are not touching another
area on the screen. This could affect the notes that you write.
To ensure that your notes are correctly saved, do not draw too close to the edge of the canvas.

Handwriting
140Table of Contents
If you experience difficulties when drawing on the Reader:avoid applying excessive pressure to the screen. try not to draw too quickly. this functionality is not designed for very detailed
drawings or for writing small characters.
TipIf you tap [New] while creating a drawing, the current
drawing is saved, and a new canvas opens.These drawings will be saved only in the internal memory.

Handwriting
141Table of Contents
Editing an Existing Drawing
1 Press the (Home) button tap [Handwriting] tap the drawing that you wish to edit.
2 Edit the drawing.You can use the supplied stylus or your finger.To erase a line, tap (Erase) tap or stroke a part of the line.
3 Tap [Save].
TipIf you tap [New] while creating a drawing, the current
drawing is saved, and a new canvas opens.These drawings will be saved only in the internal memory.To delete the currently viewed drawing, press the
(Menu) button tap [Delete Drawing] [Yes].

Handwriting
142Table of Contents
Deleting/Protecting a DrawingYou can delete or protect drawings.
1 Press the (Home) button tap [Handwriting].
2 Press the (Menu) button tap [Delete Drawings] or [Protect Drawings].To delete drawings, see Details.You can also delete a drawing after step 1 by tapping and holding it. See Details.To protect drawings, see Details.You can also protect a drawing after step 1 by tapping and holding it. See Details.

Handwriting
143Table of Contents
Capturing a ScreenshotThe Reader allows you to capture a screenshot of a drawing and store the image as a picture file.
1 Press the (Home) button tap [Handwriting] tap a drawing.
2 Press the (Menu) button tap [Capture Screenshot] [OK].You can view your captured screenshots via the [Pictures] application.

Handwriting
144Table of Contents
Using (Menu) ItemsBelow is a list of option items available when you press the (Menu) button from the [Handwriting] content list.Option Description[Delete Drawings]
Deletes one or more drawings from the Reader. See Details.
[Protect Drawings]
Protects one or more drawings from deletion. See Details.

Web Browsing
145Table of Contents
Web BrowsingBrowsing the WebThe Reader has a Web browser that enables you to visit Web sites and download files and images directly to it.
1 Make sure that Wi-Fi is set up and turned on.
2 Press the (Home) button tap [Browser].
3 Navigate to a Web site.Tap (Bookmarks) tap one of the bookmarks.Tap the URL box and type the URL address using the
on-screen keyboard, and tap [Go].
4 Browse the Web site.Press the < (Previous) button to scroll up.Press the > (Next) button to scroll down.Tap and drag to move the view area.Press the (Back) button to go back to the previous
Web page.
NoteYou must agree to the terms and conditions before using

Web Browsing
146Table of Contents
[Browser]. Please read the terms and conditions carefully. When you tap [Accept], [Browser] opens.
TipYou can press the (Menu) button tap [Continue
Reading] to return to the last read page of your last read book.

Web Browsing
147Table of Contents
Browsing Tools
Zooming inWhile in zoom mode, the zoom bar is shown at the bottom-right of the screen.Pinch out to zoom in. Pinch in to zoom out. Double-tap to fit the page to the window size.To exit zoom mode, press the (Back) button.
Capturing a screenshotYou can capture the current page as a screenshot.
1 When viewing a Web page, press the (Menu) button tap [More] [Capture Screenshot] [OK].Screenshots are stored in the [Pictures] application. See Details.

Web Browsing
148Table of Contents
DownloadsWhen you click a download link, the item will be downloaded onto the Reader.*You can view the download history by pressing the (Menu) button tap [More] [Downloads].* Only supported file types can be downloaded. For
supported file types, see Details.
Downloading a linked fileYou can download a file behind a link without opening it in the browser window.
1 Tap and hold the link tap [Save Link].
2 Tap [Yes] when prompted.Depending on the Web site, a file may begin downloading once you tap the download icon.The downloaded file can be found in the [Books] application.

Web Browsing
149Table of Contents
Downloading an imageYou can download an image displayed in the browser window.
1 Tap and hold the image tap [Save Image].
2 Tap [Yes] when prompted.
Viewing download progressYou can view items that you are currently downloading or have recently downloaded.
1 When an item is downloading, an icon indicating that the download is in progress appears in the status bar.Tap the status bar to open the notification window. See Details.Items that you are currently downloading are listed under [Ongoing].Recent items that have been downloaded and recent items which were not downloaded successfully are listed under [Notification].
2 Press the (Back) button to return to the Web page.

Web Browsing
150Table of Contents
Cancelling a downloadYou can cancel a download that is currently in progress.
1 When viewing a Web page, press the (Menu) button tap [More] [Downloads].You can also tap the status bar tap the item currently downloading under [Ongoing].The download history opens.
2 Tap and hold an item tap [Cancel Download], or press the (Menu) button tap [Cancel Download].
To return to the Web page, press the (Back) button.

Web Browsing
151Table of Contents
Opening a downloaded file/imageYou can view the files downloaded from a Web site. Downloaded files are stored in [Books], [Pictures] or [Audio], depending on the file type.
1 When viewing a Web page, press the (Menu) button tap [More] [Downloads].You can also tap the status bar tap the item currently downloading under [Notification].
2 Tap a downloaded file, or tap and hold an item tap [Open].
The Reader opens the file in the appropriate application.To return to the Web page, press the (Back) button.

Web Browsing
152Table of Contents
Deleting a downloaded fileYou can delete downloaded files.
1 When viewing a Web page, press the (Menu) button tap [More] [Downloads].
2 Tap and hold an item tap [Delete].The file is deleted from the Reader.Depending on the file type, files can also be deleted from their respective applications.

Web Browsing
153Table of Contents
Multiple Windows
Opening a new window
1 When viewing a Web page, press the (Menu) button [More] [Windows] [New Window].A maximum of 3 windows can be open at one time. If [New Window] is not displayed, tap [Close] in the Window list.
Opening a link in a new windowInstead of the current window, you can open a link in a new window so that you can keep the current window open.
1 Tap and hold a link tap [Open in New Window].The link opens in a new window.
A maximum of 3 windows can be open at one time. After the third window is opened, [Open in New Window] is not displayed.

Web Browsing
154Table of Contents
Changing the browser window in viewWhen you have more than one browser window open, you can change the window in view.
1 When viewing a Web page, press the (Menu) button tap [More] [Windows].
2 Select another browser window.
Closing a browser windowYou can close browser windows.
1 When viewing a Web page, press the (Menu) button tap [More] [Windows].
2 Tap [Close].The window is closed.
NoteIf there is only one browser window open and you tap
[Close], the browser home page is automatically opened.

Web Browsing
155Table of Contents
Bookmarks and History
Bookmarking a Web siteYou can bookmark your favorite Web sites so that you can return to them quickly.
1 Visit the Web site that you wish to bookmark.
2 Add the current site to the bookmarks by doing one of the following:Tap next to the URL box tap [Add Bookmark].Press the (Menu) button tap [More] [Add
Bookmark].
3 Optionally, edit the bookmark name by tapping the text input area under [Name] and using the on-screen keyboard. See Details.
4 Tap [OK].The current Web page is now added to the bookmark list.
Opening a bookmarked Web siteYou can quickly return to your favorite Web sites using bookmarks.

Web Browsing
156Table of Contents
1 When viewing a Web page, tap next to the URL box.The bookmark list opens.
2 Tap the bookmark to open it.
Editing a bookmarkYou can change a bookmark name or the address (URL) if necessary.
1 When viewing a Web page, tap next to the URL box.The bookmark list opens.
2 Tap and hold the bookmark that you wish to edit tap [Edit Bookmark].
3 Edit the bookmark name/location by tapping the text input area under [Name]/[Location] and using the on-screen keyboard.
4 Tap [OK].To return to the Web page you were browsing, press the (Back) button.

Web Browsing
157Table of Contents
Deleting bookmarksYou can remove bookmarks from the bookmark list to keep only the ones you need.
1 When viewing a Web page, tap next to the URL box.The bookmark list opens.
2 Tap and hold the bookmark that you wish to remove from the list tap [Delete Bookmark].
3 Tap [OK] when prompted.The bookmark is removed from the list.
To return to the Web page you were browsing, press the (Back) button.

Web Browsing
158Table of Contents
Opening a previously visited Web siteYou can view a list of Web sites that you have previously visited.
1 When viewing a Web page, tap next to the URL box.
2 Tap [History].A list of sites that you have previously visited opens.
3 Tap an item to open it in the browser.
Deleting browsing history itemsYou can remove entries from the browsing history.
1 When viewing a Web page, tap next to the URL box.
2 Tap [History].A list of sites that you have previously visited opens.
3 Tap and hold the entry that you wish to remove from the list tap [Remove from History].

Web Browsing
159Table of Contents
4 Press the (Back) button to return to the Web page you were browsing.
TipYou can delete all browsing history items by pressing the
(Menu) button tapping [Clear History] in Step 2.

Web Browsing
160Table of Contents
Browser SettingsYou can change the following browser settings to your preference. When viewing a Web page, press the (Menu) button and tap [More] [Settings] to change the settings.Setting Description[Default Zoom] The default zoom ratio. Set to “Medium”
by default.[Open Pages in Overview]
Opens the page scaled to the window size. Enabled by default.
[Text Encoding] Set to “Unicode (UTF-8)” by default. The browser supports the following encodings:
Latin-1 (ISO-8859-1)Unicode (UTF-8)
[Block Pop-up Windows]
Blocks pop-up windows. Enabled by default.
[Load Images] Loads images on a Web page. Enabled by default.
[Auto-fit Pages] Formats Web pages to the window size. Enabled by default.
[Enable JavaScript]
Enables JavaScript. Enabled by default.

Web Browsing
161Table of Contents
Setting Description[Set Home Page] Sets the default Web page to display.
You can set the currently opened Web page as your home page.
[Page Information]
Displays the details of a Web page.
[Clear Cache] Empties the cache.[Clear History] Deletes the browsing history.[Accept Cookies] Accepts cookies from Web sites. Enabled
by default.[Clear All Cookie Data]
Removes all cookies.
[Remember Form Data]
Allows the browser to remember the form history. Enabled by default.
[Clear Form Data] Empties the search and form history.[Remember Passwords]
Allows the browser to remember some entered passwords. Enabled by default.
[Clear Passwords] Deletes the passwords saved by the browser.
[Reset to Default] Restores the default settings, and deletes all browser data.
[Legal Information]
Displays the terms and conditions of use of the browser.
To return to the Web page you were browsing, press the (Back) button.

Web Browsing
162Table of Contents
Using (Menu) ItemsBelow is a list of option items available when you press the (Menu) button from a browser window.
Option Description[Browse Home] Displays the home page. See Details.[Refresh] Updates the content displayed on the
Web page.[Forward] Advances to a previously viewed
page.[Orientation] Changes to portrait or landscape
mode.[Continue Reading] Closes the [Browser] application and
returns to the last read page of your last read book.
[More] Displays more option items.[Windows] Opens the window list. See Details.[Add Bookmark] Allows you to bookmark a Web page.
See Details.[Capture Screenshot]
Captures a screenshot of the current Web page. See Details.
[Downloads] Opens the download history. See Details.

Web Browsing
163Table of Contents
Option Description[Settings] Changes browser settings. See
Details.

Dictionary
164Table of Contents
DictionaryUsing the DictionaryYou can choose one of several embedded dictionaries to use.Only the dictionaries included on the Reader can be used. New dictionaries cannot be installed or added.
1 Press the (Home) button tap [Dictionary].
2 Type a word that you wish to look up by using the on-screen keyboard. The list of candidate words is displayed.

Dictionary
165Table of Contents
Title of the current dictionaryList of candidate words
3 Tap one of the candidate words.The definition is displayed in the dictionary viewer.To look up another word, tap (Search) in the dictionary viewer.
TipIn the dictionary viewer, tap and hold another word to look
that word up in the dictionary.

Dictionary
166Table of Contents
Changing the DictionaryYou can choose a different dictionary.The dictionary can also be changed as you look up a word.
1 Press the (Menu) button tap [Change Dictionary].
2 Tap one of the dictionaries.
3 The dictionary is changed, and the list of candidate words or the dictionary viewer for the dictionary to which you changed is displayed.When you change the dictionary in the [Dictionary] application, the dictionary used when you look up a word in the [Books] application also changes.

Dictionary
167Table of Contents
Listing Previously Looked-up WordsYou can view a list of words that you have previously looked up in the selected dictionary.
1 When a dictionary is open, press the (Menu) button tap [Word Logs: Dictionary].A list of words that you have previously looked up opens.
2 Tap a word to look it up in the dictionary.
Deleting items in the look-up historyYou can delete words that you have previously looked up.
1 Press the (Menu) button tap [Delete Word Logs].
2 Tap the items that you want to delete.A check appears next to selected items.
3 Tap [Done] [Yes].To return to the dictionary viewer, press the (Back) button.

Dictionary
168Table of Contents
Using (Menu) ItemsBelow is a list of option items available when you press the (Menu) button from the dictionary viewer.Option Description[Previous View]
Opens a previously looked-up word in the dictionary viewer after you have looked up another word from the dictionary viewer.
[Change Dictionary]
Changes to another dictionary and searches again.
[Font] Changes the font size of the candidate words list and the definition viewer.
[Word Logs: Dictionary]
Displays a list of previously looked-up words. See Details.

Text Memo
169Table of Contents
Text MemoCreating a Text MemoYou can use the [Text Memo] application to create a memo.
1 Press the (Home) button tap [Text Memo].
Create a new memo.
2 Tap at the upper-right corner of the screen.A notepad opens.
3 Type a memo using the on-screen keyboard.
4 Tap [Save].

Text Memo
170Table of Contents
TipIf you tap [New] while creating a memo, the current memo
is saved, and a new notepad opens.Newly created memos will be saved only in the internal
memory.

Text Memo
171Table of Contents
Editing an Existing Memo
1 Press the (Home) button tap [Text Memo] tap the memo that you wish to edit.
2 Tap [Edit].The on-screen keyboard opens.Edit the memo using the on-screen keyboard.
3 Tap [Save].
TipIf you tap [New] while creating a memo, the current memo
is saved, and a new notepad opens.Newly created memos will be saved only in the internal
memory.To delete the currently viewed memo, press the (Menu)
button tap [Delete Memo] [Yes].

Text Memo
172Table of Contents
Deleting/Protecting a MemoYou can delete or protect one or more memos.
1 Press the (Home) button tap [Text Memo].
2 Press the (Menu) button tap [Delete Memos] or [Protect Memos].To delete memos, see Details.You can also delete a memo after step 1 by tapping and holding it. See Details.To protect memos, see Details.You can also protect a memo after step 1 by tapping and holding it. See Details.

Text Memo
173Table of Contents
Using (Menu) ItemsBelow is a list of option items available when you press the (Menu) button from the [Text Memo] content list.Option Description[Delete Memos]
Deletes one or more text memos from the Reader. See Details.
[Protect Memos]
Protects one or more text memos from deletion. See Details.

Pictures
174Table of Contents
PicturesViewing PicturesYou can use the [Pictures] application to view pictures one by one or as a slideshow. You can also select the picture of your choice for the Reader’s standby screen.For details on setting pictures to the standby screen, see Details.For details on transferring pictures to the Reader, see Details.For details on supported file types, see Details.

Pictures
175Table of Contents
1 Press the (Home) button tap [Pictures].To browse the pictures list, see Details.
Tool icons Details
2 Tap a picture.The picture viewer opens.

Pictures
176Table of Contents
Picture viewer navigationPerform the following operations with a picture open.
To Do thisGo to the next page
Press the > (Next) button.Swipe left.
Go to the previous page
Press the < (Previous) button.Swipe right.

Pictures
177Table of Contents
Changing the OrientationYou can adjust the view to either portrait or landscape.
1 Press the (Home) button tap [Pictures].
2 Tap a picture press the (Menu) button tap [Orientation].The orientation switches between landscape and portrait mode.
Pictures are shown in the orientation that you have specified.

Pictures
178Table of Contents
Zooming in on a PictureYou can zoom in on pictures for easier visibility.The viewer shows the zoom bar and viewing position indicator while in zoom mode.
Pinch out to zoom in.Pinch in to zoom out.
You can drag on the screen to move the viewing position.To exit zoom mode, press the (Back) button.

Pictures
179Table of Contents
Viewing Pictures in a SlideshowThe slideshow displays pictures one by one in the current sort order. You can also specify the display interval.
1 Press the (Home) button tap [Pictures].
2 Tap a picture press the (Menu) button tap [Slideshow].The slideshow starts from the current picture.
To stop the slideshow and return to the viewerPress the (Back) button.Tap on the picture.
To change the slideshow interval
1 Press the (Home) button tap [Pictures].
2 Tap a picture press the (Menu) button tap [Settings] [Slide Duration]. Choose from one of the following displayed items.

Pictures
180Table of Contents
3 Press the (Back) button to return to the picture viewer.
The selected interval is now applied when you start a slideshow.TipYou can also change the slideshow interval from the
[Settings] application. See Details.

Pictures
181Table of Contents
Deleting PicturesYou can delete one or more pictures.
1 Press the (Home) button tap [Pictures].
2 Press the (Menu) button tap [Delete Pictures].To delete pictures, see Details.You can also delete a picture by tapping and holding it. See Details.

Pictures
182Table of Contents
Using (Menu) ItemsBelow is a list of option items available when you press the (Menu) button from the [Pictures] content list.Option Description[Delete Pictures]
Deletes one or more pictures from the Reader. See Details.
[Settings] Changes the slideshow interval. See Details.

Audio
183Table of Contents
AudioEnjoying AudioThe Reader has an audio player so that you can enjoy listening to music while reading.For details on transferring audio to the Reader, see Details.For details on supported file types, see Details.
Audio
184Table of Contents
Playing audio
1 Press the (Home) button tap [Audio].The album list opens. For browsing an audio list, see Details.
2 Tap an album.The track list opens.
3 Tap a track.The audio player opens and starts playing the track.

Audio
185Table of Contents
Item Description
Playback icon Appears during playback.You can tap the status bar to display the notification window and jump to the audio player.
Mute Tap to temporarily turn off audio output from the player.
Volume control Adjusts the volume level. Tap to decrease the volume, and to increase the volume.

Audio
186Table of Contents
Cover art Displayed when available.
Shuffle Tap to enable shuffle playback.
Repeat Tap to disable repeat play/repeat all songs in the album/repeat the current song.
Audio controls Tap to pause.Tap to play. Tap to skip to the beginning of the previous audio file (or the beginning of the current file if you tap more than 3 seconds into the track).Tap to skip to the beginning of the next audio file.
Position bar Slider
Tap on a point on the bar or tap and drag the slider to adjust the playback position.
Press the (Menu) button tap [Continue Reading] to return to the last content you were reading. You can read while listening to audio.To return to the track list, press the (Back) button. In the track list, appears for the track currently playing.
NoteThe Reader will not enter sleep mode or automatic power

Audio
187Table of Contents
saving modes during audio playback.
Deleting an audio track
1 Press the (Home) button tap [Audio].
2 Tap an album.The track list opens.
3 Press the (Menu) button tap [Delete Audio]. To delete tracks, see Details.You can also delete a track by tapping and holding it. See Details.

Audio
188Table of Contents
Using (Menu) ItemsBelow is a list of option items available when you press the (Menu) button from the [Audio] track list.Option Description[Delete Audio] Deletes one or more tracks from the Reader.
See Details.

Settings
189Table of Contents
Changing the SettingsChanging the SettingsThe [Settings] application allows you to personalize the Reader, set the date and time, configure the Wi-Fi connection, and change the standby screen and other Reader settings.
Settings

Changing the Settings
190Table of Contents
General SettingsSetting Description[Page Turn Preference]
Sets the swipe direction for turning pages.
[Menu Language] Sets the menu language.[Keyboard] Sets the on-screen keyboard layout.

Changing the Settings
191Table of Contents
Wireless Network SettingsSetting Description[Wi-Fi] Turn Wi-Fi on/off. See Details.[Wireless Standby]
Wireless standby helps avoid unnecessary battery consumption caused by wireless communication. If you do not perform any wireless operations for more than 5 minutes, the wireless feature automatically enters standby mode.
NoteAccessing the [Browser] application from
wireless standby mode takes more time than accessing when the Reader is connected to the wireless network.
If you deactivate wireless standby, the Reader retains a wireless connection at all times, resulting in higher battery consumption.
[Wi-Fi Settings] Wi-Fi settings enable the Reader to use local Wi-Fi networks to connect to the Internet. See Details.

Changing the Settings
192Table of Contents
Application PreferencesSetting Description[Books] Sets preferences for all books. You can
adjust the default font size. [Dictionary] Specifies the default dictionary.[Pictures] Sets the slideshow interval.[Browser] Sets the browser preferences.

Changing the Settings
193Table of Contents
Date and Time SettingsSetting Description[Date] Sets the date.[Time] Sets the time.[Date Format]
Sets the date format.
[24-Hour Format]
Check to display time in 24 hour-format.
[Time Zone] Sets the time zone.

Changing the Settings
194Table of Contents
System ManagementSetting Description[Device Lock] Sets a 4-digit PIN for the Reader to prevent
unauthorized use.To set [Device Lock] to [On], input your 4-digit PIN tap [Continue] to enter it again tap [OK]. When [Device Lock] is set to [On], you must unlock the Reader with the 4-digit PIN when waking up the Reader from sleep mode, or when turning on the power.To set [Device Lock] to [Off ], input your 4-digit PIN and tap [Continue].
NoteSony recommends that you make a note of
your password and keep it in a safe place separate from the Reader.
If you forget your password, contact Sony Customer Support. Note that in unlocking your device, all content on it will be erased.

Changing the Settings
195Table of Contents
Setting Description[Standby Screen]
Sets standby screen preferences.[Type of Image]: You can select whether to display the cover of the last read book or pictures from the [Pictures] application. When you select [Selected Pictures], continue by tapping [Select Pictures] tap to add a check next to the pictures you want to display tap [Done].[Show Message]: You can select whether to display a message about waking up the Reader from sleep mode on the standby screen.
[Download Destination]
Sets the destination for files downloaded from the browser. Select between [Internal Memory] and [SD Card].

Changing the Settings
196Table of Contents
InitializationSetting Description[Restore Defaults] Restores the default Reader settings.[Clear Keyboard History]
Deletes words registered to the on-screen keyboard history.
[Format Memory] Allows you to format the Reader’s internal memory and the microSD card.NoteIf you have formatted the Reader or
microSD card on your computer, the Reader may not be able to display transferred content. In this case, use the Reader’s [Format Memory] function to reformat the Reader and your microSD card.
When either memory is formatted, audio file playback and content download stop, and the Wi-Fi feature is disabled.
TipBefore formatting, make sure to backup
data you wish to keep to your computer. Note that protected content will also be deleted when you format it.

Changing the Settings
197Table of Contents
AboutSetting Description[Device Information]
Displays the device details including the memory capacity, Adobe DRM authorization and MAC address in use.
[Legal Information]
Displays trademark and copyright information.
[End User License Agreement]
Displays the terms and conditions on use of the Reader.

Changing the Settings
198Table of Contents
Device ShutdownEnables you to shut down (turn off ) the Reader, instead of leaving it in sleep mode.

Other Information
199Table of Contents
TroubleshootingTroubleshooting TipsTroubleshooting tips may help you quickly resolve technical issues.
1 Charge the Reader completely.
2 Reset the Reader.
Press the RESET button with a small pin or clip.The screen will freeze; the Reader will not restart automatically.Press the (Power) button, and the startup screen appears.
NoteThe bookmarks, highlights, handwritten notes or the
setting information may be deleted by resetting.
Other Information

Troubleshooting
200Table of Contents
Do not push the RESET button with a breakable point, such as the graphite of a mechanical pencil. It can cause the RESET button to be blocked.
3 Comprehensive support and troubleshooting information is available at the support PC Web site. See Details.
Support PC Web SiteFor comprehensive support and troubleshooting information, visit the support PC Web site.
Support PC Webhttp://support.sony-europe.com/eBook/PRS
Reader Device
Power On/Off
The Reader cannot turn on.The Reader cannot be operated if connected to your
computer and set to data transfer mode. Use the safely remove hardware function of your computer, and then disconnect the USB cable from the Reader.

Troubleshooting
201Table of Contents
Moisture condensation may have occurred. Wait for a few hours and then turn on the Reader.
If the battery is completely depleted, power will not be supplied to the (Power) button, and you may not be able to turn on the Reader. In this case, the Charge/Busy indicator may blink red 3 times. Connect the Reader to your computer via the supplied USB cable; the Reader will automatically turn on approximately 5 minutes later. Wait until the Reader turns on before trying to operate it.
The Reader cannot turn off or enter sleep mode.If the Reader screen freezes and stops responding, the
(Power) button will also not work. In this case, reset the Reader. See Details.
The Reader automatically enters sleep mode or turns off.To conserve the battery’s charge, the Reader includes
automatic power saving modes. The Reader will enter sleep mode after 10 minutes of inactivity. After 3 days* in sleep mode, the Reader will shut down/power off automatically.
* If the battery’s charge is low, the Reader may automatically turn off within 3 days. However, when playing audio or viewing a slideshow, this feature does not work. The automatic power saving modes cannot be turned off.

Troubleshooting
202Table of Contents
Battery
Cannot charge the Reader.If you use other than the supplied USB cable to charge the
Reader, it may not charge correctly. To charge the Reader, use only the supplied USB cable and, optionally, the AC Adapter (PRSA-AC1A, sold separately). See Details.
If you are charging from the USB port on your computer, make sure that the Reader is connected directly to the USB port with the supplied USB cable. Do not use a USB hub.
The battery has not been given enough time to fully charge. Charge the Reader until the icon changes to the
icon. (The charge icon does not indicate the remaining battery power while charging.)
Your computer must be turned on to charge the Reader. The Reader will not be charged if your computer enters sleep mode or standby mode. Keep your computer turned on with a stable and continuous power supply while charging the Reader.
If your computer enters sleep mode while the Reader is connected and charging, the Reader battery’s charge will gradually drain, the Reader will shut down and the Reader’s battery will not charge. In this case, disconnect the USB cable from the Reader, wake the computer from sleep mode, and then reconnect the USB cable to the Reader.
Your computer may not be supplying sufficient power. If

Troubleshooting
203Table of Contents
you connect the Reader to your laptop computer, maintain a stable and continuous power supply to the laptop computer while charging the Reader.
Battery life seems short.The Reader may not have been charged fully. Make sure
that you charge the Reader until changes to .The operating temperature is below 5°C (41°F). This is due
to the battery characteristics and not a malfunction.The Reader requires power while in sleep mode. If you are
not planning to use the Reader, turn it off instead of leaving it in sleep mode.
If you are not browsing on the Web, exit [Browser] by pressing the (Home) button.
The icon in the status bar indicates that the Reader is playing audio. Audio playback consumes battery power. Go to the audio player and pause playback if necessary. See Details. The Reader does not automatically enter into sleep mode while playing audio.
The Reader battery gradually discharges when not in use for a prolonged period of time. Before turning on the Reader after a prolonged period of disuse, charge the Reader again.
If you are not using wireless communications, turn off Wi-Fi. See Details.
If you are charging the Reader by data transfer mode and

Troubleshooting
204Table of Contents
the computer enters sleep mode or standby mode, the Reader will be unable to charge, and the battery may drain. When charging the Reader, confirm that your computer is on, and completely charge the Reader before using it. See Details.
Touchscreen
The Reader does not wake up or start immediately.In cold temperatures, the touchscreen may respond slower
than usual. This is due to the touchscreen characteristics and is not a malfunction.
After resetting or turning off the Reader, it may take time for the startup screen to appear.
The screen does not respond.Reset the Reader. See Details.
The screen responds slowly.If the touchscreen becomes dirty, it may not function
correctly. Clean the touchscreen with a soft cloth, such as a cleaning cloth for eyeglasses.
In cold temperatures, the touchscreen may respond slower than usual. Turn off the Reader and leave it for a few hours until it adjusts to the ambient temperature.

Troubleshooting
205Table of Contents
Wireless Connectivity
Wi-Fi connection
The Reader does not connect to the Wi-Fi network.The network feature could not be turned on because the
remaining battery power is too low. Charge the Reader for a few minutes, and then try again.
Make sure that Wi-Fi is turned on and check the signal strength of the access point.
Scan the available access points in the vicinity and select a new one.
Make sure that the security method (WEP/WPA), the static IP address and the proxy settings are correct.
The access point is using an unsupported security method or encryption key.
Public Wi-Fi networks may require a user ID and password. In this case, you must enter a correct user ID and password to establish a network connection.
The access point has the MAC address filter enabled. To check the MAC address, press the (Home) button tap
[Settings] [About] [Device Information]. Make sure that this MAC address is accepted by the access point.
The Wi-Fi network settings of the access point are not correct. Adjust the settings as described in the manuals

Troubleshooting
206Table of Contents
that came with the access point and in any information provided by the network administrator.
The Reader is too far from the access point. Move the Reader closer to the access point and scan again.
Obstacles such as walls, metal or concrete between the Reader and an access point may adversely affect the connection. Try moving the Reader to a different location and scan again.
There is other equipment nearby using the 2.4 GHz frequency band (such as a cordless phone, a microwave oven, or Bluetooth computer equipment). Move the equipment away or turn it off.
The Wi-Fi network service is temporarily not available or degraded. Check with the network administrator for the status.
Cannot find the access point in the Wi-Fi networks list.The access point you want to use is set to not broadcast its
SSID to users. In this case, the access point may not be shown on the Wi-Fi network list. Tap [Add Wi-Fi Network] and enter the SSID manually. See Details.

Troubleshooting
207Table of Contents
Browser
The Web page is not displayed properly.The Wi-Fi network connection may have been interrupted.
Make sure that Wi-Fi is turned on and set up correctly, check the signal strength of the access point, and then refresh the Web page.
Due to the vast range of standards and technologies used to design Web pages, it is not possible to guarantee that all pages will be displayed correctly.
Cannot change the font size.The font size does not change if it is specified by the Web
page. You can use the zoom feature to enlarge the page display.

Troubleshooting
208Table of Contents
Reading Books
Cannot open a book.You must be the account holder who purchased the book
to read it.The book may be protected by unsupported digital rights
management technology.The book may be in an unsupported file type. For details
on supported file types, see Details.
“Continue Reading” does not work, or the bookmark is missing.If the file status has changed (such as in the following
cases), data under [Continue Reading] or notes may be deleted. A text/PDF file is edited.
Cannot find content on the Reader.If you have formatted the Reader on your computer, the
Reader may not be able to display transferred content. In this case, use the Reader’s [Format Memory] function to reformat the Reader. See Details.
If you delete or modify folders or files in the “database” folder on your computer, content or notes may be deleted.

Troubleshooting
209Table of Contents
Playing Audio Files
Thumbnail of an album is not displayed.An album or an audio file with cover art information can
only display its thumbnail in the album list.
Cannot play audio.The audio may be in an unsupported file type. For details
on supported file types, see Details.
Sound cannot be heard.Increase the volume.Make sure that your headphones (not supplied) are
connected properly to the headphone jack on the Reader.

Troubleshooting
210Table of Contents
Viewing Pictures
Cannot view a picture.The picture may be in an unsupported file type. For details
on supported file types, see Details.

Troubleshooting
211Table of Contents
Connecting to your Computer
The computer does not detect the Reader.After connecting the Reader to your computer via the USB
cable, you must set the Reader to data transfer mode. See Details.
It may take a while for the computer to detect the Reader.Make sure that the Reader is connected directly to the USB
port with the supplied USB cable. Do not use a USB hub.Try connecting to a different USB port on the computer.Try disconnecting the Reader and connecting it again.If none of the above solves the problem, reset the Reader.
See Details.

Troubleshooting
212Table of Contents
microSD Card
The Reader does not detect the microSD card, or cannot open an item stored on the microSD card.If you have formatted the microSD card on the computer,
the Reader may not be able to display transferred content. Use the Reader to format the microSD card. See Details.
It may take a while for the Reader to detect the microSD card and load all files stored on it. Wait a little longer after inserting the microSD card to the card slot.
Make sure that the microSD card is supported by the Reader. See Details.
Make sure that the microSD card is inserted properly. See Details.
Make sure that the gold contact point of the microSD card and the card slot are clean. If dirty or dusty, clean them carefully.
Cannot save the book or other items on the microSD card.The Reader does not offer a feature that enables you to
move files to or from the microSD card.
Cannot delete the book or other items from the microSD card.You cannot delete the file if it is read-only. You must use
the computer and remove the read-only attribute from the file.

Precautions
213Table of Contents
PrecautionsSafety Information
Protected contentProtected content is limited to personal use only. Use of the content beyond this limit requires permission of the copyright holders.
Handling the ReaderIn order to comply with FCC radio-frequency radiation
exposure guidelines for an uncontrolled exposure, this device and its antenna must not be co-located or operating in conjunction with any other antenna or transmitter.
If the Reader causes interference to radio or television reception, turn the Reader off and move it away from the radio or television.
Refrain from using the Reader according to the in-flight announcements during take off or landing in an aircraft.
Do not drop, or put any heavy object on top of the Reader or apply a strong shock to the Reader. It may cause a malfunction or damage.

Precautions
214Table of Contents
Never subject the Reader to extremes of light, temperature, moisture or vibration.
If part of the Reader that generates heat contacts your skin for a prolonged period, you may suffer from symptom of burn, such as redness, swelling, even if temperature is moderate. Avoid prolonged contact, especially if you have sensitive skin.
Do not leave the Reader on an unstable surface. Do not poke people using the supplied stylus. Do not treat or use the supplied stylus roughly, such as
bending it, or scratching the touchscreen with it. Use the supplied stylus only for touchscreen operations. Do not use the stylus if it is damaged or deformed. If any object is placed on the touchscreen, it may cause a
malfunction. When not in use, leave the Reader in sleep mode, or turn it off.
When using the Reader internationally, it is your responsibility to ensure that the Reader is used in compliance with the following specifications:
AC voltage Wireless products regulations Other safety regulations or requirementsBe sure not to short-circuit the terminals of the Reader with
metallic objects.Never leave the Reader exposed to high temperature, such
as in a car parked in the sun or under direct sunlight.

Precautions
215Table of Contents
Avoiding water and moistureNote that condensation may form temporarily in cases
such as when the player is moved quickly from a low-temperature environment to a high temperature environment or used in a room that has a heater just turned on. Condensation creates a phenomenon where moisture in the air adheres to surfaces such as metal panels, etc., and then changes to liquid. If condensation forms in the Reader, leave it turned off until the condensation disappears. If you use the Reader with condensation present, a malfunction may result.
The Reader is not waterproof. Remember to follow the precautions below.
Be careful not to drop the Reader into a sink or other container filled with water.
Do not use the Reader in humid locations or bad weather, such as in the rain or snow.
Do not get the Reader wet.If you touch the Reader with wet hands, or put the Reader in a damp article of clothing, the Reader may get wet and this may cause a malfunction.
Charging the ReaderHeat may build up in the Reader while charging, or if it is
used for an extended period of time.

Precautions
216Table of Contents
Use the supplied USB cable or the optional AC adapter (PRSA-AC1A, sold separately) only. Do not use other USB cable and AC Adapter.
Never wrap the Reader in anything when it is being charged. Heat build-up in the Reader may cause malfunction or damage.
If the battery quickly runs out of power after being fully charged, it may be reaching the end of its life and should be replaced. Consult Sony Support Center.

Precautions
217Table of Contents
Road safetyDo not use headphones (not supplied) while driving, cycling, or operating any motorized vehicle. It may create a traffic hazard and is illegal in many areas. It can also be potentially dangerous to play at a high volume while walking, especially at pedestrian crossings. You should exercise extreme caution or discontinue use in potentially hazardous situations.
Preventing hearing damageAvoid using the headphones (not supplied) at a high volume. Hearing experts advise against continuous, loud and extended play. If you experience a ringing in your ears, reduce the volume or discontinue use.

Precautions
218Table of Contents
Caring for othersKeep the volume at a moderate level. This will allow you to hear outside sounds and to be considerate to the people around you.
Warning for headphones (not supplied)If lightning occurs while you are using the Reader, take off your headphones (not supplied) immediately.
Wi-Fi connectivity The Wireless LAN functionality has passed Wi-Fi certification and complies with the interoperability specifications established by WFA (Wi-Fi Alliance).

Precautions
219Table of Contents
Cleaning the ReaderClean the Reader with a soft cloth, such as a cleaning cloth
for eyeglasses. Make sure that there is no dust or dirt on the soft cloth, as the Reader may be damaged.
Do not use any type of abrasive pad, scouring powder or solvent, such as alcohol or benzene, as it may mar the finish of the case.
Wipe the stylus with a dry cloth when it gets dirty. Tapping or dragging on the touchscreen using a dirty stylus may damage the surface.
Be sure to keep the Reader away from water or spills.
TouchscreenDo not apply excessive pressure to the touchscreen. The
color or lighting may become blurred or uneven, and the Reader may become damaged.
When using the Reader in a cold environment, thin lines may appear on the touchscreen. This is not a malfunction.
The outside cover of the touchscreen is made of glass. This glass could break if the Reader is dropped on a hard surface or receives a substantial impact. It could also be damaged by scratching and abrasion while being carried in a bag. If you are concerned about damages to the touchscreen, you can use a protective case (sold separately).

Precautions
220Table of Contents
Wireless featureTurn off the wireless feature when you are in a location in
which radio communications are prohibited. When you are in such a location, you must obtain permission from the appropriate authorities before enabling the wireless feature of this device.
Turn off the wireless feature in health care facilities where any regulations posted in such areas instruct you to do so. Hospitals or health care facilities may be using equipment that could be effected by radio frequency (RF) energy which is generated by wireless communication.
Do not use your Reader near medical equipment without first obtaining permission to do so.
General notes on using the Wi-Fi (Wireless LAN) function.In some countries or regions, use of Wi-Fi products may be restricted by the local regulations (e.g. limited number of channels).

Precautions
221Table of Contents
Applications on the Reader
Disclaimer: In no event will SONY be liable for any financial damage, or loss of profits, including claims made by third parties, arising out of the use of the software supplied with this Reader.Sony is not responsible for incomplete recording/downloading or damaged data due to problems of the Reader or computer.Copyright laws prohibit reproducing the software or the
manual accompanying it in whole or in part, or renting the software without the permission of the copyright holder.
The software provided with this Reader cannot be used with equipment other than that which is so designated.
Due to continued efforts to improve quality, software specifications may be changed without notice.
Please note that, due to continued efforts to improve quality, software specifications may be changed without notice.
Operation of this Reader with software other than that provided is not covered by the warranty.
By updating the Reader device software, you can ensure your Reader has the latest features. For details about updating the Reader, refer to the support PC Web site. See Details.

Precautions
222Table of Contents
Depending on the types of the text and characters, the text shown on the Reader may not be displayed properly. This is due to:− The capacity of the Reader.− The Reader is not functioning normally.− Content information is written in the language or the
character that is not supported by the Reader.The ability to display the languages on your Reader will
depend on the OS installed on your computer. For better results, please ensure that the installed OS is compatible with the desired language you want to display.− We do not guarantee all the languages will be able to be
displayed properly on your Reader.− User-created characters and some special characters may
not be displayed.

Precautions
223Table of Contents
About Pre-installed Sample ContentSample content is pre-installed in the Reader so that you can try them out right away.The pre-installed sample content is for the purpose of trial reading, viewing and listening.
NoteYou will not be able to restore the pre-loaded samples
once you delete them from the Reader. Sony does not supply any replacement samples.

Precautions
224Table of Contents
Reader Disposal ReferenceThe built-in rechargeable battery of the Reader is recyclable. Do not remove the battery yourself; consult Sony Support Center.
Disposal of Old Electrical & Electronic Equipment (Applicable in the European Union and other European countries with separate collection systems)
This symbol on the product or on its packaging indicates that this product shall not be treated as household waste. Instead it shall be handed over to the applicable collection point for the recycling of electrical and electronic equipment. By ensuring this product is disposed of correctly, you will help prevent potential negative consequences for the environment and human health, which could otherwise be caused

Precautions
225Table of Contents
by inappropriate waste handling of this product. The recycling of materials will help to conserve natural resources. For more detailed information about recycling of this product, please contact your local Civic Office, your household waste disposal service or the shop where you purchased the product.
Applicable accessories: USB cable, stylus

Precautions
226Table of Contents
Disposal of waste batteries (applicable in the European Union and other European countries with separate collection systems)
This symbol on the battery or on the packaging indicates that the battery provided with this product shall not be treated as household waste.On certain batteries this symbol might be used in combination with a chemical symbol. The chemical symbols for mercury (Hg) or lead (Pb) are added if the battery contains more than 0.0005% mercury or 0.004% lead.By ensuring these batteries are disposed of correctly, you will help prevent potentially negative consequences for the environment and human health which could otherwise be caused by inappropriate waste handling of the battery. The recycling of the materials will help to conserve natural resources.

Precautions
227Table of Contents
In case of products that for safety, performance or data integrity reasons require a permanent connection with an incorporated battery, this battery should be replaced by qualified service staff only.To ensure that the battery will be treated properly, hand over the product at end-of-life to the applicable collection point for the recycling of electrical and electronic equipment.For all other batteries, please view the section on how to remove the battery from the product safely. Hand the battery over to the applicable collection point for the recycling of waste batteries.For more detailed information about recycling of this product or battery, please contact your local Civic Office, your household waste disposal service or the shop where you purchased the product.

Precautions
228Table of Contents
Additional Information
The following information is only applicable to equipment sold in countries applying EU directivesThe manufacturer of this product is Sony Corporation, 1-7-1 Konan Minato-ku Tokyo, 108-0075 Japan. The Authorized Representative for EMC and product safety is Sony Deutschland GmbH, Hedelfinger Strasse 61, 70327 Stuttgart, Germany. For any service or guarantee matters please refer to the addresses given in separate service or guarantee documents.
EU Declaration of ConformityHereby, Sony Corp., declares that this equipment is in compliance with the essential requirements and other relevant provisions of Directive 1999/5/EC. For details, please access the following URL: http://www.compliance.sony.de/This product is intended to be used in the following countries. AT/BE/CH/DE/DK/ES/FI/FR/GB/IE/IT/NL/NO/SE

Precautions
229Table of Contents
France: The Wi-Fi feature of this Reader shall exclusively be used inside buildings. Any use of the Wi-Fi feature of this Reader outside of the buildings is prohibited on the French territory. Please make sure that the Wi-Fi feature of this Reader is disabled before any use outside of the buildings. (ART Decision 2002-1009 as amended by ART Decision 03-908, relating to radio- frequencies use restrictions).
Italy: Use of the RLAN network is governed:with respect to private use, by the Legislative Decree of
1.8.2003, no. 259 (“Code of Electronic Communications”). In particular Article 104 indicates when the prior obtainment of a general authorization is required and Art. 105 indicates when free use is permitted;
with respect to the supply to the public of the RLAN access to telecom networks and services, by the Ministerial Decree 28.5.2003, as amended, and Art. 25 (general authorization for electronic communications networks and services) of the Code of electronic communications.
Norway: Use of this radio equipment is not allowed in the geographical area within a radius of 20 km from the centre of Ny-Ålesund, Svalbard.

Precautions
230Table of Contents
Notes on microSD CardsSD cards are made to standards and are commonly used as storage media for portable devices. microSD and microSDHC cards are members of the SD card family.The Reader supports the following card types. microSD and microSDHC cards
Up to 32 GBmicroSD cards of up to 32 GB has been tested to work with the Reader; however, not all microSD cards are guaranteed to work.
PrecautionsInsert into the correct slot with the card’s label side up until
it clicks into place.To avoid a choking hazard, keep the microSD card out of
the reach of children.Do not touch the gold contact point of the microSD card.Do not disassemble or modify a memory card.Do not allow a memory card to get wet.Avoid the following to prevent data damage. Sony does
not provide any guarantee for damaged data.− Remove a memory card or turn off the Reader while
reading or writing data.

Precautions
231Table of Contents
− Operate the Reader in the location where static charge or electrical noise is present.
Do not strike, bend, drop, disassemble, open, crush, deform, puncture, shred, microwave, incinerate or paint the microSD card.
Do not use force, a thin stick or tweezers to remove the microSD card. If you cannot remove the microSD card, contact customer support.
Do not remove the microSD card or turn off the Reader while data on the memory card is being edited or accessed. Otherwise, edited data will not be saved.
Do not insert a deformed microSD card into the Reader.If you change or erase a folder name via computer, or move
a file to a folder other than “database”, there is a possibility that data recorded in a memory card might be lost or become unreadable by this product.
Formatting a microSD cardYou can use the Reader to format a microSD card if necessary. WARNINGFormatting the microSD card will delete all files stored on it. Files that you have set protection for via the Reader’s applications will also be deleted.

Precautions
232Table of Contents
1 Press the (Home) button tap [Settings] [Initialization] [Format Memory] [SD Card].
2 Tap [Yes] when prompted.To cancel, tap [No].
It may take a few minutes to finish formatting the microSD card.

Legal Notice
233Table of Contents
Legal NoticeLegal Notice
The contents of each book pre-loaded on this product are copyrighted works, edited with the cooperation of the publisher.Copyright laws prohibit copying the data of this product or the contents of this manual (illustrations, related documents, etc.) in whole or in part without the permission of the copyright holder. Additionally, use of the data of this product or the contents of this manual is not allowed without Sony’s permission except for personal use.Sony, the Sony logo, “Reader”, “BBeB” and their logos are
either trademarks or registered trademarks of Sony Corporation.
EPUB is a registered trademark of the IDPF.Frutiger, Univers, Helvetica and Palatino are trademarks of
Linotype Corp. registered in the United States Patent and Trademark Office and may be registered in certain jurisdictions in the name of Linotype Corp. or its licensee Linotype GmbH.
Bitstream is a registered trademark, and Dutch, Font

Legal Notice
234Table of Contents
Fusion, and Swiss are trademarks, of Bitstream Inc.Microsoft, Windows, Windows Vista and Windows Media
are trademarks or registered trademarks of Microsoft Corporation in the United States and / or other countries.
Macintosh and Mac OS are trademarks of Apple Inc., registered in the U.S. and other countries.
This PRS-T1 contains Adobe® Reader® Mobile software under license from Adobe Systems Incorporated, Copyright © 1995-2011 Adobe Systems Incorporated. All rights reserved. Adobe and Reader are trademarks of Adobe Systems Incorporated.
MPEG Layer-3 audio coding technology and patents licensed from Fraunhofer IIS and Thomson.
This product includes software developed by the OpenSSL Project for use in the OpenSSL Toolkit. (http://www.openssl.org/) Copyright© 1998-2011 The OpenSSL Project. All rights reserved. This product includes cryptographic software written by Eric Young ([email protected]). This product includes software written by Tim Hudson ([email protected]). For details on OpenSSL License, refer to [End User License Agreement] in [About] at [Settings] on the Reader.
Wi-Fi, the Wi-Fi CERTIFIED logo, WPA, WPA2 and Wi-Fi Protected Setup are trademarks or registered trademarks of Wi-Fi Alliance.
All other system names and product names appearing

Legal Notice
235Table of Contents
in this document are the registered trademarks or trademarks of their respective owners. Further, the trademark ™ and registered trademark ® symbols are not indicated throughout this document.Program © 2006,2007,2008,2009,2010,2011,2012 Sony CorporationDocumentation © 2011 Sony Corporation4-288-614-32(3)

Appendix
236Table of Contents
AppendixSpecificationsModel namePRS-T1Power sourceBuilt-in rechargeable battery: 3.7 V DC, 1000mAhUSB powered from a computer or the optional AC Adapter PRSA-AC1A (sold separately) via the supplied USB cable.Battery life (continuous page turn)Maximum Battery: Approximately 14,000 continuous page turns when reading only.** Measured using a text based content in ePub format and a
fully charged battery, consecutive page-turns at approximately one second per page under the recommended operating temperature. Actual battery life may vary based on usage patterns and individual device.

Appendix
237Table of Contents
Charging timeComputer-based charging: Approximately 2.5 hoursAC Adapter PRSA-AC1A (sold separately)-based charging: Approximately 2 hoursInternal memory capacity (for data storage)Approximately 1.4 GB after initial setting. Depending on size of pre-loaded excerpts, available memory capacity may vary.Operating/Charging temperature5°C to 35°C (41°F to 95°F)Dimensions (w/h/d)Approximately 110 × 173 × 8.9 mm (4 3/8 × 6 7/8 × 3/8 inches)MassApproximately 168 g (5.9 oz.)Display152.4 mm (6 inch) diagonal electrophoretic display 600 × 800 pixels, 16-level grayscaleWi-FiWireless standards: IEEE 802.11b/g/n compliantWireless security: WEP (Open System), WEP (Shared Key), WPA-PSK (TKIP), WPA-PSK (AES), WPA2-PSK (TKIP), WPA2-PSK (AES)

Appendix
238Table of Contents
Expansion slotsmicroSD card slotSee Details for supported card types and precautions.Supplied itemsUSB cable × 1Stylus × 1Quick Start Guide

Appendix
239Table of Contents
Supported File TypesThe following files can be transferred to the Reader device.However, depending on the file size and format, it may not be possible to view/display/play some data.BooksEPUB files (.epub)
EPUB (OPS version 2.0) supported.PDF files (.pdf )
Support is based on the PDF 1.6 specification.Text files (.txt)FB2 files (.fb2)

Appendix
240Table of Contents
AudioMP3 files (.mp3) The following specifications should be met in order to
import an MP3 file:Bit rate: 8 to 320 kbpsSampling frequency: 8 to 48 kHzFile must be unsecured.AAC files (.mp4, .m4a) Raw AAC is not supported. The following specifications should be met in order to
import an AAC file:Bit rate: up to 160 kbpsSampling frequency: 8 to 48 kHzFile must be unsecured.PicturesJPEG files (.jpg, .jpeg)GIF files (.gif )PNG files (.png)BMP files (.bmp)
NoteA large file size of picture may not be displayable, and its
file will not appear in the list.For an animation GIF file, only the first frame will be shown.

Appendix
241Table of Contents
System RequirementsOperating System DetailsMicrosoft Windows 7 (32/64-bit)
Windows 7 Starter
Windows 7 Home Basic
Windows 7 Home Premium
Windows 7 Professional
Windows 7 UltimateMicrosoft Windows Vista (32/64-bit)
Windows Vista Home Basic with Service Pack 2 or later
Windows Vista Home Premium with Service Pack 2 or later
Windows Vista Business with Service Pack 2 or later
Windows Vista Ultimate with Service Pack 2 or later
Microsoft Windows XP (32-bit only)
Windows XP Home Edition with Service Pack 3 or later
Windows XP Professional with Service Pack 3 or later
Windows XP Media Center Edition 2004 & 2005 with Service Pack 3 or later

Appendix
242Table of Contents
Operating System DetailsMac OS X 10.7 (64-bit only)
Mac OS X version 10.7 or later
Mac OS X 10.6 (32/64-bit)
Mac OS X version 10.6.6
Mac OS X 10.5 (32-bit only)
Mac OS X version 10.5.8
NoteThe Reader is not supported with the following:
An operating system other than those listed aboveA personally built computer or operating systemA multi-boot environmentA multi-monitor environment