Employee Applicant Tracking - University of Tennessee...
110
Employee Applicant Tracking A Guide for Hiring Managers
Transcript of Employee Applicant Tracking - University of Tennessee...

Employee Applicant Tracking
A Guide
for
Hiring Managers

What is UT JOBS?
New Employee Applicant Tracking System (ATS)
for the
University of Tennessee
What’s Different for Departments?
• Online Requisitions Through IRIS
• Approvals Using IRIS Approval Workflow
• Seven-Day Minimum Posting Period for Exempt and Non-exempt Positions
• One Stop for Affirmative Action Approval
• Ability to Manage the Applicant Hiring Process Online
What’s Different for Applicants?
• Ability to Search for Jobs by Campus or
Institute, Geographic Region, Zip Code or Job Function
• Ability to Create Profile and Set Up Social Network Notifications
• Ability to Submit Resume to Partially Complete the Application
• Ability to Check their Application Status

Getting Started

Access IRIS
Choose IRIS Production
Enter Your IRIS User Name & Password

Access Position Create/ Change E-Form
Double Click
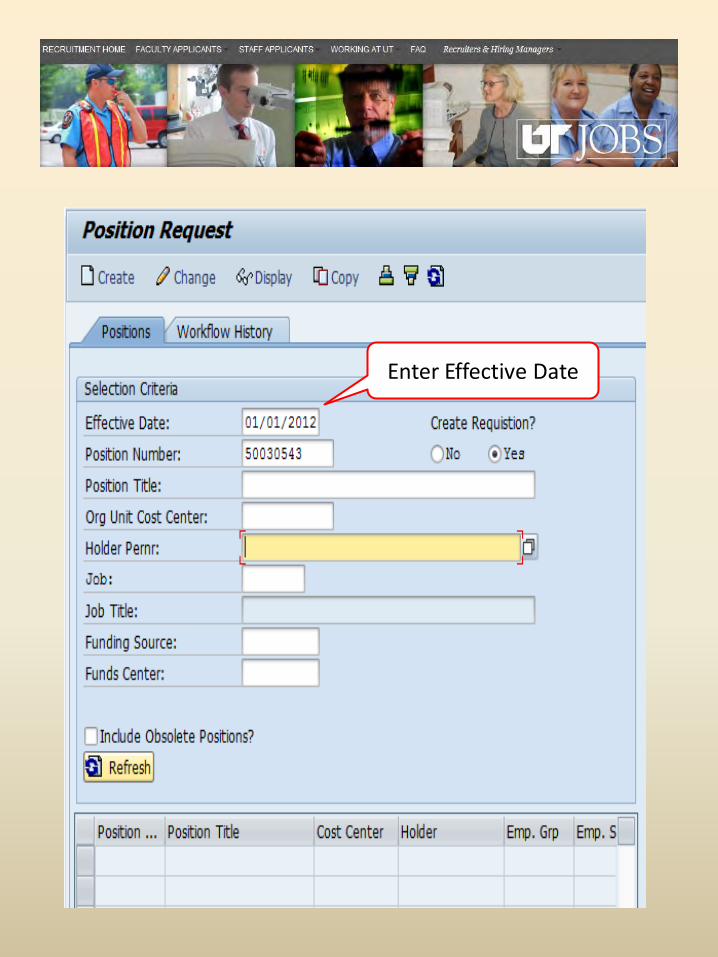
Enter Effective Date

If the position exists in IRIS, enter Position Number or Search by Other Available Fields
Note: If this is a new position there will be no position number.
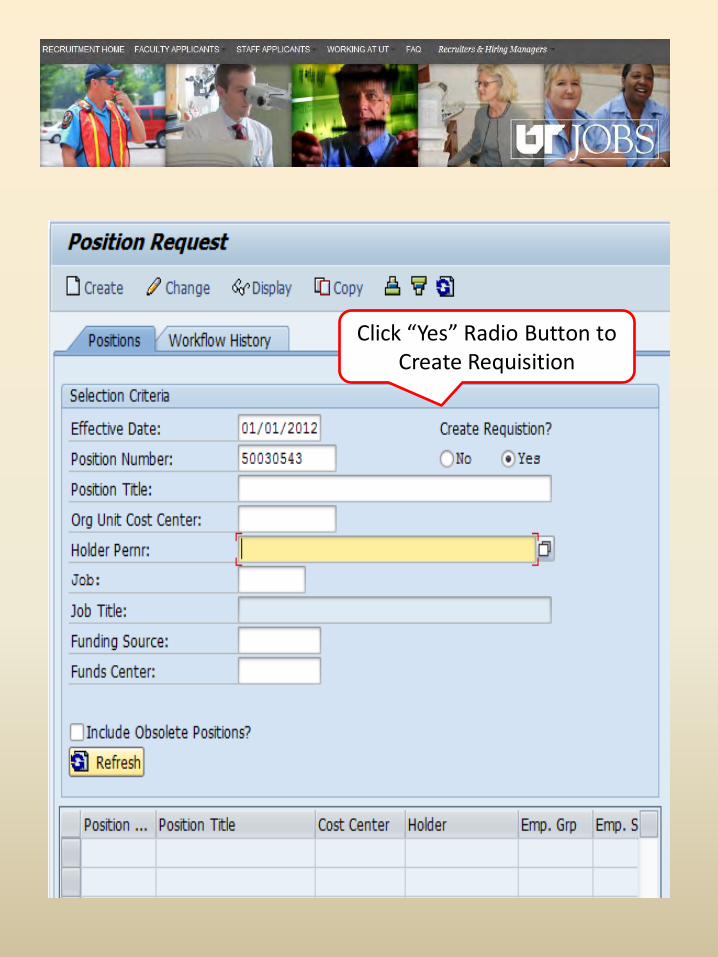
Click “Yes” Radio Button to Create Requisition
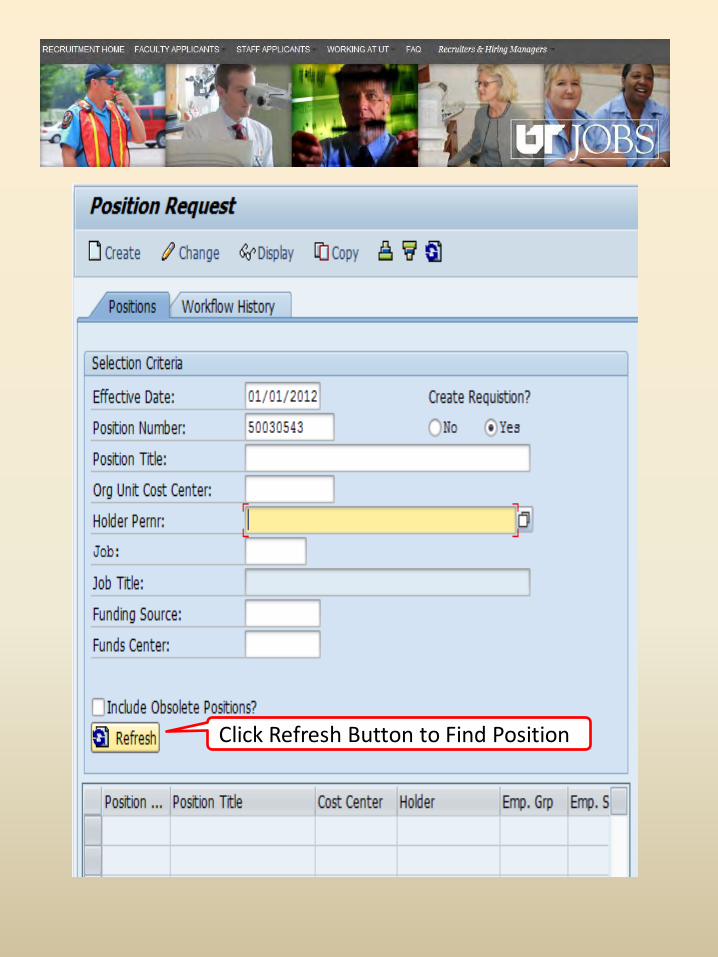
Click Refresh Button to Find Position
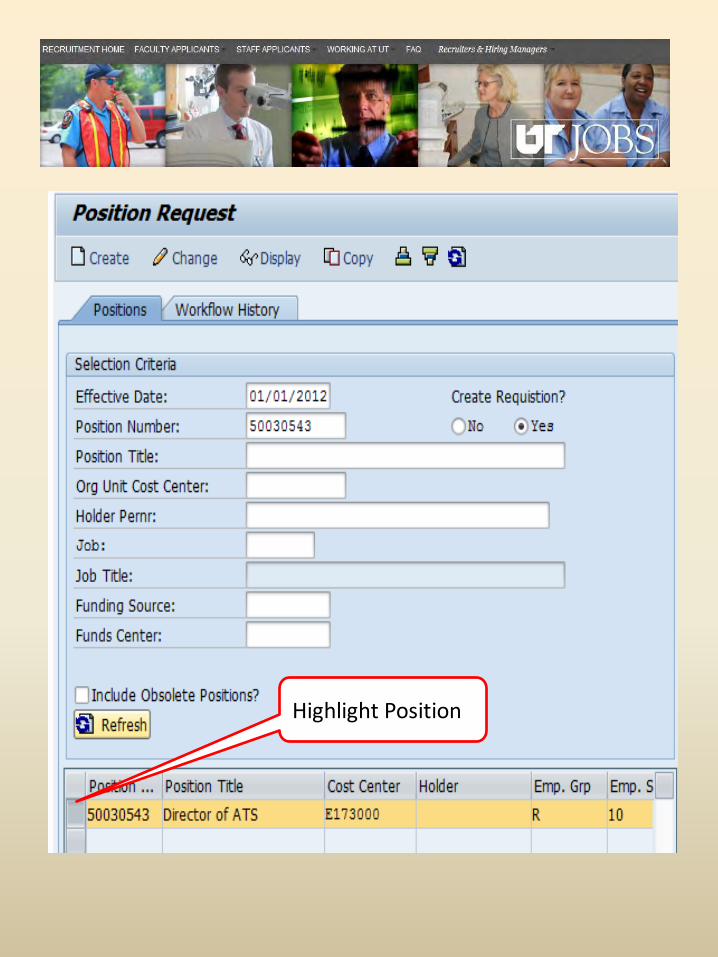
Highlight Position

Click Change
If you are requesting a new position, click Create instead of Change.
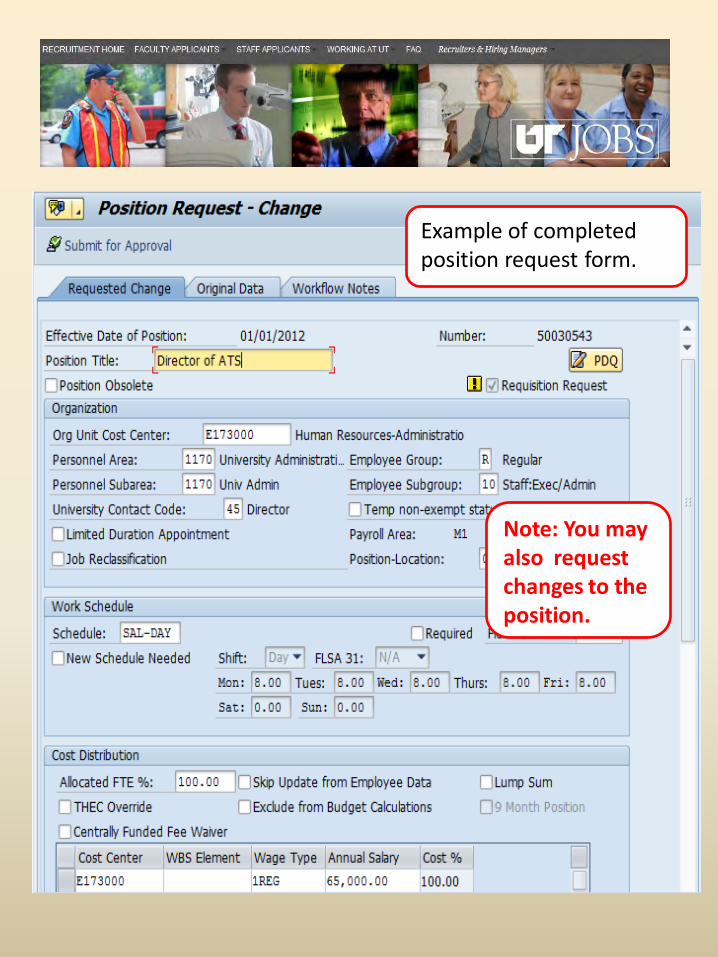
Example of completed position request form.
Note: You may also request changes to the position.

To attach job announcement, click the Services for Object Button

Click Create Store Business Document to begin.

Double-click to access directory where position announcement is stored.

Double-click file to transfer position announcement.
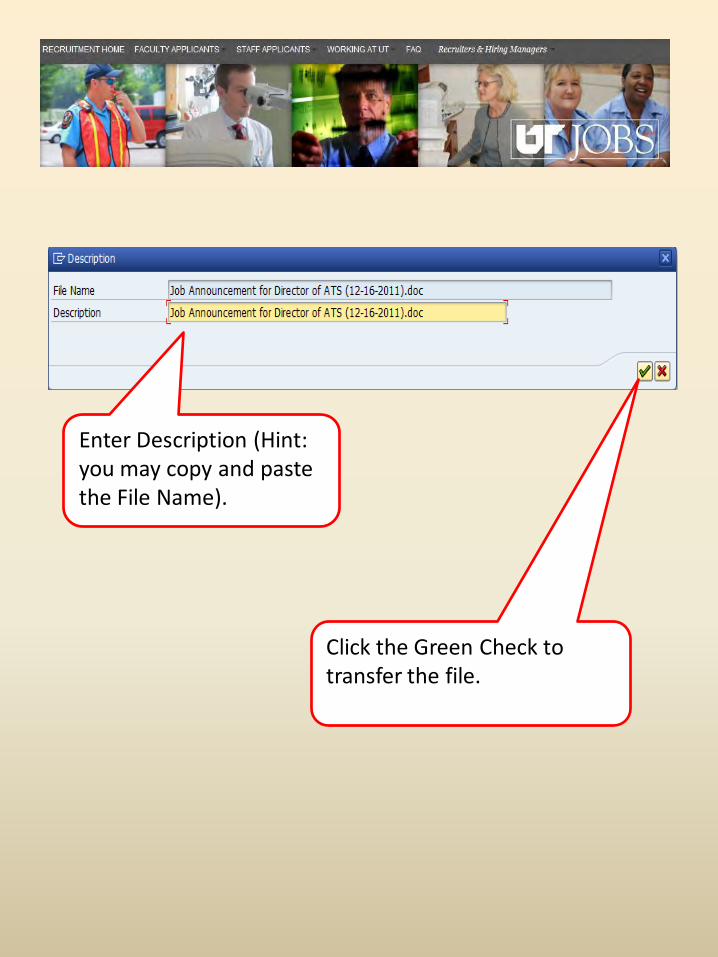
Enter Description (Hint: you may copy and paste the File Name).
Click the Green Check to transfer the file.
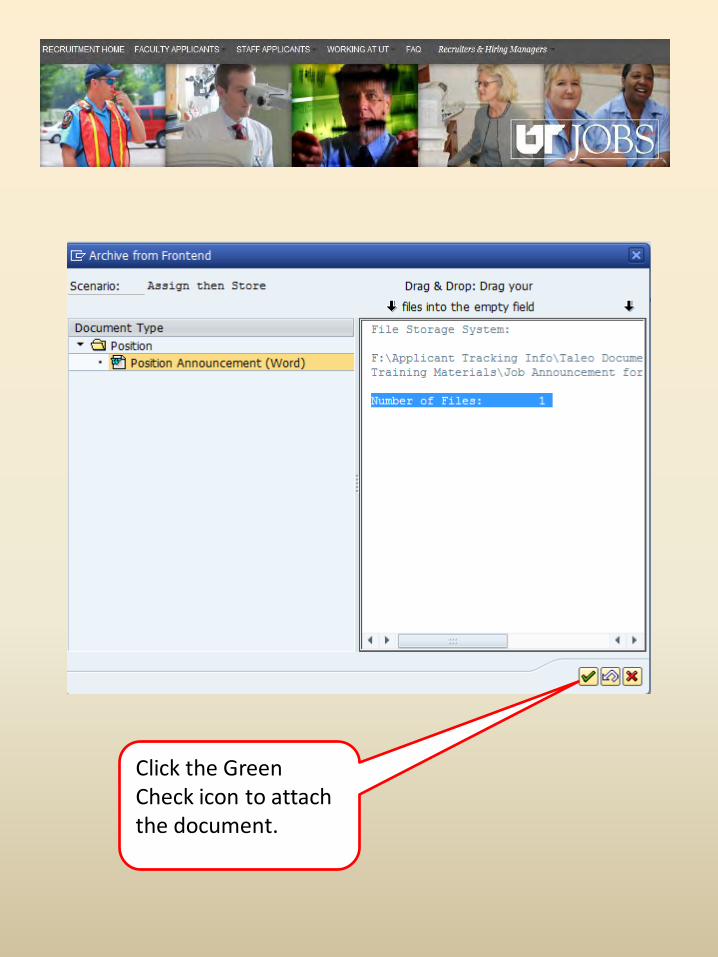
Click the Green Check icon to attach the document.
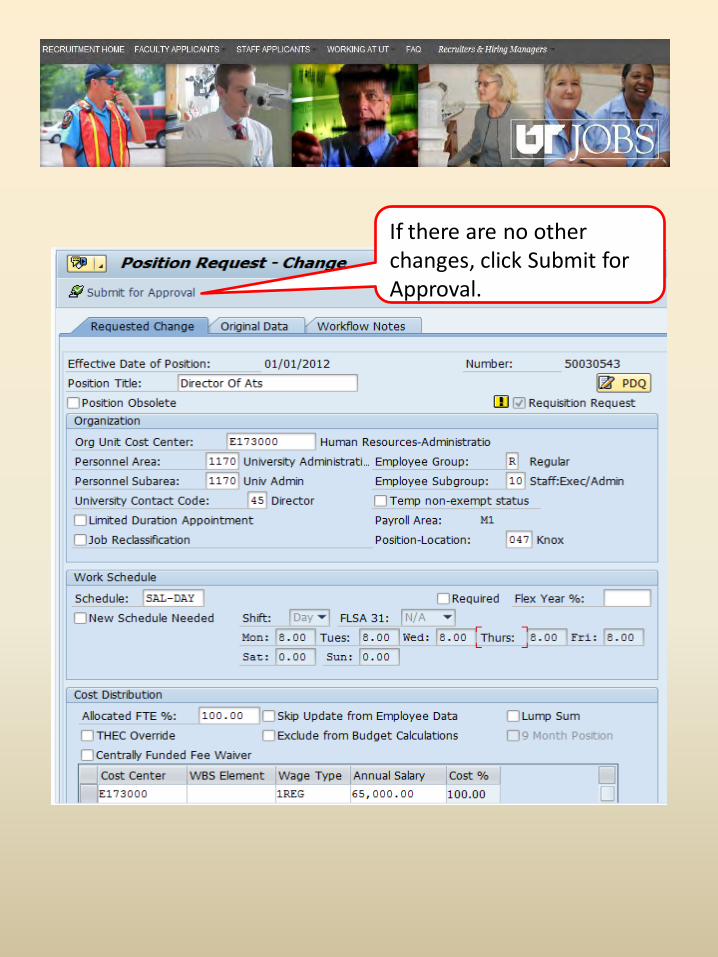
If there are no other changes, click Submit for Approval.

Viewing
Your
Requisition
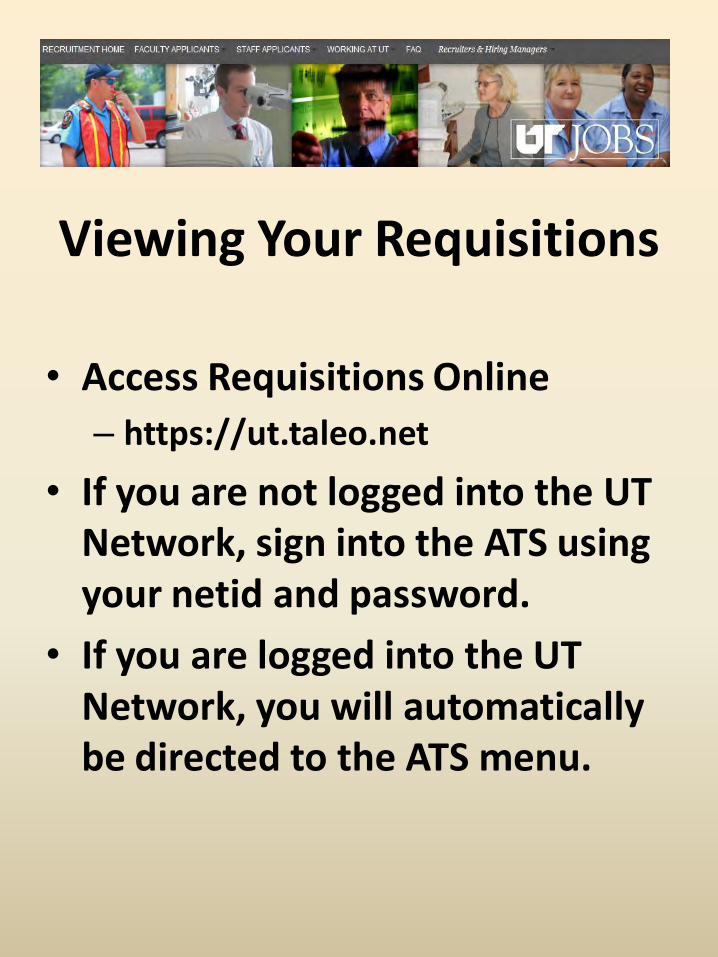
Viewing Your Requisitions
• Access Requisitions Online
– https://ut.taleo.net
• If you are not logged into the UT Network, sign into the ATS using your netid and password.
• If you are logged into the UT Network, you will automatically be directed to the ATS menu.
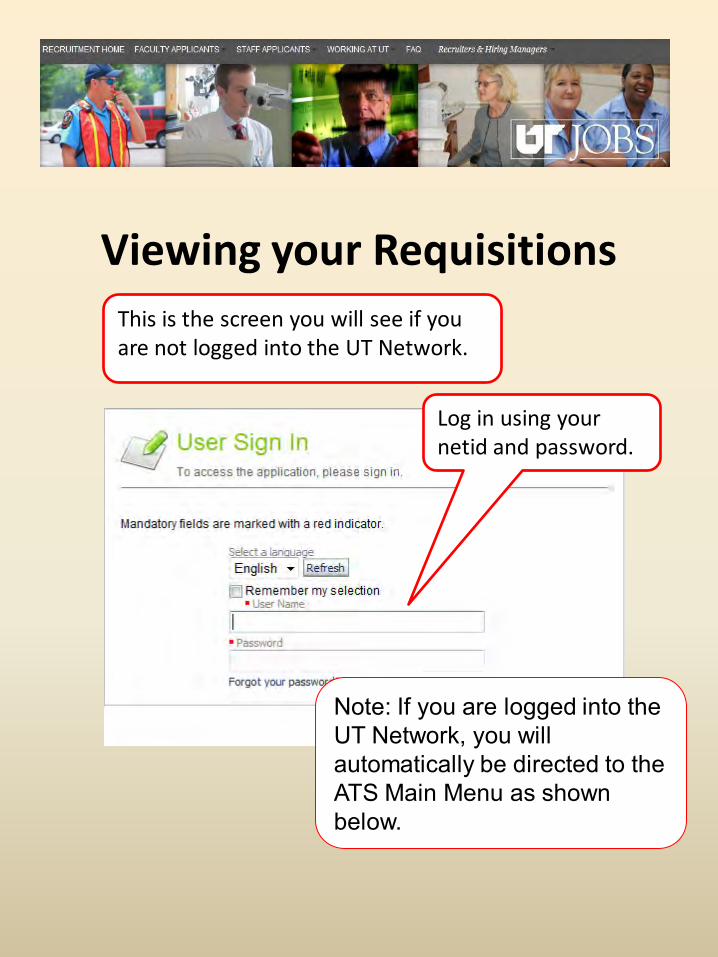
Viewing your Requisitions
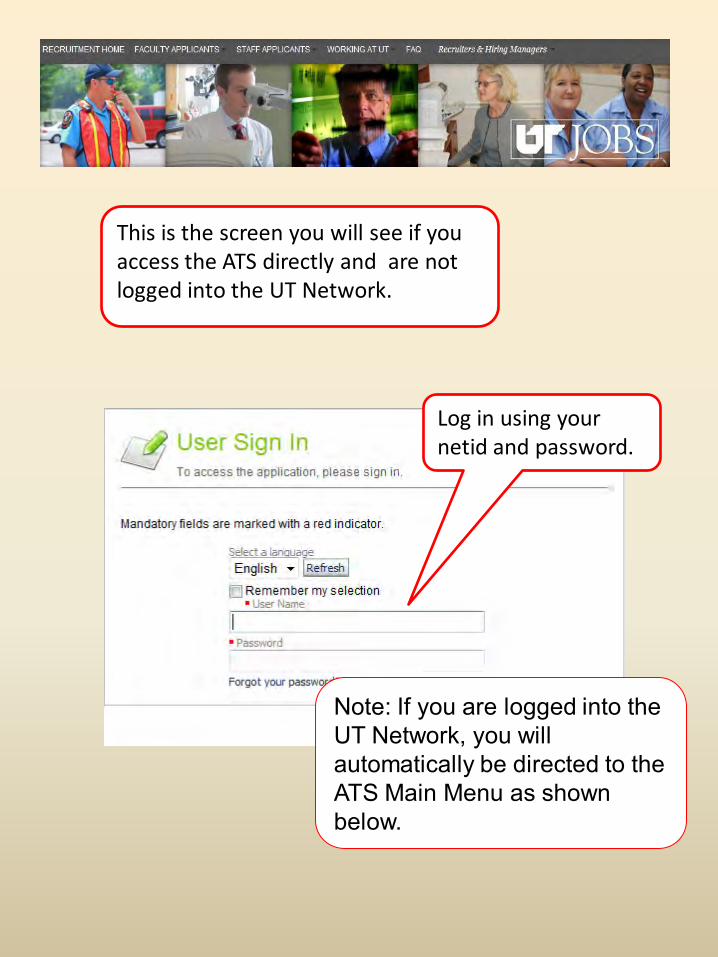
Log in using your netid and password.
Note: If you are logged into the UT Network, you will automatically be directed to the ATS Main Menu as shown below.
This is the screen you will see if you are not logged into the UT Network.
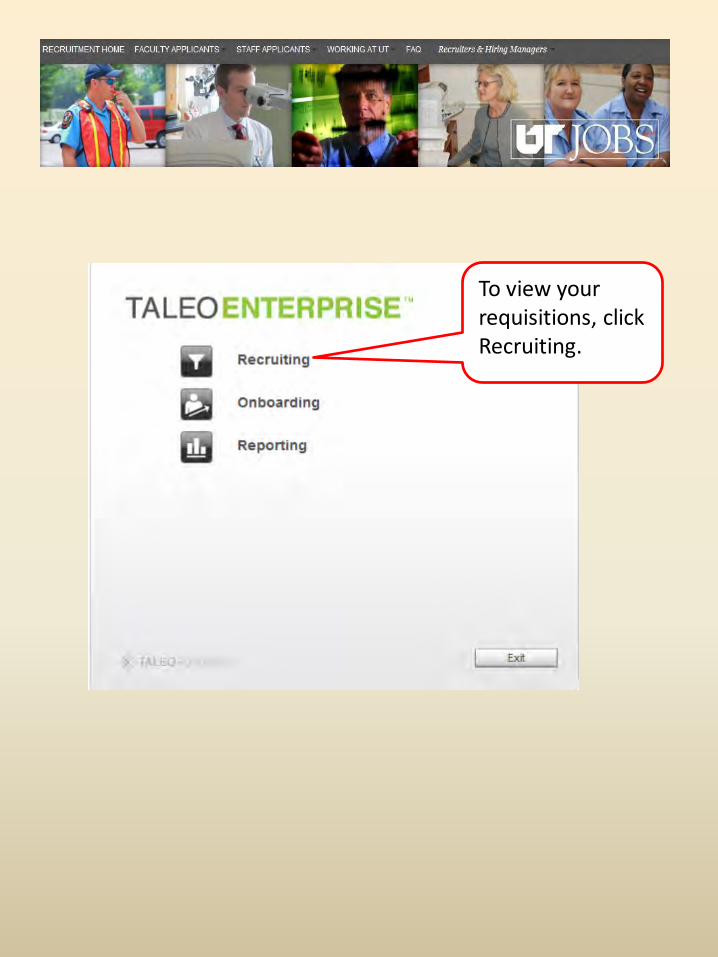
To view your requisitions, click Recruiting.

On the Main Menu, click View Requisitions to find detailed information about your job requisition.
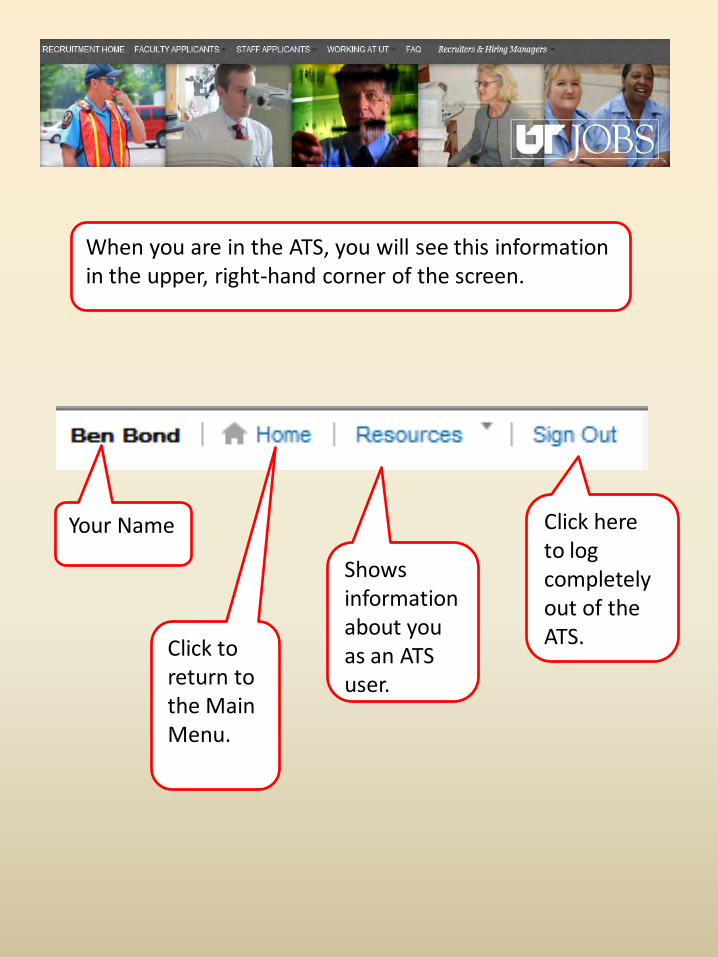
When you are in the ATS, you will see this information in the upper, right-hand corner of the screen.
Your Name
Click to return to the Main Menu.
Shows information about you as an ATS user.
Click here to log completely out of the ATS.
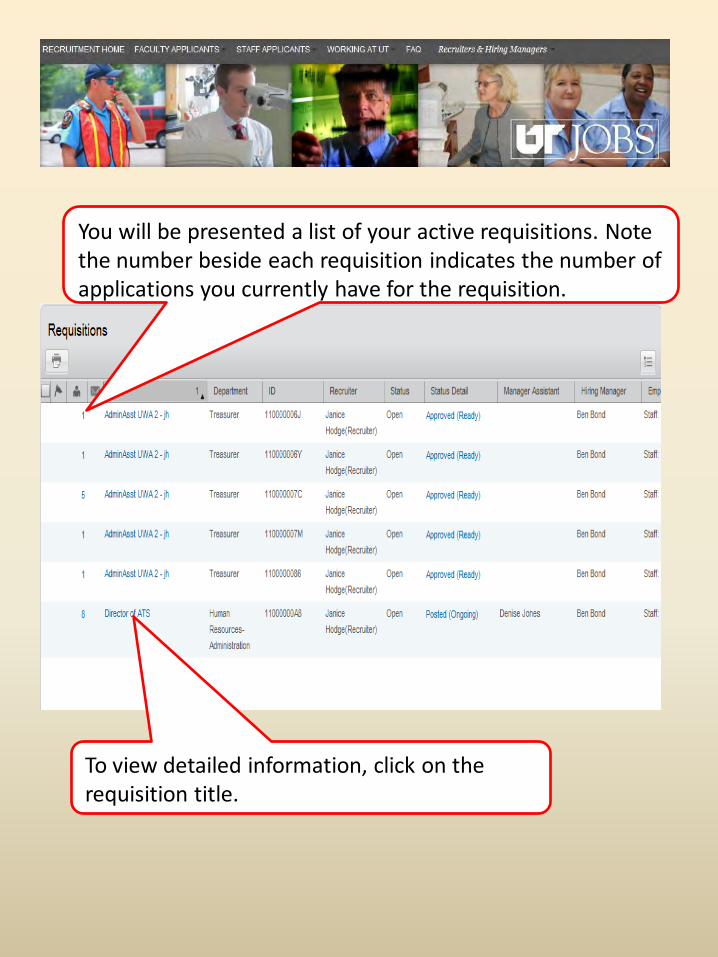
You will be presented a list of your active requisitions. Note the number beside each requisition indicates the number of applications you currently have for the requisition.
To view detailed information, click on the requisition title.
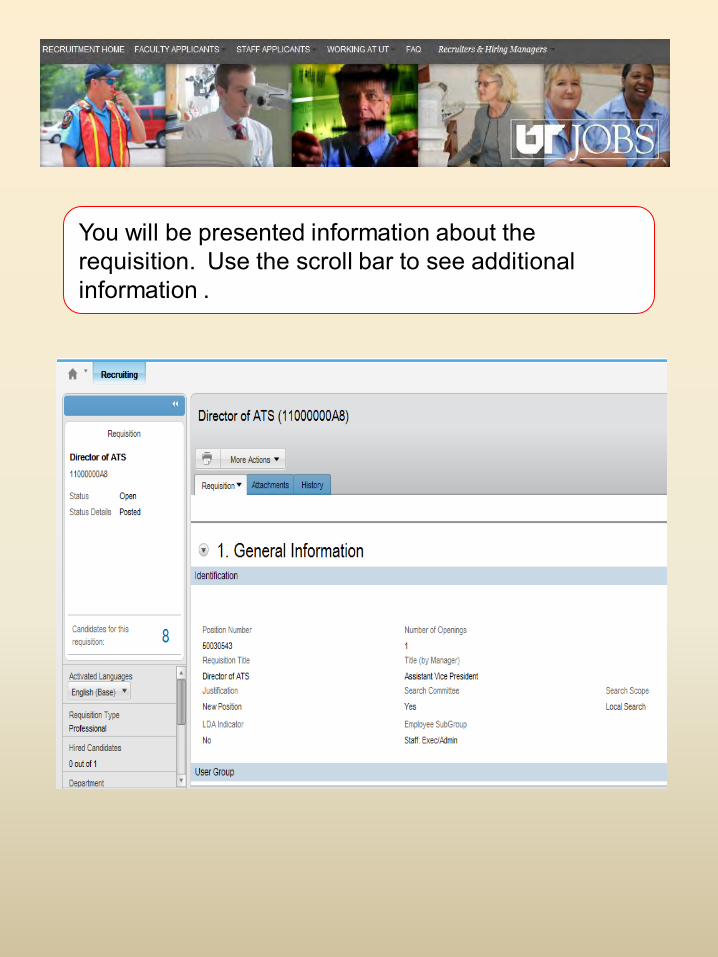
You will be presented information about the requisition. Use the scroll bar to see additional information .
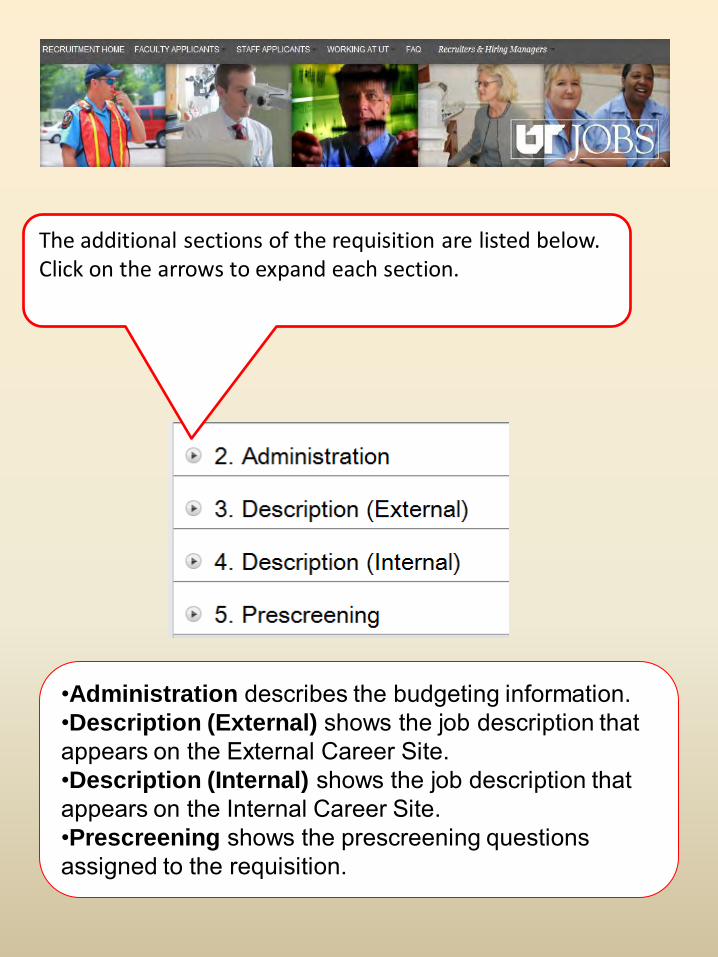
The additional sections of the requisition are listed below. Click on the arrows to expand each section.
•Administration describes the budgeting information. •Description (External) shows the job description that appears on the External Career Site. •Description (Internal) shows the job description that appears on the Internal Career Site. •Prescreening shows the prescreening questions assigned to the requisition.
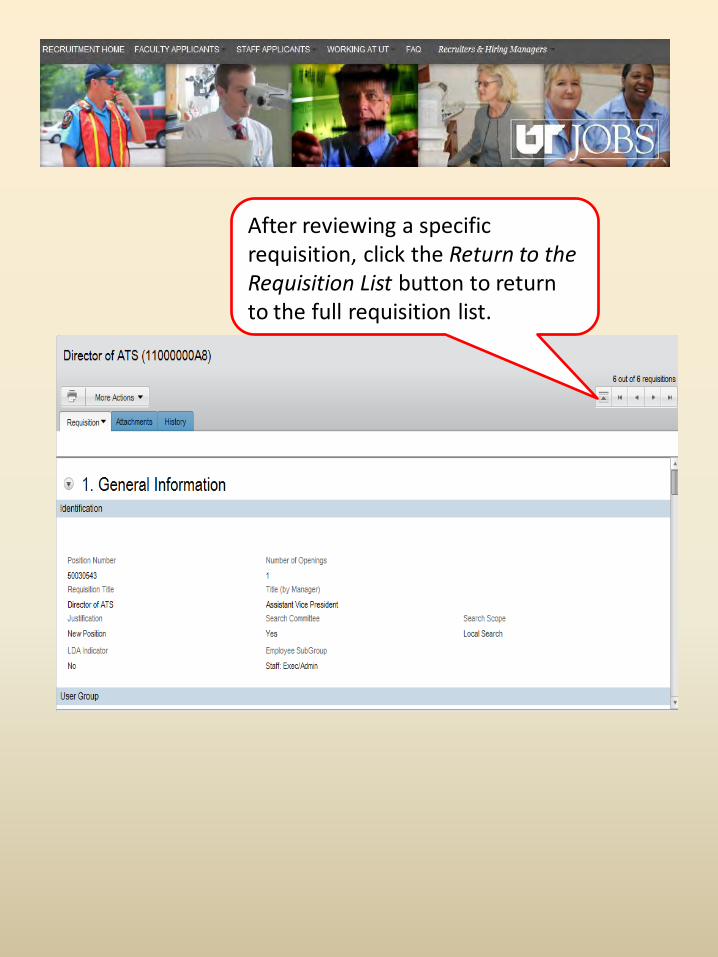
After reviewing a specific requisition, click the Return to the Requisition List button to return to the full requisition list.
Viewing Applications
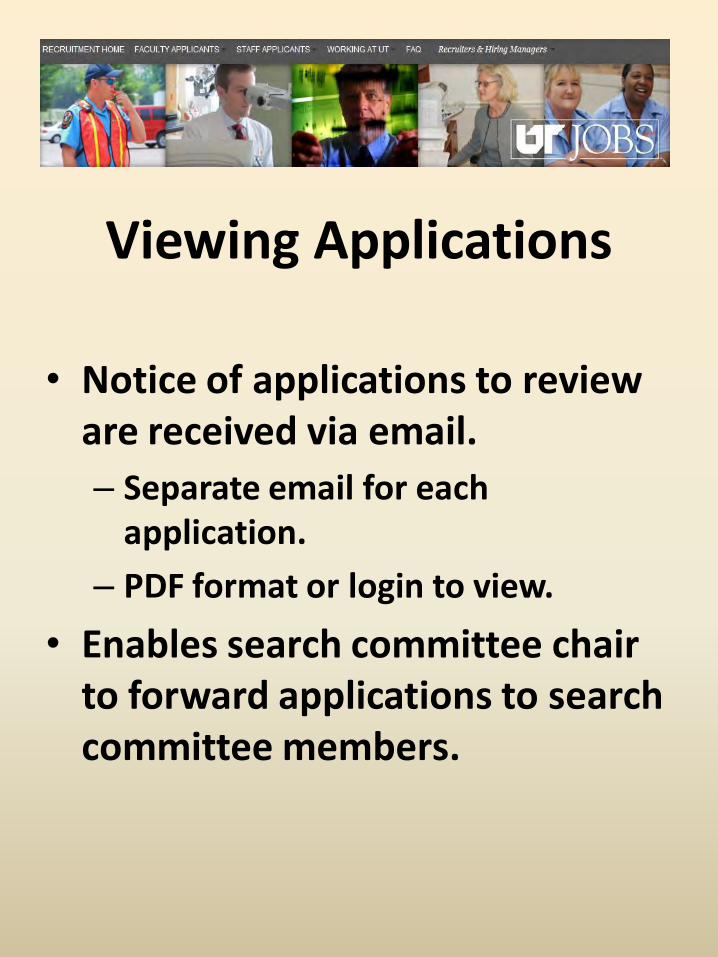
Viewing Applications
• Notice of applications to review are received via email.
– Separate email for each application.
– PDF format or login to view.
• Enables search committee chair to forward applications to search committee members.
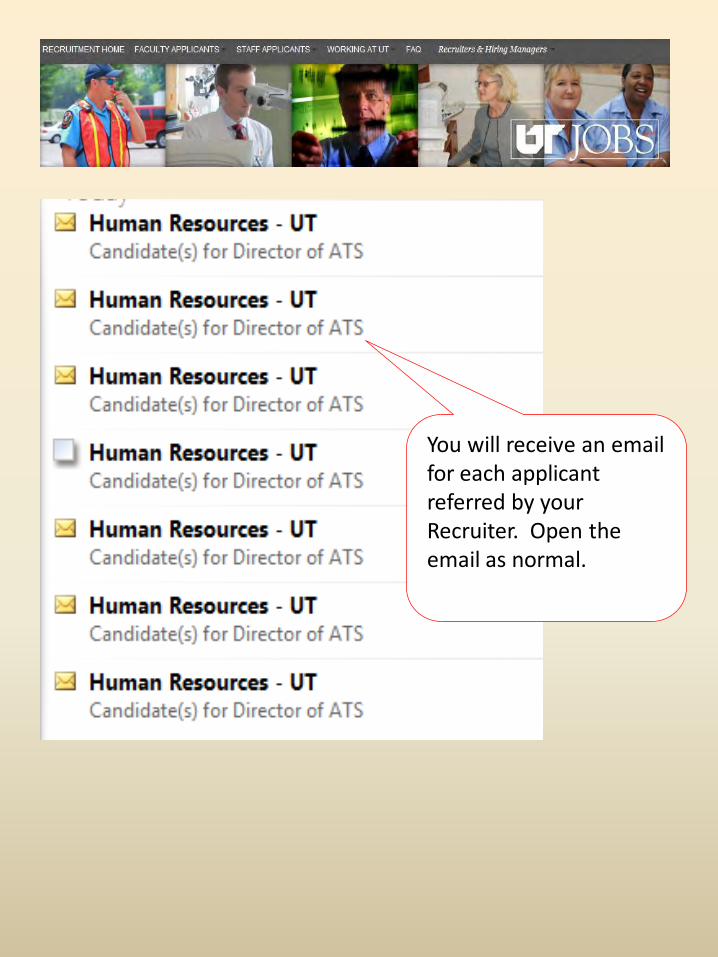
You will receive an email for each applicant referred by your Recruiter. Open the email as normal.
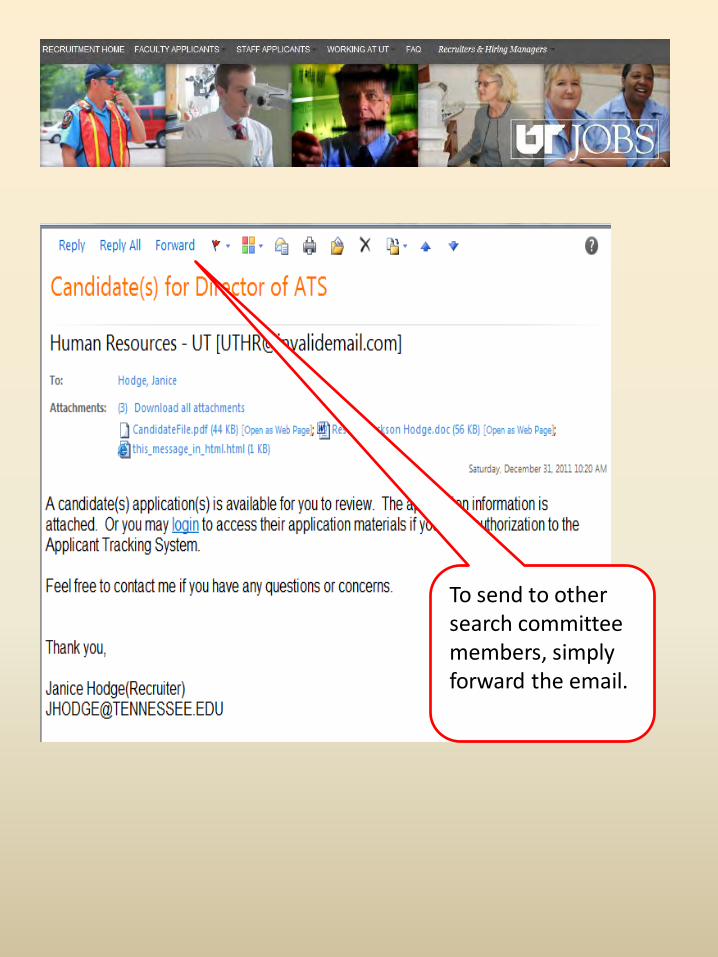
To send to other search committee members, simply forward the email.
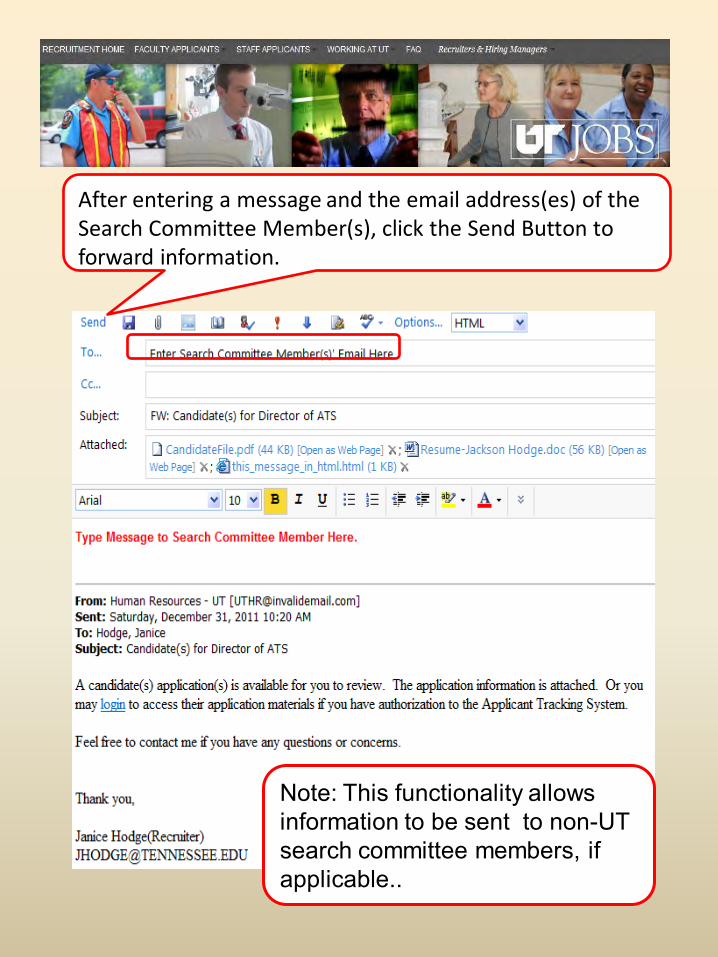
After entering a message and the email address(es) of the Search Committee Member(s), click the Send Button to forward information.
Note: This functionality allows information to be sent to non-UT search committee members, if applicable..
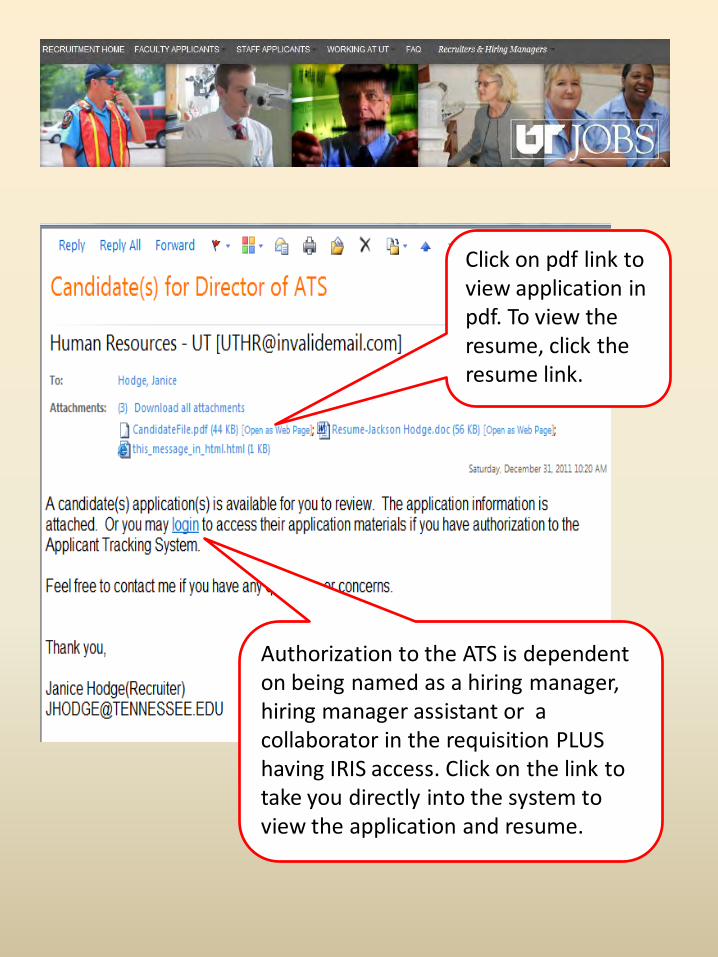
Click on pdf link to view application in pdf. To view the resume, click the resume link.
Authorization to the ATS is dependent on being named as a hiring manager, hiring manager assistant or a collaborator in the requisition PLUS having IRIS access. Click on the link to take you directly into the system to view the application and resume.
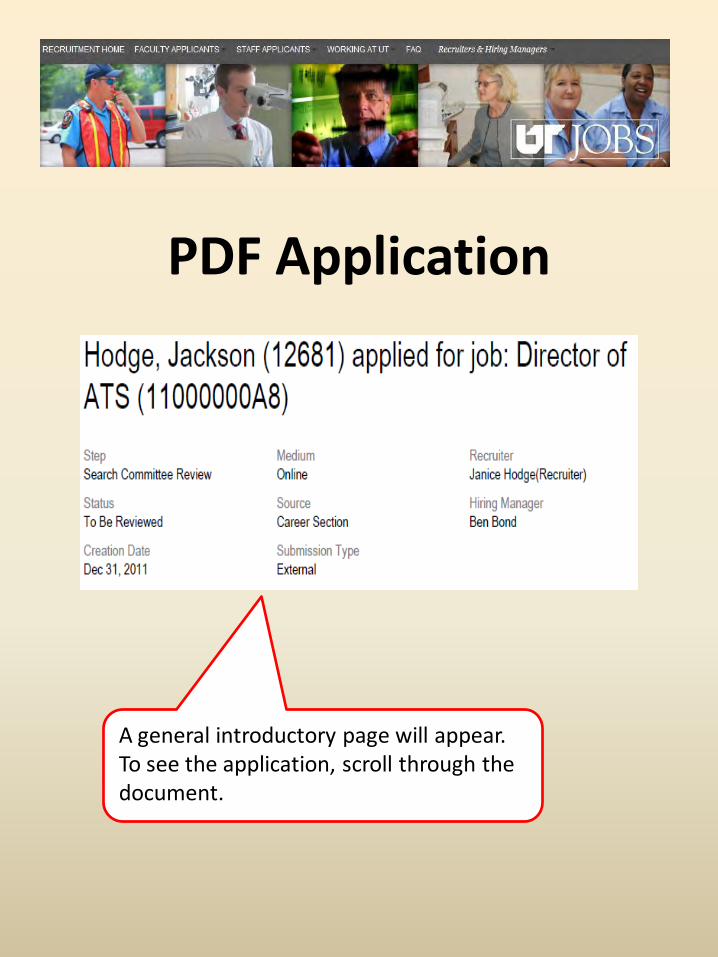
PDF Application
A general introductory page will appear. To see the application, scroll through the document.
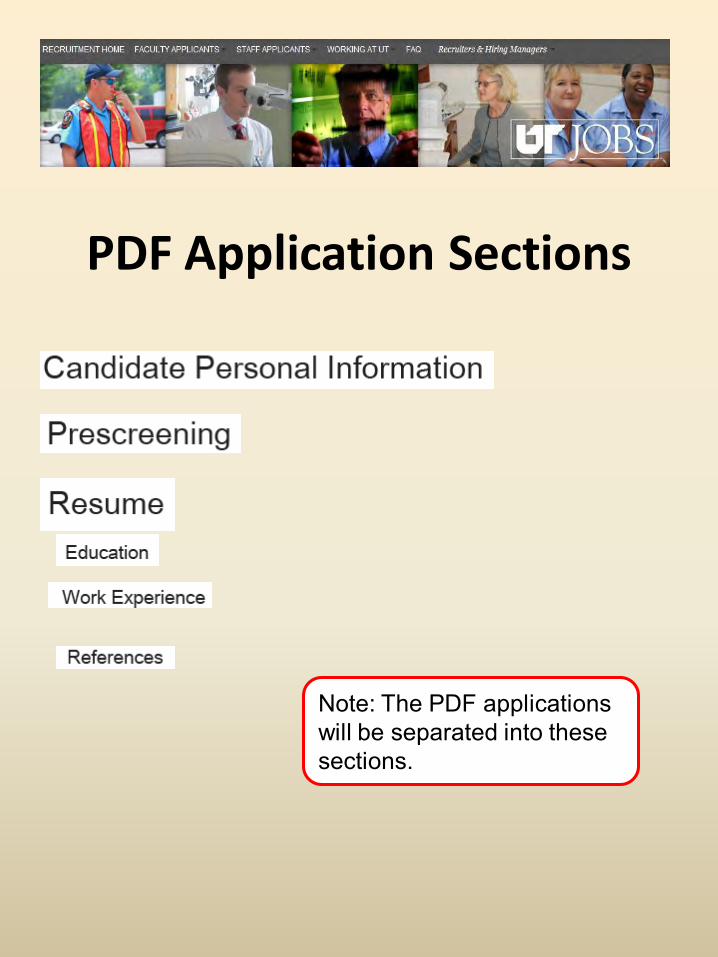
PDF Application Sections
Note: The PDF applications will be separated into these sections.

Log in using your netid and password.
Note: If you are logged into the UT Network, you will automatically be directed to the ATS Main Menu as shown below.
This is the screen you will see if you click the login link in the email and are not logged into the UT Network.
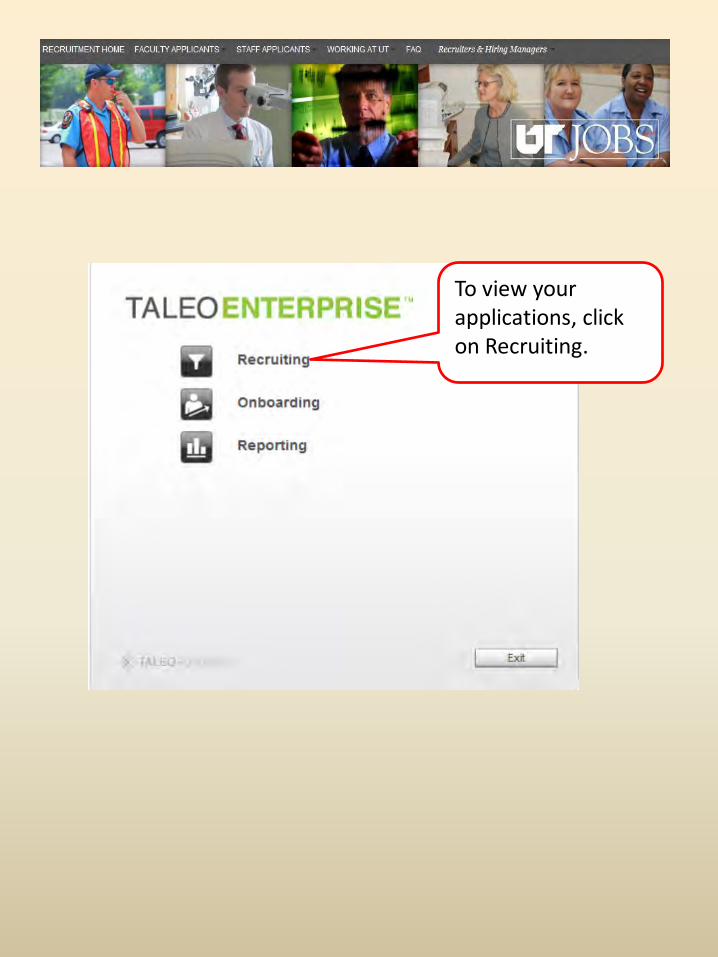
To view your applications, click on Recruiting.
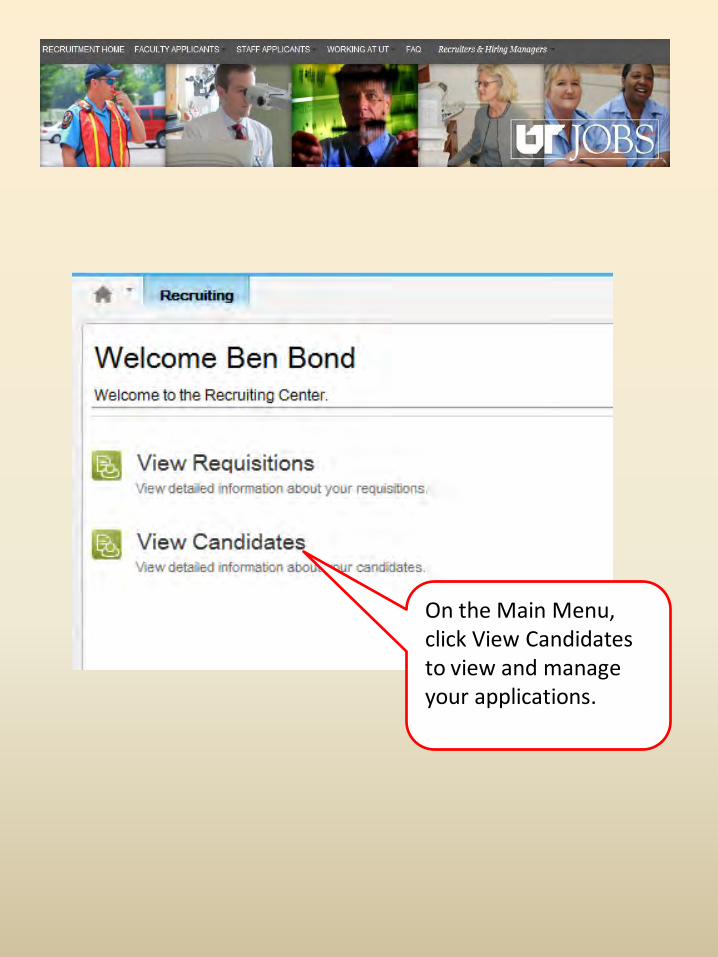
On the Main Menu, click View Candidates to view and manage your applications.
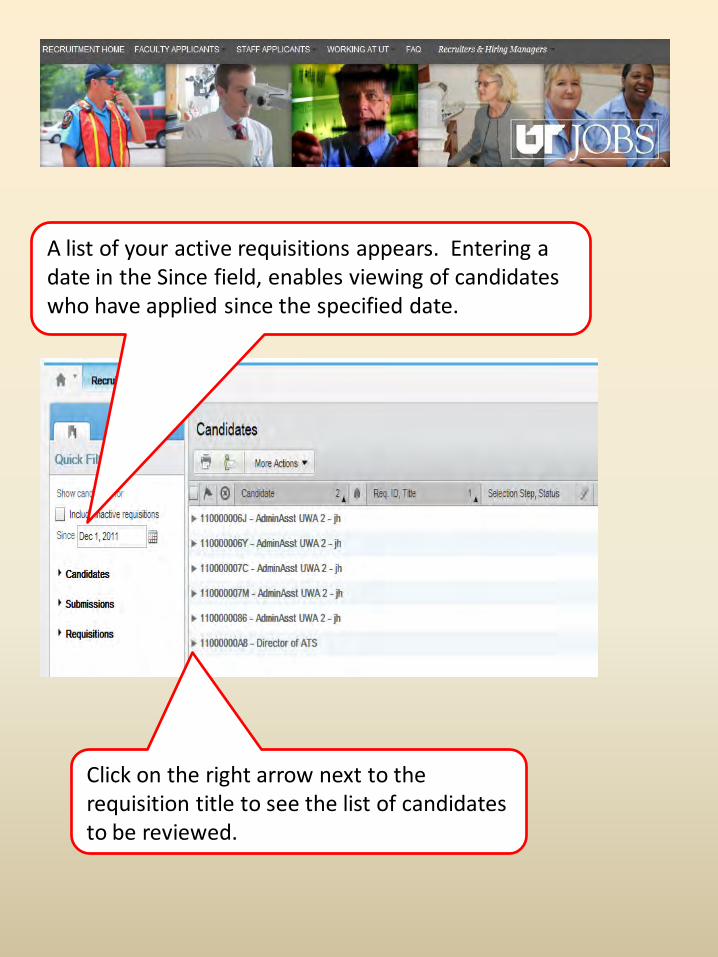
A list of your active requisitions appears. Entering a date in the Since field, enables viewing of candidates who have applied since the specified date.
Click on the right arrow next to the requisition title to see the list of candidates to be reviewed.

HINT: To filter your requisition list to show the requisition with which you want to work, click on Requisitions and scroll to the Requisition ID field. Enter the Requisition ID and click the refresh button ( ).
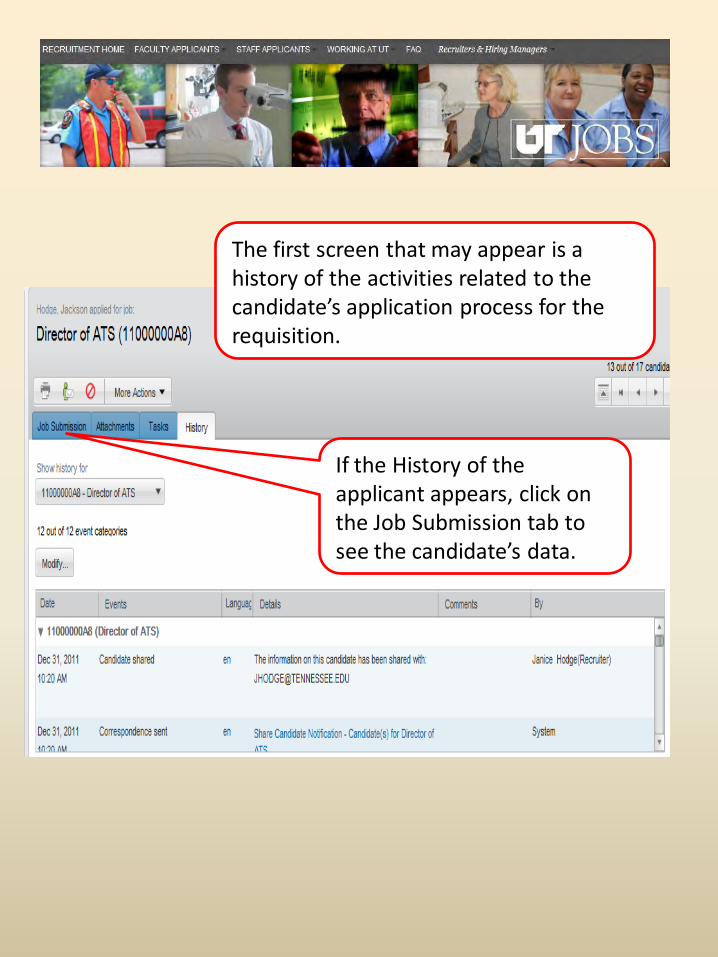
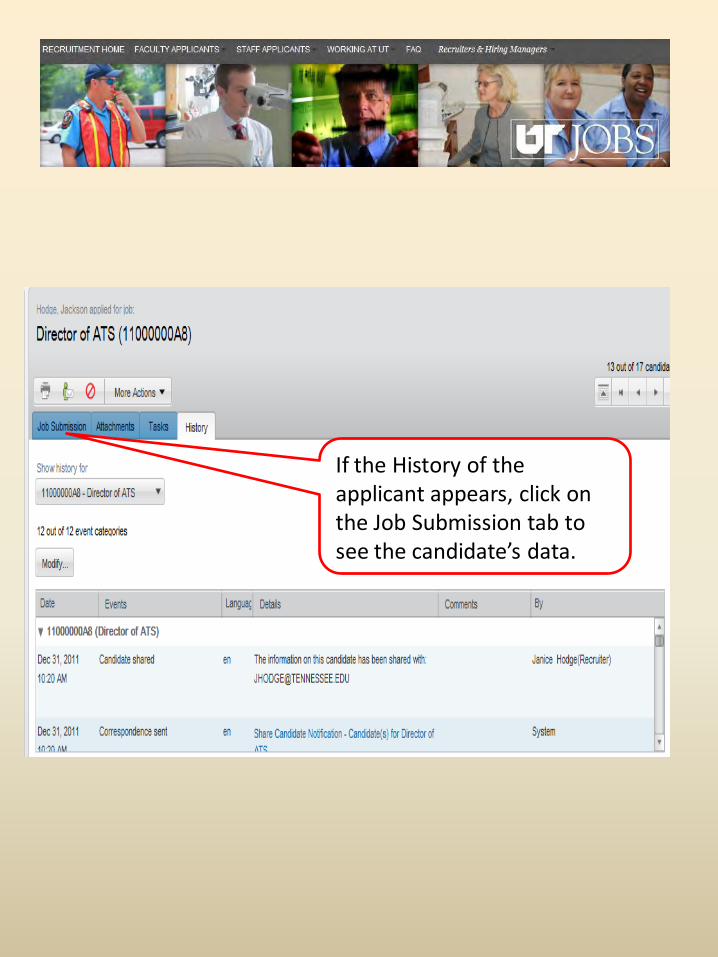
If the History of the applicant appears, click on the Job Submission tab to see the candidate’s data.
The first screen that may appear is a history of the activities related to the candidate’s application process for the requisition.
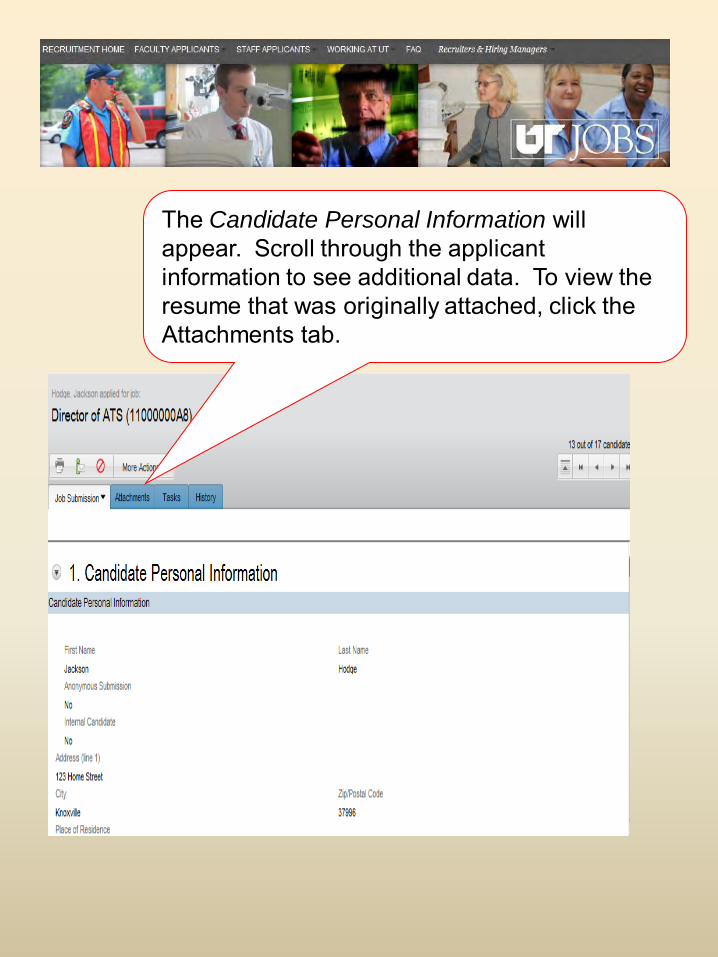
The Candidate Personal Information will appear. Scroll through the applicant information to see additional data. To view the resume that was originally attached, click the Attachments tab.
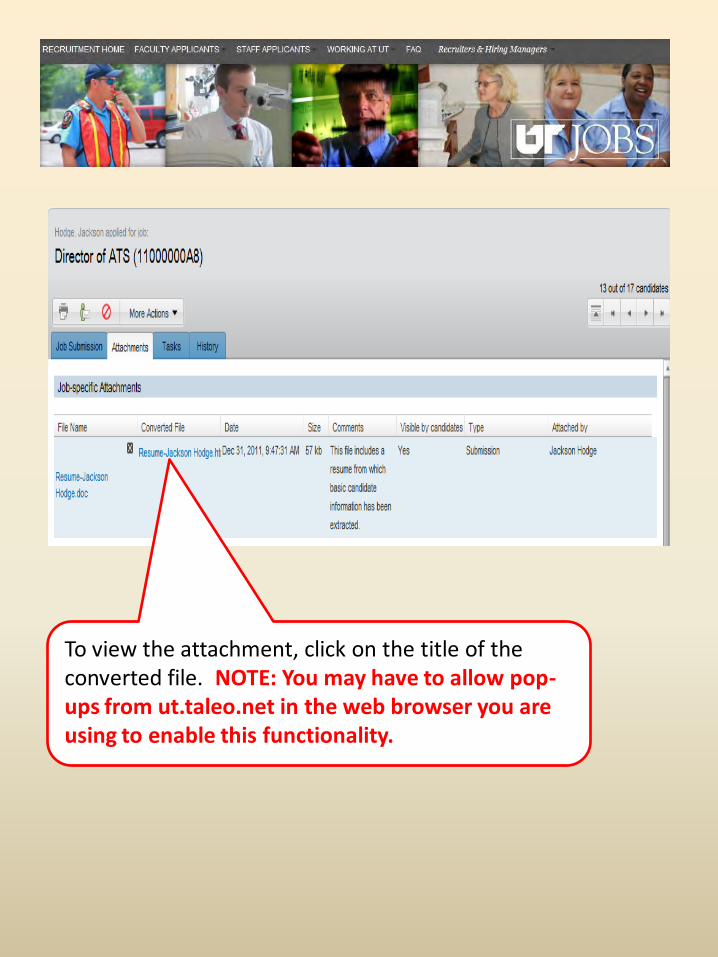
To view the attachment, click on the title of the converted file. NOTE: You may have to allow pop-ups from ut.taleo.net in the web browser you are using to enable this functionality.
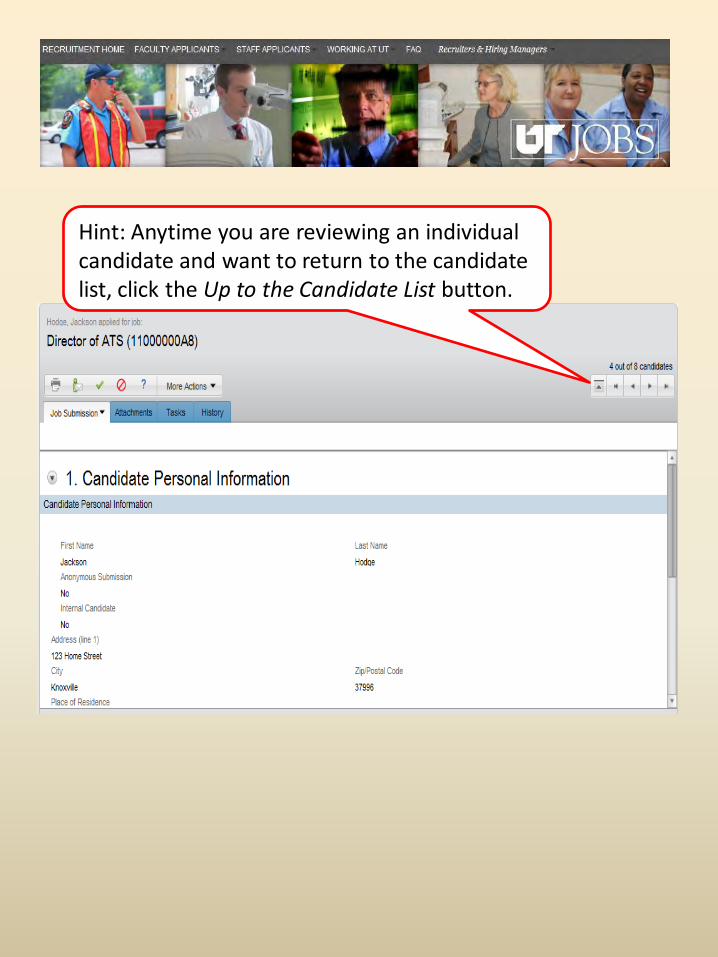
Hint: Anytime you are reviewing an individual candidate and want to return to the candidate list, click the Up to the Candidate List button.

Managing Candidates

Managing Candidates • Each candidate goes through a series
of steps and statuses during the hiring process.
• An important step in the Exempt Hiring process is the approval by your affirmative action/equity and diversity office of the primary and secondary interview pools…this MUST be completed before interviews are scheduled.

Managing your Candidates
• As a hiring manager or assistant, you will be moving your candidates through a series of steps and statuses.
• The following example shows the steps necessary to reject a candidate.
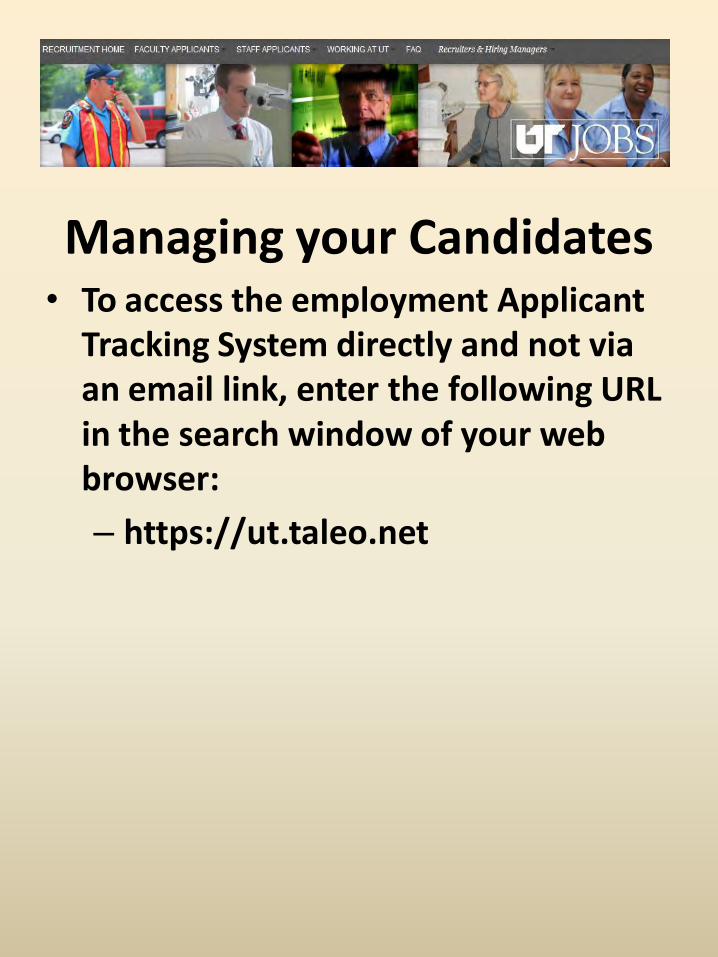
Managing your Candidates • To access the employment Applicant
Tracking System directly and not via an email link, enter the following URL in the search window of your web browser:
– https://ut.taleo.net

Log in using your netid and password.
Note: If you are logged into the UT Network, you will automatically be directed to the ATS Main Menu as shown below.
This is the screen you will see if you access the ATS directly and are not logged into the UT Network.

To view your candidates, click on Recruiting.

On the Main Menu, click View Candidates to view and manage your applications.

A list of your active requisitions appears. By entering a date in the Since field, you can review only candidates who have applied since a certain date.
Click on the right arrow next to the requisition title to see the list of candidates to be reviewed.

HINT: To filter your requisition list to show the requisition with which you want to work, click on Requisitions and scroll to the Requisition ID field. Enter the Requisition ID and click the refresh button ( ).
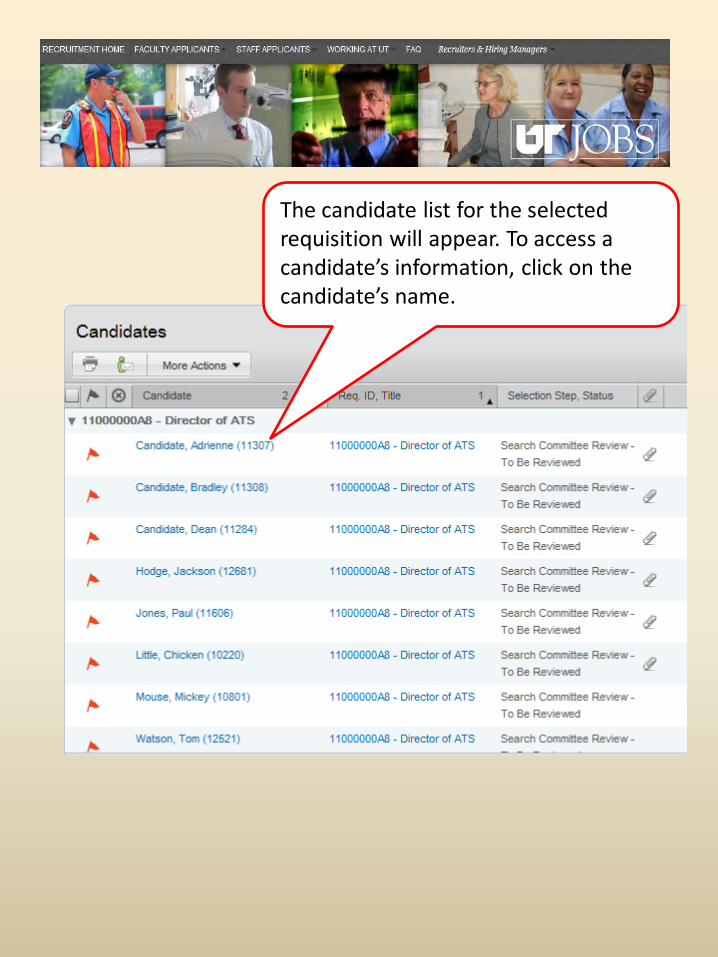
The candidate list for the selected requisition will appear. To access a candidate’s information, click on the candidate’s name.
If the History of the applicant appears, click on the Job Submission tab to see the candidate’s data.
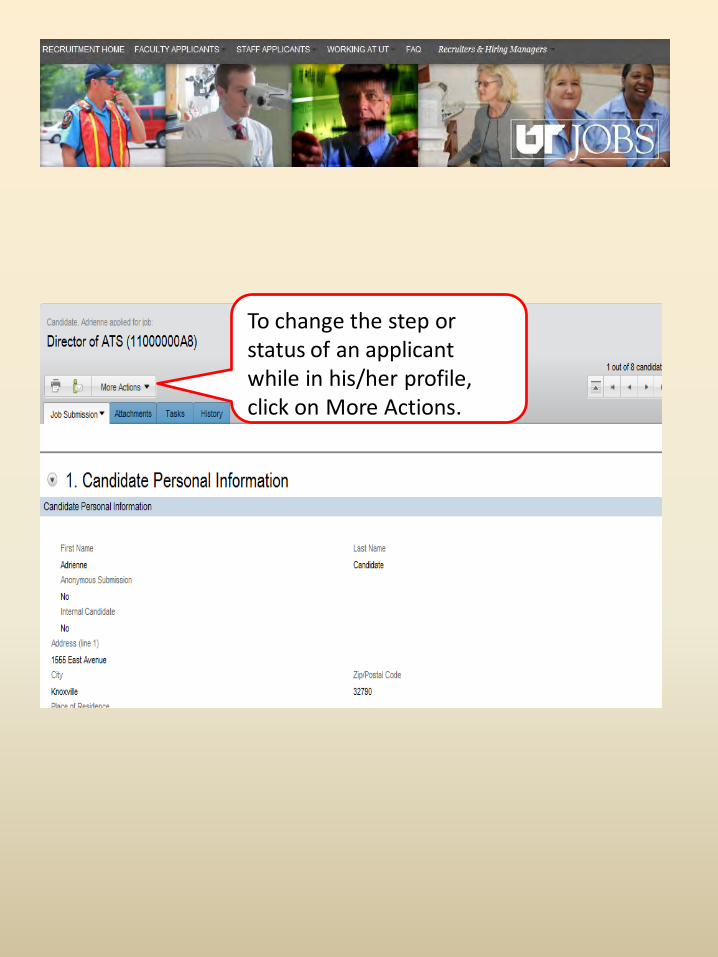
To change the step or status of an applicant while in his/her profile, click on More Actions.
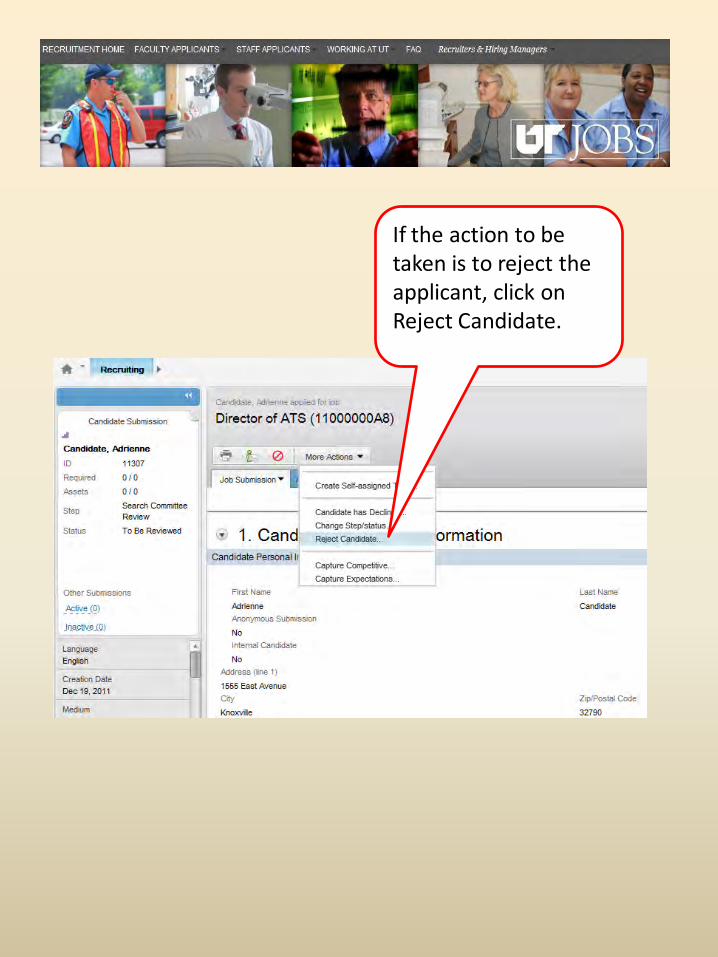
If the action to be taken is to reject the applicant, click on Reject Candidate.
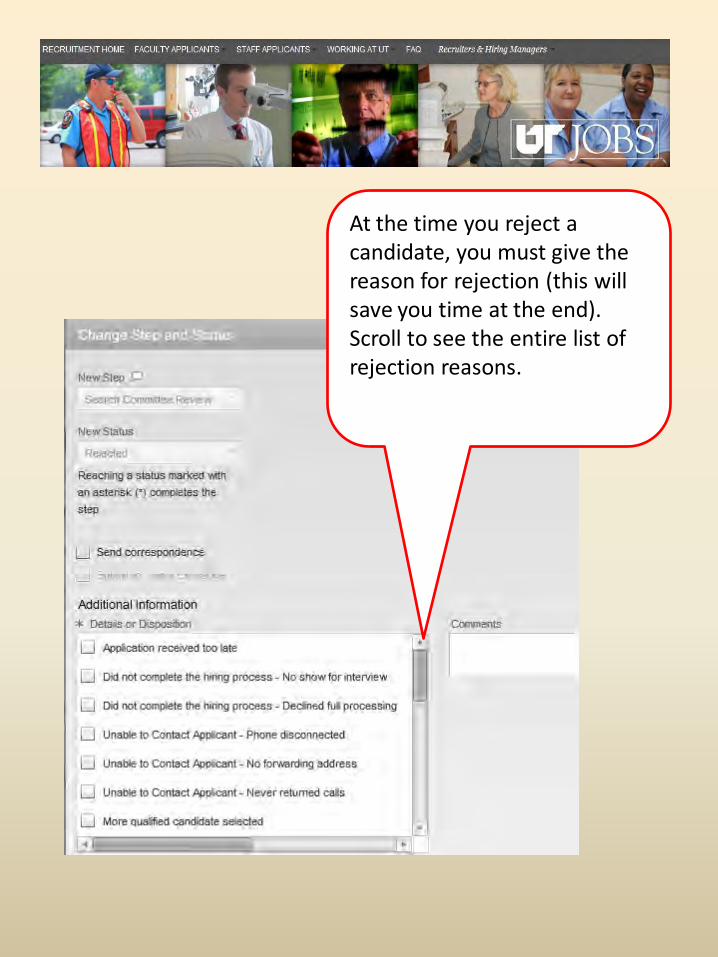
At the time you reject a candidate, you must give the reason for rejection (this will save you time at the end). Scroll to see the entire list of rejection reasons.

Check the appropriate reason for rejecting applicant.
Click Save and Close.
HINT: You may reject multiple applicants at the same time ONLY if the reject reason is the same for all selected applicants.
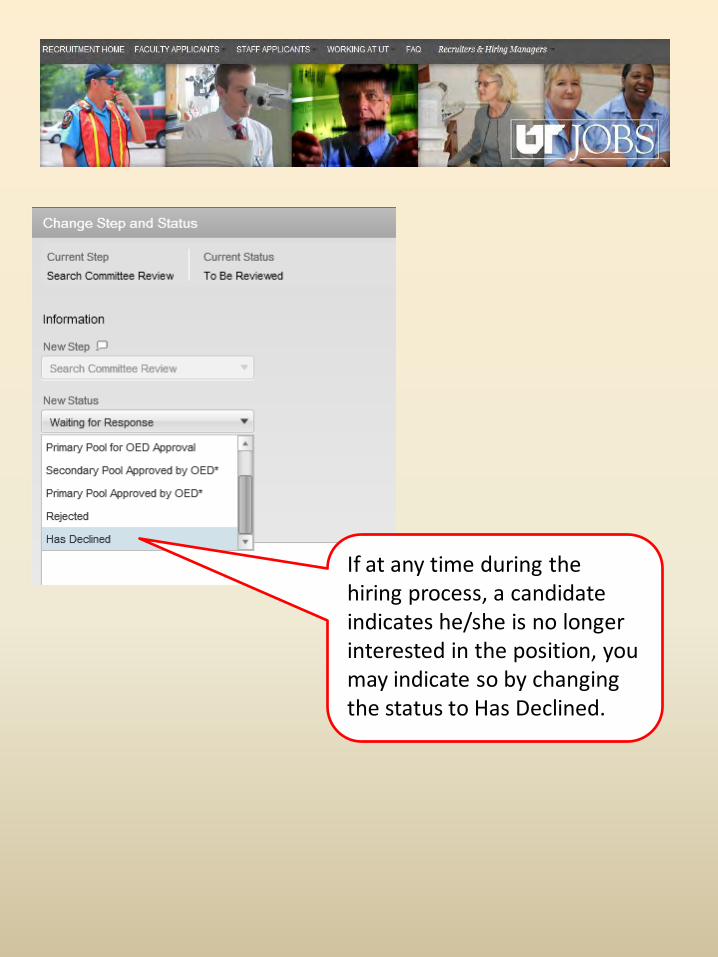
If at any time during the hiring process, a candidate indicates he/she is no longer interested in the position, you may indicate so by changing the status to Has Declined.
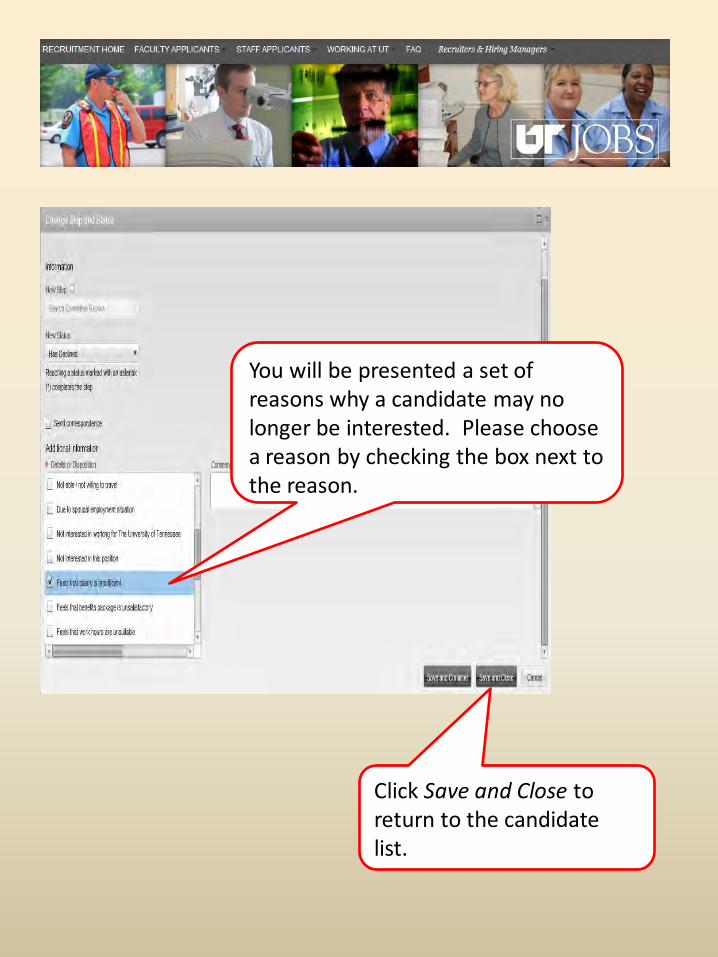
You will be presented a set of reasons why a candidate may no longer be interested. Please choose a reason by checking the box next to the reason.
Click Save and Close to return to the candidate list.

Affirmative Action/Equity and Diversity
Approval
• You may change the step or status of multiple applicants at the same time ONLY if all selected applicants are moving to the same step/status.
• As an example of changing multiple applicants at the same time, this demo will show the process for identifying the primary and alternate interview pools for affirmative action/equity and diversity approval.
Affirmative Action/
Equity and Diversity Approval
• To access the employment Applicant Tracking System directly and not via an email link, enter the following URL in the search window of your web browser:
– https://ut.taleo.net
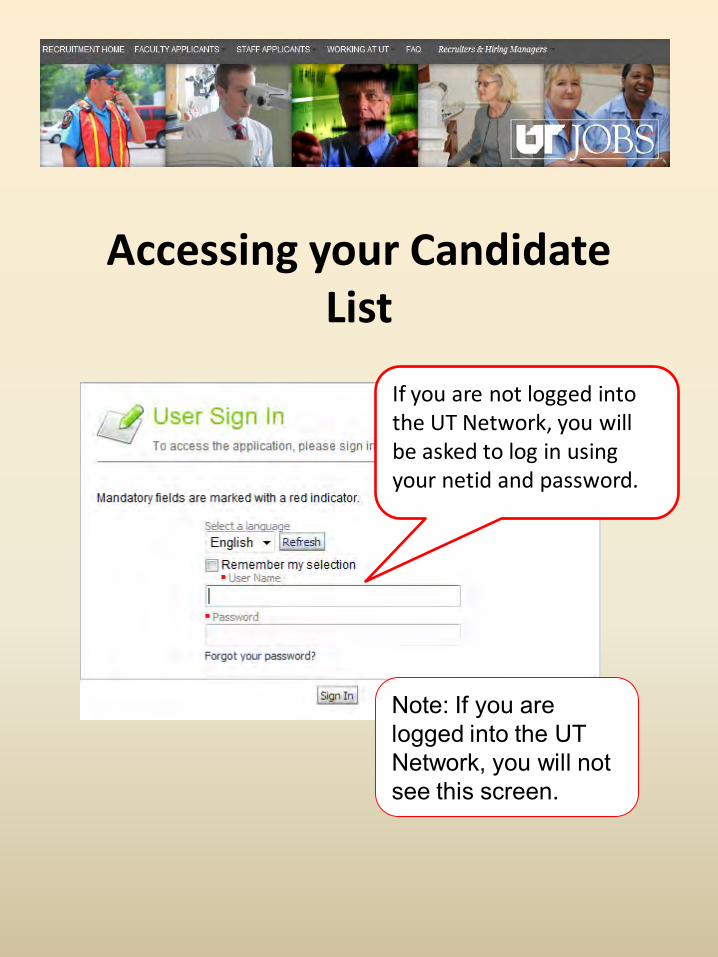
Accessing your Candidate List
If you are not logged into the UT Network, you will be asked to log in using your netid and password.
Note: If you are logged into the UT Network, you will not see this screen.
Log in using your netid and password.
Note: If you are logged into the UT Network, you will automatically be directed to the ATS Main Menu as shown below.
This is the screen you will see if you access the ATS directly and are not logged into the UT Network.

To view your candidates, click on Recruiting.

On the Main Menu, click View Candidates to view and manage the candidates for your requisition.
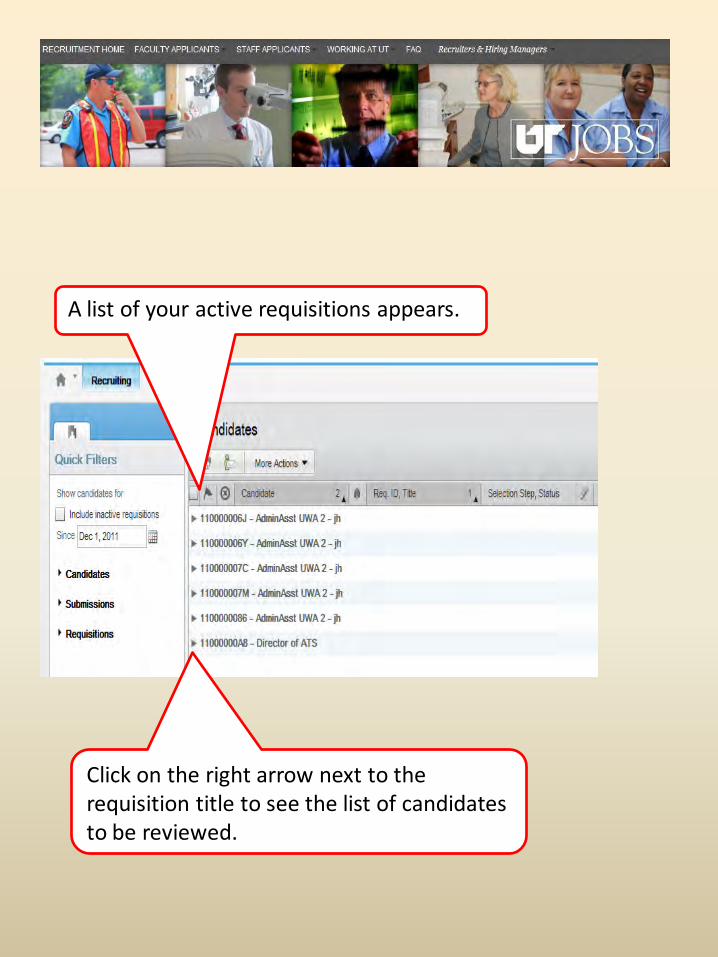
A list of your active requisitions appears.
Click on the right arrow next to the requisition title to see the list of candidates to be reviewed.

HINT: To filter your requisition list to show the requisition with which you want to work, click on Requisitions and scroll to the Requisition ID field. Enter the Requisition ID and click the refresh button ( ).
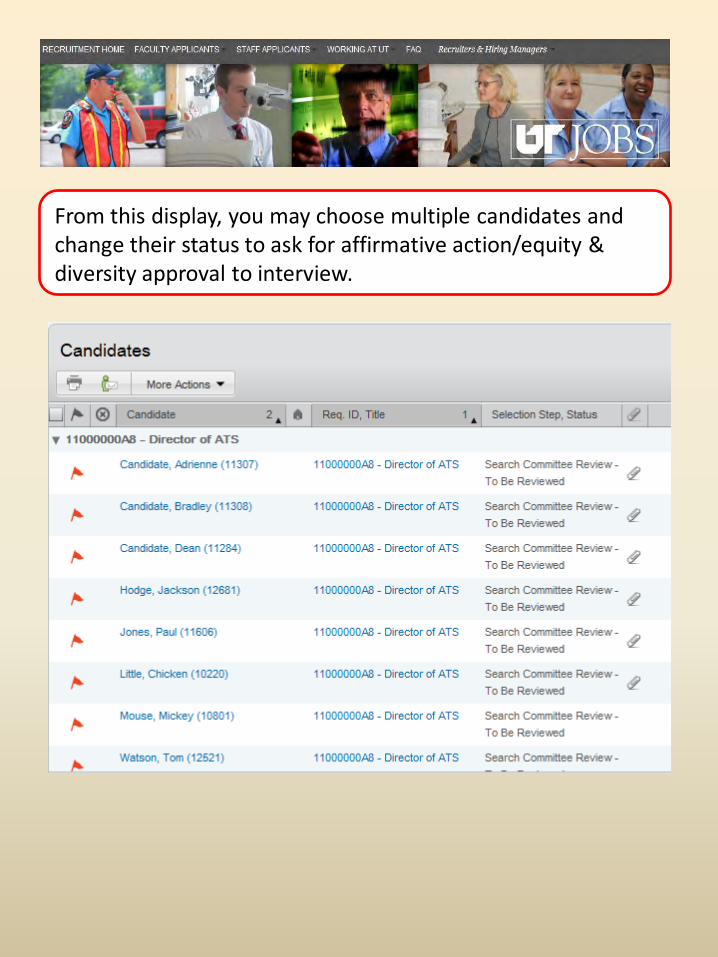
From this display, you may choose multiple candidates and change their status to ask for affirmative action/equity & diversity approval to interview.
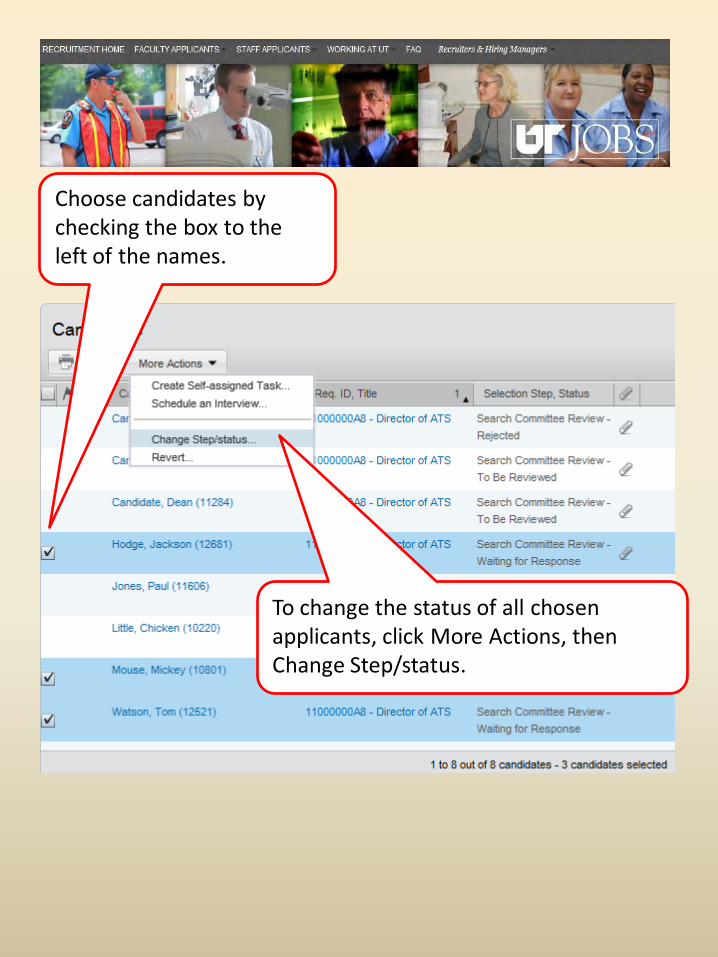
Choose candidates by checking the box to the left of the names.
To change the status of all chosen applicants, click More Actions, then Change Step/status.
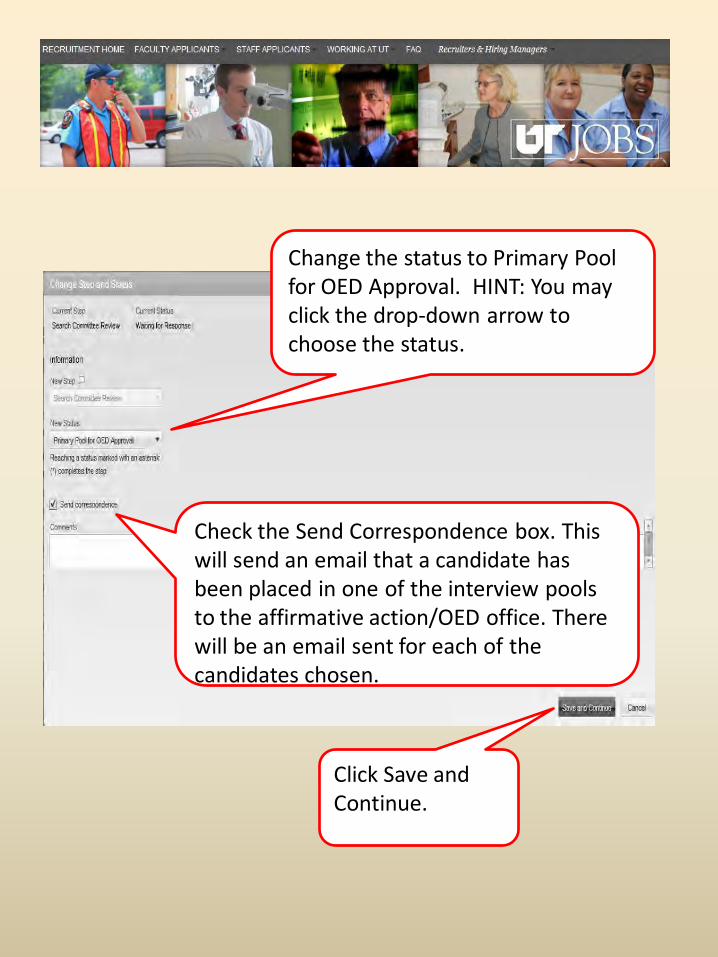
Change the status to Primary Pool for OED Approval. HINT: You may click the drop-down arrow to choose the status.
Click Save and Continue.
Check the Send Correspondence box. This will send an email that a candidate has been placed in one of the interview pools to the affirmative action/OED office. There will be an email sent for each of the candidates chosen.
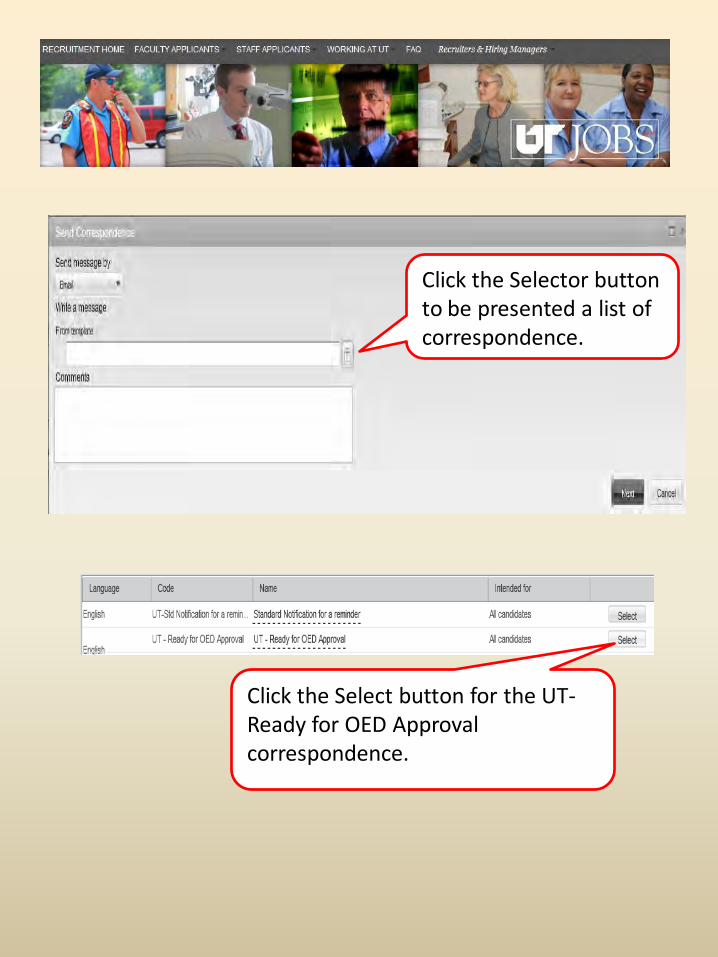
Click the Selector button to be presented a list of correspondence.
Click the Select button for the UT-Ready for OED Approval correspondence.
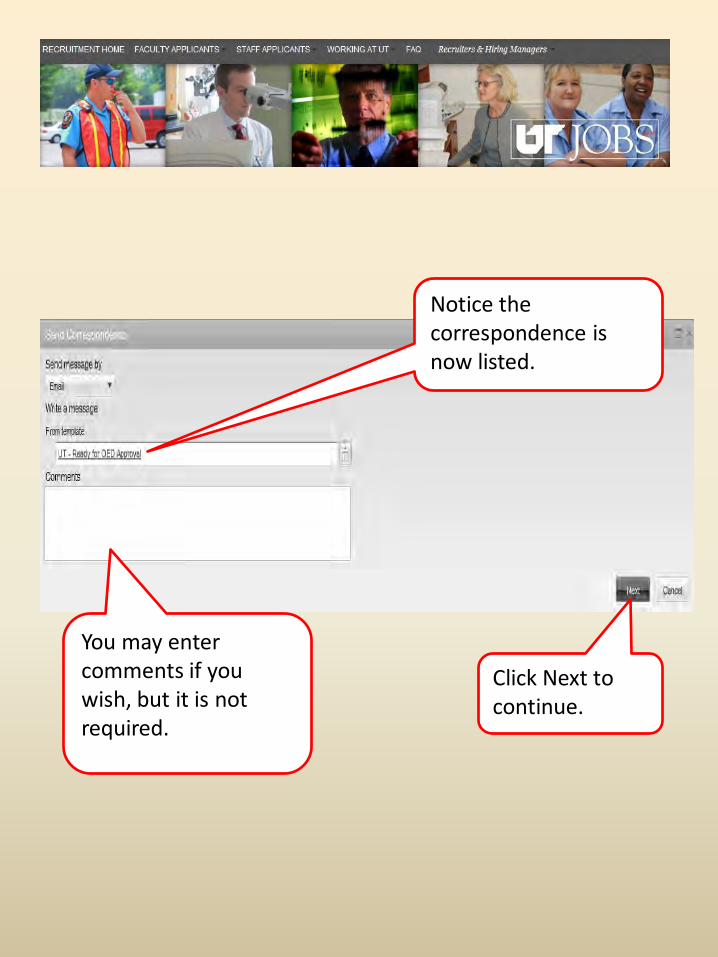
Notice the correspondence is now listed.
You may enter comments if you wish, but it is not required.
Click Next to continue.
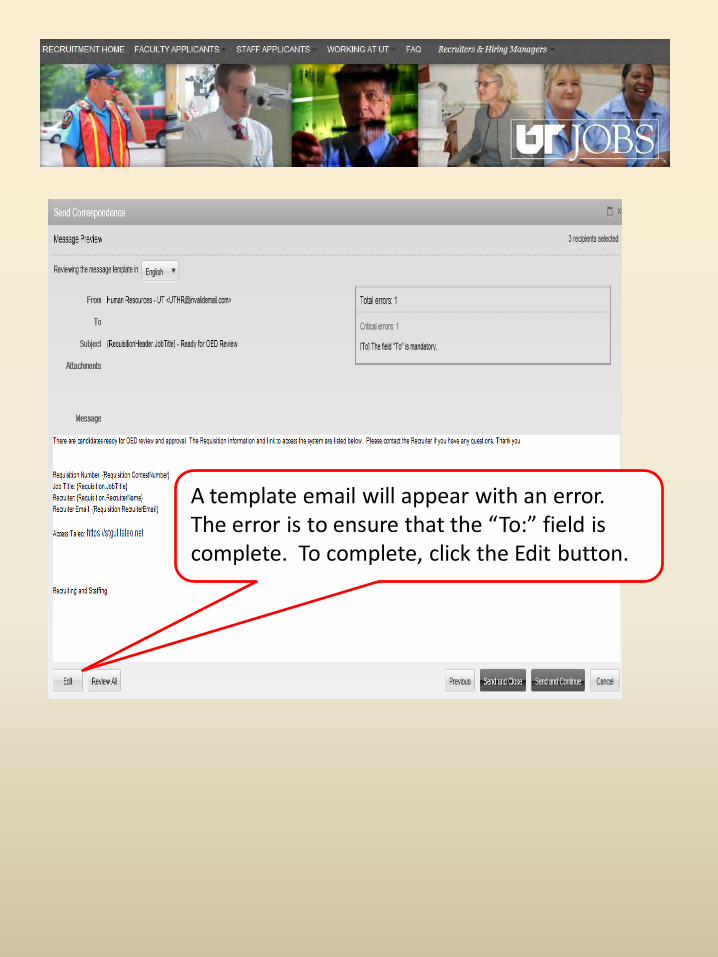
A template email will appear with an error. The error is to ensure that the “To:” field is complete. To complete, click the Edit button.
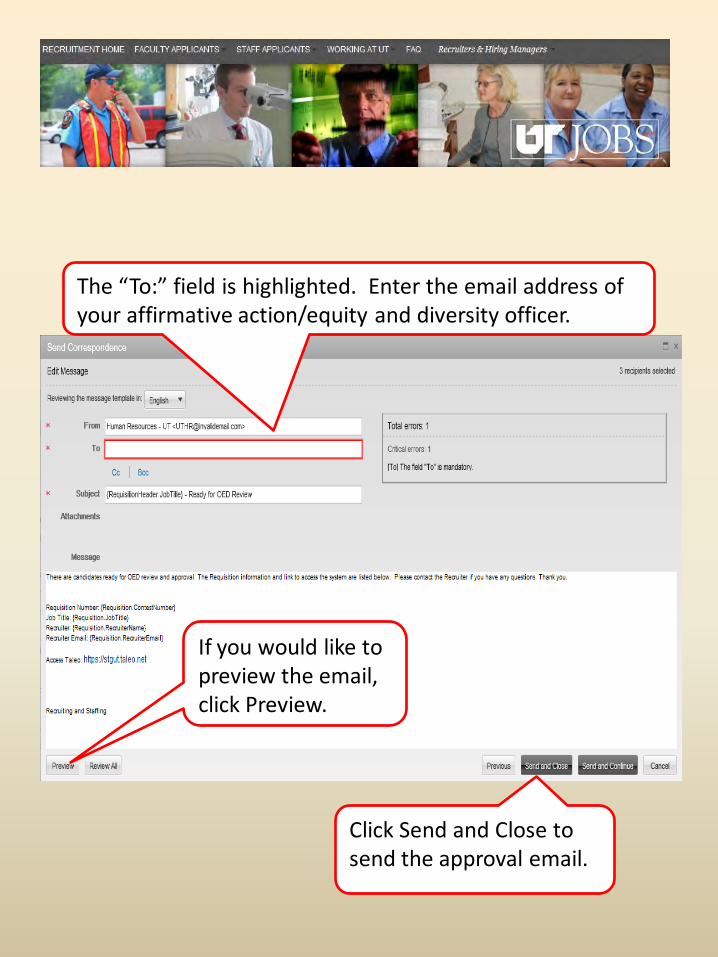
The “To:” field is highlighted. Enter the email address of your affirmative action/equity and diversity officer.
If you would like to preview the email, click Preview.
Click Send and Close to send the approval email.
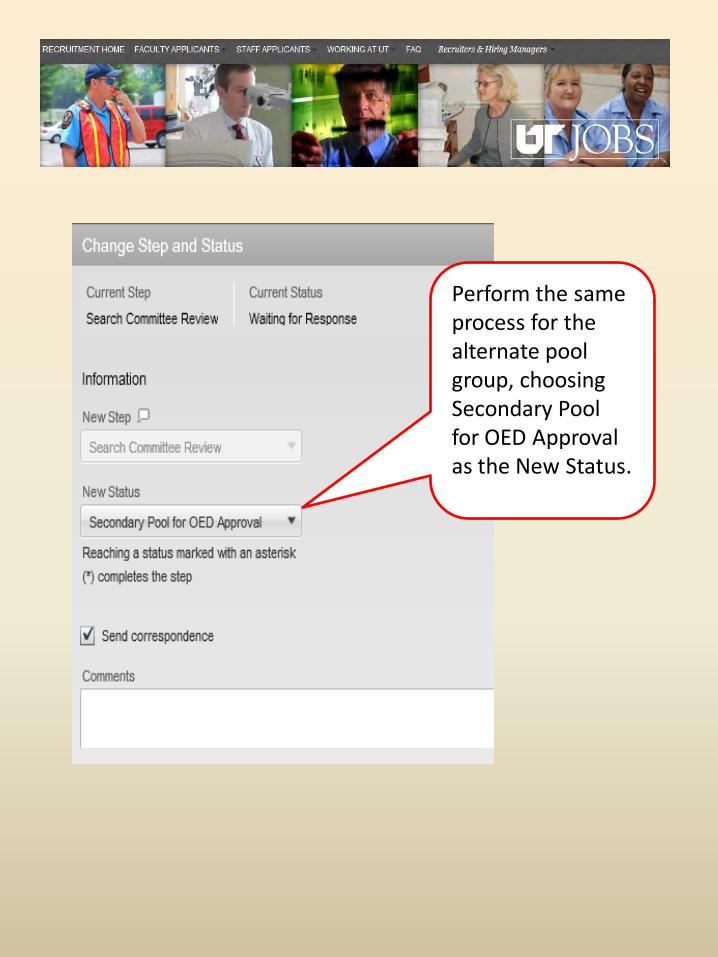
Perform the same process for the alternate pool group, choosing Secondary Pool for OED Approval as the New Status.

For the remainder of this demo, we will be following Jackson Hodge through the hiring process.
Jackson was one of the candidates named in the primary interview pool. Both pools were approved by your affirmative action officer and was moved to the Search Committee Interview-To be Scheduled step and status.

Select Jackson by clicking the box beside his name. To change
Jackson’s status, click More Actions.
The search committee chair/assistant will schedule the interview. Once the interview has been scheduled, Jackson’s status needs to be changed.

From the More Actions menu, choose Change Step/Status.

Now that the interview with the Search Committee has been scheduled, change the status to Interview Scheduled.
The Comments section is a good place to store the date and time of the interview. Click Save and
Close to return to the candidate list.
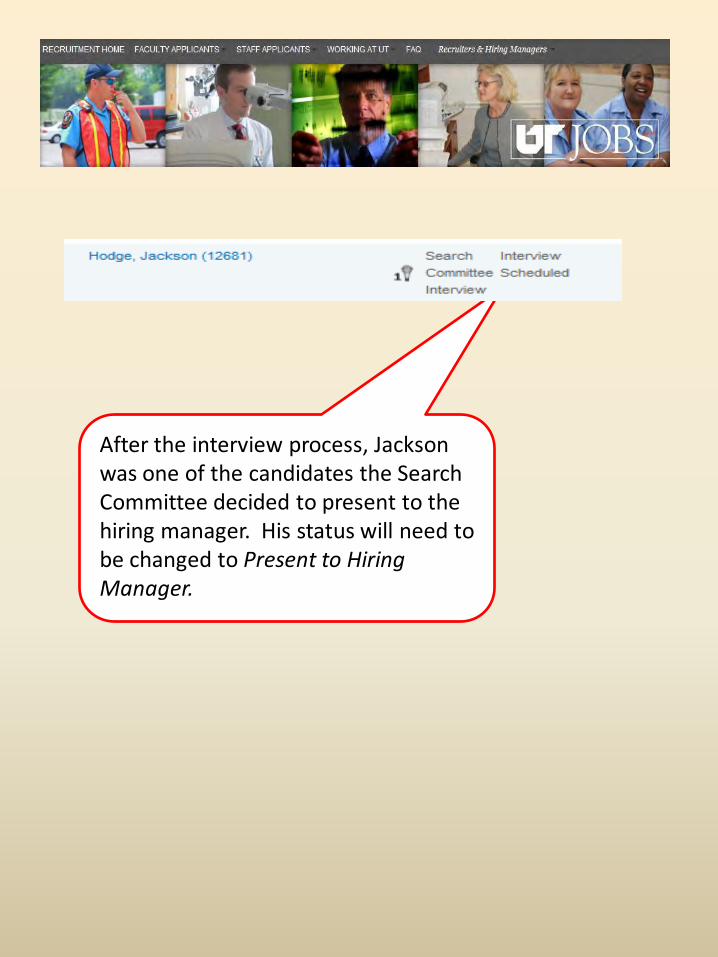
After the interview process, Jackson was one of the candidates the Search Committee decided to present to the hiring manager. His status will need to be changed to Present to Hiring Manager.
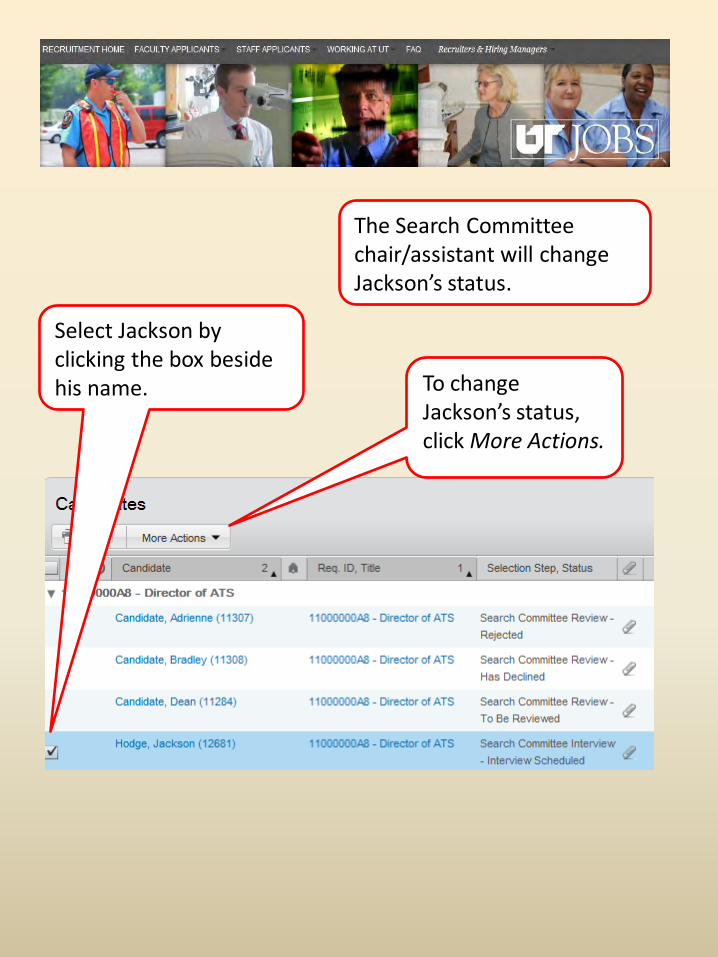
Select Jackson by clicking the box beside his name. To change
Jackson’s status, click More Actions.
The Search Committee chair/assistant will change Jackson’s status.
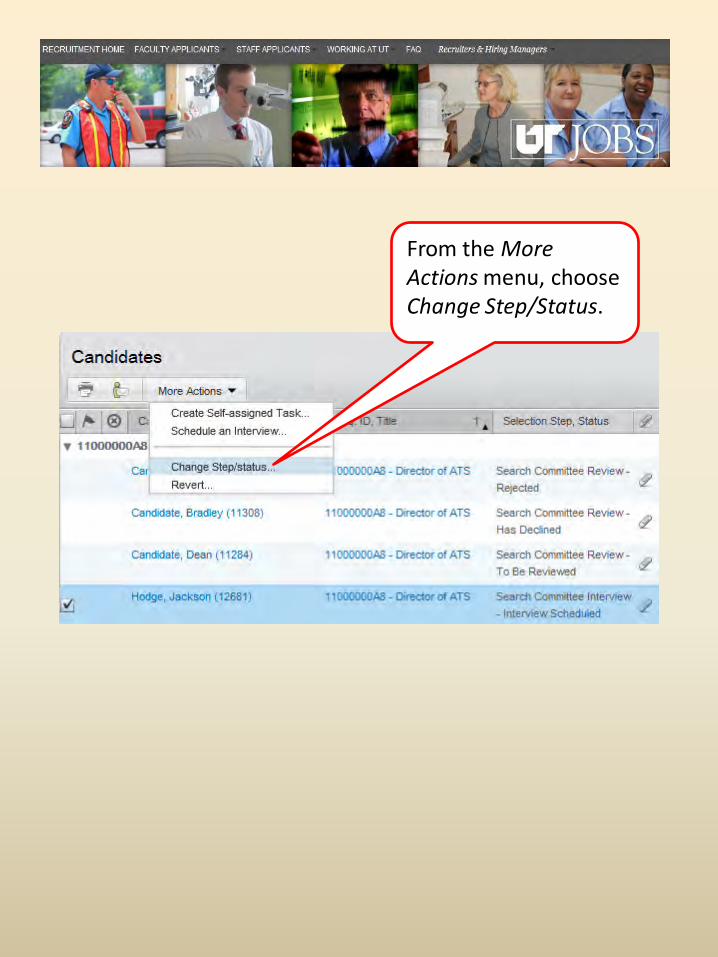
From the More Actions menu, choose Change Step/Status.
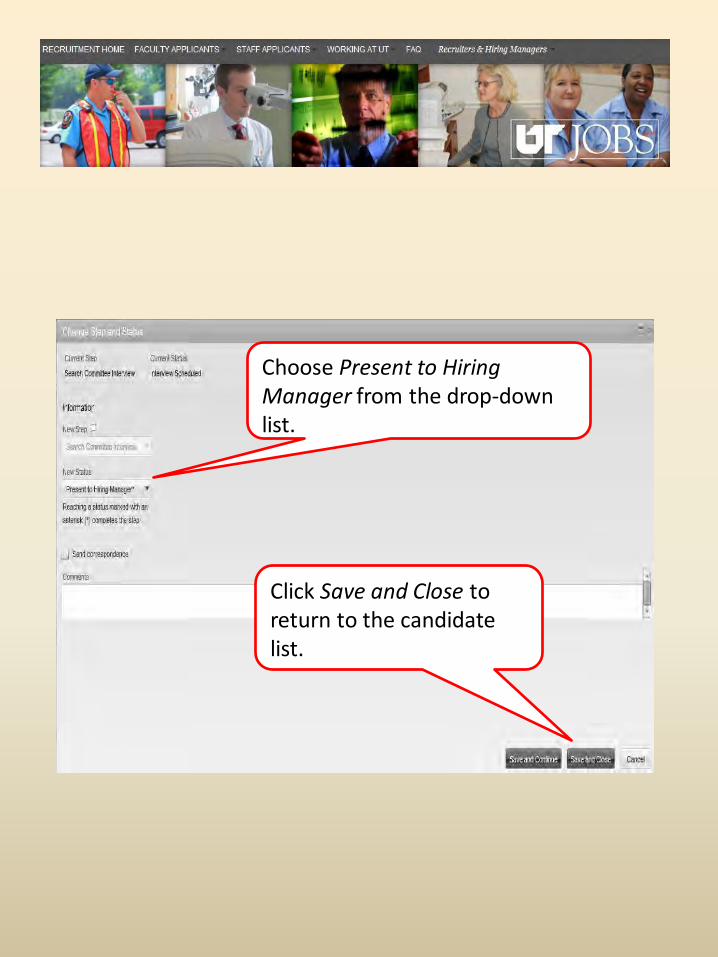
Choose Present to Hiring Manager from the drop-down list.
Click Save and Close to return to the candidate list.
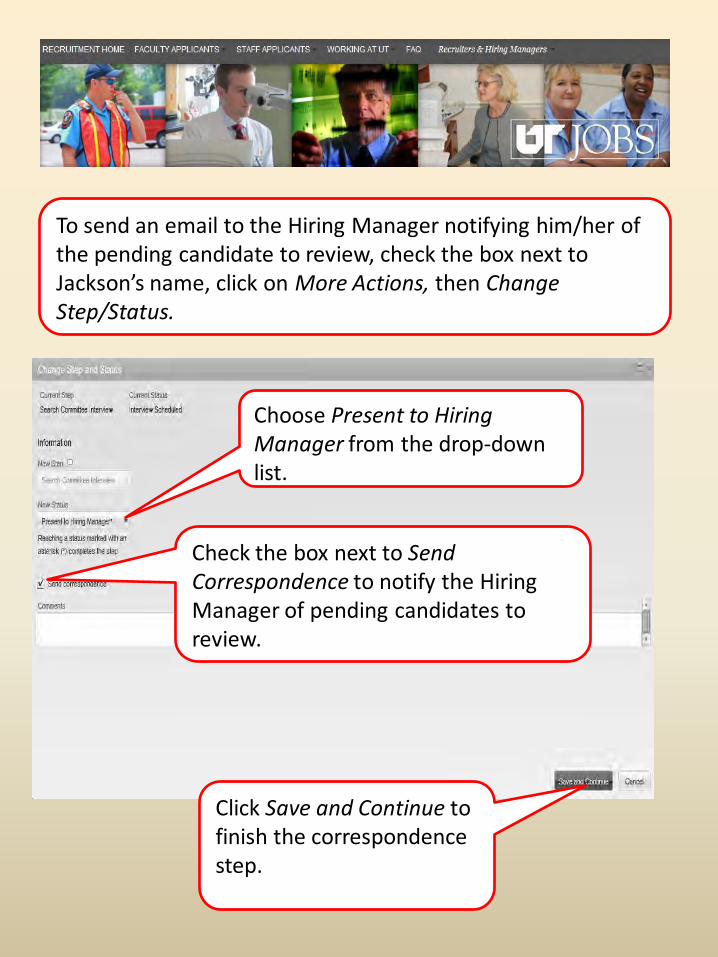
Check the box next to Send Correspondence to notify the Hiring Manager of pending candidates to review.
Choose Present to Hiring Manager from the drop-down list.
Click Save and Continue to finish the correspondence step.
To send an email to the Hiring Manager notifying him/her of the pending candidate to review, check the box next to Jackson’s name, click on More Actions, then Change Step/Status.

Click the Selector button to choose a correspondence template.
Click the Select button for the UT-Hiring Manager Applications Ready to Review template.
Click the Next button to continue.

The template will appear. When the email goes to the Hiring Manager, the “variable fields” will be replaced by actual requisition and candidate data.
Click Send and Close to generate the email and return to the candidate list.
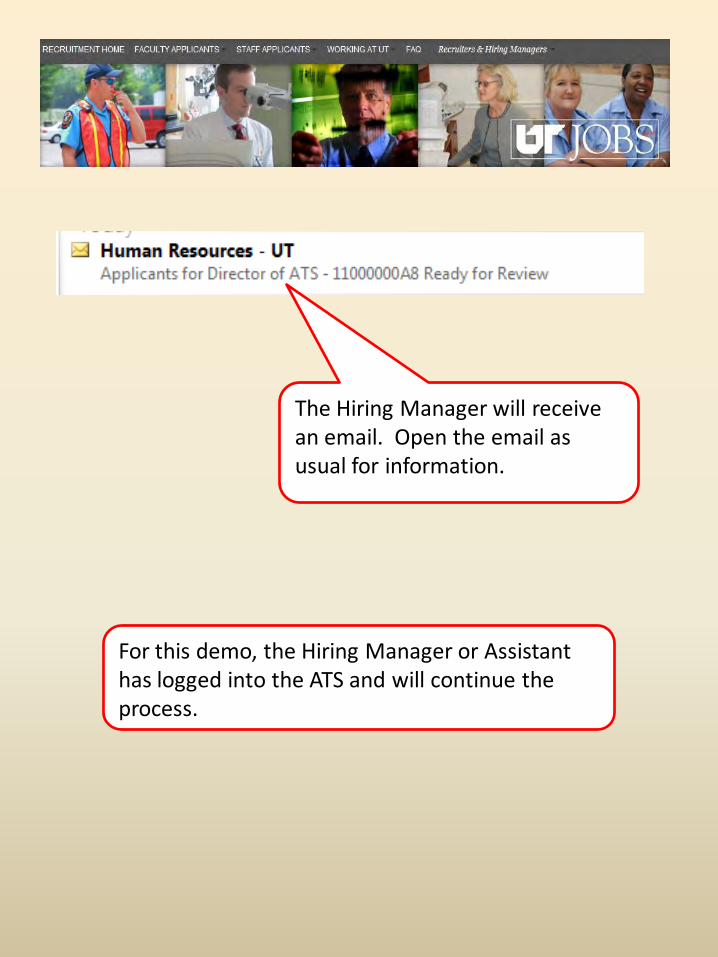
The Hiring Manager will receive an email. Open the email as usual for information.
For this demo, the Hiring Manager or Assistant has logged into the ATS and will continue the process.
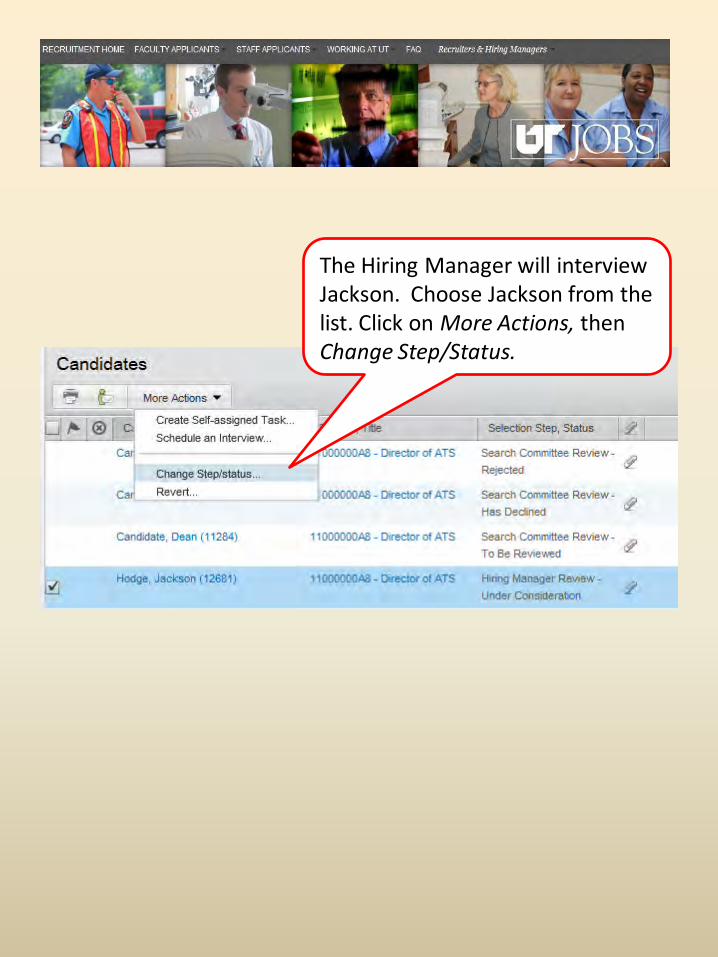
The Hiring Manager will interview Jackson. Choose Jackson from the list. Click on More Actions, then Change Step/Status.
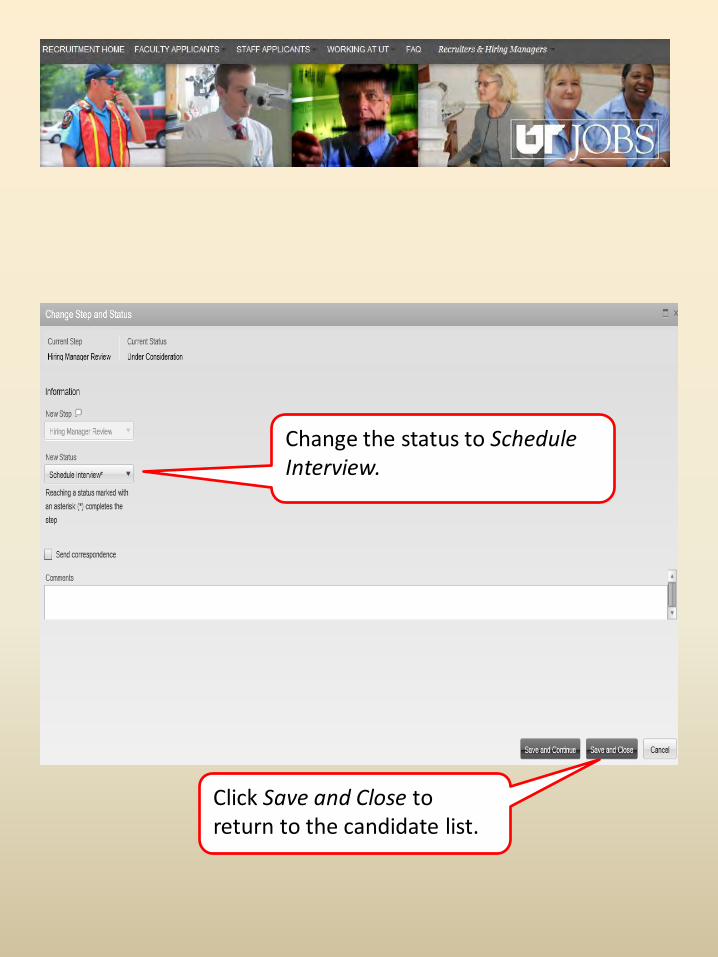
Change the status to Schedule Interview.
Click Save and Close to return to the candidate list.
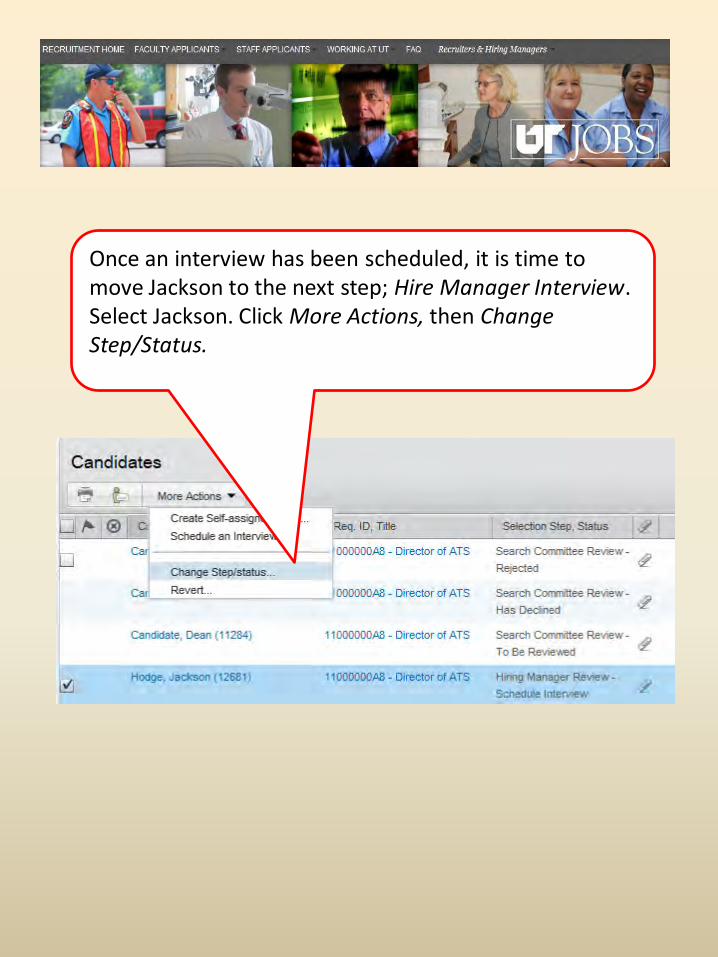
Once an interview has been scheduled, it is time to move Jackson to the next step; Hire Manager Interview. Select Jackson. Click More Actions, then Change Step/Status.
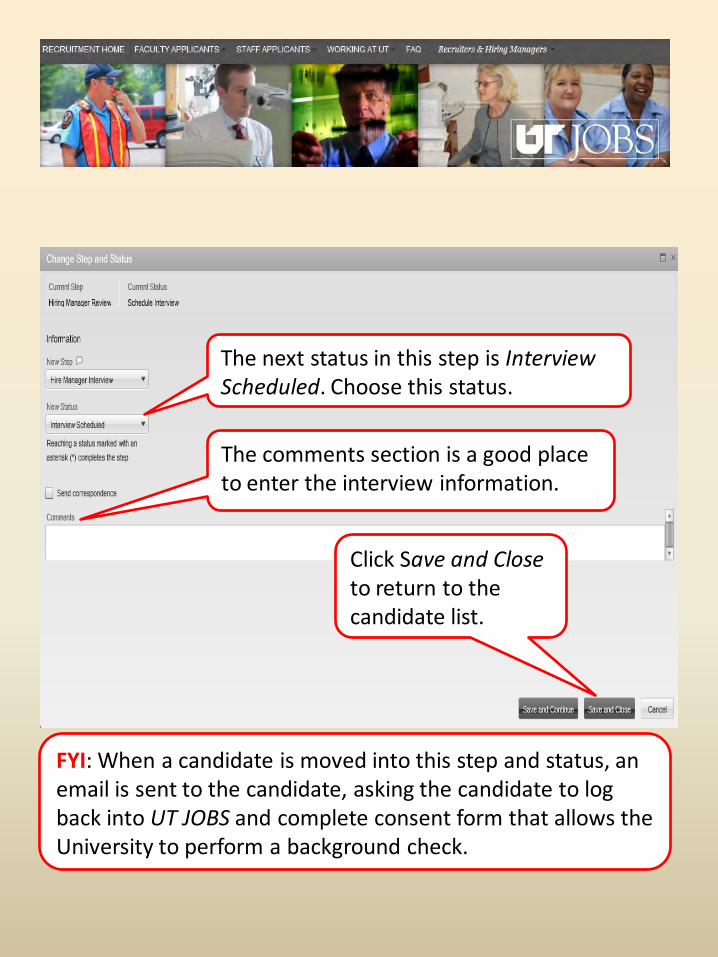
The next status in this step is Interview Scheduled. Choose this status.
The comments section is a good place to enter the interview information.
Click Save and Close to return to the candidate list.
FYI: When a candidate is moved into this step and status, an email is sent to the candidate, asking the candidate to log back into UT JOBS and complete consent form that allows the University to perform a background check.
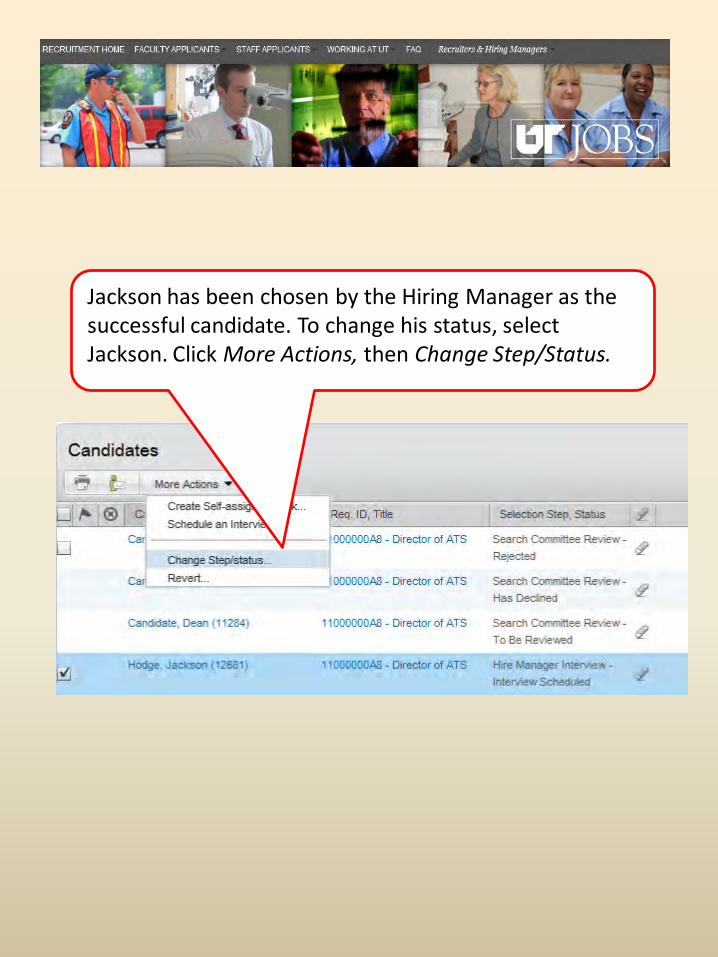
Jackson has been chosen by the Hiring Manager as the successful candidate. To change his status, select Jackson. Click More Actions, then Change Step/Status.
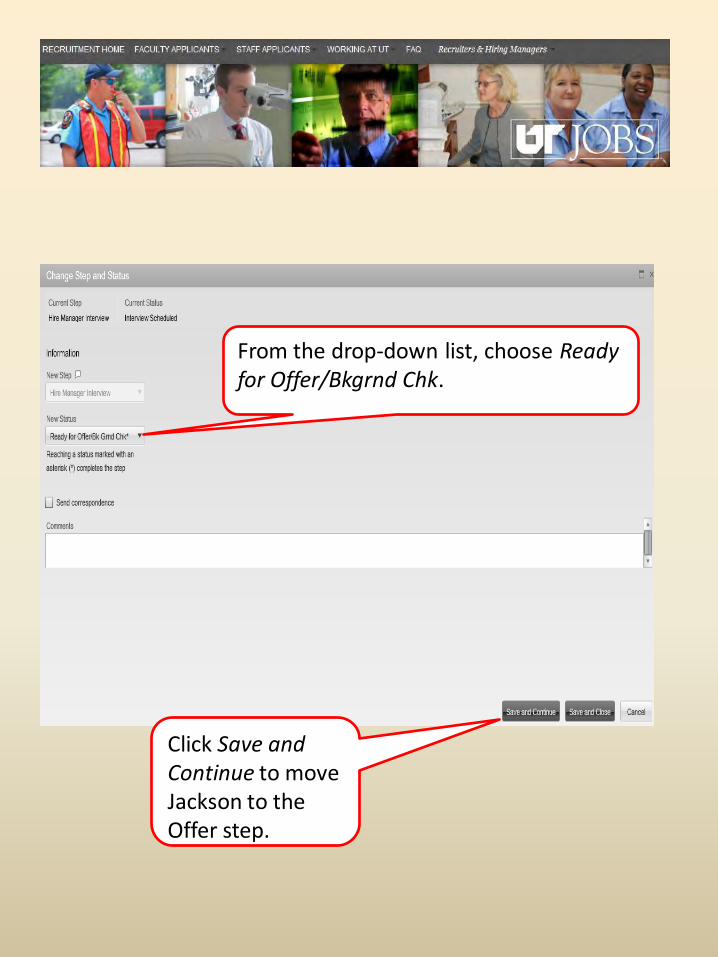
From the drop-down list, choose Ready for Offer/Bkgrnd Chk.
Click Save and Continue to move Jackson to the Offer step.
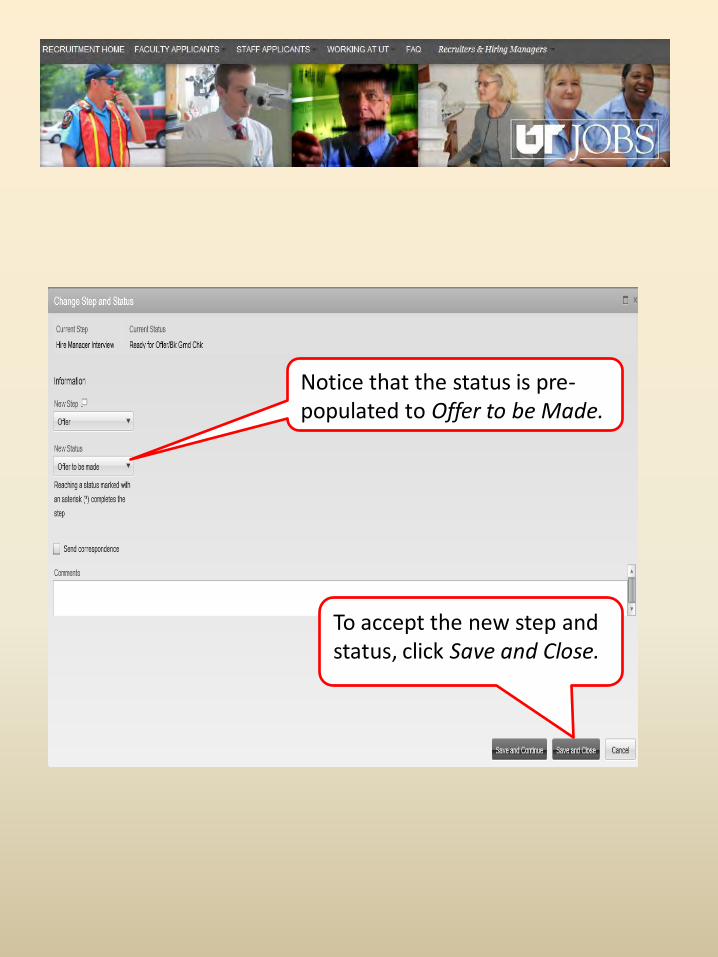
Notice that the status is pre-populated to Offer to be Made.
To accept the new step and status, click Save and Close.
Job Offer • Before a Job Offer can be made
to the candidate, the proposed offer MUST be approved.
• The approval is initiated in the ATS and completed in IRIS.
• The Hiring Department will start the process by providing job offer information in the ATS.

Continuing with our demo, we will begin the job offer process for Jackson. The process will be somewhat different from changing a step or status.
To begin the submission of the job offer request, click on the successful candidate’s name to access his/her Candidate Record.

Making sure you are in the Job Submission tab, click More Actions, then Create Offer.
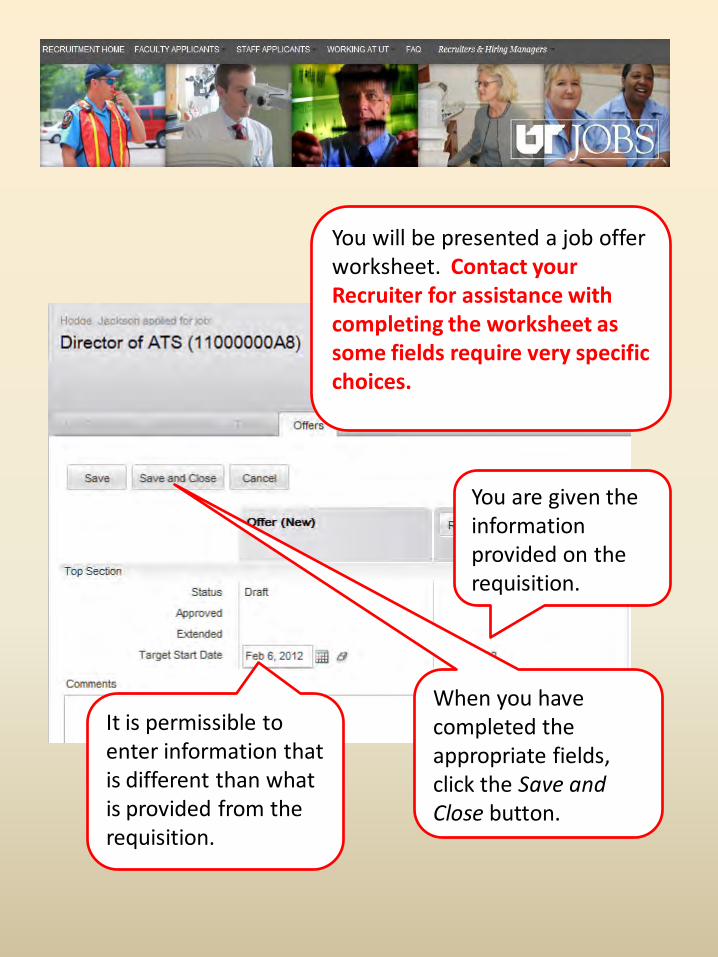
You will be presented a job offer worksheet. Contact your Recruiter for assistance with completing the worksheet as some fields require very specific choices.
You are given the information provided on the requisition.
It is permissible to enter information that is different than what is provided from the requisition.
When you have completed the appropriate fields, click the Save and Close button.
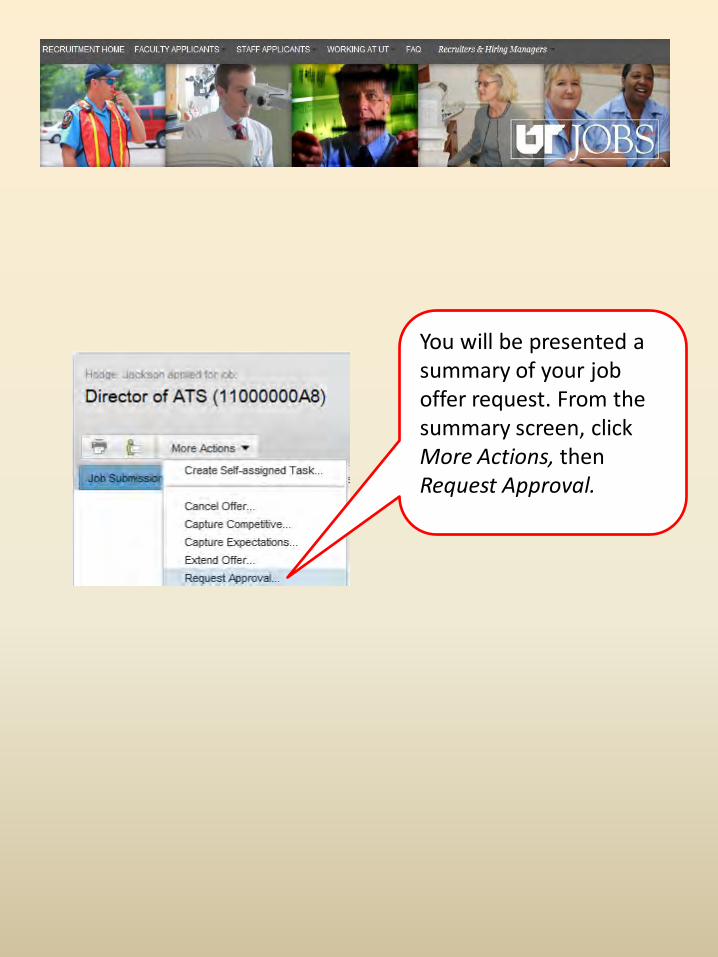
You will be presented a summary of your job offer request. From the summary screen, click More Actions, then Request Approval.
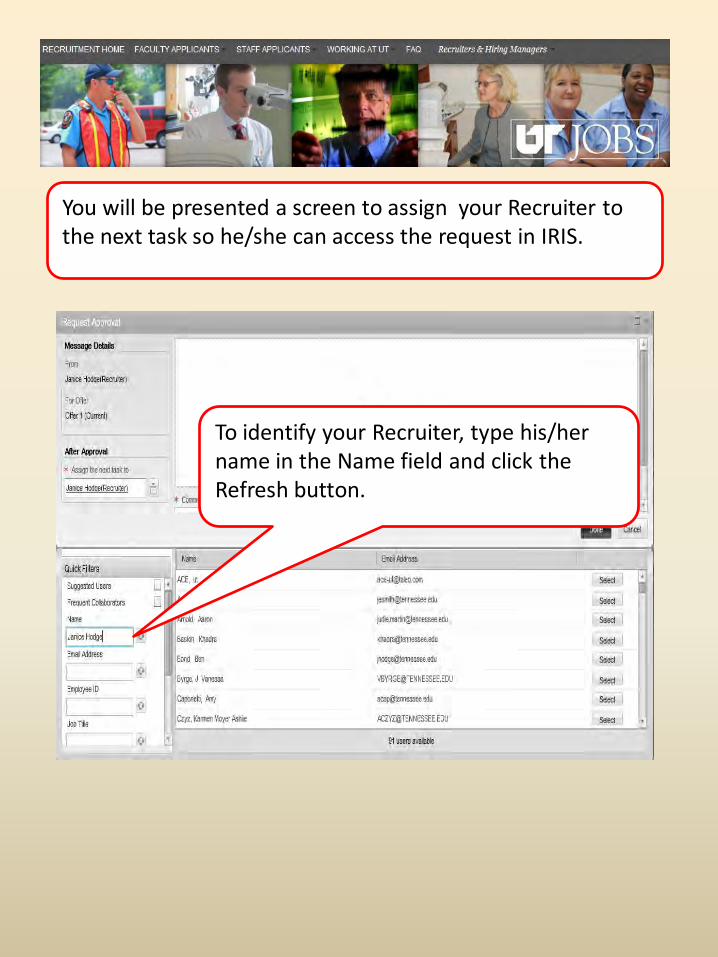
You will be presented a screen to assign your Recruiter to the next task so he/she can access the request in IRIS.
To identify your Recruiter, type his/her name in the Name field and click the Refresh button.
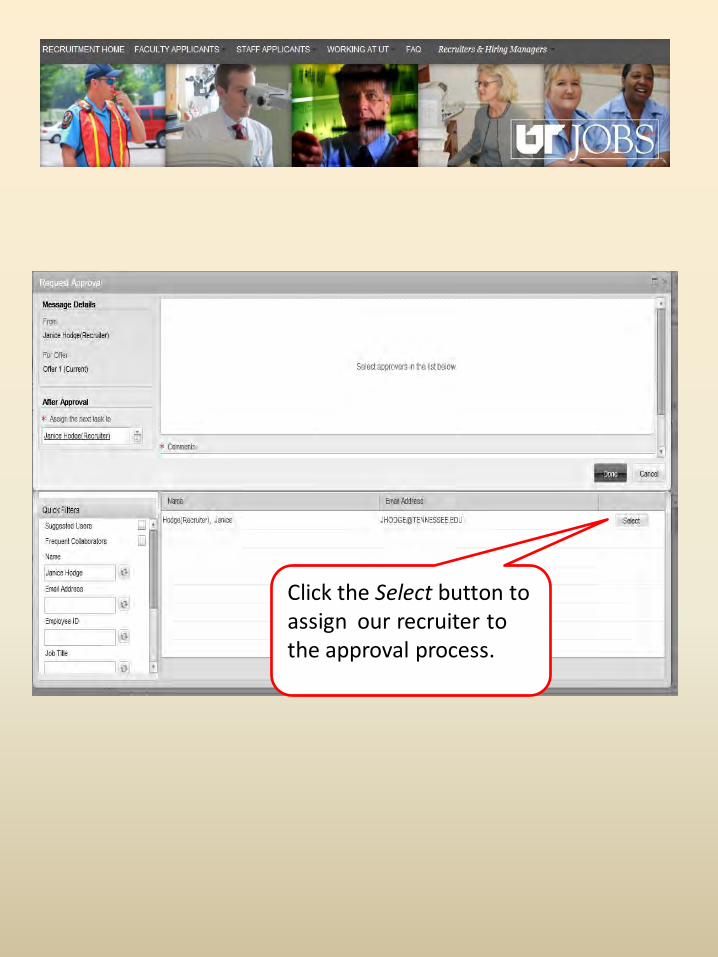
Click the Select button to assign our recruiter to the approval process.
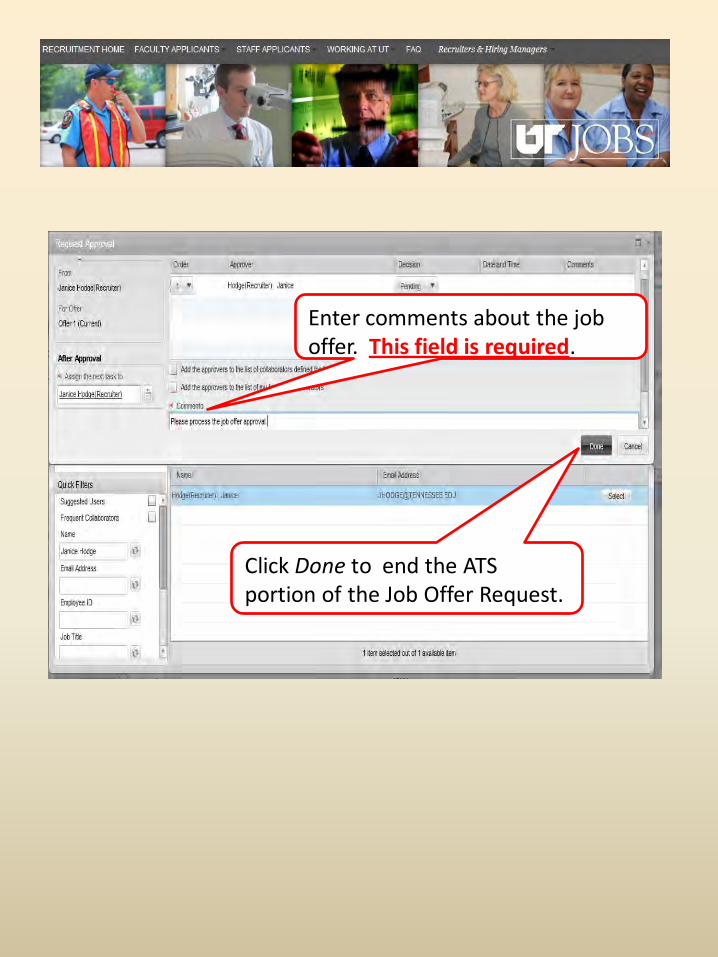
Enter comments about the job offer. This field is required.
Click Done to end the ATS portion of the Job Offer Request.

Congratulations! You have completed the Hiring
Department’s portion of the Hiring Process
Remember to Sign Out.
The job offer approval will be processed through IRIS. The person authorized in IRIS for the account paying the salary will be part of the approval path. After the job offer has been received, work with your Recruiter regarding extending the job offer to the candidate and scheduling central sign-up and/or orientation.