ELECTRIC HEIGHT ADJUSTABLE DESK · Web viewGAS LIFTING HEIGHT ADJUSTABLE TABLE DIRECTIONS FOR...
8
GAS LIFTING HEIGHT ADJUSTABLE TABLE DIRECTIONS FOR ASSEMBLY AND USE IMPORTANT: Any user or installer of table base must study this manual carefully. If this table is sold, please provide the manual to the buyer. 1 ! CAUTION MAKE SURE NO OBSTACLES ARE IN THE DESK’S PATH. FAILURE TO COMPLY WITH OR OBSERVE ALL ASSEMBLY, SAFETY, AND OPERATION INSTRUCTIONS AND WARNINGS REGARDING THE USE OF THIS PRODUCT MAY RESULT IN SERIOUS PROPERTY DAMAGE OR BODILY INJURY.
Transcript of ELECTRIC HEIGHT ADJUSTABLE DESK · Web viewGAS LIFTING HEIGHT ADJUSTABLE TABLE DIRECTIONS FOR...
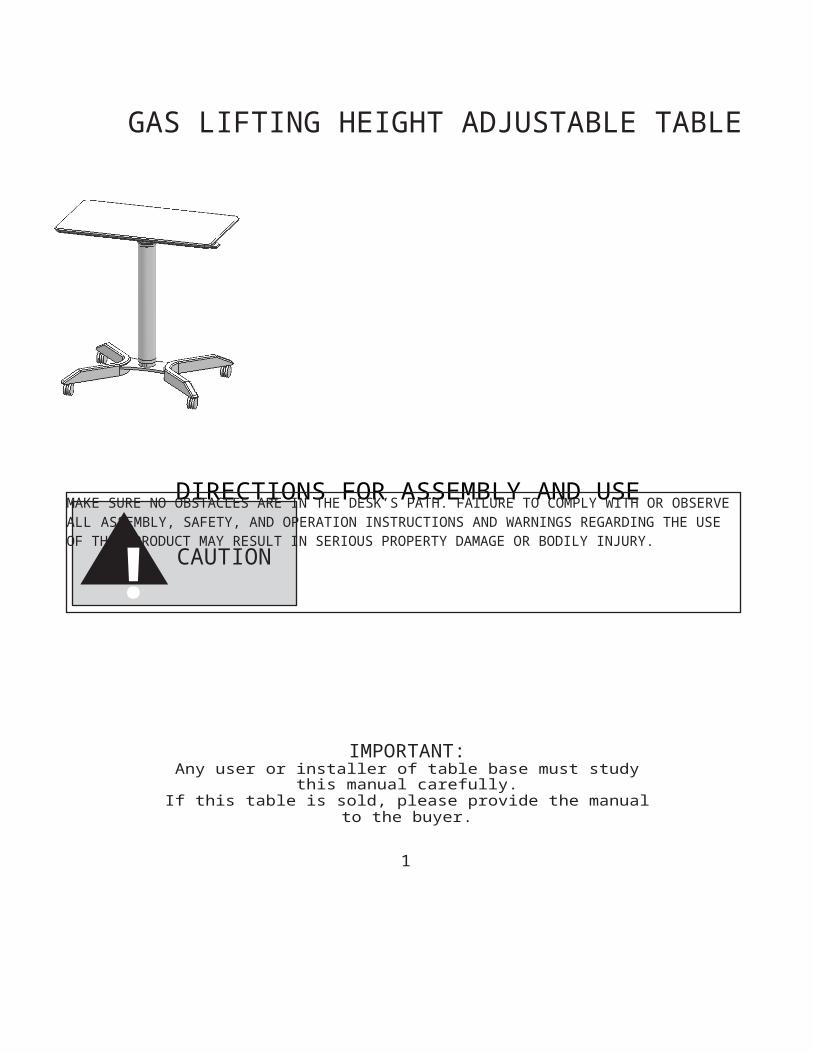
GAS LIFTING HEIGHT ADJUSTABLE TABLE
DIRECTIONS FOR ASSEMBLY AND USE
IMPORTANT:Any user or installer of table base must study this manual
carefully.If this table is sold, please provide the manual to the buyer.
1
MAKE SURE NO OBSTACLES ARE IN THE DESK’S PATH. FAILURE TO COMPLY WITH OR OBSERVE ALL ASSEMBLY, SAFETY, AND OPERATION INSTRUCTIONS AND WARNINGS REGARDING THE USE OF THIS PRODUCT MAY RESULT IN SERIOUS PROPERTY DAMAGE OR BODILY INJURY.
CAUTION!

TABLE OF CONTENTS PAGE
1. SAFETY AND WARNINGS 22. USAGE 23. SETUP AND INSTALLATION 24. PARTS LIST 35. ASSEMBLY INSTRUCTIONS 4-66. TECHNICAL SPECIFICATIONS 67. TROUBLESHOOTING GUIDE 6
1. SAFETY AND WARNINGS
2. USAGEThe table height is adjustable so that it can be positioned at the most ergonomically suitable height. These table are designed only for the purposes included in this manual.
Do not move around, crawl or lie under the table. Do not sit or stand on the table. Children
should never use the table unless they are supervised by adults.
Liability: Under no circumstances does the manufacturer accept warranty claims or liability claims for damages caused from improper use or handling of the table other than that whichis described in this operation manual.
3. SETUP AND INSTALLATION
Choose a placement for the table that’s a safe distance from window frames, radiators, furniture etc. so that people do not get stuck or trapped by the table.
Inappropriate use of this product may cause property or bodily injury.Check surroundings on all sides before using the desk. Please provide this operation to any users, installers, or support personnel operating the product.
•••
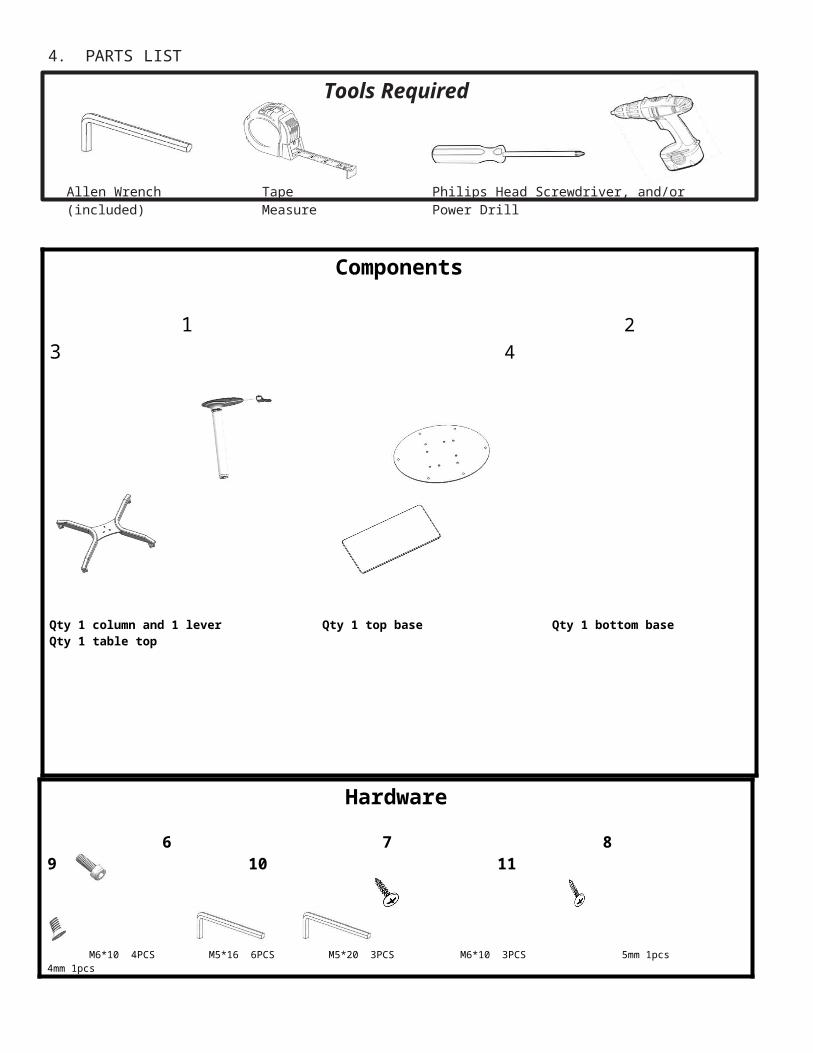
4. PARTS LIST
Components
1 2 3 4
Qty 1 column and 1 lever Qty 1 top base Qty 1 bottom base Qty 1 table top
Hardware
6 7 8 9 10 11
M6*10 4PCS M5*16 6PCS M5*20 3PCS M6*10 3PCS 5mm 1pcs 4mm 1pcs
Please count all pieces before disposing of any carton or packing material. Use a padded or carpeted area for assembly to avoid damage. For ease and safety, we recommend two people for assembly.
Philips Head Screwdriver, and/or Power DrillTape MeasureAllen Wrench
Tools Required

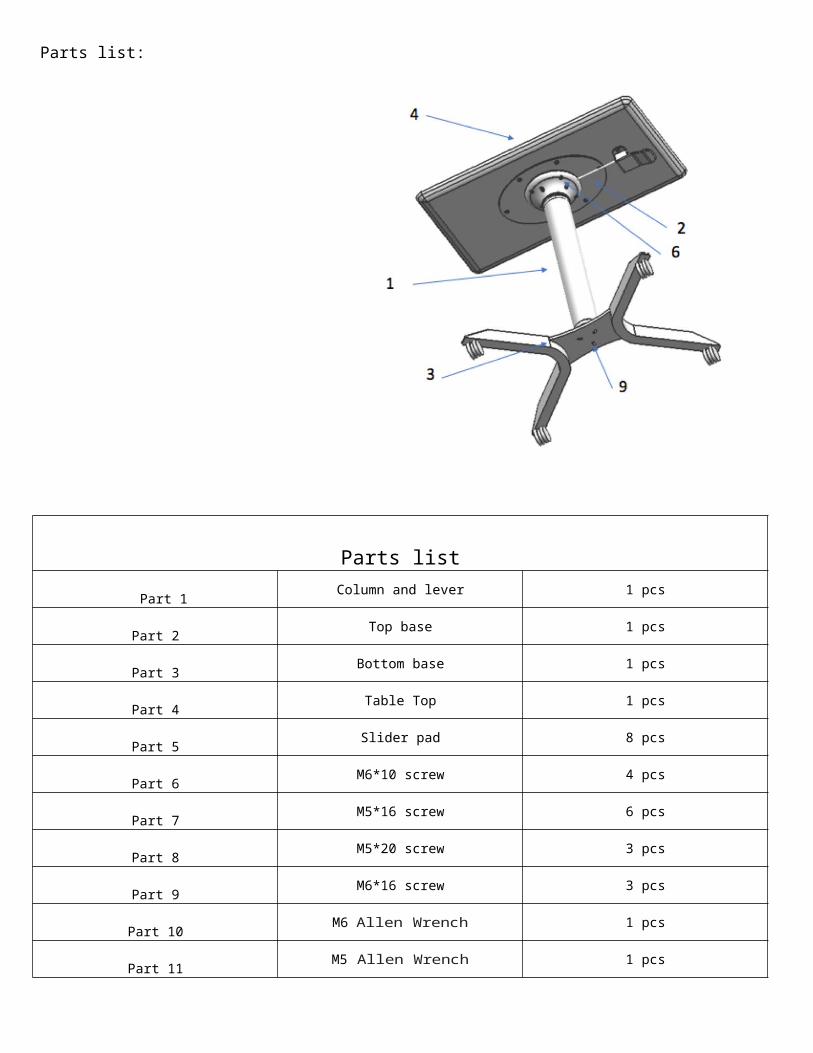
Parts list:
Parts list
Part 1 Column and lever 1 pcs
Part 2 Top base 1 pcs
Part 3 Bottom base 1 pcs
Part 4 Table Top 1 pcs
Part 5 Slider pad 8 pcs
Part 6 M6*10 screw 4 pcs
Part 7 M5*16 screw 6 pcs
Part 8 M5*20 screw 3 pcs
Part 9 M6*16 screw 3 pcs
Part 10 M6 Allen Wrench 1 pcs
Part 11 M5 Allen Wrench 1 pcs
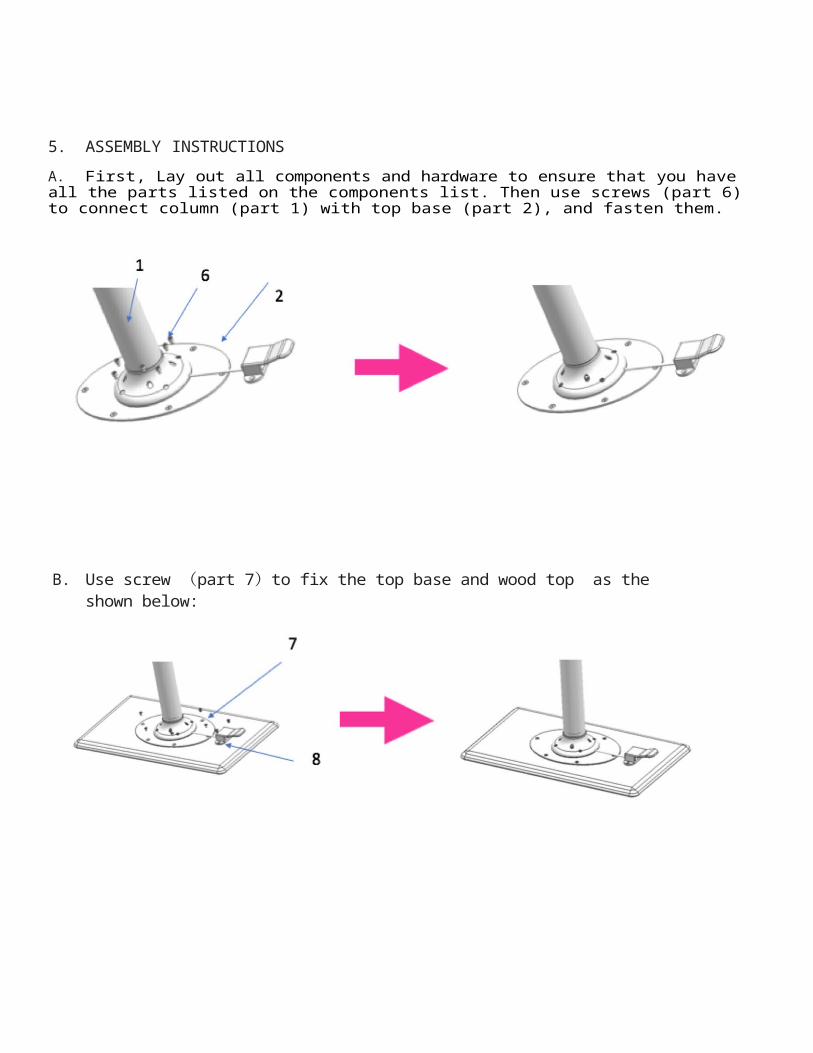
5. ASSEMBLY INSTRUCTIONS
A. First, Lay out all components and hardware to ensure that you have all the parts listed on the components list. Then use screws (part 6) to connect column (part 1) with top base (part 2), and fasten them.
B. Use screw (part 7)to fix the top base and wood top as the shown below:
3
C. Use screw (part 9) to fix bottom base (part 3) and column (part 1), also use screw (part 7) fix the controller on the table top.
6. TECHNICAL SPECIFICATION
7. TROUBLESHOOTINGIf have any problem, please contact [email protected]
Keep Children away from table. There is a risk of injury
Height Range 25.2” – 40.7” (without desktop)
Diameter 75mm
Tabletop fitting Flange adapter
Load Capacity 350N (35.7KG)