Electric bicycle user manual - inSPORTline
30
Electric bicycle user manual Enjoy your e-ride!
Transcript of Electric bicycle user manual - inSPORTline
Electric bicycleuser manual
Enjoy your e-ride!

Dear customer/user Congratulations on your purchase of a new electric bicycle (e-bike). It makes us proud that you have chosen our brand CRUSSIS and we wish you happy and safe time spend with our product. This manual contains important safety, performance and maintenance information. Read the manual before taking your first ride on your new e-bike and keep the manual handy for future reference. WHY YOU SHOULD READ THIS MANUAL: This manual was written to help you get the most performance, comfort, enjoyment and safety when riding your new e-bike. The manual describes specific care and maintenance procedures that help protect your warranty and ensure years of trouble-free use. Please pay particular attention to the section on battery charging and maintenance. It is important for you to understand your new e-bike, its features and its operation, so you get maximum enjoyment with maximum safety. By reading this manual before you go out on your first ride, you will know how to get the most from your new e-bike. It is also important that your first ride on a new e-bike is taken in a controlled environment, away from cars, obstacles and other cyclists GENERAL WARNING: Cycling can be a hazardous activity even under the best of circumstances. Proper maintenance of your e-bike is your responsibility as it helps reduce the risk of injury. This manual contains many "Warnings" and "Cautions" concerning the consequences of failure to maintain or inspect your e-bike. Many of the Warnings and Cautions say "you may lose control and fall". Because any fall can result in serious injury or even death, we do not repeat the warning of possible injury or death whenever the risk of falling is mentioned. FIT: Make sure the e-bike fits. A bike that is too big or too small for the rider is harder to control and can be uncomfortable. If your e-bike does not fit properly, you may lose control and fall. IMPORTANT SAFETY INFORMATION: Your e-bike can provide many years of service, fun and fitness - if you take responsibility for your own safety. Understand the features of your e-bike and become aware of the challenges that you will meet on the road. There is much that you can do to protect yourself while riding. We will offer many recommendations and safety tips throughout this manual. The following are those that we feel are most important. Always Wear A Helmet! Helmets significantly reduce the number and severity of head injuries. Always wear a helmet that complies with your state laws when riding the e-bike. Check with your local police department for requirements in your community. Do not wear loose fitting clothing that can become tangled in the moving parts of the e-bike. Wear sturdy shoes and eye protection. Also check your state laws concerning other protective gear that may be required when riding the e-bike.

DESCRIPTION OF E-BIKE COMPONENTS
INSPECTION AND MAINTENANCE: For your safety and enjoyment, and to insure a long life for your e-bike inspect and maintain your e-bike regularly. Use the table below for guidance. It is very important that you check certain systems and components before each and every ride. The proper condition and function of these systems is critically important for your safety. Your e-bike should be returned to your servicing dealer at least once a year for a complete and thorough inspection and tune up.

Component or Condition Inspect before every ride
Inspect periodically*
Clean and/or lubricate
Adjust/Tighten
Repair/Replace if necessary
Tire pressure Tire wear/damage Brake pad adjustment Wheel quick release adjustment Head/tail/brake lights Controls and displays Seat post quick release adjustment
Brake pad wear Brake cable tension/wear Spoke tension Wheel true Hub bearings Chain lubrication Derailleur adjustment Battery and charger Headset adjustment Bottom bracket adjustment All bolts, nuts, and mounting hardware
*Every 5 to 10 rides depending on length and conditions of the ride. WARNING: Remove the battery pack before washing your e-bike! Keep the battery pack and charger away from water to prevent electrical shock and damage to the charger or batteries. CARE AND CLEANING: Clean the e-bike with a mild soap and a sponge. DO NOT use a power hose or washer. Gently rinse with water. Avoid spraying water directly onto the control switches, motor and front hub bearings. Do not spray water inside the battery compartment. Dry the frame mounted electrical connector in the battery compartment before reinstalling the battery pack. Use automotive wax to protect painted surfaces. Lubricate the chain periodically to help prevent corrosion and minimize wear. MECHANICAL SAFETY CHECK : The mechanical safety check is a simple, sixty-second check you should perform whenever you’re about to get on the e-bike. Nuts, bolts & straps Lift the front wheel off the ground by two or three inches, and then let it bounce on the ground. Does anything sound, feel or look loose? Do a quick visual and tactile inspection of the whole e-bike. Any loose parts or accessories? If so, secure them. If you're not sure, ask someone with experience to check these items. Tires & Wheels Tires correctly inflated? Check by putting one hand on the saddle, one on the intersection of the handlebars and stem, then bouncing your weight on the e-bike while looking at tire deflection. Compare what you see with how it looks when you know the tires are correctly inflated. Adjust the tire pressure if necessary.

Tires in good shape? Spin each wheel slowly and look for cuts in the tread and sidewall. Replace damaged tires before riding the e-bike. Wheels true? Spin each wheel and check for brake clearance and side-to-side wobble. If a wheel wobbles from side to side or hits the brake pads, take the e-bike to a qualified bike shop to have the wheel trued. CAUTION: Wheels must be true for the brakes to work effectively. Wheel truing is a skill which requires special tools and experience. Do not attempt to true a wheel unless you have the knowledge and tools needed to do the job correctly. Brakes Squeeze the brake levers. Does the cable guide on the brake cable securely engage the quick release bracket on the left caliper arm? Are the brake pads contacting the wheel rim within an inch of brake lever movement? Can you apply full braking force at the levers without having them touch the handlebar? If not, your brakes need adjustment. Do not ride the e-bike until the brakes are properly adjusted. WARNING: Riding with improperly adjusted brakes or worn brake pads is dangerous and can result in serious injury or death. Quick Releases Are the front wheel and seat post quick releases properly adjusted and in the locked position? Adjust the quick release mechanism as necessary. WARNING: Riding with an improperly adjusted wheel quick release can cause the wheel to wobble or disengage from the e-bike, which can cause damage to the e-bike and serious injury or death. Handlebar and saddle alignment Are the saddle and handlebar stem correctly parallel to the top tube of the e-bike. Are the binder bolts tight enough so that you cannot twist them out of alignment? Handlebar ends Are the handlebar grips secure and in good condition? If not, replace them. Are the handlebar ends and extensions plugged? If not, plug them before you ride. WARNING: Loose or damaged handlebar grips or extensions can cause you to lose control and fall. Unplugged handlebars or extensions can act like a cookie cutter on your body and can cause serious injury in an otherwise minor accident. OPERATIONAL INSTRUCTIONS: Please read and understand these instructions completely before operating your e-bike to prevent serious injury to yourself and others, and to prevent damage to the e-bike. Forks: There is a wide variety of suspension forks used across the CRUSSIS e-bike range but they all have common does and don’ts. Forks need regular periodic maintenance. Look after your suspension fork, and it will last longer and perform better. Here are a few key areas to consider, to protect your investment. The most important part of maintaining your suspension fork, is keeping the fork well lubricated and clean. This means removing all dirt from the fork stanchions and around the seals, especially between the stanchions and fork arch at the front of the fork after each-and-every ride also ensuring there is lubrication inside the fork, and that this lubricant is not contaminated by dirt from the outside. Fork stanchions should be inspected every few rides, for impact damage or scratches that might carry dirt inside the fork. Any evidence of this should be brought to the attention of a suspension specialist for urgent treatment.
Servicing suspension fork:
We recommend cleaning and lubrication refills (lower leg service) every 50 riding hours, and a full service (strip down, seal replacement and full oil change) every 100 hours which should be performed by a professional mechanic.
Adjusting the suspension fork:
The major difference between suspension forks used across the CRUSSIS e-bike range is the spring. There are two types of springs used in suspension forks Coil spring and Air spring.
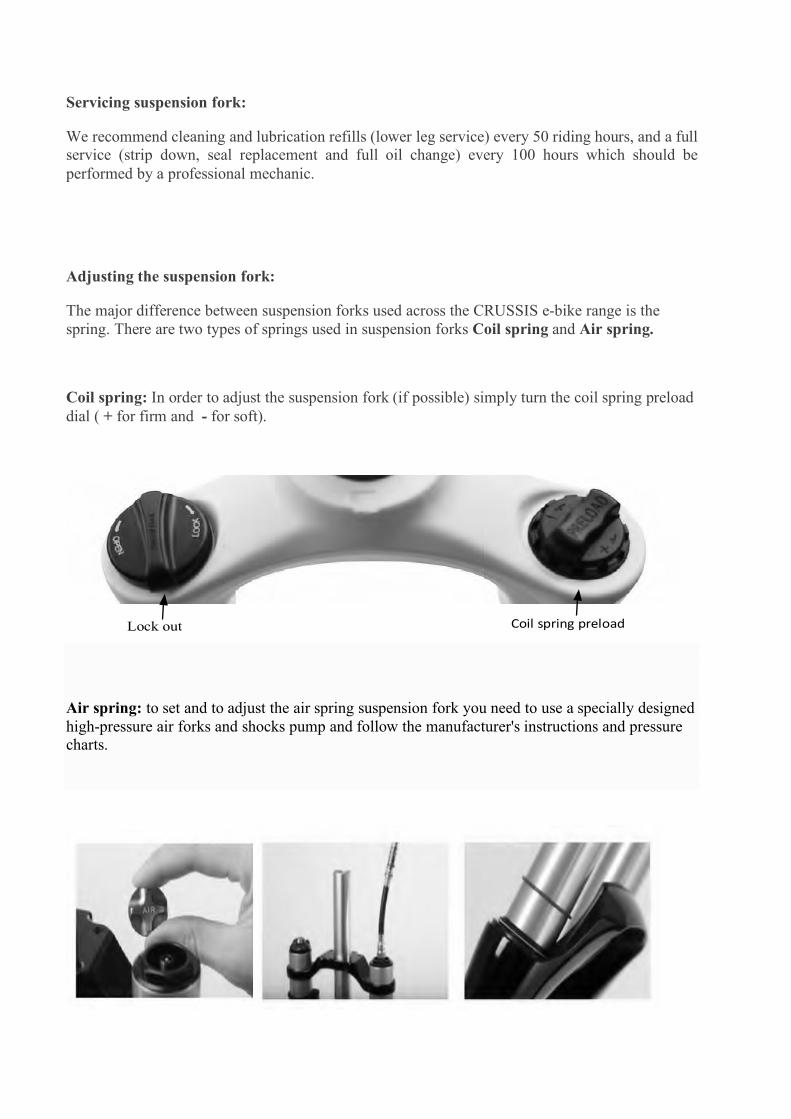
Coil spring: In order to adjust the suspension fork (if possible) simply turn the coil spring preload dial ( + for firm and - for soft).
Air spring: to set and to adjust the air spring suspension fork you need to use a specially designed high-pressure air forks and shocks pump and follow the manufacturer's instructions and pressure charts.
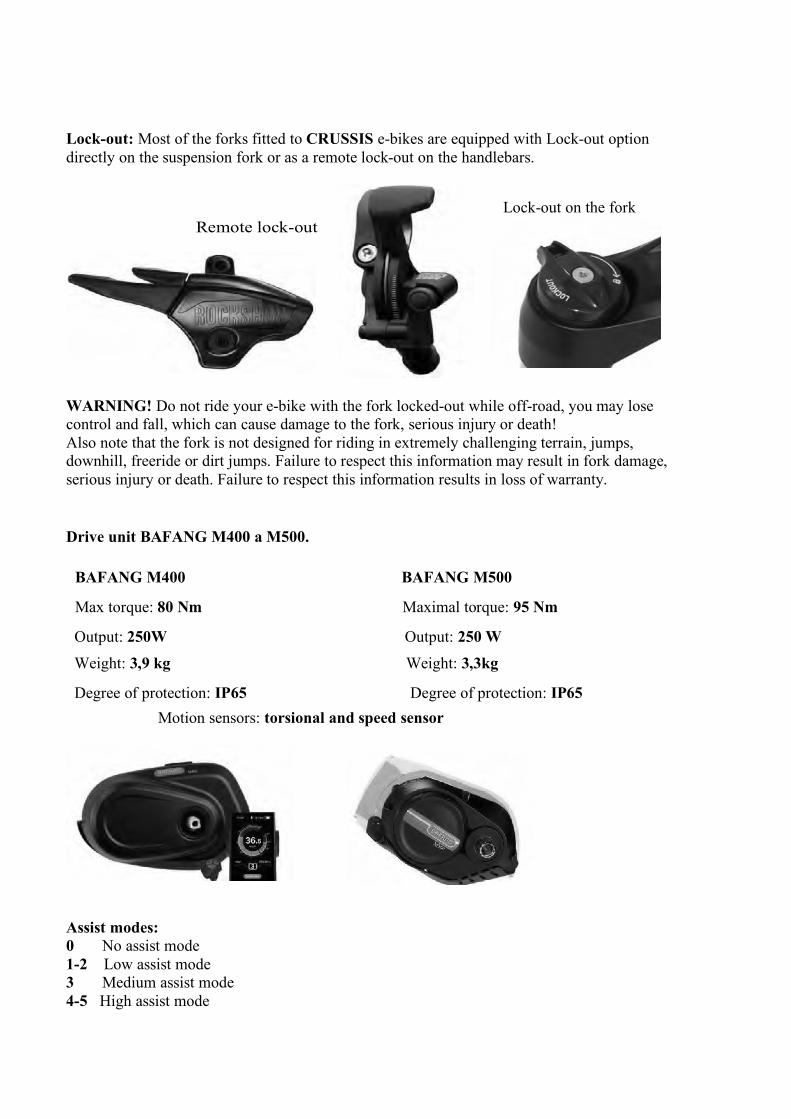
Lock-out: Most of the forks fitted to CRUSSIS e-bikes are equipped with Lock-out option directly on the suspension fork or as a remote lock-out on the handlebars.
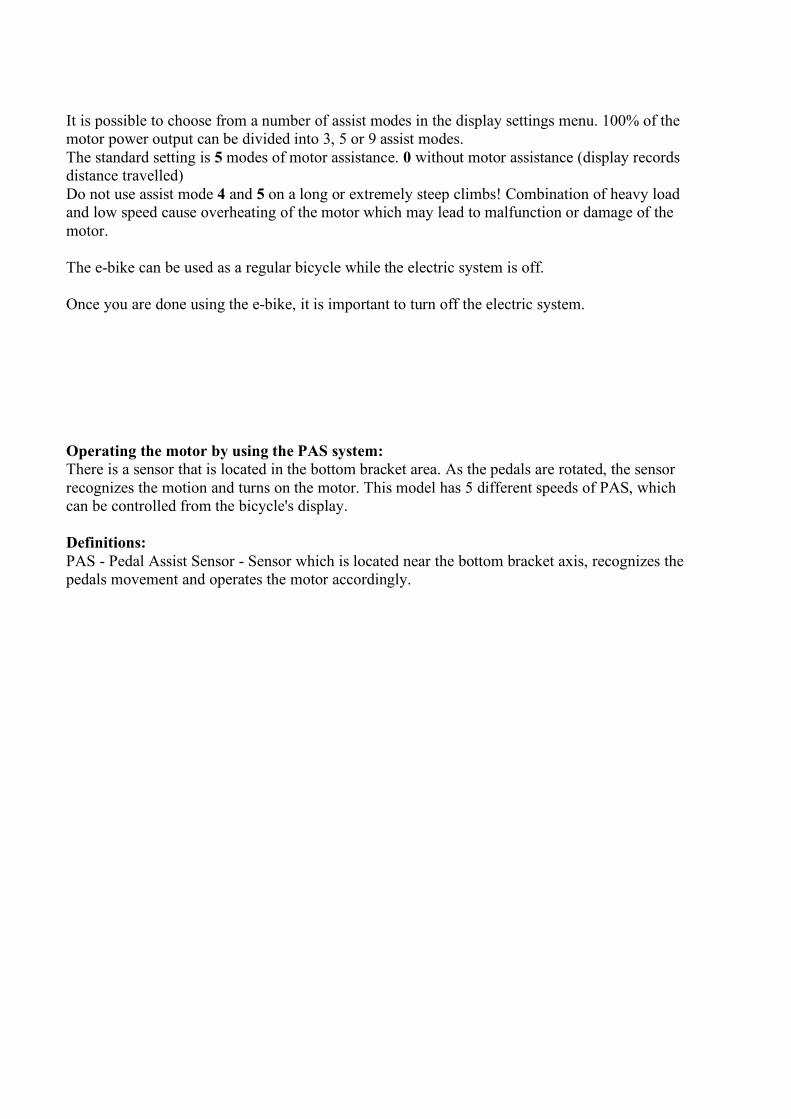
WARNING! Do not ride your e-bike with the fork locked-out while off-road, you may lose control and fall, which can cause damage to the fork, serious injury or death! Also note that the fork is not designed for riding in extremely challenging terrain, jumps, downhill, freeride or dirt jumps. Failure to respect this information may result in fork damage, serious injury or death. Failure to respect this information results in loss of warranty. Drive unit BAFANG M400 a M500. BAFANG M400 BAFANG M500
Max torque: 80 Nm Maximal torque: 95 Nm
Output: 250W Output: 250 W
Weight: 3,9 kg Weight: 3,3kg
Degree of protection: IP65 Degree of protection: IP65 Motion sensors: torsional and speed sensor
Assist modes: 0 No assist mode 1-2 Low assist mode 3 Medium assist mode 4-5 High assist mode
Lock-out on the fork
It is possible to choose from a number of assist modes in the display settings menu. 100% of the motor power output can be divided into 3, 5 or 9 assist modes. The standard setting is 5 modes of motor assistance. 0 without motor assistance (display records distance travelled) Do not use assist mode 4 and 5 on a long or extremely steep climbs! Combination of heavy load and low speed cause overheating of the motor which may lead to malfunction or damage of the motor. The e-bike can be used as a regular bicycle while the electric system is off. Once you are done using the e-bike, it is important to turn off the electric system. Operating the motor by using the PAS system: There is a sensor that is located in the bottom bracket area. As the pedals are rotated, the sensor recognizes the motion and turns on the motor. This model has 5 different speeds of PAS, which can be controlled from the bicycle's display. Definitions: PAS - Pedal Assist Sensor - Sensor which is located near the bottom bracket axis, recognizes the pedals movement and operates the motor accordingly.
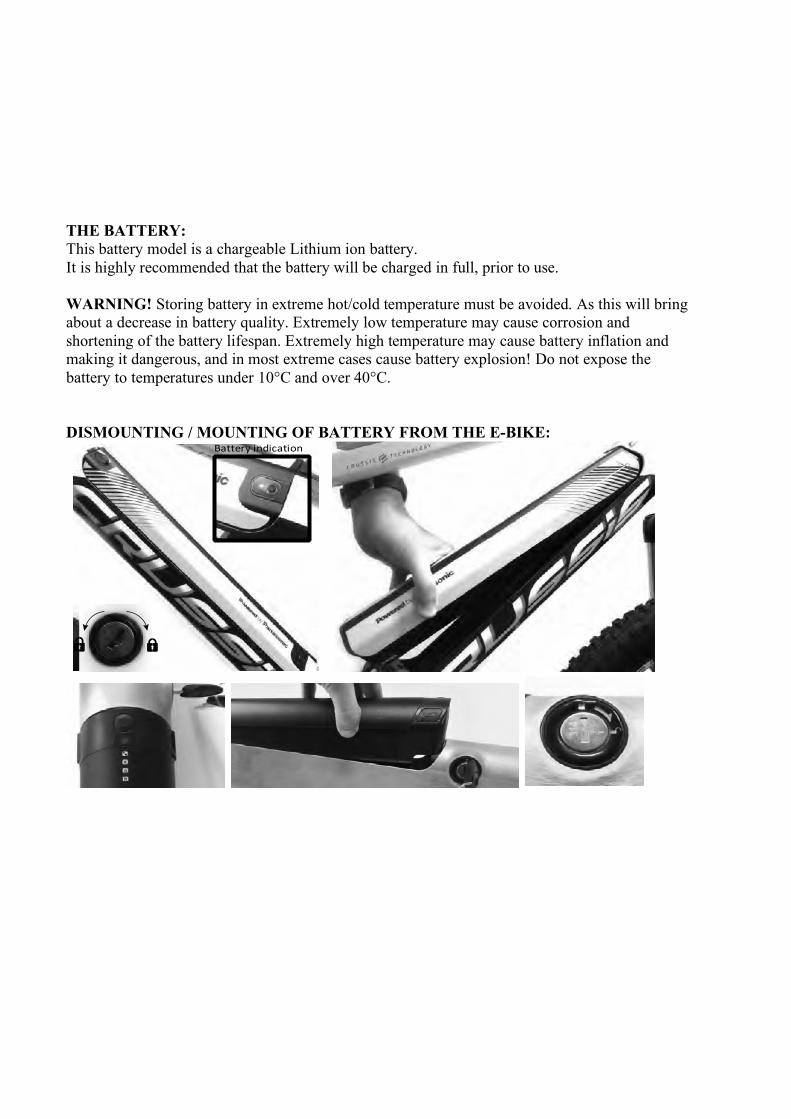
THE BATTERY: This battery model is a chargeable Lithium ion battery. It is highly recommended that the battery will be charged in full, prior to use. WARNING! Storing battery in extreme hot/cold temperature must be avoided. As this will bring about a decrease in battery quality. Extremely low temperature may cause corrosion and shortening of the battery lifespan. Extremely high temperature may cause battery inflation and making it dangerous, and in most extreme cases cause battery explosion! Do not expose the battery to temperatures under 10°C and over 40°C. DISMOUNTING / MOUNTING OF BATTERY FROM THE E-BIKE:

EMPHASIS FOR BATTERY CHARGING: The battery must be charged with the provided charger only, any other form of charger is forbidden and dangerous! The battery must be charged only when it is in off mode (and not emitting voltage). The battery may be charged while assembled to the e-bike as well as when it is unassembled. While the battery is in charging, the charger red indicator light is turned on, as the light turns into green the battery is fully charged. Before the charging, in order to avoid circuit shortening, the charger should be first connected to the electrical socket and then to the battery. In order to finish the charging process, the charger should first be disconnected from the electrical socket and then disconnected from the battery. Do not cover the battery and the charger during charging process. In case in which the battery overheats during the charging process, the charging should be stopped immediately! It is normal for the charger to become somewhat hotter during the charging process. Do not place the battery and / or the charger near flammable substances during charging. The battery works better when it is fully charged, it is recommended to begin riding when battery is fully charged. WARNING! The charger should be checked for physical damage. Before every charging, make sure that the charger wiring is not torn or exposed and whether its electrical plug is damaged! In case you notice a problem with the charger, the battery must not be charged until the charger is fixed / replaced! In case of a defective charger contact your bicycle provider! WARNING! Never charge the battery without supervision! Do not charge the battery overnight while all people are sleeping in the house!
PRESERVING OF BATTERY'S LIFESPAN: It is highly recommended to charge the battery in full immediately after purchasing your e-bike. The charger must be disconnected from the electricity and the battery after the charging process is completed. The battery must not be left empty for more than 24 hours, if the battery is left uncharged for too long it may reach a state in which it is no longer chargeable. If you know that the bicycle will not be in use for a long period of time, the battery should be charged in full, separated from Average battery lifespan depends on its use and on its conditions. Even with proper care, rechargeable batteries do not last forever. This battery model will last between 700-1000 charging cycles. A partial charge/discharge counts fractionally against those numbers. Running the battery down halfway and then recharging it completely, uses up to one half of a charge cycle. IMPORTANT! The battery cells are discharged autonomously, once the battery is left unused for a prolonged period. In cases battery cells are left low charged for a long period of time, their charge cycles and capacity will diminish, and the quality of the battery will be damaged. The battery should be left fully charged if it is not to be used for a prolonged period. FACTORS INFLUENCING THE E-BIKE RANGE: 1. Rolling resistance of the tires. CRUSSIS e-bikes are fitted with low rolling resistance tires, however it is crucial to keep the tires inflated properly according to manufacturer pressure charts. 2.Weight of the e-bike. The lower weight of the e-bike, the rider and the load carried, the greater the range. 3.Battery status. It depends on whether the battery was fully charged before your trip. It is also to be expected that the higher the number of discharge cycles the battery has undergone, the smaller capacity it has. the surface, the shorter the range. 4. Profile and surface of the track. The higher the elevation difference and the steeper hills you negotiate and the worse the surface, the shorter the range will be. 5.Riding mode. It depends on which of the three riding modes you have set. 6.Continuity of riding. The more braking and acceleration, the shorter the range. 7.Air resistance. For example, it depends on whether we ride a bicycle with a low frame and sitting upright or whether we ride a sporty bicycle with the seat set to the same height as the handlebars. 8.Wind strength. The stronger the wind we have in the back, the longer the range and vice versa. 9.Weight of the rider and load. The greater the weight, the shorter the range. 10.External temperature. The lower the temperature, the less battery capacity can be used while riding.

OPERATING THE E-BIKE’S CONTROL PANEL (LCD color display): Control panel Bafang with high contrast LCD display gives you all the important information even under direct sunlight. The user interface is easy to read and intuitive to use with remote control panel giving you great feedback.
Type: DP C18 Display: LCD 3,5” Weight: 202g Dimensions: 98x63x69mm Handlebar bracket diameter: 22,2/25,4/31,8mm Voltage: 36/43/48V Degree of protection: IP65 Operating temperature: -20°C - +45°C USB port: 5V 500mA
1. Time: The time is displayed in a 24-hour format and shows the current time. 2. USB connection: When a USB is connected externally, the corresponding symbol appears on the display. 3. Display illumination/backlight indicator: The symbol is displayed only when it is active. 4. Speed display (scale): The value on the scale matches the digital speed value. 5. Selected mode: distance traveled (TRIP), total mileage counter (ODO - cannot be erased), maximum speed achieved (MAX), average speed (AVG), distance remaining (RANGE), your energy consumption (CALORIE), time (TIME) 6. Battery charge level: Shows the current battery charge level.
7.Battery Voltage/Percentage of charge level: Displays the current battery charge level in Volts or in %, the mode can be set in the menu (SOC View) to display the battery charge level. 8. Speed display (digital): current speed display, units shown can be changed in the (Unit) menu 9. Power display (scale): The power value on the scale displays the motors assistance in Watts or Amperes depending on your selection in (Power view) menu.

10. Pedal/walk assist mode: Press the + or - button briefly to change the level of assistance (1-3, 1-5, 1-9, depending on the bike model). Press and hold the - button to activate the walk assist mode. The display shows the mode symbol. *For the e-bike model 9.6, it is necessary to use the - button to select the walk assist symbol and then hold the - button to activate the Walking Assistant. 11. Data display mode: Displays the current data corresponding to the selected mode.
Operating the e-bike’s electric system: ON/OFF Button: Turn on the power by pressing the button of the battery, Pressing on the central button of the displays remote control for approximately 2 seconds will start the e-bike's electric system (the bicycle are ready to be driven in electric mode). To switch the electric system off use the same method. In case the e-bike is not in use for longer than 10 minutes, the electric system of the e-bike will switch off automatically. Briefly press on the Mode (i) button to switch between the modes in following order: distance travelled (TRIP), total mileage counter (ODO - cannot be erased), maximum speed achieved (MAX), average speed (AVG), time (TIME), your energy consumption (CALORIES), distance remaining (RANGE).

Pedal assist mode selection: To adjust the pedal assist simply press the + or – button and select the level of pedal assist. The lowest level is 0, the highest level is 5. The default setting after the display is turned on is level 1. Level 0 is pedal assist-free mode.
If the electric system is on, the backlight will adjust its-self to ambient light. The reflector symbol appears on the display when the backlight is dimmed. The display allows 5 levels of sensor sensitivity adjustment from which you can select to adjust the backlight brightness. This sensor works similarly to mobile phones sensors and darkens or lightens the display according to ambient light. This can be adjusted in the display menu (AI sensitivity). If the automatic dimming is turned off, the display backlight can be dimmed manually by pressing and holding the Backlight button. Walk assist:
Pedal assist 1
Pedal assist 5

To activate the walk-assist mode press and hold the (-) button, the bike travels on its own at a speed of about 6 km/h and when starting or pushing. To deactivate the walk-assist mode simply release the (-) button. You can choose the speed at which your bike will travel by changing the gear. This feature is not designed for driving! *For the 9.6 e-bike range it is necessary to select the walk-assist mode first and then activate it by pressing and holding the – button.
Pedal assist 1 Walk assist If the electric system of the bike is switched on and the display is lit, the display backlight will adjust itself to ambient light. When the backlight is dimmed a reflector symbol appears on the display. The display allows 5 levels of sensor sensitivity to choose from to adjust the backlight brightness. This sensor works similarly to mobile phone sensors and darkens or brightens the display according to ambient light. This can be set in the AI sensitivity display menu. If the automatic dimming is turned off, the display backlight can be dimmed manually by pressing and holding the Backlight button.

Display setting
Setting wheel circumference
Setting
USER SETTINGS MENU

Entering the user settings menu: After the electric system has been switched on and the display is lit, press the MODE button (i) twice in a row and access the user menu settings. The interface contains - Display settings - Information - Exit Setting: Simply press on the + or – button to navigate in the user settings menu and confirm your selection by pressing on the MODE button (i). Select EXIT and briefly press the MODE button (i) to exit the interface. You can also exit the interface by pressing on the MODE button (i) twice in a row. In either case, the set data will be saved when exit. After more than 20 seconds of inactivity, the display automatically returns to main interface, no data will be saved. Display settings: In the setting menu press on the + or – button to navigate and select Display settings menu by pressing on the MODE button (i). There is 10 options in this interface. (1) Unit setting In the Display settings menu press + or – button and select the Units menu. Press the MODE button (i) briefly to confirm the option and access the menu. Press + or - and select between Metric (metric - km) / Imperial (British – miles). Press on the MODE button (i) to confirm your selection and return to the Units menu. Press the MODE button (i) twice (at an interval of less than 0.5 seconds) to return to the main interface or select BACK -> EXIT
(2) Brightness setting In the Display settings menu press + or – button and select the Brightness menu. Press the MODE button (i) briefly to confirm the option and access the menu. Press + or - and select from the options 100 % / 75 % / 50% / 30 % / 10 % of brightness. Press on the MODE button (i) to confirm your selection and return to the Brightness setting menu. Press the MODE button (i) twice (at an interval of less than 0.5 seconds) to return to the main interface or select BACK -> EXIT
(3) Auto OFF setting In the Display settings menu press + or - button and select the Auto OFF menu. Press the Mode button (i) briefly to confirm the option and access the menu. Press + or - and select from options /9 / 8 / 7 / 6 / 5 / 4 / 3 / 2 / 1 minute. Press on the MODE button (i) to confirm your selection and return to the Auto OFF menu. Press the MODE button (i) twice (at an interval of less than 0.5 seconds) to return to the main interface or select BACK -> EXIT (4) Max PAS setting In the Display settings menu press + or - button and select the Max PAS menu. Press the Mode button (i) briefly to confirm the option and access the menu. Press + or - and select /3 / 5 / 9 / levels of pedal assist levels. Press on the MODE button (i) to confirm your selection and return to the Max PAS menu. Press the MODE button (i) twice (at an interval of less than 0.5 seconds) to return to the main interface or select BACK -> EXIT (5) Power view setting In the Display settings menu press + or – button and select the Power view menu. Press the Mode button (i) briefly to confirm the option and access the menu. Press + or - and select between power display modes Watts or Amperes. Press on the MODE button (i) to confirm your selection and return to the Power view menu. Press the MODE button (i) twice (at an interval of less than 0.5 seconds) to return to the main interface or select BACK -> EXIT
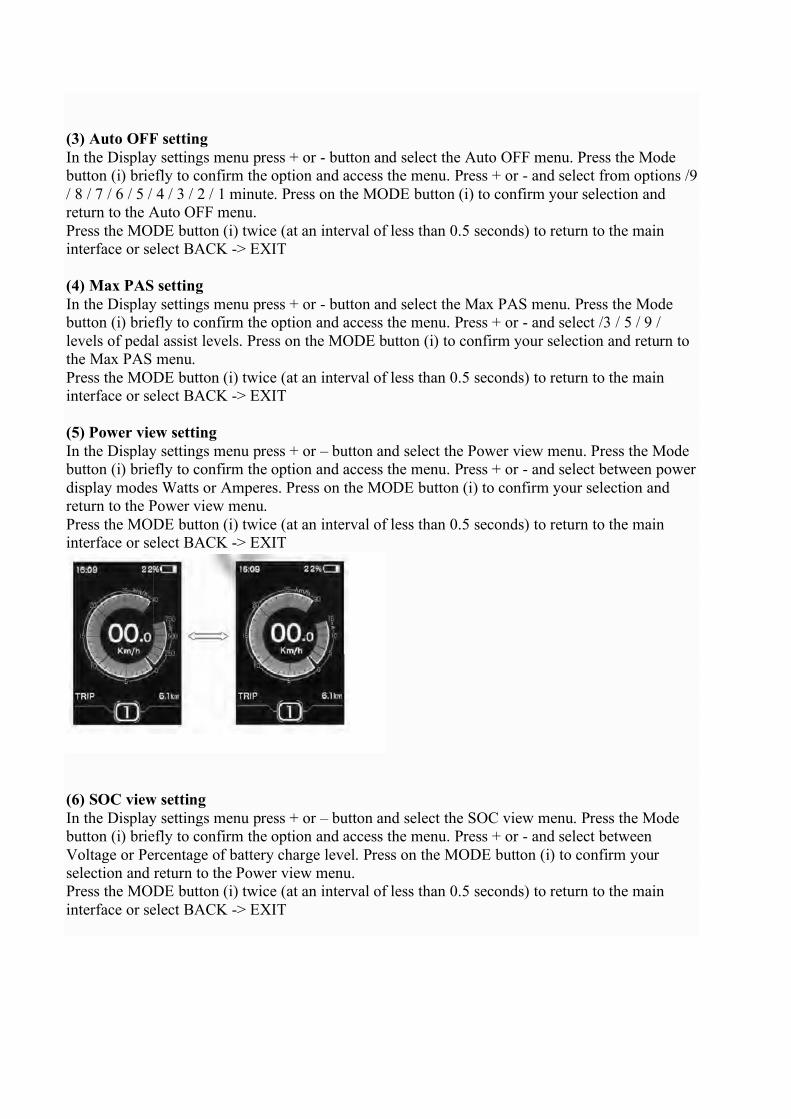
(6) SOC view setting In the Display settings menu press + or – button and select the SOC view menu. Press the Mode button (i) briefly to confirm the option and access the menu. Press + or - and select between Voltage or Percentage of battery charge level. Press on the MODE button (i) to confirm your selection and return to the Power view menu. Press the MODE button (i) twice (at an interval of less than 0.5 seconds) to return to the main interface or select BACK -> EXIT

(7) Trip reset menu (TRIP, MAX, AVG) In the Display settings menu press + or – button and select the Trip reset menu. Press the MODE button (i) briefly to confirm the option and access the menu. Press + or - and select between YES or NO. The Trip reset menu includes maximum distance travelled MAX, average speed AVG and TRIP distance travelled. Press on the MODE button (i) to confirm your selection and return to the Trip reset menu. Press the MODE button (i) twice (at an interval of less than 0.5 seconds) to return to the main interface or select BACK -> EXIT (8) AL Sensitivity setting In the Display settings menu press + or – button and select the AL Sensitivity menu. Press the MODE button (i) briefly to confirm the option and access the menu. Press + or - and select from options 0 / 1 / 2 / 3 / 4 / 5 / OFF. Option OFF means that the automatic display brightness change feature is not activated. Level 1 is the weakest sensor sensitivity to light, level 5 is the highest sensor sensitivity to light. Press on the MODE button (i) to confirm your selection and return to the Al Sensitivity setting menu. Press the MODE button (i) twice (at an interval of less than 0.5 seconds) to return to the main interface or select BACK -> EXIT (9) Password setting In the Display settings menu press + or – button and select the Password menu. Press the MODE button (i) briefly to confirm the option and access the menu. Press + or - and select from options OFF / ON. Option OFF means that the password is not activated. To activate the password, follow the procedure described bellow. Password input: Enter the Password menu and select ON. Briefly press the MODE button (i) and the input password will appear on the display. Briefly press + or - to switch between 0-9. Press the MODE button (i) briefly to confirm the option. After you enter the input password, the new password appears again in the interface. Repeat the steps above to enter a new password. If the new password matches the original password, the system will notify you that the password entry was successful. Otherwise, you must repeat the first step to enter a new password and re-confirm the password. After setting the password, the interface automatically returns to the original menu within 2 seconds Press the MODE button (i) twice (at an interval of less than 0.5 seconds) to return to the main interface or select BACK -> EXIT

Password change: After you set your password, another Reset Password option is added to the Password menu. Briefly press the + or - button and select the Change password menu. Press the MODE button (i) briefly and confirm the option, enter the current password in the interface. If an incorrect password is entered 10 times, the display will shut itself OFF. After setting the password change, the interface automatically returns to the original menu within 2 seconds Press the MODE button (i) twice (at an interval of less than 0.5 seconds) to return to the main interface or select BACK -> EXIT
Password OFF: Enter the Password menu and select option OFF. Briefly press the MODE button (i) to confirm the option. Enter the current password and confirm by pressing the MODE button (i). If you enter the correct password, the display confirms the password and turns Password function OFF If an incorrect password is entered 10 times, the display will shut itself OFF. After setting the password OFF, the interface automatically returns to the original menu within 2 seconds Press the MODE button (i) twice (at an interval of less than 0.5 seconds) to return to the main interface or select BACK -> EXIT

(10) Set Clock In the Display settings menu press + or – button and select the Set Clock menu. Press the Mode button (i) briefly to confirm the option and access the menu. The time is displayed in 24-hour format. The cursor remains at the first digit of the clock. Briefly press + or - button and select 0-2, confirm the selection by pressing on the MODE button (i). The cursor moves to the second digit of the clock. Briefly press + or – button and select 0-9, confirm the option by pressing on the MODE button (i). The cursor moves to the first digit of the minutes. Briefly press + or – button and select 0-5, confirm the option by pressing the MODE button (i). The cursor moves to the second digit of the minutes. Briefly press + or – button and select 0-9, confirm the option by pressing on the MODE button (i) and return to the Set Clock menu. Press the MODE button (i) twice (at an interval of less than 0.5 seconds) to return to the main interface or select BACK -> EXIT Information: In the Setting menu press + or – button and select the Information menu. Press the MODE button (i) briefly to confirm the option and access the information. You can use the menu to view all the information, but you cannot edit or interfere with it. (1) Wheel circumference - information only for reading (2) Speed limit - information only for reading (3) Battery info - information only for reading
Information displayed Explanation Information shown Explanation Temp Current temperature Cycle Times Cycle time
TotalVolt Battery Voltage Max Uncharge Time Max discharge time Curent Amperes Last Uncharge Time Last time of discharge
RestCap Remaining battery capacity
Total Cell Number of cells
FullCap Battery capacity when fully charged
Cell Voltage 1 Voltage of cell 1
RelChargeState Relative battery charge status shown in %
Cell Voltage 2 Voltage of cell 2
AbsChargeState Absolute battery charge status shown in %
Cell Voltage 3 Voltage of cell 3

(4) Error code In the Information menu press + or – button and select the Error code menu. Press the MODE button (i) briefly to confirm the option and access the menu. The last 10 errors are shown. E-CODE 1 displays information about the last error. E-CODE 10 will not be displayed until the tenth error occurs. A maximum of 10 records can be stored in the memory. Error message 00 means no error. Consult the error code table to see what each code stands for. The display may show e-bike failures. When an error is detected, the corresponding symbol appears on the display. Additionally, one of the following codes appears.
Solution
Have the battery Voltage checked
Have the rotor of the motor checked
Have the power cord and motor checked
Stop and wait until the motor cools down (if the error persists visit the service)
Stop and wait until the motor cools down (if the error persists visit the service)
Have the control unit replacedStop and wait until the error message disappears (if the error persists visit the service)Have the control unit replaced
Check the placement of the magnet (if the error persists visit the service)
Have the battery and connectors checked
Have the control unit replaced
Contact the manufacturer
Have the torsion sensor replaced
Have the control unit checkedHave the connectors between thedisplay and the control unit checkedHave the control unit checked
Have the control unit checked
Have the control unit and the connectors between the display and the controlunit checked
Abnormal communication
Have the torsion sensor replaced
Error of the 15V circuit
Control error36
37 Error of the WTD control unit
27 Control unit surge
30
35
24 Unspecified error
25 Torsion sensor error
26 Torsion sensor error
21 Speed sensor error
22 BMS Battery Error
23 Control unit error
12 Current sensor error in the control unit
14 The control unit temperature has reached the operating max
15 Control unit temperature sensor error
9 Engine Phase Error
10 The motor temperature has reached the operating max
11 Motor temperature sensor error
Error code Error description
7 High Voltage protection
8 Hall probe error inside the motor

Model DP C18 – e-bike line 5.6 Specifications: Display size: 3“ Weight: 185g Dimensions: 82x94x75mm Handlebar mounting bracket diameter: 22,2/ 25,4/ 31,8mm Voltage: 36/ 43/ 48V Operating temperature: -20°C/ +°45°C Level of protection: IP65 Description of the DP C18 LCD display:
A – Service warning B – Menu C – Current speed information D – Display mode selection (TRIP, TOTAL, MAXS, AVG, RANGE, C) E – Error code F – Data display mode (TRIP, TOTAL, MAXS, AVG, RANGE, C) G – Pedal assist level (1 – 5) H – WALK assist
I – display light/backlight indicator (only displayed when active) J – Display mode selection (TRIP, TOTAL, MAXS, AVG, RANGE, C) K – Battery charge level (at maximum battery charge 10 degrees are shown; 1 degree = 10% of battery capacity)

Controller description:
A - button + B - button – C - display light/backlight button D - ON/OFF button E - MODE button (TRIP, TOTAL, MAXS, AVG, RANGE, C) Operating the e-bike’s electric system: ON/OFF Button: Turn on the power by pressing the button of the battery, Pressing on the central ON/OFF button of the displays remote control for approximately 2 seconds will start the e-bike's electric system (the bicycle are ready to be driven in electric mode). To switch the electric system off use the same method. In case the e-bike is not in use for longer than 5 minutes, the electric system of the e-bike will switch off automatically. Pedal assist mode selection: To adjust the pedal assist simply press the + or – button and select the level of pedal assist. The lowest level is 0, the highest level is 5. The default setting after the display is turned on is level 1. Level 0 is pedal assist-free mode.
Walk assist: To activate the walk-assist mode press and hold the (-) button, the bike travels on its own at a speed of about 6 km/h and when starting or pushing. To deactivate the walk-assist mode simply release the (-) button. You can choose the speed at which your bike will travel by changing the gear. This feature is not designed for driving!

Turn on the lighting and backlight of the display: Press and hold the button for approximately 2 seconds to turn on the display lighting and backlight. To turn off the display lighting and backlight, use the same method. When the display is turned on in a dark environment, both the display backlight and the lights are automatically turned on. If the display backlight is switched off manually, it must be turn back on manually. To turn on the light, the e-bike must be equipped with lighting that is powered by the battery of the e-bike. Display data mode selection: By briefly pressing on the MODE button (i), you can select between the modes in following order: distance traveled (TRIP), total mileage counter (TOTAL), maximum speed achieved (MAXS), average speed (AVG), distance remaining (RANGE), your energy consumption (C)
Battery charge status indicator: Battery charge level (displays 10 degrees at maximum charge; 1 degree = 10% capacity). If discharge occurs, the battery contour will flash. The battery must be charged immediately. Setting the parameters: If the electric system of the bike is switched on press the MODE button (i) twice in a row (at an interval of 0.3 seconds) and enter the SETTINGS interface. To leave the settings interface use the same method.

Adjustable parameters: Erasing the data such as TRIP, MAXS, AVG, tC. Setting unit km/mil (S7). Adjusting the automatic display backlight (bL0), display brightness (bLI). Setting the display automatic switch off function (OFF). Maintenance warning (nnA). Non-adjustable parameters: Wheel circumference (LUd). Max speed limit (SPL). Battery information (B01). Error codes (E00 – E09). Erasing the data TRIP, MAXS, AVG, tC: Press the MODE button (i) twice in a row (at an interval of 0.3 seconds), enter the SETTINGS interface an select the tC option (erasing the TRIP, MAXS, AVG data). Confirm the option by pressing the MODE button (i). Press the + or – button to select from the options “n” (NO) or “y” (YES). If the option “y” (YES) is confirmed all the data is deleted, except for the Total distance traveled (TOTAL). Press on the MODE button to confirm the option and continue. If the data is not manually erased, the values remain unchanged.
Setting the units km/miles (S7): Briefly press on the + or – button and select unit km/h or mile/h. Press the MODE button (i) briefly to confirm the selection and proceed to the next parameter setting.
Setting the sensitivity of the displays automatic backlight sensor (bL0): Press on the + or - button to select from the options 0-5, where 0 means backlight is off, 1 is the lowest sensibility and 5 is the highest sensibility of displays sensor to light. Press on the MODE button (i) to confirm the option and proceed to the next parameter.

Setting the brightness of the display (bLI): Press on the + or – button to select from options 1-5, where 1 is the dimmest and 5 is the brightest of the display brightness setting. Press on the MODE button (i) to confirm the option and proceed to the next parameter.
Automatic shut off setting (OFF): Press on the + or – button to select from options 0-9, where 0 stands for non-active (the display will not shut off automatically), 1 (display will shut off automatically after 1 minute), 9 (the display will shut off automatically after 9 minutes). Press on the MODE button (i) to confirm the option and proceed to the next parameter.
Maintenance warning (nnA): Press on the + or – button to select from options 0 (OFF - warning not active) or 1 (ON-warning active). Press on the MODE button (i) to confirm the option and proceed to the next parameter. If the total distance travelled is 5,000 km (can be adjusted by the manufacturer), the display shows the SERVICE symbol. When the display is switched on, the total mileage information will flash for 4 seconds, indicating the necessary maintenance.
Wheel circumference (LUd): Information only for reading – cannot be adjusted. Press on the MODE button (i) and proceed to the next parameter.
Speed limit information (SPL):
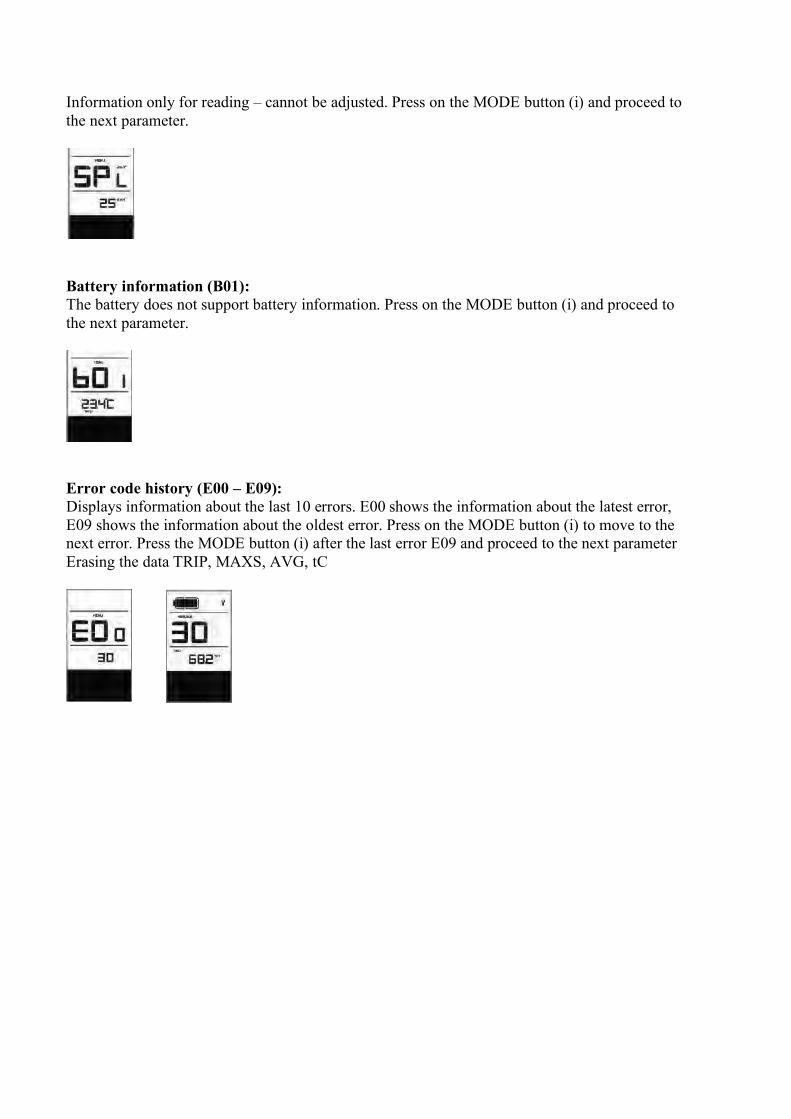
Information only for reading – cannot be adjusted. Press on the MODE button (i) and proceed to the next parameter.
Battery information (B01): The battery does not support battery information. Press on the MODE button (i) and proceed to the next parameter.
Error code history (E00 – E09): Displays information about the last 10 errors. E00 shows the information about the latest error, E09 shows the information about the oldest error. Press on the MODE button (i) to move to the next error. Press the MODE button (i) after the last error E09 and proceed to the next parameter Erasing the data TRIP, MAXS, AVG, tC

Solution
Have the battery Voltage checked
Have the rotor of the motor checked
Have the power cord and motor checked
Stop and wait until the motor cools down (if the error persists visit the service)
Stop and wait until the motor cools down (if the error persists visit the service)
Have the control unit replacedStop and wait until the error message disappears (if the error persists visit the service)Have the control unit replaced
Check the placement of the magnet (if the error persists visit the service)
Have the battery and connectors checked
Have the control unit replaced
Contact the manufacturer
Have the torsion sensor replaced
Have the control unit checkedHave the connectors between thedisplay and the control unit checkedHave the control unit checked
Have the control unit checked
Have the control unit and the connectors between the display and the controlunit checked
Abnormal communication
Have the torsion sensor replaced
Error of the 15V circuit
Control error36
37 Error of the WTD control unit
27 Control unit surge
30
35
24 Unspecified error
25 Torsion sensor error
26 Torsion sensor error
21 Speed sensor error
22 BMS Battery Error
23 Control unit error
12 Current sensor error in the control unit
14 The control unit temperature has reached the operating max
15 Control unit temperature sensor error
9 Engine Phase Error
10 The motor temperature has reached the operating max
11 Motor temperature sensor error
Error code Error description
7 High Voltage protection
8 Hall probe error inside the motor

www.crussis.cz
CRUSSIS electrobikes s.r.o.K Březince 227, 182 00 Praha 8
Czech Republic