Education of visually Impaired Pupils in Ordinary...
134
Guides for Special Education No. 6 Education of visually Impaired Pupils in Ordinary school by J. Kirk Horton Hellen Keller International Unesco, 1988
Transcript of Education of visually Impaired Pupils in Ordinary...

Guides for Special Education No. 6
Education of visually Impaired Pupils in Ordinary school
by J. Kirk Horton Hellen Keller International
Unesco, 1988
PREFACE -
This guide is the sixth in the Series on Guides for Special Education published by Unesco.
The guides, which are intended for teachers, parents and community workers, aim at stimulating discussion on basic knowledge, methods and techniques relevant to the education of handicapped persons, and offer practical advice for action in this field.
Although the guide is meant to promote and develop educa- tional support to visually impaired pupils in the ordinary school, the information, skills and activities covered are just as valuable to teachers working in special school settings. However, it is hoped that the orientations provided in the guide will encourage both teachers as well as the system or organization to which they are attached to consider placement of and educational support to visually impaired pupils in the ordinary school.
The views and opinions expressed in this guide are those of the author and do not necessarily reflect those of Unesco.
Earlier topics in the Series:
1.
2.
3.
4.
5.
The Education of Children and Young People who are Mentally Handicapped:
Working'Together: Guidelines for Partnership between Professionals and Parents of Children and Young People with Disabilities:
Testing and Teaching Handicapped Children in Developing Countries:
Education of Deaf Children and Young People;
Language and Communication for the Young Disabled Person.
Future Topic: Children with Severe Cerebral Palsy: An educational guide.
The guides are published in English, French, Spanish, Arabic and Chinese. The text may be freely reproduced or translated provided that mention is made of the author and source.
Special Education Programme
Unesco Paris 1988 __.__. -. -._. -
INTRODUCTION
Dear Reader,
Before you start to read this manual, I would like to explain a few things to you. Originally this manual was developed while I was working in Papua New Guinea. It was written to help special education teachers of visually impaired children who were working in Integrated Education programs. I found that teachers after receiving their initial training still needed ideas to use in the classroom. SO, I wrote this manual. At that time I never throught the manual would be published for a wider audience.
A few years later the manual came to the attention of UNESCO and they decided to use it in their series Guides for Special Education. This gave me both a feeling of happiness and worry. I was happy because it was an opportunity for the manual to be used by teachers in more than Just a few countries. I was worried because I realised that very few ideas in this manual were mine. As I have rewritten the manual, I have become even more confused about from whom I have "borrowed" certains ideas and activities. I have finally come to the conclusion that it does not matter. In an "activities" manual ideas come from everywhere! It would be impossible for me to track down each activity to the person who first developed it. So, to save time I am stating now that this manual is a com- bination of many different people's ideas. All I have tried to do is bring a few of the ideas together. In cases where I am sure of the source and have taken the information almost verbatim, I have included the authors name in parenthesis within the text.
Another problem that I ran into was try'ing to decide what activities to keep in the manual and what activities to eliminate. Some of the sections might be too long; while others might be too short. There may even be sections I have not included. Once again I have come to the conclusion that it does not matter. If this manual does nothing more than to stimulate you to write a similar and more complete manual, I will be happy-

As I worked on the manual, I tried to keep activities and the use of equipment and supplies as simple as possible. Much of the advance equipment for educating visually impaired children is not available in many parts of the world. Therefore, I have not included the use of this equipment in the manual.
There are a few people I would like to thank. For as- sistance with the field testing of the manual, I would like to thank:
a. Mt. Sion Center for the Blind in Papua New Guinea,
b. Indonesian Federation of the Blin-d, C. Western Samoa Association for the Blind, d. Special Education Division, Ministry of
Education in Thailand, and e. Training Center for the Blind in Gaza.
I would also like to thank Miss Pattara Donsuwan of the Caulfield Memorial Library for the Blind, Pakkred, Thailand for the illustrations in this manual.
I would like to thank Larry Campbell of Helen Keller International and the organization of Helen Keller In- ternational for their support and to UNESCO for pub- lishing this manual and making it available to you.
I would like to thank Mr. and Mrs. Mike Milles, Mission Hospital Peshawar, Pakistan and Ms. Kathleen M. Huebner Ph. D., National Consultant in Education, American Foundation for the Blind for their ideas, suggestions, and reviews of the draft manual.
Lastly, I would like to thank all the teachers of the visually impaired from whom I have "borrowed" ideas. I could not have written this manual without the kind assistance of all of you.
I hope you find this manual helpful.
Sincerely yours,
J. Kirk Horton Country Director - Thailand Helen Keller International
1. 2. 3. 4.
5. 6. 7. a. 9. 10
TABLE OF CONTENTS
CIIAPTER PAGE
TYPES OF EDUCATIONAL PROGRAMS .............. TEACHERS' RESPONSIBILITIES ................. SUPPORTING THE REGULAR CLASSROOM TEACHER ... TEACHING "CURRICULUM PLUS SKILLS" ........... 1. SENSORY TRAINING .......................
A. HEARING ............................ B. TOUCH C. SMELL AND'TASTE.:::
.................
................. D. RESIDUAL VISION ....................
2. ORIENTATION AND MOBILITY ............... A. BODY MOVEMENT ...................... 8. SENSORY TRAINING ................... C. CONCEPT DEVELOPMENT ................
3. ABACUS ................................. 4. BRAILLE READING AND WRITING ...........
A. PRE-BRAILLE TACTUAL ACTIVITIES ..... 8. PRE-BRAILLE WORKSHEETS ............ C. MECHANICS OF READING BRAILLE D. BRAILLE ALPNABET ............. . . . . . . E. BRAILLE READING ................... F. BRAILLE CONTRACTIONS ............... G. SLATE AND STYLUS
5. RECORDED BOOKS ....... . . . . . . . . . . . . . . . ::: 6. HANDWRITING ............................ 7. TYPING ................................. 8. ACTIVITIES OF DAILY LIVING ............. MATERIALS ADAPTATION ....................... EQUIPMENT AND SUPPLIES ..................... REMEDIAL WORK .............................. LINK BETWEEN HOME AND SCHOOL ............... WAYS TO MAKE YOUR JOB EASIER ............... REFERENCES ...................... . .......... 1. MATERIALS ............................. 2. BOOKS .................................
1 11 15 22 23 23 28 35 37 45 46 52 54 69 72 72 74 79 81 85 a9 90 91 95 99
102 107 113 115 118 120 124 124 127
CHAPTER 1 -- TYPES QF EDUCATIONAL PRbGRAMS
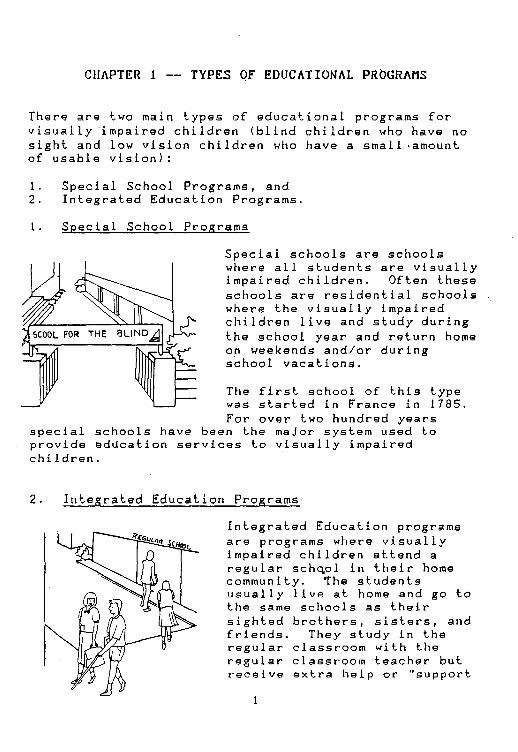
There are two main types of educational programs for visually.impaired children (blind children who have no sight and low vision children who have a small.amount of usable vision):
1. Special School Programs, and 2. Integrated Education Programs.
1. Special School Programs
Special schools are schools where all students are visually impaired children. Often these schools are residential schools where the visually impaired children live and study during the school year and return home on weekends and/or during school vacations.
The first school of this type was started in France in 1785. For over two hundred years
special schools have been the major system used to provide education services to visually impaired children.
2. Integrated Education Programs
Integrated Education programs are programs where visually impaired children attend a regular schqol in their home community. The students usually live at home and go to the same schools as their sighted brothers, sisters, and friends. They study in the regular classroom with the regular classroom teacher but receive extra help or "support
1
.._ -___ ---

services" from a special education teacher who has been trained to work with visually impaired children. This system was started in America in 1900 and became popular there and in other countries in the mid-1960's.
WHICH SYSTEM IS BETTER?
Since the first integrated education program started in 1900, the question has been asked again and again which system is better for educating blind and low vision children. Professionals in the field of blindness have discussed, argued, and debated about this question. Still the question has not been answered. Both systems have definite advantages and disadvant- ages. There are some very good special schools for visually impaired children. Other special schools are no more than homes that care for visually impaired children without trying to educate the children. The same is true for integrated education programs. There are some well run integrated programs in which children receive excellent education, but there are other programs which are poorly run and where the blind or low vision child is placed in the back of the classroom and ignored. The question of which system is better is not as important as knowing the advantages and disad- vantages of both systems.
SOflE OF THE ADVANTAGES OF SPECIAL SCBOOL PROGRAMS
1. The teachers in special schools are trained either through special training or on the job experience to teach blind and low vision children. Therefore, the children are always in contact with a teacher who can help them with their special needs. In integrated education programs this may not be true. The classroom teacher may be trained in teaching Sighted children but not visually impaired children. For'special training the blind or low vision child may have to wait until the special teacher is at the school.
2
2. Because all the students in a special school program are either blind or low vision, the school can more easily afford to buy special equipment, braille books, large print books, tactual models, and so on. In an integrated program, a school can less easily af- ford to buy equipment and books for just one or two visually impaired children.
3. The class size in a special school is usually small with a smaller teacher to student ratio. It is easier for the teacher to provide individual attention when the class size is small. In an integrated program, the classroom teacher may have 30 to 40 children in the class besides the blind or low vision student. The classroom teacher does not have as much time to give individual attention to students as a teacher in a spe- cial school.
4. Because the children often live at the special school (residential school), there is more time before, during, and after school to teach special subjects that visually impaired children need but which are not in the teaching curriculum such as Orientation and Mobility, Activities of Daily Living, and so on. It is more difficult in integrated programs to find the time to teach these important subjects since the student is only at school during the school day.
5. Special schools can develop special curriculum for subject are,as that might be more difficult for visually impaired children. In integrated programs, the blind or low vision children have to follow the standard school curriculum because they are attending a regular school.
ADVANTAGES OF INTEGRATED EDUCATION pROGRAMS .
1. In integrated programs, the specia.1 students live at home and attend regular schools near their homes. They are not separated from their parents, brothers, and sisters but continue to be members of the family. In special schoo,ls, the children are usually separated from their families and live at school. The students might have the opportunity to visit their families only
3
once or twice a year. This lessens the interaction the children have with their parents, brothers, and sisters.
2. Integrated programs are less expensive than special schools. Special schools require land on which.to build school buildings, dormitories, kitchens, dining rooms, and so on. This can be very costly. The special school must also pay for the on-going cost of providing food, clothing, and health services to the students living at the school. Because integrated education programs do not have these on-going expenses, educa- tional services can be provided at a lower cost.
3. In integrated programs, blind and low vision children go to school with sighted children. Everyday they have the opportunity to play and learn with other sighted children. This interaction helps the visually impaired children to better understand sighted children and for sighted children to better understand visually impaired children. In special residential schools visually impaired children have less chance to social- ize with sighted children. Often all their classmates and school friends are also either blind or low vision. When they finish school, they may not have either the skills, experience, or confidence to live and work in a sighted world.
4. Often children have difficulty transferring knowledge they have learned in a special school to their home areas. One child might learn to use a cane to travel independently at the special school but will not be able to use the cane in h'is home area. This may happen because the child might not be familiar with the area or because his parents will not let him travel in- dependently because of their fear that a blind child cannot safely travel alone. This is.less of a problem in an integrated program because the child is being trained in his home area. He does not have to make this transfer of knowledge. Also, as the parents watch the child be trained by the special education teacher, they will be able to form a more realistic picture of what the child is able to do on his own.

We have reviewed some of the advantages and disadvan- tages of both special schools and integrated education programs. It is important to be aware of these advan- tages and disadvantages because if you work in one of these types of programs, you need to make a special ef- fort as a teacher to overcome the disadvantages.of that type of program. For example, if you work in a special school, you should be aware that it is more difficult for blind and low vision children to socialize with sighted children. You need to make a special effort to reduce this disadvantage of special schools programs by finding ways to allow your children the opportunity to socialize with sighted children. Or if you are working in an integrated education program, you have to be willing to find time either before or after school and either at school or at the child's home to teach the extra areas that the child needs but which are not in the school curriculum.
Although we have mentioned the advantages and disadvantages, you should be aware that neither system provides a better quality of education than the other. Both systems, if run well, will provide quality education. Quality of education depends more on trained teachers, administrators, availability of materials books, and 90 forth than whether the program is either in special school or is an integrated program in a regular school.
The type of school program a blind or low vision child should attend depends on several factors. One factor is what type of programs are available. If there is not an integrated program in the child's home area, it would mean the child would have to go to a special school program. Another factor is what type of program best fits the child's needs. There might be certain factors at home such as the family ngt having enough money to feed the child that makes it'better for the child to be placed in a special school program. Or the child may have other problems besides his blindness that it makes it difficult for him to attend the regular school. Once again the child might learn bet- ter in a special school. On the other hand the special school may be 500 kilometers away from the child's home and located in a big city. The parents may not want to
5

send their child that far away. In this case perhaps an integrated education program would be a better placement for the child.
When visually impaired children are placed into one program that does not mean that they have to stay in that program for all the years they attend school. Some children may need a lot of special help for the first two or three years of their education and less help in the later years. Their needs might best be served by starting their education in a special school and eventually returning home and finish their educa- tion by attending integrated education programs. For other children the reverse might be true. The decision of which type of education program is best for a chil'd might change as the child's needs change.
TYPES OF INTEGRATED EDUCATION PROGRAMS
There are various types of integrated education programs, but three types of programs are the most com- mon in countries that offer integrated education programs.
1. Resource Room
A resource room is a special class within the regular school. In this classroom there is a full-time special education teacher of the blind, called a resource teacher. The ,special class is equipped with special equipment and supplies the child needs. The visually impaired child is enrolled into the regylar classroom, but can come 4.0 the resource room when he or she needs special help from the resource teacher.
A resource room is only feasible if there are four or more blind or low vision children attending the same school. If there are less than this number of child-
6

ren, it is neither economically feasible nor a good use of the special teacher's time to set up a resource room.
Although the term RESOURCE ROOM uses the word ROOM, this does not mean that it is always a special room. Depending on the extra space in the school this "room" might be a corner in the teacher's room, part of the principal's office, or the back of the regular classroom. There have even been resource rooms on the porches of some schools. The resource room is more of a resource AREA than a room.
2. Itinerant Program
In the Itinerant program, the special education teacher of the blind, called an itinerant teacher, travels from school to school where either blind or low vision children are enrolled. The itinerant teacher does not spend all his or her time in once school, but visits different schools on a regular basis. The number of times the itinerant teacher visits a school depends on the needs of the children. It could vary from one visit a week to as much as five visits a week.
In an itinerant program, how the resource teacher travels from school to school depends on what form of transportation is available in the ar,ea. There are itinerant teachers who have their owd cars; others who walk; and still others who take buses, motorcycles, bicycles, horses, rickshaws, boats, and even small planes to travel from school to school. Depending on the distance covered and the type of transportation used, some itinerant teachers spend a lot of time traveling while others are able to quickly travel from one school to another.
7

3. Teacher Consultant Program
The teacher consultant program is very similar to the itinerant program. The. itinerant teacher travels from school to school, but only visits a certain school on a very irregular basis. The time the itinerant teacher spends in the school is primarily spent with the regular classroom
teacher and not directly with the student. This type of program is useful for those children who need little assistance from the itinerant teacher.
Resource Room, Itinerant Program, and Teacher Consult- ant program are the three types of integrated education programs that are most commonly used. Other programs that you may encounter are Self-Contained Classroom in a regular school. This is a special class in the regular school for blind and low vision children. The child receives all his education in this classroom and is not integrated into the regular classroom. It is like a special school but is located in a regular school. Another type of program is a combination of a residential facility near a regular school. The children attend the regular school for their education, but instead of returning home at night, they return to a special residential facility for them.
The type of integrated education program that is used depends on two factors!
1. the grouping of students (rt;mber of students who live in a certain area), and 2. the needs of the students.
1. Grouping: If there are many children that live in same area and near the same school, than a resource room could be developed. Often this is not the case, as the children do not either live close to each other
8

or close to the same school but are scattered throughout the school district. When this is the case, an itinerant program would be best.
It is very poor use of the special education teacher's time and skills to develop a r.esource program if.there are only one or two visually impaired children in a single school. If a resource program was developed, the resource teacher would not have enough work to do. When this has been tried, one of two things often happens. The regular classroom teachers see that the resource teacher has only two students while they have to teach 30 to 40 students and they begin to feel resentful toward the resource teacher. Or in order to keep the resource teacher busy, the blind and low vi- sion children spend more and more time in the resource room and less and less time in the regular classroom. Eventually the program changes from an integrated program to a self-contained classroom.
2. Needs: Some children need more help from the spe- cial education teacher than other children. This need will also help determine what type of integrated program is developed. If a child is able to keep up with the rest of the class and only needs the special education teacher to provide a few special books, then the special education teacher does not need to see the child on a regular basis. Perhaps he needs to visit the child and the classroom teacher only once or twice a term. In this case, a teacher consultant program would be best. Another child may,need more help from from the special teacher. Here an itinerant program would be best.
The special education teacher may be involved in a com- bination of these three program at one time. He might spend four days in a resource room, aqd the fifth day of the school week providing itineradt services to one or two children in different schools. Once every two months he might also follow up on some children who do not need regular support services. In this example the teacher is working in ,a11 three types of integrated education programs.
The type of program might change from school year to school year. Perhaps one year there are four children near the same school. This would make a resource room feasible. The next year one child graduates, a second child moves to a different part of the country, and the parents of the third child decide to place their child into a special residential school program. Only one of the four original children is left in the resource room. It would not be feasible to continue to provide support services to this one child using the resource room approach. It would be better to change the program to an itinerant program. Or perhaps none of the children move and in the second year allfour children are able to study in the regular classroom with only limited support services from the resource teacher. The needs of the students have changed. Al- though there are four children in the same school, a resource room may not be needed. These children could better be served through an itinerant program.
10

CHAPTER 2 -- TEACHERS' RESPONSIBILITIES
In integrated education programs, both the regular classroom teacher and the special education teacher have specific responsibilities. It is important to know who is responsible for which aspect of the blind or low vision child's education.
RESPONSIBILITIES OF THE REGULAR CLASSROOM TEACHER
1. The regular classroom teacher is the primary educator of the visually impaired child who is enrolled in his classroom. It is the teacher's responsibility to teach all the children in the classroom jncluding the blind or low vision child. The special education teacher provides support service so that the regular teacher can educate the visually~impaired child.
2. The regular classroom teacher must give thevisually
impaired child the same attention and help as he gives the other children in his classroom. The teacher does not need to make special rules or require,less work from the visually impaired child.
3. The regular classroom teacher must communicate freely with the special education teacher. He must in- form the sp.ecial education teacher about the child's progress and about any problems the child may be having. He must also provide the special education teacher with homework assignments, test, and other materials that need to be either put into braille or large print or changed so the blind child can under- stand them.
11

RESPONSIBILITIES OF THE SPECIAL EDUCATION TEACIIER
Placing either a blind or low vision child in a regular classroom and not providing the child with support services does not constitute integrated education. The role of the special education teacher is to provide the needed support services so that the blind child can successfully be educated in a regular classroom. All the responsibilities of the specjal education teacher are in some way connscted with providing support serv- ices either directly to the child, his teacher, or his family. Remembar it is not the responsibility nf the special education teacher to educate the blind child. The regular classroom teacher is the primary educator, not the special education teacher.
The responsibilities of the special education teacher include:
1. Provide support to the regular teacher by answering his questions about blindness and helping both the regular teacher and the other students feel comfortable with a blind child in the classroom. This might also include observing the regular teacher in the classroom and making suggest- ll3ns and/or demonstrations 60 that the regular teacher can provide more meaningful in- struction to the blind child.
2. Teach the "curriculum plus" (+) skills theachild may need. "Curriculum plus" skills are the spsoial skills that blind or low vision children need to successfully adapt to.living in a sighted world. These skills may include braille, orienta- tion and mobility, activities of daily living, sensory training, abacus, typing, and
12

so forth. These are skills the regular classroom teacher is not prepared to teach. They must be taught by the special education teacher if the child needs any of these curriculum plus skills.
3. Adapt materials such as test, worksheets, maps, and charts so they can be under- stood by the blind or low vision child.
4. Provide any special equip- ment and supplies the child needs. This might include a braille writer, braille books, special paper, an abacus, and/or a typewriter for a blind child and large print books, felt tip pens, bold line paper, and magnifiers for a low vision child.
5. Assist with providing or locating remedial work or extra help in subject areas that the child may have difficulty following in the regular classroom. This extra assis- tance is in addition to what the regular classroom teacher is teaching and is needed only when' the students have difficulty understanding certain parts of a lesson.
13
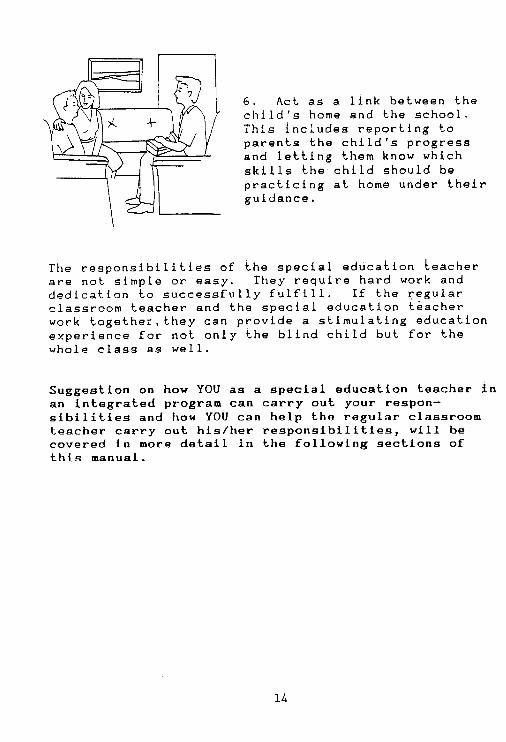
6. Act as a link between the child's home and the school. This includes reporting to parents the child's progress and letting them know which skills the child should be practicing at home under their guidance.
The responsibilities of the special education teacher are not simple or easy. They require hard work and dedication to successfully fulfill. If the regular classroom teacher and the special education teacher work together,they can provide a stimulating education experience for not only the blind child but for the whole class as well.
Suggestion on how YOU as a special education teacher in an integrated program can carry out your respon-
sibilities and how YOU can help the regular classroom teacher carry out his/her responsibilities, will be covered in more detail in the following sections of this manual.
CHAPTER 3 -- SUPPORTING TtlE REGULAR CLASSROOM TEACHER
Having a visually impaired child in the classroom might be a new experience for the regular classroom teacher. He may have many questions and fears about having to educate a child who cannot see. The special education teacher must answer the classroom teacher's questions and help him and the students in the class feel com- fortable with having a blind or low vision child in the classroom.
Listed below are some questions the classroom teacher might ask.
i. Is a visually impaired child different from other children?
No, he is not different. He is first a child and only secondly is he visually impaired. He has the same needs, wants, and feelings as sighted children. He should always be treated the same as you would treat a sighted child.
2. Should I use words like see and look? Will these words make the visually impaired child feel bad?
No, they will not make the child feel bad. You should feel comfortable using these words. They are as much a part of the child's vocabulary as they are of yours. Although the child may not use his eyes to see or look, these words still have meaning to him. You can also feel comfortable using expressions such as "See you tomorrow" or "See you soon".
15

3. How will the child get to school and how will she
walk around the classroom without hurting herself?
Depending on the age of the child, she might walk to school with either her friends or with her brothers and sisters. As she grows,older, she may use a long cane to walk to school by herself. The special education teacher will orient and familiarize the child to the school and her classroom. He will also teach the child some
special techniques to use so she will not hurt herself when walking.
4. How will the child read and write?
This depends on the degree of remaining vision. Some children with low vision will be able to read and write using large print. Other children who are to- tally blind will use braille to read and write. Braille is a special system of raised dots that blind people feel with their fingers.
If a.book is not in braille, either the special educa- tion teacher or another student can read the book to the child. Or perhaps the special education teacher will record the book on a tape recorder so the child can listen to it.
16

5. How can I teach reading skills or check the child's homework if I cannot read braille?
The special education teacher will teach the child the braille code. Reading skills are taught the same way whether a child uses print or braille. The special education teacher can write in print above the braille letters, so you can follow what the child is reading. For homework assignments, the special education teacher can write in print what the child has
srrtren in braille or you can just have the child read aloud what he has written.
6. How will the child know ihat I am talking to him?
Always call the child by her name so she knows you are talking to her. You do not need to shout at the child when speaking to her. She has a visual loss, not a hearing loss. Also do not waste time by playing "Guess Who I Am." Unless the child knows you well, tell her who you are. Voices are not always easy to identify, particularly in crowds and in noisy situations.
--If you make it a habit t o call all children by their names when speaking to them, it,will l <elp all the stu- dents to learn the names of their classmates plus it will not seem unusual for you to call the visually im- paired child by her name.
17
7. How will the child read what I write on the blackboard?
You may either read aloud what you are writing on the black-board or have a sighted student sit next to the visually impaired child and read what,you are writing in a low voice so as not to disturb the other children. If you know in advance what you are going to write on the blackboard, give it to the special education teacher so he can put it into braille or large print. For example, if you know what math problems you are going to write on the blackboard tomorrow, give it to the special teacher and he will write it in either braille or large print.
If a child has some vision, you may allow him walk up to the blackboard to read what you have written.
8. Will other children go blind if they play with khe blind child or sit near him in class?
No, blindness is not a disease. It does not spread from one person to another like a cold.
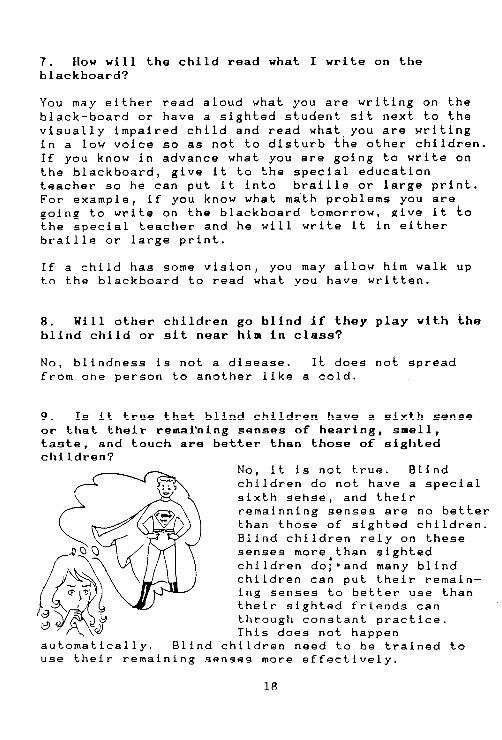
9. Is it true that blind children have a sixth sense or that their remai'ning senses of hearing, smell, taste, and touch are better than those of sighted children?
No, it is not true. Blind children do not have a special sixth sehse, and their remainning senses are no better than those of sighted children. Blind children rely on these senses more than sighted children dojband many blind children can put their remain- ing senses to better use than their sighted friends can through constant practice. This does not happen
automatically. Blind children need to be trained to use their remaining senses more effectively.
18

10. What will the visually imapired child do during recess? Houldn't it be safei- if he stays inLthe classroom?
The child should not only be allowed but encouraged to play with the other children. He needs' to play not only for physical exercise but also for socialization. Ask the special education teacher about recreational activities for the child.
11. How will the child take test and exams?
Give the test to the special education teacher before the day of the test so he can put it into'either braille or large print. If that is not possible, ask the special education teacher to read the test to the child. Or perhaps you can read it to the child as the other children are taking the test.
12. Should I have special rules or give special grades to the child?
No ! The child should follow the same rules as all other children in the classroom. If she does not fol- low them, she should be disciplined. Do not make spe- cial rules for the child. Special grades also are not needed. The child should be graded on the quality of her work the same way as you would grade any child's work. If you give special grades, this does not realistically tell how the child is performing. It is not fair to either the child or her classmates.
Also do not give praise for something the child should be expected to do. It is not remarkable that a visually impaired child can locate fier desk without help or that she can read braille. This should be expected.
19
13. What does the special education teacher do? How often will she come to my school?
The role of the special education teacher is to provide support services. You are the primary educator of the child. The special teacher will help you with. materials, supplies, and ideas. He will teach the child special skills that you cannot teach such as braille, orientation and mobility (how to move safely when walking), activities of daily living, and typing. He will also provide assistance with any remedial work the child may need. How often he comes to your school will depend on how much assistance either you or the child needs.
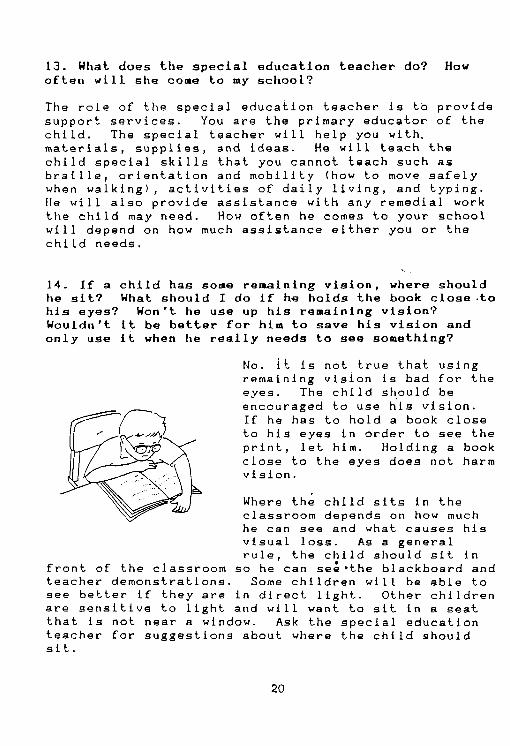
. 14. If a child has some renaining vision, where should he sit? What should I do if he holds the book close ‘to his eyes? Won't he use up his remaining vision? Wouldn't it be better for him to save his vision and only use it when he really needs to see something7
No. it is not true that using remaining vision is bad for the eyes. The child sh.ould be encouraged to use his vision. If he has to hold a book close to his eyes in order to see the print, let him. Holding a book close to the eyes does not harm vision.
Where the child sits in the classroom depends on how much he can see and what causes his visual loss. As a general rule. the child should sit in
front of the classroom so he'can sei*the blackboard and teacher demonstrations. Some children will be able to see better if they are in direct light. Other children are sensitive to light and will want to sit in a seat that is not near a window. Ask the special education teacher for suggestions about where the child should sit.
20
Having a blind child in the classroom can be a reward- ing experience for all. The child not only learns from his teacller and sighted friends, but tlley can also learn from the child. The teacher and sighted friends will learn that there is nothing to fear about blind- ness and that visually impaired people and sighted people can be friends.
21

CHAPTER 4 -- TEACHING "CURRICULUM PLUS" SKILLS
It is the responsibility of the special education teacher to teach "curriculum plus" skills. These are the additional skills a child needs due to his limited vision. The regular classroom teacher does not have the special training to teach these skills. These spe- cial skills are not included in the regular school cur- riculum but they still must be taught.
Curriculum Plus skills include:
1. Sensory Training
2. Orientation and Mobility
3. Abacus
4. Braille Reading and Writing
5. Recorded Books
6. Handwriting
7. Typing
8. Activities of Daily Living
Each of these areas will be discussed and teaching sug- gestions will be given. Even though the child does not receive a grade in these subjects, it is still impor- tant that they are taught in order for the child to have a complete education. The special education teacher has to find the time to teach these special skills. Some of the skills, such as activities of daily living, might best be taught 19 the child's home. This can be done either before or after school. Other skills, such as orientation and mobility, have to be taught outdoors. Not all teaching can be done in the school setting.
22

"CURRICULUtl PLUS" #l -- SENSORY TRAINING
Sensory Training is the training of the remaining senses. A visually impaired child does not automati- cally have a better sense of touch, hearing, smell, or taste. The child has to be trained to use these senses as well as possible.
This section will include sensory training for:
A. Hearing a. Touch C. Smell and Taste D. Residual Vision
A. REARING
The sense of hearing is very important for a visually impaired child. He gathers much information by listening. It helps him follow classroom activities and obtain information from the teacher's presentation and classroom discussions. Listening is also essential for developing good orientation and mobility skills. The child not only has to be able to hear and follow what is being said, but he also has to be able to pick
out what is being slid, as well as to pick out main
ideas, ignore distracting noises, identify activities ,by their sound, and be able to locate the position of an object or person by their sounds.
Some listeniqg skills, like picking out the main points in e a story being read, are difficult to learn and take time and practice to master.
Developing these skills should begin as early as possible. In fact training should begin while the child is still a baby.
23
A child should be able to:
Be aware of sounds. (I hear something!)
Identify sounds. (What is that sound?)
Select one sound from many different sounds. (What is that one sound?)
Localize sounds. (Where is that sound coming from?)
Track sounds. (Where is that sound going'?)
SPECIFIC ACTIVITIES
1. Bounce a ball and have the child count the number of times he hears the ball bounce. This will help the child select and localize sounds.
2. Clap your hands, knock on the table, or hit two pieces of wood together in a particular rhythm. Have the child repeat the pattern. This will help the child to be aware and remember sounds and rhythm patterns.
3. Use a sound that can change in volume (sing, use a radio, and so on). Have the child stand up as the sound becomes louder and sit down as the sound becomes softer. Or the child can spread her arms as the sound becomes louder, and bring her arms together as the sound becomes softer. aware of sounds.
This will helg the child be
4. Make a "sound tape" with different sounds on it. Have the child listen to the tape and identify each sound. This will help the child identify sounds.

5. Sit outside or go for a.walk with the child. Have her identify and point to all sounds she hears. This will help the child to be aware, identify, and select sounds.
6. Play games with the child by having him identify what you are doing by the sounds you are making (walking across the room, closing the door, tearing paper) typing, and so on). This will help the child to identify and localize sounds.
7. Read stories, l.isten to the radio, sing songs with the child. Then ask the child questions about what he has just heard. This will help the child to remember what he has heard.
8. Have the child identify children and teachers in her school by the sounds they make (voices, the way they walk, and so on). This will help the child identify, select, localize, and tract sounds.
9. Teach the child to identify animals and birds by the sounds and songs they make. This will help the child to identify, select, and localize sounds.
10. Play games with a ball that has a sound source inside. Depending on the size of the ball have the child roll, throw, and catch it. You can easily make a small sound ball by using a table tennis ball and straight pins. Break the head off the straight pin and push the pin into the table tennis ball. Put five or six pins into thF ball and cover the hole with glue. Or put 5ome small stones in a can. This can be rolled back and forth and will have a loud sound. These activities are very good because they help to teach a child to'track moving sounds.
25
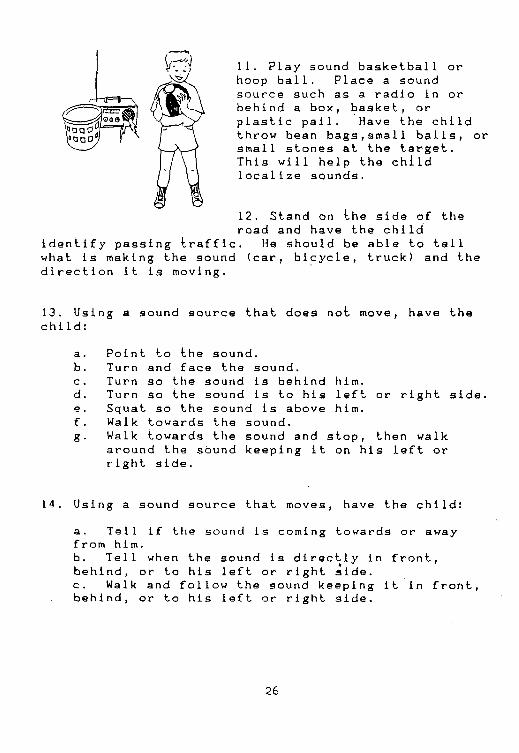
$3; 11. Play sound basketball or hoop ball. Place a sound source such as a radio In or behind a box, basket, or plastic pail. 'Have the child throw bean bags,small balls, or small stones at the target. This will help the child localize sounds.
- 12. Stand on the side of the road and have the child
identify passing traffic. He should be able to tell what is making the sound (car, bicycle, truck) and the direction it is moving.
13. Using a sound source that does not move, have the child:
a. Point to the sound. b. Turn and face the sound. C. Turn so the sound is behind him. d. Turn so the sound is to his left or right side. e. Squat so the sound is above him. f. Walk towards the sound. g- Walk towards the sound and stop, then walk
around the sound keeping it on his left or right side.
14. Using a sound source that moves, have the child:
a. Tell if the sound is coming towards or away from him. b. Tell when the sound is directly in front, behind, or to his left or right side. C. Walk and follow the sound keeping it in front, behind, or to his left or right side.
26

15. Start with a continuous sound and have the child walk to the sound. Gradually decrease the length of the sound. This can be done by clapping your hands. Start by continuously clapping and having the child walk to you. Then clap your hands fewer times until the child can locate you with only one or two claps. Be sure not to move or make other sounds when doing this activity or the child may
find you by using other clues than the sound of your clapping hands.
16. Help the child learn to remember sounds. Some of the activities above will help.~ Other activities include:
a. Have the child repeat phrases and groups of numbers, b. Have the child memorize songs and poems, or C. Have the child tell stories.
TRAINING CONSIDERATIONS
1. The type of activity, how complex you make.it, and the way you teach it will depend upon the age of the child.
2. Start these activities in a quiet place and then later move into a noisier place.
3. These activities cannot be done only once and then forgotten. They must be repeated many times while gradually making them more and more difficult. They must also be done in many different settings to give the child a variety of experiences.
27
8. TOUCH
It is through the sense of touch that the visually im- paired child gets concrete and exact knowledge of the world around him. Only by feeling and tactua1l.y ex- ploring objects can a child get realistic information about their shape, size, weight, hardness, surface qualities, and temperatures. If a child hears a description of a dog but never touches and tactually explores a dog, he may not have an accurate idea of what a dog is like. If with the verbal description he is able to feel a dog, then he will have a more realis- tic idea of what a dog is like. He will know where the dog's head and tail are located, what the fur feels like, and the dog's size and shape. As he touches more and more dogs he will develop even a better idea of what a dog looks like. l4e will not only be'able to find ways that all dogs are similar but also ways that they are different.
While a child is still a baby, he should start tac- tually exploring the world around him. Parents must encourage their child to feel different objects around the home. This early tactual exploration not only provides the child with concrete information about the world, but is also the first step in teaching the child to use his hands, to explore objects tactually, to in- crease finger movements, and to understand basic con- cepts such as size and weight. Children who have not been encouraged to use their hands may have difficulty with some of the following activities:
1. Grasping and holding objects. The child may tend to hold small objects with her whole hand and not with her fingers.
2. Transferring objects from one hind to the other. The child may drop the obJect or transfer it awkwardly.
28
3. Exploring objects. The child may not know how to feel a whole object in a systematic way. She might feel one area but not another. Or she may be "t-actually shy" and explore an object by just lightly touching one or two areas with her finger tips.
4. Moving Fingers. The child may have difficulty doing activities that require fine finger movements such as putting pegs into a peg board. She might keep dropping the small pegs, be unable to put the pegs into the holes, or might miss holes and not realize it.
Only with training can a child learn to use her sense of touch well. The following list, of activitjes .will help the- child to develop .hand coordination, finger movement, tactual discrimination, and fine muscle con- trol (fine muscles are small muscles as in the fingers; control of these muscles are needed for activities such as writing with a slate and stylus). They will also help you teach the child such tactual concepts as:
big and little soft and hard hot and cold heavy and light rough and smooth breakable and unbreakable shapes: round, square, triangle,
Many of these activities will also be important for pre-braille reading skills.
29
SPECIFIC ACTIVITIES
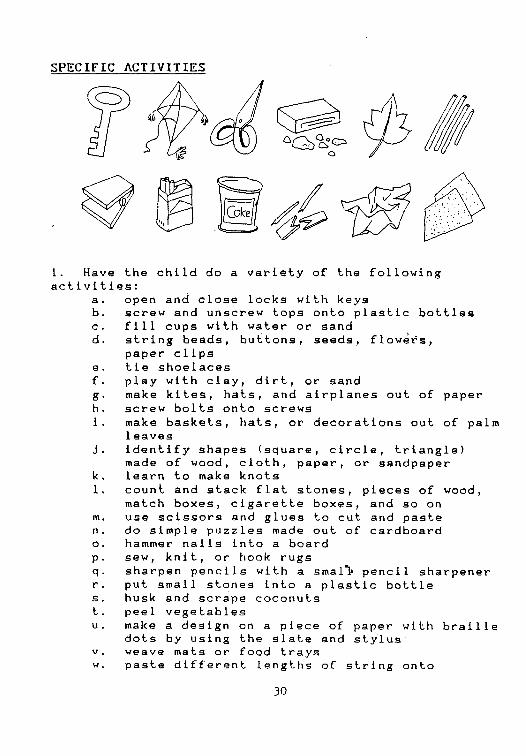
1. Have the child do a variety of the following activities:
a. b. c. d.
e. f. g* h. i.
J.
k. 1.
m. n. 0. P- q. r. 5. t. U.
v. W.
open and close locks with keys screw and unscrew tops onto plastic bottles fill cups with water or sand string beads, buttons, seeds, flowers, paper clips tie shoelaces play with clay, dirt, or sand make kites, hats, and airplanes out of paper screw bolts onto screws make baskets, hats, or decorations out of palm leaves identify shapes (square, circle, triangle) made of wood, cloth, paper, or sandpaper learn to make knots count and stack flat stones, pieces of wood, match boxes, cigarette boxes, and so on use scissors and glues to cut and paste do simple puzzles made out of cardboard hammer nails into a board sew, knit, or hook rugs sharpen pencils with a smalt pencil sharpener put small stones into a plastic bottle husk and scrape coconuts peel vegetables make a design on a piece of paper with braille dots by using the slate and stylus‘ weave mats or food trays paste different lengths of string onto

cardboard X. throw, roll, and catch a ball with a sound
source inside or a can with stones inside Y. play games with little finger puppets made out
of paper 2. break long sticks into short sticks of
specific size (as long as the arm or the hand, six inches, and so on).
These activities can be done either at home or at school. Most of these activities use simple materials that are easy and inexpensive to find. In fact the best materials are those materials that come from the natural environment and not from some special stores. Not only will these activities help increase the sense of touch, they can also be used as recreation, daily living, and arts and craft activities. 2. Let the child identify and sort different piles of objects like stones, leaves, sticks, seeds, coins, and so on. They can be sorted by:
a. Object. Put all the peanuts in one pile and the coffee beans in another pile. b. Size. Put all the big stones in one pile and the little stones in another pile. C. Shape. Put all the leaves with pointed ends in one pile and the leaves with smooth ends in another pile. d. Length. Put all the long sticks in one pile and the short sticks into another pile. e. Weight. Put all the heavy stones in one pile and the light stones in another pile. F. Texture. Put all the coins with smooth edges in one pile and coins with rough edges in another pile.
Not only can these objects be sorteg in to two dlf- ferent piles, they can also be sorted by having the child put the objects in order from the biggest to the smallest, heaviest to the lightest, and so on.
31
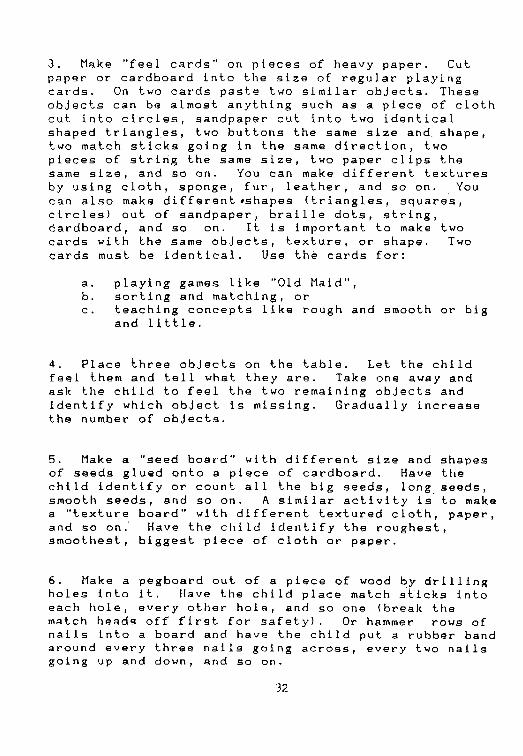
3. Make "feel cards" on pieces of heavy paper. cut paper or cardboard into the size of regular playing cards. On two cards paste two similar objects. These objects can be almost anything such as a piece of cloth cut into circles, sandpaper cut into two identical shaped triangles, two buttons the same size and.shape, two match sticks going in the same direction, two pieces of string the same size, two paper clips the same size, and so on. You can make different textures by using cloth, sponge, fur, leather, and so on. You can also make differentrshapes (triangles, squares, circles) out of sandpaper, braille dots, string, cardboard, and so on. It is important to make two cards with the same objects, texture, or shape. Two cards must be identical. Use the cards for:
a. playing games like "Old Maid", b. sorting and matching, or C. teaching concepts like rough and smooth or big
and little.
4. Place three objects on the table. Let the child feel them and tell what they are. Take one away and ask the child to feel the two remaining objects and identify which object is missing. Gradually increase the number of objects.
5. Make a "seed board" with different size and shapes of seeds glued onto a piece of cardboard. Have the child identify or count all the big seeds, long.seeds, smooth seeds, and so on. A similar activity is to make a "texture board" with different textured cloth, paper, and so on.' Have the child identify the roughest, smoothest, biggest -piece of cloth or paper.
6. Make a pegboard out of a piece of wood by drilling holes into it. Have the child place match sticks into each hole, every other hole, and so one (break the match heads off first for safety). Or hammer rows of nails into a board and have the child put a rubber band around every three nails going across, every two nails going up and down, and so on.
32

7. -Blocks are very good for children to play with as they increase his ability to manipulate objects. They can be stacked, pushed., hit together, and used to make houses and roads. Make blocks out of wood or use old cigarette.or match boxes. Put a small stone in the boxes and tape them shut so they will also have a sound when they are shaken.
8. When making puzzles for blind children, keep the shapes and designs simple. You can cut puzzle shapes out of wood or cardboard.
9. Cut different sizes and shapes out of cardboard. Make a pattern with the pieces and have the child feel the pattern and repeat it. The difficulty of the pat- tern will depend on the ability of the child. This can also be done with stringing objects on a string. String two buttons, one bead, and two paper clips on a string. Let the child feel the string and repeat the pattern.
10. Make "sewing cards" by punching holes in a piece of cardboard or heavy paper. Use a small twig or piece of bamboo for the needle. Tie yarn on the twig or slightly split the bamboo and place the end of the yarn in the split. Tie the other end of the yarn through one of the holes in the cardboard. Wave the child "sew" the yarn onto the card by pullihg the needle and yarn in and out of the holes. This activity is not only good for finger manipulation and training the two hands to work together but is also helpful in teaching basic sewing stitches.
33
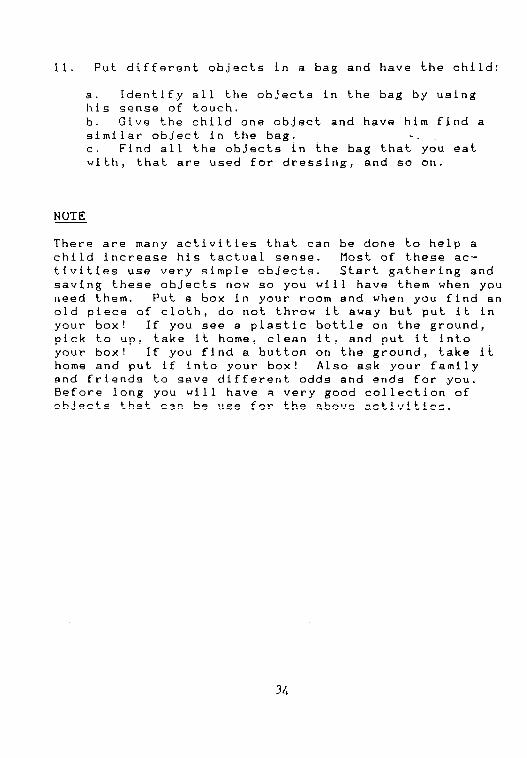
11. Put different objects in a bag and have the child:
a. Identify all the objects in the bag by using his sense of touch. b. Give the child one object and have him find a similar object in the bag. C. Find all the objects in the bag that-you eat with, that are used for dressing, and so on.
NOTE
There are many activities that can be done to help a child increase his tactual sense. Most of these ac- tivities use very simple objects. Start gathering and saving these objects now so you will have them when you need them. Put a box in your room and when you find an old piece of cloth, do not throw it away but put it in your box! If you see a plastic bottle on the ground, pick to up, take it home, clean it, and put it into your box! If you find a button on the ground, take it home and put if into your box! Also ask your family and friends to save different odds and ends for you. Before long you will have a very good collection of objects that can be use for the above activities.

C. SHELL AND TASTE
The senses of smell and taste are sometimes&thought to be unimportant. It is true that they are not used by the visually impaired child as much as hearing and touch, but smell and taste can provide the child with useful information about his surroundings. The sense of smell can help the child keep his orientation when traveling and the sense of taste can be very helpful in cooking.
For smells the child has to develop the ability to:
1. Be aware of smells. (I smell something!)
2. Identify and discriminate smells. (What is that smell?)
3. Tell the location of the smell. (Where is the smell coming from?)
For taste the child has to be able to:
1. Be aware of different kinds of taste. (This tastes sour, sweet, spicy, spoiled, and so on.)
2. Identify foods by their taste. (This tastes like salt).
SPECIFIC ACTIVITIES
1. Gather together household items and fooda, and have the child identify each item by using only his sense of smell:
glue perfume oranges kerosene soap beer tin fish onions flower smoke
Have the child identify these items using only his sense of taste:
salt pepper sugar lemon mango curry powder
35

2. Teach the child to determine the condition of foods by their smell, such as:
good and sour milk fresh and spoiled meats, fruits and vegetables clean and dirty water fresh and old seafood such as fish and crab
This could prevent the child from getting food poison- ing by eating or cooking foods that are not fresh.
3. Teach the child the different smells of common flowers and trees. These smells could be helpful as clues when he travels.
4. Have the child identify a smell and then walk towards it. This will help the child to know where a smell is coming from.
5. Teach the child that different rooms, stores, and places sometimes have specific smells such as the bathroom, garbage dump, bakery, and so on. This will help the child when he wants to locate those places.
6. Encourage the child to help his mother to prepare family meals so he can learn the different smells and tastes of cooked and uncooked food.
36

D. RESIDUAL VISION
Residual vision is any remaining vision that a person has. It is very important to train a child to use his remaining vision. This could be the more important sense for the child. Many people think that if there is residual vision that it should not be used. They think that using it will make the eyesight worse. This is not true. If a child has some remaining vision, he should be strongly encouraged to learn to use it when- ever and wherever possible. Although it may not be possible to improve the child's eyesight, he can still learn to use his remaining distant and near vision more effectively.
1. DISTANT VISION
Some children with residual vision have poor mobility skills because they do not know how to use their residual vision. They can see but they do not know how to interpret what they are seeing. They do not know how to look.
SPECIFIC ACTIVITIES
1. Teach the child to develop selective viewing, that 1st to see one thing out of many.
a. Put plastic cups on the table and have the child count them. Gradually move the child back until the cups are Just within the range of his viewing. Put other objects on the table such as bowls and books, but still have the child count only the number of cups. b. Have the child stand in the middle of the room. Place a brightly colored object somewhere in the room. Tell the child bo turn until he sees it and then point to it. C. Have the child walk around the room and touch all the blue objects or count all objects that are square. d. Go for a walk with the child and ask him to identify objects. Ask him to count the number of trees he passes, to step on all the big stones' that he sees, or pick only the red flowers.
37
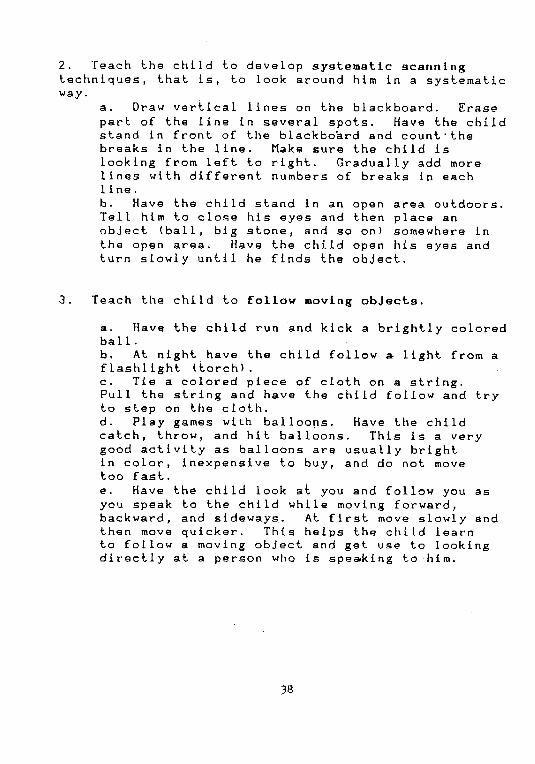
2. Teach the child to develop systematic scanning techniques, that is, to look around him in a systematic way.
a. Draw vertical lines on the blackboard. Erase part of the line in several spots. Have the child stand in front of the blackbo'ard and count'the breaks in the line. Make sure the child is looking from left to right. Gradually add more lines with different numbers of breaks in each line. b. Have the child stand in an open area outdoors. Tell him to close his eyes and then place an object (ball, big stone, and so on) somewhere in the open area. Have the child open his eyes and turn slowly until he finds the object.
3. Teach the child to follow moving obJects.
Have the child run and kick a brightly colored Ll,. b. At night have the child follow a light from a flashlight (torch). C. Tie a colored piece of cloth on a string. Pull the string and have the child follow and try to step on the cloth. d. Play games with balloons. Have the child catch, throw, and hit balloons. This is a very good activity as balloons are usually bright in color, inexpensive to buy, and do not move too fast. e. Have the child look at you and follow you as you speak to the child while moving forward, backward, and sideways. At first move slowly and then move quicker. This helps the child learn to follow a moving object and get use to looking directly at a person who is speaking to,him.

4. Teach the child the general location where certain objects will be found.
a. Road signs are usually higher than head height. b. Wall clocks are found high on the wall (closer to the ceiling than the floor). C. Potato plants do not grow tall, so they will be located near the ground, but bushes can grow very tall and may be head height or higher. d. Door handles and knobs are located on the side of the door, not in the middle. e. Bananas hang from the bottom of the leaf line not from the top.
2. NEAR VISION
Near vision is used for reading and writing. There are many "visually impaired" children with enough residual vision to read either normal or large print. Often these children are forced to learn braille for no other reason then they go to schools for the blind. This is wrong. If a child can read print, he should use print books and not braille books for reading.
SPECIFIC ACTIVITIES
1. Let the child color pictures. If he can not see the lines of the picture, make the lines darker with a black felt tip pen.
2. Have the child write with a black felt tip pen and white paper. This provides very good contrast.
3. If the child has difficulty seeing or following the lines in his notebook, make the lines darker using a black felt tip pen. Hake sure when the child writes he uses a different color pen than the color you used to make the lines darker. If he uses the same color, it will be difficult for him to see the bottom of the let- ters when he tries to read.
79

4. Make sure the child is not working in shadows. Check to see that his body is not blocking the light when reading and writing. Also make sure that there is no glare. If the child is sitting near the window, make sure the sun is not shining in his eyes.
5. Make sure the child is sitting in the front row of the classroom so she can see the blackboard. If she needs to get out of her chair and walk up closer to,the blackboard in order to read it, encourage her to do it.
6. Try and increase the contrast when the child is reading and writing. Yellow filter paper over a book will make the letters look blacker. Or place a typoscope, a piece of black card board with a stripe cut in it, over the printed line. This will block out all the lines of print except the line that is being read. This will help the child keep his place when reading. It will also make the letters easier to see.
7. Have the child use a portable white board and black or blue felt tip markers. This provides very good con- trast and the child can write as large as is needed. Make sure there is as little glare as possible.
8. When reading books which are printed on this or poor quality paper, place a piece of black paper under the page being read. This will help eliminate the "bleed through" effect of the print on the back side of the page.
9. For some children it might be easier to read if they keep their head and eyes still while moving the book.
LO

10. Make vision stimulation cards or worksheets for the child. There are four stages to follow (Barraga):
Stage 1: Discrimination and recognition of geometric shapes in solid black and in outline drawings.
\ 1 I I
u u m ~r=~l~~ua~~~;a~~:~a~l~~~ oL@D
diamond; on cards. Make four cards for each shape and size. Four large circles, four medium
m
circles, four small circles,
v
and so on. Color the shape on
0 two cards in black. You should have two large black circles, two large outlines of circles,
two medium black circles, two medium outlines of circles, and so on. Have the child:
a. Identify the shapes (this is diamond, this is a square, and so on). b. Match the shapes (all squares in one pile and circles in another pile). C. Sort the shapes by size (big circles in one pile, medium circles in one pile, and little circles in another pile).
Stage 2: Discrimination and recognition of object forms in solid black, outline drawings, and outline drawings with inner detail.
iilb @
Draw objects* (cups, trees, apples, flowGrs, and so on) on white cards. Hake six cards for each object , for example six cards each with one cup drawn on them. Color the object on two cards solid black. Leave two cards in outline form. On the last two
cards add inner detail (like leaves on a tree). You should have two black trees, two outline drawing of trees, and two outlines with trees with leaves. Have the child identify and match the cards.
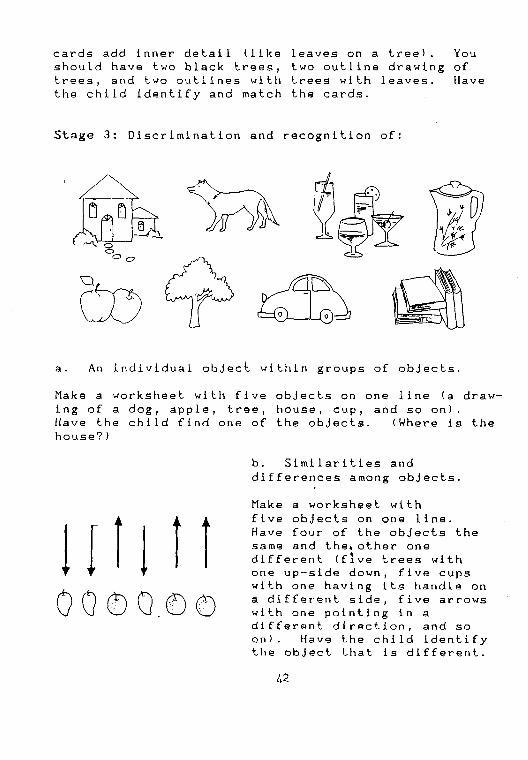
Stage 3: Discrimination and recognition of:
a. An individual object within groups of objects.
Make a worksheet with five objects on one line (a draw- ing of a dog, apple, tree, house, cup, and so on). flave the child find one of the objects. (Where is the house?)
b. Similarities and differences among objects.
Make a worksheet with five objects on one line. Have four of the objects the same and the, other one different (five trees with one up-side down, five cups with one having its handle on a different side, five arrows with one pointing in a different direction, and so on). Have the child identify the object that is different.
A I
J
Nl
Ml
Q
L
z
HI F
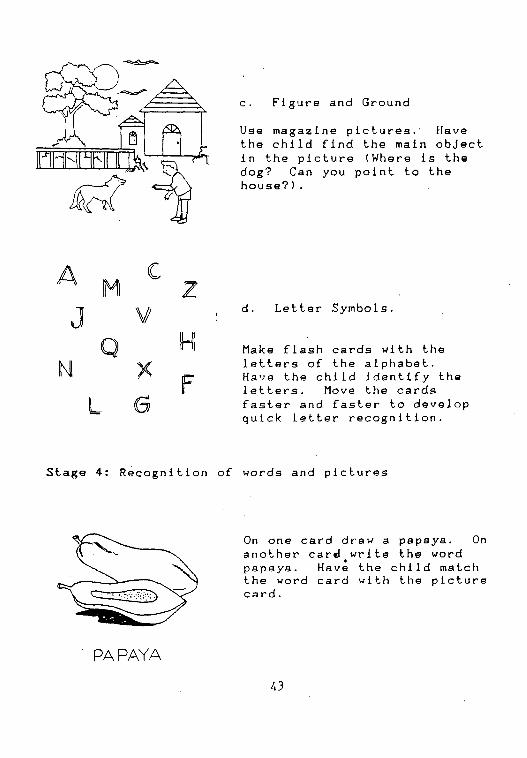
C. Figure and Ground
Use magazine pictures: Have the child find the main object in the picture (Where is the dog? Can you point to the house?).
I d. Letter Symbols.
Make flash cards with the letters of the alphabet. Have the child identify the letters. Move the cards faster and faster to develop quick letter recognition.
Stage 4: Recognition of words and pictures
On one card draw a papaya. On another card write the word papaya. Hav: the child match the word card with the picture card.
PA PAYA
43
I.

11. Make dot to dot pictures. Put a number by each dot and have the child connect the dots by drawing a line from dot 1 to dot 2 to dot 3.
12. Make puzzles. Paste a picture onto cardboard and then cut it into small pieces of different sizes and shapes. Have the child put the puzzle back together.
13. Put four different objects on the table. Have the child look at them and then close his eyes. When his eyes are closed take one object away. Ask the child which object is missing. Gradually add more objects to make the game harder.
14. If the child is having trouble seeing the print in her book, check the illumination. It may be too dark for her to see the print or there may be too much light reflecting in her eyes. If after checking the il- lumination she still has trouble seeing the print, you or a volunteer may have to rewrite the book in larger print. This will help the low vision child to see the print. It will also help her distinguish similar look- ing letters and numbers like "a, e, and o", "f and t", and "3 and 8".

"CURRICULUM PLUS" 12 -- ORIENTATION AND MOBILITY
Orientation and Mobility training includes more than teaching sighted guide techniques, pre-cane skills, and cane skills. You will be teaching those skills, but you will also be working on body movement, sensory training, and concept development. For correct tech- niques for sighted guide, pre-cane, and cane skills see the References at the end of the Manual.
This section will cover:
A. Body Movement
B. Sensory Training
1. Hearing 2. Touch 3. Smell
C. Concept Development
1. Body Concepts 2. Spatial Concepts 3. Left - Right Concepts 4. Compass Directions 5. Environmental Concepts
Some of these areas have already been covered under the Sensory Training section of this manual (pages 23 - & 1. In this section they will only be briefly discussed as they relate to orientation and mobility. -.
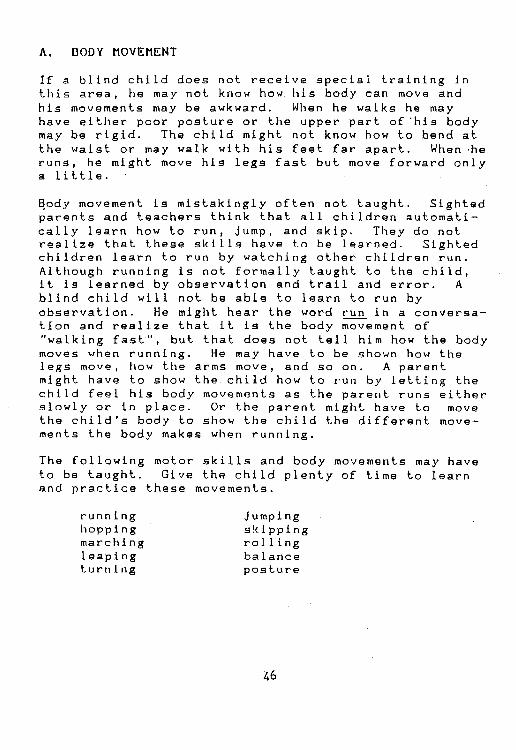
A. BODY HOVEllENT
If a blind child does not receive special training in this area, he may not know how his body can move and his movements may be awkward. When he walks he may have either poor posture or the upper part of'his body may be rigid. The child might not know how to bend at the waist or may walk with his feet far apart. When ,he runs, he might move his legs fast but move forward only a little.
Body movement is mistakingly often not taught. Sighted parents and teachers think that all children automati- cally learn how to run, jump, and skip. They do not realize that these skills have to be learned. Sighted children learn to run by watching other children run. Although running is not formally taught to the child, it is learned by observation and trail and error. A blind child will not be able to learn to run by observation. He might hear the word run in a conversa- tion and realize that it is the body movement of "walking fast", but that does not tell him how the body moves when running. He may have to be shown how the legs move, how the arms move, and so on. A parent might have to show the child how to run by letting the child feel his body movements as the parent runs either slowly or in place. Or the parent might have to move the child's body to show the child the different move- ments the body makes when running.
The following motor skills and body movements may have to be taught. Give the child plenty of time to learn and practice these movements.
runnfng Jumping hopping skipping marching rolling leaping balance turning posture
16
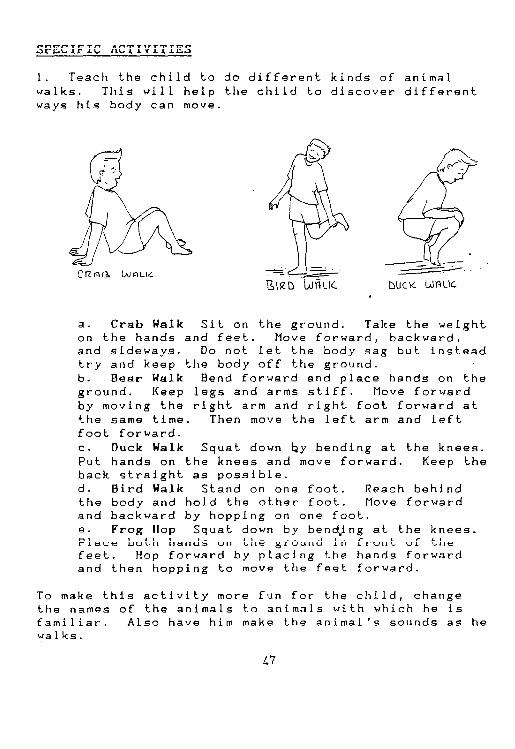
SPECIFIC ACTIVITIES
1. Teach the child to do different kinds of animal walks. This will help the child to discover different ways his body can move.
a. Crab Walk Sit on the ground. Take the weight on the hands and feet. Move forward, backward, and sideways. Do not let the body sag but instead try and keep the body off the ground. b. Bear Walk Bend forward and place hands on the ground. Keep legs and arms stiff. Move forward by moving the right arm and right foot forward at the same time. Then move the left arm and left foot forward. C. Duck Walk Squat down by bending at the knees. Put hands on the knees and move forward. Keep the back straight as possible. d. Bird Walk Stand on one foot. Reach behind the body and hold the other foot. Move forward and backward by hopping on one foot. e. Frog Hop Squat down by bendkng at the knees. Place both hands on the ground in front of the feet. Hop forward by placing the hands forward and then hopping to move the feet forward.
To make this activity more fun for the child, change the names of the animals to animals with which he is familiar. Also have him make the animal's sounds as he walks.
.!&7
Different type of human walks can also be taught. How does an adult walk? A fat lady walk? Or an old man walk7 They all have different type of walks. You might have to show the child these different walks by placing your hands on the child's body and moving his body and limbs so he will understand the motion of the different walks.
2. Teach the child some of the following movements. These movements will also help teach the child the dif- ferent ways his body can move.
Spin Like A Top From a standing position Jump up and turn around to face the opposite direction.
&
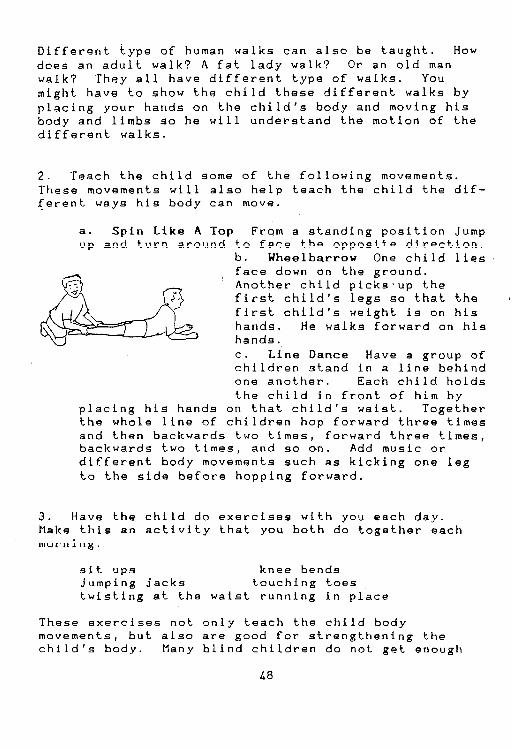
b. Wheelbarrow One child lies i face down on the ground.
Another child picksS-up the 7. first child's legs so that the 1
first child's weight is on his hands. He walks forward on his hands. C. Line Dance Have a group of children stand in a line behind one another. Each child holds the child in front of him by
placing his hands on that child's waist. Together the whole line of children hop forward three times and then backwards two times, forward three times, backwards two times, and so on. Add music or different body movements such as kicking one leg to the side before hopping forward.
3. Have the child do exercises with you each day. Make this an activity that you both do together each morning.
sit up5 knee bends jumping jacks touching toes twisting at the waist running in place
These exercises not only teach the child body movements, but also are good for strengthening the child's body. Many blind children do not get enough

exercise. They sit most of the time and are inactive, This is not healthy for the 'child.
4. Have the child hop on one foot and count the number of times he can hop. If the child has difficulty keep- ing his balance, either hold his hands or let him hold the side of a table, desk, or the wall.
5. Put a wooden beam on the ground and have the child walk on it. It is not necessary for the beam to be off the ground. Walking on the beam will help increase balance. A big round piece of bamboo can also be used. Have the child stand on the bamboo and try walking sideways, forward, and backward. If the beam or bamboo rolls, anchor it to the ground by staking each end and then test it yourself to make sure it is secure.
6. To improve posture have the child walk with a book or basket on his head. Many blind children tend to let their heads drop forward by not keeping their necks straight. This is not good for either posture or for the back muscles. Encourage good posture at all times.
7. Run with the child by letting the child hold one end of a towel or piece of clottl while you hold the other end. Run along side of the child or a lfttle ahead of the child but not behind. Do not pull the child forward but let him run at his own pace. You will find that the cloth or towel will help you to easily guide the child as you run together.

8* Rope games are excellent
for teaching body movement and coordination of body parts. Teach the child to Jump rope. This is not an easy activity and it will take time, practice, and patience but it is a very good activity. It inexpensive to do and is also an excellent form of exercise
13
9. Hold a stick so it is uarallel to the ground. Have the child then pass Gradually ground. 10. Ball movement. coordinati coordinati
feel how high the stick is off the ground and under the stick without touching it. lower the stick closer and closer to the
games are also very good for developing body Kicking balls helps develop foot
on. Throwing balls helps develop hand on.
11. It is very important that a child is taught to make accurate body turns. He has to learn "to feel" what it is like to make accurate 900, 1800, and 360" turns.
a. Show the child how to make accurate turns by moving her feet. b. Have the child walk around a rectangular table while trailing it with one hand. At each corner she will make a 900 turn. C. Have the child stand against a wall and pra- ctice making turns. Start with the child facing forward with her back against the wall and her arms by herside. When she turns 90° to either the left or right, wall.
hoer shoulders will be touching the For a 180turn she will be facing the wall
and for a 3600 turn her back would once again be against the wall. When the child is able to make correct turns using the wall as a tactual aid, have her move one arm length away from the wall.
50

Have her do more turns checking each turn by extending her hand to the wall to see how accurate she is. d. Place four chairs a few feet away around the child (in front, back, and at both sides). Have the child make a turn and then walk forward. If he has made an accurate turn, one of the chairs should be directly in front of him. e. Have the child walk from one spot to another by following your directions. Give one direction at a time. "Walk forward three steps and stop." "Turn, 90° to the left and stop." "Go five steps forward and stop." And so on.
51
B. SENSORY TRAINING
Special activities for sensory training have already been presented (pages 23 -AL ). You may reread those suggestions for training activities. However, more remains to be said about how each sense is used in orientation and mobility.
1. IIearing
Hearing is the blind child's only "long range" sense. He can hear things at a distance, but can only touch or smell things when they are close by. This "long range" sense of hearing helps a blind child travel safely and keep his orientation. The sound of a car passing on a road tells the child not only that it is not safe to cross the road at that moment, but also where the road is in relation to the child and which direction the road runs. If the child hears a car going around a bend or over a speed bump, he will know where the bend or speed bump is located in relation to his present position. This will help the child keep his orientation. To do this, the child must be able to distinguish the sounds of a car turning, slowing down, and so on. He must also be able to locate where the sound is coming from . That is why the activities on sound localization that have been presented (pages 23 -
are so important.
You should be aware of a special hearing skill called Facial Vision. You may have experienced this and not have known it. Perhaps one very dark night you were walking home along a path with trees or bushes on each side. A11 of a sudden you stop because you know there is a branch in front of you. You can not see the branch but somehow you feel that it is there. You put your hand out, find the branch, walk,under it, and con- tinue walking home. This is not a f;t-m of magic. Re- search has shown that this "facial vision" is related to the sense of hearing. You are receiving some type of echo, possibly the sound of your foot steps as they bounce off the branch. This is based on the same prin- ciple that a bat uses to fly at night. Somenbllnd children have developed this ability to a high degree. When walking along a path, they can count each tree
27)
52
that is near the path without touching it. Or they can walk right up to a wall and stop before hitting it.
2. Tout h
A blind child uses his sense of touch to:
a. identify physical landmarks (trees, fences, and so on),
b. determine what kind of surface he is walking on and the direction of the surface (grass, dirt, concrete, going up, going down, bumpy, and so on), and
C. explore and identify objects (This is a chair. This is a cup).
When you are walking with a child, make sure you have him identify the kind of surface he is walking on. Have him tell you when the surface changes in both tex- ture and level. Let him touch and explore physical landmarks to make sure he can find and identify them later when he is by himself. It is no good saying, "There is a banana tree on your right" if you do not let the child feel it and fix in his mind the trees location in relation to other significant objects nearby, how he got there, and what it feels like.
3. Smell
The sense of smell can provide the child with useful information. Different kinds of stores have different smells. The bakery, the chemist, the road side vendor, and the petrol station are all easily identified by their smell. All of these will serve as clues (and sometimes destinations) for the child. Flowers and trees can sometimes be smelled from e distance, giving the child a clue about where she is located. Garbage left on a footpath or road can be avoided by using one's sense of smell. Encourage the child to identify any odors she comes across and to find their sources by going and touching the flowers, going into the bakery, and so on.
53

C. CONCEPT DEVELOPflENT
Many blind children have difficulty with concepts of position, location, and direction. If you tell a blind child to bend over, or put his book in the middle of his desk, or to turn and face right, he might not un- derstand what you are talking about. If you are teach- ing a child that a right triangle has three sides and that one angle is always 90" and the other two are each 450, he will not understand what you are talking about if he doesn't understand the words triangle, side, angle, 90", and 450. This misunderstanding could be the result of poor concept development.
What is a concept? A concept is a mental representation, picture, or idea of what something should be (11111). A concept is formed by grouping objects, events, or experiences together by what they have in common. All people develop concepts. If I say the word dog, you have a picture in your mind of what a dog looks like even though all dogs do not look the same. In fact there are many different kinds of dogs. But they all share certain characteristics that make them dogs. Because we have all seen -a variety of dogs, played with them, heard them bark, petted them, and seen pictures of them, we have developed a concept of the common characteristics that form a dog. When we see a four legged thing in the street we can tell if it is or is not a dog. Not only do we have concept3 about concrete objects like dogs, cats, cars, and so on, but we have also developed concepts for abstract ideas like love, honor, and beauty.
l-low are concepts formed7 Concepts are formed in two steps (Hill). The first is by abstracting information from the environment. We take all kinds of information, and try to put it together. We first learn that a cer- tain thing erists and that it is different from other things. We then put a name to this thing. We now have an idea about the thing as a whole. As we get more information, we learn about its parts. We then go to the next step of generalization. We take the similarities of the thing we have identified and try to see where else it can fit or what other thing3 are similar with it. We then have formed a concept.
It sounds difficult but we are all constantly forming new concepts all the time. We do it without even being aware of the process!
Most of the information we get from our environment we get by using our sense of vision. By using our eyes we are able to see objects as a whole. The blind child lacks this ability to see object in their wholeness. When he feels an object he feels its parts and then puts the parts together to form an idea of what the whole object is like. Some objects cannot be held and tactually explored as they may be too big, too little, too delicate. Take the concept of a house. It is too big for a child to feel all its parts. He can use a small model to give him more information about its shapes, but this does not give him the true dimension of a house, nor does one model teach the child what different kinds of houses look like. For the child to fully develop the concept of a house he has to be ex- posed to many different models of houses while rein- forcing these models with tactually exploring a real house. On the models he can feel the doorway of the houses, but this needs to be expanded to feeling the doorways of actual houses.
Many blind children, from listening to sighted people talk, can give an excellent verbal description of some- thing but possess no real understanding of what they are talking about. They have just memorized what they have heard.
A blind child must have concepts taught to him. When teaching concepts remember the following:
a. Know what concept you are trying to teach and teach only that concept. Do not try to teach six or eight concepts at one time. l
.
b. Present the concept in many ways and in many different settings.
C. Use the W/W theory of teaching. That means, whatever works use it!
55

d. The child cannot laarn concepts by listening to you talk. He has to be active to learn concepts.
e. Provide the child with new and different experiences in order to build and increase the concepts he has.
1. Body Concepts
Body concepts (sometimes called body image) is the knowledge of the parts of the body and how they func- tion and move. Many blind children have poor body concepts. They do not fully understand the various ways different parts of the body can move. They have very poor body movements because they have not developed good concepts about their bodies.
A child should be familiar with all body parts. Some to begin with are:
head eyes ears nose mouth teeth tongue face eyebrows chin
hair neck shoulder chest stomach back arms hand bottom Jaw
fingers hip legs knees feet heels toes wrist ankle lips
Eventually all commonly referred to body parts should be taught. This also includes teaching any slang words that different parts of the body may have, for example head is sometimes called a noggin. 4s the child gets older this list will expand to include both the male and female sexual organs and organs inside the body.
56

The child should know the:
a. Location of each body part. (Where are your toes?) b. Function of each body part. (What do you use your eat-s for? What does your liver do?) C. Relationships between body parts. (What is below your nose? What is on top of your head?) d. Movements of each body part. (How many ways can you move your tongue? How high .can you raise your hand? Is it possible to touch your left elbow with your left hand7 NO! 1
The child also needs to have an understanding of body surfaces, such as front, back, side, top, and bottom.
SPECIFIC ACTIVITIES
1. Play games like "Simon Says". After each command ask the child what he is doing. This makes the child even more active and reinforces the concept on a verbal level. Teacher: "Simon Says, 'Touch your knee.' What are you touching?" Child: "I am touching my knee." Think of a variety of commands:
"Touch something,below your knee. What are you touching?" "Touch something that moves up and down. What are you touching?" "Touch. something you listen with. What are you touching?"
2. Teach songs like "If You're Happy And You Know It. I'
If you're happy and you know it. clap your hands. (Clap, Clap) If you're happy and you know it clap your hands. (Clap, Clap) If you're happy and you know then let the world know it. If you're happy and you know it clap your hands. (Clap, Clap)
57

Continue the song but use different actions by sub- stituting clap your hands with blink your eyes, hit your head, pull your ear, and so on.
3. Teach dances like the "Hookey Pookey."
Put your left foot in. Put your left foot out. Put your left foot in and shake it all about. You do the Hookey Pookey and you turn yourself around. That's what it's all about.
On 'he first line, put your left foot in front of you. On the second line, put your left foot behind you. On the third line put your left foot ,ln front of you and shake it. On the line that begins "You do the Hookey Pookey..,.", you put your hands in the air and shake them as you turn yourself around.
Continue the song using different body parts and/or ac- tions by substituting the words left foot with right arm, head, bottom, whole body, run in place, hop on one foot, and so on.

2. Spatial Concepts
Spatial concepts include front - back, top - bottom, UP - down, in - out, and many others. These are important and the child should understand what they mean in a wide variety of situations. You may also teach varia- tions of these concepts such as:
front : in front of, face, facing, forward, before, ahead
back: behind, rear, backward, after top: above, over, up, high, upward bottom: below, under, down, low, downward, beneath,
underneath in: into, inside, within, inner, inward out: outside, out of, outer, outward
Other spatial concepts also have to be taught such as:
next, next to, beside, right, left, sideways, alongside of, away, distant, far; close, near, here, there, against, clockwise, counter clockwise, opposite, across from, parallel, perpendicular, around, toward, upside,- down, middle, between, in between, center, diagonal, horizontal, and vertical.
Some of these concepts are quite difficult. To make it even harder, some concepts mean different spatial posi- tions depending how they are used. For example', the sentence "Chop the tree down and then chop it up into small pieces" can be confusing. Is the "up" the same as the "up" in "Stand up"? No, it is not. Is the ac- tion for the word over in "Put your hand over your head" and "Turn the book over" the same? No, not quite the same.
When teaching spatial concepts to a child, teach them in relationship to:
1. the child himself, 2. the child to other objects, and finally 3. other objects to other objects.
53
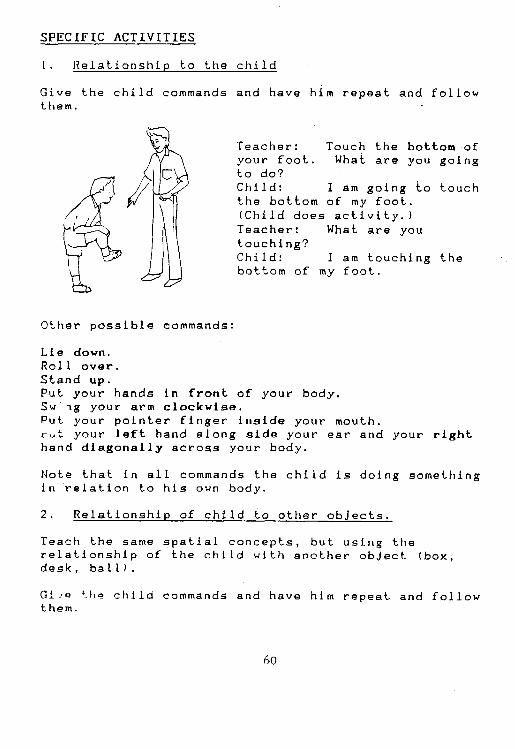
SPECIFIC ACTIVITIES
1. Relationship to the child
Give the child commands and have him repeat and follow them.
Teacher: Touch the bottom of your foot. What are you going to do? Child: I am going to touch the bottom of my foot. (Child does activity.) Teacher: What are you touching? Child: I am touching the bottom of my foot.
Other possible commands:
Lie down.
Roll over. Stand up. Put your hands in front of your body. Sw'-rg your arm clockwise. Put your pointer finger inside your mouth. r,L, your left hand along side your ear and your right
hand diagonally across your body.
Note that in all commands the child is doing something in relation to his own body.
2. Relationship of child to other objects.
Teach the same spatial concepts, but using the relationship of the child with another obJect (box, desk, ball).
Gile the chiid commands and have him repeat and follow them.

Teacher: Put your hands under the desk. What are you going to do? Child: Put my hands under the desk. (Child does activity.) Teacher: Where are your hands? Child: My hands are under the desk.
Other possible commands:
Hove your foot towards the wall. Put the box above your head. Move until you are underneath the table. Put you hand diagonally across the desk.
Note that in all these commands the child is doing something with a part of his body and another object.
3. Relationship of one obJect to another object.
Teach the spatial relationships of one object to another object.
Teacher: Put the book on top of the desk. What are you going to do? Child: I am going ti nut the book on top of the desh (Child does activity'
Teacher: hlhere is the book? Child: On top of, the desk.

Other possible commands:
Move the chair next to the wall. Put the chair on the opposite side of the room across from the door. Put your plate in the middle of the table.
Note that in all these commands the spatial concepts are between two objects. The.commands do not tell the child to do something with his body.
3. Left - Right Concepts
These concepts should be introduced while the child is still young and then constantly reinforced. Try to use these words as often as possible so that the child is exposed to these words in a variety of situations. i
SPECIFIC ACTIVITIES
1. If a child is having difficulty remembering which is left and which is right, tie a string or ribbon around his left hand. When giving directions or com- mands use the words left and ribbon. "Raise your left hand -- the one with the ribbon on it. Gradually omit the word ribbon, using only the word left. "Raise your left hand." When the child can remember which hand is his left hand', then remove the ribbon.
2. When using the words left and right together, al- ways use left first and right second. This will help build directional concepts used in reading and writing.
3. Be sure and teach left and right in the following situations:
a. with parts of the body (left ear, right ear), b. with clothing that comes in pairs (left and right sandals), C. with sides of objects (left side of the desk, right side of the door), d. with placement of objects (Put your clothes
62

on the left side of the bed.), and e. with movement (turn left, roll the ball to the right).
Note that left and right sides of objects depends on how the child is facing them.
4. Teach the child that not only he and other objects have left and right sides but also other people have left and right sides. Note that left and right sides of other people do not depend on how the child is facing. Your left hand is always your left hand regardless of the direction the child is facing. This can be a difficult concept for a child to understand. In fact many sighted adults have trouble with this concept. When facing another person remember that his left side is not on the same side as your left side. If you want him to turn and face the window that is on your left, you have to say "Turn right." This concept is called directionality. To teach directionality, start by:
a. Standing next to, in front, or behind the child facing in the same direction as the child. Have the child locate and touch parts of your body (your left ear, your right leg) or hand you objects .(Put the ball in my left hand. Put the left side of the book so it is near my.right ear.).
b. Face the child and have him locate different sides of your body. This will be more difficult because your left side will be facing the child’s right side.
63
4. Compass Directions
The compass directions of north, south, east, and west are very important because they are always constant. They do not depend on the direction the child is facing. North is always north but the left side of the table depends on which direction the child is facing. Because compass directions are constant, they will help a child keep her orientation when traveling. It is easier to remember a set of directions using compass directions than it is remembering a,series of left - right commands. It is also easier to reverse the directions to come back where one started when using compass directions and to plan alternate travel routes when the need arises.
SPECIFIC ACTIVITIES
1. When beginning to teach compass directions, relate the directions to the face of a clock. Twelve would be north, three would be east, and so on. This ,will help the child to begin to realize the relationships between the four directions.
2. When beginning to teach compass directions, always have the child face north. Teach the other directions in relationship to north (south is behind, east is to the right, and west is to the left).
a. Have the child turn and face different compass directions on command. Use the words left and right with the compass directions. Always have the child turn back north, before a new command is given. b. As the child begins to understand the relationship between north, souCh, east, and west, omit the left - right words in commands. C. After the child learns the compass directions in relation to north, follow the same sequence as above with south, east, and west.

If the child has trouble turning to face a direction, have him point to the direction before turning. lie could be having a problem with making accurate 900 and 1809 turns, and not with compass directions.
2. Have the child face north and tell him the direc- tion he is facing. Stand in front, behind, or to the side of the child and clap your hands.
a. Ask the child which direction you are from him. The child answers, "You are north (south, and so on) of me." b. Ask the child which direction he is from you. The child answers, "I am south (north,kand so on) of you."
Note that the direction used to answer each question will be different. If you are north of the child, then the child is south of you.
3. Show the child places in the school and home and tell him the compass direction they face:
The sidewalk in front of the school runs north and south. When you walk out the door, you are facing west. When you are sitting at your desk, you are facing east.
4. Ask the child to describe his walking route to school using compass directions rather than left and right turns.
5. When teaching orientation and mobility, use co'mpass directions instead of left and right.

6. As the child learns compass directions, ask him many questions to reinforce the concepts:
If you are facing north, what is behind you? If you walk out the door and turn left, what direction are you facing7 When you are coming to school, what direction is behind you as you walk through the school gate?
7. Make a braille compass out of paper for the child. Each time he turns, he should also turn the compass so the direction on the compass is facing the same direc- tion as the child.
5. Environmental Concepts
A child has to learn the basic concepts about the environment. These concepts help the child to learn how the space around her is organized. This will help the child keep her orientation when traveling and plan- ning travel routes.
Many of these concepts such as street patterns and blocks are not always constant. There are many varia- tions but the child needs to understand the basic con- cepts before she can understand the variations. For example, the basic shape of a block is rectanglular with four sides; but this is not always true as there are blocks with three and five sides. In order for the child to understand these variations, she first has to understand the basic block shape.
This is also true for other environmental concepts. Not all streets are straight. Not all intersections have four corners. But before the child can begin to understand the variations of curved streets, T-shaped intersections, and so on, she first has to be taught the basic environmental concepts.
66

SUGGESTED ACTIVITIES
1 . First teach the child the very basic concepts, such as:
a. a sidewalk is located to the side of the street. b. between the sidewalk and the street there is a curb. C. on the side of the path is a grass line. d. Streets and paths have two sides. e. Intersections are formed when two streets or paths cross. f. At intersections are corners.
Teach these concepts by using models and maps then reinforce them by taking the child into the environment to experience these concepts. Have the child walk and touch the sidewalk. Let the child walk around the block and count the sides. llave the child stand on one side of the street and you stand on the other side. Talk to the child so she will be aware of the width of the street.
2. Introduce more advance concepts using compass directions.
a. Streets run east - west or north - south but not east - north. b. A car on a north and south street can only go one of two directions, either north or south but not east or west. C. A street has two sides. A north and south street has a east side and west side. A east and west street has a north and south side. d. The four corners of an intersection are called the north - east corner, south - east corner, and so on. e. In countries where people drive on the left side of the road, the traffic on the west side of a north - south street runs north while the traffic on the east side runs- south, and so on,.- This is a-very important concept for a child to understand when he starts to use public trnns-
67
portation. She has to know which side of the road to stand on to catch the bus going in the same direction she wants to go.
Teach these concepts by using models and then reinforce them by using real streets. Models can be made by taping rulers onto the desk to represent roads and using empty match boxes to represent cars and matches to represent people. Open the match box a little to represent the front part of the car.
3. After the child understand the basic environmental concepts, you can start to introduce the child to the variations.
a. Not all streets run true north - south. b. There are T-shaped intersections and off-set intersections. C. Some intersections have traffic circles. d. In some countries traffic can turn right on red lights.
Also teach these concepts with models and maps followed by actual experience in the environment.
68
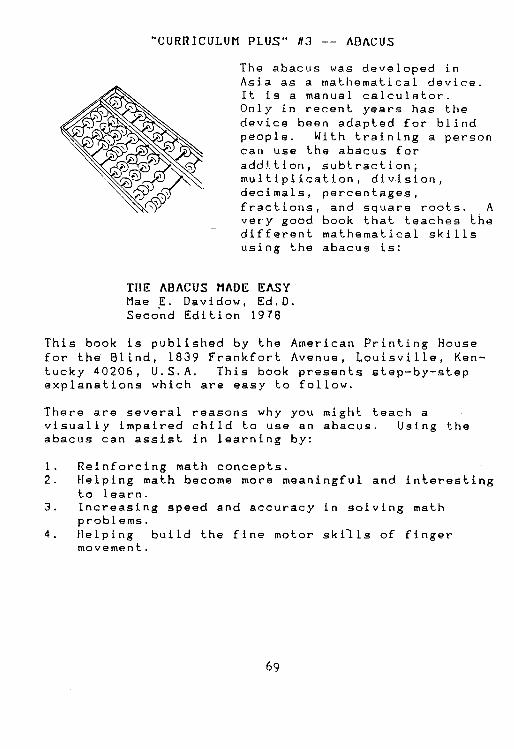
"CURRICULUM PLUS" 113 -- ABACUS
The abacus was developed in Asia as a mathematical device. It is a manual calculator. Only in recent years has the device been adapted for blind people. With training a person can use the abacus for addition, subtraction; multiplication, division, decimals, percentages, fractions, and square roots. A very good book that teaches the different mathematical skills using the abacus is:
TIIE ABACUS HADE EASY Mae .E. Davidow, Ed-D. Second Edition 1978
This book is published by the American Printing House for the Blind, 1839 Frankfort Avenue, Louisville, Ken- tucky 40206, U.S.A. This book presents step-by-step explanations which are easy to follow.
There are several reasons why you might teach a visually impaired child to use an abacus. Using the abacus can assist in learning by:
1. Reinforcing math concepts. 2. Helping math become more meaningful and interesting
to learn. 3. Increasing speed and accuracy in solving math
problems. 4. tlelping build the fine motor skills of finger
movement.
69
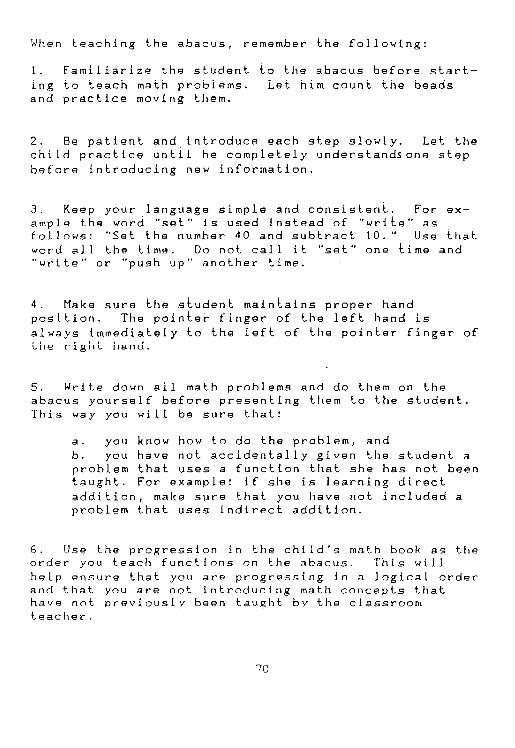
When teaching the abacus, remember the following:
1. Familiarize the student to the abacus before start- ing to teach math problems. Let him count the beads and practice moving them.
2. Be patient and introduce each step slowly. Let the child practice until he completely understandsone step before introducing new information.
3. Keep your language simple and consistent. FOF ex- ample the word "set" is used instead of "write" as follows: "Set the number 40 and subtract 10." Use that word all the time. Do not call it "set" one time and "write" or "push up" another time.
4. Make sure the student maintains proper hand position. The pointer finger of the left hand is always immediately to the left of ttle pointer finger of the right hand.
5. Write down all math problems and do them on the abacus yourself before presenting them to the student. This way you will be sure that:
a. you know how to do the problem, and b. you have not accidentally given the student a problem that uses a function tllat she has not been taught. For example: if she is learning direct addition, make sure that you have not included a problem that uses indirect addition.
6. IJse the progression in the child's math book as the order you teach functions on the abacus. This will help ensure that you are progressing in a logical order and that you are not introducing math concepts that have not previously been taught by the classroom teacher.
70

7. If other children in the classroom are interested in the abacus, show them how it works. Teach a small group of children (with the blind child a member) how to use the abacus. This will help the blind child feel a part of the group, and she will not feel she is learning something that other children do not need to know. This will also help the other children improve their math skills.
8. Make sure the child is solving simple math problems on the abacus and not in her head. She will need the basic abacus skills when she confronts harder problems.
9. tlave the child memorize the abacus "secrets" or "rules" as'she would the multiplication tables.
10. Only with practice will a child &aster the abacus.
NOTE
Even if the abacus is not the primary aid that a child uses for math, it may still be taught. It is an excel- lent way to build and increase understanding of math concepts.
71
"CURRICULUM PLUS" 114 -- BRAILLE READING AND WRITING
This section will cover:
A.
El.
C.
D.
E.
F.
G.
A.
Pre-Braille Tactual Activities
Pre-Braille Worksheets
Mechanics of Reading Braille
Braille Alphabet
1. Teaching the Alphabet Orally 2. Teaching the Written Alphabet
Braille Reading
1. Sight Vocabulary 2. Word Attack Skills 3. Content
Braille Contractions
Slate and Stylus
Pre-Braille Tactual Activities
Before beginning to teach braille reading and writing skills, it is important the child develops good tactual discrimination and finger dexterity (ability to move fingers). If a child has had only. limited experience in using his hands, then time should be spent in developing tactual discrimination and finger dexterity before the braille alphabet is introduced. Use the suggested activities listed under Sensory Training for the sense of touch (Pages 28 - 34 ). Remember that it takes both time and a variety of activities to develop the sense of touch.
72

Also at this stage it is important that a child begins to be aware of written language (Olson). Sighted children become aware of written language at a very early age. They see their parents reading a newspaper. They see signs when walking and playing. Although they do not know what the letters mean, they are beginning to realize that print exists and that objects have names that can be written. The visually impaired child does not have this advantage. To create this awareness, it is helpful if braille labels are put on different objects in the child's home. Put a braille label on the back of the chair that says "chair". Put braille labels on the child's bed, the child's toothbrush, door to the house, and so on. The parents will have to show the child where the label is and en- courage the child to feel it. The child will not be able to read the labels, but he will begin to under- stand that braille exists and can be used to write the names of objects.
Another activity that would be helpful is for you to braille a story book for the child. Above the braille letters write the print letters. That way the child can follow the braille line as his parent reads him the story. At the beginning the adult may have to put the child's hands on the braille and move them across the braille lines as she reads
\ I the story.
1 help (he lp the chi
Both of these activities wil familiar with braille and he there is a written language.
child become Id realize that
73
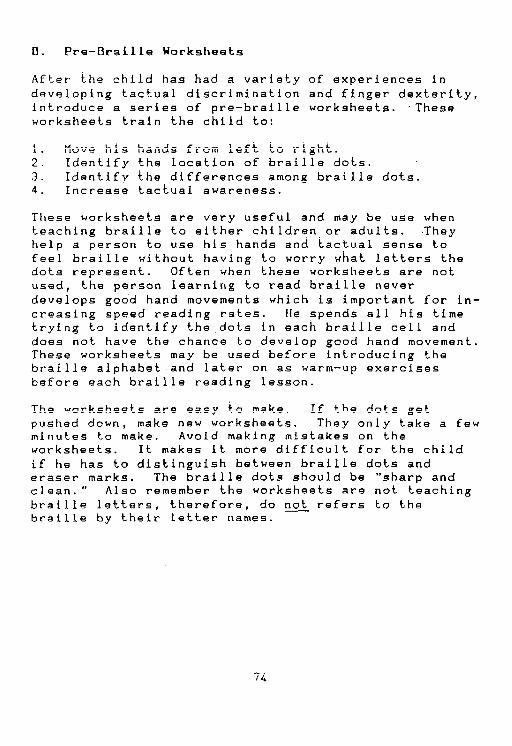
R. Pre-Brail le Worksheets
After the child has had a variety of experiences in developing tactual discrimination and finger dexterity, introduce a series of pre-braille worksheets. .These worksheets train the child to:
1. Move his hands from left to right. 2. Identify the location of braille dots. 3. Identify the differences among braille dots. 4. Increase tactual awareness.
These worksheets are very useful and may be use when teaching braille to either children or adults. .They help a person t o use his hands and tactual sense to feel braille without having to worry what letters the dots represent. Often when these worksheets are not used, the person learning to read braille never develops good hand movements which is important for ln- creasing speed reading rates. He spends all his time trying to identify the dots in each braille cell and does not have the chance to develop good hand movement. These worksheets may be used before introducing the braille alphabet and later on as warm-up exercises before each braille reading lesson.
The worksheets are easy to make. If the dots get pushed down, make new worksheets. They only take a few minutes to make. Avoid making mistakes on the worksheets. It makes it more difficult for the child if he has to distinguish between braille dots and eraser marks. The braille dots should be "sharp and clean." Also remember the worksheets are not teaching braille letters, therefore, do not refers to the braille by their letter names. -
74
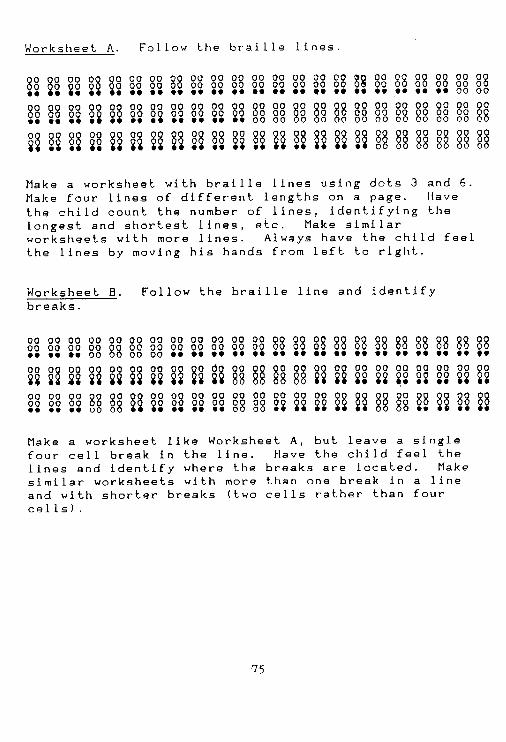
Worksheet A. Follow the braille lines.
Make a worksheet with braille lines using dots 3 and 6. Make four lines of different lengths on a page. Have the child count the number of lines, identifying the longest and shortest lines, etc. Make similar worksheets with more lines. Always have the child feel
left to right. the lines by moving his hands from
Worksheet 8. Follow the brai breaks.
lie 1 ine and identify
00 00 00 00 00 00 00 00 00 00 0 :o, 2 0,: 88 88 00 00 00 cl0 00 . . 00 l * 00 l e 0 l 8 * 88 l o 88 l e 8s. l 88 . . 88 . . 88 . . 88 . . 88 . . 88 . . 88 . . 88 . . 88 ,.
Make a worksheet like Worksheet A, but leave a single four cell break in the line. slave the child feel the lines and identify where the breaks are located. Make similar worksheets with more than one break in a line and with shorter breaks (two cells rather than four cells).
75
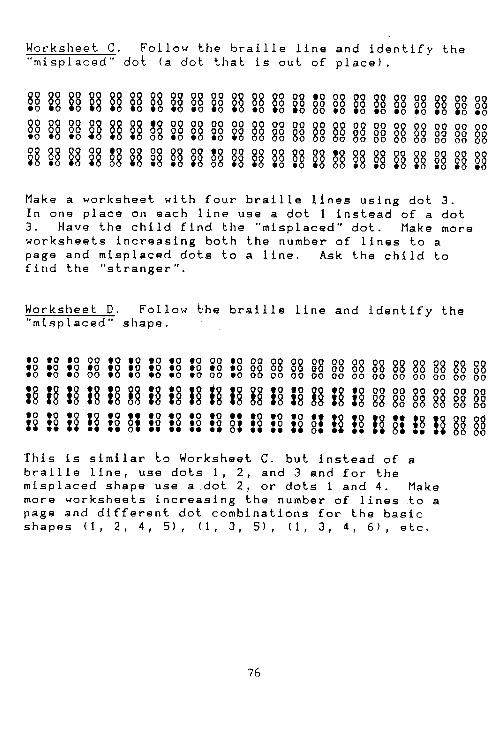
Worksheet C. Follow the braille line and identify the "misplaced" dot (a dot that is out of place).
Make a worksheet with four braille lines using dot 3. In one place on each line use a dot 1 instead of a dot 3. have the child find the "misplaced" dot. Make more worksheets increasing both the number of lines to a page and misplaced dots to a line. Ask the child to find the "stranger".
Worksheet D. Follow the braille line and identify the "misplaced" shape.
:oO :oO :“o PO” 18 :X t: :8 P8 :oO 00 l o l o 00
:g” 88 88 l 00 00 00 l o 00 so
“% 8X % 0 00
88 008 00 00
88 00
88 88 00 00
88 00 00 00 00 o”8 00
i% f% 1% 1% I% 1% i% i! 1% 1% 1% 8% 1% i% 8% i% i% %% 3% %% %% %% 3%
This is similar to Worksheet C. but instead of a braille line, use dots 1, 2, and 3 and for the misplaced shape use a dot 2, or dots 1 and 4. Make more worksheets increasing the number of lines to a page and different dot combinations for the basic shapes (1, 2, 4, 51, (1, 3, 51, (1, 3, 4, 6), etc.
76

Worksheet E. Follow the braille line and count the dots.
% 88 88 :8 88 88 t8 XX 88 Z8 88 88 $8 $8 88 :8 88 88 8s 88 88 68 88 00 00 00 00 00 00 00 00 00 00 00 00 00 00 00 00 00 00 00 00 00 00 00 i% %% %% i?% %% %% H% %% 1% !% %% 8% 1% %% %% !% %% %% 1% %% %% %% %% g g g x,% ix” KJ g 80% g g ;“s 3% gj g g %% 1% 1% a”% I!$ %% 8% pj
Make a worksheet with braille line using dot 1, and then two spaces, dot 1, and then two spaces, and so on. have four lines of different lengths on one page. Have the child count the number of dots in each line. Make other lines with other type of dot formations (dots 1, 2, 3), etc. and with only one space between each cell.
Worksheet F. Follow the braille line and tell how many dots are in each dot formation.
Make a worksheet with line composed of dot 1 and dots 1 and 3 with two spaces between each written cell. Have the child count the number of dots Lneach written cell (one or two). Make another worksheet with a combina- tion of dot 1, dots 1 and 3, dots 1, 3, and 5 with one space between each cell.
77
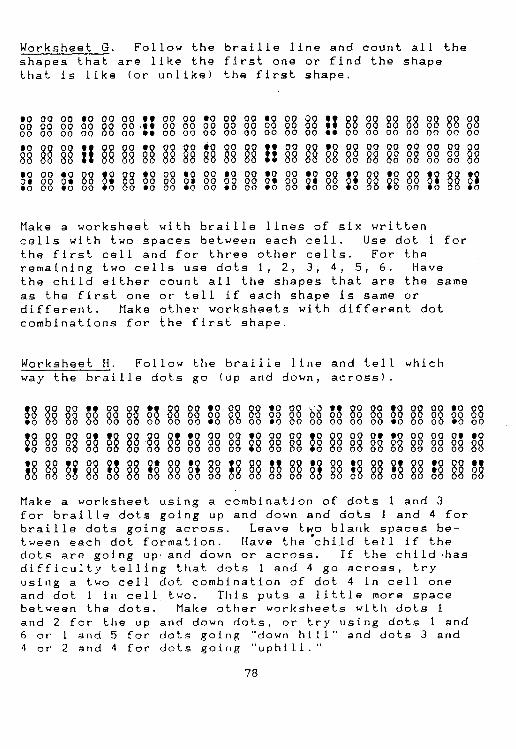
Worksheet G. Follow the braille line and count all the shapes that are like the first one or find the shape that is like (or unlike) the first shape.
l o 00 00 l o 00 00 00 00 00” 8 0
gg ,: ’ 88 88 0’8 88 88 Z8 :8 28 tt 88 :8 88 88 88 88 88 00 00 00 00 00 *a 00 00 00 00 00 00 00 00 l m 00 00 00 00 00 00 00
Make a worksheet with braille lines of six written cells with two spaces between each cell. Use dot 1 for the first cell and for three other cells. For the remaining two cells use dots 1, 2, 3, 4, 5, 6. Have the child either count all the shapes that are the same as the first one or tell if each shape is same or different. Make other worksheets with different dot combinations for the first shape.
Worksheet H. Follow the braille line and tell which way the braille dots go (up and down, across).
Make a worksheet using a combination of dots 1 and 3 for braille dots going up and down and dots 1 and 4 for braille dots going across. Leave two blank spaces be- tween each dot formation. Have the 'child tell if the dots are going up and down or across. If the child #has difficulty telling that dots 1 and 4 go across, try using a two cell dot combination of dot 4 in cell one and dot I in cell two. This puts a little more space between the dots. Hake other worksheets with dots 1 and 2 for the up and down dots, or try using dots 1 and 6 or 1 and 5 for dots going "down hill" and dots 3 and 4 or 2 and 4 for dots going "uphill."
78

Remember also to use these worksheets as warm-up exer- cises after a child begins to read braille. Have him move his hands faster and use a lighter touch to develop quick recognition. This is needed to increase reading speed.
C. Mechanics of Reading Braille
When a child is first starting,to experience braille, she should develop the following habits (Olson):
1. Good Posture 2. Good Hand Movements 3. Correct Finger Position 4. Light Finger Touch
SUGGESTED ACTIVITIES
1. Make sure the child is sitting straight and that the braille reading material, is at,a comfortable height. If the desk is too high, the child will have to reach up to feel the book and this will make her tired.
2. Check the child's fingerand hand position. Braille should be read with the tips of the fingers. The fingers should be slightly bent and wrist should be slightly elevated. If the wrist are resting on the book, the child will not be able to move her hands across the page quickly.
Fingers should be slightly curved and' resting lightly on the reading material. If the child's fingers are straight, place a book below the braille reading line. The book should be the same thickness as the distance from the child's finger tips to her knuckles. The child will have to bend her fingers slightly at the knuckles to feel the braille.
79

3. Make sure the child is using two hands when reading. Even though only tvo or three fingers may be used to read most of the braille letters, the other fingers will give the child clues such as the length of a word, and how close she is to the end of the line. Using two hands will also help the child located the next line quicker. Many children like to read with Just one finger. This should be discouraged as it forces the child to read very slowly.
4. Have the child lightly touch the dots. She should not press down hard on the dots or try to "scrub" them. To practice developing a light touch, place chalk dust on the child's fingers. Ask the child to follow the braille lines in a book until all the chalk is gone. Do this again and again and see if the child can feel more lines before the chalk is rubbed off.
5. Discourage the child from moving his lips when reading. This is a bad habit and makes the child a slow reader. Slave the child place a ruler or a pencil between his teeth as he reads. Or let the child chew gum. This will prevent him from moving his lips when reading. Many children develop this bad habit of moving their lips when reading because the only time they read is when they are reading aloud to the teacher. Try and limit the amount of time the child is reading aloud to you. You can find other ways to dis- cover if the child is understanding what he is reading, such as asking him questions after he has read the story to himself.
6. Practice hand movements and looating new lines quickly. Have the child follow the'braille lines in a book for one minute. Count the number of lines he felt. llave him do it again and again trying to move his hands faster and faster. The child does not have to read the braille but rather Just feel and follow the braille lines. This will help develop faster hand movements. This is an exercise that should be done during every braille lesson.
D. Braille Alphabet
1. Teaching the Alphabet Orally
The alphabet should be taught. orally before the child starts to learn the braille letters. Use alphabet songs and games.
As the child learns the alphabet, he should also learn the sounds the letters make. He should be taught that the letter A has a "ahh" sound, V has a "vee" sound, and so on. This is important because it not only helps the child learn the alphabet, but also:
a. teaches basic skills that will be used in reading,
b. helps develop better reading skills, and C. increases listening skills.
SPECIFIC ACTIVITIES
1. Play games in which the child is given a word and has to tell the sound and letter it starts with.
Teacher:
Child:
"What letter does s-s-s-snake begin ', with?" "Snake begins with a s-s-s-s sound which is the letter S.
Give the child an obJect and have him tell what letter it begins with.
2. Repeat the above activity but have the child iden- tify the last letter in ttle word.
Teacher:
Child:
"What is the last letter in the word door-r-r-r?" "The last letter in the word door is the er-r-r-r sound which is the letter R.
81

3. Give the child a letter and have him tell you five words that begin with that letter.
B = beg, box, boat, button, big
4. Give the child three words. Two of the words should begin with the same sound and one should begin with a different sound. Have the child identify the word that is different.
beg, toy; big snake, dog, door
Gradually increase the number of wordb. Do this same activity for final sounds.
desk, hand, neck tree, boy, see
NOTE: All of these activities can be done'in any language. You do not have to use English. Give the child words in his own language or make up words.
5. Play the alphabet game.
Teacher:
Child:
"I am going to the market and I am going to buy an..." (something that starts with a letter A such as apple). (repeats what the teacher said and adds another word that begins with the latter B.1 "I am going to the market and I am going to buy an apple and a banana."
The game continues with the teacher repeating every- thing and adding a new word for the letter C. The game is finished when either the teacher or child makes a mistake.
82
2. Teaching the Written Alphabet
There are two ways you can introduce the braille alphabet:
1. Teach the letters in the order that you say them. First A, then B, then C, and so on until all letters from A through Z have been taught; or
2. Teach the letters that are easiest to feel first, such as A, K, 0, and L and then teach the more dif- ficult dot formations.
If one way does not work, try the other way. Make sure that you:
a. Do not go too fast or introduce too many letters at one time, or the child will become confused. b. Do not introduce letters that are reversal of each other, such as E and I or H and J at the same time. C. Do introduce writing along with reading the letters. d. Have the child write words and not Just letters. For example, after a child can write the letters from A to F, he can start writing the following words:
add face bad deaf cab dad
dead fade cafe
Pick words that are in the child's vocabulary and experience. You will have to tell the child how to spell the word. He might not remember it each time, but that is not important. The obje'ctive is to get the child away from writing only letters.
___.. ..“._
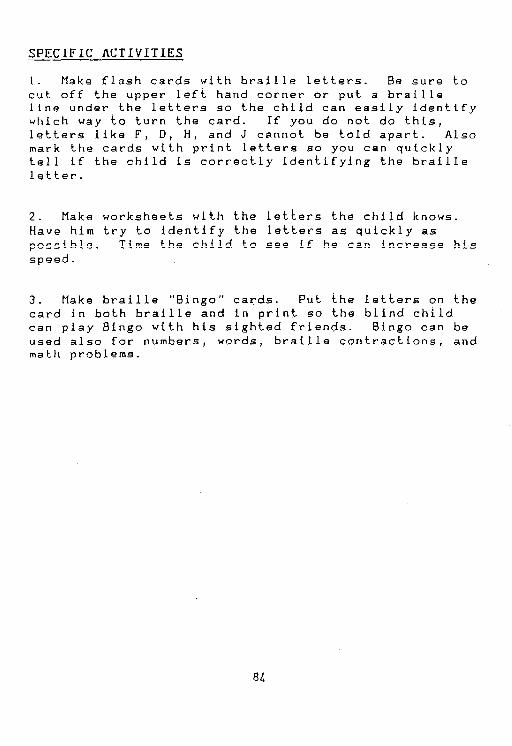
SPECIFIC ACTIVITIES
1. Make flash cards with braille letters. Be sure to cut off the upper left hand corner or put a braille line under the letters so the child can easily identify which way to turn the card. If you do not do this, letters like F, D, H, and J cannot be told apart. Also mark the cards with print letters so you can quickly tell if the child is correctly identifying the braille letter.
2. Make worksheets with the letters the child knows. Have him try to identify the letters as quickly as possible. Time the child to see if he can increase his speed.
3. Make braille "Bingo" cards. Put the letters on the card in both braille and in print so the blind child can play Bingo with his sighted friends. Bingo can be used also for numbers, words, braille contractions, and math problems.

E. Drai 1 le Reading
Reading should be introduced as soon as the child starts to learn to write the braille alphabet. The process of teaching reading skills to a braille reader is the same as for a print reader. Both need to develop the same skills. Reading will be taught by the classroom teacher, but there are ways you can assist.
SPECIFIC ACTIVITIES
1. Write print letters over the braille letters. This way, the classroom teacher can follow what the child is reading.
2. Make sure the child is eventually using the same book as the other children in the classroom.
3. Check the book to see how appropriate it is to the child's experiences and culture. If the book is talk- ing about going to the market, make sure that the child has had that experience. Take him to a market so he can learn what a market is, how it smells, and so on.
4. If you are using a supplementary book with the child on a one to one basis, check to make sure the book is appropriate with the child's experiences. If the book is talking about elaphants and camels and the child has never seen or felt an elephant or camel, then either:
a. do not use that book but find a book that is
more relevant to the child's experiences, b. rewrite the book using animals the child is familiar with like pigs and chickens, or C. explain to the child what elephants and camels are.
5. If no books are used in the classroom, you will have to write your own. This is how many teachers teach reading to sighted children. The class does an activity together, such as taking a walk, and then they
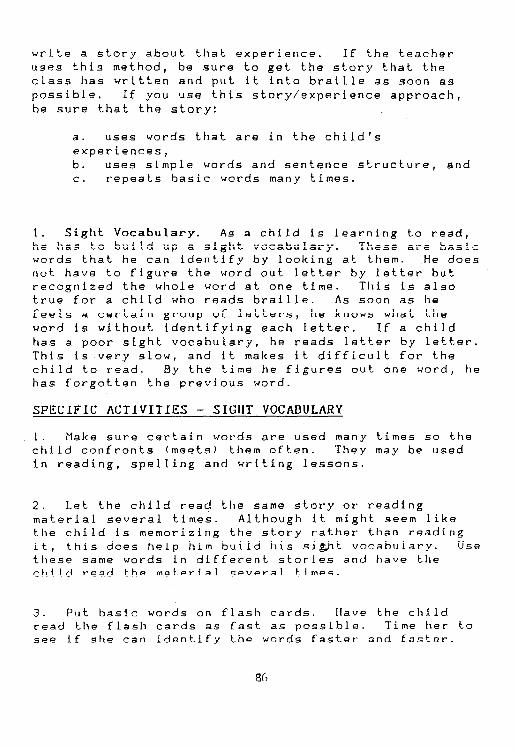
write a story about that experience. If the teacher uses this method, be sure to get the story that the class has written and put it into braille as soon as possible. If you use this story/experience approach, be sure that the story:
a. uses words that are in the child's experiences, b. uses simple words and sentence structure, and C. repeats basic words many times.
1. Sight Vocabulary. As a child is learning to read, he has to build up a sight vocabulary. These are basic words that he can identify by looking at them. He does not have to figure the word out letter by letter but recognized the whole word at one time. This is also true for a child who reads braille. As soon as he feels a certain group of letters, he knows what the word is without identifying each letter. If a child has a poor sight vocabulary, he reads letter by letter. This is very slow, and it makes it difficult for the child to read. By the time he figures out one word, he has forgotten the previous word.
SPECIFIC ACTIVITIES - SIGHT VOCABULARY
1. Make sure certain words are used many times 30 the child confronts (meets) them often. They may be used in reading, spelling and writing lessons.
2. Let the child read the same story or reading material several times. Although it might seem like the child is memorizing the story rather than reading it, this does help him build his si&ht vocabulary. Use ttlese same words in different stories and have the child read the material several times.
3. Put basic words on flash cards. llave the child read the flash cards as fast as possible. Time her to see if she can identify the words faster and faster.
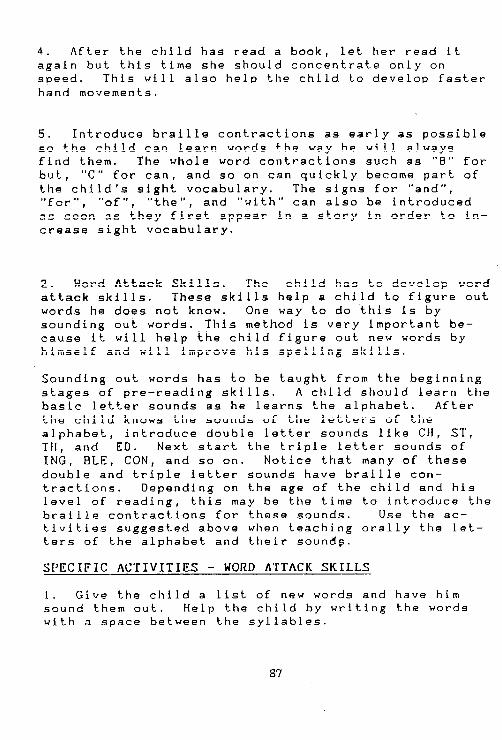
4. After the child has read a book, let her read it again but this time she should concentrate only on speed. This will also help the child to develop faster hand movements.
5. Introduce braille contractions as early as possible so the child can learn words the way he will always find them. The whole word contractions such as "B" for but, "C" for can, and so on can quickly become part of the child's sight vocabulary. The signs for "and", *'for", "of", "the", and "with" can also be introduced as soon as they first appear in a story in order to in- crease sight vocabulary.
2. Word Attack Skills. The child has to develop word attack skills. These skills help a child to figure out words he does not know. One way to do this is by sounding out words. This method is very important be- cause it will help the child figure out new words by himself and will improve his spelling skills.
Sounding out words has to be taught from the beginning stages of pre-reading skills. A child should learn the basic letter sounds as he learns the alphabet. After the child knows the sounds of the letters of the alphabet, introduce double letter sounds like CH, ST, TtI , and ED. Next start the triple letter sounds of ING, BLE, CON, and so on. Notice that many of these double and triple letter sounds have braille con- tractions. Depending on the age of the child and his level of reading, this may be the time to introduce the braille contractions for these sounds. Use the ac- tivities suggested above when teaching orally the let- ters of the alphabet and their sounds.
SPECIFIC ACTIVITIES - WORD ATTACK SKILLS
1 . Give the child a list of new words and have him sound them out. Help the child by writing the words with a space between the syllables.
87

In .some languages the letters may have different sounds in different wotds. In English the letter A has dif- ferent sounds in the words car and apple. In other languages the letters may always have the same sound. In Indonesian the A always has the sound like A in the word apple.
2. Give the child three or four sounds and have him put them together to form a word.
3. Give the child a word and have him flnd a word that rhymes with it.
ring = bring, sing, thing, king
4. When the child is reading and comes to a word he does not know, help him sound it out rather than tell- ing him what it is.
3. Content. Another way to figure out words is by content. Try the following activities to build this skill.
SPECIFIC ACTIVITIES - CONTENT
1. After the child reads a story, go through the book and erase a few of the main words. Ask the child to reread the story and fill in the missing words.
2. Write sentences with one word missing. Make sure the rest of the sentence gives a club to what the miss- ing word is. Let the child fill in the missing word by reading for content.
John is sick. Ile is going to the . . . . . . . . I like to eat . . . . . . It is very sweet and not good for my teeth, but I still like it.
88

3. When a child is reading and comes across a word he does not know, have him skip it and read the rest of the sentence. He can then try to figure out the word by the content of what he has read.
F. Brai 1 le Contractions
Braille contractions should be introduced as early as possible. They will help improve a child's reading skills and will help him read faster. fusing for a child to learn
It is very con- to read and write a word in
an uncontracted form, build it into his sight vocabulary, then learn to read and write the word in a new form. The child is being forced to learn something, unlearn it, and relearn something new. Teach it correctly the first time and you will not force the child to go through this process. This is true whether the child's reading language is English, Arabic, French, or German. If there is a contracted braille code, use it.
Many teachers feel that learning the contracted form of a word first will harm a child's spelling skills. They are partially right, but that does not mean that con- tractions should not be used. It means that you have to teach the correct spelling of contracted words in a spelling lesson. Many of the contractions do not change the spelling of words. The "ar " sign In the word fear (or "ea " sign if you follow the Australian and British rules) does not change the spelling of the word. You can teach the whole word contractions and abbreviations in spelling lessons.
Some teachers say that contracted braille is too dif- ficult for young children to learn.'.They feel there are too many contractions. They are correct that there are many contractions. What they forget is that many of these contractions are not used in basic reading books because of their limited vocabulary. You will not find words like knowledge, receiving, immediate, braille, and so on in a first or second grade reading . book. You do not have to teach those contractions until they appear in the child’s books in the upper
89
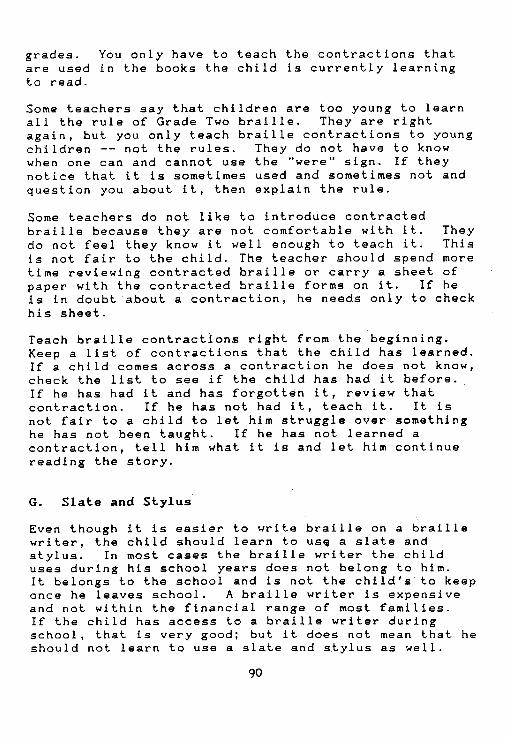
grades. You only have to teach the contractions that are used in the books the child is currently learning to read.
Some teachers say that children are too young to learn all the rule of Grade Two braille. They are right again, but you only teach braille contractions to young children -- not the rules. They do not have to know when one can and cannot use the "were" sign. If they notice that it is sometimes used and sometimes not and question you about it, then explain the rule.
Some teachers do not like to introduce contracted braille because they are not comfortable with it. They do not feel they know it well enough to teach it. This is not fair to the child. The teacher should spend more time reviewing contracted braille or carry a sheet of paper with the contracted braille forms on it. If he is in doubt about a contraction, he needs only to check his sheet.
Teach braille contractions right from the beginning. Keep a list of contractions that the child has learned. If a child comes across a contraction he does not know, check the list to see if the child has had it before. If he has had it and has forgotten it, review that contraction. If he has not had it, teach it. It is not fair to a child to let him struggle oversomething he has not been taught. If he has not learned a contraction, tell him what it is and let him continue reading the story.
G. Slate and Stylus
Even though it is easier to write braille on a braille writer, the child should learn to usg a slate and stylus. In most cases the braille writer the child uses during his school years does not belong to him. It belongs to the school and is not the child's to keep once he leaves school. A braille writer is expensive and not within the financial range of most families. If the child has access to a braille writer during school, that is very good; but it does not mean that he should not learn to use a slate and stylus as well.
90
"CURRICULUfl PLUS" 115 - RECORDED BOOKS
One way to increase th e amount of reading material available to the visually impaired child is to record books on cassette tape. Recorded books have several advantages:
1. No special training is needed to record books.
2. It is easier and quicker to record a book than to braille it.
3. It builds listening skills.
4. It is faster to listen to a book than it is to read it in braille.
Recorded books also have two disadvantages:
1. They do not teach reading skills.
2. It is difficult to understand math problems, graphs, and so on when they are presented orally.
Therefore, all basic school books should be in either braille or large print. Recorded books can be used for supplementary reading materials.
Rules to follow when recording a book:
1 . Ther,e are many different types qf tape recorders and tapes. The most common is the cassette tape player and recorder. Use this type of machine when recording books rather than reel to reel machines.
2. Always tape in a quiet room. Close the door and windows to eliminate background noises:
91
3. Read or skim the book yourself before you begin to record it. This will familarize you to what the book contains and will help you be aware of difficult words.
4. Start each tape with the following information:
a. Name of book b. Author C. Date of publication d. Tape # and Side tt. e. Leave a fifteen second pause before beginning to read the book. This will be filled in when you have finished taping one side of the.tape. You will record in this space, "This side contains print pages ___ to ___.
It is important to record this information at the beginning of each tape. It helps the reader to iden- tify the book and learn basic information about it. '
5. If you cough or clear your throat while recording a book, rewind the tape and record over it. Do not leave these sounds on the tape, because they are very dis- tracting to the reader.
6. Read at a normal reading pace and in a normal read- ing voice. Do not try to act the story out with dif- ferent voices for the characters. Do not try to dramatize the story with sighs, cries, or other emotions. Only trained actors can do this with success.
7. Do not talk down to the child or use a baby voice when reading children stories. Do not add things like, "Sit down now and open your ears ,because I am going to tell you a story."
92

a. Spell any difficult names of places or people the first time you read them.
9. If there is a picture or diagram that is important for the understanding of the book, explain it in words. Do this by writing down what you want to say and then record what you have written. If the picture does not add any new information or is merely in the book for decoration, ignore it.
10. Do not change one word in the book! Read it just as it is. If there are bad words in the book that you do not want to say, then get someone else to record the book. Do not record the book and skip them. Also do not change the story line of the book. If the book has a sad ending, you have no right to change itto a happy ending. Remember,you are not an editor or a censor. Your responsibility is to record the book exactly as it 1s written.
11. Do not add sound effects to the tape. It is very distracting to the reader. Sound effects are nice for a radio program but not for a recorded book.
12. Do not finish a tape in the middle of a sentence or a paragraph.
13. When you are finished, label each tape in both print and braille. Use this format: Tape Number # out of ----- (total number) tapes. This will help both you and the reader to know if you have al'1 the tapes of the book.
14. Do not forget to go back and record over the fif- teen second pause at the beginning of the book with the print page numbers the tape contains.
93

15. Make sure the child knows how to use the tape recorder.
16. Use volunteers to tape books for you. It will save you time. Make sit-e they understand and follow the rules given above.
94
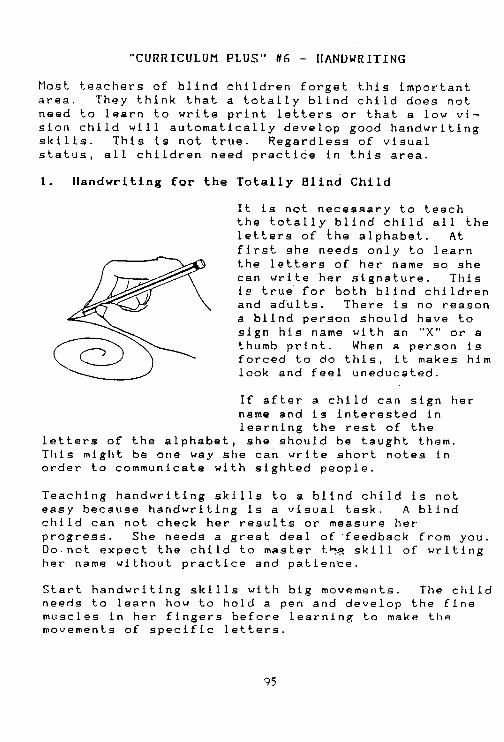
"CURRICULUM PLUS" H6 - IIANDWRITING
Most teachers of blind children forget this important area. They think that a totally blind child does not need to learn to write print letters or that a low vi- sion child will automatically develop good handwriting skills. This is not true. Regardless of visual status, all children need practice in this area.
1. IIandvriting for the Totally Blind Child
It is not necessary to teach the totally blind child all the letters of the alphabet. At first she needs only to learn the letters of her name so she can write her signature. This is true for both blind children and adults. There is no reason a blind person should have to sign his name with an “X” or a thumb print. When a person is forced to do this, it makes him look and feel uneducated.
If after a child can sign her name and is interested in learning the rest of the
letters of the alphabet, she should be taught them. This might be one way she can write short notes in order to communicate with sighted people.
Teaching handwriting skills to a blind child is not easy because handwriting is a visual task. A blind child can not check her results or measure her progress. She needs a great deal of,feedback from you. Do.not expect the child to master t5.e. skill of writing her name without practice and patience.
Start handwriting skills with big movements. The child needs to learn how to hold a pen and develop the fine muscles in her fingers before learning to make the movements of specific letters.
35
SUGGESTED ACTIVITIES
1. have the child use crayons and make big circle movements on a piece of paper. Do not worry about the results. The goals are to help the child become com- fortable holding a writing instrument and to start developing a feeling of hand movement. You can also use the blackboard for this activity.
2. Put five or six braille dots on a page and have the child draw lines between the dots. This will help the child to develop the sense of guiding a crayon, pencil or pen from one point to another.
3. Make boxes on a piece of paper with braille lines. Have the child color in the boxes. Gradually make the boxes smaller. This will help the child to work in smaller spaces. If you put screening under the paper, it will give a raised texture to the colored area which the child can feel. Use other simple designs besides squares.
4. Make two braille lines going across the page. Have the child make circles between the lines or up and down strokes while trying to stay within the two lines. Gradually make the lines closer together. Always have the child work in the same direction that he will use when writing his name. If he is learning to write English letters, he should work form left to right because this will be the direction he will move his hand when writing his name. Or if he is learning to write his name in Arabic, he should practice writing right to left.
5. Teach the child each letter of his name one by one and in the order they come. If the child's name is Tom, first teach the capital letter "T". After the child has mastered that letter, teach the letter "0". Teach only one letter at a time.
96

The same is true for
6. There are many different ways to make each letter of the alphabet. Use the easiest way. Do not worry if some of the letters you teach are print letters and others are.cursive letters. It is more important that they can be easily written and read rather than that they follow one type of writing style.
7. When teaching a letter, have the child start by making the letter big and gradually making it smaller and smaller.
the child's signature. llave him start by writing his name large in order to develop the correct hand movements to form the letters correctly. Gradually have the'child reduce the size of the letters.
a. A Signature card will help a child write within a small space. Take a piece of cardboard and cut a small rertangle out of the middle. When the child needs to sign his name, place this cardboard over the paper so that the rectangle space is over the place where the signature should be. The child can then sign his name using the rectangle sp-ace as a tactual boundary.
Remember the child can not check his writing. The only feedback he.will get is from you. Therefore, do not have the child work alone. You must be with tile child in order to give laim immediate feedback, praise, and encouragement.
97
2. Handwriting for the Low Vision Child
The low vision child will learn more than writing his name. fle should learn all the letters of the alphabet, numbers, punctuation signs, and so on. He should fol- low the same writing lessons as the sighted children in the classroom.
SUGGESTED ACTIVITIES
1. Have the child use white paper with dark lines. Or make the lines in his notebook darker so he can see them more easily.
2. Let the child use a felt tip pen or a black ink pen. The print will be darker than with a pencil.
3. Check lighting to make sure there is no glare or shadows.
4. Have the child write on a portable white board with felt tip pens. This provides very good contrast but be careful of glare.
5. Teach the child the correct way to write letters. Many low vision children have learned to write by look- ing at the shapes of the letters. They have then made up their own movements to form the letters. Often these movements are not correct and cause the child to write slowly. Make sure the child is using the correct movements to write letters. For instance, the letter "b I' is made with a downward movement and than a half circle movement counter clockwise. You do not make the half circle first.
6. Low vision children are often messy and disorganized. You can insist that they learn to keep their papers organized and their work areas clean. A notebook that a child can put all his work papers into will be of great help.
98
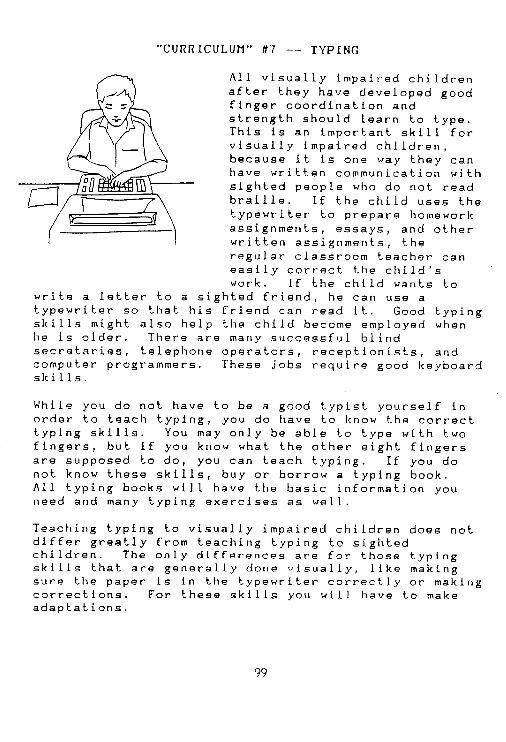
"CURRICULUtl" It7 -- TYPING
All visually impaired children after they have developed good finger coordination and strength should learn to type. This is an important skill for visually impaired children, because it is one way they can have written communication with sighted people who do not read braille. If the child uses the typewriter to prepare homework assignments, essays, and other written assignments, the regular classroom teacher can easily correct the child's work. If the child wants to
write a letter to a sighted friend, he can use a typewriter so that his friend can read it. Good typing skills might also help the child become employed when he is older. There are many successful blind secretaries, telephone operators, receptionists, and computer programmers. These jobs require good keyboard skills.
While you do not have to be a good typist yourself in order to teach typing, you do have to know the correct typing skills. You may only be able to type with two fingers, but if you know what the other eight fingers are supposed to do, you can teach typing. If you do not know these skills, buy or borrow a typing book. All typing books will have the basic information you need and many typing exercises as well.
Teaching typing to visually impaired children does not differ greatly from teaching typing to sighted children. The only differences are for those typlng skills that are generally done visually, like making sure the paper is in the typewriter correctly or making corrections. For these skills you will have to make adaptations.
99

Here are some things to keep in mind:
1 . Teach the child about the typewriter. He should learn the function of each key and knob on the typewriter. He should also know how to clean.the typewriter, change ribbons, and so on.
2. Encourage good posture while typing.
3. Do not let a low vision child watch his fingers. Ile must learn the location of each key without looking. All people learning to type must do this if they are going to learn how to type quickly.
4. Make sure the child always keeps his fingers on the home keys. If he has trouble locating them, put some type of tactual marking such as glue or pieces of sand paper on the "F" and "J" keys.
5. Insist that the child use the correct fingers for t.wing. The letter "A" is always typed with the little finger of the left hand. If is never typed with any other finger.
6. As a child becomes a better typist, he will know when he makes a mistake nine times out of ten. Correc- tion tape is easier to use than correction fluid. The child can tell which side of the correction tape should be placed near the paper by feeling the tape. The two sides feel different.
7. If you do not have a typewriter, borrow one. Many schools have typewriters that you may borrow for half an hour a day.
8. If you cannot find a typing book, remember that the home keys are (from left to right) A, S, D, and F for the left hand and J, K, L, and ; for the right hand. Each finger is responsible for certain keys on the
100

typewriter.
A finger (little finger, left hand): keys Q and Z. S finger (ring finger, left hand): keys W and X. D finger (middle finger, left hand): keys E and C. F finger (pointer finger, left hand): keys G, R, T, V
and 8.
J finger (pointer finger, right hand): keys H, U, Y, M, and N.
I< finger (middle finger, right hand): keys I and , (comma). L finger (ring finger, right hand): keys 0 and . (period). ; finger (little finger, right hand): keys P and / (diagonal).
Both the left and right thumbs are used for the space bar.
9. The child can make sure the paper is in the typewriter correctly by rolling the paper into the typewriter and then releasing the paper release key. He can then line the top edge of the paper with the bottom of the paper. When the two sides are even, he locks the paper into the typewriter by closing the paper release key. He then rolls the paper back into the typewriter until the top edge is even with the line bar.
101
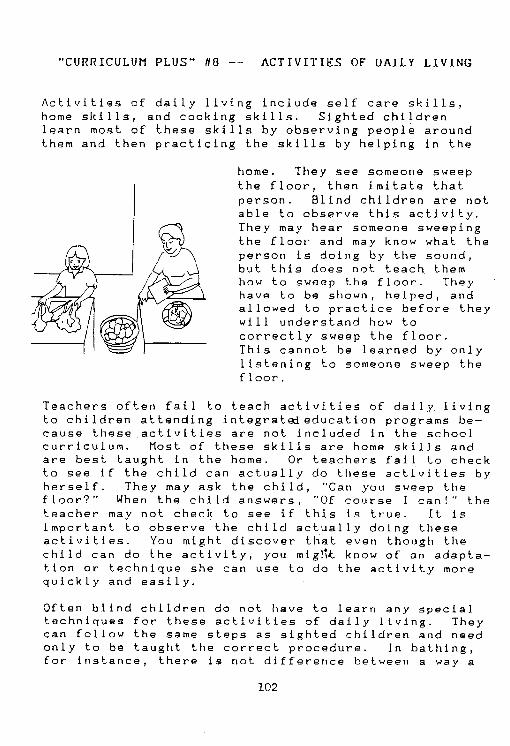
"CURRICULUM PLUS" 118 -- ACTIVITIES OF DAILY LIVING
Activities of daily living include self care skills, home skills, and cooking skills. Sighted children learn most of these skills by observing people around them and then practicing the skills by helping in the
home. They see someone sweep the floor, then imitate that person. Blind children are not able to observe this activity. They may hear someone sweeping the floor and may know what the person is doing by the sound, but this does not teach them how to sweep the floor. They have to be shown helped, and allowed to practice before they will understand how to correctly sweep the floor. This cannot be learned by only listening to someone sweep the floor.
Teachers often fail to teach activities of daily living to children attending integratededucation programs be- cause these activities are not included in the school curriculum. Most of these skills are home skills and are best taught in the home. Or teachers fail to check to see if the child can actually do these activities by herself. They may ask the child, "Can you sweep the floor?" When the child answers, "Of course I can!" the teacher may not check to see if this is true. It is important to observe the child actually doing these activities. You might discover that even though the child can do the activity, you migl;h know of an adapta- tion or technique she can use to do the activity more quickly and easily.
Often blind children do not have to learn any special techniques for these activities of daily living. They can follow the same steps as sighted children and need only to be taught the correct procedure. In bathing, for instance, there is not difference between a way a
102

blind child and a sighted child wash themselves. They both must use soap and water; the actual procedure of washing is the same.
Sometimes, however, a special technique may hel,p a blind child do some activities more easily. These techniques usually make use of the other senses: touching, hearing, tasting, or smelling. To fill a glass of water, a sighed child pours water into the glass and stops when he sees that the water is almost to the top rim; a blind child must use either a tactual or a hearing clue to know when to stop pouring. If a sighted child wants to wear his yellow shirt, he can easily open the closet door and pick it out; the blind child must have some kind of tactual clue to differen- tiate between,his yellow and white shirt. For specific ideas on adaptations used for activities of daily living see the references at the end of the manual.
It is important for visually impaired children to master as many of these daily living skills as they can, so that they need not depend on others. If they cannot do these activities they must wait until someone else can help them. This is an inconvenience not only to others in the household but also to the visually im- paired child.
When teaching these activities, keep the following in mind:
1. Break each activity down into small steps which the child can master easily. Teach one step, then the next, and so on. Make sure the child masters each step before moving on to the next step.
2. Be realistic about what you tea-h. Make sure it is appropriate for the child's age. Most sighted five year old children are not cooking the family meal, so do not expect a five year old blind child to do this activity.
3. Work closely with the child's family. They should know what the child can do so they can reinforce this
103

learning at home. If you have taught the child how to peel vegetables, his mother should let her do this ac- tivity at home.
4. Children learn these skills by doing them. They cannot learn them from lectures. Make sure there is plenty of time to practice these skills.
5. Gather all materials and equipment before starting the activity. This will help you save time during the lesson.
6. Be sure that the child knows where these materials are and can locate them easily.
7. Be certain that the child can use each implement or piece of equipment (knife, stove, saw, razor, fork) correctly and safely.
a. Have a work plan that tells you the correct proce- dure to use and lists each step in the proper order.
9. After the activity is completed, be sure that the child cleans and returns all equipment and supplies to their correct storage space so they can be easily lo- cated later.
The following is a partial list of activities of daily living which the visually impaired cfiild should be able to do. Remember to introduce these activities at the appropriate age level and to work closely with the child's family so they allow the child to practice these skills in the home.
101,

1. Self Care Skills
Dressing Eating Brushing teeth tlair care Make-up Bathi?g Toilet needs and cise of Che iakbine Money identffication and management Menstrbation Care and ideniifictition of clothes Care of nails
Health Care Shaving Medicine
2. Home skiiis
Sweeping and mopping tile floor Dusting Making Che bed Washing windows Sweeping and cleaning the Yard, Feeding animals Cleaning the,house Washing, drying; folding, and ironing clothes Clothes identification Sewing Polishing shoes Washing and drying dishes Pouring Water
3. Cooking Skills
Marketing Cleaning and peeling frtiits and vegetables Identifying fresh foods Lighting the stove Cutting fire wood Placing pots and pans on a lighted stove Use of electrical appliances Preparing simple foods Identifying when foods are cooked
105

Safe use of knives Husking coconuts and making ,coconut milk Identifying boxed and canned Ifoods Measuring spices Cleaning fish and other seafood
106

CHAPTER 5 -- MATERIALS ADAPTATION
Visually impaired children use the following types of materials (Lowenfield):
1. Materials that are usable in the original form (blocks, beads, etc.).
2. Materials thtiC adaptation (card,
require some modification or
games; etc.). worksheets put into braille,
3. Materials that h ave been designed and manufactured especially for blind children print maps, braille books, etc.).
(large
4. Materials that provide substitute experiences (models of animals; planes; houses, etc.).
We are concerned in this section with Number 2 -- materials that require modification or adaptation for use by the visually impaired child. Most of these adaptations can be made by the special education teacher. YOU
do not need to be an artist to adapt these materials, but you do need to be creative. You also need to ask yourself questions such as: How can a worksheet or graph be put into a new format so that it can be
chi Id? understood and used by the
You wfll have to put the material into a tac- .tual format for a blind student and a large print for- mat for a low vision student.
Before you adapt materials, you must have the right equipment. Start by making a materials adaptation kit and always bring it with you when visiting your students. Often materials have to be adapted on the spot. You cannot do this if you do not have your equipment with you. You will need a container to put
107
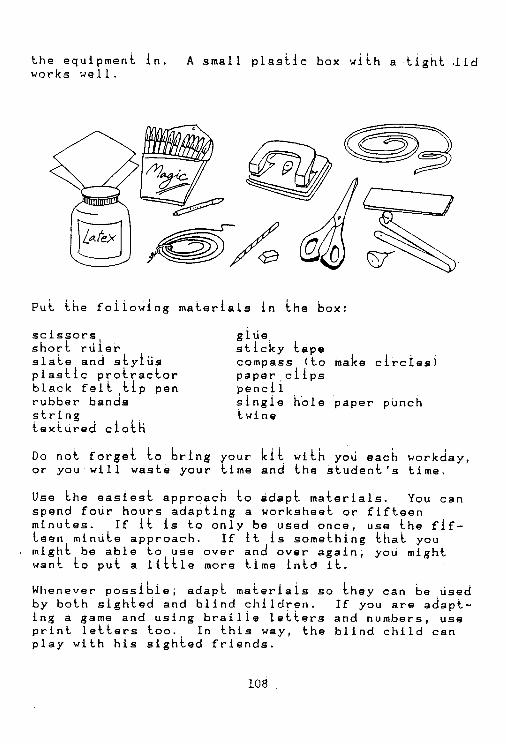
the equipment in. A small plastic box with a 'tight lid works well.
Put the following materials in the box:
scissors short ruler slate and sCyi;is plastic protractor black felt,tip pen rubber bands
i,t=i!ZZeci cfoCh
giiie sticky tape compass (to hake cikciesj paper,cilps pencil single hole paper punch twine
Do not forget Lo bring your kiC with you each workday, or you will wastb your time and the student's time.
Use the easiest approach to adapt materials. You can spend four hours adapting a worksheet or fifteen minutes. If it is t o only be used once, use the fif- teen minute approach. If it is something that you might be able to use over and over again, you might want to put a liCt1 e more time into it.
Whenever possible; adapt materials so they can be used by both sighted and blind children. If you are aciapt- ing a game and using braille letters and numbers, use print letters too. In this way, the blind child can play with his sighted friends.
108

When adapting materials, you do not always have to make them look,like the print copy as long as they are teaching the same concept. For example; if you are adapting a math worksheet that wants the child to count how many ducks on each line; you do not have to cut out little duck shapes and paste them on a piece of paper. It would be easier to paste buttons on a piece'of paper or make braille dots. The worksheet is not teaching about ducks but about counting., It does matter if it is ducks; buttons; or braille dots. ,Tactual pictures that are shapes of ducks,,trees; dogs; or cats look pretty to sighted people but they do not provide much information to the visually impaired'child.
Think about whak you are going to do before starting to adapt a particular material. Ask yourself the foilowing questions:
i. Wh& is Lhis kichii,g material trying to teach?
2. WIIY is iC. difficult for the student to use this material in its original form?
3. How can I adapt it so the student can understand it'?
4. Do I have all the material9 that I need?
109

EXAMPLE
You are given a'connect the dotllworksheet to adapt Yourfirst reaction might be that it is not important for the blind child. But when you think about it you realize that if the other children will be doing this activity, your student should also do it. You ask yourself these four questions:
Question 1: What is this worksheet trying to teach7
Is it teaching a child to make a picture? No, not really. Is it checking to see if the child knows his numbers7 Yes, it is. Does it reinforce hand movement, holding a pencil, and drawing lines? Yes.
Question 2: Why cannot the child do it in its original form?
That is easy! He can not see the dots or numbers on the page.
Questions 3: Ilow can I adapt it7
I can make a similar worksheet on braille paper and use braille dots and braille numbers. I could even arrange
'the dots in the same shape as they are on the print worksheet. ,The child will not know what the picture is, but that is not what the worksheet is teaching.
110
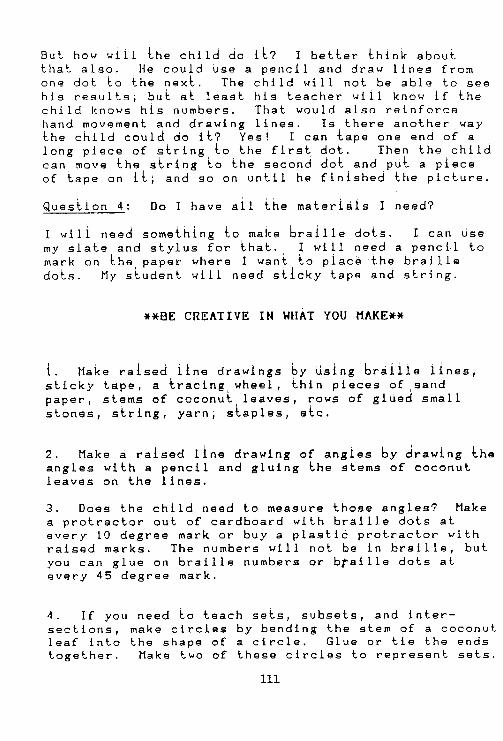
But how will the child do it? I better think about that also. fje could use a pencil and draw lines from one dot to the next. The child will not be able to see his results, but at least his teacher will know if the child knows his numbers. That would also reinforce hand movement and drawing lines. Is there another way the child could do it? Yes! I can tape one end of a long piece,of string,to the first dot. Then the child can move the string to the second dot and put a piece of tape on it; and so on until he finished the picture.
Question 4: Do I have all the materials I need'?
I wiii need something Co make braille dots. I can use my slate and stylus for that. I will need a pencil to mark on the paper where I want to piacb the braille dots. My student will need sticky tape and string.
+%EE CREATIVE IN WHAT YOU HAKE+*
i. Make raised ifne drawings by using braiiie i1,ne.s; sticky tape, a tracing,wheel, thin pieces of,sand paper l stems of coconut31eaves, rows of glued small stones, string; yarn, staples, etc.
2. Make a raised line drawing of angles by drawing Lhe angles with a pencil and gluing the stems of coconut leaves on the lines.
3. Does the child need to measure those angles? Hake a protractor out of cardboard with braille dots at every 10 degree mark or buy a plastic protractor with raised marks. The numbers will not be in braille, but you can glue on braille numbers or braille dots at every 45 degree mark.
4. If you need to teach sets, subsets, and inter- sections, make circles by bending the stem of a coconut leaf into the shape of a circle. Glue or tie the ends together. Make two of these circles to represent sets.
111

For the intersection part, lay one circle partially over the otfler.
5. Trying to adapt a graph? Hake braille lines for the basic graph design and tape the paper on a piece of cardboard. Use straight pins at the intersecting points shown on the print graph. Connect the pins and string so the child can feel the curve the graph represents.
6. A worksheet that deals with reflecting or mirror images may be adapted by using a coconut branch with the same number of leaves on each side Take off three leaves on the left side and have Lhe child do the same to the right side.
7. heed a measuring stick? clit i sticic and cut a notch at each centimeter.
one meter long
112
CIIAPTER 6 -- EQUIPMENT AND SUPPLIES
As a special education teacher, you must inform the school or your supervisor what equipment and supplies are needed and see that they get to the child. Ad- ministrators often do not know what type of equipment is needed or where to buy it. Keep a list of things you need, where it can be bought, and the price. When you are asked what you need, you will have 'the informa- tion on hand.
Make sure your requests are realistic and Chat they are I for items you really need. It would be nice to have either a talking,calctiiator or anelectric typewriter, but are they really needed? the money can be used'?
Are Chere better ways that
Generally; it 1 s cheaper to make something than to buy it from the store. If,you cannot make it, find out if the product is available locally before importing it. Paper available in the community that,can be used for braille paper is less expensive than imported paper.
The equipmeni and supplies you need will depend upon the type of integrated education program you follow and the visual status of your students. You do not need your own desk in every school if you are an itinerant teacher nor do you need braille books for a student who can read print.
Your students will need a desk and a safe place to store materials and supplies. The school will usually provide these. Remember that a blind child needs more. desk space than a sigflted child needs. braille writers,
Braille books, and braille materials take up more
-room than regular books and paper. Low vision children .need more room for large print books.
A safe place to store equipment is very important. A braille writer is expensive and must be locked up at night. Braille books are too big to fit inside most desks. Space will be needed for the child to store his books. As a child gets older, make sure ali
it should be his duty to equipment is put away at the end of each
school day.
113
Blind children may need the following purchased equip- ment and supplies:
braille writer and paper; slate and stylus, braille books, braille ruler and protractor, abacus, cassette tapes, and access to a typewriter and a tape recorder, and a long cane.
Low vision children may need:
felt Cip pens, bold line paper, magnifiers, reading stands, and access to a typewriter and a tape recorder.
114

CIIAPTER 7 -- REtIEDIAL WORK
You may have to either provide,or,arrange for someone else to provide remedial work if the child is having difficulty keeping up with one,of his academic subjects. If the child is having difficulty following the class because of his visual limitation, you are probably the best person to assist the child with remedial work. If the problem is due to other reasons; such as the child just not being strong in that area, then either another student or someone else can help tutor the child. Some children will need more help than others.
There are no special rules for teaching,remedial work, but some of the following suggestions might be of help.
1. Be sure you know the subject matter before trying to help the child. If you are trying to teach the child division of fractions, make sure you know how to divide fractions yourself.
2. Identify the exact area where the child 13 having difficulty. If the teacher says the child,is having trouble with reading, find out if the child is having problems with braille contractions, reading comprehension;, word attack skills, or speed. If you can identify the exact area of difficulty; you can more easily correct it.
3. After identifying the problem think of exercises, lessons, and teaching aids that might be helpful. If you are not sure what to do; ask the classroom teacher or other teachers in the school for suggestions.
4. Break the learning material down to small steps as you teach the child. Make sure he understands and practices one step before introducing the next step.
115
--

5. For concentrated remedial work remove the child from the classroom when working with her. Go to another classroom or office where you can work with the child alone. If there is no room available, take her outside and work under a tree. If the child needs limited remedial work, then work with the child lo the classroom. This is helpful because the regular class- room teacher can see what you are doing and how you are teaching the child.
6. The goal of,remedial work is to help the,,child with a particular subject area so she can keep up in the regular classroom. Try to get the =hiid up to class level and back into the classroom as quickly as possible.
7. If the child is unable to keep up in a subject area because he does not have the correct materials or books; the problem is not with remedial work but with lack of materials. You should be spending your time making the materials or recording the text the child needs rather then constantly providing remedial work.
8. If a child needs remedial work, do not be afraid to ask the child's parents and family to provide special help. You will have to give them specific instructions what to do, but they should be involved with the child's education.
9. Be realistic in,your expectations of the child. If he is doing poorly in math because he does not have a natural ability in that area, thendo not expect the child to be perfect in math. On the other hand, if the child is doing poorly in math,becauSs he is lazy or lacks practice in doing exercises; you can expect the child to do better in that area with practice and by working harder.
116

10. Provide remedial work as soon as it is neededsin a specific subject area. If a child is reading at
Do not put it off until later. a grade two level when he,is
in grade four; it is going to take a lot of time and remedial work to help the child read at class level.
ii. If other children are having difficult in,the same areas as the visually impaired child, ask the classroom teacher if you or another tutor might ijork with them in a group.. This will provide remedial work to the childr,en who need it and will help the visually im- paired child realise that he 1s not the only,person ain the class having difficulty in that subject.
12. Remember you c/o not have to do ali the remediai work with the child yourself. people to,help.
Try and find other Look for volunteers, other teachers in
the school; and other children in the ciassroom to help tutor the child.
117

CilAi'TER 8 -- LINK BETWEEN HOt¶E AND SCr-iOOL
The special edticdtion teacher is the iink between home and school. It is your responsibility to let the child's parents and family know of his progress in school. If the child is absent from school because of problems at home, yoLi,should explain what is going on to the classroom Leacher. You must make regular visits to the child's home.
Parenis need co know Low Cheir child 1s progressing in school. They need to know of ways they can help the child reinforce the knowledge and skil'ls he is learning. They can find this information out by talk- ing with you. If a child learns to use the cane to go from school to home and you fail to tell the parents this information; then they are not going to let their child use this new skill.
ilost classroom t eachers are responsible for.,thlrty to% foriy children and do not have the time to make these home visits.
YOU .houid be Aware of the foiiowing points when making home visits.
i. Make home vlsics regularly. Do noC visik Che home only when there is ti problem. If you,only visit the home when the child is in trouble or havihg problems, the parenis are going lo associate your visits with bad news and they are not going to be coo happy to see YOU.
2. Teli the parents the success Ihe =hiid is havihg. Let them know when their child does something well. This will help them to be proud of their child.
3. Remember yolk are no t a psychiatrist or a family therapist. If there are problems within Fhe family, it i s not your responsibility to try and solve these problems. Although it is helpful to be aware of these problems (as they may have an influence on the child), you do not have the skills or background to solve these problems.
118
4. Private matters that you hear and talk about in the home should stay private. You should not spread gossip or information about the child’s family to your friends.
5. Let the family know that you are coming before you show up at the door. Tell the child to ask his parents if they will be home on such and such a date. This will save you from making a trip to the child’s home only to find out that the mother has gone to the market and the father has gone to work.
6. Do not visit just one parent. Both parents and other family members should be involved in the home visit. They are all important people in the child’s life and should know about the welfare, progress, and development of the child.
7. Remember the child has rights too. Nobody likes to be talked about behind their backs. Let the child know what you are going to talk about with his parents. Better yet, have the child present when you make the home visit.
8. Ask the parents if there are certain things they want you to teach the child. They might have a better idea of the areas in which the child needs extra help.
119
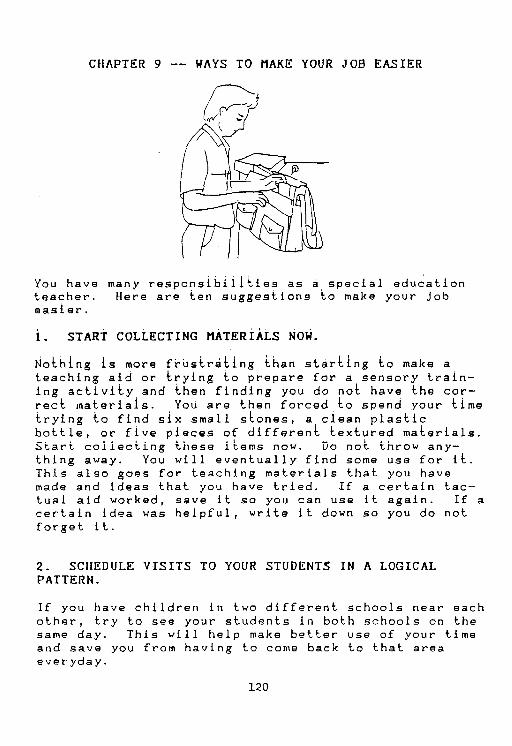
CHAPTER 9 -- WAYS TO tlAKE YOUR JO8 EASIER
YOU have many responsibillti es as a special education teacher. Here are ten suggestions to make your Job easier.
i. START COLLECTING flkTERii\tS ROti.
Nothing is more frustrating than stirking to make a teaching aid or trying to prepare for a sensory train- ing activity and then finding you do not have the cor- rect materials. You are then forced to spend your time trying to find six small stones, a clean plastic bottle, or five pieces of different textured materials. Start collecting these items now. Do not throw any- thing away. You will eventually find some use for it. This also goes for teaching materials that you have made and ideas that you have tried. If a certain tac- tual aid worked, save it so you can use it again. If a certain idea was helpful, write it down so you do not forget it.
2. SCHEDULE VISITS TO YOUR STUDENTS IN A LOGICAL PATTERN.
If you have children in two different schools near each other, try to see your students in both schools on the same day. This will help make better use of your time and save you from having to come back to that area everyday.
120

3. DEVELOP GOOD AND OPEN COMMUNICATION.
A. With the headmaster of the schooi. Let him know when you will be comihg to the school Stop in his of- fice every time you visit the school to let him know that you are there. It is his right and duty as a headmaster to know who is in school at all times. If you bring a guest, supervisor, or observer with you, introduce that person to the headmaster before seeing the child.
8. With the other teachers in the school. Visit the school during the teachers' coffee break; tea break, lunch break, etc. and talk to them about what you are doing. Also ask them questions about school activities, school vacations, and so on.
How will this make your job easier? By developing good communications with the headmaster and other teachers in the school, it will be easier for you ,to get their assistance when you need it. If you need to take a child out for an,orientation and mobility .lesson, the headmaster will be more wiling to agree if he knows you and feels comfortable with you. If you need teaching ideas, other teachers will feel freer to take the time and share their ideas with you if they know you.
4. KNOW YOUR PLACE IN THE CLASSROOti
Remember that when you visit a child in the classroom, you are a guest in both the classroom and the school. You are there to provide support services to the child and his teacher. You are not there to supervise the teacher. Nothing will destroy the working relationship between you and the teacher faster .than if she feels threatened by you. You are not her 'supervisor and you are not a spy for the headmaster. If you do not like the way she teaches a health lesson, offer a tactful and polite suggestion on other ways you have seen that lesson taught and then keep quiet.
121

5. SHARE YOUR KNOWLEDGE
When people ask questions, tell them what you are doing. Explain why you are teaching a certain skill or using a certain teaching aid. The more other people understand what you are doing, the more they will be willing to help you when you need it. They will learn that teaching a blind child is not "magic" and that they can be part of the teaching process.
6. USE VOLUNTEERS
Need a teaching aid made? A book recorded? Someone i-0 read to the child? Look for volunteers. you and save you time.
They can help You must explain to them ex-
actly what you need and how to do it, but this is worth the effort because it saves you time from having to do it yourself: Use volunteers in other ways than for Just making aids and books. If you are teaching a child to use a cane and he needs practice in holding and moving a cane, find a volunteer to work with the child. If the child needs extra practice in counting and subtracting objects, find a volunteer to work with the child fifteen minutes every day. Once again you have to train the volunteers and make sure they know exactly what they can and cannot do, but it will save you time.
7. KEEP DAILY NOTES FOR EACH CHILD
Have a section of your notebook for each child to whom you provide services. After each lesson, write down:
a. the date, b. what you taught, C. progress made or problems, .and d. ideas and special materials needed for the next lesson.
These notes are for you, so you do not have to write a long report each time. Write just enough information to help keep you organized. It should take no more than three minutes, but you will save lots of time by
122
not having to remember what you last taught the student or what you are suppose to bring next time.
8. BE PREPARED
Make sure you are organised and prepared before you go to the child's school. to work on that day?
Do you know what you are going Do you have the materials that
you need? Do you have the reading lessons that you were going to put into braille? You waste both your time and the child,'s if you come unprepared,and have to sit around trying to think of something to teach. This is not fair to the child. If you cannot go to a school prepared and organized, then do not go at all. The child will do better sitting in the classroom and fol- lowing the regular activities of the class then sitting with you while you try to prepare his lesson.
9. KEEP IN TOUCli WITH OTtlER SPECIAL EDUCATION TEACHERS
They can help you with ideas and materials. If you need a book that they have already put into braille, perhaps you can borrow it. This could save you time and extra work.
10. USE YOUR TRAVEL TIME TO PLAN
Use the time you are sitting in the car, riding the bicycle, or walking from one school to another to think about your next lesson, Review it in your mind so you are prepared to teach it. Think of what you are going to need next week or next month. Write down your daily notes. This will help you keep organized.
123

CHAPTER 10 -- REFERENCES
i. EDUCATIONAL MATERIALS AND AIDS
The following material is taken from International Sur- vey of Aids For The Visually Disabled by J. M. Gill (Research Unit for the Blind, Institute for Bioengineering, Brunel University, Uxbridge, Middlesex, England, September 1983). This books contains a very complete list of aids for the visually impaired that are commercially availabe from all parts of the world. Following is a partial list that offers basic supplies and equipment for the visually impaired.
American Foundation for the Blind 15 West 16th Street New York, New York iooii U.S.A. Telephone: (212) 620-2172
The AFB sells braille slates, braille watches, canes, reading stands, recreational equipment and a large num- ber of other articles for both blind and low vision people. They also have a very complete publications section of proffesional material. Catalogue is avail- able upon request.
American Printing House for the Blind 1839 Frankfort Avenue P.O. Box 6085 Louisville, Kentucky 40206 U.S.A. Telephone: (502) 895-2405
The APH offers many types of educationad materials and educational equipment for visually impa?red people, including braille paper, slates and stylus, maps, low vision stimulation materials, math equipment, tactile graphics kit, etc. Catalog is available on request.
124

American Thermoform Corp. 8640 East Slauson Avenue PO Box 125 Pica Rivera California 90660 U.S.A. Telephone: (2131 277-0516
The American Thermoform Corp. sells the Thermoform machine used for duplicating braille masters. It also sells the Thermoform Paper needed for this process.
Deutsche Blindenstudienanstalt Postfach 1160 Am Schlag 8 D-3550 tlarburg German Federal Rupublic Telephone: 06421-67053
Marburg offers a variety of equipment for duplicating braille masters. This includes the Stereotyper which embosses on metal plastes and other specialized equip- ment for braille book production. They also offer canes and other equipment for the visually impaired. Information available upon request.
Howe Press Perkins School for the Blind 175 North Beacon Street Watertown, Massachusetts 02172 U.S.A. Telephone: (617) 924-3434
The Howe Press sells the Perkins Brailler. It also sells a number of other equipment such ‘as a variety of slaes and stylus, tracing wheels to make raised line drawings, math equipment such as compass and protractors, etc. Catalogue available upon request.
125
New York Lighthouse Optical Aids 36-02 Northern Boulevard Long Island City, New York, 1101 U.S.A. Telephone: (212) 937-9338
The New York Lightouse has a wide variety of low vision aids and magnifiers. Information available upon request.
Royal National Institue for the Blind 224 Great Porthland Street London WlN 6AA England Telephone: 01-388 1266
The RNIB sells a wide variety of equipment, including slates and stylus, recreational equipment for the blind, low vision aids, etc. Catalogue and information available upon request.
Voltas Ltd. Kaybee Cell 9 J N Heredia Marg Bombay, 400 038 India Telephone: 26 81 31
The Volats Ltd manufactures the tion available upon request.
Taj brailler. Informa-
NOTE
Although this is a very short list, most special aids and equipment needed for education programs for visually impaired students are availabe from these suppliers. Their catalogues are not only helpful in knowing what is avilable, but will also assist you with ideas for educational materials that you can make yourself.
126

2. REFERENCES -- BOOKS
Barraga, N. Ed. D. Increased Visual Behavior in Low Vision Children, New York: American Foundation for the Blind, 1977.
Brothers and Huff. Sound Localization: Suggested Activities for the Development of Sound Localization Skills, Louisville, Kentucky: American Printing House, 1977.
Corn and Martinex. When You Have a Visually Handicapped Child.in Your Classroom: Suggestions for Teachers, New York: American Foundation for the Blind.
Cratty and Sams. The Body-Image of Blind Children, New York: American Foundation for the Blind, 1968.
Davidou, M. Ed. D. The Abacus Made Easy - Second Edition, Lousiville, Kentucky: American Printing House for the Blind, 1978.
Green, L. A Primer of Activities for Deaf Blind Children, Dallas, Texas: South Centeral Regional Center.
Groves and Griffith. Guiding the Development of the Young Visually Handicapped . . . A Selected List of Activities, Columbus, Ohio: Ohio Department of Education, 1969.
Hill and Blasch. "Concept Development," Foundation of Orientation and Mobility, New York: American Founda- tion for the Blind, 1980.
Kastein, Spaulding, Scharf. Raising The Young Blind Child, New York: Human Sciences Press, 1980.
Lowenfeld, 8. fed). The Visually Handicapped Child In School, New York: John Day, 1973.
Lydon and McGraw. Concept Development for Visually Handicapped Children, New York: American Foundation for the Blind, 1973.
127

Mangold, S. Editor. A Teacher's Guide to the Special Education Needs of Blind and Visually Handicapped Children, New York: American Foundation for the Blind, 1982.
Mullet-, M. Reading and the Visually Handicapped Child, Scott, E. Your Visual1 y Impaired Student - A Guide for Teachers, University Park Press, 1982
Napier, Kappa,n, Tuttle, Schrotberger, Dennison. Handbook for Teachers of the Visually Handicapped, Louisville, Kentucky: American Printing House for the Blind, 1981.
O'Brien, R. Ph. D. Alive , . Aware . , . A Person, Maryland: Montgomery County Public Schools, 1976.
Olson, M. "Faster Braille Reading: Preparation at the Reading Readiness Level," The New Outlook for the Blind, 70, pp 341-343.
Olson M. Ed. D. Guidelines and Games for Teaching Efficient Braille Reading, New York: American Founda- tion for the Blind, 1981.
Paskin, N. Sensory Development Training Program - Aims and Progress, New York: Centet- for Independent Living, 1975.
Sloan, L. Ph. D. Recommended Aids for the Partially Sighted, New York: National Society for the Prevention of Blindness, Inc., 1971.
The Partially Sighted. Child in Your Classroom, Compiled by the Advisory Teachers for the Visually Handicapped, Department of Education, Queesland, Australia.
Willoughby (ed). Your Students Include a Blind Student, California: National Federation of the Blind Teachers Division.
128

NOTE
An excellent publication has recently been published by the American Foundation for the Blind. It is Founda- tion of Education for Blind and Visually Handicapped Children and Youth, by Geraldine T. Scholl, Editor, 1986. This book is a very complete covering many aspects of special education for blind and visually im- paired children.
Another publication appearing later in 1988 within the series "Special Needs in Ordinary Schools" is Visual Handicaps in the Classroom by Elizabeth Chapman and Juliet Stone, published by Cassell Educational Ltd. Artillery House, Artillery Row, London SWlPlRT. The book considers the theory and issues relating to the movement to integrate visually handicapped children into ordinary schools: and offers practical suggestions to teachers to help such children participate fully in school life.
129