
Editing Document s - Cody High School B.pdfEditing Document s UNIT B Word 2010 Word 26 1. Start...
24
UNIT B Word 2010 Files You Will Need: WD B-1.docx WD B-2.docx WD B-3.docx WD B-4.docx WD B-5.docx WD B-6.docx WD B-7.docx Cut and paste text Copy and paste text Use the Office Clipboard Find and replace text Check spelling and grammar Research information Add hyperlinks Work with document properties OBJECTIVES Editing Document s The sophisticated editing features in Word make it easy to revise and polish your docu- ments. In this unit, you learn how to revise an existing file by opening it, copying and mov- ing text, and then saving the document as a new file. You also learn how to perfect your documents using proofing tools and how to quickly prepare a document for distribution to the public. You have been asked to edit and finalize a press release for a QST promo- tional lecture series. The press release should provide information about the series so that newspapers, radio stations, and other media outlets can announce it to the public. QST press releases are disseminated by fax and by e-mail. Before distributing the file electronically to your lists of press contacts and local QST clients, you add several hyperlinks and then strip the file of private information. Copyright 2010 Cengage Learning. All Rights Reserved. May not be copied, scanned, or duplicated, in whole or in part. Due to electronic rights, some third party content may be suppressed from the eBook and/or eChapter(s). Editorial review has deemed that any suppressed content does not materially affect the overall learning experience. Cengage Learning reserves the right to remove additional content at any time if subsequent rights restrictions require it.
Transcript of Editing Document s - Cody High School B.pdfEditing Document s UNIT B Word 2010 Word 26 1. Start...
UNIT
BWord 2010
Files You Will Need:
WD B-1.docx
WD B-2.docx
WD B-3.docx
WD B-4.docx
WD B-5.docx
WD B-6.docx
WD B-7.docx
Cut and paste text
Copy and paste text
Use the Office Clipboard
Find and replace text
Check spelling and grammar
Research information
Add hyperlinks
Work with document properties
OBJECTIVES
Editing Document sThe sophisticated editing features in Word make it easy to revise and polish your docu-
ments. In this unit, you learn how to revise an existing file by opening it, copying and mov-
ing text, and then saving the document as a new file. You also learn how to perfect your
documents using proofing tools and how to quickly prepare a document for distribution to
the public. You have been asked to edit and finalize a press release for a QST promo-
tional lecture series. The press release should provide information about the series so that
newspapers, radio stations, and other media outlets can announce it to the public. QST press
releases are disseminated by fax and by e-mail. Before distributing the file electronically to
your lists of press contacts and local QST clients, you add several hyperlinks and then strip
the file of private information.
B_C7513_WDB.4c.indd 25B_C7513_WDB.4c.indd 25 6/21/10 11:11 AM6/21/10 11:11 AM
Copyright 2010 Cengage Learning. All Rights Reserved. May not be copied, scanned, or duplicated, in whole or in part. Due to electronic rights, some third party content may be suppressed from the eBook and/or eChapter(s).Editorial review has deemed that any suppressed content does not materially affect the overall learning experience. Cengage Learning reserves the right to remove additional content at any time if subsequent rights restrictions require it.

Editing Document s
UNIT
BWord 2010
Word 26
1. Start Word, click the File tab, click Open, navigate to the drive and folder where you store your Data Files, click WD B-1.docx, then click Open The document opens. Once you have opened a file, you can edit it and use the Save or the Save As command to save your changes. You use the Save command when you want to save the changes you make to a file, overwriting the file that is stored on a disk. You use the Save As command when you want to leave the original file intact and create a duplicate file with a different filename, file extension, or location.
2. Click the File tab, click Save As, type WD B-Lecture PR in the File name text box, then click SaveYou can now make changes to the press release file without affecting the original file.
3. Replace Ron Dawson with your name, scroll down until the headline “Helen Moffit to Speak...” is at the top of your document window, then click the Show/Hide ¶ button in the Paragraph group on the Home tab to display formatting marks
4. Select Alaskan guide Gilbert Coonan, (including the comma and the space after it) in the third body paragraph, then click the Cut button in the Clipboard group The text is removed from the document and placed on the Clipboard. Word uses two different clipboards: the system Clipboard (the Clipboard), which holds just one item, and the Office Clipboard, which holds up to 24 items. The last item you cut or copy is always added to both clipboards. You’ll learn more about the Office Clipboard in a later lesson.
5. Place the insertion point before African (but after the space) in the first line of the third paragraph, then click the Paste button in the Clipboard groupThe text is pasted at the location of the insertion point, as shown in Figure B-1. The Paste Options button appears below text when you first paste it in a document. You’ll learn more about the Paste Options button in the next lesson. For now, you can ignore it.
6. Press and hold [Ctrl], click the sentence Ticket prices include lunch. in the fourth paragraph, then release [Ctrl]The entire sentence is selected.
7. Press and hold the mouse button over the selected text until the pointer changes to The pointer’s vertical line is the insertion point. You drag the pointer to position the insertion point where you want the text to be inserted when you release the mouse button.
8. Drag the pointer’s vertical line to the end of the fifth paragraph (between the period and the paragraph mark) as shown in Figure B-2, then release the mouse buttonThe selected text is moved to the location of the insertion point. It is convenient to move text using the drag-and-drop method when the locations of origin and destination are both visible on the screen. Text is not placed on the Clipboard when you drag and drop it.
9. Deselect the text, then click the Save button on the Quick Access toolbar
Cut ting and Pasting TextThe editing features in Word allow you to move text from one location to another in a document. Moving text is often called cut and paste. When you cut text, it is removed from the document and placed on the Clipboard, a temporary storage area for text and graphics that you cut or copy from a document. You can then paste, or insert, text that is stored on the Clipboard in the document at the location of the insertion point. You cut and paste text using the Cut and Paste buttons in the Clipboard group on the Home tab. You also can move selected text by dragging it to a new location using the mouse. This operation is called drag and drop. You open the press release that was drafted by a colleague, save it with a new filename, and then reorganize the information in the press release using the cut-and-paste and drag-and-drop methods.
STEPS
If you make a mis-take, click the Undo button on the Quick Access toolbar, then try again.
TROUBLE
B_C7513_WDB.4c.indd 26B_C7513_WDB.4c.indd 26 6/21/10 11:12 AM6/21/10 11:12 AM
Copyright 2010 Cengage Learning. All Rights Reserved. May not be copied, scanned, or duplicated, in whole or in part. Due to electronic rights, some third party content may be suppressed from the eBook and/or eChapter(s).Editorial review has deemed that any suppressed content does not materially affect the overall learning experience. Cengage Learning reserves the right to remove additional content at any time if subsequent rights restrictions require it.

Editing Document s
Wo
rd 2010
Word 27
FIGURE B-1: Moved text with Paste Options button
FIGURE B-2: Dragging and dropping text in a new location
A shortcut key is a function key, such as [F1], or a combination of keys, such as [Ctrl][S], that you press to perform a command. For example, instead of using the Cut, Copy, and Paste commands on the Ribbon or the Mini toolbar, you can use the keyboard shortcuts [Ctrl][X] to cut text, [Ctrl][C] to copy text, and [Ctrl][V] to paste text. You can also press [Ctrl][S] to save changes to a document instead of
clicking the Save button on the Quick Access toolbar or clicking Save on the File tab. Becoming skilled at using keyboard shortcuts can help you quickly accomplish many of the tasks you perform in Word. If a keyboard shortcut is available for a command, then it is listed in the ScreenTip for that command.
Using keyboard shortcuts
Pasted text Paste Options
button
Text being moved
from here…
… to location of
vertical line
B_C7513_WDB.4c.indd 27B_C7513_WDB.4c.indd 27 6/21/10 11:12 AM6/21/10 11:12 AM
Copyright 2010 Cengage Learning. All Rights Reserved. May not be copied, scanned, or duplicated, in whole or in part. Due to electronic rights, some third party content may be suppressed from the eBook and/or eChapter(s).Editorial review has deemed that any suppressed content does not materially affect the overall learning experience. Cengage Learning reserves the right to remove additional content at any time if subsequent rights restrictions require it.

Editing Document s
UNIT
BWord 2010
Word 28
STEPS
1. Select Travel Luncheon in the headline, then click the Copy button in the Clipboard group A copy of the selected text is placed on the Clipboard, leaving the original text you copied in place.
2. Place the insertion point before season in the third paragraph, then click the Paste button in the Clipboard group“Travel Luncheon” is inserted before “season,” as shown in Figure B-3. Notice that the pasted text is formatted differently than the paragraph in which it was inserted.
3. Click the Paste Options button, move the mouse over each button on the menu that opens to read its ScreenTip, then click the Keep Text Only (T) button The formatting of “Travel Luncheon” is changed to match the rest of the paragraph. The buttons on the Paste Options menu allow you to change the formatting of pasted text. You can choose to keep the original format-ting (Keep Source Formatting), match the destination formatting (Merge Formatting), or paste the text unfor-matted (Keep Text Only).
4. Select www.questspecialtytravel.com in the fifth paragraph, press and hold [Ctrl], then press and hold the mouse button until the pointer changes to
5. Drag the pointer’s vertical line to the end of the last paragraph, placing it between site and the period, release the mouse button, then release [Ctrl]The text is copied to the last paragraph. Since the formatting of the text you copied is the same as the format-ting of the destination paragraph, you can ignore the Paste Options button. Text is not copied to the Clipboard when you copy it using the drag-and-drop method.
6. Place the insertion point before www.questspecialtytravel.com in the last paragraph, type at followed by a space, then save the documentCompare your document with Figure B-4.
Copying and Pasting TextCopying and pasting text is similar to cutting and pasting text, except that the text you copy is not removed from the document. Rather, a copy of the text is placed on the Clipboard, leaving the original text in place. You can copy text to the Clipboard using the Copy button in the Clipboard group on the Home tab, or you can copy text by pressing [Ctrl] as you drag the selected text from one location to another. You continue to edit the press release by copying text from one location to another.
If you want to copy or move items between parts of a long docu-ment, it can be useful to split the document window into two panes. This allows you to display the item you want to copy or move in one pane and the destination for the item in the other pane. To split a window, click the Split button in the Window group on the View tab, drag the horizontal split bar that appears to the location you want to split the window, and then click. Once the document window is split
into two panes, you can drag the split bar to resize the panes and use the scroll bars in each pane to display different parts of the docu-ment. To copy or move an item from one pane to another, you can use the Cut, Copy, and Paste commands, or you can drag the item between the panes. When you are finished editing the document, double-click the split bar to restore the window to a single pane, or click the Remove Split button in the Window group on the View tab.
Splitting the document window to copy and move items in a long document
You can also cut or copy text by right-clicking the selected text, and then click-ing the Cut or Copy command on the menu that opens.
QUICK TIP
If you don’t like the result of a paste option, try another option or click the Undo button , and then paste the text again.
QUICK TIP
B_C7513_WDB.4c.indd 28B_C7513_WDB.4c.indd 28 6/21/10 11:12 AM6/21/10 11:12 AM
Copyright 2010 Cengage Learning. All Rights Reserved. May not be copied, scanned, or duplicated, in whole or in part. Due to electronic rights, some third party content may be suppressed from the eBook and/or eChapter(s).Editorial review has deemed that any suppressed content does not materially affect the overall learning experience. Cengage Learning reserves the right to remove additional content at any time if subsequent rights restrictions require it.

Editing Document s
Wo
rd 2010
Word 29
FIGURE B-4: Copied text in document
Formatting of pasted text
matches surrounding text
Text was copied
from here…
… to here
FIGURE B-3: Text pasted in document
Formatting of the
pasted text matches
the headline text
B_C7513_WDB.4c.indd 29B_C7513_WDB.4c.indd 29 6/21/10 11:12 AM6/21/10 11:12 AM
Copyright 2010 Cengage Learning. All Rights Reserved. May not be copied, scanned, or duplicated, in whole or in part. Due to electronic rights, some third party content may be suppressed from the eBook and/or eChapter(s).Editorial review has deemed that any suppressed content does not materially affect the overall learning experience. Cengage Learning reserves the right to remove additional content at any time if subsequent rights restrictions require it.

Editing Document s
UNIT
BWord 2010
Word 30
STEPS
1. Click the launcher in the Clipboard group The Office Clipboard opens in the Clipboard task pane. It contains the Travel Luncheon item you copied in the last lesson.
2. Select the sentence San Diego Union-Tribune travel editor ... (including the space after the period) in the last paragraph, right-click the selected text, then click Cut on the menu that opensThe sentence is cut to the Office Clipboard.
3. Select the sentence A detailed schedule is... (including the ¶ mark), right-click the selected text, then click Cut The Office Clipboard displays the items you cut or copied, as shown in Figure B-5. The icon next to each item indicates the items are from a Word document. The last item collected is displayed at the top of the Clipboard task pane. As new items are collected, the existing items move down the task pane.
4. Place the insertion point at the end of the second paragraph (after “Quarter.” but before the ¶ mark), then click the San Diego Union-Tribune... item on the Office ClipboardClicking an item on the Office Clipboard pastes the item in the document at the location of the insertion point. Items remain on the Office Clipboard until you delete them or close all open Office programs. Also, if you add a 25th item to the Office Clipboard, the first item you collected is deleted.
5. Place the insertion point at the end of the third paragraph (after “Duong.”), then click the A detailed schedule is... item on the Office ClipboardThe sentence is pasted into the document.
6. Select the fourth paragraph, which begins with the sentence This is the first event... (including the ¶ mark), right-click the selected text, then click Cut The paragraph is cut to the Office Clipboard.
7. Place the insertion point at the beginning of the third paragraph (before “Our...”), click the Paste button in the Clipboard group on the Home tab, then press [Backspace]The sentences from the “This is the first...” paragraph are pasted at the beginning of the “Our speaker list...” paragraph. You can paste the last item collected using either the Paste command or the Office Clipboard.
8. Place the insertion point at the end of the third paragraph (after “www.questspecialtytravel.com.” and before the ¶ mark), then press [Delete] twiceTwo ¶ symbols and the corresponding blank lines between the third and fourth paragraphs are deleted.
9. Click the Show/Hide ¶ button in the Paragraph group Compare your press release with Figure B-6. Note that many Word users prefer to work with formatting marks on at all times. Experiment to see which method you prefer.
10. Click the Clear All button on the Clipboard task pane to remove the items from the Office Clipboard, click the Close button on the Clipboard task pane, press [Ctrl][Home], then save the documentPressing [Ctrl][Home] moves the insertion point to the top of the document.
Using the Of fice ClipboardThe Office Clipboard allows you to collect text and graphics from files created in any Office program and insert them into your Word documents. It holds up to 24 items and, unlike the system Clipboard, the items on the Office Clipboard can be viewed. To display the Office Clipboard, you simply click the launcher in the Clipboard group on the Home tab. You add items to the Office Clipboard using the Cut and Copy commands. The last item you collect is always added to both the system Clipboard and the Office Clipboard. You use the Office Clipboard to move several sentences in your press release.
You can set the Office Clipboard to open automatically when you cut or copy two items con-secutively by click-ing Options in the Clipboard task pane, and then selecting Show Office Clipboard Automatically.
QUICK TIP
To delete an individ-ual item from the Office Clipboard, click the list arrow next to the item, then click Delete.
QUICK TIP
B_C7513_WDB.4c.indd 30B_C7513_WDB.4c.indd 30 6/21/10 11:12 AM6/21/10 11:12 AM
Copyright 2010 Cengage Learning. All Rights Reserved. May not be copied, scanned, or duplicated, in whole or in part. Due to electronic rights, some third party content may be suppressed from the eBook and/or eChapter(s).Editorial review has deemed that any suppressed content does not materially affect the overall learning experience. Cengage Learning reserves the right to remove additional content at any time if subsequent rights restrictions require it.

Editing Document s
Wo
rd 2010
Word 31
FIGURE B-5: Office Clipboard in Clipboard task pane
FIGURE B-6: Revised press release
You can also use the system and Office Clipboards to copy and move items between documents. To do this, open both documents and the Clipboard task pane in the program window. With multiple doc-uments open, copy or cut an item from one document and then switch to the other document and paste the item. To switch
between open documents, point to the Word icon on the taskbar, and then click the document you want to appear in the document window. You can also display more than one document at the same time by clicking the Arrange All button or the View Side by Side but-ton in the Window group on the View tab.
Copying and moving items between documents
Clipboard
task pane
Click to paste all
the items on the
Office Clipboard
Items stored on the
Office Clipboard
(yours may include
additional items)
Last item
collected
First item moves
down as more
items are collected
Click to change
display options
for the Office
Clipboard
B_C7513_WDB.4c.indd 31B_C7513_WDB.4c.indd 31 6/21/10 11:12 AM6/21/10 11:12 AM
Copyright 2010 Cengage Learning. All Rights Reserved. May not be copied, scanned, or duplicated, in whole or in part. Due to electronic rights, some third party content may be suppressed from the eBook and/or eChapter(s).Editorial review has deemed that any suppressed content does not materially affect the overall learning experience. Cengage Learning reserves the right to remove additional content at any time if subsequent rights restrictions require it.

Editing Document s
UNIT
BWord 2010
Word 32
STEPS
1. Click the Replace button in the Editing group, then click More in the Find and Replace dialog box The Find and Replace dialog box opens and expands, as shown in Figure B-7.
2. Type Luncheon in the Find what text box“Luncheon” is the text that will be replaced.
3. Press [Tab], then type Lecture in the Replace with text box“Lecture” is the text that will replace “Luncheon.”
4. Click the Match case check box in the Search Options section to select itSelecting the Match case check box tells Word to find only exact matches for the uppercase and lowercase char-acters you entered in the Find what text box. You want to replace all instances of “Luncheon” in the proper name “Travel Luncheon Series.” You do not want to replace “luncheon” when it refers to a lunchtime event.
5. Click Replace AllClicking Replace All changes all occurrences of “Luncheon” to “Lecture” in the press release. A message box reports three replacements were made.
6. Click OK to close the message box, then click Close in the Find and Replace dialog boxWord replaced “Luncheon” with “Lecture” in three locations, but did not replace “luncheon.”
7. Click the Find button in the Editing group Clicking the Find button opens the Navigation pane, which is used to browse a longer document by headings, by pages, or by specific text or objects. The Find command allows you to quickly locate all instances of text in a document. You use it to verify that Word did not replace “luncheon.”
8. Type luncheon in the Search document text box in the Navigation pane, then scroll up until the headline is at the top of the document windowThe word “luncheon” is highlighted and selected in the document, as shown in Figure B-8.
9. Click the Close button in the Navigation pane, press [Ctrl][Home], then save the documentThe highlighting is removed from the text when you close the Navigation pane.
Finding and Replacing Tex tThe Find and Replace feature in Word allows you to automatically search for and replace all instances of a word or phrase in a document. For example, you might need to substitute “tour” for “trip.” To manually locate and replace each instance of “trip” in a long document would be very time-consuming. Using the Replace command you can find and replace all occurrences of specific text at once, or you can choose to find and review each occurrence individually. You also can use the Find command to locate and highlight every occurrence of a specific word or phrase in a document. QST has decided to change the name of the lecture series from “Travel Luncheon Series” to “Travel Lecture Series.” You use the Replace command to search the document for all instances of “Luncheon” and replace them with “Lecture.”
To find, review, and replace each occur-rence individually, click Find Next.
QUICK TIP
Alternately, you can also use the Find tab in the Find and Replace dialog box to find text in a document.
QUICK TIP
If any of the Search Options check boxes are selected in your Find and Replace dialog box, deselect them. If Format appears under the Find what or Replace with text box, click in the text box, then click the No Formatting button.
TROUBLE
B_C7513_WDB.4c.indd 32B_C7513_WDB.4c.indd 32 6/21/10 11:12 AM6/21/10 11:12 AM
Copyright 2010 Cengage Learning. All Rights Reserved. May not be copied, scanned, or duplicated, in whole or in part. Due to electronic rights, some third party content may be suppressed from the eBook and/or eChapter(s).Editorial review has deemed that any suppressed content does not materially affect the overall learning experience. Cengage Learning reserves the right to remove additional content at any time if subsequent rights restrictions require it.

Editing Document s
Wo
rd 2010
Word 33
FIGURE B-7: Find and Replace dialog box
FIGURE B-8: Found text highlighted in document
Rather than scrolling to move to a different place in a longer docu-ment, you can use the Go To command to quickly move the inser-tion point to a specific location. To move to a specific page, section, line, table, graphic, or other item in a document, you use the Go To tab in the Find and Replace dialog box. To open the Find and
Replace dialog box with the Go To tab active, click the Page number button on the status bar. On the Go To tab in the Find and Replace dialog box, select the type of item you want to find in the Go to what list box, enter the relevant information about that item, and then click Go To or Next to move the insertion point to the item.
Navigating a document using the Go To command
Find only
complete words
Use wildcards (*) in
a search string
Navigation
pane
Search
document
text box
List shows
each match
and its sur-
rounding text
Found text is
highlighted
Find words that sound
like the Find what text
Replace only exact
matches of uppercase
and lowercase
characters
Find and replace all
forms of a word
B_C7513_WDB.4c.indd 33B_C7513_WDB.4c.indd 33 6/21/10 11:12 AM6/21/10 11:12 AM
Copyright 2010 Cengage Learning. All Rights Reserved. May not be copied, scanned, or duplicated, in whole or in part. Due to electronic rights, some third party content may be suppressed from the eBook and/or eChapter(s).Editorial review has deemed that any suppressed content does not materially affect the overall learning experience. Cengage Learning reserves the right to remove additional content at any time if subsequent rights restrictions require it.

Editing Document s
UNIT
BWord 2010
Word 34
STEPS
1. Right-click Moffit in the headlineA menu that includes suggestions for correcting the spelling of “Moffit” opens. You can correct individual spelling and grammar errors by right-clicking text that is underlined with a red or green wavy line and select-ing a correction. Although “Moffit” is not in the Word dictionary, it is spelled correctly in the document.
2. Click Ignore All Clicking Ignore All tells Word not to flag “Moffit” as misspelled.
3. Press [Ctrl][Home], click the Review tab, then click the Spelling & Grammar button in the Proofing groupThe Spelling and Grammar: English (U.S.) dialog box opens, as shown in Figure B-9. The dialog box identifies “inagural” as misspelled and suggests possible corrections for the error. The word selected in the Suggestions box is the correct spelling.
4. Click ChangeWord replaces the misspelled word with the correctly spelled word. Next, the dialog box identifies “Gaslamp” as a misspelled word and suggests the correction “Gas lamp.” The proper name “Gaslamp Quarter” is spelled correctly in the document.
5. Click Ignore OnceWord ignores the spelling. Next, the dialog box indicates that “are” is repeated in a sentence.
6. Click DeleteWord deletes the second occurrence of the repeated word. Next, the dialog box flags a subject–verb agreement error and suggests using “is” instead of “are,” as shown in Figure B-10. The phrase selected in the Suggestions box is correct.
7. Click ChangeWord replaces “are” with “is” in the sentence, and the Spelling and Grammar dialog box closes. Keep in mind that the Spelling and Grammar checker identifies many common errors, but you cannot rely on it to find and correct all spelling and grammar errors in your documents. Always proofread your documents carefully.
8. Click OK to complete the spelling and grammar check, press [Ctrl][Home], then save the document
Checking Spelling and Grammar When you finish typing and revising a document, you can use the Spelling and Grammar command to search the document for misspelled words and grammar errors. The Spelling and Grammar checker flags possible mistakes, suggests correct spellings, and offers remedies for grammar errors such as subject–verb agreement, repeated words, and punctuation. You use the Spelling and Grammar checker to search your press release for errors. Before beginning the search, you set the Spelling and Grammar checker to ignore words, such as Moffit, that you know are spelled correctly.
If Word flags your name as misspelled, right-click it, then click Ignore All. If Moffit is not flagged as misspelled, skip to Step 3.
TROUBLE
To change the language used by the Word proofing tools, click the Language button in the Language group on the Review tab, click Set Proofing Language, then click the language you prefer on the menu that opens.
QUICK TIP
If Word does not offer a valid correc-tion, correct the error yourself.
QUICK TIP
You might need to correct other spelling and grammar errors.
TROUBLE
B_C7513_WDB.4c.indd 34B_C7513_WDB.4c.indd 34 6/21/10 11:12 AM6/21/10 11:12 AM
Copyright 2010 Cengage Learning. All Rights Reserved. May not be copied, scanned, or duplicated, in whole or in part. Due to electronic rights, some third party content may be suppressed from the eBook and/or eChapter(s).Editorial review has deemed that any suppressed content does not materially affect the overall learning experience. Cengage Learning reserves the right to remove additional content at any time if subsequent rights restrictions require it.

Editing Document s
Wo
rd 2010
Word 35
FIGURE B-9: Spelling and Grammar: English (U.S.) dialog box
FIGURE B-10: Grammar error identified in Spelling and Grammar dialog box
As you type, AutoCorrect automatically corrects many commonly misspelled words. By creating your own AutoCorrect entries, you can set Word to insert text that you type often, such as your name or contact information, or to correct words you misspell frequently. For example, you could create an AutoCorrect entry so that the name “Ronald T. Dawson” is automatically inserted whenever you type “rtd” followed by a space. You create AutoCorrect entries and cus-tomize other AutoCorrect and AutoFormat options using the AutoCorrect dialog box. To open the AutoCorrect dialog box, click the File tab, click Options, click Proofing in the Word Options dialog box that opens, and then click AutoCorrect Options. On the AutoCorrect tab in the AutoCorrect dialog box, type the text you want to be corrected automatically in the Replace text box (such as
“rtd”), type the text you want to be inserted in its place automati-cally in the With text box (such as “Ronald T. Dawson”), and then click Add. The AutoCorrect entry is added to the list. Click OK to close the AutoCorrect dialog box, and then click OK to close the Word Options dialog box. Word inserts an AutoCorrect entry in a document when you press [Spacebar] or a punctuation mark after typing the text you want Word to correct. For example, Word inserts “Ronald T. Dawson” when you type “rtd” followed by a space.
If you want to remove an AutoCorrect entry you created, simply open the AutoCorrect dialog box, select the AutoCorrect entry you want to remove in the list, click Delete, click OK, and then click OK to close the Word Options dialog box.
Inserting text with AutoCorrect
Word identified
as misspelled
Suggested
correction
Check indicates
grammar is being
checked too
Ignores this
occurrence of
the word
Ignores all
occurrences
of the word
Adds the word to
the Word dictionary
Changes the word
to the selected
correction
Displays an
explanation of
the grammar rule
used to identify
the error
Grammar error
identified
Possible
corrections
Changes all
occurrences of
the word to the
selected
correction
Adds the
misspelled word
and the correction
to the AutoCorrect
list
B_C7513_WDB.4c.indd 35B_C7513_WDB.4c.indd 35 6/21/10 11:12 AM6/21/10 11:12 AM
Copyright 2010 Cengage Learning. All Rights Reserved. May not be copied, scanned, or duplicated, in whole or in part. Due to electronic rights, some third party content may be suppressed from the eBook and/or eChapter(s).Editorial review has deemed that any suppressed content does not materially affect the overall learning experience. Cengage Learning reserves the right to remove additional content at any time if subsequent rights restrictions require it.

Editing Document s
UNIT
BWord 2010
Word 36
STEPS
1. Scroll down until the headline is displayed at the top of your screen 2. Select noted in the first sentence of the third paragraph, then click the Thesaurus button
in the Proofing group on the Review tabThe Research task pane opens, as shown in Figure B-11. “Noted” appears in the Search for text box, and pos-sible synonyms for “noted” are listed under the Thesaurus: English (U.S.) heading in the task pane.
3. Point to prominent in the list of synonymsA box containing a list arrow appears around the word.
4. Click the list arrow, click Insert on the menu that opens, then close the Research task pane“Prominent” replaces “noted” in the press release.
5. Right-click innumerable in the first sentence of the first paragraph, point to Synonyms on the menu that opens, then click numerous“Numerous” replaces “innumerable” in the press release.
6. Select the four paragraphs of body text, then click the Word Count button in the Proofing groupThe Word Count dialog box opens, as shown in Figure B-12. The dialog box lists the number of pages, words, characters, paragraphs, and lines included in the selected text. Notice that the status bar also displays the number of words included in the selected text and the total number of words in the entire document. If you want to view the page, character, paragraph, and line count for the entire document, make sure nothing is selected in your document, and then click Word Count in the Proofing group.
7. Click Close, press [Ctrl][Home], then save the document 8. Click the File tab, click Save As, type WD B-Lecture PR Public in the File name text box,
then click SaveThe WD B-Lecture PR file closes, and the WD B-Lecture PR Public file is displayed in the document window. You will modify this file to prepare it for electronic release to the public.
Researching Information The Word Research feature allows you to quickly search reference sources and the World Wide Web for infor-mation related to a word or phrase. Among the reference sources available in the Research task pane is a Thesaurus, which you can use to look up synonyms for awkward or repetitive words. When you are working with an active Internet connection, the Research task pane also provides access to dictionary and translation sources, as well as to Web search engines such as Bing. After proofreading your document for errors, you decide the press release would read better if several adjectives were more descriptive. You use the Thesaurus to find synonyms.
You can also click the Research button in the Proofing group to open the Research task pane.
QUICK TIP
To look up synonyms for a different word, type the word in the Search for text box, then click the green Start searching button.
QUICK TIP
To add or remove available reference sources, click Research options in the Research task pane.
QUICK TIP
B_C7513_WDB.4c.indd 36B_C7513_WDB.4c.indd 36 6/21/10 11:12 AM6/21/10 11:12 AM
Copyright 2010 Cengage Learning. All Rights Reserved. May not be copied, scanned, or duplicated, in whole or in part. Due to electronic rights, some third party content may be suppressed from the eBook and/or eChapter(s).Editorial review has deemed that any suppressed content does not materially affect the overall learning experience. Cengage Learning reserves the right to remove additional content at any time if subsequent rights restrictions require it.

Editing Document s
Wo
rd 2010
Word 37
FIGURE B-11: Research task pane
FIGURE B-12: Word Count dialog box
A blog, which is short for weblog, is an informal journal that is created by an individual or a group and available to the public on the Internet. A blog usually conveys the ideas, comments, and opinions of the blogger and is written using a strong personal voice. The person who creates and maintains a blog, the blogger, typically updates the blog daily. If you have or want to start a blog, you can configure Word to link to your blog site so that you can write, format, and publish blog entries directly from Word.
To create a new blog post, click the File tab, click New, then double-click Blog post to open a predesigned blog post document
that you can customize with your own text, formatting, and images. You can also publish an existing document as a blog post by open-ing the document, clicking the File tab, clicking Save & Send, and then clicking Publish as Blog Post. In either case, Word prompts you to log onto your personal blog account. To blog directly from Word, you must first obtain a blog account with a blog service provider. Resources, such as the Word Help system and online forums, pro-vide detailed information on obtaining and registering your per-sonal blog account with Word.
Publishing a blog directly from Word
Word selected in
the document
Click to select
a different
reference
source
Possible
meaning for
the selected
word
Synonyms for
the active
meaning of
the word
Click to add
or change
reference
sources
Your paragraph
count may differ
B_C7513_WDB.4c.indd 37B_C7513_WDB.4c.indd 37 6/21/10 11:12 AM6/21/10 11:12 AM
Copyright 2010 Cengage Learning. All Rights Reserved. May not be copied, scanned, or duplicated, in whole or in part. Due to electronic rights, some third party content may be suppressed from the eBook and/or eChapter(s).Editorial review has deemed that any suppressed content does not materially affect the overall learning experience. Cengage Learning reserves the right to remove additional content at any time if subsequent rights restrictions require it.

Editing Document s
UNIT
BWord 2010
Word 38
STEPS
1. Select your name, click the Insert tab, then click the Hyperlink button in the Links groupThe Insert Hyperlink dialog box opens, as shown in Figure B-13. You use this dialog box to specify the loca-tion of the Web page, file, e-mail address, or position in the current document you want to jump to when the hyperlink—in this case, your name—is clicked.
2. Click E-mail Address in the Link to sectionThe Insert Hyperlink dialog box changes so you can create a hyperlink to your e-mail address.
3. Type your e-mail address in the E-mail address text box, type Travel Lecture Series in the Subject text box, then click OKAs you type, Word automatically adds mailto: in front of your e-mail address. After you close the dialog box, the hyperlink text—your name—is formatted in blue and underlined.
4. Press and hold [Ctrl], then click the your name hyperlinkAn e-mail message addressed to you with the subject “Travel Lecture Series” opens in the default e-mail pro-gram. People can use this hyperlink to send you an e-mail message.
5. Close the e-mail message windowThe hyperlink text changes to purple, indicating the hyperlink has been followed.
6. Scroll down, select Gaslamp Quarter in the second paragraph, click the Hyperlink button, click Existing File or Web Page in the Link to section, type www.gaslamp.org in the Address text box, then click OKAs you type the Web address, Word automatically adds “http://” in front of “www.” The text “Gaslamp Quarter” is formatted as a hyperlink to the Gaslamp Quarter Association home page at www.gaslamp.org. When clicked, the hyperlink will open the Web page in the default browser window.
7. Select detailed schedule in the last sentence of the third paragraph, click the Hyperlink button, type www.questspecialtytravel.com in the Address text box, then click OK The text “detailed schedule” is formatted as a hyperlink to the QST Web site. If you point to a hyperlink in Word, the link to location appears in a ScreenTip. You can edit ScreenTip text to make it more descriptive.
8. Right-click Quarter in the Gaslamp Quarter hyperlink, click Edit Hyperlink, click ScreenTip in the Edit Hyperlink dialog box, type Map, parking, and other information about the Gaslamp Quarter in the ScreenTip text box, click OK, click OK, save your changes, then point to the Gaslamp Quarter hyperlink in the documentThe ScreenTip you created appears above the Gaslamp Quarter hyperlink, as shown in Figure B-14.
9. Press [Ctrl], click the Gaslamp Quarter hyperlink, click the Word icon on the taskbar, press [Ctrl], click the detailed schedule hyperlink, verify that the links opened in separate tabs in your browser, close the tabs, then click the Word icon on the taskbar to return to the press release document in Word Before distributing a document, it’s important to test each hyperlink to verify it works as you intended.
Adding HyperlinksA hyperlink is text or a graphic that, when clicked, “jumps” the viewer to a different location or program. When a document is viewed on screen, hyperlinks allow readers to link (or jump) to a Web page, an e-mail address, a file, or a specific location in a document. When you create a hyperlink in a document, you select the text or graphic you want to use as a hyperlink and then you specify the location you want to jump to when the hyperlink is clicked. You create a hyperlink using the Hyperlink button in the Links group on the Insert tab. Text that is formatted as a hyperlink appears as colored, underlined text. Hundreds of people on your lists of press and client contacts will receive the press release by e-mail or Internet fax. To make it easier for these people to access additional information about the series, you add several hyperlinks to the press release.
By default, Word automatically creates a hyperlink to an e-mail address or URL when you type the address or URL in a document.
QUICK TIP
To remove a hyper-link, right-click it, then click Remove Hyperlink. Removing a hyperlink removes the link, but the text remains.
QUICK TIP
You can also edit the hyperlink destination or the hyperlink text.
QUICK TIP
If you are not working with an active Internet connection, skip this step.
TROUBLE
B_C7513_WDB.4c.indd 38B_C7513_WDB.4c.indd 38 6/21/10 11:12 AM6/21/10 11:12 AM
Copyright 2010 Cengage Learning. All Rights Reserved. May not be copied, scanned, or duplicated, in whole or in part. Due to electronic rights, some third party content may be suppressed from the eBook and/or eChapter(s).Editorial review has deemed that any suppressed content does not materially affect the overall learning experience. Cengage Learning reserves the right to remove additional content at any time if subsequent rights restrictions require it.

Editing Document s
Wo
rd 2010
Word 39
FIGURE B-13: Insert Hyperlink dialog box
FIGURE B-14: Hyperlinks in the document
Word includes several options for distributing and sharing documents over the Internet directly from within Word, including e-mailing and faxing documents. When you e-mail a document from within Word, the document is sent as an attachment to an e-mail message using your default e-mail program. To e-mail a file, open the file in Word, click the File tab, click Save & Send, and then select one of the options under Send Using E-mail on the Save & Send tab. You can choose to attach the document as a Word file, a .pdf file, or an .xps file, or to send it as an Internet fax. When you click an option, a
message window opens that includes the filename of the current file as the message subject and the file as an attachment. Type the e-mail address(es) of the recipient(s) in the To and Cc text boxes, any mes-sage you want in the message window, and then click Send on the message window toolbar to send the message. The default e-mail program sends a copy of the document to each recipient. Note that faxing a document directly from Word requires registration with a third-party Internet fax service. Fax services generally charge a monthly or per page fee for sending and receiving faxes.
E-mailing and faxing documents directly from Word
Create a hyperlink to
a Web page or file
Create a hyperlink to
a location in the
current file
Create a hyperlink to
a new blank
document
Create a hyperlink to
an e-mail address
Text selected to
be formatted
as a hyperlink
Files in the current
drive or folder
(yours may differ)
Purple text
indicates the
hyperlink has
been followed
Hyperlinks are
colored and
underlined
ScreenTip for
the Gaslamp
Quarter
hyperlink
B_C7513_WDB.4c.indd 39B_C7513_WDB.4c.indd 39 6/21/10 11:12 AM6/21/10 11:12 AM
Copyright 2010 Cengage Learning. All Rights Reserved. May not be copied, scanned, or duplicated, in whole or in part. Due to electronic rights, some third party content may be suppressed from the eBook and/or eChapter(s).Editorial review has deemed that any suppressed content does not materially affect the overall learning experience. Cengage Learning reserves the right to remove additional content at any time if subsequent rights restrictions require it.

Editing Document s
UNIT
BWord 2010
Word 40
STEPS
1. Press [Ctrl][Home], then click the File tab Backstage view opens with the Info tab displayed. The Information pane, in the middle of the tab, includes options related to stripping the file of private information. See Table B-1. The preview pane, on the right side of the tab, displays basic information about the document. Notice that the file contains document properties. You might want to remove these before you distribute the press release to the public.
2. Click the Properties button in the preview pane, then click Show Document Panel The Document Properties panel opens above the document window, as shown in Figure B-15. It shows the standard document properties for the press release. Document properties are user-defined details about a file that describe its contents and origin, including the name of the author, the title of the document, and keywords that you can assign to help organize and search your files. You decide to remove this information from the file before you distribute it electronically.
3. Click the File tab, click the Check for Issues button, then click Inspect Document, clicking Yes if prompted to save changesThe Document Inspector dialog box opens. You use this dialog box to indicate which private or identifying information you want to search for and remove from the document.
4. Make sure all the check boxes are selected, then click InspectAfter a moment, the Document Inspector dialog box changes to indicate that the file contains document properties.
5. Click Remove All next to Document Properties, then click CloseThe standard document property information is removed from the press release document.
6. Click the Properties button in the preview pane, then click Show Document Panel The Document Properties panel opens and shows that the document properties have been removed from the file.
7. Click the Close button in the Document Properties panel, save the document, submit it to your instructor, close the file, then exit WordThe completed press release is shown in Figure B-16.
Working with Document Proper tiesBefore you distribute a document electronically to people outside your organization, it’s wise to make sure the file does not include embedded private or confidential information. The Info tab in Backstage view includes tools for stripping a document of sensitive information, for securing its authenticity, and for guard-ing it from unwanted changes once it is distributed to the public. One of these tools, the Document Inspector, detects and removes unwanted private or confidential information from a document. Before sending the press release to the public, you remove all identifying information from the file.
To create or modify document proper-ties for a file, type in the Document Properties panel text boxes.
QUICK TIP
A document prop-erty, such as author name, might appear automatically in a content control in a document. Stripping a file of document properties does not remove this information from a content control.
QUICK TIP
TABLE B-1: Options on the Info tab
option use to
Protect Document
Mark a document as final so that it is read-only and cannot be edited; encrypt a document so that a password is required to open it; restrict what kinds of changes can be made to a document and by whom; and add a digital signature to a document to verify its integrity
Check for Issues Detect and remove unwanted information from a document, including document properties and comments; check for content that people with disabilities might find difficult to read; and check the document for features that are not sup-ported by previous versions of Microsoft Word
Manage versions Browse through and delete draft versions of unsaved files
B_C7513_WDB.4c.indd 40B_C7513_WDB.4c.indd 40 6/21/10 11:12 AM6/21/10 11:12 AM
Copyright 2010 Cengage Learning. All Rights Reserved. May not be copied, scanned, or duplicated, in whole or in part. Due to electronic rights, some third party content may be suppressed from the eBook and/or eChapter(s).Editorial review has deemed that any suppressed content does not materially affect the overall learning experience. Cengage Learning reserves the right to remove additional content at any time if subsequent rights restrictions require it.

Editing Document s
Wo
rd 2010
Word 41
FIGURE B-15: Document Properties panel
FIGURE B-16: Completed press release for electronic distribution
The Document Properties panel includes summary information about the document that you enter to suit your needs. To view more detailed document properties, including those entered automatically by Word when the document is created, click the Document Properties button in the Document Properties panel, and then click Advanced Properties to open the Properties dialog box. You can also click the Properties button on the Info tab and then click Advanced Properties to open the Properties dialog box. The General, Statistics, and Contents tabs of the Properties dialog box display information about the file that is automatically created and updated by Word. The General tab shows the file type, location, size, and date and time the file was created and last modified; the Statistics tab displays information about revisions to the document along with the number
of pages, words, lines, paragraphs, and characters in the file; and the Contents tab shows the title of the document.
You can define other document properties using the Properties dia-log box Summary and Custom tabs. The Summary tab shows informa-tion similar to the information shown in the Document Properties panel. The Custom tab allows you to create new document properties, such as client, project, or date completed. To create a custom property, select a property name in the Name list box on the Custom tab, use the Type list arrow to select the type of data you want for the property, type the identifying detail (such as a project name) in the Value text box, and then click Add. When you are finished viewing or modifying the document properties, click OK to close the Properties dialog box, then click the Close button on the Document Properties panel.
Viewing and modifying advanced document properties
Your file
location will
differ
Document
Properties
panel
Document
properties
assigned by
Ron Dawson when
the original file
was created
B_C7513_WDB.4c.indd 41B_C7513_WDB.4c.indd 41 6/21/10 11:12 AM6/21/10 11:12 AM
Copyright 2010 Cengage Learning. All Rights Reserved. May not be copied, scanned, or duplicated, in whole or in part. Due to electronic rights, some third party content may be suppressed from the eBook and/or eChapter(s).Editorial review has deemed that any suppressed content does not materially affect the overall learning experience. Cengage Learning reserves the right to remove additional content at any time if subsequent rights restrictions require it.

Practice
Editing Document sWord 42
For current SAM information, including versions and content details, visit SAM Central (http://www.cengage.com/samcentral). If you have a SAM user profile, you may have access to hands-on instruction, practice, and assessment of the skills covered in this unit. Since various versions of SAM are supported throughout the life of this text, check with your instructor for the correct instructions and URL/Web site for accessing assignments.
a. Command used to insert text stored on the Clipboard into a documentb. Temporary storage area for up to 24 items collected from Office filesc. Temporary storage area for only the last item cut or copied from a documentd. A function key or a combination of keys that perform a command when pressede. Text or a graphic that jumps the reader to a different location or program
when clickedf. An informal journal that is available to the public on the Internetg. User-defined details about a file that describe its contents and originh. Feature used to suggest synonyms for wordsi. Command used to remove text from a document and place it on the Clipboard
6. Paste 7. Shortcut key 8. System Clipboard 9. Document properties 10. Office Clipboard 11. Cut 12. Thesaurus 13. Hyperlink 14. Blog
Match each term with the statement that best describes it.
FIGURE B-17
2
5
4
3
1
Label the elements of the Word program window shown in Figure B-17.
Concepts Review
B_C7513_WDB.4c.indd 42B_C7513_WDB.4c.indd 42 6/21/10 11:12 AM6/21/10 11:12 AM
Copyright 2010 Cengage Learning. All Rights Reserved. May not be copied, scanned, or duplicated, in whole or in part. Due to electronic rights, some third party content may be suppressed from the eBook and/or eChapter(s).Editorial review has deemed that any suppressed content does not materially affect the overall learning experience. Cengage Learning reserves the right to remove additional content at any time if subsequent rights restrictions require it.

Wo
rd 2010
Editing Document s Word 43
Select the best answer from the list of choices.
15. Which of the following statements is not true? a. You can view the contents of the Office Clipboard.b. The Office Clipboard can hold more than one item.c. The last item cut or copied from a document is stored on the system Clipboard.d. When you move text by dragging it, a copy of the text you move is stored on the system Clipboard.
16. What is the keyboard shortcut for the Paste command? a. [Ctrl][P] c. [Ctrl][V]b. [Ctrl][X] d. [Ctrl][C]
17. Which command is used to display a document in two panes in the document window?a. Split c. Arrange Allb. New Window d. Two Pages
18. To locate and select all instances of a word in a document, which command do you use?a. Find c. Highlightb. Search d. Replace
19. A hyperlink cannot be linked to which of the following? a. ScreenTip c. Web pageb. Document d. E-mail address
20. Which of the following is an example of a document property? a. Permission c. Languageb. URL d. Keyword
Skills Review 1. Cut and paste text.
a. Start Word, click the File tab, then open the file WD B-2.docx from the drive and folder where you store your Data Files.
b. Save the document with the filename WD B-WAOS 2013 PR.c. Select Your Name and replace it with your name. d. Display paragraph and other formatting marks in your document if they are not already displayed.e. Use the Cut and Paste buttons to switch the order of the two sentences in the fourth paragraph (which begins New
group shows...).f. Use the drag-and-drop method to switch the order of the second and third paragraphs. g. Adjust the spacing if necessary so that there is one blank line between paragraphs, then save your changes.
2. Copy and paste text.a. Use the Copy and Paste buttons to copy WAOS 2011 from the headline and paste it before the word map in the
third paragraph.b. Change the formatting of the pasted text to match the formatting of the third paragraph, then insert a space between
2011 and map if necessary.c. Use the drag-and-drop method to copy WAOS from the third paragraph and paste it before the word group in the
second sentence of the fourth paragraph, then save your changes. 3. Use the Office Clipboard.
a. Use the launcher in the Clipboard group to open the Clipboard task pane.b. Scroll so that the first body paragraph is displayed at the top of the document window.c. Select the fifth paragraph (which begins Studio location maps...) and cut it to the Office Clipboard.d. Select the third paragraph (which begins Wilmington is easily accessible...) and cut it to the Office Clipboard.e. Use the Office Clipboard to paste the Studio location maps... item as the new fourth paragraph.f. Use the Office Clipboard to paste the Wilmington is easily accessible... item as the new fifth paragraph.g. Adjust the spacing if necessary so there is one blank line between each of the six body paragraphs.h. Turn off the display of formatting marks, clear and close the Office Clipboard, then save your changes.
B_C7513_WDB.4c.indd 43B_C7513_WDB.4c.indd 43 6/21/10 11:12 AM6/21/10 11:12 AM
Copyright 2010 Cengage Learning. All Rights Reserved. May not be copied, scanned, or duplicated, in whole or in part. Due to electronic rights, some third party content may be suppressed from the eBook and/or eChapter(s).Editorial review has deemed that any suppressed content does not materially affect the overall learning experience. Cengage Learning reserves the right to remove additional content at any time if subsequent rights restrictions require it.

Editing Document sWord 44
Skills Review (continued) 4. Find and replace text.
a. Using the Replace command, replace all instances of 2011 with 2013.b. Replace all instances of tenth with twelfth. c. Replace all instances of the abbreviation st with street, taking care to replace whole words only when you perform
the replace. (Hint: Deselect Match case if it is selected.)d. Use the Find tab in the Find and Replace dialog box to find all instances of st in the document and to make sure no
errors occurred when you replaced st with street. (Hint: Deselect the Find whole words only check box.)e. Save your changes to the press release.
5. Check spelling and grammar and research information.a. Switch to the Review tab.b. Move the insertion point to the top of the document, then use the Spelling and Grammar command to search for and
correct any spelling and grammar errors in the press release. (Hint: Riverwalk is not misspelled.)c. Use the Thesaurus to replace thriving in the second paragraph with a different suitable word.d. Check the word count of the press release.e. Proofread your press release, correct any errors, then save your changes.
6. Add hyperlinks.a. Save the document as WD B-WAOS 2013 PR Public, then switch to the Insert tab.b. Select your name, then open the Insert Hyperlink dialog box.c. Create a hyperlink to your e-mail address with the subject WAOS 2013. d. Test the your name hyperlink, then close the message window that opens. (Hint: Press [Ctrl], then click the hyperlink.)e. Select NEA in the last paragraph of the press
release, then create a hyperlink to the Web page with the URL www.nea.gov.
f. Right-click the NEA hyperlink, then edit the hyper-link ScreenTip to become Information on the National Endowment for the Arts.
g. Point to the NEA hyperlink to view the new ScreenTip, then save your changes.
h. If you are working with an active Internet connec-tion, press [Ctrl], click the NEA hyperlink, view the NEA home page in the browser window, then close the browser window.
7. Work with document properties.a. Click the File tab, click the Properties button on the
preview pane, then open the Document Properties panel to view the document properties for the press release.
b. Click the File tab to return to Backstage view with the Info tab displayed, then use the Check for Issues command to run the Document Inspector.
c. Remove the document property data, click the Home tab, close the Document Properties panel, then save your changes. The finished press release is shown in Figure B-18.
d. Save the document, submit it to your instructor, close the file, then exit Word.
FIGURE B-18
B_C7513_WDB.4c.indd 44B_C7513_WDB.4c.indd 44 6/21/10 11:12 AM6/21/10 11:12 AM
Copyright 2010 Cengage Learning. All Rights Reserved. May not be copied, scanned, or duplicated, in whole or in part. Due to electronic rights, some third party content may be suppressed from the eBook and/or eChapter(s).Editorial review has deemed that any suppressed content does not materially affect the overall learning experience. Cengage Learning reserves the right to remove additional content at any time if subsequent rights restrictions require it.
Wo
rd 2010
Editing Document s Word 45
Independent Challenge 1Because of your success in revitalizing a historic the-atre in Wellington, New Zealand, you were hired as the director of The Canberra Lyric Theatre in Canberra, Australia, to breathe life into its theatre revitalization efforts. After a year on the job, you are launching your first major fund-raising drive. You’ll create a fund-raising letter for the Lyric Theatre by modifying a letter you wrote for the theatre in Wellington.
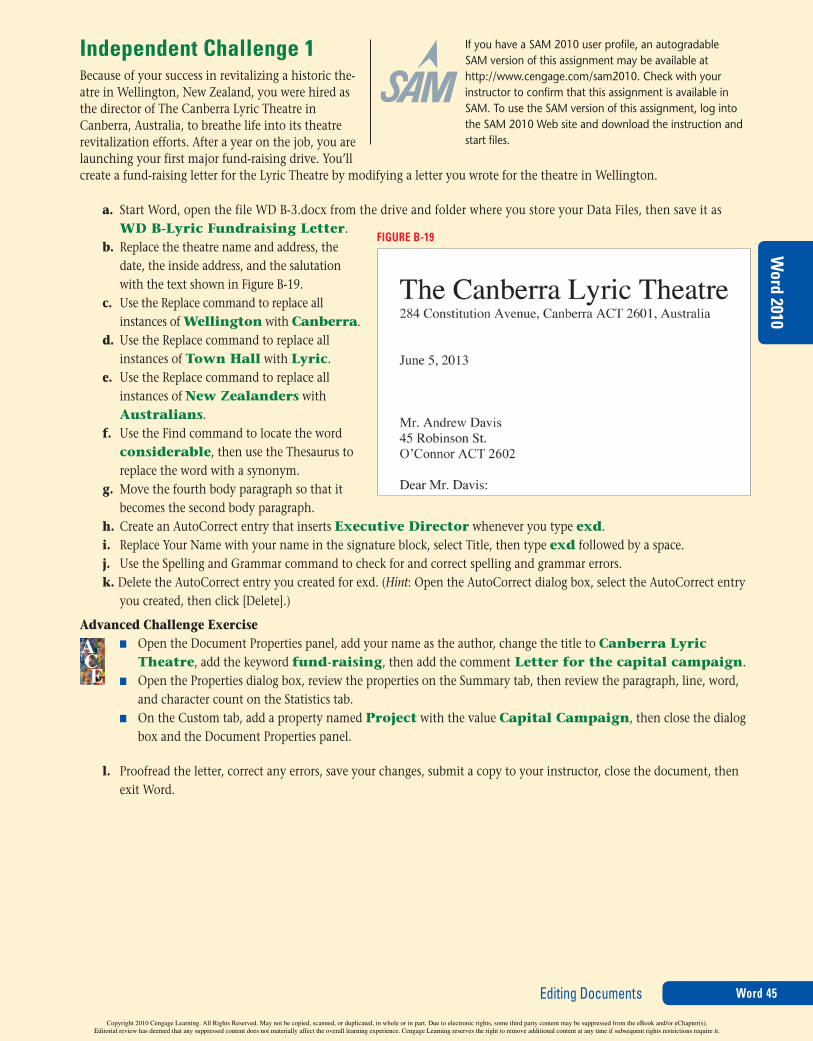
a. Start Word, open the file WD B-3.docx from the drive and folder where you store your Data Files, then save it as WD B-Lyric Fundraising Letter.
b. Replace the theatre name and address, the date, the inside address, and the salutation with the text shown in Figure B-19.
c. Use the Replace command to replace all instances of Wellington with Canberra.
d. Use the Replace command to replace all instances of Town Hall with Lyric.
e. Use the Replace command to replace all instances of New Zealanders with Australians.
f. Use the Find command to locate the word considerable, then use the Thesaurus to replace the word with a synonym.
g. Move the fourth body paragraph so that it becomes the second body paragraph.
h. Create an AutoCorrect entry that inserts Executive Director whenever you type exd.i. Replace Your Name with your name in the signature block, select Title, then type exd followed by a space. j. Use the Spelling and Grammar command to check for and correct spelling and grammar errors.k. Delete the AutoCorrect entry you created for exd. (Hint: Open the AutoCorrect dialog box, select the AutoCorrect entry
you created, then click [Delete].)
Advanced Challenge Exercise ■ Open the Document Properties panel, add your name as the author, change the title to Canberra Lyric
Theatre, add the keyword fund-raising, then add the comment Letter for the capital campaign. ■ Open the Properties dialog box, review the properties on the Summary tab, then review the paragraph, line, word,
and character count on the Statistics tab. ■ On the Custom tab, add a property named Project with the value Capital Campaign, then close the dialog
box and the Document Properties panel.
l. Proofread the letter, correct any errors, save your changes, submit a copy to your instructor, close the document, then exit Word.
FIGURE B-19
If you have a SAM 2010 user profile, an autogradable SAM version of this assignment may be available at http://www.cengage.com/sam2010. Check with your instructor to confirm that this assignment is available in SAM. To use the SAM version of this assignment, log into the SAM 2010 Web site and download the instruction and start files.
B_C7513_WDB.4c.indd 45B_C7513_WDB.4c.indd 45 6/21/10 11:12 AM6/21/10 11:12 AM
Copyright 2010 Cengage Learning. All Rights Reserved. May not be copied, scanned, or duplicated, in whole or in part. Due to electronic rights, some third party content may be suppressed from the eBook and/or eChapter(s).Editorial review has deemed that any suppressed content does not materially affect the overall learning experience. Cengage Learning reserves the right to remove additional content at any time if subsequent rights restrictions require it.

Editing Document sWord 46
Independent Challenge 2An advertisement for job openings in Denver caught your eye and you have decided to apply. The ad, shown in Figure B-20, was printed in last weekend’s edition of your local newspaper. Instead of writing a cover letter from scratch, you revise a draft of a cover letter you wrote several years ago for a summer internship position.
a. Read the ad shown in Figure B-20 and decide which position to apply for. Choose the position that most closely matches your qualifications.
b. Start Word, open WD B-4.docx from the drive and folder where you store your Data Files, then save it as WD B-Cover Letter.
c. Replace the name, address, telephone number, and e-mail address in the letterhead with your own information.
d. Remove the hyperlink from the e-mail address.e. Replace the date with today’s date, then replace the inside
address and the salutation with the information shown in Figure B-20.
f. Read the draft cover letter to get a feel for its contents.g. Rework the text in the body of the letter to address your
qualifications for the job you have chosen to apply for in the following ways:
• Delete the third paragraph.
• Adjust the first sentence of the first paragraph as follows: specify the job you are applying for, including the position code, and indicate where you saw the position advertised.
• Move the first sentence in the last paragraph, which briefly states your qualifications and interest in the position, to the end of the first paragraph, then rework the sentence to describe your current qualifications.
• Adjust the second paragraph as follows: describe your work experience and skills. Be sure to relate your experience and qualifications to the position requirements listed in the advertisement. Add a third paragraph if your qualifications are extensive.
• Adjust the final paragraph as follows: politely request an interview for the position and provide your phone number and e-mail address.
h. Include your name in the signature block.i. When you are finished revising the letter, check it for spelling and grammar errors, and correct any mistakes. Make sure
to remove any hyperlinks.j. Save your changes to the letter, submit the file to your instructor, close the document, then exit Word.
FIGURE B-20
B_C7513_WDB.4c.indd 46B_C7513_WDB.4c.indd 46 6/21/10 11:12 AM6/21/10 11:12 AM
Copyright 2010 Cengage Learning. All Rights Reserved. May not be copied, scanned, or duplicated, in whole or in part. Due to electronic rights, some third party content may be suppressed from the eBook and/or eChapter(s).Editorial review has deemed that any suppressed content does not materially affect the overall learning experience. Cengage Learning reserves the right to remove additional content at any time if subsequent rights restrictions require it.

Wo
rd 2010
Editing Document s Word 47
Independent Challenge 3As administrative director of continuing education, you drafted a memo to instructors asking them to help you finalize the course schedule for next semester. Today, you’ll examine the draft and make revisions before distributing it as an e-mail attachment.
a. Start Word, open the file WD B-5.docx from the drive and folder where you store your Data Files, then save it as WD B-Business Courses Memo.
b. Replace Your Name with your name in the From line, then scroll down until the first body paragraph is at the top of the screen.
Advanced Challenge Exercise ■ Use the Split command on the View tab to split the window under the first body paragraph, then scroll until the
last paragraph of the memo is displayed in the bottom pane. ■ Use the Cut and Paste buttons to move the sentence If you are planning to teach... from the first body
paragraph to become the first sentence in the last paragraph of the memo. ■ Double-click the split bar to restore the window to a single pane.
c. Use the [Delete] key to merge the first two paragraphs into one paragraph.d. Use the Office Clipboard to reorganize the list of twelve-week courses so that the courses are listed in alphabetical
order, then clear and close the Office Clipboard. e. Use the drag-and-drop method to reorganize the list of one-day seminars so that the seminars are listed in alpha-
betical order.f. Select the phrase “Web site” in the first paragraph, then create a hyperlink to the URL www.course.com with the
ScreenTip Spring 2014 Business Courses.g. Select “e-mail me” in the last paragraph, then create a hyperlink to your e-mail address with the subject Final
Business Course Schedule.h. Use the Spelling and Grammar command to check for and correct spelling and grammar errors.i. Use the Document Inspector to strip the document of document property information, ignore any other content that
is flagged by the Document Inspector, then close the Document Inspector.j. Proofread the memo, correct any errors, save your changes, submit a copy to your instructor, close the document, then
exit Word.
Real Life Independent Challenge This Independent Challenge requires an Internet connection.
Reference sources—dictionaries, thesauri, style and grammar guides, and guides to business etiquette and procedure—are essen-tial for day-to-day use in the workplace. Much of this reference information is available on the World Wide Web. In this inde-pendent challenge, you will locate reference sources on the Web and use some of them to look up definitions, synonyms, and antonyms for words. Your goal is to familiarize yourself with online reference sources so you can use them later in your work.
a. Start Word, open the file WD B-6.docx from the drive and folder where you store your Data Files, then save it as WD B-Web Reference Sources. This document contains the questions you will answer about the Web reference sources you find. You will type your answers to the questions in the document.
b. Replace the placeholder text at the top of the Web Reference Sources document with your name and the date.c. Use your favorite search engine to search the Web for grammar and style guides, dictionaries, and thesauri. Use the
keywords grammar, usage, dictionary, glossary, and thesaurus to conduct your search. d. Complete the Web Reference Sources document, then proofread it and correct any mistakes.e. Save the document, submit a copy to your instructor, close the document, then exit Word.
B_C7513_WDB.4c.indd 47B_C7513_WDB.4c.indd 47 6/23/10 8:04 AM6/23/10 8:04 AM
Copyright 2010 Cengage Learning. All Rights Reserved. May not be copied, scanned, or duplicated, in whole or in part. Due to electronic rights, some third party content may be suppressed from the eBook and/or eChapter(s).Editorial review has deemed that any suppressed content does not materially affect the overall learning experience. Cengage Learning reserves the right to remove additional content at any time if subsequent rights restrictions require it.

Editing Document sWord 48
FIGURE B-21
Visual WorkshopOpen WD B-7.docx from the drive and folder where you store your Data Files, then save the document as WD B-Visa Letter. Replace the placeholders for the date, letterhead, inside address, salutation, and closing with the information shown in Figure B-21, then use the Office Clipboard to reorganize the sentences to match Figure B-21. Correct spelling and grammar errors, remove the document property information from the file, then submit a copy to your instructor.
B_C7513_WDB.4c.indd 48B_C7513_WDB.4c.indd 48 6/21/10 11:12 AM6/21/10 11:12 AM
Copyright 2010 Cengage Learning. All Rights Reserved. May not be copied, scanned, or duplicated, in whole or in part. Due to electronic rights, some third party content may be suppressed from the eBook and/or eChapter(s).Editorial review has deemed that any suppressed content does not materially affect the overall learning experience. Cengage Learning reserves the right to remove additional content at any time if subsequent rights restrictions require it.


