EASE Diagnostics Universal Reprogrammer Getting StartedThank you for purchasing the EASE Universal...
116
Copyright © 1999-2006, EASE Diagnostics. EASE Diagnostics Universal Reprogrammer Getting Started
Transcript of EASE Diagnostics Universal Reprogrammer Getting StartedThank you for purchasing the EASE Universal...

Copyright © 1999-2006, EASE Diagnostics.
EASE DiagnosticsUniversal Reprogrammer
Getting Started
Copyright © 1999-2006, EASE Diagnostics.
All rights reserved. Information in this document is subjectto change without notice. All trademarks are property oftheir respective owners. The display of trademarks in thisdocument does not imply that any license has been grantedby its owner. No trademark infringement is intended and nosuggestion is made that the owner of the trademarkendorses our products.

Table of Contents
Part I Getting Started 3
Part II Software Requirements 4
Part III How Do I Get Data? 5
Part IV How Much Does Data Cost? 6
Part V Installing Reprogrammer Software 7
................................................................................................................................... 71 Begin Installation
................................................................................................................................... 82 Preparing Installation
................................................................................................................................... 93 User Info & Type of Installation
................................................................................................................................... 104 Copying Files & Completion
................................................................................................................................... 115 Setup USB Devices
................................................................................................................................... 136 Install Additional Software
Part VI Chrysler Specific Instructions 15
................................................................................................................................... 151 Data Subscription
................................................................................................................................... 172 Download DCX
................................................................................................................................... 233 Install DCX
................................................................................................................................... 274 Reprogram - Chrysler
Part VII Ford Specific Instructions 36
................................................................................................................................... 361 FMP - Data Subscription
................................................................................................................................... 412 FMP - Download
................................................................................................................................... 453 FMP - Install
................................................................................................................................... 484 Reprogram - Ford
Part VIII GM Specific Instructions 74
................................................................................................................................... 741 Install - TIS
................................................................................................................................... 782 Install - Data
................................................................................................................................... 783 Install - Driver
................................................................................................................................... 844 Install - Virtual COM Port
................................................................................................................................... 885 Reprogram - GM
Part IX Mazda Specific Instructions 107
................................................................................................................................... 1071 Mazda - Install
IContents
I
Copyright © 1999-2006, EASE Diagnostics.

................................................................................................................................... 1072 Reprogram - Mazda
Part X Toyota Specific Instructions 108
................................................................................................................................... 1081 Install Toyota
................................................................................................................................... 1082 Reprogram - Toyota
Part XI Frequently Asked Questions 108
................................................................................................................................... 1081 Chrysler - FAQ
................................................................................................................................... 1082 Ford - FAQ
................................................................................................................................... 1093 GM - FAQ
Part XII Technical Specifications 110
EASE Universal Programmer - HelpII
Copyright © 1999-2006, EASE Diagnostics.

Getting Started 3
Copyright © 1999-2006, EASE Diagnostics.
EASE Diagnostics
1 Getting StartedThank you for purchasing the EASE Universal Reprogrammer!
This document, along with the other enclosed documents, will help to guideyou through the setup of your new EASE Reprogramming device. Pleaseperform the following steps, when you first receive this package:
1. Check the enclosed packing list, to ensure that you have received all of yourordered items.
2. Install the EASE J2534 Reprogramming Workbench software on your PC (seeInstalling Reprogramming Software for help with this installation)
3. Install the Additional Software from the J2534 Reprogramming Workbench CD:
REQUIRED ADDITIONAL SOFTWARE· Adobe Reader
OPTIONAL ADDITIONAL SOFTWARE· EASE PC Scope
4. Install the Manufacturer Specific software. This software allows you to retrieveand store the latest files needed to program the controller for specificmanufacturers.
· Chrysler Specific - DCX2534 Update Manager· Data Subscription· Downloading - DCX· Installing - DCX
· Ford Specific - FMP (Ford Module Programming)· Data Subscription· Downloading - FMP· Installing - FMP
· GM Specific - TIS 2000· Install - TIS· Install - Data· Install - Driver· Install - Virtual COM Port
· Mazda Specific - Now available, Help Documentation Coming Soon.· Toyota Specific - Now available, Help Documentation Coming Soon.
5. Begin reprogramming vehicle controllers with your EASE ReprogrammerJ2534.· Chrysler Controllers· Ford Controllers· GM Controllers· Mazda Specific - Now available, Help Documentation Coming Soon.· Toyota Specific - Now available, Help Documentation Coming Soon.
Frequently Asked Questions· Chrysler Specific Frequently Asked Questions
· I downloaded and installed the latest DCX Update Manager, and now I can
4
Copyright © 1999-2006, EASE Diagnostics.
Getting StartedEASE Diagnostics
not reprogram Chrysler Controllers. I am getting Error: PassThruOpen. What can I do?
· How do I get data?· I get an error message that says there is already an instance of the SPA sof
tware running. How can I get rid of this?· Ford Specific Frequently Asked Questions
· I downloaded and installed FMP 40 of the Ford Module Programming, and now I can not reprogram Ford Controllers. What can I do?
· How do I get data?· When I click the launch button in the Ford SPA, it says that there is already
an instance of the SPA software running. How can I get rid of this?· I am unable to modify the VIN number on a Ford. What do I need to do?
· GM Specific Frequently Asked Questions· I installed TIS 2000 v5.5, and now I can not reprogram GM Controllers. Wh
at can I do?· How do I get data?· I want to reprogram an OBD I GM controller but I get an error message in TI
S 2000, what can I do?· What does this Error Code in TIS 2000 mean?· I get an error message that, "The EASE Driver is not installed." How can i fi
x this?· I installed the Reprogramming Workbench and TIS 2000, is there anything
else I need to do to reprogram GM controllers with my new UVI-J2534-1 device?
· How can I manually uninstall TIS 2000, if I can not uninstall or reinstall the TIS 2000 software?
2 Software RequirementsThe EASE Scan Tool Software requires the following (minimum) hardware and softwarefor operation.
· Windows 98SE/ME/2000/XP· Pentium II 400MHz or greater or 100% compatible computer· 128 MB of RAM· 500 MB Hard Drive· One free USB Port· Monitor· Mouse· Keyboard· CD-ROM drive· Internet Connection (Required for Chrysler and Ford reprogramming)

How Do I Get Data? 5
Copyright © 1999-2006, EASE Diagnostics.
EASE Diagnostics
3 How Do I Get Data?Ok you have your reprogramming unit so now how do you get the data to reprogram acontroller.
Chrysler Controller Reprogramming Data Subscription -Follow the instructions in the Register Subscription for DCX2534 section under InstallChrysler DCX2534.
Ford Controller Reprogramming Data Subscription -Follow the instructions in the Register Subscription for FMP section under Install FordFMP.
GM Controller Reprogramming Data -This yearly subscription has monthly updates and includes a software security key. Thisis available through EASE Diagnostics. To get data for GM Controller Reprogrammingplease contact an EASE Diagnostics Sales Representative.
EASE DiagnosticsState Route 492 Box 3011New Milford, PA 18834(570) [email protected]
Mazda Controller Reprogramming Data Subscription -To get data for Mazda Controller Reprogramming please contact an EASE DiagnosticsSales Representative. For more information you can also go towww.mazdatechinfo.com. Now available, Help Documentation Coming Soon.
EASE DiagnosticsState Route 492 Box 3011New Milford, PA 18834(570) [email protected]
Toyota Controller Reprogramming Data Subscription -To get data for Toyota Controller Reprogramming please contact an EASE DiagnosticsSales Representative. For more information you can also go to techinfo.toyota.com.Now available, Help Documentation Coming Soon.
EASE DiagnosticsState Route 492 Box 3011New Milford, PA 18834(570) 465-9060

6
Copyright © 1999-2006, EASE Diagnostics.
How Do I Get Data?EASE Diagnostics
4 How Much Does Data Cost?The cost of data subscriptions vary based on the manufacturer as well as the amount oftime you wish to keep the subscription. Below is a listing for these cost per manufacturerat the time that this publication was produced. Prices are subject to change at thediscretion of the manufacturer.
Chrysler Controller Reprogramming Data Subscription -24 Hour Subscription - $20.0030 Day Subscription - $200.001 Year Subscription - $1,500.00
For more information you can also go to www.techauthority.com.
Ford Controller Reprogramming Data Subscription -3 Day Subscription - $24.951 Month Subscription - $59.951 Year Subscription - $599.95
For more information you can also go to www.motorcraft.com.
GM Controller Reprogramming Data -Data pricing for GM Controller Reprogramming please contact an EASE DiagnosticsSales Representative.
EASE DiagnosticsState Route 492 Box 3011New Milford, PA 18834(570) [email protected]
Mazda Controller Reprogramming Data Subscription -3 Day Subscription - $29.951 Month Subscription - $59.951 Year Subscription - $599.95
For more information you can also go to www.mazdatechinfo.com.
Toyota Controller Reprogramming Data -Daily Subscription - $10.00Monthly Subscription - $50.00
How Much Does Data Cost? 7
Copyright © 1999-2006, EASE Diagnostics.
EASE Diagnostics
Yearly Subscription - $350.00
For more information you can also go to techinfo.toyota.com.
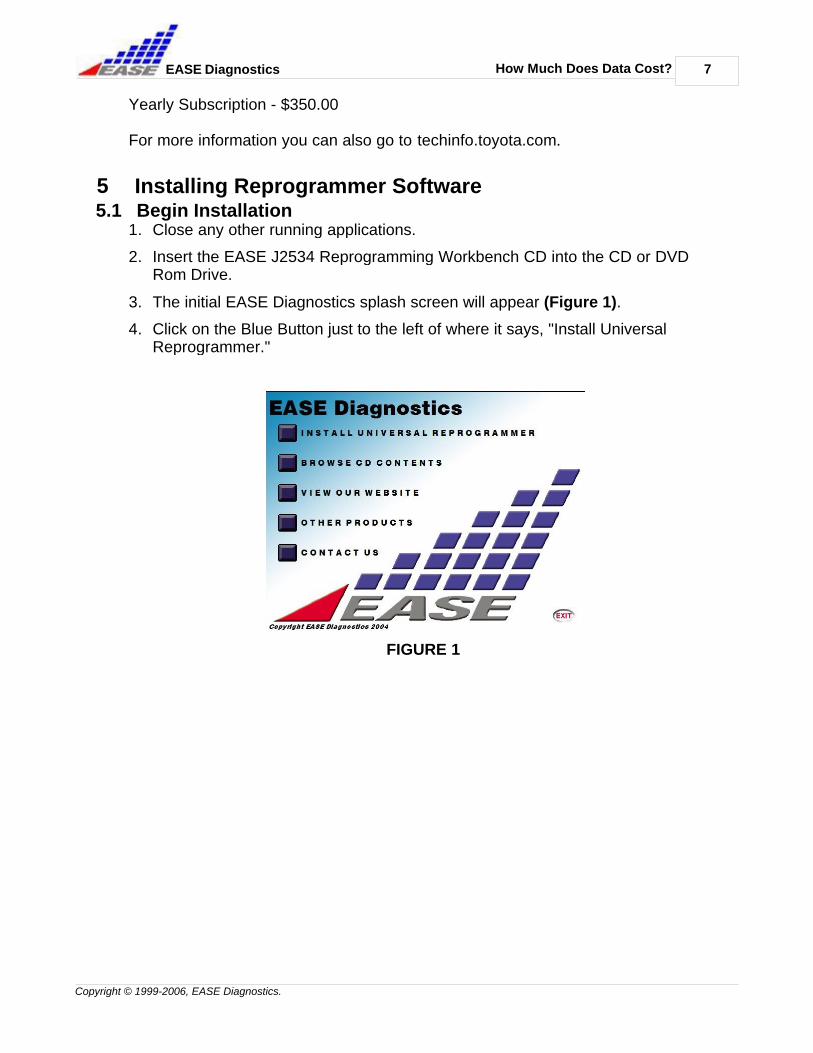
5 Installing Reprogrammer Software5.1 Begin Installation
1. Close any other running applications.
2. Insert the EASE J2534 Reprogramming Workbench CD into the CD or DVDRom Drive.
3. The initial EASE Diagnostics splash screen will appear (Figure 1).
4. Click on the Blue Button just to the left of where it says, "Install UniversalReprogrammer."
FIGURE 1

8
Copyright © 1999-2006, EASE Diagnostics.
Installing Reprogrammer SoftwareEASE Diagnostics
5.2 Preparing Installation 5. This will bring up the next screen
(Figure 2).
6. On this screen, click on the "BeginInstallation" button to start theinstallation of the ReprogrammingWorkbench software.
7. A message box will appear sayingthat the software is preparing toinstall, this will only take a fewmoments and you will see theprogress bars moving across thescreen.
8. Next, an initial installationconfirmation screen will be displayed(Figure 3), click "Next" to continue.
FIGURE 2
FIGURE 3
9. This will bring up the License Agreement.
a. Please read through this carefully before agreeing to the terms.
b. Click "Yes" to continue.
Installing Reprogrammer Software 9
Copyright © 1999-2006, EASE Diagnostics.
EASE Diagnostics
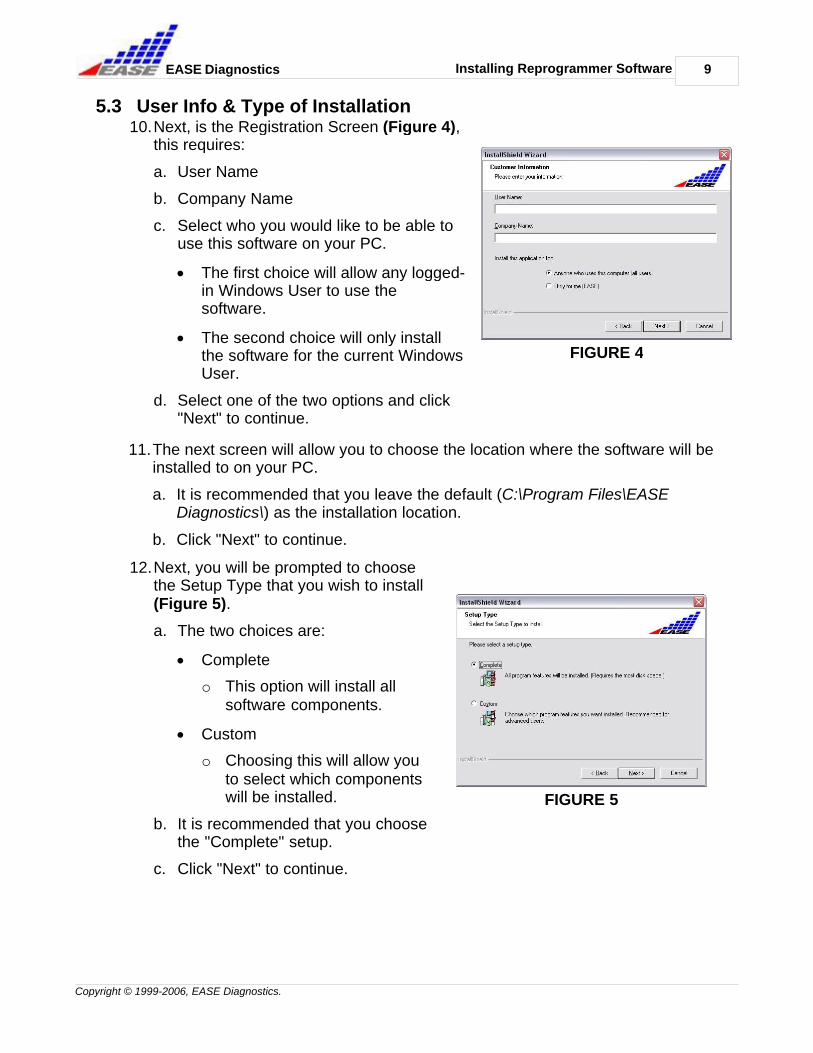
5.3 User Info & Type of Installation10.Next, is the Registration Screen (Figure 4),
this requires:
a. User Name
b. Company Name
c. Select who you would like to be able touse this software on your PC.
· The first choice will allow any logged-in Windows User to use thesoftware.
· The second choice will only installthe software for the current WindowsUser.
d. Select one of the two options and click"Next" to continue.
FIGURE 4
11.The next screen will allow you to choose the location where the software will beinstalled to on your PC.
a. It is recommended that you leave the default (C:\Program Files\EASEDiagnostics\) as the installation location.
b. Click "Next" to continue.
12.Next, you will be prompted to choosethe Setup Type that you wish to install(Figure 5).
a. The two choices are:
· Complete
o This option will install allsoftware components.
· Custom
o Choosing this will allow youto select which componentswill be installed.
b. It is recommended that you choosethe "Complete" setup.
c. Click "Next" to continue.
FIGURE 5
10
Copyright © 1999-2006, EASE Diagnostics.
Installing Reprogrammer SoftwareEASE Diagnostics
5.4 Copying Files & Completion13.A confirmation screen will be displayed next.
a. Review the information, and make sure all of it is correct before proceeding.
b. Click "Next" to continue and begin the installation.
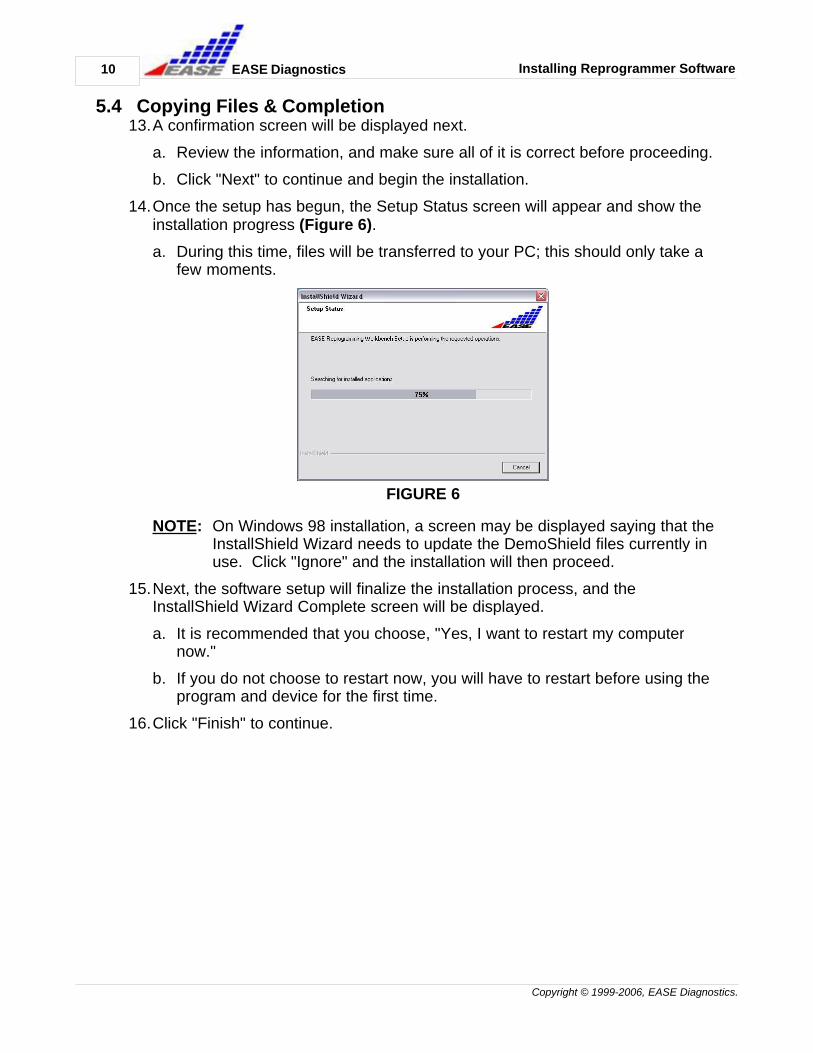
14.Once the setup has begun, the Setup Status screen will appear and show theinstallation progress (Figure 6).
a. During this time, files will be transferred to your PC; this should only take afew moments.
FIGURE 6
NOTE: On Windows 98 installation, a screen may be displayed saying that theInstallShield Wizard needs to update the DemoShield files currently inuse. Click "Ignore" and the installation will then proceed.
15.Next, the software setup will finalize the installation process, and theInstallShield Wizard Complete screen will be displayed.
a. It is recommended that you choose, "Yes, I want to restart my computernow."
b. If you do not choose to restart now, you will have to restart before using theprogram and device for the first time.
16.Click "Finish" to continue.
Installing Reprogrammer Software 11
Copyright © 1999-2006, EASE Diagnostics.
EASE Diagnostics
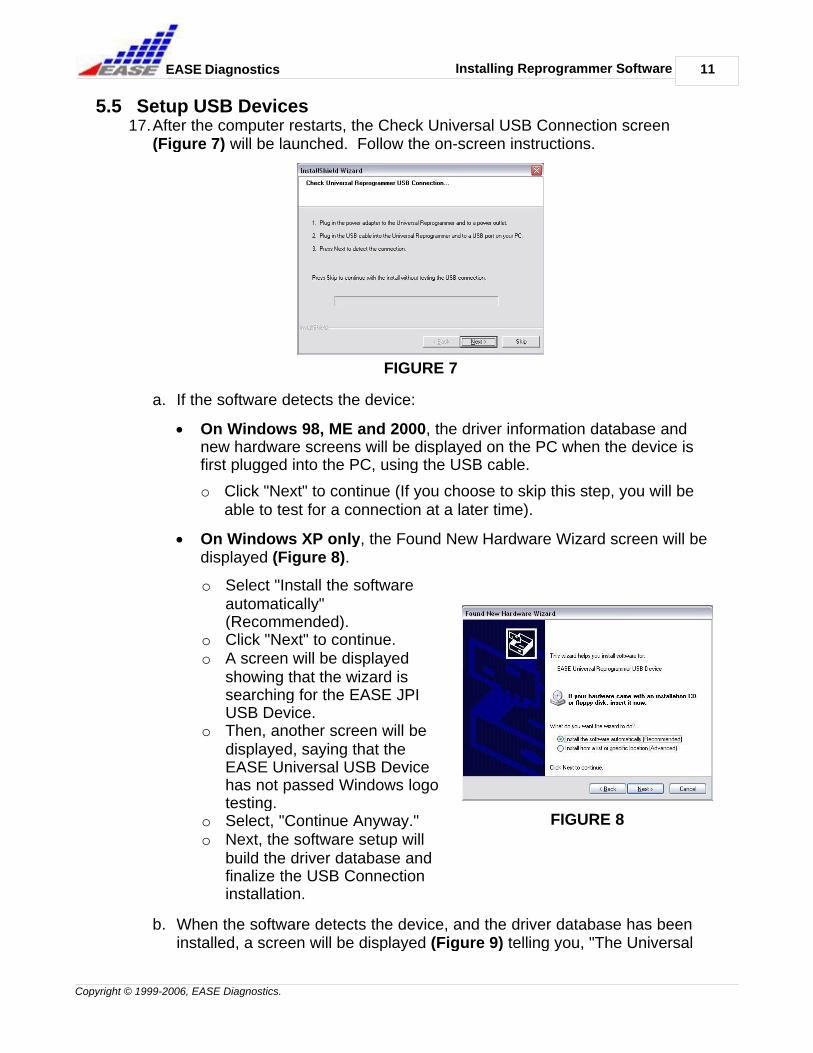
5.5 Setup USB Devices17.After the computer restarts, the Check Universal USB Connection screen
(Figure 7) will be launched. Follow the on-screen instructions.
FIGURE 7
a. If the software detects the device:
· On Windows 98, ME and 2000, the driver information database andnew hardware screens will be displayed on the PC when the device isfirst plugged into the PC, using the USB cable.
o Click "Next" to continue (If you choose to skip this step, you will beable to test for a connection at a later time).
· On Windows XP only, the Found New Hardware Wizard screen will bedisplayed (Figure 8).
o Select "Install the softwareautomatically"(Recommended).
o Click "Next" to continue.o A screen will be displayed
showing that the wizard issearching for the EASE JPIUSB Device.
o Then, another screen will bedisplayed, saying that theEASE Universal USB Devicehas not passed Windows logotesting.
o Select, "Continue Anyway."o Next, the software setup will
build the driver database andfinalize the USB Connectioninstallation.
FIGURE 8
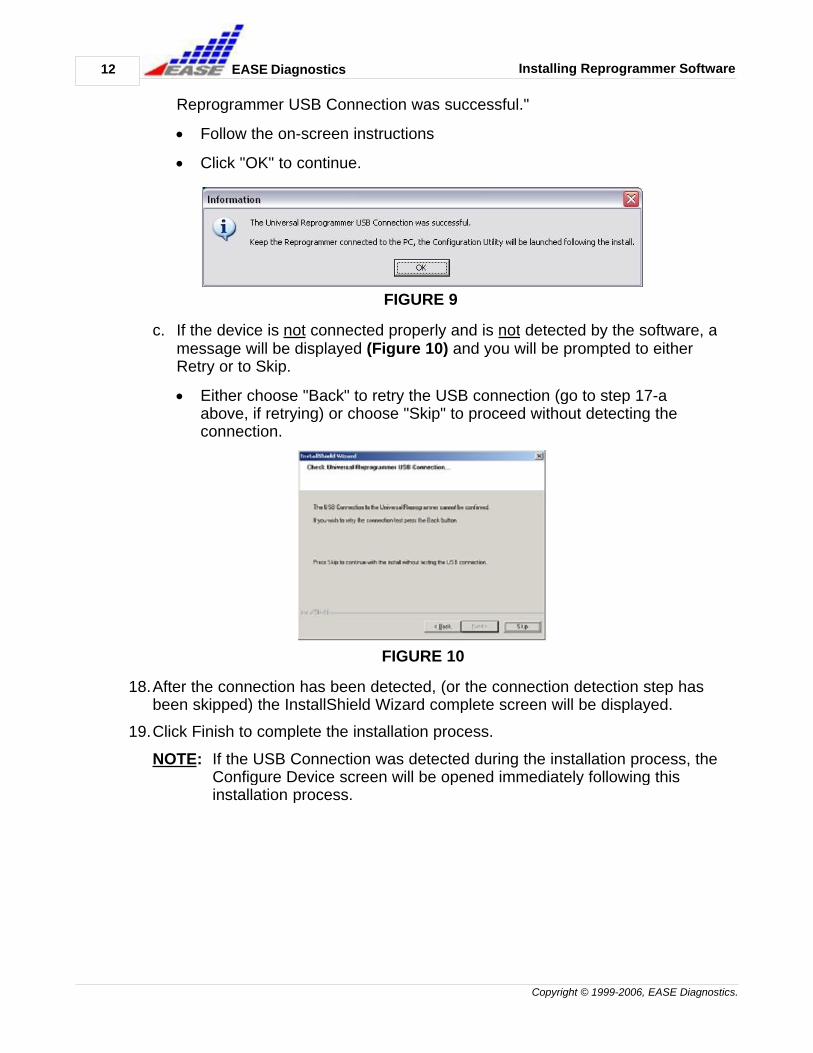
b. When the software detects the device, and the driver database has beeninstalled, a screen will be displayed (Figure 9) telling you, "The Universal
12
Copyright © 1999-2006, EASE Diagnostics.
Installing Reprogrammer SoftwareEASE Diagnostics
Reprogrammer USB Connection was successful."
· Follow the on-screen instructions
· Click "OK" to continue.
FIGURE 9
c. If the device is not connected properly and is not detected by the software, amessage will be displayed (Figure 10) and you will be prompted to eitherRetry or to Skip.
· Either choose "Back" to retry the USB connection (go to step 17-aabove, if retrying) or choose "Skip" to proceed without detecting theconnection.
FIGURE 10
18.After the connection has been detected, (or the connection detection step hasbeen skipped) the InstallShield Wizard complete screen will be displayed.
19.Click Finish to complete the installation process.
NOTE: If the USB Connection was detected during the installation process, theConfigure Device screen will be opened immediately following thisinstallation process.
Installing Reprogrammer Software 13
Copyright © 1999-2006, EASE Diagnostics.
EASE Diagnostics
5.6 Install Additional SoftwareInstall the following additional software from the J2534 ReprogrammingWorkbench CD (instructions for how to install this additional software can be foundon the final page of the Scan Tool Installation Instructions):
REQUIRED ADDITIONAL SOFTWARE· Adobe Reader
OPTIONAL ADDITIONAL SOFTWARE· EASE PC Scope
To Install Other Products on the Universal Reprogrammer CD:
1. After the installation of the Universal Reprogrammer completes, it isrecommended that you install the additional software from the CD.
a. If your computer did not need to restart during the UniversalReprogrammer installation process, the "Universal Reprogrammer" BeginInstallation screen should still be displayed on your screen.
· Click on the red "Main" button on the bottom-left-hand corner of thescreen, to return to the main menu.
b. If your computer did restart during the installation process, you will need tore-run the CD. To do this, you must either:
· Open your CD tray and then close it again and allow the CD to auto run(leave the CD in the tray while doing this).
· Open "My Computer" on your PC and double click on the CD drive icon.
2. Now, the Main Menu of the EASE CD Browser should be displayed on yourscreen.
3. Click on the Blue Button just to the left of where it says, "Other Products."
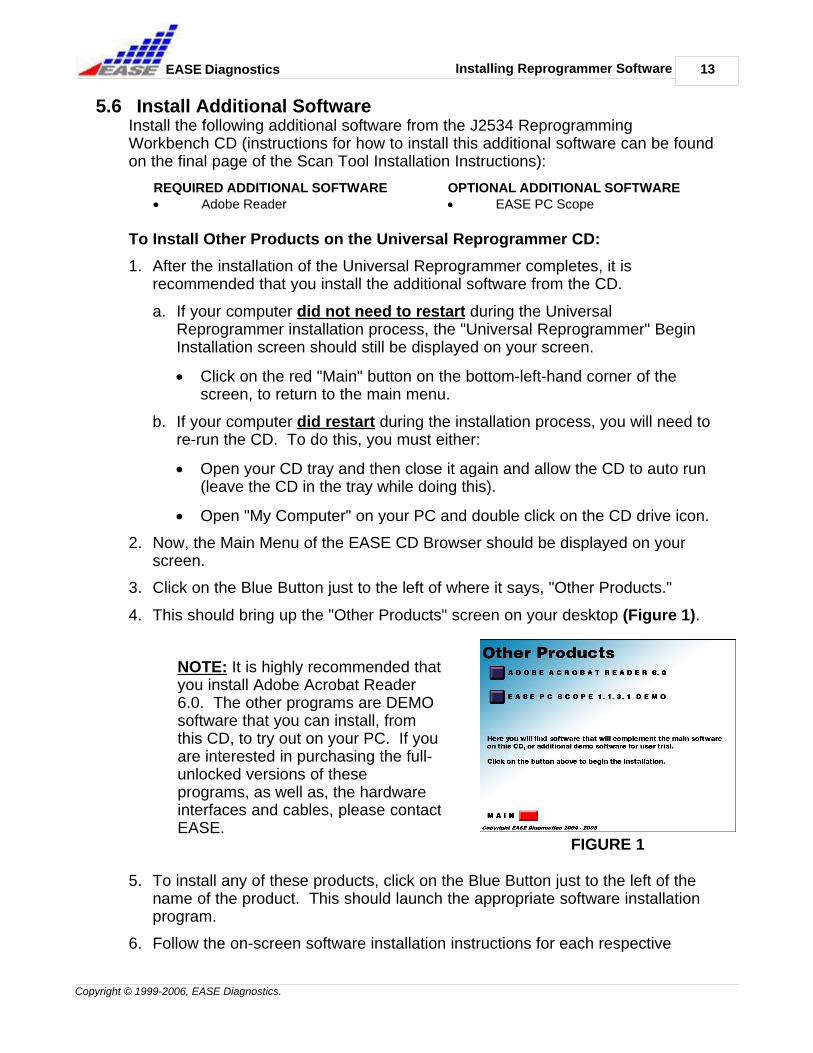
4. This should bring up the "Other Products" screen on your desktop (Figure 1).
NOTE: It is highly recommended thatyou install Adobe Acrobat Reader6.0. The other programs are DEMOsoftware that you can install, fromthis CD, to try out on your PC. If youare interested in purchasing the full-unlocked versions of theseprograms, as well as, the hardwareinterfaces and cables, please contactEASE.
FIGURE 1
5. To install any of these products, click on the Blue Button just to the left of thename of the product. This should launch the appropriate software installationprogram.
6. Follow the on-screen software installation instructions for each respective

14
Copyright © 1999-2006, EASE Diagnostics.
Installing Reprogrammer SoftwareEASE Diagnostics
software program.
NOTE: Some of these software installations will require that you restart yourPC when the installation completes. If you choose to restart your PC,you will need to go back to Begin Installation in the previous section ifyou want to go back and install any of the other programs listed.
Chrysler Specific Instructions 15
Copyright © 1999-2006, EASE Diagnostics.
EASE Diagnostics
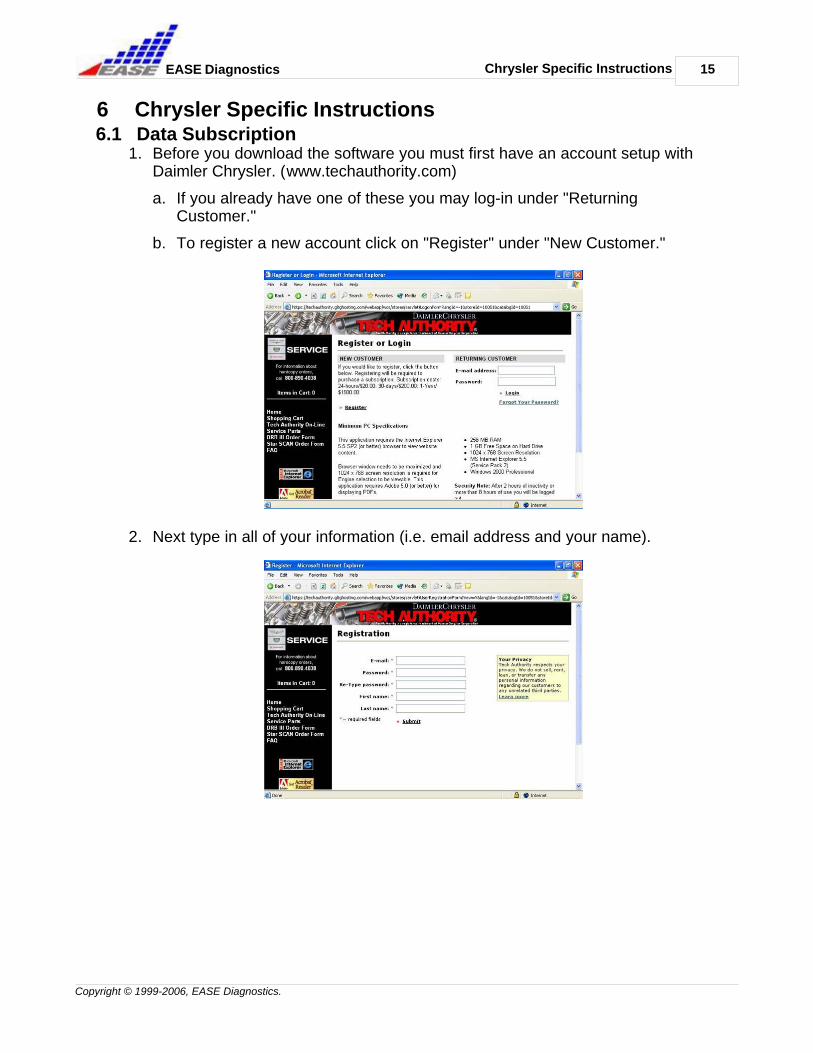
6 Chrysler Specific Instructions6.1 Data Subscription
1. Before you download the software you must first have an account setup withDaimler Chrysler. (www.techauthority.com)
a. If you already have one of these you may log-in under "ReturningCustomer."
b. To register a new account click on "Register" under "New Customer."
2. Next type in all of your information (i.e. email address and your name).

16
Copyright © 1999-2006, EASE Diagnostics.
Chrysler Specific InstructionsEASE Diagnostics
3. Then, click on "Subscribe" to gain access to the latest software updates.
4. Read through the terms of service and click the circle next to "I Agree" and thenclick "Submit."
Chrysler Specific Instructions 17
Copyright © 1999-2006, EASE Diagnostics.
EASE Diagnostics
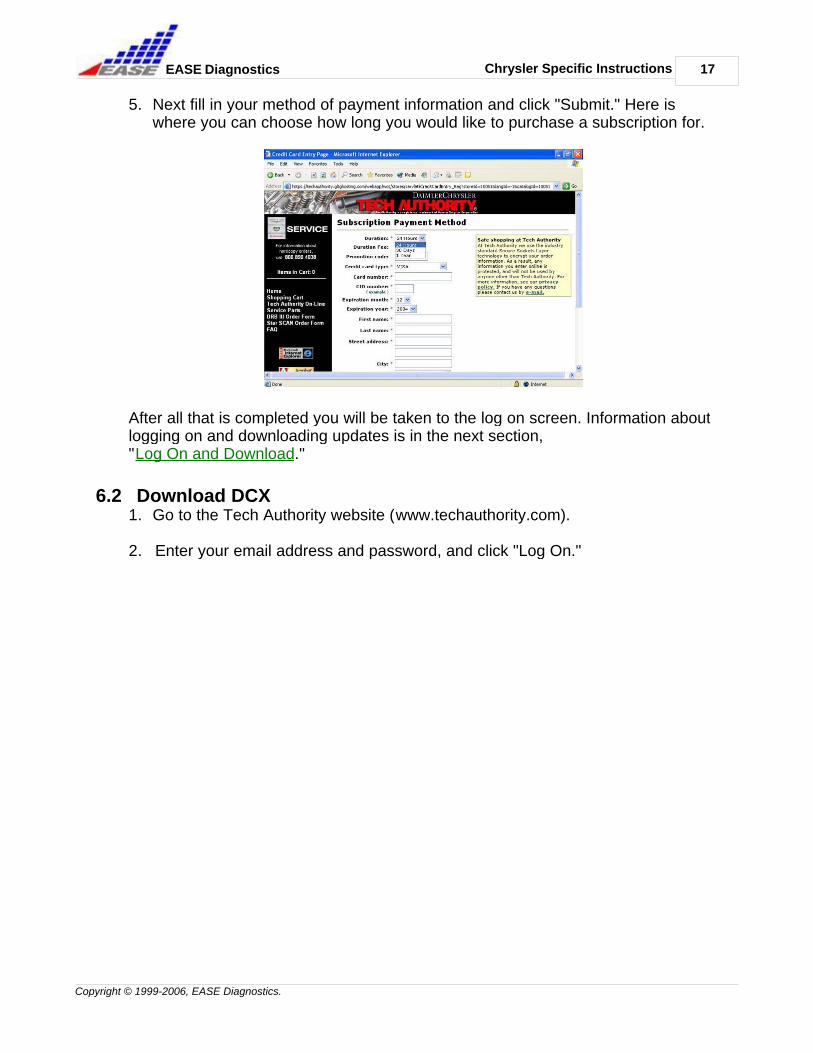
5. Next fill in your method of payment information and click "Submit." Here iswhere you can choose how long you would like to purchase a subscription for.
After all that is completed you will be taken to the log on screen. Information aboutlogging on and downloading updates is in the next section,"Log On and Download."
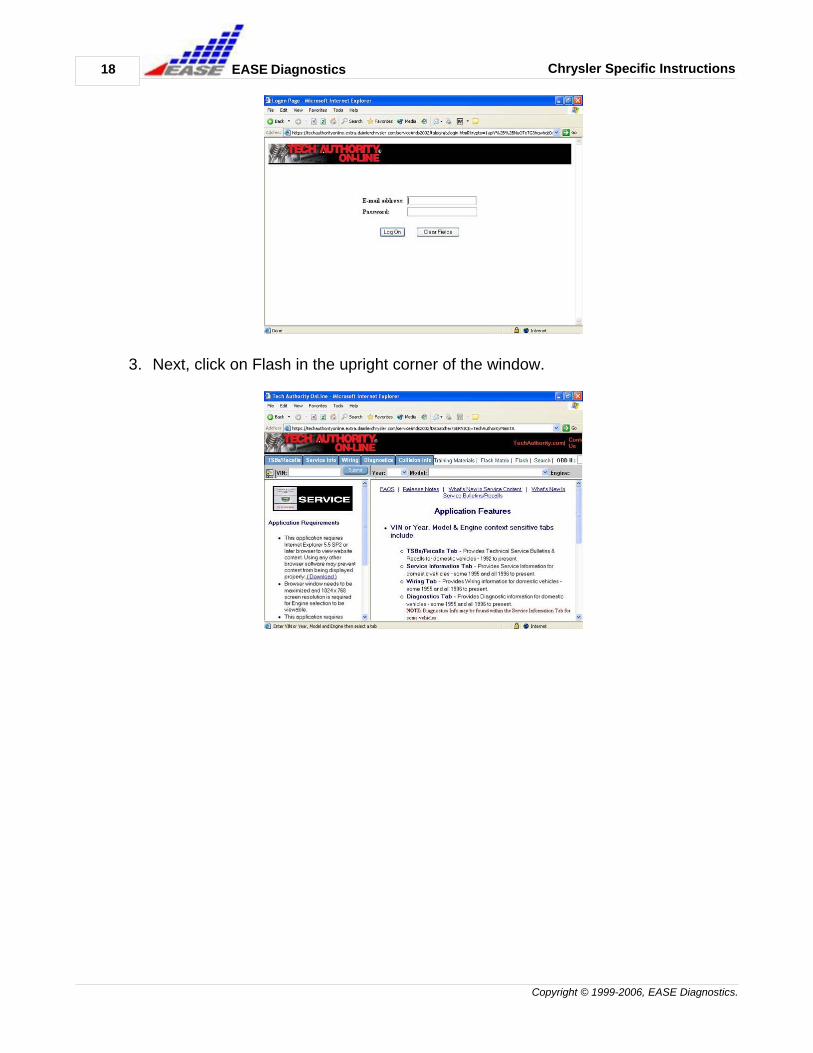
6.2 Download DCX1. Go to the Tech Authority website (www.techauthority.com).
2. Enter your email address and password, and click "Log On."
18
Copyright © 1999-2006, EASE Diagnostics.
Chrysler Specific InstructionsEASE Diagnostics
3. Next, click on Flash in the upright corner of the window.

Chrysler Specific Instructions 19
Copyright © 1999-2006, EASE Diagnostics.
EASE Diagnostics
4. In the upper-left corner you will see the word "Here" underlined, click on it.
5. It is recommended that you print the next screen, "J2534 ReprogrammingProcess," before continuing on from there.
20
Copyright © 1999-2006, EASE Diagnostics.
Chrysler Specific InstructionsEASE Diagnostics
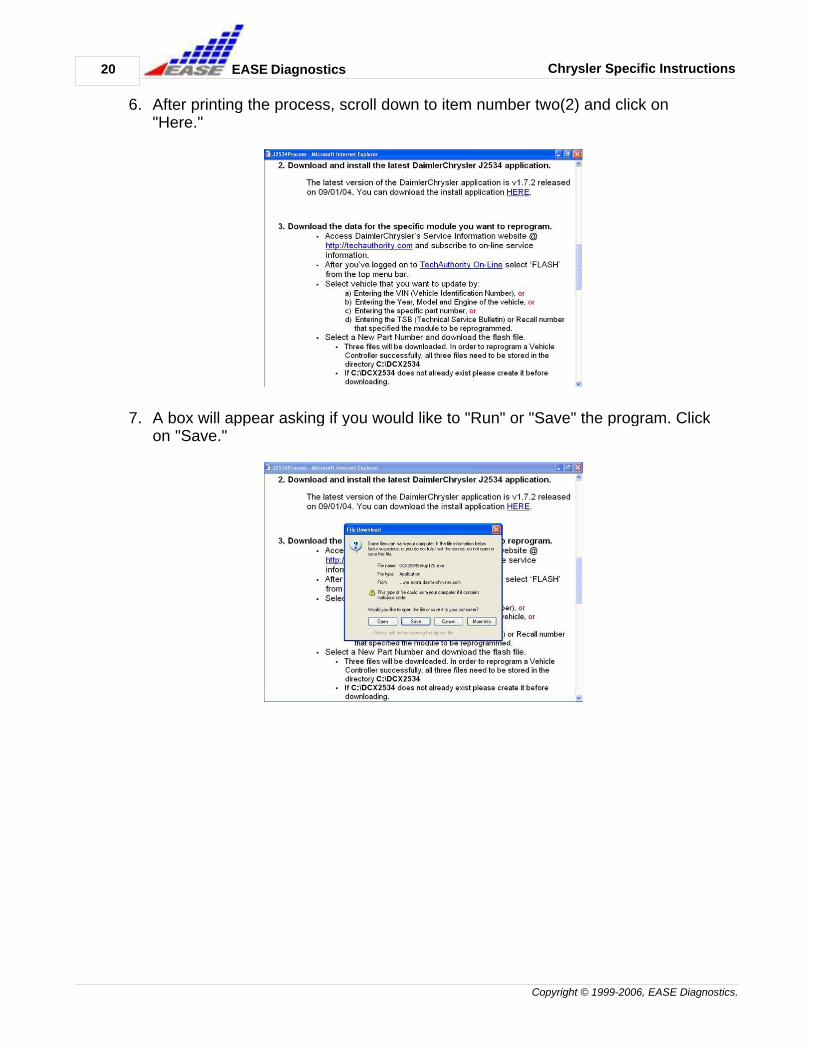
6. After printing the process, scroll down to item number two(2) and click on"Here."
7. A box will appear asking if you would like to "Run" or "Save" the program. Clickon "Save."
Chrysler Specific Instructions 21
Copyright © 1999-2006, EASE Diagnostics.
EASE Diagnostics
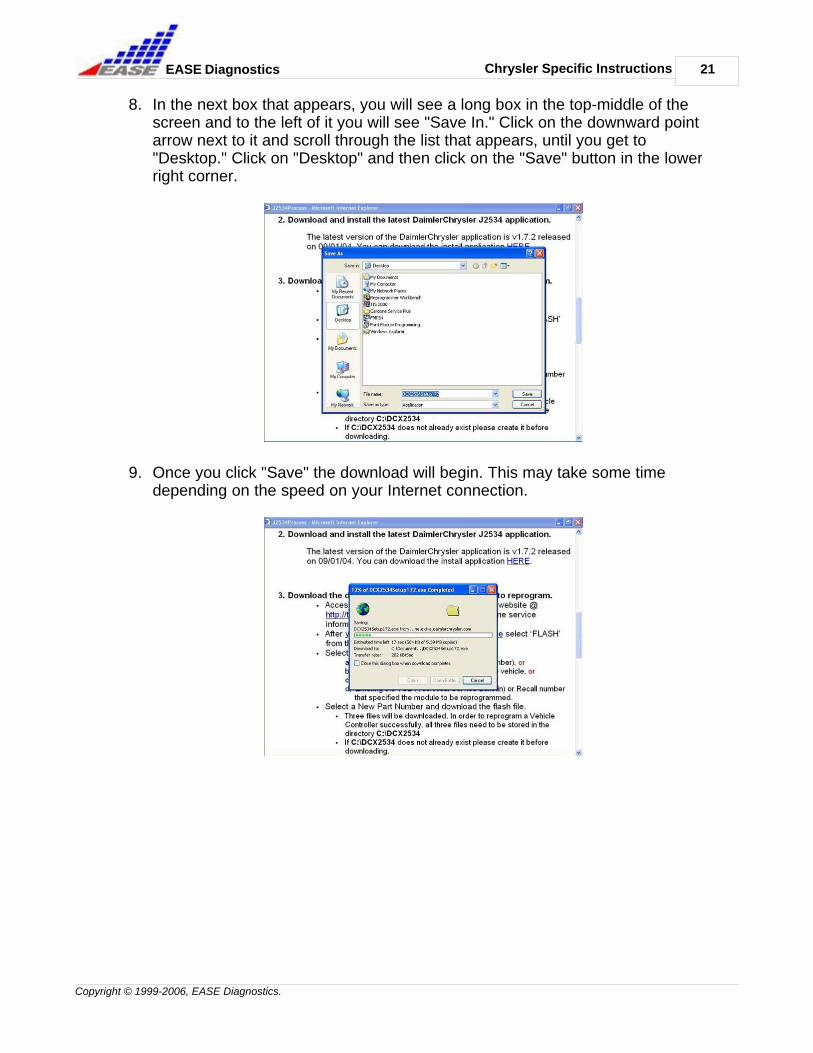
8. In the next box that appears, you will see a long box in the top-middle of thescreen and to the left of it you will see "Save In." Click on the downward pointarrow next to it and scroll through the list that appears, until you get to"Desktop." Click on "Desktop" and then click on the "Save" button in the lowerright corner.
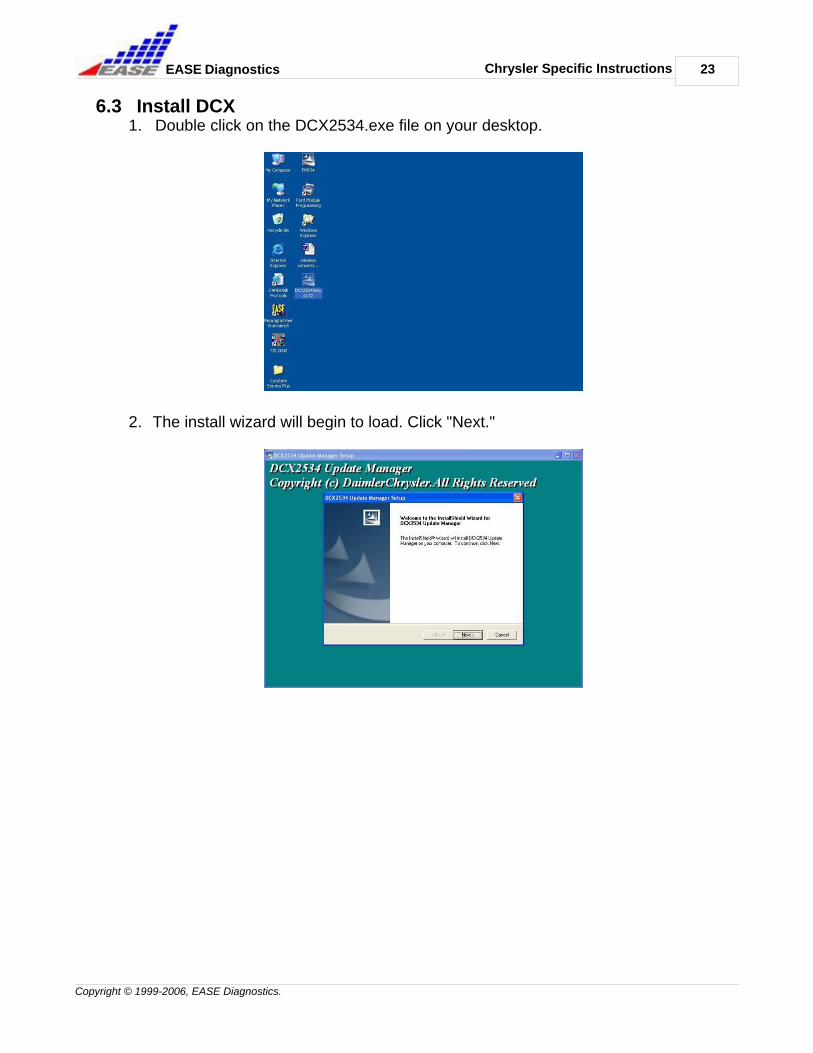
9. Once you click "Save" the download will begin. This may take some timedepending on the speed on your Internet connection.

22
Copyright © 1999-2006, EASE Diagnostics.
Chrysler Specific InstructionsEASE Diagnostics
10.Once the download is complete the "Close" button will appear in the lower-rightcorner of the box on the screen. Click on the "Close" button.
Now you have finished downloading your Chrysler Reprogramming Softwareupdate. The next section, Installation, will step you through the process oninstalling the update you just downloaded.
Chrysler Specific Instructions 23
Copyright © 1999-2006, EASE Diagnostics.
EASE Diagnostics
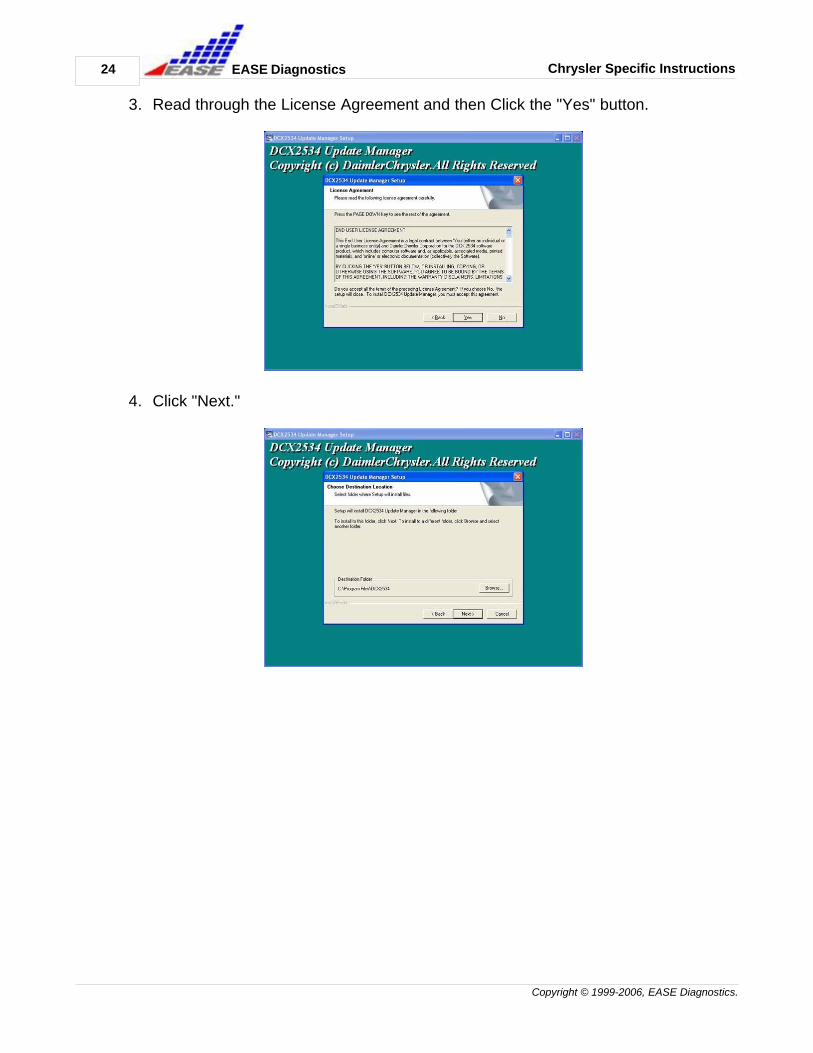
6.3 Install DCX1. Double click on the DCX2534.exe file on your desktop.
2. The install wizard will begin to load. Click "Next."
24
Copyright © 1999-2006, EASE Diagnostics.
Chrysler Specific InstructionsEASE Diagnostics
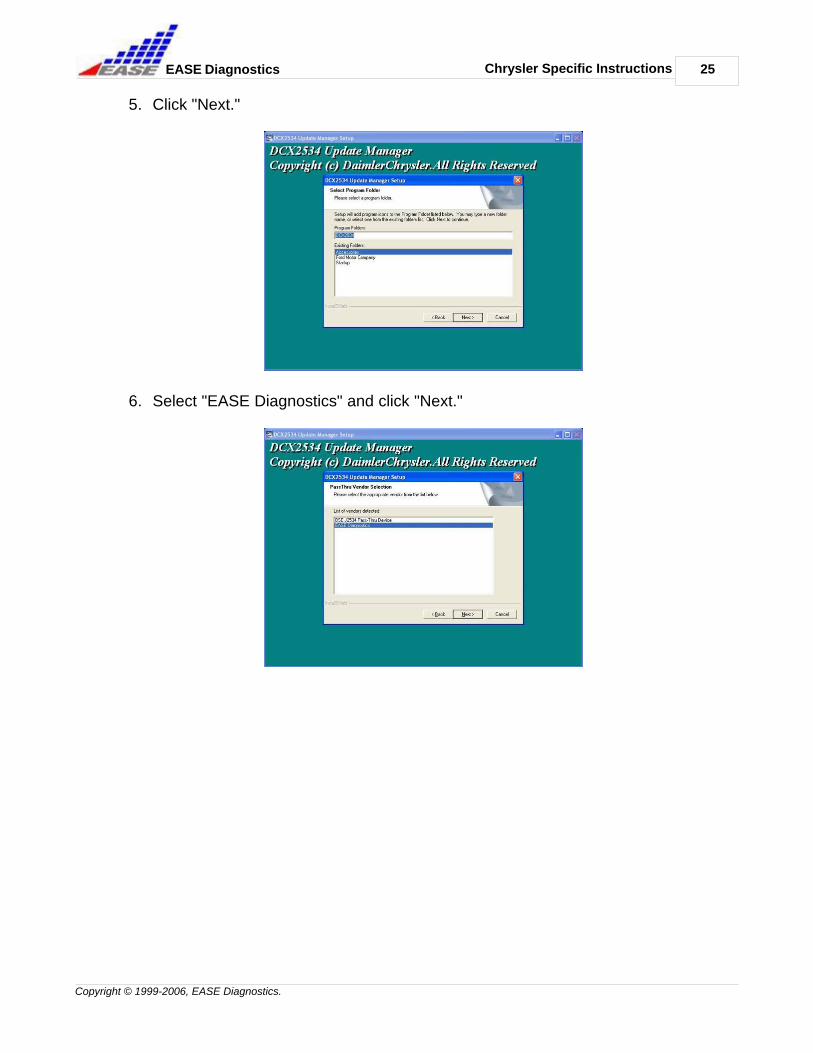
3. Read through the License Agreement and then Click the "Yes" button.
4. Click "Next."
Chrysler Specific Instructions 25
Copyright © 1999-2006, EASE Diagnostics.
EASE Diagnostics
5. Click "Next."
6. Select "EASE Diagnostics" and click "Next."
26
Copyright © 1999-2006, EASE Diagnostics.
Chrysler Specific InstructionsEASE Diagnostics
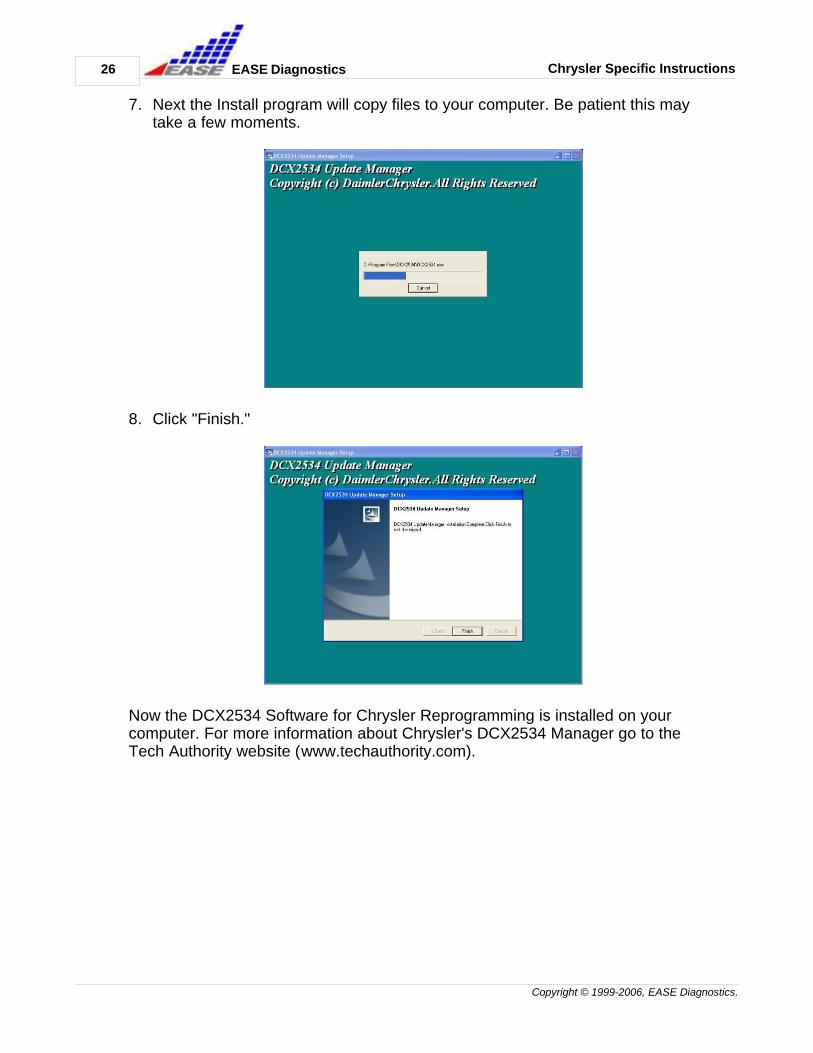
7. Next the Install program will copy files to your computer. Be patient this maytake a few moments.
8. Click "Finish."
Now the DCX2534 Software for Chrysler Reprogramming is installed on yourcomputer. For more information about Chrysler's DCX2534 Manager go to theTech Authority website (www.techauthority.com).
Chrysler Specific Instructions 27
Copyright © 1999-2006, EASE Diagnostics.
EASE Diagnostics
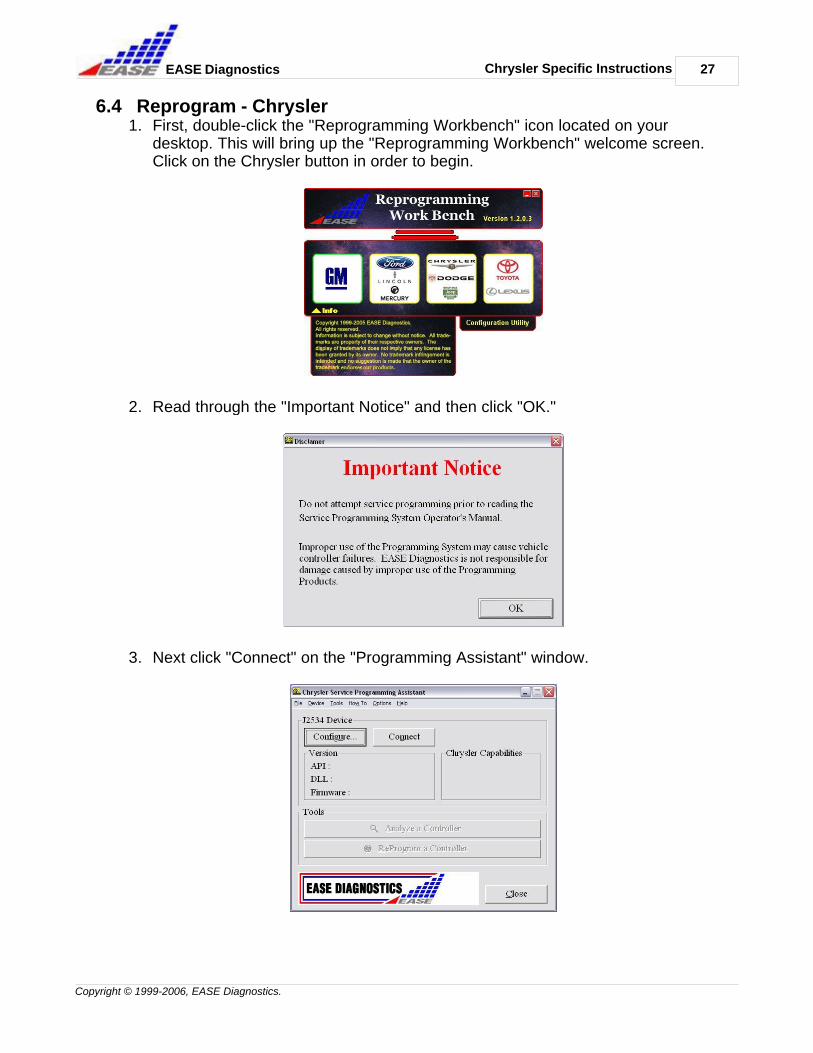
6.4 Reprogram - Chrysler1. First, double-click the "Reprogramming Workbench" icon located on your
desktop. This will bring up the "Reprogramming Workbench" welcome screen.Click on the Chrysler button in order to begin.
2. Read through the "Important Notice" and then click "OK."
3. Next click "Connect" on the "Programming Assistant" window.

28
Copyright © 1999-2006, EASE Diagnostics.
Chrysler Specific InstructionsEASE Diagnostics
4. Click "Analyze a Controller."
5. Select the "In-Vehicle" or "Off-Board" reprogramming. Then click "Next."
Chrysler Specific Instructions 29
Copyright © 1999-2006, EASE Diagnostics.
EASE Diagnostics
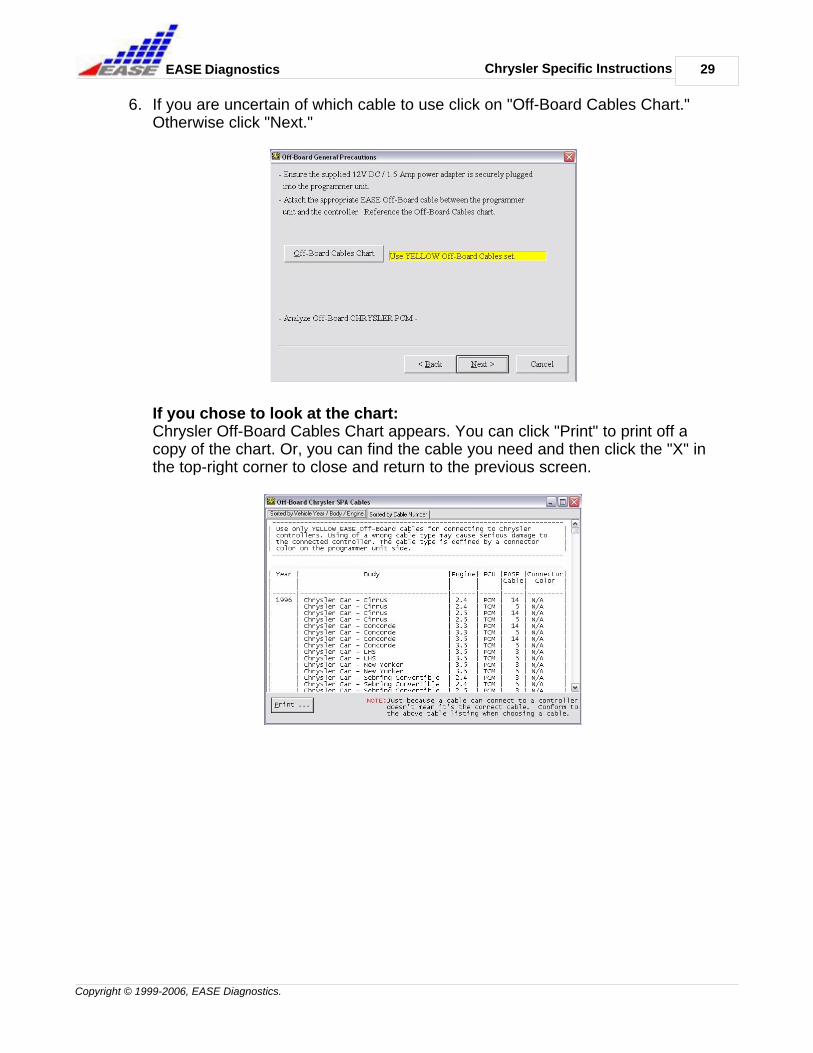
6. If you are uncertain of which cable to use click on "Off-Board Cables Chart."Otherwise click "Next."
If you chose to look at the chart:Chrysler Off-Board Cables Chart appears. You can click "Print" to print off acopy of the chart. Or, you can find the cable you need and then click the "X" inthe top-right corner to close and return to the previous screen.
30
Copyright © 1999-2006, EASE Diagnostics.
Chrysler Specific InstructionsEASE Diagnostics
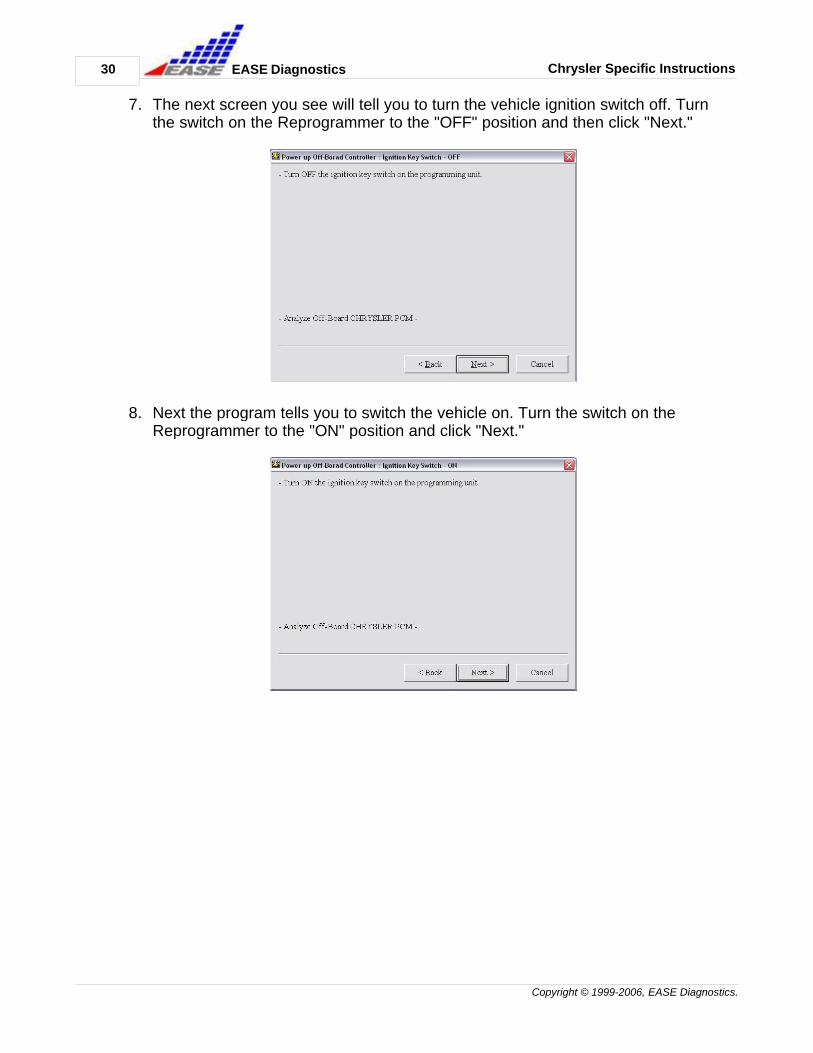
7. The next screen you see will tell you to turn the vehicle ignition switch off. Turnthe switch on the Reprogrammer to the "OFF" position and then click "Next."
8. Next the program tells you to switch the vehicle on. Turn the switch on theReprogrammer to the "ON" position and click "Next."

Chrysler Specific Instructions 31
Copyright © 1999-2006, EASE Diagnostics.
EASE Diagnostics
9. Next, the vehicle parameters will appear as the Reprogrammer analyzes thecontroller. Click "Next" to view DTC's and I/M results.
10. Once the controller is analyzed you can view current DTC's recorded s well aswhat monitors have completed. Click "Next" to continue.

32
Copyright © 1999-2006, EASE Diagnostics.
Chrysler Specific InstructionsEASE Diagnostics
11. The next screen you see will be a summary of the previous screens which youcan print out for reference. Click "Finish" to continue on to reprogramming thecontroller.
12. Then you will return to the "Programming Assistant" window. Click on"Reprogram a Controller."

Chrysler Specific Instructions 33
Copyright © 1999-2006, EASE Diagnostics.
EASE Diagnostics
13. Then you will be prompted to select what you would like to reprogram. Click onthe circle next to "Reprogram a controller using DCX2534" and then click"Next."
14. Next, the Reprogrammer will try to read the Part Number from the controller, ifit does not come up automatically click on "Retrieve" and then take note of thePart Number that is received. Click "Next" to continue.
34
Copyright © 1999-2006, EASE Diagnostics.
Chrysler Specific InstructionsEASE Diagnostics
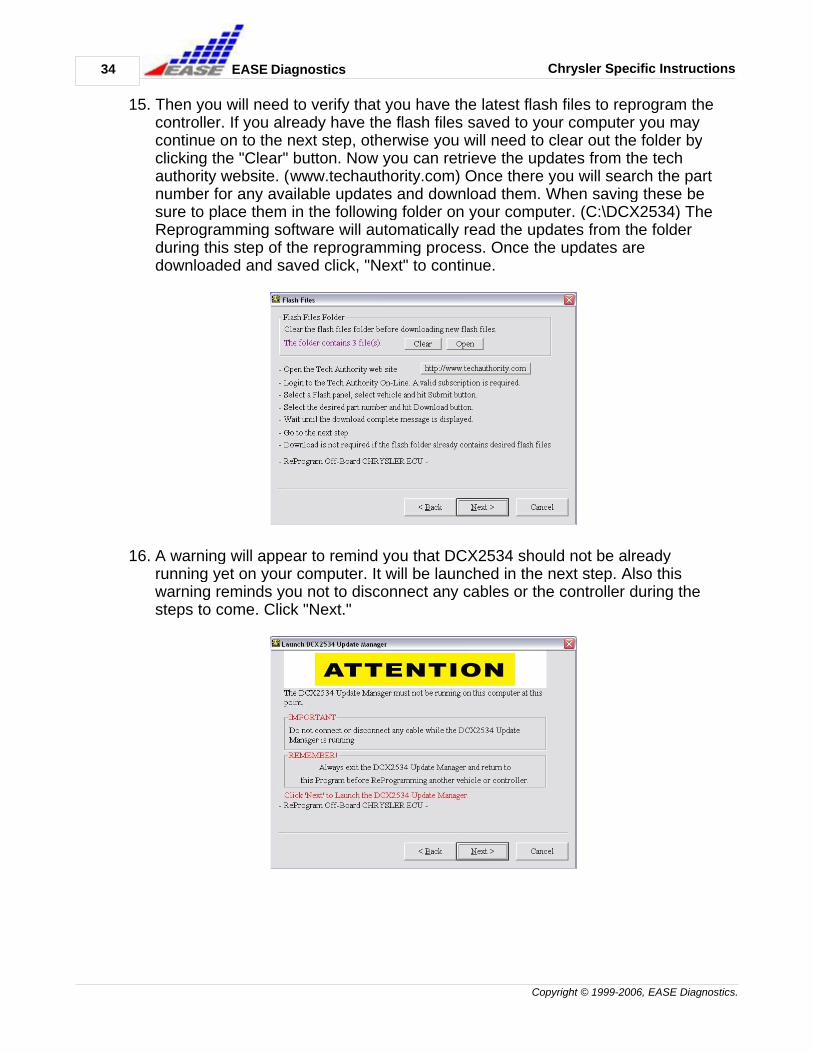
15. Then you will need to verify that you have the latest flash files to reprogram thecontroller. If you already have the flash files saved to your computer you maycontinue on to the next step, otherwise you will need to clear out the folder byclicking the "Clear" button. Now you can retrieve the updates from the techauthority website. (www.techauthority.com) Once there you will search the partnumber for any available updates and download them. When saving these besure to place them in the following folder on your computer. (C:\DCX2534) TheReprogramming software will automatically read the updates from the folderduring this step of the reprogramming process. Once the updates aredownloaded and saved click, "Next" to continue.
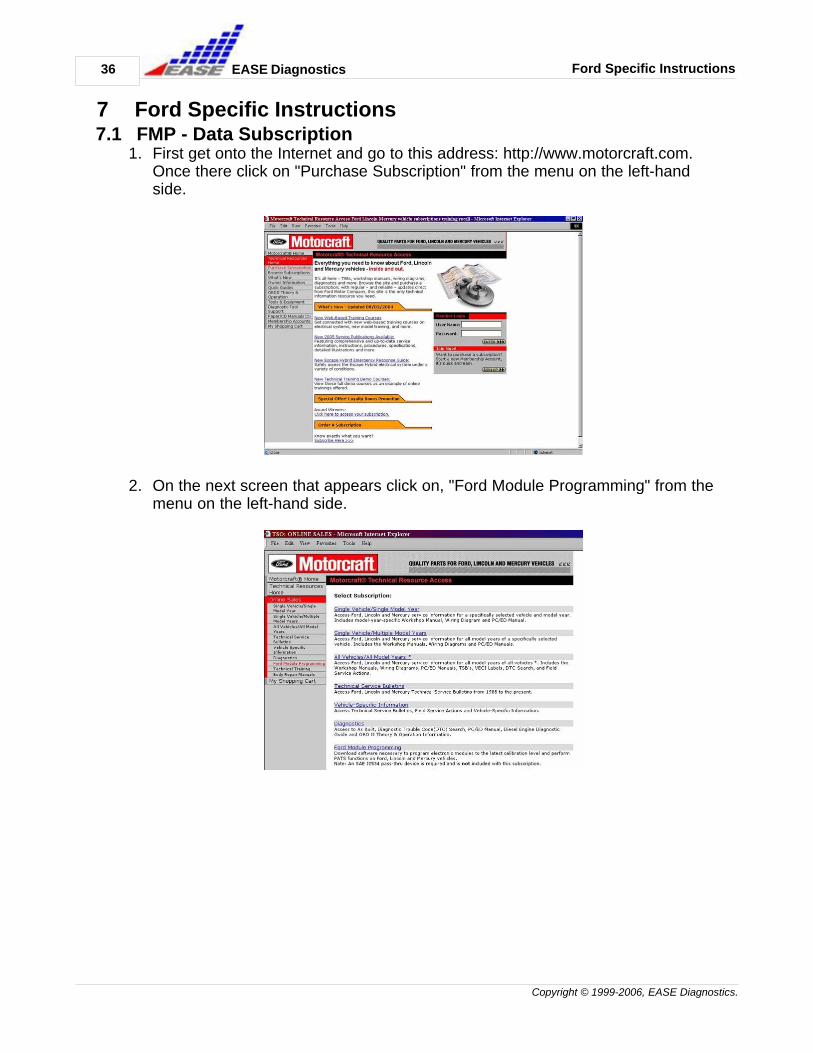
16. A warning will appear to remind you that DCX2534 should not be alreadyrunning yet on your computer. It will be launched in the next step. Also thiswarning reminds you not to disconnect any cables or the controller during thesteps to come. Click "Next."

Chrysler Specific Instructions 35
Copyright © 1999-2006, EASE Diagnostics.
EASE Diagnostics
17. The DCX2534 software will then come up and prompt you to click "Start" tobegin the reprogramming of the controller.
18. Finally you are instructed to turn the ignition switch on the Reprogrammer tothe "OFF" position. It is strongly recommended that you analyze the controllerone more time after reprogramming to ensure that the necessary changes havetaken place. Click "Finish" to complete the reprogramming process andcontinue on to analyze the controller again.
If need assistance with the analyze procedure again please refer to Steps 5through 12.
36
Copyright © 1999-2006, EASE Diagnostics.
Ford Specific InstructionsEASE Diagnostics
7 Ford Specific Instructions7.1 FMP - Data Subscription
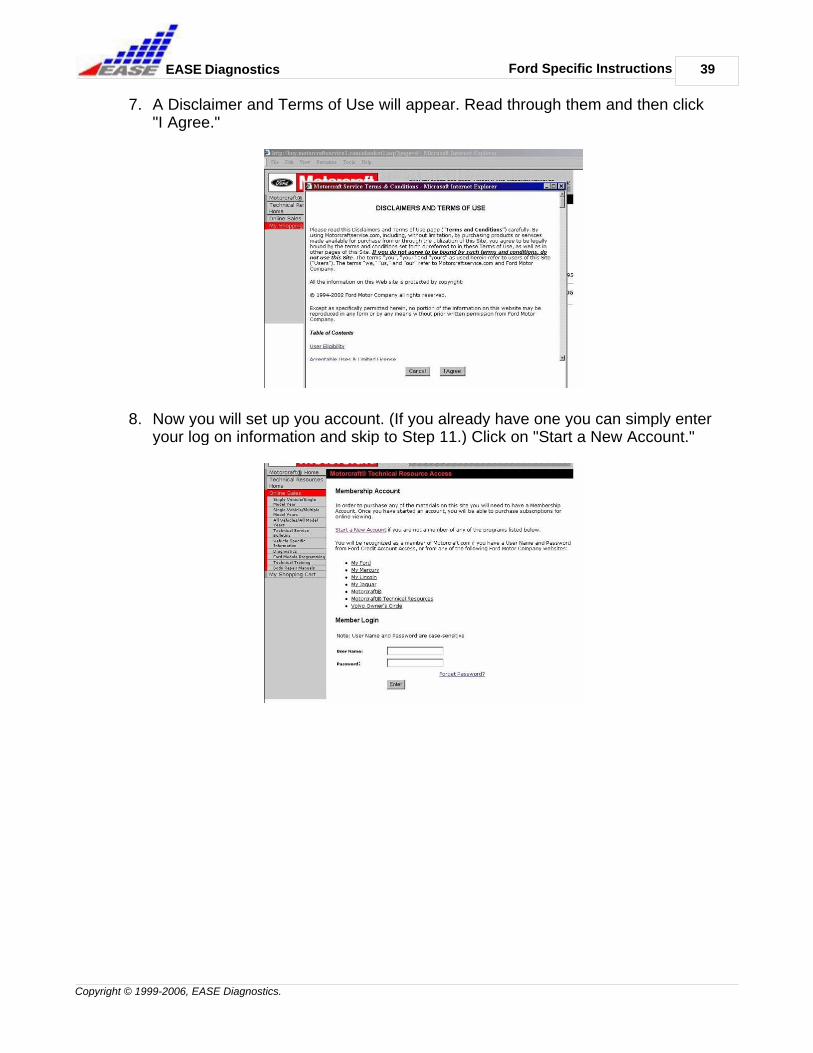
1. First get onto the Internet and go to this address: http://www.motorcraft.com.Once there click on "Purchase Subscription" from the menu on the left-handside.
2. On the next screen that appears click on, "Ford Module Programming" from themenu on the left-hand side.

Ford Specific Instructions 37
Copyright © 1999-2006, EASE Diagnostics.
EASE Diagnostics
3. Now on the screen that appears select the term of the subscription you wish topurchase. (i.e. month or year)
4. Then select the number of terms your wish to purchase. After you select thisthe price will automatically update. Then click "Add to Cart."

38
Copyright © 1999-2006, EASE Diagnostics.
Ford Specific InstructionsEASE Diagnostics
5. As you are adding the item to your cart a screen will popup like the one below.Click "OK" and then click "Checkout."
6. This screen shows your selections again. Click "Checkout."
Ford Specific Instructions 39
Copyright © 1999-2006, EASE Diagnostics.
EASE Diagnostics
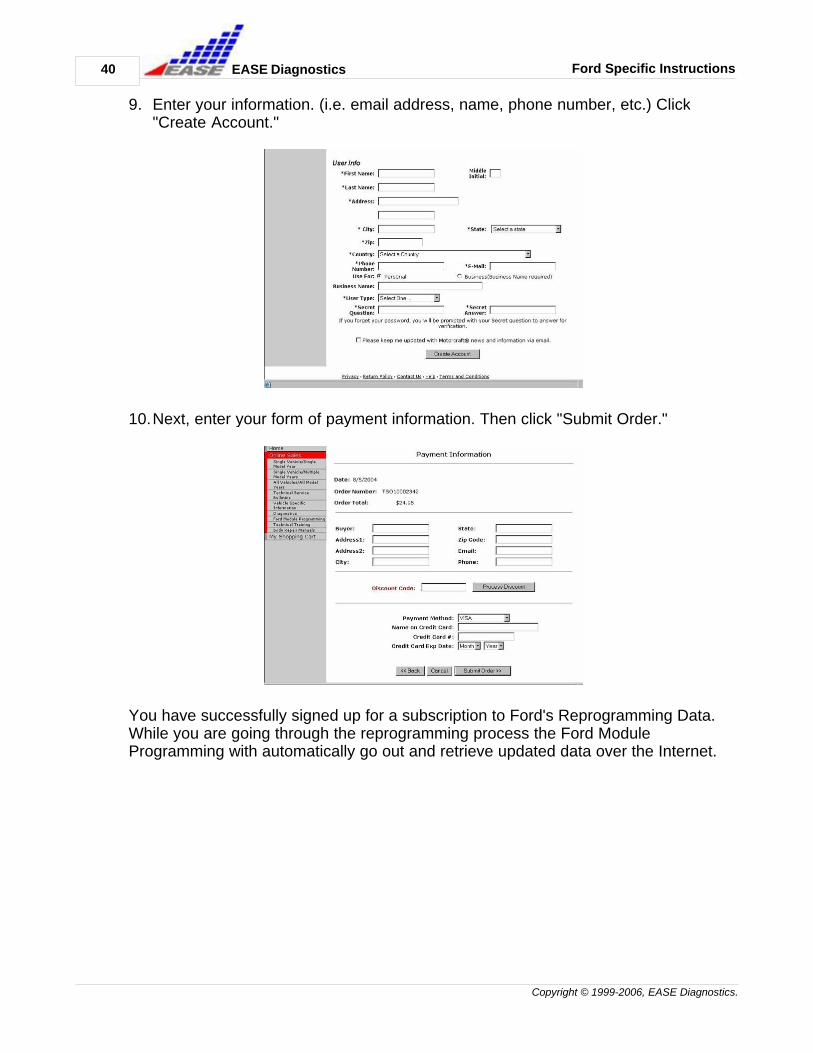
7. A Disclaimer and Terms of Use will appear. Read through them and then click"I Agree."
8. Now you will set up you account. (If you already have one you can simply enteryour log on information and skip to Step 11.) Click on "Start a New Account."
40
Copyright © 1999-2006, EASE Diagnostics.
Ford Specific InstructionsEASE Diagnostics
9. Enter your information. (i.e. email address, name, phone number, etc.) Click"Create Account."
10.Next, enter your form of payment information. Then click "Submit Order."
You have successfully signed up for a subscription to Ford's Reprogramming Data.While you are going through the reprogramming process the Ford ModuleProgramming with automatically go out and retrieve updated data over the Internet.
Ford Specific Instructions 41
Copyright © 1999-2006, EASE Diagnostics.
EASE Diagnostics
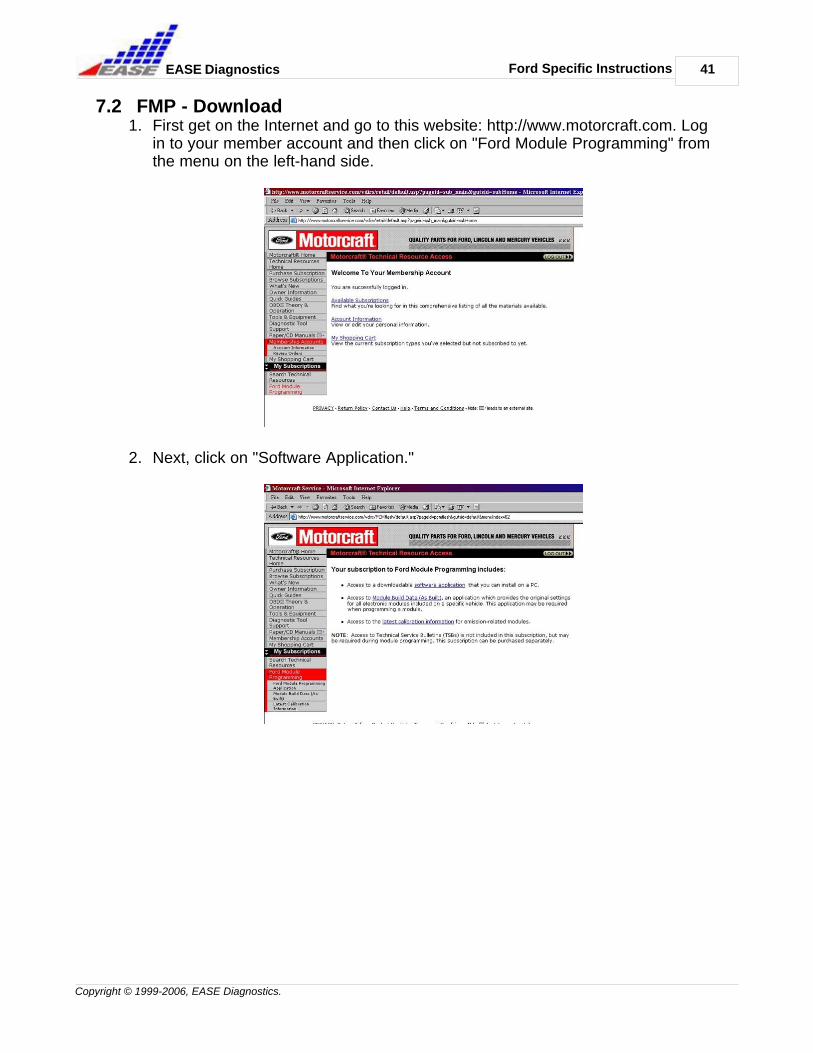
7.2 FMP - Download1. First get on the Internet and go to this website: http://www.motorcraft.com. Log
in to your member account and then click on "Ford Module Programming" fromthe menu on the left-hand side.
2. Next, click on "Software Application."
42
Copyright © 1999-2006, EASE Diagnostics.
Ford Specific InstructionsEASE Diagnostics
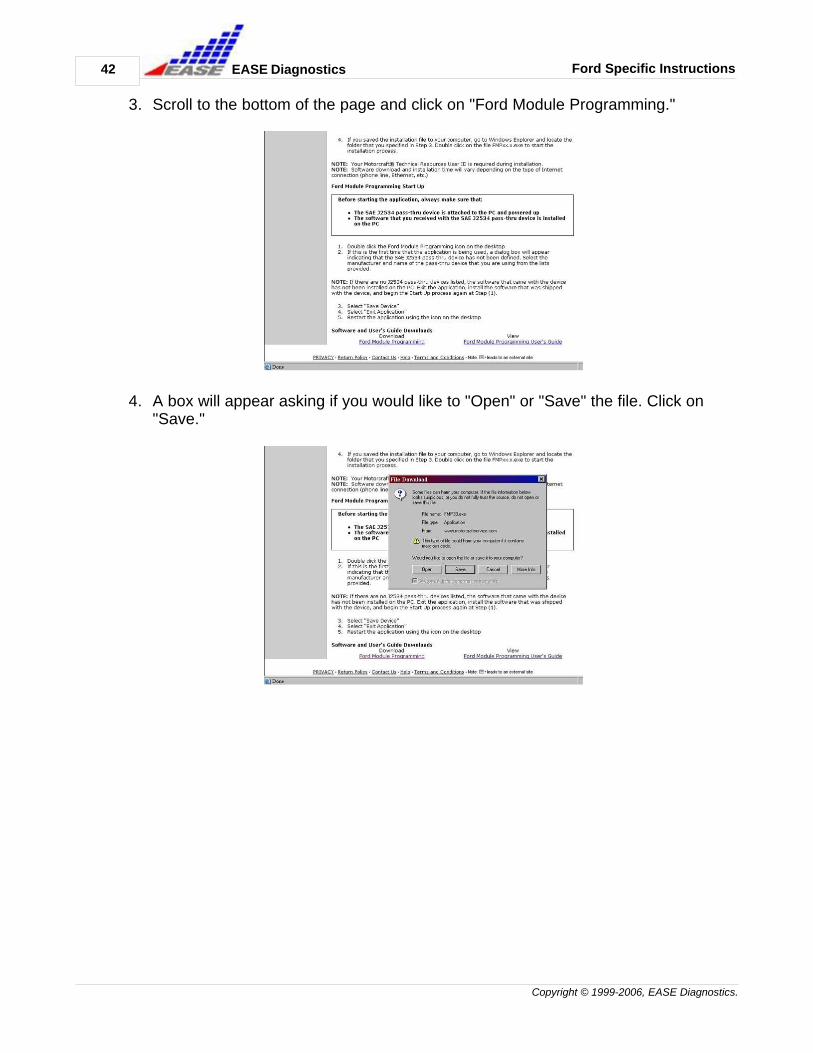
3. Scroll to the bottom of the page and click on "Ford Module Programming."
4. A box will appear asking if you would like to "Open" or "Save" the file. Click on"Save."

Ford Specific Instructions 43
Copyright © 1999-2006, EASE Diagnostics.
EASE Diagnostics
5. Next, you will see the "Save As" box. Towards the top of the box you will find abox with the words "Save In" next to it. Click on the downward pointing arrow onthe other side of the box and select "Desktop" from the list that appears. Thenclick "Save."
6. The download will begin. Please be patient this may take a few moments.
44
Copyright © 1999-2006, EASE Diagnostics.
Ford Specific InstructionsEASE Diagnostics
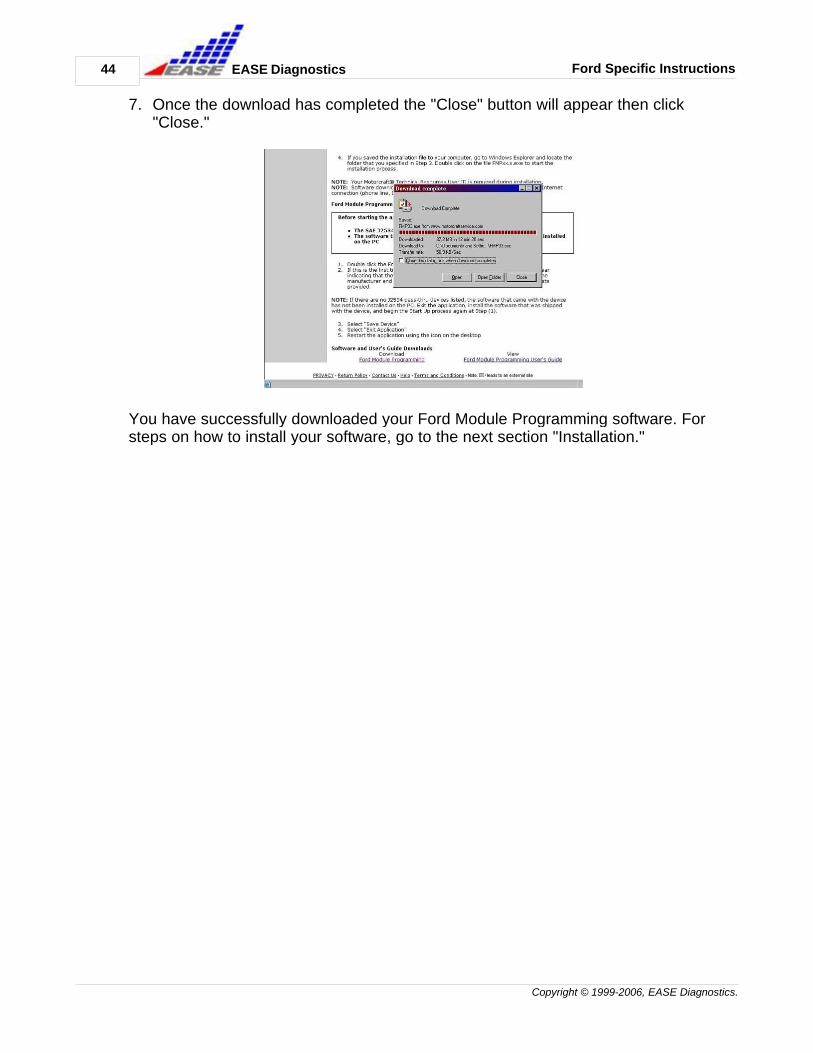
7. Once the download has completed the "Close" button will appear then click"Close."
You have successfully downloaded your Ford Module Programming software. Forsteps on how to install your software, go to the next section "Installation."
Ford Specific Instructions 45
Copyright © 1999-2006, EASE Diagnostics.
EASE Diagnostics
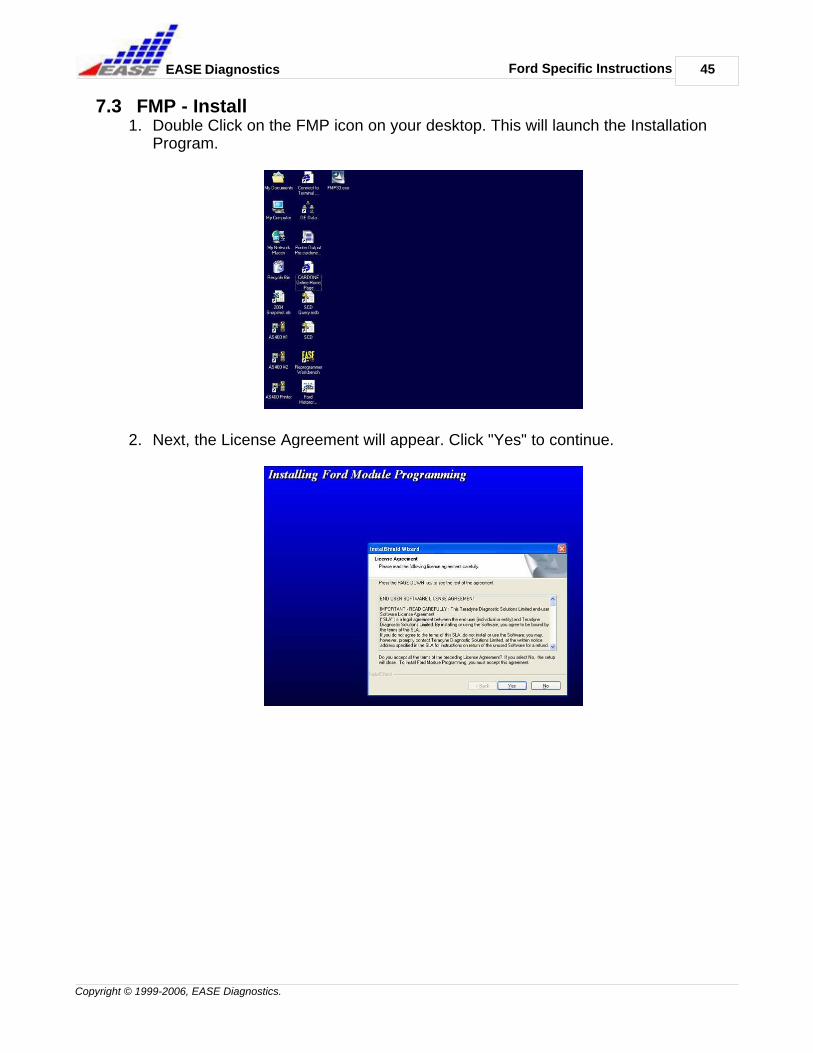
7.3 FMP - Install1. Double Click on the FMP icon on your desktop. This will launch the Installation
Program.
2. Next, the License Agreement will appear. Click "Yes" to continue.

46
Copyright © 1999-2006, EASE Diagnostics.
Ford Specific InstructionsEASE Diagnostics
3. Click "Next."
4. Enter the user name you created when you applied for your subscription andclick "Next."
Ford Specific Instructions 47
Copyright © 1999-2006, EASE Diagnostics.
EASE Diagnostics
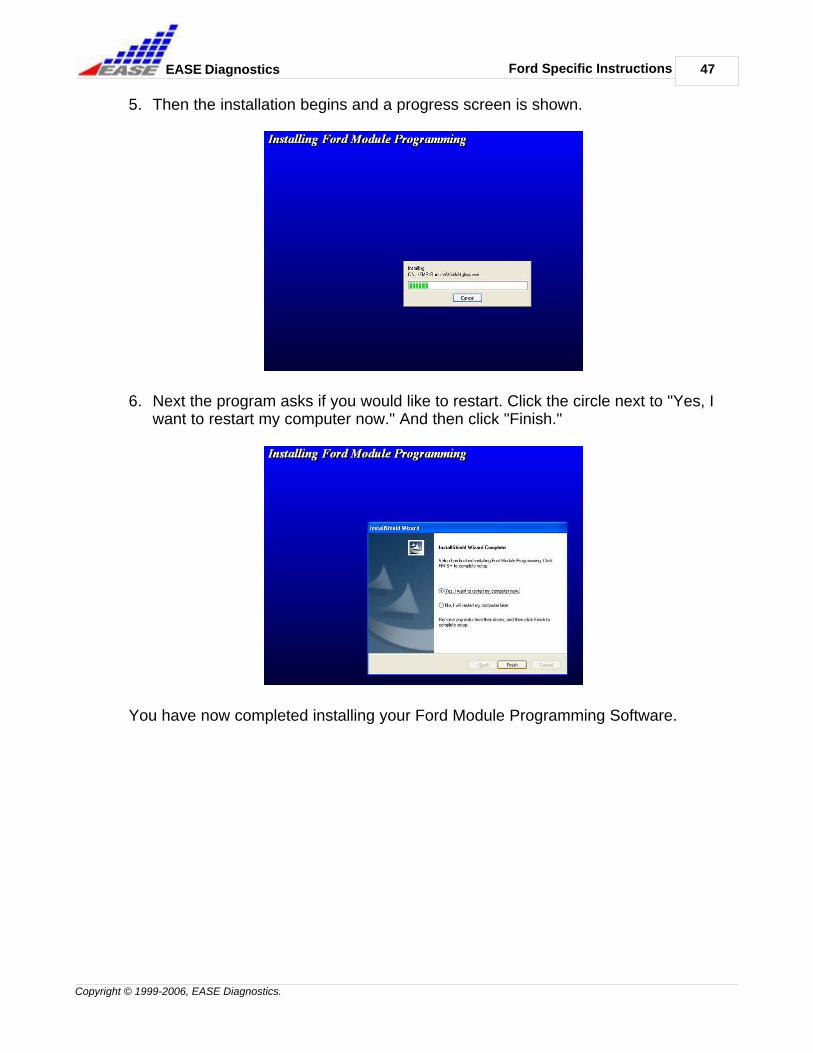
5. Then the installation begins and a progress screen is shown.
6. Next the program asks if you would like to restart. Click the circle next to "Yes, Iwant to restart my computer now." And then click "Finish."
You have now completed installing your Ford Module Programming Software.

48
Copyright © 1999-2006, EASE Diagnostics.
Ford Specific InstructionsEASE Diagnostics
7.4 Reprogram - Ford1. First, double-click the "Reprogramming Workbench" icon located on your
desktop. This will bring up the "Reprogramming Workbench" welcome screen.Click on the Ford button in order to begin.
2. Read through the "Important Notice" and then click "OK."
3. Next click "Connect" on the "Programming Assistant" window.

Ford Specific Instructions 49
Copyright © 1999-2006, EASE Diagnostics.
EASE Diagnostics
4. Click "Analyze a Controller."
5. Select the "In-Vehicle" or "Off-Board" reprogramming. Then click "Next."
50
Copyright © 1999-2006, EASE Diagnostics.
Ford Specific InstructionsEASE Diagnostics
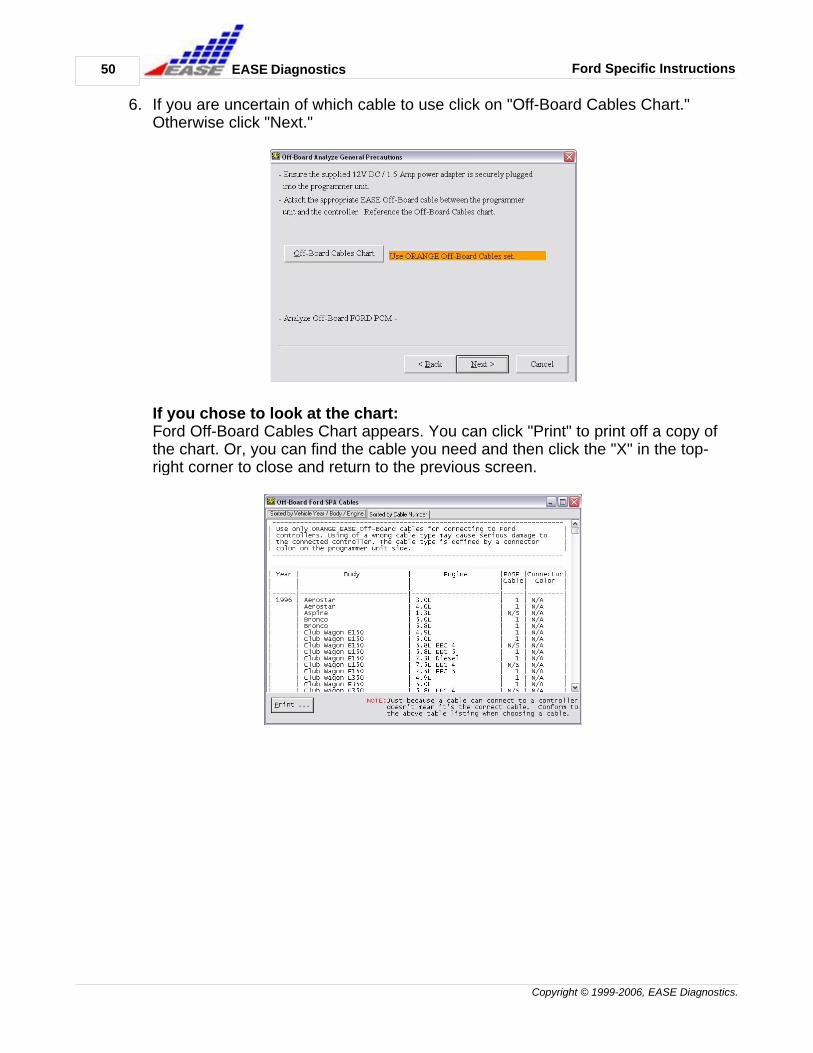
6. If you are uncertain of which cable to use click on "Off-Board Cables Chart."Otherwise click "Next."
If you chose to look at the chart:Ford Off-Board Cables Chart appears. You can click "Print" to print off a copy ofthe chart. Or, you can find the cable you need and then click the "X" in the top-right corner to close and return to the previous screen.

Ford Specific Instructions 51
Copyright © 1999-2006, EASE Diagnostics.
EASE Diagnostics
7. The next screen you see will tell you to turn the vehicle ignition switch off. Turnthe switch on the Reprogrammer to the "OFF" position and then click "Next."
8. Next the program tells you to switch the vehicle on. Turn the switch on theReprogrammer to the "ON" position and click "Next."

52
Copyright © 1999-2006, EASE Diagnostics.
Ford Specific InstructionsEASE Diagnostics
9. Next, the vehicle parameters will appear as the Reprogrammer analyzes thecontroller. Click "Next" to view DTC's and I/M results.
10.Once the controller is analyzed you can view current DTC's recorded s well aswhat monitors have completed. Click "Next" to continue.
Ford Specific Instructions 53
Copyright © 1999-2006, EASE Diagnostics.
EASE Diagnostics
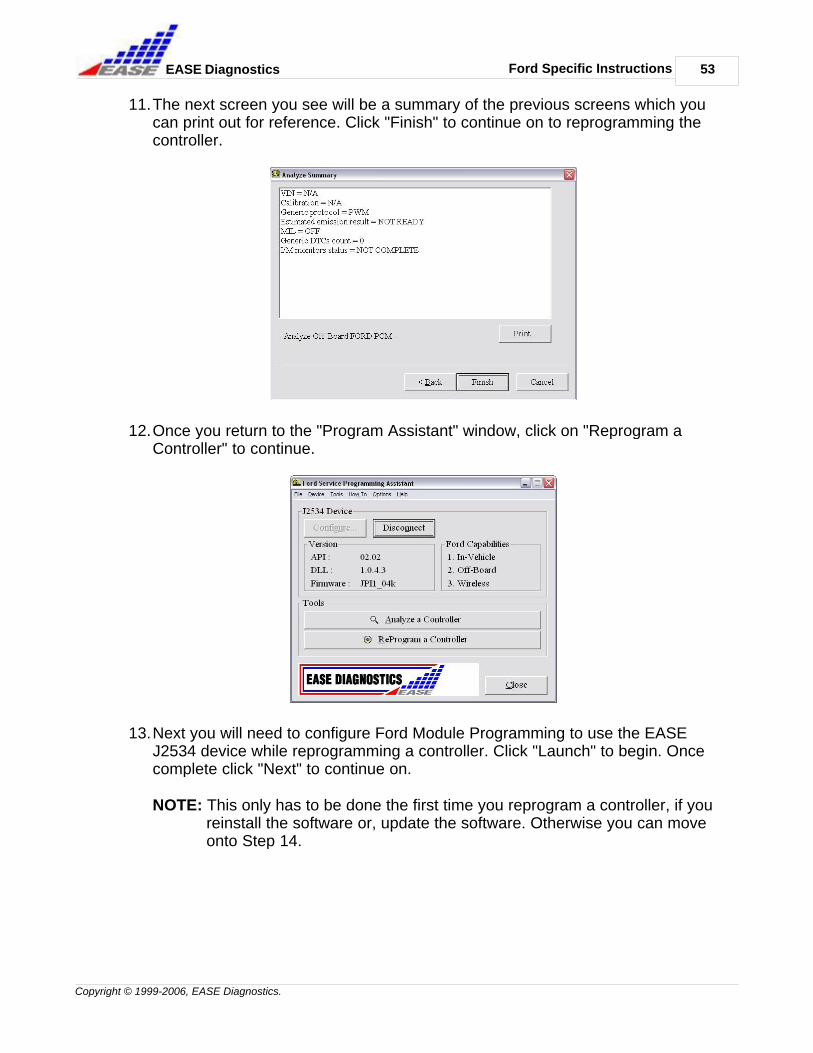
11.The next screen you see will be a summary of the previous screens which youcan print out for reference. Click "Finish" to continue on to reprogramming thecontroller.
12.Once you return to the "Program Assistant" window, click on "Reprogram aController" to continue.
13.Next you will need to configure Ford Module Programming to use the EASEJ2534 device while reprogramming a controller. Click "Launch" to begin. Oncecomplete click "Next" to continue on.
NOTE: This only has to be done the first time you reprogram a controller, if youreinstall the software or, update the software. Otherwise you can moveonto Step 14.

54
Copyright © 1999-2006, EASE Diagnostics.
Ford Specific InstructionsEASE Diagnostics
a. Select "EASE Diagnostics" from the Device Manufacturer listing. Thenselect "Universal Reprogrammer" from the device listing. Click "SaveDevice" and then "Exit Application" when you are finished.
Ford Specific Instructions 55
Copyright © 1999-2006, EASE Diagnostics.
EASE Diagnostics
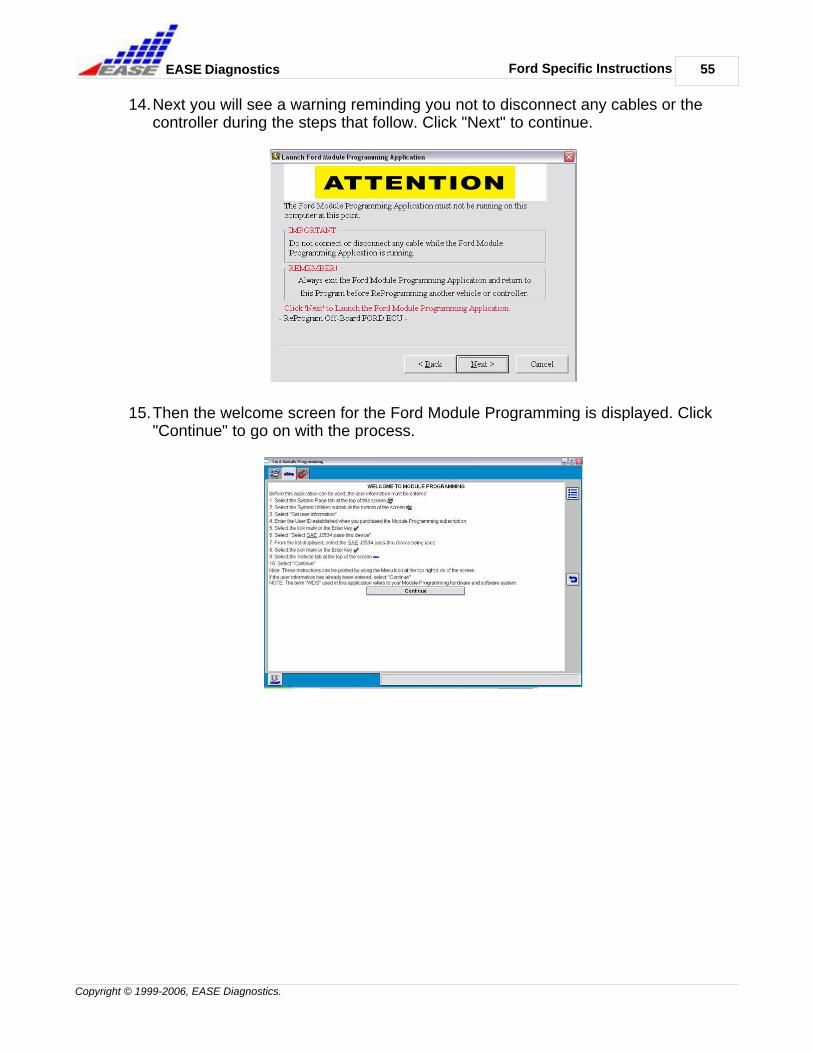
14.Next you will see a warning reminding you not to disconnect any cables or thecontroller during the steps that follow. Click "Next" to continue.
15.Then the welcome screen for the Ford Module Programming is displayed. Click"Continue" to go on with the process.

56
Copyright © 1999-2006, EASE Diagnostics.
Ford Specific InstructionsEASE Diagnostics
16.The "System Utilities" screen is then displayed and you can do various thingssuch as update the software user information, under "Set User Information."Click on the tab with the "Blue Car" on it to continue with the reprogramming.
17.Next you will see a warning that this software should only be used to reprogramFord, Lincoln, and Mercury motor vehicles. Click on "Start New Session."

Ford Specific Instructions 57
Copyright © 1999-2006, EASE Diagnostics.
EASE Diagnostics
18.Then the software asks you to be sure that you are connected to the Internet.Click on the "Confirm" button at the bottom of the screen.
19.Click on the "Check Mark" in the lower-right corner.

58
Copyright © 1999-2006, EASE Diagnostics.
Ford Specific InstructionsEASE Diagnostics
20.Wait while the software updates before reprogramming.
21.Another warning appears, stating that the Ford Module Programming softwaremay need to update and if so it may need to restart. Click the "Check Mark" inthe lower-right corner. If the software did not need to restart please skip to Step24.
22.Next if the software needed to restart you will receive a message asking if thesoftware restarted itself after an update. Click "Yes" to continue.
Ford Specific Instructions 59
Copyright © 1999-2006, EASE Diagnostics.
EASE Diagnostics
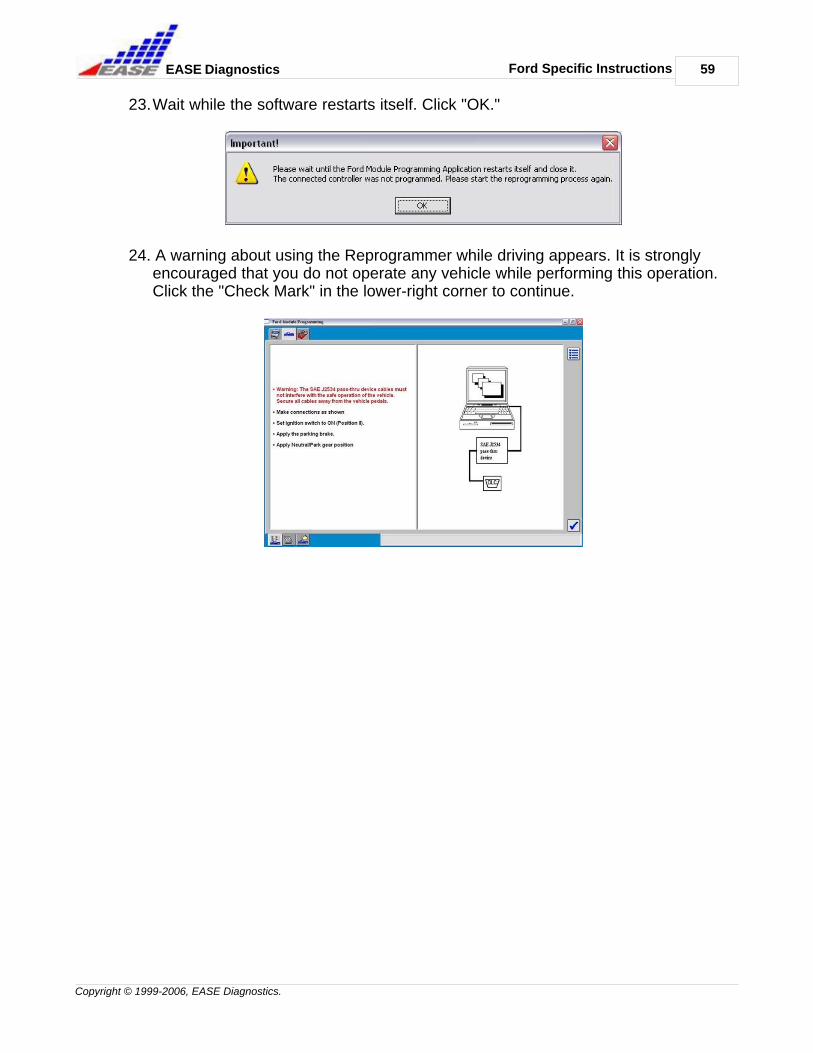
23.Wait while the software restarts itself. Click "OK."
24. A warning about using the Reprogrammer while driving appears. It is stronglyencouraged that you do not operate any vehicle while performing this operation.Click the "Check Mark" in the lower-right corner to continue.
60
Copyright © 1999-2006, EASE Diagnostics.
Ford Specific InstructionsEASE Diagnostics
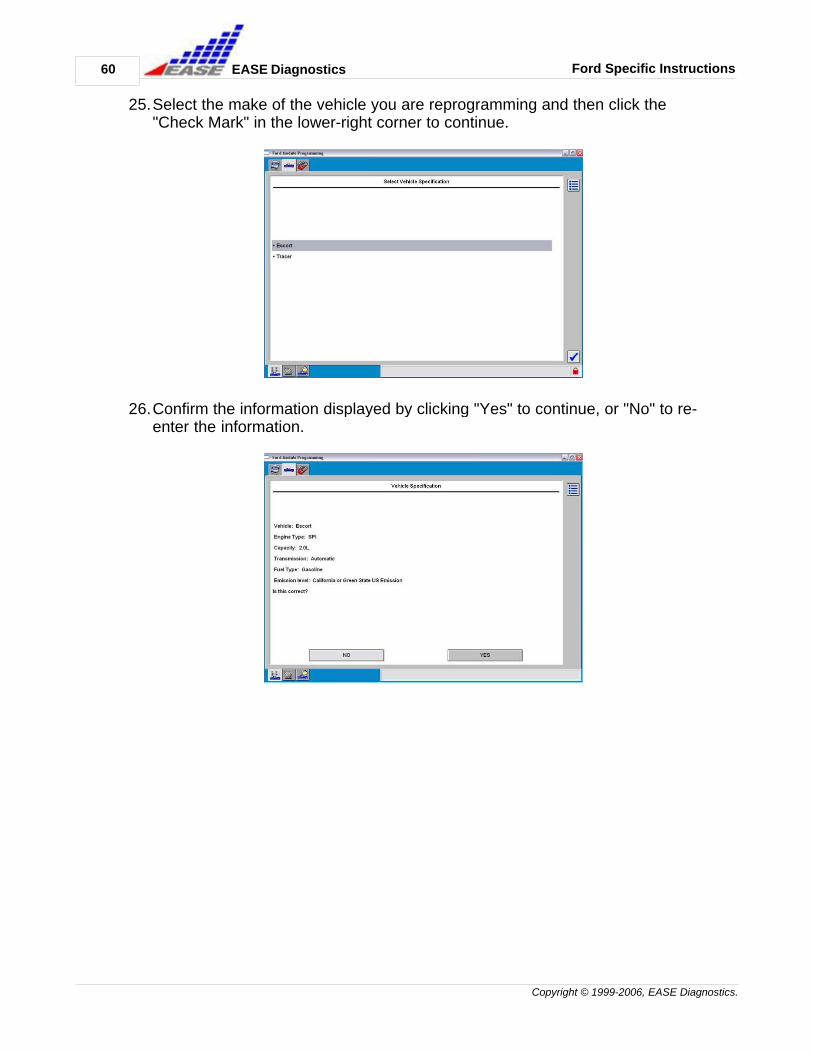
25.Select the make of the vehicle you are reprogramming and then click the"Check Mark" in the lower-right corner to continue.
26.Confirm the information displayed by clicking "Yes" to continue, or "No" to re-enter the information.

Ford Specific Instructions 61
Copyright © 1999-2006, EASE Diagnostics.
EASE Diagnostics
27.Next enter the last few digits of the VIN. Enter the RO and Odometer readingand then click the "Check Mark" in the lower-right corner to continue.
28.The vehicle information is then displayed. Click on the tab with the "RedToolbox" on it to continue.

62
Copyright © 1999-2006, EASE Diagnostics.
Ford Specific InstructionsEASE Diagnostics
29. The following screen is displayed. Click on "Module Programming" and thenthe "Check Mark" in the lower-right to continue.
30.Click on "Programmable Module Installation" and then click on the type ofcontroller you are programming.
Ford Specific Instructions 63
Copyright © 1999-2006, EASE Diagnostics.
EASE Diagnostics
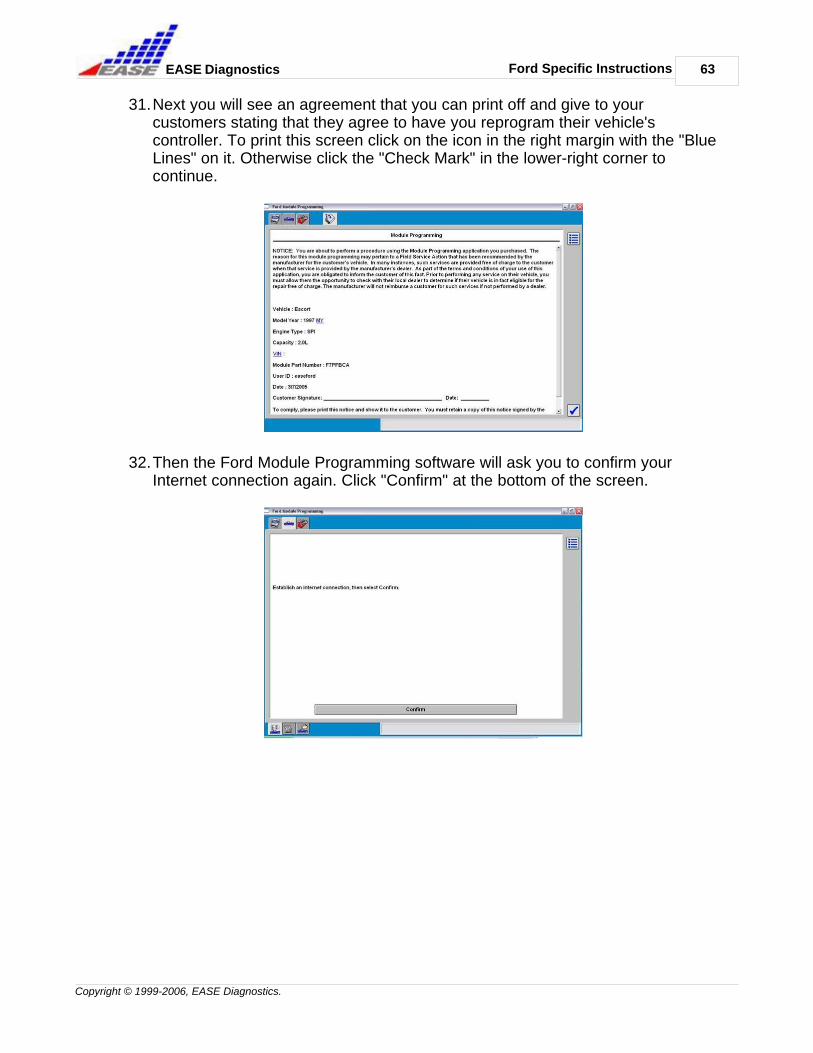
31.Next you will see an agreement that you can print off and give to yourcustomers stating that they agree to have you reprogram their vehicle'scontroller. To print this screen click on the icon in the right margin with the "BlueLines" on it. Otherwise click the "Check Mark" in the lower-right corner tocontinue.
32.Then the Ford Module Programming software will ask you to confirm yourInternet connection again. Click "Confirm" at the bottom of the screen.

64
Copyright © 1999-2006, EASE Diagnostics.
Ford Specific InstructionsEASE Diagnostics
33.Wait while the software loads necessary files to reprogram the controller.
34. Turn the switch on the Reprogrammer to the "OFF" position and then click the"Check Mark" in the lower-right corner to continue.

Ford Specific Instructions 65
Copyright © 1999-2006, EASE Diagnostics.
EASE Diagnostics
35.If you are reprogramming this module Off-Board disregard this screen and clickthe "Check Mark" in the lower-right corner to continue. Otherwise install the newmodule before continuing on.
36.A warning about the fuel pump and cooling fan running during thereprogramming process. It is recommended that you remove their fuses beforecontinuing. Click on the "Check Mark" in the lower-right corner to continue.
66
Copyright © 1999-2006, EASE Diagnostics.
Ford Specific InstructionsEASE Diagnostics
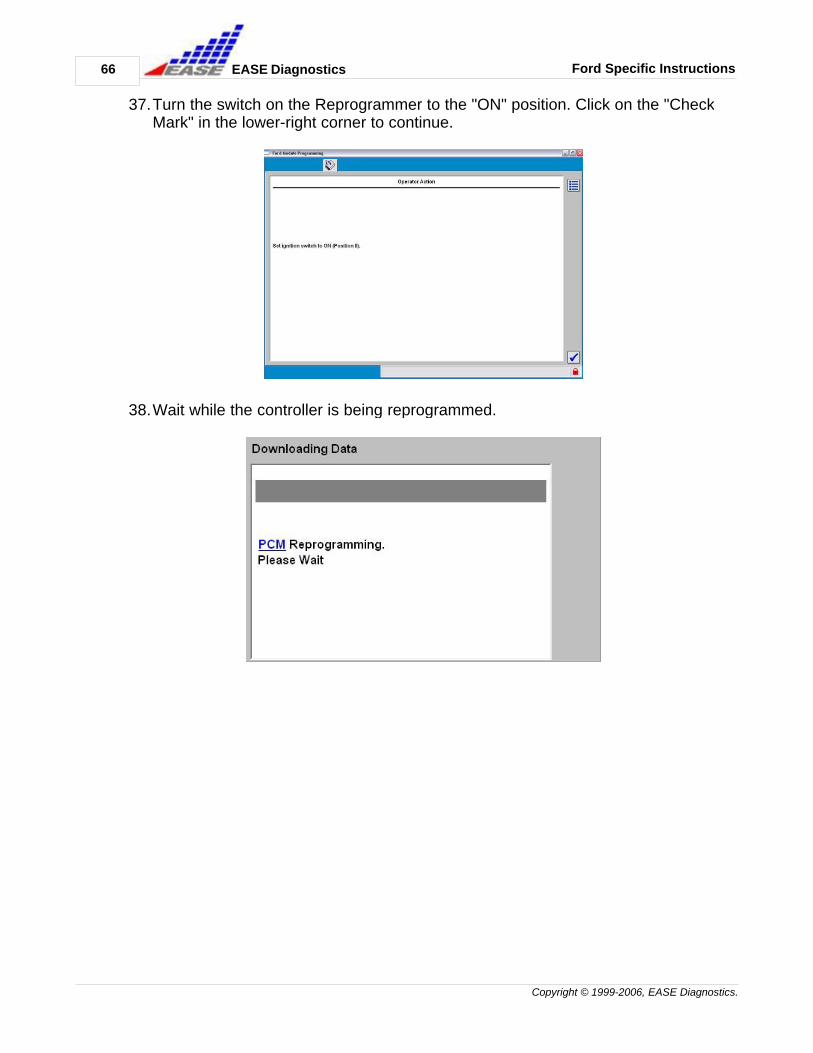
37.Turn the switch on the Reprogrammer to the "ON" position. Click on the "CheckMark" in the lower-right corner to continue.
38.Wait while the controller is being reprogrammed.
Ford Specific Instructions 67
Copyright © 1999-2006, EASE Diagnostics.
EASE Diagnostics
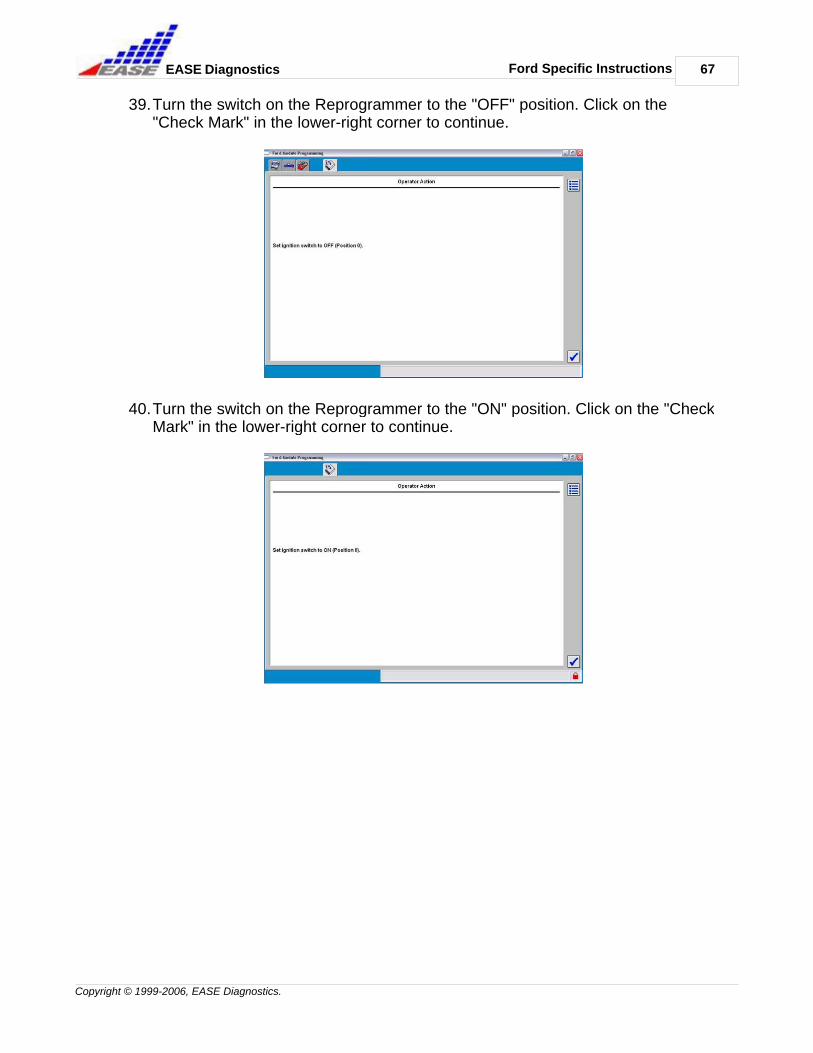
39.Turn the switch on the Reprogrammer to the "OFF" position. Click on the"Check Mark" in the lower-right corner to continue.
40.Turn the switch on the Reprogrammer to the "ON" position. Click on the "CheckMark" in the lower-right corner to continue.
68
Copyright © 1999-2006, EASE Diagnostics.
Ford Specific InstructionsEASE Diagnostics
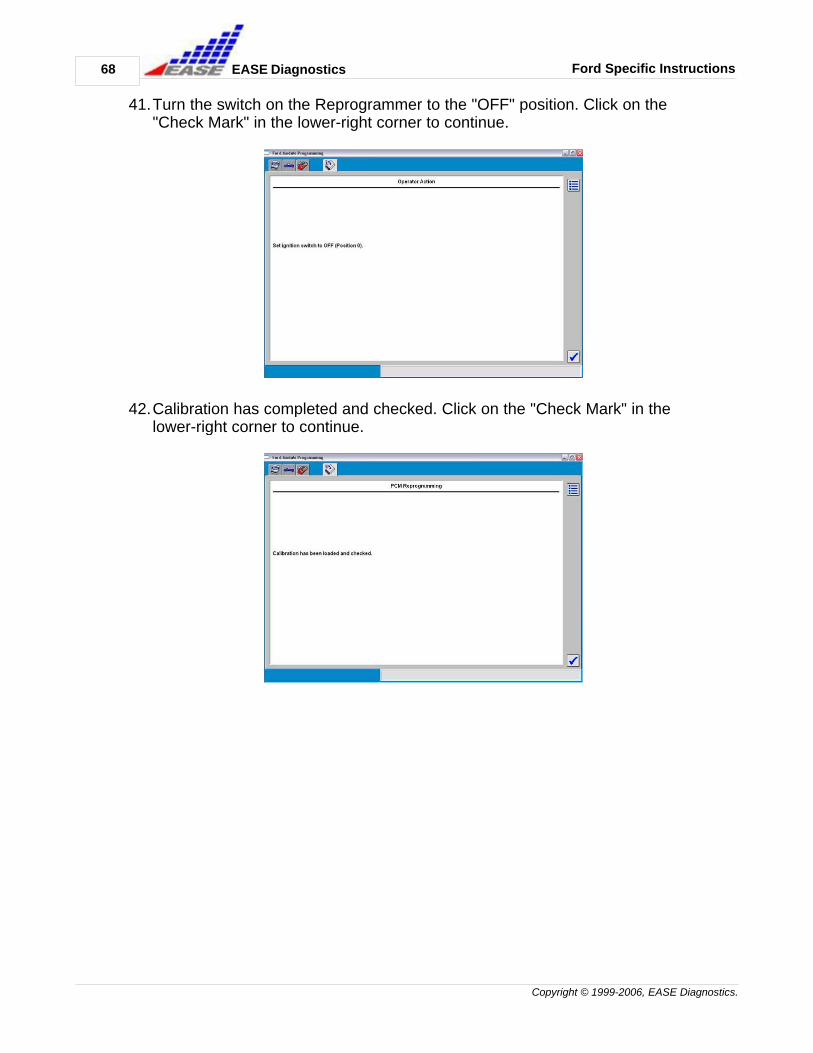
41.Turn the switch on the Reprogrammer to the "OFF" position. Click on the"Check Mark" in the lower-right corner to continue.
42.Calibration has completed and checked. Click on the "Check Mark" in thelower-right corner to continue.
Ford Specific Instructions 69
Copyright © 1999-2006, EASE Diagnostics.
EASE Diagnostics
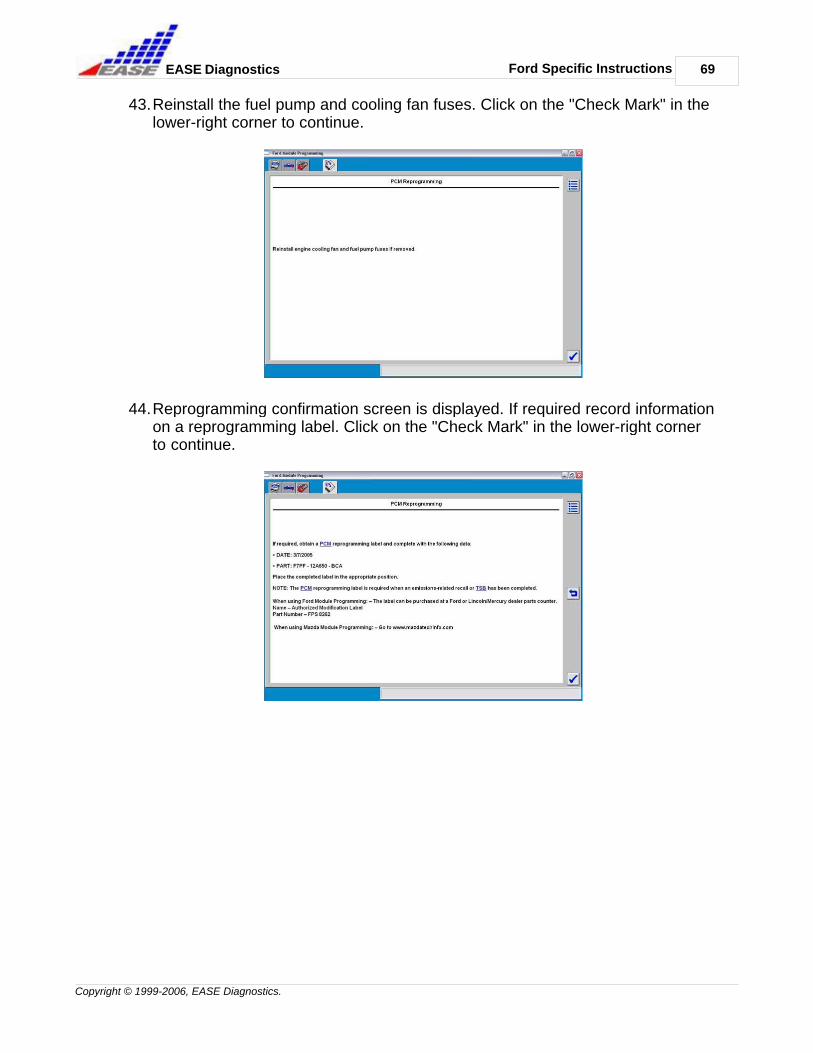
43.Reinstall the fuel pump and cooling fan fuses. Click on the "Check Mark" in thelower-right corner to continue.
44.Reprogramming confirmation screen is displayed. If required record informationon a reprogramming label. Click on the "Check Mark" in the lower-right cornerto continue.

70
Copyright © 1999-2006, EASE Diagnostics.
Ford Specific InstructionsEASE Diagnostics
45.Turn switch on Reprogrammer to "RUN" position. Click on the "Check Mark" inthe lower-right corner to continue.
46.Turn the switch on the Reprogrammer to the "OFF" position. Click on the"Check Mark" in the lower-right corner to continue.
Ford Specific Instructions 71
Copyright © 1999-2006, EASE Diagnostics.
EASE Diagnostics
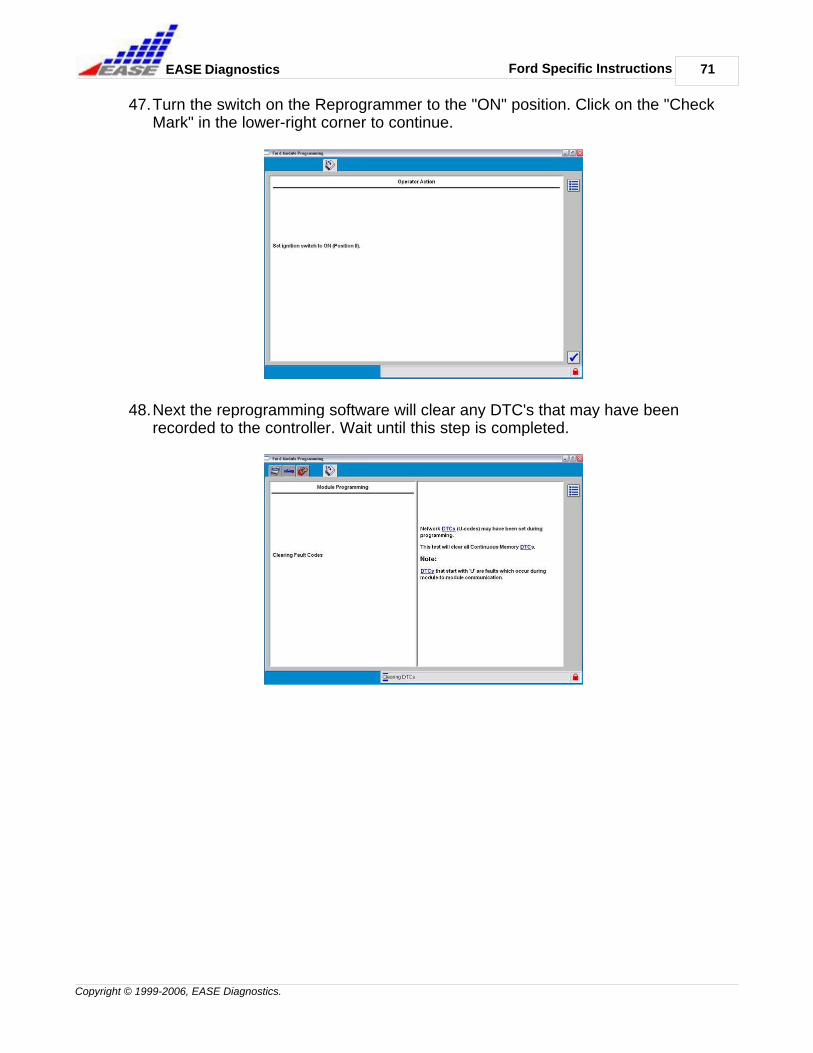
47.Turn the switch on the Reprogrammer to the "ON" position. Click on the "CheckMark" in the lower-right corner to continue.
48.Next the reprogramming software will clear any DTC's that may have beenrecorded to the controller. Wait until this step is completed.

72
Copyright © 1999-2006, EASE Diagnostics.
Ford Specific InstructionsEASE Diagnostics
49.Turn the switch on the Reprogrammer to the "OFF" position. Click on the"Check Mark" in the lower-right corner to continue.
50.The updated vehicle information will be displayed. Click on the tab with the"Blue Car" on it to continue.

Ford Specific Instructions 73
Copyright © 1999-2006, EASE Diagnostics.
EASE Diagnostics
51.When finished click on "Complete (deletes recordings)" to continue.
52.You will be asked, "Are you sure you want to exit?" Click on the "Check Mark"in the lower-right corner to exit Ford Module Programming and return to theReprogrammer software.
53.Reprogramming is complete. It is strongly recommended that you analyze thecontroller again to make sure the necessary changes took place.
If you need help analyzing the controller again refer to Steps 4 through 11.
74
Copyright © 1999-2006, EASE Diagnostics.
GM Specific InstructionsEASE Diagnostics
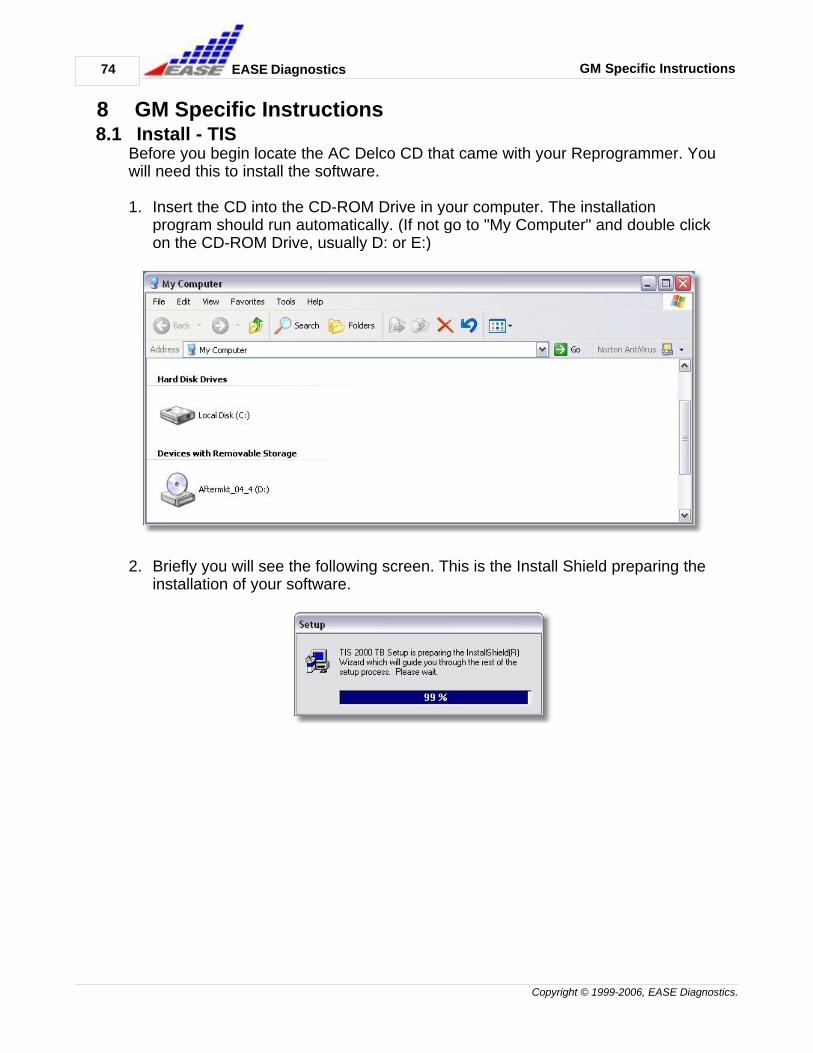
8 GM Specific Instructions8.1 Install - TIS
Before you begin locate the AC Delco CD that came with your Reprogrammer. Youwill need this to install the software.
1. Insert the CD into the CD-ROM Drive in your computer. The installationprogram should run automatically. (If not go to "My Computer" and double clickon the CD-ROM Drive, usually D: or E:)
2. Briefly you will see the following screen. This is the Install Shield preparing theinstallation of your software.
GM Specific Instructions 75
Copyright © 1999-2006, EASE Diagnostics.
EASE Diagnostics
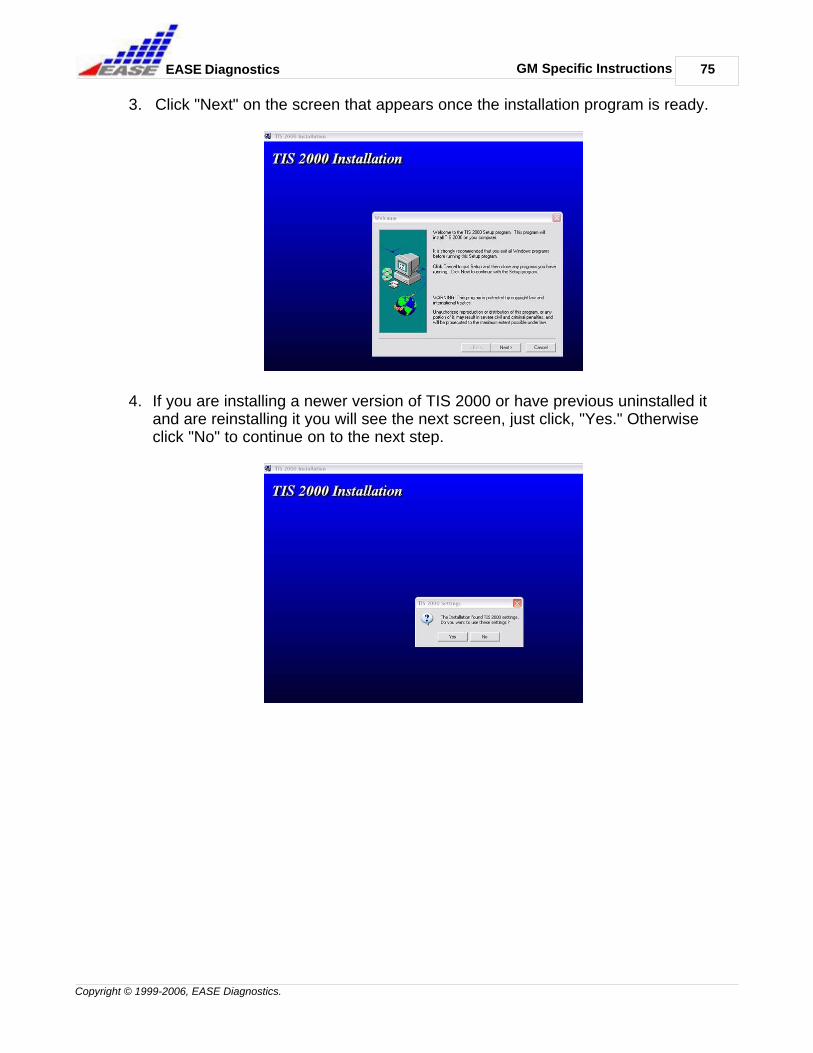
3. Click "Next" on the screen that appears once the installation program is ready.
4. If you are installing a newer version of TIS 2000 or have previous uninstalled itand are reinstalling it you will see the next screen, just click, "Yes." Otherwiseclick "No" to continue on to the next step.
76
Copyright © 1999-2006, EASE Diagnostics.
GM Specific InstructionsEASE Diagnostics
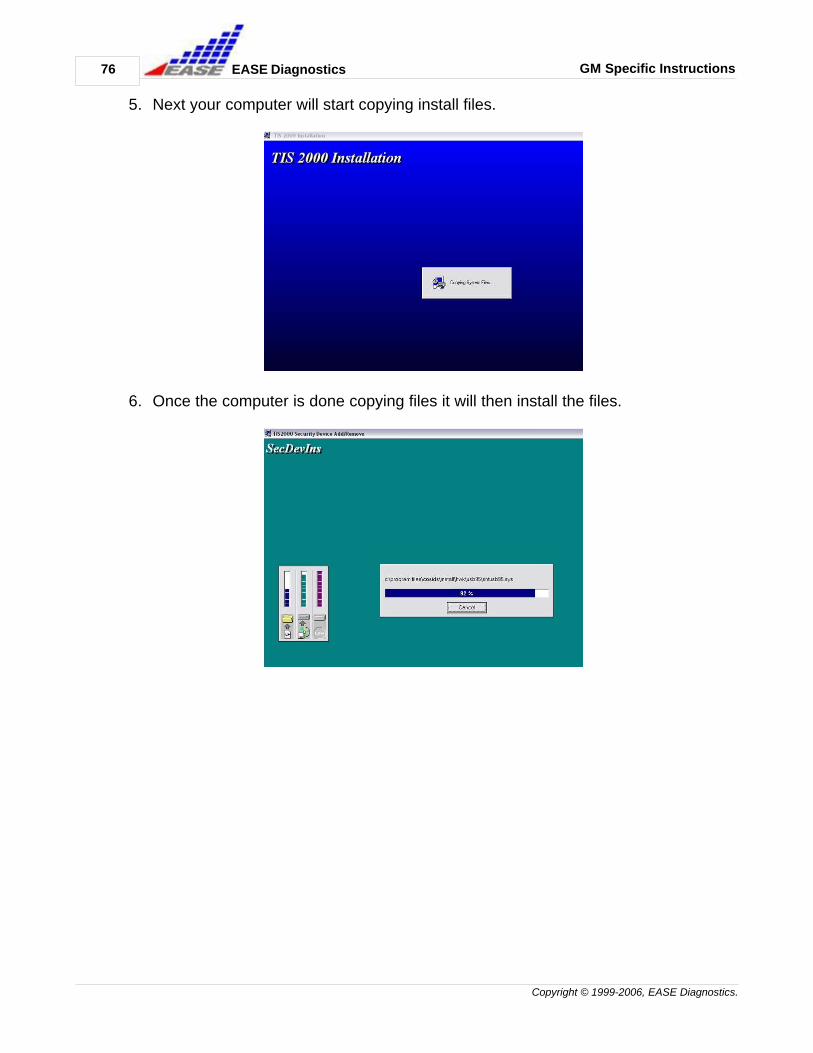
5. Next your computer will start copying install files.
6. Once the computer is done copying files it will then install the files.

GM Specific Instructions 77
Copyright © 1999-2006, EASE Diagnostics.
EASE Diagnostics
7. Then a screen will appear asking you to select the proper key that you have toaccess the software databases. (You will need this key every time you go touse the TIS Software.)
8. The computer will then finish copying files to your hard drive. A box with astatus bar on it will appear while the computer is copying the last of the file. Thismay take a few moments please be patient.
9. Click "OK."
You have now successfully installed TIS 2000. Please continue on to the nextsection, "Install Update" to make sure you have the latest data updates for yoursoftware.
78
Copyright © 1999-2006, EASE Diagnostics.
GM Specific InstructionsEASE Diagnostics
8.2 Install - DataAfter you have installed the TIS 2000 software you need to install the latest data update.
1. Insert the latest data CD into your CD-ROM drive.
2. Double click on the TIS 2000 icon on your desktop.
3. TIS 2000 will display a message stating that it is installing updates.
4. When you reach the TIS 2000 Welcome screen your updates have been installed.
You will receive monthly updates in the mail. Each month just run through this process tokeep your TIS 2000 software current with the latest data for reprogramming.
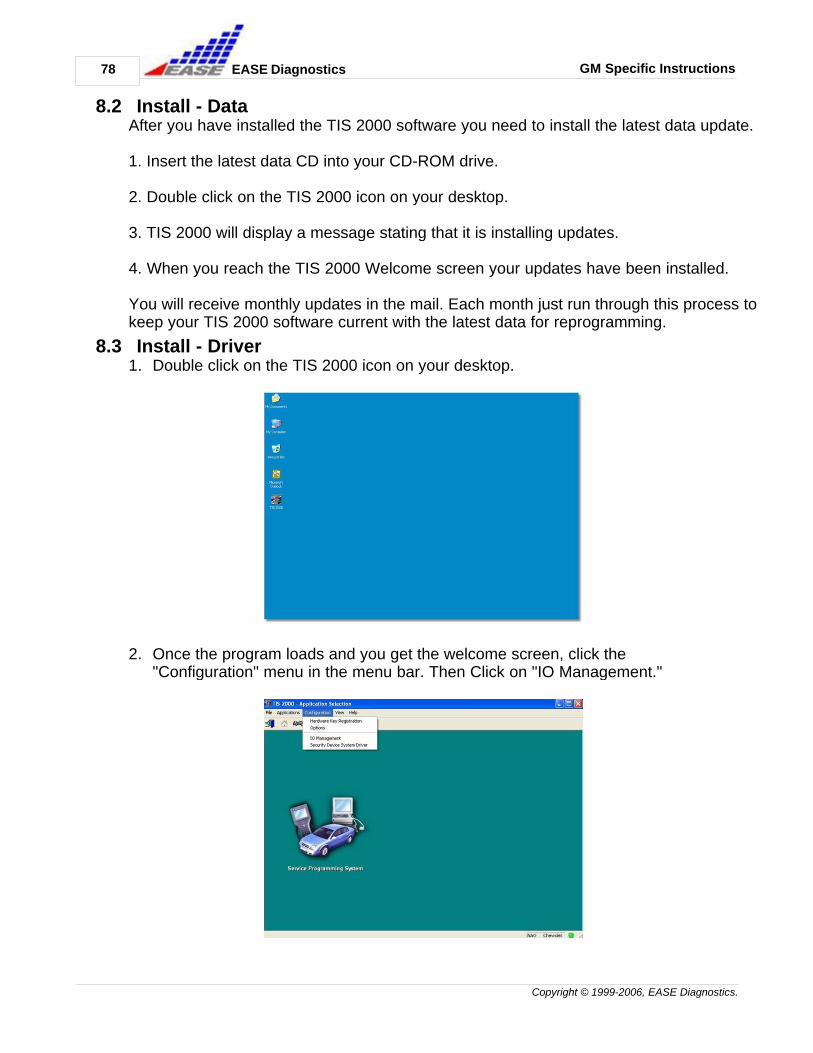
8.3 Install - Driver1. Double click on the TIS 2000 icon on your desktop.
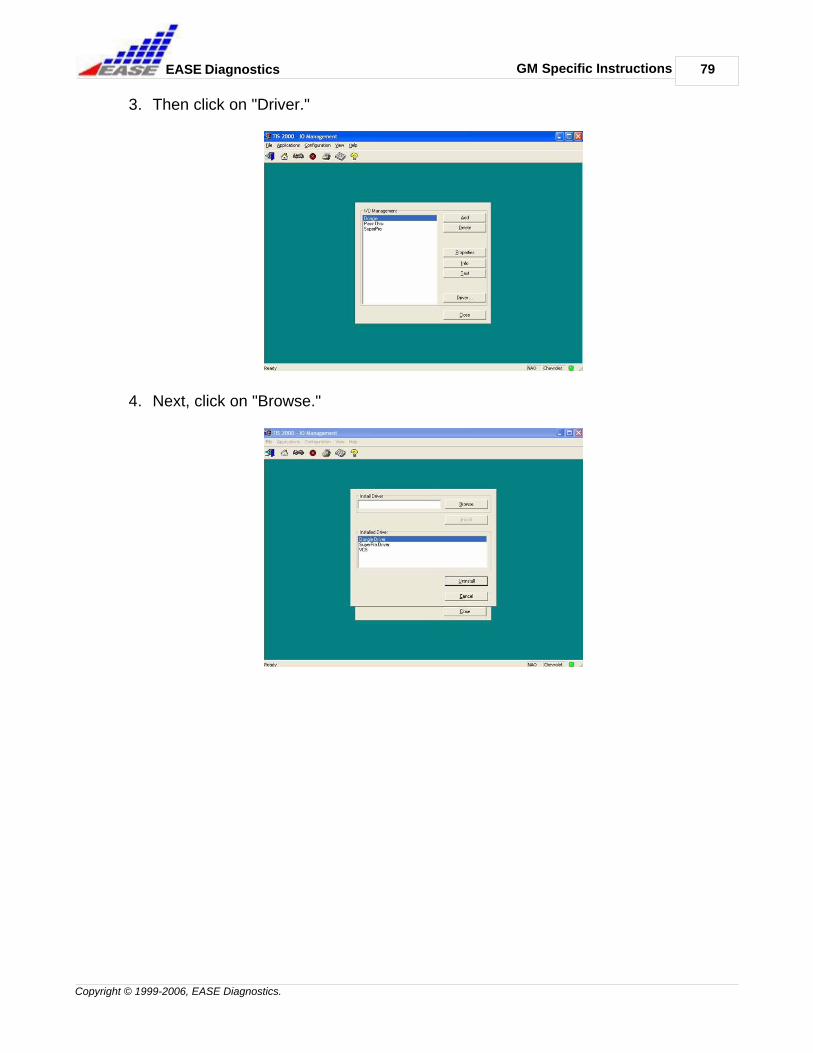
2. Once the program loads and you get the welcome screen, click the"Configuration" menu in the menu bar. Then Click on "IO Management."
GM Specific Instructions 79
Copyright © 1999-2006, EASE Diagnostics.
EASE Diagnostics
3. Then click on "Driver."
4. Next, click on "Browse."
80
Copyright © 1999-2006, EASE Diagnostics.
GM Specific InstructionsEASE Diagnostics
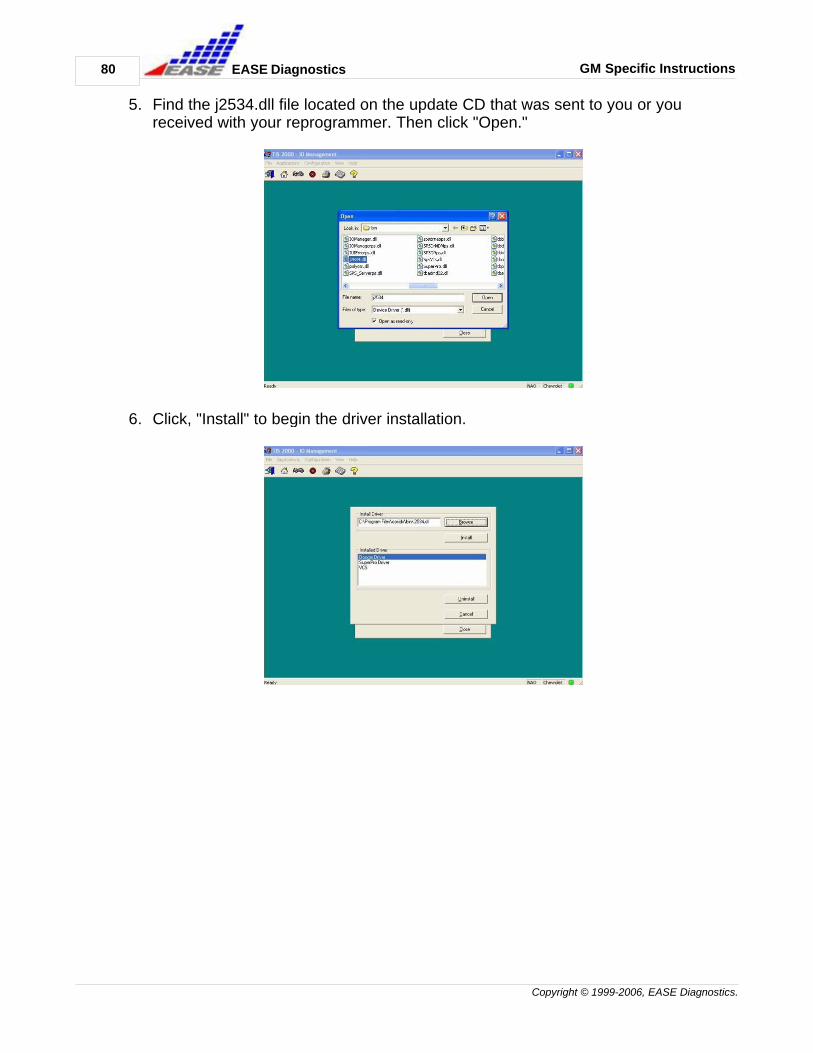
5. Find the j2534.dll file located on the update CD that was sent to you or youreceived with your reprogrammer. Then click "Open."
6. Click, "Install" to begin the driver installation.
GM Specific Instructions 81
Copyright © 1999-2006, EASE Diagnostics.
EASE Diagnostics
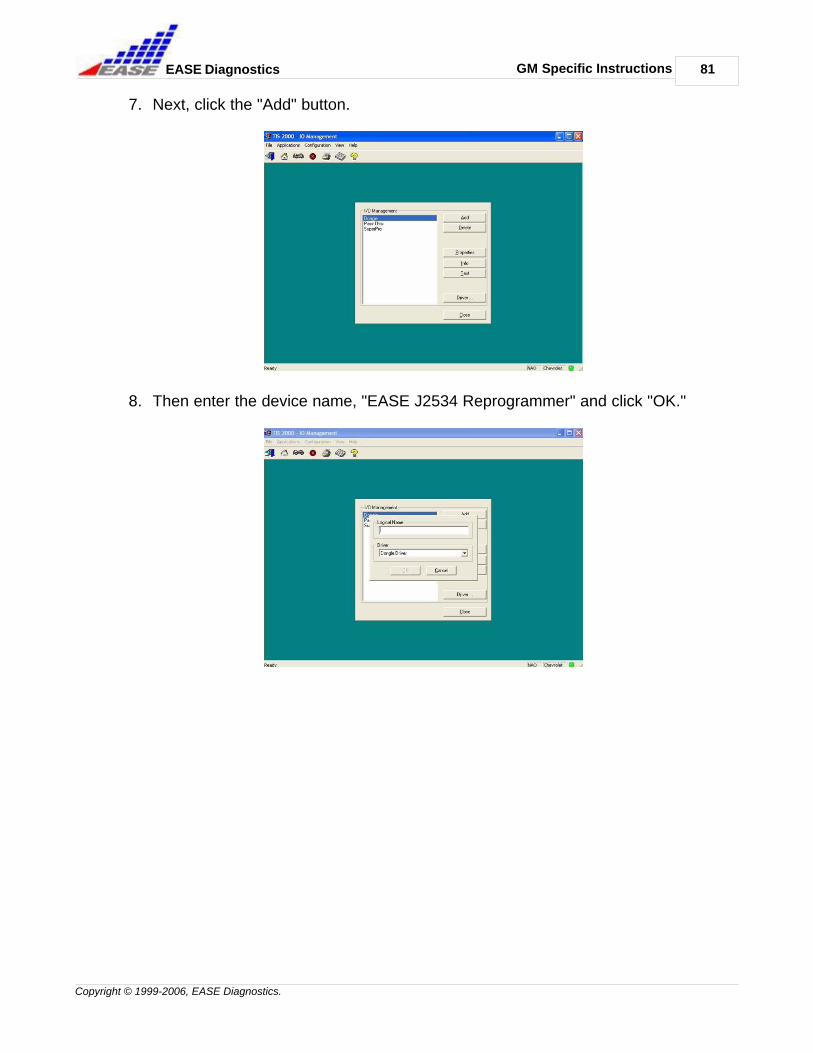
7. Next, click the "Add" button.
8. Then enter the device name, "EASE J2534 Reprogrammer" and click "OK."

82
Copyright © 1999-2006, EASE Diagnostics.
GM Specific InstructionsEASE Diagnostics
9. Now, select J2534 Pass-Thru Driver from the drop down menu in the DriverSection.
10.Select the EASE J2534 Reprogrammer in the list and click "Properties."

GM Specific Instructions 83
Copyright © 1999-2006, EASE Diagnostics.
EASE Diagnostics
11.The drop down field will be blank but when you select the drop down you canselect Universal Reprogrammer (EASE Diagnostics). Then click "OK."
12.Finally click on "Close" and exit TIS 2000.
You have just finished updating your GM Reprogramming software.
84
Copyright © 1999-2006, EASE Diagnostics.
GM Specific InstructionsEASE Diagnostics
8.4 Install - Virtual COM PortIn order to use the EASE J2534 Universal Reprogrammer (alreadyinstalled on your PC) to program GM OBD I vehicles you must performthe following steps:
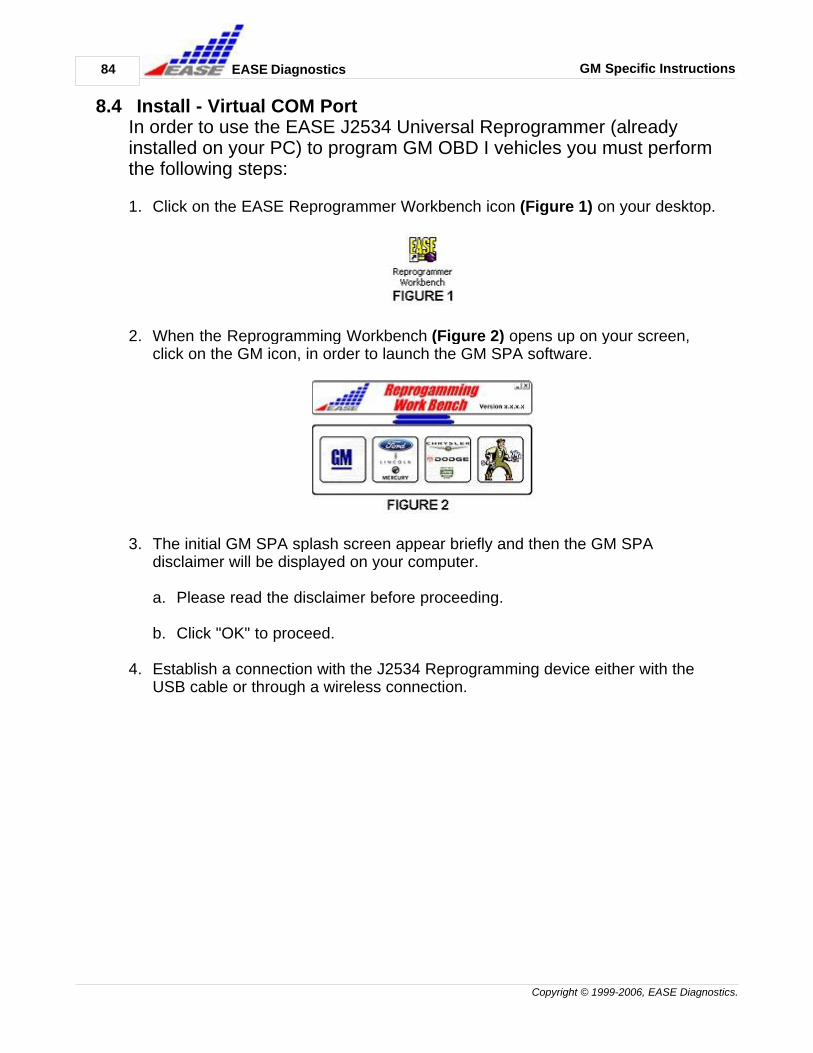
1. Click on the EASE Reprogrammer Workbench icon (Figure 1) on your desktop.
2. When the Reprogramming Workbench (Figure 2) opens up on your screen,click on the GM icon, in order to launch the GM SPA software.
3. The initial GM SPA splash screen appear briefly and then the GM SPAdisclaimer will be displayed on your computer.
a. Please read the disclaimer before proceeding.
b. Click "OK" to proceed.
4. Establish a connection with the J2534 Reprogramming device either with theUSB cable or through a wireless connection.

GM Specific Instructions 85
Copyright © 1999-2006, EASE Diagnostics.
EASE Diagnostics
5. After a connection has been established, click on the ReProgram a Controllerbutton on the main GM SPA screen (Figure 3).
NOTE: It is not necessary to be connected to a controller in order to set up thisVirtual Com Port. You only need to be connected to the J2534 Device.
6. Make the appropriate selections, and click the "Next" button on the next six (6)screens of the GM SPA software until you reach the screen that says,"ATTENTION" in a yellow box at the top (Figure 4).
7. On this screen, the center box (where it says, "DIAGNOSTIC TOOL IN TIS
2000 PROGRAM") you will see a line that reads, "For OBD1 controllers.Select 'Pass-Thru' configured to:"
a. At the end of this line, you will see a listing for a COM number (either COM8 or COM 9).
b. Make note of which COM number is listed here, you will need that numberto finish this configuration.
86
Copyright © 1999-2006, EASE Diagnostics.
GM Specific InstructionsEASE Diagnostics
8. Click the "OK" button at the bottom of this screen to proceed and launch theTIS 2000 software.
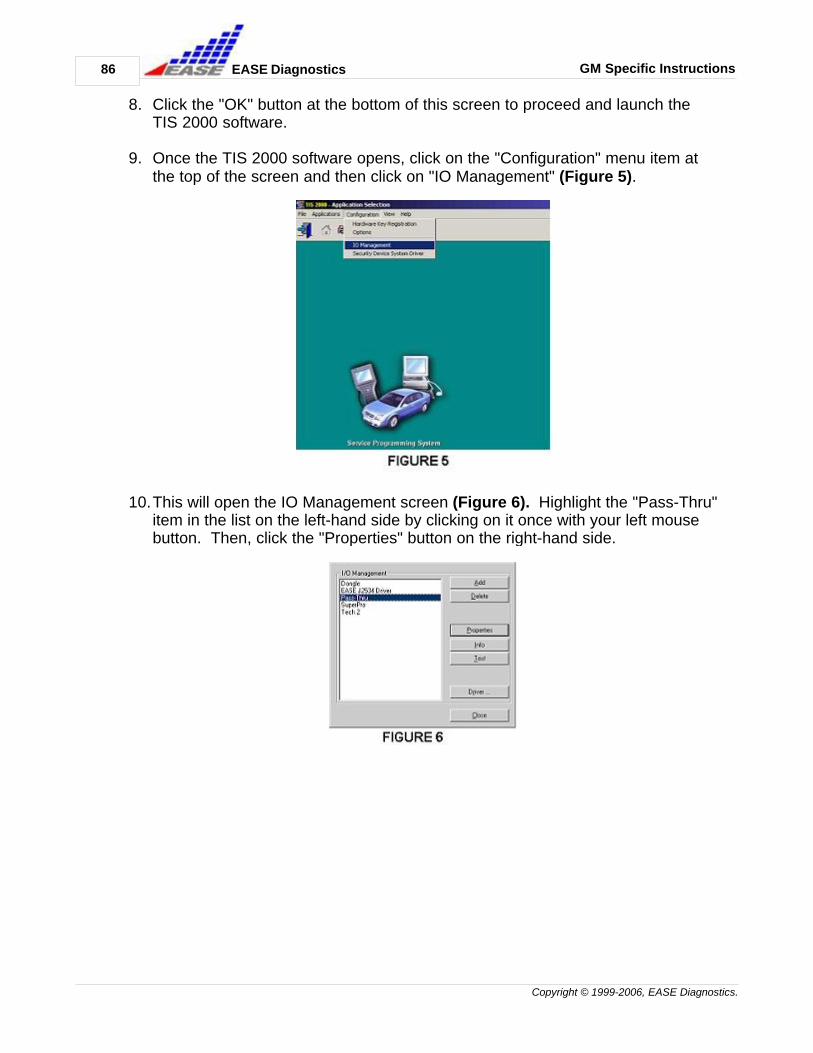
9. Once the TIS 2000 software opens, click on the "Configuration" menu item atthe top of the screen and then click on "IO Management" (Figure 5).
10.This will open the IO Management screen (Figure 6). Highlight the "Pass-Thru"item in the list on the left-hand side by clicking on it once with your left mousebutton. Then, click the "Properties" button on the right-hand side.
GM Specific Instructions 87
Copyright © 1999-2006, EASE Diagnostics.
EASE Diagnostics
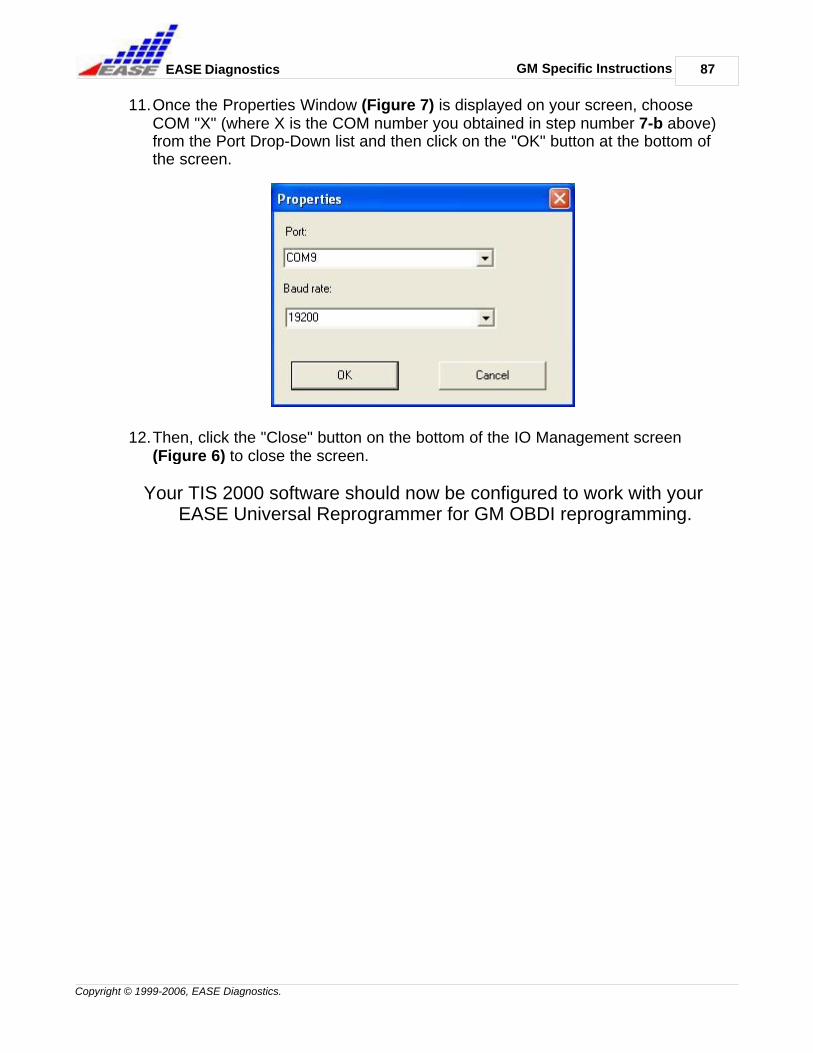
11.Once the Properties Window (Figure 7) is displayed on your screen, chooseCOM "X" (where X is the COM number you obtained in step number 7-b above)from the Port Drop-Down list and then click on the "OK" button at the bottom ofthe screen.
12.Then, click the "Close" button on the bottom of the IO Management screen(Figure 6) to close the screen.
Your TIS 2000 software should now be configured to work with yourEASE Universal Reprogrammer for GM OBDI reprogramming.

88
Copyright © 1999-2006, EASE Diagnostics.
GM Specific InstructionsEASE Diagnostics
8.5 Reprogram - GM1. First, double-click the "Reprogramming Workbench" icon located on your
desktop. This will bring up the "Reprogramming Workbench" welcome screen.Click on the GM button in order to begin.
2. Read through the "Important Notice" and then click "OK."
3. This will then bring open the "Programming Assistant" window. Once thereprogrammer has connected to the computer you are ready to begin analyzingthe controller. Click "Analyze a Controller."

GM Specific Instructions 89
Copyright © 1999-2006, EASE Diagnostics.
EASE Diagnostics
4. Next you will be instructed to select the method by which you will be analyzingthe controller. Then click "Next" to continue.
5. Once you have chosen your method of analyzing, you will be asked to selectthe make of vehicle you are reprogramming. Then click "Next" to continue.

90
Copyright © 1999-2006, EASE Diagnostics.
GM Specific InstructionsEASE Diagnostics
6. Next you will be asked to select the cable you are using to reprogram thecontroller. And then click "Next" to continue.
7. The software then tells you to turn the ignition switch on the Reprogrammer tothe "ON" position. Click "OK."
8. The Reprogrammer will then analyze the controller.
GM Specific Instructions 91
Copyright © 1999-2006, EASE Diagnostics.
EASE Diagnostics
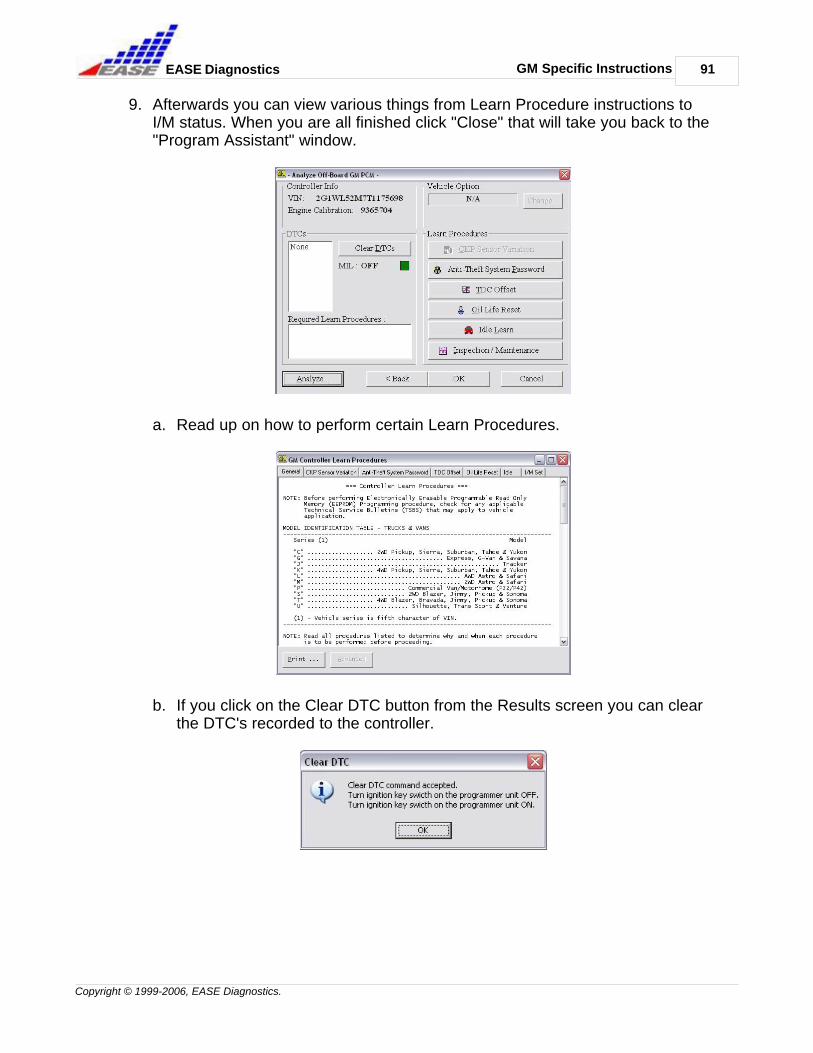
9. Afterwards you can view various things from Learn Procedure instructions toI/M status. When you are all finished click "Close" that will take you back to the"Program Assistant" window.
a. Read up on how to perform certain Learn Procedures.
b. If you click on the Clear DTC button from the Results screen you can clearthe DTC's recorded to the controller.
92
Copyright © 1999-2006, EASE Diagnostics.
GM Specific InstructionsEASE Diagnostics
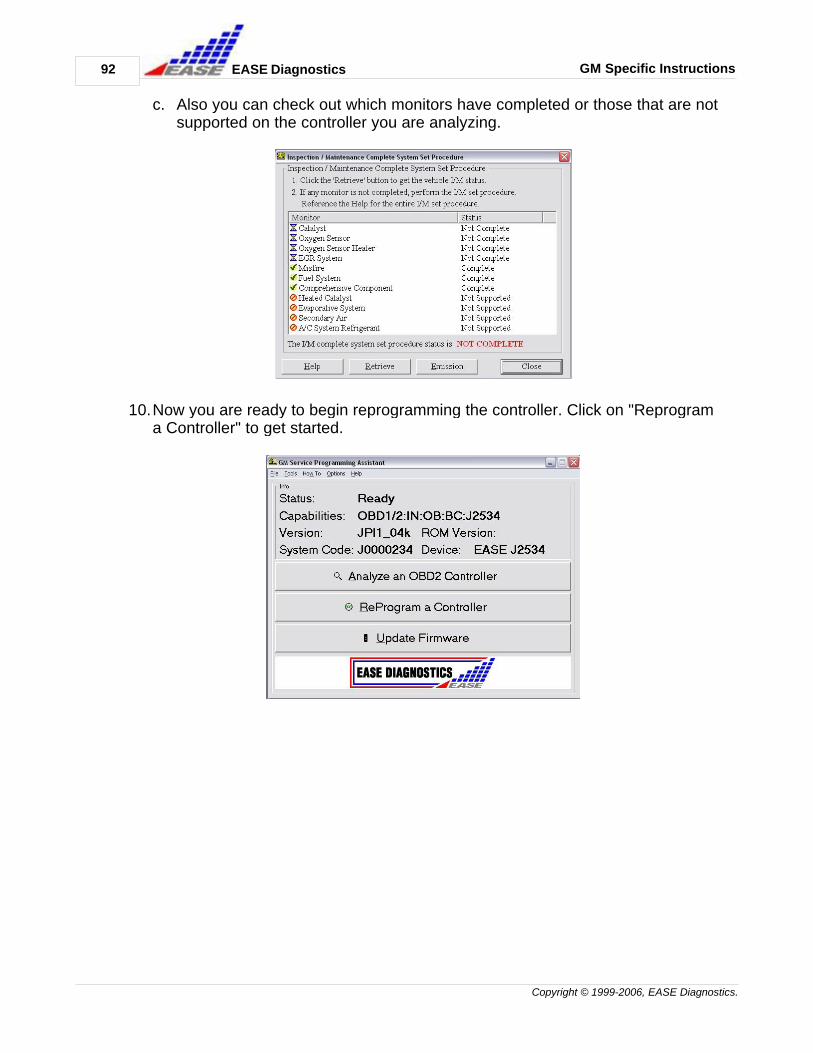
c. Also you can check out which monitors have completed or those that are notsupported on the controller you are analyzing.
10.Now you are ready to begin reprogramming the controller. Click on "Reprograma Controller" to get started.
GM Specific Instructions 93
Copyright © 1999-2006, EASE Diagnostics.
EASE Diagnostics
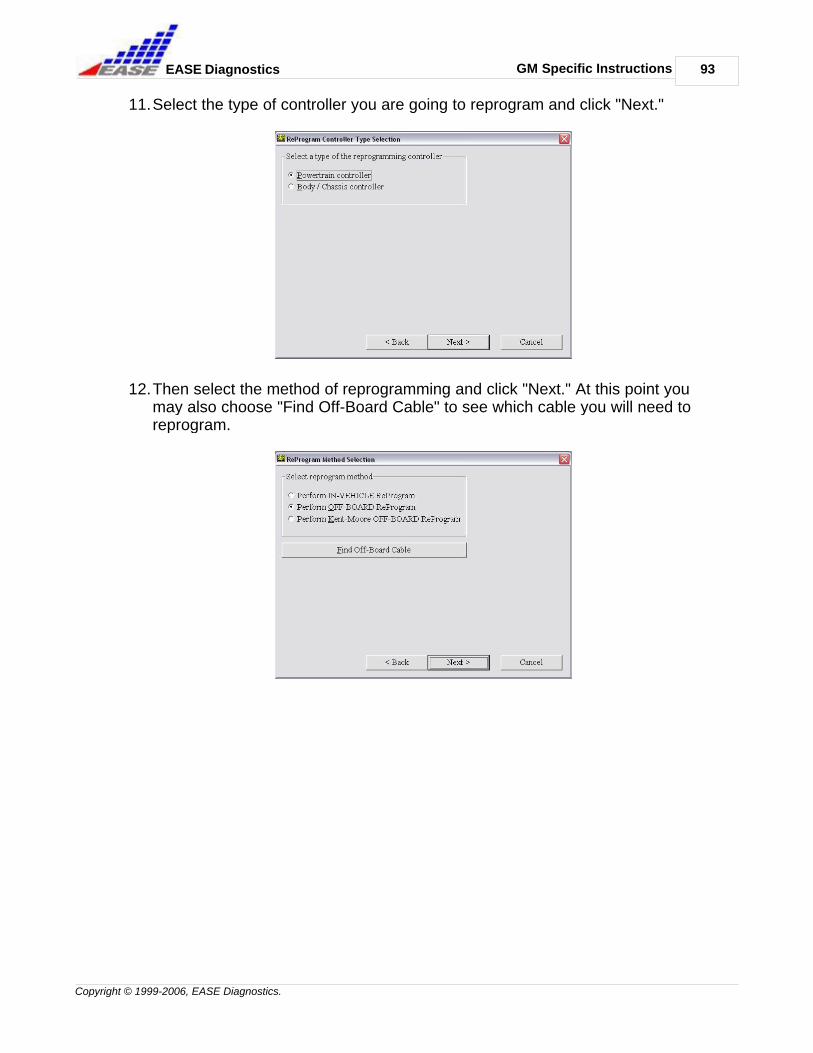
11.Select the type of controller you are going to reprogram and click "Next."
12.Then select the method of reprogramming and click "Next." At this point youmay also choose "Find Off-Board Cable" to see which cable you will need toreprogram.

94
Copyright © 1999-2006, EASE Diagnostics.
GM Specific InstructionsEASE Diagnostics
a. If you choose to "Find Off-Board Cable" the following screen will appear.Select the vehicle Year, Engine, and Body and the cable needed forreprogramming will be displayed on the right. When you are finished click"Close" and then "Next" on the previous screen to continue.
13.Next you will select the make of vehicle you are reprogramming and click"Next."
GM Specific Instructions 95
Copyright © 1999-2006, EASE Diagnostics.
EASE Diagnostics
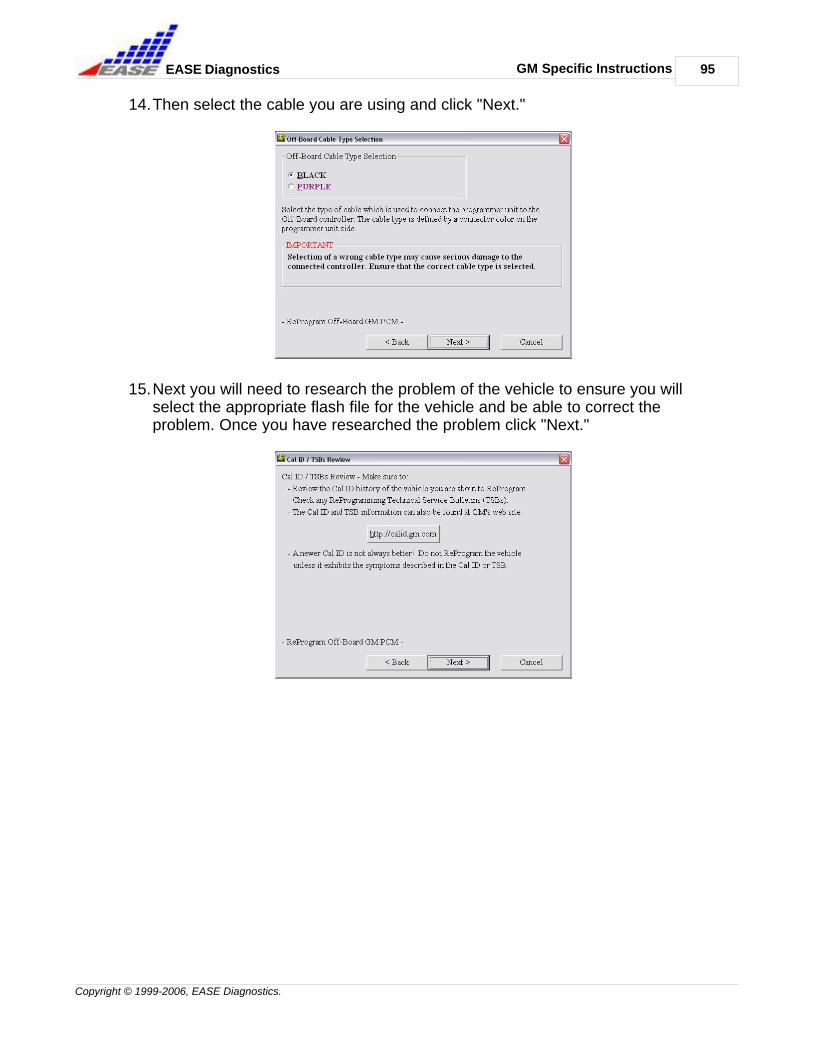
14.Then select the cable you are using and click "Next."
15.Next you will need to research the problem of the vehicle to ensure you willselect the appropriate flash file for the vehicle and be able to correct theproblem. Once you have researched the problem click "Next."

96
Copyright © 1999-2006, EASE Diagnostics.
GM Specific InstructionsEASE Diagnostics
a. Enter the vehicle's VIN and click "Submit."
b. Select the type of controller you are programming and then select the typeof programming. Click "Next" to continue.

GM Specific Instructions 97
Copyright © 1999-2006, EASE Diagnostics.
EASE Diagnostics
c. The website searches for recent updates to the information about thevehicle you entered.
d. The results of the search are displayed. Click on the Calibration number todisplay detailed information about what the calibration remedies.
98
Copyright © 1999-2006, EASE Diagnostics.
GM Specific InstructionsEASE Diagnostics
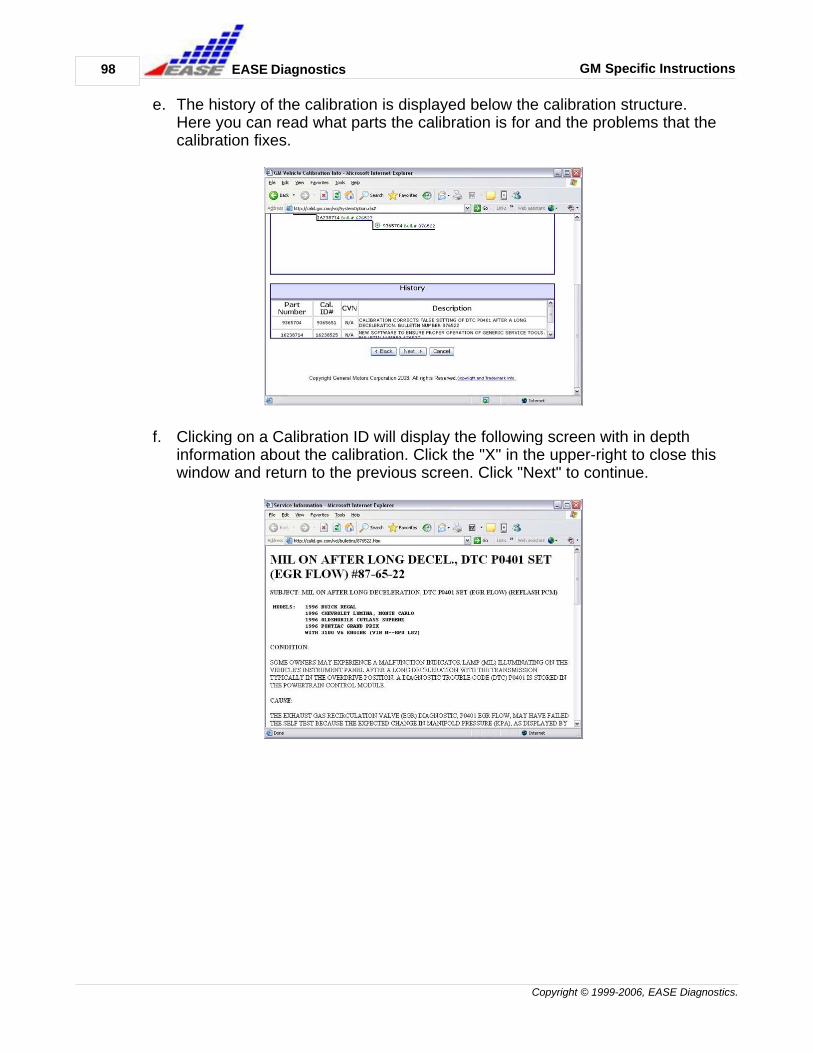
e. The history of the calibration is displayed below the calibration structure.Here you can read what parts the calibration is for and the problems that thecalibration fixes.
f. Clicking on a Calibration ID will display the following screen with in depthinformation about the calibration. Click the "X" in the upper-right to close thiswindow and return to the previous screen. Click "Next" to continue.

GM Specific Instructions 99
Copyright © 1999-2006, EASE Diagnostics.
EASE Diagnostics
g. Finally a summary of the calibration you have selected to use is displayed.Click "Next" to continue. You will then be taken back to the screen askingyou to enter the VIN at this point you may just click the "X" in the upper-rightcorner to close this window and return to the TIS software.
16.After returning to the TIS software and clicking "Next" the following screenshould appear warning you of various things you need to do before continuingon with the Reprogramming process. Once all the precautions are met, click"Next" to continue.

100
Copyright © 1999-2006, EASE Diagnostics.
GM Specific InstructionsEASE Diagnostics
a. If you are still uncertain of the cable needed for reprogramming you maylook it up just before you reprogram the controller. It is important that youuse the correct cable in order not to damage your Reprogrammer or thecontroller you are about to reprogram. Once you are sure of the correctcable you may click the "X" in the upper-right to close this window.
17.Then, another warning will appear reminding you not to disconnect any cablesor the controller during the remainder of the reprogramming process.
GM Specific Instructions 101
Copyright © 1999-2006, EASE Diagnostics.
EASE Diagnostics
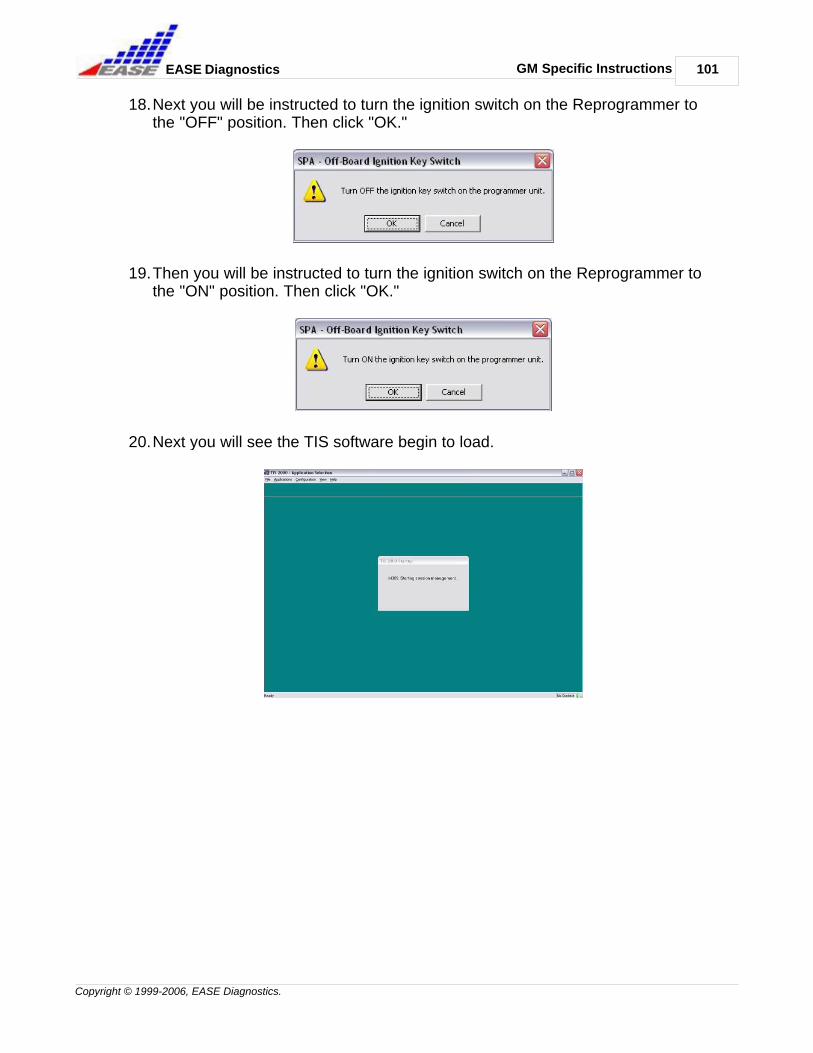
18.Next you will be instructed to turn the ignition switch on the Reprogrammer tothe "OFF" position. Then click "OK."
19.Then you will be instructed to turn the ignition switch on the Reprogrammer tothe "ON" position. Then click "OK."
20.Next you will see the TIS software begin to load.

102
Copyright © 1999-2006, EASE Diagnostics.
GM Specific InstructionsEASE Diagnostics
21.Click on the Service Programming System logo to start the reprogramming thecontroller.
22.Select the device you are using to reprogram the controller. In this case EASEJ2534 and then click "Next."
GM Specific Instructions 103
Copyright © 1999-2006, EASE Diagnostics.
EASE Diagnostics
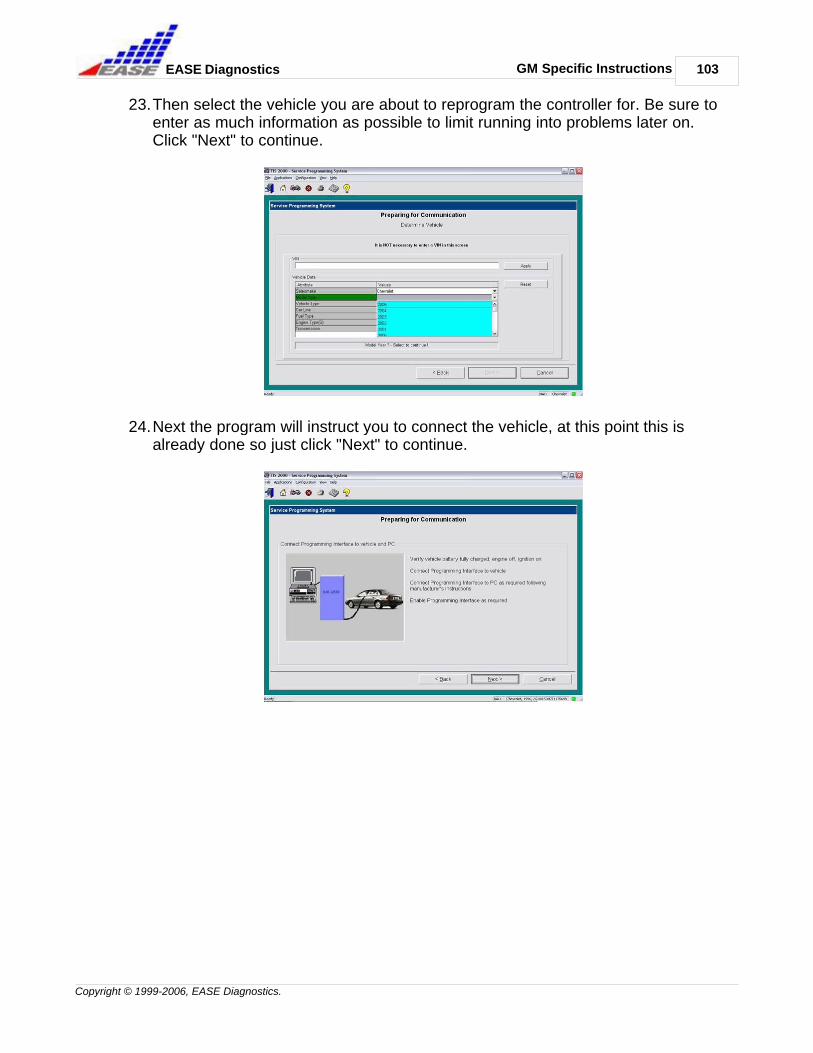
23.Then select the vehicle you are about to reprogram the controller for. Be sure toenter as much information as possible to limit running into problems later on.Click "Next" to continue.
24.Next the program will instruct you to connect the vehicle, at this point this isalready done so just click "Next" to continue.
104
Copyright © 1999-2006, EASE Diagnostics.
GM Specific InstructionsEASE Diagnostics
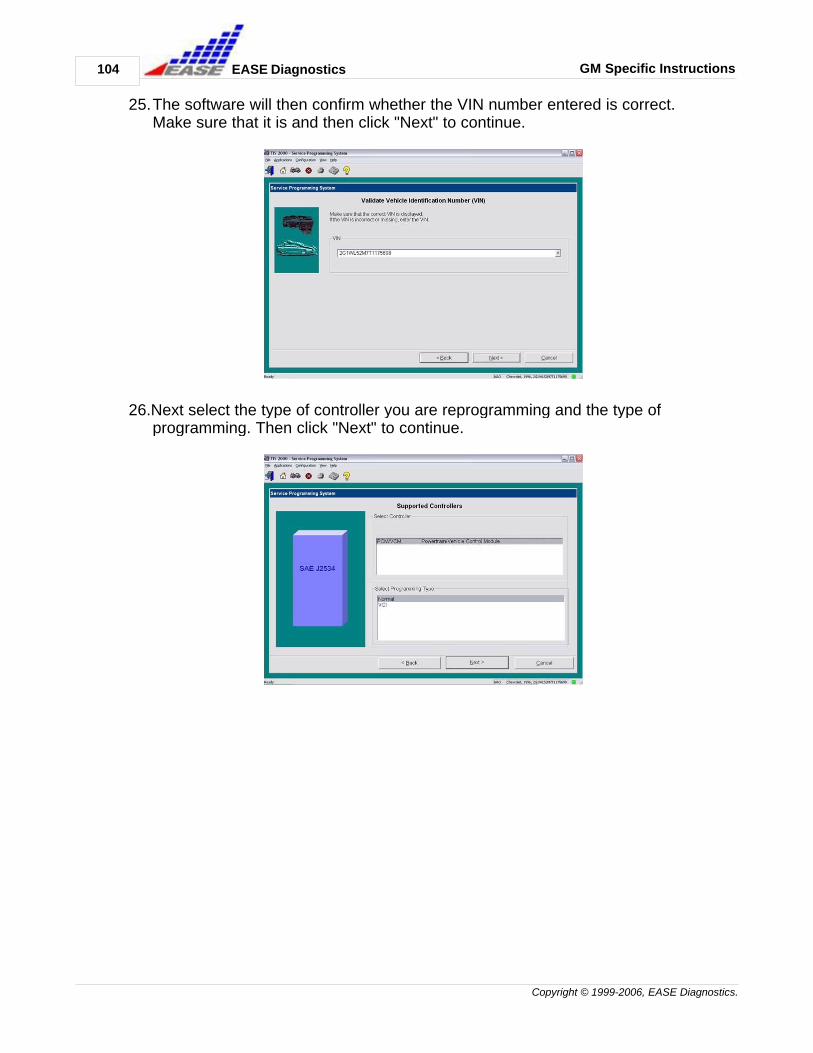
25.The software will then confirm whether the VIN number entered is correct.Make sure that it is and then click "Next" to continue.
26.Next select the type of controller you are reprogramming and the type ofprogramming. Then click "Next" to continue.

GM Specific Instructions 105
Copyright © 1999-2006, EASE Diagnostics.
EASE Diagnostics
27.Next select the calibration you wish to send to the controller and click "Next."
28.A summary of the calibration you have selected to update the controller with isdisplayed. Click "Next" to continue.

106
Copyright © 1999-2006, EASE Diagnostics.
GM Specific InstructionsEASE Diagnostics
29.Then the Transfer Data screen will appear, and reprogramming will begin. If itdoes not start on its own click "Reprog" to begin the reprogramming filetransfer. The reprogramming progress will be displayed.
30.Once completed a confirmation will pop up. Click "Close" to exit TIS 2000.
GM Specific Instructions 107
Copyright © 1999-2006, EASE Diagnostics.
EASE Diagnostics
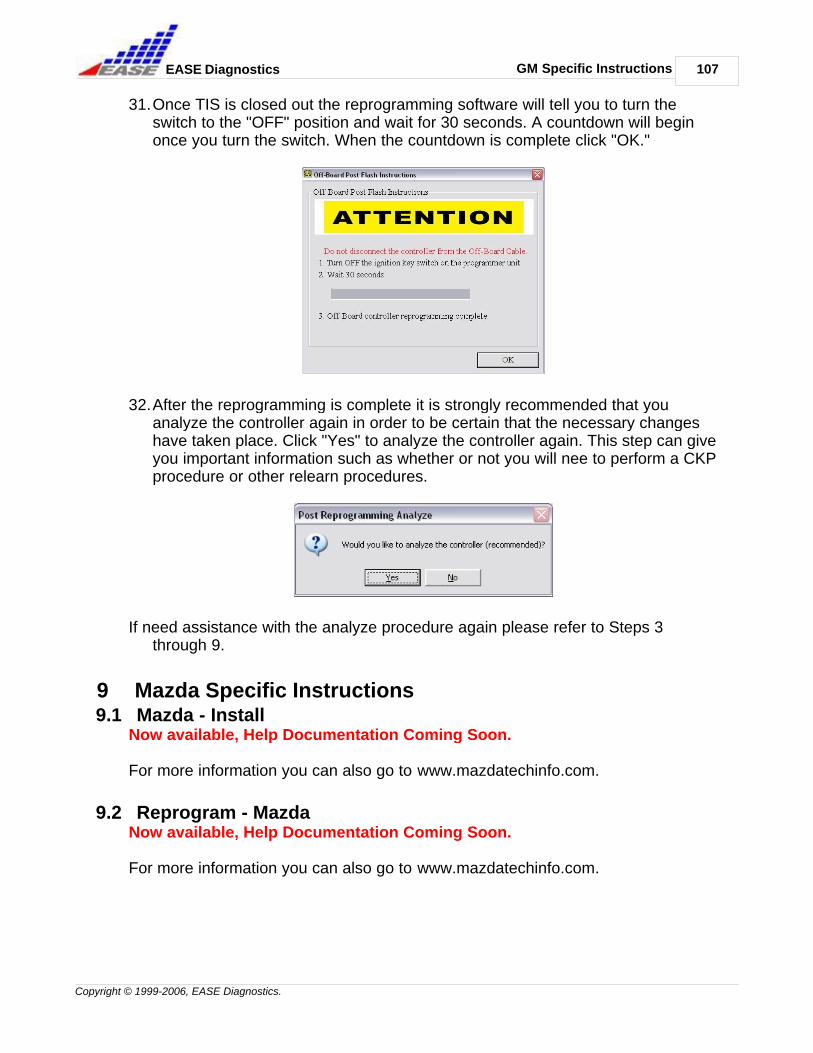
31.Once TIS is closed out the reprogramming software will tell you to turn theswitch to the "OFF" position and wait for 30 seconds. A countdown will beginonce you turn the switch. When the countdown is complete click "OK."
32.After the reprogramming is complete it is strongly recommended that youanalyze the controller again in order to be certain that the necessary changeshave taken place. Click "Yes" to analyze the controller again. This step can giveyou important information such as whether or not you will nee to perform a CKPprocedure or other relearn procedures.
If need assistance with the analyze procedure again please refer to Steps 3through 9.
9 Mazda Specific Instructions9.1 Mazda - Install
Now available, Help Documentation Coming Soon.
For more information you can also go to www.mazdatechinfo.com.
9.2 Reprogram - MazdaNow available, Help Documentation Coming Soon.
For more information you can also go to www.mazdatechinfo.com.

108
Copyright © 1999-2006, EASE Diagnostics.
Toyota Specific InstructionsEASE Diagnostics
10 Toyota Specific Instructions10.1 Install Toyota
Now available, Help Documentation Coming Soon.
For more information you can also go to techinfo.toyota.com.
10.2 Reprogram - ToyotaNow available, Help Documentation Coming Soon.
For more information you can also go to techinfo.toyota.com.
11 Frequently Asked Questions11.1 Chrysler - FAQ
Question: I downloaded and installed the latest DCX Update Manager, and now I cannot reprogram Chrysler Controllers. I am getting Error: PassThruOpen. What can Ido?
Answer: You will need to install the latest Reprogramming Workbench updateavailable by clicking here. (This Link Opens a New Window) After you have thatinstalled there are directions on how to set it up for the DCX2534 UpdateManager, which you can get by clicking here.
You can also acquire the free software update by calling EASE Diagnostics at570-465-9060 and ask for the Reprogramming WorkBench Update Version1.3.0.12. There is a $25.00 shipping and handling fee.
Question: How do I get data?
Answer: Purchase a subscription from Chrysler and download the necessary files.For More Information Click here.
Question: I get an error message that says there is already an instance of theSPA software running. How can I get rid of this?
Answer: Enter the Reprogramming Workbench and click on the Chrysler Module.Then once you get to the Chrysler Service Programming Assistant screen clickon File, then DCX2534 Options. When the Chrysler Module ProgrammingApplications Options screen appears click on Restore Defaults.
11.2 Ford - FAQQuestion: I downloaded and installed FMP 40 of the Ford Module Programming, and
now I can not reprogram Ford Controllers. What can I do?
Answer: EASE has posted an update for the Reprogramming WorkBench Software thatwill resolve this issue. You can download the free update if you click here. (This LinkOpens a New Window) Please take note of the estimated download times. It is

Frequently Asked Questions 109
Copyright © 1999-2006, EASE Diagnostics.
EASE Diagnostics
recommended that you have a high speed Internet connection.
You can also acquire the free software update by calling EASE Diagnostics at570-465-9060 and ask for the Reprogramming WorkBench Update Version1.3.0.12. There is a $25.00 shipping and handling fee.
Question: How do I get data?
Answer: Purchase a subscription from Ford and download the necessary files. ForMore Information click here.
Question: When I click the launch button in the Ford SPA, it says that there isalready an instance of the SPA software running. How can I get rid of this?
Answer: Enter the Reprogramming Workbench and click on the Ford Module.Then once you get to the Ford Service Programming Assistant screen click onFile, then FMP Options. When the Ford Module Programming ApplicationsOptions screen appears click on Restore Defaults.
Question: I am unable to modify the VIN number on a Ford. What do I need todo?
Answer: You need to contact Ford directly. This is a function of their software thatwe have no control over.
11.3 GM - FAQQuestion: I installed TIS 2000 v5.5, and now I can not reprogram GM Controllers. Whatcan I do?
Answer: EASE has posted an update for the Reprogramming WorkBench Software thatwill resolve this issue. You can download the free update if you click here. (This LinkOpens a New Window) Please take note of the estimated download times. It isrecommended that you have a high speed Internet connection.
You can also acquire the free software update by calling EASE Diagnostics at570-465-9060 and ask for the Reprogramming WorkBench Update Version1.3.0.12. There is a $25.00 shipping and handling fee.
Question: How do I get data?
Answer: This yearly subscription has monthly updates and includes a softwaresecurity key. This is available through EASE Diagnostics. To get data for GMController Reprogramming please contact an EASE Diagnostics SalesRepresentative.
Question: I want to reprogram an OBD I GM controller but I get an error messagein TIS 2000, what can I do?
110
Copyright © 1999-2006, EASE Diagnostics.
Frequently Asked QuestionsEASE Diagnostics
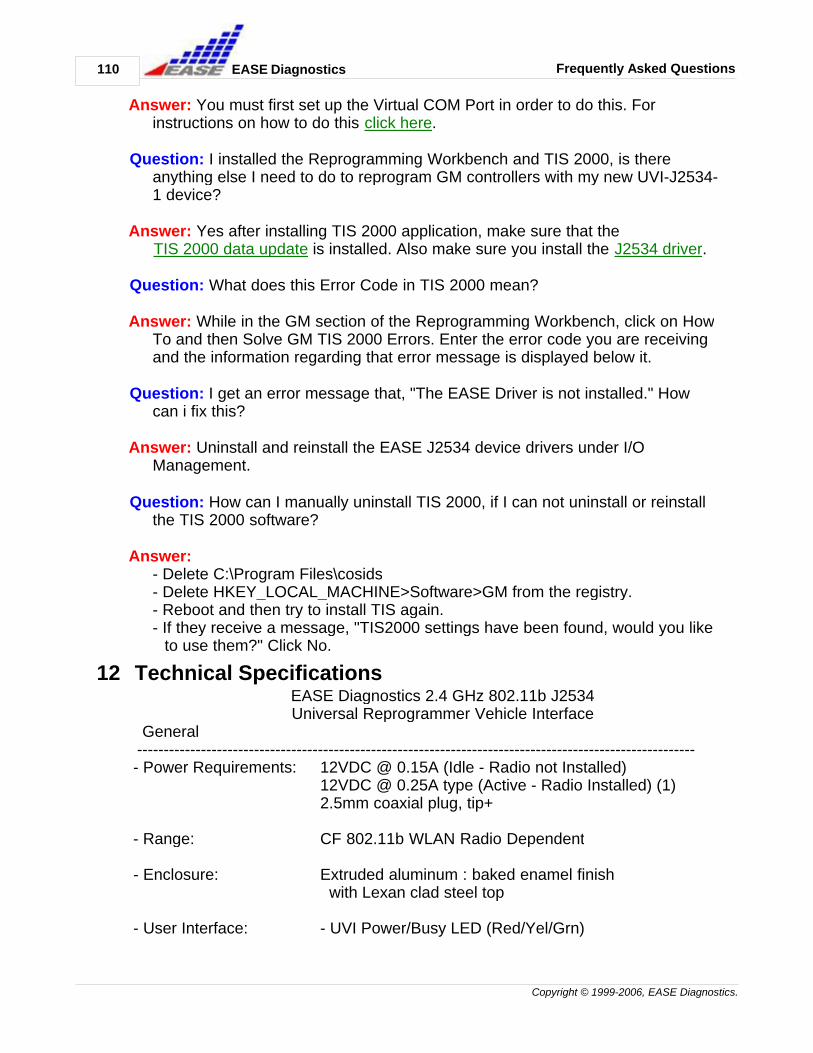
Answer: You must first set up the Virtual COM Port in order to do this. Forinstructions on how to do this click here.
Question: I installed the Reprogramming Workbench and TIS 2000, is thereanything else I need to do to reprogram GM controllers with my new UVI-J2534-1 device?
Answer: Yes after installing TIS 2000 application, make sure that theTIS 2000 data update is installed. Also make sure you install the J2534 driver.
Question: What does this Error Code in TIS 2000 mean?
Answer: While in the GM section of the Reprogramming Workbench, click on HowTo and then Solve GM TIS 2000 Errors. Enter the error code you are receivingand the information regarding that error message is displayed below it.
Question: I get an error message that, "The EASE Driver is not installed." Howcan i fix this?
Answer: Uninstall and reinstall the EASE J2534 device drivers under I/OManagement.
Question: How can I manually uninstall TIS 2000, if I can not uninstall or reinstallthe TIS 2000 software?
Answer:- Delete C:\Program Files\cosids- Delete HKEY_LOCAL_MACHINE>Software>GM from the registry.- Reboot and then try to install TIS again.- If they receive a message, "TIS2000 settings have been found, would you like
to use them?" Click No.
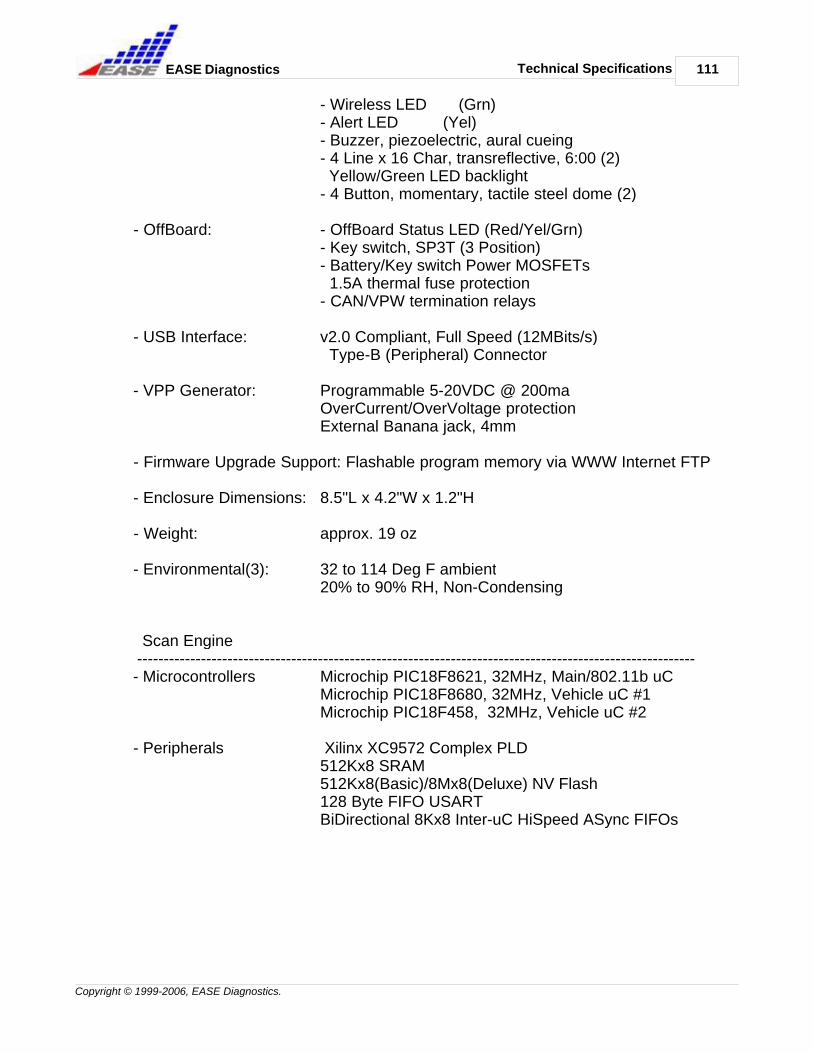
12 Technical SpecificationsEASE Diagnostics 2.4 GHz 802.11b J2534Universal Reprogrammer Vehicle Interface
General --------------------------------------------------------------------------------------------------------- - Power Requirements: 12VDC @ 0.15A (Idle - Radio not Installed)
12VDC @ 0.25A type (Active - Radio Installed) (1)2.5mm coaxial plug, tip+
- Range: CF 802.11b WLAN Radio Dependent
- Enclosure: Extruded aluminum : baked enamel finish with Lexan clad steel top
- User Interface: - UVI Power/Busy LED (Red/Yel/Grn)
Technical Specifications 111
Copyright © 1999-2006, EASE Diagnostics.
EASE Diagnostics
- Wireless LED (Grn)- Alert LED (Yel)- Buzzer, piezoelectric, aural cueing- 4 Line x 16 Char, transreflective, 6:00 (2) Yellow/Green LED backlight- 4 Button, momentary, tactile steel dome (2)
- OffBoard: - OffBoard Status LED (Red/Yel/Grn)- Key switch, SP3T (3 Position)- Battery/Key switch Power MOSFETs 1.5A thermal fuse protection- CAN/VPW termination relays
- USB Interface: v2.0 Compliant, Full Speed (12MBits/s) Type-B (Peripheral) Connector
- VPP Generator: Programmable 5-20VDC @ 200maOverCurrent/OverVoltage protectionExternal Banana jack, 4mm
- Firmware Upgrade Support: Flashable program memory via WWW Internet FTP
- Enclosure Dimensions: 8.5"L x 4.2"W x 1.2"H
- Weight: approx. 19 oz
- Environmental(3): 32 to 114 Deg F ambient20% to 90% RH, Non-Condensing
Scan Engine --------------------------------------------------------------------------------------------------------- - Microcontrollers Microchip PIC18F8621, 32MHz, Main/802.11b uC
Microchip PIC18F8680, 32MHz, Vehicle uC #1Microchip PIC18F458, 32MHz, Vehicle uC #2
- Peripherals Xilinx XC9572 Complex PLD512Kx8 SRAM512Kx8(Basic)/8Mx8(Deluxe) NV Flash128 Byte FIFO USARTBiDirectional 8Kx8 Inter-uC HiSpeed ASync FIFOs
112
Copyright © 1999-2006, EASE Diagnostics.
Technical SpecificationsEASE Diagnostics
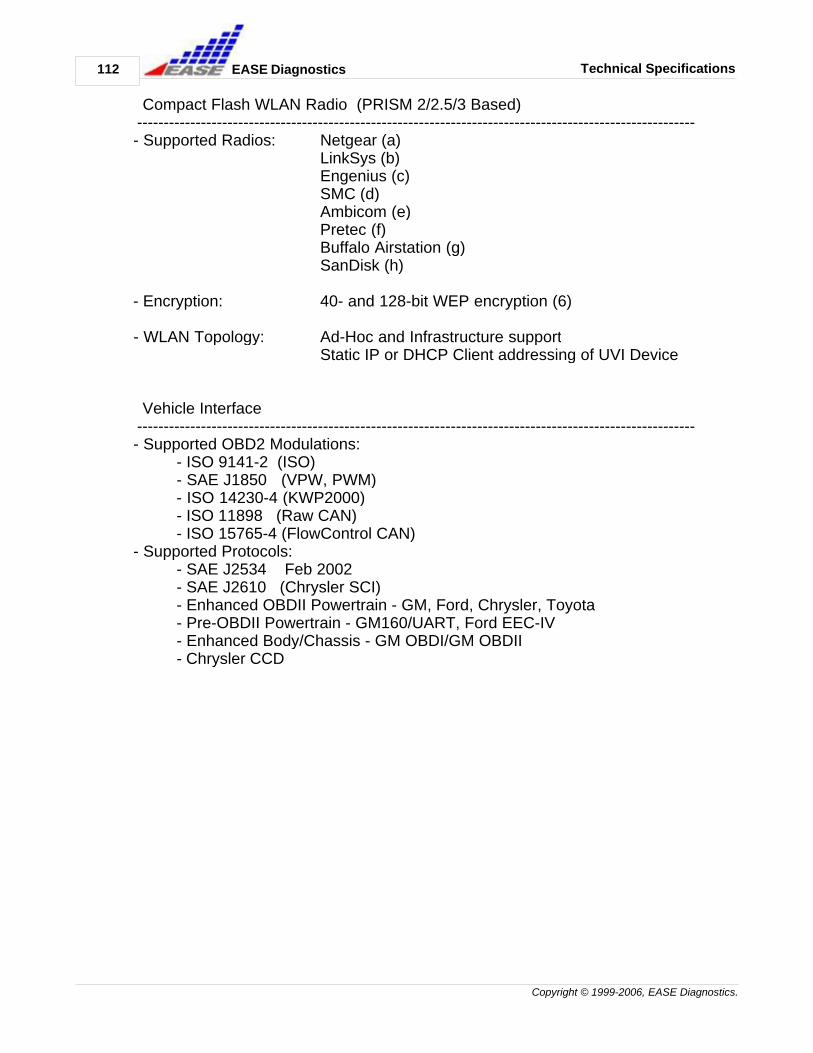
Compact Flash WLAN Radio (PRISM 2/2.5/3 Based) --------------------------------------------------------------------------------------------------------- - Supported Radios: Netgear (a)
LinkSys (b)Engenius (c)SMC (d)Ambicom (e)Pretec (f)Buffalo Airstation (g)SanDisk (h)
- Encryption: 40- and 128-bit WEP encryption (6)
- WLAN Topology: Ad-Hoc and Infrastructure supportStatic IP or DHCP Client addressing of UVI Device
Vehicle Interface --------------------------------------------------------------------------------------------------------- - Supported OBD2 Modulations:
- ISO 9141-2 (ISO)- SAE J1850 (VPW, PWM)- ISO 14230-4 (KWP2000)- ISO 11898 (Raw CAN)- ISO 15765-4 (FlowControl CAN)
- Supported Protocols:- SAE J2534 Feb 2002- SAE J2610 (Chrysler SCI)- Enhanced OBDII Powertrain - GM, Ford, Chrysler, Toyota- Pre-OBDII Powertrain - GM160/UART, Ford EEC-IV- Enhanced Body/Chassis - GM OBDI/GM OBDII- Chrysler CCD

Technical Specifications 113
Copyright © 1999-2006, EASE Diagnostics.
EASE Diagnostics
Specific Supported Radio Model Numbers --------------------------------------------------------------------------------------------------------- (a) Netgear
MA701 (b) LinkSys
WCF11 (4)WCF12
(c) EngeniusNL-2511CF Mercury
(d) SMCSMC2642W (4)
(e) AmbicomWL1100C (4)
(f) PretecOC-WLBXX-A (4)
(g) Buffalo AirstationWL12-CF-S11 (4)
(h) SandiskSDWCFB-000-768 (5)
Notes --------------------------------------------------------------------------------------------------------- (1) - Based upon Engenius NL-2511CF WLAN Radio CF Card running EASE GenericScan Tool. (2) - Available on UVI Deluxe model. Contact EASE for availability. (3) - The maximum ambient temperature of an Engenius WLAN Radio has
been specified at 131 Deg F. To prevent overheating the Radio wheninserted into the UVI device, the ambient temperature of theUVI device should not exceed the 114 Deg F limit.
(4) - Untested,.. but will work if Intersil PRISM 2/2.5/3 non-SSF based.Contact EASE for details on supported WLAN Radios.
(5) - Planned for future support. Contact EASE for details on supported WLAN Radios. (6) - Dependent upon WLAN Radio capabilities.