E tool and Corrigo Web - regincontrols.com · Corrigo E tool Heating, Corrigo E tool Ventilation...
29
E tool and Corrigo Web User manual
Transcript of E tool and Corrigo Web - regincontrols.com · Corrigo E tool Heating, Corrigo E tool Ventilation...

E tool and Corrigo Web User manual

1. User manual Corrigo E tool ............................................................................................................................................. 2 2. About this manual ........................................................................................................................................................... 3 3. Installation ....................................................................................................................................................................... 3 4. About Corrigo E tool ........................................................................................................................................................ 3 5. Startup............................................................................................................................................................................. 4 6. Menu bar ......................................................................................................................................................................... 5
6.1 File............................................................................................................................................................................. 5 6.2 Edit ............................................................................................................................................................................ 5 6.3 View........................................................................................................................................................................... 6 6.4 Tools.......................................................................................................................................................................... 6 6.5 Help ......................................................................................................................................................................... 12
7. Toolbar .......................................................................................................................................................................... 13 8. Folders .......................................................................................................................................................................... 13
8.1 General.................................................................................................................................................................... 13 8.2 Overview.................................................................................................................................................................. 13 8.3 Actual / Set-point ..................................................................................................................................................... 14 8.4 Consumption (only E tool Heating and E tool Boiler) ............................................................................................... 14 8.5 Alarm status............................................................................................................................................................. 15 8.6 Inputs/Outputs ......................................................................................................................................................... 16 8.7 Time control............................................................................................................................................................. 17 8.8 Settings.................................................................................................................................................................... 18 8.9 Manual / Auto .......................................................................................................................................................... 20 8.10 Configuration ......................................................................................................................................................... 20
9. Updating Corrigo E........................................................................................................................................................ 21 10. TCP/IP – network terms .............................................................................................................................................. 22
10.1 Networks, subnets, routers .................................................................................................................................... 22 10.2 IP address, Subnet mask, Default Gateway, DNS server...................................................................................... 22 10.3 DHCP, fixed and dynamic addresses .................................................................................................................... 22 10.4 White and black addresses.................................................................................................................................... 23 10.5 Tunnels.................................................................................................................................................................. 23
11. Corrigo Web (Only E tool Ventilation and Heating) ..................................................................................................... 24 11.1 Connection ............................................................................................................................................................ 24 11.2 Configuration of the webservers ............................................................................................................................ 24 11.3 Settings for the website ......................................................................................................................................... 26 11.4 Log on to the website............................................................................................................................................. 27 11.5 Change values on the website............................................................................................................................... 27

Corrigo E tool Rev. D
2
1. User manual Corrigo E tool Revision D October 2008 This user manual covers Corrigo E tool for both heating (E tool Heating), ventilation (E tool Ventilation) and boiler control (E tool Boiler). This manual is published by AB REGIN without guarantee. AB REGIN can at any time, without prior notice, make changes and improvements to the contents of this manual if this is called for due to printing errors, erroneous information or changes to hardware or software covered by the manual. Any such changes will always be included in future editions of the manual. ©AB REGIN, 2004. ® Corrigo
™ E tool

Corrigo E tool Rev. D
3
2. About this manual This manual is designed to be an aid during installation and use of Corrigo E tool. It describes all the functions unique to the program. The Corrigo E control parameters however are not described here. For detailed information on these, please see the manual for the controller in question.
3. Installation
To install and run Corrigo E tool you need a PC running Windows 2000 or Windows XP. To run Corrigo Web, you need Internet Explorer 7.0 or later and Java. To communicate with a Corrigo you need a special communication cable, E-Cable. Corrigo E tool is delivered as a self-installing program on a CD, or can be downloaded from Regin’s homepage (www.regin.se). Load the CD and follow the on-screen instructions, or download the program folder from www.regin.se. Unzip the folder and run the setup.exe file, which you will find in the unzipped folder.
4. About Corrigo E tool
Corrigo E tool Heating, Corrigo E tool Ventilation and Corrigo E tool Boiler are Windows based PC-programs for the configuration and maintenance of the various Corrigo E series controllers. Corrigo E tool has not been designed with the intention of being a full SCADA program.
The display window is divided into several parts: At the top there is a menu bar with standard Windows type drop-down menus Below the menu bar there is a Toolbar which gives direct access to various functions. All the functions in the E toolbar are also accessible through the menu bar system. Below the E toolbar there is a row of folder tabs giving access to a number of folders that can be shown, one at a time in the area below the tabs. At the bottom of the window is the Status bar. This manual will mainly describe the functions of the items in the menu bar and the E toolbar. These functions are the same for all the Corrigo applications. Since the contents of the folders vary depending on which of the programs you are running they will not be covered in detail in this manual. Use the appropriate Corrigo E controller manual for reference.

Corrigo E tool Rev. D
4
5. Startup
The installation program will have placed a Corrigo E tool folder in the Programs folder in the Start menu. This folder contains the links to Corrigo E tool Heating, Corrigo E tool Ventilation and Corrigo E tool Boiler. To start either program, click on the Start button at the lower left hand corner of the display. Then click on Programs, the folder Corrigo E tool and finally the program you wish to run. To avoid having to go through the Start folder, you can create a shortcut on the desktop by pointing at the program name, click and hold the right hand mouse button and drag the program name from the folder onto the desktop. Release the button and click on "Create shortcut here". On start-up Corrigo E tool will automatically search for any controller connected to the computer and connect to it if it is of a type suitable to the program being loaded. If no suitable Corrigo controller is found the program will start offline.
Corrigo E tool always starts with a box where you enter which Corrigo model you are using. The Overview folder is also displayed. Make sure that you enter the correct model, or strange things may occur in the control and alarm handling.

Corrigo E tool Rev. D
5
6. Menu bar The menu bar has five drop-down menus:
6.1 File These items are used to handle configuration files. The data describing a configuration can be saved as a file. Any number of different configurations can be saved, the only limit being available disk space. The file will have a .vtc extension and needs about 22 kb of disk space.
New New will open a new unnamed file. A box appears where you can choose if you wish to create an E8, E15 or E28. Make sure that you choose the correct model. If you load an incorrect model in a Corrigo, unexplainable alarms etc. may appear since certain functions can be activated that are not visible in the present model.
Open Opens a saved file.
Save Saves the current file to disk. If the file is unnamed you will be prompted for a name.
Save as Saves the current file to disk using a new name of your choice.
Read only This item can normally be ignored. Should you for some reason open two instances for the same file one of them will be marked as Read only to prevent data conflict.
Print Will give a printed list showing all the configuration settings of the present file.
Exit Close Corrigo E tool. If the present configuration is unsaved you will be asked if you wish to save it before closing down.
6.2 Edit The edit menu only contains one item:
Delete Delete is only used in conjunction with Holiday periods. Use delete to remove assigned periods.
Corrigo E tool Rev. D
6
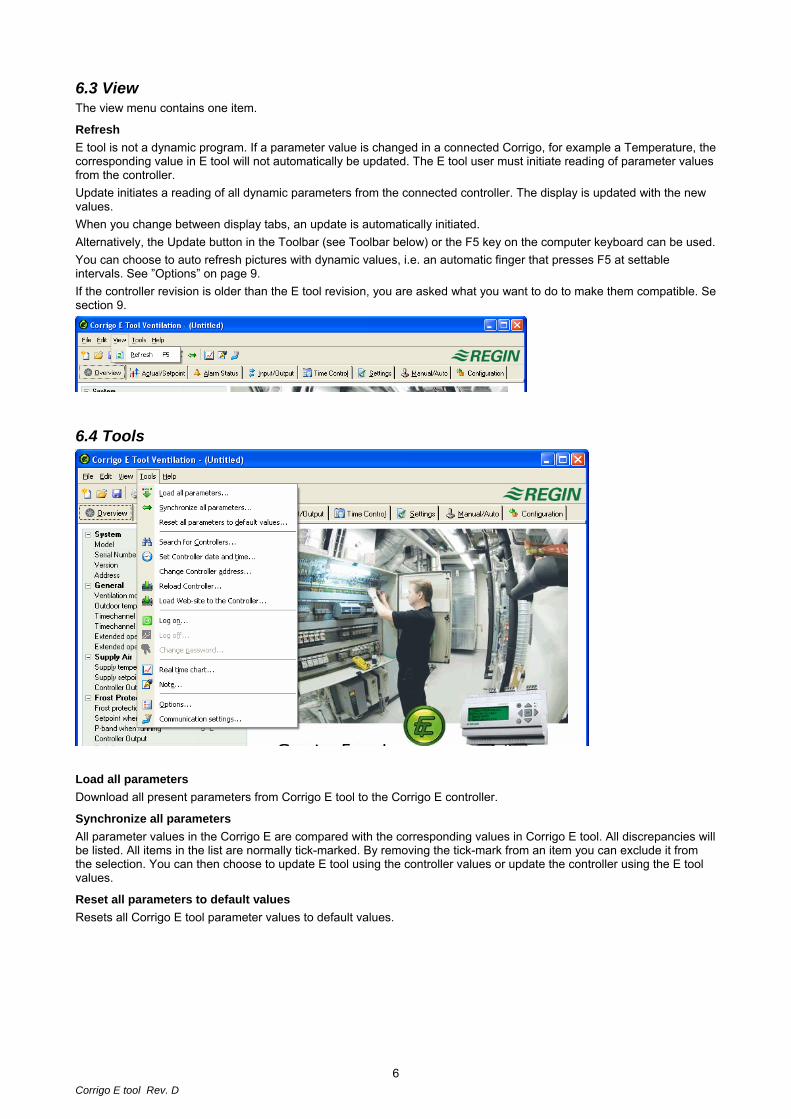
6.3 View The view menu contains one item.
Refresh E tool is not a dynamic program. If a parameter value is changed in a connected Corrigo, for example a Temperature, the corresponding value in E tool will not automatically be updated. The E tool user must initiate reading of parameter values from the controller. Update initiates a reading of all dynamic parameters from the connected controller. The display is updated with the new values. When you change between display tabs, an update is automatically initiated. Alternatively, the Update button in the Toolbar (see Toolbar below) or the F5 key on the computer keyboard can be used. You can choose to auto refresh pictures with dynamic values, i.e. an automatic finger that presses F5 at settable intervals. See ”Options” on page 9. If the controller revision is older than the E tool revision, you are asked what you want to do to make them compatible. Se section 9.
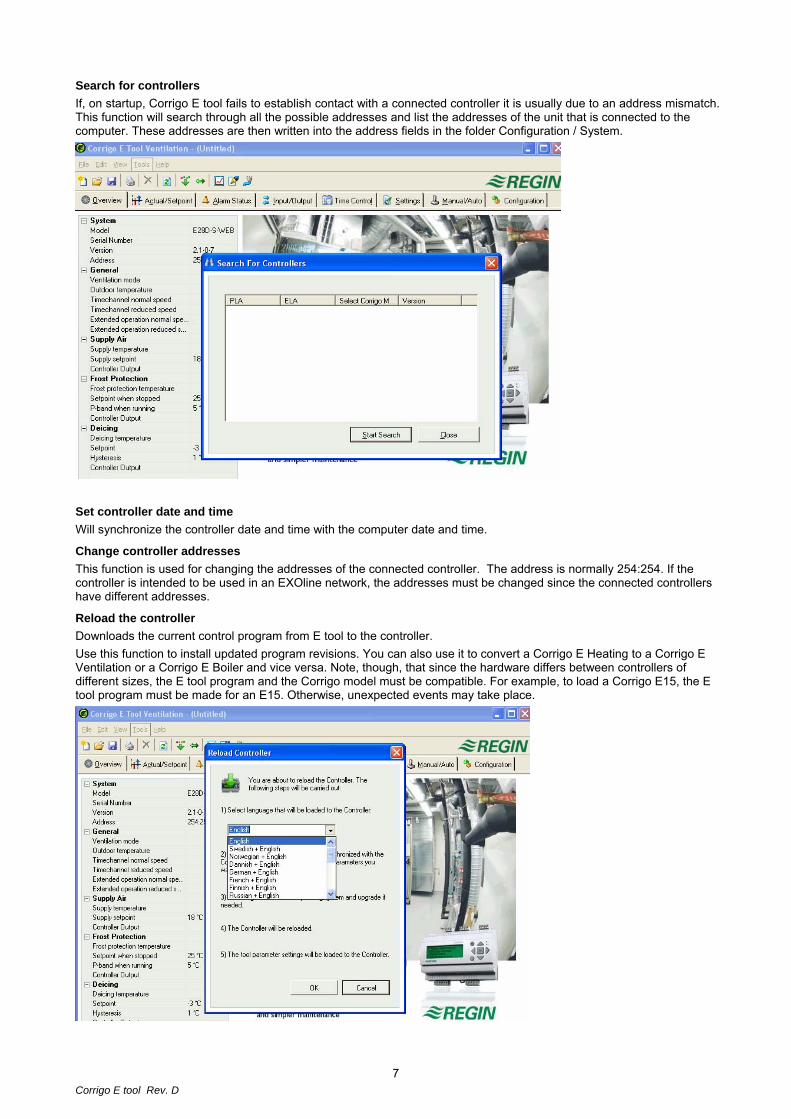
6.4 Tools
Load all parameters Download all present parameters from Corrigo E tool to the Corrigo E controller.
Synchronize all parameters All parameter values in the Corrigo E are compared with the corresponding values in Corrigo E tool. All discrepancies will be listed. All items in the list are normally tick-marked. By removing the tick-mark from an item you can exclude it from the selection. You can then choose to update E tool using the controller values or update the controller using the E tool values.
Reset all parameters to default values Resets all Corrigo E tool parameter values to default values.
Corrigo E tool Rev. D
7
Search for controllers If, on startup, Corrigo E tool fails to establish contact with a connected controller it is usually due to an address mismatch. This function will search through all the possible addresses and list the addresses of the unit that is connected to the computer. These addresses are then written into the address fields in the folder Configuration / System.
Set controller date and time Will synchronize the controller date and time with the computer date and time.
Change controller addresses This function is used for changing the addresses of the connected controller. The address is normally 254:254. If the controller is intended to be used in an EXOline network, the addresses must be changed since the connected controllers have different addresses.
Reload the controller Downloads the current control program from E tool to the controller. Use this function to install updated program revisions. You can also use it to convert a Corrigo E Heating to a Corrigo E Ventilation or a Corrigo E Boiler and vice versa. Note, though, that since the hardware differs between controllers of different sizes, the E tool program and the Corrigo model must be compatible. For example, to load a Corrigo E15, the E tool program must be made for an E15. Otherwise, unexpected events may take place.

Corrigo E tool Rev. D
8
Reload the Web-site to the controller Downloads the configuration to the webserver in the Corrigo. A model with TCP/IP communication must be used. More details in chapter 11.
Log on Corrigo E has three different log-on levels, 1, 3 and 5. 5 is the basic level with the lowest access, 3 is operator level giving more access and 1 is system level with full access. As default Corrigo comes with the following passwords for the different levels: System 1111 Operator 3333 Basic 5555 Should you try to perform an operation which requires a higher access level than the one you have, you will be prompted to change log-on level.
Log off Is only active if you are logged on as Operator or System. Enables log-off to the basic level.
Change password Is only active if you are logged on as Operator or System. Permits change of the password for the present log-on level.
Real time chart
Creates a real time chart. Up to four parameters of your choice can be logged. The chosen parameters are listed at the bottom of the screen together with information on colour, which of the vertical scales it is referring to and latest recorded value. The chart has left and right vertical scales with individually settable ranges. The horizontal timeline can be changed so that the chart window can show longer or shorter intervals. Using the scrollbar at the bottom of the chart you can scroll along the timeline to show any position since the recording started. Values are recorded every 5 seconds. All recorded values can be saved to a textfile for later use in, for example, a spread-sheet program. The chart cannot be saved. On exiting all values and settings are lost. Real time chart tools
Export Exports all recorded values to a .txt file. The values are tab-separated for easy import to, for example, Excel. Each line of the text file contains the values from one recording together with the time for the recording. Any number of values can be saved, the only limit being available disk space.
Export Show / hide left / right grid Options Add curves Show cursor Zoom out Pause Time scale
Delete all curves Show nodepoints Go to home

Corrigo E tool Rev. D
9
Add curves A click on this button reveals a list of all Corrigo parameters that can be displayed in the chart. Choose up to 4 parameters.
Delete all curves. Deletes all the selected curves.
Show/hide left/right grid Chart grids scaled to the left and right scales can be displayed or hidden.
Show nodepoints A marker can be displayed on each curve at the point of each recording.
Show cursor Displays a vertical line on the chart display. The cursor can be moved along the timeline. When the cursor is active, instead of showing the latest recorded values in the parameter list, the values at the cursor position are displayed. In this way you can check back on earlier record values.
Go to home Home position is the chart position where you have the "recording pens" close to the right hand edge of the chart. If you have scrolled back along the timeline you can use this button to jump back to normal position.
Pause Pauses the chart. The "paper" stops scrolling and no new curve segments are added. Data acquisition continues, however, and new readings are saved every 5 seconds. Press Pause again and all the saved readings will be added to the chart.
Options Set various options.
Time scale signifies the time width of the chart display. Left scale / Right scale sets the scaling for the left and right chart scales.
Time scale Sets the time width of the chart display.
Parameter list
The parameter list shows the parameters assigned to the chart. To remove a parameter, right-click on it and choose remove. To change which of the right / left scales the parameter curve is referring to, right-click and choose properties or double-click with the left mouse-button.
Notes Gives access to a notepad area. Any text written here is saved together with the configuration file. If you make a printout of the configuration the notepad text is included in the printout.

Corrigo E tool Rev. D
10
Options Permits the setting of some program parameters.
You can choose to auto refresh pictures with dynamic values, i.e. an automatic finger that presses F5 at settable intervals.
Log-on timeout After inactivity for longer than the set time the log-on level will be set to 5.
Number of decimals Sets the number of decimals displayed. All calculations however, are always done with full precision.
Lock configuration Blocks access to the configuration tab.
Block tools Not used.
Communication settings Setting of the communication between E tool and controller. Which communication is suggested depends on which Corrigo model has been loaded into E tool at start-up. Serial communication is suggested for all models except Corrigo Web.
Click on Communication channels and then on Serial.

Corrigo E tool Rev. D
11
Check that the suggested Com port corresponds to the Com port which the computer has assigned to E-cable. You can see which Com port has been assigned in the Control panel / System / Device Manager / Ports (COM & LPT). If you have opened E tool with a Corrigo Web, you can choose if the communication should take place via E-cable (serial) or via the TCP/IP port.
TCP/IP communication
If the controller has a TCP/IP port, it can communicate via a TCP/IP network. This is done by selecting Use a TCP/IP There are three ways to connect a controller with a TCP/IP port to a network for communication with a main computer: By pressing on TCP/IP, WEB-site and E-mail settings, you can choose between three different connection possibilities: 1. Crossover network cable 2. Automatically by DHCP (dynamic IP address) 3. Static IP address See chapter 11 for the remaining setting options. Crossover network cable In the most basic case, a crossover network cable, E Cable-TCP/IP, is used. The user is connected directly to the controller. Connect a crossover TCP/IP-cable directly between the controller and the computer. Start E tool. Open the tool ”Communication settings” from the menu ”Tools” or via the icon in the toolbar. Choose ”Use a TCP/IP port in this controller”. The program will ask if you are using a crossover network cable. Answer ”Yes” to this question. The program will now search for controllers. Since no DHCP is available, a ”broadcast” address will be used. Therefore, it is important that the computer is only connected directly to the current controller with a crossover Cat5-cable. If the search was successful, the controller’s IP-settings will be shown: IP address, Subnet mask and Default Gateway (if there is one). If no values are shown: press ”Search”. A search window will be opened and hopefully the controller’s TCP/IP card will be found and its serial number will be shown in the window. Select the row and press ”OK”. If the program cannot find a controller:
• Control the cable and contacts. • Control if there are more active network connections (Control panel/Network connections). Inactivate all
except the ”Local area connection”. • Press ”Search” again.
Enter the IP address, the Subnet mask and, if any, the Gateway for the controller and press ”Load TCP/IP-settings”. A message will be shown if the loading was successful. Press ”OK”. You may get a message that a TCP/IP-connection has been established, but a controller with the address 254:254 could not been found. Instead, a

Corrigo E tool Rev. D
12
controller with another PLA:ELA address has been found. Answer ”Yes” to the question whether this controller should be used instead. E tool can now be used for configuration/downloading/upgrading/synchronisation etc. If the message ”Cannot read index variable 255:30.QSystem.PLA. Not responding.” is shown, there is no connection between the controller’s TCP/IP card and the operating system EXOreal on the controller’s base circuit board. This may be due to an old EXOreal-version combined with a certain version of components on the TCP/IP card. The problem can be solved by loading the latest EXOreal-version to the controller. However, to do this a connection must first be established (catch-22). By ”Powering up” and ”Searching” multiple times, you may be able to establish a connection. Otherwise, the controller must be sent to Regin for upgrading. Automatically by DHCP (dynamic IP address) In this case, you choose the standard setting Obtain IP settings automatically (by DHCP). This configuration is suitable for most networks equipped with a DHCP server, and, above all, when it is required that the controllers are assigned their addresses dynamically. The following requirements have to be fulfilled: - The DHCP server and the DNS server must cooperate since the controller sends its DNS name to the DHCP
server. The Windows 2000 Server and the Windows 2003 Server support this. The DHCP server gives the controller an IP address and registers the IP adress and the DNS name in the DNS server.
- Each DNS name must be unique. - The EXOline-TCP port, 26486, must be open from the controller to the main computer. This is especially
important when the communication passes through a firewall. When the controller and the computer running E tool are on the same subnet, you do not have to specify a DNS name or a Domain. When the controller and the computer are on different subnets, you have to specify the DNS name and the Domain. You get the domain name from the network administrator. Static IP address In this case, the static IP address of the controller is specified. This configuration is most suitable for networks without a DHCP Server. You can also use it if you do not trust the network services completely, as it is the communication that has the best qualification to work when servers etc. do not. As long as routers and switches work well, this configuration alternative will work. The following requirements have to be fulfilled: The EXOline-TCP port, 26486, must be open from the controller to the main computer. This is especially important when the communication passes through a firewall. You get the static IP address, Net Mask and Default Gateway from the network administrator.
6.5 Help Gives access to help texts and revision information.

Corrigo E tool Rev. D
13
7. Toolbar The toolbar provides shortcuts to some frequently used commands.
By placing the cursor over a tool icon a tool tip will be displayed giving a short description of the E tool. All the E tools except for Refresh have been described in the menu bar description above.
8. Folders
8.1 General The contents of the various folders depend on which of the programs E tool Heating or E tool Ventilation you are running and also on which Corrigo model, E28, E15 or E8 the program has been configured for. Therefore the contents will not be described in detail here. Items in a folder that somehow belong together are grouped. Group names are displayed in bold. The groups are normally shown expanded, that is that all the items in the group are displayed, headed by the group name. A group can be compressed to show only the group name by clicking on the box with a - (minus) to the left of the group name. For a compressed group the box will contain a +. Click on it to expand the group.
Setting values Many of the folders contain settable values. If you pass the cursor over such a value a text box (tool tip) will be displayed showing the permitted value interval. If you have a Corrigo connected you must download a value to the Corrigo for it to become active. Downloading can be done in several ways:
1. Right-click on any single item and choose Load parameters. This will download only that single parameter. 2. Right-click on a group name and choose Load parameters. This will download all parameters in the chosen
group. 3. Click on the Load all parameters button on the E toolbar. 4. Click on Tools on the Menu bar and choose Load all parameters.
These last two methods will, as the name implies, download all parameters to the Corrigo. You can also synchronize parameters following the same rules as above but choose Synchronize parameters. A useful tool to compare the settings in the Corrigo with the settings in E tool. It is also possible to reset parameters to default values by right-clicking and choosing Reset parameters to default values.
8.2 Overview
The major part of the Overview folder displays a process diagram. The diagram is a static bitmap illustration that can be edited using, for example Paint. Any number of different diagrams can be saved. Which diagram is displayed is governed by the setting of the parameter Process picture in the System sub-folder in the Configuration folder.

Corrigo E tool Rev. D
14
Down the left-hand edge of the Overview folder there is a list of the most important control parameters. To update the values, press F5 or click on the refresh button in the E tool bar. You can choose to auto refresh pictures with dynamic values, i.e. an automatic finger that presses F5 at settable intervals. See ”Options” on page 9.
8.3 Actual / Set-point
Displays relevant setpoint values and actual values.
Real time chart When right-clicking on some of the groups you are given the option of creating a real time chart. This chart will be created containing the four first recordable parameters in the group.
8.4 Consumption (only E tool Heating and E tool Boiler)
Displays consumption values for Energy Meter, Heat Water Meter and Cold Water Meter. The values are calculated using pulse constants that are set in the submenu Pulse constants in the Configuration folder.

Corrigo E tool Rev. D
15
8.5 Alarm status
Permits handling of all enabled alarms. The alarm settings can be changed by either double-clicking on the alarm you wish to change or by marking the alarm and then clicking on the button Settings. Alarm settings can also be changed in the folder Settings/Alarm objects. Note: Changes made to alarm settings must be downloaded to become active.
Alarm indications Non-activated alarms are shown with a green status box. Active alarms have a red box with an exclamation mark. Reset, not acknowledged alarms have a red, green-bordered box. Active, acknowledged alarms have a blue box with a white tick-mark. Blocked alarms have a gray box with a black X. Any changes made to alarm status in E tool are instantly transmitted to the controller without the need to use Load parameters. Changes in alarm status in the controller however are not displayed in E tool until you make a refresh. To keep track of changes in alarm status when looking at other folders, look at the alarm box in the status bar at the bottom of the window.
Alarm categories Corrigo has three alarm categories, Sum alarm A, Sum alarm B and Sum alarm C. A and B alarms will activate the digital outputs A-alarm and B-alarm respectively if configured. Both will activate the Sum alarm output if configured. C alarms are internal only. C alarms need not be acknowledged. Once they reset, they automatically return to normal status. Alarms can be shown according to class, A, B C or All classes and according to status, Normal, Blocked, Acknowledged, Returned, Alarm active and All statuses.

Corrigo E tool Rev. D
16
Alarm text in Corrigo The alarm text that is displayed in the Corrigo on activated alarm is shown in column 2 Alarm text. This text can be changed, but only via E tool. (NB At the moment, this only applies to Ventilation and Heating. Boiler does not have changeable texts). Double-click on the alarm text and a box will appear where various alarm parameters, for example the alarm text, can be changed.
Remember that the alarm text, including any possible space, may not consist of more than 38 characters. These will be distributed on 2 rows of 19 characters each. If a word in the text goes over the 19th position, the whole word will be moved to the second row. To avoid this you can add a hyphen in the 19th position, thereafter space and then the rest of the word.
For example: ”Sensor error Relative Humidity supply air” consists of 40 characters, but since the third word goes over the 19th position, the following will be shown in the display:
Sensor error Relative Humidity su 9 Sept 08:52 Class B
However, if you change the text to: “Sensor error RH supply air”, you will get:
Sensor error RH Supply air 9 Sept 08:52 Class B
8.6 Inputs/Outputs
Shows actual values for all inputs and outputs. This is a read-only folder. No settings can be made here. Un-configured inputs and outputs are grayed.

Corrigo E tool Rev. D
17
8.7 Time control
E tool Heating and E tool Boiler Here you set the daily comfort periods. Each control function has its own set of daily schedules For each day there are two periods. The 8th day, Holiday, governs the activity on all days marked as holidays in the holiday schedule, see below. The schedules for Timer channel output 1…5 dictate the activation of the corresponding digital output signal. To deactivate a period, set the time to 00:00 – 00:00. To run the unit 24 hours a day, set the time to 00:00 – 24:00. Note: An interval cannot exceed over midnight. For example, if you want to configure a period from 18:00 to 02:00 , you have to divide it into two periods: Day 1 18:00 – 24:00 and day 2 00:00 – 02:00.
E tool Ventilation Here you set the daily running periods. If single-speed fans have been configured there is only one set of daily schedules. If two-speed or pressure controlled fans have been configured there will be two sets of daily schedules. One for normal running speed and one for reduced speed. For each day there are two periods. Should the running periods for normal and reduced speed overlap, normal speed will take precedence. The 8th day, Holiday, governs the activity on all days marked as holidays in the holiday schedule, see below. The schedules for Timer channel output 1…5 dictate the activation of the corresponding digital output signal. To deactivate a period, set the time to 00:00 – 00:00. To run the unit 24 hours a day, set the time to 00:00 – 24:00. Note: An interval cannot exceed over midnight. For example, if you want to configure a period from 18:00 to 02:00 , you have to divide it into two periods: Day 1 18:00 – 24:00 and day 2 00:00 – 02:00.

Corrigo E tool Rev. D
18
Holiday schedule
Up to 24 separate holiday periods can be configured. A holiday period can be anything from one day up to 365 consecutive days. To create a holiday period, click on the button at the right hand end of the line Add holiday period. To pick a single date, click on it, a marker will indicate your choice, then click on OK. To pick a period, click and hold on the first date, drag the cursor to the last date and release the button. The period will be marked. Click OK. Alternatively, click on the first date, depress and hold the shift-key on your keyboard and click on the last date of the period. The period will be marked. Click OK. Although the calendar seems to extend far into the distant future, holiday periods can only extend up to one year from the present date. Should you choose a date further ahead than one year, the date will be replaced by the same date within one year from the present. To remove unwanted holiday periods, use the delete button in the E toolbar. Holidays/holiday periods that have been set will be valid every year, until they are removed. This means that for example Christmas and New Year will only have to be set once and are then valid for all future.
8.8 Settings
Controller settings Setting of the control parameters. Parameter setting-interval endpoint values and default value are displayed if you place the cursor over a parameter value. Changes must be downloaded to the controller in order to take effect. To download, right-click on a parameter name or a parameter group name and choose Load parameters, or click on Load all parameters in the E toolbar or the E tools menu.

Corrigo E tool Rev. D
19
Alarm settings / alarm objects Setting of alarm parameters. These settings can also be made in the Alarm status folder. Se the section on Alarm status above. Disabled alarms will be removed from the alarm list in the Alarm status folder. A and B alarms will activate the digital outputs A-alarm and B-alarm respectively if configured. Both will activate the Sum alarm output if configured. C alarms are internal only.
Alarm text in Corrigo The alarm text that is displayed in the Corrigo on activated alarm is shown in the row Alarm text. This text can be changed, but only via E tool. (NB At the moment, this only applies to Ventilation and Heating. Boiler does not have changeable texts). The alarm text, including any possible space, may not consist of more than 38 characters. These will be distributed on 2 rows of 19 characters each. If any word in the text goes over the 19th position, the whole word will be moved to the second row. To avoid this you can add a hyphen in the 19th position, thereafter space and then the rest of the word. For example: ”Sensor error Relative Humidity supply air” consists of 40 characters, but since the third word goes over the 19th position, the following will be shown in the display:
Sensor error Relative Humidity su 9 Sept 08:52 Class B
However, if you change the text to: “Sensor error RH supply air”, you will get:
Sensor error RH Supply air 9 Sept 08:52 Class B

Corrigo E tool Rev. D
20
8.9 Manual / Auto
In this menu you can take manual command of most controller functions. Very useful for testing purposes. Setting functions to manual command will generate alarms to ensure that control is returned to Auto. In this menu all changes are instantly downloaded to any attached controller, it is not necessary to run Load parameters for changes to take effect.
8.10 Configuration
This folder contains all the configuration parameters for the Corrigo. Since the contents are very diverse, the folder has been divided into sub-folders. These are accessed by clicking on the buttons in the left-hand button-list. For detailed information on these, please see the manual for the controller in question.

Corrigo E tool Rev. D
21
9. Updating Corrigo E E tool should always be updated with the latest program revision. If you are using the latest revision of E tool and connect it to a Corrigo E with an older program revision, E tool will give a warning and offer two alternatives. One alternative is to temporarily downgrade E tool to a revision corresponding to the revision in the controller. All the settings in the controller will remain intact and the controller will keep its revision. The other alternative is to upgrade the controller to the same revision as E tool. This will cause the Corrigo-unit to temporarily stop working. Any previous settings will be permanently lost. Take the following actions to avoid having to configure again:
1. Start E tool and connect it to the controller. When asked, choose to downgrade E tool to the controller’s revision. 2. Select Synchronize all parameters in the menu Tools. Then select Update tools. E tool should now contain an
exact copy of the configuration in the controller. Select Save as in the menu File and save the configuration under a suitable name.
3. Close E tool. Then open it again and choose to reload the controller with a new revision. 4. After reloading, open the saved configuration file, synchronize all parameters and the select Update the
controller. The controller should now have the latest revision and be configured as it was before the upgrade. Make sure that the settings of the parameters that were not available in the old revision have suitable values.

Corrigo E tool Rev. D
22
10. TCP/IP – network terms
10.1 Networks, subnets, routers IP network An IP network is a cluster of cables and devices, where an equipment with one IP address can communicate with any other IP addressed equipment. Internet is one network, and when your home computer connects to the Internet, you become part of the Internet.
Subnet Networks are divided into subnets, which are linked with routers. Routers need some kind of map of the network (or at least of the closest subnets, and somewhere to send everything else). A computer only needs to know the address of the closest router. A local switched Ethernet network is one subnet. Routers can have several Ethernet ports for different Ethernet networks, or maybe an Ethernet port and an ADSL connection.
10.2 IP address, Subnet mask, Default Gateway, DNS server IP address Each computer or network connected controller has an IP address consisting of four numbers between 0 and 255, which makes up a total of 32 bits.
Subnet mask Each computer or network connected controller also has a subnet mask consisting of 32 bits.
Example If the IP address is 192.0.2.73 and the subnet mask is 255.255.255.0, then the subnet addresses are from 192.0.2.0 up to 192.0.2.255, and 192.0.2.73 is your address on the subnet. Sometimes the subnet mask is specified by the number of bits used (always starting at the beginning of the subnet mask). The subnet is then 192.0.2.0/24, and the IP address and the subnet mask can also be specified together: 192.02.73/24.
Default Gateway Each computer and each controller using TCP/IP communication must know the IP address to the router that goes out from its subnet. The IP address of this router is usually called the default gateway. All traffic that shall be sent out of your own subnet is sent to the default gateway.
DNS name The computer or the controller must know the address of the equipment it is going to communicate with. This can be given as an IP address or a DNS name. DNS is a name service which can translate hierarchical names like exohuvuddator.regin.se to an IP address. Several DNS servers are part of the system, but you only have to know the IP address to one of them.
IP configuration A complete IP configuration consists of the IP address of your computer, the subnet mask, the IP address of the closest router (also called the default gateway) and a DNS server.
10.3 DHCP, fixed and dynamic addresses Static and dynamic An equipment can have manually configured IP settings, a so-called static IP address, or they may receive a dynamic IP address from a special computer, a so-called DHCP server, on the subnet.
Dynamic IP addresses The use of dynamic addresses presents a problem when other equipments try to contact the equipment, as the dynamic addresses are unknown in advance and are subject to change. To be able to contact equipment using dynamic addresses, your equipment need to use DNS, which also has to be updated when the dynamic address is changed via DHCP. This is commonly used in corporate networks and for Windows computer. However, most Internet Service Providers and several types of EXO controllers do not support the DNS update via DHCP, and must therefore use a static IP address.

Corrigo E tool Rev. D
23
10.4 White and black addresses Black addresses There is a shortage of IP addresses on the Internet and organizations are encouraged to use internal IP addresses on internal networks. Different companies may use the same address series, as their internal work computers never really need to connect directly to each other. This kind of addressing is called private or black addressing.
Reserved addresses The following addresses are reserved for private nets: 192.168.0.0 - 192.168.255.255 172.16.0.0 - 172.31.255.255 10.0.0.0 - 10.255.255.255 See also: RFC1918, Address Albcatton for Private Internets [Online document], [cited Nov 29 2005], Available HTTP: http://www.ietf.org/rfc/rfc1918.txt
White addresses Addresses that are unique on the Internet are called public or white adresses. More information of the use of IP addresses can be found on RFC3330, Special-use, IPv4 addresses, http://www.ietf.org/rfc/rfc3330.txt
NAT Firewalls can act as agents for computers with private IP addresses, when they are searching the Internet for information. A connection from a computer with a black IP address is transformed into a connection from the firewall (which has a public IP address) to the Internet server. The Internet server may then return the information to the firewall which forwards it to the computer with the black address. This is called NAT or masquerading.
EXO In general, NAT also works with EXO4 and EXO controllers, although the connection must be initiated from within the black network and target the white network.
NAT router You can also have a NAT router to forward traffic from the white net to a computer on the black net. This is accomplished by letting traffic to a specific TCP port or UDP port to be forwarded to an IP address on the black net.
EXO controllers There are Internet Service Providers that target, e.g. housing co-operatives, offering only private dynamic addresses. EXOcontrollers with a TCP/IP port can manage controllers connected this way, provided that the main computer has a static or a DNS registered public address. The EXO system can also manage the reverse condition, and allows a main computer with a private address to contact controllers with public addresses.
10.5 Tunnels Two private networks Another way to manage a connection via the Internet from a work computer to a main computer on a company network that uses private IP addresses, is to create a tunnel going into the network. A tunnel means connecting two networks using private IP addresses via the Internet, by encrypting all network packages to the destination network (encryption includes IP addresses and other information). The encryption is done by the firewall of one of the networks. The package is issued a new "address label" specifying the other firewall's public address. This firewall decrypts the contents and forwards it to the destination work station within its network. Any listeners that do not have knowledge of the password will not be able to decrypt the traffic. This technology is also called VPN.
PC – black network A tunnel can also be created between a single computer and a private network. Nowadays, it is common for travelling salesmen to connect their mobile stations via GPRS and the Internet, and then connect to the company network using a tunnel. The same technology can be used by the duty technician to work with the ÉXO4 work station from his home, from the service vehicle or similar.

Corrigo E tool Rev. D
24
11. Corrigo Web (Only E tool Ventilation and Heating) See chapter 10 for explanations of the terms used in this chapter.
11.1 Connection The controller must be connected to a static, white IP address. The following connection methods have been tested for Corrigo Web:
1. Connection directly to an ADSL/cable modem 2. Connection to a router, which in turn is connected to an ADSL/cable modem
Corrigo Web has not been tested against all internet suppliers. If the Corrigo is going to be located behind a router with a built-in firewall, the router must be configured. The router should have a fixed white IP address. Then it must find the Corrigo, either by sending an IP address to the controller or by giving the Corrigo’s MAC address. Thereafter, all incoming traffic on Ports 80 and 26486 should be NAT routed to the Corrigo’s black IP address. See the router manual for this. Ports 80 and 26486 on the internet modem must also be open for incoming traffic. This webserver technology is built into the Corrigo and is based on the fact that the Corrigo has an integrated webserver. However, this means that only one webserver can be connected to every white IP address. One Corrigo E unit can handle max 5 connections from E tool, EXO4 and Internet Explorer at the same time.
11.2 Configuration of the webservers As before, all configuration of the controller parameters takes place via E tool or directly in the display. No configuration can be done via the webserver. For configuration of the controller, see the previous chapters in this manual or the manuals for Corrigo E heating and ventilation respectively. If the configuration of the controller parameters is changed, the website will automatically be downloaded to the web server. You only need to reload the website if the settings for the website are changed.
Configuration of the TCP/IP port To configure the TCP/IP port in the Corrigo, go to Tools / Communication settings. Choose ”Use a TCP/IP port in this controller”. Select the right cable when asked. Then press ”Search” to find the correct Corrigo. After the program has found the Corrigo, select it and press OK. Note: If the Corrigo is not fresh from the factory, update the TCP/IP port by pressing ”Update TCP/IP port OS”. The Corrigo is then updated to the latest TCP/IP version. If the Corrigo was manufactured in 2008 or earlier, the TCP/IP OS needs to be updated twice in order for all changes to take effect. Then press on the button TCP/IP, WEB-site and E-mail settings.
In this box, the following settings can be made:

Corrigo E tool Rev. D
25
IP settings Here you choose if the Corrigo should have a static IP address or if the DHCP server should give it a dynamic IP address. If the TCP/IP port uses fixed IP and you have given the e-mail server’s network name, you must also enter a DNS server under Use the following IP settings. The TCP/IP port can then translate the network name into an IP address. If DHCP is used, this will take place automatically.
DNS name The Corrigo can be connected to a DNS name, for example: DNS name: Corrigoweb, Domain: regin.se. The controller’s IP address will then be connected to the DNS name Corrigoweb.regin.se.
Encrypted communication The encryption is used to prevent other users in the TCP/IP network from connecting to the Corrigo via E tool. The password is only used when you want to reach the Corrigo via E tool. If you loose the password, the controller must be cleansed and reloaded.
Web user login passwords The passwords to log on to the website. Guests have permission to view all values. Operators are authorised to view and change all values.
E-mail server settings • Network address to the e-mail server
Here you give the outgoing SMTP e-mail server, via which the TCP/IP port should send e-mails, either as a network name (DNS name, e.g. smtp.exampledomain.se) or as an IP address. Within local area networks, you usually give an IP address. If you are connected to the Internet, network names are more common. Your network technician or Internet supplier can tell you which e-mail server you should give. Note: If you give a network name, this must be connected directly to the e-mail server. It cannot be an alias for another network name. To test if you have a directly connected network name, you can use the Windows command line interpreter (Start menu → Run → cmd) to run the Ping command on the network name (for example Ping smtp.exampledomain.se) and see if the command reports ”Pinging smtp.exampledomain.se”.
• Login name and Login password These two fields are only used if the outgoing e-mail server requires logging on and supports the AUTH LOGIN method. Otherwise, leave them empty. Other log on methods or coding are currently not supported.
E-mail sender address Here you write the sender address that should be given in the e-mail. Certain e-mail servers and junk mail filters require that a real e-mail address is used here. Otherwise, you can give a fictitious sender address, e.g. [email protected]. Ask your network technician for advice if you are unsure.
Set TCP/IP settings After the above settings have been made, you download the settings to the TCP/IP card in the Corrigo by pressing on this button.

Corrigo E tool Rev. D
26
11.3 Settings for the website In the sub-folder System/Website and E-mail in the Configuration folder, you can make the following settings for the website: Headline Web-site Here you can write a headline which should be shown on the first page when you surf to the Corrigo website. Link, Heading Up to four different links to small pdf files or other Internet sites can be added to the website. Note: The total size of the pdf files and the process picture must not be over 150 kB. Under Link1, Heading you write the heading for Link 1, under Link2, Heading you write the heading for Link 2 and so on. The heading must not contain any space. Instead of for example AB Regin, you must write AB_Regin. This is the default setting for Heading 4. Link Under Link 1 you write the address to the pdf file or Internet site. Process picture The picture that is chosen here will be shown in the Overview folder on the web. The picture should be in jpg format or similar because of the lack of storage space. E-mail Here you give the e-mail address to which an alarm should be sent, as well as the title and subject of the message. After making the above settings and downloading the settings to the TCP/IP card, the only thing that remains is to download all the settings to the webserver in the Corrigo. You do this by selecting Tools/Load Web-site to the Controller.

Corrigo E tool Rev. D
27
11.4 Log on to the website This is how the login page for the Corrigo looks when it is published on the web. In the box Password, you log on using the password you have entered under TCP/IP, WEB-site and E-mail settings.
11.5 Change values on the website
All values written in blue can be changed. As soon as a value has been changed and you have pressed Enter, the value is downloaded to the Corrigo.

Head Office Sweden Phone: +46 31 720 02 00 Web: www.regin.se Mail: [email protected]
Sales Offices France: +33 14 171 46 46 Hong Kong: +852 24 07 02 81Singapore: +65 67 47 82 33