Duct Tape Corset Pattern - SarahBeata | Costumer · Duct Tape Corset Pattern How to make the...
2
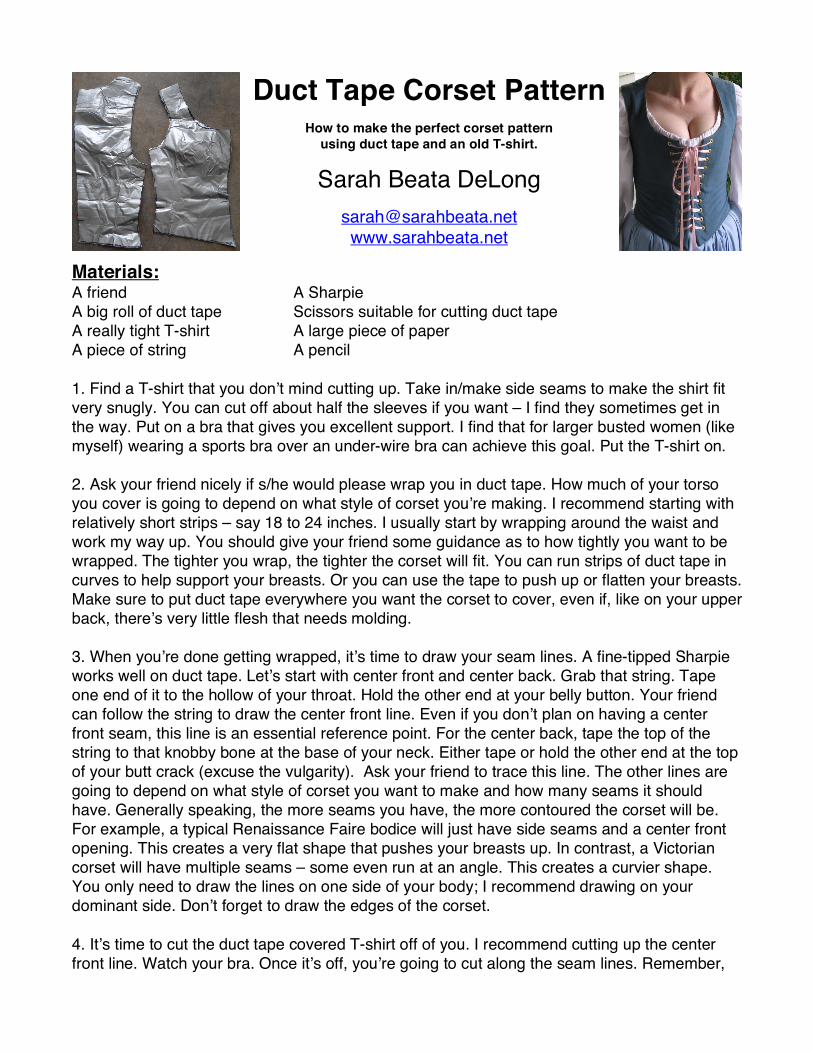
Duct Tape Corset Pattern How to make the perfect corset pattern using duct tape and an old T-shirt. Sarah Beata DeLong [email protected] www.sarahbeata.net Materials: A friend A big roll of duct tape A really tight T-shirt A piece of string A Sharpie Scissors suitable for cutting duct tape A large piece of paper A pencil 1. Find a T-shirt that you donʼt mind cutting up. Take in/make side seams to make the shirt fit very snugly. You can cut off about half the sleeves if you want – I find they sometimes get in the way. Put on a bra that gives you excellent support. I find that for larger busted women (like myself) wearing a sports bra over an under-wire bra can achieve this goal. Put the T-shirt on. 2. Ask your friend nicely if s/he would please wrap you in duct tape. How much of your torso you cover is going to depend on what style of corset youʼre making. I recommend starting with relatively short strips – say 18 to 24 inches. I usually start by wrapping around the waist and work my way up. You should give your friend some guidance as to how tightly you want to be wrapped. The tighter you wrap, the tighter the corset will fit. You can run strips of duct tape in curves to help support your breasts. Or you can use the tape to push up or flatten your breasts. Make sure to put duct tape everywhere you want the corset to cover, even if, like on your upper back, thereʼs very little flesh that needs molding. 3. When youʼre done getting wrapped, itʼs time to draw your seam lines. A fine-tipped Sharpie works well on duct tape. Letʼs start with center front and center back. Grab that string. Tape one end of it to the hollow of your throat. Hold the other end at your belly button. Your friend can follow the string to draw the center front line. Even if you donʼt plan on having a center front seam, this line is an essential reference point. For the center back, tape the top of the string to that knobby bone at the base of your neck. Either tape or hold the other end at the top of your butt crack (excuse the vulgarity). Ask your friend to trace this line. The other lines are going to depend on what style of corset you want to make and how many seams it should have. Generally speaking, the more seams you have, the more contoured the corset will be. For example, a typical Renaissance Faire bodice will just have side seams and a center front opening. This creates a very flat shape that pushes your breasts up. In contrast, a Victorian corset will have multiple seams – some even run at an angle. This creates a curvier shape. You only need to draw the lines on one side of your body; I recommend drawing on your dominant side. Donʼt forget to draw the edges of the corset. 4. Itʼs time to cut the duct tape covered T-shirt off of you. I recommend cutting up the center front line. Watch your bra. Once itʼs off, youʼre going to cut along the seam lines. Remember,
Transcript of Duct Tape Corset Pattern - SarahBeata | Costumer · Duct Tape Corset Pattern How to make the...
Duct Tape Corset Pattern
How to make the perfect corset pattern using duct tape and an old T-shirt.
Sarah Beata DeLong
[email protected] www.sarahbeata.net
Materials: A friend A big roll of duct tape A really tight T-shirt A piece of string
A Sharpie Scissors suitable for cutting duct tape A large piece of paper A pencil
1. Find a T-shirt that you donʼt mind cutting up. Take in/make side seams to make the shirt fit very snugly. You can cut off about half the sleeves if you want – I find they sometimes get in the way. Put on a bra that gives you excellent support. I find that for larger busted women (like myself) wearing a sports bra over an under-wire bra can achieve this goal. Put the T-shirt on. 2. Ask your friend nicely if s/he would please wrap you in duct tape. How much of your torso you cover is going to depend on what style of corset youʼre making. I recommend starting with relatively short strips – say 18 to 24 inches. I usually start by wrapping around the waist and work my way up. You should give your friend some guidance as to how tightly you want to be wrapped. The tighter you wrap, the tighter the corset will fit. You can run strips of duct tape in curves to help support your breasts. Or you can use the tape to push up or flatten your breasts. Make sure to put duct tape everywhere you want the corset to cover, even if, like on your upper back, thereʼs very little flesh that needs molding. 3. When youʼre done getting wrapped, itʼs time to draw your seam lines. A fine-tipped Sharpie works well on duct tape. Letʼs start with center front and center back. Grab that string. Tape one end of it to the hollow of your throat. Hold the other end at your belly button. Your friend can follow the string to draw the center front line. Even if you donʼt plan on having a center front seam, this line is an essential reference point. For the center back, tape the top of the string to that knobby bone at the base of your neck. Either tape or hold the other end at the top of your butt crack (excuse the vulgarity). Ask your friend to trace this line. The other lines are going to depend on what style of corset you want to make and how many seams it should have. Generally speaking, the more seams you have, the more contoured the corset will be. For example, a typical Renaissance Faire bodice will just have side seams and a center front opening. This creates a very flat shape that pushes your breasts up. In contrast, a Victorian corset will have multiple seams – some even run at an angle. This creates a curvier shape. You only need to draw the lines on one side of your body; I recommend drawing on your dominant side. Donʼt forget to draw the edges of the corset. 4. Itʼs time to cut the duct tape covered T-shirt off of you. I recommend cutting up the center front line. Watch your bra. Once itʼs off, youʼre going to cut along the seam lines. Remember,
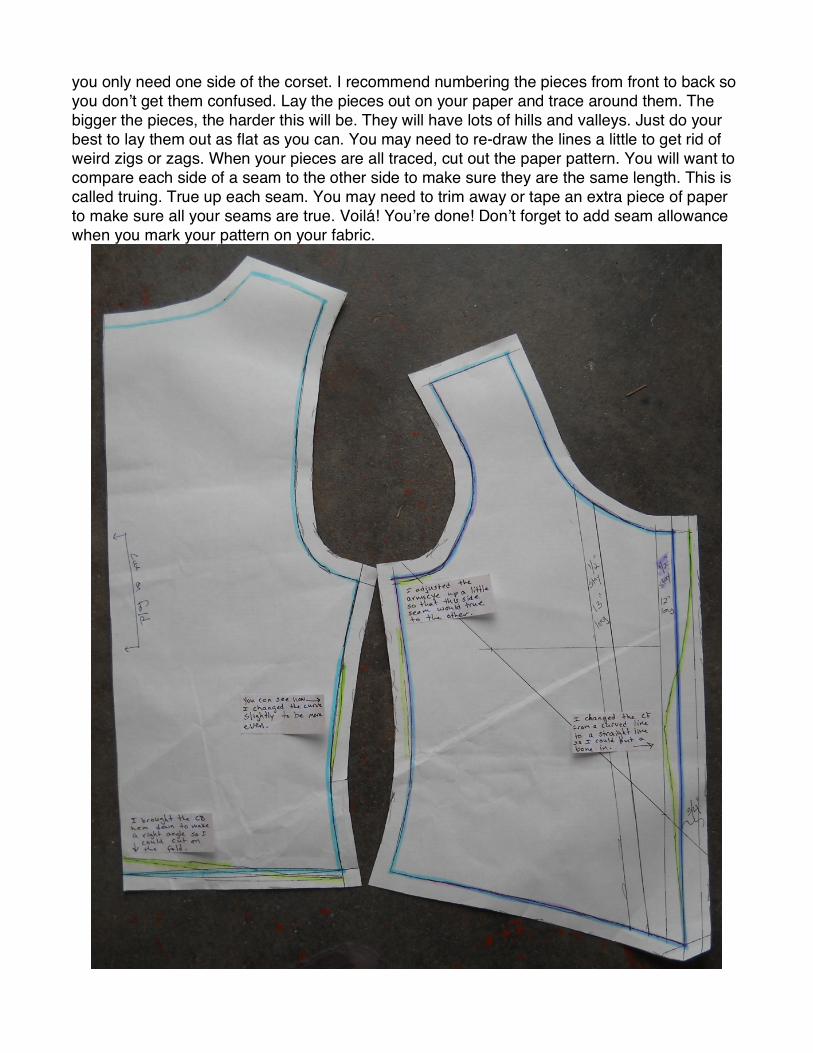
you only need one side of the corset. I recommend numbering the pieces from front to back so you donʼt get them confused. Lay the pieces out on your paper and trace around them. The bigger the pieces, the harder this will be. They will have lots of hills and valleys. Just do your best to lay them out as flat as you can. You may need to re-draw the lines a little to get rid of weird zigs or zags. When your pieces are all traced, cut out the paper pattern. You will want to compare each side of a seam to the other side to make sure they are the same length. This is called truing. True up each seam. You may need to trim away or tape an extra piece of paper to make sure all your seams are true. Voilá! Youʼre done! Donʼt forget to add seam allowance when you mark your pattern on your fabric.