Double Hourglass Quilt Block Tutorial 1. Let me start out...
5
Double Hourglass Quilt Block Tutorial 1. Let me start out by saying there are many ways to make a quilt block and this is only my way of doing things. I must give credit to Allison Harris of Cluck Cluck Sew as that is where I learned to make this block back in 2009. Her tutorial remains on her blog at Cluckclucksew.com, please stop by and see her awesome work. For a 6.5 in block (6in finished) you will need 2 strips of fabric 2 and ¼ in wide and at least 33in in length. Jelly roll strips work great for this. If you want to do scrappy, you will need a length of at least 16.5 inches of each of 4 strips. I will show a blue block - 8 in finished (For an 8in block I use 2.5in strips) and a green block which is the 6in finished block as examples. First you will need a template. For a 6.5 in block, take a piece of sturdy cardboard 8 inches square and cut in half diagonally one way and then repeat again the opposite direction so that you have cut the square into 4 triangles. My pic shows paper cut as an example, at home I used cardboard from a Ritz cracker box, which is fine for a block or two but may not last if you were doing a whole quilt. I usually make 8 in blocks and you can use your 6.5 in square ruler if you have one. It has a diagonal line on it that you can use to cut your blocks. You will see me using this ruler in the pics. The process is exactly the same with you cardboard template. Next take your strips and sew right sides together down the long side. Press seam to the dark fabric
-
Upload
truongkhanh -
Category
Documents
-
view
221 -
download
3
Transcript of Double Hourglass Quilt Block Tutorial 1. Let me start out...
Double Hourglass Quilt Block Tutorial 1.
Let me start out by saying there are many ways to make a quilt block and this is only my way of doing things. I must give credit to Allison Harris of Cluck Cluck Sew as that is where I learned to make this block back in 2009. Her tutorial remains on her blog at Cluckclucksew.com, please stop by and see her awesome work.
For a 6.5 in block (6in finished) you will need 2 strips of fabric 2 and ¼ in wide and at least 33in in length. Jelly roll strips work great for this. If you want to do scrappy, you will need a length of at least 16.5 inches of each of 4 strips. I will show a blue block - 8 in finished (For an 8in block I use 2.5in strips) and a green block which is the 6in finished block as examples.
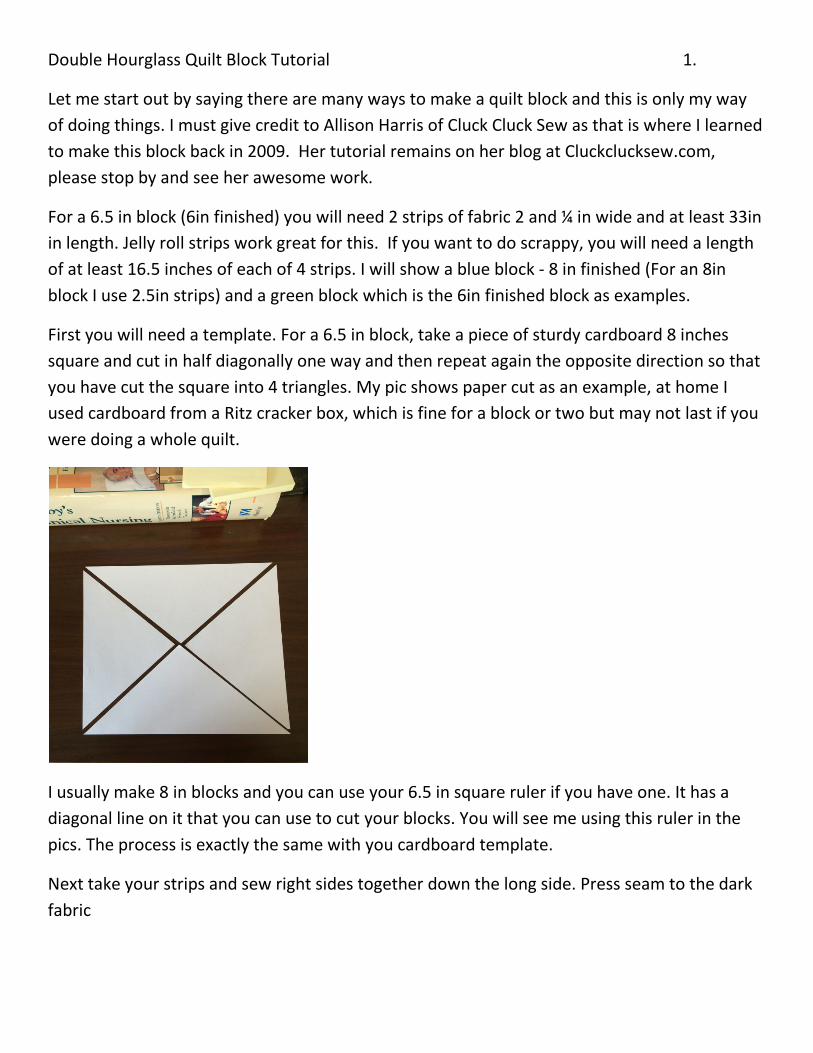
First you will need a template. For a 6.5 in block, take a piece of sturdy cardboard 8 inches square and cut in half diagonally one way and then repeat again the opposite direction so that you have cut the square into 4 triangles. My pic shows paper cut as an example, at home I used cardboard from a Ritz cracker box, which is fine for a block or two but may not last if you were doing a whole quilt.
I usually make 8 in blocks and you can use your 6.5 in square ruler if you have one. It has a diagonal line on it that you can use to cut your blocks. You will see me using this ruler in the pics. The process is exactly the same with you cardboard template.
Next take your strips and sew right sides together down the long side. Press seam to the dark fabric

2.
Next take your template guide and lay the long side of the triangle on the bottom of your pieced strip and cut on both sides. When using a ruler line up the diagonal line in the middle with the long side of your strip. The very tip may be off the opposite edge by just a tiny bit. This is ok it is caught in the seam allowance when pieced. When using the template mark the side edges with a little line to show wear your seam is. This will help you line it up evenly each time since you do not have grid lines like on the ruler.

3.
Next flip your ruler/template to the opposite side of your fabric strip. Line up the long edge and your side marks. Cut on both sides. Repeat this one more time on each side. You should have 4 triangles two with white on the long side and two with colored fabric on the long side.
Next place your triangles together and sew the bottom and side together, nesting the seams. Repeat on the top and side triangle. Next sew the two pieces together down the middle seam and you have your block, trim as needed.

4.
This is a great scrap buster block too. You can make the inner and outer hourglass different colors/fabrics to make it scrappy. Have fun with it!