Document Imaging Training - Saint Louis University
31
Information Technology Services D D o o c c u u m m e e n n t t I I m m a a g g i i n n g g T T r r a a i i n n i i n n g g IT Training and Communications 3694 West Pine Mall Phone: (314) 977-2553 Email: [email protected] http://www.slu.edu/its/
Transcript of Document Imaging Training - Saint Louis University
Information Technology Services
DDooccuummeenntt IImmaaggiinngg TTrraaiinniinngg
IT Training and Communications 3694 West Pine Mall Phone: (314) 977-2553 Email: [email protected] http://www.slu.edu/its/

© 2006 by Saint Louis University, written by Jim Greathouse, Saint Louis University, content provided by SCT Xtender Solutions.
© 2000 by CustomGuide, Inc. 4941 Columbus Avenue, Minneapolis, MN 55417
This format is copyrighted and all rights are reserved by CustomGuide, Inc. No part of this publication may be reproduced, transmitted, transcribed, stored in a retrieval system, or translated into any language or computer language, in any form or by any means, electronic, mechanical, magnetic, optical, chemical, manual, or otherwise, without the prior written permission of CustomGuide, Inc. and Saint Louis University, St. Louis, MO.
We make a sincere effort to ensure the accuracy of the material described herein; however, CustomGuide makes no warranty, express or implied, with respect to the quality, correctness, reliability, accuracy, or freedom from error of this document or the products it describes. Data used in examples and sample data files are intended to be fictional. Any resemblance to real persons or companies is entirely coincidental.
The names of software products referred to in this manual are claimed as trademarks of their respective companies. CustomGuide is a registered trademark of CustomGuide, Inc.

Table of Contents Chapter One: Getting Started .......................................................................................... 5
Lesson 1-1: Synchronizing You Password.............................................................................6 Lesson 1-2: Installing the IRC Viewer...................................................................................9
Chapter Two: Introduction and Logging In and Out ...................................................15 Lesson 2-1: Logging into WebXtender................................................................................16 Lesson 2-2: Logging out of WebXtender.............................................................................18
Chapter Three: How to use the Basic Functions..........................................................19 Lesson 3-1: Viewing Previously Scanning Documents .......................................................20
Chapter Four: Frequently Asked Questions................................................................. 25 Lesson 4-1: Frequently Asked Questions ............................................................................26
Chapter Five: Getting Help with ApplicationXtender ................................................ 27 Lesson 5-1: On-Line Help ...................................................................................................28 Lesson 5-2: Getting Help at SLU ........................................................................................30
Index......................................................................................................................................31


Chapter One: Getting Started
Chapter Objectives: • Synchronizing Your Document Imaging and Internet Native Banner
Passwords
• Installing the IRC Viewer
Before we begin looking at Document Imaging we will discuss how to synchronize your account with your Internet Native Banner (INB) account. You must have an Internet Native Banner (INB) account to be able to access Xtender and will need to synchronize your password. This will provide ease of movement between programs allowing you to access one program easily from within the other.
Prerequisite • ApplicationXtender
training account.
6 Document Imaging Training
http://www.slu.edu/its/
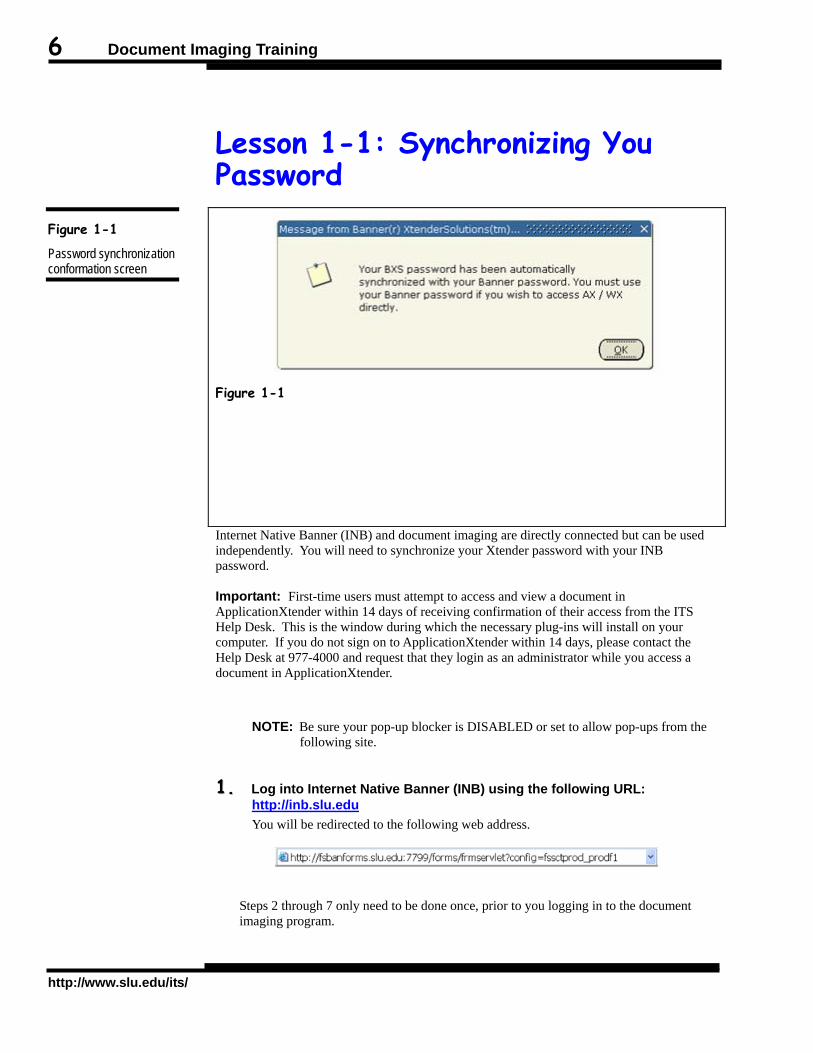
Lesson 1-1: Synchronizing You Password
Figure 1-1
Internet Native Banner (INB) and document imaging are directly connected but can be used independently. You will need to synchronize your Xtender password with your INB password. Important: First-time users must attempt to access and view a document in ApplicationXtender within 14 days of receiving confirmation of their access from the ITS Help Desk. This is the window during which the necessary plug-ins will install on your computer. If you do not sign on to ApplicationXtender within 14 days, please contact the Help Desk at 977-4000 and request that they login as an administrator while you access a document in ApplicationXtender.
NOTE: Be sure your pop-up blocker is DISABLED or set to allow pop-ups from the following site.
11.. Log into Internet Native Banner (INB) using the following URL: http://inb.slu.edu You will be redirected to the following web address.
Steps 2 through 7 only need to be done once, prior to you logging in to the document imaging program.
Figure 1-1
Password synchronization conformation screen
Chapter One: Getting Started 7
Information Technology Services
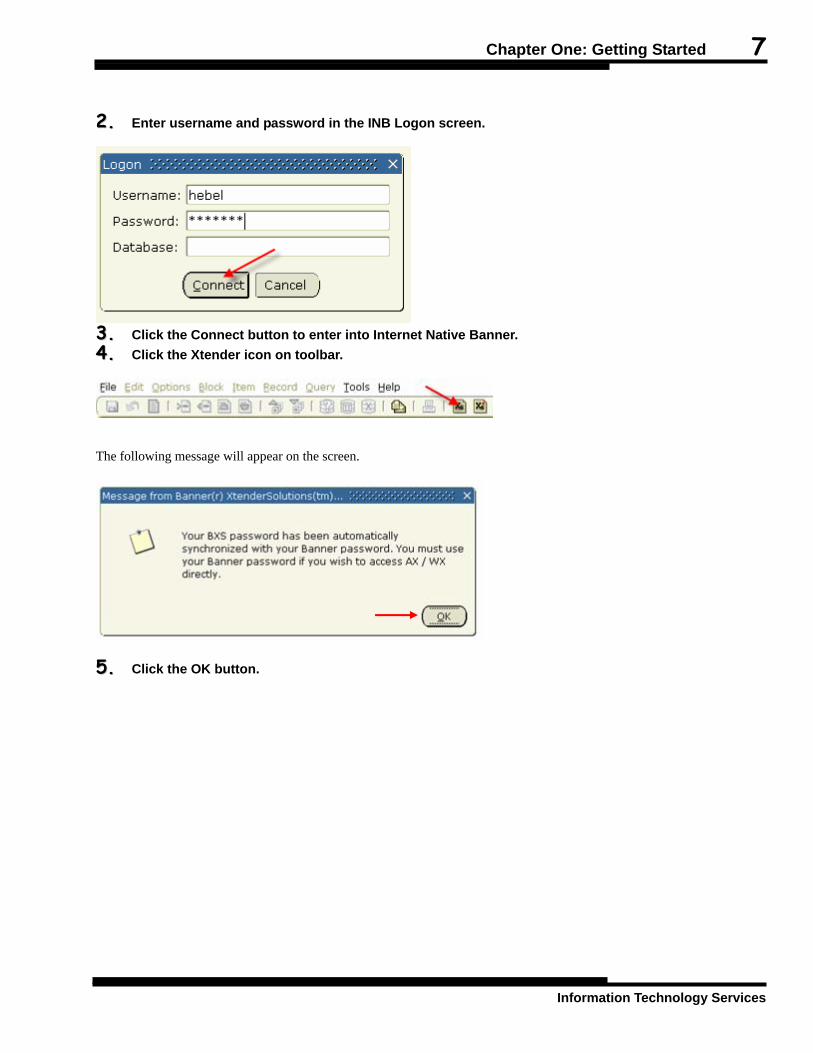
22.. Enter username and password in the INB Logon screen.
33.. Click the Connect button to enter into Internet Native Banner. 44.. Click the Xtender icon on toolbar.
The following message will appear on the screen.
55.. Click the OK button.

8 Document Imaging Training
http://www.slu.edu/its/
Next the Xtender page will appear. 66.. Close the Internet Explorer browser window. Your password has been synchronized with IN Banner account. Please refer to your specific departmental instructions on how to access your particular application.
NOTE: You may receive a message that you do not have access to a particular Xtender application. That is ok. Please refer to your specific departmental instructions on how to access your particular application.
Chapter One: Getting Started 9
Information Technology Services
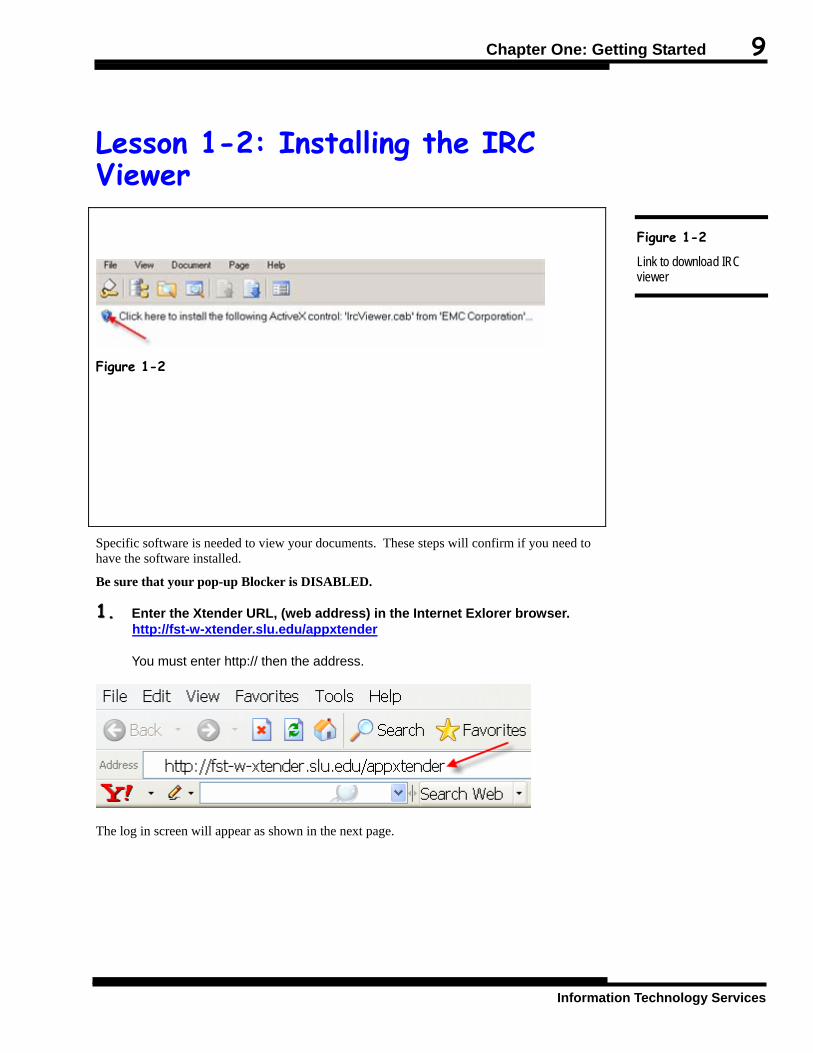
Lesson 1-2: Installing the IRC Viewer
Figure 1-2
Specific software is needed to view your documents. These steps will confirm if you need to have the software installed.
Be sure that your pop-up Blocker is DISABLED.
11.. Enter the Xtender URL, (web address) in the Internet Exlorer browser. http://fst-w-xtender.slu.edu/appxtender
You must enter http:// then the address.
The log in screen will appear as shown in the next page.
Figure 1-2
Link to download IRC viewer
10 Document Imaging Training
http://www.slu.edu/its/
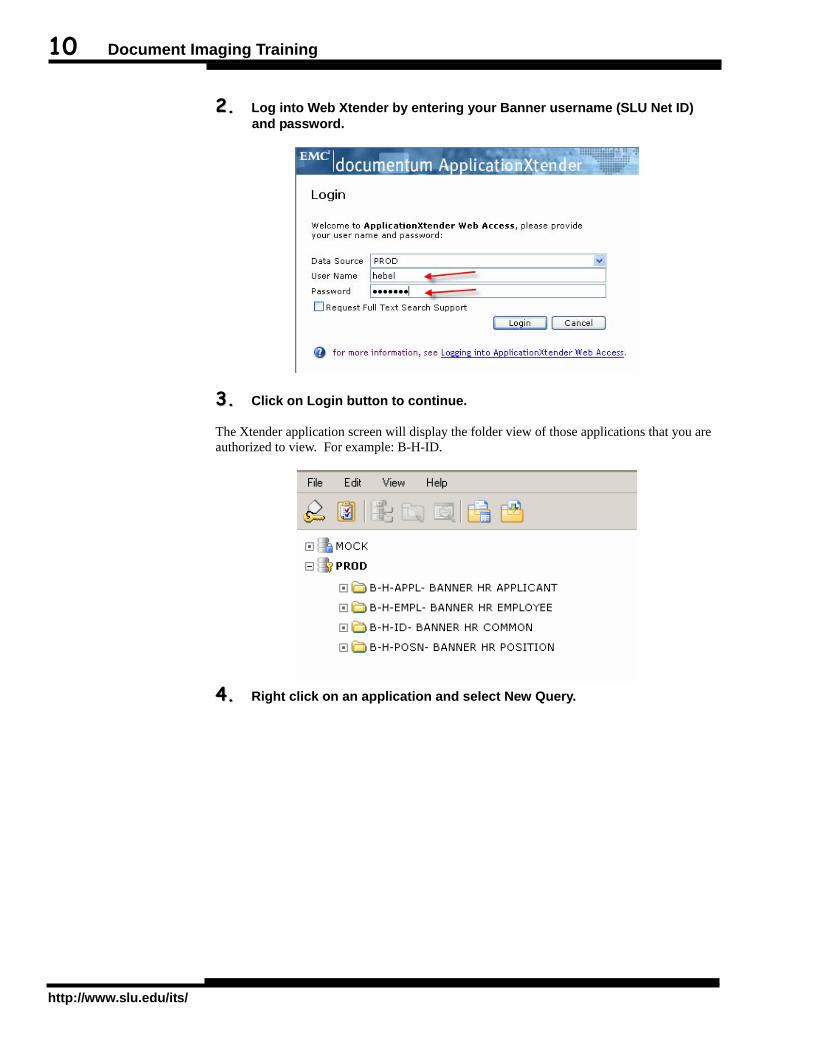
22.. Log into Web Xtender by entering your Banner username (SLU Net ID) and password.
33.. Click on Login button to continue. The Xtender application screen will display the folder view of those applications that you are authorized to view. For example: B-H-ID.
44.. Right click on an application and select New Query.
Chapter One: Getting Started 11
Information Technology Services
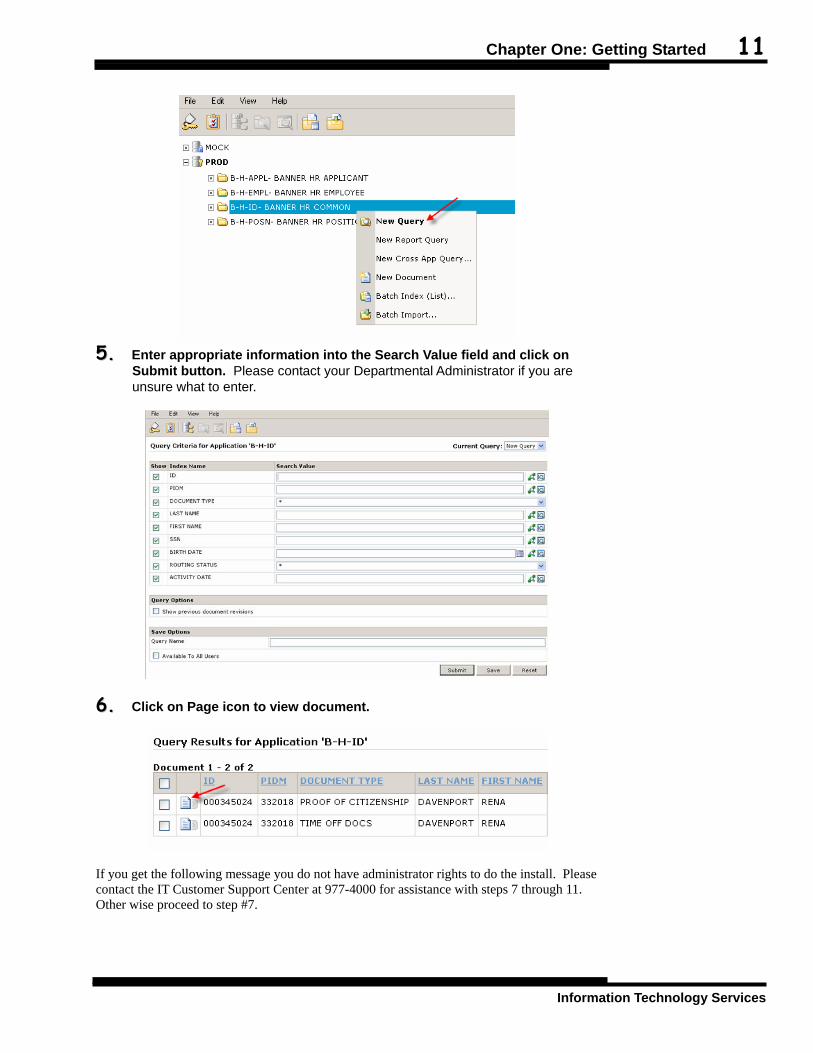
55.. Enter appropriate information into the Search Value field and click on
Submit button. Please contact your Departmental Administrator if you are unsure what to enter.
66.. Click on Page icon to view document.
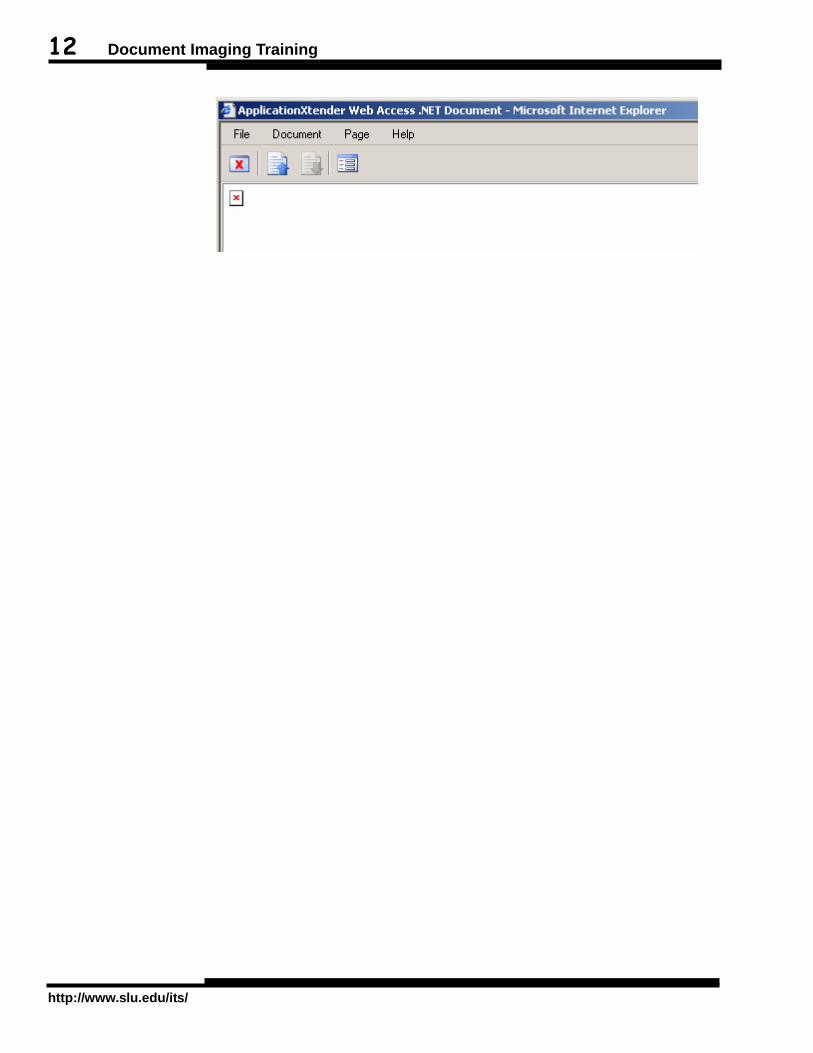
If you get the following message you do not have administrator rights to do the install. Please contact the IT Customer Support Center at 977-4000 for assistance with steps 7 through 11. Other wise proceed to step #7.
12 Document Imaging Training
http://www.slu.edu/its/
Chapter One: Getting Started 13
Information Technology Services
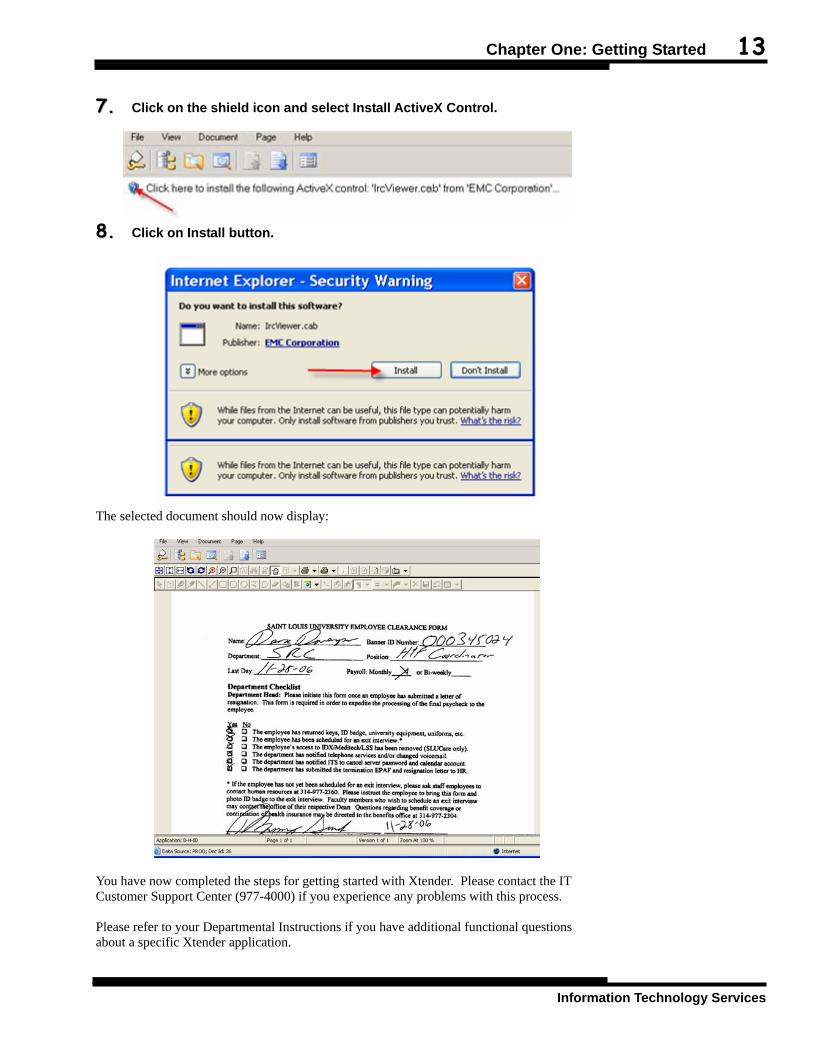
77.. Click on the shield icon and select Install ActiveX Control.
88.. Click on Install button.
The selected document should now display:
You have now completed the steps for getting started with Xtender. Please contact the IT Customer Support Center (977-4000) if you experience any problems with this process. Please refer to your Departmental Instructions if you have additional functional questions about a specific Xtender application.

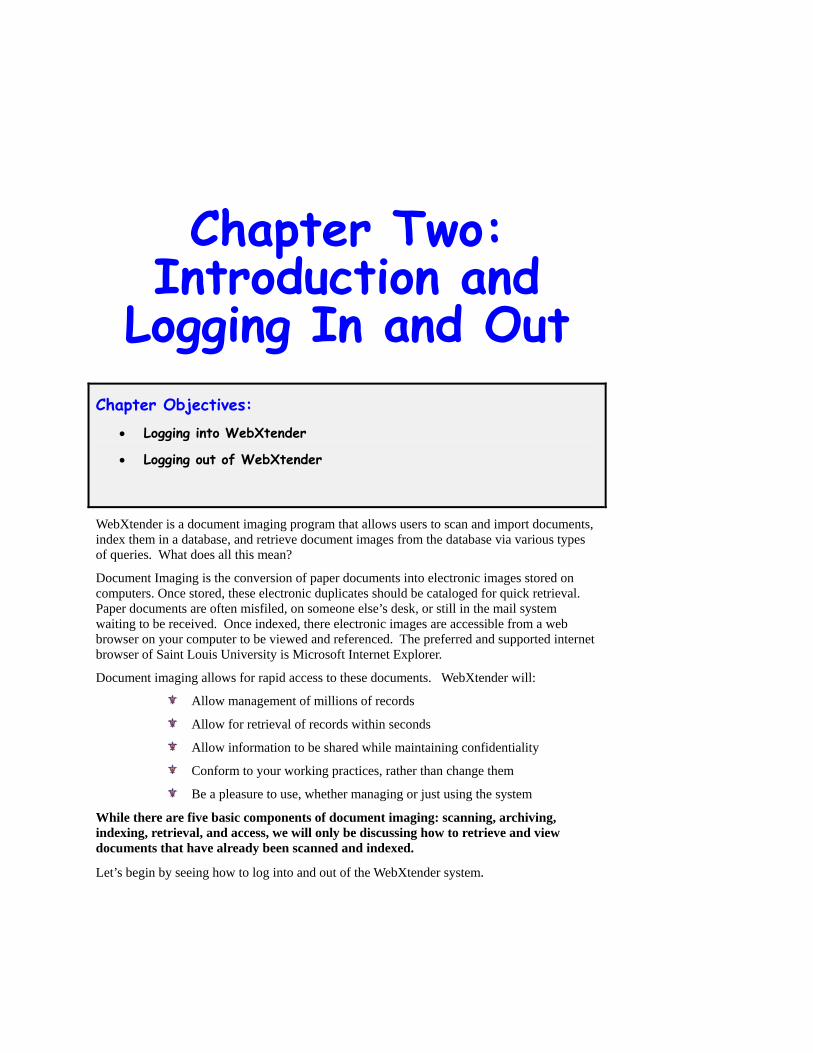
Chapter Two: Introduction and
Logging In and Out Chapter Objectives:
• Logging into WebXtender
• Logging out of WebXtender
WebXtender is a document imaging program that allows users to scan and import documents, index them in a database, and retrieve document images from the database via various types of queries. What does all this mean?
Document Imaging is the conversion of paper documents into electronic images stored on computers. Once stored, these electronic duplicates should be cataloged for quick retrieval. Paper documents are often misfiled, on someone else’s desk, or still in the mail system waiting to be received. Once indexed, there electronic images are accessible from a web browser on your computer to be viewed and referenced. The preferred and supported internet browser of Saint Louis University is Microsoft Internet Explorer.
Document imaging allows for rapid access to these documents. WebXtender will:
Allow management of millions of records
Allow for retrieval of records within seconds
Allow information to be shared while maintaining confidentiality
Conform to your working practices, rather than change them
Be a pleasure to use, whether managing or just using the system
While there are five basic components of document imaging: scanning, archiving, indexing, retrieval, and access, we will only be discussing how to retrieve and view documents that have already been scanned and indexed.
Let’s begin by seeing how to log into and out of the WebXtender system.

16 Document Imaging Training
http://www.slu.edu/its/
Lesson 2-1: Logging into WebXtender
Throughout these exercises, you will be entering data that is specific to you as an individual. Whenever you see “username” you will need to enter your SLU Net ID (e-mail user name) and your SLU Net Password to logged into the system.
11.. Double-click the WebXtender Desktop icon or enter the following URL:
URL: http://fst-w-xtender.slu.edu/wx/ (this is a production environment) Enter your logon ID and password when the Logon window opens. This logon will allow you to perform the first portion of these exercises.
22.. Use the dropdown box to choose PROD. 33.. Enter your user name. (remember, username = your email user name) 44.. Enter your log on Password. 55.. Click the Submit button.
Figure 2-1
WebXtender logon screen
Figure 2-1
Chapter Two: Introduction and Logging In and Out 17
Information Technology Services
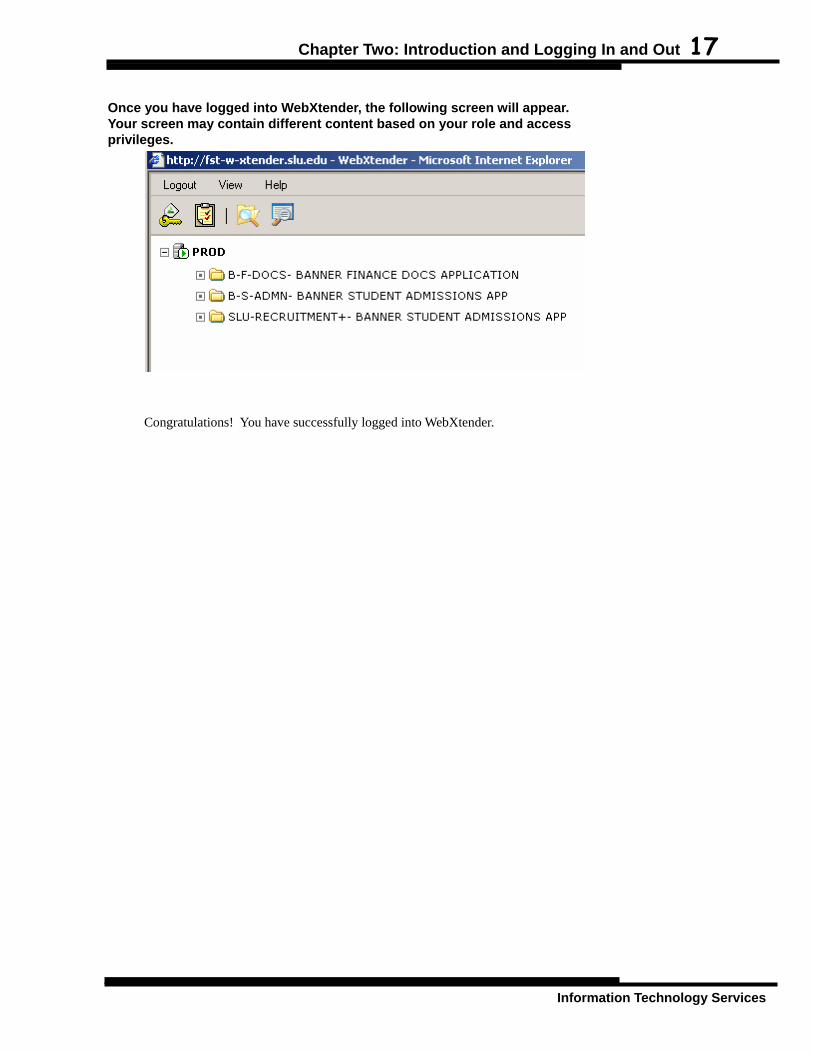
Once you have logged into WebXtender, the following screen will appear. Your screen may contain different content based on your role and access privileges.
Congratulations! You have successfully logged into WebXtender.
18 Document Imaging Training
http://www.slu.edu/its/
Lesson 2-2: Logging out of WebXtender
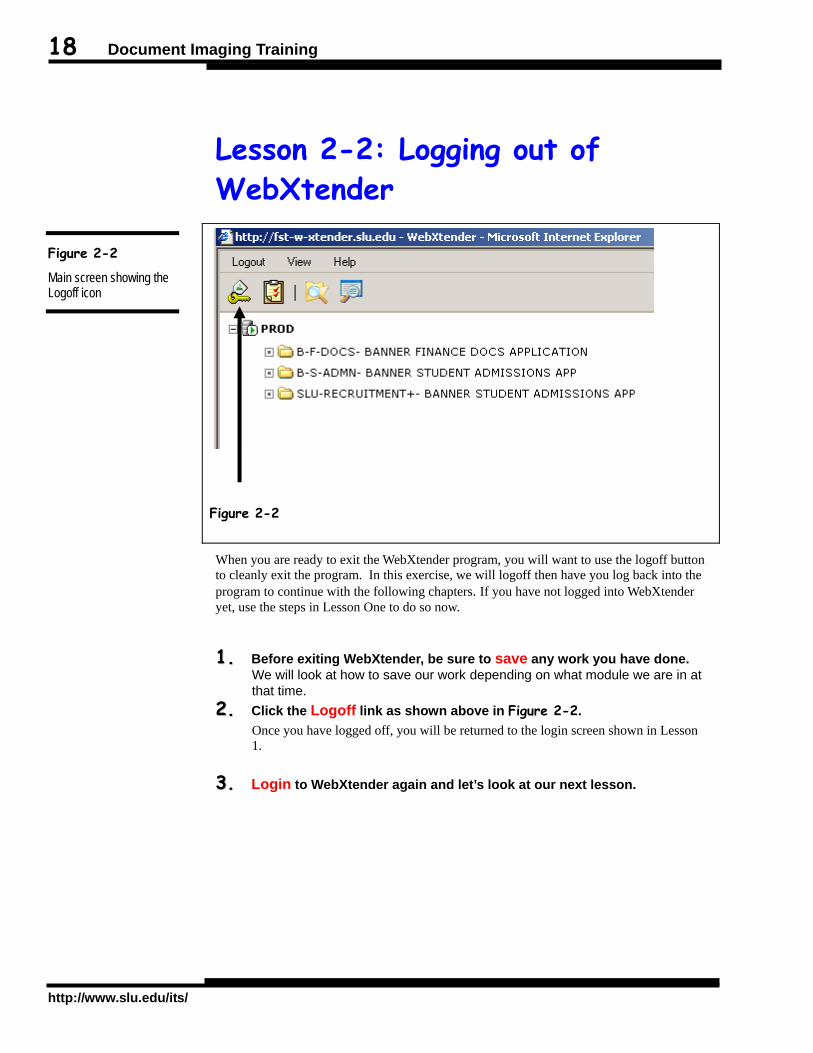
Figure 2-2
When you are ready to exit the WebXtender program, you will want to use the logoff button to cleanly exit the program. In this exercise, we will logoff then have you log back into the program to continue with the following chapters. If you have not logged into WebXtender yet, use the steps in Lesson One to do so now.
11.. Before exiting WebXtender, be sure to save any work you have done. We will look at how to save our work depending on what module we are in at that time.
22.. Click the Logoff link as shown above in Figure 2-2. Once you have logged off, you will be returned to the login screen shown in Lesson 1.
33.. Login to WebXtender again and let’s look at our next lesson.
Figure 2-2
Main screen showing the Logoff icon
Chapter Three: How to use the Basic
Functions Chapter Objectives:
• Retrieval Tools
The information in this manual is directed more to the retrieval of documents.
This chapter discusses how to locate a document that has already been scanned into Banner.

20 Document Imaging Training
http://www.slu.edu/its/
Lesson 3-1: Viewing Previously Scanning Documents
Figure 3-1 The document imaging program allows you to view information that has been scanned and indexed in Banner. When the document has been indexed, it becomes associated with a series of documents in relationship to a banner user number such as a student or staff account, financial account, etc.
11.. Log into your account as previously discussed in Lesson 2-1: Logging into WebXtender.
The following image is an example of the window that will open. Your view may be slightly different based on your roll and permissions.
Figure 3-1
Image of a scanned document
Chapter Three: How to use the Basic Functions 21
Information Technology Services
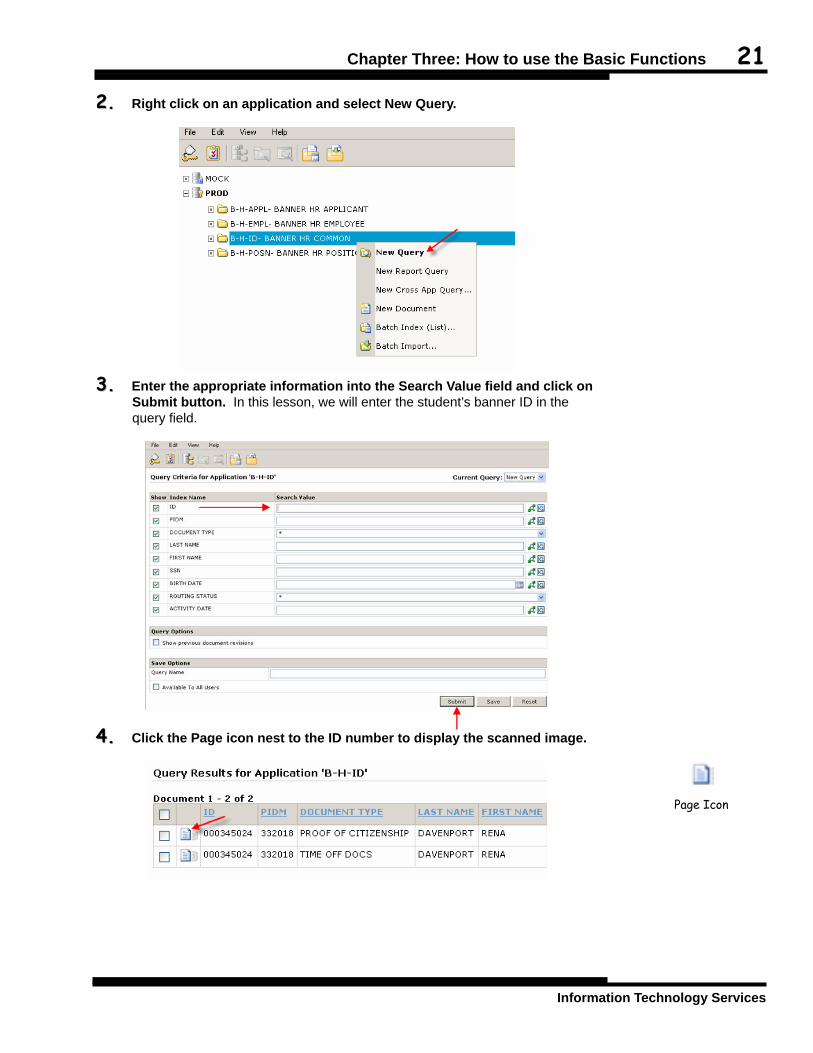
22.. Right click on an application and select New Query.
33.. Enter the appropriate information into the Search Value field and click on
Submit button. In this lesson, we will enter the student’s banner ID in the query field.
44.. Click the Page icon nest to the ID number to display the scanned image.
Page Icon
22 Document Imaging Training
http://www.slu.edu/its/
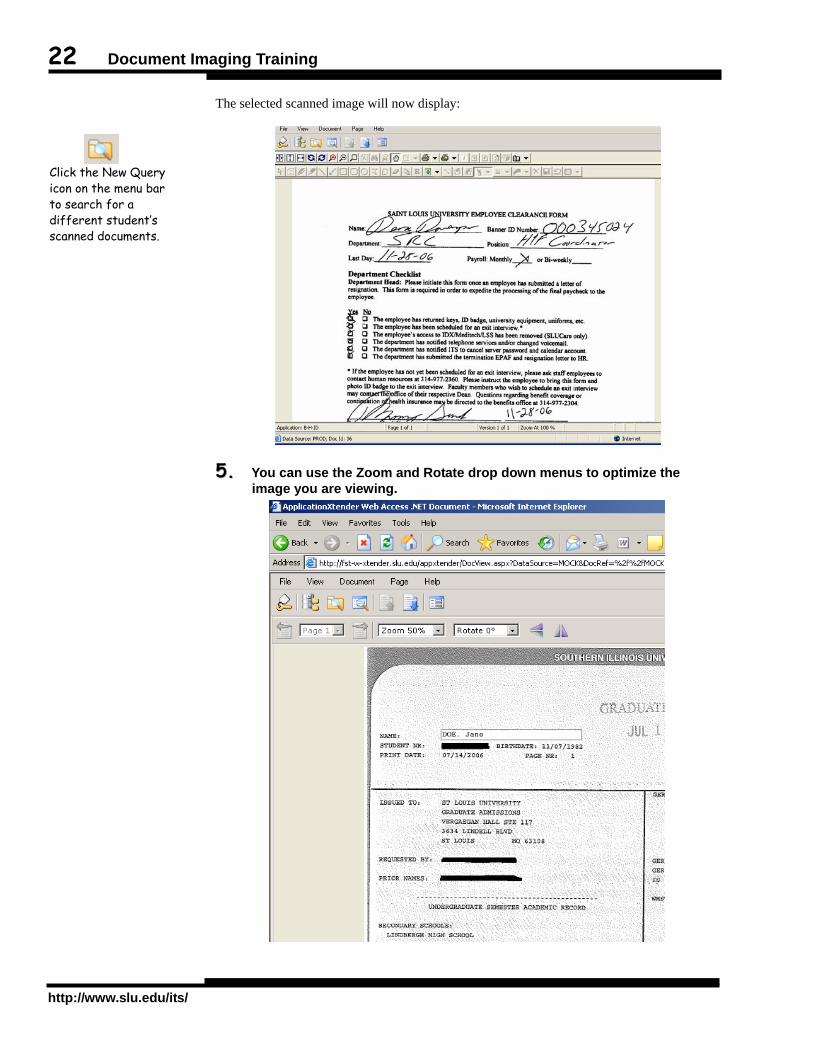
The selected scanned image will now display:
55.. You can use the Zoom and Rotate drop down menus to optimize the image you are viewing.
Click the New Query icon on the menu bar to search for a different student’s scanned documents.

Chapter Three: How to use the Basic Functions 23
Information Technology Services
66.. When you are done viewing the transcript, use the buttons marked below
to continue.

24 Document Imaging Training
http://www.slu.edu/its/
Chapter Four: Frequently Asked
Questions Additional Sources of Information
The following pages offer various sources of additional information. Often, these frequently asked questions and answers can help you before you need to call for help.
26 Document Imaging Training
http://www.slu.edu/its/
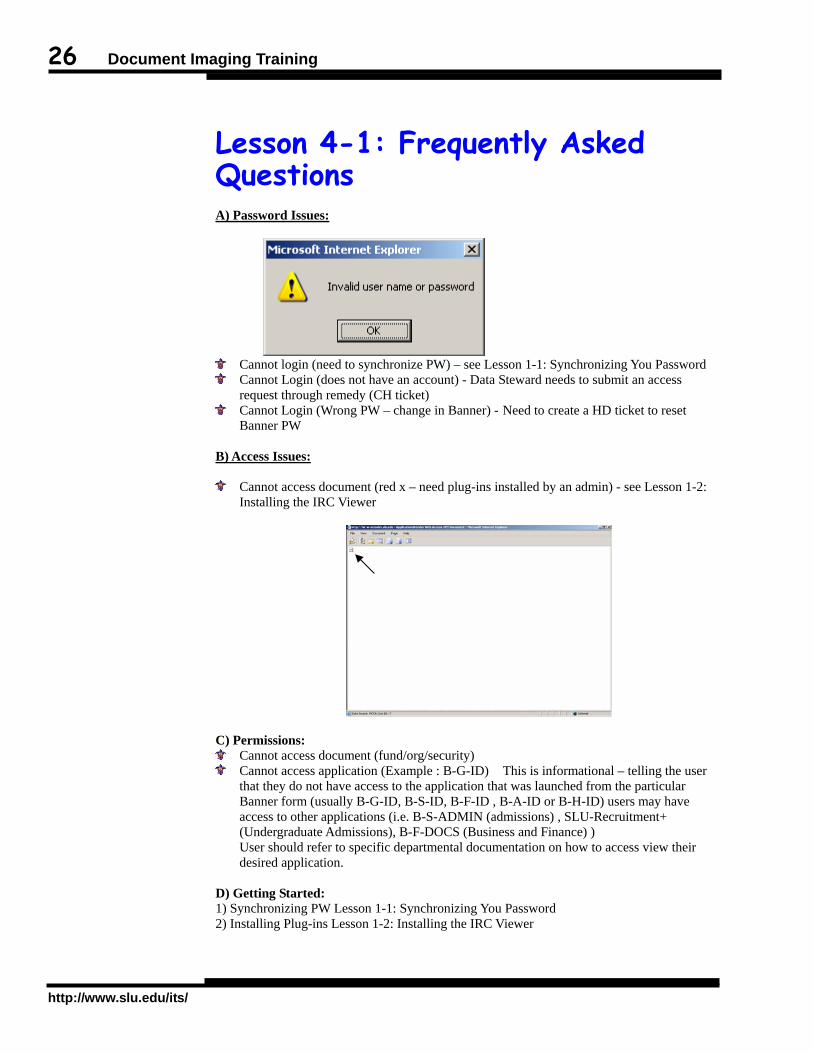
Lesson 4-1: Frequently Asked Questions A) Password Issues:
Cannot login (need to synchronize PW) – see Lesson 1-1: Synchronizing You Password Cannot Login (does not have an account) - Data Steward needs to submit an access
request through remedy (CH ticket) Cannot Login (Wrong PW – change in Banner) - Need to create a HD ticket to reset
Banner PW B) Access Issues:
Cannot access document (red x – need plug-ins installed by an admin) - see Lesson 1-2: Installing the IRC Viewer
C) Permissions: Cannot access document (fund/org/security) Cannot access application (Example : B-G-ID) This is informational – telling the user
that they do not have access to the application that was launched from the particular Banner form (usually B-G-ID, B-S-ID, B-F-ID , B-A-ID or B-H-ID) users may have access to other applications (i.e. B-S-ADMIN (admissions) , SLU-Recruitment+ (Undergraduate Admissions), B-F-DOCS (Business and Finance) ) User should refer to specific departmental documentation on how to access view their desired application.
D) Getting Started: 1) Synchronizing PW Lesson 1-1: Synchronizing You Password 2) Installing Plug-ins Lesson 1-2: Installing the IRC Viewer

Chapter Five: Getting Help with ApplicationXtender 27
Chapter Five: Getting Help with ApplicationXtender
Chapter Objectives: • Using ApplicationXtender on-line help
• Getting help at Saint Louis University
Now that you’ve walked through an introduction to using ApplicationXtender, you should be more comfortable with getting started.
Once you start trying new things in ApplicationXtender, you may have some questions.
Let’s see where you can go to get help!
28 Document Imaging Training
http://www.slu.edu/its/
Lesson 5-1: On-Line Help
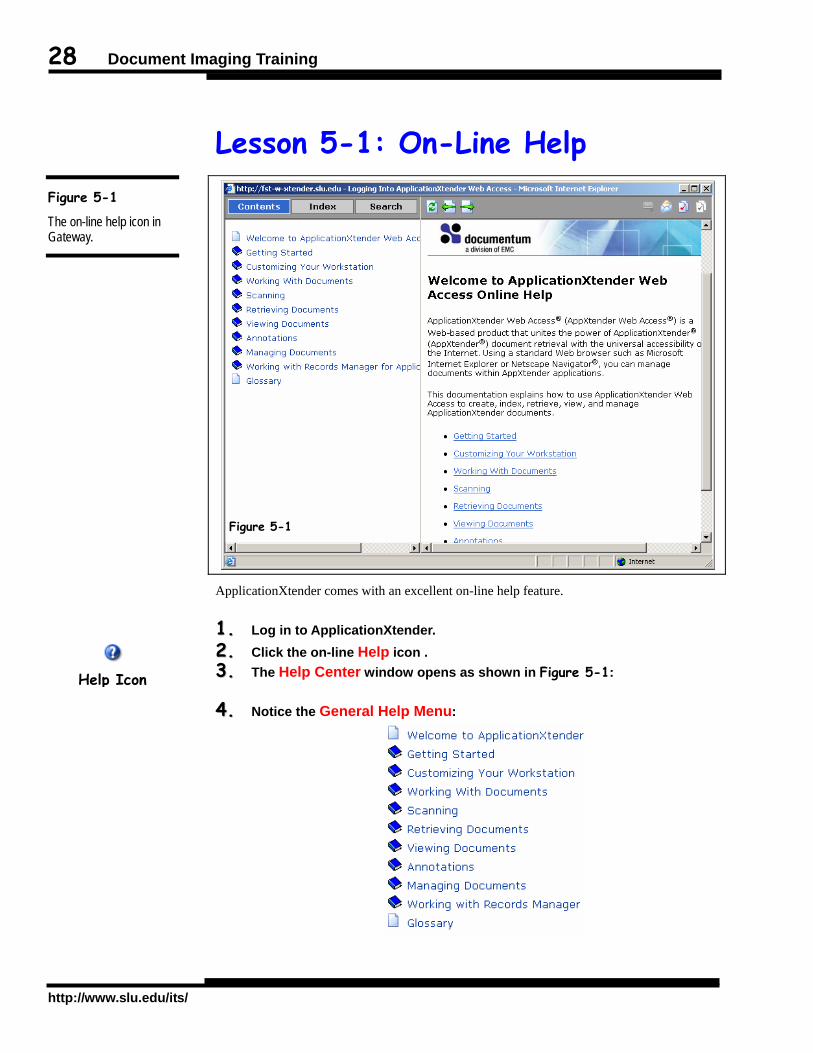
ApplicationXtender comes with an excellent on-line help feature.
11.. Log in to ApplicationXtender. 22.. Click the on-line Help icon . 33.. The Help Center window opens as shown in Figure 5-1:
44.. Notice the General Help Menu:
Figure 5-1
The on-line help icon in Gateway.
Help Icon
Figure 5-1

Chapter Five: Getting Help with ApplicationXtender 29
55.. Click Retrieving Documents. Notice how the book icon shows as being open and displays a list of subtopics to choose from?
You may also use a Search feature to look up a specific topic.
66.. Click on the Search tab then type in a specific topic and click Go!

30 Document Imaging Training
http://www.slu.edu/its/
Lesson 5-2: Getting Help at SLU
If you need additional help with ApplicationXtender:
1. Contact the ITS Customer Service Center at 977-4000.
2. Contact your local support staff: Name: __________________________________________________
Telephone: __________________________________________________
E-Mail: __________________________________________________
3. SLU Web Pages for Department Specific Information: Business and Finance: http://www.slu.edu/services/busfin/main/pages/busfin/faq_main.html
Figure 5-2
The ITS Customer Service Center is ready to offer ApplicationXtender assistance.
Figure 5-2
Index
F
Frequently Asked Questions ..................25
G
Getting Help ..........................................28
H
Help .......................................................28
I
IRC Viewer install guide .........................9
L
Logoff logging out of WebXtender ...............18
Logon logging into WebXtender...................16
P
Password Synchronize with INB .........................6
V
Viewing scanned documents .................20