Disaster recovery in the cloud from catastrophe to cloud-ready in half a webinar

Disaster Response and Recovery Webinar: [title slide] Introduction [slide – building] Natural disasters and man-made events often leave a trail of destruction in their wake, whether it’s damaged or destroyed buildings, [slide – inside building] beloved family keepsakes, or [slide – inside library and museum] treasured collections in our museums and libraries. The loss of these cultural artifacts can be heart-wrenching for the individuals involved, but is also a significant loss for the community at-large, as each lost item represents a story that can no longer be shared with current and future generations. [slide – homeowners and vol] We have all seen the images of the devastation caused by Tropical Storm Irene and Hurricane Sandy in New York. Yet among the news of the billions of dollars in damage suffered by homeowners and businesses, there were stories of people finding family photographs, letters, wedding dresses, and of conservators and other collection professionals donating their time and expertise to help salvage artwork and antiques damaged by these storms. For those who have been fortunate to recover family mementos and antiques, the question is always the same, “Can it be saved?” It may come as a surprise to you, but often the answer is yes, it can be saved. However, to be able to save our collections, we need to be prepared. [slide - disaster logo] Today, I would like to share with you how you and your institution can plan to be ready to respond to a disaster, before one ever occurs. And I would like to take this opportunity to remind all of you, that it is not IF an event will happen at your site, but WHEN. I know that some of you participated in the Disaster Planning webinar which I gave in June and I hope you have had the opportunity to share what you learned with fellow staff members and trustees and have begun work on a plan. For those of you that are joining us for the first time today, a recording of the disaster planning webinar is available online through Greater Hudson Heritage Network. If you don’t have a disaster plan at your site or if it is out-of-date, I would encourage you to watch the webinar, get informed, and champion this cause at your institution. An effective disaster response and recovery is nearly impossible without a good disaster plan. I also want to be clear, that the response and recovery phase after a disaster only takes place when first responders have deemed the area safe. Human safety always trumps any priceless antique.

Disaster Plan and Knowing Your Risks A good disaster plan includes information on [SLIDE – DISASTER PLAN POINTS]
[click] Preventing or mitigating disasters
[click] Preparing for the most likely emergencies
[click] Responding quickly to minimize damage if a disaster happens
[click] And recover effectively from a disaster while continuing to provide services to your community.
The best way to prevent or mitigate disasters is to know and understand the risks to the building and collections, and provide concise information on how to respond to different disaster scenarios. Museums and libraries hold their collections in trust for the public and must make sure to minimize any risks to the collections for their preservation and to safeguard staff, volunteers and the public. Identifying, understanding and responding to risks to the building and collections is an important component of managing cultural heritage institutions. In addition, mitigating risks that threaten the collections and or buildings, is an act of fiscal responsibility. Even with insurance, and if you qualify for assistance from FEMA, disasters are still a drain on your bank account. Understanding the risks to your collection or building will lead to a much more effective response and recovery phase. Your institution will be in the position to affect an immediate, organized, and effective response to your event. This in turn will minimize damage to collections and records and prevent interruption of operations and services. Your disaster plan should include general guidelines and specific steps museum staff will take to respond to each type of disaster or hazard. In order to prepare for this section, staff members are encouraged to first do a risk assessment. [SLIDE – IDENTIFYING RISKS] This assessment will help you identify what are the main threats to your collections, what can be done to mitigate those threats, and what are the collections that are most critical to your institution and its mission and would be irreplaceable after an emergency. [SLIDE – TWO TYPES OF DISASTERS] So, let’s begin by looking at disasters. There are two types, natural disasters and man-made events. Natural disasters are events caused by extreme weather or environmental factors, such as hurricanes, floods, tornadoes, earthquakes, etc. Man-made events would include deferred maintenance, negligence, arson, damage caused by carelessness or intentional damage, issues with the infrastructure, and industrial accidents that can lead to chemical and hazardous material emergencies. Your disaster plan should reference the events that could impact your institution. For example, in our area of the country we know that hurricanes and nor’easters are a greater threat than earthquakes and tsunamis – and your disaster plan needs to reflect

those risks. Similarly, institutions located in urban areas or are part of or near national or historic landmarks face different risks than those located in suburban or rural locations. And then there are some events which all institutions are at risk, these include fires, water damage, and mechanical failures. To give you an example, the image you see on the right is the after effects of a Molatov cocktail being dumped into an interior book drop at a local library. If your library uses an interior book drop your disaster plan needs to address the risk of items, other than library materials, being deposited in the drop and the damage they can cause to the building and collections. The simplest and most direct mitigation of this threat is to seal the internal book drop and install a free-standing, external book drop that is located away from the building. [slide – ceiling and basement flood] In addition to natural and industrial or environmental risks, your building and its mechanical system may put your collections at risk. Here is where deferred maintenance, leaky roofs, drainage problems can threaten your collection. If you know your institution has issues and that correction has been deferred for a variety of reasons, be sure you take whatever mitigation steps you can to minimize damage. If your roof leaks, be sure that any collections stored near the leak are draped in plastic or have a ceiling catch basin installed. If poor drainage is causing flooding the basement, get a water alarm, try to relocate collection items out of the basement or at least raise them 4” of the floor. [slide – shelves/walls] Another risk factor you might have could be unbolted shelving or book cases. In libraries this can be a huge problem. Or perhaps the plaster in your historic house is cracked and crumbling, yet you have an heavy framed painting suspended from a picture wire – this is a disasterous event, just waiting to happen. Both of these should be identified in your disaster plans and mitigation steps taken as soon as is feasible. [slide-scarsdale] Buildings and collections are also at greater risk while undergoing construction or renovation. The presence of construction crews, potential for accidents, damage, etc. are increased during these projects. Disaster responders often note that most fires at construction sites happen on Friday afternoons after 5pm, when workers are eager to get home for the weekend and don’t leave sufficient time for hot tools to cool off. This historical society in New York experienced such an event when a painting contractor chose to use a heat gun to remove old paint, which in turn set the doors on fire filling the exhibit areas with smoke and soot. [slide-hazards in the collection] The final risk to your institution can be from hazardous collections. Whether your collection includes taxidermied animals, biological speciments, guns and weapons, preserved foods, ethnographic and archaeological materials, treated costumes and textiles such as weighted silk, certain cellulose films, medical equipment, etc., some

items in our collections have the potential of harming staff members or damage other collections or the building if not handled properly. If you have hazardous materials in your collection, here are some steps to take to mitigate the potential threat:
Inventory hazardous materials and conduct a visual inspection for any visual changes or odors
Store hazardous materials appropriately and clearly label them as hazardous or potentially hazardous
Inform the local fire marshall of these items and their location in your institution Always wear the appropriate personnal protective gear when handling these
materials And get expert advice to keep you, your staff, your collections and your building
safe. [slide- conserve o gram] A great resource on this topic is the National Park Service Conserve-o-gram on Hazardous Materials. It’s available at the web address on the screen and I strongly recommend that you download a copy and review it. Sometimes it’s really useful to have a fresh pair of eyes look at a situation and help identify risks we may be overlooking. Questions: About risk [SLIDE – WALK THRU WITH FIRE DEPT, 1, 2, 3, 4] As I mentioned, first responders will have initial access to your site during an emergency and won’t hand it back over to you until they are sure it’s safe. It’s a really good idea to contact your local police and fire department and invite them for a walk-through of your institution. In an emergency you will be working with your local first responders to save and secure your institution. By working together, cultural institutions and fire departments can gain an understanding of how each other works, and dramatically increase the possibility of preserving lives, facilities and collections in an emergency.
[click] Share your disaster plan with your local first responders
[click] point out any areas that are a concern to you
[click] indicate the location of high priority salvage items
[click] but also ask them if they have any concerns regarding your building or collections.
I know many institutions are hesitant to have their local fire marshall out to inspect their building. But I encourage you to work with them. Not only can they recommend needed changes to protect your institution, collections and staff when a disaster occurs, but you can also inform them about your site so they are safe when entering your building. For example, I used to work in an 18th century house museum, and I knew that the floor of the kitchen garrett was not a load bearing floor – I needed to make sure

our local fire department was aware of that. If three 200 pound men, wearing 50 pounds of gear stepped in that room, the floor would probably give way.
[SLIDE – CT RIVER MUSEUM FIRE]
Another good example, is the response to a fire at the Connecticut River Museum in the summer of 2010. The museum caught fire in the evening, after the museum was closed, the fire fighters that responded broke into teams – one team fought the fire, while the other removed collections from the museum based on what had been pointed out to them – as a result high priority items were saved and collections were not damaged by the fire.
Once you have documented the risks to your collection and building, the natural next step is to take preventative measures that will mitigate these threats. Staff members and trustees need to work together to prioritize mitigation plans, beginning with those risks that are the most immediate threats to the institution. Get Prepared: Your Response and Recovery Plan is actually an important part of your overall disaster plan and should include: [SLIDE – RESPONSE AND RECOVERY PARTS]
information on your disaster response team
how you will salvage your information technology tools (your computer catalogue, internet access, etc.)
determine how to relocate your institution and its services if your building is not usable
determine the salvage priorities for your collections and institutional records
creating evacuation and emergency procedures
designating a command center or temporary work space
and of course in any disaster you need to have copies of your insurance policy and know what your insurance policy will cover – and this is for your building and your collections.
Museums and libraries should also include in their disaster response and recovery plan specific strategies for emergency clean-up and salvaging for both the collections and the building. These steps should be prioritized so that staff can use their time wisely and effectively. It’s also very helpful to include step-by-step instructions for stabilizing collections after an event and documenting condition of collection items and the facility. [slide-steps] For an effective emergency response you will need to collect and include in your plan:
Floor plans – indicate location of high priority collection items
List of emergency resources/suppliers

An outline of staff roles and responsibilities, including designation of emergency coordinators
Chain of command
Emergency contacts and call list
Evacuation procedures
Any forms or checklists to help document the disaster
Press release templates to manage the information shared with the media and the public
All of this information is based on your familiarity with your institution, its collections, its facilities and its audience. Every museum and library has a mission statement that states what their purpose is. Every institution considers itself an important part of its community. But what are the essential services you provide? During the last several major storms, local libraries have become a key resource for their communities as they work towards recovery. [SLIDE – 3 IMAGES OF LIBRARIES] In the aftermath of Tropical Storm Irene and Hurricane Sandy, local libraries and museums have played a pivotal role in their community’s recovery. Those libraries that were able to reopen quickly provided a place for those hardest hit by these storms to escape cold homes, have something warm to drink and to charge their electronic devices. How prepared is your institution to maintain these services if it is damaged or without power? How prepared are you for additional patrons? Are there enough outlets or additional users? Do you need additional power strips? Is their sufficient seating and parking? Do you have generators to get up and running if power restoration is delayed? To remain a valuable asset in an emergency libraries and museums must look ahead and define the role they will play when an emergency impacts their community, but they also need to know how to respond if a disaster strikes their own institution. And the answers to these questions should be part of the response and recovery plan in your disaster plan. Create a Disaster Response Team & Train your Staff: [SLIDE – DISASTER RESPONSE TEAM] Every emergency requires a disaster response team who will coordinate the initial response to the emergency, the salvage and oversee the long-term recovery of the collections and building. The disaster response team should include staff members that can think clearly in a crisis, they need to be able to respond and get to the site quickly. Each team member also needs to have a specific responsibility during the disaster response, know what it is and be ready to do it when an emergency occurs. It’s important to note that the members of your disaster team may not follow your organization’s hierarchy. I’m sure all of us can think of people who are great with day-to-day operations, but are not the best person in a crisis. Your disaster team should

also include any non-staff members, such as personnel from town departments and board members who will be essential in recovering from a disaster. The members of the disaster team should be able to think clearly under pressure, consider all options quickly but carefully, make decisions, and act. In particular, the head of the team will need to provide strong leadership in stressful circumstances. Ideally, each member of the disaster team should have a specific task that they are responsible for managing through the event. For larger institutions with more staff at their disposal, filling these roles should be easier. Smaller institutions may find themselves assigning more than one responsibility per person. This is not an ideal way to manage a response, and smaller institutions would benefit from establishing mutual aid agreements with neighboring institutions instead. A mutual aid agreement is a commitment that if a disaster strikes one institution, the staff/volunteers or trustees of the other will come and provide manpower and assistance. In these situations, it’s best to have nearby museum and library professionals oversee the less involved aspects of the disaster response – such as organizing and manning a rest area, providing drinks and refreshments for the disaster responders, collecting supplies and equipment, or assisting other disaster team members. So let’s go over the members of a disaster team – and as I mentioned before, not every site will have the manpower to fill out these roles, but that is where pre-planning is so important. If you don’t have enough staff, volunteers or trustees suitable for carrying out the tasks, then you need to start recruiting people from neighboring institutions. [slide-team members] Disaster Team Leader This person is responsible for activating the disaster plan and coordinating all recovery activities. They will consult with and supervise all members of the disaster team; establish and coordinate an internal communications network; and report to the director or governing body, as appropriate. Administrator/Supplies Coordinator This individual will track personnel working on the disaster recovery; maintain in-house disaster response supplies; order and coordinate supplies, equipment, and services with other team members; authorizes expenditures; and deal with the insurance company. Collections Recovery Specialist This person will keep track of all collection recovery procedures; determine overall recovery strategies; coordinate with the administrator regarding collections-related services/supplies/equipment, such as freezing services; and will train and supervise staff and workers in recovery and handling methods. Subject Specialist/Department Head

For larger institutions, this person assesses damage to the collections under his/her jurisdiction; decides what will be discarded and what will be salvaged; and assigns salvage priorities among collections Work Crew Coordinator This individual coordinates the day-to-day recovery work of library staff and volunteers to maintain an effective workflow; arranges for food, drink, and rest for staff, volunteers, and other workers. This is a role that could be performed by a non-staff member or local museum or library professional not associated with your institution, but providing assistance through a mutual aid agreement. Technology Coordinator As our institutions become more dependent on technology systems in their day-to-day operations, your disaster team needs a person who can assess damage to technology systems, such as hardware, software, telecommunications; decide on recovery strategies; sets priorities for recovery; and coordinate with the administrator for external services/supplies/equipment related to technology. Building Recovery Coordinator This person assesses damage to the building and systems; decides on recovery strategies for the building; coordinates with the administrator for external services/supplies/equipment related to building recovery. Security Coordinator After any event securing your institution from vandalism or theft is a high priority. The security coordinator maintains security of collections, building, and property during response and recovery; and sometimes oversees response to medical emergencies. Public Relations Coordinator In this age of social media and 24hour news cycles, you will need to designate a person to coordinate all publicity and public relations, including communication with the media and the public. Documentation Coordinator For insurance purposes and for claims filed with FEMA you will need someone to maintain a list of the priorities for recovery; keep a written record of all decisions; maintain a written and photographic record of all damaged materials for insurance and other purposes; and track collections as they are moved during salvage and treatment. Although they are not usually official members of the disaster response team, it’s important to know in advance who you can contact to provide support for each coordinator during the response and recovery phase, including local museum and library professionals, conservators, etc.
Question About bringing first responders to your site or creating a disaster response team? We’ve covered a lot of points regarding documenting your collections. Let’s look at some of the questions that are coming in.
Be Prepared:
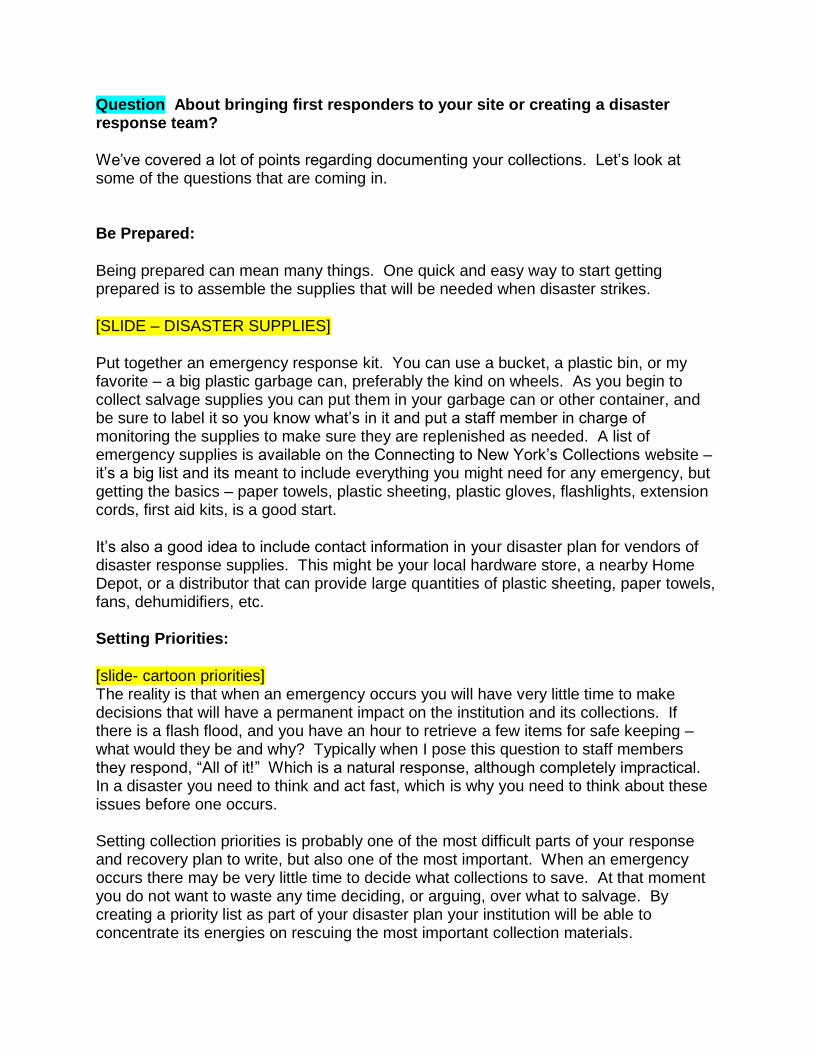
Being prepared can mean many things. One quick and easy way to start getting prepared is to assemble the supplies that will be needed when disaster strikes.
[SLIDE – DISASTER SUPPLIES]
Put together an emergency response kit. You can use a bucket, a plastic bin, or my favorite – a big plastic garbage can, preferably the kind on wheels. As you begin to collect salvage supplies you can put them in your garbage can or other container, and be sure to label it so you know what’s in it and put a staff member in charge of monitoring the supplies to make sure they are replenished as needed. A list of emergency supplies is available on the Connecting to New York’s Collections website – it’s a big list and its meant to include everything you might need for any emergency, but getting the basics – paper towels, plastic sheeting, plastic gloves, flashlights, extension cords, first aid kits, is a good start.
It’s also a good idea to include contact information in your disaster plan for vendors of disaster response supplies. This might be your local hardware store, a nearby Home Depot, or a distributor that can provide large quantities of plastic sheeting, paper towels, fans, dehumidifiers, etc.
Setting Priorities:
[slide- cartoon priorities] The reality is that when an emergency occurs you will have very little time to make decisions that will have a permanent impact on the institution and its collections. If there is a flash flood, and you have an hour to retrieve a few items for safe keeping – what would they be and why? Typically when I pose this question to staff members they respond, “All of it!” Which is a natural response, although completely impractical. In a disaster you need to think and act fast, which is why you need to think about these issues before one occurs. Setting collection priorities is probably one of the most difficult parts of your response and recovery plan to write, but also one of the most important. When an emergency occurs there may be very little time to decide what collections to save. At that moment you do not want to waste any time deciding, or arguing, over what to salvage. By creating a priority list as part of your disaster plan your institution will be able to concentrate its energies on rescuing the most important collection materials.

And I strongly recommend that you don’t follow the approach you see in this cartoon! [SLIDE – SETTING COLLECTION PRIORITIES, list ] There are several ways to begin setting these priorities.
[click] If your institution has a collection management policy, this document can help you determine some of your priority collections based on your mission statement and your collecting parameters.
[click] You can also begin by having department heads create a priority list for their collections. Often the most common disasters, such as a water leaks, will only impact one collection.
[click] By having departmentalized prioritization lists, your disaster response team can work together to salvage the most important items in that department.
[click] However, an institution-wide collection priority list should be created from these departmental ones, and this is where some fierce negotiations or even arm wrestling may occur.
[SLIDE – ARCHIVAL BOXES AND SHELVES] When setting these priorities, think of salvaging collections, not individual items. In an emergency there is rarely time to grab individual items, unless they are paintings or pieces of furniture that are critical to your mission. If your collection includes the personal library of Noah Webster – don’t try to grab specific books, but rather house these books in boxes that are well labeled and can be retrieved quickly in an emergency. [SLIDE – EACH GUIDELINE] When working on setting collection priorities here are some guidelines that can be used to determine a collections importance or significance. Not every point will apply to all institutions, but hopefully these are helpful to consider.
[click] Use – What collections are used the most by patrons and researchers, and do they support the mission of your institution.
[click] Uniqueness – This generally refers to items, such as archival documents, art work, local history items, material culture, that are considered unique and irreplaceable, and therefore would be a high salvage priority.
[click] Legal responsibility for retaining records – If your institution is responsible for maintaining any records for which there are government retention and disposition schedules than these records would be a high salvage priority.

[click] Availability of replacements – This is a point for our libraries to consider. Even in general circulation collections there may be titles that are out-of-print. If that is the case, determine whether newer additions are available and if they would be acceptable. Hard copies of newspaper may be lost, but they may be available on microfilm. If microfilms are lost, there may be digital formats available.
[click] Cost of replacement vs. cost of salvage – sometimes the cost of replacement is cheaper than salvaging, sometimes it’s not. This is when you would apply what I like to call the “Danielle Steele Rule.” You do not go through the effort and cost of freezing and drying the works of Danielle Steele, and other contemporary authors whose works are replaceable.
[click] Scholarly value – here you want to identify any materials or records that are valuable for scholarly research. This is where the information that is contained in your local history collection may be considered irreplaceable and a high salvage priority.
[click] Value to Your Institution – do you have any items in your institution that are one-of-a-kind or directly related to your history or your founders? These may be high salvage priorities.
[click] Formats that are vulnerable to damage – this applies to any items that need to be recovered quickly if they are to be successfully salvaged – this includes textiles, photographs, microfilm, cds, lps. If rescued quickly these materials can be salvaged and returned to original or near original condition.
[click] Length of time in adverse conditions – This is part two of the point we just discussed – For example, if photos, negatives, microfilm, cds, lps are wet for an extended period of time, they cannot be salvaged, and attention should be directed to a collection which can be rescued and restored.
[click] Loan items – if your institution has any items on loan, whether its artwork, or collections, whether they are pertinent to your mission or not, since it is not your property this has to be made a high salvage priority.
[SLIDE – FLOOR PLAN] A useful addition to this section would be a floor plan of your building. On it you can highlight the areas where important and high priority collection items are stored or displayed. It’s also a good idea that once you have determined your collection salvage priorities to use a small piece of reflective tape on the storage container or the accession tag, and if there is time to retrieve the item, the reflective tape would be a way of locating and identifying them, particularly if there is no power.

Triage of Museum and Library Objects: [SLIDE-OUTDOOR TRIAGE] As part of determining collection priorities in a disaster, you need to consider how you will respond if these collection materials are damaged by the event. Collection triage is an inherent part of any disaster response. While we are all familiar with the word triage and probably associate it with some war movie or disaster footage we’ve seen where medical professionals sort patients and allocate treatment based on a system of priorities that is designed to maximize the number of survivors. Well, in the aftermath of a disaster at your institution, you will need to have a system in place to perform triage on your collections. In this instance, we are defining triage as “the assigning of priority order to objects on the basis of where funds and other resources can be best used, are most needed, or are most likely to achieve success.” [SLIDE-EXAMPLES OF WHAT TO SAVE] Making these choices will probably be one of the most challenging undertakings you will ever experience. We are trained to protect and care for all the collections under our care, but in an emergency situation, tough choices have to be made for the greater good of the institution. You may have already set collection priorities in your response and recovery plan, but you may face the situation that part of collection that was a high salvage priority is too damaged and attention has to be directed elsewhere. For example, if your textile storage room had a burst pipe, you need to look at the damage with a critical eye. If you see a red and white quilt that is now pink all over due to dyes that bled, you would leave that alone and look for a piece that had less damage or at least reversible damage. [SLIDE-HELP] And with any response to collection issues, we need to accurately judge our own abilities of what we can do safely without inflicting more damage and when we need to call in expert help. Just as a tourniquet is a way to mitigate a greater calamity, the response of the staff in an emergency is to try and prevent further damage to the collection until professionals, such as conservators, can be called in to treat the effected items. [SLIDE-TRASH] Another warning. Don’t react too quickly. There have been many instances of institutions throwing away damaged paper or objects that could have been conserved. Always err on the side of caution – there’s always time to throw things out after they’ve been examined by an expert. [SLIDE-PROTECTIVE GEAR] If you are part of a disaster response team the first thing to remember is to keep yourself and your coworkers safe. Any area where an event or disaster has occurred will often have safety and health risks, such as dangerous debris and contaminated water. Be sure to protect yourself by wearing long sleeves, sturdy shoes or boots, and

rubber or plastic gloves. Protective gear such as goggles and fitted face masks might be necessary is there is a lot of dust, soot or mold. [SLIDE-HANDLE WITH CARE] Second, be careful. Regardless of the types of collections you have, all of them are more susceptible to damage when they have been in a disaster. Storage containers may be compromised, so don’t assume the handles are still strong enough or that the bottoms won’t fall out of wet boxes. Water logged textiles and books become very heavy and can tear easily. If your building experiences a furnace puff back, whichis when greasy soot is blown through the air vents and is deposited on all surfaces, handle collections very carefully. Your touch can push these oily deposits deeper into the surface of collection items, which only compounds treatment. Extra hands will be necessary to careful remove items from the effected area. Think before you remove anything and be sure you have an safe place to take it to. Basic Cleaning and Drying Procedures: [SLIDE-VACUUM] Often in any event, whether it’s a furnace puffback, a water leak, or fire, you are going to find that the collections will be covered with dirt and debris. If it’s a wet incident, the debris will be like mud. If collections items have surface dirt or debris on them from an event, be careful cleaning the debris off. Loosen dirt and debris on fragile surfaces gently with soft brushes and cloths. Avoid rubbing, which can grind in dirt. [SLIDE-MOLD] The most common type of disaster to happen to any institution is caused by water, whether it’s from a leaky roof, burst pipes or flooding. These events can lead to mold outbreaks. Mold can form within 48 hours, so it’s important to act fast. The goal is to reduce the humidity and temperature around your collections as you work through cleaning and drying them. If you find extensive mold, be careful, it can be very dangerous to your health. Be sure you have goggles, gloves and N100 face masks – all of which are available at most hardware stores. [SLIDE-AIR-DRYING] The best triage for wet collections is to begin air-drying them as soon as you can. Often you will find boxes of papers, books or other collection materials damp or even saturated with water. If the amount of damage is small, you can begin to separate these materials, carefully of course, You’ll want to air-dry the collections indoors, using fans, windows, air conditioners and dehumidifiers to keep the air moving. The challenge with air drying is that you will need to spread out the collections so that they are laying flat and do not overlap. As you can see in the slide in the upper right, it’s pretty challenging to find enough space. These are pages from a torah that were spread out in the synagogue. While it’s not ideal to drape them this way, it’s prefearable to stacking them. When air drying, be sure to use absorbent material (un-inked newsprint, blotter paper, regular towels, or paper towels) under objects. You should

replace the absorbent material as it becomes wet, which can be pretty tedious and time consuming. Now imagine laying out the contents of one box of papers at your institution – in no time you will be out of floor and table space, which is why for large scale events, an additional and larger area may be needed to conduct the triage of collection items. One option that really helps is freezing, which delays the outbreak of mold and arrests the damage that’s happening, allowing professionals the time to treat each piece properly. Photos, papers, books, and textiles should all be frozen if you can’t get them dry within 48 hours. If freezers are unavailable, and don’t hesitate calling a local food supplier to ask if you can use part of their freezer, keep effected collections as cool as possible with air circulation until air drying is possible and expect some mold growth. Also remember, since most materials become significantly weaker when wet, do not hang wet objects without a conservator's advice. Questions on getting prepared? I’m going to go through different types of collection objects and give you some generalized salvage or triage steps you can undertake in the event of an emergency. These are general guidelines that would be applicable in most circumstances, but there may be extraordinary circumstances where they would not be the best course of action. Since water-damage is the most common disaster, these are general recommendations intended to provide practical guidance in the recovery of water-damaged objects. In any disaster your efforts should be considered preliminary steps to help lessen or arrest the damage until professionals, such as conservators who have worked with collections damaged in a disaster, are available to stabilize and treat the collection. Also, don’t forget to prioritize. I really can’t emphasize enough how important it is to include a prioritized list of collections and institutional records in your disaster plan. You may not be able to save everything, so focus on what’s most relevant to your mission, your institution, and your audience. Paper and Books: [SLIDE-BOOKS/PAPER] Since our audience today includes both museums and libraries, I think it’s pretty safe to say that nearly everyone in our audience has some-paper based collections, whether they are documents, books, or works of art on paper. If you have a large quantity of books there are two ways you can approach this issue. You can remove two or three books from each wet or partly wet shelf (to relieve pressure) and leave the remainder on the shelves. You’ll need to keep the space cool and dry, and this will best be done by getting fans and dehumidifiers going in the effected space. Another option is to remove all the books from the shelves and pack snuggly into boxes or milk crates, spine down, and then freeze until the can be treated.

Obviously this second option requires a lot of manpower, and if it’s a library that has been effected you can see the need for calling in extra hands and professionals to help with the job. For smaller collections of books you can air dry them by standing them upright on end and open covers gently to support book. For documents and pamphlets, lay them out as flat as possible and try to get them dry within 48 hours. If space is limited they can be stacked by not more than 1/8” high – so very little. Like books, you can pack them snuggly, upright in their original folders or if they aren’t in folders the can be packed flat and then freeze. [SLIDE ; FRAMED ART] FRAMED ARTWORKS: For painting and other framed artwork you want to unframe them in a safe location, so not in the disaster area, on a flat, padded surface. Once unframed, keep wet paintings horizontal and paint-side up. Art on paper or photographs can be dried flat on absorbent material, image side up. If the artwork is framed behind glass or another type of glazing and appears stuck to the glass/glazing, leave it in the frame and dry glass-side down. [SLIDE-PHOTOGRAPHS] PHOTOGRAPHS: If the photographs have dirt or debris on them rinse them carefully in clean water, and this can be a gentle stream or you can immerse them and do a little gentle agitation. If the photographs are thoroughly wet, they can stay that way in a container of clean water. Dry or freeze photographs within 48 hours. If possible, interleave photographs with wax paper prior to freezing. When air-drying photographs try to lay them out on a plastic screen or paper towel to help the drying process along, or you can hang them by the corner with plastic clothespins. Don’t let the image come into contact with other surfaces as it dries. [SLIDE-TEXTILE] TEXTILES: Textiles and historic costumes can become very heavy and fragile when wet. Create a sling out of plastic sheeting to carry loose costumes and textiles and provide support. Blot excess water using towels or white cotton sheeting (and your local hotel or hospital is a great source for this) and air dry flat on absorbent toweling. If there isn’t enough space to air-dry the textiles, bag them wet in plastic bags and freeze them. If the textiles or costumes are mud-covered, you can briefly immerse them in clean water, blot, and air dry or freeze. But remember, some textile dyes will bleed in water and some finishes can be lost. [SLIDE-FURNITURE]

FURNITURE: Do not leave furniture in standing water, even a small amount can wick up into the furniture, compromising surfaces and finishes and leaving water stains. Remove wetness by dabbing with a dry, clean cloth or other absorbent material. If mud-covered, rinse immediately with clean water and dab dry. Lightly cover solid wood furniture in plastic, to allow air movement and to dry slowly to reduce cracking and splitting. Leave drawers in place, but remove contents and blot excess water in drawers. Place white sheets or cotton muslin on top of upholstery and change as they become soiled. [SLIDE] BASKETS: You can pad basketry, and other soft three dimensional items with uninked newsprint or white cotton sheeting, keep lids on, and dry slowly. LEATHER: So many leather goods are shaped, so pad them gently with absorbent material, and air dry. BONE/IVORY: Remove excess water by dabbing with absorbant material and place under plastic sheeting to slow drying. Drying too quickly can cause splitting and cracking. METAL: Dry metal as quickly as possible. Use absorbant materials to dab off wetness and use fans and/or the sun. [SLIDE- SOUND RECORDING] SOUND AND VIDEO RECORDINGS: If tapes, videos and other tapes of recordings are dirty, rinse them with clean water. Do not wipe off any standing water, but instead blot the excess water with lint-free, absorbent material and air dry on top of unlinked newsprint, cotton sheeting or other absorbent material. [SLIDE-hp] Knowing how to properly salvage collection materials takes some study and some practice. It’s a good idea to go online and look at some of the free videos that demonstrate how to salvage photographs, books, documents, and other collection items. Heritage Preservation has a 10-minute streaming video which provides professional advice for museum and library staff. There are two currently available, one on water-damaged items and the other on dealing with soot.

Don’t Go it Alone: [SLIDE-CARTOON] By this point, I would imagine that many of you are considering how overwhelming a disaster response is. And you are absolutely right. It’s time consuming. It’s exhausting. It’s emotional, and frustrating. That’s why it’s also important to know who you can turn to for help. [SLIDE-AIC CERT] Regardless of the size of the event at your institution, if any collection item has sustained damage, one of the first calls you will want to make is to the AIC-CERT hotline. AIC-CERT stands for the American Institute for Conservation’s Collections Emergency Response Team. Founded in 2007 in response to the damage caused by Hurricanes Katrina and Rita, this 106-member team, consists of conservators, archivists and curators who are specially trained to respond to a wide variety of emergencies and disasters, including floods, fires, and earthquakes. When these events occur CERT team members volunteer their assistance to cultural institutions to save vulnerable collections. AIC-CERT maintains a 24-hour emergency hot line staffed by these professionals who are located around the country. Each member of this response team has gone through an elite in-depth training in triage protocols, remediation strategies, and safety precautions (those of us from the North might forget that flood waters in the South often have snakes in them!). They also have drills responding to mock disasters, so that they will be prepared when the real thing hits. The AIC-CERT response team comes into an event after the first responders have finished their work, and while they do not often treat items in the field, they will help arrange damage assessment or coordination of salvage operations, at a cultural institution or site. They provide support for any institution, organization, collectors, artists, etc. who are impacted in a disaster. They can provide assistance remotely or on site for those that are unsure how to proceed. And the team remains available after they leave, providing advice for mitigation work and support in FEMA claims and other post-event filings. The services provided by AIC-CERT are completely free.
[SLIDE – RECOVERY SERVICES]
While the curator or librarian is on the phone with AIC-CERT explaining the damage sustained by the collection, your director should be on the phone arranging for recovery services for the building and facility. Do not expect that your staff and any available volunteers will be able to clean-up the building and get it back in working order. You will needs a disaster recovery company to provide this support, but you don’t want to use just any commercial company. You will need professionals who are knowledgeable about responding to events in historic structures, and large or significant collections. If your response and recovery plan doesn’t include the contact information for Polygon, BMS Cat, or Belfor – be sure to add it when the webinar is over. These companies work nationally and some internationally and have extensive experience in assisting libraryies and museums in getting back on their feet after an event.

[SLIDE – REGIONAL CONSERVATION CENTER]
While the AIC-CERT team is available 24 hours a day for advice and will travel to some locations that are hit hard, you will need to locate local or regional conservators to salvage collection items and to perform any necessary conservation. Conservation is a specialized field and only those knowledgeable in historic and artistic works, their composition and their special needs should perform conservation on works damaged in a disaster. It’s a good idea to include the contact information for one or two regional conservation labs in your response and recovery plan. These labs have the expertise to send qualified conservators to your site after a disaster or event to gauge the damage to your collections. The list provided here is of the labs in or near New York State.
[SLIDE-FINDING A CONSERVATOR]
You can also find local conservators by visiting the American Institute for Conservation’s “Find a Conservator” webpage. All the conservators listed on this site have been vetted by their peers and are either Professional Associated or Fellows of the AIC.
Check out Available Resources: Disaster response and recovery is often a long process and it may seem like your going through it alone, but there are state and federal organizations and agencies that can help you through the process and it’s a good idea to check out how they can assist before your site experiences an event. [SLIDE-hp LOGO] One of the best sites to become familiar with is the Heritage Preservation Emergency National Task Force. You may be familiar with Heritage Preservation which runs the Conservation Assessment Program (know commonly as CAP), but the Task Force is a really terrific resource for museums and libraries. The Heritage Emergency National Task Force is a partnership of 42 national service organizations and federal agencies created to protect cultural heritage sites from the damaging effects of natural disasters and other emergencies. It was founded in 1995 and is co-sponsored by Heritage Preservation and the Federal Emergency Management Agency. [SLIDE-GOALS] Its primary goals are to:
Help cultural heritage institutions and sites to prepare for emergencies and obtain needed resources when disaster strikes.
Encourage the incorporation of cultural and historic assets into disaster planning and mitigation efforts at all levels of government.
Facilitate a more effective and coordinated response to all kinds of emergencies, including catastrophic events.
Assist the public in recovering treasured heirlooms damaged by disasters.

One way in which Heritage Preservation’s Emergency National Task Force accomplishes these goals is their coordinated Response to Regional Disasters. After a major disaster they respond by connecting response agencies with cultural heritage leadership and providing information resources for collecting institutions and the public. Through national conference calls, research on damage, expanded Web resources, and the wide distribution of disaster response information tools, Heritage Preservation facilitates the work of Task Force members and other organizations helping with recovery. I’ve participated in these regional conference calls and they are a terrific way of not only reporting what’s happening in your neck of the woods, but to also find out what’s happening throughout an area hit by a disaster. There are also a lot of great resources available to cultural heritage institutions through the Heritage Emergency National Task Force such as: [SLIDE] The Field Guide to Emergency Response: This is a great compact handbook which was designed for immediate use when disaster strikes. It has simple, clear instructions to help staff organize essential disaster response functions and tackle common threats to collections. It also includes useful checklists and features a DVD with demonstrations of salvage techniques. [SLIDE] No institution should be without the Emergency Response and Salvage Wheel. The most recent edition features an updated section on electronic records, a water-resistant coating, and handy magnets. The Wheel is a highly respected tool for protecting documents, art, and artifacts from water damage. [SLIDE] The Preparing to Preserve Action Plan identifies a number of opportunities and recommendation for integrating historic preservation concerns into emergency management systems, primarily at the state and local level. Preparing to Preserve includes two very good flyers that are helpful for museums and libraries to understand how first responders work. These include the "Emergency Planning Model Checklist for Historic Preservation," and "1-2-3 Guide to Building Relationships with Emergency Officials." [SLIDE] Another great publication on disaster planning and response is Before and After Disasters: Federal Funding for Cultural Institutions. This 32-page booklet, provides summary information and examples on 15 federal grant and loan programs, along with resources for prevention, mitigation, and recovery projects. Throughout the year the Task Force provides news releases and tip sheets with expert advice on salvaging family heirlooms and cultural heritage collections damaged by disasters. I urge you to go to their website and join their email list. It’s one group which you will regularly check their email blasts.

[SLIDE SOURCES] In addition to the Heritage Preservation Emergency Task Force, nearly every national museum and library organization has added disaster planning, response and recovery pages to their websites. These include:
American Institute for Conservation’s(AIC), Disaster Response and Recovery American Library Association’s Disaster Preparedness and Recovery Institute of Museum and Library Services’ (IMLS) Connecting to Collections
Online Resources: Respond to an Emergency Library of Congress’ Preserving Treasures After A Disaster LYRASIS’ Disaster Response and Recovery National Center for Preservation Technology and Training’s (NCPTT) Disaster
Recovery National Park Service’s Wet Recovery National Trust for Historic Preservation’s Disaster Response
[SLIDE –New York Alliance for Response] Part of Heritage Preservation’s Emergency National Task Force include the Alliance for Response initiative. Alliance for Response is Alliance for Response is a national program on cultural heritage and disaster management. Through a series of local Forums, it builds bridges between the cultural heritage and emergency response communities before disasters happen. The Forums in turn lead to new partnerships, policies, and cooperative planning efforts. In New York, New York City is the local Alliance for Response group and it consists of staff from cultural institutions, first responders and related industries, such as insurance and recovery companies. New York City Alliance For Response has been actively involved in Hurricane Sandy recovery efforts including linking institutions that have been impacted to volunteer conservators, collections professionals, and salvage contractors.
[SLIDE-NEW YORK SOURCES] In the aftermath of Tropical Storm Irene and Hurricane Sandy, New York State and it’s cultural institutions have collected information and created some terrific websites that provide access to important resources to know about, before an event takes place. These include New York City’s Department of Cultural Affairs, “Disaster Recovery and Rebuilding Resources for the Cultural Community,” which is pdf available online. Museumwise has a great webpage on Disaster Response Resources that provides links to state and federal resources for museums, libraries and local governments. And some of the states large institutions are helping to share resources, including the Museum of Modern Art which has a conservation resources page for artists and institutions trying to recover from the damage caused by Hurricane Sandy. [SLIDE-FEMA] Knowing where to find help before a disaster strikes is key to a successful salvage and recovery effort. It’s also equally important to become familiar with how the Federal Emergency Management Agency or FEMA works after a disaster has been declared.

After a federal disaster has been declared, FEMA and your state emergency management office (EMO) will schedule Applicant Briefings in areas affected by the disaster. Notices will appear in local newspapers, on local radio stations, and via the Web site of your state Emergency Management Office. The meetings are held as soon as practicable following the President's declaration.
[SLIDE-APPLICANT BRIEFING] At the Applicant Briefing, the state Emergency Management Officer will inform prospective applicants of available assistance and eligibility requirements for obtaining federal assistance under the declared event. Applicant, work, and cost eligibility will be reviewed and the project formulation process will be introduced. The State will also discuss funding options, record keeping and documentation requirements, and special issues. At the meeting, cultural institutions will need to complete and submit a Request for Public Assistance application form. If your institution suffers damage during an event that was a federally declared disaster, and your institution intend to apply for disaster assistance you need to make sure to attend these important meetings.
Yet even with FEMA, there are steps you can take now, to be ready in case you should need to file a claim with them after a disaster. Contact the state office of Emergency Management and ask for the checklist of documents you will need to file a claim. This will include your letter of incorporation, DUNS number, etc. Make duplicates of these papers, store one copy on site and another off-site, then if the worst occurs, you’ll be able to begin filing a claim with FEMA without trying to track down the necessary paperwork.
So, now that your site and collections are ready in the event of a disaster, what do you do? Well, first be alert. Stay informed of any weather events or local disturbances that could impact your site.
[SLIDE-GET READY] And if extreme weather is forecasted here’s what you can do:
Know what's coming your way. Track storms by following updates from the National Oceanic and Atmospheric Administration, or commonly referred to as NOAA. You can even get text and email updates from them.
Keep contact information for key staff, services, and resources with you at all times.
Review your emergency response plan and take it home with you.
Back up your electronic records and store the back up in a safe place off site.
Move priority collections out of basements and off floors.
Gather plastic sheeting for covering collections, file cabinets, and computer equipment stored in vulnerable locations.
Move vital records and high priority items away from windows and below-ground areas into water-resistant areas. Avoid areas under roofs.
Know location and procedures for shutting off water, gas, and electricity.
Move outdoor objects indoors or secure them in place.

Clean the gutters – a lot of flooding starts with clogged gutters and downspouts.
And hold a planning meeting before the storm hits
[SLIDE – WHAT HAVE WE COVERED]
So, let’s just review what we covered today to help you insure that your site and staff are ready for a disaster.
Identify risks to your building and collection
Mitigage those risks
Create a Disaster Response Team
Set Collection and Institutional Records Salvage Priorities
Become familiar with basic triage for collection salvaging
Know who can help you on the local, state and national level
[slide- barnum]
And today I will leave you with a picture of the Barnum Museum in Bridgeport, Connecticut after it was hit by an F1 tornado in 2010 – and for everyone at the cultural heritage organization, after a disaster, the show must go on.
[slide-questions]
Questions


![Disaster Recovery - Prevenção e Recuperação na nuvem [WEBINAR]](https://static.fdocuments.net/doc/165x107/5596853f1a28ab1f7a8b4599/disaster-recovery-prevencao-e-recuperacao-na-nuvem-webinar.jpg)