Disaster Recovery in SharePoint Products and Technologies
30
Disaster Recovery in SharePoint Products and Technologies Date published: June 9, 2004 Summary: This is a sample chapter from the Microsoft SharePoint Products and Technologies Resource Kit. You can obtain the complete resource kit (ISBN 0-7356-1881-X), which includes a companion CD-ROM, from Microsoft Press . What do you do when things go wrong? Really, really wrong. You should not wait to ask yourself this question when you are in need of an immediate answer. The most important thing in solving critical problems is to think ahead and record your problem-resolving strategy in a disaster recovery plan. Before you can do that, you must be aware of the problem-solving tools available. This chapter covers operational tasks common in disaster recovery scenarios using the native tools provided by Microsoft Office SharePoint Portal Server 2003 and Microsoft Windows SharePoint Services. In addition, this chapter discusses how to leverage SQL Server backup and restore processes to safeguard your data in SharePoint Products and Technologies solutions.
-
Upload
datacenters -
Category
Technology
-
view
679 -
download
2
Transcript of Disaster Recovery in SharePoint Products and Technologies
Disaster Recovery in SharePoint Products and Technologies
Date published: June 9, 2004
Summary:
This is a sample chapter from the Microsoft SharePoint Products and Technologies Resource Kit. You can obtain the complete resource kit (ISBN 0-7356-1881-X), which includes a companion CD-ROM, from Microsoft Press.
What do you do when things go wrong? Really, really wrong. You should not wait to ask yourself this question when you are in need of an immediate answer. The most important thing in solving critical problems is to think ahead and record your problem-resolving strategy in a disaster recovery plan. Before you can do that, you must be aware of the problem-solving tools available. This chapter covers operational tasks common in disaster recovery scenarios using the native tools provided by Microsoft Office SharePoint Portal Server 2003 and Microsoft Windows SharePoint Services. In addition, this chapter discusses how to leverage SQL Server backup and restore processes to safeguard your data in SharePoint Products and Technologies solutions.

The information contained in this document represents the current view of Microsoft Corporation on the issues discussed as of the date of publication. Because Microsoft must respond to changing market conditions, it should not be interpreted to be a commitment on the part of Microsoft, and Microsoft cannot guarantee the accuracy of any information presented after the date of publication.
This white paper is for informational purposes only. MICROSOFT MAKES NO WARRANTIES, EXPRESS, IMPLIED OR STATUTORY, AS TO THE INFORMATION IN THIS DOCUMENT.
Complying with all applicable copyright laws is the responsibility of the user. Without limiting the rights under copyright, no part of this document may be reproduced, stored in or introduced into a retrieval system, or transmitted in any form or by any means (electronic, mechanical, photocopying, recording, or otherwise), or for any purpose, without the express written permission of Microsoft Corporation.
Microsoft may have patents, patent applications, trademarks, copyrights, or other intellectual property rights covering subject matter in this document. Except as expressly provided in any written license agreement from Microsoft, the furnishing of this document does not give you any license to these patents, trademarks, copyrights, or other intellectual property.
2007 Microsoft Corporation. All rights reserved.
Microsoft, FrontPage, SharePoint, SQL Server, Windows, Windows NT, and Windows Server are either registered trademarks or trademarks of Microsoft Corporation in the United States and/or other countries.
The names of actual companies and products mentioned herein may be the trademarks of their respective owners.
Disaster Recovery in SharePoint Products and Technologies
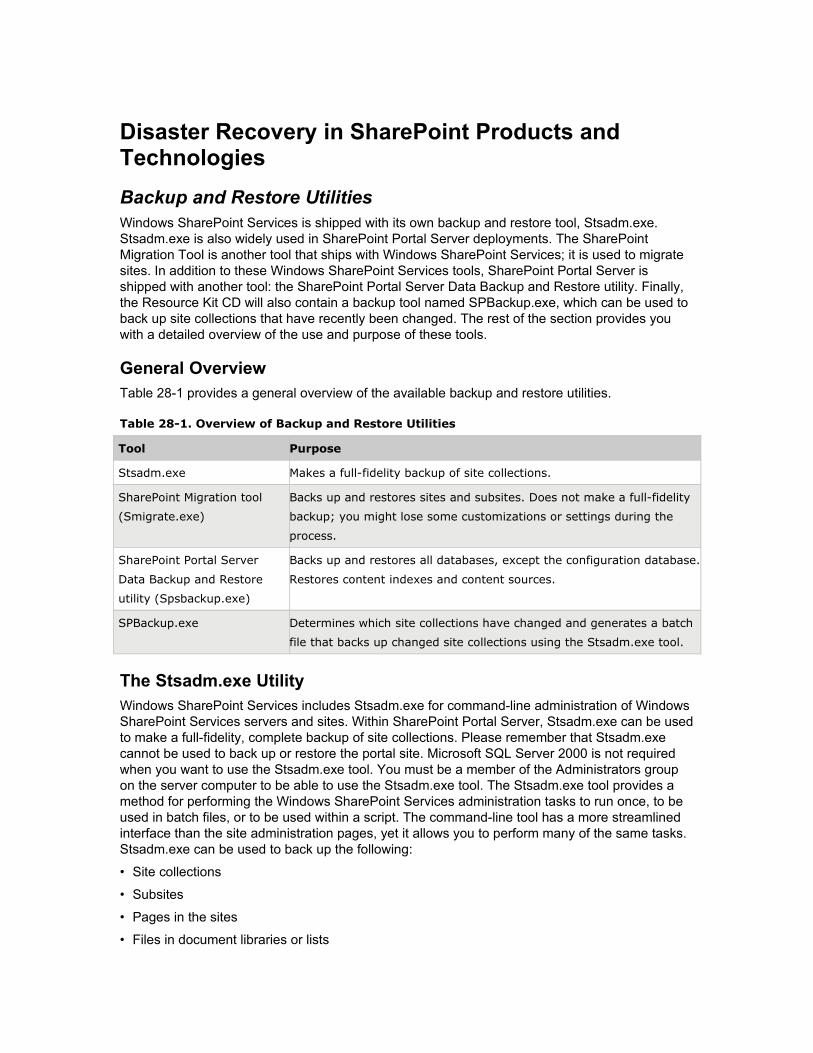
Backup and Restore UtilitiesWindows SharePoint Services is shipped with its own backup and restore tool, Stsadm.exe. Stsadm.exe is also widely used in SharePoint Portal Server deployments. The SharePoint Migration Tool is another tool that ships with Windows SharePoint Services; it is used to migrate sites. In addition to these Windows SharePoint Services tools, SharePoint Portal Server is shipped with another tool: the SharePoint Portal Server Data Backup and Restore utility. Finally, the Resource Kit CD will also contain a backup tool named SPBackup.exe, which can be used to back up site collections that have recently been changed. The rest of the section provides you with a detailed overview of the use and purpose of these tools.
General OverviewTable 28-1 provides a general overview of the available backup and restore utilities.
Table 28-1. Overview of Backup and Restore Utilities
Tool Purpose
Stsadm.exe Makes a full-fidelity backup of site collections.
SharePoint Migration tool
(Smigrate.exe)
Backs up and restores sites and subsites. Does not make a full-fidelity
backup; you might lose some customizations or settings during the
process.
SharePoint Portal Server
Data Backup and Restore
utility (Spsbackup.exe)
Backs up and restores all databases, except the configuration database.
Restores content indexes and content sources.
SPBackup.exe Determines which site collections have changed and generates a batch
file that backs up changed site collections using the Stsadm.exe tool.
The Stsadm.exe UtilityWindows SharePoint Services includes Stsadm.exe for command-line administration of Windows SharePoint Services servers and sites. Within SharePoint Portal Server, Stsadm.exe can be used to make a full-fidelity, complete backup of site collections. Please remember that Stsadm.exe cannot be used to back up or restore the portal site. Microsoft SQL Server 2000 is not required when you want to use the Stsadm.exe tool. You must be a member of the Administrators group on the server computer to be able to use the Stsadm.exe tool. The Stsadm.exe tool provides a method for performing the Windows SharePoint Services administration tasks to run once, to be used in batch files, or to be used within a script. The command-line tool has a more streamlined interface than the site administration pages, yet it allows you to perform many of the same tasks. Stsadm.exe can be used to back up the following:
• Site collections
• Subsites
• Pages in the sites
• Files in document libraries or lists
• Security and permission settings
• Feature settings
Using Stsadm.exe to back up or restore team or personal sites on a machine running SharePoint Portal Server 2003 is not supported by Microsoft. You are advised to use the Spsbackup.exe utility for disaster recovery or portal-specific needs and Smigrate.exe to export, import, or migrate personal or team sites.
You can back up an entire site collection and all the sites and content beneath it, but not an individual subsite (or any other finer level of granularity, for that matter). However, you can restore content and subsites within a site collection by restoring the site collection to a different site and manually copying the lost data to the original location.
You can use Stsadm.exe from the command line or from batch files. Stsadm.exe must be run on the Web front-end server itself. To create a backup of the site at the specified URL, use the following syntax (using the overwrite parameter to replace an existing kbackup file): stsadm.exe -o backup -url <url> -filename <filename> [- overwrite].
The SharePoint Migration ToolThe SharePoint Migration Tool (Smigrate.exe) that ships with Windows SharePoint Services is used to migrate sites. The SharePoint Migration Tool is available in the Program Files\Common Files\Microsoft Shared\Web Server Extensions\60\Bin folder on your server computer. Alternatively, you can get a copy of this file by going to http://central.workplace.corasworks.net/support/smigrate/smigrate.zip. The SharePoint Migration tool does not make a full-fidelity backup because you might lose some customizations or settings in the process. To use the SharePoint Migration Tool, you must be a site administrator for both the site or the site collection being backed up and the destination site.
Using the Smigrate.exe tool to back up, restore, or migrate personal sites is supported with the following exceptions:
1. Web Parts added to personal sites after creation time must be re-added.
2. Links added to the MyLinks Web Part must be re-added.
3. Before restoring each personal site, a new site must be created on the target virtual server with the same name as the old site but without a template being applied.
You can use the SharePoint Migration Tool from the command line or from batch files. To back up a site, you use the SharePoint Migration Tool with the following parameters:
smigrate.exe -w <Web site URL> -f <backup filename> [-e -y -u <username> -pw
<password>]
All backup files end with the .fwp extension. If you do not specify the .fwp extension, it will be added automatically. The optional –e paramater excludes subsites during backup. The optional –y parameter overwrites an existing backup file. The optional –u parameter specifies the user name of the website administrator. The optional –pw parameter specifies the password for the website administrator. Use an asterisk (*) to be prompted to type a password.
You can also use Microsoft FrontPage 2003 to create a backup file by opening a site via File\Open Site, specifying the URL of the site, and choosing Tools\Server\Backup Web Site. You can restore a site via FrontPage 2003. First you should open the nontemplated site to which you want to restore the backup. You can do this by choosing File\Open Site, specifying the URL of the site, and then choosing Tools\Server\Restore Web site.
During a backup, the SharePoint Migration Tool produces a cabinet file (.cab) with an .fwp extension to back up the site and then uses this .fwp file to restore the site or site collection. Developers can modify the backed-up site template before the site is restored by changing the file
extension of the .fwp file to .cab and extracting the manifest.xml file. After changes are made to the manifest.xml file, the .fwp file can be repackaged and the site can be restored by using the SharePoint Migration Tool.
You can only use the SharePoint Migration Tool or FrontPage to restore a backup to a site if the site exists but no template has been applied to the site yet. You can create a nontemplated site in the following ways:
• Using the Windows SharePoint Services pages, you can create a new site on the New SharePoint Site page. After creating the site, you should stop the creation process on the Template Selection page before choosing and applying a template.
• Using the Stsadm.exe tool, use the CreateWeb operation without using the –sitetemplate parameter—for example: stsadm.exe –o createweb –url http://woodgrove/MySubSite
• Using FrontPage, select File\New\Subsite, and then select any template except for SharePoint Team Site. This will apply a FrontPage site template to the site; it will not apply a Windows SharePoint Services site template to the site, and the site can be used to restore sites that were backed up.
• Using the Windows SharePoint Services Object Model.
At this point, the SharePoint Migration Tool can be used to restore a site or site collection. To restore a site or site collection, you use the SharePoint Migration Tool with the following parameters:
smigrate.exe -r -w <Web site URL> -f <backup filename> -u <username> -pw <password>]
The –r parameter restores a site to a new location.
SharePoint Portal Server Data Backup and Restore UtilityThe SharePoint Portal Server Data Backup and Restore utility is installed by default when SharePoint Portal Server is installed. You must run the SharePoint Portal Server Data Backup and Restore utility from the server itself in a single server scenario or from any of the front-end Web servers in a server farm scenario. SQL Server 2000 Client Tools must also be installed on the server from which backups and restores are performed. The SharePoint Portal Server Data Backup and Restore utility performs the following functions:
• Backs up and restores all databases within the server farm or all databases of a single portal site. That is, all databases except the configuration database.
• Restores content indexes and content sources on the corporate portal site.
• Backs up Windows SharePoint Services site databases.
• Supports moving a portal site from one farm to another.
• Restores an index server.
The configuration database is not included in the backup because it would be impossible to guarantee a successful restore of it. The configuration database that is to be restored would need to match the existing topology exactly. Furthermore, existing team sites stored across all the content databases would have to match exactly the sites in the configuration database being restored. Because there is no way to guarantee this, it is useless to back up the configuration database. The correct restore procedure indicates that you must rebuild your farm—which will rebuild the configuration database and ensures a new configuration database is created that is guaranteed to work.
The SharePoint Portal Server Data Backup and Restore utility creates an XML-based manifest file that lists all the individual backup files for SharePoint Portal Server and Windows SharePoint Services databases. To use the SharePoint Portal Server Data Backup and Restore utility
successfully, the following accounts must have access to the directory containing the backup files:
• The account for the Microsoft Windows NT service corresponding to the SQL Server instance must have write access to the directory if you want to create a backup; the account needs read access if you want to restore a backup.
• The search service and the account that the Microsoft SharePoint Portal Server Search service runs under must have write access to the directory.
• The current user must have write access to the directory.
The current user must also have the following rights:
• The user is a member of the Local Administrators group on the (optional) backward-compatible document library server.
• The user is a member of the Backup Operators group on the content index servers.
• The user is a member of the SQL Server 2000 System Administrator’s role if you want to restore a backup. For a backup, it is required that the user account has write access to the configuration database and backup permission on the particular databases that are being backed up.
After making a backup, you must click the Reset button before performing any other actions.
You can run the SharePoint Portal Server 2003 Data Backup and Restore utility from the Start menu or by typing Spsbackup from the command line in the \bin directory of the server running SharePoint Portal Server. This tool provides a graphic user interface that is easy to use, as shown in Figure 28-1.
You can also run the SharePoint Portal Server 2003 Data Backup and Restore utility by using the Spsbackup.exe command-line utility, which enables you to write a script that backs up the SharePoint Portal Server databases on a schedule. Run Spsbackup.exe with the following command-line parameters:
spsbackup { /all | /teamdbs | /ssodb | /doclib |
{ /portal site portal siteUrl [ /service { sitedbs | index } ] } } /file
backupfilepath\fileprefix [/overwrite]
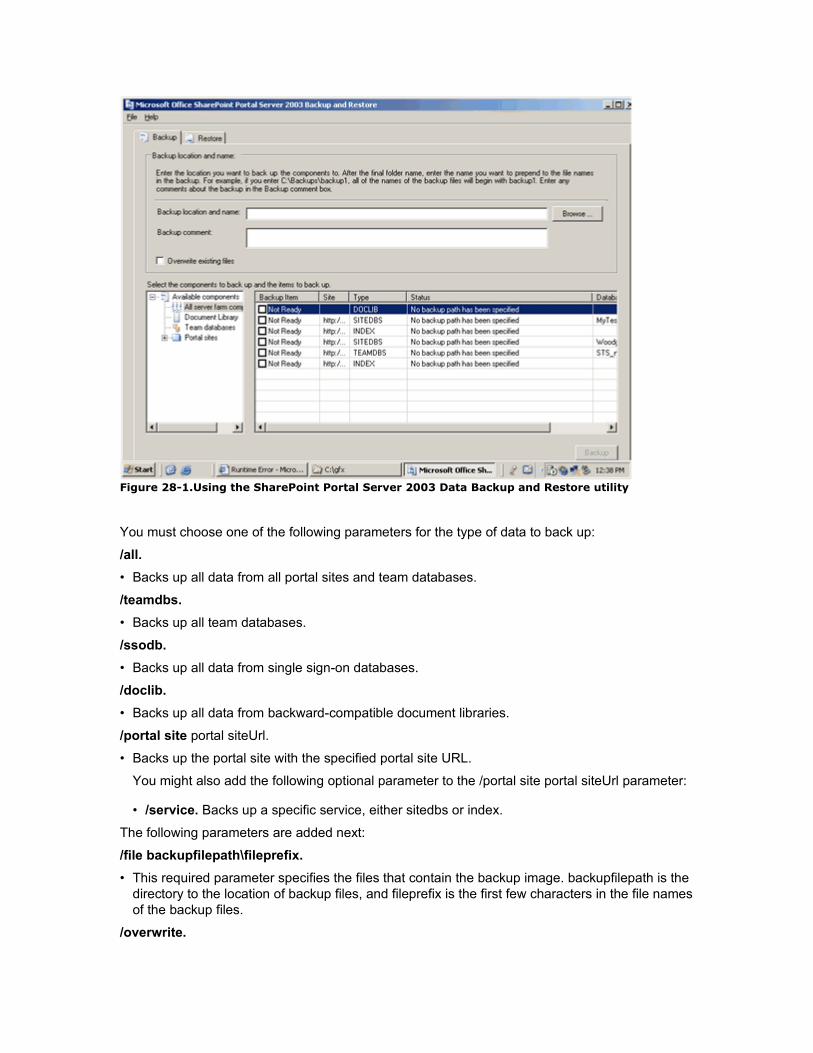
Figure 28-1.Using the SharePoint Portal Server 2003 Data Backup and Restore utility
You must choose one of the following parameters for the type of data to back up:
/all.
• Backs up all data from all portal sites and team databases.
/teamdbs.
• Backs up all team databases.
/ssodb.
• Backs up all data from single sign-on databases.
/doclib.
• Backs up all data from backward-compatible document libraries.
/portal site portal siteUrl.
• Backs up the portal site with the specified portal site URL.
You might also add the following optional parameter to the /portal site portal siteUrl parameter:
• /service. Backs up a specific service, either sitedbs or index.
The following parameters are added next:
/file backupfilepath\fileprefix.
• This required parameter specifies the files that contain the backup image. backupfilepath is the directory to the location of backup files, and fileprefix is the first few characters in the file names of the backup files.
/overwrite.

• This optional parameter overwrites any previous backup image.
/DMLocalPath.
• During a backup of the backward-compatible document library, the backup of the Web Storage System is stored to a local drive. This location will only hold the document library backup temporarily because the SharePoint Portal Server Data Backup and Restore utility pulls the backup file out of there and copies it to the backup file path specified using the /file parameter. If there is not enough disk space in the default location on the local drive, you can specify a different local path on the server.
The SPBackup.exe UtilityThe SPBackup.exe tool determines which site collections have changed and generates a batch file that, when run on a server running Windows SharePoint Services, backs up changed site collections using the Stsadm.exe tool. The batch file created by SPBackup.exe will not back up SharePoint Portal Server 2003 portal sites. However, when run on a server running SharePoint Portal Server, SPBackup.exe will generate a batch file that backs up team sites, personal sites, and workspace sites on the server. You must install SPBackup.exe to the same folder as Stsadm.exe.
The SPBackup.exe tool can be found on the Resource Kit CD.
The SPBackup.exe tool uses the following syntax: Spbackup {-a | -d | -w} [-f filename]. You can use the –a parameter to generate a file that backs up all modified site collections. The –d parameter generates a file that backs up all site collections that have changed in the past day. The –w parameter generates a file that backs up all site collections that have changed in the past week, and the –f filename parameter specifies the name of the batch file to create. If this argument is omitted, the batch file will be named SPBakOut.bat.
SAN SnapshotingTaking a snapshot of the databases hosted on a SAN (storage area network) will be supported if all the databases are backed simultaneously. This includes the configuration database. This is the only scenario where the backing up of a configuration database is supported. You must restore a snapshot image to the same machine on which the backup was taken.
Except in SAN Snapshoting, backing up the configuration database is not recommended because the configuration database is not restored during a restore operation. Instead, it is rebuilt on the fly during the restore operation.
Recovering SharePoint Sites and Personal SitesWindows SharePoint Services site collections cannot be restored individually from a complete database backup. If you restore a database, all content is overwritten, including site collections, subsites, documents, lists, and content within those sites. Restoring an entire database simply to recover a single site collection, personal site, document, or list is not recommended, because all users of that site are affected when the database is restored. This is particularly annoying in situations where one or several sites are damaged. In such scenarios, you want to get the server back up and running in the shortest time possible. Instead, use the Stsadm.exe utility for backing up and restoring the individual personal sites and site collections. Use the SharePoint Migration Tool to back up and restore individual sites.
Backing Up Site CollectionsThe –o backup parameter of the Stsadm.exe tool backs up only the specified site collection; it does not back up an entire virtual server. If you specify the virtual server root URL, only one site
collection belonging to that virtual server is backed up, which is the site collection that lives at the root of the virtual server. Other site collections are not backed up. The following example shows how to use the Stsadm.exe backup parameter to back up a site collection on a portal site. The overwrite parameter overwrites the existing backup file name.
stsadm -o backup -url http://www.woodgrove.com/sites/myexamplesitecollection
–filename myexamplesitecollectionbackup.bak –overwrite
If you add additional site collections to your server farms, you can use the Stsadm.exe enumsites parameter to list all the site collections that have been created within a SharePoint virtual server. The enumsubwebs parameter lists all subsites within a site collection. Use the enumsites parameter in your script to parse the list of sites. Then, using the Stsadm.exe backup parameter, walk through the list to create a backup of each site collection. The following examples show how to use the enumsites and enumsubwebs parameters to enumerate the site collections in a Windows SharePoint Services virtual server and to enumerate all subsites in a site collection.
stsadm -o enumsites -url http://www.woodgrove.com/
stsadm -o enumsubwebs -url
http://www.woodgrove.com/sites/myexamplesitecollection
The following example shows how to use the SharePoint Migration tool to back up a site collection.
smigrate -w http://www.woodgrove.com/sites/ myexamplesitecollection -f
c:\backup\mybackup.fwp
The amount of disk space required to back up each site collection depends on the amount of content within the site collection and how long the backups are kept on the disk before being moved to a tape drive. You can estimate the maximum amount of hard disk space required for site collection backups by using the following formula:
The number of site collections × Disk quota = Maximum disk space required
For example, if you have 10 site collections with the quotas set for 100 MB, you need 1000 MB of disk space for backing up site collections. This also means that the Windows SharePoint Services databases containing the site collections are affected by 1000 MB.
Restoring Site CollectionsTo restore individual site collections, use the Stsadm.exe tool with the Restore option. There are three options for restoring sites with the Stsadm.exe backup:
Restore a site collection over an existing site.
• When you overwrite an existing site, all existing site data—including subsites and content—are completely overwritten.
Restore a site collection to a new site on the same server.
• This is the recommended option for recovering data without overwriting the entire site collection. When you restore a site collection to a new site on the same server, you can copy the data from the restored site collection or subsite back to its original site.
Restore a site to a separate server.
• The separate server must have a separate installation of SharePoint Products and Technologies. This option is more complex and requires additional hardware to purchase and manage. Also, the following settings and configurations of the backup server must match those of the restore server:
• The type of installation configuration.
• The schema or XML files on the file system defining fields or global customizations.
• Managed paths.
• Domain. The user’s domain should be the same. For example, suppose a server is in domain A and you would try to restore on a server in domain B. If domain B and domain A are not connected, the user might not be able to access the site.
• Solution package. For example, if the Office value pack is installed on the source server but not on the target server, a restored site might not work.
• Any user-added front-end templates, Web Parts, and changes to layouts.
• Any changes made by the user to the IIS metabase.
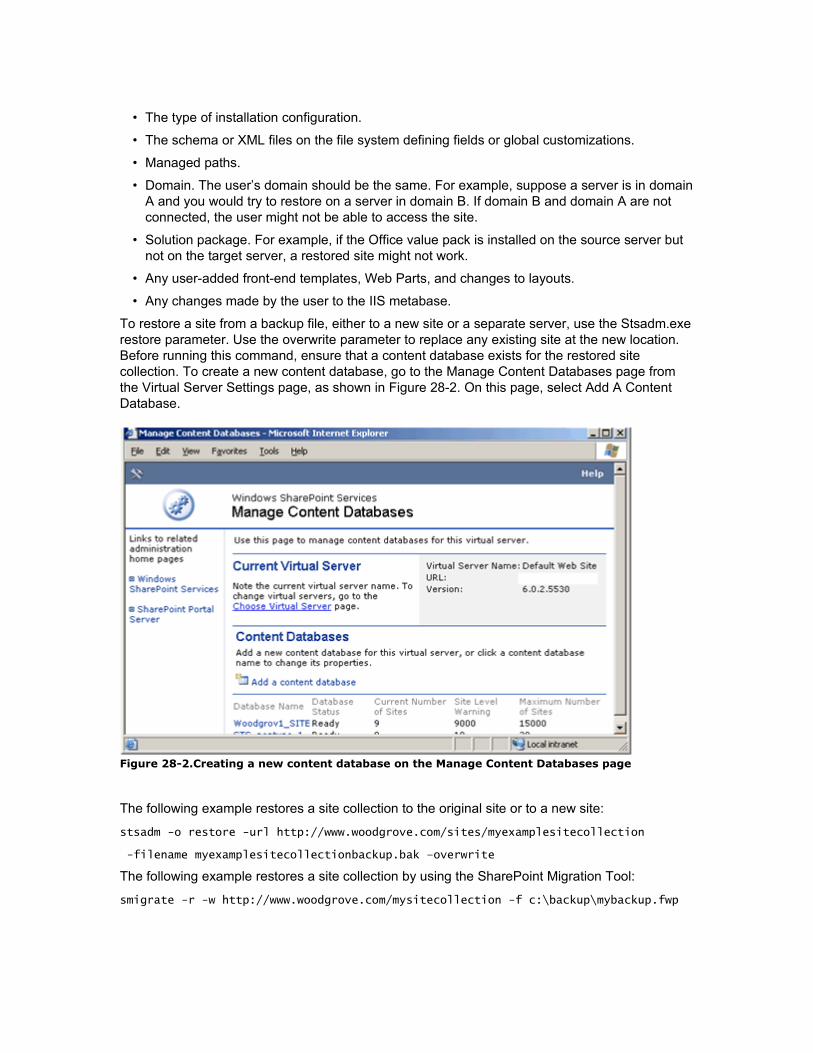
To restore a site from a backup file, either to a new site or a separate server, use the Stsadm.exe restore parameter. Use the overwrite parameter to replace any existing site at the new location. Before running this command, ensure that a content database exists for the restored site collection. To create a new content database, go to the Manage Content Databases page from the Virtual Server Settings page, as shown in Figure 28-2. On this page, select Add A Content Database.
Figure 28-2.Creating a new content database on the Manage Content Databases page
The following example restores a site collection to the original site or to a new site:
stsadm -o restore -url http://www.woodgrove.com/sites/myexamplesitecollection
-filename myexamplesitecollectionbackup.bak –overwrite
The following example restores a site collection by using the SharePoint Migration Tool:
smigrate -r -w http://www.woodgrove.com/mysitecollection -f c:\backup\mybackup.fwp
Backing Up and Restoring Personal SitesLike site collections, personal sites—which are discussed in Chapter 23, “Personalization Services in SharePoint Products and Technologies,”—can be backed up using the Stsadm.exe utility. By default, personal sites content is contained in the site database of the portal site. You could use the SharePoint Portal Server Data Backup and Restore utility to back up the personal sites content, but then you would not be able to restore individual personal sites. Instead, you would have to restore the entire site database. Stsadm.exe can back up and restore individual users’ personal sites, including all subsites, files in document libraries or lists, security and permission settings, and feature settings.
The Stsadm.exe enumsites parameter lists all personal sites that have been created on the portal site. The enumsubwebs parameter lists all subsites within a site collection. Use the enumsites parameter to parse the list of personal sites, and then back up each personal site to a file. The following example shows how to enumerate personal sites on the portal site:
stsadm -o enumsites -url http://www.woodgrove.com/
The following example shows how to use the Stsadm.exe backup parameter to back up an individual personal site:
stsadm.exe -o backup -url http://www.woodgrove.com/personal/woodgrove_kberge
-filename "MySite.bak"
To restore a personal site from an Stsadm.exe backup file, use the Stsadm.exe command with the restore parameter. The following example shows how to use the restore parameter to restore a personal site to its original site or another site:
stsadm.exe -o restore -url
http://www.woodgrove.com/personal/woodgrove_kberge
-filename "MySite.bak" –overwrite
The amount of disk space to back up personal sites depends on the following factors:
• The number of personal sites
• The amount of content in each personal site
• The amount of time that personal site backups are kept on disk before they are moved to a tape drive
You can estimate the maximum amount of disk space required for backing up the individual personal sites by using the following calculation:
The number of My Sites × Disk quota = Maximum disk space required
For example, if you have 2000 users, each with a personal site and 100-MB storage limit set on each personal site, the maximum amount of disk space required for the personal sites backup is approximately 200 GB. This also means that the portal site database, which contains the personal sites data, is equally affected by the extra 200 GB of data. Keep in mind that most personal sites will not use disk space in amounts approaching the quota. Therefore, the average disk space required for personal sites will be much lower than the quota. Set the quota high enough to accommodate the occasional large personal site. Setting the quota too low could result in support calls from users needing more space.
Recovering Individual SharePoint SitesAlthough strictly speaking the SharePoint Migration Tool is used for site migration, it provides much value in disaster-recovery scenarios. The SharePoint Migration Tool can be used to back up and restore or migrate individual sites. The following example shows how to use the
SharePoint Migration Tool to back up an individual site; the –e parameter is used to exclude subsites during backup:
smigrate -w http://www.woodgrove.com/mysitecollection -f c:\temp\myback.fwp –e
If you are migrating to a large number of sites, you should manually back up each site separately and restore each site after backup to prevent possible memory usage errors.
The Stsadm.exe tool and the SharePoint Migration Tool offer similar capabilities. However, you should bear in mind the following important differences. The Stsadm.exe tool can be used to back up an entire site collection. It is also only capable of restoring the entire site collection. To perform a backup or restore with the Stsadm.exe tool, you must be an administrator on the Windows SharePoint Services machine and run the command locally. The SharePoint Migration Tool can be used to back up and restore one individual site or subsite as long as you are an administrator of that site. You can run the SharePoint Migration tool from a machine that does not have Windows SharePoint Services installed. Another very important difference is between the Stsadm.exe tool and the SharePoint Migration Tool is the data that actually gets backed up and restored. The backups and restores made with Stsadm.exe are full-fidelity operations, which means that all data and customizations are preserved. The SharePoint Migration tool is not full-fidelity, so security, personalization, and global administration settings will be lost on the restored site.
Recovering Portal SitesYou can restore portal sites using the SharePoint Portal Server Data Backup and Restore utility or the SharePoint Portal Server Central Administration page.
The SharePoint Portal Server Data Backup and Restore utility is sensitive to the type of portal site being restored. If a corporate portal site is available, any portal site being restored automatically becomes a divisional portal site and consumes shared services from the corporate portal site. You cannot restore a divisional portal site into a server farm that is missing the corporate portal site. The corporate portal site must be restored before a divisional portal site can be restored. The SharePoint Portal Server Data Backup and Restore utility restores all databases. After that, the portal site is created, the team databases are added to the virtual server, and all content indexes on the appropriate servers are restored. This is the best way available to recover a portal site as completely as possible.
Some information for the portal site is not restored and must be configured after restore has completed. This includes proxy settings, custom Web Parts, customized templates, e-mail settings, and various registry settings described in the documentation.
To restore a portal site from the SharePoint Portal Server Data Backup and Restore utility
To restore the portal site from SharePoint Portal Server, perform the following steps:
1. On the front-end Web server where SharePoint Portal Server is installed, start the SharePoint Portal Server Data Backup and Restore utility.
2. Click the Restore tab, and then click Browse to browse to the latest backup manifest file.
3. On the left side of the window, under Available Components, click All Server farm components under Select the component to restore and the items to restore.
4. On the right side of the window, all other portal sites have the restore status of Cannot be selected; the portal site that you need to restore has a restore status of Parameters needed.
5. Select the portal site labeled Parameters needed, and then click Edit.
6. By default, the original values of the portal site to be restored are displayed, including the portal site name, portal site URL, database file names, and information.
Ensure that all these parameters are correct, and then click OK.
If a portal site must be restored and the databases for the portal site still exist in SQL Server, you must enter new database names for the portal site’s database because the SharePoint Portal Server Data Backup and Restore utility cannot restore over an existing database.
7. The portal site’s status is set to Ready. Select the Ready check box, and then click Restore.
8. After the portal site has been restored, click Extend to extend the restored portal site to the second front-end Web server.
You must unextend the virtual server for the portal site before restoring the portal site on the first front-end Web server with the SharePoint Portal Server Data Backup and Restore utility. Once you have done this, you only have to extend the virtual server on the other front-end Web servers.
To restore a portal site from SharePoint Portal Server Central Administration
The SharePoint Portal Server Central Administration page also offers the option to restore a portal site. This option can be used to restore a portal site to an empty virtual server on a different server farm. This option restores the portal site without restoring the search configuration and content indexes. The information in the existing site, services, and user profile databases are restored, but the default search configuration for new portal sites is used. To fully restore a portal site, you should use the SharePoint Portal Server Data Backup and Restore utility.
9. 1. On the SharePoint Portal Server Central Administration page, in the Portal Site and Virtual Server Configuration section, click Create a portal site.
2. 1. On the Create Portal Site page, in the Portal site Creation Options section, click Restore a portal site.
2. 1. In the Restore Portal site From Database section, perform the following steps:
1. 1. In the Site database server list, select the content database server.
2. 1. In the Site database name box, type the name of the content database from which you want to restore the portal site.
2. 1. In the User profile database server list, select the database server that hosts the user profile database.
2. 1. In the User profile database name box, type the name of the user profile database from which you will restore user profile information for the portal site.
2. 1. In the Services database server list, select the database server that hosts the services database.
2. 1. In the Services database name box, type the name of the services database from which you will restore services for the portal site.
2. 1. In the Site URL section, perform the following steps:
2. 1. In the Virtual Server list, click the existing virtual server on the server that hosts the portal site.
2. 1. In the URL box, type the URL that users use to connect to the portal site.
By default, this URL is http://server_name/.
2. 1. Click OK. On the Create Portal site Confirmation page, click OK to begin to restore the portal site.

Restoring the Backward-Compatible Document LibraryThe backward-compatible document library is an optional component based on the Web Storage System, which can be used in organizations that are migrating from SharePoint Portal Server 2001 to SharePoint Portal Server 2003.
To restore data to a backward-compatible document library
The backward-compatible document library can be backed up using the SharePoint Portal Server Data Backup and Restore utility. You can restore data to a backward-compatible document library on the same server or a new server.
1. Delete all document libraries by using the SharePoint Portal Server Central Administration page on the Change Document Library Settings page.
Because you have lost your Document Management server, you are not actually deleting the document libraries. What you are doing is deleting the entries for them in the configuration database. When you still have a working Document Management server, deleting the document library this way deletes both the entry in the configuration database and the physical document library.
For SharePoint Portal Server, delete any document libraries associated with portal sites by using the Site Settings page for each portal site. Delete any document libraries not associated with portal sites by using the following URL: http://ServerName:PortNumber/sps/DmWorkspaceDelete.aspx?WorkspaceName=NameOfWorkspace.
2. Remove the document management server from the server farm topology by removing it from the component assignments.
3. Remove the document management server from the server farm.
4. Install the document management component of SharePoint Portal Server on the newly built server.
5. Add the document management server to the server farm.
6. Add the document management server to the server farm topology by adding it to the component assignments. If you want to restore the data to a server with a new name, you should reconnect to the document libraries using the same names that you used on the previous server.
7. Restore the document management components to the server using the SharePoint Portal Server Data Backup and Restore utility. If necessary, you can use the Change Document Library Settings page to connect to the document library and associate it with a portal site.
Recovering Different Types of ServersIn SharePoint Products and Technologies solutions, different servers can play different roles: the role of front-end Web server, search server, index management and job server, or database server. In a single-server scenario, all roles are fulfilled by the same server. In small, medium, or large server farm scenarios, several servers work together performing different roles to provide portal site services. At this point, you’ve seen how to use Stsadm.exe, the SharePoint Portal Server Data Backup and Restore utility, and the SharePoint Portal Server Central Administration page to back up and restore information. This section contains additional information about recovering each type of server.
Backing Up and Restoring Front-End Web ServersFront-end Web servers are distinct from other servers in a SharePoint Portal Server server farm because they can store application customizations (such as custom WPWeb Parts) on the local
file system that cannot be recovered using the SharePoint Portal Server Data Backup and Restore utility. It is recommended that you back up these servers by using the Automated System Recovery Wizard in the Backup Utility of Windows Server 2003. The front-end Web servers also provide the Internet Information Services (IIS) 6.0 virtual servers, application pools, and customized data for all the portal sites and Windows SharePoint Services sites. Each of the front-end Web servers contains IIS metadata, which contains configuration data for the virtual servers and application pools for the sites and for customized components including templates, assemblies, and Web Part packages.
Maintain the data for each individual front-end Web server in a central location, such as a shared network folder, so that these components can easily be copied and reinstalled when a server must be recovered. For example, create a shared network folder with a subdirectory for each front-end Web server in the server farm, and use a regularly scheduled script to do the backup. You should also copy the data on the shared network folder to a tape and include it in your normal tape backup and rotation strategy. Schedule your backup script to run on a regular basis, taking into account how often data is changed on the front-end Web servers.
If a front-end Web server fails, you can quickly re-image it using your standard image. Then you can copy, restore, and reinstall the necessary components on the recovered server. The following data should be copied or backed up to the shared library for each front-end Web Server:
• IIS metabase
• Root directories of Windows SharePoint Services–extended virtual servers
• Custom Web Part assemblies
• Custom templates
• Add-in software
The following sections discuss these components in detail.
IIS MetabaseIIS automatically backs up the metabase on each front-end Web server to the %WinDir%System32\inetsrv\MetaBack directory. Back up the entire MetaBack directory for each individual front-end Web server to its own server subdirectory on the shared network location.
You cannot just copy the metadata from one front-end Web server to another because the metadata is unique to each implementation of IIS 6.0.
You can also use the iisback.vbs command-line utility to schedule and perform regular backups of the metabase on each front-end Web server remotely, beyond the normal automatic backup schedule. You should also manually create IIS 6.0 metabase backups before and after making any changes to virtual servers or application pools so that the configuration can be quickly restored if necessary.
Root DirectoriesThe root directory of a Windows SharePoint Services–extended virtual server contains the Web.config files, which are text files that contain custom XML elements or options for Web Parts and Web Part pages for each virtual server on the front-end Web Servers. You should back up the complete root directory for each front-end Web server to the shared library on a regular basis. The tree must be restored to the same path from which it was copied, and it must correspond to the paths identified within the IIS 6.0 metadata.
Custom Web Part AssembliesCustom Web Part assemblies should be kept in the shared directory and reinstalled on the front-end Web servers when new servers are added to the server farm or restored after a failure. Custom Web Part assemblies are located by default in either the bin folder under the virtual server root directory of the computer running SharePoint Portal Server or the Global Assembly Cache (GAC) folder %WinDir%assembly, depending on your software development best practices and standards.
Assemblies are unique, and each one can have different installation instructions. Some assemblies require that you edit the registry. Keep the directions for installing each assembly along with each assembly in the shared directory.
Custom TemplatesIf you have customized any site templates, these should be included in your regular script or backup process for each front-end Web server and copied to the network shared library. Copy the following directories:
• systemroot\Program Files\Common Files\Microsoft Shared\Web Server Extensions \60\config\
• systemroot\Program Files\Common Files\Microsoft Shared\Web Server Extensions \60\template\
Add-in SoftwareAdd-in software includes the following:
• Language template packs for Windows SharePoint Services
• Web Part page solutions (third-party-developed aspx pages that include Web Parts)
• Templates that work with Microsoft Office
• Microsoft Office Web Parts and Components, which is a collection of Web Parts
If you are using any add-in software packages, they must be reinstalled after restoring a front-end Web server. The backups should be located in the shared directory so that they can be reinstalled after a front-end Web server has been restored or when a new front-end Web server is added to the server farm.
Optional BackupsThere is other data that is not intended to be restored to the front-end Web server but that is interesting enough to archive for analysis and long-term off-line reference. You might consider backing up the following log files:
Internet Information Services (IIS) logs.
• %WinDir%System32\Logfiles\W3svc<IIS-instance-number>\*.log.
Usage analysis log.
• %WinDir%System32\LogFiles\STS\ (available only if usage analysis is enabled).
Other Windows SharePoint Services logs.
• STSAdm.log and OWSTimer.log from the %PersonalFolder%Local Settings\Temp directory. For STSAdm.exe, %PersonalFolder% is the personal folder of the person who installed Windows SharePoint Services on the front-end Web server. The STSAdm.log contains information related to operations performed using the Stsadm.exe tool. By default, the server log level is set to 0, which causes only errors to be logged. For OWSTimer.log,
%PersonalFolder% is the personal folder of the account that the Owstimer.exe service process is running as, which is the same as the administrative application pool identity. The OWSTimer.log contains error information reported by the SPTimer service.
Front-End Web Server Backup SizeThe size of a front-end Web server backup depends on your customer and how much customization is done on the front-end Web servers. A reasonable estimate based on a medium server farm solution consisting of two front-end Web servers is approximately 50 MB for each server. You can estimate the maximum amount of hard disk space required for front-end Web server backups by using the following formula:The number of front-end Web servers × 50 MB = Estimated disk space required
You must also plan adequate space for backing up the IIS log files. You can estimate the space required by using the following formula:
The number of days of logging × Daily log file size = Estimated disk space required
For example, if you want to preserve 30 days of logs with an average daily log file size of 1 GB, you need 30 GB.
To recover a front-end Web server
To restore a front-end Web server, perform the following steps:
8. 1. Install your standard image by using your standard imaging tools and best practices.
2. 1. Configure Microsoft Network Load Balancing or your third-party load-balancing solution, and test it to ensure that load balancing is functioning properly with the new server.
2. 1. Copy the Inetpub and IIS metabase data for the front-end Web server from its shared backup directory, and then restore the IIS metabase and reinstall any custom assemblies, templates, and add-in software components. If you did not use a standard port number for SharePoint Central Administration, you must change the port number to use Central Administration on that server.
2. 1. Connect the server to the existing configuration database for the server farm.
2. 1. Add the front-end Web server to the server topology as a Web server. If this server is a front-end Web server in a medium server farm, enable the search component and force propagation of the content indexes to ensure that the search server has current information.
Backing Up and Restoring Search ServersSearch servers typically do not need the same level of protection as database servers or front-end Web servers because searching can be set up to be redundant within medium and large server farms. In a medium server farm, the front-end Web servers also provide search services for the server farm; in a large server farm, two dedicated search servers provide search services. In either solution, if one of the search servers becomes unavailable, the redundant search server continues to provide search services until the failed server is recovered. If a search index contains corrupted data, forcing propagation of the content indexes usually overwrites the corrupted data.
To recover a search server
If you want to recover a failed search server:
1. Remove the failed server from the server farm topology.
Removing a search server using the topology manager causes all content indexes
to be deleted from the search server.
2. Restore the server by using your standard image, or install SharePoint Portal Server on a newly built server.
3. After the server is recovered, connect it to the existing configuration database for the server farm and add it to the server farm topology and component assignments as a search server.
4. In a medium server farm, configure the search server as a front-end Web server.
5. Force propagation of the content indexes to the restored search server to immediately update the indexes.
Backing Up and Restoring Index Management ServersThe SharePoint Portal Server Data Backup and Restore utility can be used to back up and restore content indexes on the index management servers. In the case of index management servers, redundancy is less relevant compared to other types of servers. In the event of a failure, this type of server has little immediate impact on the availability of the solution. However, the server does require attention because new content is not indexed or searchable until the index management server has been recovered. Searching continues to be available, but the search indexes become out of date as new content is added.
If a content index contains corrupted data, you can force a full index rebuild to overwrite the corrupted index. Rebuilding a content index is accomplished by indexing the locations specified by the content sources and storing the results in the content index on the index server. You can also reset a damaged content index from the SharePoint portal site Configure Search and Indexing page in the Administration console if Advanced Search Administration mode is enabled. You can enable Advanced Search Administration mode in the Administration console, although it is recommended that you enable it during installation.
When you reset a content index, you are emptying the index and you must perform a full update of that index to rebuild it. This can be a time-consuming and resource-intensive process in an environment in which there is a great deal of content. In addition, during a full content index reset, any user who has search alerts set will receive all the alerts. If an index becomes corrupted beyond recovery or if an index management server fails, you can restore the indexes from the latest backup.
To recover an index management server
With the loss of an index management server, the content indexes for the server farm, in addition to all content sources for the portal sites, are lost unless the content indexes have been backed up using the SharePoint Portal Server Data Backup and Restore utility. To recover an index management server, perform the following steps:
1. Remove the failed server from the server farm topology before restoring it.
2. Restore the server by using your standard image, or install SharePoint Portal Server on a newly built server.
3. Connect to the configuration database for the server farm, and add the server to the topology as an index and job server.
4. Restore the content indexes from the latest SharePoint Portal Server Data Backup and Restore Utility backup set. If a backup of the indexes does not exist, manually re-create any indexes and divisional content sources.
Backing Up Databases by Using SQL Server Backup ToolsSQL Server 2000 is the data store for SharePoint Products and Technologies. This means you can leverage all the knowledge you have about backing up SQL Server databases. You can use
the SQL Server backup tools in addition to the native SharePoint Products and Technologies backup tools Stsadm.exe and the SharePoint Portal Server 2003 Data Backup and Restore utility. In some ways, these backup tools overlap each other, but they also complement each other. You should use Stsadm.exe if you need the finest granularity possible. Using Stsadm.exe, you can restore site collections and personal sites without having to restore the entire site database.
The SharePoint Portal Server 2003 Data Backup and Restore utility offers the most complete solution: it backs up all relevant databases as well as content sources and indexes. This is very important in deployments where it takes a long time to build indexes for all content sources. If you understand the types of databases used in SharePoint Products and Technologies, the SQL Server backup tools provide an important advantage compared to the SharePoint Portal Server 2003 Data Backup and Restore utility.
With the SQL Server backup tools, you can get a full-fidelity, complete backup of the databases used by SharePoint Products and Technologies. You can restore any or all of these databases. In a scenario where portal databases are backed up using the SQL Server backup tools, you need to remember that the index is not restored. You can restore the portal site via the SharePoint Portal Server Central Administration page after you have restored the portal databases by using the SQL Server backup tools. For this scenario to work, the spsadmin service account must either be a member of the Administrator’s group on the Web front-end server or be a Windows SharePoint Services administrator. According to recommended security practices, you should not grant the spsadmin account administrator rights; on the server, the spsadmin account should be granted as few privileges as possible. By default, the content access account is granted Windows SharePoint Services administrator rights. You should create a new Windows security group, and add both the content access account and the spsadmin service account to this group. Then, using the Windows SharePoint Services administration Web pages, you should change the Windows SharePoint Services administrator account to be this Windows security group. From Windows SharePoint Services Central Administration, locate the Security Configuration section and click Set SharePoint administration group. You must have installed the SQL Server 2000 client tools to be able to use the SQL Server backup tools or use the OSQL command-line tools that are installed with the Windows Microsoft Data Engine. Both kinds of tools provide you with the possibility to perform differential backups of the relevant databases.
A differential backup backs up the parts of the database that have changed since the last full database backup. It also backs up any activity that took place during the differential backup, as well as any uncommitted transactions in the transaction log. Performing a differential backup minimizes the time that is necessary for backing up a frequently modified database.
Perform a differential backup only if you have performed a full database backup. Remember that you don’t back up the configuration database.
Windows SharePoint Services uses two types of databases: content databases and configuration databases. Data in the lists and libraries on SharePoint sites go into the content database. The virtual server settings, such as the mapping of a site URL to the physical storage location, go into the configuration database. SharePoint Portal Server uses two additional types of databases: the profile database and the services database. User profiles are stored in the profile database. Services information, such as gatherer logs and subscription schedules, goes into the services database.
You should always restore all SharePoint Portal Server databases together. Restoring just one of the databases is not supported by Microsoft. Restoring a single Windows SharePoint Services content database is supported, though. For more information, see the SQL Server documentation.
This section does not discuss how to back up data located in the Windows Microsoft Data Engine (WMSDE). You will need to use the OSQL command-line tools to do this. For more information, again, see the SQL Server documentation.
Recovering Different Server TopologiesHaving discussed each type of server in a SharePoint Products and Technologies solution, it is now time to see how you can recover different server topologies in case of total server failure. It is possible to back up the configuration database before backing up the content databases and, in the intervening time, have new sites created that would not be available after the restore operation was completed. Besides, the configuration database must be rebuilt during the restore operation to ensure that it exactly matches the farm and site configurations in the restored databases.
To restore data, SQL Server Enterprise Manager allows administrators to schedule backups for each database in the system. For example, you could schedule full backups of the content, profile, and services databases every Sunday at 1:00 a.m. and schedule differential backups every other day at 1:00 a.m. SQL Server also provides command-line options that administrators can use to back up and restore data to servers. For more information, see the SQL Server documentation.
This section does not discuss how to back up data located in the Microsoft SQL Server Database Engine (MSDE or WMSDE). You’ll need to use the OSQL command-line tools to do this. For more information, again, see the SQL Server documentation.
Hot Server Farm Swapping via SQL Log ShippingIf you want to use the SQL Log Shipping feature as a disaster recovery method for your SharePoint Portal Server or Windows SharePoint Services deployment, you’ll be interested to learn that this is a supported method of disaster recovery. But, before you can use this method, you’ll first need to prepare your environment to take advantage of this ability to hot-swap a server farm from one group of servers to another. Configuring log shipping between a live server farm and a mirror server farm in a different domain is supported. When failing over to the mirror farm in this scenario, the Domain Controller of the live farm’s domain must be available in order to authenticate users by mapping their Security Identifiers (SID).
First, you’ll need to build a mirror server farm in a remote location, using the same IIS settings on each WFE server as what presently exists on the live server farm. You’ll also need to ensure you’re using the same operating system (and service pack) and SharePoint language as the live server farm. You do not need to have the same number of servers in the mirror server farm, and the server roles do not need to be identically distributed. In addition, you do not need to have the same server names, hardware, or network load-balancing settings as the live server farm.
To enable SQL Log Shipping, all databases need to have a recovery mode of Full or Bulk-logged. The default configuration of our databases is as follows:
• _SITE – full recovery mode
• _PROF – simple recovery mode
• _SERV – simple recovery mode
Check the mode of each database and ensure that each is set to either Full or Bulk-logged. If necessary, change the mode by using either Enterprise Manager or Transact-SQL.
After you have prepared your mirror farm environment, you’ll then need to perform a full backup of your live farm by using the SharePoint Portal Server backup/restore tool. In a Windows SharePoint Services–only server farm, you will need to back up all content databases and restore them to the mirror server farm. The mirror farm in this case would have its own configuration database and the content databases would be added to the mirror farm’s virtual servers by using the Windows SharePoint Services Manage Content Databases administration pages.
Next, restore the full backup to the mirror farm by using the SPS Backup/Restore tool. If you did not change the recovery mode of the databases before making the backup, you have to change
the recovery mode of the _PROF and _SERV databases to a compatible mode (as outlined in the preceding paragraphs) after restoring the databases, by using either Enterprise Manager or Transact-SQL.
Then apply the same customizations to the mirror farm as existed in the live farm, such as customized pages, custom code, or custom-built Web Parts.
After you have applied the customizations to the mirror farm, you’ll then enable SQL Server log shipping between _SITE, _PROF, and _SERV databases for each portal site. Do not ship logs between config DBs. Also, enable log shipping for content databases hosting team or personal sites. (These sites can be hosted on different virtual servers from the portal sites or on the same virtual server.) Configure update frequency according to your Service Level Agreements and network traffic requirements.
To enable SQL Log Shipping, the databases on the secondary server need to be in Standby or No Recovery mode. This configuration can be accomplished only by manually restoring all databases a second time, using either Enterprise Manager or Transact-SQL:
• If no customizations have been applied to the mirror farm, the same database backups created by the SPS Backup/Restore tool can be used to perform the second restore to put the databases in standby or no recovery mode.
• If some customizations have been applied to the mirror farm, use either Enterprise Manager or Transact-SQL to back up and restore the databases on the secondary SQL server to put the databases in Standby or No Recovery mode.
In Enterprise Manager, you specify standby mode by selecting the Leave Database Read-Only And Able To Restore Additional Transaction Logs option from the Recovery Completion State section in the Options tab in the Restore Database dialog box. No Recovery mode can be specified by selecting the Leave Database Nonoperational But Able To Restore Additional Transaction Logs option. In Transact-SQL, you use the RESTORE DATABASE command with the WITH STANDBY or WITH NORECOVERY options to reach the corresponding mode. When specifying standby mode, also select the Terminate Users In Database check box. Doing this is important because the mirror farm databases are read-only and could have some connections that would cause transaction logs to fail to be applied.
In the SQL Log Shipping wizard, when presented with the Add Destination Database dialog box, choose the Use Existing Database option and select the corresponding database. In this dialog box, you can also select the Allow Database To Assume Primary Role option, which lets the destination database become a new log shipping source database and thus permits a possible role reversal between primary and secondary servers.
Perform weekly full backups of the live farm and restores to the mirror farm to ensure the configuration DB is kept up to date with any server farm configuration or search configuration changes.
What if your live server farm fails? What then? Well, here are the steps to restore a downed farm to a mirror farm:
1. Change the role of the secondary SQL server to a primary server to bring the portal databases online.
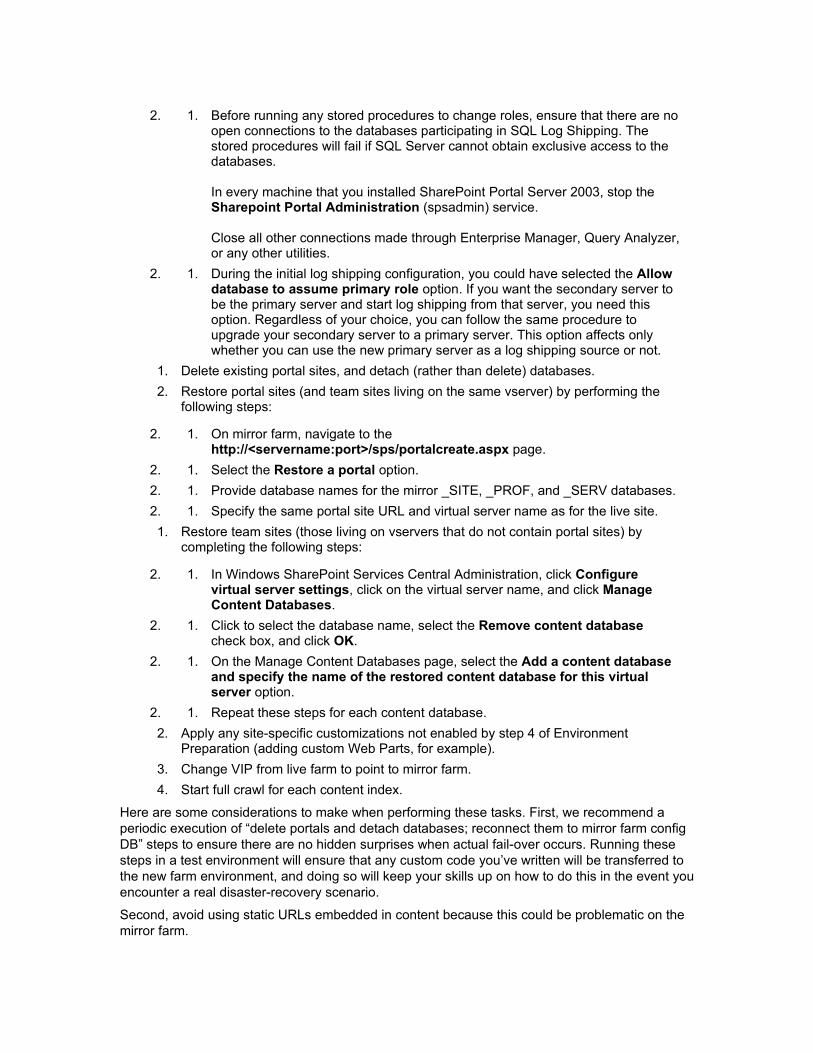
2. 1. Before running any stored procedures to change roles, ensure that there are no open connections to the databases participating in SQL Log Shipping. The stored procedures will fail if SQL Server cannot obtain exclusive access to the databases.
In every machine that you installed SharePoint Portal Server 2003, stop the Sharepoint Portal Administration (spsadmin) service.
Close all other connections made through Enterprise Manager, Query Analyzer, or any other utilities.
2. 1. During the initial log shipping configuration, you could have selected the Allow database to assume primary role option. If you want the secondary server to be the primary server and start log shipping from that server, you need this option. Regardless of your choice, you can follow the same procedure to upgrade your secondary server to a primary server. This option affects only whether you can use the new primary server as a log shipping source or not.
1. Delete existing portal sites, and detach (rather than delete) databases.
2. Restore portal sites (and team sites living on the same vserver) by performing the following steps:
2. 1. On mirror farm, navigate to the http://<servername:port>/sps/portalcreate.aspx page.
2. 1. Select the Restore a portal option.
2. 1. Provide database names for the mirror _SITE, _PROF, and _SERV databases.
2. 1. Specify the same portal site URL and virtual server name as for the live site.
1. Restore team sites (those living on vservers that do not contain portal sites) by completing the following steps:
2. 1. In Windows SharePoint Services Central Administration, click Configure virtual server settings, click on the virtual server name, and click Manage Content Databases.
2. 1. Click to select the database name, select the Remove content database check box, and click OK.
2. 1. On the Manage Content Databases page, select the Add a content database and specify the name of the restored content database for this virtual server option.
2. 1. Repeat these steps for each content database.
2. Apply any site-specific customizations not enabled by step 4 of Environment Preparation (adding custom Web Parts, for example).
3. Change VIP from live farm to point to mirror farm.
4. Start full crawl for each content index.
Here are some considerations to make when performing these tasks. First, we recommend a periodic execution of “delete portals and detach databases; reconnect them to mirror farm config DB” steps to ensure there are no hidden surprises when actual fail-over occurs. Running these steps in a test environment will ensure that any custom code you’ve written will be transferred to the new farm environment, and doing so will keep your skills up on how to do this in the event you encounter a real disaster-recovery scenario.
Second, avoid using static URLs embedded in content because this could be problematic on the mirror farm.
Third, users should consider the mirror farm to be read-only when the live farm fails. Users will have access to data and can make changes to that data, but these changes will be lost when the live farm is brought back online.
Fourth, log shipping is not a substitute for periodic full backups using SharePoint Portal Server backup and restore! Ensure that you are performing regular backups of your data. This is always a best practice.
Remember, while the mirror farm is actively engaged in log shipping, all portal databases are in read-only standby mode and remain in this state until there’s a role change. Essentially, this means that performing weekly SharePoint Portal Server backups and restores to the mirror farm requires disabling SQL Log Shipping.
For more information, see the white paper “INF: Microsoft SQL Server 2000: How to Set Up Log Shipping” at http://support.microsoft.com/default.aspx?scid=kb%3Ben-us%3BQ323135, the Microsoft Knowledge Base article 314515 at http://support.microsoft.com/default.aspx?scid=kb;en-us;314515, and the article “Log Shipping in SQL Server 2000” at http://www.microsoft.com/technet/prodtechnol/sql/2000/maintain/logship1.mspx.
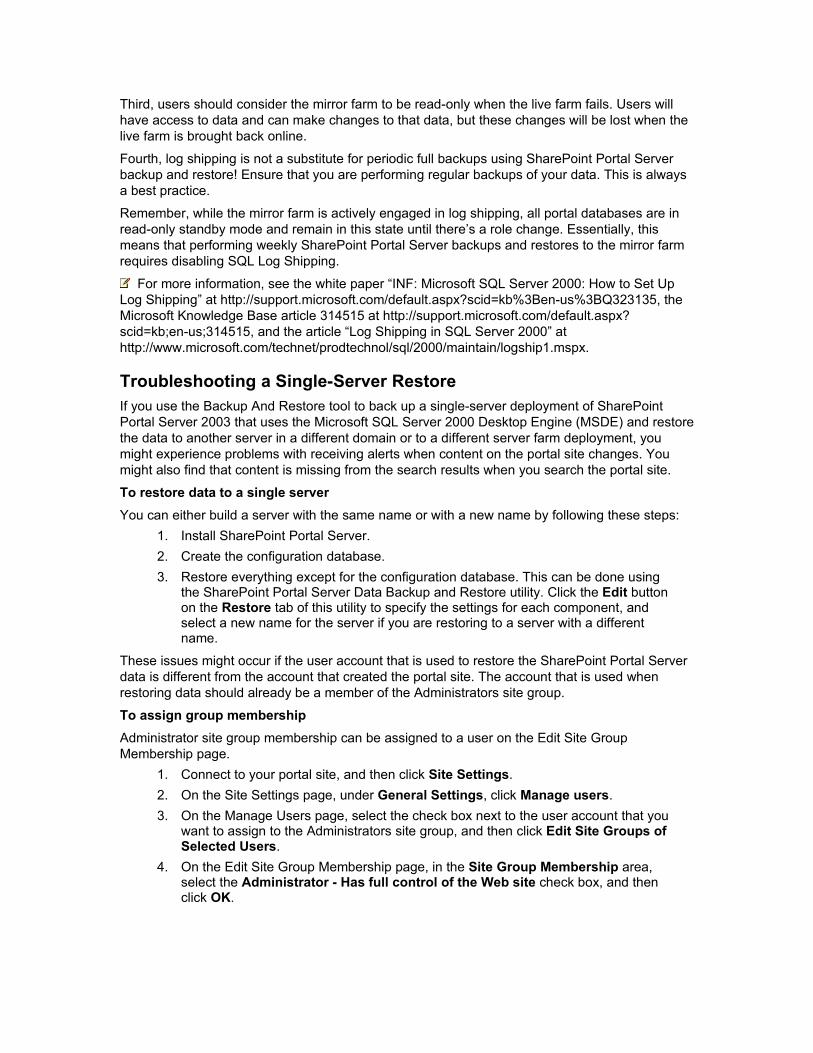
Troubleshooting a Single-Server RestoreIf you use the Backup And Restore tool to back up a single-server deployment of SharePoint Portal Server 2003 that uses the Microsoft SQL Server 2000 Desktop Engine (MSDE) and restore the data to another server in a different domain or to a different server farm deployment, you might experience problems with receiving alerts when content on the portal site changes. You might also find that content is missing from the search results when you search the portal site.
To restore data to a single server
You can either build a server with the same name or with a new name by following these steps:
1. Install SharePoint Portal Server.
2. Create the configuration database.
3. Restore everything except for the configuration database. This can be done using the SharePoint Portal Server Data Backup and Restore utility. Click the Edit button on the Restore tab of this utility to specify the settings for each component, and select a new name for the server if you are restoring to a server with a different name.
These issues might occur if the user account that is used to restore the SharePoint Portal Server data is different from the account that created the portal site. The account that is used when restoring data should already be a member of the Administrators site group.
To assign group membership
Administrator site group membership can be assigned to a user on the Edit Site Group Membership page.
1. Connect to your portal site, and then click Site Settings.
2. On the Site Settings page, under General Settings, click Manage users.
3. On the Manage Users page, select the check box next to the user account that you want to assign to the Administrators site group, and then click Edit Site Groups of Selected Users.
4. On the Edit Site Group Membership page, in the Site Group Membership area, select the Administrator - Has full control of the Web site check box, and then click OK.
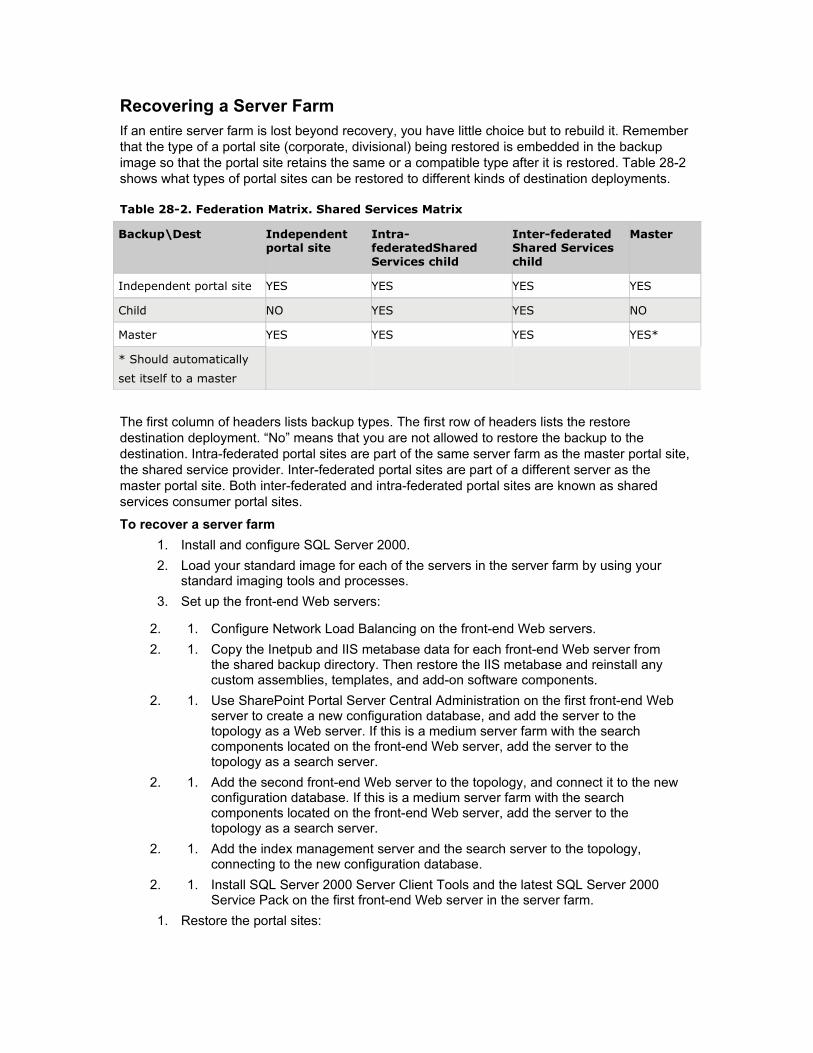
Recovering a Server FarmIf an entire server farm is lost beyond recovery, you have little choice but to rebuild it. Remember that the type of a portal site (corporate, divisional) being restored is embedded in the backup image so that the portal site retains the same or a compatible type after it is restored. Table 28-2 shows what types of portal sites can be restored to different kinds of destination deployments.
Table 28-2. Federation Matrix. Shared Services Matrix
Backup\Dest Independent portal site
Intra-federatedShared Services child
Inter-federated Shared Services child
Master
Independent portal site YES YES YES YES
Child NO YES YES NO
Master YES YES YES YES*
* Should automatically
set itself to a master
The first column of headers lists backup types. The first row of headers lists the restore destination deployment. “No” means that you are not allowed to restore the backup to the destination. Intra-federated portal sites are part of the same server farm as the master portal site, the shared service provider. Inter-federated portal sites are part of a different server as the master portal site. Both inter-federated and intra-federated portal sites are known as shared services consumer portal sites.
To recover a server farm
1. Install and configure SQL Server 2000.
2. Load your standard image for each of the servers in the server farm by using your standard imaging tools and processes.
3. Set up the front-end Web servers:
2. 1. Configure Network Load Balancing on the front-end Web servers.
2. 1. Copy the Inetpub and IIS metabase data for each front-end Web server from the shared backup directory. Then restore the IIS metabase and reinstall any custom assemblies, templates, and add-on software components.
2. 1. Use SharePoint Portal Server Central Administration on the first front-end Web server to create a new configuration database, and add the server to the topology as a Web server. If this is a medium server farm with the search components located on the front-end Web server, add the server to the topology as a search server.
2. 1. Add the second front-end Web server to the topology, and connect it to the new configuration database. If this is a medium server farm with the search components located on the front-end Web server, add the server to the topology as a search server.
2. 1. Add the index management server and the search server to the topology, connecting to the new configuration database.
2. 1. Install SQL Server 2000 Server Client Tools and the latest SQL Server 2000 Service Pack on the first front-end Web server in the server farm.
1. Restore the portal sites:
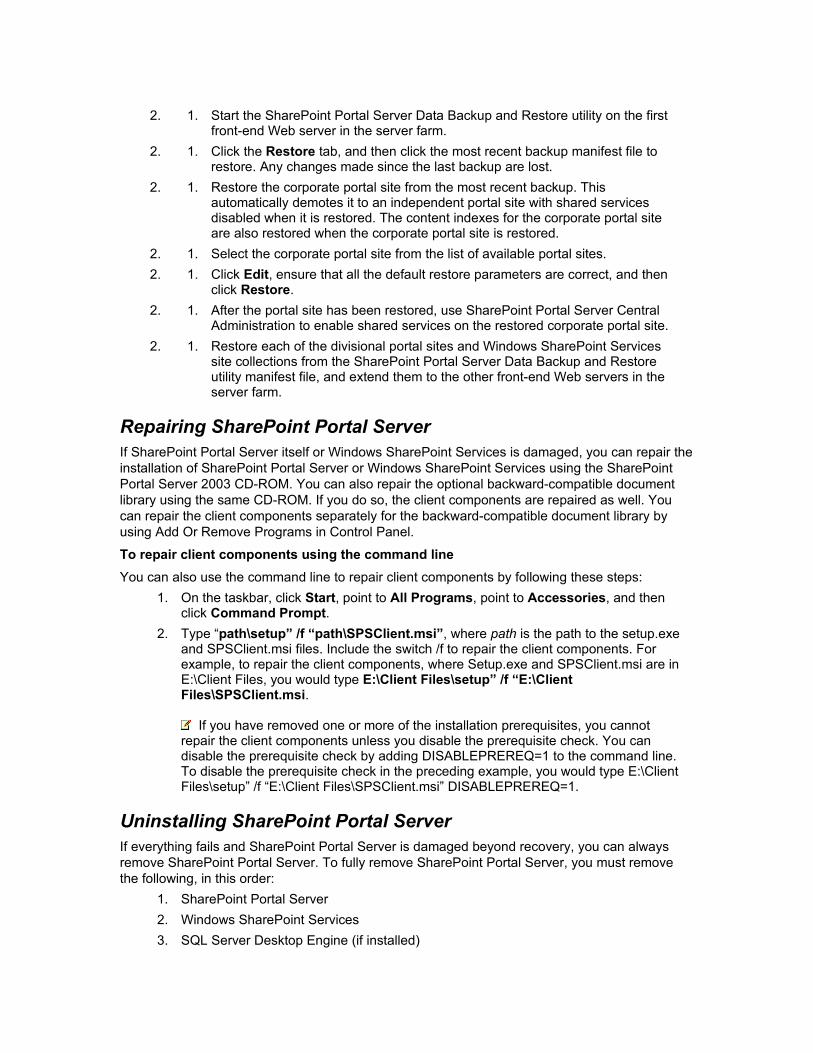
2. 1. Start the SharePoint Portal Server Data Backup and Restore utility on the first front-end Web server in the server farm.
2. 1. Click the Restore tab, and then click the most recent backup manifest file to restore. Any changes made since the last backup are lost.
2. 1. Restore the corporate portal site from the most recent backup. This automatically demotes it to an independent portal site with shared services disabled when it is restored. The content indexes for the corporate portal site are also restored when the corporate portal site is restored.
2. 1. Select the corporate portal site from the list of available portal sites.
2. 1. Click Edit, ensure that all the default restore parameters are correct, and then click Restore.
2. 1. After the portal site has been restored, use SharePoint Portal Server Central Administration to enable shared services on the restored corporate portal site.
2. 1. Restore each of the divisional portal sites and Windows SharePoint Services site collections from the SharePoint Portal Server Data Backup and Restore utility manifest file, and extend them to the other front-end Web servers in the server farm.
Repairing SharePoint Portal ServerIf SharePoint Portal Server itself or Windows SharePoint Services is damaged, you can repair the installation of SharePoint Portal Server or Windows SharePoint Services using the SharePoint Portal Server 2003 CD-ROM. You can also repair the optional backward-compatible document library using the same CD-ROM. If you do so, the client components are repaired as well. You can repair the client components separately for the backward-compatible document library by using Add Or Remove Programs in Control Panel.
To repair client components using the command line
You can also use the command line to repair client components by following these steps:
1. On the taskbar, click Start, point to All Programs, point to Accessories, and then click Command Prompt.
2. Type “path\setup” /f “path\SPSClient.msi”, where path is the path to the setup.exe and SPSClient.msi files. Include the switch /f to repair the client components. For example, to repair the client components, where Setup.exe and SPSClient.msi are in E:\Client Files, you would type E:\Client Files\setup” /f “E:\Client Files\SPSClient.msi.
If you have removed one or more of the installation prerequisites, you cannot repair the client components unless you disable the prerequisite check. You can disable the prerequisite check by adding DISABLEPREREQ=1 to the command line. To disable the prerequisite check in the preceding example, you would type E:\Client Files\setup” /f “E:\Client Files\SPSClient.msi” DISABLEPREREQ=1.
Uninstalling SharePoint Portal ServerIf everything fails and SharePoint Portal Server is damaged beyond recovery, you can always remove SharePoint Portal Server. To fully remove SharePoint Portal Server, you must remove the following, in this order:
1. SharePoint Portal Server
2. Windows SharePoint Services
3. SQL Server Desktop Engine (if installed)
4. Backward-compatible document library (if installed)
5. Internet Information Server (IIS)
Most files and subfolders located in installation folders will be removed. All Microsoft SQL Server databases will be detached, but not removed, from the database server. When you remove SharePoint Portal Server, all user data is left in the database files. These files are also left behind if you remove SQL Server Desktop Engine or Microsoft SQL Server.
Writing a Disaster Recovery PlanYou should write a disaster recovery plan that provides timely, accurate, consistent, and reusable solutions for emergency situations. Executing a consistent recovery plan in case of emergencies helps avoid wasting time, resources, and money, not to mention preventing a lot of stress. A disaster recovery plan should reflect a well-planned data protection strategy based on your customer’s specific data protection requirements. The primary objective of disaster recovery is to minimize downtime by providing the most reliable recovery plan to restore data in the event of a server crash, database corruption, or any other form of data loss. A well-planned and thoroughly tested database recovery strategy and reliable database protection software are essential to maintain the availability of SharePoint Products and Technologies solutions.
The first step in building a disaster recovery plan is to create a strategy to monitor server health. You can rely on performance counters (which are discussed in detail in Chapter 10, “Performance Monitoring in Microsoft Office SharePoint Portal Server 2003”) and diagnostic logging to provide this information. Actively capturing real-time event information is useful only if the responsible parties are proactively monitoring server health and ready to act upon this information when necessary. If problems arise, you should perform the following tasks:
• Minimize the impact of the problem.
• Perform a root-cause analysis to determine the exact nature of the problem.
• Correct the problem.
• Create a plan for providing a long-term solution and a reusable action plan should the problem reoccur.
Best PracticesThis section contains best practices that should be considered during the creation of a disaster recovery plan.
Backup and Restore StrategyTo provide the most flexibility when restoring your customer’s data, use the SharePoint Portal Server Data Backup and Restore utility in combination with using the Stsadm.exe utility to back up the Windows SharePoint Services site collections and My Sites. The backups should be made directly to a shared disk location and then backed up to tape following your best practices.
Back Up Regularly Using Scripts
Create scripts using Stsadm.exe and Spsbackup.exe to back up all the databases and indexes on a schedule. It is highly recommended that you perform backups when server usage is low. Because most large companies have defined requirements on mission-critical backups and restores, your schedule of backups will depend on your customer’s requirements. You might need to back up more or less frequently if your customer needs to meet a Service Level Agreement or has more stringent data recovery standards in place.

The following code example uses the SharePoint Back And Restore tool to back up a portal site. The code can be copied into a batch file.
"C:\Program Files\SharePoint Portal Server\BIN\spsbackup" /portal site
"http://woodgrove /file C:\\backup\MyPortal siteBackup.bak /overwrite
The following code example uses the Stsadm.exe tool to back up all site collections within a portal site. The code can be copied into a VBScript file (.vbs).
Option Explicit
Const STSADM_PATH = _
"C:\Program Files\Common Files\Microsoft Shared\web server
extensions\60\BIN\stsadm"
Dim objFso, objFolder, objFiles, objFile, objShell, objExec, strResult, objXml,
objSc,
objUrl, strUrl, strFileName, strCmd
Set objFso = CreateObject("Scripting.FileSystemObject")
Set objFolder = objFso.GetFolder("C:\backup\")
Set objFiles = objFolder.Files
WScript.Echo "Begin backup"
' Delete all backup files currently present in the backup folder.
For Each objFile in objFiles
objFile.Delete(True)
Next
' Retrieves all site collections in XML format.
Set objShell = CreateObject("WScript.Shell")
Set objExec = objShell.Exec(STSADM_PATH & " -o enumsites -url http://woodgrove/")
strResult = objExec.StdOut.ReadAll
WScript.Echo strResult
' Load XML in DOM document so it can be processed.
Set objXml = CreateObject("MSXML2.DOMDocument")
objXml.LoadXML(strResult)
' Loop through each site collection and call stsadm.exe to make a backup.
For Each objSc in objXml.DocumentElement.ChildNodes
strUrl = objSc.Attributes.GetNamedItem("Url").Text
strFileName = "C:\backup\" & Replace(Replace(strUrl, "http://", ""), "/", "_")
& _
".bak"
strCmd = STSADM_PATH & " -o backup -url """ + strUrl + """ -filename """
+ strFileName + """"
WScript.Echo "Backing up site collection " & strUrl & " to file _
" & strFileName & " using the following command " & strCmd
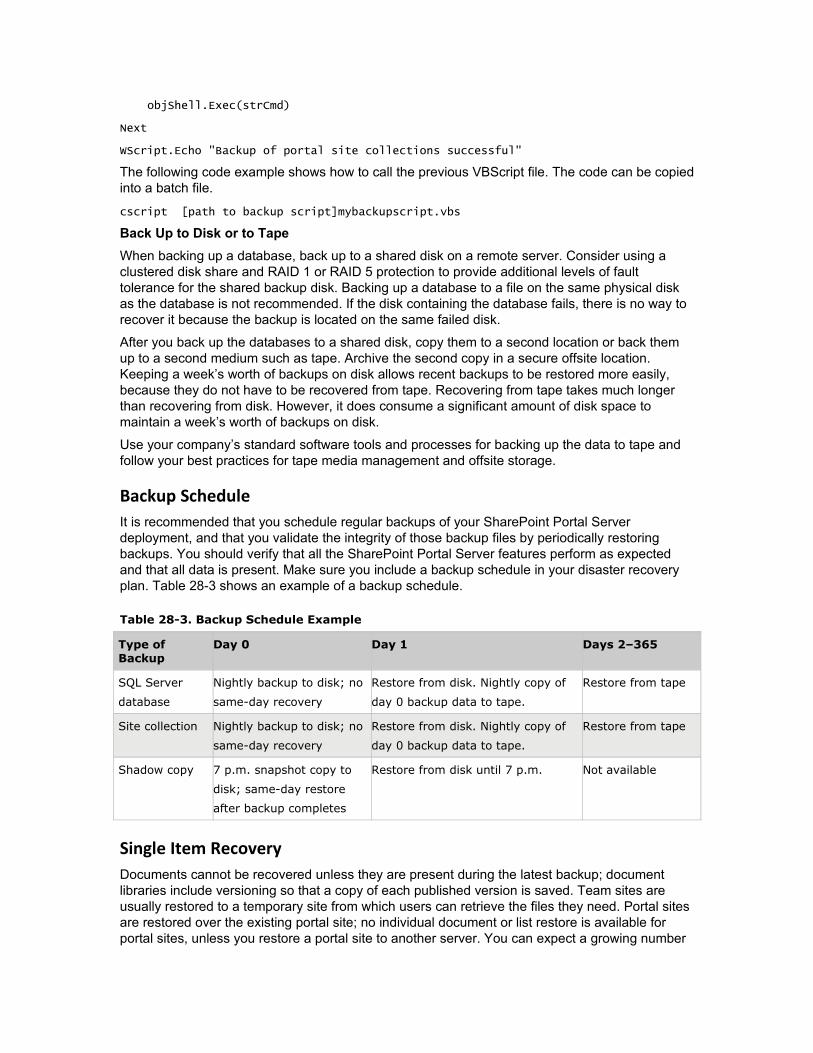
objShell.Exec(strCmd)
Next
WScript.Echo "Backup of portal site collections successful"
The following code example shows how to call the previous VBScript file. The code can be copied into a batch file.
cscript [path to backup script]mybackupscript.vbs
Back Up to Disk or to Tape
When backing up a database, back up to a shared disk on a remote server. Consider using a clustered disk share and RAID 1 or RAID 5 protection to provide additional levels of fault tolerance for the shared backup disk. Backing up a database to a file on the same physical disk as the database is not recommended. If the disk containing the database fails, there is no way to recover it because the backup is located on the same failed disk.
After you back up the databases to a shared disk, copy them to a second location or back them up to a second medium such as tape. Archive the second copy in a secure offsite location. Keeping a week’s worth of backups on disk allows recent backups to be restored more easily, because they do not have to be recovered from tape. Recovering from tape takes much longer than recovering from disk. However, it does consume a significant amount of disk space to maintain a week’s worth of backups on disk.
Use your company’s standard software tools and processes for backing up the data to tape and follow your best practices for tape media management and offsite storage.
Backup ScheduleIt is recommended that you schedule regular backups of your SharePoint Portal Server deployment, and that you validate the integrity of those backup files by periodically restoring backups. You should verify that all the SharePoint Portal Server features perform as expected and that all data is present. Make sure you include a backup schedule in your disaster recovery plan. Table 28-3 shows an example of a backup schedule.
Table 28-3. Backup Schedule Example
Type of Backup
Day 0 Day 1 Days 2–365
SQL Server
database
Nightly backup to disk; no
same-day recovery
Restore from disk. Nightly copy of
day 0 backup data to tape.
Restore from tape
Site collection Nightly backup to disk; no
same-day recovery
Restore from disk. Nightly copy of
day 0 backup data to tape.
Restore from tape
Shadow copy 7 p.m. snapshot copy to
disk; same-day restore
after backup completes
Restore from disk until 7 p.m. Not available
Single Item RecoveryDocuments cannot be recovered unless they are present during the latest backup; document libraries include versioning so that a copy of each published version is saved. Team sites are usually restored to a temporary site from which users can retrieve the files they need. Portal sites are restored over the existing portal site; no individual document or list restore is available for portal sites, unless you restore a portal site to another server. You can expect a growing number
of third-party vendors to provide document-level backup solutions. For an up-to-date list of third-party backup solutions, visit the Backup And Storage Management page in the Products And Utilities section of the MSD2D.com website (http:// www.msd2d.com).
SummaryThis chapter provides a thorough overview of what to do when you need to recover from a disaster. It discusses the native tools in SharePoint Products and Technologies that are used to back up and restore data. It also shows how to restore SharePoint sites, personal sites, portal sites, and backward-compatible document libraries. The recovery of different kinds of servers as well as different kinds of server topologies is discussed. The chapter provides information about repairing and uninstalling SharePoint Products and Technologies if all else fails. The chapter concludes with a discussion about what a disaster recovery plan should cover and what best practices should be kept in mind in disaster recovery scenarios.