Digital Postage Meter - Copier Catalogbrochure.copiercatalog.com/pitney-bowes/SV61983HK7... ·...
81
Operator Guide US English Version Digital Postage Meter
-
Upload
vuongnguyet -
Category
Documents
-
view
213 -
download
0
Transcript of Digital Postage Meter - Copier Catalogbrochure.copiercatalog.com/pitney-bowes/SV61983HK7... ·...

Operator GuideUS English Version
Digital Postage Meter

This page left intentionally blank.

SV61983 Rev. H©2012 Pitney Bowes Inc. All rights reserved. This book may not be reproduced in whole or in part in any fashion or stored in a retrieval system of any type or transmitted by any means, electronically or mechanically, without the express, written permission of Pitney Bowes.We have made every reasonable effort to ensure the accuracy and usefulness of this manual; however, we cannot assume responsibility for errors or omissions or liability for the misuse or misapplication of our products. Due to our continuing program of product improvement, equipment and material specifications as well as performance features are subject to change without notice. Your digital mailing system may not have some of the features described in this book. Available features vary, depending on the model of your mailing system, installed options, system software level, how your system is set up and the country it is designed to operate in.E-Z Seal, Postage By Phone, and Purchase Power are trademarks or registered trademarks of Pitney Bowes Inc. USPS and Shipping Assistant are registered trademarks of the United States Postal Service. Windows is a trademark or registered trademark of Microsoft Corp.

Declaration of Conformity According to FCC Rules Part 2 , Paragraph 2.1077This device complies with Part 15 of the FCC Rules. Operation is subject to the following two conditions: (1) this device may not cause harmful interference, and (2) this device must accept any interference received, including interference that may cause undesired operation. Responsible party: Pitney Bowes, 1 Elmcroft Rd., Stamford, CT 06926-0700.
Note: This equipment has been tested and found to comply with the limits for a Class B digital device, pursuant to part 15 of the FCC rules. These limits are designed to provide reasonable protection against interference in a residential installation. This equipment generates, uses, and can radiate radio frequency energy and, if not installed and used in accordance with the instruction manual, may cause interference to radio communications. However, there is no guarantee that interference will not occur in a particular installation. If this equipment does cause interference to radio or television reception, which can be determined by turning the equipment off and on, the user is encouraged to try to correct the interference by one or more of the following measures:• Reorient or relocate the receiving antenna.• Increase the separation between the equipment and receiver.• Connect the equipment into an outlet on a circuit different from that to which
the receiver is connected.• Consult the dealer or an experienced radio/TV technician for help.
CAUTION: Changes or modifications to this equipment not expressly approved by the party responsible for compliance could void the user’s authority to operate the equipment.
Shielded I/O and USB cables must be used with this equipment to ensure compliance with the limits. Use of unshielded cables is prohibited.
ServicingThis equipment is not intended to be serviceable. Please refer to the warranty information if problems occur. Failed units will be returned to the Pitney Bowes U.S. Service Center. For reference purposes, the Pitney Bowes U.S. Service Center contact address is: Pitney Bowes Inc., 1 Elmcroft Road, Stamford, CT, 06926-0700. All inquiries can be done by calling 1-800-468-8454 and following the telephone prompts. Customer Service Representatives are available Monday through Friday, 8:00 AM - 8:00 PM ET.

FCC Part 68 Compliance of the ModemThis equipment complies with Part 68 of the FCC rules and the requirements adopted by the ACTA. On the bottom of this equipment is a label that contains, among other information, a product identifier in the format US:AAAEQ##TXXXX. If requested, this number must be provided to the telephone company.This equipment is designed to be connected to a Facility Interface Code 02LS2 network with RJ11C network interface.A plug and jack used to connect this equipment to the premises wiring and telephone network must comply with the applicable FCC Part 68 rules and requirements adopted by the ACTA. A compliant telephone cord and modular plug is provided with this product. It is designed to be connected to a compatible modular jack that is also compliant. See installation instructions for details.
The ringer equivalence number (REN) is used to determine the number of devices that may be connected to a telephone line. Excessive RENs on a telephone line may result in the devices not ringing in response to an incoming call. In most but not all areas, the sum of RENs should not exceed five (5.0). To be certain of the number of devices that may be connected to a line, as determined by the total RENs, contact the local telephone company. The REN for this product is part of the product identifier that has the format US:AAAEQ##TXXXX. The digits represented by ## are the REN without a decimal point (for example, this model is 03 which is a REN of 0.3).
If this equipment causes harm to the telephone network, the telephone company will notify you in advance that temporary discontinuance of service may be required. But if advance notice isn’t practical, the telephone company will notify you as soon as possible. Also, you will be advised of your right to file a complaint with the FCC if you believe it is necessary.
The telephone company may make changes in its facilities, equipment, operations, or procedures that could affect the operation of the equipment. If this happens the telephone company will provide advance notice in order for you to make necessary modifications to maintain uninterrupted service.
If trouble is experienced with this equipment, please contact Pitney Bowes, 1 Elmcroft Rd., Stamford, CT 06926-0700, for repair or warranty information (also see Servicing section above). If the equipment is causing harm to the telephone network, the telephone company may request that you disconnect the equipment until the problem is resolved. This equipment is not intended to be repaired by the customer (user).
Connection to party-line service is subject to state tariffs. Contact the state public utility commission, public service commission, or corporation commission for information.
If the installation site has specially wired alarm equipment connected to the telephone line, ensure the installation of this mailing machine does not disable the alarm equipment. If you have questions about what will disable alarm equipment, consult your telephone company or a qualified installer.

Industry CanadaThis product meets the applicable Industry Canada technical specifications. The Ringer Equivalence Number (REN) is an indication of the maximum number of devices allowed to be connected to a telephone interface. The Ringer Equivalence Number (REN) of this terminal equipment is 1.0 (with the exception of the K7M0, which is 0.3). The termination on an interface may consist of any combination of devices subject only to the requirement that the sum of the RENs of all devices does not exceed five.The abbreviation, IC, before the registration number signifies that registration was performed based on a Declaration of Conformity indicating that Industry Canada technical specifications were met. It does not imply that Industry Canada approved the equipment.

mailstation™ 2 Digital Postal Meter | SV61983 Rev. H v
Machine IdentificationProduct Name: mailstation 2™ digital postage meterModel Number: K700 (Product Code K7M0)
ResourcesMeter: http://pb.com/support/K7M0Network Installation: www.pb.com/support/LANGeneral Questions: (800) 522-0020Installation: (877) 817-2463
NOTE: Customer Service Representatives are available Monday through Friday, 8:00 AM - 8:00 PM EST.
Supply LineWebsite: http://www.pb.com Telephone: (800) 243-7824
My AccountTo view a list of your equipment, pay invoices online, or you have questions about your Postage-by-Phone account go to: http://www.pb.com and click My Account.USPShttp://www.usps.com
Pitney Bowes Contact List

vi mailstation™ 2 Digital Postal Meter | SV61983 Rev. H
vi | Pitney Bowes Contact List
This page left intentionally blank.

mailstation™ 2 Digital Postal Meter | SV61983 Rev. H vii
Pitney Bowes Contact List ...................................................vTable of Contents ................................................................vii1 • Introduction ...................................................................1-1
What's in this Guide ............................................................................ 1-1About the Pitney Bowes Small Office Series ....................................... 1-2About Your Machine ............................................................................ 1-2Sections of the Meter Stamp ............................................................... 1-3Connecting to the Pitney Bowes Data Center ..................................... 1-3Postal Requirements ........................................................................... 1-4Other Sources of Information .............................................................. 1-4Specifications ...................................................................................... 1-5Important Safety Notes........................................................................ 1-6Important Telephone Safety Instructions ............................................. 1-8
2 • About Your System .......................................................2-1Parts of the Machine .......................................................................... 2-1Control Panel....................................................................................... 2-2Connections on Back of Machine ........................................................ 2-3
3 • Running Mail ..................................................................3-1Home Screen ...................................................................................... 3-1Checking the Funds (Postage) in Your Machine ................................. 3-1Determining the Amount of Postage to Use ........................................ 3-1Applying Postage ................................................................................ 3-2Checking and Clearing the Batch Count ............................................. 3-4
4 • Printing Options ............................................................4-1Printing Options ................................................................................... 4-1Sections of the Meter Stamp ............................................................... 4-1Printing a $0.00 Meter Stamp.............................................................. 4-2Auto-Advance of Printed Date for the Meter Stamp ............................ 4-2Manually Changing Printed Date for the Meter Stamp ........................ 4-2Turning On or Off Date Printing for the Meter Stamp .......................... 4-3Adding/Removing an Envelope Ad to the Meter Stamp ...................... 4-3Adding/Removing Postal Inscription to the Meter Stamp .................... 4-4Printing the Date and Time Only (no meter stamp) ............................. 4-4Printing Envelope Ad Only (no meter stamp) ...................................... 4-5
Table of Contents

Table of Contents
viii mailstation™ 2 Digital Postal Meter | SV61983 Rev. H
5 • System Settings ............................................................5-1System Settings .................................................................................. 5-1Setting Contrast of LCD Display.......................................................... 5-1Setting System Time ........................................................................... 5-2Setting/Disabling the Lock Code ......................................................... 5-4Setting Sleep Mode Activation Time .................................................... 5-5Activating Sleep Mode Manually ......................................................... 5-6Setting the High Value Warning........................................................... 5-7Setting the Low Funds Warning .......................................................... 5-7Entering the Prefix for Dialing Out to Data Center via Analog Line ..... 5-7Selecting Tone/Pulse for Dialing Out to Data Center via Analog Line . 5-8Using Intra BMC ZIP Code Groups ..................................................... 5-8
6 • Accounting Options ......................................................6-1Overview of Accounting ....................................................................... 6-1Turning Accounting Feature ON or OFF ............................................. 6-2Creating an Account ............................................................................ 6-2Editing Account Name and Password ................................................. 6-3Selecting an Account to Track Postage ............................................... 6-3Viewing Account Totals ........................................................................ 6-4Printing an Accounting Report ............................................................. 6-4Clearing All or Some of the Accounts .................................................. 6-5Deleting an Account ............................................................................ 6-6
7 • Reports ...........................................................................7-1Reports Overview ................................................................................ 7-1Funds Report....................................................................................... 7-1Refill Summary Report ........................................................................ 7-2Software (System) Version Report ...................................................... 7-2View Software (System) Versions (on Machine Display Only) ............ 7-3
8 • Ink Maintenance ............................................................8-1Printing a $0.00 Meter Stamp.............................................................. 8-1Messages Indicating Ink Cartridge Replacement ................................ 8-1Replacing the Ink Cartridge ................................................................. 8-2Printing Test Pattern ............................................................................ 8-4Cleaning Printer Nozzles ..................................................................... 8-4Replacing the Print Head .................................................................... 8-5Replacing the Ink Tray......................................................................... 8-5

Table of Contents
mailstation™ 2 Digital Postal Meter | SV61983 Rev. H ix
9 • Troubleshooting ............................................................9-1Getting Help ........................................................................................ 9-1Error Messages ................................................................................... 9-1Blank Display..................................................................................... 10-3Display Difficult to Read .................................................................... 10-3Printing is Incomplete, Streaked, or Poor Quality.............................. 10-3Accidentally Printing the Wrong Postage .......................................... 10-4
10 • Supplies & Options ...................................................10-1Supplies and Accessories ................................................................ 10-1Options .............................................................................................. 10-1
Appendix A • Passwords & Meter Functions .................. A-1Appendix B • Entering Text ............................................... B-1
When is Text Entry Used? ...................................................................B-1How is Text Entry Done? .....................................................................B-1
Glossary ..................................................................Glossary1

Table of Contents
x mailstation™ 2 Digital Postal Meter | SV61983 Rev. H
This page left intentionally blank.
mailstation™ 2 Digital Postal Meter | SV61983 Rev. H 1-1
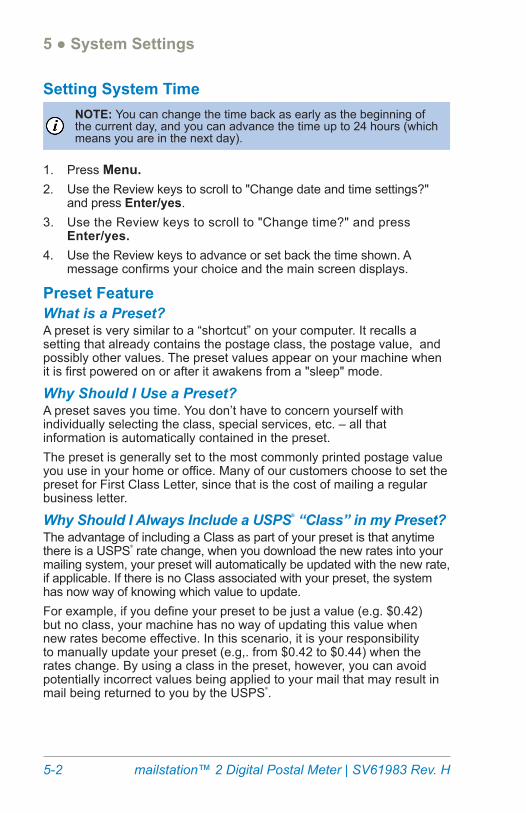
What's in this GuideChapter 1 ● IntroductionDescribes the key features of your mailing system. It also includes important safety notes.
Chapter 2 ● About Your SystemExplains the purpose and shows the location of each control and machine feature. Please read this Chapter carefully.
Chapter 3 ● Running Mail Explains how to process mail. The operations covered here are the ones you'll use most often.
Chapter 4 ● Printing Options Explains your printing options for incoming and outgoing mail.
Chapter 5 ● System Settings Provides step-by-step instructions for customizing system operation to suit your own needs
Chapter 6 ● Accounting OptionsProvides instructions for setting up the optional standard accounting feature.
Chapter 7 ● Reports Provides you with a description of reports you can print on your system
Chapter 8 ● Ink Maintenance Explains how to check print quality and take care of the ink system.
Chapter 9 ● Troubleshooting Explains how to fix common problems and tells you what error messages mean.
Chapter 10 ● Supplies & Options Lists the supplies available for your mailing system. It also describes options that add to the versatility of your mailing system and enhances the productivity of your mailroom.
Appendix A ● Passwords & Meter FunctionsProvides instructions for setting up passwords for sensitive features of the machine.
Appendix B ● Entering TextProvides instructions for entering text.
GlossaryExplains terms unique to the world of mailing.
1 • Introduction

1 ● Introduction
1-2 mailstation™ 2 Digital Postal Meter | SV61983 Rev. H
About the Pitney Bowes Small Office SeriesPitney Bowes Small Office Series™ is a line of unique mailing solutions for small businesses and those with home offices. The line has products for all volumes and types of postage usage from less than $30/month in postage to $300/month and more as well as products developed specifically for people shipping mostly packages. Pitney Bowes is dedicated to helping small businesses manage their mailing needs while avoiding time-consuming trips to the Post Office.
About Your MachineYour machine digital postage system features include:
• Space-saving, compact footprint• Easy-to-read display shows system status and prompts you
through setup operations• Automatic date advance• Keyboard-selectable envelope ads and postal inscriptions• Convenient postage-adding via Pitney Bowes
Postage By Phone® meter payment system (requires analog phone line or a PC with Internet connection)
• Ink jet printer provides clear, crisp imprints• Optional scale weighs mail pieces • Optional rating feature calculates correct postage• Date and time stamp for use on incoming mail or on sensitive
documents• Optional accounting feature tracks postage costs by department• Password protection limits access to authorized personnel• Full report printing capability provides hard-copy records of your
postage transactions• USB communication port which allows you to do postage refills/
system updates quickly and conveniently with an Internet connection.

1 ● Introduction
mailstation™ 2 Digital Postal Meter | SV61983 Rev. H 1-3
Sections of the Meter StampThese are the sections that make up the meter stamp printed on your mail piece.
Envelope Ad
Postal Inscription*
Postage Applied
Optional Printing Required Printing
Meter Serial Number
*required only for certain classes of mail
Connecting to the Pitney Bowes Data CenterYou can connect the mailstation to the Data Center through the Internet or an analog phone line. To connect via the Internet, you will need a PB Communication Device connecting the meter to an active network port. Keep the mailstation online so you can:
• Add postage funds • Install firmware/software updates • Receive USPS or other carrier rate updates • Get ZIP/Zone changes made by the USPS • Acquire optional envelope ads and postal inscriptions • Perform mandatory postal inspections • Upload pending USPS® Confirmation Services records
DatamatrixBarcode
Date ZIP Code Origination

1 ● Introduction
1-4 mailstation™ 2 Digital Postal Meter | SV61983 Rev. H
Postal RequirementsThe meter on your mailing machine is licensed by the United States Postal Service (USPS®) and you must follow some basic requirements.
• Mail must have the correct date and postage amount in the meter stamp (indicia).
• Metered mail must bear the ZIP Code location of the post office where the postage meter (mailing machine) is registered.
• If you move to another ZIP Code location, you must update the ZIP Code by calling Pitney Bowes Customer Care Center. Pitney Bowes Contact List on page v.
• The USPS® requires a postal inspection of your machine every 120 days. This postal inspection requirement can be automatically met by connecting to the Pitney Bowes Data Center to check your Postage By Phone® meter payment account balance or to add postage to your mailing system.
NOTE: If the interval between inspections is more than 90 days, your machine's display prompts "Inspection Due." If the interval between inspections is more than 120 days, the display prompts "Inspection Required." At this point, you won't be able to use your mailing system until your system is inspected. In either case, to satisfy the postal inspection requirement, :
• Press Funds, scroll to and select "Check Amt available to download". This connects you to the Pitney Bowes Data Center and allows you to check (view) your Postage By Phone Account. This does not decrease or change the funds in your account, and can be used just to fulfill the USPS® inspection requirement.
• Tape sheets are used to apply postage on mail pieces that are too thick or too large to run through your machine. These sheets must conform to postal specifications. For best performance, we recommend Pitney Bowes tape strips. See 11 • Supplies & Options on page 11-1 for ordering information.
Other Sources of InformationOther sources of information for your mailing machine include: • The machine Quick Reference Guide, located in the front pull-out tray. It
has condensed versions of many of the topics covered in this book. • The Pitney Bowes Contact List at the start of this guide, which
provides helpful websites and phone numbers

1 ● Introduction
mailstation™ 2 Digital Postal Meter | SV61983 Rev. H 1-5
SpecificationsEquipmentSize Base Model
8.4” (213 mm) H x 13.8” (351 mm) L x 10.4” (264 mm) DBase Model With Scale 9.1” (231 mm) H x 13.8” (351 mm) L x 10.4” (264 mm) D
Weight 7.9 lbs. (3.6 kg.) without scale8.7 lbs. (4.0 kg.) with scale
Power Requirements 100-120 VAC, 50/60Hz. 0.3APorts 1 USB; 1 RJ-11, 1 SerialOperating Temperature
55°F (14°C) to 95°F (35°C)
Sound Level Machine noise is less than 70dba in accordance with Regulation 3. GPSGV, 06.01.2004, EN ISO 7779, and ANSI 12.10.
LCD Display 2 lines, 20 characters longThroughput Up to 18 letters per minute
Actual throughput will vary, depending on the material used, graphic printed, machine environment, and the skill of the operator.
Print Resolution 300 x 600 dpiPrint Image Area 1" (25.2 mm) x 5.5" (140 mm)Ink Cartridge Life Your actual ink usage will vary, based on how
frequently you use the machine, the graphic printed and environmental conditions. Yields up to 400-800 imprints (or 4-6 months).
Tape Sheets Self-adhesive type, dual tape sheets for use on mail pieces that are too thick or too large to run through your machine.
Internal Envelope Ad Storage
Up to 15
Internal Postal Inscription Storage
Up to 15
Maximum Imprint $99.999Minimum Size 5" x 3.5" (127 mm x 89 mm Minimum Thickness 0.007" (0.18 mm)Maximum Thickness 5/16" (8.0 mm)
IMPORTANT: For best results, always make sure your material conforms to these specifications.

1 ● Introduction
1-6 mailstation™ 2 Digital Postal Meter | SV61983 Rev. H
Important Safety NotesFollow the normal safety precautions for all office equipment. • Please read all instructions before you attempt to operate the system.
Save these instructions for future use.• Use only Pitney Bowes-approved supplies, in particular aerosol
dusters. Improper storage and use of aerosol dusters or flammable aerosol dusters can cause an explosive-like condition that could result in personal injury and/or property damage. Never use aerosol dusters labeled flammable and always read instructions and safety precautions on the duster label.
• Use the power cord supplied with the machine and plug it into a properly grounded wall outlet that's located near the machine and easily accessible. Failure to properly ground the machine can result in severe personal injury and/or fire.
• The power cord wall plug is the primary means of disconnecting the machine from the AC supply. The unit is on whenever it is plugged into a live receptacle, even though the operator display may be blank.
• Place the mailing machine base close to an easily accessible wall outlet. DO NOT use a wall outlet controlled by a wall switch or one that is shared with other equipment.
• Do not use an adapter plug on the line cord or wall outlet.

1 ● Introduction
mailstation™ 2 Digital Postal Meter | SV61983 Rev. H 1-7
• Do not remove the ground pin from the line cord.• Make sure the area in front of the wall outlet into which the machine
is plugged is free from obstruction.• DO NOT route the power cord over sharp edges or trap it between
pieces of furniture. Make sure there is no strain on the power cord.• To reduce the risk of fire or electrical shock, DO NOT attempt to
remove covers or disassemble the control panel or its base. The cabinet encloses hazardous parts. If you should drop or otherwise damage the unit, call Pitney Bowes.
• Use only Pitney Bowes approved ink, tape strips, and cleaners. To obtain Material Safety Data Sheets (MSDS) for OSHA requirements, please go to www.pb.com/msds. When prompted, enter the product name, manufacturer, the Pitney Bowes MSDS Number, or reorder number of the item you are interested in.
• Keep fingers, long hair, jewelry and loose clothing away from moving parts at all times.
• Avoid touching moving parts or materials while the machine is in use. Before clearing a stall (jam), be sure machine mechanisms come to a complete stop.
• To prevent overheating, do not cover the vent openings.
CAUTION: In case of an ink spill, leaking ink or excessive ink accumulation, immediately disconnect the power cord from the wall plug and contact Pitney Bowes. See Pitney Bowes Contact List on page v.
• When removing stalled material, avoid using too much force to protect against minor personal injury and damage to the equipment.
• Use the equipment only for its intended purpose.• Always follow the specific occupational safety and health
standards prescribed for your workplace.

1 ● Introduction
1-8 mailstation™ 2 Digital Postal Meter | SV61983 Rev. H
Important Telephone Safety InstructionsThe machine may connect directly to an analog telephone line. For your protection, basic safety precautions should always be followed to reduce the risk of fire, electric shock, and injury to persons. These safety precautions include:
WARNING: To reduce the risk of fire, use only the 26 AWG telecommunication line cord supplied with your mailing machine.
• Never install telephone wiring during a lightning storm.• Disconnect the system's telephone line during a lightning storm.• Avoid using a telephone or equipment that connects to a telephone
line during an electrical storm; there may be a remote risk of electrical shock from lightning.
• Do not use the telephone or equipment connected to the telephone to report a gas leak if the telephone is in the vicinity of the leak.
• Never install telephone jacks in wet locations. • Do not use this product near water, for example, near a bath tub,
wash bowl, kitchen sink or laundry tub, in a wet basement or near a swimming pool.
• Never touch uninsulated telephone wires or terminals unless the telephone line has been disconnected at the network interface.

mailstation™ 2 Digital Postal Meter | SV61983 Rev. H 2-1 mailstation™ 2 Digital Postal Meter | SV61983 Rev. H 2-1
1
2 3
Parts of the Machine
5
4
Item Part Description
1 Control Panel Allows you to enter and set up information on your mailing system.
2 LED Lights amber when your machine is low on ink (one blink indicates the machine is out of ink).
3 Scale (optional)
Allows you to weigh a mail piece so you (or the machine, if you purchased the optional internal rating feature) can calculate the correct postage.
4 Top Cover Opens up to allow replacement of the ink cartridge. See Chapter 9 • Ink Maintenance on page 9-1.
5 Mail Deck Supports your envelope, post card or tape sheet as you insert for printing.
2 • About Your System

2 ● About Your System
2-2 mailstation™ 2 Digital Postal Meter | SV61983 Rev. H
Control Panel
1
4
8
7
3
9
2
5
6
Item Part Description
1 LCD Display
Shows the current status of your machine and prompts you through all setup operations in a two-line LCD.
2 Lock Key Prevents unauthorized use of your machine if the lock feature is set up and the machine is in "sleep mode"; entering your four-digit password unlocks (awakens) the machine
3 Class Allows you to select class and calculate postage based on the service selected if you have the optional internal rating system feature. See Chapter 3 - Running Mail.
4 Funds Allows you to check and add postage funds to your machine See Chapter 5 • Adding Postage/Connecting to Data Center on page 5-1.
5 Menu Allows you access to settings of the machine, such as date, time, etc. See Chapter 6 • System Settings on page 6-1.
6 Clear/Back Allows you to clear or cancel an entry or return to the previous screen/level of menu.
7 Alpha/ Numeric Keypad
Allows you to type in numbers and letters for account names, postage values, and other information.
8 Review Keys
Allows you to scroll through choices in the LCD display or review the current settings.
9 Enter/Yes and No
Allows you to confirm an operation or answer “Yes” or "No" to a prompt.

2 ● About Your System
mailstation™ 2 Digital Postal Meter | SV61983 Rev. H 2-3
Connections on Back of Machine
1
4
3
2
6
5
Item Part Description
1 Phone Jack Allows you to connect to an analog phone line via a standard RJ-11 phone plug (the same as a Fax machine) and connect to the Pitney Bowes Data Center to download postage and system updates. See Chapter 5 • Adding Postage/Connecting to Data Center on page 5-1.
2 Serial Port Allows you to connect the optional scale to weigh your mail piece.
3 USB Port Allows you to attach a USB cable to a Communication Device or to a Windows PC that has Internet access.
4 Power Receptacle
Connects to AC power cord (supplied)
5 Ink Tray Holds excess ink that results from the printing process. See Chapter 9 • Ink Maintenance on page 9-1.
6 Ink Tray Lever By sliding lever, it allows you to remove the ink tray

2 ● About Your System
2-4 mailstation™ 2 Digital Postal Meter | SV61983 Rev. H
This page left intentionally blank.

mailstation™ 2 Digital Postal Meter | SV61983 Rev. H 3-1
Home ScreenWhen you power up your system, the Home screen appears on the operating display. If your system has been set up to require a Lock Code or password, you are prompted to enter it. A typical Home screen is show below (with optional scale connected and optional internal rating feature).
$0.46 0lb 0.0oz 1st Cl Ltr MAY 26
Checking the Funds (Postage) in Your Machine1. Press Funds. The amount left in the machine displays.2. Press Clear/Back to return to main screen.
Determining the Amount of Postage to UseThe amount of postage on a mail piece is based on USPS regulations and involves factors such as:• class of mail• weight• shape (for certain size letters and all packages)• how fast you want the mail piece deliveredIf you have purchased the optional internal rating feature, the machine can make the process much easier as it calculates the postage automatically for most mail pieces based on the choices you select (weight, class, etc). In addition, if you have purchased the optional scale, the weight of the mail piece can be used by the machine's internal rating feature to further streamline the postage calculation process.If you need to manually calculate the postage, please contact your local Post Office or go to www.usps.com for the latest rates and fees.
Optional Add-On USPS Services If you want to use any of the optional add-on USPS Services (such as insurance, COD, Delivery Confirmation, Signature Confirmation, Return Receipt, etc.), please contact your local Post Office to complete the postage process. You will have to attach specific labels and/or fill out forms and pay additional fees to include these services on your mail piece.
3 • Running Mail

3 ● Running Mail
3-2 mailstation™ 2 Digital Postal Meter | SV61983 Rev. H
Applying PostageThere are several ways you can apply postage using your mailing system. Each method is described in its own Chapter that follows.
NOTE 1: For applying postage, the mailing system does not have to be connected to the Pitney Bowes Data Center. However, when you need to add funds to your machine, you must be connected. See Chapter 5 • Adding Postage/Connecting to Data Center on page 5-1 for more information).
NOTE 2:The mailing system automatically advances the date at 12:00 AM.
Keying In the Postage DirectlyUse this method when you already know the exact amount of postage.1. From the main screen, enter the postage using the numeric keys
and press Enter/yes. NOTE: You do not need to enter the decimal point.
2. Slide the envelope (or tape sheet if mail piece is too big for machine) into the mail deck. The machine prints the digital indicia and indicates when to remove the mail piece when finished.
Using the Optional Scale with Optional Internal RatingUse this method when you are using the optional scale and optional internal rating feature.1. Place mail piece on scale. The weight of the mail piece appears on
the display.
NOTE 1: If there was no class specified on the display when you placed the mail piece, you may need to scroll and select the desired class (if you are unsure if a particular class is best for your mail piece, call your local post office or visit www.usps.com). Otherwise, the machine selects a class based on the weight of the mail piece.
NOTE 2: The machine allows you to enter either a ZIP code or a Zone number for those USPS classes that require a destination entry (e.g., Priority class over 1 lb.). When prompted to enter a ZIP or Zone in these cases, you may either key in the 5-digit ZIP code or one-digit Zone number (0-8). In any case, the ZIP/Zone entered should represent the ZIP/Zone of the mail piece destination, not the machine.
2. The display shows the final postage amount and class chosen.3. Slide the envelope (or tape sheet if mail piece is too big for
machine) into the mail deck. The machine prints the digital indicia and indicates when to remove the mail piece.

3 ● Running Mail
mailstation™ 2 Digital Postal Meter | SV61983 Rev. H 3-3
Entering Weight Manually with Optional Internal RatingUse this method when:• you already know the weight of a mail piece and you are not using
the optional scale.• you are using the optional scale and the weight of the mail piece
exceeds that weight limit of the scale (2 or 5 lbs., depending on model).
1. Press Menu.2. Use the Review keys to scroll to "Type in a Weight?” and press
Enter/yes.3. Key in pounds and press Enter/yes.4. Key in ounces and press Enter/yes.
NOTE 1: If there was no class specified on the display when you placed the mail piece, you may need to scroll and select the desired class (if you are unsure if a particular class is best for your mail piece, call your local post office or visit www.usps.com). Otherwise, the machine selects a class based on the weight of the mail piece.
NOTE 2: The machine allows you to enter either a ZIP Code or a Zone number for those USPS classes that require a destination entry (e.g., Priority class over 1 lb.). When prompted to enter a ZIP or Zone in these cases, you may either key in the 5-digit ZIP Code or one-digit Zone number (0-8). In any case, the ZIP/Zone entered should represent the ZIP/Zone of the mail piece destination, not the machine.
5. The display shows the final postage amount and class chosen.6. Slide the envelope (or tape sheet if mail piece is too big for
machine) into the mail deck. The machine prints the digital indicia and indicates when to remove the mail piece.
Lock
Class
Funds
Menu
*#_
GHI
PQRS
Back
ABC
JKL
TUV
Space
DEF
MNO
WXYZ
Shift
.
Review
no
yesEnter

3 ● Running Mail
3-4 mailstation™ 2 Digital Postal Meter | SV61983 Rev. H
Weight Hold ModeThe weight hold mode, when activated, allows you to rate a piece of mail even if the weight is removed from the scale. See Chapter 6 • System Settings on page 6-1. You would use this mode when the size of the mail piece covers the display screen. The machine holds the weight in memory until you select a class and finish the rating process. When using this mode:• "WH" displays when the weight is in memory.• The weight remains for 10 seconds after the piece is removed. • To extend the time, press Enter/yes. • To clear the weight before the 10 seconds finish, press Clear/Back.
Viewing (Checking) the Batch Count1. Press Funds.2. Use the Review keys to scroll until you see a screen similar to
below. The number of pieces are shown on the top line and the accumulated postage is on the bottom line.
Checking and Clearing the Batch CountYour system has the ability to keep track of batches of mail if desired. You may use this feature to track the amount of mail going out per day, per week, per month, etc. The system stores the postage value and piece count information in a "batch register". You can view and print the batch register values at any time. You can also clear/ reset the batch register to zero when necessary.
Printing the Batch Count1. Press Menu.2. Use the Review keys to scroll to "Select a report?" and press Enter/
yes.3. Use the Review keys to scroll to "Print funds report?” and press
Enter/yes. When prompted, insert an envelope or tape strip into the mail slot. The batch count and batch value are printed. See sample on the next page.
4. When prompted to stay in reports, press No to return to the main screen.
Batch Pcs: x$xx.xx
3. Press Clear/Back to return to the main screen.

3 ● Running Mail
mailstation™ 2 Digital Postal Meter | SV61983 Rev. H 3-5
Fund
s R
epor
tUsed: $ 0 3 1 . 6 0 0
Available: $ 0 6 8 . 4 0 0
Total Pieces: 2 9
Control Sum: $ 1 0 0 . 0 0
Batch Count: 3
Batch Value: $ 0 0 2 . 7 2 0
PBI Serial No.: 11 0 0 0 2 4
Account No.: 9 9 9 9 9 9 9 9M AY 2 6 0 9
4 : 3 3 p
Used – the total of all postage ever used in the meter Available – the amount of postage left in the meter Total Pieces – the total number of mail pieces run through the meter
that had postage applied Control Sum – the total of all postage refills for the meter and equals
the amount Used plus Available. This is a postal requirement that verifies an accurate accounting of the postage in your meter.
Batch Count – the number of mail pieces that had postage applied since the last time the batch count was cleared
Batch Value – the amount of postage applied since the last time the batch value was cleared
PBP Serial No. – serial number of this meter (normally meter number)
Clearing the Batch CountIMPORTANT: Make sure you really want to clear the batch count; once you do, you can't restore the data.
1. Press Funds.2. Use the Review keys to scroll to "Reset batch postage and pieces?”
and press Enter/yes.3. Press Enter/yes to confirm that you want to clear these value. The
values return to zero.4. Press Clear/Back to return to the main screen.

3 ● Running Mail
3-6 mailstation™ 2 Digital Postal Meter | SV61983 Rev. H
This page left intentionally blank.

mailstation™ 2 Digital Postal Meter | SV61983 Rev. H 4-1
Printing OptionsThere are various printing options available when processing mail through your machine. Refer to the table below.
Printing OptionUsed for Outgoing
Used for Incoming
Print a normal meter stamp (postage indicia) ●Turn off and on the printing of the date as part of the meter stamp (for certain classes of mail only)
●
Add an envelope ad as part of the meter stamp ●Add a postal inscription as part of the meter stamp
●
Print the date and time only (no meter stamp) ●Print the envelope ad only (no meter stamp) ●
Postage Applied
Sections of the Meter StampThese are the sections that make up the meter stamp printed on your mail piece.
Envelope Ad
Postal Inscription
Date ZIP Code of machine
Optional Printing Required Printing
Meter Serial Number
DatamatrixBarcode
4 • Printing Options

4 ● Printing Options
4-2 mailstation™ 2 Digital Postal Meter | SV61983 Rev. H
Printing a $0.00 Meter StampIf you want to check the ink imprint (meter stamp) on your machine, you can generate a $0.00 meter stamp for this purpose. At the Home screen, simply press Zero, then press Enter/yes, and slide an envelope (or tape strip) through the machine.
Auto-Advance of Printed Date for the Meter StampThe machine automatically advances the printed date on the meter stamp (as well as its internally held date) when the system time reaches 12:00 AM.
Manually Changing Printed Date for the Meter StampYou may want to advance the date printed on the meter stamp if it is after normal business hours and you want to prepare outgoing mail for a future business day's mailing.
IMPORTANT:• You can advance the date up to 30 days from the current
date. • Changing the printed date does not change the machine's
internally held date.• You can always return the printed date to the current date.• You cannot change the printed date to a date earlier than the
machine's internally held date (in an effort to "backdate" the mail).
• Accounting data is posted on the actual date the mail piece is run (per the internal clock/calendar in the mailing system), not by the date printed on the meter stamp.
1. Press Menu.2. Use the Review keys to scroll to "Change date and time settings?"
and press Enter/yes.3. Use the Review keys to scroll to "Change printed date?" and press
Enter/yes.4. Use review keys to select a date. A message confirms your choice
and the main screen displays.5. To set the date on your mail back to the current date, repeat steps
1-4 and select today's date.

4 ● Printing Options
mailstation™ 2 Digital Postal Meter | SV61983 Rev. H 4-3
Turning On or Off Date Printing for the Meter StampFor most mailings, you normally print the date as part of the meter stamp. However, for certain classes of mail, you may want to turn off the date. Call your local post office or visit www.usps.com for further information.1. Press Menu.2. Use the Review keys to scroll to "Change date and time settings?”
and press Enter/yes. Turning OFF Date Printing - Use the Review keys to scroll to "Turn
OFF date printing?" and press Enter/yes. A message confirms your choice and the main screen displays with dashes instead of a date. See example below.
$0.46 0lb 0.0oz 1st Class ---- --
Turning ON Date Printing - Use the Review keys to scroll to "Turn ON date printing?" and press Enter/yes. A message confirms your choice and the normal main screen displays with the date.
Adding/Removing an Envelope Ad to the Meter Stamp
Purchasing Other Envelope Ads for Your machineYour machine comes pre-loaded with six envelope ads. If you want another envelope ad, contact Pitney Bowes. See "Pitney Bowes Contact List" on page <?>. Ready-made items can be purchased and downloaded directly into your machine. We can also work with you to create custom ads.
1. Press Menu.2. Use the Review keys to scroll to “Change Ad?" and press Enter/yes.
The current ad (if any) is listed. Adding an Ad - Use the Review keys to scroll to the ad desired and
press Enter/yes. A message confirms your choice and the main screen displays.
Removing an Ad - Use the Review keys to scroll to "None" and press Enter/yes. A message confirms your choice and the main screen displays.

4 ● Printing Options
4-4 mailstation™ 2 Digital Postal Meter | SV61983 Rev. H
Adding/Removing Postal Inscription to the Meter Stamp
IMPORTANT: The postal inscription that prints on the meter stamp is a separate setting from the postal class you have chosen to rate your mail piece. The two normally should match for your mail piece. However, changing one on your mailing machine does NOT automatically change the other. You need to change each in their separate settings. See"3 • Running Mail" on page 3-1 for changing the postal class for rating.
1. Press Menu.2. Use the Review keys to scroll to “Change inscription?" and press
Enter/yes. Adding a Postal Inscription - Use the Review keys to scroll to the
inscription desired and press Enter/yes. A message confirms your choice and the main screen displays.
Removing a Postal Inscription - Use the Review keys to scroll to "None" and press Enter/yes. A message confirms your choice and the main screen displays.
Purchasing Other Postal Inscriptions for Your machineYour machine comes pre-loaded with two postal inscriptions. If you want another postal inscription, contact Pitney Bowes. See "Pitney Bowes Contact List" on page <?>. Inscriptions can be purchased and downloaded directly into your machine.
Printing the Date and Time Only (no meter stamp)You may want to use this feature to time-stamp incoming mail or sensitive documents.1. Press Menu.2. Use the Review keys to scroll to "Change meter stamp type?” and
press Enter/yes. Turning ON Date and Time Only Printing - Use the Review keys to
scroll to "Print date and time only?" and press Enter/yes. The main screen displays with the date and time only.
MAY 26 09 3:29 PM -Date/Time only-
Sample Printed Date/Time Stamp Turning OFF Date and Time Only Printing - Use the Review keys to
scroll to "Print normal postage?" and press Enter/yes. The normal main screen displays.

4 ● Printing Options
mailstation™ 2 Digital Postal Meter | SV61983 Rev. H 4-5
Printing Envelope Ad Only (no meter stamp)You may want to use this feature to add your company's message to incoming mail.1. Press Menu.2. Use the Review keys to scroll to "Change meter stamp type?” and
press Enter/yes. Turning ON Ad Only Printing - Use the Review keys to scroll to "Print
ad only?" and press Enter/yes. If you have already selected an ad for your normal meter stamp, that is the one used; otherwise, you are prompted to choose an ad. When completed, the main screen displays with the ad only.
Ad: Seasons Greetings -Ad only-
Turning OFF Ad Only Printing - Use the Review keys to scroll to "Print normal postage?" and press Enter/yes. The normal main screen displays.
Sample Printed Envelope Ad

4 ● Printing Options
4-6 mailstation™ 2 Digital Postal Meter | SV61983 Rev. H
This page left intentionally blank.

mailstation™ 2 Digital Postal Meter | SV61983 Rev. H 5-1 mailstation™ 2 Digital Postal Meter | SV61983 Rev. H 5-1
System SettingsSettings settings allow you to customize your machine for the way you run your mail and add security to those features that are sensitive to your organization. These settings include:• Setting display contrast• Setting system time• Using the preset feature• Setting/disabling lock code• Setting sleep mode activation time• Activating sleep mode manually• Settings for the optional scale• Setting a high value warning• Setting a low funds warning• Entering the prefix for dialing out to data center (via analog line)• Selecting tone/pulse for dialing out to data center (via analog line)• Creating Intra BMC (Bulk Mail Center) ZIP Code groups
Setting Contrast of LCD DisplayYou can adjust the LCD display contrast if necessary.1. Press Menu.2. Use the Review keys to scroll to "Change set up" and press Enter/
yes.3. Use the Review keys to scroll to "Change display contrast?" and
press Enter/yes.4. Use the Review keys to select the contrast and press Enter/yes.5. Press Clear/Back to return to the main screen.
5 • System Settings
5 ● System Settings
5-2 mailstation™ 2 Digital Postal Meter | SV61983 Rev. H
Setting System TimeNOTE: You can change the time back as early as the beginning of the current day, and you can advance the time up to 24 hours (which means you are in the next day).
1. Press Menu.2. Use the Review keys to scroll to "Change date and time settings?"
and press Enter/yes.3. Use the Review keys to scroll to "Change time?" and press
Enter/yes.4. Use the Review keys to advance or set back the time shown. A
message confirms your choice and the main screen displays.
Preset Feature What is a Preset?A preset is very similar to a “shortcut” on your computer. It recalls a setting that already contains the postage class, the postage value, and possibly other values. The preset values appear on your machine when it is first powered on or after it awakens from a "sleep" mode.
Why Should I Use a Preset?A preset saves you time. You don’t have to concern yourself with individually selecting the class, special services, etc. – all that information is automatically contained in the preset.The preset is generally set to the most commonly printed postage value you use in your home or office. Many of our customers choose to set the preset for First Class Letter, since that is the cost of mailing a regular business letter.
Why Should I Always Include a USPS® “Class” in my Preset?The advantage of including a Class as part of your preset is that anytime there is a USPS® rate change, when you download the new rates into your mailing system, your preset will automatically be updated with the new rate, if applicable. If there is no Class associated with your preset, the system has now way of knowing which value to update. For example, if you define your preset to be just a value (e.g. $0.42) but no class, your machine has no way of updating this value when new rates become effective. In this scenario, it is your responsibility to manually update your preset (e.g,. from $0.42 to $0.44) when the rates change. By using a class in the preset, however, you can avoid potentially incorrect values being applied to your mail that may result in mail being returned to you by the USPS®.

5 ● System Settings
mailstation™ 2 Digital Postal Meter | SV61983 Rev. H 5-3
IMPORTANT: • You cannot delete the preset, but you can define new values
for the preset based on the current condition of the machine.• The preset values display after you turn on your machine or
after you activate the machine from "sleep" mode.• When a rate change become effective, always check the
postage value assigned to the preset to make sure that it complies with the new rates.
Turning the Preset Feature On or Off 1. Press Menu.2. Use the Review keys to scroll to "Change setup?" and press Enter/
yes.2. Use the Review keys to scroll to "Use preset setup?" and press
Enter/yes. Turning ON Preset - Press Enter/yes at "Turn preset ON?" prompt.
A message confirms your choice. You may view the preset values if you wish. When finished, press Clear/Back twice and follow prompts to return to main screen.
Turning OFF Preset - Use the Review keys to scroll to "Turn preset Off?" and press Enter/yes. A message confirms your choice. Press No to return to main screen.
3. If you have turned on the preset feature, the main screen reflects the preset settings. If you have turned off the preset feature, the normal main screen displays.
Viewing the Preset1. Press Menu.2. Use the Review keys to scroll to "Change setup?" and press Enter/
yes.3. Use the Review keys to scroll to "Use preset setup?" and press
Enter/yes.4. At "View stored preset?" prompt, press Enter/yes.5 Scroll through the preset values of class, ad, inscription, date etc. 6. When finished, press Clear/Back twice to return to main screen.

5 ● System Settings
5-4 mailstation™ 2 Digital Postal Meter | SV61983 Rev. H
Storing New Values for (Changing) the Preset 1. Establish the proper settings on your machine that you want the
preset to contain (class, destination, envelope ad, etc.).
NOTE: If no class is selected, you may save a postage amount as a preset. Once a class is selected, you can not save a postage amount.
2. Press Menu.3. Use the Review keys to scroll to "Change setup?" and press Enter/
yes.4. Use the Review keys to scroll to "Use preset setup?" and press
Enter/yes.5. Use the Review keys to scroll to "Store new preset?" and press
Enter/yes. You have a choice whether to review the settings of the new preset before you store it.
Yes to Review Settings - Scroll to view the preset settings of class, ad, inscription, date, etc.
No to Review Settings - Skips the review.6. When prompted, press Enter/yes to confirm the storing of new
preset. A message confirms the new preset7. When finished, follow prompts to return to main screen.
Recalling the Preset to Use for MailingYou can call up the preset values at any time to use on your mail with this simple procedure.1. Press Menu.2. Use the Review keys to scroll to "Recall Preset?" and press Enter/
yes. You return to the main screen with the preset values displayed.
Setting/Disabling the Lock CodeThe lock code prevents unauthorized access to your system after the machine has been powered up and/or has entered sleep mode.1. Press Menu.2. Use the Review keys to scroll to "Change Setup" and press Enter/
yes.3. Use the Review keys to scroll to "Use lock code setup?" and press
Enter/yes. If you have already established a lock code, you are prompted to enter the lock code at this point. Key in the four-digit code and press Enter/yes.
4. Use the Review keys to scroll to: Turn On Lock Code - Press Enter/yes at "Set a Lock Code?"
prompt. Type in a four-digit code and press Enter/yes. Re-enter the

5 ● System Settings
mailstation™ 2 Digital Postal Meter | SV61983 Rev. H 5-5
same code to confirm. A message confirms your choice. This option forces the entry of the lock code when the machine is powered on or after awakening the machine when the system was put in sleep mode after pressing Lock.
Change Lock Code - Press Enter/yes at "Change Lock Code?" prompt. Key in a new four-digit code and press Enter/yes. Re-enter the same code to confirm. A message confirms your choice.
Setting for Lock on Sleep - Press Enter/yes at "Change setting for "Lock on Sleep"? prompt. At the prompt to "Lock on Sleep:", choosing "Yes" forces the entry of the lock code when the machine is awakened after a time-out induced sleep mode.
Turn Off Lock Code - Press Enter/yes at "Turn Lock OFF?" prompt. A message confirms your choice.
5. When prompted to stay in setup, press No to return to main screen.
NOTE: If you have set up a password for an account when using the optional accounting feature (see Chapter 7, Standard Accounting Option), you can enter the account password instead of the lock code password to gain access to the machine. If you do this, however, certain features are not accessible, such as the postage refill feature; and Change Accounts, Accounting Functions and Change setup within the menu. See Appendix A - Passwords and Meter Functions, for information on the effects on system functions when gaining access to the machine by entering the lock code password versus the accounting password.
Setting Sleep Mode Activation TimeYou can set the amount of time the machine waits until entering "sleep mode". When the machine is in sleep mode, the display is blank (except for the time in the lower right) and you can't process mail. You awaken the machine by pressing any button on the control panel.
NOTE: If you have set up the lock code option to activate on sleep mode (see previous section), you will need to enter a lock code to awaken the machine.
1. Press Menu.2. Use the Review keys to scroll to "Change Setup" and press Enter/
yes.3. Use the Review keys to scroll to "Change sleep timeout?" and press
Enter/yes.4. Key in the desired amount of time (in minutes, from 1 - 20) the
machine should be idle before the sleep mode activates and press Enter/yes. A message confirms your choices.
5. When prompted to stay in setup, press No to return to main screen

5 ● System Settings
5-6 mailstation™ 2 Digital Postal Meter | SV61983 Rev. H
Activating Sleep Mode ManuallyYou can put the machine into "sleep mode" at any time. When the machine is in sleep mode, the display is blank (except for the time in the lower right) and you can't process mail. You awaken the machine by pressing any button on the control panel. 1. Press Lock.2. At prompt to set system to sleep mode, press Enter/yes. The
machine enters sleep mode.3. Press any button on the control panel to awaken the
machine.
NOTE: If you have enabled the lock code option to activate on sleep mode (see earlier topic), you will be prompted to enter the lock code to awaken the machine. Key in the four-digit code and press Enter/yes. The available funds amount displays before returning to the main screen.
Reset Scale to ZeroYou can reset the scale to zero to lessen the chance of accidentally printing the wrong postage.1. Press Menu.2. Use the Review keys to scroll to "Reset the scale to zero?" and press
Enter/yes. The weight on the display returns to 0 lb., 0 oz.
View Metric WeightYou can display a weight in metric values (grams or kilograms) when needed. This is helpful when you are using the internal rating feature and need to know the weight of an item when sending to a country whose rates are based on metric values (such as Canada). 1. Place the piece on the scale for which you wish to know the weight.2. Use the Review keys to scroll to "Metric Weight xxg". The weight on
the scale is shown in grams or kilograms.3. Press Clear/back to return to the main screen.
Activating/Disabling Weight Hold ModeThe weight hold mode allows you to rate a piece of mail even if the weight is removed from the scale. You would use this mode when the size of the mail piece covers the display screen. The machine holds the weight in memory until you select a class and finish the rating process.1. Press Menu.2. Use the Review keys to scroll to "Change Setup" and press Enter/
yes.3. Use the Review keys to scroll to "Change weight hold setup?" and

5 ● System Settings
mailstation™ 2 Digital Postal Meter | SV61983 Rev. H 5-7
press Enter/yes. 4. Follow the prompts to turn the feature ON or OFF. A confirmation
message displays and you return to the main screen.
Setting the High Value WarningYou can have the machine warn you when you manually key in a postage value that is higher than a maximum amount that you specify. This feature helps prevent you from accidentally printing a postage value that's more than you need.
NOTE: This warning does not display for postage amounts determined by the internal rating feature.
Setting the Low Funds WarningYou can have the machine warn you when your postage (funds) in the machine reaches a certain amount. This warning acts as a reminder for you to add more postage to your machine (by connecting to the Data Center and downloading funds).1. Press Menu.2. Use the Review keys to scroll to "Change Setup" and press Enter/
yes.3. Use the Review keys to scroll to "Change low funds warning?" and
press Enter/yes.4. Key in the desired amount in whole dollars only (do not enter the
decimal point) for which you want the system to prompt you for a low funds warning, and press Enter/yes. A confirming message displays.
5. When prompted to stay in setup, press No to return to main screen.
Entering the Prefix for Dialing Out to Data Center via Analog LineYou can tell the machine if you need to dial a prefix number (like 9) to get an outside line when dialing out to the Data Center via an analog line.1. Press Menu.2. Use the Review keys to scroll to "Change Setup" and press Enter/
yes.3. Use the Review keys to scroll to "Change communication settings?"
and press Enter/yes.4. Use the Review keys to scroll to "Change outside line number
(prefix)?" and press Enter/yes.5. Key in the outside line (prefix) and press Enter/yes. A confirming

5 ● System Settings
5-8 mailstation™ 2 Digital Postal Meter | SV61983 Rev. H
message displays.6. When prompted to stay in setup, press No to return to main screen.
Selecting Tone/Pulse for Dialing Out to Data Center via Analog LineYou can tell the machine if you use a tone or pulse type phone when dialing out to the Data Center via an analog line.1. Press Menu.2. Use the Review keys to scroll to "Change Setup" and press Enter/
yes.3. Use the Review keys to scroll to "Change communication settings?"
and press Enter/yes.4. Use the Review keys to scroll to "Change dial method?" and press
Enter/yes.5. Use the Review keys to select tone or pulse and press Enter/yes. A
confirming message displays.6. When prompted to stay in setup, press No to return to main screen.
Using Intra BMC ZIP Code GroupsIntra BMC (Bulk Mail Center) ZIP Code groups are a USPS pre-sort option for bulk mailings in the USA. To qualify for a discount when using Intra BMC ZIP Code groups:• You must be sending mail pieces/parcels with origination and
destination locations within the same BMC service area, and• You must create ZIP Code groups by entering the ZIP Code ranges
for the postal zones eligible for the discount. (Until the ranges are entered, the Intra-BMC class will not be selectable on your system.)
NOTE: It is not necessary to enter ZIP Code ranges to use the Parcel Post "Local" BMC rate. When you enter 0 as the zone for Pkg Service, Parcel Post, the Parcel Post "Local" BMC rate will be selected.
For more information on your eligibility, contact a specialist at the Post Office that handles your mail.
Creating/Maintaining Intra-BMC ZIP GroupsBefore you can set up Intra-BMC (Bulk Mail Center) ZIP Code groups, you must obtain a postal zone chart that is specific to your ZIP Code from your local post office.Use the postal zone chart to determine if the ending ZIP Code of the parcel falls within your BMC Zone. If it does, the parcel is eligible for an Intra-BMC parcel post rate.

5 ● System Settings
mailstation™ 2 Digital Postal Meter | SV61983 Rev. H 5-9
Once you have determined the parcel is eligible, follow the steps below to setup up Intra-BMC ZIP Code groups on you machine.1. Press Menu.2. Use the Review keys to scroll to "Change Setup" and press Enter/
yes.3. Use the Review keys to scroll to "Use Intra BMC setup?" and press
Enter/yes. 4. Use the Review keys to scroll and select the option desired by
pressing Enter/yes (see list below). NOTE: If you have never used this feature before, “Create new group” is the only available option.
Create New GroupA. Key in the first 3 digits of beginning ZIP and press Enter/yes.B. Key in the first 3 digits of ending ZIP and press Enter/yes.
Edit Existing Group A. Use the Review keys to scroll and select the group you want to
edit and press Enter/yes.B. Key in the first 3 digits of beginning ZIP and press Enter/yes.C. Key in the first 3 digits of ending ZIP and press Enter/yes.
Delete Existing GroupA. Use the Review keys to scroll and select the group you want to
delete and press Enter/yes.B. Press Enter/yes to confirm the deletion.
5. For each option, you have a choice to continue in that mode. When prompted to stay in setup, press No to return to main screen.
NOTE: When you are rating a parcel using the Parcel Post class and the machine recognizes a destination ZIP Code that falls within an Intra-BMC zone that you’ve established, it will use the discounted Intra-BMC rate instead of the normal parcel rate.

5 ● System Settings
5-10 mailstation™ 2 Digital Postal Meter | SV61983 Rev. H
This page left intentionally blank.

mailstation™ 2 Digital Postal Meter | SV61983 Rev. H 6-1 mailstation™ 2 Digital Postal Meter | SV61983 Rev. H 6-1
Overview of AccountingAn accounting feature on a mailing machine allows you to track your postage costs by categories. These categories can represent whatever makes sense to your organization - departments, people, locations, projects, etc. Tracking your mailing expenses by category allows you to manage and budget your postal costs in a more efficient manner.With this model of mailing machine, you have a choice of using one of the following accounting options:• Standard Accounting Option - 5 Accounts This is the base option that allows you to track postage for five
accounts.• Standard Accounting Option - 10 Accounts This is a higher option that allows you to track postage for 10
accounts.
Your machine stores the following information for each account:• An account name up to 14 alphanumeric characters long.• An account number.• The item total. This is the total number of pieces of mail charged to
an account since it was last cleared.• The value total. This is the total amount of postage charged to an
account since it was last cleared.• An account password (optional)
6 • Accounting Options

6 ● Standard Accounting Option
6-2 mailstation™ 2 Digital Postal Meter | SV61983 Rev. H
Creating an AccountYou need to create an account before you can use the accounting feature to track postage.1. Press Menu.2. Use the Review keys to scroll to "Use Accounting functions?" and
press Enter/yes.3. Use the Review keys to scroll to "Create an account?" and press
Enter/yes.4. Enter the name of this account. It can be up to 14 alpha/numeric
characters long and press Enter/yes. To access alpha characters, tap the appropriate number key until the desired character displays.
5. Assign a password to this account (if you want) of 4 digits and press Enter/yes. Re-enter password to confirm.
6. Follow the prompts to either add another account or stay in the Accounting menu. Follow prompts to return to main screen.
Turning Accounting Feature ON or OFF1. Press Menu. Turning ON Accounting - select "Turn Accounting On?" and press
Enter/yes. Follow the prompts for either creating an account (if this is the first time using the feature) or selecting an account (see subsequent pages).
Turning OFF Accounting - scroll to "Use Accounting functions?" and press Enter/yes. Use the Review keys to scroll to "Turn off accounting?" and press Enter/yes. A confirming message displays. Press Enter/yes to continue.
NOTE: You will not be tracking postage by account when this feature is turned off.
2. Follow the prompts to add another account if turning ON accounting or press Clear/Back to return to the main screen.
NOTE: Once you turn on the accounting feature, an account must be selected before you can print postage. This ensures that all postage printed is accounted for by one of the system accounts. In addition, if a password has been assigned to the account, you must enter the 4-digit password before proceeding.

6 ● Standard Accounting Option
mailstation™ 2 Digital Postal Meter | SV61983 Rev. H 6-3
Editing Account Name and PasswordYou can edit an account name and password if you wish.1. Press Menu.2. Use the Review keys to scroll to "Use Accounting functions?" and
press Enter/yes. 3. Use the Review keys to scroll to "Edit an existing Account?" and
press Enter/yes.4. Use the Review keys to scroll to the account you want to edit and press
Enter/yes.
NOTE: If a password has been assigned to this account, you will be prompted for one. Key in the 4-digit password if necessary and press Enter/yes.
Depending on how the account is set up, you can: Edit Account Name - follow prompts to change name. Assign a Password to Account (if none has yet been assigned)
- follow prompts to assign a 4-digit password. Re-enter password to confirm.
Edit Account Password - follow prompts to change password. Delete Account Password - follow prompts to delete password.5. Follow the prompts to edit another account or return to the
Accounting menu. Follow prompts to return to main screen.
Selecting an Account to Track PostageThis procedure assumes you have created an account already.1. Press Menu.2. Scroll to "Change account?” and press Enter/yes. The currently
selected account displays.3. Use the Review keys to scroll to the desired account and press
Enter/yes.
NOTE 1: If a password has been assigned to this account, you will be prompted to enter one. Key in the 4-digit password if necessary. A message confirms your choice and the main screen displays.
NOTE 2: See Appendix A - Passwords and Meter Functions, for information on the effects on system functions when gaining access to the system by entering the lock code password versus the accounting password.

6 ● Standard Accounting Option
6-4 mailstation™ 2 Digital Postal Meter | SV61983 Rev. H
Viewing Account TotalsYou can view your account totals any time using this option.1. Press Menu.2. Use the Review keys to scroll to "Use Accounting functions?" and
press Enter/yes. 3. Use the Review keys to scroll to "View Account Postage and
pieces?" and press Enter/yes.4. Use the Review keys to scroll to the desired account. The postage
and number of pieces for this account displays.5. Press Clear/Back to return to the Accounting menu. Follow prompts
to return to main screen.
Printing an Accounting ReportYou can view and print your account totals any time. You may want to do this before you clear or delete an account, such as at the end of a fiscal year.1. Press Menu.2. Use the Review keys to scroll to "Use Accounting functions?" and
press Enter/yes. 3. Use the Review keys to scroll to "Print an Account Report?" and
press Enter/yes.4. Select print single or print multiple report and press Enter/yes. Print Single Report - Use the Review keys to scroll to the desired
account and press Enter/yes. When prompted, insert envelope or tape strip.
NOTE: If a password has been assigned to this account, you will be prompted to enter one. Key in the 4-digit password if necessary and press Enter/yes.
Print Multiple Report - All accounts will print. Insert envelope or tape strip.
NOTE: If it is a multi-page report, you will be prompted to insert another envelope/tape sheet.
5. The report is printed (see samples below) and you return back to the reports menu. Follow prompts to return to main screen.

6 ● Standard Accounting Option
mailstation™ 2 Digital Postal Meter | SV61983 Rev. H 6-5
Acc
ount
Rep
ort
Acct Name: S a l e s
Acct Number: 1Pieces: 3Postage: $ 0 2 4 . 5 5 0
11 0 0 0 2 4M AY 2 6 0 9
1 2 : 2 8 p
Acc
ount
Sum
mar
y
Account No.: Pieces: Postage: 1 5 $ 0 2 4 . 5 5 02 8 $ 0 6 7 . 4 7 03 9 $ 0 0 9 . 6 0 0
11 0 0 0 2 4M AY 2 6 0 9
1 2 : 2 8 P
Page 1 of 1
Single Account Report
Multiple Account Report
Clearing All or Some of the AccountsYou can clear the postage totals on an account when necessary (for example, at the end of a fiscal year).
IMPORTANT: Make sure you really want to clear an account. Once you do, the account information is gone. We suggest you print an accounting report first (see previous topic) before clearing.
1. Press Menu.2. Use the Review keys to scroll to "Use Accounting functions?" and
press Enter/yes.3. Use the Review keys to scroll to "Clear Account value and pieces to
zero" and press Enter/yes.4. Select All or One account to clear and press Enter/yes. Clear All Accounts - Confirm clearing all when prompted.
NOTE: If a password has been assigned to any accounts, you will not be able to clear all accounts by this option.
Clear One Account - Use the Review keys to scroll to the account you want to clear and press Enter/yes. Confirm clearing when prompted.
NOTE: If a password has been assigned to an account, you will be prompted to enter one. Key in the 4-digit password if necessary and press Enter/yes.
5. Follow the prompts to clear another account or return to the Accounting menu. Follow prompts to return to main screen.

6 ● Standard Accounting Option
6-6 mailstation™ 2 Digital Postal Meter | SV61983 Rev. H
Deleting an AccountYou can delete an account when necessary (for example, at the end of a fiscal year).
IMPORTANT: Make sure your really want to delete an account. Once you do, the account information is gone. We suggest you print an accounting report first (see previous topic) before clearing.
1. Press Menu.2. Use the Review keys to scroll to "Use Accounting functions?" and
press Enter/yes. 3. Use the Review keys to scroll to "Delete an account?" and press
Enter/yes. 4. Use the Review keys to scroll to the account you want to delete and
press Enter/yes.
NOTE: If a password has been assigned to this account, you will be prompted to enter one. Key in the 4-digit password if necessary and press Enter/yes.
5. Confirm deleting when prompted. 6. Follow the prompts to delete another account or return to the
Accounting menu. Follow prompts to return to main screen.

mailstation™ 2 Digital Postal Meter | SV61983 Rev. H 7-1 mailstation™ 2 Digital Postal Meter | SV61983 Rev. H 7-1
Reports OverviewYour machine allows you to view and print reports for funds usage, postage refills, and other valuable data. The printable reports are done right from your machine on an envelope or tape sheet.See Chapter 7 - Standard Accounting for information on Accounting Reports.
Funds ReportA funds report allows you to print a record of how much postage has been used and how much is remaining in the machine.1. Press Menu.2. Use the Review keys to scroll to "Select a report?" and press Enter/
yes.3. Use the Review keys to scroll to "Print funds report?" and press
Enter/yes.4. When prompted, insert tape sheet or envelope into the machine. 5. The report is printed (see sample below) and you return back to the
reports menu. Follow prompts to return to main screen.
Fund
s R
epor
t
Used: $ 0 3 1 . 6 0 0
Available: $ 0 6 8 . 4 0 0
Total Pieces: 2 9
Control Sum: $ 1 0 0 . 0 0
Batch Count: 3
Batch Value: $ 0 0 2 . 7 2 0
PBI Serial No.: 11 0 0 0 2 4
Account No.: 9 9 9 9 9 9 9 9M AY 2 6 0 9
4 : 3 3 p
Used – the total of all postage ever used in the meter. Available – the amount of postage left in the meter. Total Pieces – the total number of mail pieces run through the meter
that had postage applied. Control Sum – the total of all postage refills for the meter and equals
the amount Used plus Available. Batch Count – the number of mail pieces that had postage applied
since the last time the batch count was cleared. Batch Value – the amount of postage applied since the last time the
batch value was cleared. PBI Serial No.– serial number of this meter (normally meter number). Account No. – your Postage By Phone® system account number.
7 • Reports

7 ● Reports
7-2 mailstation™ 2 Digital Postal Meter | SV61983 Rev. H
Refill Summary ReportAt Mailing Machine1. Press Menu.2. Use the Review keys to scroll to "Select a report?" and press Enter/
yes.3. Use the Review keys to scroll to "Print refill summary?" and press
Enter/yes.4. When prompted, insert tape sheet or envelope into the machine. 5. The report is printed (see sample below) and you return back to the
reports menu. Follow prompts to return to main screen.
Last
5R
efill
s
Date of Refill:M AY 2 3 0 9A P R 1 5 0 9A P R 0 2 0 9M A R 1 5 0 9F E B 2 3 0 9
Time:1 0 : 2 5 A4 : 2 9 P9 : 0 4 A1 2 : 2 9 P11 : 3 2 A
Refill Amount:$ 1 0 0 . 0 0 0$ 0 5 0 . 0 0 0$ 0 7 5 . 0 0 0$ 2 0 0 . 0 0 0$ 1 0 0 . 0 0 0
Account No: 9 9 9 9 9 9 9 9 Meter No: 11 0 0 0 2 4 Printed: M AY 2 6 0 9
Date of Refill – the date of refill Time – the time of refill Refill Amount – amount of refill Account No. – your Postage By Phone® system account number Meter No. – serial number of this meter (normally meter number) Printed – the date the report was printed
Software (System) Version ReportThis report lists system information about your machine.
At Mailing Machine (Printed)1. Press Menu.2. Use the Review keys to scroll to "Select a report?" and press Enter/
yes.3. Use the Review keys to scroll to "Print Software Version report?"
and press Enter/yes.4. When prompted, insert tape sheet or envelope into the machine. 5. The report is printed and you return back to the reports menu.
Follow prompts to return to main screen.
Softw
are
Vers
ions
UIC: 9 . 0 . 0 2
PM: 0 5 . 2 0
PSD SW Version: 0 5 . 0 0 . 0 0
RateMgr: 0 3 . 4 5
Platform: A 0 . 0 2
Rate Data: K 7 U S 0 0 2 B 0 1
0 0 0 11 0 0 0 2 4M AY 2 6 0 9
4 : 3 3 P
Rate Effective: M a y 1 2 0 9

7 ● Reports
mailstation™ 2 Digital Postal Meter | SV61983 Rev. H 7-3
View Software (System) Versions (on Machine Display Only)This report lists system information about your system on the machine display; it is not printed.1. Press Menu.2. Use the Review keys to scroll to "Select a report?" and press Enter/
yes.3. Use the Review keys to scroll to "View software ver. report?" and
press Enter/yes.4. Use the Review keys to scroll through the screens of information.5. Press Clear/Back to return back to the reports menu. Follow
prompts to return to main screen.

mailstation™ 2 Digital Postal Meter | SV61983 Rev. H 8-1 mailstation™ 2 Digital Postal Meter | SV61983 Rev. H 8-1
Printing a $0.00 Meter StampIf you want to check the ink imprint (meter stamp) on your machine, you can generate a $0.00 meter stamp for this purpose. At the Home screen, press Zero, then Enter, and slide an envelope (or tape strip) through the machine.
Messages Indicating Ink Cartridge Replacement
NOTE: We recommend that you keep a spare ink cartridge on hand at all times
Your actual ink usage will vary, depending on whether you routinely print ads, how many pieces of mail you print a day and other factors. The machine display tells you when the ink supply is low or exhausted with the following messages:
“Low Ink"Replace the ink cartridge soon. You can print about another 300 impressions or leave the system running for six days without printing. If you don’t have a replacement cartridge on hand, you should order one now. See Chapter 11, Supplies and Options for part numbers to order this item.
IMPORTANT: Order a new ink cartridge as soon as you see the “Low Ink” alert.
"Ink Out”Replace the ink cartridge immediately. The ink supply is gone; you won't be able to print.
8 • Ink Maintenance

8 ● Ink Installation and Maintenance
8-2 mailstation™ 2 Digital Postal Meter | SV61983 Rev. H
5. Press unlock symbol to open the cartridge holder.
6. Tilt the old cartridge towards you and lift out. Discard old cartridge.7. Remove new cartridge from its package and pull off protective tape
covering the vent and ink holes.
Replacing the Ink CartridgeIMPORTANT: To avoid damage to the printer:• Do not leave the print head without the ink cartridge in place. • Only replace the ink cartridge using the procedure below.
1. Press Menu.2. Use the Review keys to scroll to "Use ink functions?" and press
Enter/yes.3. Use the Review keys to scroll to "Replace ink cartridge?" and press
Enter/yes.4. Open the top cover and locate ink cartridge (see white circle below.)

8 ● Ink Installation and Maintenance
mailstation™ 2 Digital Postal Meter | SV61983 Rev. H 8-3
8. Tilt new cartridge towards you and insert into print head. Straighten cartridge so it is upright.
9. Close ink cover by pressing down on lock symbol in circle nearest to you.
10. Close machine cover. Press Enter/yes.
11. Press Enter/yes to confirm the replacement. A print head initialization occurs which lasts about 2-3 minutes.
12. When prompted, insert an envelope/tape sheet to print a test pattern to confirm print quality.
13. If test pattern looks good (see figures below), press Enter/yes. If it looks poor, proceed with step 5 from Printing a Test Pattern procedure on the next page

8 ● Ink Installation and Maintenance
8-4 mailstation™ 2 Digital Postal Meter | SV61983 Rev. H
Good Test Print(No Missing Lines)
Poor Test Print (Missing Lines)
Printing Test PatternRunning a print test may help you identify a printing problem.1. Press Menu.2. Use the Review keys to scroll to "Use ink functions?" and press
Enter/yes.3. Use the Review keys to scroll to "Print test pattern?" and press
Enter/yes.4. When prompted, insert an envelope or tape sheet into the
machine. After a few seconds, remove envelope when prompted.5. At "Is test pattern OK" prompt, either press Enter/yes if it looks good
(you'll return to the main screen), or press No and continue at step 3 in the Cleaning Printer Nozzle procedure on the next page.
Cleaning Printer NozzlesCleaning the printer nozzles may help you fix a printing problem.1. Press Menu.2. Use the Review keys to scroll to "Use ink functions?" and press
Enter/yes.3. Use the Review keys to scroll to "Clean printer nozzles?" and press
Enter/yes. A "Preparing ink Please wait..." message displays as the machine performs its cleaning.
4. When prompted, insert an envelope or tape sheet into the machine.5. At "Is test pattern OK" prompt, press Enter/yes.6. When finished, follow prompts to return to main screen.

8 ● Ink Installation and Maintenance
mailstation™ 2 Digital Postal Meter | SV61983 Rev. H 8-5
Replacing the Print HeadIMPORTANT: This procedure should only be done under the direction or with the permission of a Pitney Bowes representative.
1. Press Menu.2. Use the Review keys to scroll to "Use ink functions?" and press
Enter/yes.3. Use the Review keys to scroll to "Install new print head?" and press
Enter/yes.4. Open the top cover and locate print head. 5. Refer to the instructions that came with new print head to remove
the old print head and install the new one.6. Press Enter/yes to confirm the replacement. A print head
initialization occurs which lasts about 2-3 minutes.7. When prompted, insert an envelope/tape sheet to print a test pattern
to confirm print quality.8. If test pattern looks good, press Enter/yes.
Replacing the Ink TrayIMPORTANT: This procedure should only be done under the direction or with the permission of a Pitney Bowes representative.
1. Press Menu.2. Use the Review keys to scroll to "Use ink functions?" and press
Enter/yes.3. Use the Review keys to scroll to "Replace ink tray?" and press
Enter/yes.4. Refer to the instructions that came with new ink tray to remove the
old ink tray and install the new one.5. Press Enter/yes when completed.

8 ● Ink Installation and Maintenance
8-6 mailstation™ 2 Digital Postal Meter | SV61983 Rev. H
This page left intentionally blank.

mailstation™ 2 Digital Postal Meter | SV61983 Rev. H 9-1 mailstation™ 2 Digital Postal Meter | SV61983 Rev. H 9-1
continued->
Message Description ActionAccount Balance Low
Refill amount exceeds funds available or credit limit.
Perform refill procedures for smaller amount, make an advance payment, or call Pitney Bowes for credit (see Pitney Bowes Contact List at the start of this guide).
Cannot Reach Data Center
Trouble getting a connection to the Pitney Bowes Data Center.
Try connecting again in a few minutes. Try the steps on page 10-4.
Error MessagesFrom time-to-time your system may display an alert or error message. An alert tells you that something needs attention; an error message usually tells you about a condition you can fix. In rare instances you may have to call for service or assistance (see page v).
Getting HelpThere may be times when you need help to solve a problem, or you may want more information about how your mailing system works. Pitney Bowes provides several information resources. See page v for our web and phone support information. Before you contact us, please read the troubleshooting information in this chapter. In many cases, it can help you resolve the problem. Also, you can often restore normal operation by just turning Off and On your system.If you need to call, please have the following information at hand:• Model Identification: See Pitney Bowes Contact List at the start of
this guide.• Serial number: See the back of the system.• Nature of problem: What happens and when does it happen? Did
the machine display an error message?• The steps you've already taken to solve the problem and the results.
9 • Troubleshooting

9 ● Troubleshooting
10-2 mailstation™ 2 Digital Postal Meter | SV61983 Rev. H
Message Description ActionConnection Lost Connection made but
lost before transaction completed.
Press Clear/Back (C); try again in a few minutes. If problem persists call Pitney Bowes (see Pitney Bowes Contact List at the start of this guide).
Inspection Due Inspection Required
This message displays if a refill has not been performed in 90 days. After 120 days, postage cannot be printed until a refill/or balance check.
Perform a refill procedure or check amount available to download.
No dial tone Analog phone line not connected to machine.
Connect analog phone line to machine.
Not Enough Funds
Insufficient postage. Postage amount exceeds maximum funds available in system.
Select a lower postage amount. Perform a funds refill to add funds to the system.
Refill failed: xxxx. Contact Pitney Bowes.
A failure occurred during a refill.
Call Pitney Bowes (see Pitney Bowes Contact List at the start of this guide).
Refill Too High Refill amount entered is more than the maximum the machine will allow.
Press Clear/Back (C). Repeat refill procedure with a smaller postage amount.
Error P20XXError P21XXError E25XXError E22XXPrinter fault P2BXX
Meter error codes without descriptions
Press Clear/Back (C). If nothing happens in 5 seconds, turn off machine; wait 15 seconds, and then turn on machine. If problem persists, call Pitney Bowes (see Pitney Bowes Contact List at the start of this guide).

9 ● Troubleshooting
mailstation™ 2 Digital Postal Meter | SV61983 Rev. H 10-3
Display Difficult to ReadYou can adjust the LCD display contrast if necessary.1. Press Menu.2. Use the Review keys to scroll to "Change setup" and press Enter/
yes.3. Use the Review keys to scroll to "Change display contrast?" and
press Enter/yes.4. Select the contrast you want using the keypad.5. Press Clear/Back to return to the main screen.
Printing is Incomplete, Streaked, or Poor QualityYou may need to clean the printer nozzles to fix the printing problem.1. Press Menu.2. Use the Review keys to scroll to "Use ink functions?" and press
Enter/yes.3. Use the Review keys to scroll to "Clean printer nozzles?" and press
Enter/yes. A "Preparing ink Please wait..." message displays as the machine performs its cleaning.
5. When prompted, insert an envelope or tape sheet into the machine.6. At "Is test pattern OK" prompt, press Enter/yes. If the printing did
not improve, you may need to replace the cartridge or print head (see Section 7 - Ink Maintenance).
Blank DisplaySymptom Cause SolutionPower lamp is not lit on the machine
No power coming into machine
Check that:• power cord is plugged into both
mailing machine base and wall outlet
• power cord is not connected to a switched wall outlet, power strip, or surge protector
Power lamp is yellow on the machine
Machine in sleep mode
Press any key to "awaken" it.
9 ● Troubleshooting
10-4 mailstation™ 2 Digital Postal Meter | SV61983 Rev. H
Accidentally Printing the Wrong PostageOnce you have printed a meter stamp, the postage funds have been “used up” by the machine, even if the printing is illegible. That’s why it is so important to make sure the correct value is shown on the machine before inserting the mail piece or tape strip, and that you do not let the ink level get too low. We recommend you always keep a spare ink cartridge on hand just for this reason.If you would like a refund, you can go in person to the Post Office where you meter is registered (i.e., the ZIP Code of your meter stamp) within 60 days of the meter stamp date. You will need to bring the specific meter stamps as proof for your claim (they must be legible) and complete form 3533 “Application and Voucher for Refund of Postage, Fees, and Services”.
NOTE:If your application for refund is accepted, the USPS® will refund 90% of the original meter stamp amount.
IMPORTANT: To help prevent you from accidentally printing a postage value that's more than you need, you can have your mailing system warn you when you manually key in a postage value that is higher than the values you typically use. This setting is known as the high value warning (see Chapter 6 - System Settings to set this option). The high warning value feature is effective when you manually key in the postage value, but does not function if the internal rating feature is used.

mailstation™ 2 Digital Postal Meter | SV61983 Rev. H 10-1 mailstation™ 2 Digital Postal Meter | SV61983 Rev. H 10-1
Options• Internal Rating Feature The internal rating feature allows the machine to calculate postage
automatically for most mail pieces based on the weight (either entered manually or using the optional scale) and the class for a mail piece. It provides access to these common USPS classes of mail: 1st ClassPriorityExpressPostcard Flat Rate – Priority Envelope, Priority Box, Express EnvelopeMedia Mail - used to ship books, tapes, CDs, etc.International - Air Letter, Air Parcel, Global Priority(Also allows USPS ZIP/Zone entry)
Supplies and Accessories Contact the Pitney Bowes Supply Line™ or visit the Pitney Bowes web site to order supplies and accessories. Refer to the Contact Information List at the front of this guide for more information.
Item NumberInk Cartridge, Red Fluorescent 797-MDeluxe Cleaning Kit (useful when changing your ink) CK0-3E-Z Seal® Plus Sealing Solution, 4 oz. dabber bottle EZ1-7Tape Sheets—25 sheets (50 labels) 612-9Tape Sheets—150 sheets (300 labels) 620-9United We Stand Tape Sheets—25 sheets (50 labels) 613-9United We Stand Tape Sheets—150 sheets (300 labels) 613-848" Extension Cable for Scale 978-6
10 • Supplies & Options

10 ● Supplies & Options
10-2 mailstation™ 2 Digital Postal Meter | SV61983 Rev. H
• Scale The scale allows you to accurately weigh mail and packages. You
have a choice of a 2 lb. or 5 lb. capacity scale. See Chapter 6 - System Settings for scale settings.
• Extension Cable for Scale The extension cable allows you to position the scale up to 48 inches
from the machine for extra convenience.
• Standard Accounting The accounting feature tracks postage costs for departmental
accounts. You have a choice of purchasing 5 or 10 accounts. See Chapter 7 - Standard Accounting for details on using the accounting feature.
• Postal Inscriptions/Envelope Ads Your mailing system comes pre-loaded with the six envelope ads
and two postal inscriptions. Postal inscriptions are required on certain classes of mail based on USPS regulations; envelope ads are entirely optional. See Chapter 4 - Printing Options for choosing these to print as part of your meter stamp.
Standard Envelope AdsUS American FlagPlease Open ImmediatelySeasons GreetingsRecycleAddress Service RequestedReturn Service RequestedStandard Postal InscriptionsFirst Class MailPar Avion Air Mail
Ads and inscriptions can give your mail a professional appearance and can turn your mailings into a powerful promotional tool. Pitney Bowes can provide additional envelope ads and inscriptions if your needs require it, up to a total of 15 ads and 15 inscriptions. Additional inscriptions and ads are convenient to add because they are sent via system downloads to your machine.

Appendix A • Passwords & Meter Functions
mailstation™ 2 Digital Postal Meter | SV61983 Rev. H A-1 mailstation™ 2 Digital Postal Meter | SV61983 Rev. H A-1
Passwords can be set up on your system to prevent unauthorized access to the machine and/or to a specific account. This appendix explains the effects on system functions when using either or both types of passwords.
NOTE: For information on setting up a password for the machine itself (referred to as a "Lock Code" in this manual), see Chapter 6, System Settings. For information on setting up a password for an account when using the optional accounting feature, see Chapter 7, Standard Accounting.
If you have this: and have set it to this: then...
Meter Password(Lock Code)No Account Passwords activated
Lock Code activated but "Lock on sleep" option is not set
on power-up,or after awakening the machine when the machine was put in sleep mode by pressing Lock,you need to enter the Lock Code password
Meter Password (Lock Code)No Account Passwords activated
Lock Code activated and "Lock on sleep" option is set
on power-up,or after awakening the machine when the machine was put in sleep mode by pressing Lock,or awakening from a time-out induced sleep mode,you need to enter the Lock Code password

Appendix A
A-2 mailstation™ 2 Digital Postal Meter | SV61983 Rev. H
If you have this: and have set it to this: then...
Meter Password (Lock Code)An Account Password has been activated
Lock Code activated but "Lock on sleep" option is not set
on power-up,or after awakening the machine when the machine was put in sleep mode by pressing Lock,you can enter the Lock Code password or an Account password*
Meter Password (Lock Code)An Account Password has been activated
Lock Code activated and "Lock on sleep" option is set
on power-up,or after awakening the machine when the machine was put in sleep mode by pressing Lock,or awakening from a time-out induced sleep mode,you can enter the Lock Code password or an Account password*
*Account Password Restrictions - If you enter an Account password to gain access to the machine, the following results:• The account that you have entered the password for becomes the
selected account for printing postage and you will not need to enter the Account password again at that time.
• Change Account, Use Accounting Functions, and Change Setup within the menu are not available. Refill Postage is not available.
• If you want to gain access to all the menu items and the Refill Postage feature, press Lock to put the machine in sleep mode, press any button to awaken the machine, and enter the Lock Code password.

B-1Operator Guide | SV61983 Rev. H
When is Text Entry Used?Text is entered when:• Naming an account (with optional Standard Accounting).• Entering international country names• Entering Canada and UK Postal Codes when sending mail within
those countries
How is Text Entry Done?Text entry is done via the numeric keypad in a fashion similar to current cell phone text entry. Each key, 2 through 9, has three or four letters displayed above it.There is no dedicated key to switch between alpha and numeric mode. On those screens (and only those screens) where either an alpha or numeric character may be entered (e.g. preset names, postal codes, account names), tap a numeric key to cycle through the 4 possibilities for that key. For example, tapping the “2” numeric key cycles through "2" - "A" - "B" - "C". Extended character sets are provided for foreign markets on a country-by-country basis. In those cases, a numeric key may be tapped several times (greater than four) to cycle through the complete character set associated with a key.
Account NamesFor account names, the first letter of the first word automatically defaults to uppercase.If you wish to enter two consecutive alpha characters that are located on the same numeric key (such as “DE”), you must wait for the cursor to automatically move right to the second character’s position before entering the second character. There is about a 1-second delay following an alpha entry before the cursor moves one position to the right.
Appendix B • Entering Text

B-2 Operator Guide | SV61983 Rev. H
Appendix B
Special CharactersSpecial characters are accessed by repeatedly pressing the “1” key. Special characters include:
Symbol Name
, Comma& Ampersand* Asterisk. Period: Colon$ Currency symbol- Minus sign (dash)? Question mark/ Forward slash\ Backward slash( Open parenthesis) Close parenthesis! Exclamation point
@ “at” sign+ Plus sign# Hash mark% Percentage^ Upper carrot= Equal sign
The 0 (zero) key on the keypad functions as the space key. The word “Space” is printed on the keypad overlay to indicate this.The decimal point key also functions as the Shift key. The word “Shift” is printed on the keypad overlay to indicate this. In the alpha character entry mode (any screen that accepts alpha characters), this key toggles between “all uppercase letters” and “all lowercase letters.” When an up arrow (▲) displays in the last position, the uppercase mode is activated.

Glossary
mailstation™ 2 Digital Postal Meter | SV61983 Rev. H Glossary1 mailstation™ 2 Digital Postal Meter | SV61983 Rev. H Glossary1
Account—set up when using the Accounting option. An account can be an organization, person, department, etc. to which postage is charged. The machine stores the total postage used and the number of mail pieces processed for each account. The total number of accounts available on your machine depends on the option purchased. Advertisement, Envelope—An advertising message that appears next to the machine's meter stamp. You can choose from an array of standard and custom ads. Analog Line–a "standard" phone line supplied by the phone company. You use an analog phone line when you connect to the Pitney Bowes Data Center using your machine's modem phone jack. Analog phone lines are usually Fax lines, residential phone lines, and lines used by modems or credit card readers. Compare to Digital Line.Default—A value or setting the machine automatically uses unless you change it. As delivered, your machine has factory-set defaults or “normal” settings. You may change these if you wish.Digital Line–a type of line used on digital phone systems (so called PBX systems). Many PBX manufacturers have designed phone systems that deliver much more current to the phone than does a "standard" analog phone line supplied by the phone company. As a result, if you connect your machine's modem phone jack to a PBX digital line, thinking that it’s an analog line, you could damage your modem with too much current and not even know it. Home Screen—The machine display that shows your current selections. It indicates that you're ready to print postage. Inspection (Postal)—The USPS® requires a postal inspection of your machine every 120 days to ensure accurate postal funds accounting. This postal inspection requirement can be automatically met by merely connecting your machine to the Pitney Bowes Data Center for any reason (e.g., to check your Postage By Phone® account, add postage to your machine, etc.).IntelliLink®—A Pitney Bowes technology that allows you to download machine features, postal rates, and system updates via a digital link to the Pitney Bowes Data Center.

Glossary
Glossary2 mailstation™ 2 Digital Postal Meter | SV61983 Rev. H
Lock Code—A four-digit code that can be set up which acts as a password to gain access to the machine after it powers up or after it is awakened from a sleep mode.Meter Stamp (indicia)—The imprint produced by the machine (known as meter stamp or indicia). Depending on your settings, it may include:• The indicia (includes the postage amount, date, code, etc.)• An advertisement, which is an optional part of the machine stamp that
lets you convey your own special message to the mail recipient.Modem–a device on your machine for connecting to the Pitney Bowes Data Center over a standard (analog) telephone line. This modem should NOT be connected to a digital line (as is used on most PBX systems in offices). See also Digital Line.Origin Postal Code—The Postal Code assigned to your city or town. Mail processed on your machine must be posted from a location in your Postal Code area.Postage-By-Phone®—A service available through Pitney Bowes that allows you to buy postage and check account status via a phone line or the Internet. It also permits convenient postal inspection. Presets—A custom machine setting you can call up instantly at the push of a button. You can assign the preset a number of values, depending on the postage mode you're in, how your machine is set up and what options are installed. A preset will always have a name and postage amount, and could also have an ad, class of service, operating mode and other values assigned to it.Serial Number—The serial number found on the rear of the machine.Sleep Mode—An energy-saving feature of your machine that clears the display after a certain period of idle time. Pressing any key awakens the display.Tape Sheets—self-adhering paper which you print postage on and apply to a piece of mail or package that is too big to be processed through the machine.

Index
mailstation™ 2 Digital Postal Meter | SV61983 Rev. H I-1 mailstation™ 2 Digital Postal Meter | SV61983 Rev. H I-1
AAccessories. See OptionsAccidentally Printing the Wrong Postage 10-4Accounting feature (Standard)
Clearing all or some of the accounts 6-5Creating an account 6-2Deleting an account 6-6Editing Account Name and Password 6-3Effects of password on meter functions , 5-5Overview of Available Options 6-1Printing an accounting report (single and mulitple) 6-4Selecting an Account to Track Postage 6-3Setting passwords 6-2Turning feature ON or OFF 6-2Viewing account totals 6-4
Add-on USPS services. See also Postal (various sub-listings). 3-1Advertisement, Envelope
Glossary Entry Glossary1Alpha/Numeric keypad 2-2Applying postage. See also Postage 3-2Auto-Advance of printed date 3-2, 4-2
BBatch Count
Viewing (Checking) the Batch Count 3-4Blank Display 10-3
CClasses (postal). See Postal ClassClass key
used when entering postage 3-2, 3-3Cleaning Printer Nozzles 8-4Control Panel
Figure and Description 2-2
DDate
Auto-advance of date 4-2How it shows on meter stamp 4-1Manually changing printed date 4-2Printing date on incoming mail 4-5
Default SettingsGlossary Entry Glossary1
Destination ZIP or Zone 3-2, 3-3Digital indicia. See Meter stampDigital Line Glossary1Display on control panel

Index
I-2 mailstation™ 2 Digital Postal Meter | SV61983 Rev. H
Location and use 2-2Problems, Being blank 10-3
EEntering weight manually 3-3Enter/Yes key, location and use 2-2Envelope ad
Location on meter stamp 1-3Purchasing 4-3
Error Messages 9-1Extension cable option for scale 10-2
FFeatures, Overview of Machine 1-2
GGlossary Glossary1
HHigh value warning, Explanation and setting 5-7Home Screen 3-1
IIncoming mail, Printing options 4-4Indicia. See Meter stampInk maintenance
Cleaning printer nozzles 8-4Printing test pattern 8-4Replacing ink tray 8-5Replacing the ink cartridge 8-2Replacing the print head 8-5
Ink Tank (Cartridge)How to Order 10-1Messages Indicating Replacement 8-1Replacing 8-2
Ink trayReplacing 8-5
Internal rating featureExplanation of option 2-2, 10-1Used when applying postage 3-2, 3-3
Intra BMC ZIPs, Set up in machine 5-8
LLED
Location on machine 2-1, 2-3Lock code
Effects on meter functions A-1Setting up in machine 5-4
Low Ink, Message 8-1

Index
mailstation™ 2 Digital Postal Meter | SV61983 Rev. H I-3
MMachine, Conections on Back 2-3Machine Settings
Batch Count - Checking, Printing, and Clearing 3-4Maintenance. See Ink maintenanceManually Changing Printed Date for the Meter Stamp 4-2Menu key, location and use 2-2Messages Indicating Ink Cartridge Replacement 8-1Meter serial number
Location on meter stamp 1-3, 4-1Meter stamp
Adding/Removing postal inscription to the meter stamp 4-4Figure explaining sections 1-3, 4-1Manually changing printed date 4-2Printing envelope ad only (no meter stamp) 4-5Tunring On or Off printed date 4-3
Metric weight, viewing 5-6
NNo key, location and use 2-2
OOptions
Accounting Feature 10-1Extension cable for scale 10-1Internal Rating Feature 10-1Postal Inscriptions/Envelope Ads 10-2Scale 10-1
Origin postal codePostal requirements 1-3, 4-1
Origin Postal Code Glossary2Overview of Accounting Options 6-1Overview, of book 1-1
PPasswords
Effects on meter functions A-1Entering for lock code to enable meter A-1Entering when using departmental accounts 6-3Restrictions when accessing meter via account password A-2Setting up for departmental accounts 6-2Setting up for lock code 5-5
PostageAs it shows on meter stamp 1-3, 4-1Keying in the postage directly 3-2Optional add-on USPS services 3-1Using when entering weight manually 3-3
Postal ClassChoosing the right one 3-2, 3-3

Index
I-4 mailstation™ 2 Digital Postal Meter | SV61983 Rev. H
List of available with internal rating option 10-1Setting a matching inscription 4-4
Postal InscriptionsAdding/Removing to the Meter Stam 4-4List of 10-2Printing option 4-1Purchasing 4-4
Postal Requirements 1-4, 3-1Presets
Glossary entry Glossary2Recalling preset 5-4Storing a new one 5-3Turning on or off 5-3Viewing existing preset 5-3What is a Preset 5-2Why Should I Always Include a USPS® “Class” 5-2Why Should I Use Presets 5-2
Printer Nozzles, Cleaning 8-4Print Head, Replacing 8-5Printing
Printing a $0.00 Meter Stamp 4-2, 8-1Printing options 4-1Printing the Batch Count 3-4Print the date and time only 4-1Print the envelope ad only 4-1Sections of the Meter Stamp Figure 4-1Test Pattern (for troubleshooting) 8-4
ProblemsAccidentally Printing the Wrong Postage 10-4
RReplacing the Ink Cartridge 8-2Replacing the Ink Tray 8-5Replacing the Print Head 8-5Reports
Explanation 7-1Funds 7-1Refill Summary 7-2Software Version 7-2View Software Versions (non-printing) 7-3
RequirementsPostal, for Your Machine 1-4
Review keys, location and use 2-2
SSafety Notes 1-6Safety, Telephone 1-8Scale
Explanation of option 10-2Ordering one 10-2

Index
mailstation™ 2 Digital Postal Meter | SV61983 Rev. H I-5
Used when rating mail 3-2Used when rating mail but overwieght piece 3-3View metric weight 5-6
Security. See PasswordsSerial Number Glossary2Settings. See Machine SettingsSleep mode
Definition 5-5Manual activation 5-6Setting sleep mode activation time 5-5
Small Office Series™ 1-2Specifications
Equipment 1-5Standard Accounting. See Accounting, StandardSupplies and Accessories 10-1System Settings
Activating sleep mode manually 5-7Entering the prefix for dialing out to data center via Analog Line 5-7Preset Feature 5-2Setting/Disabling the lock code 5-4Setting sleep mode activation time 5-5Setting System Time 5-2Setting the high value warning 5-7
TTape sheets
Proper applying 3-2, 3-3Tape Strips Glossary2Telephone, Safety 1-8Text entry
Entering postal codes and accounts B-1Special characters B-2
Time-stamp incoming mail 4-4Tracking Postage
Batch Count 3-4Troubleshooting
Accidentally Printing the Wrong Postage 10-4Blank Display 10-3Display is difficult to read 10-3Error Messages 9-1Getting Help 9-1Printing is Incomplete, Streaked, or Poor Quality 10-3
Turn off date printing 4-1

Index
I-6 mailstation™ 2 Digital Postal Meter | SV61983 Rev. H
VViewing (Checking) the Batch Count 3-4
WWarnings
Low Ink 8-1Weighing with optional scale 3-2, 3-3Weight hold mode 3-4Weight, viewing metric 5-6What's in this Guide 1-1
ZZone, Entering when rating a mail piece 3-2, 3-3


© 2012 Pitney Bowes Inc.All Rights Reserved
1 Elmcroft RoadStamford, Connecticut 06926-0700www.pitneybowes.com
PB Form SV61983 Rev. H 4/12
*sv61983revH*