Developer Guide: Smartphone Mobiliser Applications - Sybase
71
Developer Guide: Smartphone Mobiliser Applications Sybase Mobiliser Platform 5.1 SP03
Transcript of Developer Guide: Smartphone Mobiliser Applications - Sybase

Developer Guide: Smartphone Mobiliser Applications
Sybase Mobiliser Platform 5.1
SP03
ii Developer Guide: Smartphone Mobiliser Applications
DOCUMENT ID: DC01866-01-0513-01
LAST REVISED: August 2013
Copyright © 2013 by Sybase, Inc. All rights reserved.
This publication pertains to Sybase software and to any subsequent release until otherwise indicated in new editions or technical notes. Information in this document is subject to change without notice. The software described herein is furnished under a license agreement, and it may be used or copied only in accordance with the terms of that agreement.
Upgrades are provided only at regularly scheduled software release dates. No part of this publication may be reproduced, transmitted, or translated in any form or by any means, electronic, mechanical, manual, optical, or otherwise, without the prior written permission of Sybase, Inc.
Sybase trademarks can be viewed at the Sybase trademarks page at http://www.sybase.com/detail?id=1011207. Sybase and the marks listed are trademarks of Sybase, Inc. ® indicates registration in the United States of America.
SAP and other SAP products and services mentioned herein as well as their respective logos are trademarks or registered trademarks of SAP AG in Germany and in several other countries all over the world.
Java and all Java-based marks are trademarks or registered trademarks of Oracle and/or its affiliates in the U.S. and other countries.
Unicode and the Unicode Logo are registered trademarks of Unicode, Inc.
IBM and Tivoli are registered trademarks of International Business Machines Corporation in the United States, other countries, or both.
All other company and product names mentioned may be trademarks of the respective companies with which they are associated.
Use, duplication, or disclosure by the government is subject to the restrictions set forth in subparagraph (c)(1)(ii) of DFARS 52.227-7013 for the DOD and as set forth in FAR 52.227-19(a)-(d) for civilian agencies.
Sybase, Inc., One Sybase Drive, Dublin, CA 94568.

Developer Guide: Smartphone Mobiliser Applications iii
Contents Introduction ...................................................................................... 1
New Features in Mobiliser Platform 5.1 SP03 ................................ 3
Other Changes ....................................................................... 3
Reference Application Main Features ............................................. 5
Designing a Smartphone Application ............................................. 7
The Reference Smartphone Applications ................................ 8
Smartphone Mobiliser Architecture .............................................. 11
Smartphone Code Layers ..................................................... 11
Developing a Hybrid Smartphone Application ............................. 15
Development Prerequisites ................................................... 15
Environment Setup ............................................................... 15
Maven ....................................................................... 15
Source Code Structure .................................................................. 17
Modules ................................................................................ 17
Build ..................................................................................... 18
Installing Dependencies to a Local Repository .......... 20
Uploading Dependencies to a Repository Server ...... 20
Android Development .................................................................... 21
Android SDK Dependencies ................................................. 21
Cordova Dependency ........................................................... 21
Facebook SDK Dependency ................................................. 21
ODC Dependencies .............................................................. 23
Building the Android applications with Eclipse ...................... 27
Building Android Applications with Android Studio ................ 31
iOS Development ........................................................................... 33
Creating CordovaLib ............................................................. 33
Creating a Facebook SDK iOS Framework ........................... 34
Building an iPhone Application ............................................. 34
BlackBerry Development ............................................................... 37
Command Line Build for BlackBerry ..................................... 37
Building the BlackBerry Application with Eclipse ................... 38
Customizing a Smartphone Application ....................................... 39
Custom Look and Feel .......................................................... 39
Custom Functionality ............................................................ 40
Custom Mobiliser Transactions ............................................. 40
Different UI Packages ........................................................... 41
Deploying the Application to Mobiliser Platform ......................... 43
Provisioning the Application to the Device .................................. 45
Debugging ...................................................................................... 47
Testing ............................................................................................ 49

Introduction
iv Developer Guide: Smartphone Mobiliser Applications
Localizing ....................................................................................... 51
Securing the Application ............................................................... 53
Authentication/Registration .......................................................... 55
Registration .......................................................................... 55
Authentication ....................................................................... 55
Running the Application on the Device ........................................ 57
Setting the Server Information .............................................. 57
Integrating Google Maps ............................................................... 59
Obtaining an API Key ................................................ 59
Asynchronously Loading the API ............................... 59
Map DOM Elements .................................................. 59
Adding Overlays ........................................................ 60
Integrating Facebook Single Sign-on ........................................... 61
Register App and Obtain Application ID ................................ 61
Mobile Web ............................................................... 61
Android ..................................................................... 61
iOS ............................................................................ 62
Automated Testing ......................................................................... 63
Known Limitation ........................................................................... 65

v Developer Guide: Smartphone Mobiliser Applications


Introduction
Developer Guide: Smartphone Mobiliser Applications 1
Introduction
This guide provides information about using Sybase® Smartphone Mobiliser to develop client applications for smartphones that run on Sybase Mobiliser Platform.
Smartphone Mobiliser is a sample application that you can use as a starting point for developing custom Mobiliser client applications. Depending on the requirements of your organization, you can either reuse parts of this application, or build your own application from scratch. Smartphone Mobiliser is not a production-ready application.
The application is built using a range of open source software. Given the fast pace at which mobile technology evolves, be sure to review the components and revisions used, and update any to the most suitable version before you begin developing your custom application. Once your apps are published in the various mobile application stores, update them regularly to support the latest mobile OS versions.
This guide describes the requirements for designing and developing a mobile smartphone application, how to set up a development environment, how to customize the code, and how to test, secure, and deploy the application to the device or simulator.
Figure 1. Smartphone Mobiliser application – Android splash screen

Introduction
2 Developer Guide: Smartphone Mobiliser Applications

New Features in Mobiliser Platform 5.1 SP03
Developer Guide: Smartphone Mobiliser Applications 3
New Features in Mobiliser Platform 5.1 SP03
Location-based services – use geolocation functionality to identify a location, such as the nearest post office or ATM. Users can search within a specified distance from their current location. Location-based services also include mobile commerce, in the form of coupons or advertising that is directed at customers based on their current location.
Facebook integration – simplifies the on-boarding and sign-up process during which an end user is authenticated. For example, if a user is already signed in to mobile application via the Facebook application, he or she need not provide additional credentials.
Remote check deposit using images – allows the end user to use the smartphone’s camera to take a picture of a check and send it to the server for further processing. The user can also retrieve and view checks that were scanned earlier.
Internationalization support – offers content and functionality in multiple languages and regions. Other relevant localization changes include number, date, and currency formats.
(Android only) On device charging – provides a closed-loop near-field communication (NFC) solution for on device charging (ODC). Smartphone Mobiliser seamlessly integrates with the ODC service in Mobiliser Platform to enable the user to install the Mer (a mobile-oriented software distribution), to configure the ODC wallet, and to manage transactions on the smartphone.
Other Changes
Changes to the underlying development environment include:
Changed Aspect Release 5.1 Release 5.1 SP03
Source code management Subversion Common code managed via SVN:externals (internal links), which is specific to the SCM tool.
Perforce No features specific to the SCM tool are used, so you can easily switch to other systems if needed. Maven handles common code.
iOS build environment Xcode Custom build scripts
Command line builds. Maven (Xcode Maven plug-in). Xcode.
iOS provisioning iOS Developer license. Drawback: manage your own device list (UDIDs)
SAP iOS enterprise license; deploy without limitations on corporate devices; no registration required. Uses SAP central build system. Developer license option is still available for non-SAP developers.
Android build environment Eclipse Ant build (command line)
Command line builds. Maven (Maven 2 Eclipse plug-in). Eclipse IDE. Android Studio (IntelliJ, Gradle).
BlackBerry build environment
Ant build (command line) Command line builds. Maven (invokes Ant). Eclipse IDE.

New Features in Mobiliser Platform 5.1 SP03
4 Developer Guide: Smartphone Mobiliser Applications

Reference Application Main Features
Developer Guide: Smartphone Mobiliser Applications 5
Reference Application Main Features
The main features available in the Smartphone Mobiliser reference application include:
Function Description
Consumer Sign-up New users can easily sign up, using the contact data and credentials provided. You can sign up as a Money Consumer (mobile wallet) or mBanking Consumer. The user confirms the sign-up process with a one-time password (OTP) that is received via SMS.
Transaction Details Shows an overview of the latest transactions. Selecting a transaction displays its details.
Send Money Person-to-person money transfer, based on mobile telephone number (MSISDN) pulled from the phone’s contacts list.
Request Money Send request for money transfer to contact, based on mobile telephone number (MSISDN) retrieved from the phone’s contacts. The request is visible on the receiver side under Pay Bills > Open Requests.
Airtime Topup Top up your own prepaid card, or another card with specified phone number.
Pay Bills Register new bills, pay bills, open bills, and pay open requests.
Manage Accounts Manage your SVA account, and load or unload money. You can also add bank accounts and credit cards, manage alerts and notifications, change your PIN, and block your account.
Coupons Search and retrieve coupons in your area. Redeem using bar code or quick response (QR) code scanner at the counter.
Remote Deposit (checks) Allows you to upload a picture (of a check) taken with the phone’s camera. Uploaded pictures can be retrieved from the server for further processing.
Locate Us Example of location-based services that can be built by combining location data stored on the Mobiliser Platform server with Google Maps to locate offices, ATMs, branches, and so on.
Foreign Exchange Rates Check current exchange rates.
Loan Inquiry Send a request for a specific loan to a bank. The bank follows up on this request and contacts the user.
On Device Charging (Android only) Provides a closed-loop NFC solution for On Device Charging.
Change UI Language Change the language on the user interface at runtime. Smartphone Mobiliser supports double-byte languages (Chinese, Arabic).
Terms and Conditions Agree to new or renewed terms and conditions during the login process or registration.
Single Sign-On (SSO) using Facebook account
Authenticate with a Facebook account by pushing the FB login button. No additional credentials are needed.
Offline Demo In this mode, no credentials are required and you can demonstrate and test the application with a fixed set of data, locally stored in JSON format. This mode is also useful for rapid prototyping, when you do not have a server available, or when working offline.
Reference Application Main Features
6 Developer Guide: Smartphone Mobiliser Applications
Caution: Smartphone Mobiliser is limited in scope and functionality, and is not consumer-ready. Its purpose is as a sample, so developers can quickly extend or easily create their own mobile smartphone applications.

Designing a Smartphone Application
Developer Guide: Smartphone Mobiliser Applications 7
Designing a Smartphone Application
The Smartphone Mobiliser application is a reference application that runs out of the box with a matching Mobiliser Platform server. To avoid compatibility issues regarding exposing and consuming Web services, server and client version numbers must match. The application is available in two deployment variations, as either:
A mobile Web app that is hosted on a Web server, or An installable mobile smartphone app.
More details on how to set up and install the mobile web application can be found in the Sybase Mobiliser Platform Installation guide.
The reference application is built using Web technologies that should be familiar within any Information Technology department. The underlying mobile development framework used for building the installable app is Apache Cordova, which is an open-source multiplatform mobile application framework.
Figure 2. A Cordova application
A Cordova application is built using HTML5, CSS, and JavaScript code. Developers specify the structure of an application layout using HTML5, design the look and feel of the application presentation using CSS, and finally, implement the business logic for the application using JavaScript.
The Cordova application runs inside a browser, which usually is a WebKit-based browser running inside the native operating system for each mobile platform, for example, Safari/iOS on an iPhone. Cordova provides a wrapper layer that is implemented using native code for each specific supported mobile platform to provide the hooks into the mobile device features, for example: geolocation, camera, accelerometer, and the contact list. Figure 3 shows how each layer wraps around the one beneath it.
Cordova Application
Java Script
HTML 5
CSS 3

Designing a Smartphone Application
8 Developer Guide: Smartphone Mobiliser Applications
Figure 3. Layers of a Cordova application
The Reference Smartphone Applications
The reference applications are prebuilt, and include a set of features that are connected to the back-end server. Both are an online applications that support offline access only in the demo mode. Currently, there are two flavors of the applications available:
Core Money / mBanking – combines basic mobile wallet functionality and alerts with mobile banking functions.
Open Bank API – allows signing in via a third-party banking system and provides management of checks, various banking accounts, and favorites.
The applications also have a standard SAP® layout, and look and feel, as shown in Figure 4.
Mobile OS Platform
Cordova Native
Wrapper
Native Browser
component
Web Application

Designing a Smartphone Application
Developer Guide: Smartphone Mobiliser Applications 9
Figure 4. Standard mBanking reference application layout on 4-inch iPhone
To design a Smartphone Mobiliser application, a developer must plan how the different pages that amount to a specific business transaction will interact. Figure 5 is an example storyboard for one design, showing the (mock) screen layouts in an interface flow diagram.

Designing a Smartphone Application
10 Developer Guide: Smartphone Mobiliser Applications
Figure 5: Example of a storyboard
Usually, the application look and feel is provided by graphic designers, who provide static screen designs created in Photoshop. Mobile application developers implement these designs as HTML5 code to be used within the application. If the application developers do not have access to Photoshop, they may want to request slices for each graphics element used in the GUI. These slices can be generated by the designers in Photoshop.

Smartphone Mobiliser Architecture
Developer Guide: Smartphone Mobiliser Applications 11
Smartphone Mobiliser Architecture
Smartphone Code Layers
There are certain files that most developers use to build a new application. First, let’s take a look at the different layers and modules that make up the main parts of the application framework.
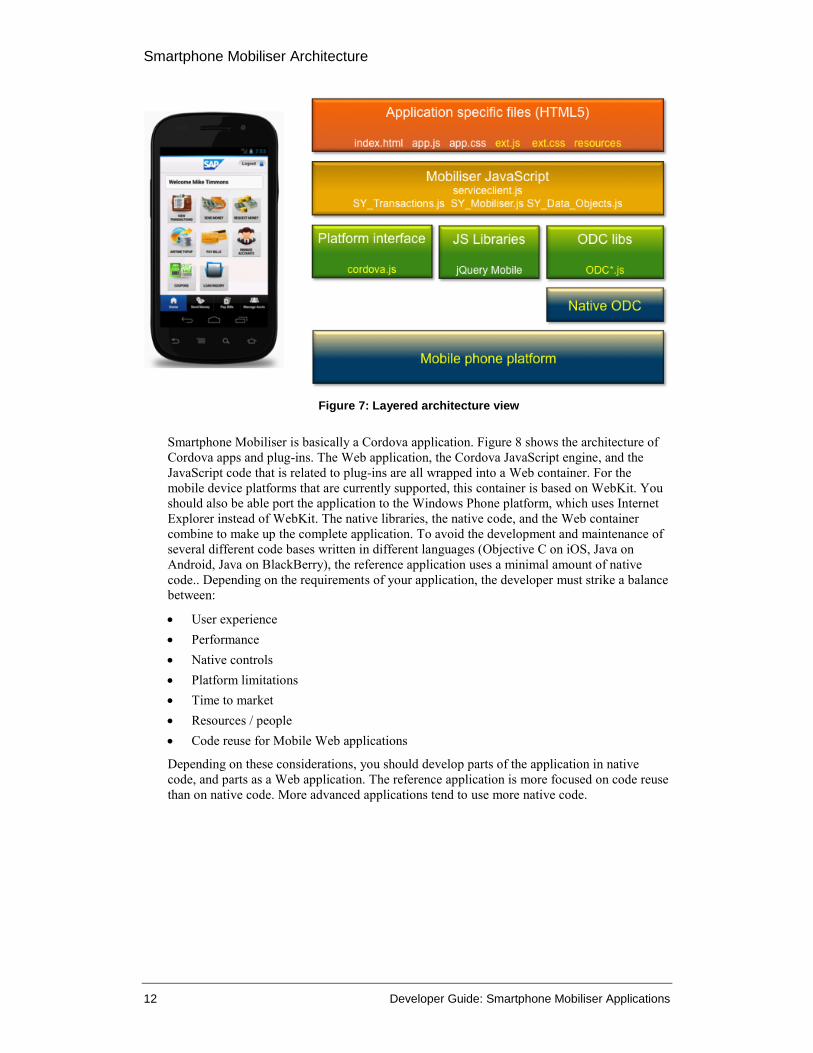
The code in the application framework is generally separated into three logical layers, each of which fulfills a specific function of the application. Figure 6 shows the main files in each framework layer.
Figure 6: Application framework code layers
Figure 7 shows a different view of the same layers. The items in yellow text are platform specific. The cordova.js file is a platform-specific file that differs for iOS, Android, BlackBerry, and so on. The same is true for the JavaScript and CSS files in the ext folder, and the ODC libraries and plug-ins that are available only for Android. The resources (images for icons, splashscreen, etc.) are also platform specific. In the reference application, most resources and CSS definitions are similar. However, you can implement a different look and feel for each platform if needed, such as creating custom buttons that look like native ones.
The items in white text are common across all platforms. In Smartphone Mobiliser, as much as 80% of the code is shared, although this depends on requirements. In the reference application, the common code is managed as a separate project that produces a repository artifact that is reused across multiple projects.
The file serviceclient.js is derived from the JavaScript interface that is generated (on the server side) by the smartphone web service. However, we maintain a separate copy in which we have made a few changes:
1. Added offline demo mode implementation
2. Added control on network status
3. Implemented a service request timer
4. Added a method to add “@attribute” in JSON object.
Presentation Layer
app.css
style.css
index.html
Business Logic Layer
app.js
SY_Data_-Objects.js
Communication Layer
SY_Transactions.js SY_Mobiliser.js
Smartphone Mobiliser Architecture
12 Developer Guide: Smartphone Mobiliser Applications
Figure 7: Layered architecture view
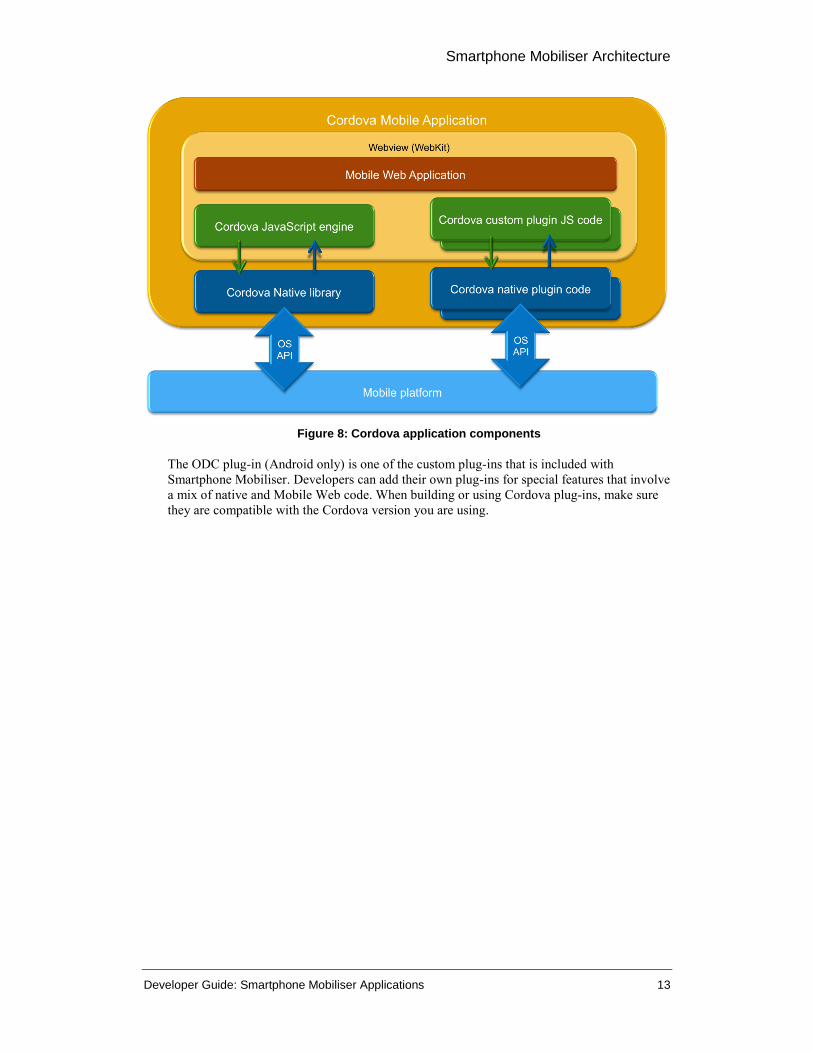
Smartphone Mobiliser is basically a Cordova application. Figure 8 shows the architecture of Cordova apps and plug-ins. The Web application, the Cordova JavaScript engine, and the JavaScript code that is related to plug-ins are all wrapped into a Web container. For the mobile device platforms that are currently supported, this container is based on WebKit. You should also be able port the application to the Windows Phone platform, which uses Internet Explorer instead of WebKit. The native libraries, the native code, and the Web container combine to make up the complete application. To avoid the development and maintenance of several different code bases written in different languages (Objective C on iOS, Java on Android, Java on BlackBerry), the reference application uses a minimal amount of native code.. Depending on the requirements of your application, the developer must strike a balance between:
User experience Performance Native controls Platform limitations Time to market Resources / people Code reuse for Mobile Web applications
Depending on these considerations, you should develop parts of the application in native code, and parts as a Web application. The reference application is more focused on code reuse than on native code. More advanced applications tend to use more native code.
Smartphone Mobiliser Architecture
Developer Guide: Smartphone Mobiliser Applications 13
Figure 8: Cordova application components
The ODC plug-in (Android only) is one of the custom plug-ins that is included with Smartphone Mobiliser. Developers can add their own plug-ins for special features that involve a mix of native and Mobile Web code. When building or using Cordova plug-ins, make sure they are compatible with the Cordova version you are using.

Smartphone Mobiliser Architecture
14 Developer Guide: Smartphone Mobiliser Applications
Developing a Hybrid Smartphone Application
Developer Guide: Smartphone Mobiliser Applications 15
Developing a Hybrid Smartphone Application
Building a hybrid application combines the skills and tooling required for both native application development as well as those required for Web application development.
Development Prerequisites
1. Install and configure Mobiliser Platform. 2. Set up a server on which to run Mobiliser services (the Smartphone Web services). The
services can be installed locally, on premise, or in the (Amazon) cloud. 3. Ensure that you are using Smartphone Mobiliser version 5.1.3 with Mobiliser version
5.1.3 . The Web services available on each version of Mobiliser are different, so the mobile client implementation differs as well.
4. Install SoapUI or other tools, such as the Google Chrome extensions “JSONView” and “Postman – REST client,” to figure out how to use and test Web services.
5. Install Maven 3.0.3 or higher (but lower than 3.1.0), and configure to connect to the correct Nexus repository.
Environment Setup
The current version of Smartphone Mobiliser uses Cordova version 2.5.0, and the environment setup is based on this. More recent versions of Cordova are likely to require a different environment. The developer must adapt, as necessary, to the requirements for the version of Cordova used. Development tooling such as Xcode and the Android ADT are also subject to change. Since the tools, the mobile operating systems, the dependencies such as Cordova, jQuery Mobile, and so on continue evolving, this document provides only a snapshot of the components that have been used for this release. Developers must update all these components as required and consider new tools, and new features as they become available.
SAP recommends that you set up your environment according to the guidelines available on the PhoneGap document site:
Getting started guide PhoneGap 2.5.0
http://docs.phonegap.com/en/2.5.0/guide_getting-started_index.md.html#Getting%20Started%20Guides
Set up the development environment for each specific platform. Install SDKs for any of the mobile platforms, such as Android, Apple iPhone and iPad, BlackBerry, and others.
If you can build and run a standard PhoneGap application on your target platform, you will be able to build and run Smartphone Mobiliser-based applications as well.
Maven
Smartphone Mobiliser uses Maven to handle the various artifacts, dependencies and the shared code.
Ensure the Apache Maven software project management tool (version 3.03 or later, but lower than 3.1.0) is installed on your system. You can download Maven from http://maven.apache.org/. Maven also requires Java to be installed on your system. Follow the installation instructions to set up environment variables.
Verify your installation by running:
mvn --version

Developing a Hybrid Smartphone Application
16 Developer Guide: Smartphone Mobiliser Applications
Source Code Structure
Developer Guide: Smartphone Mobiliser Applications 17
Source Code Structure
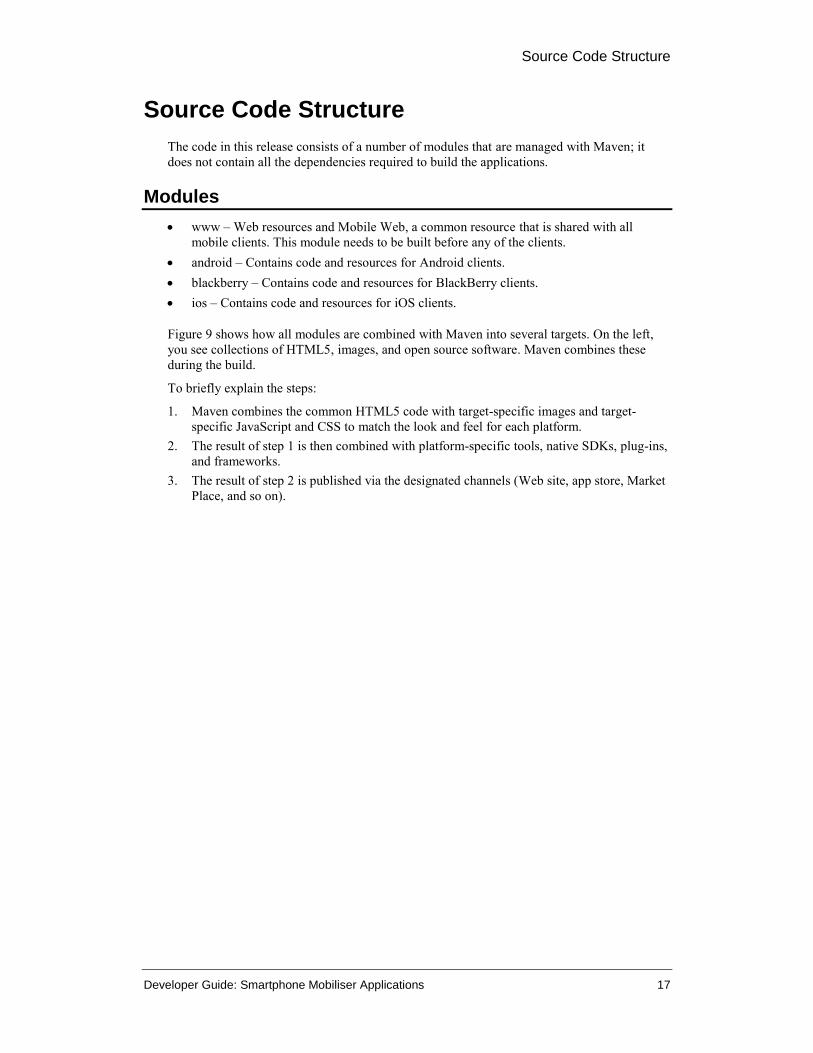
The code in this release consists of a number of modules that are managed with Maven; it does not contain all the dependencies required to build the applications.
Modules
www – Web resources and Mobile Web, a common resource that is shared with all mobile clients. This module needs to be built before any of the clients.
android – Contains code and resources for Android clients. blackberry – Contains code and resources for BlackBerry clients. ios – Contains code and resources for iOS clients.
Figure 9 shows how all modules are combined with Maven into several targets. On the left, you see collections of HTML5, images, and open source software. Maven combines these during the build.
To briefly explain the steps:
1. Maven combines the common HTML5 code with target-specific images and target- specific JavaScript and CSS to match the look and feel for each platform.
2. The result of step 1 is then combined with platform-specific tools, native SDKs, plug-ins, and frameworks.
3. The result of step 2 is published via the designated channels (Web site, app store, Market Place, and so on).

Source Code Structure
18 Developer Guide: Smartphone Mobiliser Applications
Figure 9: How Maven combines artifacts into build targets
Build
You can navigate into a specific module’s folder and use mvn clean install to build an individual module. You can also build several flavors of the apps from the root folder by specifying the target’s XML file. For example, to build all Android applications, use the following command:
mvn clean install –f android.xml

Source Code Structure
Developer Guide: Smartphone Mobiliser Applications 19
Figure 10: Command line build for all Android targets
As you can see in the build output, Maven builds several projects in a specified sequence. The build result is pushed into the Maven repository and will be used at a later stage in the build process. You can also see that there are separate builds targeting phones and tablets, and builds that include and exclude the ODC feature.
The build takes a few minutes to complete, depending on how many artifacts and dependencies are already available in your local repository. When everything is set up correctly, the results are:
Figure 11: Build results reported for Android build

Source Code Structure
20 Developer Guide: Smartphone Mobiliser Applications
Before you can successfully build a module, you must resolve all Maven dependencies. You can either install the dependencies that are unavailable in a public Maven repository to a local repository on your development machine, or deploy them to your shared repository server. This document assumes that you have sufficient knowledge about using Maven and repository management tools (for example, Nexus) to set this up. See http://maven.apache.org/ and http://maven.apache.org/repository-management.html for more information. We will provide some basic guidelines for setting up your environment.
Installing Dependencies to a Local Repository
mvn install:install-file -Dfile=your-artifact-1.0.jar -
DgroupId=org.some.group] \
-DartifactId=your-artifact] -Dversion=1.0 -Dpackaging=jar
Uploading Dependencies to a Repository Server
mvn deploy:deploy-file
More information:
http://maven.apache.org/plugins/maven-install-plugin/usage.html
http://maven.apache.org/plugins/maven-deploy-plugin/usage.html
Android Development
Developer Guide: Smartphone Mobiliser Applications 21
Android Development
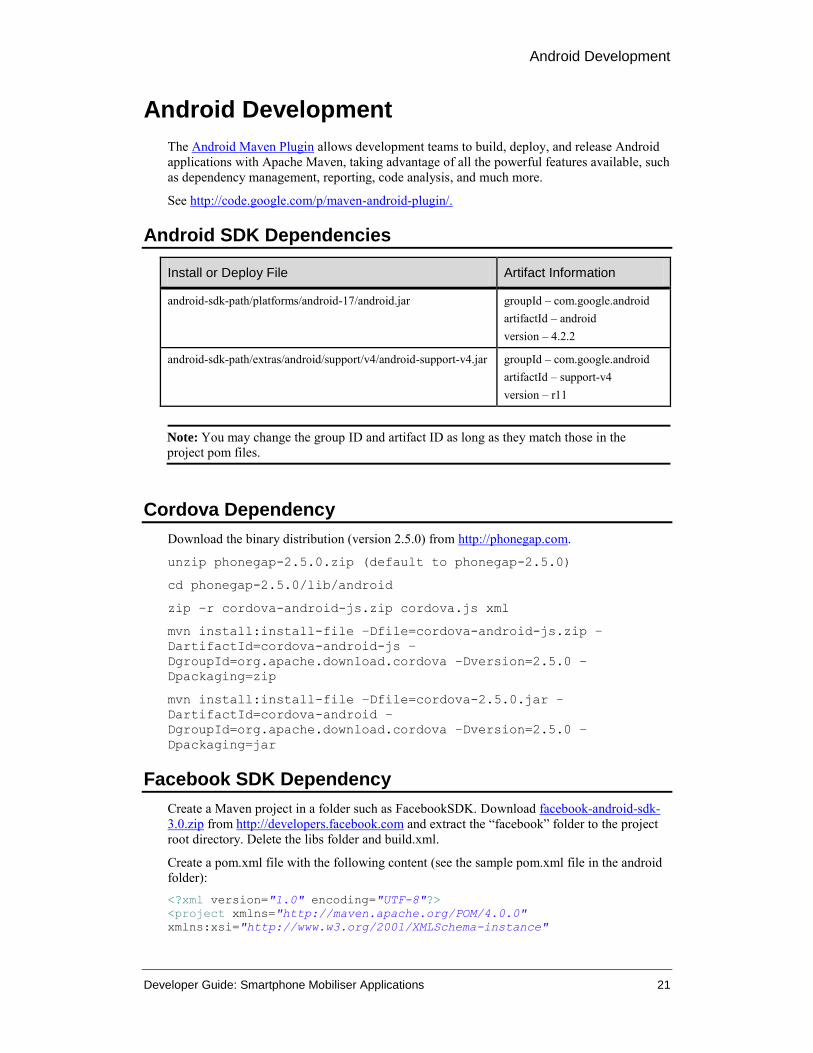
The Android Maven Plugin allows development teams to build, deploy, and release Android applications with Apache Maven, taking advantage of all the powerful features available, such as dependency management, reporting, code analysis, and much more.
See http://code.google.com/p/maven-android-plugin/.
Android SDK Dependencies
Install or Deploy File Artifact Information
android-sdk-path/platforms/android-17/android.jar groupId – com.google.android artifactId – android version – 4.2.2
android-sdk-path/extras/android/support/v4/android-support-v4.jar groupId – com.google.android artifactId – support-v4 version – r11
Note: You may change the group ID and artifact ID as long as they match those in the project pom files.
Cordova Dependency
Download the binary distribution (version 2.5.0) from http://phonegap.com.
unzip phonegap-2.5.0.zip (default to phonegap-2.5.0)
cd phonegap-2.5.0/lib/android
zip –r cordova-android-js.zip cordova.js xml
mvn install:install-file –Dfile=cordova-android-js.zip –
DartifactId=cordova-android-js –
DgroupId=org.apache.download.cordova –Dversion=2.5.0 –
Dpackaging=zip
mvn install:install-file –Dfile=cordova-2.5.0.jar –
DartifactId=cordova-android –
DgroupId=org.apache.download.cordova –Dversion=2.5.0 –
Dpackaging=jar
Facebook SDK Dependency
Create a Maven project in a folder such as FacebookSDK. Download facebook-android-sdk-3.0.zip from http://developers.facebook.com and extract the “facebook” folder to the project root directory. Delete the libs folder and build.xml.
Create a pom.xml file with the following content (see the sample pom.xml file in the android folder): <?xml version="1.0" encoding="UTF-8"?>
<project xmlns="http://maven.apache.org/POM/4.0.0"
xmlns:xsi="http://www.w3.org/2001/XMLSchema-instance"

Android Development
22 Developer Guide: Smartphone Mobiliser Applications
xsi:schemaLocation="http://maven.apache.org/POM/4.0.0
http://maven.apache.org/maven-v4_0_0.xsd">
<modelVersion 4.0.0</modelVersion>
<name>Facebook Android SDK Library</name>
<groupId>com.facebook.download.sdk</groupId>
<artifactId>facebook-android-sdk</artifactId>
<version>3.0.0</version>
<packaging>apklib</packaging>
<dependencies>
<dependency>
<groupId>com.google.android</groupId>
<artifactId>android</artifactId>
<version>4.2.2</version>
<scope>provided</scope>
</dependency>
<dependency>
<groupId>com.google.android</groupId>
<artifactId>support-v4</artifactId>
<version>r11</version>
</dependency>
</dependencies>
<build>
<sourceDirectory>src</sourceDirectory>
<plugins>
<plugin>
<groupId>com.jayway.maven.plugins.android.generation2</groupId>
<artifactId>android-maven-plugin</artifactId>
<version>3.6.0</version>
<extensions>true</extensions>
<configuration>
<sdk>
<platform>17</platform>
</sdk>
</configuration>
</plugin>
<plugin>
<groupId>org.apache.maven.plugins</groupId>
<artifactId>maven-compiler-plugin</artifactId>
<version>3.0</version>
<configuration>
<source>1.6</source>
<target>1.6</target>
</configuration>
</plugin>
</plugins>
</build>
</project>
Build and install with:
mvn clean install

Android Development
Developer Guide: Smartphone Mobiliser Applications 23
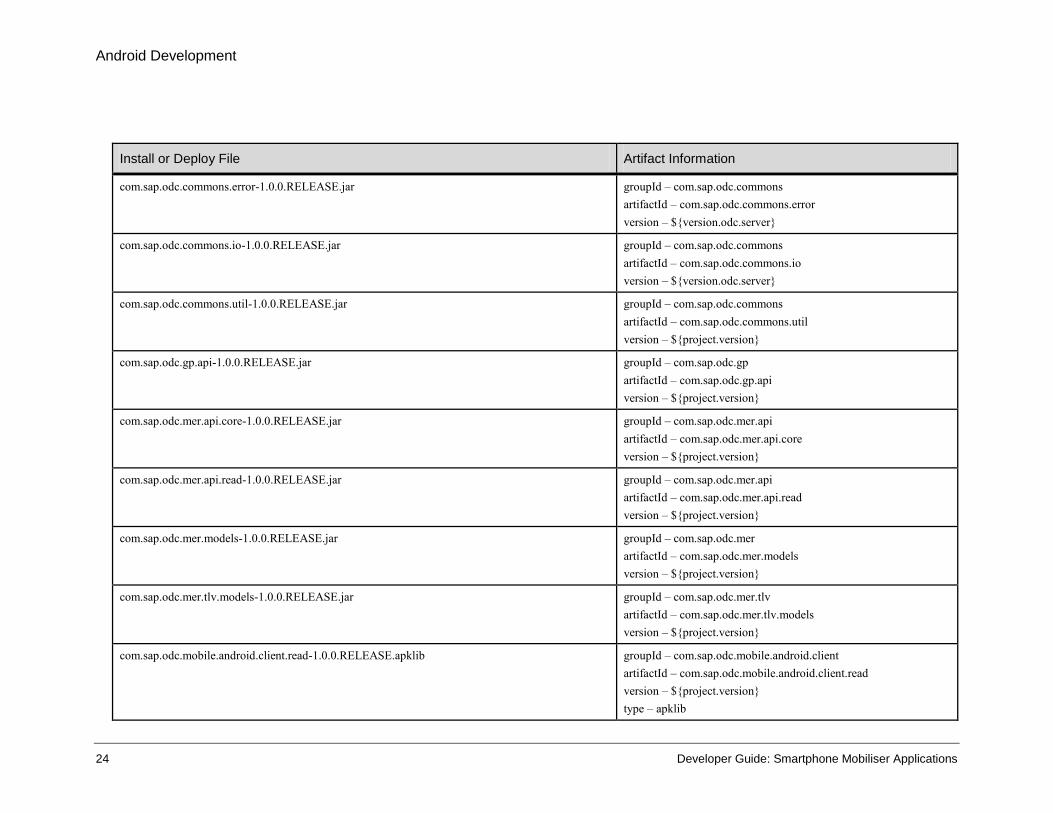
ODC Dependencies
version.odc.server = 1.0.0.RELEASE
project.version = 1.0.0.RELEASE
Install or Deploy File Artifact Information
Android-sdk-path/extras/google/gcm/gcm-client/dist/gcm.jar groupId – com.google.android.gcm artifactId – client version – 1
KSOAP http://ksoap2-android.googlecode.com/svn/m2-repo/
groupId – com.google.code.ksoap2-android artifactId – ksoap2-android version – 3.0.0
Mobile Security Card (jar directly added in our nexus as third party http://seek-for-android.googlecode.com/files/MSC%20Smartcard%20Service%203.0.tar.gz)
groupId – com.mobilesecuritycard artifactId – com.mobilesecuritycard.openmobileapi
Device Fidelity api-android-2.2.1.jar
groupId – com.devicefidelity artifactId – api-android version – 2.2.1
SDIOLib-2.2.1-armeabi.so
groupId – com.devicefidelity artifactId – SDIOLib version – 2.2.1 scope – runtime classifier – armeabi type – so
com.sap.odc.cload.core-1.0.0.RELEASE.jar
groupId – com.sap.odc.cload artifactId – com.sap.odc.cload.core version – ${version.odc.server}
com.sap.odc.commons.constants-1.0.0.RELEASE.jar groupId – com.sap.odc.commons artifactId – com.sap.odc.commons.constants version – ${version.odc.server}
Android Development
24 Developer Guide: Smartphone Mobiliser Applications
Install or Deploy File Artifact Information
com.sap.odc.commons.error-1.0.0.RELEASE.jar groupId – com.sap.odc.commons artifactId – com.sap.odc.commons.error version – ${version.odc.server}
com.sap.odc.commons.io-1.0.0.RELEASE.jar groupId – com.sap.odc.commons artifactId – com.sap.odc.commons.io version – ${version.odc.server}
com.sap.odc.commons.util-1.0.0.RELEASE.jar
groupId – com.sap.odc.commons artifactId – com.sap.odc.commons.util version – ${project.version}
com.sap.odc.gp.api-1.0.0.RELEASE.jar groupId – com.sap.odc.gp artifactId – com.sap.odc.gp.api version – ${project.version}
com.sap.odc.mer.api.core-1.0.0.RELEASE.jar groupId – com.sap.odc.mer.api artifactId – com.sap.odc.mer.api.core version – ${project.version}
com.sap.odc.mer.api.read-1.0.0.RELEASE.jar groupId – com.sap.odc.mer.api artifactId – com.sap.odc.mer.api.read version – ${project.version}
com.sap.odc.mer.models-1.0.0.RELEASE.jar groupId – com.sap.odc.mer artifactId – com.sap.odc.mer.models version – ${project.version}
com.sap.odc.mer.tlv.models-1.0.0.RELEASE.jar groupId – com.sap.odc.mer.tlv artifactId – com.sap.odc.mer.tlv.models version – ${project.version}
com.sap.odc.mobile.android.client.read-1.0.0.RELEASE.apklib groupId – com.sap.odc.mobile.android.client artifactId – com.sap.odc.mobile.android.client.read version – ${project.version} type – apklib

Android Development
Developer Guide: Smartphone Mobiliser Applications 25
Install or Deploy File Artifact Information
com.sap.odc.mobile.android.client.synchro-1.0.0.RELEASE.apklib groupId – com.sap.odc.mobile.android.client artifactId – com.sap.odc.mobile.android.client.synchro version – ${project.version} type – apklib
com.sap.odc.mobile.android.json-1.0.0.RELEASE.apklib groupId – com.sap.odc.mobile.android artifactId – com.sap.odc.mobile.android.json version – ${project.version} type – apklib
com.sap.odc.mobile.android.plugin.impl-1.0.0.RELEASE.apklib groupId – com.sap.odc.mobile.android.plugin artifactId – com.sap.odc.mobile.android.plugin.impl version – ${project.version} type – apklib
com.sap.odc.mobile.android.smartcard.api-1.0.0.RELEASE.apklib
groupId – com.sap.odc.mobile.android.smartcard artifactId – com.sap.odc.mobile.android.smartcard.api version – ${project.version} type – apklib
com.sap.odc.mobile.android.smartcard.devicefid-1.0.0.RELEASE.apklib groupId – com.sap.odc.mobile.android.smartcard artifactId – com.sap.odc.mobile.android.smartcard.devicefid version – ${project.version} type – apklib
com.sap.odc.mobile.android.smartcard.openmobile-1.0.0.RELEASE.apklib groupId – com.sap.odc.mobile.android.smartcard artifactId – com.sap.odc.mobile.android.smartcard.openmobile version – ${project.version} type – apklib
com.sap.odc.mobile.android.smartcard.server-1.0.0.RELEASE.apklib groupId – com.sap.odc.mobile.android.smartcard artifactId – com.sap.odc.mobile.android.smartcard.server version – ${project.version} type – apklib

Android Development
26 Developer Guide: Smartphone Mobiliser Applications
Install or Deploy File Artifact Information
com.sap.odc.mobile.android.synchro-1.0.0.RELEASE.apklib groupId – com.sap.odc.mobile.android artifactId – com.sap.odc.mobile.android.synchro version – ${project.version} type – apklib
com.sap.odc.mobile.android.utils-1.0.0.RELEASE.apklib groupId – com.sap.odc.mobile.android artifactId – com.sap.odc.mobile.android.utils version – ${project.version} type – apklib

Android Development
Developer Guide: Smartphone Mobiliser Applications 27
Building the Android applications with Eclipse
You can download the Android Developer Tools (ADT) from http://developer.android.com. Google now offers an ADT bundle that comprises a complete Eclipse installation, including all necessary plug-ins. Alternatively, you can install the ADT plug-in into your favorite Eclipse environment.
Figure 12: ADT splash screen
Incompatibility issues between plug-ins and Java versions required might give you more overhead than needed; Sybase recommends that you use separate Eclipse environments for server-side (J2EE) development, for Android development, and for BlackBerry development (32-bits only).
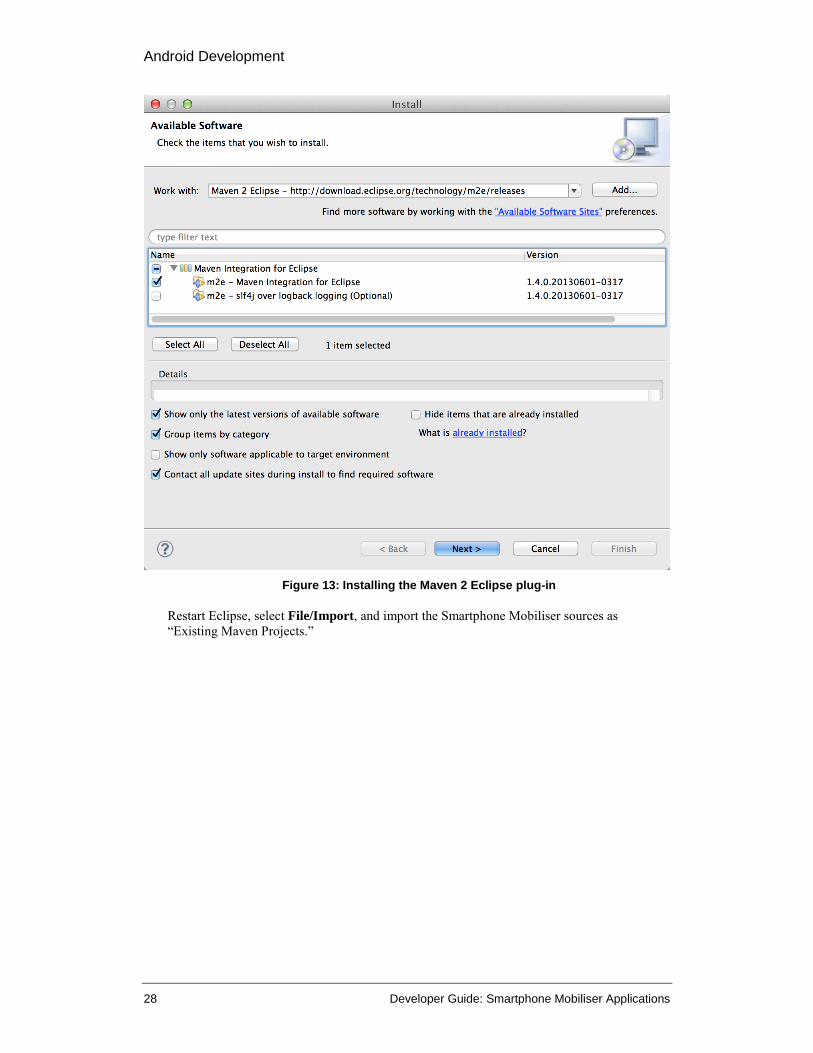
To use Maven from within Eclipse, you must install the Maven 2 Eclipse plug-in as shown in Figure 13.
Android Development
28 Developer Guide: Smartphone Mobiliser Applications
Figure 13: Installing the Maven 2 Eclipse plug-in
Restart Eclipse, select File/Import, and import the Smartphone Mobiliser sources as “Existing Maven Projects.”

Android Development
Developer Guide: Smartphone Mobiliser Applications 29
Figure 14: Import existing Maven project
Most of the code for Android applications is in the “Android” folder. However, common Web application code is located in a folder called “www” and must be imported as a separate Maven project. When you import the Android folder, Maven 2 Eclipse identifies several subprojects; select to import them all. You might also need another Eclipse plug-in (M2E Maven Archiver Connector), which is installed automatically.
When you make changes to code in the www folder, you will probably need build two projects: the www project, and the phone or tablet project.

Android Development
30 Developer Guide: Smartphone Mobiliser Applications
Figure 15: Importing the common Web application code as Maven project
To build projects in Eclipse, right-click the project you want to build and select Run As >
Maven install. To build all Android projects (except the www project) in a single build, select the “parent” project, which builds all projects in the correct sequence.
Figure 16: Building the Web application code within Eclipse

Android Development
Developer Guide: Smartphone Mobiliser Applications 31
Building Android Applications with Android Studio
Currently, it seems likely that Google plans to replace the ADT that is based on Eclipse with a different IDE that is based on IntelliJ, and a new build system that is based on Gradle. This new IDE is called Android Studio and can be downloaded from http://developer.android.com/sdk/installing/studio.html. At the time of writing, the Android Studio is available as an early access preview.
Figure 17: Android Studio's splash screen
This IDE can import Maven projects and build the required targets. It also provides a straightforward process for deploying your target to a device or simulator. To get started with Smartphone Mobiliser in Android Studio, use Import Project as shown in Figure 18.
Figure 18: Importing the Maven project for Android in Android Studio
Import both the Maven “android” project, and the common Web application code in the ”www” folder. During the import, you must review the settings; in most cases, the default settings should be sufficient. After you have imported the sources, the build system automatically starts to resolve dependencies. Since the Android Studio IDE is still subject to
Android Development
32 Developer Guide: Smartphone Mobiliser Applications
changes, we cannot provide detailed information about using it to develop Smartphone Mobiliser customizations.
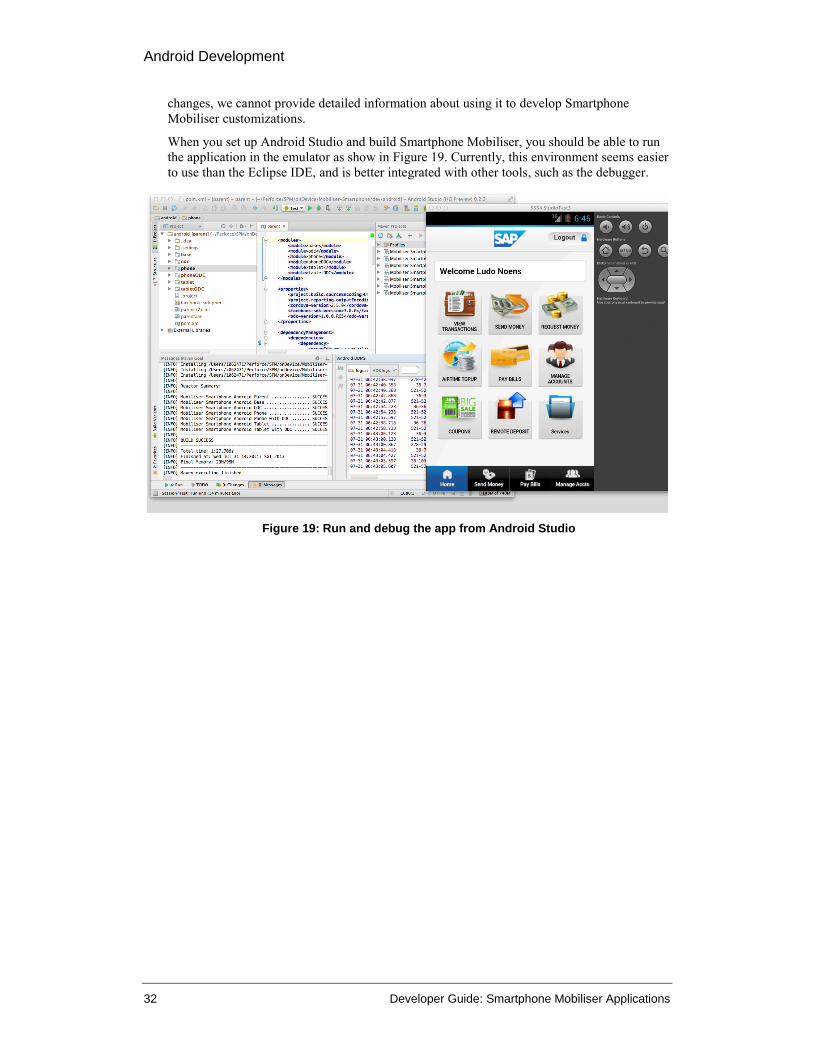
When you set up Android Studio and build Smartphone Mobiliser, you should be able to run the application in the emulator as show in Figure 19. Currently, this environment seems easier to use than the Eclipse IDE, and is better integrated with other tools, such as the debugger.
Figure 19: Run and debug the app from Android Studio

iOS Development
Developer Guide: Smartphone Mobiliser Applications 33
iOS Development
The Xcode Maven plug-in developed by SAP can be used to run Xcode builds that are embedded in a Maven life cycle. Download the plug-in from:
http://sap-production.github.io/xcode-maven-plugin/site/index.html
Creating CordovaLib
Download cordova-2.5.0-src.zip from cordova.apache.org and extract cordova-ios.zip from it.
Create a Maven project folder, such as cordova-xcode-lib:
mkdir –p src/xcode
mkdir –p unpack/project
unzip cordova-ios.zip –d unpack
./unpack/bin/create unpack/project com.sap.CordovaProject
CordovaProject
cp -R unpack/CordovaLib/ src/xcode
mkdir -p src/xcode/CordovaLib.bundle
cp -R unpack/project/www/ src/xcode/CordovaLib.bundle
Create a pom.xml file:
<project xmlns="http://maven.apache.org/POM/4.0.0"
xmlns:xsi="http://www.w3.org/2001/XMLSchema-instance"
xsi:schemaLocation="http://maven.apache.org/POM/4.0.0
http://maven.apache.org/xsd/maven-
4.0.0.xsd">
<modelVersion>4.0.0</modelVersion>
<groupId>com.sap.org.apache.download.cordova</groupId>
<artifactId>CordovaLib</artifactId>
<version>2.5.0</version>
<packaging>xcode-lib</packaging>
<build>
<plugins>
<plugin>
<groupId>com.sap.prd.mobile.ios.mios</groupId>
<artifactId>xcode-maven-plugin</artifactId>
<version>1.9.3</version>
<extensions>true</extensions>
<configuration>
<settings>
<EXECUTABLE_NAME>libCordovaLib.a</EXECUTABLE_NAME>
</settings>
</configuration>
</plugin>
</plugins>
</build>
</project>
Create the iOS lib and install it in a local repository or deploy it to a repository server:
mvn clean install
mvn clean deploy
iOS Development
34 Developer Guide: Smartphone Mobiliser Applications
Creating a Facebook SDK iOS Framework
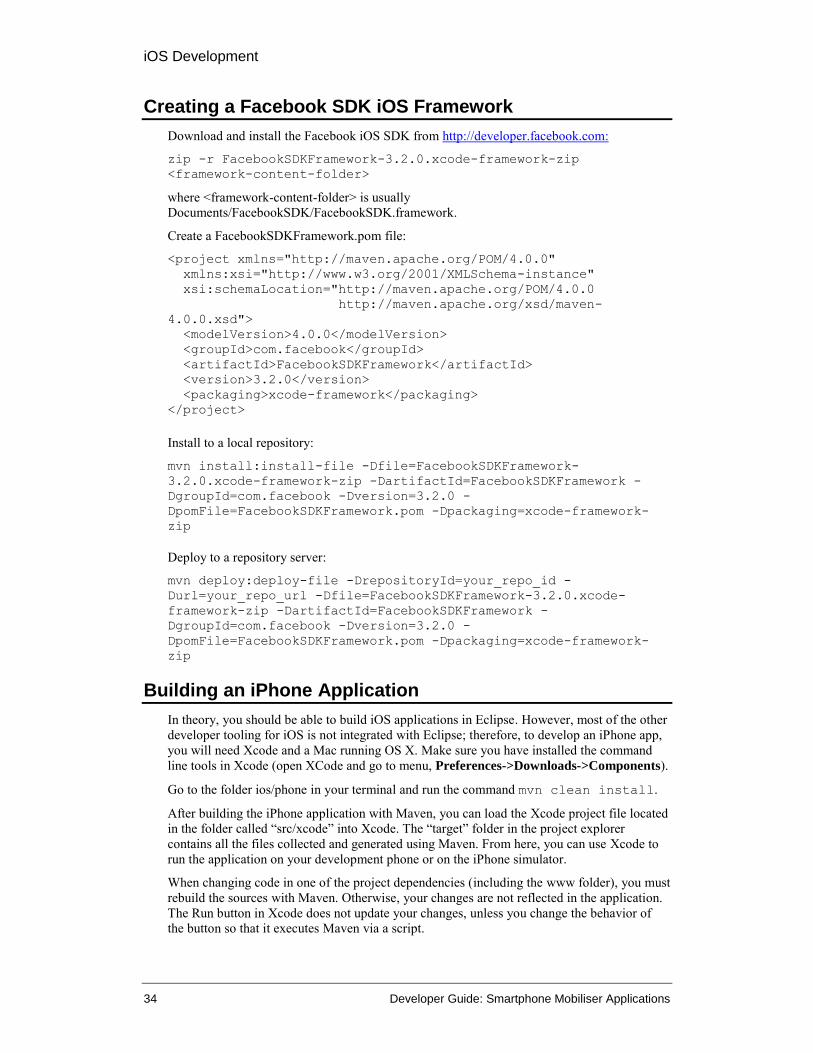
Download and install the Facebook iOS SDK from http://developer.facebook.com:
zip -r FacebookSDKFramework-3.2.0.xcode-framework-zip
<framework-content-folder>
where <framework-content-folder> is usually Documents/FacebookSDK/FacebookSDK.framework.
Create a FacebookSDKFramework.pom file:
<project xmlns="http://maven.apache.org/POM/4.0.0"
xmlns:xsi="http://www.w3.org/2001/XMLSchema-instance"
xsi:schemaLocation="http://maven.apache.org/POM/4.0.0
http://maven.apache.org/xsd/maven-
4.0.0.xsd">
<modelVersion>4.0.0</modelVersion>
<groupId>com.facebook</groupId>
<artifactId>FacebookSDKFramework</artifactId>
<version>3.2.0</version>
<packaging>xcode-framework</packaging>
</project>
Install to a local repository:
mvn install:install-file -Dfile=FacebookSDKFramework-
3.2.0.xcode-framework-zip -DartifactId=FacebookSDKFramework -
DgroupId=com.facebook -Dversion=3.2.0 -
DpomFile=FacebookSDKFramework.pom -Dpackaging=xcode-framework-
zip
Deploy to a repository server:
mvn deploy:deploy-file -DrepositoryId=your_repo_id -
Durl=your_repo_url -Dfile=FacebookSDKFramework-3.2.0.xcode-
framework-zip -DartifactId=FacebookSDKFramework -
DgroupId=com.facebook -Dversion=3.2.0 -
DpomFile=FacebookSDKFramework.pom -Dpackaging=xcode-framework-
zip
Building an iPhone Application
In theory, you should be able to build iOS applications in Eclipse. However, most of the other developer tooling for iOS is not integrated with Eclipse; therefore, to develop an iPhone app, you will need Xcode and a Mac running OS X. Make sure you have installed the command line tools in Xcode (open XCode and go to menu, Preferences->Downloads->Components).
Go to the folder ios/phone in your terminal and run the command mvn clean install.
After building the iPhone application with Maven, you can load the Xcode project file located in the folder called “src/xcode” into Xcode. The “target” folder in the project explorer contains all the files collected and generated using Maven. From here, you can use Xcode to run the application on your development phone or on the iPhone simulator.
When changing code in one of the project dependencies (including the www folder), you must rebuild the sources with Maven. Otherwise, your changes are not reflected in the application. The Run button in Xcode does not update your changes, unless you change the behavior of the button so that it executes Maven via a script.
iOS Development
Developer Guide: Smartphone Mobiliser Applications 35
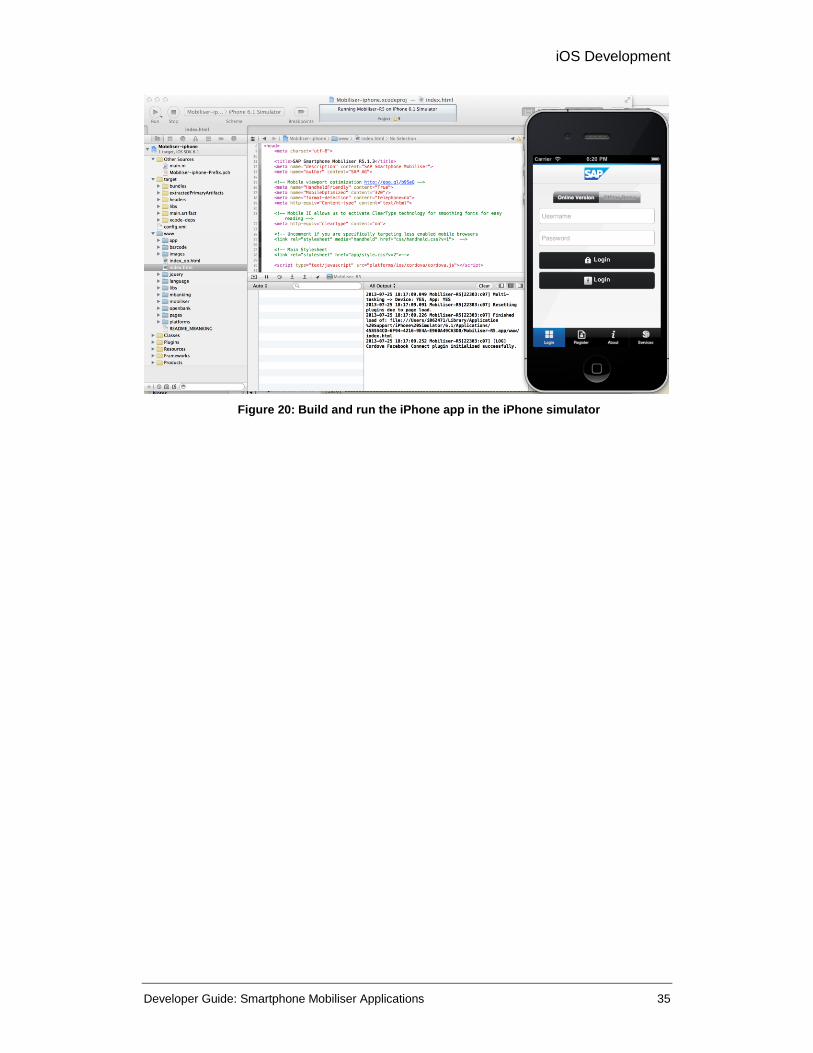
Figure 20: Build and run the iPhone app in the iPhone simulator

iOS Development
36 Developer Guide: Smartphone Mobiliser Applications
BlackBerry Development
Developer Guide: Smartphone Mobiliser Applications 37
BlackBerry Development
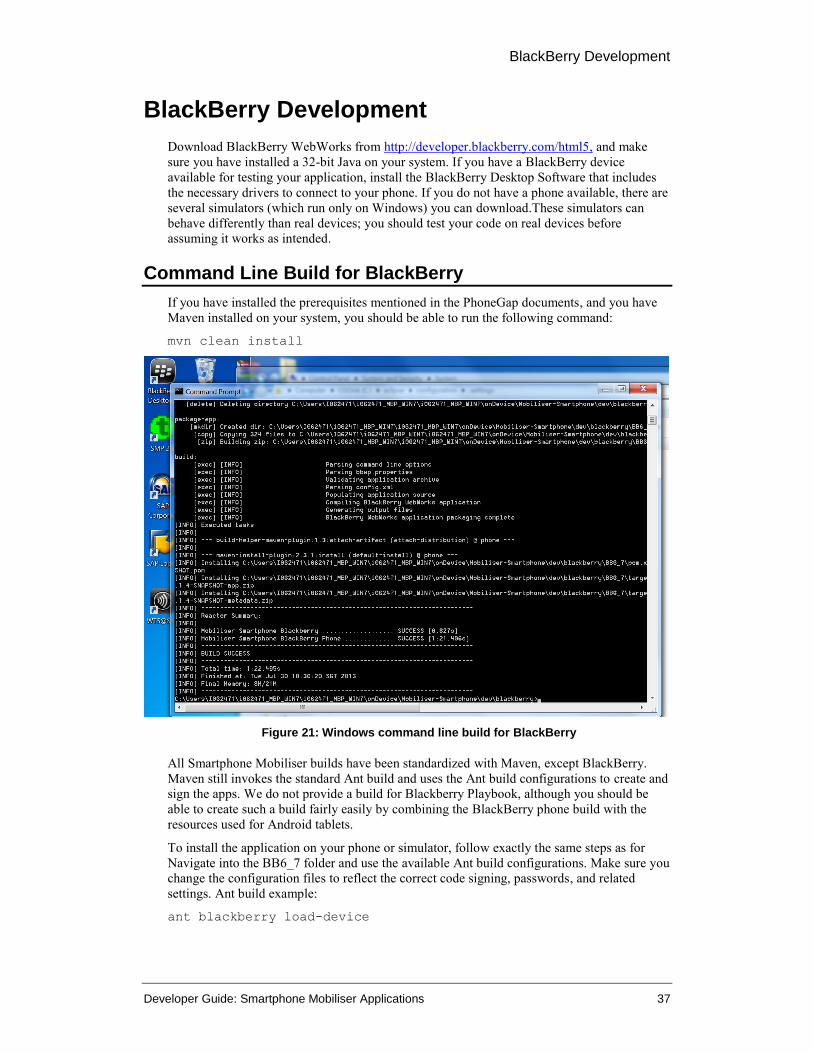
Download BlackBerry WebWorks from http://developer.blackberry.com/html5, and make sure you have installed a 32-bit Java on your system. If you have a BlackBerry device available for testing your application, install the BlackBerry Desktop Software that includes the necessary drivers to connect to your phone. If you do not have a phone available, there are several simulators (which run only on Windows) you can download.These simulators can behave differently than real devices; you should test your code on real devices before assuming it works as intended.
Command Line Build for BlackBerry
If you have installed the prerequisites mentioned in the PhoneGap documents, and you have Maven installed on your system, you should be able to run the following command:
mvn clean install
Figure 21: Windows command line build for BlackBerry
All Smartphone Mobiliser builds have been standardized with Maven, except BlackBerry. Maven still invokes the standard Ant build and uses the Ant build configurations to create and sign the apps. We do not provide a build for Blackberry Playbook, although you should be able to create such a build fairly easily by combining the BlackBerry phone build with the resources used for Android tablets.
To install the application on your phone or simulator, follow exactly the same steps as for Navigate into the BB6_7 folder and use the available Ant build configurations. Make sure you change the configuration files to reflect the correct code signing, passwords, and related settings. Ant build example:
ant blackberry load-device

BlackBerry Development
38 Developer Guide: Smartphone Mobiliser Applications
Building the BlackBerry Application with Eclipse
The steps for installing the Maven plug-ins are the same as for Android. Import the BlackBerry project as an existing Maven project by opening the “blackberry” folder and the “www” folder as separate Maven projects.
Figure 22: Building the BlackBerry application in Eclipse

Customizing a Smartphone Application
Developer Guide: Smartphone Mobiliser Applications 39
Customizing a Smartphone Application
Custom Look and Feel
The most basic change any developer needs to do is to rebrand the application with the enterprise-specific colors and logos. The developer then looks at the files in the “Presentation Layer” (see Figure 6) and modifies the CSS and HTML code as needed.
Figure 23 shows the app.css file CSS code that defines the look and feel of the widgets in the application:
Figure 23. Part of the app.css file
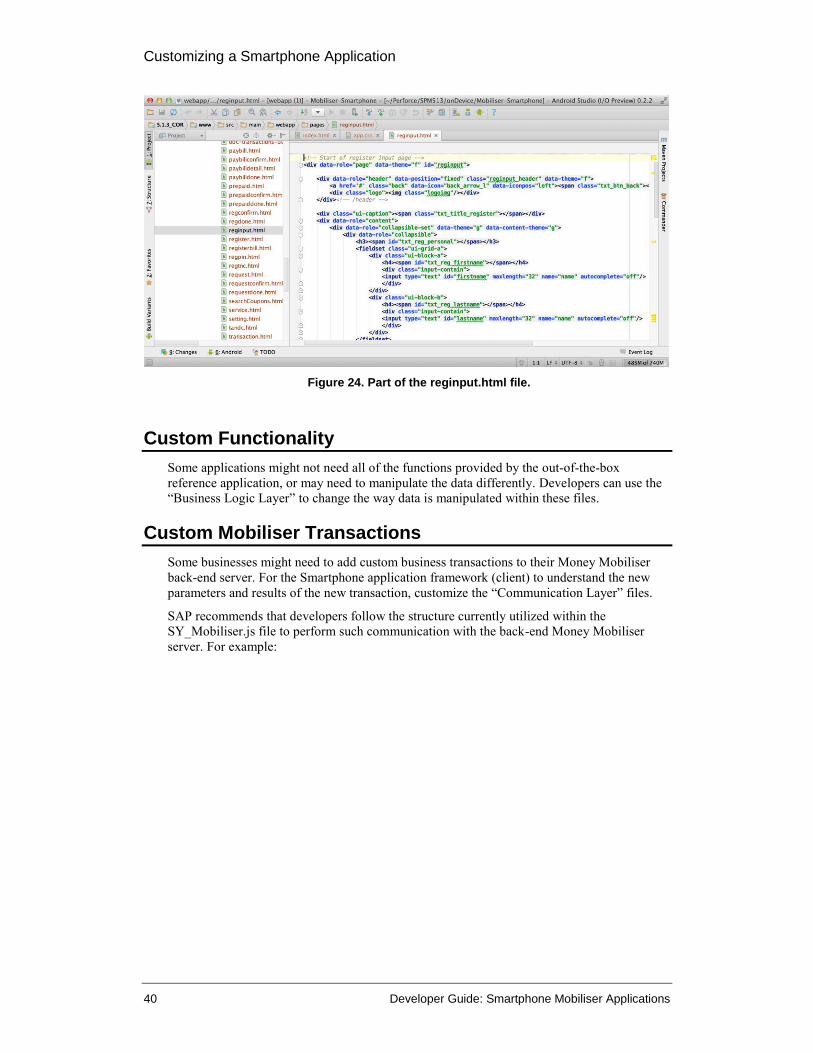
Figure 24 shows the register input page in reginput.html. A developer can change the structure of the application by changing the HTML code. Changing images also is done through the HTML and CSS files. Earlier implementations used a single HTML file that contained all the page definitions (a Single Page App); the current version dynamically loads individual pages and scripts as needed via Ajax calls. This reduces the runtime memory required for the application and improves the performance for most low- and mid-end smartphones. However, this implementation does affect the performance of Mobile Web, as it introduces additional latency. You can avoid the latency by using offline caching mechanisms.
Customizing a Smartphone Application
40 Developer Guide: Smartphone Mobiliser Applications
Figure 24. Part of the reginput.html file.
Custom Functionality
Some applications might not need all of the functions provided by the out-of-the-box reference application, or may need to manipulate the data differently. Developers can use the “Business Logic Layer” to change the way data is manipulated within these files.
Custom Mobiliser Transactions
Some businesses might need to add custom business transactions to their Money Mobiliser back-end server. For the Smartphone application framework (client) to understand the new parameters and results of the new transaction, customize the “Communication Layer” files.
SAP recommends that developers follow the structure currently utilized within the SY_Mobiliser.js file to perform such communication with the back-end Money Mobiliser server. For example:

Customizing a Smartphone Application
Developer Guide: Smartphone Mobiliser Applications 41
Figure 25. An example functions from the SY_Mobiliser.js file
Different UI Packages
Currently, the framework uses jQueryMobile as its UI package to display the widgets on the pages. There are many other packages that can be used instead, for example, SenchaTouch.
Note: Using a different UI package requires code changes that are outside the scope of this document.

Customizing a Smartphone Application
42 Developer Guide: Smartphone Mobiliser Applications
Deploying the Application to Mobiliser Platform
Developer Guide: Smartphone Mobiliser Applications 43
Deploying the Application to Mobiliser Platform
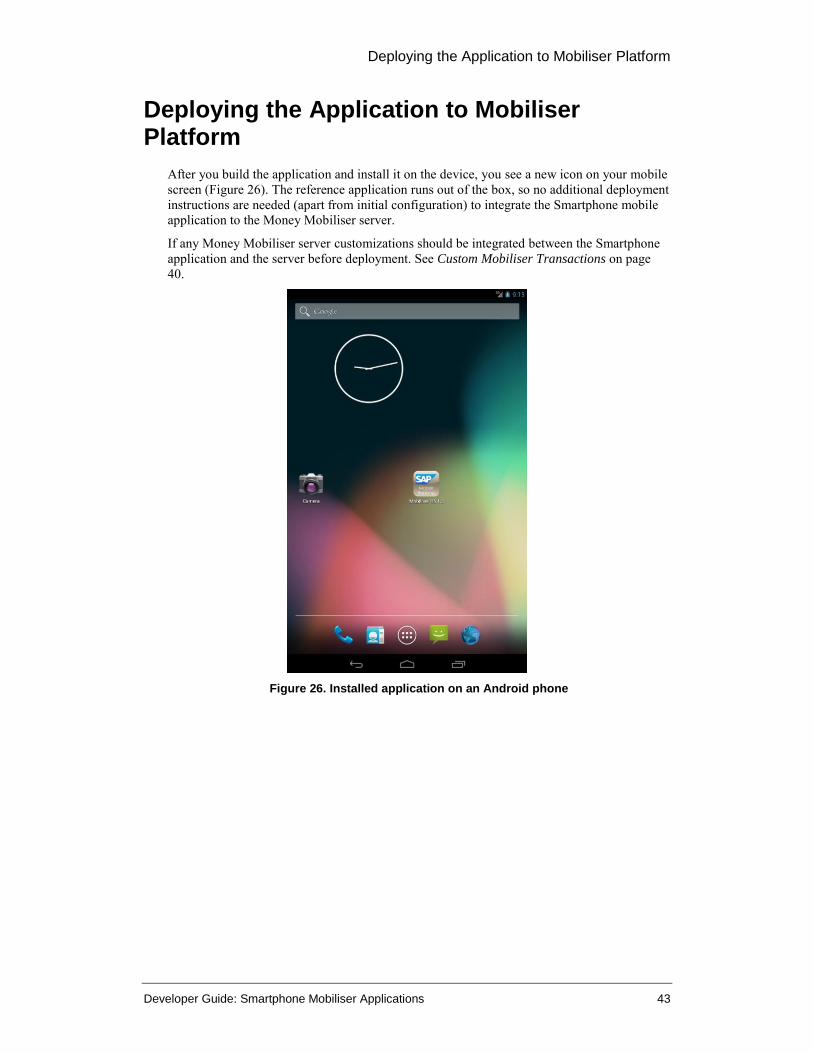
After you build the application and install it on the device, you see a new icon on your mobile screen (Figure 26). The reference application runs out of the box, so no additional deployment instructions are needed (apart from initial configuration) to integrate the Smartphone mobile application to the Money Mobiliser server.
If any Money Mobiliser server customizations should be integrated between the Smartphone application and the server before deployment. See Custom Mobiliser Transactions on page 40.
Figure 26. Installed application on an Android phone

Deploying the Application to Mobiliser Platform
44 Developer Guide: Smartphone Mobiliser Applications

Provisioning the Application to the Device
Developer Guide: Smartphone Mobiliser Applications 45
Provisioning the Application to the Device
Provisioning a finished application is usually done through the official distribution marketplace for each mobile platform:
iPhone, iPad – App Store BlackBerry – BlackBerry App World Android – Android Market, Google Play Store Follow the instructions and policies for each of these distribution channels to provision your application.
For Android and BlackBerry applications, you can host and distribute the built package through proprietary means, but instructions for doing so are outside the scope of this document.
Provisioning the Application to the Device
46 Developer Guide: Smartphone Mobiliser Applications

Debugging
Developer Guide: Smartphone Mobiliser Applications 47
Debugging
These are the essential tools for debugging:
Standard browsers, such as Google Chrome, FireFox, or Internet Explorer – most of the code is in HTML/CSS/JS. You can also use the browser’s debugging module; for example, FireBug on FireFox.
A TCP monitor – trace the messages that are transmitted between devices and browsers. Newer tools that you can use to debug Web applications directly on the mobile device
(for example, WEINRE). However, detailed discussion about these toolsis outside the scope of this document.

Debugging
48 Developer Guide: Smartphone Mobiliser Applications

Testing
Developer Guide: Smartphone Mobiliser Applications 49
Testing
In addition to internal code testing, it is also important that you set up a staging system that resembles the production environment, and perform end-to-end system testing that includes any third-party integration, and the Money Mobiliser backend.

Testing
50 Developer Guide: Smartphone Mobiliser Applications

Localizing
Developer Guide: Smartphone Mobiliser Applications 51
Localizing
Use the Smartphone Mobiliser application to localize your apps, which means changing the language of the presentation layer. Smartphone Mobliser uses the jQuery module for localization, which stores the different text for each language in a “language” folder. Each file that starts with “strings_” holds the texts for all fields in a particular language, which is determined by the two-letter language code that finishes the file name. For example, the strings_en.js file holds English text; strings_cn.js holds Chinese (Mandarin) texts.
Figure 27. Example file for Mandarin Chinese

Localizing
52 Developer Guide: Smartphone Mobiliser Applications

Securing the Application
Developer Guide: Smartphone Mobiliser Applications 53
Securing the Application
The Smartphone Mobiliser reference application does not store any data on the mobile device. All data is removed from the mobile phone’s memory as soon as the user finishes using the application. The application resides inside a browser container, which manages security using SSL.
To prevent any sniffing of credit card numbers or bank account numbers during registration, such information is encrypted on the client before it is sent to the server over an SSL connection. The public key used for the encryption is requested from the server first, before the client encrypts the data. After registration and secure storage on the server side, you cannot retrieve this information in clear text on the client. It is always returned from the server as masked data (for example, xxxxxxxxxxx4132).
In addition to encryption, we have also added more information in the data that is sent to the server via web service calls. We added a unique application id that can be used on the server as input for audit data. To avoid privacy concerns and regulations, this unique id is not related to a specific device. It is generated and stored locally on the device during the launch of the application when there is no locally stored identification found.
See the Money Mobiliser Server documentation for additional information about how the back-end system handles and securely stores sensitive data.
Securing the Application
54 Developer Guide: Smartphone Mobiliser Applications

Authentication/Registration
Developer Guide: Smartphone Mobiliser Applications 55
Authentication/Registration
Registration
A user can register an account from within the Smartphone application on the device after deployment. Click the Register button on the menu at the bottom of the application, then click Continue:
Figure 28. Personal information page
Click Authentication to set a password, then click Continue. Follow the onscreen instructions to finish the registration process. Depending on your back-end configuration, you are either sent a passcode via SMS, or you can obtain it from the Channel Manager’s console output. Enter the passcode on the registration screen and click Confirm.
Authentication
Once your registration has succeeded, proceed to the login page and enter your credentials to start using your Smartphone Mobiliser application.
Note: In the mBanking implementation for the Smartphone Mobiliser application, users must have a service level that enables them to log in to the application (for example, Platinum service). This can be added by the administrator/agent who is using the Customer Support Tool (or a developer who is playing this role).

Authentication/Registration
56 Developer Guide: Smartphone Mobiliser Applications

Running the Application on the Device
Developer Guide: Smartphone Mobiliser Applications 57
Running the Application on the Device
Setting the Server Information
The only setup required to run the application after it is installed on the device is possibly adding server information. Finished applications (or those that are nearly finished) should be provisioned with the server setup provided within the application, allowing the user to skip this step.
At the login page, select Services, the select Settings, push the Mobiliser Settings button and set the required information as needed, based on what your administrator sets for you.
Note: The Mobiliser Settings button in intended only for development purposes, and is not available on the hosted Mobile Web application.
Running the Application on the Device
58 Developer Guide: Smartphone Mobiliser Applications
Integrating Google Maps
Developer Guide: Smartphone Mobiliser Applications 59
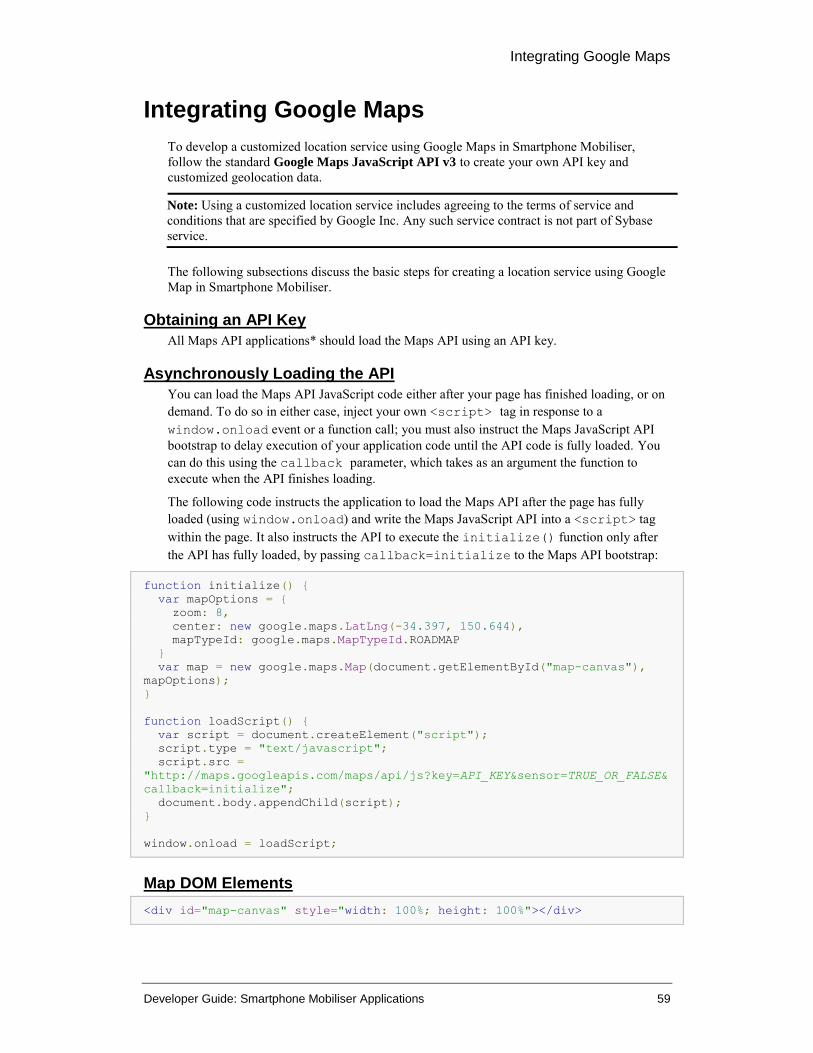
Integrating Google Maps
To develop a customized location service using Google Maps in Smartphone Mobiliser, follow the standard Google Maps JavaScript API v3 to create your own API key and customized geolocation data.
Note: Using a customized location service includes agreeing to the terms of service and conditions that are specified by Google Inc. Any such service contract is not part of Sybase service.
The following subsections discuss the basic steps for creating a location service using Google Map in Smartphone Mobiliser.
Obtaining an API Key
All Maps API applications* should load the Maps API using an API key.
Asynchronously Loading the API
You can load the Maps API JavaScript code either after your page has finished loading, or on demand. To do so in either case, inject your own <script> tag in response to a window.onload event or a function call; you must also instruct the Maps JavaScript API bootstrap to delay execution of your application code until the API code is fully loaded. You can do this using the callback parameter, which takes as an argument the function to execute when the API finishes loading.
The following code instructs the application to load the Maps API after the page has fully loaded (using window.onload) and write the Maps JavaScript API into a <script> tag within the page. It also instructs the API to execute the initialize() function only after the API has fully loaded, by passing callback=initialize to the Maps API bootstrap:
function initialize() {
var mapOptions = {
zoom: 8,
center: new google.maps.LatLng(-34.397, 150.644),
mapTypeId: google.maps.MapTypeId.ROADMAP
}
var map = new google.maps.Map(document.getElementById("map-canvas"),
mapOptions);
}
function loadScript() {
var script = document.createElement("script");
script.type = "text/javascript";
script.src =
"http://maps.googleapis.com/maps/api/js?key=API_KEY&sensor=TRUE_OR_FALSE&
callback=initialize";
document.body.appendChild(script);
}
window.onload = loadScript;
Map DOM Elements
<div id="map-canvas" style="width: 100%; height: 100%"></div>

Integrating Google Maps
60 Developer Guide: Smartphone Mobiliser Applications
Adding Overlays
Overlays are often added to the map upon their construction; all overlays define an Options object for use in construction that allows you to designate the map on which they should appear. You can also add an overlay to the map directly by using the overlay's setMap() method, passing it the map on which to add the overlay.
var myLatlng = new google.maps.LatLng(-25.363882,131.044922);
var mapOptions = {
zoom: 4,
center: myLatlng,
mapTypeId: google.maps.MapTypeId.ROADMAP,
}
var map = new google.maps.Map(document.getElementById("map-canvas"),
mapOptions);
var marker = new google.maps.Marker({
position: myLatlng,
title:"Hello World!"
});
// To add the marker to the map, call setMap();
marker.setMap(map);
See https://developers.google.com/maps/documentation/javascript/tutorial.

Integrating Facebook Single Sign-on
Developer Guide: Smartphone Mobiliser Applications 61
Integrating Facebook Single Sign-on
To develop a customized Facebook single sign-on in Smartphone Mobiliser, developers need only register their own applications in the Facebook developer center, then apply the corresponding settings into Smartphone Mobiliser.
Register App and Obtain Application ID
(Developers) Go to https://developers.facebook.com/apps and create a new Facebook app to register your Smartphone application. An application ID is assigned to each application, which you must apply in the corresponding place in the source code (in the ext.js file) of Smartphone Mobiliser.
After registration, configure the setting of each platform into which the Facebook single sign-on integrates. Currently, Smartphone Mobiliser supports Mobile Web, Android, and iOS. Device users must select the corresponding configuration field of the platform into which they want to integrate the Facebook single sign-on.
The following subsections discuss platform-specific configurations.
Mobile Web
Specify your own mobile site URL, which Facebook directs to after sign-on is complete.
Example:
Android
To set up a Facebook single sign-on for an Android application, configure the package name and class name, and input the key hashes of your application to associate with Facebook.
To generate a key hash on your build machine computer, run Java's keytool utility against the Android debug keystore (which is, by default, located in your “android” directory).
On OS X, run:
keytool -exportcert -alias androiddebugkey -keystore
~/.android/debug.keystore | openssl sha1 -binary | openssl base64
On Windows, use:
keytool -exportcert -alias androiddebugkey -keystore
%HOMEPATH%\.android\debug.keystore | openssl sha1 -binary | openssl
base64
When you are prompted for a password, enter “android” (without quotes). You are then given a key hash that is made up of approximately 30 characters. If you are not prompted for a password, verify your paths to ensure the debug.keystore file is present.

Integrating Facebook Single Sign-on
62 Developer Guide: Smartphone Mobiliser Applications
If you have a release key, add its hash in the same way. To obtain the release key hash, use the keytool utility in the same way as above, except for the alias and path.
On OS X, run:
keytool -exportcert -alias <RELEASE_KEY_ALIAS> -keystore
<RELEASE_KEY_PATH> | openssl sha1 -binary | openssl base64
On Windows, use:
keytool -exportcert -alias <RELEASE_KEY_ALIAS> -keystore
<RELEASE_KEY_PATH> | openssl sha1 -binary | openssl base64
Make sure to use the password that you set when you first created the release key.
Example:
iOS
Fill in the Bundle ID from your Xcode project configuration, and enable Facebook login. If the application is to be deployed to the App Store, also enter the App Store ID.
Example:
For more details, see https://developers.facebook.com/.

Automated Testing
Developer Guide: Smartphone Mobiliser Applications 63
Automated Testing
The recommended approach for testing the mobile application is to use a combination of manual and automated tests. Because a large part of the application is written in HTML5 (JavaScript), and because the code for installable applications and Mobile Web is largely common, you can leverage solutions that are available for testing Web applications.
To test Mobile Web, you can use an automated test structure that is based on Selenium Webdriver and JUnit.
The following steps, which assume that Mac OS X and the Chrome browser are installed), allow you to test the Smartphone Mobiliser Web application:
1. Download the latest chromedriver2 package from http://code.google.com/p/chromedriver/downloads/list.
2. Unpack and run chromedriver from the command line. 3. Edit the dev/www/pom.xml file to activate (that is, uncomment) the lines that are
related to integration tests. Search for: “<!-- remove the comment to run functional integration
test”
4. Save the file. 5. Open another shell and navigate to the folder “/mBanking/www” in your workspace. 6. Run:
mvn -Duser=<user name you've registered> -
Dpassword=<password you've registered> -Dwsurl=http://<ip
of your server>:<web service
port>/mobiliser/rest/smartphone install
This script is written in Java and uses JUnit. The code is in: www/src/test/java/com/sap/mobiliser/smartphone/MobileWebIT.java
You can easily extend this code by adding more test cases.

64 Developer Guide: Smartphone Mobiliser Applications
Known Limitation
Developer Guide: Smartphone Mobiliser Applications 65
Known Limitation
In the current implementation, the end user can add a credit card with card number 0000000000000000 (16 zeros). The credit card number validation algorithm is only a sample, and must be replaced by a proper method, according to customer requirements.