Designing and Creating Your Own T-Shirt Designs T-Shirt Instructions.pdfown t-shirt designs is a way...
6
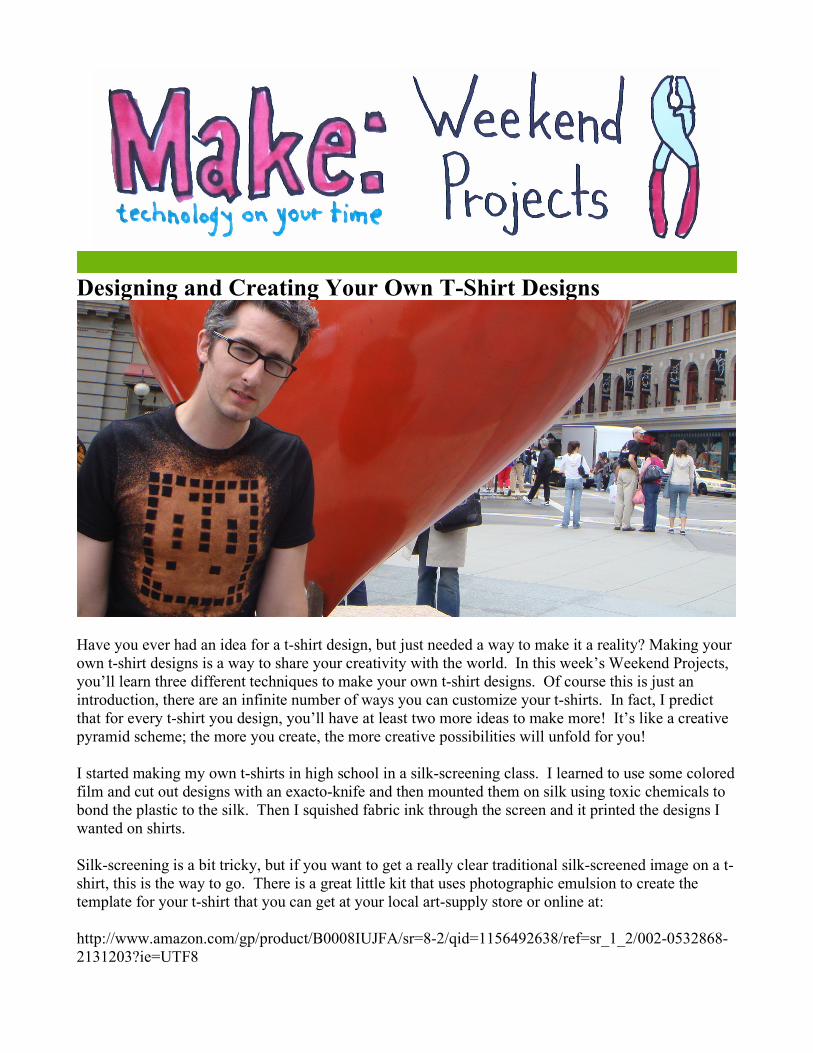
Designing and Creating Your Own T-Shirt Designs Have you ever had an idea for a t-shirt design, but just needed a way to make it a reality? Making your own t-shirt designs is a way to share your creativity with the world. In this week’s Weekend Projects, you’ll learn three different techniques to make your own t-shirt designs. Of course this is just an introduction, there are an infinite number of ways you can customize your t-shirts. In fact, I predict that for every t-shirt you design, you’ll have at least two more ideas to make more! It’s like a creative pyramid scheme; the more you create, the more creative possibilities will unfold for you! I started making my own t-shirts in high school in a silk-screening class. I learned to use some colored film and cut out designs with an exacto-knife and then mounted them on silk using toxic chemicals to bond the plastic to the silk. Then I squished fabric ink through the screen and it printed the designs I wanted on shirts. Silk-screening is a bit tricky, but if you want to get a really clear traditional silk-screened image on a t- shirt, this is the way to go. There is a great little kit that uses photographic emulsion to create the template for your t-shirt that you can get at your local art-supply store or online at: http://www.amazon.com/gp/product/B0008IUJFA/sr=8-2/qid=1156492638/ref=sr_1_2/002-0532868- 2131203?ie=UTF8
Transcript of Designing and Creating Your Own T-Shirt Designs T-Shirt Instructions.pdfown t-shirt designs is a way...
Designing and Creating Your Own T-Shirt Designs
Have you ever had an idea for a t-shirt design, but just needed a way to make it a reality? Making your own t-shirt designs is a way to share your creativity with the world. In this week’s Weekend Projects, you’ll learn three different techniques to make your own t-shirt designs. Of course this is just an introduction, there are an infinite number of ways you can customize your t-shirts. In fact, I predict that for every t-shirt you design, you’ll have at least two more ideas to make more! It’s like a creative pyramid scheme; the more you create, the more creative possibilities will unfold for you! I started making my own t-shirts in high school in a silk-screening class. I learned to use some colored film and cut out designs with an exacto-knife and then mounted them on silk using toxic chemicals to bond the plastic to the silk. Then I squished fabric ink through the screen and it printed the designs I wanted on shirts. Silk-screening is a bit tricky, but if you want to get a really clear traditional silk-screened image on a t-shirt, this is the way to go. There is a great little kit that uses photographic emulsion to create the template for your t-shirt that you can get at your local art-supply store or online at: http://www.amazon.com/gp/product/B0008IUJFA/sr=8-2/qid=1156492638/ref=sr_1_2/002-0532868-2131203?ie=UTF8
I’m going to save photographic emulsion screen-printing for a later installment of Weekend Projects. For this episode, I’ll teach you three DIY strategies to make your own t-shirt designs: Iron-ons, Sewing Machine Drawing, and Designing with Bleach. Once you’ve put it together, make sure to take a photograph of it and upload it to the MAKE flickr pool at http://www.flickr.com/groups/make/pool/ and the craft pool at http://www.flickr.com/groups/craft/pool/ If you haven’t subscribed to the new craft magazine, go kick the tires at http://craftzine.com/
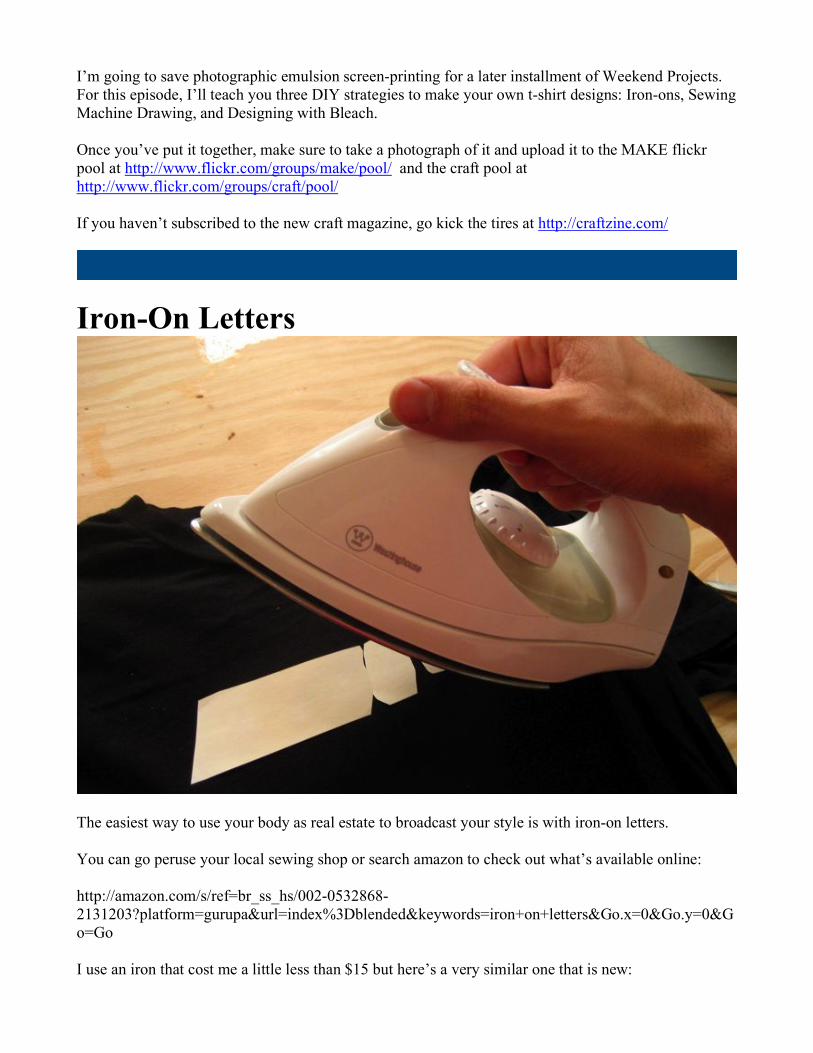
Iron-On Letters
The easiest way to use your body as real estate to broadcast your style is with iron-on letters. You can go peruse your local sewing shop or search amazon to check out what’s available online: http://amazon.com/s/ref=br_ss_hs/002-0532868-2131203?platform=gurupa&url=index%3Dblended&keywords=iron+on+letters&Go.x=0&Go.y=0&Go=Go I use an iron that cost me a little less than $15 but here’s a very similar one that is new:
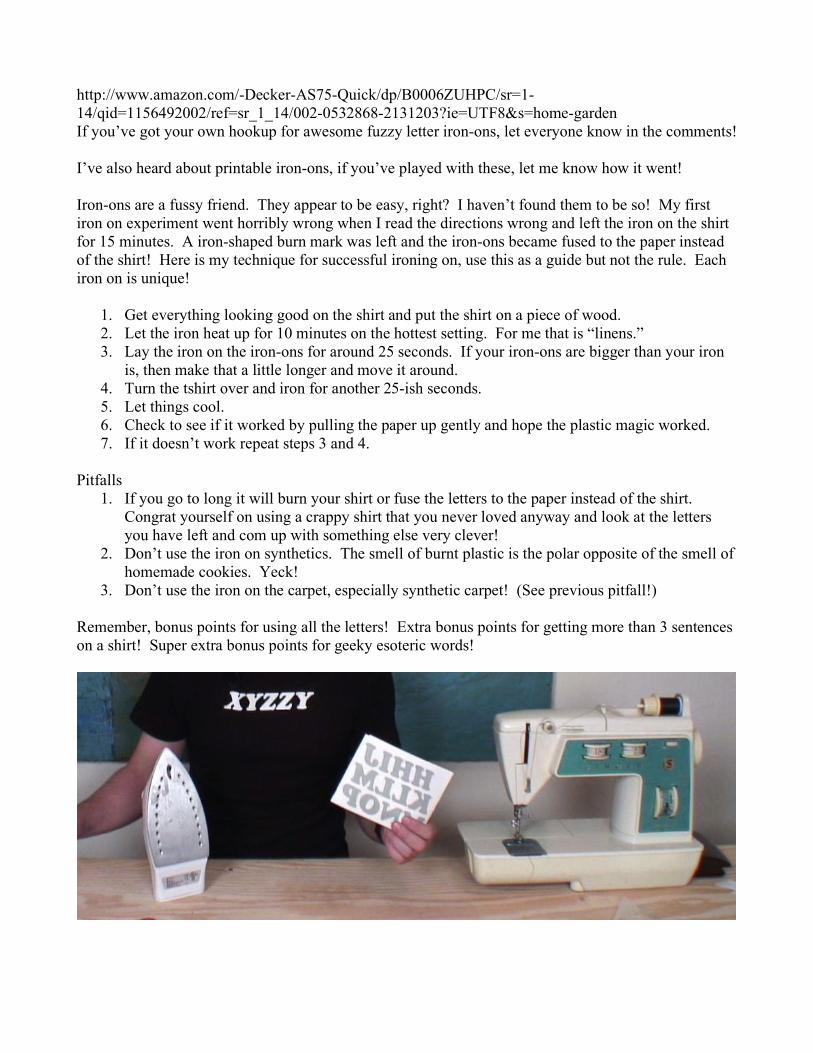
http://www.amazon.com/-Decker-AS75-Quick/dp/B0006ZUHPC/sr=1-14/qid=1156492002/ref=sr_1_14/002-0532868-2131203?ie=UTF8&s=home-garden If you’ve got your own hookup for awesome fuzzy letter iron-ons, let everyone know in the comments! I’ve also heard about printable iron-ons, if you’ve played with these, let me know how it went! Iron-ons are a fussy friend. They appear to be easy, right? I haven’t found them to be so! My first iron on experiment went horribly wrong when I read the directions wrong and left the iron on the shirt for 15 minutes. A iron-shaped burn mark was left and the iron-ons became fused to the paper instead of the shirt! Here is my technique for successful ironing on, use this as a guide but not the rule. Each iron on is unique!
1. Get everything looking good on the shirt and put the shirt on a piece of wood. 2. Let the iron heat up for 10 minutes on the hottest setting. For me that is “linens.” 3. Lay the iron on the iron-ons for around 25 seconds. If your iron-ons are bigger than your iron
is, then make that a little longer and move it around. 4. Turn the tshirt over and iron for another 25-ish seconds. 5. Let things cool. 6. Check to see if it worked by pulling the paper up gently and hope the plastic magic worked. 7. If it doesn’t work repeat steps 3 and 4.
Pitfalls
1. If you go to long it will burn your shirt or fuse the letters to the paper instead of the shirt. Congrat yourself on using a crappy shirt that you never loved anyway and look at the letters you have left and com up with something else very clever!
2. Don’t use the iron on synthetics. The smell of burnt plastic is the polar opposite of the smell of homemade cookies. Yeck!
3. Don’t use the iron on the carpet, especially synthetic carpet! (See previous pitfall!) Remember, bonus points for using all the letters! Extra bonus points for getting more than 3 sentences on a shirt! Super extra bonus points for geeky esoteric words!
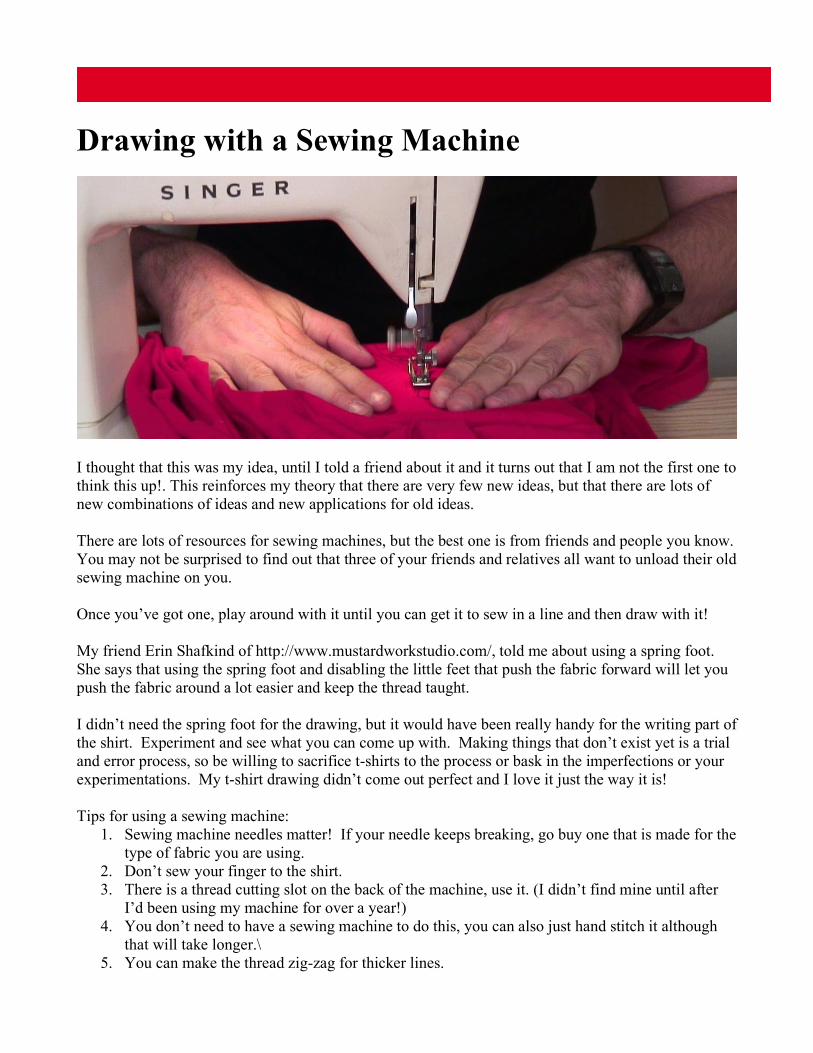
Drawing with a Sewing Machine
I thought that this was my idea, until I told a friend about it and it turns out that I am not the first one to think this up!. This reinforces my theory that there are very few new ideas, but that there are lots of new combinations of ideas and new applications for old ideas. There are lots of resources for sewing machines, but the best one is from friends and people you know. You may not be surprised to find out that three of your friends and relatives all want to unload their old sewing machine on you. Once you’ve got one, play around with it until you can get it to sew in a line and then draw with it! My friend Erin Shafkind of http://www.mustardworkstudio.com/, told me about using a spring foot. She says that using the spring foot and disabling the little feet that push the fabric forward will let you push the fabric around a lot easier and keep the thread taught. I didn’t need the spring foot for the drawing, but it would have been really handy for the writing part of the shirt. Experiment and see what you can come up with. Making things that don’t exist yet is a trial and error process, so be willing to sacrifice t-shirts to the process or bask in the imperfections or your experimentations. My t-shirt drawing didn’t come out perfect and I love it just the way it is! Tips for using a sewing machine:
1. Sewing machine needles matter! If your needle keeps breaking, go buy one that is made for the type of fabric you are using.
2. Don’t sew your finger to the shirt. 3. There is a thread cutting slot on the back of the machine, use it. (I didn’t find mine until after
I’d been using my machine for over a year!) 4. You don’t need to have a sewing machine to do this, you can also just hand stitch it although
that will take longer.\ 5. You can make the thread zig-zag for thicker lines.
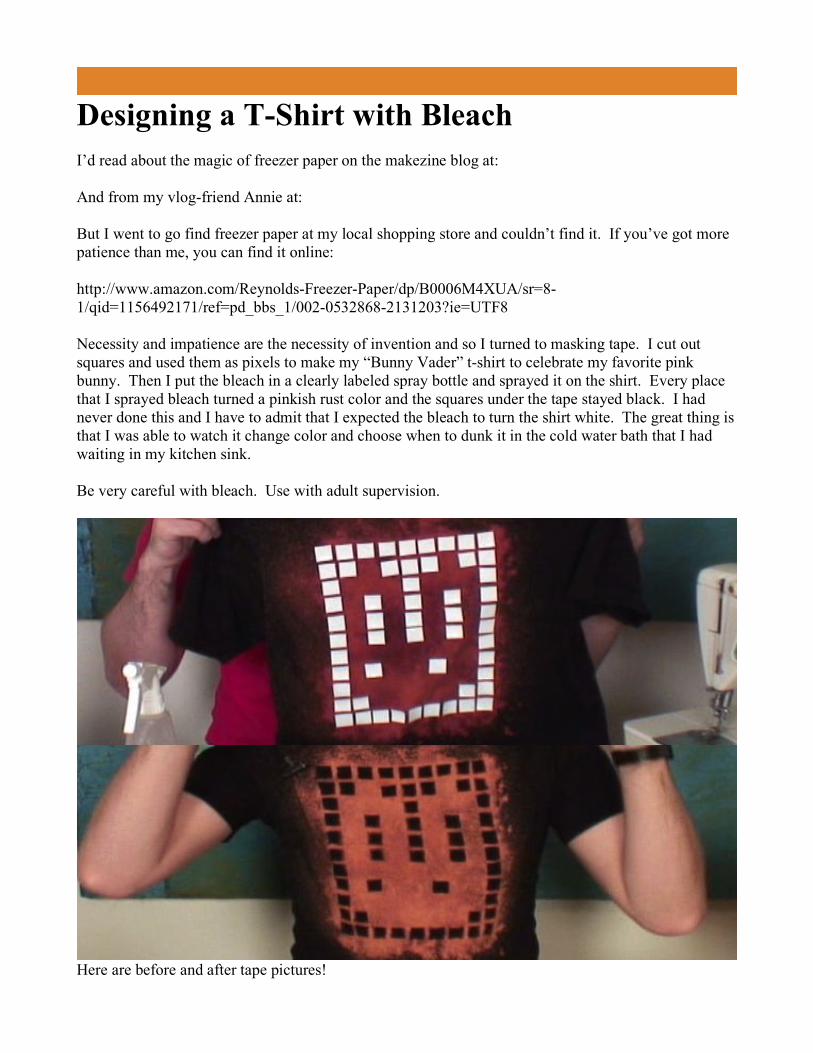
Designing a T-Shirt with Bleach I’d read about the magic of freezer paper on the makezine blog at: And from my vlog-friend Annie at: But I went to go find freezer paper at my local shopping store and couldn’t find it. If you’ve got more patience than me, you can find it online: http://www.amazon.com/Reynolds-Freezer-Paper/dp/B0006M4XUA/sr=8-1/qid=1156492171/ref=pd_bbs_1/002-0532868-2131203?ie=UTF8 Necessity and impatience are the necessity of invention and so I turned to masking tape. I cut out squares and used them as pixels to make my “Bunny Vader” t-shirt to celebrate my favorite pink bunny. Then I put the bleach in a clearly labeled spray bottle and sprayed it on the shirt. Every place that I sprayed bleach turned a pinkish rust color and the squares under the tape stayed black. I had never done this and I have to admit that I expected the bleach to turn the shirt white. The great thing is that I was able to watch it change color and choose when to dunk it in the cold water bath that I had waiting in my kitchen sink. Be very careful with bleach. Use with adult supervision.
Here are before and after tape pictures!
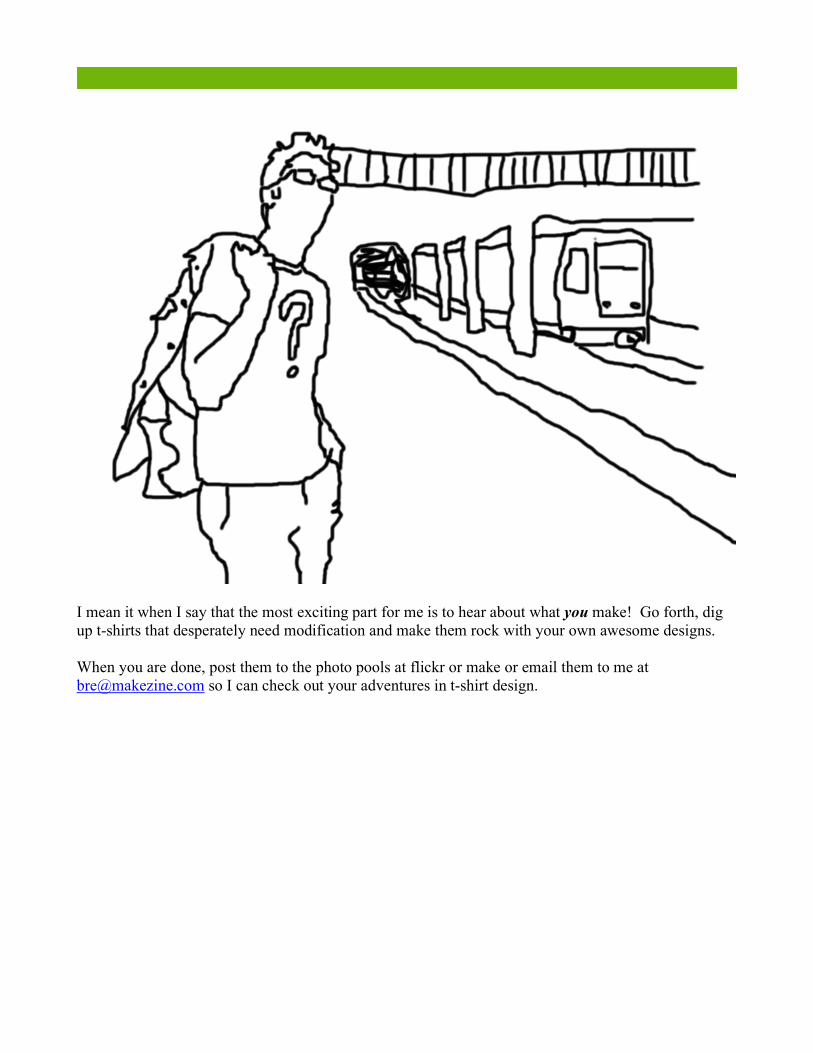
I mean it when I say that the most exciting part for me is to hear about what you make! Go forth, dig up t-shirts that desperately need modification and make them rock with your own awesome designs. When you are done, post them to the photo pools at flickr or make or email them to me at [email protected] so I can check out your adventures in t-shirt design.


![T shirt%20 designs%20pro-forma(1)[1]](https://static.fdocuments.net/doc/165x107/55667afad8b42a0f168b496e/t-shirt20-designs20pro-forma11-5584974a83c1c.jpg)