Design Guide - Irrigation Direct Canada
48
Drip Irrigation Design Guide YOUR PERSONAL www.irrigationdirect.com
Transcript of Design Guide - Irrigation Direct Canada

Drip IrrigationDesign Guide
Y O U R P E R S O N A L
www.irrigationdirect.com

General Overview ...........................................................................................................................2
History & Origin .......................................................................................................................... 2
Advantages & Benefits ........................................................................................................... 2, 3
Anatomy of a Drip System .......................................................................................................... 3
Water Source .......................................................................................................................... 3
Water Distribution ................................................................................................................. 3
Watering Devices .................................................................................................................... 3
Soil Types .................................................................................................................................... 4
Drip Terminology ........................................................................................................................ 5
Overall Considerations ................................................................................................................9
Designing & Planning Your System ............................................................................................. 10
Planning your layout ................................................................................................................ 10
Grouping Plant Types ............................................................................................................... 11
Drip Components Options by Plant Types: ............................................................................... 12
Containers or Flower Pots .................................................................................................... 12
Trees and Shrubs .................................................................................................................. 13
Flower Beds & Ground Cover ............................................................................................... 13
Vegetable Gardens ............................................................................................................... 14
Vineyards .............................................................................................................................. 14
Determining Your Water Source Flow Rate & Pressure ........................................................... 15
Water Connection Options ................................................................................................. 16, 17
Calculating Total Flow & Creating Watering Zones ........................................................... 17, 18
Watering Schedules ........................................................................................................... 18, 19
Design FAQ’s ........................................................................................................................ 19-22
System Materials Checklist .......................................................................................................... 22
Water Source Connection Items .......................................................................................... 23, 24
Drip Tubing, Fittings & Accessories ..................................................................................... 24,25
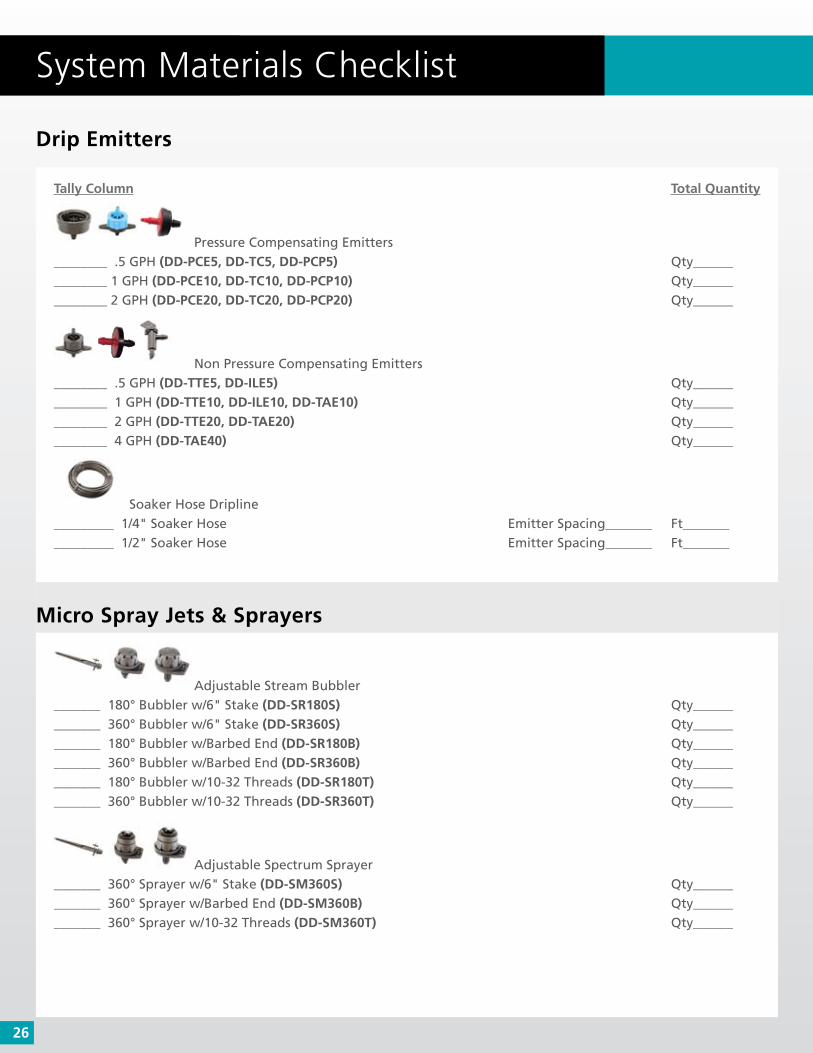
Drip Emitters ............................................................................................................................. 26
Micro Jets & Sprayers ........................................................................................................... 26-28
Table of Contents

Go Online to Order: www.IrrigationDirect.com
Installing Drip Irrigation System ................................................................................................. 28
Connecting to Water Source – All Types ............................................................................ 28, 29
Layout Main & Branch Lines ..................................................................................................... 30
Connecting Hose & Tubing ................................................................................................. 30, 31
Installing Different Water Devices – All Types .................................................................... 31-33
Flushing Out the System ........................................................................................................... 34
End of Lines .............................................................................................................................. 34
Final Preparations ............................................................................................................... 34, 35
System Maintenance & Troubleshooting .................................................................................... 35
Troubleshooting .................................................................................................................. 35,36
System Winterization ............................................................................................................... 36
Spring Start-up ......................................................................................................................... 37
Retrofitting existing sprinklers with drip ................................................................................... 38
Option 1 ............................................................................................................................... 38-40
Option 2 .................................................................................................................................... 41
Option 3 .................................................................................................................................... 42

2
History & Origin of Drip Irrigation
General Overview
Advantages & Benefits of Drip Irrigation
Drip Irrigation, also commonly referred to as micro-irrigation, trickle
irrigation, low volume irrigation or xerigation. This is a method of
irrigation which efficiently delivers water to the soil surface or the
root zone; this is done by having water drip slowly from emission
devices, most commonly called “drip emitters” or “drippers”.
Early forms of drip irrigation can be traced back to ancient times
where clay pots were filled with water and then buried in the
ground, this allowed the water to gradually leak out and into the
root zone of nearby vegetation. The first formal development of
drip irrigation supplies began around 1866 in Afghanistan, where
they tested drip irrigation and drainage systems by using various
types of clay pipe. A researcher at Colorado State University, Mr.
E.B. House, began applying subsurface water directly to the root zone in 1913. Perforated Pipe was first used for
irrigation in Germany around 1920.
After WWII, the ability to mold plastics became widespread and more cost effective. This helped pave the way for
innovations in the manufacturing of drip irrigation system components. At this time, Polyethylene (PE) tubing,
also referred to as “micro tubing” or “spaghetti tubing”, and early versions of emitters (drippers), became more
common and began to be installed throughout the US and Europe.
In Israel, Simcha Blass & Yeshayahu Blass were innovating in the area of emitter design. They created a method
that allowed water to flow through longer and wider passageways inside of the emitter. These “labyrinths” as
they were called, resulted in less clogging. The velocity of water moving through the labyrinth, and resulting
turbulence, helps to slow it down, creating a “drip”. In 1959 Kibbutz Harzerim partnered with Blass to form a
company called Netafim, to further develop and test this concept. Netafim was then able to patent the first drip
irrigation emitter. This development helped the technology of drip irrigation rapidly expand to Australia, North
America, & South America in the late 60’s.
In this time of water and resource conservation, drip irrigation makes sense. It is generally less expensive to install
than conventional subsurface PVC systems and uses much less water.
Water Conservation - Drip irrigation allows you an efficient watering by supplying water where it is needed - at
the very roots of the plants. As a result, water is not wasted on leaves or soil. This significantly reduces the chances
for evaporation and run off. Both are common with traditional irrigation systems where the water is often
supplied at a rate greater than the soil can absorb it.

Go Online to Order: www.IrrigationDirect.com
3
Advantages & Benefits of Drip Irrigation, Continued
Anatomy of a Drip System
Reduce Weed Growth - When water is applied using a conventional sprinkler, everything gets wet. Since drip
irrigation applies water to the root zone of your plants, the spaces in between plants remain dry. This greatly
inhibits weed seed germination. If the soil remains dry, most seeds will not germinate. Landscape maintenance
takes less time with drip irrigation.
Reduce Plant Stress - When plants get deep, consistent watering, they thrive. Inefficient, shallow watering can
contribute to plant stress. Promote healthy growth and disease resistance plants in your garden with drip.
Extremely Flexible Application - You have many options with drip irrigation tubing, fittings, and emitters. It is a
versatile watering system which can easily be installed on hillsides or flat terrains. Drip is the perfect irrigation
method for oddly shaped landscapes and windy areas. Existing sprinkler systems can be retrofit with drip irrigation
with very little effort.
Save Money - Once a drip irrigation system is installed, you will use less water to irrigate. If you are on a well, you
will notice a severe drop in your pumping costs. You will no longer need to hand watering your garden. Automate
you system with an irrigation controller and eliminate the need to pay someone to while are on vacation. With
the reduction of plant disease and unwanted weeds, your gardening labor and maintenance costs will also
drop considerably.
Knowing all the parts and pieces that are needed to make up a drip irrigation system can seem a bit daunting.
But if you look close enough, you will find that all drip irrigation systems break down into 3 main sections.
The first section is the Water Source Connection. This covers all the parts needed to attach your drip system to
your water supply. The parts common to this section are the Hose Timer, Vacuum Breaker, Hose Filter, Pressure
Regulator and Tubing Adapter. The water supply can either be a hose bibb, spigot, faucet connection or irrigation
valve. In general, most water supply connections will come with either ¾" male hose threads or pipe threads.
Next is Water Distribution. This covers all the parts needed to bring your water to the areas that require watering.
The parts common to this section are Solid Poly tubing, Fittings and Stakes.
Last is the Water Devices. This covers all the parts needed to deliver water directly to the plants. The parts
common to this section are Drip Emitters, Micro Jets, Sprayers and Soaker Hose Dripline.

4
General Overview
Drip Terminology
Not all soils are the same and each soil type will absorb water differently.
Different soil types will also have an effect on which type of drip emitters
will work best on your drip system. While all soils contain the same elements,
different types of soils will contain different proportions of these given
elements. Although there many different types of soils, drip irrigation focuses
on the following three soil types: Clay, Sand and Loam.
Clay soils have densely packed particles that have little space for water or air. Water is
absorbed very slowly and run off can occur if water is applied to quickly. When wet, water
tends to move outward, away from the drip emitter. Clay soils will hold water very well
and can stay wet for several days. Choose ½ & 1 GPH drip emitters when planting in clay
soils. Drip emitter spacing tends to be further apart.
Sandy soils are very loose and have plenty of space for water or air. Water is absorbed very
quickly and runoff usually doesn’t occur. When wet, water tends to move straight down
through the soil. Sandy soils do not hold water very well and can dry out very quickly.
Choose 2 & 4 GPH drip emitters when planting in sandy soils. Drip emitter spacing tends to
be closer together.
Loam soils are an ideal in-between mix of clay and sandy soils. Its absorption rate is greater
than that of clay soil but not as fast as sandy soil. When wet, water will move outward and
down more evenly. Loam soils will hold water well and dry out at a medium rate. Choose
1 & 2 GPH drip emitters when planting in loamy soils.
Drip irrigation can seem like it comes with a language all its own. Knowing the specific drip terminology is
important before planning your drip irrigation system.
PSI – Pounds per Square Inch
GPM – Gallons per Minute
GPH – Gallons per Hour
GAL – Gallons
FT – Foot
MHT – Male Hose Threads
FHT – Female Hose Threads
MPT – Male Pipe Threads
FPT – Female Pipe Threads
Soil Types

Go Online to Order: www.IrrigationDirect.com
5
Timers: aka Hose Timer, Irrigation Timer, Water Timer,
Controller, Clock. Timers are used to automate the
watering of a drip irrigation system or sprinkler system.
• HoseEndTimer,IrrigationController
Valves: A manual or electric irrigation device used to
control the flow of water. It is used in conjunction with
an Irrigation Controller
Ball Valves: aka Shut off valves: Hose thread ball
valves are used to shut off individual water lines or to
split an existing water source to make two separate
connections. Connect to 3/4" hose bibb, faucet, spigot,
or garden hose end.
• InlineBallValve,YBallValve
Vacuum Breakers: aka Backflow Preventers:
Prevents water from flowing back from your drip
irrigation system into your household water. This
prevents contamination of your water supply. Most
municipalities require backflow prevention devices at
the beginning of most irrigation systems.
Fertilizer Injector: aka Fert Injector: Fertilizer injectors
are installed on the drip systems mainline to deliver
liquid fertilizers and nutrients. Dilution rate is
adjustable, so you can feed your drip system as needed.
Filters: aka Hose Filters, Drip Filters: Filters are installed
between the hose vacuum breaker and the drip
regulator and protects drip emitters, soaker hose
dripline, sprayers and bubblers from rust, sand and
other impurities that may clog them. Filters have
removable screens for easy cleaning.
• InlineHose,YFilter
Water Source Connection Items, aka Head Assembly

6
Water Source Connection Items, Continued & Water Distribution
General Overview
Pressure Regulators: aka Pressure Reducers: A pressure
regulator reduces household water pressure to a lower
set pressure for use with a drip system. Always install a
regulator after the filter.
Swivel Adapters: aka Tubing Adapters: Use to attach
1/2" or 1/4" mainline drip tubing to a water source
connection assembly, hose bibb, spigot, faucet or the
end of a garden hose. The swivel end screws onto male
hose threads. Drip tubing inserts into the compression,
direct-loc or barbed end.
Drip Zone Kit: Preassembled inline drip valve kit for
drip irrigation systems. Includes valve, Y style filter
and pressure regulator. It’s available in 3/4" or 1"
pipe threads.
Water Distribution
Drip Tubing: aka Poly Tubing, Poly Pipe, Supply Line,
Trunk Line: Common term for Polyethylene pipe.
Flexible, black tubing used for both drip irrigation main
and lateral lines. Emitters can be inserted into tubing
or connected via micro tubing. Common sizes are 1/2"
(aka 5/8") or 3/4" tubing.
Micro Tubing: aka Spaghetti Tubing, Feeder Tubing:
1/4" micro tubing can be used as the main line for small
deck/flower-pot installations, but is more often used as
a lateral supply line off of 1/2" main line tubing. The
micro tubing carries water to emitters (drippers) and
micro sprays. Also referred to as “Distribution Tubing”
it is available in Polyethylene (PE) or the more flexible
Poly Vinyl Chloride (PVC).

Go Online to Order: www.IrrigationDirect.com
7
Water Distribution, Continued
Compression Fittings: Fittings used to connect lengths
of 1/2" and 3/4" solid drip tubing. The drip tubing
is inserted into the compression fitting. The fittings
internal compression ring squeezes the tubing slightly
making a secure water tight seal. Compression fittings
are more of a permanent connection and are not
recommended for reuse. Glue or lubricants are
not required.
Direct-Loc Fittings: aka Spin Loc, Perma Loc, Easy Loc,
Power Loc: Twist barbed fittings onto 1/2" drip poly
tubing, twist lock nut to lock tubing in place and make
a water tight seal. Removable fittings make it easy to
reconfigure your drip system if your needs or landscape
designs change. Best fittings for winterizing your drip
system – unscrew fittings, remove and store tubing
away for winter. No glue or Teflon tape required.
¼" Barbed Connectors: aka Micro Connectors: Used
to make connections between 1/4" micro tubing or to
connect 1/4" micro tubing and 1/4" soaker hose dripline
to 1/2" or 3/4" drip poly tubing. Use with a hole punch
to attach to 1/2" or 3/4" solid tubing. No glue or
lubricants are required.
Stakes: aka Clips, Hold Downs. Plastic or metal stakes
used to hold drip tubing in place. Also available in 1/4"
or 1/2" mounting clips to attach drip tubing to wood
decks, eves, overhangs and fences.

8
Water Devices
General Overview
Emitters: aka Drip Emitters, Drippers: Emitters distribute
water droplets at a specified flow rate when used as
part of a drip irrigation system. Emitters come in a
variety of sizes, styles, and flow rates. They have barbed
or threaded bases. Barbed ends are either poked
directly into 1/2" drip tubing or inserted into the end
of 1/4" tubing. Threaded bases are screwed into micro
tubing stakes and risers.
• Pressure Compensating Emitters: Pressure
compensating emitters deliver a consistent output of
water, even with changes in pressure due to long drip
tubing runs or changes in elevation.
- Button Emitters, Turbo Style Emitters, Self Piercing
Emitters with 1/4" barbed inlets
- Multi Outlet & Retro Fit Emitters with 1/2" FPT inlets
• Non Pressure Compensating Emitters: Non pressure
compensating emitters output will vary with changes
in elevation and pressure. These emitters are best
used where the watering zone is level.
- Flag Emitters, Turbo Key Style Emitters, Inline
Emitters with 1/4" barbed inlets
Sprayers: aka Micro Sprays & Jets: Micro spray covers a
category of spray caps, bases, one-piece, and adjustable
sprayers and bubblers that are small and designed to
operate with drip irrigation systems. They can be used
for ground cover, flower beds, vegetable gardens and
landscapes where you need to water a large area.
• AdjustableSprayers,StreamBubblers,MicroSprays,
Foggers & Misters with barbed and threaded ends

Go Online to Order: www.IrrigationDirect.com
9
Water Devices, Continued & Overall Consideration
Tubing Stakes & Risers: aka Spray Stakes, Rigid Risers:
Stakes and risers are use to create adjustable sprayer
platforms to raise water above plants, shrubs or
ground cover.
Soaker Hose Dripline: aka Drip Emitter Tubing, Dripper
Line, Drip-a-Long: Soaker Hose Dripline has drip
emitters injected into the tubing as it is extruded. The
tubing comes with emitters evenly spaced from 6 to
12 inches for 1/4" size tubing and 12" to 3 feet for
1/2" size tubing. It’s useful in row crops, vegetable
gardens and evenly-spaced tree and shrub plantings. It
is available in both 1/2" and 1/4" tubing sizes. Soaker
hose dripline limits are based on tubing size, emitter
output and spacing.
• 1/4"&1/2"SoakerHoseDripline
Hole Punches: aka Tubing Punch: Tool used to punch a
hole into solid drip poly tubing for the insertion of drip
emitters or 1/4" barbed fittings.
• KeyPunch,DeluxeHolePunch,SuperPunch
Overall Consideration
When planning out a drip irrigation system, it’s
important to take in all the different variables that
come with designing a system. Conditions such as soil
type, sun exposure and slopes can all have an impact
on the parts that you will need to install. It’s also
important to know your water source’s flow rate and
pressure. Know the limitations of each drip component
and any special requirements they may need. Product
details for each part can be found on our website by
clicking on the details tab.
Whether installing a drip system by yourself or
turning it into a family project, a drip system can be
a rewarding endeavor and doing your homework
before hand can help make the installation of your drip
irrigation system painless and hassle free.

10
Planning Your Layout
Designing & Planning Your System
Before you begin your drip irrigation system, it’s best to start by making a sketch of the areas that you want
to water. Be sure to include and label all your plant types, including shrubs, trees, ground cover, flower beds,
vegetable gardens and containers. Identify all the site watering sources, what type they are, and any existing
connections. Add any buildings, walkways, retaining walls or obstacles that you may need to work around.
Draw out each run of drip mainline tubing and any laterals that will be needed to supply water to each planting
area. For plants that are away from the mainline, draw out runs of 1/4" micro tubing to cover each plant.
Working from a good plan will help aid you when making a materials list and is essential in designing an
efficient drip irrigation system.

Go Online to Order: www.IrrigationDirect.com
11
Grouping Plant Types
Plants of similar sizes and growth habits generally have watering requirements that are much the same. Always try
to group watering zones by plant moisture needs and local climate conditions (shade, partial shade, full sun).
Consider the following:
• Plantsthatneedfrequent, shallow watering, like annual flowers and ground cover, should be grouped
separately from those needing less frequent, deep watering, like trees.
• Seasonalplantingslikecrops or vegetable gardens should be kept separate from permanent plantings like
shrubs. Install inexpensive flow control valves to shut off these areas when not in use.
• Createseparatezonesforplants in the shade versus hot, sunny spots.
• Container plants should be watered separately from plants in the ground. They have confined root systems
and may dry out more quickly.

12
Drip Component Options by Plant Types
Designing & Planning Your System
• Containers or Flower Pots: Use pressure compensating drip emitters in small containers with 1/4" micro tubing
or attached to 1/2" solid tubing. Use 1/4" soaker hose dripline, stream bubblers or sprayers in larger pots.

Go Online to Order: www.IrrigationDirect.com
13
Drip Component Options by Plant Types, Continued
• Trees and Shrubs: Use either pressure compensating or non pressure compensating drip emitters with 1/2" drip
tubing or off 1/4" micro tubing attached to 1/2" drip line. Use soaker hose dripline to create drip rings around
medium and large shrubs and small to large trees.
• Flower Beds & Ground Cover: To cover small flower beds and ground cover, use 1/4" soaker hose dripline.
For larger beds and ground covers, use micro sprayers and jets.

14
Drip Components Options by Plant Types, Continued
Designing & Planning Your System
• Vegetable Gardens & Berry Bushes: For small
vegetable gardens and berry bushes, use 1/4" soaker
hose dripline with 6" or 12" drip emitter spacing. For
large vegetable gardens and berry bushes, use 1/2"
soaker hose dripline with 12" to 36" emitter spacing.
For gardens with uneven plant spacing, use 1/4" micro
tubing with inline drip emitters or 1/2" solid drip
tubing with self installed drip emitters.
• Vineyards: Use 1/2" or 3/4" solid
drip tubing attached to trellis. Install
pressure compensating drip emitters
in tubing facing down.
• Slopes: When designing a drip system for slopes,
it’s best to install drip tubing along the parallel of
the slope and install .5 gph drip emitters. Lower
flow emitters along with shorter but more frequent
watering times will help prevent runoff and
soil erosion.

Go Online to Order: www.IrrigationDirect.com
15
Determining Your Water Source Flow Rate & Pressure
The flow rate of your water supply determines how much water you have available for your drip emitters and
micro sprinklers. It is commonly measured in gallons per hour (GPH) or gallons per minute (GPM). The greater the
rate of flow of water, the more drip emitters you can install on a single watering zone and the more zones you
can run from a single irrigation valve.
Water pressure is the force pushing the flow of water through your system and is measured in pound per square
inch (psi). If your water pressure is too low, drip emitters and sprayers won’t work properly. Too high a pressure
and drip tubing and fittings can blow apart. A standard drip systems optimal operating pressure is between 20
to 30 psi. The higher the pressure, the greater the need for a pressure regulator in your drip system.
To determine the flow rate out of your faucet, follow these five steps:
1. Turn off any running water sources in the house (Washer, Dishwasher….ect)
2. Place a 5-gallon bucket under the faucet.
3. Quickly turn on the faucet so that it is fully open.
4. Record how many seconds it takes to fill the 5-gallon bucket (gallons per second).
5. Calculate your flow rate to determine Gallons per Hour:
(5 gallons ÷ X seconds) X 60 seconds/minute X 60 minutes/hour = Gallons per Hour (GPH)
Example: If it takes 75 seconds to fill our 5-gallon bucket. The formula is:
(5 gallons ÷ 75 seconds) X 60 seconds/minute X 60 minutes/hour = 240 GPH
Now you know the limit of emitter output for your system. In the example above, you can place a total of 240
1-gph or 480 1/2-gph drip emitters on your system. Note: This is only one factor in designing your system. You
also need to consider water pressure and maximum run for mainline tubing.
Although your water source may flow more the 240 GPH, it’s important to understand that the size of the drip
tubing will limit how much water can pass through.
QUICK TIP: The maximum recommended flow rate for 1/2" drip poly tubing is 240 GPH (4 GPM).
QUICK TIP: The maximum recommended flow rate for 3/4" drip poly tubing is 540 GPH (9 GPM).

16
Determining Your Water Source Flow Rate & Pressure, Continued
Designing & Planning Your System
To determine the water pressure at your faucet, follow these four steps:
1. Purchase an inexpensive water pressure gauge at your local hardware store (Around $10).
2. Screw the pressure gauge onto your hose bibb.
3. Turn on the hose bibb and read the psi (pounds per square inch) off of the gauge.
4. Test the pressure at each water source you will connect too.
Drip systems operate best between 20-30 psi. Most household water systems operate at 50-70 psi. Install a pressure
regulator to reduce the pressure if you measure above 40 psi.
If this is the case, we recommend hiring a plumber to reduce the pressure of your household water system.
In general, most of the water source connections in drip irrigation fall into two main categories; Hose Bibb
and Irrigation Valves. While irrigation valves are more specific, hose bibbs tend to cover a much wider range
of connections.
Known as a spigot, faucet or hydrant, hose bibbs offer the most convenient water source connection available
for your drip system. Standard hose bibb connections come with 3/4" male hose threads and use hose washers to
make water tight seals. If your water source connection has pipe threads, Irrigation Direct sells adapter fittings to
convert either 1/2" or 3/4" male and female pipe threads to 3/4" male hose threads.
QUICK TIP: If your household water pressure is at 90 psi or greater, it may compromise the operation of your
drip regulator.
Water Connections Options

Go Online to Order: www.IrrigationDirect.com
17
Water Connections Options, Continued
For larger drip systems with multiple zones, irrigation valves and controllers are typical installed. This usually
involves more work in setting up and installing. Valves typically use pipe threads for connections and require
Teflon tape to make water tight seals. It also may require you to cut into your existing household water main to
supply the valves. If you are unsure about how or where to install irrigation valves, it may be best to contact an
irrigation professional to help with installation.
When planning your drip system, it’s important not to exceed your drip zones water source capacity. To determine
a flow zones capacity, add up the total number of drip emitters and their flows. This same method applies for
micro sprays and jets.
Example: Your drip irrigation plan calls for using a total of 80 drip emitters and 40 ft of soaker hose dripline.
The emitters consist of 25 – 2 GPH, 15 – 1 GPH, 40 - 1/2 GPH drip emitters and 40 ft of soaker hose dripline with
6" spacing with 1/2 GPH emitters. The plan also includes using 4 micro sprayers for ground cover at 10 GPH each.
To calculate the overall flow rate:
25 – 2 GPH Emitters (25 x 2) = 50 Gallons per hour
15 – 1 GPH Emitters (15 x 1) = 15 Gallons per hour
40 – 1/2 GPH Emitters (40 x .5) = 20 Gallons per hour
40 Ft soaker hose drip line (40 / .5) x .5) = 40 Galling per hour
4 – 10 GPH Micro Sprayers (4 x 10) = 40 Gallons per hour
Total flow rate = 165 GPH or 2.75 GPM. If the max capacity of 1/2" drip tubing is 240 GPH,
you will have a flow reserve of 75 GPH or 1.25 GPM.
Calculating Total Flow & Creating Watering Zones

18
Calculating Total Flow & Creating Watering Zones, Continued
Designing & Planning Your System
If your drip systems flow demand exceeds its water source capacity, you will need to create a new water zone.
Installing a hose splitter will give you extra water source connections for additional drip zones.
When determining your water schedule, it’s important to understand that there are several factors that need to
be taken into account. Plants with deep root zones require longer watering than those with shallow root zones.
Conditions such as temperature, wind, humidity, sun exposure and soil type will all have an effect on how much
water can be applied at one time.
The follow watering times and intervals are meant to be guidelines to help you with setting up a watering
schedule. When starting, it’s best to water for 2 or 3 irrigation cycles. Check for moisture around drip emitters
and root zones. Be sure the soil is neither too wet nor too dry and the plants look healthy. Make gradual changes
to your schedule to adjust for your drip systems conditions. As the seasons change, increase or decrease your
watering schedule accordingly.
QUICK TIP: When planning a drip zone, be sure to leave enough flow for future system expansions or when
plants mature and require more water.
QUICK TIP: Install flow control valves on both 1/2" & 1/4" drip tubing to isolate and control water to various
sections of your drip system.
Watering Schedules

Go Online to Order: www.IrrigationDirect.com
19
Watering Schedules, Continued
Design FAQs
Drip Emitters & Soaker Hose Dripline:
Type of Plants Watering Time Hot Climate Warm Climate Cool Climate
Flowers 30 Mins to 1 Hr Every 1-2 Days Every 3 Days Every 3-4 Days
Small Trees & Shrubs 1 to 2 Hrs Every 1-2 Days Every 2-3 Days Every 3-4 Days
Medium Trees & Shrubs 4 to 6 Hrs Every 2-3 Days Every 3-4 Days Every 4-5 Days
Large Trees & Shrubs 6 to 8 Hrs Every 2-3 Days Every 3-4 Days Every 4-5 Days
Vegetables 30 Mins to 1 Hr Every 1-2 Days Every 3 Days Every 3-4 Days
Vines 3 to 6 Hrs Every 1-2 Days Every 3 Days Every 3-4 Days
Containers 10 to 30 Mins Every 1-2 Days Every 2 Days Every 3 Days
Example: In late spring time, a row of small trees would need to be watered for 1 to 2 hours with a scheduled
interval of every 2nd or 3rd day.
Micro Sprays and Jets:
Type of Plants Watering Time Hot Climate Warm Climate Cool Climate
Flower Beds & Ground Cover 30 Mins to 1 Hr Every 1-2 Days Every 3 Days Every 4-6 Days
Small Trees & Shrubs 1 to 2 Hrs Every 1-2 Days Every 4-5 Days Every 5-6 Days
Medium Trees & Shrubs 2 to 3 Hrs Every 2-3 Days Every 4-5 Days Every 6-7 Days
Large Trees & Shrubs 2 to 5 Hrs Every 2-3 Days Every 4-5 Days Every 5-7 Days
Greenhouses 5 to 15 Mins 2-4 times/day 2 times/day 1-2 times/day
Example: In the middle of summer, a flower bed & ground cover would need to be watered for 30 to 60 minutes
with a scheduled interval of every day or 2nd day.
Q. Where do I start? The best advice when planning a drip system is to start small. Designing and installing a small
drip system will give you valuable experience if and when you decide to expand. Start with containers, pots or a
small garden. Irrigation Direct offers several drip irrigation starter kits to help you get started.
Q. What is my water source’s flow rate? Flow rates will vary from location to location. Saying that you have
enough flow might work for a small drip system, but may cause problems when designing a large system.
Follow the instructions in the design section to determine your water sources flow rate.
Q. Do I need to install a filter? Designed to filter out rust, sand or debris, installing a drip filter is necessary to
protect your emitters from clogging over time. Even if your drip system is connected to your household water
source, installing a filter is a low cost solution to protect your investment.

20
Design FAQs, Continued
Designing & Planning Your System
Q. Do I need a pressure regulator? Most household pressure is around 50 to 70 psi. Drip irrigation systems
operate in the 20 to 30 psi. Excessive pressure can cause fittings and emitters to blow off the tubing. Follow the
instructions in the design section to determine your water sources pressure.
Q. Which pressure regulator do I need? Most drip systems will work with a 20 psi regulator. Large drip systems
with elevation changes or systems with hanging baskets do better with a 30 psi regulator.
Q. How far can I run my 1/2" drip tubing? This is the main feeder line for your drip irrigation system. It is used to
create manifolds and branch lines. The maximum distance that you can run drip tubing will vary with the number
of emitters you install and the spacing between emitters, but here are two conservative guidelines:
Maximum Run per circuit (Zone): 200 ft
Maximum Flow Capacity: 240 gph
Our Drip Tubing Maximum Run Chart will help you compare different scenarios. The maximum run will increase if
you use low-output emitters (1/2 gallon-per-hour). Increasing pressure regulator size from a 20 psi regulator to a
30 psi regulator will also extend the distance that you can run drip mainline.
.600" ID x .700" OD TubIng MaxIMuM LengTh Run ChaRT
PCe PRessuRe COMPensaTIOn eMITTeRs nOn PRessuRe COMPensaTIOn eMITTeRs
0.5 gPh 1.0 gPh 2.0 gPh 0.5 gPh 1.0 gPh 2.0 gPh
20 P.s.I. 30 P.s.I. 20 P.s.I. 30 P.s.I. 20 P.s.I. 30 P.s.I. 20 P.s.I. 20 P.s.I. 20 P.s.I.
12" sPaCIng (100 eMITTeRs PeR 100')
MaxIMuM Run In FeeT 360 465 225 245 165 200
gPh RequIReD 180 233 225 245 330 400
18" sPaCIng (66 eMITTeRs PeR 100')
MaxIMuM Run In FeeT 440 590 280 375 200 265 300 210 135
gPh RequIReD 147 197 187 250 267 353 100 140 180
24" sPaCIng (50 eMITTeRs PeR 100')
MaxIMuM Run In FeeT 535 710 340 450 240 320 360 250 160
gPh RequIReD 134 178 170 225 240 320 90 125 160
36" sPaCIng (33 eMITTeRs PeR 100')
MaxIMuM Run In FeeT 680 900 440 580 305 405 470 325 210
gPh RequIReD 113 150 147 193 203 270 78 108 140
48" sPaCIng (25 eMITTeRs PeR 100')
MaxIMuM Run In FeeT 820 1090 530 690 370 590 560 400 250
gPh RequIReD 103 136 133 173 185 245 70 100 125
60" sPaCIng (20 eMITTeRs PeR 100')
MaxIMuM Run In FeeT 970 1290 620 820 435 575 650 460 290
gPh RequIReD 97 129 124 164 174 230 65 92 116
Note: If your water source is from a Hose Bibb (Water Faucet, Spigot or Hydrant) you are limited to 240 GPH.

Go Online to Order: www.IrrigationDirect.com
21
Design FAQs, Continued
Q. How many drip emitters can I install? You can add as many drip emitters as your flow rate will support. A
typical hose bibb delivers 240 gallons per hour. So you have 240 gallons available for your emitters to “consume”.
Simply add up the total number of gallons to be consumed by the emitters that you plan to add. You can put 240
1 gallon-per-hour emitters on the line (or 480 1/2 gallon-per-hour emitters or 120 2 gallon-per-hour emitters).
Keep in mind that if you’re adding adjustable emitters and micro sprays, the output can be in excess of 30 gallons
per hour for each emitter or sprayer. It doesn’t take many sprays to use up those 240 gallons.
Q. How far can I run my 1/4" micro tubing? Due to its smaller size, any single run of micro tubing must not exceed
to 50 feet.
Q. Can I bury my drip tubing? It is not recommended to bury drip tubing. Drip tubing can become compressed
over time causing reduced water flow to your system. If you need to bury your drip tubing, it’s best to sleeve it in
solid PVC pipe.
Q. Can I expand my system? Expanding your drip system will depend on the reserve of water left over from your
initial installation. Make sure you know your water source flow rate and the total flow that your current drip
system is using. This will allow you to determine any excess water that may be used to expand your system.
Q. How long do I water my drip system? Watering times will vary from location to location and also on the
current season. Reference the charts in the watering schedule section to determine your watering time needs
Q. What’s the difference between PC and non PC emitters? Pressure compensating emitters are the best choice
for many applications. If your landscape has elevation changes (hills, dips, etc.) go with pressure-compensating
emitters. They have a diaphragm inside which maintains the same water flow through the emitter even if the
elevation (and pressure) changes.
With non-pressure-compensating emitters, the emitters on the higher elevations will distribute less water than
those at the bottom of the slope. Non-pressure compensating emitters are a great choice for flat landscapes and
with gravity-fed drip systems.
Pressure Compensating Emitters
• Deliversthestatedgph(gallonperhour)evenifpressurerangeisfrom10-50psi
• Workswellwithelevationchanges
• Self-flushingtoreduceclogging
Non-Pressure Compensating Emitters
• Theoutputwillvarywithchangesinpressureandelevation
• Lessexpensivethanpressurecompensatingemitters
• Recommendedpressure:15-20psi

22
Design FAQs, Continued
Designing & Planning Your System & System Materials Checklist
Q. Can I retrofit my existing sprinkler system to drip? Retrofitting an existing sprinkler system can be done by
adding adapter fittings to convert the sprinkler risers to accept a water source connection assembly or multi port
drip emitters. Follow the instructions in the design section for information on retrofitting.
Q. Can I combine both sprinklers and drip in the same system? We do not recommend mixing sprinklers and drip
irrigation on the same system. The problem lies in the output difference between the two. Sprinklers are designed
to deliver a lot of water over a very short time while drip emitters and components are designed to deliver lower
amounts of water over a very long time. Running both types on one system would cause over watering in one case
and under watering in another.
With your flow information and a design plan sketched out, it’s time to work up a materials list of all the parts
you will need for your drip irrigation system. Start with the parts for your water source connection; make sure to
add all the required items and any adapter fittings that may be needed. Next, include the items necessary for your
water distribution. Be sure to include enough 1/2" & 1/4" drip tubing, fittings and tubing holder stakes to cover
the entire area to be watered. The final parts to add will be the drip emitters, soaker hose dripline, sprayers
and bubblers.
We have included a materials checklist for you to use in conjunction with your design plan to source out all the
items you will need for your drip system. Use the columns to the left for hash marks when you are counting up the
individual items, then use the columns to the right to record the total needed for each part.
System Materials Checklist
QUICK TIP: When creating your parts list, it’s best to included a few extra fittings, emitters and goof plugs.
These extra parts can be used to make repairs to your system if necessary and can help to keep your down time
to a minimum.

Go Online to Order: www.IrrigationDirect.com
23
Water Source Connection Items
Tally Column Total Quantity
_______ Timer (DD-HEDT) Qty______
_______ Drip Zone Kit
3/4" Drip Assembly w/20 psi regulator (DD-DZ75LF20) Qty______
3/4" Drip Assembly w/30 psi regulator (DD-DZ75LF30) Qty______
_______ Irrigation Valve
3/4" Valve w/pipe threads (DD-DFV075) Qty______
1" Valve w/pipe threads (DD-DFV100) Qty______
1" Valve w/slip inlets (DD-DFV100SS) Qty______
_______ Ball Valve
Inline Valve (DD-BV75) Qty______
Y Ball Valve (DD-YBV75) Qty______
_______ Backflow Preventer (DD-HVB) Qty______
_______ Fertilizer Injector (FI-EZ2013-HB) Qty______
_______ Filter
Inline Filter 3/4" hose threads (DD-HIF75) Qty______
Y Style Filter 3/4" hose threads (DD-YS75HFM) Qty______
Y Style Filter 3/4" pipe threads (DD-YS75) Qty______
Y Style Filter 1" pipe threads (DD-YS100) Qty______
_______ Pressure Regulator
20 psi 3/4" hose threads (DD-HPR20) Qty______
30 psi 3/4" hose threads (DD-HPR30) Qty______
45 psi 3/4" hose threads (DD-HPR45) Qty______
20 psi 3/4" pipe threads (DD-PR20LF-75) Qty______
30 psi 3/4" pipe threads (DD-PR30LF-75) Qty______

24
Water Source Connection Items, Continued
System Materials Checklist
Tally Column Total Quantity
_______ Drip Tubing Adapter
Compression Adapter w/FHT (DD-CHS700) Qty______
Compression Adapter w/FPT (DD-CFP700) Qty______
Direct-Loc Adapter w/FHT (DL-FHS600) Qty______
1/4" Barbed Adapter w/FHT (DD-CHS250) Qty______
Misc Adapter Fittings _________________
Solid Drip Tubing
________ 1/4" Micro Tubing (DD-DH250-50, -100) Ft________
________ 1/2" Solid Drip Tubing (DH-700-50, -100, -500, -1000) Ft________
________ 3/4" Solid Drip Tubing (DH-940-50, -100, -500) Ft________
Fittings – 1/2" & 3/4" Compression or Direct-Loc (DD for Compression / DL for Direct-Loc)
________ Couplings (DD-C700 or DL-C600) Qty______
________ Elbows (DD-L700 or DL-L600) Qty______
________ Tees (DD-T700 or DL-T600) Qty______
________ Crosses (DL-CS600) Qty______
________ Flow Valve (DD-FCV700 or DL-FCV600) Qty______
________ End Caps (DD-EC700 or DL-EC600) Qty______
________ Figure 8 End Cap (DD-F8) Qty______
Misc Fittings ___________________________________
Drip Tubing, Fittings & Accessories

Go Online to Order: www.IrrigationDirect.com
25
Drip Tubing, Fittings & Accessories, Continued
Tally Column Total Quantity
Fittings - 1/4" Barbed
________ Connectors (DD-C250) Qty______
________ Elbows (DD-L250) Qty______
________ Tees (DD-T250) Qty______
________ Crosses (DD-CS250) Qty______
________ Flow Valves (DD-FVC250) Qty______
________ Goof Plug (DD-GP) Qty______
________ Bug Plugs (DD-BP250) Qty______
Tubing Stakes
________ 1/4" Micro Stakes (DD-D2) Qty______
________ 1/2" Plastic Hold Down Stake (DD-S1) Qty______
________ 1/2" Metal Hold Down Stake (DD-S8) Qty______
Tubing Mounting Clips ( x = W for White and B for Black)
________ 1/4" Micro Clips (DD-MC700x) Qty______
________ 1/2" Clips (DD-MC250x) Qty______
Hole Punch
________ Key Punch (DD-KP) Qty______
________ Deluxe Hand Punch (DD-HP250) Qty______
________ Super Punch (DD-SP250) Qty______
26
Tally Column Total Quantity
Pressure Compensating Emitters
________ .5 GPH (DD-PCE5, DD-TC5, DD-PCP5) Qty______
________ 1 GPH (DD-PCE10, DD-TC10, DD-PCP10) Qty______
________ 2 GPH (DD-PCE20, DD-TC20, DD-PCP20) Qty______
Non Pressure Compensating Emitters
________ .5 GPH (DD-TTE5, DD-ILE5) Qty______
________ 1 GPH (DD-TTE10, DD-ILE10, DD-TAE10) Qty______
________ 2 GPH (DD-TTE20, DD-TAE20) Qty______
________ 4 GPH (DD-TAE40) Qty______
Soaker Hose Dripline
_________ 1/4" Soaker Hose Emitter Spacing_______ Ft_______
_________ 1/2" Soaker Hose Emitter Spacing_______ Ft_______
Adjustable Stream Bubbler
_______ 180° Bubbler w/6" Stake (DD-SR180S) Qty______
_______ 360° Bubbler w/6" Stake (DD-SR360S) Qty______
_______ 180° Bubbler w/Barbed End (DD-SR180B) Qty______
_______ 360° Bubbler w/Barbed End (DD-SR360B) Qty______
_______ 180° Bubbler w/10-32 Threads (DD-SR180T) Qty______
_______ 360° Bubbler w/10-32 Threads (DD-SR360T) Qty______
Adjustable Spectrum Sprayer
_______ 360° Sprayer w/6" Stake (DD-SM360S) Qty______
_______ 360° Sprayer w/Barbed End (DD-SM360B) Qty______
_______ 360° Sprayer w/10-32 Threads (DD-SM360T) Qty______
Drip Emitters
System Materials Checklist
Micro Spray Jets & Sprayers

Go Online to Order: www.IrrigationDirect.com
27
Micro Spray Jets & Sprayers, Continued
Tally Column Total Quantity
Adjustable Stream Sprayer
________ 90° Sprayer (DD-MJVQ) Qty______
________ 180° Sprayer (DD-MJVH) Qty______
________ 360° Sprayer (DD-MJVF) Qty______
Adjustable Rotary Sprinkler
_______ 360° Sprinkler w/10-32 Threads (DD-VRS) Qty______
Micro Sprays – 1 Piece 0.040 Orifice
________ 90° (DD-MSQ40) Qty______
________ 180° (DD-MSH40) Qty______
________ 360° (DD-MSF40) Qty______
Micro Sprays – 1 Piece 0.060 Orifice
________ 90° (DD-MSQ60) Qty______
________ 180° Sprayer (DD-MJVH) Qty______
________ 360° Sprayer (DD-MJVF) Qty______
Micro Sprays – Base & Caps
________ Black .030" Orifice (DD-MSB30) Qty______
________ Blue .040" Orifice (DD-MSB40) Qty______
________ Green .050" Orifice (DD-MSB50) Qty______
________ Red .060" Orifice (DD-MSB60) Qty______
________ 90° Green Cap (DD-MCQ) Qty______
________ 180° Red Cap (DD-MCH) Qty______
________ 360° Blue Cap (DD-MCF) Qty______
Adjustable Stake Assembly
________ 13" Stake (DD-MJCS13) Qty______
28
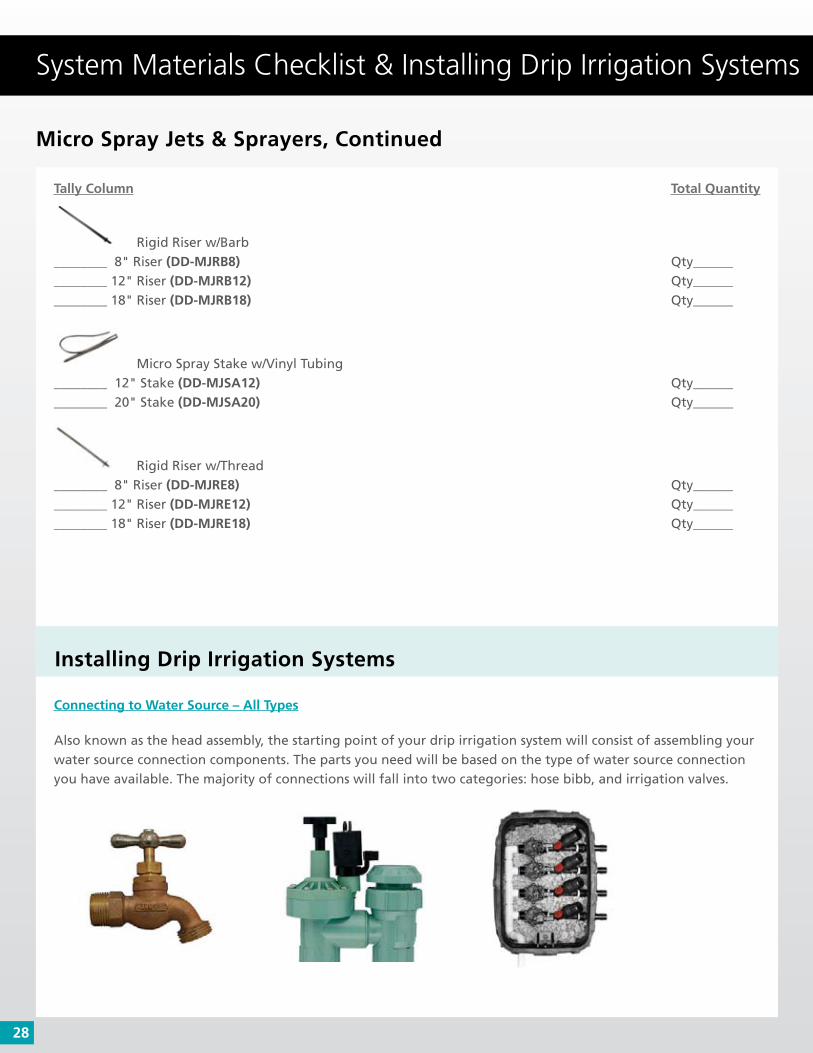
Tally Column Total Quantity
Rigid Riser w/Barb
________ 8" Riser (DD-MJRB8) Qty______
________ 12" Riser (DD-MJRB12) Qty______
________ 18" Riser (DD-MJRB18) Qty______
Micro Spray Stake w/Vinyl Tubing
________ 12" Stake (DD-MJSA12) Qty______
________ 20" Stake (DD-MJSA20) Qty______
Rigid Riser w/Thread
________ 8" Riser (DD-MJRE8) Qty______
________ 12" Riser (DD-MJRE12) Qty______
________ 18" Riser (DD-MJRE18) Qty______
Connecting to Water Source – All Types
Also known as the head assembly, the starting point of your drip irrigation system will consist of assembling your
water source connection components. The parts you need will be based on the type of water source connection
you have available. The majority of connections will fall into two categories: hose bibb, and irrigation valves.
Micro Spray Jets & Sprayers, Continued
System Materials Checklist & Installing Drip Irrigation Systems
Installing Drip Irrigation Systems

Go Online to Order: www.IrrigationDirect.com
29
Hose bibb: For most backyard drip irrigation systems, connecting to a hose bibb is the most common connection.
First, determine if this connection will be dedicated solely to your drip system or if you will still need access for
a garden hose. Installing a Y style ball valve will split you existing connection into two. Be sure to install each
component in order and in the proper direction of flow.
Use Teflon tape to make watertight connections between components with pipe threads and
o-rings or hose washers with components with hose threads. Hand tighten each part to make
a water tight seal. Be sure not to over tighten any hose thread connections, over tightening
can cause the threads to strip and become damaged.
Irrigation Valves: For an above ground installation, start with installing anti-siphon valves.
An anti-siphon valve combines a valve and vacuum breaker in one device, so there is no need
to install a separate vacuum breaker. On the downstream of the valve, you will need to install
a filter, pressure regulator and hose tubing adapter. These parts can be installed just below
the valves outlet or in a valve box for access to the filter.
Inline valves need to be installed in conjunction with a back flow preventer. Back flow
preventers are larger versions of the vacuum breaker and are mainly installed and large
residential or commercial installations. Check with your local municipality for any code
requirements concerning the use of backflow preventers. Inline valves will require a filter,
pressure regulator and tubing adapter. Irrigation Direct offers preassembled drip zone kits.
Connecting to Water Source — All Types, Continued
baLL VaLVe
(OPTIOnaL)hOse TIMeR
(OPTIOnaL)VaCuuM
bReakeR
hOse FILTeR
FeRTILIzeR InjeCTOR
(OPTIOnaL)
PRessuRe ReguLaTOR
hOse swIVeL
aDaPTeR

30
Before rolling out your drip tubing, it’s best to lay it out in the
sun for at least 30 minutes or more. This helps to soften the
tubing and makes unrolling it much easier. When laying drip
tubing, it’s best to roll it out in the same way you would roll a
tire. This prevents the tubing from spiraling and kinking.
Begin unrolling by weighting down the end of the tubing with a
heavy object or tubing hold down stake to keep it in place. Roll
out the tubing in the desired areas according to your design sketch. Keep some slack in your tubing runs to allow
for expansion and contraction due to temperature changes in weather. Install tubing hold down stakes every 5 to
10 feet to hold the tubing in place.
If you need to bury your drip tubing, it’s best to sleeve it in solid PVC pipe. This will prevent the drip tubing from
compressing and reducing or cutting off the flow of water. When you need to make 90° turns in tubing, use an
elbow. If you need to branch off mainline tubing, use a tee. When cutting drip tubing, simply use a pair of tubing
cutters, garden shears or scissors.
With your 1/2" drip tubing laid out, it’s time to connect all the separate ends
together to create one uniformed run of tubing. Make sure you have all
your couplings, elbows and tees handy. It helps to order a few extra of each
fitting in case you need to add or change your drip tubing layout for
any reason.
If you’re attaching your tubing with compression fittings, begin by scoring
the tubing about an inch up from the end of the tubing. Next, make sure
you have a straight cut across your drip tubing, cut tubing if needed. Then
take the fitting and place the tubing squarely against the compression
opening and press inward. As the compressing fitting bites into the tubing, gently rock the tubing and fitting back
and forth until one inch of drip tubing is inserted into the fitting. Repeat this process for all compression fittings.
The trick to installing compression fittings is to apply even constant force as your insert the tubing. Compression
fittings are designed for a more permanent installation and are not recommended for reuse.
Layout Main & Branch Lines
Installing Drip Irrigation Systems
Connecting Hose & Tubing

Go Online to Order: www.IrrigationDirect.com
31
Direct-Loc fittings work a bit differently than their compression fitting counterparts.
Direct-Loc fittings have a 1/2" barbed end that you place your drip tubing over and
a lock nut that spins over the barb which locks the tubing in place, creating a water
tight seal. Direct-Loc fittings are perfect if you need to reuse your fittings, remove
your drip tubing or reconfigure your drip irrigation system.
Installing 1/4" micro tubing is not unlike installing its bigger brother. But unlike
the bigger tubing, the only connectors available are in the 1/4" barbed 250 series.
Attach micro tubing end with connectors, elbows and tees. To install, simply place
one end of the micro tubing over the barbed end of the fitting and apply firm even
pressure the tubing sits against the fittings collar.
To install 1/4" micro tubing as a feeder off of 1/2" solid drip tubing, begin by making
a hole in the 1/2" tubing with a hole punch. Then attach one end of the micro
tubing onto the end of the 1/4" barbed fitting. Then insert the other end of the 1/4"
barbed fitting into the 1/2" drip tubing until it snaps into place.
Drip Emitters: Drip emitters are installed using one of two different methods. The first method is installing the
emitter’s barbed end directly into the 1/2" drip mainline by using a hole punch.
Connecting Hose & Tubing, Continued
QUICK TIP: To help with installation, dip the tubing in warm water for a few minutes to soften the ends before
inserting the tubing into the fitting.
Installing Different Water Devices — All Types

32
Another method is to attach the drip emitter into 1/4" micro tubing then attaching the micro tubing to the 1/2"
mainline with a barbed connector and hole punch. This method is used when plants are away from the 1/2"
mainline. Use a micro tubing stake holder to hold emitters in place.
Soaker Hose Dripline: Install soaker hose dripline as you would your mainline. Before unrolling, it’s best to let
the tubing sit in the sun for 30 minutes or more. Unroll the tubing as you would unroll a tire down the lengths
of your garden rows or through your shrubs and ground cover. For 1/2" size soaker hose, use compression or
Direct-Loc fittings to attach the soaker hose to the drip mainline. For 1/4" size soaker hose, use 1/4" barbed
fittings to connect the soaker hose to 1/2" drip mainline. Soaker hose dripline can also be used to create drip
rings around medium and large shrubs and small to large trees.
Installing Different Water Devices — All Types, Continued
Installing Drip Irrigation Systems

Go Online to Order: www.IrrigationDirect.com
33
Sprayers and Bubblers: Sprayers and bubblers can be installed using three different methods. The first method is
installing sprayers and bubblers with barbed ends directly into 1/2" drip mainline.
The second method is attaching sprayers and bubblers with threaded ends onto fixed stakes with preinstalled vinyl
tubing or onto rigid risers with a clip stake to make an adjustable height sprayer.
The third method is installing sprayers and bubblers that come preinstalled on a 6" stake. Each stake comes with a
1/4" barbed inlet that attaches to micro tubing and then attaches to 1/2" drip mainline.
Installing Different Water Devices — All Types, Continued
34
Now that you’ve rolled out all your drip tubing and installed the drip emitters, soaker hose dripline, sprayers and
bubbles, it’s time to flush your drip system. This is done to flush out any dirt, dust, insects or debris that may have
made its way into your drip tubing during installation. To flush your drip system, simply turn on your water source
and let the water run freely for a few minutes.
With your drip lines fully flushed, it’s time to install the drip tubing end caps. End caps come in three styles;
figure 8, compression and Direct-Loc.
The figure 8 end of line hose clamp simply doubles over the drip tubing to make a water
tight seal. It’s easily removed if you need to flush your drip system.
Both the Compression and Direct-Loc style end caps have removable
threaded cap to aid with flushing your drip tubing.
Before operating your drip system, it’s important to do a complete walk through and check all your drip tubing and
connections. Verify that the water source connection components are installed and each connection is hand tight.
Be sure that all drip lines are securely attached to their fittings and that all drip tubing end caps have been installed.
If everything checks outs, it’s time to turn your water on. Begin by turning on you water and letting the system fill
up for several minutes. You may hear a hissing sound coming from several locations on your drip system. This is the
air that is being expelled from the drip emitters, soaker hose dripline, sprayers or bubblers. Once your drip system
is fully filled with water, this hissing will stop. After the system has been running for about 15 minutes, check for
any leaks with the water source connection components and with any drip tubing connections. Check that each
drip emitter, sprayer or bubbler is working properly. If there is excessive leaking around any installed drip emitters
or where any 1/4" barbed connectors are attached to 1/2" drip tubing, remove the emitter/connector from the
1/2" tubing and insert a goof plug to seal the hole. Then use your hole punch and reinstall the drip emitter or
1/4" barbed connector at least 1-1/2" away from the goof plug.
Flushing Out The System
Installing Drip Irrigation Systems & System Maintenance
End of Lines
Final Preparations and Start Up

Go Online to Order: www.IrrigationDirect.com
35
It’s important to remember that some leaking around drip emitters or barbed connections is normal with a system
startup. As the tubing fills and expands, the connections will seal over time.
Make any adjustments to sprayers, bubblers or flow control valves that might be needed. Add any drip emitters
that may have been missed during the installation or extra emitters, sprayers or bubblers to supply more water
to a given area.
Like everything else, a bit of preventive maintenance will go a long way with keeping your drip system in working
order. Periodically check your system for any leaks or wear in the drip tubing. Inspect all drip emitters, sprayers and
bubblers and verify that each are flowing and not clogged. Clean or replace any components that have become
clogged or have stopped flowing water. Check the filter screen each week for the first month for any debris built
up. Clean the screen with a soft nylon brush and water. The frequency at which your filter screen needs cleaning
will depend upon your water’s quality.
Check to see if any drip tubing has been moved or under strain, also check for any nicks or cuts and use couplings
to replace and bad sections of tubing. It’s best to flush your drip tubing a few times each year. This can help to
flush out any minerals that may have built up in the tubing. Over time, it may be necessary to add more emitters,
sprayers or bubblers as your landscape matures and its watering needs change.
It helps to keep a small repair kit of parts to deal with any problems that might occur over time. Common parts to
have on hand are 1/4" barbed fittings, 1/2" tubing couplings, small lengths of both 1/4" and 1/2" solid drip tubing,
extra drip emitters and plenty of goof plugs.
Hose timer is not working: Hose timers tend to fall into two categories, either they work or they don’t. Always
make sure you have good batteries installed. Be sure to read your timers instructions and thoroughly check
the timers program for any missing information. Manually activate your timer to verify the internal mechanism
is working properly. To test for automatic operations, set a start time for several minutes from the current time
and observe.
Final Preparations and Start Up, Continued
System Maintenance & Troubleshooting
Troubleshooting

36
No water from drip emitters, soaker hose dripline, sprayers or bubblers: Verify that you have water to your
drip system. Be sure that proper filtration is installed and that all drip lines have been periodically flushed. Check
to see if any flow control valves have been shut off or if any drip lines are cracked or broken. Make sure all end
caps are installed and tight.
Drip emitters and sprayers have uneven or little flow at the end of the dripline: Verify that you haven’t
exceeded the dripline maximum flow rate of 240 gph. Remove any excess or unused drip emitters or install lower
flow emitters. Turn down any adjustable sprayers and bubblers. Making small adjustments to your system can help
with solving this problem
In areas that are prone to freezing or for long periods of inactivity, we recommend winterizing your drip system.
Winterizing is the process of removing water from a drip system that would otherwise damage the tubing and
components during freezing weather.
Start by shutting off your water faucet or the mainline that supplies water to your drip system. Remove any hose
timers, its batteries and store in a dry location. For irrigation valves, removing the internal rubber diaphragm will
extend the diaphragms life.
Remove all drip hose end caps and allow the water to drain completely. To “blow out” your drip system, use of an
air compressor is recommended as long as the pressure is limited to 30 psi or under. Higher pressures can result in
damaging your drip tubing or components. Once the water has been removed, replace the end caps. This will help
to keep out any dirt or insects.
In areas of harsh prolonged freezing, we recommend rolling up your drip tubing altogether. Removal of your
drip tubing can easily be done by installing Direct-Loc fittings during the initial installation. These fittings make
removal and installation of your drip tubing quick and easy.
Troubleshooting, Continued
System Maintenance & Troubleshooting
System Winterization

Go Online to Order: www.IrrigationDirect.com
37
Starting up your drip system for the spring is not unlike the initial walk thru you made during your systems
installation, although Murphy’s Laws does seem to kick into high gear around this time. As stated before, keep
your repair kit close at hand to deal with any problems that might pop up.
Start by installing fresh batteries in your hose timer and reprogram for a spring watering schedule. Install all water
source connection components as before, inspect and replace any cracked or worn hose washers. Inspect the filter
screen, clean or replace if needed. Reattach any drip lines that were removed, then remove all end caps and flush
the lines. Once the drip lines have been flushed, replace the end caps and run your drip system
Inspect all drip emitters, soaker hose dripline, sprayers and bubblers. Clean or replace any parts that have stopped
watering. Check the drip tubing for any cracks, splits or for any areas that may have been chewed on by animals or
varmints, repair or replace any tubing as needed.
For drip systems using irrigation valves, reinstall rubber diaphragms, reprogram your controller and activate each
valve to insure each are working properly.
Spring Start-up

38
Replace each sprinkler with pressure compensating drip bubblers or emitters and run 1/4” tubing from the riser to
your plants. Single-outlet emitters allow you to run 1/4" drip tubing to individual plants. With a 6-outlet bubbler
on top of a 1/2" riser, you can run up to 6 1/4" drip tubes from the bubbler.
The emitters and bubblers operate at 10 psi - 40 psi. Check your water pressure before installing. If your pressure
is 40 psi or less, you are good to go. If not, you will need to install a pressure regulator.
Pressure Compensating Emitters
There are three emitters available: 1/2 gph (red inside), 1 gph (black inside), and 2 gph (green inside). The barbed
tip accepts 1/4" drip micro tubing. To install, simply remove the sprinkler from the 1/2" threaded riser. You can
screw the emitter directly onto the riser or add a Marlex elbow as described in the Quick Tip below.
Option 1 - Threaded Bubblers and Emitters
Retrofitting Existing Sprinklers with Drip
QUICK TIP: Use a Marlex Elbow for 90 degree turn - To run the 1/4" tubing parallel to the ground rather than
straight up off of the riser, use a Marlex Elbow. This allows the tubing to run flat on the ground and avoids
a trip hazard.

Go Online to Order: www.IrrigationDirect.com
39
STEP ONE:
Thread Marlex Elbow onto cut off riser.
Use Teflon tape on pipe threads.
STEP THREE:
Push 1/4" drip micro tubing onto barbed
end of Pressure Compensating Emitter.
STEP TWO:
Thread Emitter onto Marlex Elbow.
COMPLETED ASSEMBLY:
1/4" tubing can now be staked next to plant.
Option 1 - Threaded Bubblers and Emitters, Continued

40
Pressure Compensating Bubblers
There are up to 6 outlets available on each bubbler. Each small outlet
distributes 6 gph (black), 10 gph (red), or 20 gph (green). They ship with one
outlet open. Cut the tip off of the outlets as you need them (see below). To
install, simply remove the sprinkler from the 1/2" threaded riser. You can screw
the bubbler directly onto the riser or add a Marlex elbow as described below.
Option 1 - Threaded Bubblers and Emitters, Continued
Retrofitting Existing Sprinklers with Drip
Installing a Marlex elbow and bubbler
Install Bubbler and attach 1/4" micro tubing
Insert filter (included)
Cut tip off of the outlets you want to use.
Run tubing to plants and stake into place.
Use only the outlets you need.

Go Online to Order: www.IrrigationDirect.com
41
Replace sprinklers with drip micro spray fittings. Swap out the sprinkler with a micro spray adapter. The adapter
will accept threaded micro spray fittings.
Micro Spray Adapter
The adapter threads directly onto a 1/2" riser. Micro jet fittings thread into the top.
Micro Jet/Spray fittings operate best between 10 psi - 30 psi. Check your water pressure before
installing. If your pressure is 30 psi or less, you are good to go. If not, you will need to install a
pressure regulator.
These spray fittings come in a variety of configurations from fixed patterns and outputs to adjustable spray and
stream options.
Micro Spray Adapter Threads onto 1/2" Riser Micro Sprays Thread into Adapter
One-Piece Micro Spray Adjustable Stream Spray Adjustable Micro Spray Adjustable Rotary Spray
Option 2 - Micro Jet Sprayers

42
Cap off all of the sprinklers and add a standard drip system with
1/2" drip tubing and drip emitters. You can leave your irrigation
valve in place. Just add a drip regulator, filter and swivel adaptor
to the existing PVC line. From there you can add drip mainline
tubing and drippers or emitter tubing. Irrigation Direct carries a
selection of adapter fittings (like the one shown) that will help with
most connections.
An MH9 adapter elbow (with male hose threads) is glued onto 3/4" PVC pipe. The inline filter, drip regulator, and
swivel adapter are then attached.
Option 3 - Cap Sprinklers & Add Drip Regulator to the Supply Line
Retrofitting Existing Sprinklers with Drip