Biomedical text mining: Automatic processing of unstructured text

Poznan University of Technology
Faculty of Computing Science and Management
Institute of Computing Science
Master’s thesis
DESIGN AND IMPLEMENTATION OF A TEXT PROCESSING APPLICATION
IN THE ECLIPSE RICH CLIENT FRAMEWORK
Urszula Krukar
Supervisor
Dawid Weiss, PhD
Referee
Bartosz Walter, PhD
Poznan, 2007–2008

Streszczenie
Carrot2 to system grupujacy wyniki wyszukiwan z najbardziej popularnych wyszukiwarek interne-
towych oraz innych zródeł dokumentów. Do biblioteki dołaczona jest aplikacja demo, Browser, po-
siada ona jednak kilka powaznych wad: jakosc kodu jest niska, wiele elementów jest zaszytych w ko-
dzie, osadzenie przegladarki internetowej jest zrobione w „hakerski” sposób. Aplikacja ta jest bardzo
kosztowna w utrzymaniu, a rozszerzenie jej funkcjonalnosci jest praktycznie niewykonalne.
Niektóre z wyzej wymienionych problemów sa nastepstwem braków w samej bibliotece Carrot2.
Algorytmy grupujace w niej zawarte sa parametryzowalne, jednak brakuje sposobu na pobranie listy
parametrów oraz ustawienie ich wartosci.
Celem tej pracy magisterskiej jest aktywny udział w pracach nad nowa wersja biblioteki Carrot2
oraz zaprojektowanie i implementacja nowej aplikacji demo korzystajac z biblioteki Eclipse Rich Client
Platform. Stworzona aplikacja powinna byc rozszerzalna i dostosowana do aktualnych potrzeb pro-
jektu. Po zakonczeniu prac zastapi ona całkowicie aplikacje Browser oraz stanie sie czescia projektu
Carrot2 w wersji 3.x.
Abstract
Carrot2 is an open source project implementing algorithms for clustering search results from ma-
jor Web search engines and other text document sources. There is a demo application called the
Browser, but it has a number of drawbacks: poor code quality, hard-coded components, embedded
Web browser, practically hacked into the Swing GUI. The Browser is increasingly hard to maintain and
almost impossible to extend. Some of these problems are direct consequences of functionality defi-
ciencies in the Carrot2 library itself. Clustering algorithms are parameterized, but there is no API for
retrieving these parameters and binding them to component instances.
The goal of this thesis is to take an active part in the design and development of the 3.x version of
the Carrot2 library and to design and implement a new demo application using the Eclipse Rich Client
Platform. The new application, called the Workbench, should be well-designed and easily extensible.
It will be published as part of the Carrot2 open source project and should replace the Browser when
Carrot2 3.x version is published.

Contents
1 Introduction and scope of work 1
1.1 Motivation . . . . . . . . . . . . . . . . . . . . . . . . . . . . . . . . . . . . . . . . . 1
1.2 Goals . . . . . . . . . . . . . . . . . . . . . . . . . . . . . . . . . . . . . . . . . . . . . 1
1.3 Requirements . . . . . . . . . . . . . . . . . . . . . . . . . . . . . . . . . . . . . . . 3
1.3.1 Use-case scenarios (functional requirements) . . . . . . . . . . . . . . . 3
1.3.2 Non-functional requirements . . . . . . . . . . . . . . . . . . . . . . . . . 4
2 Background 5
2.1 The Eclipse Framework . . . . . . . . . . . . . . . . . . . . . . . . . . . . . . . . . . 5
2.2 OSGi and Equinox . . . . . . . . . . . . . . . . . . . . . . . . . . . . . . . . . . . . . 6
2.3 Carrot2 . . . . . . . . . . . . . . . . . . . . . . . . . . . . . . . . . . . . . . . . . . . 6
2.3.1 System Architecture in Version 2.x . . . . . . . . . . . . . . . . . . . . . . 6
2.3.2 System Architecture in Version 3.x . . . . . . . . . . . . . . . . . . . . . . 7
3 High-level design overview 13
3.1 Design goals . . . . . . . . . . . . . . . . . . . . . . . . . . . . . . . . . . . . . . . . 13
3.2 System Components . . . . . . . . . . . . . . . . . . . . . . . . . . . . . . . . . . . 13
3.2.1 Carrot2 Core Library . . . . . . . . . . . . . . . . . . . . . . . . . . . . . . . 13
3.2.2 Document sources and algorithms . . . . . . . . . . . . . . . . . . . . . . 15
3.2.3 Workbench Core . . . . . . . . . . . . . . . . . . . . . . . . . . . . . . . . . 15
4 Implementation 17
4.1 Working schedule . . . . . . . . . . . . . . . . . . . . . . . . . . . . . . . . . . . . . 17
4.2 Attribute editors . . . . . . . . . . . . . . . . . . . . . . . . . . . . . . . . . . . . . . 17
4.3 Save-restore feature . . . . . . . . . . . . . . . . . . . . . . . . . . . . . . . . . . . . 18
4.4 Headless build . . . . . . . . . . . . . . . . . . . . . . . . . . . . . . . . . . . . . . . 20
4.5 Testing . . . . . . . . . . . . . . . . . . . . . . . . . . . . . . . . . . . . . . . . . . . . 20
4.6 Various usability problems . . . . . . . . . . . . . . . . . . . . . . . . . . . . . . . . 21
4.6.1 Perspective bar . . . . . . . . . . . . . . . . . . . . . . . . . . . . . . . . . . 21
4.6.2 Actions location in results editor . . . . . . . . . . . . . . . . . . . . . . . 22
5 Summary and conclusions 25
I

II
Bibliography 27
Web resources 28
Appendices 29
A Technical low-level bits 29
A.1 Converting a Java project to a plugin project . . . . . . . . . . . . . . . . . . . . . 29
A.2 Adding a new processing component . . . . . . . . . . . . . . . . . . . . . . . . . 31
A.3 Adding a new attribute editor . . . . . . . . . . . . . . . . . . . . . . . . . . . . . . 31

Chapter 1
Introduction and scope of work
1.1 Motivation
Carrot2 is an open source project implementing algorithms for clustering search results from
major Web browsers and other text document sources. It can automatically organize (clus-
ter) search results into thematic categories. To demonstrate its functionality, Carrot2 pro-
vides its own set of demo applications, the desktop search application called “the browser”
among them (see Fig. 1.1).
The browser was initially developed as a prototype, with the plan to abandon it entirely
later on and create a new, better, well-designed application for production use. It never
happened though. New functions crept to existing code without taking the time to refactor
existing code base, slowly turning the code into what is called “spaghetti code”. Another
programming-driven reason motivating a complete redesign was the GUI foundation library
– Swing. Relying on Swing means that the application window does not blend nicely with the
user operating system’s native look. Embedding a fully featured Web browser also required
extensive hacking and fiddling with native code, since Swing’s support for rendering HTML
is rudimentary.
The other aspect calling for a complete restructuring of the browser application is an
urgent need to provide users of the Carrot2 system with an application that would allow
them to tune and experiment with various clustering algorithms. All parameters concerning
algorithmic processing and input/output code were formerly hardcoded in the GUI, making
it very difficult to tune and play with the software (because their mapping back to parameter
names had to be known later for other applications), as well as add new features (because
these new features had to be added to the GUI).
1.2 Goals
The main goal of this thesis was to create a brand new demo application that would not
suffer from any of the previously mentioned problems. More specifically, the goals of this
thesis were limited to:
1

1.2. Goals 2
FIGURE 1.1: A screenshot of the previous implementation of the browser application.
• design and implement an RCP-based application for tuning parameters, evaluating
performance and running clustering algorithms from the Carrot2 framework (we will
refer to this application as the Workbench);
• fulfill functional and non-functional requirements listed in Section 1.3,
• adhere to the Carrot2’s 3.0-version core, take an active part in its design and develop-
ment,
• prepare the required documentation allowing other people to contribute and extend
the resulting RCP-based application.
To achieve this goal, radical changes in the Carrot2 library itself had to be introduced.
A new version of Carrot2 (called the 3.x line) has been proposed and rolled out in parallel
with the work on this project. The development of the 3.x line is still active at the time of
submission of this thesis.

1.3. Requirements 3
1.3 Requirements
1.3.1 Use-case scenarios (functional requirements)
Carrot2 Workbench is intended to be used by a variety of users. They all have different ex-
pectations and expect a different set of critical features.
Non-advanced user
Simplicity of use is essential for the non-advanced user. He or she will use the workbench as
a simple graphical user interface (GUI) to one or many search engines. Clusters appearing
next to the returned search results are an additional benefit from using the application.
The user expects search results to be delivered quickly (in sub-second times), with as lit-
tle configuration overhead as possible (which implies some sensible default values for clus-
tering parameters).
The non-advanced user may also be interested in some visualization of clusters’ struc-
ture, although this is not the primary search interface. We can describe the following basic
usage scenario:
• select among the available clustering algorithms and search sources,
• run a search query with default configuration and parameter values,
• browse through cluster labels and their content,
• display detailed info about the selected document (preferably in an embedded Web
browser).
Advanced user
An advanced user is usually a programmer that uses Carrot2 to develop his own software.
This user is interested in tuning input sources and clustering algorithms to his or her needs,
usually by editing thresholds and configuration files. A basic usage scenario for an advanced
user is to:
• run a search with previously saved parameter values,
• tune parameters while observing what changes they introduce to the structure of clus-
ters,
• save modified parameter values.
Other features useful for an advanced user are:
• the ability to save and restore named sets of parameter values,
• possibility of importing and exporting parameter values to an XML file.

1.3. Requirements 4
Carrot2 developer
The workbench application will be used as an internal tool for Carrot2 developers to improve
and facilitate debugging and performance analysis of new algorithms. The expectations of
this user group are more complex. The workbench should be able to display low-level de-
bugging information and perform some sort of benchmarking, if possible on a number of
JVMs spawned as separate processes.
A usage scenario for an advanced user includes the following steps:
• configuring benchmarking parameters, including JVM parameters,
• launching benchmarking,
• observing the results and measurements (e.g., time distribution for the whole algo-
rithm or for its specific sub components),
• comparing measurement results for different parameter values or different JVM con-
figurations.
The above functionality is considered optional to this thesis and may be realized in part,
or postponed until proper resources to implement it are available.
1.3.2 Non-functional requirements
The Eclipse Rich Client Platform framework (RCP), discussed more thoroughly in 2.1, had
been chosen for a few reasons. One of the crucial decision drivers was the possibility of
embedding a full native Web browser – this functionality was a big problem in the previous
Carrot2 demo application.
Other non-functional requirements from user perspective include:
• GUI consistent with native look and feel of the local graphical user interface, regard-
less of the target platform (MacOS X, Windows, Linux),
• possibility to dynamically add additional clustering algorithms and input sources (fea-
tures),
• possibility to launch workbench from a Web browser using Java Web Start technology.
Infrastructural requirements include:
• full ANT builds in headless (non-GUI) environment,
• documentation of how to add new features (search sources, algorithms) and extend
the workbench,
• JDK 1.5+ compatibility.

Chapter 2
Background
This chapter is written based on a book by Eric Clayberg and Dan Rube Eclipse: Building
Commercial-Quality Plug-ins [EC06].
2.1 The Eclipse Framework
It is hard to find a Java programmer not familiar with Eclipse. To most, Eclipse is simply
a Java development environment (IDE), easily extensible with numerous plugins. To those
more enlightened, Eclipse is a target platform for plugins they write themselves. Finally, to
a very limited audience, Eclipse becomes a base framework on top of which they can build
entire new applications, not related to Java development at all.
Eclipse was created by IBM and from the beginning it was meant to be a highly exten-
sible platform, not a monolith application. This extensibility was accomplished by intro-
ducing concepts such as plugins and extension points. A plugin is a small portion of func- PLUGINS
EXTENSIONPOINTS
tionality. It can depend on other plugins and there can be other plugins that depend on it.
Plugins may define extension points and in this way give other plugins the ability to extend
their own functionality. In fact, most things in Eclipse are an extension: views, toolbar, menu
actions, perspectives, preference pages, and nearly everything else.
Sometimes a plugin may need to include resources specific to a certain operating system
(OS). In this case a fragment may be used. A plugin may have many fragments related to it FRAGMENT
and specific fragments are included when the plugin is built for different operating systems.
It is also common to define locale-specific resources as fragments.
Plugins of similar functionality may be grouped into features. This makes the distribu- FEATURES
tion of related plugins easier for the provider and the installation process less involving for
the user.
Finally, a set of cooperating features is called a product. PRODUCT
5

2.2. OSGi and Equinox 6
2.2 OSGi and Equinox
Originally, IBM developed dedicated runtime mechanism to load and manage plugins. It
was optimized for Eclipse, but it was also “reinventing the wheel” since analogical projects
have been developed earlier. One of them was the OSGi project.1 It is a detailed specification OSGI
that is fairly similar to original Eclipse runtime but supports additional features. With every
consecutive version, Eclipse becomes more and more aligned with the OSGi model.
Equinox is an implementation of the OSGi specification. This project was started by EQUINOX
Eclipse itself with the goal to implement the entire OSGi specification while adding some
additional features which would simplify running and management of applications.
2.3 Carrot2
Carrot2 was originally created by Dawid Weiss as a part of his Master’s thesis [Wei01] with a
number of significant contributions from various authors later, when the project was pub-
lished under an open source license on SourceForge. The project initially reimplemented
the Suffix Tree Clustering algorithm (STC) and was aimed for experiments with clustering
Polish search results. Several other people from Poznan University of Technology joined the
project later on, among them Stanisław Osinski who developed and contributed a very effi-
cient clustering algorithm called Lingo (created as a part of his Master’s thesis [Osi03]).
The success of the open source project led its developers to set up a commercial spin-
off company called Carrot Search. Carrot Search and Carrot2 are an example of how open
source can foster innovation and fruitful cooperation with business.
2.3.1 System Architecture in Version 2.x
In version 2.x, Carrot2 defines several types of components:
input this component is responsible for providing documents to be clustered (usually by
extracting document snippets from a search engine, e.g., Yahoo!, Google, Lucene, etc.),
filter this is a generic type of data-processing component, used to transform input into out-
put. Anything could be a transformation: case normalization, feature extraction, ac-
tual clustering, etc.,
output this component is the sink for received documents and clusters as they appear in
the input.
A sequence of components is defined as a processing chain, where output of one compo- PROCESSINGCHAIN
nent is the input of another. Almost every component required other specific components
to precede or follow it in the chain. It is the programmer’s job to create a chain in such a way
that all dependencies are resolved properly (although the code checks for illegal component
combinations).
1For more information regarding the OSGi model, refer to the following Web sites: [B] and [C].

2.3. Carrot2 7
Components can be configured using parameters. Parameters are always passed as char-
acter strings, although some of them are in fact numbers or enumerations. Parameters are
not documented anywhere besides the source code.
2.3.2 System Architecture in Version 3.x
In version 3.x two major deficiencies of version 2.x were addressed:
• lack of the application programming interface (API) for extracting metadata about pa-
rameters,
• “generic” components, which can be used in one scenario anyway.
Metadata extraction API
Let us explain the terminology used in this section. An attribute is a named value that af- ATTRIBUTE
fects the way certain components work (an input attribute) or carries the result of processing
performed by a component (an output attribute). This naming is an analogy to various con-
texts containing attributes encountered in Java Web applications. Attributes in Carrot2 3.0
can have different scope:
instance scope In this scope an attribute is initialized once, at the time of creation of a given
component. Then, the component can be reused for more than a single request (e.g.,
when component pool is used), but the attribute is not altered anyhow.
request scope In this scope the attribute is initialized before every request, and its value is
collected and placed in the request context after completion of every request.
Each attribute has a specified type (numeric, string, enumeration value, etc.), default
value and additional annotations specifying its runtime behavior. In order to describe an
attribute, the following set of annotations can be used:
@Attribute – indicates a given class’ field is an attribute,
@Input, @Output – indicates the direction of value binding,
@Init, @Processing – specifies the initialization scope of an attribute,
@Required – used to force mandatory initialization values for attributes that should be ini-
tialized explicitly, can only be used in combination with @Input.
Whenever the type of an attribute is not enough to specify its valid value range, there is a
need for additional constraints. Coming up with a way of defining constraints is a challenge. CONSTRAINT
In order to fit in with the rest of the metadata API, constraints should be defined with an-
notations. But one @Constraint is not enough: it tells nothing about actual condition the
value should meet. A set of annotations is more desirable, e.g., @Range(min=0, max=10),
@Size(100), etc. The solution was to introduce a meta-annotation @IsConstraint and

2.3. Carrot2 8
an abstract class Constraint. This class defines methods for validating the value of an
attribute. Actual constraint class like @Size is itself annotated with @IsConstraint and
points to a class implementing the validation code. This way it is really simple to add sev-
eral kinds of constraints and treat them all in the same way (see Figure 2.1 on the following
page).
Since attributes will be displayed in the GUI there is a need for some descriptive, user-
friendly information: label, tooltip, description and the like. More complex components
might have up to several dozen attributes (the record-holder is the Lingo-3g algorithm, which
has 55 attributes). Most of them require expert knowledge in order to understand their
meaning and how they affect clusters’ distribution. It would come in handy if attributes
could be grouped, for example into semantic groups or by level of expertise needed to un-
derstand them.
The designers of Carrot2 3.0 decided that this kind of metadata will not be defined us-
ing annotations, since they are not programming-related (will not change at runtime). The
first thought was to store them in XML files kept together with the source code. This ap-
proach was abandoned because it created multiple files which had to be updated whenever
an attribute was added, removed or changed.
Another thought was to place attributes’ description in the JavaDoc – a form of in-code
documentation that can be extracted from source files in Java, but is not accessible after
compilation. The final solution was to generate XML files from JavaDoc during the build
process and then use them at runtime to provide descriptive information about attributes
and other program components.
Component lifecycle
Components are managed by a controller. The controller is in charge of creating compo- CONTROLLER
nents, binding values of input attributes, collecting values of output attributes, and final
cleanup of components after they are about to be discarded. It is also responsible for man-
aging components in a multi-threaded execution environment (the assumption is that com-
ponents are not thread-safe).
The simplest controller-component interaction is shown on Figure 2.2 on page 10. In this
case the controller is created only to perform a single request and is destroyed immediately
afterward. The important steps here are:
1. input instance attributes are bound upon creation of a component,
2. init() method gets invoked – additional initialization can be performed,
3. input request attributes are bound,
4. beforeProcessing() method gets invoked – preparation for request handling based
on request-time input attribute values can be performed,
5. process() method gets invoked – actual processing performed,

2.3. Carrot2 9
FIGURE 2.1: The mechanism of defining of a new constraint.

2.3. Carrot2 10
FIGURE 2.2: Controller-component interaction – simple case.

2.3. Carrot2 11
6. afterProcessing() method gets invoked – cleanup (releasing of all the resources
allocated in beforeProcessing()) can be performed,
7. all output request attribute values collected,
8. dispose() method gets called – cleanup (release of all references, so garbage collec-
tion can proceed).
The above scenario is simplified because only one component is used. Typically more
components will be needed in order to handle a request. They form a processing chain just
like in the earlier version of Carrot2. Controllers maintain an attribute map for each request, ATTRIBUTE MAP
which is an analogy to a request context in Web applications. This map is passed to each
component along the chain, as shown in Figure 2.3 on the following page.

2.3. Carrot2 12
FIGURE 2.3: Processing chain with attribute map

Chapter 3
High-level design overview
3.1 Design goals
While working on a design for Carrot2 Workbench, there were a few key issues to consider:
1. the Carrot2 library must compile without Eclipse plugins and run without Eclipse run-
time (because of constraints placed by project maintainers),
2. the list of document sources and clustering algorithms cannot be hard-coded in any
way and should be easily extensible,
3. the list of attributes and parameters that the application needs to work with cannot
be predicted in any way, but still all attributes should be presented and editable.
In order to achieve goal 1, not a single line of code inside Carrot2 project can depend
on Eclipse packages. In practice this means that the only way to hold plugin-related in-
formation inside Carrot2 library projects is by using plugin-specific metadata files (see Ap-
pendix A.1).
Achieving goals 2 and 3 was a textbook example of using extension points. Extensions
and extension points are defined using plugin.xml file, so they do not interfere with regular
Carrot2 code.
3.2 System Components
Coarse architecture diagram is presented in Figure 3.1. Let us explain the purpose of every
element in subsections below.
3.2.1 Carrot2 Core Library
This is a set of Carrot2 projects that specify all needed interfaces and utilities for implement-
ing specific document sources and algorithms. These include (all in org.carrot2.core
package):
13

3.2. System Components 14
FIGURE 3.1: High-level workbench architecture.
• ProcessingComponent interface – defines the life cycle of a Carrot2 processing com-
ponent (see 2.3.2 for more details),
• ProcessingComponentBase – an abstract class that provides an empty implementa-
tion of the ProcessingComponent interface,
• DocumentSource – marker interface for processing components providing documents
for further processing,
• ClusteringAlgorithm – marker interface for processing components which perform
clustering of documents,
• Controller – definition of controller that performs processing using processing com-
ponents,
• metadata extracting API described in Section 2.3.2.
Using these core interfaces two Eclipse extension points have been defined:
• org.carrot2.core.algorithm,
• org.carrot2.core.source.

3.2. System Components 15
New document sources and algorithms can be added to the workbench by extending one of
these extension points (step-by-step instruction of how to add new extension point can be
found in Appendix A.2).
3.2.2 Document sources and algorithms
Document sources and algorithms are system components that depend on the Carrot2 core
library. They provide the actual functionality of the workbench – document sources (infor-
mation to be clustered) and algorithms (filtering and clustering rules).
Considering these components in separation from the rest of the system allows them
to be distributed as an integral part of the Workbench or as completely separate features,
downloaded and installed on demand from third-party sources. In practice this means that
anyone can implement processing components and integrate them with the workbench.
This possibility will be explored initially by Carrot Search, a commercial spin-off company
created by authors of the Carrot2 project.
3.2.3 Workbench Core
Once we have defined extension points for document sources and algorithms, it is time to
engage them into some processing and display some results. The workbench core provides
a number of GUI components for this (see Figure 3.2).
Attributes editing component Generic component that can display any set of attributes
and can be embedded inside any view that needs to display attributes. This com-
ponent can notify listeners whenever attribute value is changed.
Attributes grouping component A component that displays attribute groups, each group is
displayed using previously mentioned attributes editing component.
Cluster tree component Tree-like component that displays clusters hierarchy and can be
embedded inside any view. Provides selection events whenever selection on the tree
is changed.
Document list component A component that displays documents using embedded system
Web browser. Listens to selection changes and displays documents of the cluster that
is currently selected.
Search view Workbench view where all source and algorithm can be chosen, any required
attributes can be set, and processing can be started.
Results editor Displays results of the processing started using the search view.

3.2. System Components 16
FIGURE 3.2: Workbench, main window with all GUI component: 1 – Search view, 2 – Clustertree component, 3 – Document list component, 4 – Attributes grouping component, 5 –Results editor. Attributes editing components are surrounded with green border.

Chapter 4
Implementation
The implementation of the workbench was an active cooperative effort, led by the author of
this thesis. In the spirit of open source collaboration, no extensive plans or design was pre-
pared and development followed the needs and expertise of team members. This chapter
presents some of the interesting issues and problems encountered during the implemen-
tation phase. A history of all issues and progress is available in Carrot2 JIRA and on-line
mailing lists.
4.1 Working schedule
Actual implementation was scheduled to last for three month, from March to May of 2008.
It was divided into intervals lasting one month each:
• March – create definitions of extension points, the Search view, simple query-results
view
• April – improve results views, it should consist of: Clusters hierarchy tree, Documents
list and Attributes view; all of them should be visible as separate context-sensitive
views and as a part of query-results view
• May – headless build of the Workbench, saving and loading of attribute values, cluster-
tree state restoring, perspectives for different tasks, embedding of rich flash visualiza-
tion
4.2 Attribute editors
The attributes editing component (described in Section 3.2.3) was the hardest bit to design
in an easily extensible way. There are two main difficulties:
• the set of attributes to display is not predictable,
• attributes have different types and are constrained; this component should ensure
that only correct values are entered by the user.
17

4.3. Save-restore feature 18
FIGURE 4.1: Examples of different attribute editors.
We decided that different attribute types should be edited using different widgets (e.g., a
check box would be used for a binary value, a combo box for enumerated values). An editing
widget should also ensure that all constraints are enforced. Let us take numeric attributes:
if only values from a restricted range are allowed than a slider is an appropriate choice. If
any numeric value is allowed, a spinner would be much more convenient. The conclusion
is that the editor should be chosen with regards to constraints of the attribute.
The attributeEditor extension point was introduced to solve all of these problems.
An implementation of this extension point must provide the class name of the editor and
mapping between the editor and attribute types it can be used for. The editor is responsible
for creating of an editing widget, setting current value of the attribute, and notifying listeners
when the attribute’s value has changed. It is also possible to create editor dedicated to one
attribute only.
The factory pattern was used to implement lookup of the most appropriate editor for a
given attribute. The algorithm is presented in Figure 4.2 on the next page.
4.3 Save-restore feature
Eclipse RCP has a built-in mechanism for persisting application state between sessions. The
framework restores application window layout but it is the component’s responsibility (e.g.,
view, editor, etc.) to save and restore its own state. The save-restore feature highly affects the
usability of the application and is extensively used throughout the Workbench application.
The saving procedure takes place during the shutdown sequence. It is performed in a
top-down fashion: every component saves its own state and asks its children to do the same.
A memento object is provided for storing necessary state variables. Memento provides sup-
port for mapping string keys to primitive values and to have other memento objects as chil-
dren. The component can add child elements to the provided memento and deliver them
to its own children. This way, there is a single root memento object in the entire system,
persisted to the workbench.xml file and saved in the workspace. The state restoration pro-
cedure is analogical, but in the reverse direction.
One major problem occurred while reopening recently visible editor windows. It is a
two-phase process. First, an editor input is restored. In the Workbench the input consists
of search parameters: a document source component identifier, an algorithm identifier, and
an attributes map (attributes required by the document source component are kept inside
this map). Carrot2 provides a mechanism for persisting these attribute using the Simple

4.3. Save-restore feature 19
FIGURE 4.2: Algorithm used by attribute editor’s factory.

4.4. Headless build 20
XML framework (see [F]). During data deserialization from XML, the framework needs to
instantiate Class objects dynamically – the problem is in choosing the right class loader to
do it.
Simple XML is bundled as a separate plugin and has its own class loader. By default,
the plugin’s class loader can load classes from within this plugin and from all plugins that it
depends on. Unfortunately, this was not enough in our case since deserialization takes place
at Workbench core level and actual component classes reside in plugins; such a situation
inevitably led to ClassNotFound exceptions.
The solution was to use a buddy classloading feature of the OSGi framework. When this
mechanism is used, class loader searches for class definitions among buddy plugins, if it
fails to find a class through normal routes. List of buddies is specified using a buddy policy.
Eclipse provides several built-in policies. In order to solve our problem, the dependent policy
was accurate – this policy means that all dependent plugins become buddies.
A more detailed information on buddy classloading can be found in [JM05].
4.4 Headless build
Automated building of RCP applications has been a nuisance for a long time. At the moment
of writing template build scripts are bundled as a part of the PDE, but their actual use is still
far from trivial.
The Eclipse automated build needs only the product definition – Workbench.product
file – and the PDE installed. PDE provides dedicated Apache ANT tasks which do all of
the necessary work. In order to use those tasks, PDE needs to be executed in the so-called
“headless” mode.
A set of hooks is defined so that the build process can be customized. The Workbench
build script uses two of them:
postSetup Projects are copied from a Carrot2 directory structure to the structure required
by the build process.
preAssemble This hook is called after all of the plugins have been compiled and right before
they are packaged into JAR files. The metadata XML files (described in Section 2.3.2)
are generated here.
Each successful build results in a Workbench application (distribution). The build is part
of the continuous integration loop at Carrot2 and the results can be downloaded in a binary
form from the Carrot2 server http://builds.carrot2.org/.
4.5 Testing
Eclipse provides a test framework which can be used for an automated unit testing. Tests
are created using the standard JUnit framework, but they are executed within an Eclipse
runtime. This way all errors like missing dependencies or Access Restriction errors can be

4.6. Various usability problems 21
FIGURE 4.3: The perspective bar when docked on the left.
caught. A good practice is to create a separate test feature and put test plugins inside it.
Every single test run starts up a new Eclipse instance which is relatively time-consuming. In
order to avoid it, one test suite containing all tests was created.
Tests may execute in two modes:
core-test Tests run in headless mode. It is useful for running tests which do not require
GUI.
ui-test Tests run inside an Eclipse Workbench. It is useful for testing plugins that use the
Eclipse UI and JFace.
It is possible to run tests manually from the Eclipse PDE using the context menu Run As
→ JUnit Plugin Test.
4.6 Various usability problems
4.6.1 Perspective bar
At the moment of writing, the Workbench provides two default perspectives: search and
tuning. The Perspective Bar component allows switching from one perspective to the other.
We wanted this bar to be docked on the top right, as it is by default in the Eclipse JDT. In the
Workbench, however, the bar did not seem to work like in the JDT. When choosing Dock On
→ Top Right from a context menu, the bar did not move. After adjusting the bar to the left,
an awkward empty space appeared on top of the window (see Figure 4.3).
This bug was quite a show-stopper. Further investigation of this issue showed that this
was an apparent bug of the RCP itself. RCP allows to define which components are shown
in an application window. An application developer may choose any combination of the
toolbar, status line, menu bar, progress indicator, and the perspective bar. The API allows to
set visibility flag for all of the above separately. It turns out that the perspective bar works
correctly only if the toolbar is visible.

4.6. Various usability problems 22
FIGURE 4.4: Toolbar of the Error Log view.
FIGURE 4.5: Toolbar of the Java Source editor.
We reported this bug to the Eclipse Bugzilla as issue numbered 2352031. It is still unre-
solved at the moment of writing.
4.6.2 Actions location in results editor
The results editor (shown in Figure 3.2) consists of 3 components: clusters, documents and
attributes. Each of these components is also available as a separate view. Each of them can
contribute component-specific actions which should be enabled regardless whether embed-
ded as a part of the results editor or within a view.
In Eclipse, views have a toolbar created by the framework (as shown in Figure 4.5). Ed-
itors also have a toolbar designed for their needs – it becomes a part of the main toolbar
(shown in Figure ??). Neither of these locations satisfied our needs: our goal was for actions
to become part of the editor itself.
Finding a right place for the actions in the editor was problematic since they should
not be grouped together. A solution was to use the Eclipse forms package: an alternative
way of creating GUI for Eclipse applications. The forms allow to achieve the Web-like look
in desktop applications and are used mostly for creating form-like editors. Only a small
fraction of the forms is used in the Workbench, namely sections. A section consists of: a
title bar, an optional text control placed to the right of the title text, a description, and a
content. The text control was used to place a toolbar. The content of a section is one of the
components. Sections are put on a form which has the title bar with the text control itself.
Editor-wide actions are put on the form toolbar placed as the text control on the form title
bar.
A component creates actions on a toolbar that is passed to it. This way, the same set of
actions is enabled on a view and in the results editor (see Figures 4.8 and 4.9).
1https://bugs.eclipse.org/bugs/show_bug.cgi?id=235203

4.6. Various usability problems 23
FIGURE 4.6: Sequence presents how components inside the results editor are created.
FIGURE 4.7: Sequence presents how components inside a view are created.

4.6. Various usability problems 24
FIGURE 4.8: A component toolbar and the main editor toolbar.
FIGURE 4.9: A component toolbar in the view.
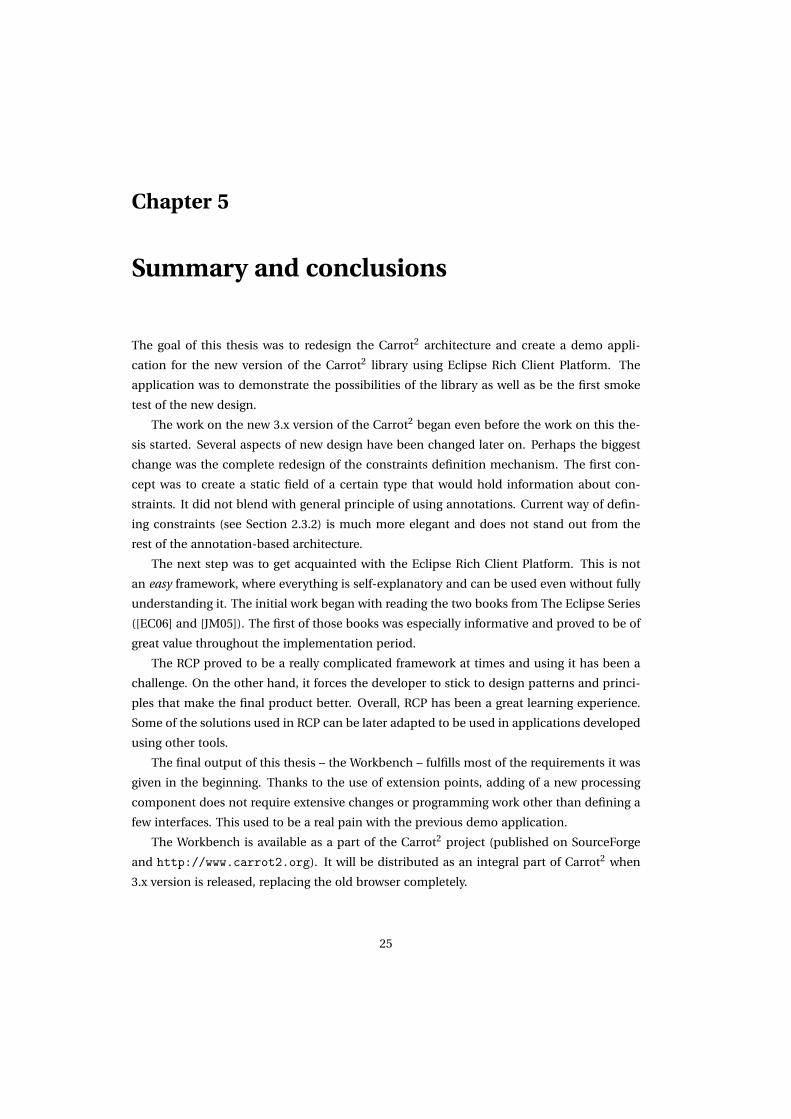
Chapter 5
Summary and conclusions
The goal of this thesis was to redesign the Carrot2 architecture and create a demo appli-
cation for the new version of the Carrot2 library using Eclipse Rich Client Platform. The
application was to demonstrate the possibilities of the library as well as be the first smoke
test of the new design.
The work on the new 3.x version of the Carrot2 began even before the work on this the-
sis started. Several aspects of new design have been changed later on. Perhaps the biggest
change was the complete redesign of the constraints definition mechanism. The first con-
cept was to create a static field of a certain type that would hold information about con-
straints. It did not blend with general principle of using annotations. Current way of defin-
ing constraints (see Section 2.3.2) is much more elegant and does not stand out from the
rest of the annotation-based architecture.
The next step was to get acquainted with the Eclipse Rich Client Platform. This is not
an easy framework, where everything is self-explanatory and can be used even without fully
understanding it. The initial work began with reading the two books from The Eclipse Series
([EC06] and [JM05]). The first of those books was especially informative and proved to be of
great value throughout the implementation period.
The RCP proved to be a really complicated framework at times and using it has been a
challenge. On the other hand, it forces the developer to stick to design patterns and princi-
ples that make the final product better. Overall, RCP has been a great learning experience.
Some of the solutions used in RCP can be later adapted to be used in applications developed
using other tools.
The final output of this thesis – the Workbench – fulfills most of the requirements it was
given in the beginning. Thanks to the use of extension points, adding of a new processing
component does not require extensive changes or programming work other than defining a
few interfaces. This used to be a real pain with the previous demo application.
The Workbench is available as a part of the Carrot2 project (published on SourceForge
and http://www.carrot2.org). It will be distributed as an integral part of Carrot2 when
3.x version is released, replacing the old browser completely.
25

Summary and conclusions 26
FIGURE 5.1: The final version of the Carrot2 Clustering Workbench.

Bibliography
[EC06] Dan Rubel Eric Clayberg. Eclipse: Building Commercial-Quality Plug-ins. The Eclipse Series.
Addison-Wesley, second edition, 2006.
[JM05] Jean-Michel Lemieux Jeff McAffer. Eclipse Rich Client Platform: Designing, Coding, and
Packaging Java Applications. The Eclipse Series. Addison Wesley Professional, 2005.
[Osi03] Stanisław Osinski. An algorithm for clustering of web search results. Master’s thesis, Poznan
University of Technology, Poznan, Poland, 2003.
[Wei01] Dawid Weiss. A clustering interface for web search results in polish and english. Master’s
thesis, Poznan University of Technology, Poznan, Poland, 2001.
27

Web resources
[A] Carrot2
http://carrot2.org
[B] OSGi Alliance
http://www2.osgi.org/
[C] Equinox Project
http://www.eclipse.org/equinox/
[D] UI Forms
http://www.eclipse.org/articles/Article-Forms/article.html
[E] Build and test automation for plug-ins and features
http://www.eclipse.org/articles/Article-PDE-Automation/automation.html
[F] Simple XML Framework
http://simple.sourceforge.net/
28

Appendix A
Technical low-level bits
A.1 Converting a Java project to a plugin project
Select a Java project in Package Explorer, choose PDE Tools > Convert Projects to Plug-in
Projects and select your project. Two files have been added to your project:
• META-INF/MANIFEST.MF – stores all information needed for a project to be treated as
OSGi bundle: name, version, dependencies, runtime requirements etc.
• build.properties – properties needed during building of a plugin are kept in this
file.
Both of those files are edited using Manifest Editor. It is opened for MANIFEST.MF file. It is
one of the multi-page editors, let us describe each page shortly:
Overview
This page is used to edit general information about a plugin, including:
• ID – unique identifier of the plugin. It is recommended to create an ID using Java
package convention. Identifier should start with company name (usually reverted
web-site address e.g. org.carrot2), this way each company has to ensure uniqueness of
the rest of the ID. Of course, you can use ID that does not follow this recommendation,
it would look weird though.
• Version – plugin version consists of 3 parts: major, minor and service version num-
ber, e.g. 1.0.0. Optional alphanumeric qualifier can be added at the end. It is not
interpreted by Eclipse runtime in any way, but may include additional information,
like build date or repository revision number. Qualifier is usually added during build
process, so it should not be specified in MANIFEST.MF file.
• Activator – plugins can perform custom actions when being activated by extending
Plugin class. Carrot2 components must leave this field empty! Otherwise Eclipse plu-
gins would be required to compile Carrot2 code.
29

A.1. Converting a Java project to a plugin project 30
• Singleton – All plugins planning to use plugin registry should be singletons. If project
contains document source or clustering algorithm definition, this option should be
checked.
• Execution Environment – specifies minimal execution environment required to run
the plugin. Since Carrot2 is 1.5+ compliant, J2SE-1.5 environment should be chosen.
Dependencies
Two kinds of dependencies can be specified here:
• Plug-in dependencies – all the plugins that are needed at runtime should be listed
here (optionally with acceptable versions range),
• Imported packages – java packages that need to be accessible, but it is irrelevant, in
which plugin they will be found.
Every plugin has it’s own class loader and information contained on this page are used
by it to find class definitions. If plugin has successfully compiled and built, but throws
NoClassDefFoundError during execution, than most likely some required plugin/package
is not listed on this page.
Runtime
On this page two aspects of plugin’s runtime behavior are specified:
• Exported packages – I recommend adding all packages here, unless you have really
good reason to do otherwise.
• Classpath – All resources (libraries or directories) that need to be added to plugin’s
classpath should be listed here.
Extensions
List of extensions is specified here. This page will be used greatly in sections A.2 and A.3.
Extension-Points
List of extension points is specified here. You most likely will leave this page empty.
Build
Most important part here is Binary build. All folders that need to be embedded inside a plu-
gin should be checked in this list. This will most likely be directories with images, templates
etc.

A.2. Adding a new processing component 31
A.2 Adding a new processing component
In this section new document source will be added. If you want to add a new clustering
algorithm, only the extension point is different, the rest of the steps are alike.
In order to add new document source do the following:
1. Go to Extensions page in MANIFEST.MF editor.
2. Add new org.carrot2.core.source extension.
3. Fill in the id of extension, otherwise it will be set to defaults value id1, which is not
very descriptive.
4. Element source should be created along with extension. If it was not, add it now.
5. Fill in all attributes:
• class – fully qualified class name of document source component. Must im-
plement DocumentSource and be accessible from other plugins (public and ex-
ported in Runtime section of MANIFEST.MF editor – see A.1 for details).
• label – name of the component in human-readable form.
• icon – image file (preferably with transparent background and 16x16 size). Re-
member to add image directory to Binary Build (see A.1)
You should notice that new file plugin.xml was added to the project. This is the file,
where extension points and extensions are defined. They cannot be put into MANIFEST.MF
file, since extensions are not a part of OSGi specification.
To add a new clustering algorithm, extends org.carrot2.core.algorithm extension
point and point to the class that implements org.carrot2.core.ClusteringAlgorithm.
A.3 Adding a new attribute editor
It might happen that your newly-created component has some uncommon attributes and
Workbench does not provide editors for them by default. This can be easily resolved by
creating new attributeEditor extension.
Important! Editors cannot be created inside the same project that com-
ponent is created in. If they were, project would have to depend on Work-
bench Core and SWT plugins and couldn’t be compiled outside of Eclipse
RCP. New plugin can be created for sole purpose of adding editors, or they
can be added to one of the existing Workbench plugins.
In order to add new type editor do the following:
1. Go to Extensions page in MANIFEST.MF editor.
2. Add new attributeEditor extension – you can skip this step, if you already have
existing extension. Many editors can be created inside one extension.

A.3. Adding a new attribute editor 32
3. Add new typeEditor to existing extension.
4. Fill in attributeClass – fully qualified name of a class that this editor can serve.
Editor might be used for all subclasses and implementing classes too. This property is
required.
5. Fill in class – fully qualified class name of an editor.
6. If editor is suitable for specified attribute class only when certain constraints are also
present, add constraints element.
7. Add at least one constraint element.
8. For each constraint fill in constraintClass – fully qualified annotation class name.
Annotation needs to be annotated with @IsConstraint meta-annotation (see 2.3.2
for details).
9. If there are multiple constraints specified, fill in the allAtOnce property. If set to
true, all constraints will have to present for this editor to match the attribute. Other-
wise, only one of them will be enough.
In order to add new dedicated editor do the following:
1. Redo first 2 steps from previous instruction.
2. Add new dedicatedEditor to existing extension.
3. Fill in class – fully qualified class name of an editor.
4. Fill in attributeId – identifier of a attribute.
5. Fill in componentClass – fully qualified name of a component class that contains this
attribute
Implementation details
All attribute editors must implement IAttributeEditor interface. There is an empty im-
plementation provided for convenience. Meaning of different methods in this interface:
init() – first method called in lifecycle of the editor. Information from attribute descriptor
can be extracted here and stored for later use.
createEditor(parent) – controls are created here
setValue()/getValue() – pair of methods for setting/getting current value of a attribute.
Object returned by the getter must be compatible with attribute type.
dispose() – last method called in lifecycle – good place to dispose of any allocated re-
sources, especially system resources acquired like images, fonts and colors.

A.3. Adding a new attribute editor 33
add/removeAttributeChangeListener() – standard listener management methods. Ev-
ery time value of an attribute changes, listeners need to be notified.
saveState()/restoreState() – there might be a need to save state of the editor between
sessions. These methods support build-in Eclipse save-restore feature.

CD Content
A CD attached to this thesis contains the following resources:
• the PDF version of this thesis
• the Workbench source code
• the Workbench binary version for Windows and Linux
34