Description: Robinhood 60cm 5 Function Fan Forced Oven · Description: Robinhood 60cm 5 Function...
12
Description: Robinhood 60cm 5 Function Fan Forced Oven Model Numbers: OBD605K65SS Issue 2
Transcript of Description: Robinhood 60cm 5 Function Fan Forced Oven · Description: Robinhood 60cm 5 Function...
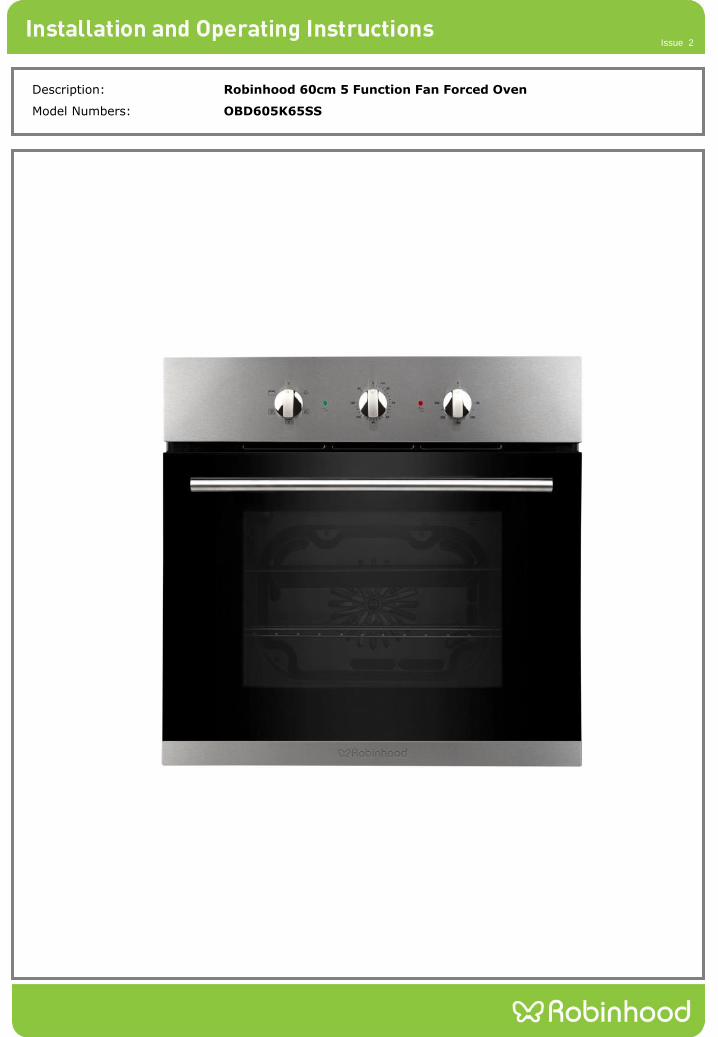
Description: Robinhood 60cm 5 Function Fan Forced Oven
Model Numbers: OBD605K65SS
Issue 2

Warning and safety information
Installing the built in oven
This appliance is not intended for use by persons (including children) with reduced physical, sensory or
mental capabilities, or lack of experience and knowledge, unless they have been given supervision or
instruction concerning use of the appliance by a person responsible for their safety. Children should be
supervised to ensure that they do not play with the appliance.
Do not leave this oven unattended or unsupervised whilst children or infirmed are present.
During use the appliance will become hot, care should be taken to avoid touching heating elements inside the
oven.
WARNING: Accessible parts may become hot during use, to avoid burns young children should be kept away.
The installation of this oven is to be carried out by using only a qualified electrician and must be earthed.
This oven is to be installed in accordance with the local, national building, electrical and plumbing codes.
This appliance is supplied with a 10 amp plug. If the power supply cable is damaged, it must be replaced by the
manufacturer or its service agent or similarly qualified person to avoid a hazard
The oven is not intended to be operated by means of an external timer or separate remote-control system.
Do not allow electrical fittings or cables to be in contact with hot areas of the appliance.
Do not use harsh abrasive cleaners or sharp metal scrapers to clean the oven glass doors since they can
scratch the surface, which may result in shattering of the glass
Do not clean the oven with a steam cleaner
.
Important: the power supply to the appliance must be turned off before any adjustments or maintenance work.
Installation of Built-in Oven
To ensure the proper working order of the built-in appliance, the kitchen unit must be of a suitable size.
To provide adequate ventilation, there must be appropriate ventilation openings in the front bottom and the top part of
200 cm2, and an exhaust opening on the bottom of a least 200 cm2 , and an exhaust opening of at least 60 cm2 .
The unit panels next to the cooker must be heat resistant. In the case of veneered wood units, glues must be resistant
to a temperature of 100℃.
In accordance with safety standards, once the appliance has been mounted, there must be no possible contact with
electrical parts. Any protective parts must be secured so that they can only be removed with the use of tools.
2

Installing the built in oven
Positioning the appliance
Ensure that the aperture that you will be fitting
the oven into, is of the size given in the
diagram.
The oven must be fitted into an oven housing
with the ventilation cut-outs shown in the
“Ventilation requirements” section below
Ensure that the rear panel of the furniture
housing unit has been removed.
Cooling fan
A tangential cooling fan is fitted inside of this
appliance, to make the internal temperature
of the oven stable and the external surface
temperature lower. After the oven has been
used the cooling fan will run on for a period
of time, until the oven is sufficiently cooled.
Ventilation requirements
(Figure shows the ventilation and cut-out requirements
for the installation of the appliance into a standard
kitchen unit).
(Figure shows the ventilation and cut-out requirements
for the installation of the appliance into a tall housing unit).
Fastening the oven
Insert the appliance into the
compartment; open the oven
door and fasten the oven to
the cabinet using the four
screws “A”, remembering to
place the special spacers
provided between the hole
and the screw itself.
3

Installation- continued
Electric connection
This oven must be connected to a 220-240V 50Hz power supply. It is earthed via the cord and 10A plug.
Before carrying out the connection to the power supply, the voltage rating of the appliance (stamped on the appliance
identification plate) must be checked for correspondence to the available mains supply voltage, and the mains electric
wiring should be suitable for the oven’s power rating (also indicated on the appliance identification plate);
The switched outlet must be connected to a suitable earth wiring, in conformity to current safety regulations.
This appliance must be plugged into a 10A switched outlet. It should not be located above the appliance and no more
than 1.25m away from it. The power supply cord must not touch against any hot surfaces and must be placed so that its
temperature does not exceed 75C at any point along its length.
After having installed the appliance, the switched outlet must always be in an accessible position. If the electrical supply
(outlet and plug) is restricted, means of all-pole disconnection (circuit breaker) must be accessible and incorporated in the
fixed wiring in accordance with the wiring rules.
NOTE: For connections to the mains power supply, never use adapters, reductions or multiple power points as these may
overheat and catch fire.
The mains terminal block is located on the back of the oven and the terminals are accessible by opening the terminal
block cover. Note: The terminal cover should not be opened when the mains power is still connected to the appliance and
never by an unauthorized person.
The electrical safety of this appliance can only be guaranteed if the oven is correctly and efficiently earthed. The
manufacturer declines all responsibility for damage resulting from an installation which has not been earthed correctly
4

Instruction on use
Control panel features
This oven combines in a single appliance the advantages of traditional convection ovens with those of modern forced air
ventilation ovens.
It is an extremely versatile appliance that allows you to easily and safely choose between 5 different cooking modes. The
selection of the various functions can be obtained by putting the programmer to the manual position or setting a
beginning/end of cooking program and successively by turning the selector (B) and thermostat (C) knobs on the control
panel.
Oven programmer/timer display
1.Oven function selector knob
2.Indicator light
3.Oven programmer/timer display
4.Oven operating light
5.Thermostat control knob
Timer
1. If no need to use the oven programmer, setting the timer on “NO” and connected to your mains supply.
2. If need to use the timer, you turn the timer knob as you wish, then choose a time between
0~120 mins, the oven will power off when the timing is finished.
IMPORTANT: The oven power off when the alarm silenced. If you have
finished cooking, then you should turn the oven function selector
and thermostat control knob to 0.
Setting a cooking function and temperature
1.When your appliance is connected to the mains supply for the first time, the power indicator light will come on, after
selecting the cooking function and setting a temperature, the operating light will come on and the oven will start working,
finally setting the cooking time;(the cooking time is from 0min to 120mins, revolving the knob in clockwise direction to the
corresponding time on panel when setting the cooking time.
2.The oven function selector knob should be used to select the particular mode of cooking that you require. The appliance
will utilise different elements within the oven cavity, depending on the oven function that you select. When a function is
selected, the power indicator light will come on.
Functions
Light: Operates the interior light
Fan : The fan runs without heat to reduce defrosting time on frozen foods. The time required to defrost
the food depends on the room temperature.
Fan Assisted Grill:
The fan circulates heat from the oven grill around the food, simultaneous quick browning and sealing
the juices in. Economical rotisserie or spit effect.
Rear element and Fan Forced:
This method of cooking uses the circular element and the heat is distributed by the fan. This results
in a faster more economical cooking process. The fan oven allows food to be cooked simultaneously
on different shelves.
Conventional Grill:
This cooking method is for normal grilling using inner and outer parts of top element. It’s ideal for
medium to large portions of sausages, bacon, fish etc.
min
80
40120
ON 20
60100
No
5

Instructions on use - continued
Thermostat Controls
The oven thermostat control knob sets the required temperature of the oven.
It is possible to regulate the temperature within a range of 50-250 degree
centigrade
Note: Turn to the knob clockwise only.
Oven operating light
This light will come on to indicate that the oven’s heating elements are in operation.
The light will turn off when the temperature set on the thermostat control knob has been reached. It will cycle on and off
throughout the cooking time.
Note: You should not place food inside the oven until the correct temperature has been reached.
Cooking guidelines
•Please refer to the information given on food packaging for guidance on cooking temperatures and times. Once familiar
with the performance of your appliance, temperatures and times can be varied to suit personal preference.
•If you are using the fan oven function, then you should follow the information given on the food packaging for this
particular mode of cooking.
•Make sure that frozen foods are thoroughly thawed before cooking, unless the instructions on the food packaging
advise that you can “cook from frozen”.
•You should pre-heat the oven and not place food inside of it until the oven operating light has gone off. You can choose
not to pre-heat when using the fan oven mode; however you should extend the cooking time given on the food
packaging by approximately ten minutes.
• Before cooking, check that any accessories that are not required are removed from the oven.
•Place cooking trays in the centre of the oven and leave gaps between the trays to allow air to circulate.
•Try to open the door as little as possible to view the dishes.
•The oven light will remain on during cooking.
Light
6
Accessories:
Your oven will come supplied with the following items:
1. Oven shelf (A)
2. Drip tray (B)
The numbers 1 -4 indicate the different shelf positions that you
can use.

Instructions on use - continued
Wire Shelves & Tray
The 2 wire shelves come with a built-in safety feature to help minimise them being accidentally pulled fully out. This
comes in the way of a “step”, positioned part-way in from the rear of the accessory. To fit them into the oven, push the
wire shelf part way into the oven until the step “catches”, then angle the part over the step & fully insert. To remove,
repeat the operation in reverse.
The tray comes with a removable wire handle. Hook the handle over the front edge of the tray and adjust the handle to
the horizontal position. To remove, angle the handle back up while the tray is supported.
Replacing the light bulb
Turn off the supply of power to the oven by turning off the circuit breaker connecting it to the mains, or by removing the
plug if it is accessible;
Unscrew the glass cover attached to the lamp holder;
Unscrew the lamp and replace it with another high-temperature lamp (300℃) with the following characteristics:
Voltage: AC220V-240V
Wattage: 25W
Socket: E 14
Temperature rating: 300 degrees centigrade
Remount the glass cover and reconnect the appliance to the power supply.
WARNING:
Ensure that the appliance is switched off before
replacing the lamp to avoid the possibility of electric shock.
Disassembling/assembling the oven door
To make it easier to clean the inside of your oven, the oven door can be removed, by proceeding as follows (fig. 1-2):
•Open the door completely and lift the 2 levers “B” (fig.1);
•Now, shutting the door slightly, you can lift it out by pulling out the hooks “A” as shown in figure 2.
To reassemble the door:
•With the door in a vertical position, insert the two hooks “A into the slots;
•Ensure that seat “D” is hooked perfectly onto the edge of the slot (move the oven door backwards and forward
slightly);
•Keep the oven door open fully, unhook the 2 levers “B” downwards and then shut the door again
7
Maintenance and cleaning

Maintenance
How to keep your oven in good condition
Important: Before cleaning your oven, or performing maintenance, disconnect it from the power supply.
To extend the life of your oven, it must be cleaned frequently, keeping in mind that:
•Do not use steam equipment to clean the appliance
•The enamelled or stainless steel parts should be washed with lukewarm water without using any abrasive powders
or corrosive substances which could ruin them; Stainless steel could get stained. If these Stains are difficult to
remove, use special products available to rinse thoroughly any dry.
•The inside of the oven should preferably be cleaned immediately after use, when it is still warm, with hot water and
soap; the soap should be rinsed away and the interior dried thoroughly. Avoid using abrasive detergents (for
example cleaning powders) and abrasive sponges for dishes or acids (such as lime scale-remover, etc…) as
these could damage the enamel. If the grease spots and dirt are particularly tough to remove, use a special product
for oven cleaning, following the instructions provided on the packet.
•If you use your oven for an extended period of time, condensation may form. Dry it using a soft cloth.
•There is a rubber seal surrounding the oven opening which guarantees its perfect functioning. Check the condition of
this seal on a regular basis. If necessary, clean it and avoid using abrasive products or objects to do so. Should it
become damaged, please contact Customer Service. We recommend you avoid using the oven until it has been
repaired.
•Never line the oven bottom with aluminium foil, as the consequent accumulation of heat could compromise the
cooking and even damage the enamel.
•Clean the glass door using non-abrasive products or sponges and dry it with a soft cloth.
•Do not use harsh abrasive cleaners or sharp metal scrapers to clean the oven door glass since they can
scratch the surface, which may result in shattering of the glass.
8

Troubleshooting
The oven isn’t coming on.
• Check that the oven is in manual operation mode.
• Check that you have selected a cooking function and a cooking temperature.
There appears to be no power to the oven and grill.
• Check that the appliance has been connected to the electrical mains supply correctly.
• Check that the mains fuses are in working order.
• Check that the operating instructions for setting the time of day and putting the appliance into manual operation mode
have been followed.
The grill function works but the main oven does not.
• Check that you have selected the correct cooking function.
The grill and top oven element is not working, or cuts out for long periods of time during use.
• Allow the oven to cool for approximately 2 hours. Once cool, check whether the appliance is again working properly.
My food is not cooking properly
• Ensure that you are selecting the correct temperature and the correct cooking function for the food that you are cooking.
It may be appropriate to adjust your cooking temperature by plus or minus 10°C, to achieve the best cooking results.
My food is not cooking evenly
• Check that the oven has been installed correctly and is level.
• Check that the correct temperatures and shelf positions are being used.
The oven light is not working
• Refer to previous page and follow the “Replacing the oven bulb” section.
I am getting condensation in my oven
• Steam and condensation is a natural by product of cooking any food with high water content, such as frozen food,
chicken etc.
• You may get condensation in the oven cavity and forming between the oven door glasses. This is not necessarily a sign
that the oven is not working correctly.
• Do not leave food in the oven to cool after it has been cooked and the oven has been switched off.
• Use a covered container, where practical, when cooking to reduce the amount of condensation that forms.
Technical information
Oven size 65 litres
Width 595mm
Depth 555mm
Height 595mm
Voltage 220-240 / 50hz
Wattage 2350W
Light Specifications
Oven light 25W / 300C
9

The appliance may be built-in and connected to the power supply only by a qualified technician.
Particular areas of the cooktop surface (adjacent to the hotplates) are hot during operation.
Hot oil ignites readily, so be sure have the preparation of such food (fries) under constant control.
Hotplates may not be left in operation empty, without any dishes on top.
Never use the appliance as a room heater.
Never use the ceramic-glass cooktop as a working surface. Sharp objects may damage the cooktop
surface.
Never place any metal objects upon the induction hotplate, such as knives, forks, spoons, pot lids, and
the like, as they may get very hot.
Preparation of food in aluminium or plastic cookware is not allowed. Never place any plastic objects or
aluminium foil upon the cooktop surface.
In case any other appliances are plugged in the electric mains close to the cooktop, prevent contact
of the plug cable with the hot cooking zones.
Never keep any flammable or temperature sensitive objects, like cleaning agents, sprays, detergents, etc.,
below or near the appliance.
Never use cracked or broken ceramic-glass cooktop. In case you notice any visible cracks on the surface,
cut the power supply immediately and contact Customer Service.
In case of any malfunction, disconnect the appliance from the power supply and call customer service.
Do not use high-pressure steam cleaner or hot steam to clean the appliance.
The appliance is manufactured in compliance with the relevant safety standards.
Important information
10

Warranty Certificate (New Zealand)
Pre-Installation
Terms and Conditions
The following conditions apply in respect of the warranty given in this certificate:
1. Monaco Corporation Limited (“Monaco”) warrants the following Robinhood products against manufacturing defects and
faulty materials, under normal use and subject to the exclusions in this certificate, for a period of:
Rangehood, Ovens, Cooktops, Dishwashers - 24 months from date of original purchase for domestic use. Uniduct – 12 months from date of original purchase for domestic use. Ironing centre – 12 months from date of original purchase for domestic use.
Taps, including Pull-out and Mixer taps – 5 years on parts only from date of original purchase domestic for use, 24 months parts and labour from date of original purchase for domestic use
Sinks sets– 5 years on stainless steel sink including draining bench from date of original purchase for domestic use, 6 months on all stainless steel accessories, including wire rack, colander and tray from date of original purchase for domestic use.
Laundry Tub - 5 years on stainless bowl, 24 months on Tap, Cabinet and other components from the date of original purchase for domestic use.
“Original purchase”, when used in this certificate, means purchase by the customer directly from Monaco or one of its approved suppliers.
2. This warranty is limited to the repair or replacement, at our option, within the warranty period of any component part which we at our discretion determine to contain faulty materials or a manufacturing defect in breach of this warranty. This warranty is subject to terms and conditions set out in this certificate.
3. The warranty only applies within New Zealand.
4. The customer must produce the original invoice or other purchase documentation as proof of the original purchase date. Warranty exclusions
1. The warranty does not apply where, in Monaco’s opinion:
The defect is caused by misuse, wear and tear, dirt, fire or accidental damage. The product has been repaired or serviced by an unauthorised person. The product was not installed in accordance with our instructions. The product was purchased overseas or was not designed for use in New Zealand. The product was not used, cleaned or cared for in accordance with our instructions.
The product was used outdoors.
2. In addition, this warranty does not extend to damage or defects which in our opinion, directly or indirectly arise from or are due to:
Exposing the product to acidic or corrosive materials or chemicals such as dyes, solvents, denture cleaner or acetone;
Using inappropriate household cleaning products such as abrasive cream or powder cleansers, furniture polish, bleach, mentholated spirits, drain cleaners, sugar soap, metal pads and strongly alkaline or acidic cleaners;
Heat damage, including from washing the product at high temperatures;
Impact or mishandling the product, including the impact caused by objects scraped along, thrown or dropped on the product surface or excessive weight being placed on the product; Structural or support changes in or affecting the building or the application where the product has been installed;
Failure to clean or maintain the product as recommended; or
any other causes specified in the product information as being excluded from this warranty.
3. Variations with the colour or gloss within the product or any ageing or fading of colour, shine or gloss level over time are not covered by this warranty. The warranty does not cover visual imperfections or blemishes in the surface and edges of the product that were not brought to your supplier’s attention at the time you inspected the product.
4. Costs incurred on installation or removal of a product, or any reinstallation of a product, or any associated costs, are not covered by this warranty.
5. Monaco will not be liable for consequential or indirect loss or damage whatsoever and however arising out of or in connection with the supply, performance or removal of the product, including (but not limited to) loss of profit, loss of revenue, loss of contract, loss of goodwill or increased cost of workings, even if due to the negligence of Monaco or any of its approved suppliers, employees or agents. 6. Charcoal filters and light bulbs are not covered by this warranty
7. This warranty and the statements contained in this certificate or other documents given to you do not exclude, restrict or modify the application of any term implied into this warranty by statute, provided that (to the extent any statutory provision permits Monaco to limit its liability for a breach of an implied condition or warranty) Monaco’s liability for such breach is limited to the payment of the cost of replacing the product, repairing the product or acquiring an equivalent product.
8. Subject to clause 5, our obligations under this warranty are limited to those set out in this certificate, and this warranty is expressly instead of all other warranties, express or implied, including any implied warranty of merchantability or fitness for a particular purpose and notwithstanding any course of dealing between the parties or custom and usage in trade to the contrary.
Terms and conditions are subject to change.
New Zealand Monaco Corporation Ltd Telephone: (09) 415 6000 Facsimile: (09) 415 7400 Email: [email protected] www.robinhood.co.nz

Warranty Certificate (Australia)
Australia Shriro Australia Pty Ltd ABN 28 002 386 129 Telephone: 1800 648 556 Facsimile: 1800 628 577 Email: [email protected] www.robinhood.com.au
Terms and Conditions
If you are a consumer under the Australian Consumer Law, our goods come with guarantees that cannot be excluded under the Australian Consumer
Law. You are entitled to a replacement or refund for a major failure and for compensation for any other reasonably foreseeable loss or damage. You are
also entitled to have the goods repaired or replaced if the goods fail to be of acceptable quality and the failure does not amount to a major failure
1. Shriro Australia Pty Limited (“Shriro”) also warrants the following Robinhood products against manufacturing defects and faulty materials, under normal
use and subject to the exclusions in this certificate, for a period of:
Rangehood, Ovens, Cooktops, Dishwashers - 24 months from date of original purchase for domestic use.
Uniduct – 12 months from date of original purchase for domestic use.
Ironing centre – 12 months from date of original purchase for domestic use.
Taps, including Pull-out and Mixer taps – 5 years on parts only from date of original purchase domestic for use, 24 months parts and labour from date
of original purchase for domestic use
Sinks sets– 5 years on stainless steel sink including draining bench from date of original purchase for domestic use, 6 months on all stainless steel
accessories, including wire rack, colander and tray from date of original purchase for domestic use.
Laundry Tub - 5 years on stainless bowl, 24 months on Tap, Cabinet and other components from the date of original purchase for domestic use.
“Original purchase”, when used in this certificate, means purchase by the customer directly from Shriro or one of its approved suppliers.
2. This warranty is limited to the repair or replacement, at our option, within the warranty period of any component part which we at our discretion
determine to contain faulty materials or a manufacturing defect in breach of this warranty. This warranty is subject to terms and conditions set out in this
certificate.
3. The warranty only applies within Australia.
4. For warranty service outside of capital city metropolitan area or 30 km from nearest authorised service agent you will be liable for reasonable travelling
expenses and the cost of transport of the product or parts to and from the service agent
5. To make a claim under this warranty, you must produce the original invoice or other purchase documentation as proof of the original purchase date.
You must send your claim to Shriro Australia Pty Limited, 104 Vanessa Street, Kingsgrove NSW 2208 within 7 days of any alleged defect or failure of the
product first becoming apparent, you are responsible for the expense of making a claim under this warranty.
This warranty is given by:
Shriro Australia Pty Ltd
ABN 28 002 386 129
Telephone: 1800 648 556
Facsimile: 1800 628 577
Email: [email protected]
www.robinhood.com.au
Attention Customer Services Manager
Warranty exclusions
1. The warranty does not apply where, in Shriro’s opinion:
The defect is caused by misuse, wear and tear, dirt, fire or accidental damage.
The product has been repaired or serviced by an unauthorised person.
The product was not installed in accordance with our instructions.
The product was purchased overseas or was not designed for use in Australia.
The product was not used, cleaned or cared for in accordance with our instructions.
The product was used outdoors.
2. All Robinhood Rangehoods are suitable for indoor use only and not suitable over BBQs or charcoal cookers designed for outdoor use.
3. In addition, this warranty does not extend to damage or defects which in our opinion, directly or indirectly arise from or are due to: exposing the product
to acidic or corrosive materials or chemicals such as dyes, solvents, denture cleaner or acetone; using inappropriate household cleaning products such
as abrasive cream or powder cleansers, furniture polish, bleach, mentholated spirits, drain cleaners, sugar soap, metal pads and strongly alkaline or
acidic cleaners; heat damage, including from washing the product at high temperatures;
impact or mishandling the product, including the impact caused by objects scraped along, thrown or dropped on the product surface or excessive weight
being placed on the product; structural or support changes in or affecting the building or the application where the product has been installed; failure to
clean or maintain the product as recommended; or any other causes specified in the product information as being excluded from this warranty.
4. Variations with the colour or gloss within the product or any ageing or fading of colour, shine or gloss level over time are not covered by this warranty.
The warranty does not cover visual imperfections or blemishes in the surface and edges of the product that were not brought to your supplier’s attention
at the time you inspected the product.
5. We will not be responsible under this warranty for, nor pay the costs of, removing the existing product, or reinstalling the new product, or any
associated costs or damages.
6. Charcoal filters and light bulbs are not covered by this warranty
The benefits given by this warranty are in addition to other rights and remedies of consumers under any law in relation to the goods which cannot be
excluded.
This warranty certificate is not intended to create a contract between Shriro Australia Pty Limited and the purchaser.