Demo Script - Using IBM Bluemix DevOps Services Fix, build...
14
Demo Script - Using IBM Bluemix DevOps Services Fix, build and deploy an application in the cloud with Bluemix DevOps Services This demo script covers some key Bluemix DevOps Services capabilities, such as: • Track and Plan: Track work in Agile projects • Web IDE: Write code directly on the cloud, using a web browser • Git hosting: Source control using the hosted Git repository • Delivery Pipeline: Automated builds and deployments for continuous integration and delivery (on Bluemix) • Bluemix integration: Application are easily deployed to the cloud (Bluemix) The goal of this demo in not to teach how to use Bluemix Services, but just to showcase some capabilities. If you need educational material, refer to http://bluelabs.mybluemix.net/workshops first. This demo does not cover any Bluemix Mobile service, such as Mobile Quality Assurance (MQA). But the overall scenario is very similar to what Dan Berg demonstrates in his video at https://www.youtube.com/watch?v=EHng3L2JScU Time Required: • Create and deploy your own demo app: Less than 5 minutes • Prepare the demo: Approximately 10 minutes. • Run the demo: Approximately 15 minutes. Prerequisites To run this demonstration, you need to be registered at Bluemix and DevOps Services . See the detailed prerequisites for the demo on http://bluelabs.mybluemix.net/demos/homestead The demo application works on a computer or a mobile device (tablets and smartphones using Android or iOS). If you don't have a lot of experience with Bluemix DevOps Services, it is strongly recommended to complete some hands-on exercises before you deliver a customer facing demonstration. You will find some material on http://bluelabs.mybluemix.net/workshops About the App In this demo, you will use the "Homestead Demo" application to show how DevOps Services supports agile teams. Homestead Co is a retailer of products for outdoor activities. On their website, they sell items such as ski boots, backpacks, hiking boots, or bikes. Homestead Demo is a simple web application that can be deployed on Bluemix. Page 1 / 14
Transcript of Demo Script - Using IBM Bluemix DevOps Services Fix, build...

Demo Script - Using IBM Bluemix DevOps ServicesFix, build and deploy an application in the cloud with Bluemix DevOps Services
This demo script covers some key Bluemix DevOps Services capabilities, such as:• Track and Plan: Track work in Agile projects• Web IDE: Write code directly on the cloud, using a web browser• Git hosting: Source control using the hosted Git repository• Delivery Pipeline: Automated builds and deployments for continuous integration and
delivery (on Bluemix)• Bluemix integration: Application are easily deployed to the cloud (Bluemix)
The goal of this demo in not to teach how to use Bluemix Services, but just to showcase some capabilities. If you need educational material, refer to http://bluelabs.mybluemix.net/workshops first.This demo does not cover any Bluemix Mobile service, such as Mobile Quality Assurance (MQA). But the overall scenario is very similar to what Dan Berg demonstrates in his video at https://www.youtube.com/watch?v=EHng3L2JScU
Time Required:• Create and deploy your own demo app: Less than 5 minutes• Prepare the demo: Approximately 10 minutes.• Run the demo: Approximately 15 minutes.
PrerequisitesTo run this demonstration, you need to be registered at Bluemix and DevOps Services. See the detailed prerequisites for the demo on http://bluelabs.mybluemix.net/demos/homesteadThe demo application works on a computer or a mobile device (tablets and smartphones using Android or iOS).If you don't have a lot of experience with Bluemix DevOps Services, it is strongly recommended to complete some hands-on exercises before you deliver a customer facing demonstration. You will find some material on http://bluelabs.mybluemix.net/workshops
About the AppIn this demo, you will use the "Homestead Demo" application to show how DevOps Services supports agile teams. Homestead Co is a retailer of products for outdoor activities. On their website,they sell items such as ski boots, backpacks, hiking boots, or bikes.Homestead Demo is a simple web application that can be deployed on Bluemix.
Page 1 / 14

Overview of the demo scenarioThe demo scenario is fairly simple. As a user, you discover a problem in the web application. To have this problem solved, you (or someone at Homestead) create a defect and assign it to the upcoming sprint (Track & Plan)As a Software Engineer at Homestead, you find the source code that causes the problem. Then you fix the defect on the cloud from a web browser (Web IDE).You commit your changes, and you specify the defect number to enable traceability between the change set and the work item. (Git Hosting)When you push your changes to the repository, the application is automatically built and deployed (Delivery Pipeline). The user can verify that the problem has been fixed. Then you close the corresponding defect
Get your Demo App Running in Less than 5 MinutesFrom nothing to a live demo application in a couple of minutes.
1- Fork the Homestead Demo application
The objective is to create your own copy of the HomesteadDemo application. Then you will have full control to modify and deploy the app.
1. Navigate to https://hub.jazz.net/project/jlmarech/HomesteadDemo
2. Click the EDIT CODE button in the upper-right corner. You are asked to sign in on Bluemix DevOps Services.
3. Click the FORK button in the upper-left corner.4. Type a name for your project.5. Make sure that the options for add features for Scrum development and Deploy to
Bluemix are checked (see image below)6. Then click CREATE.
Page 2 / 14

2- Deploy your demo application
Bluemix DevOps Services provides support automated builds and automated deployments. Here you create a delivery pipeline in just a few steps. In this demo project, everything has been pre-configured to minimize manual updates. Your application will be built, deployed, and ready to use in no time.
You first configure the pipeline to automatically build the application (builder stage)
1. On the upper-right-corner, click BUILD & DEPLOY.2. On the Pipeline page, click ADD STAGE.3. On the INPUT tab, specify a stage name (BuildStage), and make sure that the
“Automatically execute jobs...” option is checked.4. On the JOBS tab, click ADD JOB, and select Build for the job type
5. Click SAVE. Automated build is now enabled for your demo project.
Now you go a step further and you configure continuous delivery (deployment stage)
6. On the Pipeline page, click ADD STAGE.7. On the INPUT tab, specify a stage name (DeployStage), and make sure that the
“Automatically execute jobs...” option is checked.8. On the JOBS tab, click ADD JOB, and select Deploy for the job type9. In the Script section, remove all the code and replace it with the following command:
source app-deploy.sh
When the deployer is triggered, it will call a predefined script file (app-deploy.sh) that has been created for you in this demonstration project.
Page 3 / 14

10. Click SAVE. Automated deployment is defined and configured for your demo project.
11. On the Build Stage, click the play (Run Stage) button to request a build.
The pipeline first builds your application. When the build completes, the next stage (deploy) is automatically started. And the application is deployed.
12. When the deployment completes, a green circle is displayed. Click the URL link to explore your deployed application.
Page 4 / 14

13. Verify that the Products page displays multiple sporting goods, and that the Bikes page displays some bikes.
Your application is up and running in the cloud.
Page 5 / 14

Get Prepared for the Demo (~10 min.)
Follow the instructions below to prepare your environment for the demo
1- Update project description
You can add a description and a picture to your DevOps Services project. This step is not required to run a demo, but it makes your project look more realistic.
1. In the upper-right corner, click the Gear icon (settings)
2. Enter a project description then click SAVE. 3. Click Add Photo and select any image file from your disk.
2- Configure Agile Planning
Your application is almost ready to be used for a demo. You just need to configure the project to support the more recent agile planning features.
1. On the upper-right corner, click the Gear icon to access project settings (not needed if you performed optional step 1)
2. From the left pane, open the OPTIONS page, verify that "Enable Track & Plan" and "Make this a a Bluemix project" options are checked.
3. On the upper-right-corner, click TRACK & PLAN. The agile planning page opens ("Quick Planner")
4. On the left pane, click Sprint Planning. On the planning page, click Add Sprints. Create two Sprints of two weeks each, as shown in the picture below.
5. Click Create. You have created two Sprints for your project. You will use these Sprints during the demo later.
Page 6 / 14
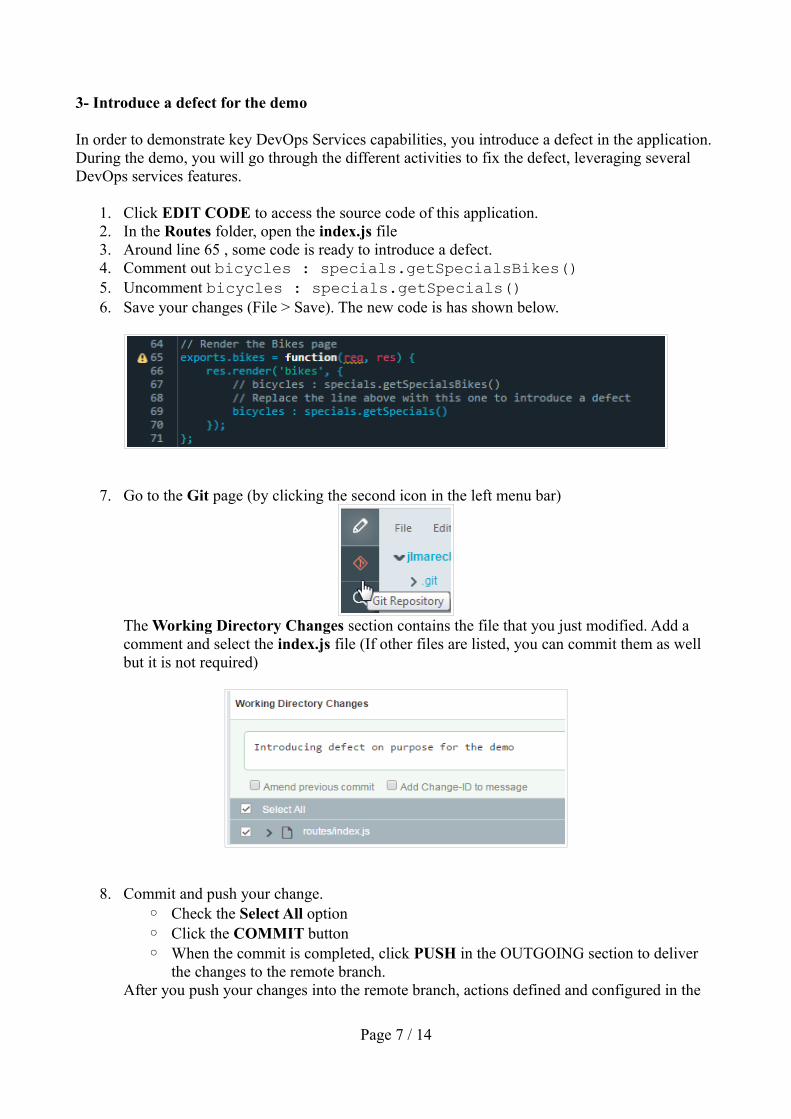
3- Introduce a defect for the demo
In order to demonstrate key DevOps Services capabilities, you introduce a defect in the application. During the demo, you will go through the different activities to fix the defect, leveraging several DevOps services features.
1. Click EDIT CODE to access the source code of this application.2. In the Routes folder, open the index.js file3. Around line 65 , some code is ready to introduce a defect.4. Comment out bicycles : specials.getSpecialsBikes()5. Uncomment bicycles : specials.getSpecials()6. Save your changes (File > Save). The new code is has shown below.
7. Go to the Git page (by clicking the second icon in the left menu bar)
The Working Directory Changes section contains the file that you just modified. Add a comment and select the index.js file (If other files are listed, you can commit them as well but it is not required)
8. Commit and push your change. ◦ Check the Select All option ◦ Click the COMMIT button◦ When the commit is completed, click PUSH in the OUTGOING section to deliver
the changes to the remote branch. After you push your changes into the remote branch, actions defined and configured in the
Page 7 / 14

pipeline are triggered.
9. Click BUILD & DEPLOY to open the pipeline page. Notice that the application is automatically built and deployed to Bluemix.
10. When build and deployment complete, open the application. On the Bikes page, notice that now ski boots items are displayed, in addition to some bikes.
Congratulations! You have successfully introduced a bug in the Homestead application. You are now ready to run the demo using the script documented in the next section.
Note: Another compelling demo scenario for developer audiences is to fork a project and use the manual deployment (deploy icon in the menu bar) option instead of the delivery pipeline. Additional configuration in the manifest.yml file is needed to cover such a scenario. Refer to the “Advanced Configuration” section for guidance.
Page 8 / 14

Run the Demo (15 min.)Fix, build and deploy an application on the cloud using Bluemix DevOps Services
Follow these instructions to demonstrate key DevOps Services capabilities (Track & Plan / Web IDE / Git Hosting / Delivery Pipeline / Bluemix integration)
1- Find and log a defect (Track & Plan)
1. Go to the Homestead web application2. On the main menu, click Bikes to display all the bikes available at Homestead. Because the
page also displays ski boots, there is an error in the application.Note: You may invite people to access the demo app on their smartphone or tablet. When you fix the code, people can see the change live on their device.
3. Open your Homestead project in DevOps Services. 4. Click TRACK & PLAN5. On the left pane, click Sprint Planning6. On the backlog, create a new defect
◦ Type: Defect◦ Summary: The Bike page also displays ski boots◦ Priority: High
7. Click SAVE to create the defect.
8. On a real project, the backlog would contain several items. Let's assume that this one is the most important. Assign it to Sprint 1 (drag & drop) so that the defect is addressed quickly. The new defect is assigned to the Sprint backlog.
9. Change the owner to assign the defect to a team member (Owner: assign yourself)10. On the Sprint Planning view, in the backlog for Sprint 1, click the defect to open it.11. Change the status (Start working). 12. Add a comment in the DISCUSSION field.: "I confirm this is a defect, I
am working on it right now"13. Click SAVE.14. Note the defect number (42886 in this example). You will need this number later.
2- Modify the code to solve the problem (Web IDE)
1. Click EDIT CODE2. Open the index.js file (routes folder)3. In the code that renders the Bikes page (around line 68), replace
◦ bicycles : specials.getSpecials() ◦ with bicycles : specials.getSpecialsBikes()
4. Save the change (note that the web IDE has an auto-save feature)
Page 9 / 14
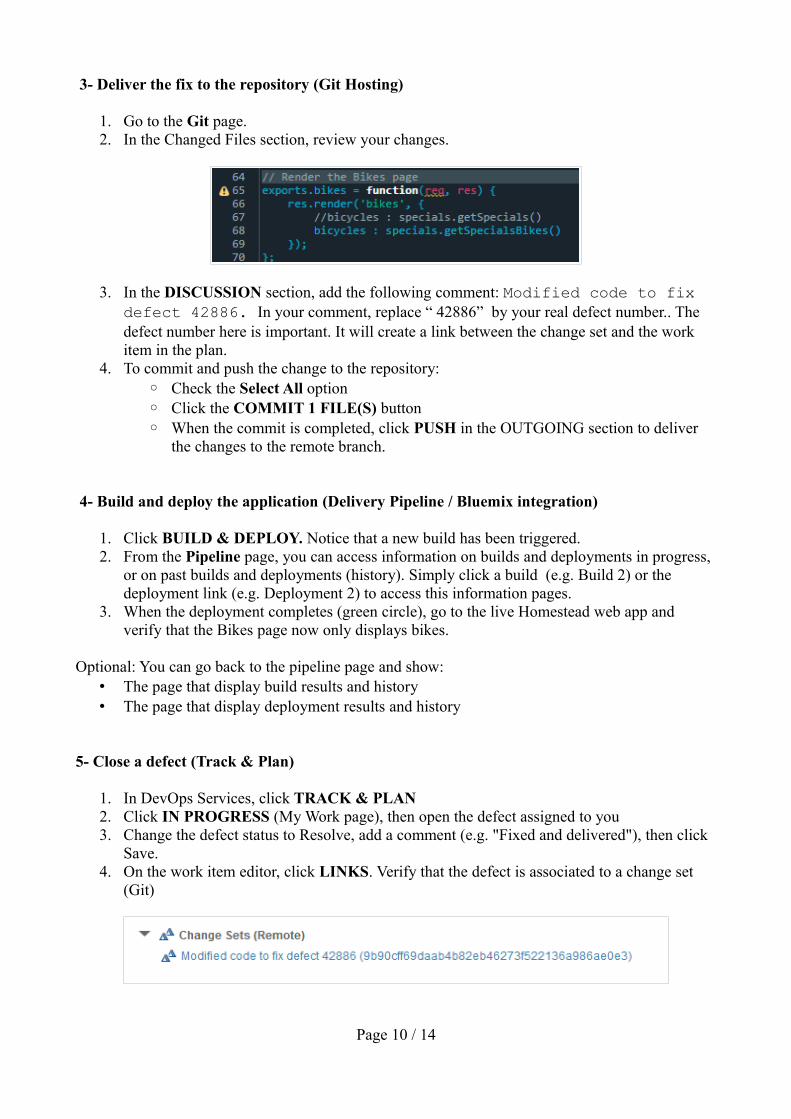
3- Deliver the fix to the repository (Git Hosting)
1. Go to the Git page.2. In the Changed Files section, review your changes.
3. In the DISCUSSION section, add the following comment: Modified code to fix defect 42886. In your comment, replace “ 42886” by your real defect number.. The defect number here is important. It will create a link between the change set and the work item in the plan.
4. To commit and push the change to the repository:◦ Check the Select All option ◦ Click the COMMIT 1 FILE(S) button◦ When the commit is completed, click PUSH in the OUTGOING section to deliver
the changes to the remote branch.
4- Build and deploy the application (Delivery Pipeline / Bluemix integration)
1. Click BUILD & DEPLOY. Notice that a new build has been triggered. 2. From the Pipeline page, you can access information on builds and deployments in progress,
or on past builds and deployments (history). Simply click a build (e.g. Build 2) or the deployment link (e.g. Deployment 2) to access this information pages.
3. When the deployment completes (green circle), go to the live Homestead web app and verify that the Bikes page now only displays bikes.
Optional: You can go back to the pipeline page and show:• The page that display build results and history• The page that display deployment results and history
5- Close a defect (Track & Plan)
1. In DevOps Services, click TRACK & PLAN2. Click IN PROGRESS (My Work page), then open the defect assigned to you3. Change the defect status to Resolve, add a comment (e.g. "Fixed and delivered"), then click
Save.4. On the work item editor, click LINKS. Verify that the defect is associated to a change set
(Git)
Page 10 / 14
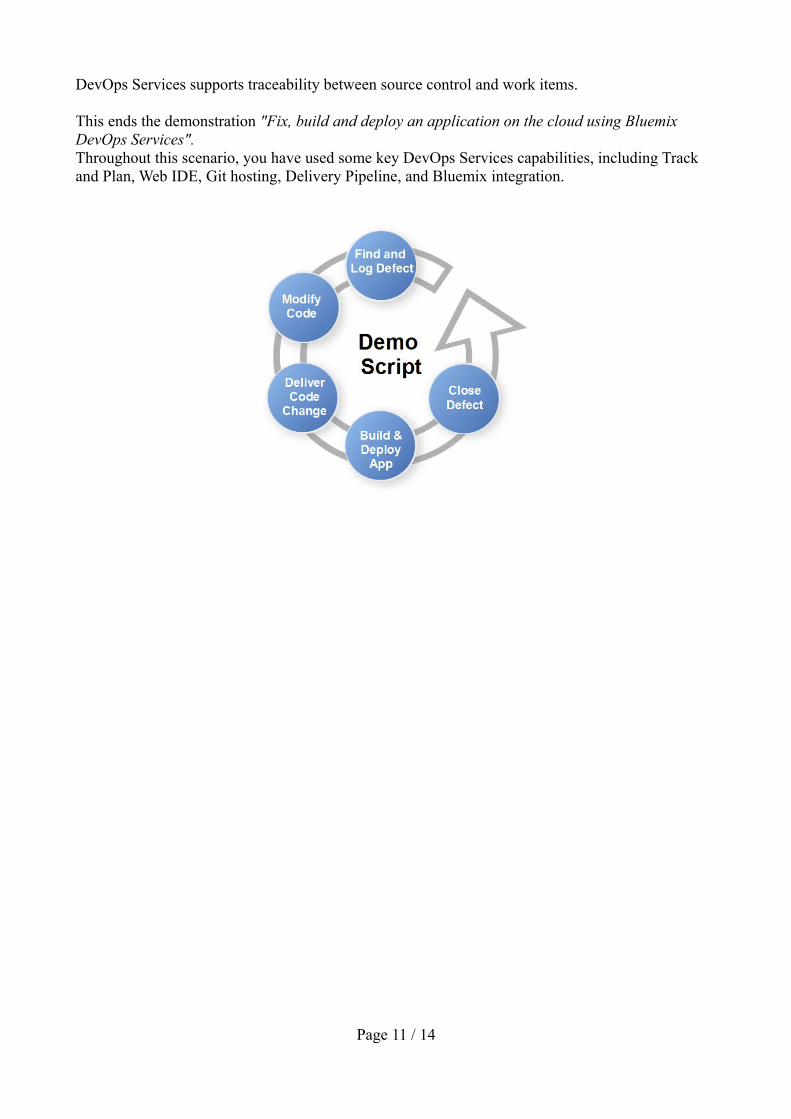
DevOps Services supports traceability between source control and work items.
This ends the demonstration "Fix, build and deploy an application on the cloud using Bluemix DevOps Services".Throughout this scenario, you have used some key DevOps Services capabilities, including Track and Plan, Web IDE, Git hosting, Delivery Pipeline, and Bluemix integration.
Page 11 / 14
Advanced Configuration
The demo project has been created to facilitate reuse and minimize the work needed before you can run a demo in front of an audience.To reuse the Homestead Demo application is other scenarios, you may want to customize the project to fit your needs.
Clean up deployment configuration information
When you fork a project, it may contain some deployment information that you want to get rid off.
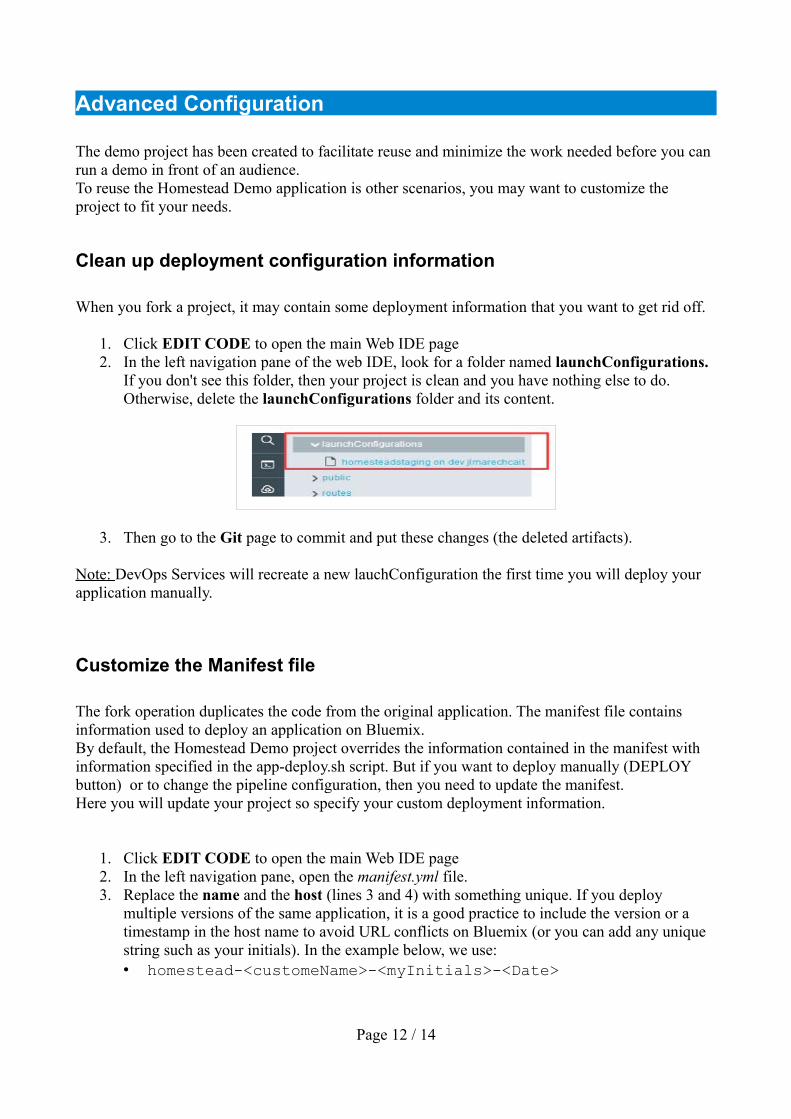
1. Click EDIT CODE to open the main Web IDE page2. In the left navigation pane of the web IDE, look for a folder named launchConfigurations.
If you don't see this folder, then your project is clean and you have nothing else to do. Otherwise, delete the launchConfigurations folder and its content.
3. Then go to the Git page to commit and put these changes (the deleted artifacts).
Note: DevOps Services will recreate a new lauchConfiguration the first time you will deploy your application manually.
Customize the Manifest file
The fork operation duplicates the code from the original application. The manifest file contains information used to deploy an application on Bluemix. By default, the Homestead Demo project overrides the information contained in the manifest with information specified in the app-deploy.sh script. But if you want to deploy manually (DEPLOY button) or to change the pipeline configuration, then you need to update the manifest.Here you will update your project so specify your custom deployment information.
1. Click EDIT CODE to open the main Web IDE page2. In the left navigation pane, open the manifest.yml file.3. Replace the name and the host (lines 3 and 4) with something unique. If you deploy
multiple versions of the same application, it is a good practice to include the version or a timestamp in the host name to avoid URL conflicts on Bluemix (or you can add any unique string such as your initials). In the example below, we use:• homestead-<customeName>-<myInitials>-<Date>
Page 12 / 14
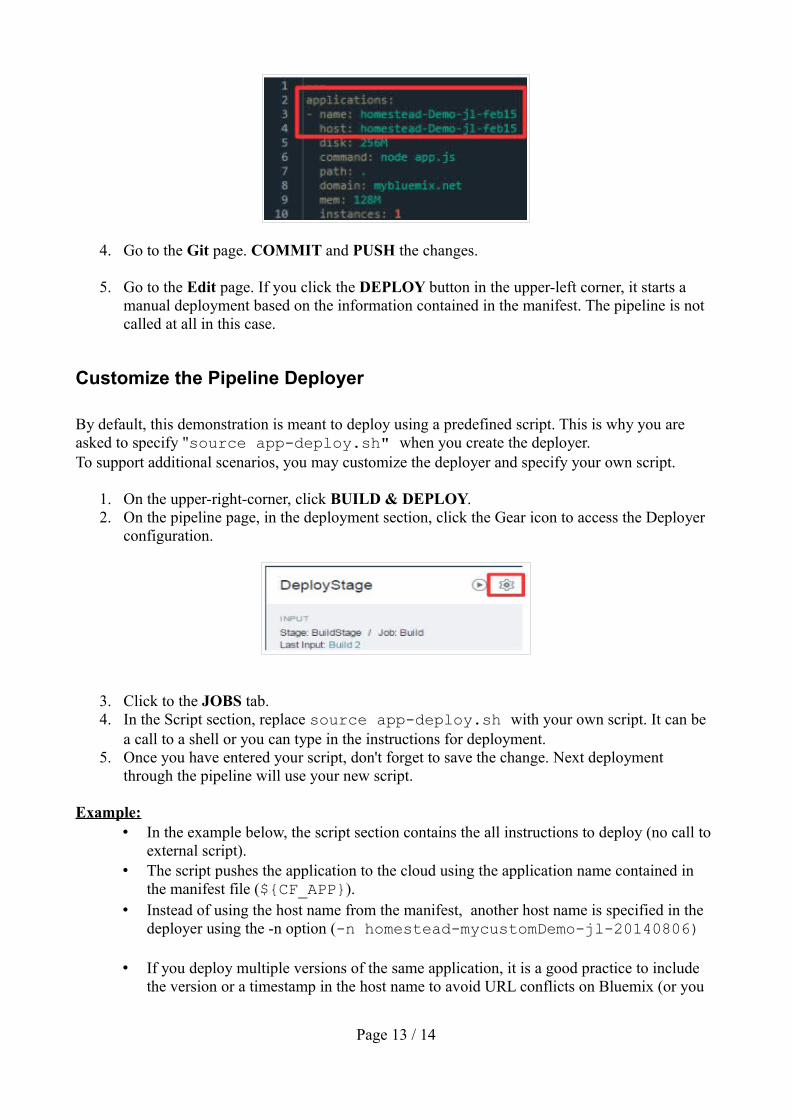
4. Go to the Git page. COMMIT and PUSH the changes.
5. Go to the Edit page. If you click the DEPLOY button in the upper-left corner, it starts a manual deployment based on the information contained in the manifest. The pipeline is not called at all in this case.
Customize the Pipeline Deployer
By default, this demonstration is meant to deploy using a predefined script. This is why you are asked to specify "source app-deploy.sh" when you create the deployer.To support additional scenarios, you may customize the deployer and specify your own script.
1. On the upper-right-corner, click BUILD & DEPLOY.2. On the pipeline page, in the deployment section, click the Gear icon to access the Deployer
configuration.
3. Click to the JOBS tab.4. In the Script section, replace source app-deploy.sh with your own script. It can be
a call to a shell or you can type in the instructions for deployment.5. Once you have entered your script, don't forget to save the change. Next deployment
through the pipeline will use your new script.
Example:• In the example below, the script section contains the all instructions to deploy (no call to
external script).• The script pushes the application to the cloud using the application name contained in
the manifest file (${CF_APP}).• Instead of using the host name from the manifest, another host name is specified in the
deployer using the -n option (-n homestead-mycustomDemo-jl-20140806)
• If you deploy multiple versions of the same application, it is a good practice to include the version or a timestamp in the host name to avoid URL conflicts on Bluemix (or you
Page 13 / 14
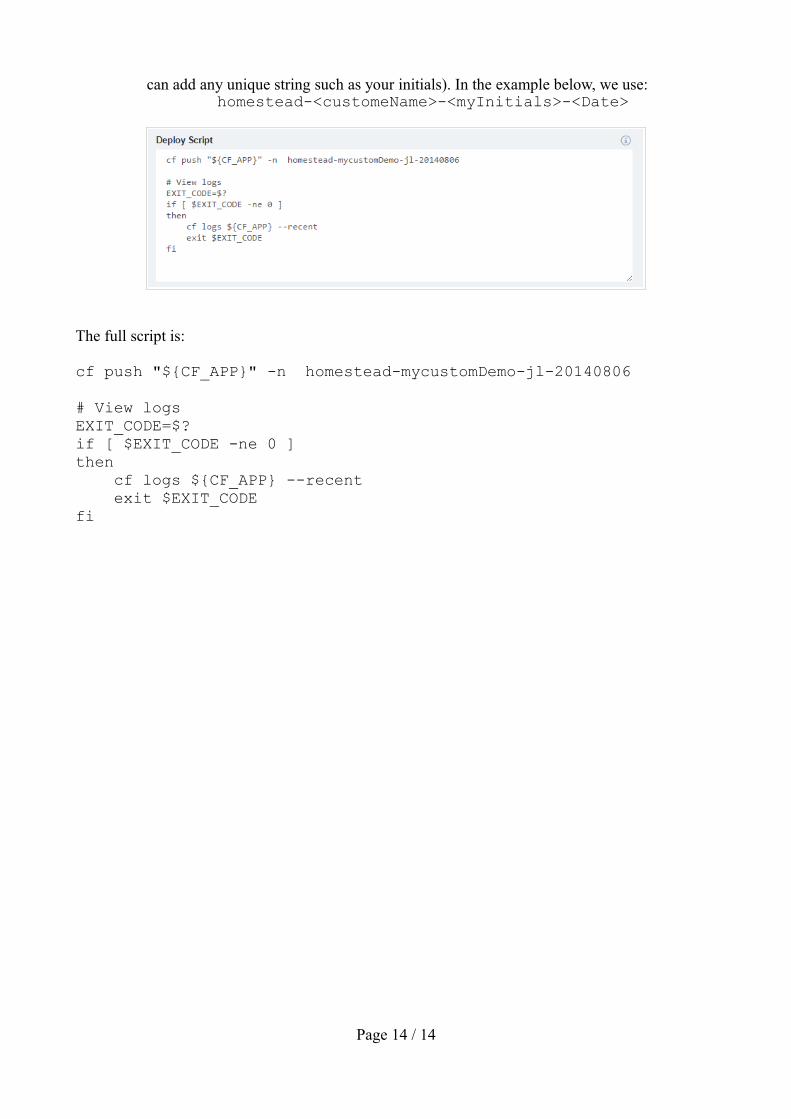
can add any unique string such as your initials). In the example below, we use:homestead-<customeName>-<myInitials>-<Date>
The full script is:
cf push "${CF_APP}" -n homestead-mycustomDemo-jl-20140806
# View logsEXIT_CODE=$?if [ $EXIT_CODE -ne 0 ]then cf logs ${CF_APP} --recent exit $EXIT_CODEfi
Page 14 / 14
![[Presentation] BUILDING SCALABLE APPS WITH DEVOPS on IBM Bluemix](https://static.fdocuments.net/doc/165x107/55a68eeb1a28abb97d8b4890/presentation-building-scalable-apps-with-devops-on-ibm-bluemix.jpg)