Dell Command | Monitor Version 10.0 User's...
34
Dell Command | Monitor Version 10.0 User's Guide
Transcript of Dell Command | Monitor Version 10.0 User's...
Dell Command | Monitor Version 10.0User's Guide

Notes, cautions, and warnings
NOTE: A NOTE indicates important information that helps you make better use of your product.
CAUTION: A CAUTION indicates either potential damage to hardware or loss of data and tells you how to avoid the problem.
WARNING: A WARNING indicates a potential for property damage, personal injury, or death.
© 2008 -2018 Dell Inc. or its subsidiaries. All rights reserved. Dell, EMC, and other trademarks are trademarks of Dell Inc. or its subsidiaries. Other trademarks may be trademarks of their respective owners.
2018 - 04
Rev. A00
Contents
1 Introduction....................................................................................................................................................5What's new in this release.................................................................................................................................................5Dell Command | Monitor overview.................................................................................................................................. 5
2 Windows SMM Security Mitigations Table (WSMT) Compliance................................................................... 7
3 Features........................................................................................................................................................ 8CIM schema support......................................................................................................................................................... 8BIOS settings configuration and enumeration................................................................................................................8WMI/OMI security............................................................................................................................................................. 8Alert reporting.....................................................................................................................................................................9Remote shutdown..............................................................................................................................................................9System information access...............................................................................................................................................9Detailed asset information.................................................................................................................................................9Remote wake-up configuration........................................................................................................................................ 9Remote modification of system BIOS settings...............................................................................................................9System health and status..................................................................................................................................................9RAID monitoring and alerting for Intel and LSI Controllers........................................................................................... 9SNMP monitoring and traps............................................................................................................................................10
4 Standards and protocols............................................................................................................................... 11
5 User scenarios..............................................................................................................................................12Scenario 1: Asset management....................................................................................................................................... 12
SCCM integration ...................................................................................................................................................... 12Scenario 2: Configuration management........................................................................................................................ 13Scenario 3: Health monitoring.........................................................................................................................................13
Monitoring system alerts through operating system Event Viewer, Syslog, or CIM indication.........................13Scenario 4: Profiles........................................................................................................................................................... 13
Battery profile..............................................................................................................................................................14BIOS management profile..........................................................................................................................................14Boot control.................................................................................................................................................................14Base desktop mobile...................................................................................................................................................14Log record....................................................................................................................................................................15Physical asset..............................................................................................................................................................15System memory profile.............................................................................................................................................. 15
6 Using Dell Command | Monitor.....................................................................................................................16Polling interval setting...................................................................................................................................................... 16RAID status reporting.......................................................................................................................................................16Monitoring the Dell client systems................................................................................................................................. 16Application log for Dell Command | Monitor for Linux................................................................................................. 17
Configuration file.........................................................................................................................................................17
Contents 3
Detecting advance format drives....................................................................................................................................17Boot configurations.......................................................................................................................................................... 17
DCIM_BootConfigSetting......................................................................................................................................... 18DCIM_BootSourceSetting.........................................................................................................................................18DCIM_OrderedComponent....................................................................................................................................... 18
Changing the system settings.........................................................................................................................................18Setting BIOS attributes in a system running Windows using PowerShell commands....................................... 19Setting BIOS attributes in the system running Linux............................................................................................. 19Changing the boot sequence.................................................................................................................................... 21Shutting down and restarting the Windows system remotely............................................................................. 22Getting system time value on Windows system remotely.................................................................................... 22
7 Managing Dell client systems locally............................................................................................................ 23Managing Windows systems locally using PowerShell................................................................................................23Managing Linux systems locally using OMICLI.............................................................................................................23
8 Managing Dell client systems remotely........................................................................................................ 25Managing Windows system through Windows system remotely using PowerShell................................................25Managing Linux system remotely through Windows system using WinRM............................................................. 25Managing Linux system remotely through a Linux system using WSMan................................................................26
9 Frequently asked questions..........................................................................................................................27How to find the boot order (sequence) of the boot configuration using DCIM_OrderedComponent.AssignedSequence property?.........................................................................................27How to change the boot order?.....................................................................................................................................27How to disable boot devices?.........................................................................................................................................27Fail login message appear when connect to namespace with wbemtest. How can I overcome that?................ 27How do I run TechCenter scripts without any issues?................................................................................................ 27How to set the BIOS attributes?................................................................................................................................... 28Does Dell Command | Monitor support storage and sensor monitoring for Windows and Linux operating systems?........................................................................................................................................................................... 28Can Dell Command | Monitor be integrated with other applications/consoles?..................................................... 28Can I import classes into SCCM for inventory?...........................................................................................................28Where is the SCCM OMCI_SMS_DEF.mof file located?........................................................................................... 28
10 Troubleshooting..........................................................................................................................................29Unable to remotely connect to Windows Management Instrumentation.................................................................29Installation failure on systems running Windows..........................................................................................................30BIOS setting enumeration value appears as 1 ............................................................................................................. 30Hapi installation fails due to the dependency of libsmbios...........................................................................................31CIM resources not available.............................................................................................................................................31Unable to execute the commands using DCM on the systems running Ubuntu Core 16........................................31
11 Other documents you may need..................................................................................................................32
12 Contacting Dell...........................................................................................................................................33Other documents you may need....................................................................................................................................33Accessing documents from the Dell EMC support site.............................................................................................. 33
4 Contents
IntroductionThe Dell Command | Monitor software application enables remote management using application programs to access the information, monitor the status, or change the state of the system such as remotely shutting down the system. Dell Command | Monitor uses key system parameters through standard interfaces allowing administrators to manage inventory, monitor system health, and gather information of deployed Dell systems. Dell Command | Monitor is designed for Dell Enterprise client systems, Dell IoT Gateway systems, as well as for Dell Embedded PCs. For more information on supported Dell systems refer Release notes available at dell.com/dellclientcommandsuitemanuals. This document provides an overview of Dell Command | Monitor and its features.
NOTE: Dell Command | Monitor was formerly Dell OpenManage Client Instrumentation (OMCI). After the OMCI version 8.2.1, OMCI is rebranded as Dell Command | Monitor.
Topics:
• What's new in this release• Dell Command | Monitor overview
What's new in this releaseSupport for WSMT compliance. For more information about WSMT compliance, see Windows SMM Security Mitigations Table (WSMT) Compliance section in the Dell Command | Monitor’s User’s Guide.
Support for the following BIOS features:
• Auto Switch, Battery Slice Charge Configuration, BIOS Enumeration Mode, Broadcom TruManage, Dust Filter Maintenance, eMMC, Enable Block SID, Enable Tablet Button LED Sign of Life, Fan Speed Auto Level on Cpu Zone, Fan Speed Auto Level on Psu Zone, GraphicSpecMode, HDD0 Fan Enable, HDD4 Fan Enable, Intel Speed Shift Technology, PCIE0, PCIE1, PCIE0_CPU1, PCIE1_CPU1, PPI Bypass for Block SID Command, PPI Bypass for TPM Clear, Report Logo Type, SATA-8, Secure Boot Mode, SMM Security Mitigation, Slice Battery Custom Charge Limit, and Wake on 2nd LAN (RJ-45/SFP).
For more information on BIOS attributes, see the Dell Command | Monitor Reference Guide at dell.com/dellclientcommandsuitemanuals.
Dell Command | Monitor overviewNOTE: Simple Network Management Protocol (SNMP) is not supported for Dell Command | Monitor for Linux.
Dell Command | Monitor manages client systems using the Common Information Model (CIM) standard and Simple Network Management Protocol (SNMP), which are management protocols. This reduces the total cost of ownership, improves security, and provides a holistic approach managing all the devices in a network including clients, servers, storage, networking, and software devices.
Using CIM you can access Dell Command | Monitor through Web Services for Management Standards (WSMAN).
Dell Command | Monitor contains the underlying driver set that collects client system information from different sources including the BIOS, CMOS, System Management BIOS (SMBIOS), System Management Interface (SMI), operating system, and Application Programming Interface (APIs).Dell Command | Monitor for Windows also collects client system information from Dynamic-Link Library (DLLs), and registry settings. Dell Command | Monitor for Windows retrieves this information through the CIM Object Manager (CIMOM) interface, Windows Management Instrumentation (WMI) stack, or SNMP agent, where as Dell Command | monitor for Linux retrieves this information through Open Management Infrastructure (OMI) interface.
Dell Command | Monitor enables IT administrators to remotely collect asset information, modify BIOS settings, receive proactive notifications about potential fault conditions, and get alerts for potential security breaches. In the systems running Windows, these alerts
1
Introduction 5
are available as events in the NT event log, WMI event, or SNMP traps v1. For the systems running Linux, these alerts are received as Syslog, OMI event, or Application log.
Dell Command | Monitor for Windows can be integrated into a console such as Microsoft System Center Configuration Manager by directly accessing the CIM information, or through other console vendors who have implemented the Dell Command | Monitor integration. Additionally, you can create custom scripts to target key areas of interest. Sample scripts are available at Dell TechCenter Dell Command | Monitor page. You can use these scripts to monitor inventory, BIOS settings, and system health.
NOTE: Default installation does not enable SNMP support. For more information on enabling SNMP support for Dell Command | Monitor for Windows, see Dell Command | Monitor Installation Guide at dell.com/dellclientcommandsuitemanuals.
NOTE: Default installation does not enable SNMP support. For more information on enabling SNMP support for Dell Command | Monitor for Windows, see Dell Command | Monitor Installation Guide.
6 Introduction

Windows SMM Security Mitigations Table (WSMT) Compliance
The Windows (SMM) Security Mitigations Table contains information about the ACPI table that was created for the Windows operating system, which supports Windows virtualization-based security (VBS) features. Dell Command | Monitor is WSMT compatible. This is used for configuring the platform features on Dell Client Systems with WSMT enabled BIOS.
Following are the behavioral changes due to WSMT compliance:
• Dell Command | Monitor functionalities are available on Dell client platforms which have the compatible version of BIOS supporting WMI/ACPI. For more information on the platform list, see Supported Platforms.
2
Windows SMM Security Mitigations Table (WSMT) Compliance 7
FeaturesThe key features of Dell Command | Monitor are:
• CIM schema support
• BIOS configuration
• WMI/OMI security
• Event reporting
• Remote shutdown
• Access to system information through CIM schema, using WSMAN protocol
• Compilation of detailed asset information
• Remote wake-up configurability
• Remote modification of system settings
• Monitoring of system health and reports status
• RAID monitoring and alerting for Intel integrated controllers and LSI integrated controllers
• SNMP monitoring and traps only through Dell Command | Monitor for Windows
NOTE: Using Dell Command | Monitor for Windows, the information can be accessed through SNMP as well.
NOTE: Monitoring of Intel integrated controller is not supported for the systems running Linux operating system.
CIM schema supportDell Command | Monitor for Windows conforms to the CIM 2.17 schema, and includes two WMI providers:
• WMI Indication Provider or Polling Agent
• WMI Instance or Method Provider
Dell Command | Monitor for Linux conforms to the CIM 2.32.0 schema, and includes two WMI providers:
• WMI Indication Provider or Polling Agent
• WMI Instance or Method Provider
BIOS settings configuration and enumerationDell Command | Monitor provides the ability to configure a system BIOS.
WMI/OMI securityWMI provides user authentication before granting access to the CIM data and methods. Access privileges are enforced by Distributed Component Object Model (DCOM) security and CIMOM. Complete or limited access is granted to users on per-namespace basis. There is no class implementation or property-level security. By default, users who are members of the administrators group have complete local and remote access to WMI.
For Dell Command | Monitor for Windows, you can configure WMI security using the WMI Control available in the Computer Management console under the Services and Applications section. Right-click WMI Control, and then click Properties. You can configure namespace-specific security from the Security tab. You can also run WMI Control from the Start menu or from the CLI, by running wmimgmt.msc.
3
8 Features
Alert reportingDell Command | Monitor detects events on Dell systems and alerts the local user and network administrator about potential failures, configuration changes, component inventory, integrated Intel and LSI RAID controllers, Probs and chassis intrusions. These events are displayed by a systems management application such as OpenManage Essentials (OME).
Remote shutdownDell Command | Monitor for Windows supports remote system shutdown and reboot.
System information accessDell Command | Monitor provides access to system information such as BIOS revision, BIOS manufacturer/vender, service tag, system model, first power on date, and system model through WMI/OMI using CIM. The WSMAN protocol can also be used to access this information through WMI/OMI.
Detailed asset informationDell Command | Monitor provides access to detailed inventory information such as processors, memory, PCI devices, and batteries.
Remote wake-up configurationDell Command | Monitor supports configuration of remote wake-up settings. Remote wake-up is a function of the client system and Network Interface Card (NIC).
Remote modification of system BIOS settingsDell Command | Monitor allows administrators to retrieve and set business client BIOS settings such as USB port configuration and NIC settings, etc.
System health and statusDell Command | Monitor monitors the system health such as fan status, memory, temperature, Probs, Battery, RAID controllers, docking station, and reports the status.
RAID monitoring and alerting for Intel and LSI ControllersMonitoring and alerting for Intel and LSI RAID controllers for its physical and logical drives for Dell Command | Monitor for Windows; monitoring and alerting only for LSI controllers for Dell Command | Monitor for Linux.
In storage monitoring, Dell Command | Monitor supports monitoring and alerting of:
• Intel integrated controller (compliant with CSMI v0.81 or later)
• LSI integrated RAID controllers; and 9217, 9271, 9341, 9361, 9440, 9460, and their associated drivers(physical and logical)
NOTE: Monitoring of Intel integrated controller is not supported for the systems running Linux operating system.
In sensor monitoring, Dell Command | Monitor supports monitoring and alerting of voltage, temperature, amperage, cooling devices (fan) and chassis sensors.
Features 9
SNMP monitoring and trapsDell Command | Monitor for Windows confirms to SNMP v1 and supports monitoring of system attributes and traps.
10 Features

Standards and protocolsDell Command | Monitor is based on the CIM standards. The CIM specification details mapping techniques for improved compatibility with management protocols.
Management protocols such as WMI, SNMP, and WSMAN are used for remote monitoring.
NOTE: Dell Command | Monitor for Windows uses Simple Network Management Protocol (SNMP) to describe several variables of the system.
The Desktop Management Task Force (DMTF) is the industry-recognized standards body that leads the development, adoption, and unification of management standards (including CIM and ASF), and initiatives for desktop, enterprise, and internet environments.
4
Standards and protocols 11
User scenariosThis chapter describes the various user scenarios of Dell Command | Monitor.
You can use Dell Command | Monitor for:
• Asset management
• Configuration management
• Health monitoring
• Profiles
Topics:
• Scenario 1: Asset management
• Scenario 2: Configuration management
• Scenario 3: Health monitoring
• Scenario 4: Profiles
Scenario 1: Asset managementA company that uses many Dell systems was not able to maintain accurate inventory information because of changes in the business and IT staff. The Chief Information Officer (CIO), requests a plan for identifying the systems that can be upgraded to Microsoft Windows latest versions. This requires an assessment of the deployed systems to determine the size, scope, and financial impact of such a project. The information collection involves a significant effort. Deploying IT staff to each client system is expensive, in terms of man-hours and end-user interruptions.
Using Dell Command | Monitor on each Dell system, the IT manager can quickly collect information remotely. Using tools such as Microsoft System Center Configuration Manager (SCCM), the IT manager queries each client system over the network and collects information such as CPU type and speed, memory size, hard-drive capacity, BIOS version, and current operating system version. Once the information is collected, it can be analyzed to identify the systems that can be upgraded to Windows latest versions.
You can also get asset inventory through WSMAN/WinRM command line or any using any CIM client command line.
SCCM integration You can integrate SCCM with Dell Command | Monitor for Windows by:
• Using the MOF file within Dell Command | Monitor install package, which contains all the Dell Command | Monitor classes and importing to ConfigMgr
The MOF is located at:
C:\Program Files\Dell\Command_Monitor\ssa\omacim\OMCI_SMS_DEF.mof
• Extending asset reporting capabilities using collections
5
12 User scenarios
Scenario 2: Configuration managementA company plans to standardize the client platform and manage each system through its lifecycle. As part of this effort, the company acquires a suite of tools, and plans to automate the deployment of a new client operating system using the Preboot Execution Environment (PXE).
The challenge is to modify the BIOS password in the BIOS of each client computer without manually visiting the desktop. With Dell Command | Monitor installed on each client system, the IT department of the company has several options for remotely modifying the boot order. The OpenManage Essentials (OME) is a management console that can be integrated with Dell command | Monitor and used to monitor BIOS settings remotely on all enterprise client systems. Another option is to write a script (CIM, WinRM/WSMAN/PowerShell/WMIC) that changes the BIOS setting. The script can be remotely delivered over the network and run on each client system.
For more information on Dell Command | Monitor, see Dell Command | Monitor Reference Guide at dell.com/dellclientcommandsuitemanuals.
For more information on Dell Command | Monitor, see Dell Command | Monitor Reference Guide.
Standardized configurations can provide significant cost savings for companies of all sizes. Many organizations deploy standardized client systems, but few manage the system configuration throughout the life of the computer. With Dell Command | Monitor installed on each client system, the IT department can lock down Legacy ports to prevent the use of unauthorized peripherals, or enable Wake On LAN (WOL) to revive the system from a sleep state during non-peak hours to perform systems management tasks.
Scenario 3: Health monitoringA user receives read error messages while trying to access certain files on the client-system hard drive. The user reboots the system and the files now appear to be accessible. The user disregards the initial problem because it appears to have resolved itself. Meanwhile, Dell Command | Monitor queries the hard drive with the problem for a predicted failure and passes a Self-Monitoring, Analysis and Reporting Technology (SMART) alert to the management console. It also displays the SMART error to the local user. The alert indicated that several read/write errors are occurring in the hard drive. The IT department of the company recommended that the user must make a backup of critical data files immediately. A service technician is dispatched with a replacement drive.
The hard drive is replaced before it fails, preventing user downtime, a help desk call, and a technician trip to the desktop to diagnose the problem.
Monitoring system alerts through operating system Event Viewer, Syslog, or CIM indicationDell Command | Monitor supports monitoring events through the following procedures:
• Pulling the log through CIM class DCIM_LogEntry.
• Monitoring CIM indication through DCIM_AlertIndication class.
• (only for Dell Command | Monitor for Windows) Monitoring events through Simple Network Management Protocol (SNMP) and Windows event viewer.
• (only for Dell Command | Monitor for Linux) Monitoring through Syslog.
For more information on Dell Command | Monitor, see Dell Command | Monitor Reference Guide at dell.com/dellclientcommandsuitemanuals.
For more information on Dell Command | Monitor, see Dell Command | Monitor Reference Guide.
Scenario 4: ProfilesNOTE: DMTF profiles are implemented for Dell Command | Monitor for Windows only.
User scenarios 13
IT administrators are required to manage client systems in multi-vendor and distributed enterprise environments. They face challenges as they must master a diverse set of tools and applications while managing several desktop and mobile client systems in various networks. To reduce the cost of these requirements and represent the provided management data, the industry-standard Distributed Management Task Force (DMTF) and Data Center Infrastructure Management (DCIM-OEM) profiles are implemented in Dell Command | Monitor. Some of the DMTF profiles are explained in this guide.
For more information on Dell Command | Monitor, see Dell Command | Monitor Reference Guide at dell.com/dellclientcommandsuitemanuals.
For more information on Dell Command | Monitor, see Client Command | Monitor Reference Guide.
Battery profile• Determine the status of the battery by enumerating or getting the instance of the class DCIM_Battery.
• Determine the estimate run time and see the estimated remaining charge.
• Check if the health information of the battery can be determined using the properties Operational Status and HealthState of the class DCIM_Battery.
• Get additional information about the health of a battery using DCIM_Sensor.CurrentState property or the CIM_NumericSensor.CurrentState property.
BIOS management profile• Determine the BIOS version by enumerating the instance of the class DCIM_BIOSElement..
• Check whether BIOS attribute values can be modified or not. Get the instance of the class, DCIM_BIOSEnumeration. The attribute can be modified if the property IsReadOnly is set to FALSE.
• Set the system password (SystemPwd). Run the DCIM_BIOSService.SetBIOSAttributes() method and set the SystemPwd to AttributeName and password value to AttributeValue parameters.
• Set the BIOS or Admin password (AdminPwd). Run the DCIM_BIOSService.SetBIOSAttributes() method and set the AdminPwd to AttributeName and password value to AttributeValue parameters.
• Run the DCIM_BIOSService.SetBIOSAttributes() method and specify the AttributeName and AttributeValue parameters.
• To modify a BIOS Attribute when BIOS or Admin password is set, run the DCIM_BIOSService.SetBIOSAttributes() method and specify the AttributeName, AttributeValue, and current BIOS password as the AuthorizationToken input parameter.
Boot control• Change the sequence of the boot items in the Legacy and UEFI boot list.
• Enable or disable the boot items in the Legacy and UEFI boot list.
• Find the current boot configuration by enumerating the instances of the class DCIM_ElementSettingData whose IsCurrent property is set to 1. The DCIM_BootConfigSetting represents the current boot configuration.
Base desktop mobile• Determine the system model, service tag, and serial number by enumerating the instance of the class, DCIM_ComputerSystem.
• Run the DCIM_ComputerSystem.RequestStateChange() method and set the RequestedState parameter value to 3. Turn off the system.
• Reboot the system. Run the DCIM_ComputerSystem.RequestStateChange() method and set the RequestedState parameter value to 11.
• Determine the power state of the system.
• Determine the number of processors in the system by querying DCIM_Processor, instances which are associated with the Central Instance through the DCIM_SystemDevice association.
• Get the system time. Run the DCIM_TimeService.ManageTime() method and set the GetRequest parameter to True.
14 User scenarios
• Check the health status of the managed element.
Log record• Identify the log name by selecting the DCIM_RecordLog instance in which the ElementName property corresponds to the log name.
• Find the individual log entries. Get all the instances of DCIM_LogEntry that are associated with the given instance of DCIM_RecordLog through the DCIM_LogManagesRecord association. Sort the instances based on the RecordID.
• Check whether record logs are enabled or not by enumerating the instance of the class DCIM_RecordLog whose property Enabledstate is set to 2 (represents enabled) and EnabledState is set to 3 (represents disabled).
• Sort the log records based on the time stamp of the log entry. Get all the instances of DCIM_LogEntry that are associated with the given instance of DCIM_RecordLog through the DCIM_LogManagesRecord association. Sort the instances of DCIM_LogEntry based on the CreationTimeStamp property value in Last In First Out (LIFO) order.
• Clear logs by running the ClearLog() method for the given instance of the DCIM_RecordLog.
Physical asset• Obtain the physical inventory for all the devices in a system.
• Obtain the physical inventory for a system chassis.
• Determine the part number of a failing component.
• Determine whether the slot is empty or not.
System memory profile• Obtain the memory information of the system.
• Obtain the physical memory information of the system.
• Check the system memory size.
• Check the available system memory size.
• Check the physical system memory size.
• Check the health status of system memory.
User scenarios 15
Using Dell Command | MonitorYou can view the information provided by Dell Command | Monitor by accessing:
• root\dcim\sysman (standard)
Dell Command | Monitor provides the information through classes in these namespaces.
For more information on the classes, see Dell Command | Monitor Reference Guide at dell.com/dellclientcommandsuitemanuals.
For more information on the classes, see Dell Command | Monitor Reference Guide.
Topics:
• Polling interval setting
• RAID status reporting
• Monitoring the Dell client systems
• Application log for Dell Command | Monitor for Linux
• Detecting advance format drives
• Boot configurations
• Changing the system settings
Polling interval settingYou can change the polling interval of fan probe, temperature probe, voltage probe, current probe, disk capacity increase/decrease, memory size increase/decrease and number of processors increase/decrease using Dell Command | Monitor.
• For Windows, dcsbdy32.ini or dcsbdy64.ini file is present at <Dell Command | Monitor installed location>\omsa\ini.
• For Linux, AlertPollingSettings.ini file is present at /opt/dell/dcm/conf.
NOTE: The numbers in the INI file are multiples of 23. The default polling interval for disk capacity and Self-Monitoring, Analysis and Reporting Technology (SMART) alert is 626 seconds (the real time = 626 X 23 seconds which is approximately 3 hours).
RAID status reportingDell Command | Monitor enables the RAID configuration information and monitors the RAID functionality for client systems with hardware and driver support. You can use RAID classes to receive the details about RAID levels, driver information, controller configuration, and controller status. After the RAID configuration is enabled, you can receive alerts for degradation or failure of drives and controllers.
NOTE: RAID status reporting is supported only for the RAID controllers which work on Common Storage Management Interface (CSMI) version 0.81 compliant drivers. OMCI 8.1 and later versions support monitoring only on the Intel on-chip RAID controller; and from OMCI 8.2 and later versions support Alerting for Intel on-chip RAID controller.
Monitoring the Dell client systems• Dell Command | Monitor for Windows supports Simple Network Management Protocol (SNMP) for monitoring and managing client
systems such as notebooks, desktops, and workstations. The Management Information Base (MIB) file is shared between Dell Command | Monitor and Server Administrator. Dell Command | Monitorfor Windows from version 9.0 has been modified to use an OID that is specific to client OID (10909) for consoles to identify client systems.
6
16 Using Dell Command | Monitor
For more information on SNMP, see Dell Command | Monitor SNMP Reference Guide at dell.com/dellclientcommandsuitemanuals.
For more information on SNMP, see Dell Command | Monitor SNMP Reference Guide.
• Dell Command | Monitor for Linux supports monitoring using WinRM and WSMan commands.
Application log for Dell Command | Monitor for LinuxDell Command | Monitor for Linux segregates the application logs and alerts for reporting and debugging purpose. The history of the generated alerts and logs for the Dell Command | Monitor application can be viewed in the dcm_application.log file available at /opt/dell/dcm/var/log.
Configuration fileYou can update the configuration file log.property available at /opt/dell/dcm/conf to apply the desired settings and DEBUG:
NOTE: Restart the OMI server after making any change in the configuration file to apply the changes.
• Log_Level — There are three log levels to segregate the system messages: ERROR, INFO, DEBUG
The user can change the log level from the configuration file. If the log level is set to DEBUG, the Dell Command | Monitor application log will send all the information in to the specified log file.
NOTE: The default log level is set to INFO.
• File_Size — The user can specify the maximum size of the dcm_application.log file. The default file size is 500 MB.
NOTE: The File_Size value must be expressed in bytes.
• BackupIndex — The user can specify the rollover count of the dcm_application.log file. If the default rollover count is 2, the third backup file will override the oldest file.
Detecting advance format drivesClient systems are transitioning to Advanced Format (AF) drives for larger storage capacity and to address the limitations of 512-byte sector hard drives (HDDs). The hard drives transitioning to 4KB sectors maintain backward compatibility, while the current AF hard drive, known as 512e hard drive, match 512-byte SATA and operate at 4KB. During the transition, you may encounter performance issues such as partition mis-aligned drives in the client systems resulting in failure of sector-based encryption software packages that handle 512e drives. Dell Command | Monitor allows you to determine if the hard drive on a system is 4KB AF drive, which helps to prevent these issues.
Boot configurationsNOTE: Dell Command | Monitor for Linux does not offer the boot configuration capabilities. So this section is not applicable for Dell Command | Monitor for Linux.
A client system can have one of two types of boot configuration:
• Legacy (BIOS)
• UEFI
In Dell Command | Monitor, the boot configuration (Legacy or UEFI) is modeled using the following classes:
• DCIM_ElementSettingData
• DCIM_BootConfigSetting
• DCIM_OrderedComponent
• DCIM_BootSourceSetting
NOTE: The terms "Boot Configuration" and "Boot List Type" are used interchangeably and convey the same meaning representing Legacy or UEFI.
Using Dell Command | Monitor 17
DCIM_BootConfigSettingAn instance of DCIM_BootConfigSetting represents a boot configuration that is used during the boot process. For example, on client systems, there are two types of boot configurations — Legacy and UEFI. So, DCIM_BootConfigSetting has a maximum of two instances to represent, one each for Legacy and UEFI.
You can determine if the DCIM_BootConfigSetting represents Legacy, using the following properties:
• InstanceID = "DCIM:BootConfigSetting:Next:1"
• ElementName = "Next Boot Configuration Setting : Boot List Type 1"
You can determine if the DCIM_BootConfigSetting represents UEFI, using the following properties:
• InstanceID = "DCIM:BootConfigSetting:Next:2"
• ElementName = "Next Boot Configuration Setting : Boot List Type 2"
DCIM_BootSourceSettingThis class represents the boot devices or sources. The ElementName, BIOSBootString, and StructuredBootString properties contain a string that identifies the boot devices. For example, floppy, hard disk, CD/DVD, network, Personal Computer Memory Card International Association (PCMCIA), Battery Electric Vehicle (BEV), or USB. Based on the boot list type of the device, an instance of DCIM_BootSourceSetting is associated with one of the instances of DCIM_BootConfigSetting.
DCIM_OrderedComponentThe DCIM_OrderedComponent association class is used to associate instances of DCIM_BootConfigSetting with instances of DCIM_BootSourceSetting representing one of the boot list types (Legacy or UEFI) to which the boot devices belongs. The GroupComponent property of DCIM_OrderedComponent refers to the DCIM_BootConfigSetting instance and the PartComponent property refers to the DCIM_BootSourceSetting instance.
Changing the system settingsIn Dell Command | Monitor, use the following methods to change the system settings and the state of the local or remote systems:
• SetBIOSAttributes — Changes the BIOS setting
NOTE: Dell Command | Monitor for Linux currently supports only SetBIOSAttributes method.
• ChangeBootOrder — Changes the boot configuration
• RequestStateChange — Shuts down and restarts the system
• ManageTime — Displaying the system time
In Dell Command | Monitor for Windows, you can run these methods using winrm, VB script, PowerShell commands, wmic, and WMI wbemtest.
18 Using Dell Command | Monitor
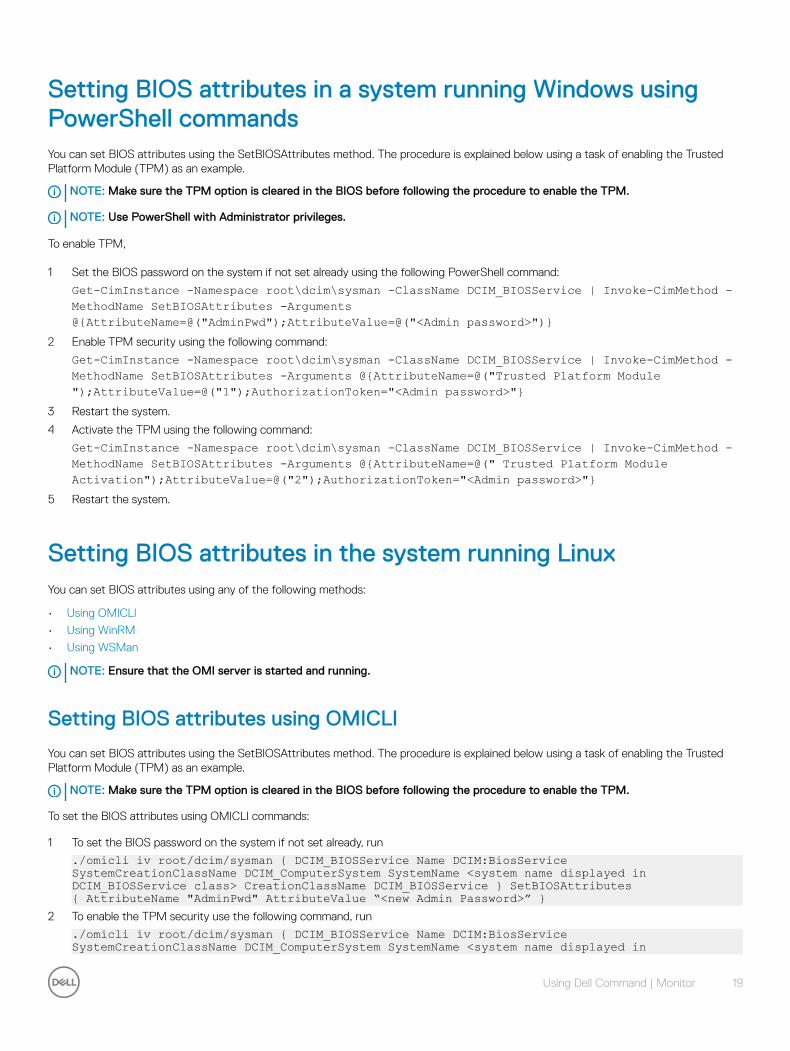
Setting BIOS attributes in a system running Windows using PowerShell commandsYou can set BIOS attributes using the SetBIOSAttributes method. The procedure is explained below using a task of enabling the Trusted Platform Module (TPM) as an example.
NOTE: Make sure the TPM option is cleared in the BIOS before following the procedure to enable the TPM.
NOTE: Use PowerShell with Administrator privileges.
To enable TPM,
1 Set the BIOS password on the system if not set already using the following PowerShell command:
Get-CimInstance -Namespace root\dcim\sysman -ClassName DCIM_BIOSService | Invoke-CimMethod -MethodName SetBIOSAttributes -Arguments @{AttributeName=@("AdminPwd");AttributeValue=@("<Admin password>")}
2 Enable TPM security using the following command:
Get-CimInstance -Namespace root\dcim\sysman -ClassName DCIM_BIOSService | Invoke-CimMethod -MethodName SetBIOSAttributes -Arguments @{AttributeName=@("Trusted Platform Module ");AttributeValue=@("1");AuthorizationToken="<Admin password>"}
3 Restart the system.
4 Activate the TPM using the following command:
Get-CimInstance -Namespace root\dcim\sysman -ClassName DCIM_BIOSService | Invoke-CimMethod -MethodName SetBIOSAttributes -Arguments @{AttributeName=@(" Trusted Platform Module Activation");AttributeValue=@("2");AuthorizationToken="<Admin password>"}
5 Restart the system.
Setting BIOS attributes in the system running LinuxYou can set BIOS attributes using any of the following methods:
• Using OMICLI
• Using WinRM
• Using WSMan
NOTE: Ensure that the OMI server is started and running.
Setting BIOS attributes using OMICLI
You can set BIOS attributes using the SetBIOSAttributes method. The procedure is explained below using a task of enabling the Trusted Platform Module (TPM) as an example.
NOTE: Make sure the TPM option is cleared in the BIOS before following the procedure to enable the TPM.
To set the BIOS attributes using OMICLI commands:
1 To set the BIOS password on the system if not set already, run
./omicli iv root/dcim/sysman { DCIM_BIOSService Name DCIM:BiosService SystemCreationClassName DCIM_ComputerSystem SystemName <system name displayed in DCIM_BIOSService class> CreationClassName DCIM_BIOSService } SetBIOSAttributes { AttributeName "AdminPwd" AttributeValue “<new Admin Password>” }
2 To enable the TPM security use the following command, run
./omicli iv root/dcim/sysman { DCIM_BIOSService Name DCIM:BiosService SystemCreationClassName DCIM_ComputerSystem SystemName <system name displayed in
Using Dell Command | Monitor 19
DCIM_BIOSService class> CreationClassName DCIM_BIOSService } SetBIOSAttributes { AttributeName "Trusted Platform Module" AttributeValue “1” AuthorizationToken “<password>”
3 Restart the system.
4 To activate the TPM, run
./omicli iv root/dcim/sysman { DCIM_BIOSService Name DCIM:BiosService SystemCreationClassName DCIM_ComputerSystem SystemName <system name displayed in DCIM_BIOSService class> CreationClassName DCIM_BIOSService } SetBIOSAttributes { AttributeName " Trusted Platform Module Activation" AttributeValue “2” AuthorizationToken “<password>” }
5 Restart the system.
6 To reset BIOS password, run
./omicli iv root/dcim/sysman { DCIM_BIOSService Name DCIM:BiosService SystemCreationClassName DCIM_ComputerSystem SystemName <system name displayed in DCIM_BIOSService class> CreationClassName DCIM_BIOSService } SetBIOSAttributes { AttributeName "AdminPwd" AttributeValue “” AuthorizationToken “<password>” }
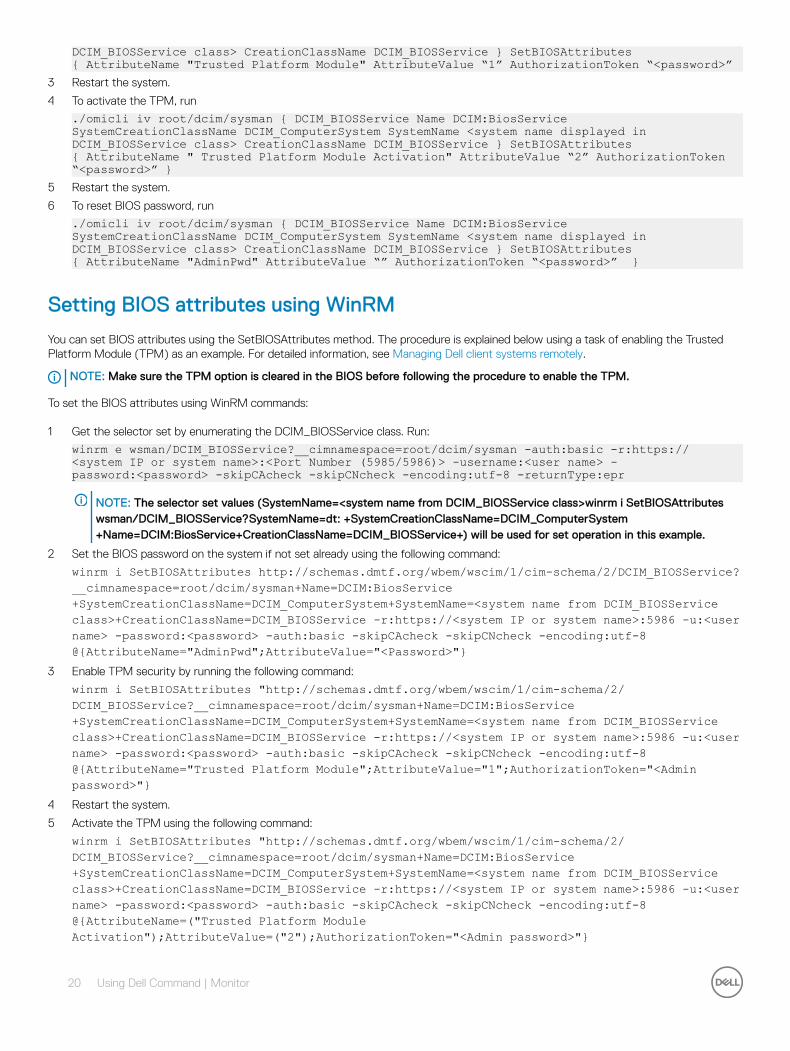
Setting BIOS attributes using WinRM
You can set BIOS attributes using the SetBIOSAttributes method. The procedure is explained below using a task of enabling the Trusted Platform Module (TPM) as an example. For detailed information, see Managing Dell client systems remotely.
NOTE: Make sure the TPM option is cleared in the BIOS before following the procedure to enable the TPM.
To set the BIOS attributes using WinRM commands:
1 Get the selector set by enumerating the DCIM_BIOSService class. Run:
winrm e wsman/DCIM_BIOSService?__cimnamespace=root/dcim/sysman -auth:basic -r:https://<system IP or system name>:<Port Number (5985/5986)> -username:<user name> -password:<password> -skipCAcheck -skipCNcheck -encoding:utf-8 -returnType:epr
NOTE: The selector set values (SystemName=<system name from DCIM_BIOSService class>winrm i SetBIOSAttributes wsman/DCIM_BIOSService?SystemName=dt: +SystemCreationClassName=DCIM_ComputerSystem+Name=DCIM:BiosService+CreationClassName=DCIM_BIOSService+) will be used for set operation in this example.
2 Set the BIOS password on the system if not set already using the following command:
winrm i SetBIOSAttributes http://schemas.dmtf.org/wbem/wscim/1/cim-schema/2/DCIM_BIOSService?__cimnamespace=root/dcim/sysman+Name=DCIM:BiosService+SystemCreationClassName=DCIM_ComputerSystem+SystemName=<system name from DCIM_BIOSService class>+CreationClassName=DCIM_BIOSService -r:https://<system IP or system name>:5986 -u:<user name> -password:<password> -auth:basic -skipCAcheck -skipCNcheck -encoding:utf-8 @{AttributeName="AdminPwd";AttributeValue="<Password>"}
3 Enable TPM security by running the following command:
winrm i SetBIOSAttributes "http://schemas.dmtf.org/wbem/wscim/1/cim-schema/2/DCIM_BIOSService?__cimnamespace=root/dcim/sysman+Name=DCIM:BiosService+SystemCreationClassName=DCIM_ComputerSystem+SystemName=<system name from DCIM_BIOSService class>+CreationClassName=DCIM_BIOSService -r:https://<system IP or system name>:5986 -u:<user name> -password:<password> -auth:basic -skipCAcheck -skipCNcheck -encoding:utf-8 @{AttributeName="Trusted Platform Module";AttributeValue="1";AuthorizationToken="<Admin password>"}
4 Restart the system.
5 Activate the TPM using the following command:
winrm i SetBIOSAttributes "http://schemas.dmtf.org/wbem/wscim/1/cim-schema/2/DCIM_BIOSService?__cimnamespace=root/dcim/sysman+Name=DCIM:BiosService+SystemCreationClassName=DCIM_ComputerSystem+SystemName=<system name from DCIM_BIOSService class>+CreationClassName=DCIM_BIOSService -r:https://<system IP or system name>:5986 -u:<user name> -password:<password> -auth:basic -skipCAcheck -skipCNcheck -encoding:utf-8 @{AttributeName=("Trusted Platform Module Activation");AttributeValue=("2");AuthorizationToken="<Admin password>"}
20 Using Dell Command | Monitor
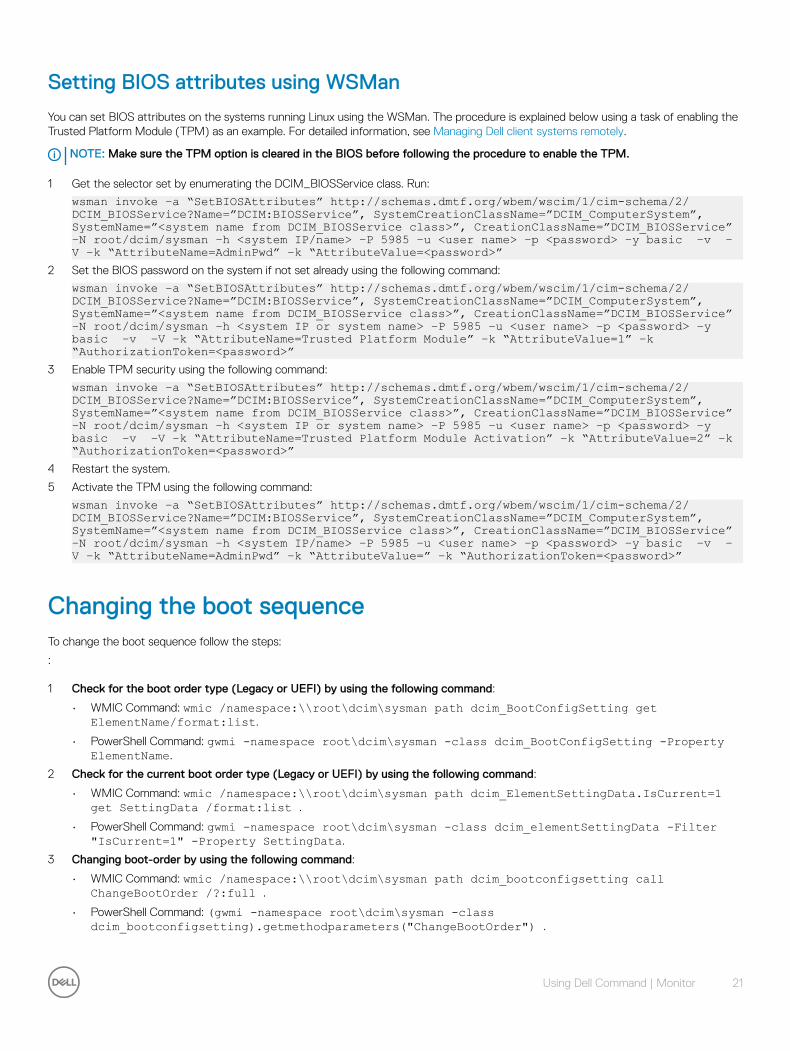
Setting BIOS attributes using WSMan
You can set BIOS attributes on the systems running Linux using the WSMan. The procedure is explained below using a task of enabling the Trusted Platform Module (TPM) as an example. For detailed information, see Managing Dell client systems remotely.
NOTE: Make sure the TPM option is cleared in the BIOS before following the procedure to enable the TPM.
1 Get the selector set by enumerating the DCIM_BIOSService class. Run:
wsman invoke –a “SetBIOSAttributes” http://schemas.dmtf.org/wbem/wscim/1/cim-schema/2/DCIM_BIOSService?Name=”DCIM:BIOSService”, SystemCreationClassName=”DCIM_ComputerSystem”, SystemName=”<system name from DCIM_BIOSService class>”, CreationClassName=”DCIM_BIOSService” –N root/dcim/sysman –h <system IP/name> –P 5985 –u <user name> –p <password> –y basic –v –V –k “AttributeName=AdminPwd” –k “AttributeValue=<password>”
2 Set the BIOS password on the system if not set already using the following command:
wsman invoke –a “SetBIOSAttributes” http://schemas.dmtf.org/wbem/wscim/1/cim-schema/2/DCIM_BIOSService?Name=”DCIM:BIOSService”, SystemCreationClassName=”DCIM_ComputerSystem”, SystemName=”<system name from DCIM_BIOSService class>”, CreationClassName=”DCIM_BIOSService” –N root/dcim/sysman –h <system IP or system name> –P 5985 –u <user name> –p <password> –y basic –v –V –k “AttributeName=Trusted Platform Module” –k “AttributeValue=1” –k “AuthorizationToken=<password>”
3 Enable TPM security using the following command:
wsman invoke –a “SetBIOSAttributes” http://schemas.dmtf.org/wbem/wscim/1/cim-schema/2/DCIM_BIOSService?Name=”DCIM:BIOSService”, SystemCreationClassName=”DCIM_ComputerSystem”, SystemName=”<system name from DCIM_BIOSService class>”, CreationClassName=”DCIM_BIOSService” –N root/dcim/sysman –h <system IP or system name> –P 5985 –u <user name> –p <password> –y basic –v –V –k “AttributeName=Trusted Platform Module Activation” –k “AttributeValue=2” –k “AuthorizationToken=<password>”
4 Restart the system.
5 Activate the TPM using the following command:
wsman invoke –a “SetBIOSAttributes” http://schemas.dmtf.org/wbem/wscim/1/cim-schema/2/DCIM_BIOSService?Name=”DCIM:BIOSService”, SystemCreationClassName=”DCIM_ComputerSystem”, SystemName=”<system name from DCIM_BIOSService class>”, CreationClassName=”DCIM_BIOSService” –N root/dcim/sysman –h <system IP/name> –P 5985 –u <user name> –p <password> –y basic –v –V –k “AttributeName=AdminPwd” –k “AttributeValue=” –k “AuthorizationToken=<password>”
Changing the boot sequenceTo change the boot sequence follow the steps:
:
1 Check for the boot order type (Legacy or UEFI) by using the following command:
• WMIC Command: wmic /namespace:\\root\dcim\sysman path dcim_BootConfigSetting get ElementName/format:list.
• PowerShell Command: gwmi -namespace root\dcim\sysman -class dcim_BootConfigSetting -Property ElementName.
2 Check for the current boot order type (Legacy or UEFI) by using the following command:
• WMIC Command: wmic /namespace:\\root\dcim\sysman path dcim_ElementSettingData.IsCurrent=1 get SettingData /format:list .
• PowerShell Command: gwmi -namespace root\dcim\sysman -class dcim_elementSettingData -Filter "IsCurrent=1" -Property SettingData.
3 Changing boot-order by using the following command:
• WMIC Command: wmic /namespace:\\root\dcim\sysman path dcim_bootconfigsetting call ChangeBootOrder /?:full .
• PowerShell Command: (gwmi -namespace root\dcim\sysman -class dcim_bootconfigsetting).getmethodparameters("ChangeBootOrder") .
Using Dell Command | Monitor 21
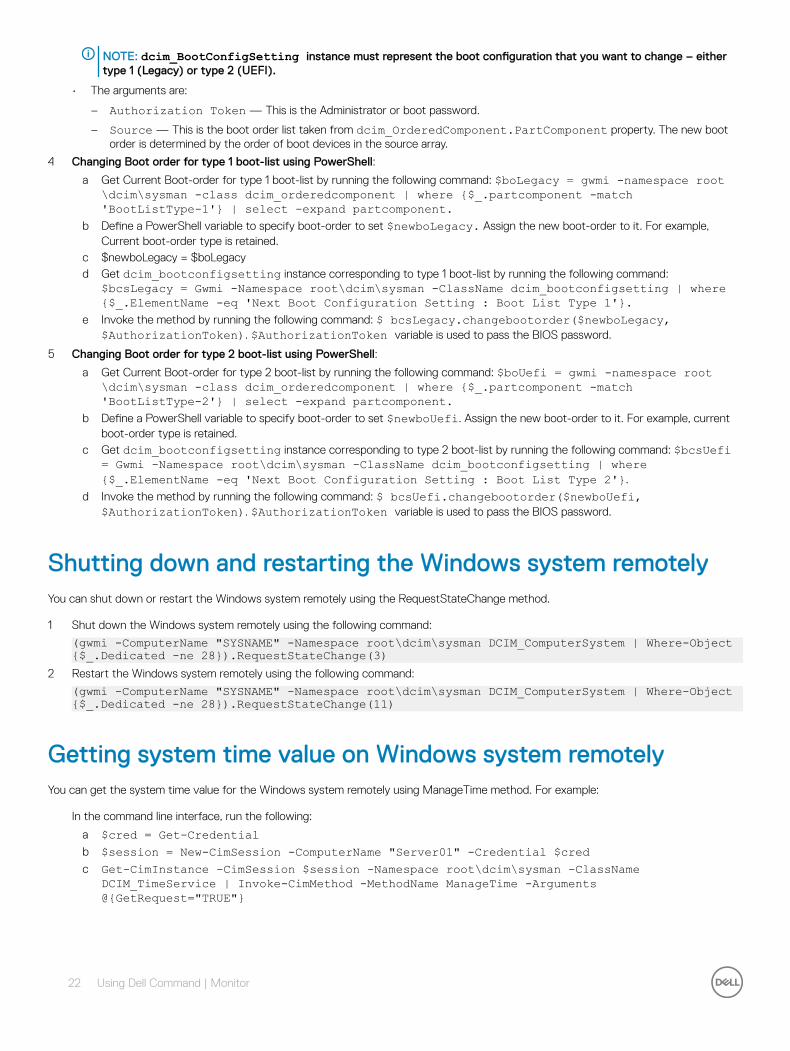
NOTE: dcim_BootConfigSetting instance must represent the boot configuration that you want to change – either type 1 (Legacy) or type 2 (UEFI).
• The arguments are:
– Authorization Token — This is the Administrator or boot password.
– Source — This is the boot order list taken from dcim_OrderedComponent.PartComponent property. The new boot order is determined by the order of boot devices in the source array.
4 Changing Boot order for type 1 boot-list using PowerShell:
a Get Current Boot-order for type 1 boot-list by running the following command: $boLegacy = gwmi -namespace root\dcim\sysman -class dcim_orderedcomponent | where {$_.partcomponent -match 'BootListType-1'} | select -expand partcomponent.
b Define a PowerShell variable to specify boot-order to set $newboLegacy. Assign the new boot-order to it. For example, Current boot-order type is retained.
c $newboLegacy = $boLegacyd Get dcim_bootconfigsetting instance corresponding to type 1 boot-list by running the following command:
$bcsLegacy = Gwmi -Namespace root\dcim\sysman -ClassName dcim_bootconfigsetting | where {$_.ElementName -eq 'Next Boot Configuration Setting : Boot List Type 1'}.
e Invoke the method by running the following command: $ bcsLegacy.changebootorder($newboLegacy, $AuthorizationToken). $AuthorizationToken variable is used to pass the BIOS password.
5 Changing Boot order for type 2 boot-list using PowerShell:
a Get Current Boot-order for type 2 boot-list by running the following command: $boUefi = gwmi -namespace root\dcim\sysman -class dcim_orderedcomponent | where {$_.partcomponent -match 'BootListType-2'} | select -expand partcomponent.
b Define a PowerShell variable to specify boot-order to set $newboUefi. Assign the new boot-order to it. For example, current boot-order type is retained.
c Get dcim_bootconfigsetting instance corresponding to type 2 boot-list by running the following command: $bcsUefi = Gwmi -Namespace root\dcim\sysman -ClassName dcim_bootconfigsetting | where {$_.ElementName -eq 'Next Boot Configuration Setting : Boot List Type 2'}.
d Invoke the method by running the following command: $ bcsUefi.changebootorder($newboUefi, $AuthorizationToken). $AuthorizationToken variable is used to pass the BIOS password.
Shutting down and restarting the Windows system remotelyYou can shut down or restart the Windows system remotely using the RequestStateChange method.
1 Shut down the Windows system remotely using the following command:
(gwmi -ComputerName "SYSNAME" -Namespace root\dcim\sysman DCIM_ComputerSystem | Where-Object {$_.Dedicated -ne 28}).RequestStateChange(3)
2 Restart the Windows system remotely using the following command:
(gwmi -ComputerName "SYSNAME" -Namespace root\dcim\sysman DCIM_ComputerSystem | Where-Object {$_.Dedicated -ne 28}).RequestStateChange(11)
Getting system time value on Windows system remotelyYou can get the system time value for the Windows system remotely using ManageTime method. For example:
In the command line interface, run the following:
a $cred = Get-Credential b $session = New-CimSession -ComputerName "Server01" -Credential $credc Get-CimInstance -CimSession $session -Namespace root\dcim\sysman -ClassName
DCIM_TimeService | Invoke-CimMethod -MethodName ManageTime -Arguments @{GetRequest="TRUE"}
22 Using Dell Command | Monitor
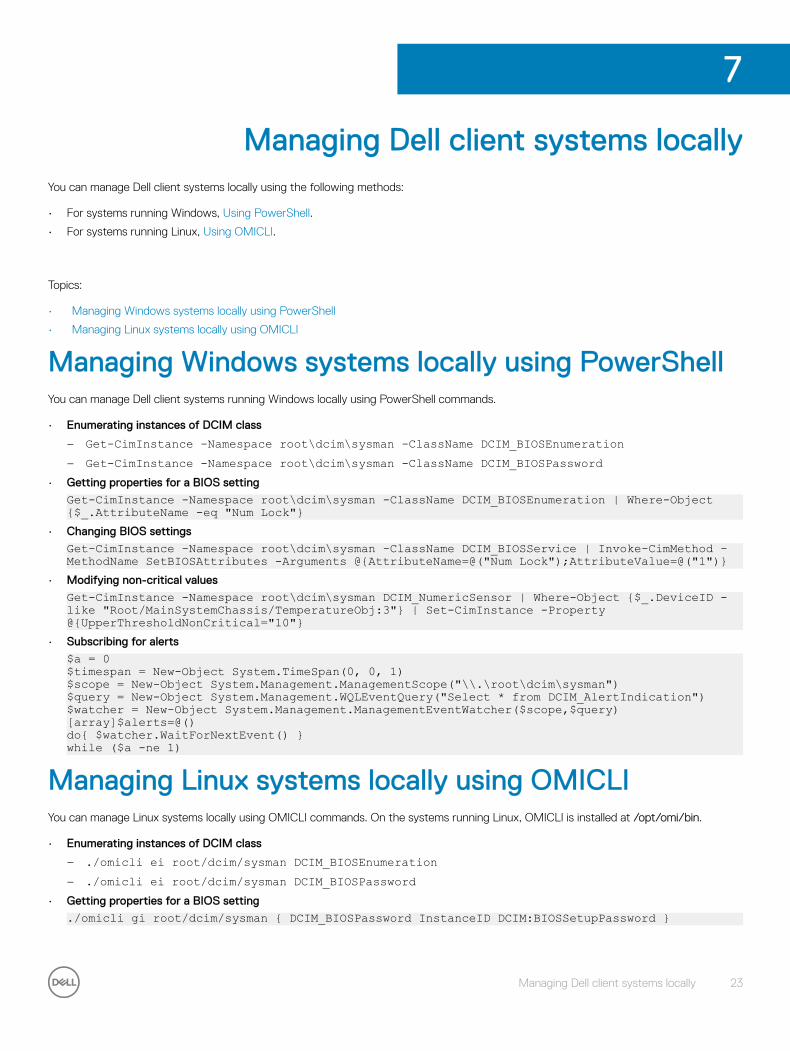
Managing Dell client systems locallyYou can manage Dell client systems locally using the following methods:
• For systems running Windows, Using PowerShell.
• For systems running Linux, Using OMICLI.
Topics:
• Managing Windows systems locally using PowerShell
• Managing Linux systems locally using OMICLI
Managing Windows systems locally using PowerShellYou can manage Dell client systems running Windows locally using PowerShell commands.
• Enumerating instances of DCIM class
– Get-CimInstance -Namespace root\dcim\sysman -ClassName DCIM_BIOSEnumeration – Get-CimInstance -Namespace root\dcim\sysman -ClassName DCIM_BIOSPassword
• Getting properties for a BIOS setting
Get-CimInstance -Namespace root\dcim\sysman -ClassName DCIM_BIOSEnumeration | Where-Object {$_.AttributeName -eq "Num Lock"}
• Changing BIOS settings
Get-CimInstance -Namespace root\dcim\sysman -ClassName DCIM_BIOSService | Invoke-CimMethod -MethodName SetBIOSAttributes -Arguments @{AttributeName=@("Num Lock");AttributeValue=@("1")}
• Modifying non-critical values
Get-CimInstance -Namespace root\dcim\sysman DCIM_NumericSensor | Where-Object {$_.DeviceID -like "Root/MainSystemChassis/TemperatureObj:3"} | Set-CimInstance -Property @{UpperThresholdNonCritical="10"}
• Subscribing for alerts
$a = 0$timespan = New-Object System.TimeSpan(0, 0, 1)$scope = New-Object System.Management.ManagementScope("\\.\root\dcim\sysman")$query = New-Object System.Management.WQLEventQuery("Select * from DCIM_AlertIndication")$watcher = New-Object System.Management.ManagementEventWatcher($scope,$query)[array]$alerts=@()do{ $watcher.WaitForNextEvent() }while ($a -ne 1)
Managing Linux systems locally using OMICLIYou can manage Linux systems locally using OMICLI commands. On the systems running Linux, OMICLI is installed at /opt/omi/bin.
• Enumerating instances of DCIM class
– ./omicli ei root/dcim/sysman DCIM_BIOSEnumeration– ./omicli ei root/dcim/sysman DCIM_BIOSPassword
• Getting properties for a BIOS setting
./omicli gi root/dcim/sysman { DCIM_BIOSPassword InstanceID DCIM:BIOSSetupPassword }
7
Managing Dell client systems locally 23
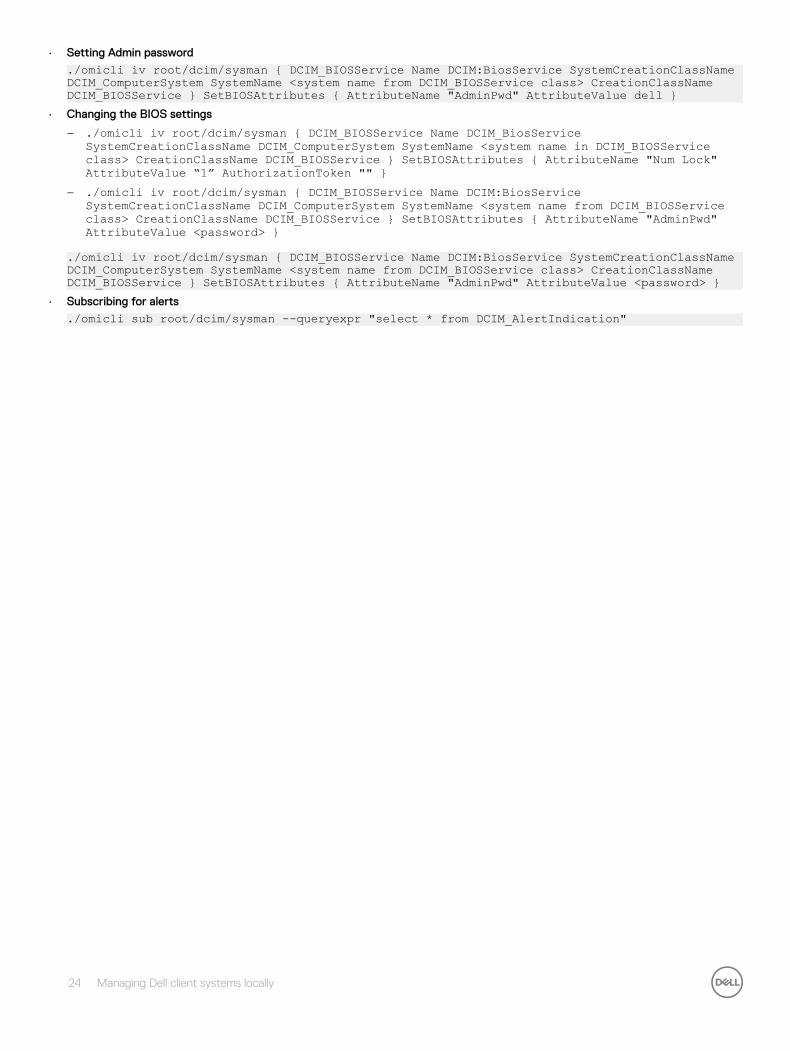
• Setting Admin password
./omicli iv root/dcim/sysman { DCIM_BIOSService Name DCIM:BiosService SystemCreationClassName DCIM_ComputerSystem SystemName <system name from DCIM_BIOSService class> CreationClassName DCIM_BIOSService } SetBIOSAttributes { AttributeName "AdminPwd" AttributeValue dell }
• Changing the BIOS settings
– ./omicli iv root/dcim/sysman { DCIM_BIOSService Name DCIM_BiosService SystemCreationClassName DCIM_ComputerSystem SystemName <system name in DCIM_BIOSService class> CreationClassName DCIM_BIOSService } SetBIOSAttributes { AttributeName "Num Lock" AttributeValue “1” AuthorizationToken "" }
– ./omicli iv root/dcim/sysman { DCIM_BIOSService Name DCIM:BiosService SystemCreationClassName DCIM_ComputerSystem SystemName <system name from DCIM_BIOSService class> CreationClassName DCIM_BIOSService } SetBIOSAttributes { AttributeName "AdminPwd" AttributeValue <password> }
./omicli iv root/dcim/sysman { DCIM_BIOSService Name DCIM:BiosService SystemCreationClassName DCIM_ComputerSystem SystemName <system name from DCIM_BIOSService class> CreationClassName DCIM_BIOSService } SetBIOSAttributes { AttributeName "AdminPwd" AttributeValue <password> }
• Subscribing for alerts
./omicli sub root/dcim/sysman --queryexpr "select * from DCIM_AlertIndication"
24 Managing Dell client systems locally
Managing Dell client systems remotelyYou can manage Dell client systems remotely using any of the following methods:
• For systems running Windows, Managing Windows system through Windows system remotely using PowerShell
• For systems running Linux, Managing Linux system remotely through Windows system using WinRM
Topics:
• Managing Windows system through Windows system remotely using PowerShell
• Managing Linux system remotely through Windows system using WinRM
• Managing Linux system remotely through a Linux system using WSMan
Managing Windows system through Windows system remotely using PowerShellYou can access and monitor Windows system remotely through Windows system by using PowerShell.Prerequisites for the Management Windows system:
• Windows PowerShell 3.0
• PowerShell configured for running remote scripts
Prerequisites for the Managed Windows system:
• Dell Command | Monitor
• Windows PowerShell 3.0
• PowerShell configured for running remote scripts
• PowerShell-remoting feature should be enabled
NOTE:
To use Windows PowerShell remotely, the remote computer must be configured for remote management. For more information, including instructions, run the PowerShell command – Get-Help about_remote_requirements.
Managing Linux system remotely through Windows system using WinRMYou can access and monitor the system running Linux through the system running Microsoft Windows using WinRM commands.Prerequisites for the Windows system
• Supported Windows operating system
• WinRM services running and configured for remote management
Prerequisites for the Linux system
• Root Privileges
• Dell Command | Monitor
• Supported Linux operating system
8
Managing Dell client systems remotely 25
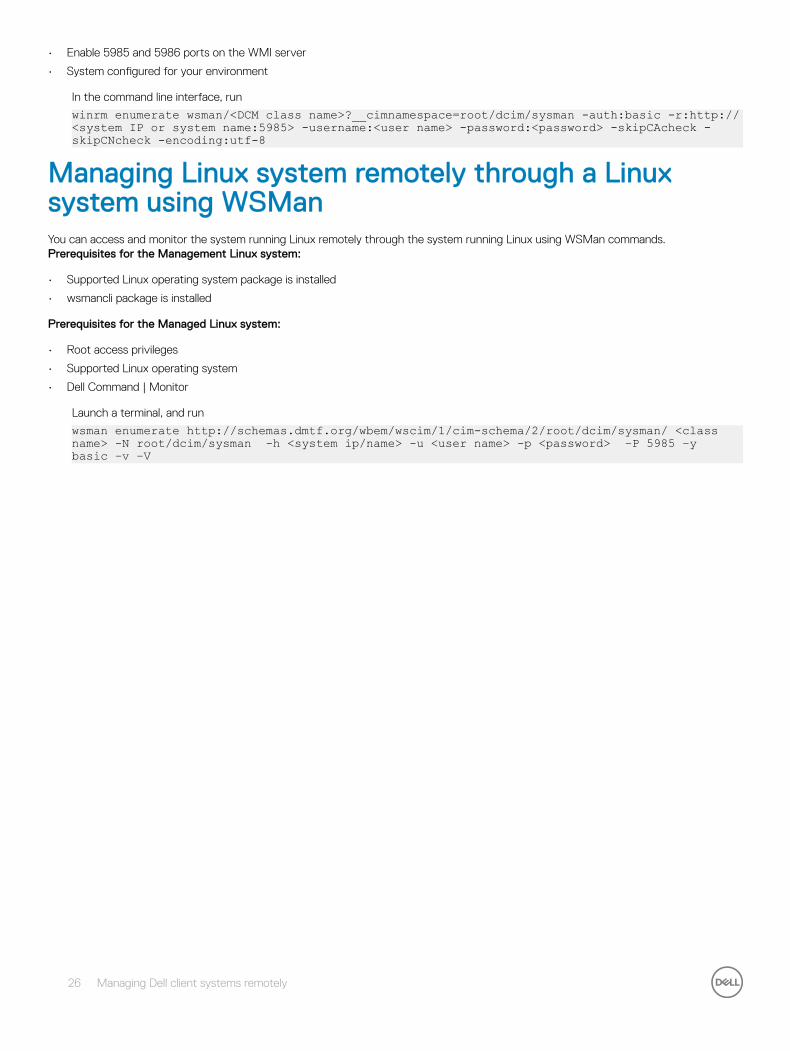
• Enable 5985 and 5986 ports on the WMI server
• System configured for your environment
In the command line interface, run
winrm enumerate wsman/<DCM class name>?__cimnamespace=root/dcim/sysman -auth:basic -r:http://<system IP or system name:5985> -username:<user name> -password:<password> -skipCAcheck -skipCNcheck -encoding:utf-8
Managing Linux system remotely through a Linux system using WSManYou can access and monitor the system running Linux remotely through the system running Linux using WSMan commands.Prerequisites for the Management Linux system:
• Supported Linux operating system package is installed
• wsmancli package is installed
Prerequisites for the Managed Linux system:
• Root access privileges
• Supported Linux operating system
• Dell Command | Monitor
Launch a terminal, and run
wsman enumerate http://schemas.dmtf.org/wbem/wscim/1/cim-schema/2/root/dcim/sysman/ <class name> -N root/dcim/sysman -h <system ip/name> -u <user name> -p <password> –P 5985 –y basic –v –V
26 Managing Dell client systems remotely
Frequently asked questions
How to find the boot order (sequence) of the boot configuration using DCIM_OrderedComponent.AssignedSequence property?When a DCIM_BootConfigSetting instance (Legacy or UEFI) has multiple DCIM_BootSourceSetting instances (boot devices) associated with it through instances of the DCIM_OrderedComponent association, the value of the DCIM_OrderedComponent.AssignedSequence property is used to determine the sequence in which the associated DCIM_BootSourceSetting instances (boot devices) are used during the boot process. A DCIM_BootSourceSetting, whose associated CIM_OrderedComponent.AssignedSequence property is equal to 0 is ignored and not considered part of the boot order.
How to change the boot order?The boot order can be changed using the DCIM_BootConfigSetting.ChangeBootOrder() method. The ChangeBootOrder() method sets the order in which the instances of DCIM_BootSourceSetting are associated with a DCIM_BootConfigSetting instance. The method has one input parameter; Source. The Source parameter, is an ordered array of PartComponent property from DCIM_OrderedComponent class that represents the association between DCIM_BootSourceSetting instances (boot devices) and DCIM_BootConfigSetting instance (boot list type-Legacy or UEFI).
How to disable boot devices?On changing the boot order, the value of the AssignedSequence property on each instance of DCIM_OrderedComponent, that associates the target DCIM_BootConfigSetting instance with a DCIM_BootSourceSetting instance that is not present in the input array of Source parameter, is set to 0, which indicates that the device is disabled.
Fail login message appear when connect to namespace with wbemtest. How can I overcome that?Launch wbemtest with Administrator privilege level to overcome any login message. Go to the Internet Explorer from the All Programs list, right-click and Run as administrator to start the wbemtest and avoid any namespace oriented error.
How do I run TechCenter scripts without any issues?The following are the prerequisites while executing the VBS scripts provided in Dell Command | Monitor Techcenter link:
1 Please configure winrm on the system using the command winrm quickconfig.
2 Check if the token support exists on the system by referring to:
• The F2 Screen in BIOS Setup.
• Using tool like wbemtest to check the key value define in the script to be existing on the system.
NOTE: Dell recommends using the latest BIOS available at dell.com/support. For more information, refer Dell Command | Monitor Reference guide at dell.com/dellclientcommandsuitemanuals.
9
Frequently asked questions 27
NOTE: Use the latest BIOS available.
How to set the BIOS attributes?BIOS Attributes can be changed using the DCIM_BIOSService.SetBIOSAttributes() method. The SetBIOSAttributes() method sets the value of the instance defined in the DCIM_BIOSEnumeration class. The method has seven input parameters. The first two parameters can be empty or null. The third parameter AttributeName needs to take the input mapping to the value of attribute name instance of DCIM_BIOSEnumeration class. The fourth parameter or AttributeValue can be any of the possible values of the Attribute Name as defined in theDCIM_BIOSEnumeration class. If the BIOS Password is set on the system, then you have to provide the same in the fifth argument. The sixth and seventh argument can again be empty or null.
Does Dell Command | Monitor support storage and sensor monitoring for Windows and Linux operating systems?Yes, Dell Command | Monitor supports both storage and sensor monitoring for supported Windows and Linux operating systems.
In storage monitoring, Dell Command | Monitor supports monitoring and alerting of:
• Intel integrated controller (compliant with CSMI v0.81 or later)
• LSI integrated RAID controllers; and 9217, 9271, 9341, 9361 and their associated drivers(physical and logical)
NOTE: Monitoring of Intel integrated controller is not supported for the systems running Linux operating system.
In sensor monitoring, Dell Command | Monitor supports monitoring and alerting of voltage, temperature, amperage, cooling devices (fan) and chassis sensors.
For more information on class and alerting, refer Dell Command | Monitor Reference guide at dell.com/dellclientcommandsuitemanuals.
Can Dell Command | Monitor be integrated with other applications/consoles?Yes, Dell Command | Monitor interfaces with leading enterprise management consoles that support industry standards. It can be integrated with the following existing enterprise management tools:
• Dell Client Integration Suite for System Center 2012
• Dell OpenManage Essentials
• Dell Client Management Pack for System Center Operation Manager
Can I import classes into SCCM for inventory?Yes, individual MOFs or OMCI_SMS_DEF.mof files can be imported in SCCM console for inventory.
Where is the SCCM OMCI_SMS_DEF.mof file located?The OMCI_SMS_DEF.mof file is located at C:\Program Files\Dell\Command_Monitor\ssa\omacim\OMCI_SMS_DEF.mof.
28 Frequently asked questions
Troubleshooting
Topics:
• Unable to remotely connect to Windows Management Instrumentation
• Installation failure on systems running Windows
• BIOS setting enumeration value appears as 1
• Hapi installation fails due to the dependency of libsmbios
• CIM resources not available
• Unable to execute the commands using DCM on the systems running Ubuntu Core 16
Unable to remotely connect to Windows Management InstrumentationIf Common Information Model (CIM) information for a remote client computer system is not available to the management application or if a remote BIOS update that uses Distributed Component Object Model (DCOM) fails, the following error messages are displayed:
• Access Denied
• Win32:RPC server is unavailable
1 Verify that the client system is connected to the network. Type the following in the command prompt of the server:
ping <Host Name or IP Address> and press <Enter>.
2 Perform the following step if both the server and the client system are in the same domain:
• Verify that the domain administrator account has Administrator privileges for both systems.
Perform the following step if both the server and the client system are in a workgroup (not in the same domain):
• Make sure that the server is running on the latest Windows Server.
NOTE: Back up your system data files before changing the registry. Editing the registry incorrectly may render your operating system unusable.
3 Edit the registry change on the client system. Click Start > Run, then type regedit, and then click OK. In the Registry Editor window, browse to My Computer\HKEY_LOCAL_MACHINE\SYSTEM\CurrentControlSet\Control\Lsa.
4 Set the forceguest value to 0 (default value is 1). Unless you modify this value, the user remotely connecting to the system will have guest privileges, even if the supplied credentials provide Administrator privileges.
a Create an account on the client system with the same user name and password, as an administrator account on the system running the WMI management application.
b If you are using IT Assistant, run the IT Assistant ConfigServices utility (configservices.exe in the/bin directory under the IT Assistant installation directory). Configure IT Assistant to run under a local administrator account, which is also now an administrator on the remote client. Also, verify that DCOM and CIM are enabled.
c If you are using IT Assistant, use the administrator account to configure subnet discovery for the client system. Enter the user name as <client machine name>\<account name>. If the system has already been discovered, remove the system from the list of discovered systems, configure subnet discovery for it, and then rediscover it.
NOTE: Dell recommends using Dell OpenManage Essentials as replacement for IT Assistant. For more information on Dell OpenManage Essentials see, dell.com/dellclientcommandsuitemanuals.
NOTE: Use Dell OpenManage Essentials as replacement for IT Assistant.
10
Troubleshooting 29
5 Perform the following steps to modify user privilege levels for connecting remotely to a system’s WMI:
a Click Start > Run, type compmgmt.msc, and then click OK.
b Browse to WMI Control under Services and Applications.c Right-click WMI Control, and then click Properties.d Click the Security tab and select DCIM/SYSMAN under the Root tree.e Click Security.f Select the specific group or user that you want to control access and use the Allow or Deny check box to configure the
permissions.
6 Perform the following steps to connect to a WMI (root\DCIM\SYSMAN) on a system from a remote system using WMI CIM Studio:
a Install WMI tools along with wbemtest on the local system, and then install Dell Command | Monitor on the remote system.b Configure the firewall on the system for WMI remote connectivity. For example, open the TCP ports 135 and 445 in Windows
firewall.c Set the Local Security setting to Classic - local users authenticate as themselves for Network access: Sharing and security
model for local accounts in the Local Security Policy.d Connect to the WMI (root\DCIM\SYSMAN) on the local system from a remote system using WMI wbemtest. For example, \\
[Target remote system IP Address]\root\DCIM\SYSMANe Enter the Administrator credentials of the target remote system if prompted.
For more information on WMI, see the applicable Microsoft documentation at msdn.microsoft.com.
Installation failure on systems running WindowsIf you are unable to complete Dell Command | Monitor for Windows installation, ensure that:
• You have Administrator privileges on the target system.
• The target system is a Dell manufactured system with SMBIOS version 2.3 or later.
• PowerShell console must not be open.
NOTE: To check the SMBIOS version on the system, go to Start > Run and run the msinfo32.exe file and check for the SMBIOS version in System Summary page.
NOTE: The system must be running supported Microsoft Windows operating system.
NOTE: The system has to be upgraded to .NET 4.0 or later versions.
BIOS setting enumeration value appears as 1 1 Verify that the following packages are installed with root user privileges;
• omi-1.0.8.ssl_100.x64.rpm
• srvadmin-hapi-8.3.0-1908.9058.el7.x86_64
• command_monitor-linux-<version number>-<buid number>.x86_64.rpm
2 If above packages are installed, then verify that the driver module is loaded.
a Verify that the driver module is loaded by running the following command lsmod | grep dcdbas.
b If the driver module is not available, retrieve the driver details by running the following command modinfo dcdbus.
c Load the driver module by running the following command insmod <filename>.
30 Troubleshooting
Hapi installation fails due to the dependency of libsmbiosIf the installation fails due to dependency problems,
Force-install all dependent packages by running apt-get –f install.
CIM resources not availableWhile enumerating, if you receive an error as “CIM resource not available”,
Verify that the commands are executed with root privileges.
Unable to execute the commands using DCM on the systems running Ubuntu Core 16
Ensure that the snap version on the system is 2.23 or later.
Troubleshooting 31
Other documents you may needIn addition to this User's Guide, you can access the following documents at dell.com/dellclientcommandsuitemanuals. Click Dell Command | Monitor (formerly OpenManage Client Instrumentation) and then click the appropriate product version link in General support section.
In addition to this User's Guide, you can access the following guides.
• The Dell Command | Monitor Reference Guide provides detailed information on all classes, properties, and descriptions.
• The Dell Command | Monitor Installation Guide provides information on installation.
• The Dell Command | Monitor SNMP Reference Guide provides Simple Network Management Protocol (SNMP) Management Information Base (MIB) applicable to Dell Command | Monitor.
11
32 Other documents you may need
Contacting DellNOTE: If you do not have an active Internet connection, you can find contact information on your purchase invoice, packing slip, bill, or Dell product catalog.
Dell provides several online and telephone-based support and service options. Availability varies by country and product, and some services may not be available in your area. To contact Dell for sales, technical support, or customer service issues:
1 Go to Dell.com/support.
2 Select your support category.
3 Verify your country or region in the Choose a Country/Region drop-down list at the bottom of the page.
4 Select the appropriate service or support link based on your need.
Topics:
• Other documents you may need
• Accessing documents from the Dell EMC support site
Other documents you may needIn addition to this User's Guide, you can access the following documents at dell.com/dellclientcommandsuitemanuals. Click Dell Command | Monitor (formerly OpenManage Client Instrumentation) and then click the appropriate product version link in General support section.
In addition to this User's Guide, you can access the following guides.
• The Dell Command | Monitor Reference Guide provides detailed information on all classes, properties, and descriptions.
• The Dell Command | Monitor Installation Guide provides information on installation.
• The Dell Command | Monitor SNMP Reference Guide provides Simple Network Management Protocol (SNMP) Management Information Base (MIB) applicable to Dell Command | Monitor.
Accessing documents from the Dell EMC support siteYou can access the required documents using the following links:
• For Dell EMC Enterprise Systems Management documents — Dell.com/SoftwareSecurityManuals
• For Dell EMC OpenManage documents — Dell.com/OpenManageManuals
• For Dell EMC Remote Enterprise Systems Management documents — Dell.com/esmmanuals
• For iDRAC and Dell EMC Lifecycle Controller documents — Dell.com/idracmanuals
• For Dell EMC OpenManage Connections Enterprise Systems Management documents — Dell.com/OMConnectionsEnterpriseSystemsManagement
• For Dell EMC Serviceability Tools documents — Dell.com/ServiceabilityTools
• a Go to Dell.com/Support/Home.
b Click Choose from all products.
c From All products section, click Software & Security, and then click the required link from the following:
– Enterprise Systems Management
12
Contacting Dell 33

– Remote Enterprise Systems Management
– Serviceability Tools
– Dell Client Command Suite
– Connections Client Systems Management
d To view a document, click the required product version.
• Using search engines:
– Type the name and version of the document in the search box.
34 Contacting Dell


