Defining and Configuring Core Network Elements … Cisco Hosted Unified Communication Services...
22
CHAPTER 3-1 Cisco Hosted Unified Communication Services Provisioning Guide Release 7.1(a) OL-23270-01 3 Defining and Configuring Core Network Elements and Resources This chapter describes the required steps to define and configure core resources and network elements, how the components are associated to each other, and how Cisco PGWs and Cisco Unified CMs are configured for the first time. It includes the following sections: • Provider Administration, page 3-1 • Defining and Associating Gatekeepers, page 3-4 • Defining and Associating Cisco PGW, page 3-5 • Defining and Configuring Cisco Unified CM Clusters, page 3-7 • Defining and Configuring DHCP Servers, page 3-12 • Using TFTP Servers, page 3-14 • Defining IP Edge Devices, page 3-14 • Using Music on Hold Servers, page 3-15 • Using Conference Servers, page 3-15 • Configuring Transcoder Servers, page 3-16 • Adding Cisco PGW-Cisco Unified CM Cluster Hardware Groups, page 3-17 • Loading the Cisco PGW and Cisco Unified CM Clusters, page 3-18 • Conferencing in Hosted UCS, page 3-21 Provider Administration This section describes the required steps to define providers and various resources, such as number types and quantities, phone types and quantities, and so on. All Hosted UCS resources, network elements, countries, and the inventory of E.164 numbers, IP addresses, and phones are defined at the provider level. They can then be assigned to resellers, customers, customer divisions, and customer locations. This section includes the following topics: • Adding Providers, page 3-2 • Managing Number Resources, page 3-2 • Managing Phone Resources, page 3-3 • Managing Services, page 3-3
Transcript of Defining and Configuring Core Network Elements … Cisco Hosted Unified Communication Services...
Cisco Hosted Unified CommunOL-23270-01
C H A P T E R 3
Defining and Configuring Core Network Elements and ResourcesThis chapter describes the required steps to define and configure core resources and network elements, how the components are associated to each other, and how Cisco PGWs and Cisco Unified CMs are configured for the first time. It includes the following sections:
• Provider Administration, page 3-1
• Defining and Associating Gatekeepers, page 3-4
• Defining and Associating Cisco PGW, page 3-5
• Defining and Configuring Cisco Unified CM Clusters, page 3-7
• Defining and Configuring DHCP Servers, page 3-12
• Using TFTP Servers, page 3-14
• Defining IP Edge Devices, page 3-14
• Using Music on Hold Servers, page 3-15
• Using Conference Servers, page 3-15
• Configuring Transcoder Servers, page 3-16
• Adding Cisco PGW-Cisco Unified CM Cluster Hardware Groups, page 3-17
• Loading the Cisco PGW and Cisco Unified CM Clusters, page 3-18
• Conferencing in Hosted UCS, page 3-21
Provider AdministrationThis section describes the required steps to define providers and various resources, such as number types and quantities, phone types and quantities, and so on. All Hosted UCS resources, network elements, countries, and the inventory of E.164 numbers, IP addresses, and phones are defined at the provider level. They can then be assigned to resellers, customers, customer divisions, and customer locations.
This section includes the following topics:
• Adding Providers, page 3-2
• Managing Number Resources, page 3-2
• Managing Phone Resources, page 3-3
• Managing Services, page 3-3
3-1ication Services Provisioning Guide Release 7.1(a)
Chapter 3 Defining and Configuring Core Network Elements and Resources Provider Administration
• Enabling USM User Roaming, page 3-4
Adding ProvidersYou can define multiple providers.
To create a provider, perform the following steps:
Procedure
Step 1 Choose Provider Administration > Providers.
Step 2 Click Add.
Step 3 From the Details menu, define the fields required for your implementation. The following fields are required, at the minimum, when adding a provider:
• Name—<ProviderName>; for example; UKProvider
• Address1—<Address>
• City—<City>
• Country—<Country>
• Post/Zip Code—<Post/Zip Code>
• Contact Name—<ContactName>
• Contact Telephone Number—<ContactTelephoneNumber>
Step 4 From the Hardware Set menu, enter the following:
• Type of Hardware Deployed—HUCS: HUCS Sample Hardware Set: HUCS DIAL PLAN
• From the GUI Branding menu, define the type of branding required.
• Branding of User Interface—Default GUI branding
• Check the Default GUI branding check box.
Step 5 Click Add.
Repeat this procedure for all providers.
Managing Number ResourcesYou can increase or decrease the quantity of number types (DDI extensions, internal extensions, and so on) available to the provider.
To increase or decrease the quantity of number types, perform the following steps:
Procedure
Step 1 Choose Provider Administration > Number Type Counters.
Step 2 From the Number Types menu, enter the appropriate number of each of the following:
• DDI Extensions—2000
3-2Cisco Hosted Unified Communication Services Provisioning Guide Release 7.1(a)
OL-23270-01
Chapter 3 Defining and Configuring Core Network Elements and Resources Provider Administration
• Internal Extensions—2000
• Analog PSTN Lines—2000
• Incoming Lines—2000
• Outgoing Lines—2000
• Emergency Call Back Lines—2000
Step 3 Click Modify.
Repeat this procedure for all providers.
Managing Phone ResourcesYou can increase or decrease the quantity of phone types, such as the Cisco Unified IP Phone 7941 (SIP), the Cisco Unified IP Phone 7961 (SCCP), and so on, available to the provider.
To increase or decrease the quantity of phone types, perform the following steps:
Procedure
Step 1 Choose Provider Administration > Phone Type Counters.
Step 2 From the Phone Types and Quantities menu, adjust the quantity for all required phone types as required for the implementation.
Step 3 Click Adjust Limits.
Repeat this procedure for all providers.
Managing ServicesYou can increase or decrease the quantity of service types, such as voice mail, conferencing, and so on, available to the provider.
To increase or decrease the quantity of service types, perform the following steps:
Procedure
Step 1 Choose Provider Administration > Service Type Counters.
Step 2 From the Service Type menu, adjust the quantity for all service types as required for the implementation.
Step 3 Click Adjust Limits.
Repeat this procedure for all providers.
3-3Cisco Hosted Unified Communication Services Provisioning Guide Release 7.1(a)
OL-23270-01
Chapter 3 Defining and Configuring Core Network Elements and Resources Defining and Associating Gatekeepers
Enabling USM User RoamingTo enable the option to use USM for logging in during user roaming, you must enable the BVSMUserRoaming preference setting. Additional preferences are configured at the Customer level to enable this feature per customer.
To activate this preference, perform the following steps:
Step 1 Choose Provider Administration > Providers.
Step 2 Select a Provider for which you want to activate the feature.
Step 3 Click Preferences.
Step 4 Click BVSMUserRoaming.
Step 5 Tick the available checkbox to enable the setting.
Step 6 Click Modify.
Repeat this for all required Providers.
Defining and Associating GatekeepersTo define and configure Cisco PGWs, you must define and associate a gatekeeper.
Defining GatekeepersA gatekeeper is defined in USM as a Cisco 36xx Series Router.
To define a gatekeeper, perform the following steps:
Procedure
Step 1 Choose Network > Gatekeepers.
Step 2 Click Add.
Step 3 Click Add next to Cisco36xx (Cisco 36xx Series Router).
Step 4 From the Details menu, enter the following:
• Host Name—<uniquename>; for example, GK2600-ENT2A
• IP Address—<gatekeeperIP>; for example, 10.120.2.51
• Description—<gatekeeperdescription>; for example, City 2 Gatekeeper A
• Config Password—<configpassword>; for example, cisco
• Enable Password—<enablepassword>; for example, cisco
• Version—<gatekeeperIOSversion>; for example, Cisco36xx: 12.x
Step 5 Click Add.
3-4Cisco Hosted Unified Communication Services Provisioning Guide Release 7.1(a)
OL-23270-01
Chapter 3 Defining and Configuring Core Network Elements and Resources Defining and Associating Cisco PGW
Note In Hosted UCS 7.1(a), Gatekeepers are supported on various Router types, not only on 36xx Series Routes.
Repeat this procedure for all gatekeepers.
Associating GatekeepersIn Hosted UCS 7.1(a) when multiple gatekeepers are used; they are configured in a cluster associated to each other.
To associate gatekeepers, perform the following steps:
Procedure
Step 1 Choose Network > Gatekeepers.
Step 2 Click H323=>H323 Links next to one of the gatekeepers you want to associate.
Step 3 Click Connect next to the gatekeeper you want to associate.
Defining and Associating Cisco PGWTo define and configure Cisco PGWs, you must define Cisco PGWs and associate them with gatekeepers.
Defining Cisco PGWsThe Cisco PGW is defined in USM as a transit switch.
To define a Cisco PGW, the following steps, at a minimum, are required.
Note Other steps, such as setting the congestion threshold, may be required for specific implementations.
Procedure
Step 1 Choose Network > Transit Switches.
Step 2 Click Add.
Step 3 Next to PGW (Cisco Transit Switch), click Add.
Step 4 From the Enter PGW Details menu, enter the following:
• Name—<uniquename>; for example, PGW-ENT2
• Description—<pgwdescription>; for example, City 2 PGWs
• Software Version—PGW: 9.7.3
3-5Cisco Hosted Unified Communication Services Provisioning Guide Release 7.1(a)
OL-23270-01
Chapter 3 Defining and Configuring Core Network Elements and Resources Defining and Associating Cisco PGW
• Line Capacity—<linecapacity>; for example, 30000
Note This is set in stone and cannot be changed later
• Country—<countrywherepgwis>; for example, United Kingdom
• Call Processor ID (Default=AUTO)—AUTO
• Click Detailed trace file of configuration sessions?.
Step 5 From the Main PGW Server Details menu, enter the following:
• Host Name—<mainpgwhostname>; for example, PGW-EN23M
• Primary IP Address—<primaryIP>; for example, 10.120.2.11
• Secondary IP Address—<secondaryIP>; for example, 10.121.2.11
• Config Username—<configusername>; for example, mgcusr
• Config Password—<configpassword>; for example, cisco
• Config Prompt—%
• MML command—mml –s8
• FTP Path—/opt/CiscoMGC/etc/cust_specific
Step 6 From the Backup PGW Server Details menu, if one exists, enter the following:
• Host Name—<backuppgwhostname>; for example, PGW-ENT2S
• Primary IP Address—<primaryIP>; for example, 10.120.2.12
• Secondary IP Address—<secondaryIP>; for example, 10.121.2.12
• Config Username—<configusername>; for example, mgcusr
• Config Password—<configpassword>; for example, cisco
• Config Prompt—%
• MML command—mml –s12
• FTP Path—/opt/CiscoMGC/etc/cust_specific
Step 7 Click Add.
Note In Hosted UCS 7.1(a), PGW 9.8(1) is also supported in addition to PGW 9.6(1) and 9.7(3).
Repeat this procedure for all Cisco PGWs.
Associating Cisco PGWs with a GatekeeperTo associate the Cisco PGW with the gatekeeper, perform the following steps:
Procedure
Step 1 Choose Network > Transit Switches.
3-6Cisco Hosted Unified Communication Services Provisioning Guide Release 7.1(a)
OL-23270-01
Chapter 3 Defining and Configuring Core Network Elements and Resources Defining and Configuring Cisco Unified CM Clusters
Step 2 Click Transit=>Gatekeeper next to one of the Cisco PGWs you want to associate with the gatekeepers.
Step 3 Click Connect next to the gatekeeper you want to associate with the Cisco PGW.
Repeat this procedure for all Cisco PGWs.
Note If the gatekeepers are in a cluster, the Cisco PGW should be associated with only one of the gatekeepers in the cluster.
Defining and Configuring Cisco Unified CM ClustersTo define and configure Cisco Unified CM clusters, you must do the following:
• Adding Cisco Unified CM Clusters and Publisher Servers, page 3-7
• Adding Cisco Unified Communications Manager Subscriber Servers, page 3-8
• Define Cisco Unified Communications Manager Set, page 3-12
• Importing Softkey and Phone Button Templates, page 3-11
• Associating Cisco Unified Communications Manager Clusters with Gatekeepers, page 3-11
Adding Cisco Unified CM Clusters and Publisher ServersCisco Unified CM is defined in USM as a PBX device.
To define a Cisco Unified CM cluster and the publisher server, perform the following steps:
Procedure
Step 1 Choose Network > PBX devices.
Step 2 Click Add.
Step 3 Click Add next to Cisco Call Manager (CCM).
Step 4 From the CCM Cluster Details menu, enter the following:
• Software Version—<UnifiedCMVersion>, for example, CCM : 7.1.x
• Name—<uniquename>; for example, e2c1
• Description—<cucmclusterdescript>; for example, City 2 cluster 7.1.3
• Publisher Host Name—<publisheripaddress>; for example, 10.131.2.2
• Publisher Unified CM Name—<shorthostname>; for example, e3c1p
• Wins Hostname—<shorthostname>; for example, e3c1p
Note This field is configurable only if the chosen Unified CM version is 4.x.
• Publisher IP Address—<publisheripaddress>; for example, 10.131.2.2
• Publisher Config Username:
3-7Cisco Hosted Unified Communication Services Provisioning Guide Release 7.1(a)
OL-23270-01
Chapter 3 Defining and Configuring Core Network Elements and Resources Defining and Configuring Cisco Unified CM Clusters
– For 4.x—<4.xpublisherusername>; for example, administrator
– For 5.x—<5.xpublisherusername>; for example, CCMAdministrator
– for 6.x—<6.xpublisherusername>; for example, administrator
– for 7.x—<7.xpublisherusername>, for example: ccmadmin
• Publisher Config Password—<publisherpassword>; for example, ipcbuemea
• Country—<countrywherecucmis>; for example, United Kingdom
• If the Annunciator server on the Publisher is going to be used, click Annunciator Server.
• Annunciator Line Capacity—<numberofAnnunciatorlines>; for example, 48
• If the Conference server on the Publisher is going to be used, click Conference Server.
• Conference Streams—<numberofConferenceStreams>; for example, 128
• IPPBX lines—<numberofippbxlines>; for example, 30000
• Max. IPPBX lines per device—<MaxIPPBXLinesperDevice>, for example 40
• If the Media Termination Point on the Publisher is going to be used, check the Media Termination Point checkbox.
• If the MOH server on the publisher is going to be used, click Music Server.
• Music lines—<numberofmusiclines>; for example, 500
• If the switchboard/console server on the publisher is going to be used, click Switchboard/Console server.
• If the TFTP server on the publisher is going to be used, click TFTP server.
• CPID—<cpid>; for example, AUTO
• Cluster ID—<clusterid>; for example, 1
• Check the Encrypt configuration sessions? checkbox.
Step 5 Click Add.
Step 6 For all 5.x nd 6.x Cisco Unified CM clusters, select the created Cisco Unified CM cluster and modify the following:
• Minimum AXL Interaction Time—1.2 Seconds (this throttles AXL requests sent to Cisco Unified CM to 50 requests per minute).
Repeat this procedure for all Cisco Unified CM clusters and publisher servers.
Adding Cisco Unified Communications Manager Subscriber ServersTo define a Cisco Unified CM subscriber server in a cluster, perform the following steps:
Procedure
Step 1 Choose Network > PBX devices.
Step 2 Choose a Cisco Unified CM cluster to which you want to add subscriber servers and click Servers.
Step 3 Click Add.
3-8Cisco Hosted Unified Communication Services Provisioning Guide Release 7.1(a)
OL-23270-01
Chapter 3 Defining and Configuring Core Network Elements and Resources Defining and Configuring Cisco Unified CM Clusters
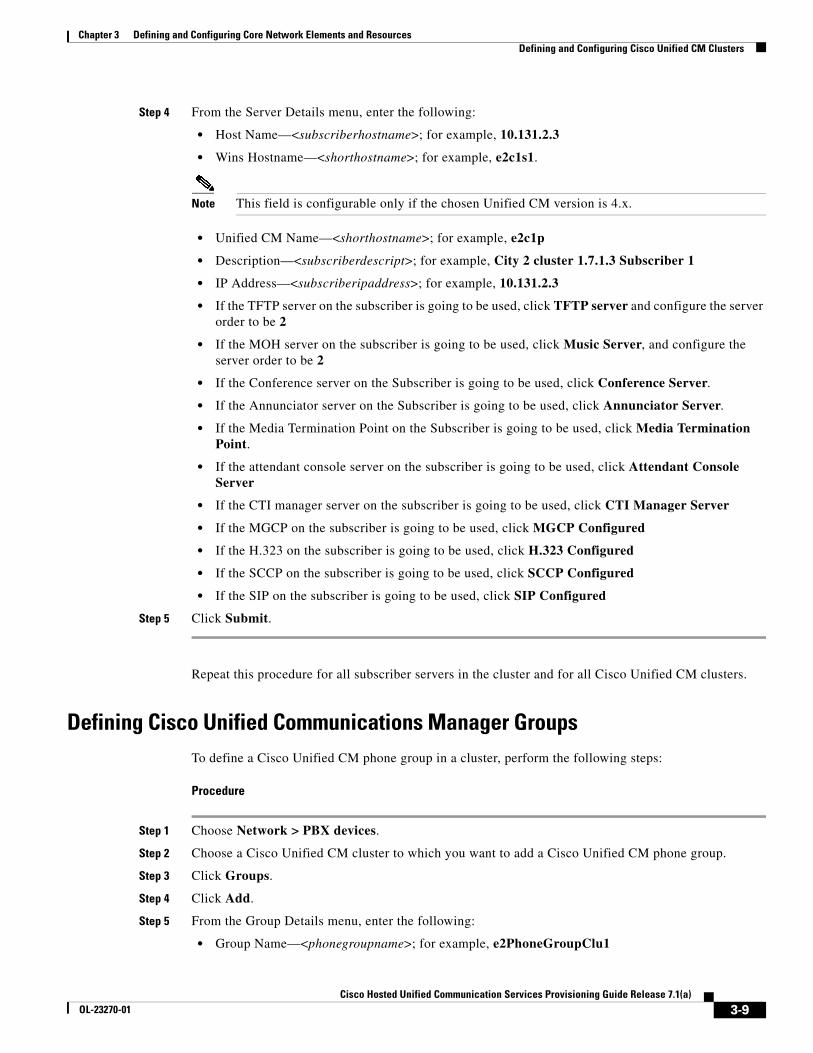
Step 4 From the Server Details menu, enter the following:
• Host Name—<subscriberhostname>; for example, 10.131.2.3
• Wins Hostname—<shorthostname>; for example, e2c1s1.
Note This field is configurable only if the chosen Unified CM version is 4.x.
• Unified CM Name—<shorthostname>; for example, e2c1p
• Description—<subscriberdescript>; for example, City 2 cluster 1.7.1.3 Subscriber 1
• IP Address—<subscriberipaddress>; for example, 10.131.2.3
• If the TFTP server on the subscriber is going to be used, click TFTP server and configure the server order to be 2
• If the MOH server on the subscriber is going to be used, click Music Server, and configure the server order to be 2
• If the Conference server on the Subscriber is going to be used, click Conference Server.
• If the Annunciator server on the Subscriber is going to be used, click Annunciator Server.
• If the Media Termination Point on the Subscriber is going to be used, click Media Termination Point.
• If the attendant console server on the subscriber is going to be used, click Attendant Console Server
• If the CTI manager server on the subscriber is going to be used, click CTI Manager Server
• If the MGCP on the subscriber is going to be used, click MGCP Configured
• If the H.323 on the subscriber is going to be used, click H.323 Configured
• If the SCCP on the subscriber is going to be used, click SCCP Configured
• If the SIP on the subscriber is going to be used, click SIP Configured
Step 5 Click Submit.
Repeat this procedure for all subscriber servers in the cluster and for all Cisco Unified CM clusters.
Defining Cisco Unified Communications Manager GroupsTo define a Cisco Unified CM phone group in a cluster, perform the following steps:
Procedure
Step 1 Choose Network > PBX devices.
Step 2 Choose a Cisco Unified CM cluster to which you want to add a Cisco Unified CM phone group.
Step 3 Click Groups.
Step 4 Click Add.
Step 5 From the Group Details menu, enter the following:
• Group Name—<phonegroupname>; for example, e2PhoneGroupClu1
3-9Cisco Hosted Unified Communication Services Provisioning Guide Release 7.1(a)
OL-23270-01
Chapter 3 Defining and Configuring Core Network Elements and Resources Defining and Configuring Cisco Unified CM Clusters
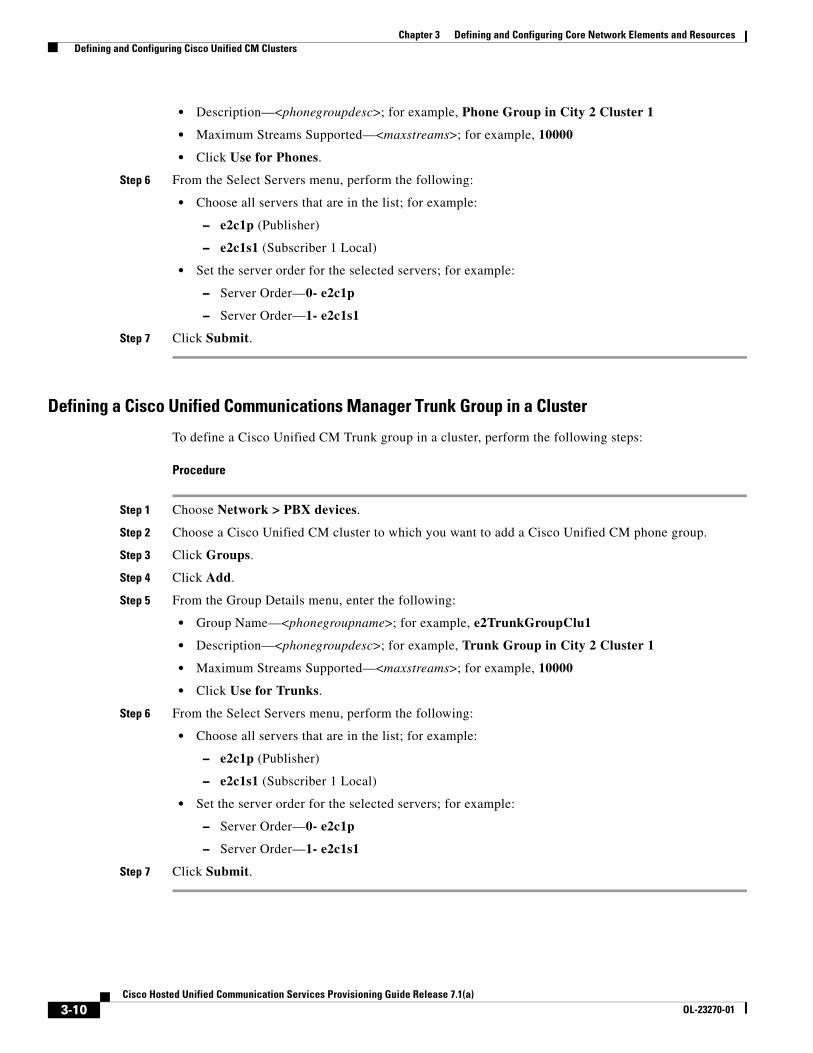
• Description—<phonegroupdesc>; for example, Phone Group in City 2 Cluster 1
• Maximum Streams Supported—<maxstreams>; for example, 10000
• Click Use for Phones.
Step 6 From the Select Servers menu, perform the following:
• Choose all servers that are in the list; for example:
– e2c1p (Publisher)
– e2c1s1 (Subscriber 1 Local)
• Set the server order for the selected servers; for example:
– Server Order—0- e2c1p
– Server Order—1- e2c1s1
Step 7 Click Submit.
Defining a Cisco Unified Communications Manager Trunk Group in a Cluster
To define a Cisco Unified CM Trunk group in a cluster, perform the following steps:
Procedure
Step 1 Choose Network > PBX devices.
Step 2 Choose a Cisco Unified CM cluster to which you want to add a Cisco Unified CM phone group.
Step 3 Click Groups.
Step 4 Click Add.
Step 5 From the Group Details menu, enter the following:
• Group Name—<phonegroupname>; for example, e2TrunkGroupClu1
• Description—<phonegroupdesc>; for example, Trunk Group in City 2 Cluster 1
• Maximum Streams Supported—<maxstreams>; for example, 10000
• Click Use for Trunks.
Step 6 From the Select Servers menu, perform the following:
• Choose all servers that are in the list; for example:
– e2c1p (Publisher)
– e2c1s1 (Subscriber 1 Local)
• Set the server order for the selected servers; for example:
– Server Order—0- e2c1p
– Server Order—1- e2c1s1
Step 7 Click Submit.
3-10Cisco Hosted Unified Communication Services Provisioning Guide Release 7.1(a)
OL-23270-01

Chapter 3 Defining and Configuring Core Network Elements and Resources Defining and Configuring Cisco Unified CM Clusters
Importing Softkey and Phone Button TemplatesTo import the softkey template configured on the Unified CM cluster, perform the following steps:
Procedure
Step 1 Choose Network > PBX devices.
Step 2 Choose a Unified CM cluster for which you want to import Softkey Templates.
Step 3 Click Import/Refresh Items.
Step 4 Check the Softkey Templates check box.
Step 5 Check the Phone Button Templates check box.
Step 6 Click Import/Refresh Items.
Viewing Softkey/Phone Button Templates
To view the imported Softkey/Phone Button Templates configured on the Unified CM cluster, perform the following steps:
Procedure
Step 1 Choose Network > PBX devices.
Step 2 Choose a Unified CM cluster for which you want to import Softkey Templates.
Step 3 Click Import/Refresh Items.
Step 4 Click Softkey Templates/Phone Button Templates.
Repeat this for all Unified CM clusters.
Associating Cisco Unified Communications Manager Clusters with Gatekeepers
To associate a Cisco Unified CM cluster with a gatekeeper, perform the following steps:
Procedure
Step 1 Choose Network > PBX devices.
Step 2 Click Connectivity next to one of the Cisco Unified CM clusters you want to associate with the gatekeeper.
Step 3 Click PBX=>Gatekeeper.
Step 4 Click Connect next to the gatekeeper you want to associate with the Cisco Unified CM cluster.
3-11Cisco Hosted Unified Communication Services Provisioning Guide Release 7.1(a)
OL-23270-01
Chapter 3 Defining and Configuring Core Network Elements and Resources Defining and Configuring DHCP Servers
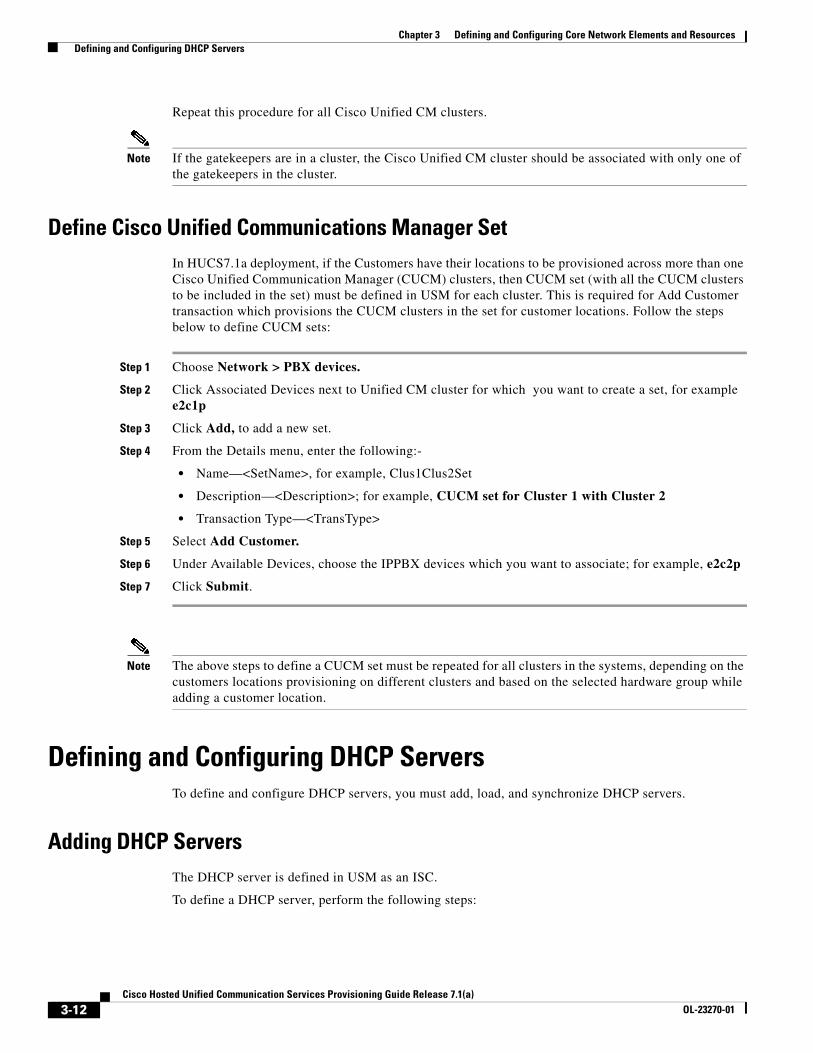
Repeat this procedure for all Cisco Unified CM clusters.
Note If the gatekeepers are in a cluster, the Cisco Unified CM cluster should be associated with only one of the gatekeepers in the cluster.
Define Cisco Unified Communications Manager SetIn HUCS7.1a deployment, if the Customers have their locations to be provisioned across more than one Cisco Unified Communication Manager (CUCM) clusters, then CUCM set (with all the CUCM clusters to be included in the set) must be defined in USM for each cluster. This is required for Add Customer transaction which provisions the CUCM clusters in the set for customer locations. Follow the steps below to define CUCM sets:
Step 1 Choose Network > PBX devices.
Step 2 Click Associated Devices next to Unified CM cluster for which you want to create a set, for example e2c1p
Step 3 Click Add, to add a new set.
Step 4 From the Details menu, enter the following:-
• Name—<SetName>, for example, Clus1Clus2Set
• Description—<Description>; for example, CUCM set for Cluster 1 with Cluster 2
• Transaction Type—<TransType>
Step 5 Select Add Customer.
Step 6 Under Available Devices, choose the IPPBX devices which you want to associate; for example, e2c2p
Step 7 Click Submit.
Note The above steps to define a CUCM set must be repeated for all clusters in the systems, depending on the customers locations provisioning on different clusters and based on the selected hardware group while adding a customer location.
Defining and Configuring DHCP ServersTo define and configure DHCP servers, you must add, load, and synchronize DHCP servers.
Adding DHCP ServersThe DHCP server is defined in USM as an ISC.
To define a DHCP server, perform the following steps:
3-12Cisco Hosted Unified Communication Services Provisioning Guide Release 7.1(a)
OL-23270-01
Chapter 3 Defining and Configuring Core Network Elements and Resources Defining and Configuring DHCP Servers
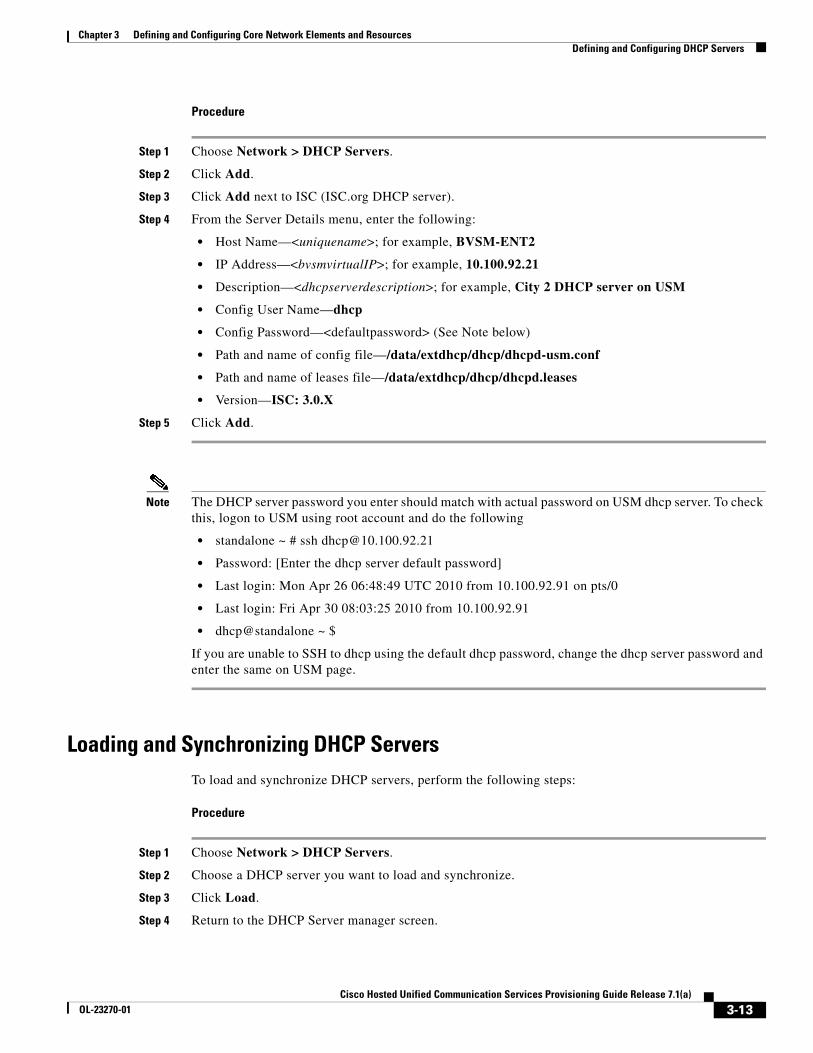
Procedure
Step 1 Choose Network > DHCP Servers.
Step 2 Click Add.
Step 3 Click Add next to ISC (ISC.org DHCP server).
Step 4 From the Server Details menu, enter the following:
• Host Name—<uniquename>; for example, BVSM-ENT2
• IP Address—<bvsmvirtualIP>; for example, 10.100.92.21
• Description—<dhcpserverdescription>; for example, City 2 DHCP server on USM
• Config User Name—dhcp
• Config Password—<defaultpassword> (See Note below)
• Path and name of config file—/data/extdhcp/dhcp/dhcpd-usm.conf
• Path and name of leases file—/data/extdhcp/dhcp/dhcpd.leases
• Version—ISC: 3.0.X
Step 5 Click Add.
Note The DHCP server password you enter should match with actual password on USM dhcp server. To check this, logon to USM using root account and do the following
• standalone ~ # ssh [email protected]
• Password: [Enter the dhcp server default password]
• Last login: Mon Apr 26 06:48:49 UTC 2010 from 10.100.92.91 on pts/0
• Last login: Fri Apr 30 08:03:25 2010 from 10.100.92.91
• dhcp@standalone ~ $
If you are unable to SSH to dhcp using the default dhcp password, change the dhcp server password and enter the same on USM page.
Loading and Synchronizing DHCP ServersTo load and synchronize DHCP servers, perform the following steps:
Procedure
Step 1 Choose Network > DHCP Servers.
Step 2 Choose a DHCP server you want to load and synchronize.
Step 3 Click Load.
Step 4 Return to the DHCP Server manager screen.
3-13Cisco Hosted Unified Communication Services Provisioning Guide Release 7.1(a)
OL-23270-01

Chapter 3 Defining and Configuring Core Network Elements and Resources Using TFTP Servers
Step 5 Click Synchronize.
Repeat this procedure for all DHCP servers.
Note When you load a DHCP server, the dhcpd-usm.conf is updated. When you synchronize a DHCP server, the dhcpd.leases file is updated.
Note DHCP servers can also be added as an IOS Device or Technician.
Using TFTP ServersWhen Cisco Unified CM publisher and subscriber servers are added, the administrator can indicate whether they have the TFTP server running. If any of the servers in a cluster is selected to act as a TFTP server, that cluster should be shown in the list of TFTP servers. To verify this, go to Network > TFTP Servers.
Note For Hosted UCS 7.1(a) testing the TFTP server is selected on Publisher and remote Subscriber servers.
Defining IP Edge DevicesIP edge devices are used to provide location-specific information, such as the IP helper address for the Cisco Unified CM IP phones, and voice and video bandwidth. The IP edge device is defined in USM as a Technician.
To define an IP edge device, perform the following steps:
Procedure
Step 1 Choose Network > IP Edge Devices.
Step 2 Click Add.
Step 3 Click Add next to Technician (a general purpose product).
Step 4 From the Details menu, enter the following:
• Host Name—<uniquename>; for example, e2clu1cus1loc2IPEdge
• IP Address—<ipedgeIP>; for example, 10.181.2.1 (this is the IP helper address for the phones in City 3 - cluster1 customer 1 location 2)
• Email Address: <email>; for example, [email protected]
• Voice WAN Bandwidth (Kbps)—<voicebandwidth>; for example, 512
• Video WAN Bandwidth (Kbps)—<videobandwidth>; for example, 1024
3-14Cisco Hosted Unified Communication Services Provisioning Guide Release 7.1(a)
OL-23270-01
Chapter 3 Defining and Configuring Core Network Elements and Resources Using Music on Hold Servers
Repeat this procedure for all IP edge devices.
Using Music on Hold ServersWhen Cisco Unified CM publisher and subscriber servers are added, the administrator can indicate whether they have the music on hold (MOH) server running. If any of the servers in a cluster is selected to act as an MOH server, that cluster should be shown in the list of music servers. To verify this, go to Network > Music Servers.
Note For Hosted UCS 7.1(a) testing the MOH server is selected on Publisher and remote Subscriber servers.
Note Music servers can also be added as a Technician.
Using Conference Servers
Note These are optional steps, and are only required for conference calls. Also note that the Unified CM Conference Bridge Software is defined in USM if the 'Conference Server' tick box was selected during the Publisher and/or Subscriber configuration.
The conference server is defined in USM as a Technician.
The Technician product is used to define Non-software conference bridges. Several steps are required to configure a Conference Bridge
Adding Conference BridgesTo add a conference bridge, perform the following steps:
Procedure
Step 1 Choose Network > Conference Servers.
Step 2 Click Add.
Step 3 Click Add next to Technician (a general purpose product).
Step 4 From the Details menu, enter the following:
• Host Name—<uniquename>, the same name used to create the conference bridge on Cisco Unified CM; for example, Clu1HWconfserver
• IP Address—<conferenceIP>, IP address of the conference bridge device or Cisco Unified CM server (for software conference bridges); for example, 10.181.2.65
• Technician e-mail—<emailaddress>
3-15Cisco Hosted Unified Communication Services Provisioning Guide Release 7.1(a)
OL-23270-01
Chapter 3 Defining and Configuring Core Network Elements and Resources Configuring Transcoder Servers
• Conference Streams—<conferencestreams>. The common practice is to use the maximum capacity field value from the Cisco Unified CM conference bridge configuration; for example, 32.
Repeat this procedure for all conference bridges.
Note USM does not add any configuration to the Cisco Unified CM when adding a conference bridge; therefore, it does not matter which type of conference bridge is configured (software, hardware, WS-SVC-CMM, and so on).
Note The conference bridge name configured in USM must match the name used to create the conference bridge on Cisco Unified CM.
Associating Conference Bridges with Cisco Unified CM ClustersTo associate a Cisco Unified CM cluster with the conference bridge, perform the following steps:
Procedure
Step 1 Choose Network > PBX devices.
Step 2 Click Connectivity next to one of the Cisco Unified CM clusters you want to associate with the conference bridge.
Step 3 Click PBX=>Conference.
Step 4 Click Connect next to the conference bridge you want to associate with the Cisco Unified CM cluster.
Repeat this procedure for all conference bridges and all Cisco Unified CM clusters.
Configuring Transcoder ServersTo configure a transcoder, you must add the transcoder and then associate it with Cisco Unified CM clusters.
Note This is an optional step, and it is required only if transcoding is required; for example, if devices are using different codecs.
Adding TranscodersTo add a transcoder, perform the following steps:
3-16Cisco Hosted Unified Communication Services Provisioning Guide Release 7.1(a)
OL-23270-01
Chapter 3 Defining and Configuring Core Network Elements and Resources Adding Cisco PGW-Cisco Unified CM Cluster Hardware Groups
Procedure
Step 1 Choose Network > Transcoder Servers.
Step 2 Click Add.
Step 3 From the Details menu, enter the following:
• Host Name—<uniquename>, the same name used to create the transcoder on Cisco Unified CM; for example, e2-xcode1
• IP Address—<xcodeIP>, the IP address of the transcoder device; for example, 10.190.2.111
• Technician e-mail—<emailaddress>
• Transcoder Capacity—<xcodecapacity>. The common practice is to use the maximum capacity field value from the Cisco Unified CM transcoder configuration; for example, 32.
Repeat this procedure for all transcoders.
Note USM does not add any configuration to the Cisco Unified CM when adding a transcoder; therefore, it does not matter which type of transcoder is configured.
Note The transcoder name configured in BVSM must match the name used to create the transcoder on Cisco Unified CM.
Associating Transcoders with Cisco Unified CM ClustersTo associate a Cisco Unified CM cluster with the transcoder, perform the following steps:
Procedure
Step 1 Choose Network > PBX devices.
Step 2 Click Connectivity next to one of the Cisco Unified CM clusters you want to associate with the transcoder.
Step 3 Click PBX=>Transcoder.
Step 4 Click Connect next to the transcoder you want to associate with the Cisco Unified CM cluster.
Repeat this procedure for all transcoders and all Cisco Unified CM clusters.
Adding Cisco PGW-Cisco Unified CM Cluster Hardware GroupsUSM uses hardware groups to determine which network components should be provisioned when a customer or location is added for example. At this stage only Cisco PGW-Cisco Unified CM cluster hardware groups are required.
3-17Cisco Hosted Unified Communication Services Provisioning Guide Release 7.1(a)
OL-23270-01
Chapter 3 Defining and Configuring Core Network Elements and Resources Loading the Cisco PGW and Cisco Unified CM Clusters
To add a hardware group, perform the following steps:
Procedure
Step 1 Choose Network > Hardware Groups.
Step 2 Click Add.
Step 3 From the Hardware Group Details menu, enter the following:
• Name—<uniquename>; for example, pgw2-e2c1-hwgrp
• Description—<hwgrpdesc>; for example, City 2 PGW 2 Unified CM Cluster 1 Hardware Group
• Limit usage of this hardware group to Any Action.
Step 4 Click Next
Step 5 From the Available Transit Switches menu, choose the required Cisco PGW; for example, PGW-ENT2.
Step 6 From the Available PBX Systems menu, choose the required Cisco Unified CM cluster; for example, e2c1.
Repeat this procedure for all Cisco Unified CM clusters.
Note For USM to provision the correct components, ensure that only one Cisco PGW and one Cisco Unified CM cluster is selected.
Loading the Cisco PGW and Cisco Unified CM ClustersAt this stage, USM provisions the Cisco PGW and Cisco Unified CM clusters for the first time.
Loading the Cisco PGWTo load the Cisco PGW, perform the following steps:
Procedure
Step 1 Choose Network > Transit Switches.
Step 2 Choose the Cisco PGW you want to load.
Step 3 Click Load.
Note This updates both USM and the Cisco PGW. Verify on the Cisco PGW that the dial plans have been created and configured.
3-18Cisco Hosted Unified Communication Services Provisioning Guide Release 7.1(a)
OL-23270-01
Chapter 3 Defining and Configuring Core Network Elements and Resources Adding Media Resource Groups and Media Resource Group Lists
Loading Cisco Unified CM ClustersTo load a Cisco Unified CM cluster, perform the following steps:
Procedure
Step 1 Choose Network > PBX Devices.
Step 2 Choose the Cisco Unified CM cluster you want to load.
Step 3 Click Load Static Config.
This procedure updates the Cisco Unified CM.
Note Verify on the Cisco Unified CM cluster that all the components have been created and configured.
Repeat this procedure for all Cisco Unified CM clusters.
Adding Media Resource Groups and Media Resource Group Lists
Media resource management involves working with media resource groups and media resource group lists. Media resource management provides a mechanism for managing media resources so that all Cisco Unified CMs within a cluster can share them. Media resources provide conferencing, transcoding, media termination, annunciator, and MOH services.
Media resource groups and media resource group lists are added to each Cisco Unified CM cluster.
Adding Media Resource GroupsTo define a media resource group in a cluster, perform the following steps:
Procedure
Step 1 Choose Network > PBX devices.
Step 2 Choose a Cisco Unified CM cluster to which you want to add a media resource group and click Media Services.
Step 3 Click Media Resource Groups.
Step 4 Click Add.
Step 5 From the Details menu, enter the following:
• Name—<mrgname>; for example, e2mrgClu1
• Description—<mrgdescript>; for example, Media Resource Group in City 2 Cluster 1
Step 6 From the Group Members menu, choose all available music, conference, and transcoder servers that are in the list.
3-19Cisco Hosted Unified Communication Services Provisioning Guide Release 7.1(a)
OL-23270-01
Chapter 3 Defining and Configuring Core Network Elements and Resources Adding Media Resource Groups and Media Resource Group Lists
Step 7 Click Add.
This procedure updates both USM and Cisco Unified CM.
Note Verify on the Cisco Unified CM cluster that the media resource group has been created and configured.
Repeat this procedure for all media resource groups and all Cisco Unified CM clusters.
Adding Media Resource Group ListsTo define a media resource group list in a cluster, perform the following steps:
Procedure
Step 1 Choose Network > PBX devices.
Step 2 Choose a Cisco Unified CM cluster to which you want to add a media resource group list and click Media Services.
Step 3 Click Media Resource Group Lists.
Step 4 Click Add.
Step 5 From the Details menu, enter the following:
• Name—<mrglname>; for example, e2mrglClu1
• Description—<mrgldescript>; for example, Media Resource Group List in City 2 Cluster 1
Step 6 From the Select Media Resource Groups menu, choose all available media resource groups that are in the list, in the required order.
Step 7 Click Add.
Note When selecting media resource groups to add to the media resource group list, only the media resource groups that are associated with this cluster are displayed.
Note This procedure updates both USM and Cisco Unified CM; it creates the Media resource group list. Verify on the Cisco Unified CM cluster that all the media resource groups have been created and configured.
Repeat this procedure for all media resource group lists and all Cisco Unified CM clusters.
Assigning a Media Resource Group List to Cisco Unified Communications Manager Trunks
To assign a media resource group list to a Cisco Unified CM trunk, perform the following steps:
3-20Cisco Hosted Unified Communication Services Provisioning Guide Release 7.1(a)
OL-23270-01
Chapter 3 Defining and Configuring Core Network Elements and Resources Conferencing in Hosted UCS
Procedure
Step 1 Choose Network > PBX devices.
Step 2 Choose a Cisco Unified CM cluster you want to assign a media resource group list to a trunk.
Step 3 Click Trunk Config.
Step 4 Choose the Cisco Unified CM cluster trunk; for example, e2c1-External.
Step 5 Click Modify.
Note When selecting media resource group lists to assign to the trunk, only the media resource group lists that are associated with this cluster are available.
Note This updates both USM and Cisco Unified CM. Verify on the Cisco Unified CM cluster that the media resource group list is assigned to the Cisco Unified CM trunk.
Repeat this procedure for all Cisco Unified CM clusters.
Conferencing in Hosted UCS
Note If Hosted UCS7.1a is deployed without Hardware Conference Bridge and Transcoder, the CUCM clusters must be configured with following device region associations, for the ad-hoc conference to work using CUCM software conference bridges. The steps mentioned in this sections is to be performed after provisioning HUCS 7.1a deployment
In HUCS7.1a, three-way ad-hoc conferencing is tested with the configuration as follows:
Procedure:
Step 1 Check the Regions of software Conference Bridge and H.225 GK controlled trunk to HSI on CUCM clusters.
Step 2 If there is no association between these two regions, configure the inter-region relationship codec to be G.711. This is because, intra-region codec is G.711 and inter-region codec is G.729 by default on CUCM. Hence, configuring G.711 to be inter-region codec for these two regions enables the conference call to use G.711 and makes it work.
3-21Cisco Hosted Unified Communication Services Provisioning Guide Release 7.1(a)
OL-23270-01

Chapter 3 Defining and Configuring Core Network Elements and Resources Conferencing in Hosted UCS
3-22Cisco Hosted Unified Communication Services Provisioning Guide Release 7.1(a)
OL-23270-01

![Index [link.springer.com]978-1-4302-3346-6/1.pdf · configuring with Spring, ... advice order, defining, 89–91 ... file transfer, 5 messaging, 7 remote procedure calls, 6](https://static.fdocuments.net/doc/165x107/5a78f0317f8b9a5a148df815/index-link-978-1-4302-3346-61pdfconfiguring-with-spring-advice-order.jpg)