Decorative Reverse projects Appliqué Pillow · metallic thread around your entire pillow. Note:...
3
projects step 1. Cutting intricate designs is definitely one of my favorite features of the ScanNCut machine. Being able to cut such designs out of fabric is even more impressive. By simply adding fusible to my inexpensive cotton, I was able create this fun throw pillow for my home in no time! Decorative Reverse Appliqué Pillow Liz Hicks MATERIALS: Brother™ ScanNCut machine, colored cotton fabric, white cotton fabric, iron, Iron-On Fabric Appliqué Contact Sheet (CASTBL1), High Tack Adhesive Fabric Support Sheet (CASTBL2), poly-fill, metallic thread, sewing machine, Cut Up This Book Begin by pressing fabric and ironing on the appliqué contact sheet. Allow to cool and trim to 12" x 12". step 2. Take your design from Cut Up This Book and scan it into your ScanNCut machine, using the ‘Scan-to-Cut’ function. (For this project, I used the collection of stars.)
Transcript of Decorative Reverse projects Appliqué Pillow · metallic thread around your entire pillow. Note:...

projects
step 1.
Cutting intricate designs is definitely one of my favorite features of the ScanNCut machine. Being able to cut such designs out of fabric is even more impressive. By simply adding fusible to my inexpensive cotton, I was able create this fun throw pillow for my home in no time!
Decorative Reverse Appliqué Pillow
Liz Hicks
MATERIALS: Brother™ ScanNCut machine, colored cotton fabric, white cotton
fabric, iron, Iron-On Fabric Appliqué Contact Sheet (CASTBL1),
High Tack Adhesive Fabric Support Sheet (CASTBL2), poly-fill,
metallic thread, sewing machine, Cut Up This Book
Begin by pressing fabric and ironing on the appliqué contact sheet. Allow to
cool and trim to 12" x 12".
step 2. Take your design from Cut Up This Book and scan it into your ScanNCut
machine, using the ‘Scan-to-Cut’ function. (For this project, I used the
collection of stars.)
DECORATIVE REVERSE APPLIQUÉ PILLOW (CONTINUED)
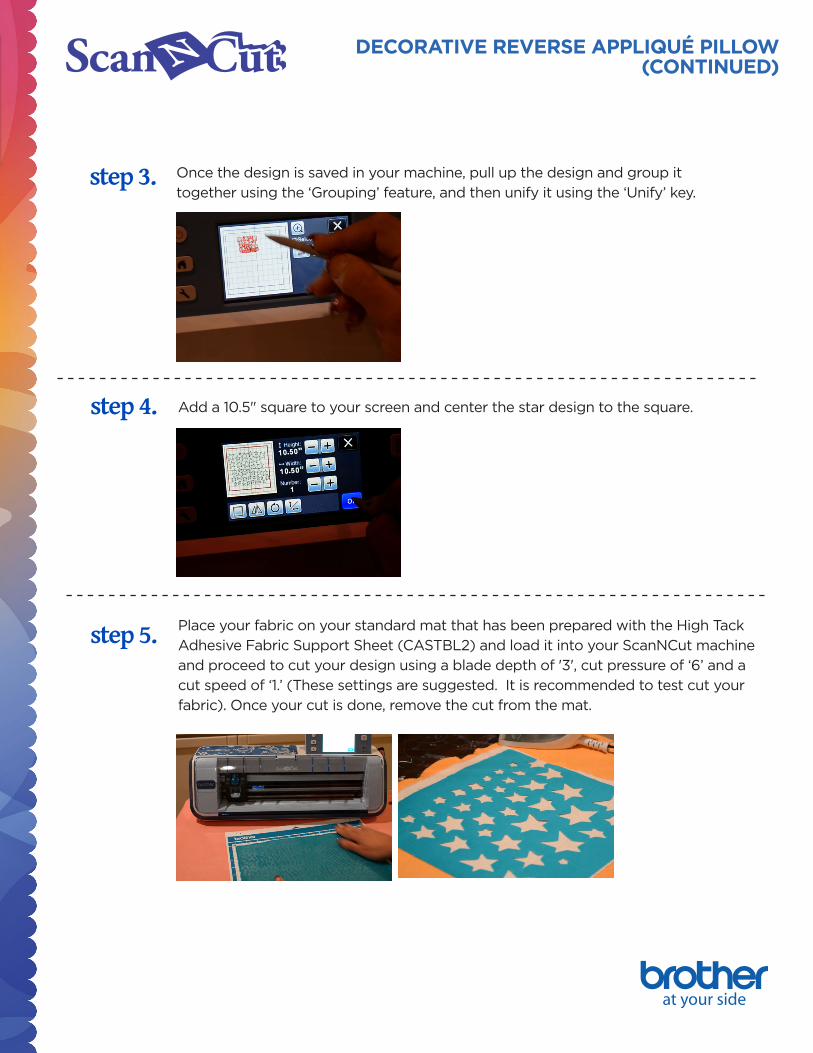
step 4. Add a 10.5" square to your screen and center the star design to the square.
step 3. Once the design is saved in your machine, pull up the design and group it
together using the ‘Grouping’ feature, and then unify it using the ‘Unify’ key.
step 5. Place your fabric on your standard mat that has been prepared with the High Tack
Adhesive Fabric Support Sheet (CASTBL2) and load it into your ScanNCut machine
and proceed to cut your design using a blade depth of '3', cut pressure of ‘6’ and a
cut speed of ‘1.’ (These settings are suggested. It is recommended to test cut your
fabric). Once your cut is done, remove the cut from the mat.
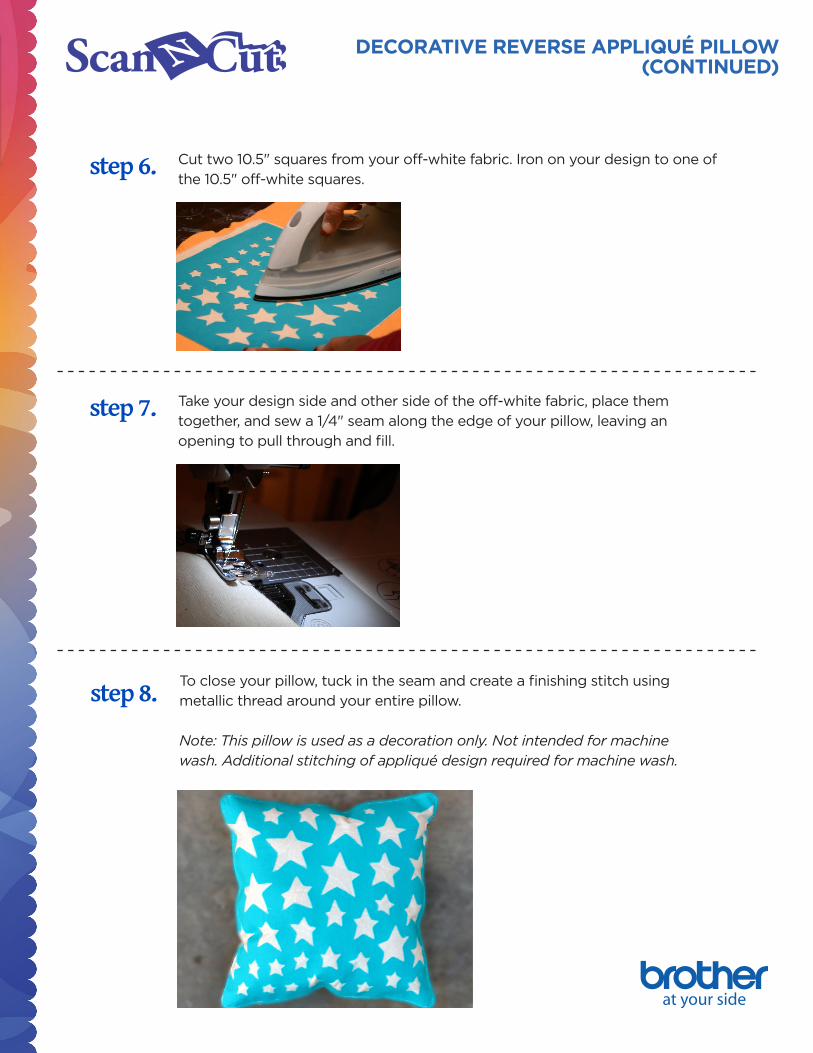
step 6. Cut two 10.5" squares from your off-white fabric. Iron on your design to one of
the 10.5" off-white squares.
DECORATIVE REVERSE APPLIQUÉ PILLOW (CONTINUED)
step 8. To close your pillow, tuck in the seam and create a finishing stitch using
metallic thread around your entire pillow.
Note: This pillow is used as a decoration only. Not intended for machine wash. Additional stitching of appliqué design required for machine wash.
step 7. Take your design side and other side of the off-white fabric, place them
together, and sew a 1/4" seam along the edge of your pillow, leaving an
opening to pull through and fill.